Tag Archives: Simplicity 1803

OAL: The Winners!

4 Aug

Hey everyone! Sorry, one more OAL post 🙂

I had SO much fun co-hosting the OAL this year with Andi, and I love that we had so many participants (66 posted completed outfits on the Ravelry thread!). I can’t even tell you how much I loved following along with everyone’s progress, and seeing what cool outfits came out of it! I really love the variety of sewing and knitting patterns that showed up in the OAL (some having already moved over to my to-make queue ;)). Such a fun time and I’m really glad I got to host! Thanks to everyone who participated! Y’all are the best! ♥

logo

Andi & I wanted to sweeten the deal with an opportunity for prizes, so let’s get to that! Our official sponsor for the OAL is Indie Stitches, who generously donated prizes for each of the winners. Those who win get a free pattern of these choosing from Indie Stitches, plus a free knitting pattern of their choosing from the Untangling Knots shop. For the drawing, we compiled a list of all the posts on the OAL Finished Outfits thread that were submitted before the deadline on 7/31 and included a full outfit. The names were put on a numbered spreadsheet, which we used random.org to pull the winning numbers. So, without further ado – our 4 OAL winners~~

help_pj_medium2
Karen’s Helen bed jacket & PJ’s
Damn, that’s such a good idea – why didn’t I think of that? Classy pjs and a bed jacket for lounging, instead of my ratty workout shorts and an even rattier quilt.

P1020012
Roisin’s Myrna cardigan & Vogue 8998
ROISIN! I swear I did not choose her name on purpose; this was purely luck of the draw. I love her little pink Myrna and the fabric for that dress is such a perfect match!

41866102
Kristi’s Myrna & Simplicity 1803//McCall 6696
Such a pretty and classic combination! You can’t see too well in these photos, but go look at her Ravelry page – the top of the dress bodice is outlined in pink piping, which looks fabulous! And the inside is just gorgeous 🙂

image_medium2
Martinalici’s Featherweight cardigan & Washi dress
Love this – especially that hand-embroidered collar! Also, that Featherweight Cardigan is going in my queue asap 🙂

Woohoo! Congratulations, ladies! Keep an eye out for an email from me 🙂

For those who didn’t win, I still have a lil’ somethin’ for ya – a discount code! Use the code OAL2014 for 15% off your purchase at Indie Stitches shop. This code is valid for 48 hours, so through 7AM August 6 (whew! Is it August already?).

Thanks again to everyone who played along, I hope you had as much fun as we did! To see all the finished outfits in all their glory, check out the OAL Finished Outfits Ravelry thread, the Official Unofficial Flickr Group and the hashtag #oal2014 🙂

Completed: My Finished OAL Dresses!

28 Jul

Good morning, everyone! I hope your AM is filled with lots of sunshine, like mine, and coffee, unlike mine (because, *ahem* someone forgot to mention we were out after he made a pot yesterday). Anyway, that’s neither here nor there – you came here to see finished dresses and sweaters, right? Let’s get to it!

OAL 2014: Completed Simplicity 1803 + Myrna Cardigan

Fair warning – this is a pretty picture-intensive post. I have two dresses to show plus a cardigan! (You’re so lucky that I don’t have two sweaters. I tried, but the second one is technically a vest right now soooo…). While I could theoretically stretch this out into 3 posts, I actually really hate it when people do that so I’m just dumping it all in one glorious picture-filled OAL extravaganza! Hope you don’t mind looking at my mug 😉

Speaking of which… you probably noticed the change in scenery, not to mention actual decent looking photos. That’s because I didn’t take them! Ha! All photo credit for this post goes to my lovely friend, Jenna, of Kitty Cat Stevens (you may recognize her photos from last year; she took those ace ones of my Lace trench). She really did an amazing job with these and I just love how they turned out!

OAL 2014: Completed Simplicity 1803 + Myrna Cardigan

Dress #1 was made with a lightweight cotton from Mood Fabrics (purchased at the NY location while I was there in March). The bodice is view C with cap sleeves, a softly pleated skirt and a lapped zipper.

OAL 2014: Completed Simplicity 1803 + Myrna Cardigan

OAL 2014: Completed Simplicity 1803 + Myrna Cardigan

OAL 2014: Completed Simplicity 1803 + Myrna Cardigan

LOOKS SO GOOD WITH MY HAIR.

OAL 2014: Completed Simplicity 1803 + Myrna Cardigan

OAL 2014: Completed Simplicity 1803 + Myrna Cardigan

Dress #2 was made with a gorgeous rayon challis from Grey’s Fabric. I used the same pattern, swapped out the bodice for view B with bias-faced arm holes, a softly gathered skirt and an invisible zipper.

OAL 2014: Completed Simplicity 1803 + Myrna Cardigan

OAL 2014: Completed Simplicity 1803 + Myrna Cardigan

OAL 2014: Completed Simplicity 1803 + Myrna Cardigan

OAL 2014: Completed Simplicity 1803 + Myrna Cardigan

OAL 2014: Completed Simplicity 1803 + Myrna Cardigan

OAL 2014: Completed Simplicity 1803 + Myrna Cardigan

The hem on this one is finished with rayon seam binding. So pretty!
OAL 2014: Completed Simplicity 1803 + Myrna Cardigan

OAL 2014: Completed Simplicity 1803 + Myrna Cardigan

Finally – here’s Myrna herself! I guess I can talk a little more about this part of the project since I haven’t really mentioned it much on my blog (unlike that entire OAL full of posts, ha).

OAL 2014: Completed Simplicity 1803 + Myrna Cardigan

Can I just say – I LOVE THIS CARDIGAN. It was super fun and super easy to knit, not to mention super fast (how many more times can I say super in this post?). According to my Ravelry, I finished it in just under a month.

I went with the size XS, getting gauge with size 6 needles (which is typical for me + worsted weight yarn + Andi’s patterns).

OAL 2014: Completed Simplicity 1803 + Myrna Cardigan

The yarn is (super?)AMAZING, isn’t it? Something I picked up from my local yarn store, Haus of Yarn– I knew I wanted neon yellow to go with the fabric for dress #1, so I took a swatch with me and went lurkin’. Maybe it’s just my yarn store (granted, we have more in this city – actually, a surprising number of really good yarn stores – but this particular store is less than two miles from my house, so obviously I like shopping here best haha), but they never seem to have the color I want in the weight/fiber I prefer! In this case, they only had a couple options for neon yellow worsted weight wool. Because I am an adult, I picked the most expensive option – this is Jill Draper Makes Stuff, and the color is Daffodil. At $26.50 per skein, it was definitely a splurge, but I only needed 2 skeins for this sweater so I figured it was worth it 🙂 Spoiler: It totally was! This yarn was a dream to work with – so soft and squishy, with a beautiful saturated color gradient. I don’t know if this particular yellow looks any good on me, but I also don’t give a fuck because it makes me happy.

OAL 2014: Completed Simplicity 1803 + Myrna Cardigan

I knit the pattern 100% as written, and had no issues. Blocked it with a bit of gentle shampoo (I keep meaning to get that special wool washing/no rinse shit they sell at my LYS, but since I went over budget with the yarn I had to put it back. Maybe next time. Maybe never lolz). True story: I forgot to finish the keyhole until after I’d blocked the whole thing, so I had to go back and keep knitting. I’m glad I did, though – I was on the fence about the keyhole because it looks kind of wonky at first, but once it’s finished it really does make a world of difference!

OAL 2014: Completed Simplicity 1803 + Myrna Cardigan

The button bands are stabilized with Petersham ribbon. Because this cardigan has a v-neck, I steamed the Petersham with a gentle curve to mimic the shape of the neckline, and stopped it a little above the top button hole (so, before you ask: no, it doesn’t go all the way around the neck). I used this tutorial from Sunni’s blog for guidance – she’s using it to hem a skirt, but it’s the same concept with the neckline, with a less aggressive curve. The vintage glass buttons are from my stash, previously purchased at the flea market.

OAL 2014: Completed Simplicity 1803 + Myrna Cardigan

I love how well the sweater goes with dress #2, because that was not planned at all! I didn’t decide to make a second dress until I’d already started the sewalong, and knit about half of the sweater. They do look good together, though. Yay for unintentional matching!

How are y’all doing with your OAL garments? Almost finished? Remember – the deadline to enter is this Thursday, July 31. Don’t forget to post your finished outfits in the Ravelry thread, which will give us all full lurking capabilities and also enter your ass to win some prizes. We also have the Offical Unoffical Flickr Group if you don’t use Ravelry/only finished a dress – but please be aware that your two pieces need to be uploaded to the Ravelry thread to be eligible for the contest 🙂 I’m loving all the dresses and sweaters I’ve seen so far, and I need to see MORE PLS.

Feeling inspired? Here’s a link to all the tutorials covered during the OAL:
1: Choosing Your Fabric and Size
2: Cutting and Marking Your Fabric
3: Sewing the Bodice
4: Sewing Sleeves or Bias Facing
5: Attaching the Skirt
6: Inserting a Lapped Zipper (see also: My Method for Invisible Zippers)
7: Hemming & Finishing
How to Stabilize a Buttonband with Petersham Ribbon (not part of the official OAL, but useful nonetheless!)
FINALLY, you can see my Myrna Ravelry notes here.

OAL 2014: Completed Simplicity 1803 + Myrna Cardigan

Whew! That’s a lotta post for a coffee-deprived Monday morning! 😉

OAL: Hemming & Finishing

14 Jul

Good morning, OAL-gers! Today is the final post in the OAL series (which I’m sure means that a lot of y’all are dancing for joy to hear that there won’t be any more of these posts! Ha!), and we will be finishing our dresses. Yay!

You should have a mostly-finished dress at this point – everything is connected, all seams are finished, and the only thing left to do is hem the dang thing! Of course you can hem however you like (as most of y’all already have at this point), but I wanted to give a couple options for those who are unsure what to do, or just want to try something different. You know how much I love having options!

First things first, try your dress one and determine where you would like the hem to hit. I like my hemlines above the knee, and this dress runs a little long (or, rather, I’m a little short), so I ended up cutting off about 4″ from the hemline. I’ve found that the easiest way to mark my hemline is to measure the length of a skirt that I like, mark that length with a pin on my dress, and then try it on to see if it works. Before you cut, add back a hem allowance (however much you will be turning up before you stitch the hem), otherwise, your skirt will end up a little short 🙂

Option #1: The Easy Turned Hem

OAL - Hemming
Fold the skirt hem under 1/4″ to the wrong side and press.

OAL - Hemming
Now fold one more time, again to the wrong side, and press. However much you fold under depends on how much of a hem depth you want. I stick with about 5/8″ for this particular type of hem. You can certainly fold more for a deeper hem, but be aware that the curved hemline means that you might have difficulty easing the fullness in (since a curved hem means it’s bigger at the bottom than it is at the top) if it’s too deep.

OAL - Hemming
Now just topstitch that bad boy down!

Some tips for topstitching your hem:
– Start on a side seam so your backstitching doesn’t distract from the beautiful front or back of your dress
– Use a slightly longer stitch length (I use 3.0 over my machine’s standard 2.5 length); the stitches will be a little more defined
– Topstitch from the right side if you can help it – the needle stitches are much prettier than the bobbin stitches
– Use the measurement markings on your throat plate to help ensure you are stitching in a straight line

OAL - Hemming
If you are sewing the version with the notched bodice, don’t forget to tack down your facing to the center front. Catch only the seam allowances and use a couple of handstitches to keep that facing inside the bodice where it belongs.

OAL - Hemming
And done! 🙂

Option #2: The Extra-Fancy Hem
One thing I like to include with my hems is a strip of seam binding. This vinage-inspired finishing covers the raw edge (so you don’t have to fold twice) and is a fun little surprise whenever someone sees the wrong side of your skirt. You can use seam binding, bias strips, or even lace – in a matching, contrasting, or complementary color. I just think it looks really pretty and it really adds a nice professional finish to an area that most of us tend to rush through (because, duh, we just wanna wear our dresses!). For this hem, I used vintage seam binding and topstitched it down, although you can also sew the hem by hand if you’d like it to be invisible from the outside.

OAL - Hemming
Starting at one of the side seams, pin your hem tape to the right side of your skirt hem, letting the binding hang over about halfway.

OAL - Hemming
Stitch, keeping your needle as close to the edge of the binding as possible.

OAL - Hemming
When you reach the full circle of the hem, overlap the binding by about 1″ and fold the raw edge under, as shown.

OAL - Hemming
OAL - Hemming
Now fold the binding to the wrong side to whatever hem allowance you prefer, measuring all the way around to ensure it is even. Pin into place.

OAL - Hemming
Topstitch on the opposite (unsewn) side of the seam binding – again, sewing as close to the edge of the binding as you can. Press and use steam to ease out any fullness.

OAL - Hemming
Ta da!

And that’s it! Give yourself a pat on the back, pour yourself a stiff cocktail, and do a little dance because YOU FUCKING SEWED A FUCKING DRESS, LIKE A FUCKING BOSS! Whoop whoop!! Don’t forget to post your finished outfit in the Offical OAL Finished Outfits Ravelry Thread – there are already sooo many beautiful dresses and cardigans lurking around there, omg. Remember that you have until 7/31 to post to be eligible for prizessss – so you’ve got a couple more weeks if you’re running behind 🙂 Don’t have a full outfit but want still want to share your dress? You can post that in the Official Unofficial OAL Flickr Group.

Stay tuned for my OAL photos in the next couple of weeks… a friend took them for me, and, well, all I’m going to say is that they are MUCH better than anything I could have tried to do haha!

OAL: Inserting A Lapped Zipper

7 Jul

Good morning, everyone! Hope y’all had a nice weekend (holiday or not!). We are just coming up on the home stretch of our OAL – just a couple more steps left until we are finished and can start rocking our gorgeous dresses! Woohoo!

Today, we will be inserting zippers into our dresses. In this post, I will be covering the insertion of a lapped zipper, which is my preferred method for this style. I won’t be covering invisible zippers here, but I do have a tutorial on inserting an invisible zipper if you’d like to use one for your dress. I put an invisible zip in my second OAL dress (the one not featured in this post), using the same method as outlined in the tutorial, and it came out beautifully! So that’s an option if you need it 🙂 Otherwise, let’s talk about the lapped zipper!

As I mentioned, I really love a good lapped zipper. I blame Gertie for sparking that obsession, btw. When I was working at Muna’s, she never understood why I preferred to use lapped zippers in most of my garments – she was of the camp that invisible zippers were more elegant. Maybe, I guess, but sometimes I like the design element of having the zipper be visible (or, at least, the stitching line of the zipper being visible). It’s definitely easier to match up seamlines and prints with a lapped zipper, since you can hand-baste into place and sew from the right side. Also, lapped zippers are a bit stronger than their invisible counterparts – which could be important if whatever you made is a little on the snug side. Of course, there’s a time and a place for everything – lapped and invisible zippers included – but for casual sundresses, I just love a beautiful lapped zipper.

Anyway, onto the zipper!

OAL - Lapped Zipper
Start by finishing the raw edges of the center back – from the bottom of the skirt all the way to the top of the bodice. I catch my facings in the serging (or whatever finishing you’ll be using) so I don’t have to tack them down later. Now is also a good time to check and make sure that both back seams are the same length and that the waist seam matches up, so you know everything will also match up when it’s time to put the zipper in.

OAL - Lapped Zipper
Start at the bottom of the skirt and sew up to the zipper stop, as indicated on the pattern. Backstitch a couple of times to make sure everything is secure, then press the seam open. Leave the unstitched part unpressed.

OAL - Lapped Zipper
Now make sure that zipper is the right length for your dress! If it’s a bit long (I have a metric shit load of 22″ zippers, so I forever have to shorten mine), you can easily shorten it. Just mark where the zipper stop needs to go, and sew across the teeth to create a zipper stop. If you are using a nylon zipper, you can do this by machine. For zippers with metal teeth, you’ll want to sew by hand. Once you’ve made your stop (and test it!), cut the teeth about an inch below. Presto: shortened zipper!
Also, just a side note – I always have people tell me that you can’t shorten a metal zipper. Well, I guess I’m some sort of magical sewing unicorn because I shorten pretty much ALL my metal zippers! Ha! The trick is to snip both sides of the tape as far to the teeth as you can, and then you can usually get the teeth to coax apart. Use a pair of crappy scissors in case you need some assistance. Alternately, you can sew the zipper with the excess coming off the top edge of your garment, and your facing/waistband/whatever intersecting seam can act as a zipper stop. But no, it’s not difficult (nor impossible) to shorten metal zippers.

OAL - Lapped Zipper
On the right side of the open seam (or left; however you want your lap to go. I like my lap to be on the left, though), press the seam allowance at 1/2″ to the wrong side of the bodice, all the way down to the stitching.

OAL - Lapped Zipper
On the left hand side, press the seam allowance at 5/8″ to the wrong side, again all the way down to the stitching.

OAL - Lapped Zipper
On the right hand side (or whatever side has the 1/2″ fold), pin your zipper with the teeth right along the edge of the fold. I start my zipper about 1/8″~ from the top of the fabric; but I also don’t use hooks and eyes with my lapped zippers (personal preference! I’ve found they’re not really necessary). If you are using a hook and eye, start your zipper a little lower. As far as the tape at the top of the zipper – you can just fold that under to the wrong side of the dress. If you don’t catch it with your stitching, you can tack it down by hand at the end.

OAL - Lapped Zipper
Now sew your zipper to the garment, about 1/8″ away from the fold. Use a zipper foot and/or move your needle to get close to the edge (but not so close that the zipper won’t function!). If you have trouble starting the stitching at the top of the zipper, pull both thread tails (the needle thread and the bottom thread) very gently while you press the pedal; this will keep the fabric from getting eaten by your feed dogs and making a big thread nest on the underside of your garment.

OAL - Lapped Zipper
Ok, that’s one side! Onto the next!

OAL - Lapped Zipper
OAL - Lapped Zipper
Now take the larger 5/8″ folded edge and place it on top of the zipper, with the fold meeting the stitching line you just sewed. Pin everything down, being careful to only catch the back of your garment – don’t pin all the way through the front! I just slide my hand around the inside to be sure, but you can also put a book inside the bodice and use that to keep from pinning all the way through. Once you’ve pinned the overlap down, check the zipper tape and make sure your pinning is even – it should be down the middle of the zipper tape. If it’s not, readjust.

OAL - Lapped Zipper
It can be helpful to hand baste the zipper tape into place before you use your sewing machine. This will keep the fabric from shifting around and gives you a very precise installation.

OAL - Lapped Zipper
One thing I like to do before I start sewing is to mark my stitching line (otherwise it can be kind of difficult to tell where you are stitching, since the zipper is closed and you can’t see the guidelines on the throat plate!). Go about 1/2″-5/8″ from the fold – this will depend on where you’ve pinned/basted your zipper tape – stick a pin through the marked line and check the wrong side of the tape to be sure it will catch and not be too close to the teeth. If you are sewing a zipper that still has the original zipper stop (aka, you didn’t shorten your zipper), it can be helpful to mark with a pin where the zipper stop is, just so you don’t accidentally sew over it and break your needle.

Now take the dress to the sewing machine and sew along your marked stitching line. Try to keep things as straight as possible, since this stitching is visible 🙂 Keep the zip closed and be careful not to sew through the front of the drss. When you get to the bottom of the zipper (or a couple of stitches before your marked zipper stop), lower your needle, raise the presser foot, pivot, and sew across the bottom of the zipper (be very careful and VERY SLOW if you are sewing in a zipper with metal teeth!). Backstitch a couple of times to keep everything secure.

OAL - Lapped Zipper
OAL - Lapped Zipper
Remove your basting threads, wipe out any markings, and the give the zipper a final press. If you were unable to catch the top of the zipper tape in your first stitching, tack it down now by hand.

And that’s it! Zipper is done! 😀 As always, please let me know if you have any questions!

OAL: Attaching the Skirt

30 Jun

Good morning, OALgers! Today we are going to attach the skirts to our bodices – which means we’ll have semi-dress-looking things by the end of this post! Yay!

While this post is shorter, picture-wise, than the previous posts for this OAL (and thank God for that! The rest of the sewing from here on out is much easier), there are a few things I want to cover here:
– Moving the pockets from the front princess seam, to the side seam
– Converting the gathers to pleats
– A different way to sew gathers

Ready? Let’s start with moving those stupid pockets. Ideally, you’d do this before you cut your fabric out, but it’s really no biggie if you’re doing this right before you sew the pockets in (as I tend to do). Just make sure your marking tool doesn’t bleed through the pattern tissue, or consider removing your fabric from the pattern pieces just to be extra sure.

If you don’t want to move the pockets, that’s perfectly fine – you can skip this step. Just be warned that they are right down the front of the dress – in what I thought was a pretty awkward spot. I don’t know who had the brilliant idea to put the pockets there on this pattern, but as far as I’m concerned, pockets belong in side seams (or over a butt, which is another nice place to put a pocket I suppose), so that’s where I am moving mine to.

OAL - Attaching the Skirt
Start by locating your skirt pieces – the skirt front and skirt side front will have dots marked where the pockets should go. You’ll also want the skirt back piece, as we are going to move some markings over there. I X’d out the old pocket markings (the ones printed on the pattern), so I wouldn’t get confused as to which markings to use.

OAL - Attaching the Skirt
Starting with the skirt side front, measure from the top how far down the pocket marking is – about 3.5″ in this case.

OAL - Attaching the Skirt
Now move to the opposite side of the pattern piece (where there aren’t any pocket markings) and make a dot the same distance from the top.

OAL - Attaching the Skirt
Measure the distance between the two dots and mark the second dot as shown on the side seam.

OAL - Attaching the Skirt
Repeat for the skirt back, marking on the seam that is NOT indicated to be the center back. It’s also a good idea at this point to lay your pieces together so you can be sure the markings match up and your pockets are nice and even.

Ok, onto adding the pockets! These next steps are the same regardless of what seam your pockets are being inserted into…

OAL - Attaching the Skirt
If you’re using a machine to finish your edges, go ahead and do that now. Finish all the raw edges of each of side of each skirt piece, as well as all edges of each of the 4 pocket pieces. If you’re pinking, you can finish as you go.

OAL - Attaching the Skirt
Match the markings on the pocket to the markings on each of the 4 skirt pieces with right sides together, and pin. Sew the pocket in place (from top to bottom), using a 3/8″ seam allowance. The smaller seam allowance will help that pocket stay hidden to the inside of the skirt.

OAL - Attaching the Skirt
You should have 4 skirt pieces with a pocket sewn on each one. Take the pieces to the ironing board and press all the seam allowances toward the pocket. If you want to understitch the pockets (I always do), you may do so now.

OAL - Attaching the Skirt
Now match up one skirt back piece with one skirt side front piece (or skirt front with skirt side front), right sides together, and pin the skirt seam above and below the pocket, as well as around the pocket itself. Excuse the cat tail 😛

OAL - Attaching the Skirt
Using a 5/8″ seam allowance, sew the skirt and pockets in one long swoop of stitching. Start at the top and sew until you get to the pocket markings.

OAL - Attaching the Skirt
Lower your needle, raise the presser foot, and pivot the fabric until you can continue to sew around the pocket. When you get to the second set of pocket markings, lower the needle and pivot again, then continue down the side seam of the skirt.

OAL - Attaching the Skirt
You should have two skirt pieces that look like this.

OAL - Attaching the Skirt
To press the pockets, start by clipping the seam allowance connecting the pocket to the skirt, as shown. Be careful not to snip your stitching lines!

OAL - Attaching the Skirt
Now press the pocket toward the skirt side front (or skirt front), and press open the seam allowances that are above and below the pocket.

OAL - Attaching the Skirt
Sew the last skirt pieces (depending on where you pockets are, you will either be attaching the front or the skirt backs) and press all the seam allowances open. Your skirt should look like this.

For converting the gathers to soft pleats:
OAL - Attaching the Skirt
Pin the skirt to the bodice at all seams and notches (so bodice side seam to skirt side seam, etc).

OAL - Attaching the Skirt
You should have a good amount of excess between each pinned section.

OAL - Attaching the Skirt
Working in one section at a time, pinch the excess and manipulate it into small pleats, then pin into place. I like to start with one section and then immediately do the same section on the opposite side (so, center front right then center front left, etc), so I can be sure that my sections are mirrored with the same numbers of pleats that are facing in the same direction. For my dress, I had 1 pleat in the front section, 2 in the section between the side seam and the princess seam at the front, and 3 at the back skirt piece, with all pleats pointing to the center front.

OAL - Attaching the Skirt
Once you’ve pinned your pleats to your liking, baste the entire edge into place and double check from the outside that the pleats are even, mirrored, and facing in the same direction. Then stitch, finish the seam allowance, and press the seam toward the bodice.

OAL - Attaching the Skirt
And done!

For gathering the skirt, read on!

Now, there are a few ways you can gather your skirt. You can do the standard long basting stitches that you pull to gather (using 1, 2, or 3 rows, depending on your preference) – which works perfectly fine, but I always find that my threads snap and that just drives me crazy. I’m going to show you another way to gather, which I find easier, more efficient, and works REALLY well if you’re dealing with a bulky or heavy fabric.

OAL - Attaching the Skirt
You need a long string to gather with. I actually like to use thin crochet thread, but silk thread, button hole twist, really thin yarn – hell, even unflavored dental floss – will all work just as well. For this skirt, I’m using button hole twist because I’ve somehow managed to lose my crochet thread. Oh well. Anyway, cut a length that is a few inches longer than the width of your ungathered skirt.

OAL - Attaching the Skirt
This next part probably won’t make a lot of sense, but just bear with me! Lay your thread on the right side of your fabric, a little less than your seam allowance (so for this skirt, 1/2″ from the edge). Set your sewing machine to do a wide zig-zag stitch and carefully sew over the thread, making sure the needle doesn’t actually puncture the thread – it should just zig zag across either side of the thread.

OAL - Attaching the Skirt
It’ll look like this when you’re done.

OAL - Attaching the Skirt
Now, pin your skirt to your bodice, again matching up all seams and notches.

OAL - Attaching the Skirt
There will be quite a bit of excess between each pinned section. To gather, just pull the thread you zig zagged over and distribute the gathers as you like. Twist the excess thread around a pin at each end of the skirt, to keep it in place so you can manipulate the gathers.
(I don’t know why this photo won’t show. You can see it if you click on it and go straight to Flickr. It’s just a picture of how to twist the thread around your pins.)

OAL - Attaching the Skirt
This is a MUCH easier way to gather than the standard basting stitch, as you’re much less likely to break your thread (and thus have to start over again). The best way I’ve found to do this is to pull the threads until the skirt is the same width as the bodice, twist the ends around a pin so the gathers stay in place, and then slide the skirt fabric around and redistribute the gathers until they are even across every section. Leave yourself at least 5/8″ wide ungathered sections of the skirt at the center back – it’ll make it easier to insert your zipper.

OAL - Attaching the Skirt
Once you’ve got the skirt the way you like it, sew into place at your 5/8″ seam allowance (you can baste first to check the outside, if you like). I sew mine with the gathers facing up, so I can keep an eye on them and make sure they’re not doing anything crazy while they’re being sewn.

OAL - Attaching the Skirt
Once sewn, just give the gathering thread a nice pull and it should slip right out of the zig zag stitches – which means you can totally use it again 🙂 Now finish the seam allowance and press it toward the bodice, being careful not to flatten the gathers.

OAL - Attaching the Skirt
And done! Yay!

Two more things-
– A few of y’all were asking if we were planning on opening a Flickr Group for you to share your OAL photos. While Andi & I weren’t intending on doing so – the Official Hangout Thread is on Ravelry – we realized that some of y’all might only be doing the sewing portion and/or don’t have a Ravelry account. SO. We’ve created the Official Unofficial OAL Flickr Page, which you can join and post to (photos or discussions) if you feel so inclined! Please keep in mind that this page is strictly for sharing/discussion purposes – i.e., anything solely posted here will not be included in the prize drawing (if you want prizes, you gotta post your finished outfit on the FO thread on Ravelry), but share away! We absolutely don’t want to leave anyone out 🙂
– Also, don’t forget to enter to win the Fashionary Sketchbook giveaway, if you haven’t already done so. Giveaway ends on Wednesday!

As always, let me know if you have any questions! 🙂

OAL: Sewing Sleeves or Bias Facing

23 Jun

Hiya OAL-gers! Today we are going to attach our sleeves and/or finish our arm hole edges with bias facing (depending on which version of the bodice you are sewing). Again, this is a long, picture-heavy post, so sorry! I will be covering my favorite way to sew bias facing (as I mentioned in my silk cherry Vogue 1395 post last week), so you may want to check this out even if you’re not sewing along with us 🙂

For the version with sleeves, read on!

OAL 2014 - Sleeves and Bias Binding
You should have a bodice and two sleeves. If you have not already done so, you may want to baste the edges of the facing along the arm hole, as that will all get attached in just a moment.

OAL 2014 - Sleeves and Bias Binding
Make sure your pleat markings for the sleeves are marked on the RIGHT SIDE of the fabric. I used chalk so it will just brush out and not leave a permanent mark.

OAL 2014 - Sleeves and Bias Binding
To form the pleat the top of the sleeve, fold the fabric exactly along the solid line and bring it to the dashed center line. Pin in place. Do this for both sides, forming two pleats.

OAL 2014 - Sleeves and Bias Binding
Baste the pleats into place.

OAL 2014 - Sleeves and Bias Binding
Now you are going to sew two lines of basting stitches. The first line of stitching is along the curve of the sleeve cap, starting at one set of notches and ending at the opposite set, at exactly 5/8″ from the raw edge*. Leave long thread tails. This basting will be used to ease the sleeve into the arm hole. The second line of stitching is along the hem edge of the sleeve, from end to end, at 5/8″ as well. This basting will be used to hem the sleeve. You can leave it off if you feel confident in your sleeve-hemming skills, though!
* Note: Lots of people like to ease their sleeves in with two lines of basting, at 5/8″ and 1/2″. You are more than welcome to do that if that’s your jam, but I’ve found that I get much more gentle easing with less puckering if I use one line at 5/8″. Totally up to you!

OAL 2014 - Sleeves and Bias Binding
Sew the underarm seam of the sleeve, right sides together. Finish the edges and press.

OAL 2014 - Sleeves and Bias Binding
To hem the sleeve, first fold up the bottom edge 1/4″ and press. Fold up the remaining hem allowance, exactly along the line of basting stitches that you created, and press again. All raw edges should be encased inside the hem at this point.

OAL 2014 - Sleeves and Bias Binding
Topstitch the sleeve hem into place and press again. If you’d like, you may use a slightly long stitch length (I use 3.0 to my normal 2.5) – I personally just think it looks a little nicer 🙂

OAL 2014 - Sleeves and Bias Binding
Time to stick that shit in the arm hole! Starting at the bottom, match up the side seam with the underarm seam, and match the notches. Match the dashed line at the sleeve cap (the one that both pleats are folded to) to the shoulder seam. Your sleeve will be obviously too big for the arm hole, that’s fine, we are going to fix that.

OAL 2014 - Sleeves and Bias Binding
Very gently pull the line of basting stitches, easing the sleeve excess to fit the arm hole. We don’t want to create big gathers here – we just want the sleeve to be a little smaller so it fits smoothly. Once you’ve got the sleeve eased in, pin everything into place.
* Note: Easing sleeves can be a little difficult! These sleeves will ease in smoothly, but if you are having problems with puckers, you may want to open up your pleats at the top of the sleeve and make them a little bit deeper. That’ll use up some of the excess ease 🙂 Don’t go too crazy with that, though, as you do need a little bit of easing so the sleeve has a pretty curve and enables you to move your arms around and all that.

OAL 2014 - Sleeves and Bias Binding
Now you can sew the sleeve in! Sew exactly along the 5/8″ line of basting, being careful to make sure there are no puckers or gathers and that your sleeve in eased in smoothly. I like to sew my sleeves in with the gathered side facing up – that way, I can periodically lower my needle, raise the presser foot, and adjust the easing as I go.

OAL 2014 - Sleeves and Bias Binding
Once you’ve got the sleeve sewn in, double check both sides to be sure that there is no gathering or puckering. Your sleeve will probably have a bunch of excess at the seam allowance like I have here – that’s fine! As long as it’s smooth at the stitching line 🙂 Now go ahead and finish your seams.
* Note: The instructions tell you to sew a second line of stitching right by the first one. Honestly, I’ve never done this before – even before I had a serger – and I’ve never caused a Sewing Apocalypse, so take that as you will.

OAL 2014 - Sleeves and Bias Binding
Press the seam allowances (I press toward the bodice) and steam the sleeve cap to remove any excess fullness.

OAL 2014 - Sleeves and Bias Binding
Finished: Cute little cap sleeves! Yeeeahhh!!

For the sleeveless, read on for the bias facing tutorial!

OAL 2014 - Sleeves and Bias Binding
The first thing we want to do is remove some of the seam allowance from the arm hole of our bodices. This bodice is designed to be sewn with a 5/8″ seam allowance, and we will be attaching our bias strips at 1/4″. So you’ll want to shave off about 3/8″ from the entire circumference of the arm hole.

OAL 2014 - Sleeves and Bias Binding
Now measure the arm hole, so you know how long to cut your bias strips.

OAL 2014 - Sleeves and Bias Binding
Next, we are going to cut bias strips from our fashion fabric (or cool contrasty fabric, if you want!). There are lots of tutorials on how to do this; I am just showing you my preferred method 🙂 Start with a piece of fabric that has two straight edges at a right angle. For the cross grain, you can just rip your fabric, which will give you a perfect straight edge without cutting.

OAL 2014 - Sleeves and Bias Binding
Fold the ripped edge up to meet the top straight edge, thus forming a diagonal line. Cut along the diagonal line (you may want to gently press first, if you need a guideline); you have just created a bias edge.

OAL 2014 - Sleeves and Bias Binding
Now cut two strips on the diagonal/bias – 1″ wide and the length of your arm hole measurement. I like to draw my lines with chalk and cut with scissors; you can also use a ruler and rotary cutter if that’s your jam.

OAL 2014 - Sleeves and Bias Binding
Sew each little bias strip into a circle with the right sides together, using a 1/4″ seam allowance. Press the seam allowances open.

OAL 2014 - Sleeves and Bias Binding
Next, we want to make sure the facing will fit inside the arm hole before we actually sew it in. *Generally* speaking, most bias facing is fine at 1/2″ shorter than the measurement of what it’s being sewn into (which is why we cut our strips at the measurement of the arm hole – 1/4″ seam allowance x2 = 1/2″), but some stretchier fabrics – such as my rayon challis – require a shorter bias strip. So we are going to check that measurement now. This pinning/sectioning also makes it easier to sew the bias strips in if you’re a newb.
Anyway, section your arm hole and bias strips into 4 equal sections, and mark with pins.

OAL 2014 - Sleeves and Bias Binding
Pin the bias facing to the arm hole, starting with the seam matching the side seam, with right sides together (so your bias facing is on the outside of the garment). Match each section, so your bias facing is pinned at 4 points. From there, check one section and see if the facing is short enough for the arm hole – you just need to be able to gently stretch it to match the length of the bodice arm hole (gently, I say! We are not sewing ribbing onto tshirts here!). If it’s too long, pull it out and shorten the bias strip accordingly, then repin. I had to shorten mine by another 1/2″ to get it to fit.
* Note: If you want your bias facing on the OUTSIDE of your garment (again, cool contrasty thing), you will need to pin it to the inside of the arm hole.

OAL 2014 - Sleeves and Bias Binding
Once your facing is the correct length and pinned into place, sew it down with a 1/4″ seam allowance, catching the edges of the bodice facing in your stitching as you come across them. Again, the bias facing needs to be on the outside of the garment, right sides together.

OAL 2014 - Sleeves and Bias Binding
Now take the whole thing to the ironing board and press the seam allowances toward the facing.

OAL 2014 - Sleeves and Bias Binding
Fold the facing down toward the arm hole, wrong sides together, matching the raw edge of the facing with the stitching line you just created. Press.

OAL 2014 - Sleeves and Bias Binding
Fold the entire thing down one more time, along the stitching line, to the inside of the arm hole (or outside, if you’re going that route). All raw edges should be completely encased at this point.

OAL 2014 - Sleeves and Bias Binding
This is what your pressed/unstitched facing should look like. Note that I also caught my bodice front facing in the stitching/binding, so it’s all encased and won’t need to be tacked down later.

OAL 2014 - Sleeves and Bias Binding
Now topstitch your facing to the arm hole, about 1/8″ from the fold. Try to keep your stitching line consistently spaced, as this will show on the outside of your garment. You may need to gently stretch the binding as you sew the curves. Alternately, you can slipstitch this binding if you don’t want the stitching to show on the outside, but I’ve found that works best if you have underlining to sew it to (otherwise you may have little thread puckers).

OAL 2014 - Sleeves and Bias Binding
Once you’ve sewn down your bias facing, take it back to the iron and give it one last press, to ease out any wrinkles or fullness, and to make the edges nice and sharp.

OAL 2014 - Sleeves and Bias Binding
And that’s it! A gorgeous bias facing that doesn’t require using a fiddly tool (man, those things can be obnoxious). I LOVE this method and I find it much easier than any other binding method I’ve used before. This works for both necklines and arm holes, and can be done either flat or in-the-round as I demonstrated.

Phew! That’s all for this week! As always, let me know if you have any questions 🙂

OAL: Sewing the Bodice

16 Jun

Hey OAL-gers! Today is the day we get to start SEWING! Yay! Just a warning – this is a VERY long, picture-heavy post! Seriously, there are like 50+ photos in this post. I considered splitting it into two posts, but I figured anyone who is bored with sewalong posts will probably be more pissed that there are two of them. So, long post, apologies in advance.

Part of the reason why this post is so long is because I decided to make two versions of the dress! I wanted to cover both of the bodices (well, both basic shapes – I won’t be covering that weird yoke thing. SORRY), as well as sleeved and sleeveless versions. Not to mention, I want two dresses out of this 🙂 So, in this post, I’ll be going over the construction for both bodice B (v neck and shoulder straps) and bodice C (notched neckline).

OAL 2014 - Sewing the bodice
The very first thing we will want to do is staystitch our necklines so they don’t stretch out of shape. Staystitching is one of those really important steps that frequently gets skipped over – and I admit, I was one of those people for a long time! – but you really really should not skip it. Staystitching prevents the bias edge of the neckline from stretching out over time – which can happen more quickly than you’d think, especially when you’re manhandling your bodice into submission while you’re sewing it. Please don’t skip the staystitching!

Ok, soapbox rant over – your instructions will tell you what direction to staystitch. For bodice B (and A, I guess), you are going from the center front to the outer edges. Bodice C and also the back bodice are staystitched from the shoulder to the center front. Pay close attention to what direction you will be stitching, and follow that.

OAL 2014 - Sewing the bodice
To staystitch, reduce your stitch length to be slightly smaller than the standard on your machine (my machine stays around 2.5, so I staystitch at 2.0), and sew at 1/2″ seam allowance. Don’t forget to backstitch at each end. That’s it!

OAL 2014 - Sewing the bodice
Next, let’s tackle those darts in the back bodice (I know, I’m skipping around the instructions – I like to do the “prep” sewing first to get it out of the way. Just roll with it). Start by marking your dart with your preferred method. Here I used wax tracing paper and a rotary marking tool; but you can also mark the legs and point and connect the lines with a ruler. Whatever works for you!

OAL 2014 - Sewing the bodice
Start by pinning the legs of the dart together at the bottom. I pin horizontally along the marked line, this way I can check both sides to be sure the lines are matching up. Continue all the way up the dart until you get to the point, and mark that with a pin as well.

OAL 2014 - Sewing the bodice
Now you can start sewing along the marked line of your dart. Do NOT sew over your pins!

OAL 2014 - Sewing the bodice
Here’s a fun party trick I learned from Papercut Patterns – when you taper out to the dart point and have about one thread left before your needle sews off the fabric, stop and lower your needle.

OAL 2014 - Sewing the bodice
With the needle down, lift your presser foot and rotate the fabric 180*. Lower your presser foot and sew down the inside of the dart until you’re about halfway down, then backstitch.

OAL 2014 - Sewing the bodice
Your dart should look like this. I love this method because you don’t get a weird bump at your dart tip (which can happen if you tie it off or backstitch at the point), and the dart is nice and secure thanks to the backstitching. Pretty cool!

OAL 2014 - Sewing the bodice
Now press that dart toward the side seams. Use a tailor’s ham if you got one!

OAL 2014 - Sewing the bodice
Finished dart! Do this for both back bodice pieces.

OAL 2014 - Sewing the bodice
Now let’s sew up our princess seams! Princess seams can be a little tricky at first if you don’t know what you’re doing, but they don’t have to be! You should have two front bodice pieces – the center front, and the side front. See how the side front is bigger than the center front? Those two pieces will ease together.

OAL 2014 - Sewing the bodice
Start by pinning the side front to the center front, starting at the bottom and stopping when you reach the notch.

OAL 2014 - Sewing the bodice
Now pin the two pieces together at the top, again, stopping when you reach the notch. You should have a small section of not-pinned bodice.

OAL 2014 - Sewing the bodice
Gently manipulate the fabric of the center front piece to curve along with the side front, and pin into place. Try not to include any wrinkles or puckers. I’ve found these particular pieces ease pretty well without needing to cut notches, but if you are having trouble getting a smooth curve, you may want to snip a few small (1/2″ max!) notches into the curve of the center front piece, which will help the seam allowance spread out and lie flat against the side front curve.

OAL 2014 - Sewing the bodice
Stitch the curve along the seam allowance (PROTIP: the side that needs to be eased – the side front – should be on the bottom; the feed dogs will help ease it in!), and then finish as desired. I used my serger for my dress.

OAL 2014 - Sewing the bodice
Now press the seam allowances toward the side front. Again, use your tailor’s ham if you got one!

OAL 2014 - Sewing the bodice
Repeat for the other half of the front bodice. Yay princess seams!

The next few steps are for bodice B…

OAL 2014 - Sewing the bodice
Take your yoke front and stitch it to the bodice back, matching notches. Finish the seam allowances and press toward the back (or press open, depending on your method of finishing).

OAL 2014 - Sewing the bodice
Fuse your interfacing to the back facing (I also interfacing my front yoke facing, since this rayon challis is pretty spongey!) and sew to the front facing, matching notches. Finish the long unnotched edge of the sewn facings – in this case, I used my serger, but you could use pinking shears, turn the seam allowance under and stitch, or even bind with bias tape. Whatever you want, it’s your dress!

OAL 2014 - Sewing the bodice
With right sides together, pin the facing to the back bodice, matching notches and raw edges. Stitch.

OAL 2014 - Sewing the bodice
Trim and clip your seam allowances so they’re not so bulky – I trim mind in half, and clip the curved edges so they will lie flat when pressed (note – I notched these so you can actually see where it’s notched – but you actually only need to clip the curves. Take small snips and don’t cut into your stitching line!).

OAL 2014 - Sewing the bodice
Finally, you’ll want to understitch your facing so everything stays in place and rolls to the inside. This is really easy – just open the facing up away from the bodice, and push all the seam allowances so they’re against the wrong side of the facing. Sew through the facing and seam allowances, about 1/8″ away from the seamline.

OAL 2014 - Sewing the bodice
Turn the facing to the wrong side of the bodice back, and give everything a nice press.

OAL 2014 - Sewing the bodice
Take one back bodice and one front bodice, and pin the two together as shown, matching your dots and raw edges (yes, I know, the instructions have you sew the center front seam before this. I forgot. Oh well.). Baste into place, about 1/2″ from the raw edge.

OAL 2014 - Sewing the bodice
Sew the two front facing pieces together up to the marked dot, and backstitch to secure. There will be a small space above the dot that is unsewn – this will make it easier to sew that slight v-seam. Press the seam open and finish the edges of the long unnotched edge.

Do the same for your center front pieces – sew up to the dot and backstitch. Finish your seams separately and press them open.

OAL 2014 - Sewing the bodice
Same as with the back facing, match the front facing to the front bodice, right sides together and raw edges matching. Spread the unsewn sections of the bodice and facing apart; when you get to the dot, lower your needle, pivot, and continue sewing back up the v.

OAL 2014 - Sewing the bodice
Understitch the seam allownace to the facing, turn the facing to the inside, and press.

Finally, sew up the side seams and finish the edges.

OAL 2014 - Sewing the bodice
Hey look, your bodice is done! High fives all around!

Remaining steps for bodice C…

OAL 2014 - Sewing the bodice
With ride sides together, sew the center front pieces up to the dot, and backstitch. Finish the seam allowances separately and press open. Sew the front bodice to the back bodice at the shoulders, finish seams and press.

OAL 2014 - Sewing the bodice
Your bodice front should have a nice deep notch, like so.

OAL 2014 - Sewing the bodice
Fuse your interfacing to your facing pieces. Sew the front facings together at the center front, up to the dot (same as with the bodice front), and stitch the front facing to the back facing at the shoulder seams. Press all seams open and finish the long unnotched edge.

OAL 2014 - Sewing the bodice
With right sides facing and raw edges matching, pin the facing to the top of the bodice, all the way around.

OAL 2014 - Sewing the bodice
Sew the facing to the bodice at your normal 5/8″ seam allowance. When you get to that center front notch, sew all the way to the corner, lower your needle, and raise your presser foot.

OAL 2014 - Sewing the bodice
Pivot the fabric and continue stitching until you reach the dot (where you joined the front pieces and stopped stitching). Go very slowly and be sure that the fabric is completely flat underneath the presser foot – you don’t want to sew any wrinkles!

OAL 2014 - Sewing the bodice
This is what your front bodice will look like once you’ve sewn it. Hm, my staystitching is crooked as hell.

OAL 2014 - Sewing the bodice
Now trim all your seam allowances in half, and clip the curves, points, and corners.

OAL 2014 - Sewing the bodice
Understitch your facings (scroll up to view B if you need more info on how to do this!) all the way around. You will not be able to understitch all the way into the center front notch – that’s ok! Just go as far as you can.

OAL 2014 - Sewing the bodice
Turn the facing to the inside and use a tool (I have a point turner, but you can use a knitting needle or chopstick or even a dull pencil) to push the notch points out. Give everything a good press.

Sew up your side seams and finish the edges as desired.

OAL 2014 - Sewing the bodice
Bodice C is finished!

WHEW! Was that the longest post or what!? Promise they’ll get easier from here 🙂 As always, let me know if you have any questions!

OAL: Cutting and Marking Your Fabric

9 Jun

Hey guys! Today we are going to cut and mark our fabric for our dresses! Woohoo!

I’m going to go out on a limb here and say that most people don’t like this part of the sewing process. I get it – you’re ready to start sewing, but first you gotta futz with those tissue pattern pieces, cutting, and marking all the little dots and clipping all the little notches. Such a pain when you really just want to get to the fun part!

I personally don’t mind cutting – I actually find the process a little fun – I listen to dancey music and use the opportunity to get pumped about my project. CUTTING PARTY WOOHOO! While I do like to get everything with cutting done in one session (and marking, too, if I have the time), I do not try to rush the process. I’ve found that rushing just causes more harm than good – you get sloppy, you cut things inaccurately or off-grain. No good! Please don’t try to rush through this – take your time (trust me, y’all, we’ve got plenty of time here) and just try to enjoy the process. You might surprise yourself!

One thing I’ve found that I do mind, though, is taking photos while trying to cut – and I think it really shows in my pictures here, unfortunately. If anything about this post is unclear, please do not hesitate to post your question in the comments and I will get back to you as soon as I can!

OAL - Cutting and Marking Fabric
If you haven’t already done so, check your pattern instructions to see what pieces you cut and how many of each. I always like to look at this first, just to be sure I don’t end up with some unfortunate surprise (such as realizing too late that a certain piece needed to be cut 4 times, and I’ve already cut up all my fabric. WHOOPS!).

Make sure your fabric is prewashed and that you have pressed all the wrinkles out. You may also press your pattern pieces (dry iron, no heat) if you prefer, but I’ve found these thin tissue patterns can usually be smoothed out enough to skip the ironing. Up to you!

OAL - Cutting and Marking Fabric
Now for the fabric! The first thing you want to do is make sure that your cut edges are nice and straight. This will help you keep the folded fabric straight, and thus, cut the pattern pieces on grain. See how the cut edge of my fabric is wavy? We are going to fix that.

OAL - Cutting and Marking Fabric
Cut a little snip about 1″ below the cut edge of your fabric (or 1″ lower than the lowest dip, if it’s super wavy like mine)

OAL - Cutting and Marking Fabric
And then just rip straight across the edge. Ah! Doesn’t that feel nice? Totally my favorite part of cutting HAHA!

OAL - Cutting and Marking Fabric
Now that the edges are straight, you may fold the fabric lengthwise, wrong sides together*, and lay it on your cutting table. At this point, I also like to pin my cut edges together, as well as the selvedges – it keeps the fabric from shifting around, which is especially helpful if you are cutting something that tends to slip around. Make sure the fabric is completely smooth all the way to the fold (no wrinkles or anything); else you may end up cutting an inaccurate piece. If your fabric is twisting, try shifting the cut edges until everything lies smooth.

*You may also fold your fabric right sides together, if you prefer. My stance on this is that the fabric is easier to mark on the wrong side if it is folded with wrong sides together (as you can just open the two pieces and mark them at the same time; it’s also easier to use wax paper+tracing wheel this way), so this is the way I fold/cut. Also, if you fold with the right sides out, you get to stare at your pretty fabric while you cut it. Bonus! 🙂

OAL - Cutting and Marking Fabric
Once your fabric is folded and completely flat, you can start pinning down the pieces! I like to start with the pieces that need to go on the fold – as you can see in my poorly-cropped picture, this is indicated by an arrow (it’s also in the cutting instructions of the pattern, fyi). I do this because otherwise I’ll forget! Not good! For pieces on the fold, butt your pattern piece right up to the fold of the fabric and pin all the way around.

OAL - Cutting and Marking Fabric
A note on pinning – how you choose to pin your pieces is entirely up to you. Some people completely omit pins and just use pattern weights and trace the pieces, or a rotary cutter. That is perfectly fine if that’s your jam. I personally like pins and scissors, so this is what I will be demonstrating for this sew-along. I like to pin parallel and about 1/4″ away from the pattern piece. I also use a lot of pins – the more the merrier! – as I find it helps me cut more accurately. Don’t be afraid to go overboard on the pins, is what I’m saying here.

OAL - Cutting and Marking Fabric
One other thing I’d like to bring up is the topic of grain – and making sure that your pieces are all cut on grain. What is grain? Grain is the direction of the threads that make up a woven fabric. Lengthwise runs parallel to the selvedge, crosswise is perpendicular, and bias runs at a 45 degree angle. Grain is EXTREMELY important when cutting your fabric – if you cut things off grain, you run the risk of your dress doing some funny things. Ever worn a pair of jeans where the seam kept trying to twist around your leg? That’s what happens when something is cut off grain. We want to be sure that everything is cut accurately on grain – i.e., the lengthwise grain goes straight up and down your body. This is super super simple to do, but you’d be surprised how many people don’t bother with it (for more information on grain, check out this Threads article)

In the picture above, I’m pointing at the grainline on the pattern piece. This line needs to run parallel to the selvedge of your fabric to ensure that your fabric is cut on grain.

OAL - Cutting and Marking Fabric
All you need to do is make sure that the grainline printed on your pattern piece is the same distance from the selvedge all the way across. I like to use a clear ruler for this – you can see straight through it, which makes it easy to adjust the pattern piece until it’s straight. I start in the middle, check the distance the grainline is from the selvedge (in this case, it’s 4.5″), stick a pin to hold the pattern piece in place, and then check that the distance at each end of the grainline is also 4.5″ (and stick another pin in there to keep the piece from shifting). Once I’m sure the entire grainline on that one pattern piece is completely straight and parallel to the selvedge, then do I finish pinning and cut.

It sounds like a lot of extra work, but it’s really not – and you’ll absolutely see the results (or, rather, won’t – because your garment won’t be hanging funny!). This also means that you can plan your cutting layout howeverrrr you want – as long as you keep the pieces on grain. The pattern instructions do include a suggested cutting layout – and if this is your first time making a pattern, I definitely suggest that you follow it, just to keep things simple – but it’s not always the most economical way to cut your fabric. As long as you’re keeping all your pieces on grain, feel free to see if you can find a better way to get the most out of your fabric 🙂

Ok! So that being said – time to finish pinning and cutting! Go ahead and pin the rest of your pieces down to the fabric (you may follow the cutting layout in the pattern if you need some guidance), and make sure you have everything pinned before you start cutting!

When you cut, keep the fabric completely flat on the table (or floor, but it’s better for your back/sanity if you can at least find a temporary table space to cut on!) with your shears at a 90 degree angle. Slice completely through the entire length of the shears – no timid little baby cuts! – and use your opposite hand to hold the fabric down so it stays flat on the table. Try to be as accurate as possible with your cutting, and take your time going around curves and sharp points.

OAL - Cutting and Marking Fabric
Once you’ve cut aaaall your pattern pieces (yes, all of them! Remember, there are 4 pocket pieces to cut!), time to mark! For notches (the little triangles printed sporatically on the edges of the pattern pieces), I just take a tiny snip all the way to the point of the notch. I know some people cut the notch outward, like a little triangle. That’s fine if you want to do that, but I find it too time-consuming and less accurate than just a simple snip.

OAL - Cutting and Marking Fabric
For marking dots – such as where the sleeve is attached to the bodice – I like to stick a pin in the pattern piece, directly through the center of the dot. Gently pull the two pieces of fabric apart, and mark where the pin enters each piece of fabric.

For marking dots and the stitching lines on the bodice (the notched version), you can use wax paper and a tracing wheel. I didn’t take any photos of this, but it’s pretty self-explanatory. Lay the paper with the wax side facing down on the wrong side of the fabric, and just trace over the lines of the dart with the tracing wheel. Easy!

Ok, that’s all for today! If you’ve still got a little bit of sewing stamina left, go ahead and cut out your interfacing pieces as well. We start sewing next week! Yay!

OAL: Choosing Your Fabric and Size

2 Jun

Time to kick the sewing portion of this OAL! Wheee!!

Today, we will be going over fabric options and choosing your size. Just a head’s up – I know a lot of y’all already have your material picked out, and may have even started sewing. That’s great! You are welcome to forge ahead if you so choose – my posts will be aimed at beginners, so don’t feel like you have to stick with the slow pace if it ain’t your thang. Those of you who have not chosen your fabric and/or plan to make a muslin, just be aware that you have a couple weeks until we actually start sewing. These posts will, of course, stay up long after the sewalong is over, so they will always be available for reference if ya need it 🙂

Ok, that’s out of the way – let’s talk fabric! A few of you mentioned that you’d like a little guidance on fabric, and I aim to please, so I’ve pulled a few pieces out of my stash to show you. Just a side note – the majority of these pieces are from Mood Fabrics. Not because they are sponsoring this OAL or anything – I just have a LOT of fabric from Mood. That’s all! I’ve linked to everything that you can get from the website, so you can buy it yourself if you so please. No sneaky affiliate links are hidden in this post, so feel free to click away 🙂

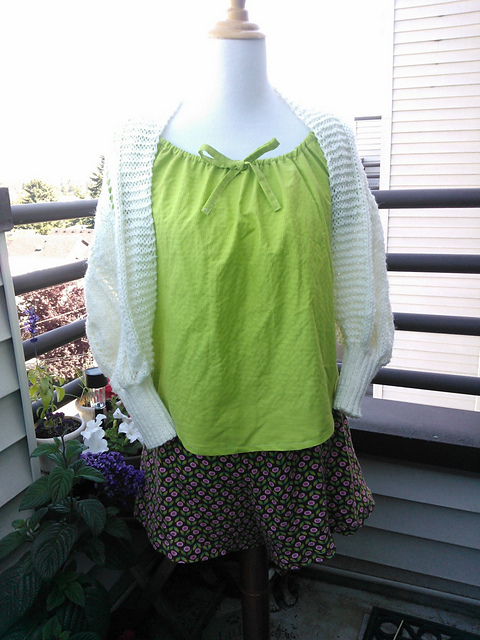
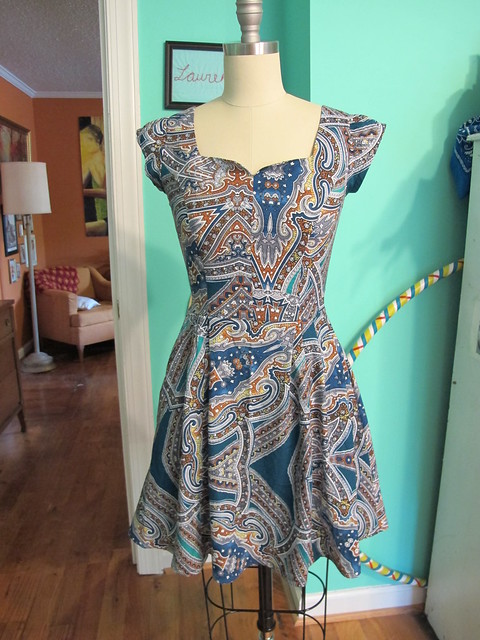
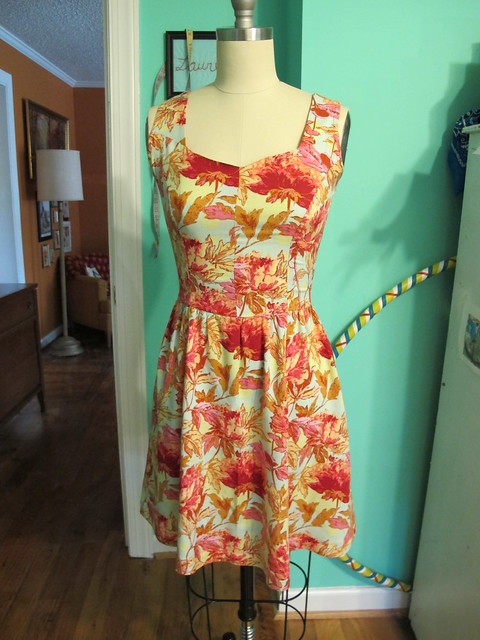
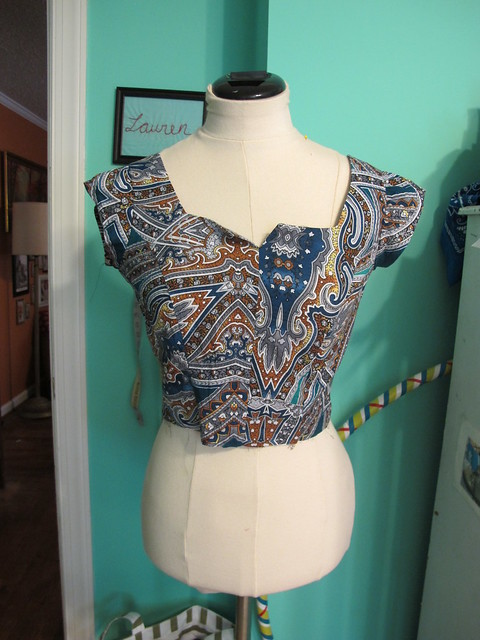
When it comes to choosing fabric, the first thing you want to decide is what you want your overall dress silhouette to be. The fabric you choose will ultimately determine if your dress is drapey, or has a skirt that likes to stand out on it’s own. Here’s an example – this is the same pattern I will be making for the sewalong (Simplicity 1803), sewn up in two completely different types of fabric:

Simplicity 1803
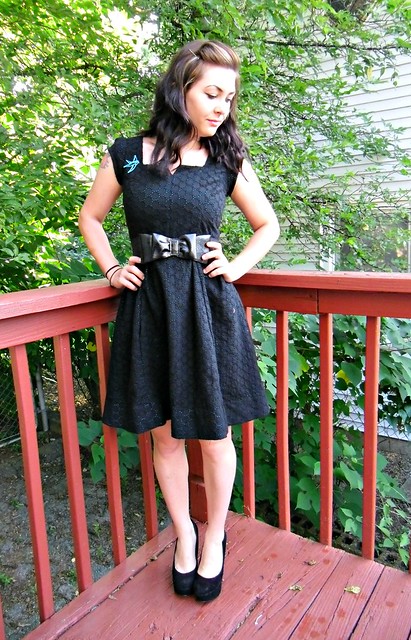
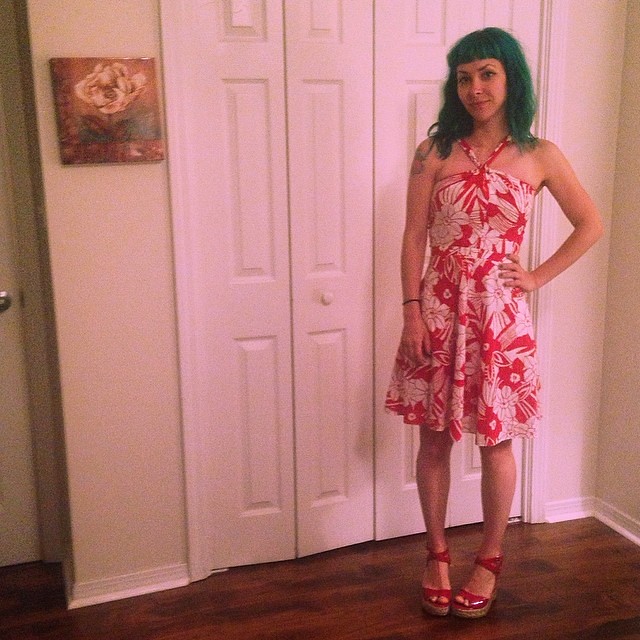
Version 1 was sewn up in a thick cotton eyelet that had a lot of body. There is a nice structure to the bodice, and look at the skirt – see how the pleats stand on their own? The thickness of the fabric help give the skirt some structure.

Simplicity 1803, v2
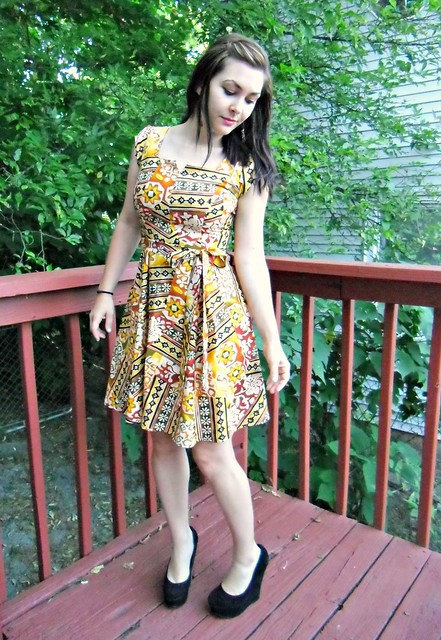
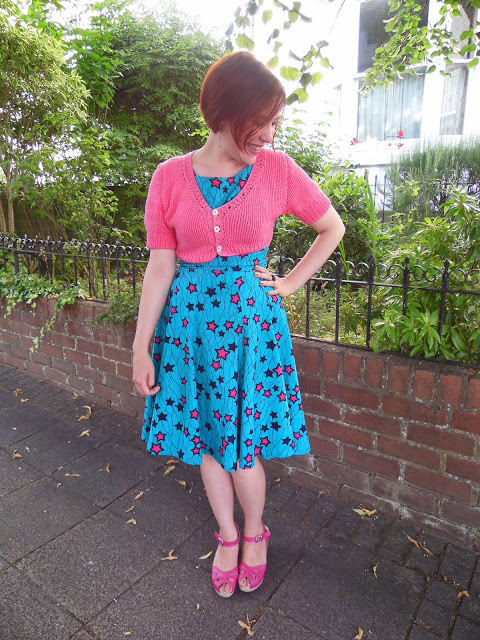
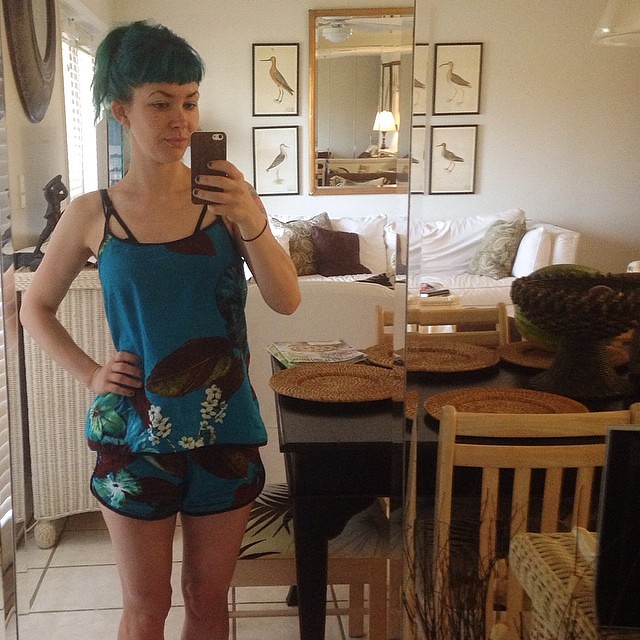
Version 2 was sewn in a drapey rayon fabric, which means the resulting dress is much softer. See how the pleats in the skirt look more like soft, draped folds? This fabric does not have a lot of body, so it hangs in soft drapes (I just think that’s so pretty!). The bodice does not have a lot of structure – the notch in the neckline has folded over itself over time (not really shown in this picture, but if you look at more recent photos of me wearing this dress you will see what I mean).

Still confused about how body and drape can affect how a pattern looks? Check out these two versions of my Tania culottes – version 1 is sewn in a lightweight drapey cotton, and version 2 is made in a nice linen/silk suiting with a lot of body. Both of those are made the in EXACT same size from the EXACT same pattern, but they are very different!

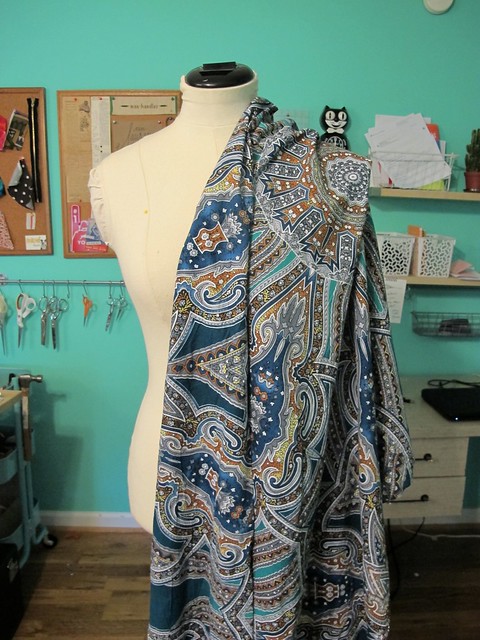
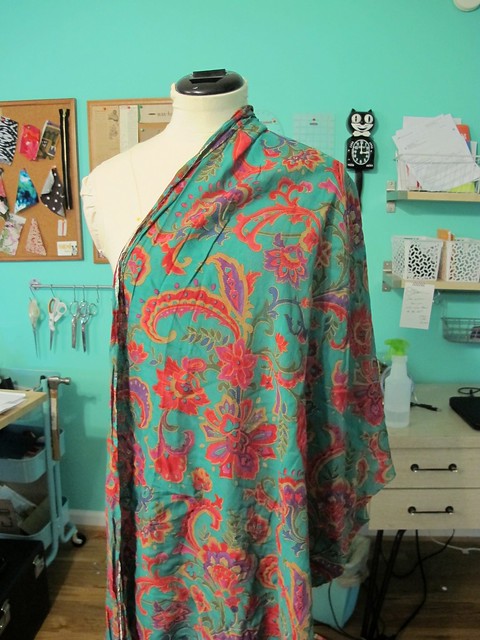
Hopefully those visuals will give you a good idea of how drape can affect the finished dress! How you want your dress to look is totally a matter of personal preference – however, I will point out that if you are concerned about adding bulk to your waist, you will probably want to stick with a drapey fabric. Anything with body will stand out at the gathers or pleats (however you decide to do the skirt), and it will make your waist look bigger. Just an fyi! I personally love the drapier stuff, but again, it’s totally up to you. If you’re having trouble envisioning how a particular fabric will drape and whether or not it has body, just hang some folds over your arm (or a chair, or whatever) and that should give you a good idea of how it’ll hang off your body. In the following pictures, I’ve hung my fabrics off my dressform so you can see what I’m talking about.

Once you’ve decided if you want a structured or drapey dress, now comes the time to pick fabric! The pattern gives you lots of options for various fabrics – and this is a pretty flexible style, so *most* anything will work as long as it’s not a knit.

OAL- Fabrics
If you’re a n00b to dressmaking and want something easy to work with, a lightweight cotton is my #1 suggestion! This is the fabric I will be using to make my dress for the OAL; it’s a lightweight cotton that I picked up at Mood while I was in NYC earlier this year. Cottons are great because they are easy to cut, press, and sew, and they feel wonderful to wear in the summer. Plus, they usually come in cool prints and colors! Other types of cottons to look for: cotton lawn, cotton bastiste, cotton voile, cotton shirting.

OAL- Fabrics
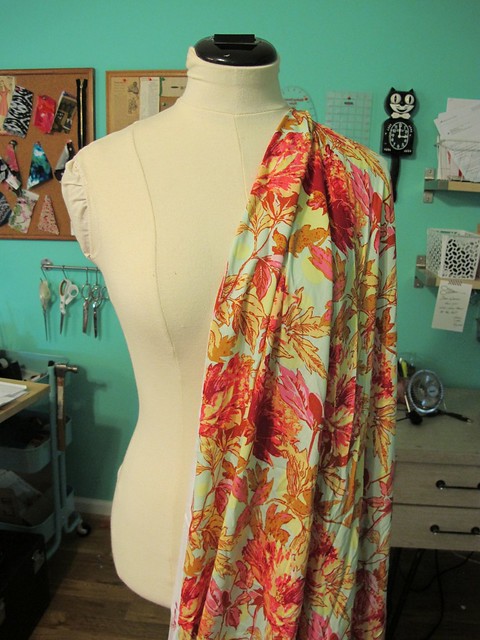
Here is a gorgeous cotton/silk blend that I just LOVE. Isn’t it beautiful? The addition of silk makes this a very lightweight, very drapey fabric – it’s practically tissue-weight. This fabric is also on the edge of being sheer, so an underlining is recommended.

OAL- Fabrics
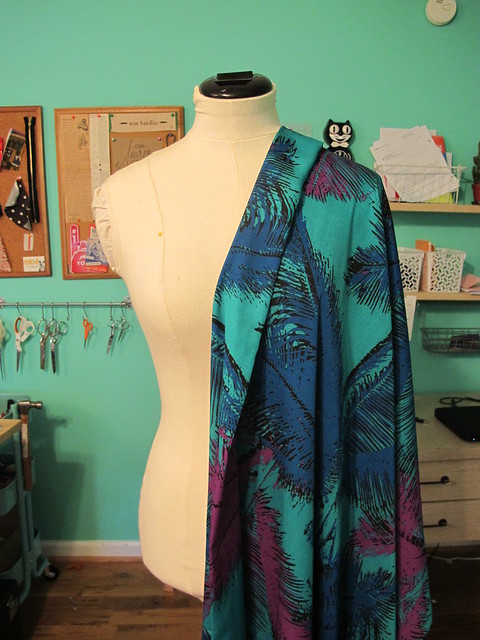
Another good choice for this dress (assuming you want drapey) is rayon! This gorgeous rayon challis was sent to me from Grey’s Fabric!

A word on rayon: Rayon is amazingggg to wear, one of my favorite fibers. It’s also a big giant pain to sew, because it’s very shifty. I would not recommend this fabric if you are brand-new to sewing, but do give it a thought if you’re up for a challenge! It is absolutely worth the extra effort, I promise.

OAL- Fabrics
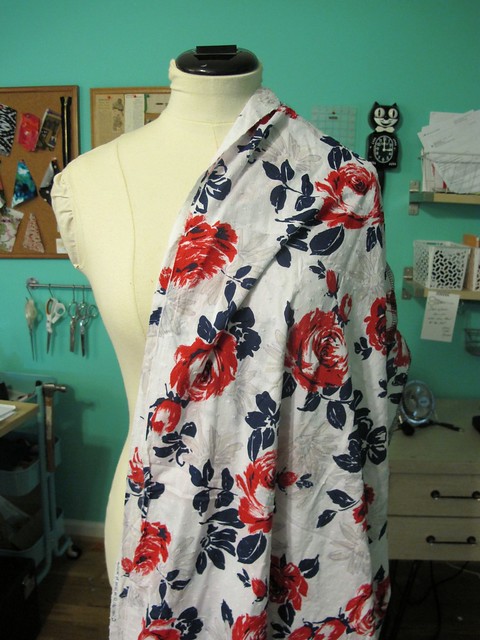
Here’s another drapey challis that looks and hangs similar to the rayon, except it’s polyester. Poly is a nice cheap alternative to rayon, although be warned that it is a little more difficult to press due to the nature of the fibers. This fabric is from Metro Textiles in NYC.

OAL- Fabrics
Another lovely choice is a lightweight chambray! This one is from my man Sam at Chic Fabrics in NY.

OAL- Fabrics
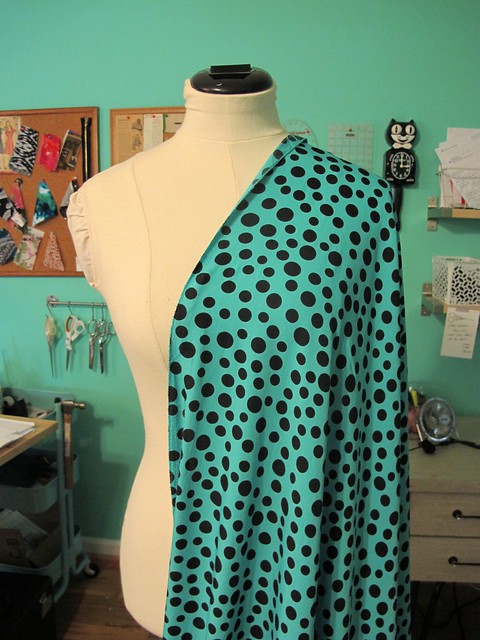
Here’s a lightweight cotton dotted swiss that has a little bit of body – see how it stands away from the form? This is another fabric that would benefit from an underlining as it’s a bit sheer. Also, I’m just now remembering how pretty this fabric is (from Mood in NYC) and why the FUCK haven’t I sewn anything out of it yet??

OAL - Fabric
Ooh oooh I LOVE this fabric!! This is a mediumweight silk crepe, also from Mood NYC. Silk crepe is great because the “grabby” texture makes it easier to sew than most silks, and it has a lovely drape and very saturated colors.

OAL- Fabrics
The last of my drapey options – cotton gauze. This stuff very lightweight – it’s semi-sheer and almost floaty – but it does have a little bit of body (compare it to the cotton/silk near the top). This fabric is *also* from Mood NYC. Haha that place is awesome.

Moving onto the more bodylicious of the fabric options…

OAL- Fabrics
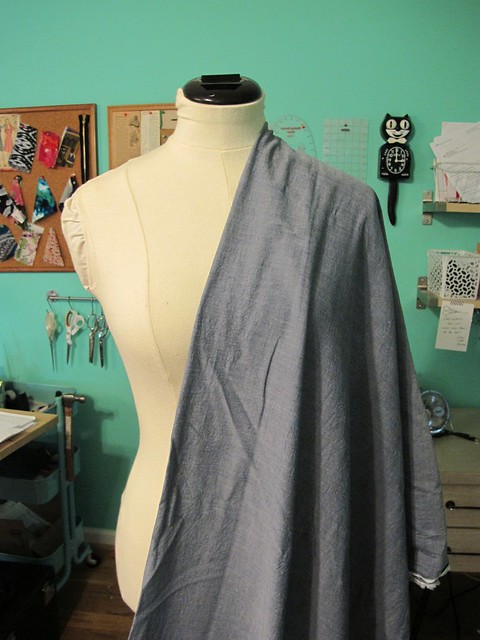
Linen is, of course, always a good choice! This is a medium weight linen. There’s a fair amount of body in the fabric – which will show in the gathers – but it has a nice drape that results in soft folds.

OAL- Fabrics
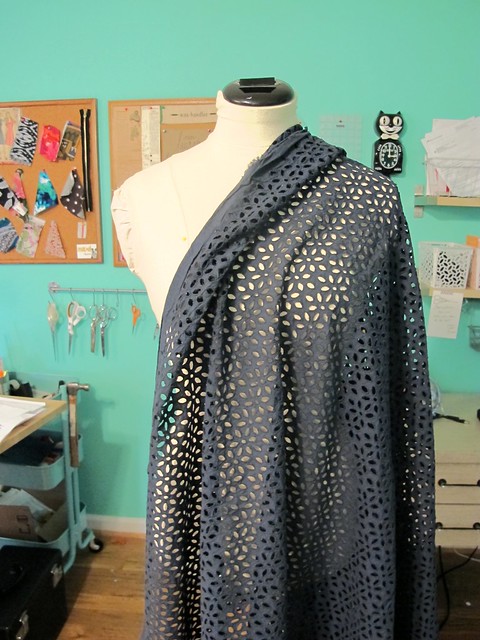
You could always go with my ol’ TNT, eyelet 🙂 I think eyelet (or any lace in general) is a beautiful option for this pattern. Just keep in mind that you will need to underline the dress so it’s not see-through. This fabric is from Muna’s, but I’ve seen similar ones at different retailers.

OAL- Fabrics
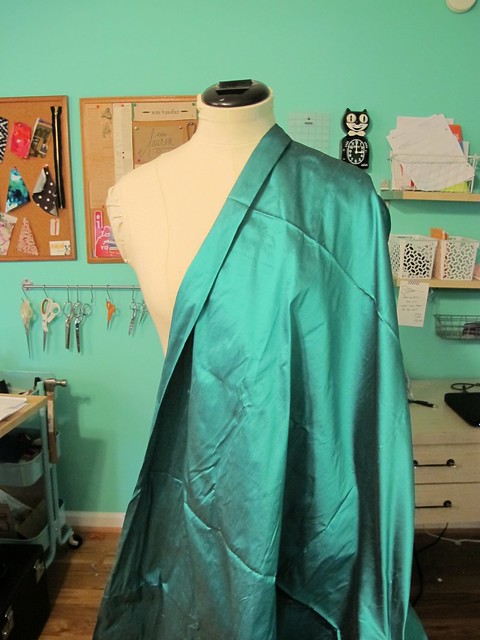
The pattern suggests silk Shantung as a fabric option, so here’s what that looks like! Notice how the fabric practically stands up on it’s own – silk Shantung (and dupioni, for that matter) has a very crisp drape before it’s washed.

OAL- Fabrics
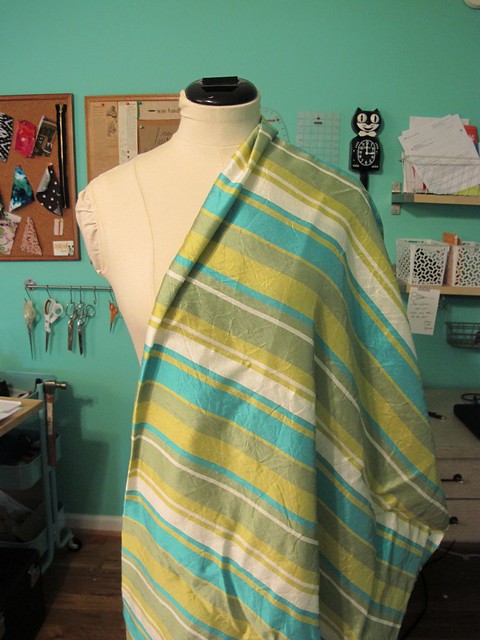
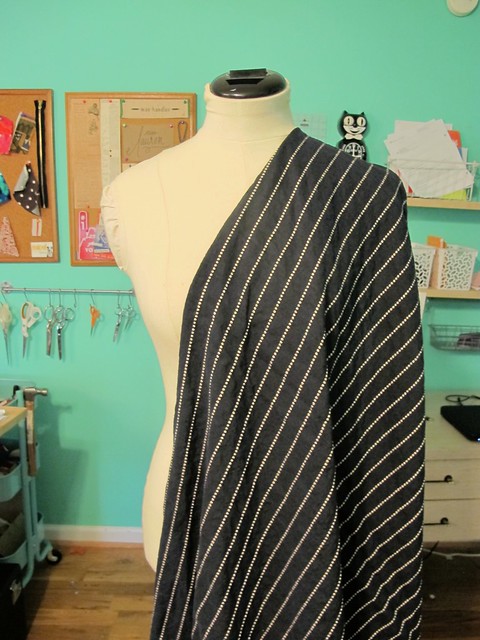
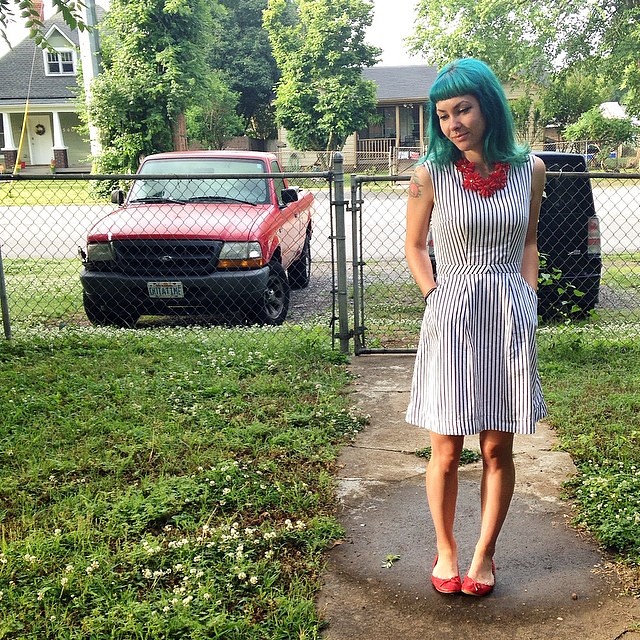
If you’ve ever been curious to know what silk Shantung looks like after it’s been washed, here ya go! This striped Shantung originally looked more like the silk above – very stiff with a definite sheen – but after a go in the washer and dryer, it’s softened up quite a bit and has a much more subtle luster. It definitely still has a good amount of body, but the drape is much softer now.

OAL- Fabrics
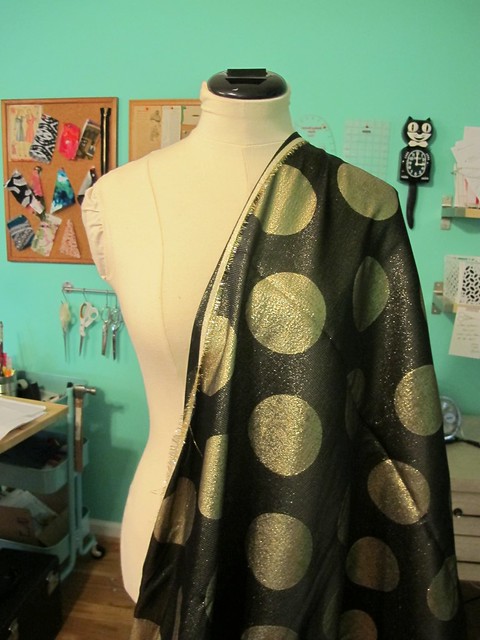
Hahaha how’s this for body? 😛 This is a polyester brocade, with lurex for sparkles. It’s probably not for the meek, sure, but I think it would look awesomeeee in this pattern!

OAL- Fabrics
Finally, here’s a stretch cotton sateen. I don’t want to say I don’t recommend this fabric- because, honestly, it would be fine for this pattern – but it wouldn’t be my first choice. I personally don’t care for the way stretch wovens hang- I think they always look a little stiff and awkward. If you have your heart set on a stretch woven, go on with your bad self, but I do suggest that you consider sizing down since the stretch factor will give you a bit more room. Fabric is from Mood NYC, btw!

Speaking of sizing, let’s talk about that now!

The back of the pattern has sections for body measurements and suggested sizes. Just ignore that. If you go by what the pattern tells you to do, you are gonna end up with some sad sack of a dress headed straight for frumpsville.

I always (always always always- regardless of indie designer or Big 4) base my pattern size off the finished measurements. Too often, patterns come with a lot of extra ease built in (ease= the difference between your actual measurements and the measurements of the garment in question), which usually ends up being too big for how I like to wear my clothes. I figured out a looong time ago that the finished measurements generally give you a better idea of fit, so that’s what I go by now.

For the sake of keeping things simple, I’m just showing the Simplicity pattern, but this works for pretty much any pattern. Every company has a different place they like to print the finished measurements- some do it on the pattern pieces, some do it on the envelope, some include it in the instructions, oh, and some don’t include it at all! – so you may have to hunt it down. For those companies who don’t include their finished measurements (also: Really??? No seriously, how hard is it to add a least add that information??), I’m afraid you’ll have to measure your pattern pieces and subtract the seam allowances. Sorry! Simplicity prints their finished measurements at key fitting points – the bust, waist, and hips.

OAL - Sizing
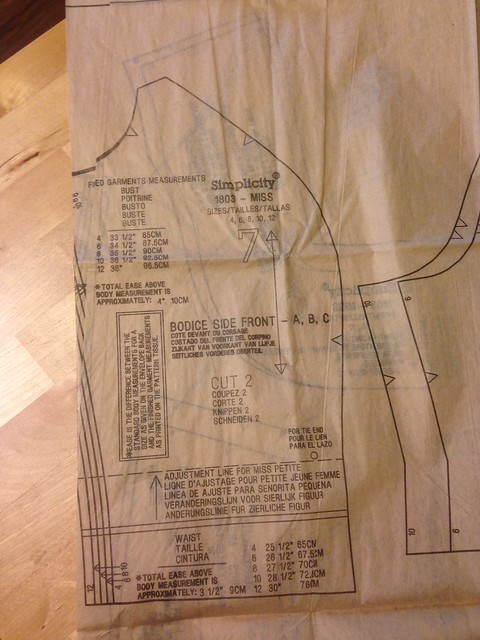
Take a look at your front bodice piece and you should see the measurements. This tells you what measurement the bust will be, assuming you made no modifications and kept the same seam allowance. Your ease preferences are completely up to you, but I personally like about 1/2″ of ease or less as I wear my clothes very fitted. If you don’t know how much ease you like, measure a dress you have that fits the way you like and that should give you an idea. A good rule of thumb is that you want to aim for 1/2″-2″ in the bodice, depending on how fitted you want the final dress to be. Anything more than 2″ runs the risk of looking too big.

OAL - Sizing
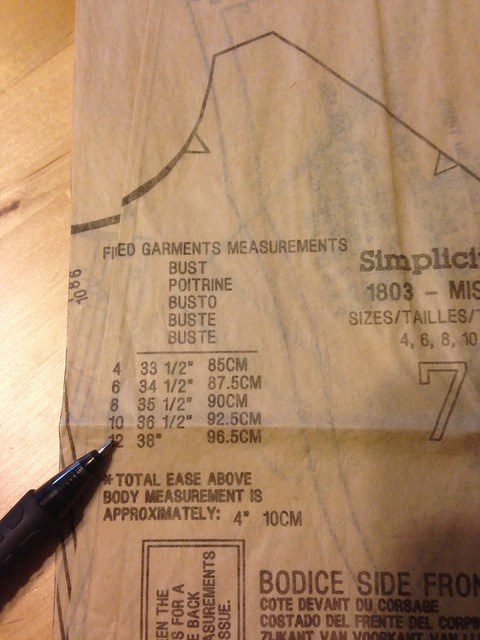
Here are the finished bust measurements. Fun fact: according to Simplicity’s measurements on the envelope, I should be sewing a size 10 as I exactly fit those body measurements. Looking at the finished measurements, I’m going to sew a 4, as 33.5″ is the perfect amount of ease for my 32.5″ bust. If I went by the envelope, my size 10 would have a finished measurement of 36.5″ – a whopping 4″ above my actual measurements. That’s pretty loose-fitting – too much for me! So I’m going with the 4. You may find that the size you cut is smaller than the size indicated on the envelope – or you may like the amount of ease, and want to stick with that. Either one is fine! The only thing that matters here is that you end up with a dress that fits the way YOU like.

OAL - Sizing
After you’ve decided what size to cut the bodice based on the finished measurements, find the waist measurements and proceed the same way. Again, I’m going with the 4 because I like very little ease at my waist- and that 10 would be much too big for me.

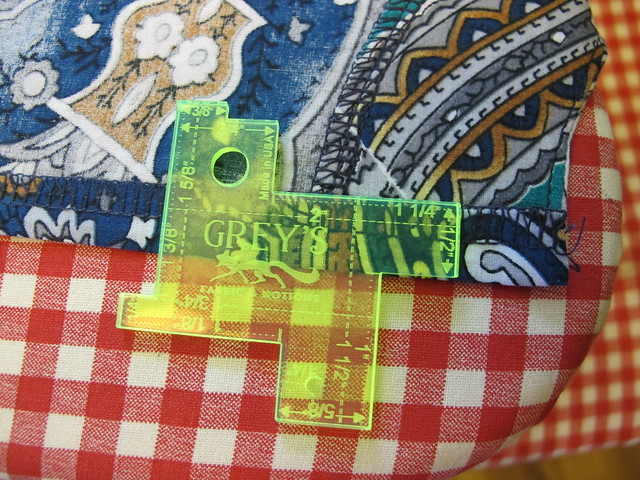
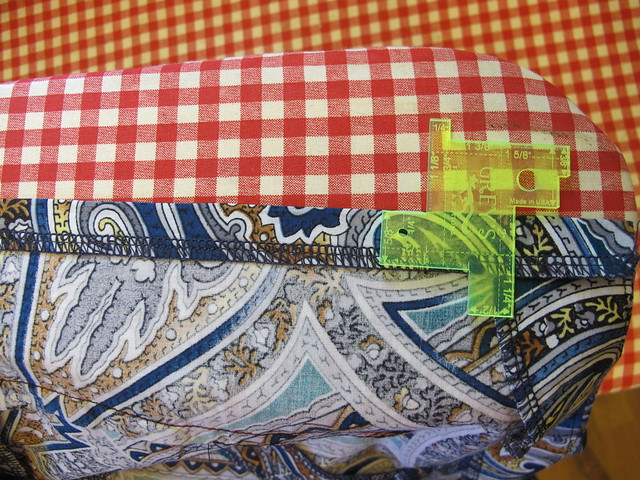
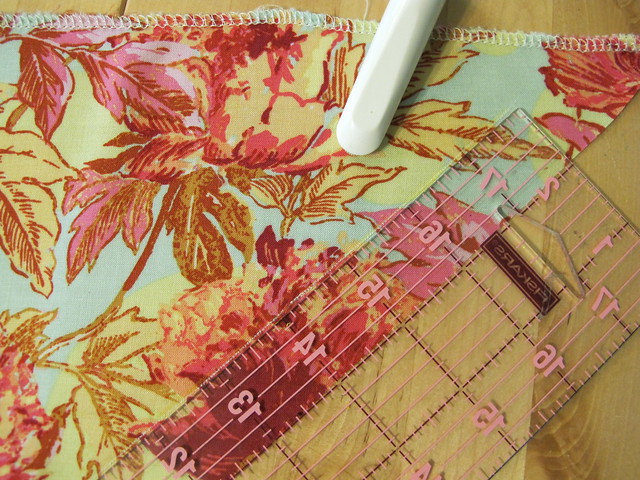
You may or may not be the same size throughout the pattern – perhaps you’re one size at the bust, and a different one at the waist. That’s fine! You can grade between sizes to get a custom fit – just mark the size you want at each point, and use a ruler to connect the lines at an angle. That’s it! If you find that you are between sizes, then I suggest going with the bigger size, as it is easier to take something in than let it out. Keep in mind that this pattern includes a 5/8″ seam allowance, so that does give you a little bit of room to play with.

A few more things to consider (sorry, I know this is long, but I swear I’m wrapping up!)
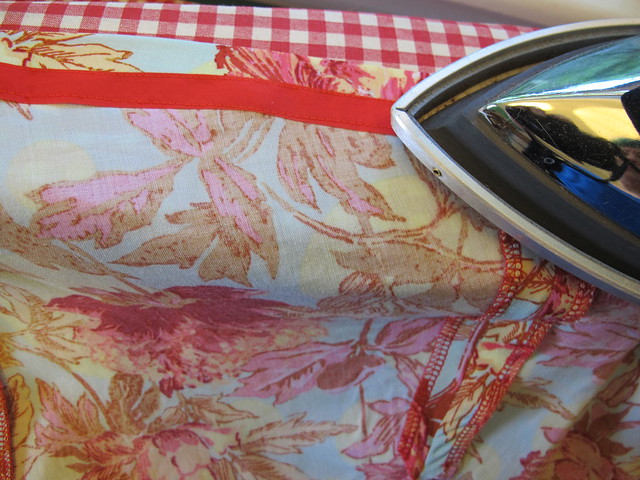
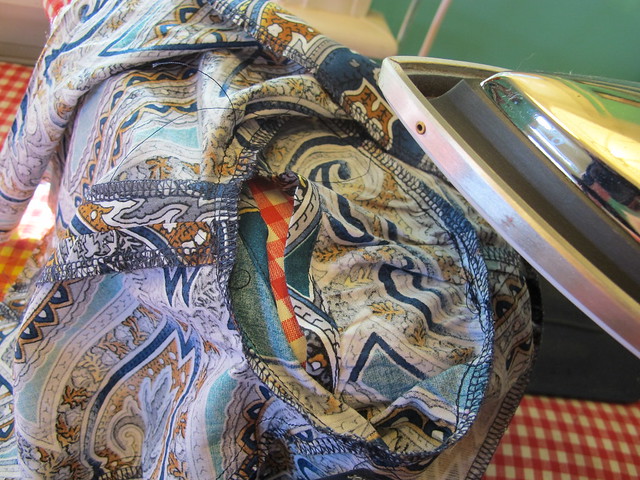
– Make sure to prewash your fabric! You absolutely don’t want it to shrink after you’ve made it into a dress (talk about a huge bummer!), so get that taken care of now. Prewashing means you just treat the fabric the same way you will launder the finished garment. I throw mine in the wash on cold (cottons, rayons, silks, polys – everything except wool gets a prewash) and hang it to dry if it’s sunny out (not because I’m opposed to the dryer – but because I’m opposed to ironing. All my handmades get hung to dry because I hate dealing with wrinkles!). It can be helpful to serge or zigzag the raw edges before washing, just so the fabric doesn’t fray.
– Does the fabric need an underlining? Does it feel nice against your body and is it opaque enough that you feel comfortable wearing it? I will not be covering underlining in this OAL, but you can reference my post on underlining here if you’d like more guidance (The dress I was making in that post is the same black eyelet one posted near the top, fyi 🙂 ).
– If your fabric is on the thicker side, consider using a lightweight fabric for the facings to reduce bulk. I usually go with cotton broadcloth for this purpose – it’s cheap, it’s stable, it’s lightweight, it does the job – but you can use anything you want.
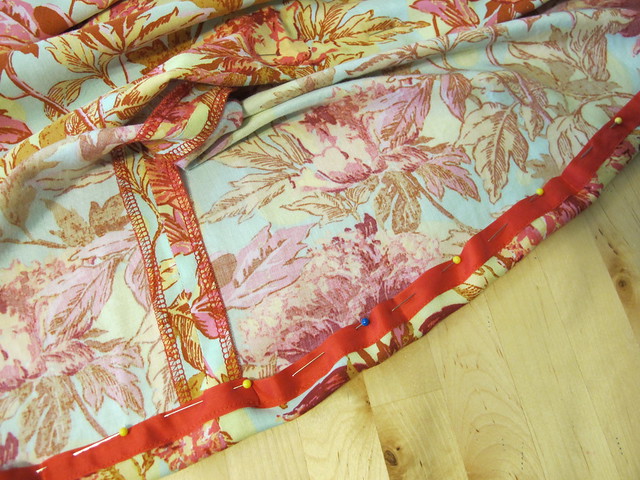
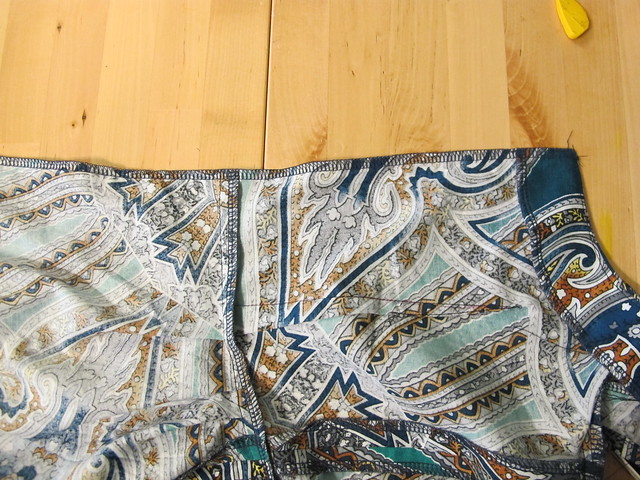
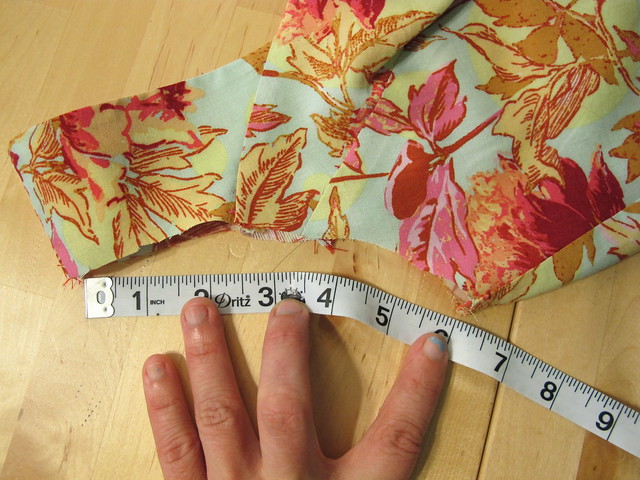
– Planning on matching stripes or plaids? Make sure you buy enough fabric! An addition 1/2-1 yard should be fine (err on the side of more if you have any suspicion that you might need to recut – better to have too much than not enough!)
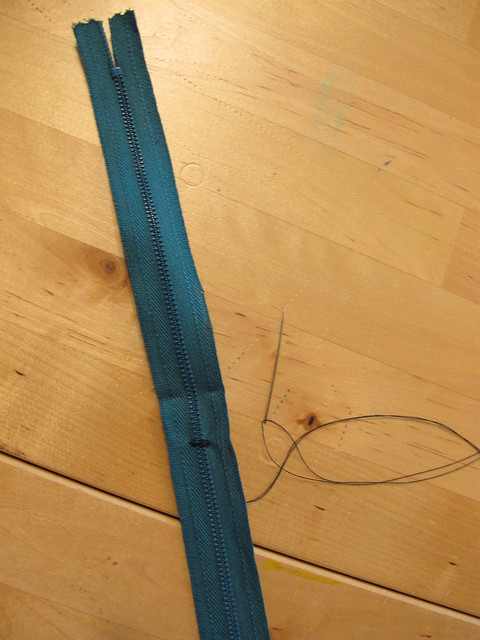
– You will also need interfacing and a zipper to complete the pattern. For interfacing, I recommend this lightweight fusible from Fashion Sewing Supply – it’s the best! Really! You can use whatever interfacing you want, just make sure it is the right weight for your fabric. *Most* fabrics are ok with lighweight fusible, though. As far as zippers – I like standard lapped zippers for this pattern, but you can use an invisible if that’s what you prefer (unless your fabric is very thick; in that case, I recommend using a lapped zipper as an invisible won’t be strong enough). Either one works as long as it’s 16″!
– If you have not made this pattern before and you are still unsure of what size to choose, make a muslin! This can be as simple as just cutting the bodice pieces (don’t worry about the facings) out of old fabric and inserting a zipper so you can get an idea of the fit. In addition to helping you determine that the finished dress *will* fit you, it will also give you a little practice with sewing the bodice before you cut into your nice fabric. I will not be covering muslins in this sewalong, due to time, but I am happy to help you assess fit if you need some assistance. Just holler at me – leave a comment on this post, tag me on Instagram (please make sure your account is public, otherwise, I won’t be able to see your post!), or link me in the OAL Ravelry Thread – and I’ll get back to you as quickly as I can 🙂 You can try Twitter, but I’m only getting about 1/3 of my notifications when they happen so that’s probably not the best way to reach me, fyi.

Ok, that’s all for today! Sorry this post was so long! Next week, we will cover cutting your fabric and marking your pattern pieces.

Me-Made-May ’14: Week 5 Round-Up

30 May

Ahhhh, you guys! Me Made May (and thus, the daily photographs) is almost over! Can I get a FUCK YEAH!?

This is going to be a longer than usual round-up, because I went on vacation and obviously I had to change outfits a couple times each day. That’s what you do on vacation, right? ps, sorry in advance.

5/24
5/24, Saturday
Dress: Lady Skater
Shoes: Keds

First day of our vacation! Here we are en route to Santa Rosa Beach, at a food truck somewhere in Alabama. I knew we’d spend the day in the car, so I opted for a comfy knit dress. I’ve always thought this dress was very fall-like, due to the colors, but the fabric is definitely summer-appropriate as well 🙂

5/25 pt. 1
5/25, Sunday I
Pajamas: Lakeside pajamas

I’ve been wearing various other me-mades throughout the month that haven’t made it into photos (workout wear, pajamas, leggings, underwear, etc), so here’s some proof! I brought two pairs of Lakeside pajamas to wear while on vacation – the ones you see here, plus a new set I made a couple days before (I used this cute strawberry print cotton lawn to make them, if you were wondering!)- and wore them all week. In addition to being awesome pajamas, they also make a great swimsuit cover-up! Although, to be fair, I started out wearing the set and ended up in only the shorts(+ bikini top, obvs) by the end of the week.

Speaking of bathing suits…

5/25, pt. 2
5/25, Sunday II
Swimsuit: Papercut Patterns Soma Swimsuit (no blog post on this… yet! But here’s the link to the pattern :))
Sunglasses: Franco Sarto
Hat: Scarlet Begonia

Hell yes I came with a handmade swimsuit! THREE, in fact! This is the first – the result of my pattern testing for Papercut Patterns a couple of months ago 🙂 I haven’t had a chance to write up a proper blog post, but here’s a sneak preview 🙂

5/25, pt. 3 (sorry! Last one for today)
5/25, Sunday III
Top: Refashioned from a men’s Hawaiian shirt
Shorts: Rite of Spring shorts
Shoes: Keds

After spending all afternoon at the beach (no, really, I laid up on a float and bobbed around in the ocean for hours and it was glorious), I reluctantly put on clothes and walked around the shops with Landon. I didn’t buy stuff, but I did buy liquor. Priorities, y’all.

Also, that shirt. This is the third vacation I’ve dragged it to (and no shit, I literally wore that same outfit last May HAHAAHAHA whatever, it’s good, I’m not apologizing for shit), so it’s basically my official vacation shirt at this point. Unfortunately, it’s also way too big now. My alterations were pretty shoddy (it was a very last-minute job), and I’m thinking I may just need to send it to the nice Goodwill Bin in the sky at this point.

5/26, pt. 1- my other @papercutpatterns Soma bikini + a photo bombing niece  #mmm14 #mmmay14
5/26, Monday I
Swimsuit: Papercut Patterns Soma Swimsuit
Sunglasses: Franco Sarto
Hat: Scarlet Begonia

Exact same get-up as the day before, but check out how different it turned out! This is version 2 of the Soma Swimsuit, and the second one I tested (yeah, I tested both. I wasn’t asked to, but after making the first one I kind of went crazy. I almost made 3, tbh). I used this version to play with stripes and decorative elastic, and I LOVE how it turned out. Seriously, my favorite swimsuit ever! Again, expect a blog post on these bad boys soon 🙂

Oh yeah, and that bratty kid in the background is my niece 🙂 I told her she could photobomb my picture and she sure did me proud.

5/26, pt. 2- dress: Sewaholic Lonsdale; shoes: Fergalicious.  #mmm14 #mmmay14
5/26, Monday II
Dress: Sewaholic Lonsdale
Shoes: Fergalicious

I wore this for a dinner out with my parents+Landon’s parents (the first time they met! It went very well :)), and unfortunately forgot to take a photo until right before bed. Oh well! Also, I love this dress and I should totally make it again.

5/27, pt. 1- swimsuit: closet case files bombshell  #mmm14 #mmmay14
5/27, Tuesday I
Swimsuit: Closet Case Files Bombshell
Sunglasses: Franco Sarto
Hat: Scarlet Begonia

Last bathing suit! This is one I made last year, and I still love it 🙂 Especially good for those days when I realized I’ve just been drinking beer and eating key lime pie all weekend and oh god it’s time for the beach. Hahahaha!!

5/27 forgot to upload this yesterday! Drinking wine in Seaside, FL :) top: thrifted; skirt: Tilly's Miette (tie-less); shoes: Fergalicious #mmm14 #mmmay14
5/27, Tuesday II
Shirt: Thrifted
Skirt: Tilly’s Miette
Shoes: Fergalicious

Post beach, Landon and I spent the afternoon in Seaside, checking out the cute houses, the shops, and drinking free wine (the best part!). Again, with the top – that’s another unofficial vacation top (that I bought… 3 years ago, at the Goodwill on Santa Rosa Beach, ha!) that’s about to get the Goodwill shaft. It’s just too big 😦

5/28 channeling my inner mermaid before heading back to Tennessee ☀️ top: Megan Nielsen cropped briar; skirt: Megan Nielsen cascade.  #mmm14 #mmmay14
5/28, Wednesday
Top: Cropped Briar
Skirt: Cascade

Last day on the beach! I thought it would be fun to take the photos of my Cascade by the cascading waves (you can’t even tell in this picture but they were AMAZING that day!). The wind was blowing like crazy, and I think it makes for a really cool picture 🙂 This picture also vaguely reminds me of <a href="this picture from the Little Prince, which makes me happy 🙂

5/29 dress: deer & doe Belladone; shoes: Sam Edelman; necklace: Fabu #mmm14 #mmmay14
5/29, Thursday
Dress: Belladone
Shoes: Sam Edelman
Necklace: Fabu

Back to Nashville! It was at this point that I realized we were almost at the end of May – and I haven’t worn some of my favorite stuff! So out comes the Belladone 🙂 I tried to style this a little differently than usual – I generally wear it with brown or yellow, but I do like the red 🙂

5/30
5/30, Friday (today!)
Dress: Simplicity 1803
Belt: Thrifted
Necklace: Chatterblossom
Shoes: Born

My other favorite dress – and our star pattern for the OAL. I love this pattern and I’m glad I finally have a reason to buckle down and make another! Which reminds me – the sewalong starts on Monday! Eep! 🙂

Speaking of which – those of you who are participating, do you feel like you need a post that covers fabric selection? I was planning on skipping straight ahead to cutting and marking, since I figured most everyone’s already chosen their fabric (and thus makes a post on fabric selection a moot point) – not to mention a lot of y’all are sewing different patterns (which means different fabric requirements) – but you tell me!

Sooo I guess that’s almost it for Me Made May! We do have one more day of the month (and you bet I’ll be wearing me-mades and begrudgingly taking a photo, ha), but I’m not going to include it in this round-up because it doesn’t fit with my ~schedule~. Sorry! If you want to view the rest of the weeks, here they are:
Me-Made May: Week 1
Me-Made-May: Week 2
Me-Made-May: Week 3
Me-Made-May: Week 4
I also have a Flickr Album of all my MMM photos, if that’s more your jam.
If you’re sick of looking at me, that’s ok too – I’m sick of looking at myself at this point :B

I am glad I participated this year, because I definitely learned a lot about what’s lurking in my closet – namely, that there is WAY more than I think there is! Seriously, so many pieces didn’t even make it out this month, and that’s kind of sad considering I only repeated one skirt and a couple of tshirts. I’ve had some size fluctuations over the past couple of years, which means a lot of my summer wear doesn’t fit anymore (and while I altered some of it – such as the Simplicity dress I’m wearing today – a whole bunch of it got sold/donated instead). After that giant purge, I was under the impression that I didn’t have a lot left to wear in warm weather – which is clearly not the case! With that being said, despite my overabundance of clothing, there are still tons of pieces that my wardrobe is lacking. I’ve got plans to make more separates, including shorts (gah, I can’t believe I didn’t wear shorts once this month, wtf?) and tshirts, as well as workout wear, loungewear, and more bathing suits! Serious question… how many bathing suits is too many? They are REALLY fun to make, ok.

How did your Me-Made-May turn out (if you participated)? Did you learn anything life-changing about your closet? Are you SO sick of taking photos? 🙂

Ohh, I almost forgot – I promised y’all outtakes! Let’s revel in the unflattery together:

MMM'14- Outtakes
Most of my photos end up looking like this haha. I dunno why, but I always close my eyes when the picture is being taken (not to mention… whatever my mouth is doing. I guess I was in the middle of talking haha. OK FINE I BASICALLY NEVER SHUT UP)

MMM'14- Outtakes
If anyone happens to see where I left my arm, I’d appreciate your help.

MMM'14- Outtakes
Original photobomb did it better

MMM'14- Outtakes
Look at the fear in Amelia’s eyes hahahahahaha

MMM'14- Outtakes
I just think this is cute. Amelia doesn’t care much for being held (despite my consistent grabby hands at her), but she loooves having her butt scratched.

MMM'14- Outtakes
Hey, that’s almost a good picture! Until you zoom in a bit…

MMM'14- Outtakes
That, my friends, is the face of a cat who’s completely given up on life.

MMM'14- Outtakes
Ok, this is my favorite outtake and the one that made me laugh the hardest. This is a really unflattering picture of both of us – I’m pulling some kind of weird face (again, seriously, probably in the middle of talking) and Amelia just looks PISSED.

MMM'14- Outtakes
If that doesn’t look like the devil incarnate, I don’t know what does.

Have a great weekend, everyone!