Tag Archives: amazing fabric

Completed: The Quart Coat, in Alexander McQueen Fabric

14 Dec

Well y’all. This post has been a LONG time coming – hopefully it was worth the wait!

Quart Coat made with Alexander McQueen fabric

I made a coat! Big whoop, amirite? It’s been a minute since I sewed a real coat – I just don’t live in a climate that warrants a serious need for multiple coats. Which is a bummer because I really LOVE sewing me some coats! And I actually sewed two this year – but I just want to talk about this one first. Like I said, it has been a long time in the making!

I received this fabric way back in May of 2016, actually! It took me a solid year to decide what I wanted to make with it, then nearly another year to actually start the project. And while I finished this earlier in 2018 (in February, it appears) – it has taken me this long to get some photographs of it! So yeah, this might be my longest project to date!

Quart Coat made with Alexander McQueen fabric

So – a little bit about the fabric! This fabric is actually Alexander McQueen coating from a prior collection. It is 100% wool, solid black, and has laser printed skulls all over that you really only see in certain lighting. I wasn’t able to find what this fabric was used for in AM’s collections, but it’s essentially a medium weight (on the lighter side of medium weight, to be specific) coating. It’s super, super amazing.

The coating was actually given to me – you know, back in 2016 – courtesy of my friend Anokhee. She originally bought it from Darrell Thomas Textiles in Ottawa, Canada (where she also teaches!). If you are thinking “wow Lauren that’s a really fucking generous gift” YOU WOULD BE ABSOLUTELY RIGHT. I was floored when I received the fabric, and am honestly still a bit dazzled every time I wear my coat. I didn’t really know Anokhee that well when she sent me the fabric – we were email/internet buddies, seeing as she lives in Canada and I’m in Nashville – but this year, I actually got to hang out with her several times when I was in Canada to teach my Jeans Workshops at Darrell Thomas Textiles! I’ve even sat in her hot tub, so, basically, yes she’s an amazing friend.

And speaking of Darrell Thomas Textiles – if you follow me on Instagram, you’ve probably seen this name pop up a few times. Darrell’s shop gets some of the BEST high-end designer fabric I’ve ever seen, and I’ve been really lucky to be the recipient of a few special pieces, as well as be able to shop there in person! In addition to this McQueen fabric, I’ve gotten some amazing Dolce & Gabbana prints (stay tuned for a blog post on one of them!), as well as pieces from Burberry, Louis Vuitton, and other gorgeous pieces that aren’t necessarily attributed to a specific designer but are still stunning as hell. While these pieces definitely, absolutely are not cheap – they are unique, special, and high-quality. I realize this post just sounds like a giant advertisement, so I’m gonna stop now, but – just wow. Check out his Instagram if you want some eye-candy to creep on.

Ok, back to my coat!

Quart Coat made with Alexander McQueen fabric

Quart Coat made with Alexander McQueen fabric

Quart Coat made with Alexander McQueen fabric

So, yes, I hemmed and hawed when it came to cutting this fabric! First, I couldn’t decide on a pattern. Then, I went through a lot of second-guessing with the fit, post-muslin. Once I powered through and cut all the (many, many) pieces, the actual construction of this garment went pretty quickly (according to my Instagram – it took about two weeks!). I don’t generally second-guess myself and I rarely treat my fabric like it is some kind of precious gold, but in this case, I am glad I took my time to figure out exactly what I wanted because the finished coat is basically perfect as far as I’m concerned!

The pattern I chose is the Quart Coat from Pauline Alice Patterns. I love the military look of this style, and I felt it would pair well with my McQueen fabric. Especially since my fabric can look either solid black or covered in skulls, depending on the light!

I cut a 36, and my preliminary muslin looked preeetty good except that there were some light pulls near the bust, which is usually indicative of needing a full bust adjustment. For the life of me, I could NOT find a way to add room at the bust with these particular pattern pieces! The princess seams come out of the arm hole, not over the bust, and every tutorial I found (or reference in my dozens of fit books) only covered the latter. And half of them wanted to add a dart – which I didn’t want in my coat. I tried several different things and agonized for months. I knew this fabric was expensive, hard to come by, and I wanted to do it right! But you know what? I ultimately decided, fuck it, and went ahead and cut the coat. Part of this was because the drag lines were indeed really subtle – super minor. The other part was me realizing that muslin doesn’t have the same “give” that regular garment fabrics do, and there was a good chance those minor fitting issues would be resolved by simply using a different fabric. I’m not always right, but I was right in this case. The wrinkles disappeared, the coat looks fabulous, and life goes on.

After getting past that and cutting aaaaalll those pieces, I was ready to sew! I actually started a little log to keep track of how long my progress was taking. JUST THE PREP ALONE (cutting, marking, underlining, etc) took 8.5 hours! I stopped keeping track after that (ha!) but I always tell this to people when they suggest I do some custom sewing for them. Bitch, u can’t afford me.

Quart Coat made with Alexander McQueen fabric

Quart Coat made with Alexander McQueen fabric

Since the coating is on the lighter weight side, I opted to underline all my pieces with a cotton flannel. This adds a layer of support (necessary as this is a quite structured coat) as well as additional warmth. I used a Robert Kaufman Mammoth Flannel for this purpose; I had purchased it with the intention of another project that I ended up scrapping. If you’re curious, this is the specific flannel I used inside my coat haha. While I find Mammoth Flannel to be really reasonably priced (and it is SO NICE!), it is a bit expensive to use as underlining. That said, I already had the fabric so I didn’t see any point in buying something else, even if it did cost less.

Underlining definitely took the longest. I like to underline by hand, which means a looong time of sitting at my cutting table, with endless hand-basting. I use cotton thread (silk is nice too, but cotton is what I had on hand!) and create long basting stitches, which are then removed as the pieces are sewn together. After the pieces are sewn by machine, I trimmed all the flannel from the seam allowances and then catchstitched the seam allowances down (again, by hand) to keep them nice and flat. It’s a lot of extra effort, but this fabric deserves that effort!

The lining is a solid black silk charmeuse, which I bought at Mood Fabrics on one of my many trips to NYC. I love, love LOVE using silk charmeuse for coat linings – it’s heavy and warm, and it looks expensive as hell. Just the way silk charmeuse catches the light when you wave it around delights me to no end. Why I chose black – well, I had considered using a fun lining color, like red or teal. But while shopping, nothing at the store really appealed to me. I also feel like most RTW (not all, but a lot of them) use coordinating and matching linings, rather than contrast. I wanted my coat to look like it could have come from the shop, and also, black on black just looks good.

Since my coat was all black, that gave me a little freedom to choose something more contrasting for the buttons and sleeve zippers – so I went with BRIGHT SHINY GOLD!!! I just love how this turned out, I think it really adds a luxurious touch that isn’t over-the-top. My buttons are from Mood Fabrics (they are actually Marc Jacobs hahahaah!), and my zippers are from Sil Thread (in the NYC Garment District). I spent a long time trying to find hardware that had the same tone and brightness, so they match well.

Quart Coat made with Alexander McQueen fabric

A few things about the construction – one, I definitely put the pleats in backwards. Whoops! It doesn’t bother me, but, if you noticed that – yes, I am aware. I did not do any traditional/heavy tailoring with this garment. Part of this is because I just wanted to finish the damn thing – and part of it is because I’ve learned I don’t really like wearing heavily tailored coats. I dunno, they just feel a little too precious to me, and I’m scared I’ll mess them up somehow! Also, my padstitching always ends up going wonky if the coat gets stored with the lapels in the wrong place, and I can’t ever seem to steam them back into submission. So while this coat has some basic tailoring – the fronts are interfaced (with a fusible weft, before I added the underlining), there is a back stay, and I added both shoulder pads and sleeve heads – I left off the fancy stuff like horsehair, padstitching, and bound button holes (just machine ones here!). Sacrilegious? Sure. Whatever you say.

I don’t know what else to say about this project, so just have a photo dump:

Quart Coat made with Alexander McQueen fabric

Quart Coat made with Alexander McQueen fabric

Quart Coat made with Alexander McQueen fabric

Quart Coat made with Alexander McQueen fabric

Quart Coat made with Alexander McQueen fabric

Quart Coat made with Alexander McQueen fabric

Oh! Here’s another piece from Darrell Thomas Textiles – one of my precious Burberry wools! I actually have two of these (the other one is the classic tan, which I believe they just got a new shipment in at the shop), both of which I made into simple blanket scarves. I started with a yard of fabric, which I cut in half lengthwise and then seamed together (with a flat-felled seam) to create a rectangle that is 28″ wide by 70″ long. I then hemmed the two long sides with a 1/2″ seam folded twice and edgestitched down. On the tan scarf, I also hemmed the short ends – and on this one, I teased out a little fringe! I have always wanted one of these Burberry scarves – and while the fabric was not cheap (I don’t remember the exact amount, I think it’s somewhere in the realm of $150-$170 CAD per yard), it is definitely cheaper than buying from Burberry! And it’s basically a giant blanket, which is the best thing ever 🙂

Quart Coat made with Alexander McQueen fabric

So, there’s the long story saga of my Alexander McQueen coat! Cheers to you if you’re still here reading 🙂 Big thanks to Anokhee for her incredibly generous gifts – both the fabric and for introducing me to the wonder that is Darrell Thomas Textiles! Another giant thanks to my student Elisa, who graciously took these photos for me during my workshop at Stitch Sew Shop earlier this month! In closing, I will leave you with this beautiful cheese plate that we destroyed immediately after:

and a cheese plate <3

Have a great day, everyone!

Completed: Fleecy Fraser Sweatshirt

2 Mar

Ok, so, apologies in advance for posting a really boring sweatshirt today, but, I feel like this post is warranted for two reasons – really awesome fabric, and a previously overlooked version of a pattern.

Honestly, this might be my new favorite fabric at Mood (up there in the ranks with their Bamboo Jersey and Organic Cotton twill). AND they have plenty of colors still in stock (although as of this posting, currently sold out of this particular green – sorry!)! It’s a Christmas Miracle!

Sewaholic Fraser Sweatshirt made with stretch fleece from Mood Fabrics

In all seriousness, though, I wanted to really focus on the fabric for this post. I promise it’s a really good one and worth the praise! I found this Moss Bamboo and Cotton Stretch Fleece on the Mood Fabric’s website a few months ago, via swatch (I always take advantage of my free swatches and usually end up throwing random stuff in my cart before I place my order! I have discovered some REALLY cool fabrics that way that I might have otherwise overlooked). I’m not even kidding when I say it’s one of my new favorite fabrics – they have loads of colorways and it’s nice and wide (60″) so you need less yardage.

Sewaholic Fraser Sweatshirt made with stretch fleece from Mood Fabrics

Sewaholic Fraser Sweatshirt made with stretch fleece from Mood Fabrics

Sewaholic Fraser Sweatshirt made with stretch fleece from Mood Fabrics

Sewaholic Fraser Sweatshirt made with stretch fleece from Mood Fabrics

The fabric is comprised of 66% bamboo, 28% cotton, and 6% spandex. That little bit of spandex is essential for giving the fabric a great stretch with a fabulous recovery. Plus, I really love bamboo fabrics – they are soft, easy to wash and wear, and they are antimicrobial so they have fantastic stink-reducing properties!

This fabric is considered a sweatshirt fleece, meaning it is has one side that is nice and smooth and the opposite side is soft and brushed. Unlike your typical sweatshirt fleece, it’s a slightly lighter weight with a softer drape. It is also a 4 way stretch, which, WEIRDLY (don’t ask me why, I couldn’t tell you) has more stretch along the grain rather than the crossgrain (if I recall, 40% at the cross grain and something like 80% along the grain). It’s soft (did I mention that it’s soft? Because it is FUCKING SOFT), it snaps back into shape, and it comes in a nice array of colors – what isn’t there to love?

Sewaholic Fraser Sweatshirt made with stretch fleece from Mood Fabrics

Sewaholic Fraser Sweatshirt made with stretch fleece from Mood Fabrics

This sweatshirt is actually the second garment I made using this fleece – my first garment was a pair of black Virginia leggings. I don’t have any photos of those – let’s be real, they are black leggings and basically impossible to photograph – but I wear them ALL THE TIME (here is a photo on my Instagram – I’d already been wearing them for 3 days at that point haha). Think of your favorite fleece leggings or tights – and then just imagine them in bamboo instead of poly (so no stink and no pilling). Because of the spandex, the fabric doesn’t bag out – meaning no baggy knees or butts. Also, in retrospect – they look pretty much the same as the pants I am wearing (the Cecilia Pant from Elizabeth Suzann – aka my MAGIC PANTS seriously you guys these pants are magical), so maybe I should have just worn the leggings for this photo!

So anyway, about this project! After my success with the leggings, I bought 2 more yards of this hunter green colorway without a real idea of what I wanted to make with it. I knew I wanted a sweatshirt, but a plain sweatshirt seemed like such a cop-out. So I went with the Sewaholic Fraser Sweatshirt.

I will be completely honest – I did NOT like this particular view of the Fraser when I first saw it (or, to be even more honest – any subsequent versions that I’ve seen since). I dunno, the super contrast yoke just looks unflatteringly Western to me (and I typically love me some Western wear) – very costume-y, very Wonder Woman. I had no intentions of ever sewing up that version (I do like the other versions – you can see the one I made with a collar here), but weirdly, I thought of it when I was trying to decide what to do with this fleece. I thought it might look good with the contrast just being the wrong fuzzy side of the fabric, so the color still matched but there would be some subtle texture differences (again, just like my version with the collar).  I’m actually pretty pleased with the end result – it’s still a nice sweatshirt but with a little more interest… and it doesn’t look costume-y. And I have worn it every day this week, no lie, so obviously it’s a massive success in my book haha.

Sewaholic Fraser Sweatshirt made with stretch fleece from Mood Fabrics

Sewaholic Fraser Sweatshirt made with stretch fleece from Mood Fabrics

I made a size 0 and slimmed down the hips (Sewaholic Patterns are designed for pear-shaped women, and I’ve found I don’t need the extra room down there). I also cut this on the lengthwise grain, instead of the crossgrain – remember when I said the fabric had more stretch on the lengthwise grain? I think it would work either way, but I wanted a reeeeeally stretchy, comfy sweatshirt! Shortened the sleeves about 1″… they are still slightly long, but in my experience it’s better to keep them long and allow for a little more shrinkage, then re-hem if necessary. I have waaaay too much bracelet-length sleeves as a result of not being aware of this for the first half of my sewing career haha.

I did have to pay careful attention to the stitching at the center front V, as well as matching the sleeve contrast seam to the bodice contrast seam – for those, I based first on my sewing machine (much easier to take the stitches out if you mess it up) before using my serger. I used the single needle chainstitch on my coverstitch machine to topstitch the contrast, to give it a little more dimension. Other than that, a very quick and easy sew! I did notice the the fleece flattens when you press it, but it’s easy to fluff back up with your fingers.

Sewaholic Fraser Sweatshirt made with stretch fleece from Mood Fabrics

Anyway, that’s all for this one! A simple project, but also a big gushy heart-eyes love song about some amazing fabric! Now, quick, y’all need to buy it before I snap up the rest of this stuff! 🙂

** Note: The fabric used for this post was provided to me by Mood Fabrics, in exchange for my participation in the Mood Sewing Network. All opinions are my own!

Completed: Liberty of London Carolyn Pajamas

7 Aug

I hope y’all are ready to look at some fancy shit today.

Liberty Carolyn PJs

Behold, my newest set of pajamas – also known as the most expensive thing I sleep in 😛

Liberty Carolyn PJs

A few months ago, I was contacted by Josephine’s Dry Goods to try out a piece of Liberty fabric from their staggering collection. They actually have a LOT of incredible, high-quality fabric from all sorts of designers (and they always happy to send samples if you are on the fence!) – but I was really keen to try the Liberty specifically because, let’s face it – you should never say no to free Liberty amirite. While I’m not generally a fan of the cutesy floral prints – they are pretty, but they definitely are not my style – there are plenty of non-cutesy non-floral prints to choose from – Adelajda, Weather Wonderland, Oxford, Melting Elements, Lauren’s Leaf (best name ever), Endurance – to name a few!

After a LOT of deliberation, I decided on Fornasetti Forest – I love the psychedelic print, as well as the colors. The colors aren’t necessarily ones that I tend to wear – but I was making PJs with my Liberty, which allows for a little more color experimentation. The fabric was shipped out quickly, and arrived in a beautiful little package.

Liberty Carolyn PJs

Liberty Carolyn PJs

Liberty Carolyn PJs

I used the Carolyn Pajamas pattern from Closet Case Patterns – having made these twice before (in summer linen and cotton flannel – both of which are still nighttime wardrobe staples for me!), I was pretty familiar with the pattern – both in terms of construction and fit – which means that I could get straight into sewing and know that I would be happy with the finished garment. I made a size 2 for both the top and the bottom, which is the same size I made for my other PJs. I went with view C, which features shorts + a short sleeved top, and added the optional piping to really make the style lines stand out.

Liberty Carolyn PJs - on dressform

Liberty Carolyn PJs - collar

Liberty Carolyn PJs - pocket

While this was a pretty straightforward project, I did put some thought into construction before I started. Since the Tana Lawn I used is so fine, I decided to use French seams for all the construction seams – yep, including the armsyces! – well, except for the mock fly, which I ultimately decided to just serge (I did consider binding that seam, but I was afraid it would be too bulky in an area that definitely doesn’t need even a hint of bulk haha). The piping and topstitching are both black – to bring out the black detail in the print and kind of ground it a little. I did have some coral-y orange lawn that exactly matched the orange in the fabric, but I went with black because I think it pulls all the colors together a little better. This print is pretty wild on its own! Getting black piping meant that I didn’t have to make my piping, either – I bought some premade stuff from a local shop here in town and that saved me a bit of effort!

Liberty Carolyn PJs - shorts flat

The top of the shorts waistband has a little ruffle, which is the result of using an elastic that is about 1/4″ too narrow. I couldn’t find elastic in the correct width that was soft enough (I like wearing the really soft PJ elastic, but sometimes you don’t get the best variety of widths), so I went a little narrower. Rather than redraft the waistband to reflect the new width, I just sewed a line of stitching 1/4″ away from the top edge and then inserted the elastic. I did this on my linen pair and I like the way it looks.

Liberty Carolyn PJs - top flat

Liberty Carolyn PJs - waistband

Liberty Carolyn PJs - cuff detail

Liberty Carolyn PJs - inside detail

Working with Liberty fabric was super easy – the Tana Lawn is a nice, tight weave that doesn’t fray much and responds well to pressing. Despite the expense (it’s about $40/yard), this is probably one of the best fabrics to make pajamas out of. Like I said, it’s SUPER easy to work with – even on a more complicated pattern – and it’s also really delightful to wear, as it’s nice and cool in the summer heat. Plus, the prints are really fun – perfect for a wacky night’s rest. Since the fabric is pretty light, I did use a really fine needle – a 70/10 sharp. I also found out that silk pins work best with this fabric, as larger pins will show pinholes (although I also learned that a quick steam will usually make the holes close up pretty easily).

I reaaaaally wanted to finish these in time to wear to Belize (I had visions of getting some island backgrounds in a photo or two), but I pretty much only managed to get them prewashed before it was time to leave. On the flip side, I was able to wear them to a little weekend cabin retreat with my book club – and everyone was really jealous of my awesome sleepwear. I think the top actually would do well on it’s own as daytime wear (with pants, I mean hahaha), which I’ve considered wearing. I just need to get past the mentality of it being PJs, you know?

Liberty Carolyn PJs - full set

Liberty Carolyn PJs

I think I’ve said enough about these PJs for now, but don’t think I don’t have more versions on the horizon – my plaid flannel ones suffered a bit of a dye transfer earlier this year (btw I’m never indigo dyeing anything ever again). While they are certainly still wearable, I’m on the lookout for a good replacement fabric to make a fresh pair!

As a side note – I have officially made all 3 versions of this PJ pattern. Heather, am I the only one? Can I have a trophy?

Note: The Liberty of London fabric that I used for these pajamas was very generously provided to me by the fine folks over at Josephine’s Dry Goods. I highly recommend them for all your Liberty needs!

OAL2016: Choosing Your Fabric

1 Jun

What up, y’all! Welcome to the first official day of The Outfit Along! If you haven’t picked a fabric yet, don’t freak out – that’s what this post is about today 🙂 I’ve handed over the reins to Michelle of Style Maker Fabrics – one of our sponsors (who not only supplied my fabric, but is also offering prizes and a discount on the site – you’ll have to read to the bottom to get to it, though 😉 ) for this OAL. If you’re not familiar with Style Maker Fabrics, consider this your introduction 🙂 Style Maker Fabrics has a great selection of beautiful and on-trend dressmaking fabrics, and their website allows you to shop not only by fabric type, but also by garment type and color (which I think is pretty genius!). Style Maker Fabrics is also ready and willing to help you find that perfect fabric if you are having trouble with too many choices – tell them the garment you want to make and a few parameters (color, fiber, price, etc) and they’ll pull together some suggestions so you don’t have to weed through all they have to offer. Although, personally, I think that’s the fun part! 🙂

ANYWAY, enough about me – I’m going to give this over to Michelle now! As a side note, my chosen fabric and yarn are both in this post – can you guess which one they are? 🙂

————————————————————————————————————————————-

OAL_Banner

I am so excited to be participating in this year’s Outfit Along. I had the pleasure of working with Lauren earlier in the spring on a special project for my online shop, Style Maker Fabrics, and now I am happy to return the favor!
Favorites 5
Yarn Colors: Maize/Banyon/Hibiscus
Fabrics: Left- 1/2/3 Center- 1/2/3 Right- 1/2/3

To kick things off for the sewing portion of Outfit Along 2016, I wanted to share some tips and inspiration for selecting the perfect fabric for the Hollyburn skirt from Sewaholic patterns, the official OAL sewing pattern. You could apply most of these tips to just about any pattern, but I will look at the Hollyburn specifically. I have also paired some yummy skeins of Quince’s Sparrow yarn (recommended for Zinone, the official knit pattern) with some fabrics from our shop to hopefully inspire your own outfit!

Hollyburn

First and foremost, what type of fabric should you be looking for? The nice thing about the Hollyburn skirt is its versatility. The pattern calls for light to medium weight wovens, which translates to a fabric with little to no stretch in just about any weight/thickness (not a lot of help, right?). This is where you can really get creative. Think about how you want to wear your skirt, your personal style and maybe even what is missing from your closet. Here are three main fabric categories to think about and how they will translate in your finished skirt.

Structured Lines
The first category includes fabrics with a bit more weight- denim, twill, canvas, suiting, etc. These fabrics have very little drape, if really any at all, and they hold their shape giving you garment a clean A-line look. A great choice for a durable skirt, something to wear every day, year round- like a classic denim skirt. I would steer towards the lighter weights to maximize the movement of your skirt. I would also lean towards keeping the length on the shorter side, View B or C to keep it from feeling too heavy- both in looks and actual weight.

Structure 1
1/2/3

Form and Grace
The next category includes much lighter weight, structured wovens- lawn, shirting, linen, chambray, etc. These fabrics still provide some architecture to your skirt but will also have more movement, drape and body. Perfect for spring and summer, these fabrics are much lighter and airy resulting in a bit more feminine look. With some of these fabrics (especially the lighter colors), you may find that you need to add a lining- an extra step but totally worth it for the perfect fabric.

Form 2
1/2/3

Feminine Drape
Last but not least, the truly drapey, fluid wovens- rayon challis, crepe, chiffon, etc. Probably my favorite category, these fabrics will give your skirt the maximum amount of drape and movement. They will also give you the minimum volume as they will provide no added structure but the silky, flowy nature will soften the lines of this skirt giving you a beautiful feminine silhouette. This would be my preferred fabric choice for the longest length, View A, as the fluidity of the fabrics will give you an amazing lightness and feel that you won’t be able to resist taking a twirl in.

Drape 3

1/2/3

Ok, now that you have the style of skirt that you want to make in mind and what type of fabrics would be suitable, let’s talk about pattern and design. The pattern recommends staying away from plaids, stripes and directional designs, but Why? Having a structured pattern to the fabric does add another level of difficulty but I don’t think this it is something you should shy away from. It may take a little extra fabric and a bit more planning how you want the pattern to lay out but the results will be amazing. With a seam down the center front and back you will want to take some extra care to match up the pattern as best you can. Or throw caution to the wind and don’t worry about it! I would only recommend this approach for a more fluid fabric (category 3 above) as the drape will help hide the any mismatch.

Up next, color- my favorite part about picking fabrics! With the help of my local yarn shop, Apple Yarns, I was able to pick up a whole color range of Sparrow and play with how this yummy linen yarn looks with different colors and textures of fabric. Not a whole lot else to say about color other than that they are all stunning- I will just let the photos do the talking. Here are some favorite combinations for this summer!

Coral 4
Yarn Colors: Hibiscus/Pink Grapefruit/Paprika
Fabric: Top- 1/2/3/4/5 Bottom- 1/2/3/4/5

Aqua 1
Yarn Colors: Eleuthera/Banyon/Fundi
Fabric: Left- 1/2/3/4 Right- 1/2/3/4/5

Denim 2
Yarn Colors: Birch/Blue Spruce/Pigeon
Fabric: Top- 1/2/3/4 Bottom- 1/2/3/4

Neutrals 3
Yarn Colors: Maize/Little Fern/Citron/Sans/Fen
Fabric: Top- 1/2/3/4/5 Bottom- 1/2/3/4/5

Hopefully you have found this post helpful and inspiring. I know Lauren has lots of amazing tips for sewing the Hollyburn pattern to share over the next few weeks. I can’t wait to see everyone’s creations, both knit and sewn!

Happy stitching!
Michelle

Note: All of the fabrics shown are available in our online shop, Style Maker Fabrics. To help with your project, we are offering all OAL participants FREE US shipping (or discounted international shipping) on their orders through June 30th, 2016 with code OAL2016. We have also contributed a few special prizes for the three random winners of the OAL challenge. Read all of the details HERE.

Discount

————————————————————————————————————————————-

Thanks again for such a great – both in terms of info AND delicious fabric eye-candy – post, Michelle! Friends, let’s talk about our chosen fabric + yarn. What did you end up with? Can you guess which one in this post is mine? Are you second-guessing yourself after seeing these new options? It’s never too late to make two skirts, you know 😉

Completed: The Shutters & Shuttles Sway Dress (+ a Giveaway!!)

14 Dec

I’m so excited to finally be able to share this project with y’all!

Shutters & Shuttles Sway Dress - front

Over the summer, I’ve been in cahoots with Allison of Shutters & Shuttles to collaborate a fabric + dress design. She reached out to me after I made my Scout Tee using some of her fabric, and we thought it would be fun to match up a custom fabric with a pattern, as well as having a little giveaway too!

If you’re not familiar with Shuttles & Shuttles, they are a small company that produces handwoven and hand-dyed fabric, made entirely in Nashville, TN. Allison produces all the fabric herself using a 60″ AVL mechanical dobby loom, and makes all sorts of fabric goods – from rugs, to blankets, to yardage (some of which is produced into small batches of ready-to-wear clothing). Some of her fabrics appear in limited-edition Elizabeth Suzann collections, which is how I came to be familiar with the line (and spoiled rotten by getting to sew them!). Suffice to say, I’m a big fan of Shutters & Shuttles and I just love everything that comes out of Allison’s studio. It’s a bonus to be able to say that I literally know who made my fabric 🙂 So obviously I am pretty excited about this collaboration!

Shutters & Shuttles Sway Dress - front

The awesome part about working with a fabric designer is that you actually get to design the fabric. What a novel idea, amirite?! 😉 Allison has a swatch book showing all the designs and colors that she’s made – everything from intricate designs woven into the fabric, to a simple weave with a beautiful hand-dyed watercolor effect. You know how the first time you went into a fabric store, you were likely overwhelmed from all the sheer possibility staring at you from every direction? Well, I kind of had the same feeling – except multiplied! It was REALLY hard to choose a design; I wanted one of everything all at once! Ultimately, though, I knew this piece was pretty special and I wanted to do my garment the justice of allowing it to be worn frequently. We ended up with a fairly simple design, which I just think is absolutely gorgeous. A medium weight cotton yarn, dyed a deep rich navy blue, woven with a heavy slubbed texture. The fabric has a lot of dimension and texture, and the color is a perfect backdrop to show that off. It’s a warm, heavy fabric – it feels like I’m wearing a blanket. Sooo, obviously I made a blanket dress. Yes!

Shutters & Shuttles Sway Dress - side

Shutters & Shuttles Sway Dress - side

Wanting to stick with something tried and true (like, this NOT the project to allow for any mishaps!), I made another Papercut Patterns Sway dress. Yep – my second navy Sway dress in 2015. Hey, what can I say – at least I’m predictable 😉 This is definitely a winter-weight dress, as the fabric is so robust and heavy. It’s a great match for this pattern, as it hangs and drapes beautifully into an exaggerated tent shape. Since the pattern design is so simple, it really gives the fabric a chance to take center stage. BUT, since the fabric is also (relatively) simple, this is a good staple dress that can be worn different ways, like a good pair of jeans. It looks great with a collared shirt, with a simple long sleeved shirt, or with a turtleneck. I’m wearing it here with my grey wool Renfrew cowl, which I really love! Super cozy, y’all!

Shutters & Shuttles Sway Dress - pockets

This being a really simple dress that I’ve already made before, there’s not much new to talk about construction-wise. I serged all my seams independently, then pressed them open and catch-stitched each side down to keep them flat. That alone was the bulk of the time it took to make this – that’s a lot of hand-sewing! I also slip-stitched the hem for an invisible finish, and WHEW THAT TOOK FOREVER. Totally worth it for the finished effect, though. Since the fabric is really heavy and thus puts a lot of strain on the shoulders, I used a heavier fabric for the front and back facings, as well as interfaced them (using self-fabric would have been way too thick). Actually, the fabric I used is the same linen that I made my first Sway dress with – ha! It was a good color match 😉 I also made sure to add pockets – also out of the linen!

Fit-wise, the only change I made was to raise the armholes by about 1/2″ as I felt like they were too low on my first dress. This being a winter dress, I will likely always wear it with a top underneath – so low armholes aren’t much of a problem, but I’m glad I raised them anyway!

Shutters & Shuttles Sway Dress - back

As with my first Sway, this dress is designed to be worn forwards or backwards. I really like it with the v at the back, but wearing it with the v in the front + a vneck tshirt – that’s a nice look, too! The only issue this poses is when it comes to hemming – it’s hard to get a perfectly even hem all the way around, because once you flip the dress around, protruding boobs hike the hemline up a little! I straightened things out as best I could, but I’ve also come to terms with the fact that the hem will never be 100% perfectly even. Oh, who am I kidding – my hems are never even. WHATEVER.

Shutters & Shuttles Sway Dress - front

Shutters & Shuttles Sway Dress - back

Shutters & Shuttles Sway Dress - neckline

Working with this fabric was SUCH a joy! It’s so easy to cut and handle, and the cotton content means that it takes pressing like a champion. I do recommend catching down all your seam allowances, as it helps keep things nice and flat so you get a good sharp press on the outside. One thing that Allison and I discussed was whether or not this fabric is suitable to sew if you don’t have a serger for finishing the raw edges. Obviously, serging would be first choice – the fabric is prone to fraying, so serging that eliminates the possibility of unraveling and blends is really nicely with the fabric texture. That being said, the fraying isn’t super terrible – the fabric is a tight weave, so it hold it’s own pretty well. I do think finishing your raw edges is pretty important, but even just a simple pass with a zigzag stitch would work fine. Something gorgeous like a bound or Hong Kong seam finish would be perfect, although I didn’t take that extra step personally (I did consider it! But only consider it, ha!). For places that I didn’t serge – such as inside the all-in-one facing – I shortened my stitch length a couple mm’s to give the seam a little more strength.

All that being said, don’t let a lack of overlocker deter you from using this fabric! It’s a lot more durable than you think, like, it’s not going to completely unravel itself just from you looking at it. This isn’t some crazy bouclé, after all 😉 haha!

Shutters & Shuttles Sway Dress - inside

Shutters & Shuttles Sway Dress - fabric close up<

Here’s a close-up of the fabric’s color and texture. Isn’t it delicious?!

Oh! As a fun little bonus, when I came to pick up my fabric – there was this cool white border print taking up about the first 1/2 yard or so. Allison said she’d tied the navy threads onto the white that was already on the loom to start off (forgive me if I’m totally butchering this explanation – I’ve never woven fabric before!), and played around with a fun design before the white ran out and went into solid navy. She offered to cut it off, but I wanted to try to use it because it is SO cool looking! There wasn’t a lot of the design to play with – it’s about half a yard, going along the width of the fabric. I was able to eek out a simple scarf, though:

Shutters & Shuttles Scarf

aka A BLANKET FOR MY NECK.

Shutters & Shuttles Scarf

I really wanted to wear the two pieces together, but I have spared you.

Shutters & Shuttles Scarf

I really agonized over how to finish the raw edges of this scarf. The short edges are selvedge, so they are fine as-is. I thought about doing a rolled hem, but I realized that the fabric is so textured and cushy, it actually hides serging really well. Look at the blue edge – can you see the serging? Just barely! So yeah, I just serged my edges and called it a day! Insta-scarf!

Shutters & Shuttles Sway Dress - front

Ok, I think you guys have put up with my blabber long enough for one post – let me blab about this giveaway now! Allison wove some extra yardage of this lovely blue cotton, which means that one of you get a piece! Yay!

GIVEAWAY IS NOW CLOSED

The giveaway is for a piece of plain weave, hand-dyed, hand-woven blue cotton fabric from Shutters & Shuttles and made in Nashville, TN. The fabric is approximately 60″ wide, and you get 1.5 yards – which is plenty to do something fun with! Oh, and it’s pre-washed! (although you may want to wash it separately by itself the first few times, in case the dye decides to bleed) Wanna throw your name in the bucket? Just leave a comment on this post and tell me what you would make if you won the fabric! This is an awesome, warm, heavy cotton fabric that would do well for something like my Sway dress- it would also make a lovely circle skirt, or even a REALLY comfy pair of loose pants! Or maybe you want to be boring and make a bunch of scarves? 🙂 I won’t judge you! (note, the cool white border won’t come on your piece. That was a one-off that I selfishly kept for myself, not even gonna apologize for that!)

The giveaway is open WORLDWIDE and I will close the comments one week from today, on December 21, 2015 at 7:00 AM CST. In the meantime, you should check out the Shutters & Shuttles site, including all the inspirational things in the shop. Oh! Speaking of which – if you want to buy something, use the code LLADBIRD for a 15% discount – good through 12/25/15 (meaning, you can still totally buy yourself a great Christmas gift 😉 Including this exact yardage, YAY!).

GIVEAWAY IS NOW CLOSED

Shutters & Shuttles Sway Dress

MASSIVE thanks to Allison + Shutters & Shuttles for doing this collaboration with me, because this fabric is fucking awesome!! Now, which one of y’all is gonna be my fabric twinsie? 🙂 Good luck!!!

My Trip to London & Paris!

8 Dec

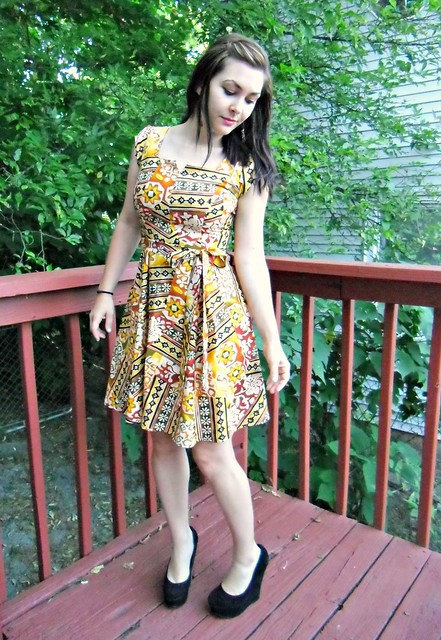
Hey everyone! Ok, whew, I’m finally back and mostly caught up with boring adult life things, so now I can get back to the fun stuff! Wheeee!! Today is all about my trip to London (with a little two day stop in Paris). Sorry if you just wanted me to dive back into the sewing shizz! Deal with it~

deal with it
God, that gif never gets old.

Anyway, sooo, London! I’m just going to touch on highlights, and share some photos (nearly all of these have been posted on Instagram/Twitter, but sometimes it’s nice to have a little backstory with the photos, yeah? 🙂 Oh, except for the ones I shamelessly stole from other people. Hey, if you tag me in it, I get to use it hahaha). Don’t take this as a ~London guide~ because I really am not a travel blogger by any stretch of the imagination, but hey, I’m happy to share all the things I learned while on this trip 🙂 Fair warning: I did not take very many pictures. I never do when I go on trips; I find that for me it’s really hard to stay in the moment and enjoy myself if I’m worried about getting good photos. Also, this post ended up being reeeally long, despite my best efforts at condensing it – so yeah. Sorry! It’s totally ok if only my mom ends up reading it 🙂

Thursday: I flew into London on a red-eye, arriving on Friday morning. Not much to say about the trip, as I mostly slept on the plane (or, rather, tried to). I will mention that I never once saw my seat mate do anything other than stare straight ahead. Not even watching TV – that was off the whole time – just staring at the back of the seat in front of him. At one point, I noticed he was wearing headphones. Later, I realized that they weren’t plugged in. So there’s that.

Saturday: This was the day of the London meet-up on Goldhawk Road. Yes. The day after I flew in. In retrospect, planning a meet-up during which I will likely still have jet-lag (spoiler: I did. Ohhh I so did) is a terrible idea. I ended up feeling very tired, a little sick (in that I-barely-slept-last-night kind of way, although, I *did* sleep well the night before. When you’re staying with Clare in her Elvis Presley Deluxe Suite, how couldn’t you? 😉 ), and was generally very quiet and a lot overwhelmed – not overwhelmed with the meet-up, per se, but just the whole thing about being in a completely different country and all that. All that being said – I had a wonderful time at the meet-up! We had a smallish group of less than 20 women, which was nice and manageable (I’ve heard stories about those 80+ people meet-ups, and y’all, I would be horrified. Haha!). It was so nice to meet everyone who came out, not to mention shop with them! I do like buying fabric solo, but man… I’m a big fan of the peer pressure influence too 🙂 And Goldhawk Road is pretty awesome! It’s no NYC Garment District by any means, but there were still loads of shops to check out, the prices were good, and everyone who worked there was pretty friendly 🙂 Also, some of the window displays were insane.

The fabric shops here have the best window displays 😂✂️

This was my favorite window display out of all of them. How good is that? The more I look at it, the more it makes me laugh.

Price-wise, all the shops in the area were pretty reasonable. I had to be very mindful of whatever I bought – I was limited to one checked bag (an additional would have cost $100), plus, my dollars don’t go as far in London when compared to the pound. Not to mention, I have TONS of fabric at my house that I need to sew through! So I tried to stay pretty restrained (and make everyone else buy lots of awesome fabrics, heh heh heh) and did not buy much.

Just hanging out with myself here 😜 #lladybirdinlondon (also, @bbhandmadedress made me a tag, yay!)

After we were all shopped out, we went to Defector’s Weld around the corner for drinks and food. I unfortunately did not get a photo of the meet-up (again, me and taking photos doesn’t really jive), oh well! So instead, here’s a photo of my name on the table. Big thanks to Stevie for wrangling the reservation for this part of the meet-up – couldn’t have done it without her! ♥ Also, big huge thanks to Sally and Fiona for being my personal Tube Guides during this day, as I otherwise would have definitely gotten myself super lost.

So yeah, first meet-up was excellent! Thanks to everyone who made it out – I just wish I’d been feeling better, so I could have talked more and not just sat there staring at my soup like a freaking zombie. I have learned my lesson for the next time! Get over the jet-lag first!

Fortunately, the jet-lag only hung around for another day… then I felt REALLY splendid for the rest of the trip. So that was good!

Sunday: I met up with Birgitte, who was also visiting London from out of town (albeit from Norway… but still! Somewhere Else!), and we went to see the Wedding Dresses 1775-2014 exhibit at the V&A Museum. One thing I loooove about London is that basically all the museums are free! SWEET! Of course, certain exhibits may cost you regardless – such as the one we saw at the V&A, I think it was around £10? It was totally worth it, though! They will also check your coat and bags at the museum for free, which was nice since it was cold and rainy that day.

Guess where I ammmm... 😜 #lladybirdinlondon

After the museum, Birgitte and I wandered into Liberty of London. At the risk of making myself sound like a complete idiot – I had no idea Liberty was a department store? I’ve only ever known it for the fabrics. So I was pretty surprised to see that – not only is it an entire store, but it’s a fucking FANCY store! Now I understand the hype. Still don’t care much for the fabrics (I tried, I really did! But no Liberty fabrics came home with me on this trip), but, I get it.

dalston shopping

Monday: This was the day I really started feeling 100%. I met up with Nicole, Rachel and Vanessa for a shopping day in Dalston Mills, at the Ridley Road Market. Nicole lives in the area and was kind enough to show us around – it. was. AMAZING! Such a completely different culture from what I’d seen the night before (I mean, I went into Harrod’s at one point, for fuck’s sake hahaha). We shopped for fabrics at the little fabric store – as well as on all the tables selling beautiful African wax prints (which you can also get on Goldhawk, but I liked the wax prints here better!). I also bought hair dye (because, why not?) and a new neon green purse, having realized my sling bag was not big enough for the necessary umbrella & other necessities.

Hi, I love meat 🍗🍔🐔 #lladybirdinlondon

There is a lot of dead meat on Ridley Road. Here I am standing next to some. Yay, meat!

me & Rachel ♥

It was such a treat to be able to spend some time with Rachel. We may or may not have bought mostly the same fabrics (all destined for lingerie, no less!). In case you were wondering – she’s just as gorgeous in real life as she is in photos. Maybe even more so! And she’s so tall – especially next to this 5’2″ runt 😛

And now I'm hanging out with @ohthepeteroh, who was my first roommate in Nashville before he moved back to London. It's been 10 years and he's aged like a fine wine 🍷 #lladybirdinlondon

After my shopping day in Dalston Mills, I stayed in East London and met up with my friend Peter for drinks at a couple of the nearby bars. Peter is an old friend of mine – we go ‘way back, like, pre-high school, and he was my first roommate when I moved out of my parent’s house. I haven’t seen him since he moved back to London 10 years ago, so it was REALLY great to see him and catch up. We both drank ourselves into hangovers that night. It was awesome.

Classic English breakfast today! I will not be eating those beans hahahaha #bpSewvember

Tuesday: Hangover day! I started my morning with a big, proper English breakfast with Clare, which I ate about half of (I know! I hate wasting food, but hangovers for me tend to be the really sick/no appetite types). I did not touch the beans, which horrified about half of Instagram, apparently. Sorry, dudes. Baked beans are gross and I wasn’t about to risk trying them when I was already feeling sick!

Anyway, a hot shower did a good job of clearing me right up, so I was able to drag myself out of the flat and take myself on a date to the British Museum. This was pretty much the only thing I had planned in advance before getting to London – I knew I wanted to see mummies! And I did see mummies – three times, in fact. I kept going back to the Egyptian room, because mummies are awesome haha.

Took myself on a date today and made a new friend #lladybirdinlondon

I also took a selfie with this guy. I felt pretty silly, but I’m trying not to care. I really wanted to take a selfie with the naked Greek statues (head height for me is right about at the weiners, which is PERFECT), but I just couldn’t bring myself to do it. Next time!

It was also pretty cool seeing the all the Parthenon stuff. We have a full-scape replica of the Parthenon in Nashville (because of course we do), and it’s pretty true to the original. Except for that whole collapsing part haha 😛

Tower Bridge hangs! 🚣🌉 #lladybirdinlondon

Wednesday: In the AM, I met with Melissa Fehr in her floating house boat on the Thames river. Yes, you heard me – HOUSE BOAT. I had no idea that was a thing in London, but it is, and it is excellent. There’s a whole boat community out there, with floating gardens and community centers and other impressive floating things. Also, Melissa is fucking hilarious, and her cat is adorable and extremely good at laser acrobats.

Great lunch/beer (ok, I'm the only one who had alcohol 😜 haha) this afternoon with @fehrtrade and @tillybuttons 🍻 yay for mini sewing meet ups! 👯

After tea & pumpkin pie and general boat-awe, we took a bus to get lunch with Tilly on her side of London, as well as check out her beautiful studio where I would be teaching my class later that evening.

class at Tilly's

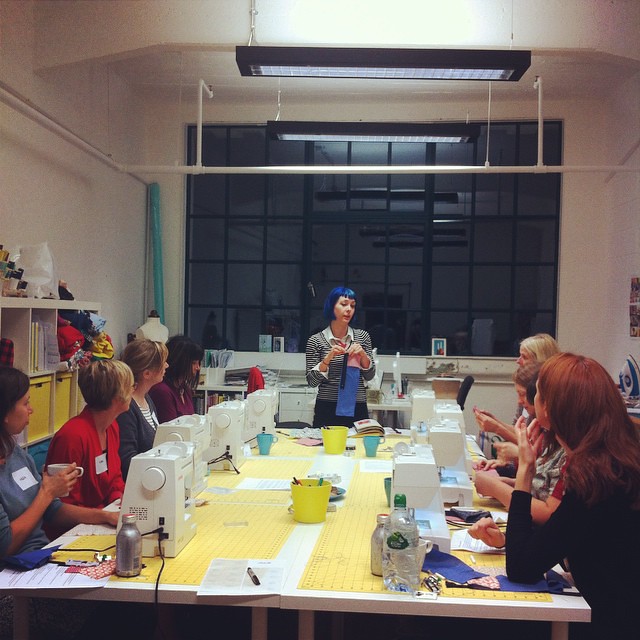
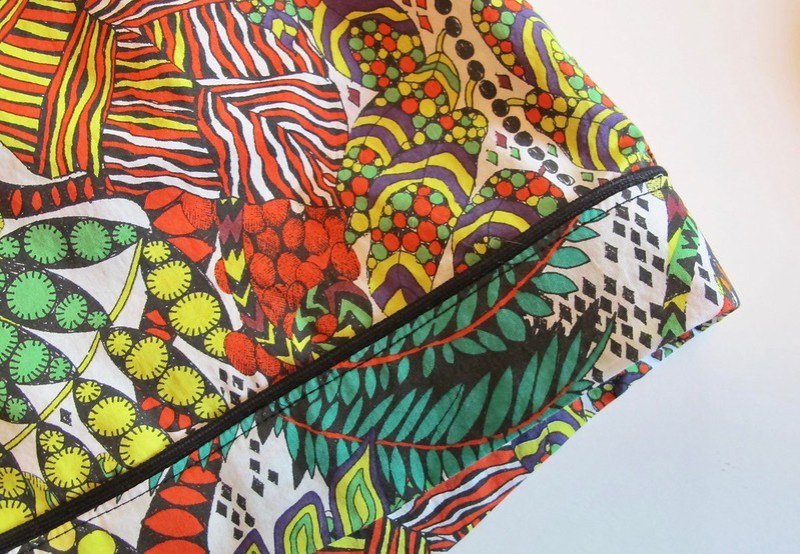
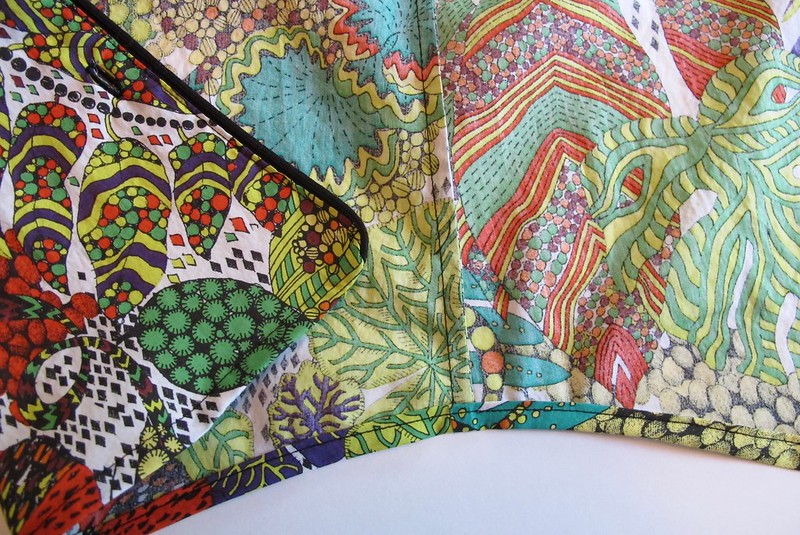
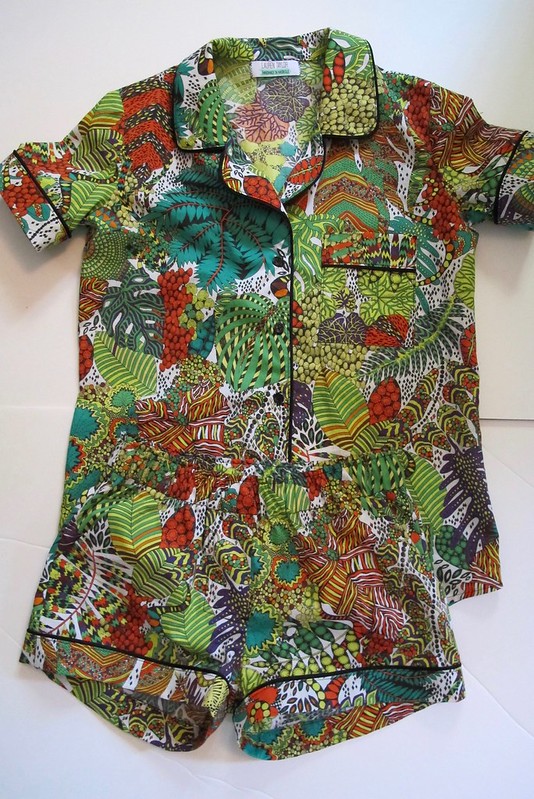
Oh, so, my class! Zips & Buttonholes was 3 hours of great fun! My students were all fabulous and really killed their zipper insertions (and I’m a little jealous that my first zippers never looked that great! Many, many MANY years of dodgy zippers are in my past, ha!). Everyone was so lovely and fun to chat with – one person even brought me a gift of bicycle print jersey (for real! I was – and still am – completely floored by her kindness and generosity. Thank you so much, Caroline!). We did have one injury in the class – I think that was a first for all of us (knock on wood, haha). Poor Rosie! Actually, she was a really great sport throughout the ordeal – and I love the photo we got together haha. I hope your finger is feeling better now, Rosie! You should be proud of your battle scar 😛 haha!

train to Paris!

Thursday: While my family spent the day feasting and hanging out, I woke up at the ass crack of dawn (aka 5AM) to catch a train to Paris! Our party (me, Clare, Kelly and Emmie rode the Eurostar into Paris bright and early, with a couple hours to spare before the big meet-up arranged by Carmen. Clare was staying in a separate hotel (being preggers, she has greater rest needs, plus, she was staying an extra day in Paris), but Kelly & Emmie and myself – along with Tilly & Freya (who I just met during the trip and OMG LOVE HER) – booked ourselves up a swanky little pad via AirBNB. Like, my bed nook (hell yes I got my own bed… I’m opening to sharing, but I also snore, so that usually means I end up solo hahaha) had PARIS DISCO LIGHTS:

Made it to Paris! Our swanky flat has a lofted bed with red and blue lights... Naturally, this is the one I chose #lladybirdinlondon

I almost wish we staying in Paris longer just to enjoy that damn apartment. We were on the top floor, with skylights on the roof and chandeliers hanging off everything. There was also pink toilet paper, which really cracked me up. Apparently, that’s not uncommon in Paris (or London, for that matter)? I’ve just never seen it in the US – only ads from, like, the 60s. I wish we had colorful toilet paper here now. My bathroom would be so much more exciting.

You know it's been a good trip when you forget to take any pictures! Paris, you are amazing. Thank you for being so lovely these past 2 days 💕 #lladybirdinlondon

Paris Spoolette Meet-Up November 2014

The Paris meet-up was SPLENDID. Carmen really outdid herself with planning everything down to the last detail, with an itinerary, maps, and GOODIE BAGS.

Gifts!

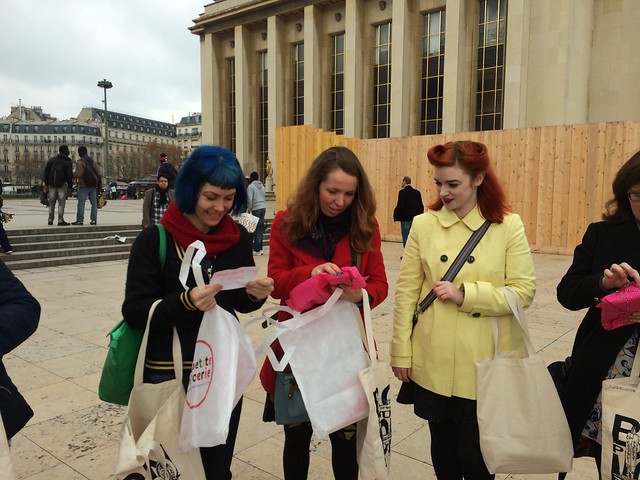
I am pretty sure I have the worst manners ever, but Kelly & I fucking ripped right into those bags the second they were handed to us. Everyone else was standing patiently and politely up to that point. Whoops.

Paris Spoolette Meet-Up November 2014

I was really excited to see Norma! I met her in NYC while I was there in March, but we didn’t really have a chance to talk then – so it was nice to actually have a good chat with her. Love Norma!

Ok, so, as far as places we shopped in Paris… I’m afraid I can’t really give you a running list. I ended up following my small group like a little puppy – not to mention, I couldn’t read any of the signs (I really did try to brush up on my French in the months before I left, but learning a foreign language is hard!), so I don’t remember them. Sorry, guys! If you want suggestions on where to go for fabric shopping in Paris, best ask someone else… because I’m pretty useless haha.

We did find some great shops, though! There was one- Les étoffes du Sentier (I took a photo of the bag, ha) – who liked us so much, they led our small group (we were long split off from the big group, being slow shoppers and all) to their big warehouse where they had even MORE stuff, including (really inexpensive, really nice quality) leather. Loved those guys!

Spoolettes in Paris

We also went into La Maison Sajou, which is basically the cutest shop in the world. I could have bought one of everything in there, were my bank account limitless. I am chatting with Rehannon here, omg that girl is such a trip! ♥ Also, I’ve never seen a bigger collection of Lauren derp faces than there are from this trip HAHA!

Paris Spoolette Meet-Up November 2014

The ladies at Sajou were kind enough to make us all tea, and clever enough to serve said tea in their branded mugs. PROTIP: If you want me to buy something, just let me carry it around for a while. By the time I finished my tea, I knew that mug was coming home with me. You can totally see it in my eyes, haha.

Paris Spoolette Meet-Up November 2014

Oh yeah, we also hit up the sweet Les Coupons de St-Pierre, which is one of those mythical “coupon” shops where you get 3 meters of fabric for 8€ or 10€ (or more of less, depending on fabric!). That place was sweet, the employees were awesome, *and* they gave us a discount because of Carmen! Woohoo!

Paris Spoolette Meet-Up November 2014

Finally, what was left of our party moseyed over to The Pink Flamingo Pizza Parlor rue Muller (fair warning – that link auto plays music!) for drinks and dinner. I really loved this place – the pizza was outstanding and there were some cray flavor combinations. We shut that place down with our chatting and drinking.

Friday: We had a small meet-up rendezvous at Anna Ka Bazaar the next morning. They served us tea and cookies and gave us a nice discount (and yes, I bought myself a special piece of splurge fabric. Anna K instead of Liberty, fuck yea!), and let us hang in the shop for a bit. Norma came out, because I wanted her to see my Marlborough bra and assess the fit. Sooo… long story short, after realizing there was no bathroom to duck into, and determining that no one in the shop (especially the owners, obviously) minded seeing some bewbs, I just stood behind the counter in my bra and Norma gave me an impromptu fitting lesson for the crowd’s entertainment. Ha! Fortunately, the major fit areas (band, bridge, most of the cup) are spot-on. I just need to tweak the upper cup and the strap placement, which Norma told me how to do. How’s that for some customer service, amirite? Also, the ladies at Anna K were really excited when they realized that, not only did I make my bra – but the patternmaker was Norma! And now I can say I spent some ~topless time~ in France hahaha.

Jolies Bobines met with us and took our small group (me, Kelly, Emmie, Tilly, Freya & the addition of Nicole) on to more shopping after Anna K to some of her favorite Paris fabric shops. One of the places she brought us to was Malhia Kent, which was AMAZING. So much brocade and sparkly lurex! It was hard to restrict myself to just one special piece, but I was worried about luggage restraints at that point. I managed 🙂 Also, it was really cool to finally meet Jolies! Despite my complete and utter lack of French knowledge, she was able to speak enough English so that we could get a good conversation going 🙂 She did suggest that I start following French blogs and reading French patterns, as it helped her learn English faster – so I might have to try that!

After Jolies left while we ate lunch, I starting feeling my hangover (two in one trip, argh), so the rest of my time in Paris was spent avoiding the wine and steaks that my fellow travelers were eating. Bummer! As luck would have it, I felt better right about the time we boarded the Eurostar to get back to London. Figures!

Shopping date with @tillybuttons today! I'm a little fabric'd out after Paris, but managed to squeeze a little piece from Cloth House in my bag 😉 #lladybirdinlondon

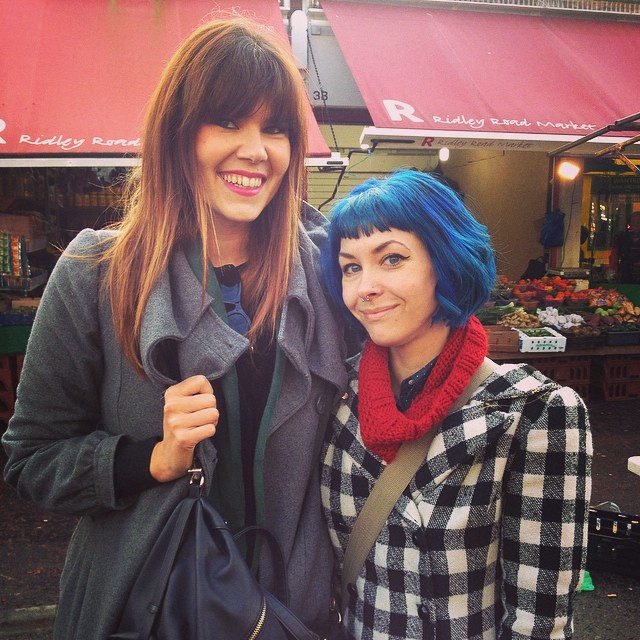
Saturday: Since Clare was still in Paris for another day, I went back into central London (by myself! I am getting so good at this tube navigation system, haha!) and met with Tilly for a nice relaxed shopping day in Soho. We went to lots of little shops in the area – some fabric, some gifts, some clothing – but the only place I bought anything from was Cloth House (see above for fear of my loot not fitting in my luggage, ha). Tilly also took me into the clothing store Joy, which is full of some of the cutest stuff I’ve ever seen (I really really really want to knock off this toggle coat now. I mean, come on!) (Oh, I just lied to you; totally bought a necklace from this store). We also went to Bravissimo, because the bras there cost about half as much as they do in the US (even with including the exchange rate). This is probably bordering on TMI – but, Tilly & I actually wear the same bra size (lolz), so we were able to get side-by-side fitting rooms and swap bras haha. I ended up buying the Satine bra in black, in case you were curious!

I’m really happy with how well Tilly & I got along. I’ve been friends with her online for ages, but this trip was the first time I was able to meet her in person. Sometimes, people can be different than their online persona (this hasn’t happened to me in the blog world, but I’ve heard horror stories! And I’ve used OkCupid in the past hahahahaha), so it can be a gamble when you plan to spend a multitude of days with one person if you’re not sure that your personalities will mesh. Like I said – I haven’t had this issue with anyone I’ve met through this blog (no, really! Every single one of y’all has been really cool and fun!). That being said, Tilly far exceeded my high expectations. She’s just a really great person and I’m glad I got to spend some time getting to talk with her and hang out. Now I’m getting Tilly withdrawals! Wah!

sewing party at Tilly's

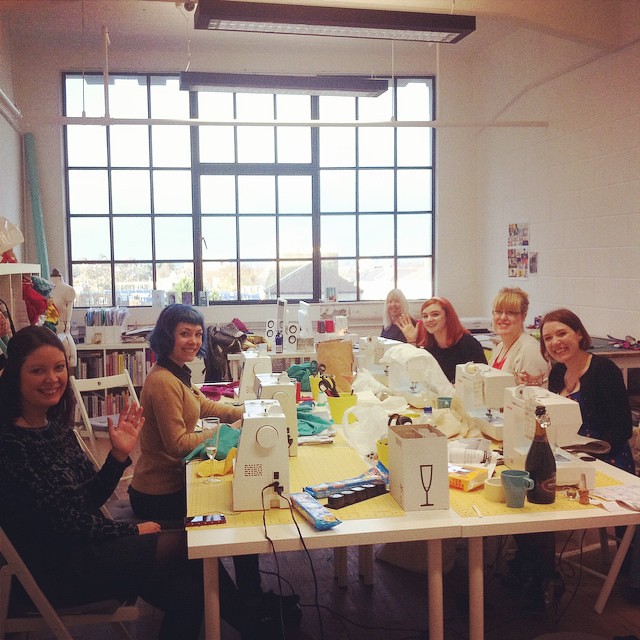
Sunday: Last day in London! When I was originally planning this trip, Tilly offered to let me take over her studio for a little sewing shindig on the last day I was there. After nearly 2 weeks away from my machine, it was pretty awesome to be able to sit down and sew again! We had a small group – unfortunately, Clare was feeling pretty beat up after Paris, so she wasn’t able to make it 😦 – but it was great seeing the rest of the ladies: Karen, Roisin, Freya, Emmie, Jane, and of course, Tilly! Everyone brought a project to work on, foods to snack on, drinks to drink on (I’m currently a Prosecco convert… mmmm), and we just had a lovely afternoon. It was a great send-off to a really really awesome trip.

BUT WAIT, THERE’S MORE!

I will live on Party Rings for the remainder of my time on this earth 😍🎉 #lladybirdinlondon

After we left Tilly’s, Tilly took me to Sainsbury’s in my quest to find Party Rings. These ridiculous cookies biscuits were a staple for my family back when we were visiting London in the late 90s – as in, my siblings and I ate the SHIT out of them. We brought a metric shit-ton back to the states with us, and it was a sad day when we finally ate the last one. I was bound and determined to find some to take home – and I did! Yay Party Rings! 😀

me & Jamie Susan

Finally, I met with my friend Jamie Susan in Greenwich for some Vietnamese food and much-needed Nashville gossip. Funny story about Jamie Susan – she’s an old friend from Nashville (we used to go on laundromat dates together haha) who moved to London about 2 years ago after getting married. I knew she was in London, but I figured she’d be so far out from Greenwich (where I was staying) that meeting up would be too much of a hassle. Turns out – girl LIVES in Greenwich! What are the odds, amirite? Anyway, I’m glad we made time for each other because it was great to catch up and I realized how much I miss her. Dammit, Jamie Susan! Come back to Nashville and visit already!

Monday: Ok, Monday doesn’t really count because it was my traveling day. However, I did want to point out that the plane from London to Toronto was pretty empty, and I somehow managed to get an entire row to myself for the whole 8 hours. That. Was. AMAZING. Also, I flew Air Canada, which was just nice as hell. The food was really good, the flight attendants were incredibly nice, and everything was just really clean and well taken care of. Oh, and there was FREE WINE. I think I’m spoiled for life, now though, after being able to stretch across an entire row and basically have a party to myself for the whole flight. It was like a First Class experience, without the First Class price tag. Go, Air Canada!

So yep, that’s my trip! Sorry the post got so long and out of hand – I tried to condense it as much as possible (and I figure – better one looong post than a bunch of short posts, especially for those who would rather skip this kind of topic altogether!). A few things I’d like to point out about traveling to London & Paris, from a non-international traveler standpoint – these are the things I wish someone had told me up front:

  • The very biggest thing that threw me off in London? They don’t put cream in their coffee! This is probably a “no shit, Sherlock” type statement to most of y’all, but I had no idea! Europeans (or, at least, those in London & Paris) put milk in their coffee. Half the people didn’t even know what I was talking about when I asked for cream. Obviously I was able to adapt very quickly (I mean, this is coffee we are talking about) – I learned that I really like flat white coffees! – but it really threw me off the first couple jet-lagged days I was there.
  • My little passport wallet came SUPER in handy the whole time I was there. It was nice to have one place to keep my cards and my passport – and I especially loved that zippered pouch for holding all my change. One thing I didn’t realize is that the British use lots of coins, especially for one and two pound amounts (we don’t really have that in the US; the one time they tried to make a dollar into a coin, there was some SERIOUS pushing against it. I know of stores that refused to accept it as payment, even though it’s legal currency haha). So, bring something that will hold your coins!
  • Another big tip if you’re taking an overseas trip – if at all possible, get a credit card with the chip, as it’s the safest way to carry money around. I think the chip is about to become standard for all new credit and debit cards (I’ve noticed the machines in stores since I got back), so it’s really just a matter of replacing your current card if you already have one. I found that my bank has a credit card with no foreign transaction fees, which saved me loads of money since I only had to pay the exchange rate. I charged everything to my card and paid it off when I got home. Obviously don’t do this if you’re not able to pay off the card – you don’t want to come home from a vacation already in debt – but if you can be responsible and hold yourself accountable, it’s very useful. Plus, I earned points for every dollar I spent, so it’s like a double bonus!
  • Speaking of those chip cards – you’re supposed to get a pin so they can be used in the machines. For whatever reason – mine just didn’t work. The card worked, I mean, but I had to sign for every purchase. I’ve heard it might be an American card thing (some people told me they had the same issues with US credit cards), but it’s just something to be aware of. Again, carry an ID with you if this is the case because they are required to check the signature if you don’t use a pin.
  • If you’re going to a foreign country and want to still use your phone without having to deal with roaming/international charges, I would seriously recommend getting a prepaid SIM card. I had my phone unlocked through my provider (DO NOT do this through a third party – nine times out of ten, you’ll get scammed. My provider tried to give me hell about unlocking the phone because I’m still under contract – despite paying cash for the phone when I bought it – so I unlocked it through their website and it went through. Worth a try, anyway!) and bought a prepaid SIM card through EE. For £15, It had 150 minutes (more than enough for me; I never talk on the phone haha), unlimited text messages, and 2 GB of data while in London. Since my plan was local only, I used WhatsApp to keep in touch with my US friends, and FaceTime to talk to Landon 🙂 The phone stayed off while I was in Paris (although I’m sure there are prepaid options for roaming other countries, if that’s a need for you!). This was obviously LOADS cheaper than what my provider was trying to charge for me to roam with a US number. Of course, I could have kept the phone off entirely, but it was pretty useful to have a local number so I could text people to arrange plans/meet-ups, and also have the data for mapping my tube routes and playing on Instagram 🙂
  • I didn’t realize this until I was actually in London, but if you use Uber (a ridesharing/taxi program that is way cheaper than a typical cab), it *does* work in London. I used this to get home after teaching at Tilly’s, and also to get to the airport on Monday morning (I’m sure every single commuter on the train loves and appreciates me for not subjecting them to standing behind me dragging my luggage onto a crowded train haha). The rates are great – I paid £40 to get from Greenwich to Heathrow, which was about a 70 minute drive during rush hour traffic. If you haven’t used Uber before, here’s a shameless free code for ya – laurent319 will get you a free ride (up to $20, then you pay the difference if it’s more than that). You just need to download the free app to use it (full disclosure – if you use that code, I will get a free ride, which I will then use to take me to and from the airport when I travel. Free Ubers for everyone! Yay!). Anyway, Uber or not – I would strongly recommend setting some money aside to get you a cab back to the airport, if public transportation is your only other option. It’s worth the money just to know you can sit and relax and not be banging your giant suitcase into someone’s poor ankles.
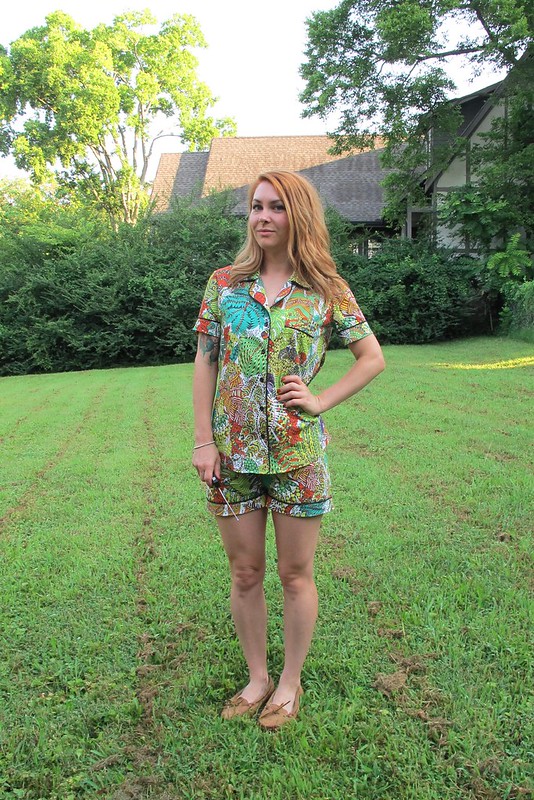
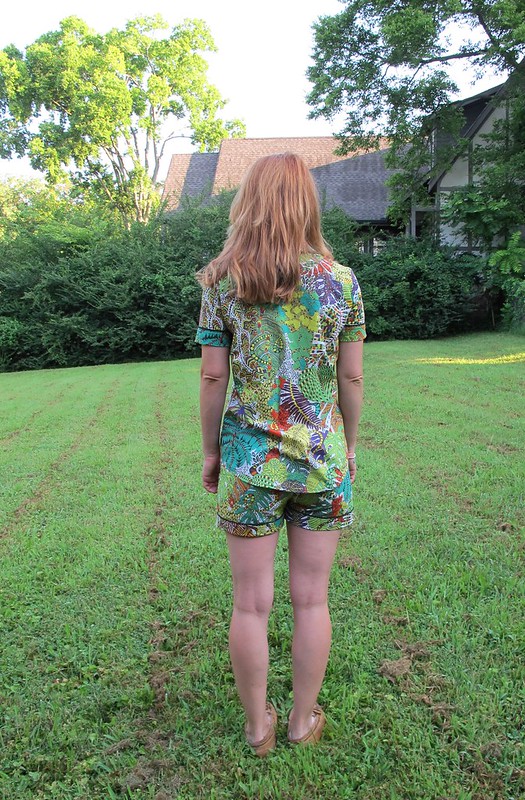
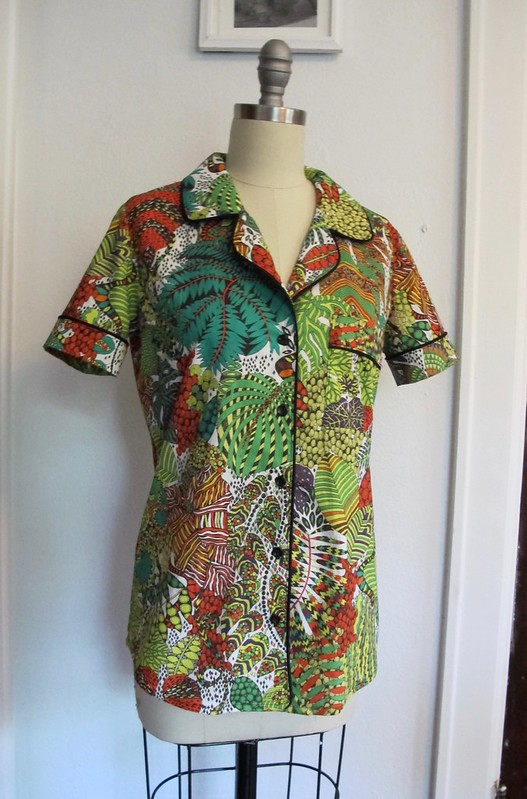
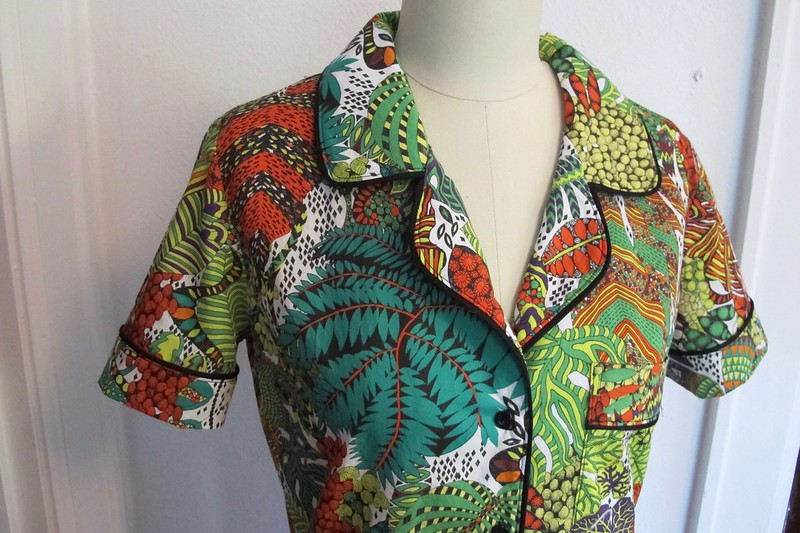
  • Wardrobe-wise, my capsule wardrobe ended up being a really great decision on my part. I made everything I had planned and wore almost entirely handmade (save for my jeans, which I can’t bear to part with because I love them so much) for the whole trip. It was nice to have a mix and match of outfits to choose from – saved on both luggage space and getting ready in the morning time. Of course, this meant that people saw me wearing the same thing more than once (gasp!), but, you know what? Fuck it.
  • Speaking of clothing and dressing appropriately for the weather, it must have been a REALLY mild time in London because I definitely was not cold! I brought both my big plaid coat and my bomber jacket, which turned out to be very useful because I ended up needing them both at one point or another. I found that by wearing lots of lightweight layers, I stayed very warm – and it was easy to peel layers off if I got too hot. It also barely rained while I was in London – it was mostly grey, which I found quite nice. I must have brought something gross back with me to the states, though, because it’s been REALLY cold and rainy ever since I got back! Ew!

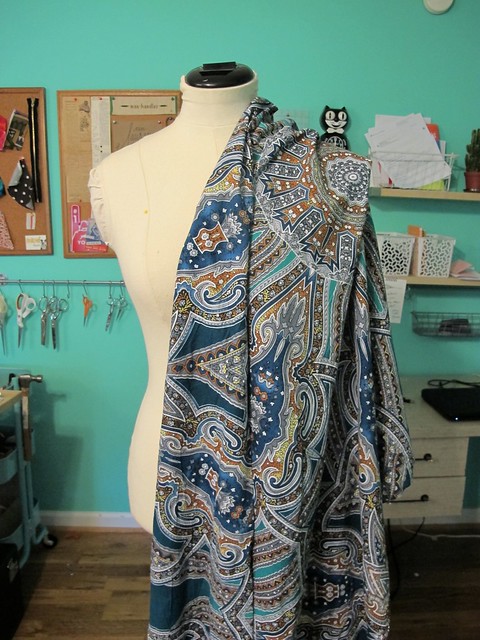
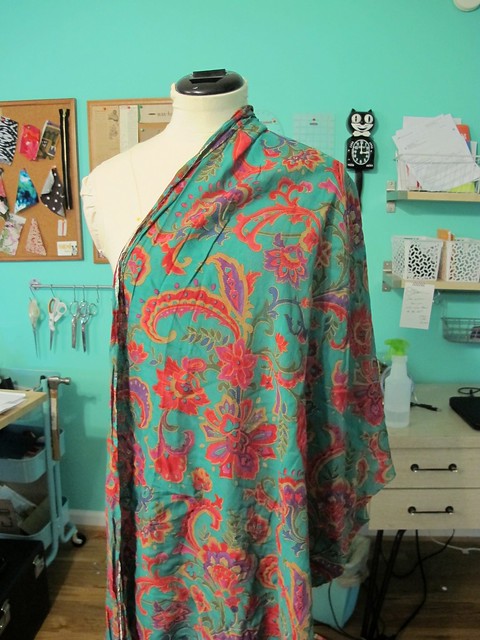
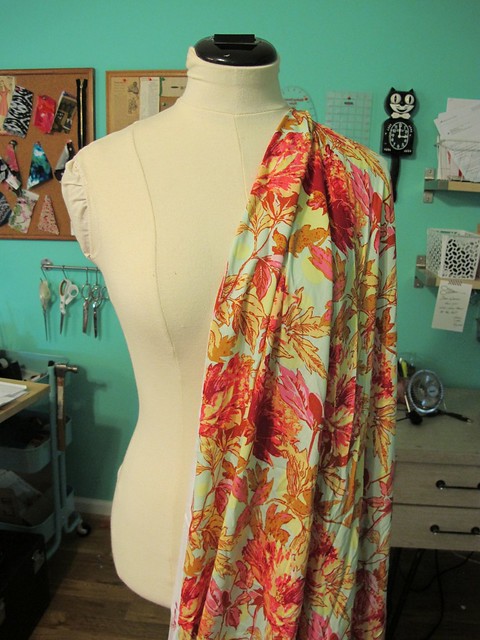
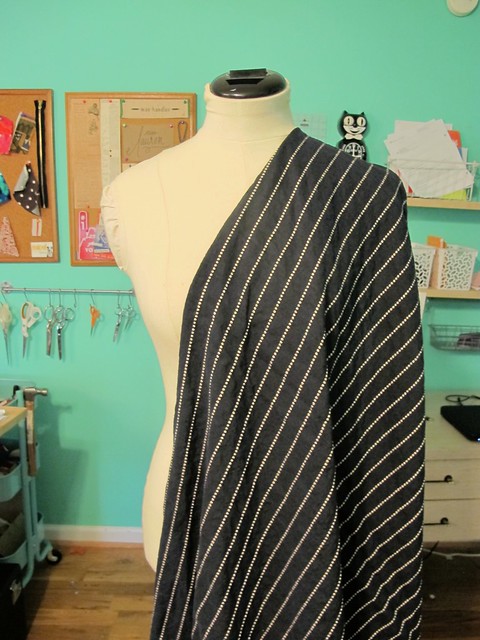
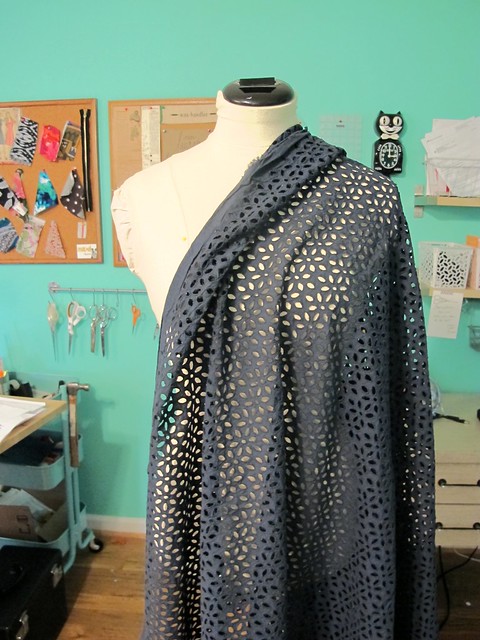
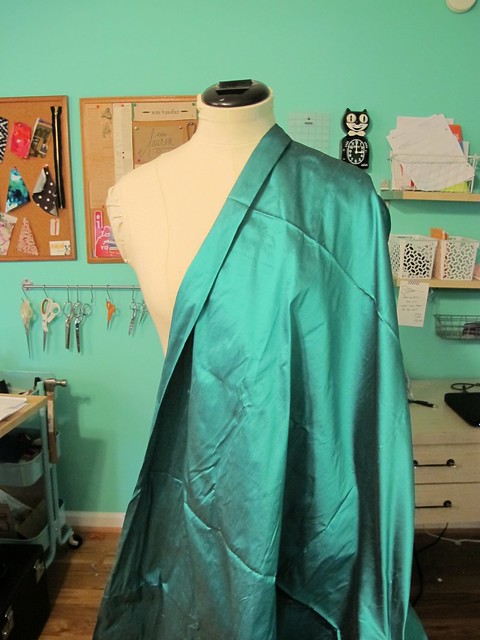
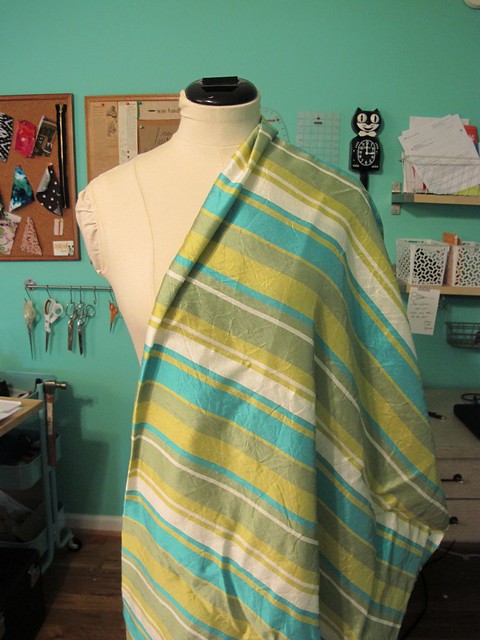
Oh, hey, I guess you want to see what I came home with, huh? 🙂 Here’s the fabric pile in all it’s glory –
I just unpacked all the fabric I bought in London and Paris. I guess I have a lot of prewashing to do now 😜 #lladybirdinlondon

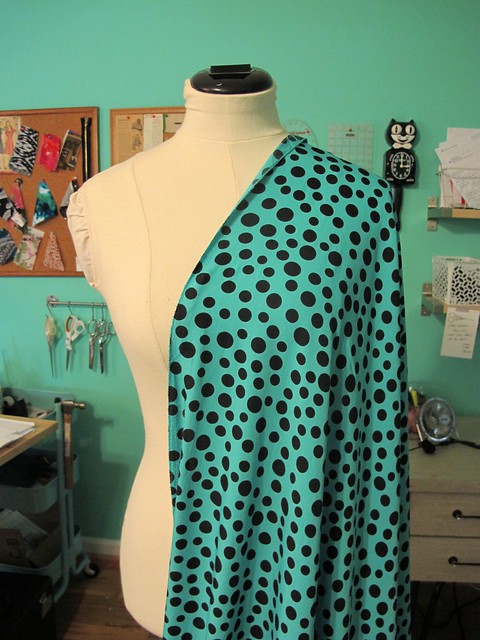
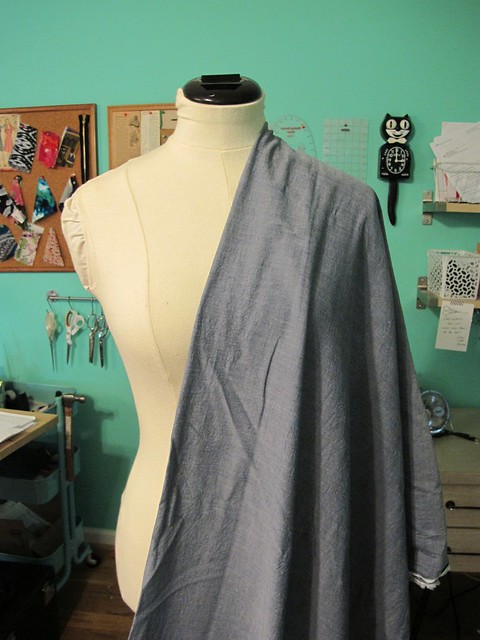
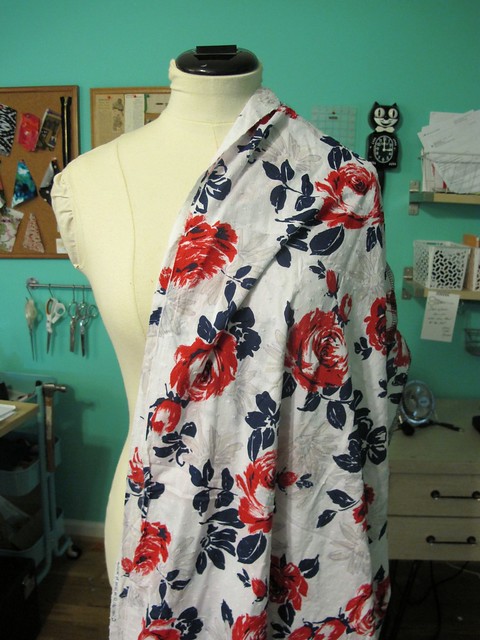
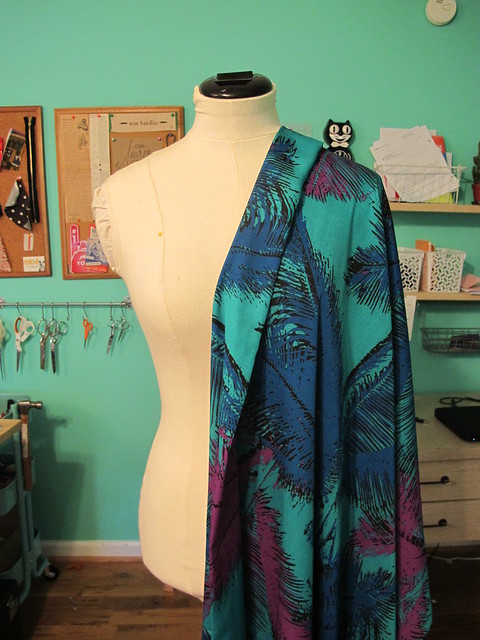
I was going to take individual pictures, but I’m tired and this post is long enough. Sooo, just a smattering of things! Just a few I want to point out exclusively – the pretty blue/purple floral-ish one in the very middle is my special piece from Anna Ka Bazaar, the red and gold geometic print is a beautiful boucle (with sparkly lurex!) from Malhia Kent, and the big peacock feathers at the bottom is my African wax print from Ridley Road Market in Dalston Mills. Oh, and the blobs at the bottom are laces and sheers for future bras! I also bought a piece of red and white striped knit from Cloth House, which somehow didn’t make it into this photo. Womp womp.

Also not pictured, but worth noting – I totally bought a mug from Sajou. I drink my coffee out of it every morning now and I just love it 🙂

Ok, I reckon this post is long enough, so time to wrap up! Big huge thanks to everyone who helped make this trip the wonderful adventure it turned out to be – those of you who made it out to the meet-ups, my class, for London and/or Paris hangs, or who just had suggestions for making the most of my trip. You are all awesome and I appreciate all of you and your input! 🙂 Big thanks to Tilly for letting me take over her studio as much as I did – and for putting up with me for multiple days (poor girl is likely sick of me at this point, ha!). Big thanks to Carmen for arranging the whole Paris meet-up and making it such a highlight of my trip (psst – want to see more photos? Here’s the Flickr Pool!). And biggest thanks to Clare, my love – who opened her home to me and initially stuck me with the I-Have-To-Go-To-London bug. I’m sad that Clare and I didn’t get to hang as much due to her pregnancy and work obligations, but even just sitting on the couch with tea and chatting at the end of the day was really really wonderful. Thank you so much ♥

Also, thank YOU for making it to the end of this post! Whew, that was a big one haha! Come over now for your complimentary Party Ring 😉

Completed: The Rigel Bomber Jacket

14 Nov

This jacket has been a LONG time in the making. Totally worth the wait, tho.

Rigel Bomber Jacket

My dream bomber jacket! ♥

I swear, ever since Katie released the Rigel Bomber jacket for Papercut Patterns, I have noticed this style popping up EVERYWHERE. Talk about being on point with style trends! I knew I wanted to make the jacket when I first saw the pattern last winter – it’s a great, casual jacket and I love the short length (sometimes my Minoru just feels a touch too long, depending on what I’m wearing with it – not to mention, the cotton/poly fabrics mean it’s not the best choice for super cold temperatures!). It’s totally different from any other pattern I own, so obviously I wanted to make it. Once I saw Clare’s Rigel bomber making it’s rounds – and then saw the dang thing in person during our trip to NYC earlier this year – it became Very Important that I have one in time for this current winter. Especially since I tried hers on and it looked ace on me. As you do.

Rigel Bomber Jacket

Since I was in bomber-mode for the duration of that particular shopping trip, I made it a point to source the notions I knew I’d have the hardest time finding – rib knit and a separating zip. In the mecca that is the Garment District of New York City, these things are relatively easy to find (well, at least compared to the Limited Fabric Options of Nashville, ha!). I found both of these things at Pacific Trimming – the rib knit came from the very back corner of the store, and the zipper is a Riri zipper! I chose the colors, specified the custom length according to my pattern, and paid something insane like $20 for it. I don’t actually remember how much the zipper cost, because I mostly blocked it out of my mind – but suffice to say, it cost significantly more than the $5 zips you can pick up just about anywhere.

Rigel Bomber Jacket
Rigel Bomber Jacket

I do want to talk about the Rigel a little more before I start going on a tangent about my notions, though. I sewed up the XXS – one, because that’s my Papercut size, and two, it’s the same size as Clare’s and I liked the way hers fit on me. I did not make any length or fitting adjustments to the pattern, just sewed it straight out of the envelope. The instructions on this pattern are great – you are guided through the steps of adding a single welt pocket, attaching the ribbing, and inserting the open-ended zip. The only part of the instructions that leaves a bit to be desired is the lack of lining – which most blog posts I’ve read have mentioned. My assumption here is that Katie wanted the pattern to be as quick and simple as possible, and adding a lining to this sort of jacket is either going to be complicated (at least to write out the instructions for) or involve a lot of hand-sewing. It’s not terribly hard to add a lining, but it does require some brain aerobics before you start sewing.

Rigel Bomber Jacket

Part of what took this jacket so long to incubate was that I couldn’t decide on a fabric! I bought my zipper and ribbing before anything else, so matching a wool fabric (yes, it had to be wool) to all that gold was a little tricky. Not to mention, my notions were a bit special – if not expensive – so I wanted to make something that I’d love and actually wear. I hemmed and hawed for MONTHS over what fabric I wanted to use… this double-faced black wool coating was my #1 contender. I actually got a swatch of it back in the spring… and it’s been pinned to my bulletin board ever since (sometimes I just make myself look at a fabric for a long time, and if I don’t get sick of it – it’s mine!). I finally bought it last month, which is actually REALLY lucky because it’s sold out now! I like how the embroidered floral design gives the fabric some interest and texture, while still keeping it relatively plain (so it doesn’t compete with my trims).

Rigel Bomber Jacket

I will mention that the fabric description is a bit off. I guess it doesn’t matter at this point, since the fabric is sold out – but it definitely feels more like a light to medium weight fabric, NOT a heavy coating. The wrong side is brushed with long fuzzy strands of fabric fiber, and this fabric SHEDS LIKE A BITCH. Even though my jacket is lined, I serged every single seam of the wool because I couldn’t otherwise control the shedding. I really don’t recommend trying this fabric if you can’t serge the raw edges – a plain straight stitch won’t prevent it from eventually disintegrating.

Also, on a bit of a bummer-town note – this fabric doesn’t really wear well. It’s already starting to pill and look kind of old 😦 So this jacket might not have a super long lifespan as it is. Good thing I can always salvage that ridiculously expensive zipper! :DDD

Rigel Bomber Jacket

I don’t know why I’m winking in this photo (just imagine me taking my pictures with a remote and tripod and things get even creepier with the winking ahaha)? Anyway, here’s the lining! I lined the entire jacket with gold china silk, which goes really nicely with my gold accents. I love the warm combination of silk+wool – it’s lightweight, and while it probably won’t work well in the Arctic, it’s fine for our mild winters (or a mild spring up north).

I will deviate for a second here to talk about the lining. As I mentioned, the instructions don’t tell you how to do this. Further, while there are lots of posts scattered around the internet on how to line the Rigel, none of them were exactly what I wanted (NO raw edges, no hand sewing). I wanted to try bagging the lining – which, spoiler alert, that shit totally worked! I used to do this all the time when I worked for Muna last year, but my memory was a little spotty, especially since we never used written instructions for anything (I like instructions when I’m sewing – even if it’s just a checklist – so I don’t forget to do something important!). I used Jen’s tutorial on bagging a jacket lining to jolt my memory, which was extremely helpful. Here are the steps I took to get my lining in that dang jacket:
1. First, I drafted some lining pieces – using the facings as a guide, I removed that amount from the jacket pieces (the front, the back, and the sleeves), and added 3/8″ seam allowances. I also added an ease pleat to the back piece, but I haven’t ripped open the basting yet because I found that I don’t need it. Someday, it will pop open and scare me, probably.
2. I constructed the entire jacket – up to the ribbing and zipper. The lining was completely assembled, with the facings attached.
3. I sewed the two jackets together at the neckline and zipper, as instructed by the pattern (for attaching the facing), and pressed and understitched.
4. I sewed the bottom of the zipper and facing, as instructed by the pattern (some of the lining may later need to be unpicked to get it to turn correctly, this is ok!)
5. I sewed the lining to the seam allowance of the ribbing at the bottom, right sides together.
6. I attached the lining to the sleeve hems at the ribbing, right sides together.
7. At this point, I had a giant Möbius tube of jacket+lining with everything attached and no openings anywhere. It was slightly horrifying – and exactly on track. This is when you rip open a section of the underarm lining that’s already been stitched, and pull the entire jacket through the hole.
8. Press everything, and then sew up the hole. I actually close up my hole from the inside by machine as much as I can, and then sew the remaining inch or so shut on the outside (I tried to take pictures to show how I do this, but it’s really hard to understand if you’re not actually seeing it in action. Needless to say, my closed-up hole is only about an inch long, instead of the 4″ tear I had to make to get the jacket pulled through it).
9. The little sections at the bottom where the facing meets the ribbing will need to be sewn shut by hand.

Rigel Bomber Jacket
Rigel Bomber Jacket

AND JUST LIKE THAT – A COMPLETELY BAGGED LINING WITH NO VISIBLE SEAMS! Woohooo!

Rigel Bomber Jacket

Ok, now we can talk about all the fun trimmings!

Rigel Bomber Jacket
Rigel Bomber Jacket

What I neglected to tell you guys about this ribbing is that is actually has sparkly gold stripes. It is amazing! Pacific Trimming sells these in 1 yard pieces – and I needed two pieces. They’re about $8 a piece, if I recall correctly (they won’t cut them down, at least, they wouldn’t when I was there!). Also, when I pressed them, they smelled like a fart (I actually wrote this in my sewing notebook, so it must be important and worth mentioning, I guess). Must be all the polyester?

The Riri zipper looks really nice with the sparkly gold, I think! I still haven’t decided if it was worth the obscene price I paid. On one hand, it was really cool to be able to pick the zipper based exactly on my specifications – color, length, everything. It does feel solid and it is really satisfying to zip up (Riri zippers are referred to as the ~Rolls Royce~ of zippers, I’m told). That being said – $20 for a zipper? Yeah. I dunno. It sure is pretty, though!

Have a photo dump:

Rigel Bomber Jacket
Rigel Bomber Jacket
Rigel Bomber Jacket
Rigel Bomber Jacket
Rigel Bomber Jacket
Rigel Bomber Jacket
Rigel Bomber Jacket

God, I’m sorry about that.

Rigel Bomber Jacket

Anyway, I LOVE my new jacket and I’m so glad I took my time with choosing the right fabric (as well as figuring out that lining!) because the end result was so worth the wait. I’ve been wearing this thing constantly since I finished it – just in time for the weather to get cold, it seems. I’d love to make a patterned version of this one – either with some floral wool (LIBERTY?!), or something polka dotted! Can’t have too many bombers amirite. I even have a couple more pieces of rib knit that I apparently bought during that shopping trip that I completely forgot about. They are black with white stripes. Thanks, past Lauren! ♥

Oh! And my pants are those Jamie Jeans I made a couple of months ago. Just mentioning it because I ended up taking in the inseam a little bit more after that last post, so you can see what they look like now. I think the fit is much better! I’ve found I can usually go about 3-4 wearings between washings on these, before the knees bag out enough to drive me crazy.

Lastly, I will leave you with this outtake. Not sure what I was doing there, but it made me laugh, so hopefully it’ll make you laugh too! 😀

Rigel Bomber JacketHave a great weekend, y’all!

Completed: Vogue 8664

27 Jun

Remember the Sew Bossy Initiative? This is a fun little sewing challenge where you get paired up with a fellow blogger and basically tell them what to sew next – complete with you sending them the fabric, pattern, and anything needed to finish the garment in question. Your sewing buddy will do the same for you.

Vogue 8664 - Birthday Dress

Well, I got paired up with Rachel Pinheiro, and while we were fairly quick about getting the patterns and fabric to each other, it’s taken an entire year for me to actually sew my dress (and poor Rachel, I sent her a pattern that ended up being a no-go, so she’s still trying to decide what to sub in!). On top of that, I’ve actually had this dress completed for over a month! Oops! Well, better late than never, I guess 🙂

Vogue 8664 - Birthday Dress

Rachel sent me Vogue 8664 as my pattern for the Sew Bossy. While it’s a gorgeous design, part of the reason why I dragged my feet on sewing it up is because I simply did not like the skirt included. Don’t get me wrong – it’s a pretty, fitted skirt. But I don’t do fitted skirts, they just don’t work with my lifestyle these days (and by “lifestyle,” I mean, I sit on the floor a lot. Ha!). So I sat and considered it, and debated if changing up the skirt would ruin the whole fun of Sew Bossy (since I’m not really letting Rachel boss me at this point). Fortunately (well, unfortunately for Rachel hahah booo), Rachel ended up scrapping the pattern *I* sent her, so we decided it would be fine for me to change out the skirt to make something more suitable for my daily life. As fun at this challenge is – it’s not very fun if I end up with a garment I’m not actually ever going to wear!

Vogue 8664 - Birthday Dress
This actually ended up being my birthday dress- which I decided to do about 10 days before I needed it. I don’t even go out for my birthday these days, but man, sometimes it’s nice to just wear a new dress that makes you feel good, you know? And I feel pretty good in this dress!

Vogue 8664 - Birthday Dress
Anyway – back to the Vogue pattern! I cut the size 6, with the B cup pieces (I don’t wear anywhere near a B cup, fyi, that’s just the pattern piece that had the closest finished measurement to my body), and made a muslin of the bodice to check the fit. My fabric is a cotton sateen with a heavy stretch – Rachel bought it in Brazil, isn’t it amaaaazing?! – so I used some old stashed stretch fabric for my muslin. Out of the envelope, everything fit mostly well, except that I did take about 1″ out of the center back (not an uncommon adjustment for me). I debated on whether or not to sew the sleeves, but I’m glad I did in the end, because they’re pretty awesome! They get their shape from two giant darts at the sleeve head; the body of this particular fabric I used also helps 🙂

Vogue 8664 - Birthday Dress
The other major change I made to the pattern was to swap out the skirt for an A-line. I used the skirt from my Belladone pattern – pockets and all – and I think they matched up pretty well. Plus, you know, it’s wearable. For me, anyway 🙂

Vogue 8664 - Birthday Dress
Construction-wise, I made a few changes. The main one was that I did not line the bodice as called for. Rachel sent me enough fabric so I could self-line, but I used up pretty much all that while cutting the skirt and pockets. Anyway, I don’t think I’d like this fabric as self-lining – it’s pretty thick and heavy for a summer dress, two layers would be crazy! Instead, I drafted a facing for the neckline (this was as easy as tracing the edge of the neckline and extending it to 1″ wide for a narrow facing piece, then adding seam allowances). I debated with what to do about the arm holes, since the sleeve doesn’t go all the way around (and thus, this is where that lining really helps). In the end, I bound the arm hole edges with flat bias facing, which covers all the raw edges and also makes the insides look pretty 🙂 You do see topstitching from the outside, but it’s not very noticeable with this fabric.

Vogue 8664 - Birthday Dress
I also changed the midriff to be a contrasting solid color. I actually cut the dress to be all the same self-fabric, but after I sewed everything together… it just looked like a hot mess! Too much pattern being broken up in too many places. Yuck! So I painstakingly ripped out the midriff (which had already been topstiched at this point, ugh) and replaced it with a solid navy sateen that I had in my stash. You probably recognize this fabric because I’ve used it multiple times on multiple garments (including my lace trench, these Maritime shorts and this Belladone. And I STILL have more of this fabric! Man, that shit is awesome).

Vogue 8664 - Birthday Dress
So here’s the major glaring flaw with this dress – the damn waistband seam allowances show from the outside! This happened for a multitude of reasons – mainly, I didn’t interface the outside waistband (i.e., the navy solid). I had already interfaced the feathered waistband, which after I ripped out I put on the inside of the garment, and I didn’t want to re-interface because, fuck you, that shit is expensive. Don’t look at me like that. It might have been ok, except I also didn’t trim my seam allowances, or even attempt to grade them. Why? I don’t know. I have no idea. Anyway, they’re totally visible from the outside and it doesn’t look the greatest, but, whatever. I’m not ripping that shit out again, I can live with it.

Vogue 8664 - Birthday Dress
Speaking of interfacing, I have discovered a most brilliant solution for interfacing fabric with a high stretch content – stretch interfacing! Whowouldathunk?! I used this tricoat interfacing from Fashion Sewing Supply (the only place I buy interfacing from; srsly, it’s all amazing). It gives a bit of interfaced support to your fabric without actually compromising the stretch! Which means my waistband still stretches, despite being interfaced. It’s fucking awesome. I used this stuff on the neckline facing as well.

Vogue 8664 - Birthday Dress
As I mentioned before, I made my neckline facing 1″ wide. Generally, facings are closer to 2″-3″ wide. Why so narrow? I wanted to topstitch it down (partially to keep it on the inside of the garment, and partially because of all the topstitching already on the dress), and didn’t need a giant flap of interfacing beyond my topstitching. Even though I topstitched the facing, I also understitched it first – it helps everything roll to the inside and press flat before that final line of stitching.

Vogue 8664 - Birthday Dress
Also topstitched: the lapped zipper, both edges of the midriff band, around the arms (where I sewed down the bias facing), the pocket edges, and the sleeve and skirt hems.

Vogue 8664 - Birthday Dress
I just love the way the neckline facing looks! It’s so dainty!

Vogue 8664 - Birthday Dress
Here is the arm hole facing. It is sewn in the exact same way as I sew bias facing for a sleeveless dress.

Vogue 8664 - Birthday Dress
For garments with very visible seams that need to be matched up across a zipper, you can’t beat a lapped zipper. It makes things sooo much easier to match, as you can see it while you’re sewing (as opposed to an invisible zipper, which is sewn on the wrong side).

Vogue 8664 - Birthday Dress
And that’s it! A bossy birthday dress 🙂 I’m happy to report that I did finish this in time for my birthday – woohoo! Also, these are the last photos I have of my hair this color, fyi. I actually dyed it over the weekend (right after I took these pictures, of course, ugh), and now it’s purple! Stay tuned for that 😉

Consider this a Sew Bossy success! I can’t wait to see what Rachel dreams up for her fabric, because I know whatever she makes is going to be amazing (like everything else she makes, gah). Thanks to Heather Lou for dreaming up this fun challenge, and to Rachel for agreeing to pair up with me!

How bout you? Ever participate (or would you participate) in Sew Bossy? Does it give you a mini heart attack to imagine someone else telling you what to make? Spill!

OAL: Cutting and Marking Your Fabric

9 Jun

Hey guys! Today we are going to cut and mark our fabric for our dresses! Woohoo!

I’m going to go out on a limb here and say that most people don’t like this part of the sewing process. I get it – you’re ready to start sewing, but first you gotta futz with those tissue pattern pieces, cutting, and marking all the little dots and clipping all the little notches. Such a pain when you really just want to get to the fun part!

I personally don’t mind cutting – I actually find the process a little fun – I listen to dancey music and use the opportunity to get pumped about my project. CUTTING PARTY WOOHOO! While I do like to get everything with cutting done in one session (and marking, too, if I have the time), I do not try to rush the process. I’ve found that rushing just causes more harm than good – you get sloppy, you cut things inaccurately or off-grain. No good! Please don’t try to rush through this – take your time (trust me, y’all, we’ve got plenty of time here) and just try to enjoy the process. You might surprise yourself!

One thing I’ve found that I do mind, though, is taking photos while trying to cut – and I think it really shows in my pictures here, unfortunately. If anything about this post is unclear, please do not hesitate to post your question in the comments and I will get back to you as soon as I can!

OAL - Cutting and Marking Fabric
If you haven’t already done so, check your pattern instructions to see what pieces you cut and how many of each. I always like to look at this first, just to be sure I don’t end up with some unfortunate surprise (such as realizing too late that a certain piece needed to be cut 4 times, and I’ve already cut up all my fabric. WHOOPS!).

Make sure your fabric is prewashed and that you have pressed all the wrinkles out. You may also press your pattern pieces (dry iron, no heat) if you prefer, but I’ve found these thin tissue patterns can usually be smoothed out enough to skip the ironing. Up to you!

OAL - Cutting and Marking Fabric
Now for the fabric! The first thing you want to do is make sure that your cut edges are nice and straight. This will help you keep the folded fabric straight, and thus, cut the pattern pieces on grain. See how the cut edge of my fabric is wavy? We are going to fix that.

OAL - Cutting and Marking Fabric
Cut a little snip about 1″ below the cut edge of your fabric (or 1″ lower than the lowest dip, if it’s super wavy like mine)

OAL - Cutting and Marking Fabric
And then just rip straight across the edge. Ah! Doesn’t that feel nice? Totally my favorite part of cutting HAHA!

OAL - Cutting and Marking Fabric
Now that the edges are straight, you may fold the fabric lengthwise, wrong sides together*, and lay it on your cutting table. At this point, I also like to pin my cut edges together, as well as the selvedges – it keeps the fabric from shifting around, which is especially helpful if you are cutting something that tends to slip around. Make sure the fabric is completely smooth all the way to the fold (no wrinkles or anything); else you may end up cutting an inaccurate piece. If your fabric is twisting, try shifting the cut edges until everything lies smooth.

*You may also fold your fabric right sides together, if you prefer. My stance on this is that the fabric is easier to mark on the wrong side if it is folded with wrong sides together (as you can just open the two pieces and mark them at the same time; it’s also easier to use wax paper+tracing wheel this way), so this is the way I fold/cut. Also, if you fold with the right sides out, you get to stare at your pretty fabric while you cut it. Bonus! 🙂

OAL - Cutting and Marking Fabric
Once your fabric is folded and completely flat, you can start pinning down the pieces! I like to start with the pieces that need to go on the fold – as you can see in my poorly-cropped picture, this is indicated by an arrow (it’s also in the cutting instructions of the pattern, fyi). I do this because otherwise I’ll forget! Not good! For pieces on the fold, butt your pattern piece right up to the fold of the fabric and pin all the way around.

OAL - Cutting and Marking Fabric
A note on pinning – how you choose to pin your pieces is entirely up to you. Some people completely omit pins and just use pattern weights and trace the pieces, or a rotary cutter. That is perfectly fine if that’s your jam. I personally like pins and scissors, so this is what I will be demonstrating for this sew-along. I like to pin parallel and about 1/4″ away from the pattern piece. I also use a lot of pins – the more the merrier! – as I find it helps me cut more accurately. Don’t be afraid to go overboard on the pins, is what I’m saying here.

OAL - Cutting and Marking Fabric
One other thing I’d like to bring up is the topic of grain – and making sure that your pieces are all cut on grain. What is grain? Grain is the direction of the threads that make up a woven fabric. Lengthwise runs parallel to the selvedge, crosswise is perpendicular, and bias runs at a 45 degree angle. Grain is EXTREMELY important when cutting your fabric – if you cut things off grain, you run the risk of your dress doing some funny things. Ever worn a pair of jeans where the seam kept trying to twist around your leg? That’s what happens when something is cut off grain. We want to be sure that everything is cut accurately on grain – i.e., the lengthwise grain goes straight up and down your body. This is super super simple to do, but you’d be surprised how many people don’t bother with it (for more information on grain, check out this Threads article)

In the picture above, I’m pointing at the grainline on the pattern piece. This line needs to run parallel to the selvedge of your fabric to ensure that your fabric is cut on grain.

OAL - Cutting and Marking Fabric
All you need to do is make sure that the grainline printed on your pattern piece is the same distance from the selvedge all the way across. I like to use a clear ruler for this – you can see straight through it, which makes it easy to adjust the pattern piece until it’s straight. I start in the middle, check the distance the grainline is from the selvedge (in this case, it’s 4.5″), stick a pin to hold the pattern piece in place, and then check that the distance at each end of the grainline is also 4.5″ (and stick another pin in there to keep the piece from shifting). Once I’m sure the entire grainline on that one pattern piece is completely straight and parallel to the selvedge, then do I finish pinning and cut.

It sounds like a lot of extra work, but it’s really not – and you’ll absolutely see the results (or, rather, won’t – because your garment won’t be hanging funny!). This also means that you can plan your cutting layout howeverrrr you want – as long as you keep the pieces on grain. The pattern instructions do include a suggested cutting layout – and if this is your first time making a pattern, I definitely suggest that you follow it, just to keep things simple – but it’s not always the most economical way to cut your fabric. As long as you’re keeping all your pieces on grain, feel free to see if you can find a better way to get the most out of your fabric 🙂

Ok! So that being said – time to finish pinning and cutting! Go ahead and pin the rest of your pieces down to the fabric (you may follow the cutting layout in the pattern if you need some guidance), and make sure you have everything pinned before you start cutting!

When you cut, keep the fabric completely flat on the table (or floor, but it’s better for your back/sanity if you can at least find a temporary table space to cut on!) with your shears at a 90 degree angle. Slice completely through the entire length of the shears – no timid little baby cuts! – and use your opposite hand to hold the fabric down so it stays flat on the table. Try to be as accurate as possible with your cutting, and take your time going around curves and sharp points.

OAL - Cutting and Marking Fabric
Once you’ve cut aaaall your pattern pieces (yes, all of them! Remember, there are 4 pocket pieces to cut!), time to mark! For notches (the little triangles printed sporatically on the edges of the pattern pieces), I just take a tiny snip all the way to the point of the notch. I know some people cut the notch outward, like a little triangle. That’s fine if you want to do that, but I find it too time-consuming and less accurate than just a simple snip.

OAL - Cutting and Marking Fabric
For marking dots – such as where the sleeve is attached to the bodice – I like to stick a pin in the pattern piece, directly through the center of the dot. Gently pull the two pieces of fabric apart, and mark where the pin enters each piece of fabric.

For marking dots and the stitching lines on the bodice (the notched version), you can use wax paper and a tracing wheel. I didn’t take any photos of this, but it’s pretty self-explanatory. Lay the paper with the wax side facing down on the wrong side of the fabric, and just trace over the lines of the dart with the tracing wheel. Easy!

Ok, that’s all for today! If you’ve still got a little bit of sewing stamina left, go ahead and cut out your interfacing pieces as well. We start sewing next week! Yay!

OAL: Choosing Your Fabric and Size

2 Jun

Time to kick the sewing portion of this OAL! Wheee!!

Today, we will be going over fabric options and choosing your size. Just a head’s up – I know a lot of y’all already have your material picked out, and may have even started sewing. That’s great! You are welcome to forge ahead if you so choose – my posts will be aimed at beginners, so don’t feel like you have to stick with the slow pace if it ain’t your thang. Those of you who have not chosen your fabric and/or plan to make a muslin, just be aware that you have a couple weeks until we actually start sewing. These posts will, of course, stay up long after the sewalong is over, so they will always be available for reference if ya need it 🙂

Ok, that’s out of the way – let’s talk fabric! A few of you mentioned that you’d like a little guidance on fabric, and I aim to please, so I’ve pulled a few pieces out of my stash to show you. Just a side note – the majority of these pieces are from Mood Fabrics. Not because they are sponsoring this OAL or anything – I just have a LOT of fabric from Mood. That’s all! I’ve linked to everything that you can get from the website, so you can buy it yourself if you so please. No sneaky affiliate links are hidden in this post, so feel free to click away 🙂

When it comes to choosing fabric, the first thing you want to decide is what you want your overall dress silhouette to be. The fabric you choose will ultimately determine if your dress is drapey, or has a skirt that likes to stand out on it’s own. Here’s an example – this is the same pattern I will be making for the sewalong (Simplicity 1803), sewn up in two completely different types of fabric:

Simplicity 1803
Version 1 was sewn up in a thick cotton eyelet that had a lot of body. There is a nice structure to the bodice, and look at the skirt – see how the pleats stand on their own? The thickness of the fabric help give the skirt some structure.

Simplicity 1803, v2
Version 2 was sewn in a drapey rayon fabric, which means the resulting dress is much softer. See how the pleats in the skirt look more like soft, draped folds? This fabric does not have a lot of body, so it hangs in soft drapes (I just think that’s so pretty!). The bodice does not have a lot of structure – the notch in the neckline has folded over itself over time (not really shown in this picture, but if you look at more recent photos of me wearing this dress you will see what I mean).

Still confused about how body and drape can affect how a pattern looks? Check out these two versions of my Tania culottes – version 1 is sewn in a lightweight drapey cotton, and version 2 is made in a nice linen/silk suiting with a lot of body. Both of those are made the in EXACT same size from the EXACT same pattern, but they are very different!

Hopefully those visuals will give you a good idea of how drape can affect the finished dress! How you want your dress to look is totally a matter of personal preference – however, I will point out that if you are concerned about adding bulk to your waist, you will probably want to stick with a drapey fabric. Anything with body will stand out at the gathers or pleats (however you decide to do the skirt), and it will make your waist look bigger. Just an fyi! I personally love the drapier stuff, but again, it’s totally up to you. If you’re having trouble envisioning how a particular fabric will drape and whether or not it has body, just hang some folds over your arm (or a chair, or whatever) and that should give you a good idea of how it’ll hang off your body. In the following pictures, I’ve hung my fabrics off my dressform so you can see what I’m talking about.

Once you’ve decided if you want a structured or drapey dress, now comes the time to pick fabric! The pattern gives you lots of options for various fabrics – and this is a pretty flexible style, so *most* anything will work as long as it’s not a knit.

OAL- Fabrics
If you’re a n00b to dressmaking and want something easy to work with, a lightweight cotton is my #1 suggestion! This is the fabric I will be using to make my dress for the OAL; it’s a lightweight cotton that I picked up at Mood while I was in NYC earlier this year. Cottons are great because they are easy to cut, press, and sew, and they feel wonderful to wear in the summer. Plus, they usually come in cool prints and colors! Other types of cottons to look for: cotton lawn, cotton bastiste, cotton voile, cotton shirting.

OAL- Fabrics
Here is a gorgeous cotton/silk blend that I just LOVE. Isn’t it beautiful? The addition of silk makes this a very lightweight, very drapey fabric – it’s practically tissue-weight. This fabric is also on the edge of being sheer, so an underlining is recommended.

OAL- Fabrics
Another good choice for this dress (assuming you want drapey) is rayon! This gorgeous rayon challis was sent to me from Grey’s Fabric!

A word on rayon: Rayon is amazingggg to wear, one of my favorite fibers. It’s also a big giant pain to sew, because it’s very shifty. I would not recommend this fabric if you are brand-new to sewing, but do give it a thought if you’re up for a challenge! It is absolutely worth the extra effort, I promise.

OAL- Fabrics
Here’s another drapey challis that looks and hangs similar to the rayon, except it’s polyester. Poly is a nice cheap alternative to rayon, although be warned that it is a little more difficult to press due to the nature of the fibers. This fabric is from Metro Textiles in NYC.

OAL- Fabrics
Another lovely choice is a lightweight chambray! This one is from my man Sam at Chic Fabrics in NY.

OAL- Fabrics
Here’s a lightweight cotton dotted swiss that has a little bit of body – see how it stands away from the form? This is another fabric that would benefit from an underlining as it’s a bit sheer. Also, I’m just now remembering how pretty this fabric is (from Mood in NYC) and why the FUCK haven’t I sewn anything out of it yet??

OAL - Fabric
Ooh oooh I LOVE this fabric!! This is a mediumweight silk crepe, also from Mood NYC. Silk crepe is great because the “grabby” texture makes it easier to sew than most silks, and it has a lovely drape and very saturated colors.

OAL- Fabrics
The last of my drapey options – cotton gauze. This stuff very lightweight – it’s semi-sheer and almost floaty – but it does have a little bit of body (compare it to the cotton/silk near the top). This fabric is *also* from Mood NYC. Haha that place is awesome.

Moving onto the more bodylicious of the fabric options…

OAL- Fabrics
Linen is, of course, always a good choice! This is a medium weight linen. There’s a fair amount of body in the fabric – which will show in the gathers – but it has a nice drape that results in soft folds.

OAL- Fabrics
You could always go with my ol’ TNT, eyelet 🙂 I think eyelet (or any lace in general) is a beautiful option for this pattern. Just keep in mind that you will need to underline the dress so it’s not see-through. This fabric is from Muna’s, but I’ve seen similar ones at different retailers.

OAL- Fabrics
The pattern suggests silk Shantung as a fabric option, so here’s what that looks like! Notice how the fabric practically stands up on it’s own – silk Shantung (and dupioni, for that matter) has a very crisp drape before it’s washed.

OAL- Fabrics
If you’ve ever been curious to know what silk Shantung looks like after it’s been washed, here ya go! This striped Shantung originally looked more like the silk above – very stiff with a definite sheen – but after a go in the washer and dryer, it’s softened up quite a bit and has a much more subtle luster. It definitely still has a good amount of body, but the drape is much softer now.

OAL- Fabrics
Hahaha how’s this for body? 😛 This is a polyester brocade, with lurex for sparkles. It’s probably not for the meek, sure, but I think it would look awesomeeee in this pattern!

OAL- Fabrics
Finally, here’s a stretch cotton sateen. I don’t want to say I don’t recommend this fabric- because, honestly, it would be fine for this pattern – but it wouldn’t be my first choice. I personally don’t care for the way stretch wovens hang- I think they always look a little stiff and awkward. If you have your heart set on a stretch woven, go on with your bad self, but I do suggest that you consider sizing down since the stretch factor will give you a bit more room. Fabric is from Mood NYC, btw!

Speaking of sizing, let’s talk about that now!

The back of the pattern has sections for body measurements and suggested sizes. Just ignore that. If you go by what the pattern tells you to do, you are gonna end up with some sad sack of a dress headed straight for frumpsville.

I always (always always always- regardless of indie designer or Big 4) base my pattern size off the finished measurements. Too often, patterns come with a lot of extra ease built in (ease= the difference between your actual measurements and the measurements of the garment in question), which usually ends up being too big for how I like to wear my clothes. I figured out a looong time ago that the finished measurements generally give you a better idea of fit, so that’s what I go by now.

For the sake of keeping things simple, I’m just showing the Simplicity pattern, but this works for pretty much any pattern. Every company has a different place they like to print the finished measurements- some do it on the pattern pieces, some do it on the envelope, some include it in the instructions, oh, and some don’t include it at all! – so you may have to hunt it down. For those companies who don’t include their finished measurements (also: Really??? No seriously, how hard is it to add a least add that information??), I’m afraid you’ll have to measure your pattern pieces and subtract the seam allowances. Sorry! Simplicity prints their finished measurements at key fitting points – the bust, waist, and hips.

OAL - Sizing
Take a look at your front bodice piece and you should see the measurements. This tells you what measurement the bust will be, assuming you made no modifications and kept the same seam allowance. Your ease preferences are completely up to you, but I personally like about 1/2″ of ease or less as I wear my clothes very fitted. If you don’t know how much ease you like, measure a dress you have that fits the way you like and that should give you an idea. A good rule of thumb is that you want to aim for 1/2″-2″ in the bodice, depending on how fitted you want the final dress to be. Anything more than 2″ runs the risk of looking too big.

OAL - Sizing
Here are the finished bust measurements. Fun fact: according to Simplicity’s measurements on the envelope, I should be sewing a size 10 as I exactly fit those body measurements. Looking at the finished measurements, I’m going to sew a 4, as 33.5″ is the perfect amount of ease for my 32.5″ bust. If I went by the envelope, my size 10 would have a finished measurement of 36.5″ – a whopping 4″ above my actual measurements. That’s pretty loose-fitting – too much for me! So I’m going with the 4. You may find that the size you cut is smaller than the size indicated on the envelope – or you may like the amount of ease, and want to stick with that. Either one is fine! The only thing that matters here is that you end up with a dress that fits the way YOU like.

OAL - Sizing
After you’ve decided what size to cut the bodice based on the finished measurements, find the waist measurements and proceed the same way. Again, I’m going with the 4 because I like very little ease at my waist- and that 10 would be much too big for me.

You may or may not be the same size throughout the pattern – perhaps you’re one size at the bust, and a different one at the waist. That’s fine! You can grade between sizes to get a custom fit – just mark the size you want at each point, and use a ruler to connect the lines at an angle. That’s it! If you find that you are between sizes, then I suggest going with the bigger size, as it is easier to take something in than let it out. Keep in mind that this pattern includes a 5/8″ seam allowance, so that does give you a little bit of room to play with.

A few more things to consider (sorry, I know this is long, but I swear I’m wrapping up!)
– Make sure to prewash your fabric! You absolutely don’t want it to shrink after you’ve made it into a dress (talk about a huge bummer!), so get that taken care of now. Prewashing means you just treat the fabric the same way you will launder the finished garment. I throw mine in the wash on cold (cottons, rayons, silks, polys – everything except wool gets a prewash) and hang it to dry if it’s sunny out (not because I’m opposed to the dryer – but because I’m opposed to ironing. All my handmades get hung to dry because I hate dealing with wrinkles!). It can be helpful to serge or zigzag the raw edges before washing, just so the fabric doesn’t fray.
– Does the fabric need an underlining? Does it feel nice against your body and is it opaque enough that you feel comfortable wearing it? I will not be covering underlining in this OAL, but you can reference my post on underlining here if you’d like more guidance (The dress I was making in that post is the same black eyelet one posted near the top, fyi 🙂 ).
– If your fabric is on the thicker side, consider using a lightweight fabric for the facings to reduce bulk. I usually go with cotton broadcloth for this purpose – it’s cheap, it’s stable, it’s lightweight, it does the job – but you can use anything you want.
– Planning on matching stripes or plaids? Make sure you buy enough fabric! An addition 1/2-1 yard should be fine (err on the side of more if you have any suspicion that you might need to recut – better to have too much than not enough!)
– You will also need interfacing and a zipper to complete the pattern. For interfacing, I recommend this lightweight fusible from Fashion Sewing Supply – it’s the best! Really! You can use whatever interfacing you want, just make sure it is the right weight for your fabric. *Most* fabrics are ok with lighweight fusible, though. As far as zippers – I like standard lapped zippers for this pattern, but you can use an invisible if that’s what you prefer (unless your fabric is very thick; in that case, I recommend using a lapped zipper as an invisible won’t be strong enough). Either one works as long as it’s 16″!
– If you have not made this pattern before and you are still unsure of what size to choose, make a muslin! This can be as simple as just cutting the bodice pieces (don’t worry about the facings) out of old fabric and inserting a zipper so you can get an idea of the fit. In addition to helping you determine that the finished dress *will* fit you, it will also give you a little practice with sewing the bodice before you cut into your nice fabric. I will not be covering muslins in this sewalong, due to time, but I am happy to help you assess fit if you need some assistance. Just holler at me – leave a comment on this post, tag me on Instagram (please make sure your account is public, otherwise, I won’t be able to see your post!), or link me in the OAL Ravelry Thread – and I’ll get back to you as quickly as I can 🙂 You can try Twitter, but I’m only getting about 1/3 of my notifications when they happen so that’s probably not the best way to reach me, fyi.

Ok, that’s all for today! Sorry this post was so long! Next week, we will cover cutting your fabric and marking your pattern pieces.