Tag Archives: plaid

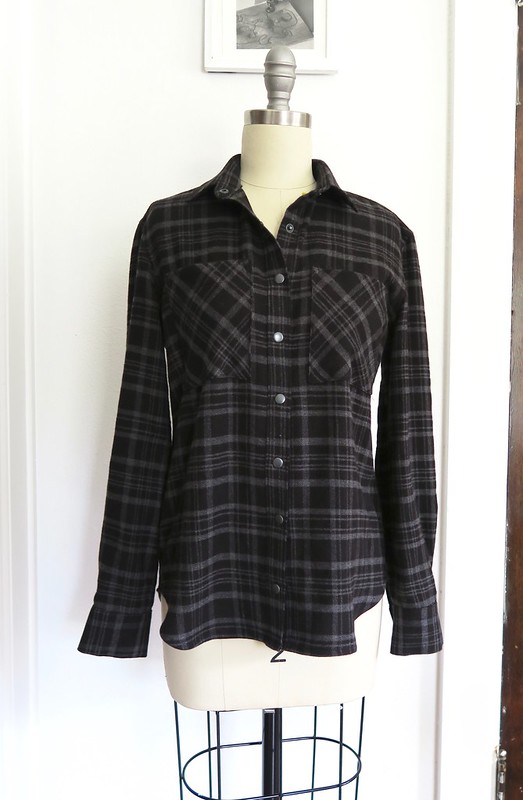
Completed: Black + Grey Flannel Archer

3 Nov

IT’S FLANNEL SEASON AGAIN, Y’ALL.

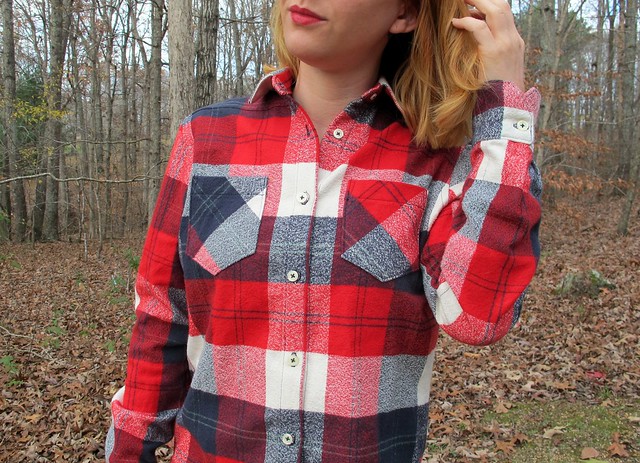
Plaid Cotton Flannel Archer

I don’t like the cold – like, at all – but I do love the clothes that are associated with this season. Layers, textured fabrics, WOOL, dark colors and jewel tones… gimmie all of it. Flannel button-ups are at the top of my list. I love that they can be worn solo and buttoned up, layered under a sweater, or layered over a tank or tshirt and left to swing free in the breeze. Snaps at the cuffs make it easy to roll the sleeves up, snaps at the button band make it possible to Hulk out at the end of the day (don’t pretend like you don’t do this with snap-up shirts, you liar).

Plaid Cotton Flannel Archer

I have a few handmade plaid flannel shirts, all of which I love to wear, so I put a short hold on adding to that stash. I finally allowed myself this year to make 2 more – both out of plaid cotton flannel from Mood Fabrics. This is the first of the two. I haven’t taken photos of the second one yet, but rest assured – it’s almost the exact same as this one, just a different colorway. Because if I am anything, I am consistent haha.

As I said, this is the Archer button up from Grainline Studio. I’ve made this shirt a lot, so there’s not a lot to elaborate on here, just a few small changes. I sewed view A with the angled cuffs, swapped out the included placket for a tower placket (I use the placket from the Negroni pattern, but this placket download from Threads is basically the same thing).

Sizing-wise, I cut a size 0 (which is the size I pretty much always sew with Grainline). One thing I did change with this pattern was to increase the seam allowances at the side and sleeve seams to 5/8″ – the included seam allowances are 1/2″, and I actually sew them at 5/8″ since I like to flat-fell those seams. I’ve noticed that my shirts are pulling ever-so-slightly at the bust now (told ya I’ve gained some weight. And also an entire cup size, ughhhhh), so I added in that extra 1/8″ and the fit is much better now!

Plaid Cotton Flannel Archer

Plaid Cotton Flannel Archer

Plaid Cotton Flannel Archer

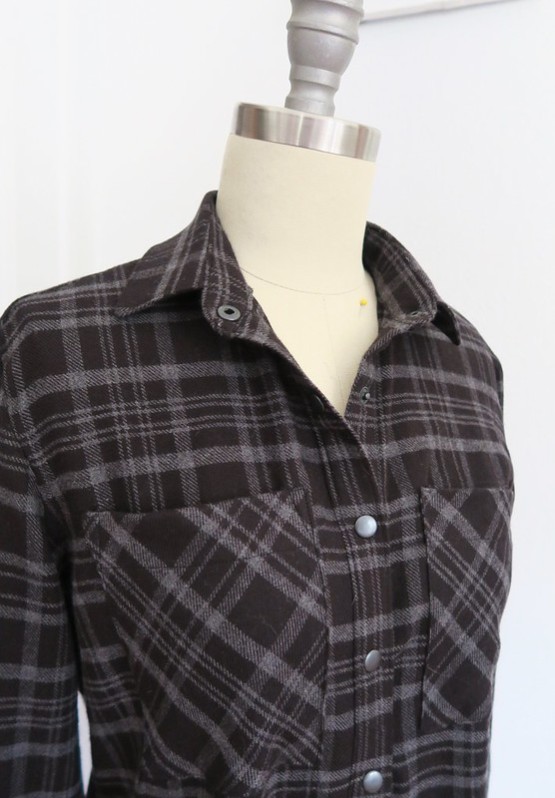
I cut my fabric on the single layer to get the plaid all matched up (see here for my plaid-matching tips!), and cut the outer yoke and pockets on the bias. I originally had the pockets cut to match the plaid at the front, but they matched so well they basically disappeared, and I wasn’t crazy about that look. So I re-cut them and I think they look much better!

As I mentioned, all seams are flat-felled so there is a nice clean finish on the inside. I used a super lightweight interfacing so that everything would stay nice and soft – I didn’t want a stiff button placket in contrast to the otherwise floppy fabric. Everything is topstitched in black, and I used black snaps for closures.

My cotton flannel was found at the Mood Fabrics store in NYC, back in August. I had a hankering for a new flannel, and I wanted one that was soft and lightweight, like it had already been worn to death. I found this and another similar flannel in a different colorway, both of which work perfectly with the color palette that my closet has ended up morphing into. Since flannel tends to shrink up quite a bit, I washed and dried my fabric three times before cutting into it. I kept the sleeves slightly on the long side, again, in case they decide to shrink up (my first flannel shirt has quite short sleeves now!).

Plaid Cotton Flannel Archer

Plaid Cotton Flannel Archer

Plaid Cotton Flannel Archer

Plaid Cotton Flannel Archer

Plaid Cotton Flannel Archer

Plaid Cotton Flannel Archer

I think that’s all I can say about this make! I’ve already worn it loads and I look forward to some hardcore layering here in the next few months 😀

A couple other things of note:
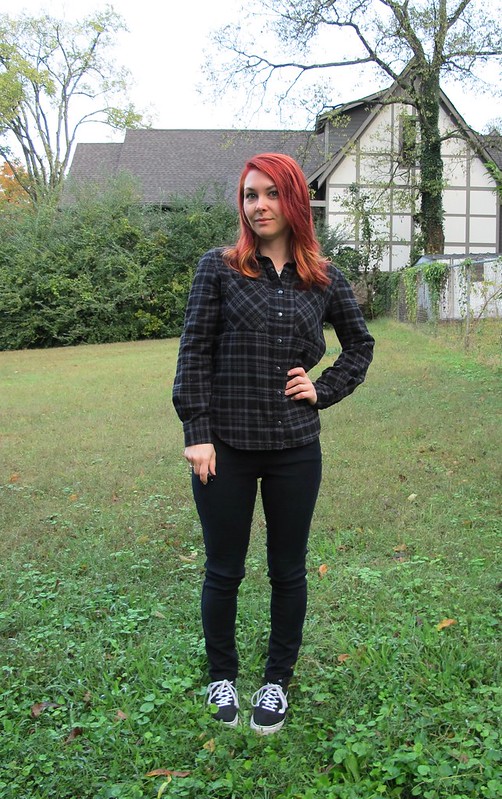
1. Yes, I made my jeans! They are Gingers that I made with veeeeery stretchy twill fabric (like, they are almost jeggings haha I love them). Just some basic black pants that don’t necessarily warrant a whole post. However, here’s a shot of the butt (and my new belt) (and this shirt, too, apparently lol)
2. Yes, that’s a new hair color! After a REALLY long time (for me anyway haha) with the same color, I decided I was ready for a change! I love the new color so much!

Plaid Cotton Flannel Archer

** Note: The fabrics used in this post were provided by Mood Fabrics, in exchange for participation in the Mood Sewing Network.

Completed: The Archer Popover

29 Dec

Oooh, one last make for this year!!!

Gingham Archer Popover

I made this about 4 months ago, but it was a sample for Craft South so I’m just now getting possession of it to actually wear! I love making samples for the shop – you get access to the pattern + materials for free, and are allowed to sew during downtime at the store – but the trade-off is that you have to leave it at the shop for at least a couple of months. Which makes sense – it is a sample, after all, haha. But it can be frustrating when you have to wait to be able to wear it!

For this top, I used my personal Archer pattern (which we do sell in the shop, but I didn’t want to rip one open when I had a perfectly usable pattern at home), and I downloaded the popover variation. The fabric is Cotton + Steel Checkers, in the 1″ black and white. It’s a nice woven cotton that feels similar to a yarn-dyed cotton – it hangs (and feels!) nicer than a quilting cotton, but it does have a dense weave that still makes it have quite a bit of body. The checkers are woven, not printed, so the design is the same on both sides of the fabric. I did take this fabric home and prewash it before actually sewing the sample – I wanted to be sure it got its shrinking out of the way before I cut it up. Actually, I also cut it while I was at home, and fused my interfacing as well. Matching plaids takes some focus and concentration, and there are a lot of pieces to contend with on this pattern. I didn’t want to have to try to juggle cutting/matching while also dealing with customers as they come in and out of the shop, so it made more sense to tackle that part of the project at home away from distractions. But all the actual sewing did happen while I was at the shop!

Gingham Archer Popover

Gingham Archer Popover

I’ve made lots of Archers in my time, so there’s not much to say that I haven’t already said. I made a size 0, and followed the instructions as they are written. This particular version is a bit different in that the button placket doesn’t extend all the way to the bottom of the shirt – hence, that it’s a popover, not a button up. The variation pack includes a new shirt front, a new front placket, and a different sleeve placket, as well as the instructions you need to actually sew them in. It’s been a few months since I made this top, so my memory is a little fuzzy, but I recall the instructions being easy enough to follow. I do remember that I did not like the instructions or pattern pieces for the tower placket on the sleeve – I found that whole process unnecessarily fiddly, although it did turn out nice in the end. Personally, my favorite way to sew a tower placket is by way of the Colette Negroni, it is very straightforward and simple, with a really nice finished result.

Other changes I made to the pattern was to include tabs for rolling up the sleeves (I swiped the pattern piece from my copy of B5526) and different shaped pockets (pattern piece swiped from the Negroni). I cut the gingham on the straight grain as directed, except for the outer yoke and pockets, which were cut on the bias. The inner yoke is also cut on the straight grain, to give the bias side some support. I didn’t get any photos of me with the sleeves rolled down, but they are full-length.

Gingham Archer Popover

Gingham Archer Popover

There were 2 reasons why I wanted to make this particular shirt – one, I really liked that Cotton + Steel fabric and I wanted to sew something out of it; and two, I wanted an excuse to bust out some fancy machine embroidery. I love embroidered western shirts, hence the inspiration for this one. Because I work in a sewing machine shop and we have several models out on the floor to play around with, I went straight for the Rolls-Royce of the bunch and did all my embroidery (and sewing, for that matter!) on the Horizon Memory Craft 15000. Y’all, we sell this sewing machine for a little over $10,000 (yes, all those zeros are supposed to be there). It comes with a fucking IPAD. It’s a super badass machine that I’m going to confidently say will never ever be in my personal budget to own, but you bet your ass that I’m gonna take advantage of the fact that I can sew something on it right now. Ha! Honestly, it was actually a good thing for me to sew this project on that machine, because it gave me lots of time to play around with it, learn how to use the embroidery features, and get comfortable sewing on it. I can’t imagine anyone would ever want to buy a sewing machine from someone who doesn’t even know how to use the thing themselves, so it was beneficial for me to learn all that in shop downtime. Also, I have a new shirt from it. Yay!

Anyway, that particular sewing machine comes with a bunch of pre-loaded embroidery designs, plus you can download (or create) more designs and upload them straight to the machine (either via USB, or with that aforementioned iPad haha). I get too overwhelmed when presented with way too many options, so I kept it simple and stuck with what was available on the machine. This little floral design fit right in the back yoke, although the suggested colors were a little weird (those were easy enough to change, obviously). I made a few practice pieces to get a feel for the finished size and also how the embroidery goes on, then I embroidered the actual garment piece. To do this, I first cut my piece and fused a piece of interfacing to the back to stabilize it (this isn’t 100% necessary in all cases, but since that piece is on the bias, it was needed). I used my sample piece to determine where the machine would start the embroidery, and centered my pattern piece in the hoop with tear-away stabilizer. Then you just turn the machine one and let it go to town! I can’t remember how long the embroidery took – we turned the speed down and let it roll on in the background while we worked – but it wasn’t super long. The machine will stop when its time to change the colors, and thankfully its also smart enough to pick up where it left off if you run out of thread or have to stop the embroidery for any reason.

Gingham Archer Popover

Gingham Archer Popover

Other than that, sewing was pretty uneventful. I finished the rest of the shirt on the same machine, which let me play around with all the available feet and additional sewing settings. It was pretty fun! All the seams are flat-felled, so it looks just as good on the inside as it does on the outside.

Gingham Archer Popover

Gingham Archer Popover

Gingham Archer Popover

Gingham Archer Popover

Gingham Archer Popover

Gingham Archer Popover

Gingham Archer Popover

I think the shirt turned out really nice, however, I’m not super crazy about how much it stands away from my body. I normally like my Archers in a stiffer fabric, but all the others I’ve made button all the way to the bottom, so I can leave them open and wear them sort of like a little jacket.This particular style might do better in a drapier fabric. With that being said, I am hoping the fabric will soften with more washing, as cotton tends to do. We will see! In the meantime, it gave me an excuse to sew something on a machine that costs more than the first 3 cars I owned combined, so that’s saying something haha.

Gingham Archer Popover

Completed: Plaid Rosarí Skirt

29 Nov

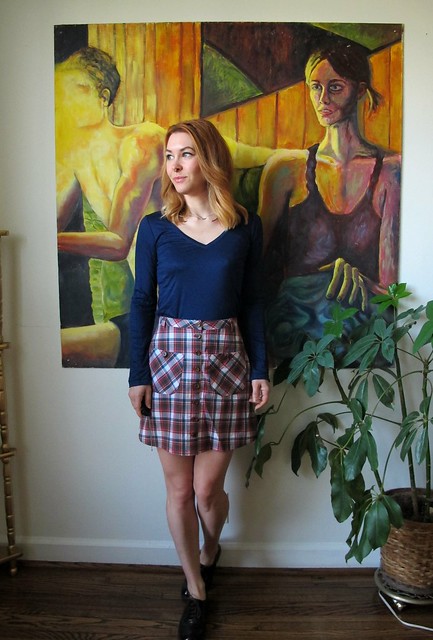
Y’all. I love this skirt pattern.

Plaid Rosari Skirt - front

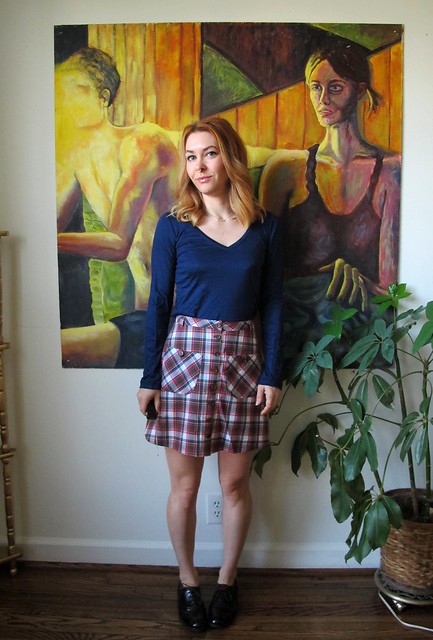
I’ve made it in corduroy, stretch twill, and Cone Mills denim, and I’ve had my sights on making a plaid version as well. Nothing like channeling your inner Cher Horwitz with a plaid mini amirite? This pattern is especially great for plaids as it doesn’t involve a lot of matching – just center front, center back, and the side seams – and you can add some ~visual interest~ by cutting the pockets and waistband on the bias.

If you didn’t already figure it out, this is the Rosarí Skirt from Pauline Alice Patterns. I made the mini version in a size 34, and added curved front pockets and a lining (this is not covered in the pattern, but it was pretty easy to figure out).

The plaid fabric is from Mood Fabrics. It is listed as a cotton flannel, but I think “flannel” is a bit of a stretch. It is VERY slightly flanneled if you look at it really really closely, I guess. Honestly, it just looks like a plaid shirting to me. It’s definitely cotton, just the flannel part isn’t exactly accurate. While I had visions of a cozy flannel skirt when I ordered the fabric, I think the smooth cotton works just fine. Probably makes it look a bit less like pajamas, ha. With that being said – if you are wanting to order any of this fabric, definitely get a swatch first!

The lining is Bemberg Rayon that I had in my stash (I’d say it was a miracle that I had a perfect color match, but ha ha have y’all seen my stash?), and the buttons are also old stash (I think they are originally from the flea market, though, probably).

Plaid Rosari Skirt - front

Plaid Rosari Skirt - side

Plaid Rosari Skirt - side

Plaid Rosari Skirt - back

Sewing this up was really easy and mostly uneventful, considering I’ve already made this pattern so many times. Like I said, I added a lining so that I could wear this with tights – the one thing that bums me out about my other Rosarí skirts is that they stick to tights and ride up (generally right in between my legs, which is sooo attractive I know) (I ended up making a teeny half-slip out of stretch silk charmeuse to wear with those – so problem solved! This is the tutorial I followed, FYI!). To add a lining, I cut the lining from the front and back pattern pieces, and sewed them together like a lining skirt. Then I attached them to inside along the top edge of the plaid pieces (also assembled together), and then treated everything as one piece. The lining is basically flat-lined to the outer fabric, except the side and back seams are enclosed. The front button band and hem are turned to the inside as per the pattern and topstitched down.

The only part that was eventful about this sewing – the fit! I was nearly finished – like, button holes sewn in and marking button placement nearly finished – and I tried the skirt on to mark those damn buttons. That’s when I realized that it was too tight – way too tight. I could get it to close, but it was less “cute plaid skirt” and more “sausage stuffed in a casing,” if you know what I mean. I couldn’t figure out why it was too small – did I gain weight? did I fuck up the seam allowances somewhere? – because, again, I’d made this skirt several times, all in the same size, and THOSE still fit just fine (I went in my closet and tried them all on to be sure haha). Then I threw it on the cutting table and plotted how I was going to fix this mess.

Well, first of all – I figured out why it was too small. See, all 3 previous versions were made using stretch fabric. Due to the addition of the lining, this skirt didn’t have any give to allow for a little more room (actually, the fabric itself wasn’t very stretchy either, so – that factors in as well). I probably also fucked up a seam allowance somewhere, idk.

To fix the skirt and actually make it wearable, I removed the waistband entirely. I let out the side seams until the skirt fit comfortably (I think I ended up with 3/8″ seam allowances – I don’t remember), in both the outer and the lining. Then I cut a new waistband and reattached everything. As you can see, it now fits. Success!

Here are a lot more photos. Sorry about that giant-ass wrinkle on the right, by the way.

Plaid Rosari Skirt - on dressform

Plaid Rosari Skirt - on dressform

Plaid Rosari Skirt - on dressform

Plaid Rosari Skirt - flat

Plaid Rosari Skirt - flat

Plaid Rosari Skirt - flat

Plaid Rosari Skirt - flat

I guess that’s it for this post! Moral of the story – even if you’ve made a pattern numerous times, always ALWAYS check that fit as you go! Your fabric can really change the fit of the garment. I generally do this when I sew, but the ONE time I did not, I ended up regretting it!

Plaid Rosari Skirt - front

Completed: Vintage Simplicity 1799

29 Feb

Raise your hands if you’re ready for spring!

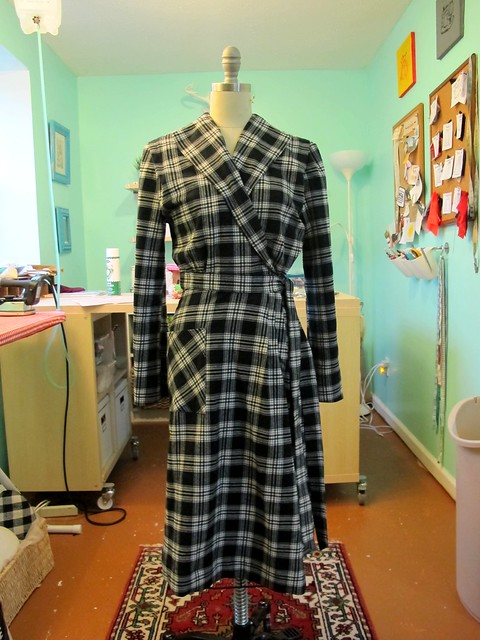
Simplicity 1799 robe

This is the time of year that I spend the majority of my day wrapped up in a robe, at least those days when I’m hanging around the house. My old fleece robe has truly served me well during these trying times, but its really starting to look its age (nearly a decade, I have recently realized!). I wanted to upgrade to something that was a little classier than the ugly fleece – something that wouldn’t make me feel quite so embarrassed to run to the mailbox in. I know, I live in the middle of nowhere – but the moment you run to the mailbox in your robe, that’s the moment someone you know decides to cruise on by.

Simplicity 1799 robe

Simplicity 1799 robe

Simplicity 1799 robe

Since more fleece was out of the question, I went with a soft cotton plaid flannel from Mood Fabrics. Mood has tons of great cotton flannels on their site, but I picked this particular one because it kind of matches my plaid flannel Carolyn pajamas. It’s a thinner plaid, with one brushed side (the other side is smooth, which I used on the inside of the robe). My only complaint is that it’s quite a bit off-grain – which, combined with using a pattern that was decidedly NOT plaid-matching-friendly, meant that I really fucked up the plaid matching on this garment. Or, rather, just threw my hands in the air and gave up about halfway through cutting. I did manage to get the center back and sleeves to have a nice continuous line, but those side seams are all kinds of wrecked. Whatever. Sometimes in sewing, we have to pick our battles. I’m not going to argue with a garment that will get the majority of it’s judgement from my cat.

Simplicity 1799 robe

Simplicity 1799 robe

The pattern I used is Simplicity 1799, a 1940s vintage pattern I’ve had my stash for quite some time. I don’t really sew much with vintage patterns these days – I find the styles to be a little too cutesy and/or dated for how I roll with my clothes lately – but I still collect and appreciate them. And sometimes, you need a little cutesy glamour to make your day prettier, especially when we’re talking about an otherwise ugly robe. Look at how classy those ladies are!

One thing I really love about vintage patterns are all the beautiful details that they include in the design. This pattern has tucks and gathers all over the places, elbow darts, and a boxy 1940s upper silhouette paired with strong shoulders. The instructions are pretty sparse as you can see, but anyone with common sewing sense can easily figure them out. I mostly went my own way – finished all the seams with my serger, left out the shoulder pads, and gave nice 2″ hems on the sleeves and bottom.

It’s really hard to see the pretty details in this, thanks to the plaid clusterfuck I’ve got going on, but I’ll try to show you some highlights:

Simplicity 1799 robe

Simplicity 1799 robe

Simplicity 1799 robe

Simplicity 1799 robe

Simplicity 1799 robe

Simplicity 1799 robe

Not much else to say about this one! Keepin’ it simple and cozy this month!

Simplicity 1799 robe

Note: This fabric was provided to me as part of my participation in the Mood Sewing Network. All declarations and opinions are my own!

Completed: The American Flannel Archer

28 Dec

Another Archer for my winter wardrobe! Yay!

Flannel Archer shirt

I actually finished this shirt nearly 2 months ago, but here I am just now getting around to posting it. I’d apologize for the delay, but honestly, I’m not sorry. It is what it is. On the flip side, I’ve been able to wear it plenty since completion, so I can actually comment on the fit from the perspective of wearing it all day. On the other hand, I’ve already made a bunch of Archers so it’s not like this is some kind of breaking news in my personal pattern collection.

Flannel Archer shirt

Flannel Archer shirt

Since I’ve made this pattern multiple times (see: one two three… well damn, there’s another one somewhere but I can’t find it oh well), I’ll spare you the nitty gritty. Like my previous versions, I cut a size 0, sewed the side seams at 5/8″ and flat-felled all the seams for a nice clean finish on the inside. The buttons are just standard shirting buttons that I had in my stash, and I matched the plaid everywhere except on the back yoke and the pockets, which are cut on the bias. Oh, and I used the pocket piece from my Negroni pattern. It looks like it belongs on a western shirt, and I like that.

Flannel Archer shirt

I really love this fabric, but this particular shirt almost didn’t happen. See, back when I bought flannel from fabric.com for my Carolyn Pajamas, I added a few yards of this Robert Kaufman Mammoth Plaid flannel to my cart so I’d qualify for free shipping (because I just love saving money when it means I have to spend more money first :P). A few days after I placed the order, I received an email from Fabric.com saying that they didn’t have the 3 yards I requested, but they did have 3 cuts (totaling around 1.5-2 yards) of a smaller amount if I wanted that. I didn’t think I’d be able to cut a shirt – let alone plaid-match – out of that small of an amount, so I picked a different plaid from the site and asked them to just change my order. When I received my order processing notification, it said I was only getting 1 yard of the new flannel (not 3, like I’d asked for in the email). I had to call the company and sort things out, and while all this was happening – they completely sold out of my back-up flannel! Argh!! Obviously, that shit wasn’t in the cards for me. I told them to cancel the second cut of flannel and just send me the original piece that I needed to finish my pajamas (which they thankfully still had! Pretty sure I bought the last of it). I was refunded for the 3 yards that were out of stock and I got free shipping too. Cool!

And then they ended up giving me the off-cuts anyway, for free. Just threw them in the package where I was surprised (but also happy because, YAY FREE FABRIC) to find them hanging out with my actual order. That’s cool, I ain’t complaining.

Flannel Archer shirt

Flannel Archer shirt

Since I had the fabric, I decided to try my original plan and make that Archer. Like I said, had 3 cuts – one was a full yard, one was a half yard, and the last was a bit less than half a yard (I’m sorry I don’t remember the exact amounts, but it was a while ago and my order history on the site doesn’t reflect the freeb). It took some ninja cutting skills to cut everything so that the plaid lines matched, but I did manage for the most part. Cutting everything on the single layer helped immensely. That being said, I was still a tiny bit short on one of the fronts, so I ended up having to piece it and there is an extra seam. It’s only a little noticeable, but, again, free flannel shirt. Not complaining.

Flannel Archer shirt

You can see the piecing here, sort of. The top seam that I’m pointing to is the actual shoulder seam. The bottom seam is the result of piecing. By carefully matching the plaids and flat-felling the seam, I was able to get it to blend pretty well.

Flannel Archer shirt

Another minor complaint is that I wasn’t able to properly match the sleeves. The lines of the plaid are uninterrupted, which is good, but the sleeves themselves are not sleeve twins. Again, fabric restrictions. Again, free flannel shirt. Not complaining.

Flannel Archer shirt

Here’s a crappy picture of the inside, in all it’s flat-felled glory. Yay!

Flannel Archer shirt

This flannel shirt is a bit different than my other ones, since the fabric is SO thick. It almost feels like I’m wearing a light jacket, as opposed to a shirt. It’s pretty awesome and super snuggly. The fit is a little more boxy, too, since this fabric doesn’t drape as well as a shirting plaid flannel. I’m pretty ok with that, though! It works well with leggings (shown here with navy Ooh La Leggings which btw FAVORITE comfy lounge legging pattern, hands down!), but also looks good with jeans. I almost wish I’d put in pearl snaps instead of regular buttons, because I really like Hulking out of my clothes, but I think the fabric is just too thick for pearl snaps. But at least I resemble an American Flag! Can’t be mad about that, not one bit.

Oh, right, and I have some winners from the Shutters & Shuttles giveaway a couple of weeks ago! First, thanks for all your awesome comments on that post – Allison and I both really enjoyed reading through them and see what you’d do with the fabric 😀 (even if it just makes me want more of that fabric now so I can steal your ideas). Second, the plural “winners” is not a typo – there are two of you! A little belated Christmas bonus and all that 🙂 Sooo congratulations are in order to both shesewsswell and Samantha! I hope you ladies love this fabulous fabric, and I cannot WAIT to see what you make up with it! ♥

Completed: Plaid Flannel Carolyn Pajamas

24 Nov

I don’t know what y’all like to sleep in, but I am ALL ABOUT some matching pj sets. Don’t care if they’re considered “unsexy” or dorky. Don’t care if it’s silly to dress up for sleeping and lounging. Matching pj sets are my jam and I’m not about to apologize for it.

Flannel Carolyn PJs - front

My very very favorite sorts of pjs are the coziest ones – the ones that come in flannel. Especially plaid flannel! Traditionally, my mom buys me a set of flannel pjs every year for Christmas. She gets them at Victoria’s Secret and they’re… ok. Either I’ve spoiled myself with my fit preference (and being able to attain that through sewing), or I am just way way off of VS’s fit model – but the fit isn’t that great on me. This is mostly due to being petite – the sleeves and legs are too long (and they’re cuffed, so NO I’m not hemming that shit!), and the rise gives me droopy crotch. The flannel is a bit thin and thus doesn’t wash well – the facings fold in on themselves and never look as good as they do when you first buy them (I understand that I could iron these, but, dude, I’m not going to do that. Are you going to iron your pajamas? Get outta here with that mess). Also, the colors and patterns available are a little too pink for my tastes. Too many girly sparkles and flowers. Victoria’s Secret has really gone downhill – at least in the design department – ever since they got all PiNK, is all I’m saying.

That’s not to say that I hated my Christmas gift – because, really, I looked forward to getting new PJs every year (nerd alert!). But there was certainly room for improvement, although I couldn’t be arsed to do it myself.

Flannel Carolyn PJs - front

Coming right up to fill a pajama-shaped void in my life are the Carolyn Pajamas. If this pattern sounds familiar, it’s because I’ve made a linen version for summer. They are AWESOME. They have all the design details of a classy set of pjs – notched collar, breast pocket, curved hem and all – as well as include slanted side pockets (which my VS pjs have sorely been lacking. What are pjs if they don’t include pockets!? Where else am I supposed to stash candy when I’m moving across the house?) and a comfy elastic waistband. The fit is slightly slim – not uncomfortable, but a bit more sleek than the stuff I’ve been wearing – and the DIY aspect means I get to adjust the length and choose my own fabrics. Win!

Flannel Carolyn PJs - side

Flannel Carolyn PJs - side

Since I’ve already made this pattern before, I won’t go into much detail on the pattern itself (go to my Linen pj post if you want to read all of that!). I used the same size 2 as before for the top, but I went up a size in the bottoms to a 4. The linen pants are quite slim and I wanted a little extra room with this flannel pair (for layering in case I get really cold, and also, I’m pretty sure my ass is getting bigger too. Not a complaint, just an observation). I made view A, which is suited for flannel fabrics – no piping or complicated cuffs, just a straightforward set of long sleeved/long pantsed pajamas.

Flannel Carolyn PJs - back

Getting the right fabric was the hardest part! I knew I wanted a plaid flannel, but I wasn’t sure where to start looking. Most of the flannels I see are still a bit girly and pink – or outright childish (like, literally for making children’s clothing). I wanted something that was a little more, I dunno, ~rustic~. Like straight out of an Eddie Bauer catalog. I like those Christmas-y red plaids, but not too Christmas-y. Honestly, I’ve been keeping an eye out for this since the pattern was initially released. I had a couple of people suggest Robert Kaufman’s Mammoth Plaid as an option, which I don’t know why I never thought of that in the first place. I’ve actually used Mammoth Plaid in the past to make Margot PJ pants (yay PJs!), and I just love the way it feels and wears and washes. Comes in really cool plaid designs, too, in all those rustic, non-girly colors.

Flannel Carolyn PJs - front

Flannel Carolyn PJs - back

I found this particular colorway at Grey’s Fabrics when I was in Boston in September, and immediately knew it was destined for pjs. Unfortunately, they only had a couple of yards left in stock, which isn’t enough for a full set of pjs (not even counting matching the plaid!). I bought all that they had and bought the rest of what I needed from Fabric.com. Every other site was sold out, and I think I bought the last of Fabric.com’s, too! I don’t know what caused the spike in Mammoth Plaid purchases – it certainly wasn’t like this when I bought it last year – but I can’t blame it because, man, this is a really nice cotton flannel, especially for the price. It’s so thick and soft with a squishy pile.

Flannel Carolyn PJs - on dressform

Cutting and sewing this in flannel – even with matching the plaid – was waaaay easier than doing it with linen. Because of the nature of the plaid, it adheres to itself and doesn’t shift much when you’re cutting and sewing it. I still cut everything on the single layer, as that’s how I like to match my plaids, and I used a walking foot because I just think it makes it easier to sew them that way.

Speaking of matching the plaid, I agonized for way too long about whether or not to match the plaid from the shirt to the pants. I couldn’t figure out if that’s a thing to do? (sorry, y’all, but I’ve never made an entire outfit out of plaid hahaha) I googled around, didn’t really get a clear answer, and ultimately decided to just match the vertical lines so that they continue uninterrupted, at least as best I could. I think it looks a little less jarring than an obvious pattern break between the shirt and the pants, but I could also be overthinking it. Thoughts?

Flannel Carolyn PJs - flat

Flannel Carolyn PJs - flat

Flannel Carolyn PJs - flat

Flannel Carolyn PJs - label

Label is from Wunderlabel, fyi!

Flannel Carolyn PJs - front

Feels good to check this one off my list! Feels even better to WEAR them! I’ve actually had these done for about a month now, and I’ve worn them most every night since. The pictures you are seeing here are after a bunch of wears and even a couple of washes – like I said, this is a really awesome flannel! I didn’t even have to press the facing back into place after washing it, ha 🙂 I guess my mom is going to have to find a different gift for me this year, though! I’m all good on the flannel end 🙂

The real question is – can I get away with wearing that top in public as a shirt? I’m can’t decide if it straight-up looks like pajamas or not.

Completed: Vogue 1395, Modified!

3 Jun

I reckon I have time for one last post before I leave! 😛

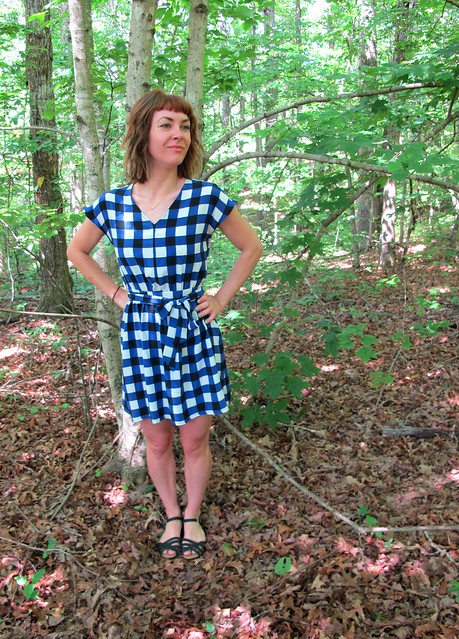
Plaid Silk V1395

May this dress be forever known as one of the bitchiest I’ve ever sewn. Sewing silk crepe is a challenge enough of it’s own – but throwing plaid into the mix? I don’t know what I was thinking when I bought this fabric (probably something like, “Ooh! Plaid silk crepe! My favorites! lololol”), but the fact that I not only sewed it up but actually finished the dang project is something of a miracle for me. It certainly didn’t give me an easy time.

Plaid Silk V1395

The pattern I used is Vogue 1395, which is a Rebecca Taylor design from last summer. I’ve made the pattern before in cherry printed silk crepe, and it’s one of my favorite summer dresses. It’s SUPER comfy, but still pretty cute! I knew I wanted to make a second one, but I wanted to try to figure out a way to make it without the back overlay. I love the back overlay, but it can shift over the course of the day and kind of make the arm holes hang weird. Plus, I wanted to improve on my first version (namely, the low arm holes that had to be emergency-raised and thus the seams are pretty wonky).

Plaid Silk V1395

Plaid Silk V1395

First, my pattern modifications. Remembering those awful armholes, I shortened the depth by a good 1.5″ or so. I actually wanted to shorten them more, but I was afraid I’d really fuck up the pattern, so I erred on the side of less. This gives the arm holes a much better depth (much more suited to my petite proportions), although you can still see a tiny bit of bra if I move a certain way. Ah, c’est la vie.

I kept the front bodice the same (other than the arm holes). I re-traced the back bodice and copied the shoulder width from the overlay to the shoulder area of my new back bodice (the OG back bodice in the pattern has narrow shoulders, and the overlay matches the front piece. This probably doesn’t make sense if you haven’t seen the pattern pieces). I redrew the bottom armscye to have a little curve, similar to the front (the overlay also doesn’t have that – it just goes straight, since it’s supposed to pull across to the front). Aaaaand that’s about it! Pretty easy modifications.

Plaid Silk V1395

Sewing up the actual pattern – again, with modifications, since I was omitting the overlay, as well as the skirt lining – was simple. Sewed the front and back together at the shoulders and side seams, added the bias binding for the necklines and arm holes, and then sewed the front closed. I sewed the skirt side seams, attached the skirt to the bodice, and then folded up the seam allowance and topstitched it down to create a casing for the elastic waist. The skirt has a simple rolled hem, and all the interior seams are french seams. Because of the bias binding, there’s quite a bit of topstitching on this dress, which I really like.

Sewing – and cutting, for that matter – silk crepe actually isn’t that difficult. Of course, it’s marginally harder than sewing, say, quilting cotton, but it’s not this terrible beast that you have to wrangle and beg and plead with. The spongey texture of the crepe gives the silk something to grab onto, so it doesn’t really shift much while sewing. It can be a little floaty when you’re trying to cut it, but I just make sure my table has enough space to hold the whole yardage and that helps a lot. You’ll want to use a sharp, new needle for sewing, and silk pins for pinning.

Plaid Silk V1395

What gave me the most trouble with this damn dress was the fact that it’s a plaid fabric. Cutting was a NIGHTMARE – like I said, silk crepe is sorta shifty at best, but as long as you’re staying on grain and getting the pattern pieces straight, it’s not too bad. Throw in strong horizontal lines and some plaid that has to match, and then it becomes an epic journey. I gave up on trying to match the plaid perfectly, and instead just focused on getting the lines to match across the seamlines. This was something I also had to focus on while sewing – again, a little shifting and/or growing is ok when you’re sewing a solid color or a busy print, but for these strong lines, you have to pay attention to make sure everything matches up at the seams. I pinned the shit out of things and used a walking foot while sewing, but man, thank god there are only a handful of seams in this dress. Otherwise, I might have ended up flipping a table over out of sheer rage.

Overall, though, everything matches up pretty well! The center front seam is a bit unfortunate looking with how the plaids lined up – but whatever. The back bodice does not quite match the back skirt – the lines are unbroken, but they’re the wrong lines (whoops). The elastic waist really helps to hide that, though, and at least it’s not at the front! The shoulder seams don’t match at all, but that’s the nature of the beast this pattern. Ya gotta pick your battles.

Plaid Silk V1395

Plaid Silk V1395

When I finished the dress, I was a little underwhelmed with how it looked on me – I wasn’t a fan of how the bodice bloused over the elastic (the overlay ties over it and flattens things, but since I didn’t have the overlay, I had the blousiness). Belts are usually my solution for this, but those looked strange, too. So I made a little self-fabric tie, out of my remaining scraps. The dimensions are as much as I could get away with from the scraps. I just sewed a tube with bias ends and turned it right side out.

I also didn’t like the length, so I cut it REALLY short. Go ahead, judge me 😛

Close-up shots:

Plaid Silk V1395

Plaid Silk V1395

Plaid Silk V1395

Final thoughts of this dress – love it, was totally worth the effort. The plaid matching, while not perfect, is good enough for me. I really love this silk print and I’m glad I pushed through to finish, although I don’t think I’ll be picking up any more plaid silk crepe anytime soon. Sewing this pattern made me want another of the unmodified version, though, so I made one last night – and it turned out beeeeyoutiful! You can see the Instagram peek here. Stay tuned in a couple weeks for that blog post, I guess!

I took these pictures in the woods because the sun was SUPER bright, and it’s awesome how much coverage the trees give! This is right outside my door, too. Amelia was sitting at the screen, complaining at me. The woods surrounding our house are on a bit of an incline, hence the slight bobble-head vibe I’m throwing here. Also, in case you were wondering and/or freaking out – I’m not allergic to poison ivy 🙂 haha 🙂 I don’t think any shows in these photos, but it’s aaaalll over the place back there!

Plaid Silk V1395

With all that being said, I’m taking a blog sabbatical for the next couple of weeks! My trip to Peru leaves tomorrow afternoon, and we will be gone through 6/18. I am not sure if I will have internet access while I’m away – definitely will be off for at least a week while I’m in Iquitos, because there’s no reception where I’m staying – but I’m not bringing my computer, so I can’t really answer emails. Fair warning in advance if you try to email me or holler with a question, because it’ll probably go unanswered the whole time I’m gone! I’m looking forward to spending some time unplugged and exploring another continent with my bestie, though!

See y’all in a couple of weeks!

Completed: The Bruyère Top

29 Dec

Now that’s one plaid flannel top that definitely doesn’t look like something a man would wear, amirite.

Deer & Doe Bruyere

This is the Bruyère top from Deer & Doe. I’ve actually had this pattern for quite a while – I bought it immediately after it’s release. I LOVE the cute and feminine twist it gives to a plain button down, and I knew it’d be beautiful in a plaid flannel. I’ve been sitting on it for this long because I haven’t been able to find the right plaid flannel – either the plaid was unbalanced (get out of my nightmare), or the colors were ugly, or the flannel was shitty. Or maybe a combination of the three. Either way, no Bruyère for me 😦

Deer & Doe Bruyere

This plaid flannel actually came from the same place that the pattern did – aaaaaall the way from Paris, France! Yup! It was the first piece of fabric I bought during my shopping spree, from Les étoffes du Sentier. The shop had a 3 meter minimum, but it was only 5€ a meter and I figured 3 is a safe number for a button up, so I went with it. It’s a nice soft cotton plaid flannel and I like how the colors are so un-girly, especially with this pattern. And, bonus – even after plaid-matching, I have leftovers to make something else with! Yes!

Deer & Doe Bruyere

First, though, check out those matched side seams! Ahhh yeah!!

Deer & Doe Bruyere

And the other side!

Deer & Doe Bruyere

And the back!

Deer & Doe Bruyere

Hi!

Deer & Doe Bruyere

Seriously, though, I’m pretty happy with how this turned out (if you couldn’t tell 😛 ). I cut the size 34, and the only fitting change I made was to remove a little bit of length from the peplum and sleeves, because I am so short. Other than that, it fits pretty well! I’m surprised at much much I like the collar – I was afraid it would look flat and dumb, but the flannel gives it some lovely body.

For cutting the plaid, I cut on the single layer and cut the waistbands, cuffs, placket and back yoke on the bias. Since the bias tends to stretch, I also cut my second yoke on the straight grain, as well as a second set of waistbands. Further, I interfaced my waistbands (to be really sure they don’t stretch out), as well as the cuffs, collar, and placket. I’m not sure why these aren’t included in the instructions, but my guess is to keep the overall look of the shirt very soft and unstructured. Which is fine, but, I do think anything that has a button will need a little extra help from interfacing. I’d definitely make some test button holes before you commit, at any rate!

Deer & Doe Bruyere

I spent a really long time trying to decide how to order the construction steps for this. The instructions are fine as they are – the process for attaching the placket/collar/facing is very clever (and clean!) and it works. However, I’m a diehard who wanted flat felled seams. In addition – I wasn’t 100% on the fit of the side seams, and I wanted to sew that last so I could tweak it after attaching the placket (when sewing flat felled shirt seams, once generally attaches the sleeves before sewing the side seams. Sewing a flat felled seam in the round just sounds like a painful thing I don’t want to do). Because of how the shirt is assembled per the instructions, you can’t really switch them out – you have to have the hem sewn to add the placket, but the side seams need to be sewn to add the hem. I know this sounds really vague and probably doesn’t make sense, but if you look at the instructions for this shirt vs ones for, say, the Negroni, it will. Anyway, this is what I ended up doing:
– I left the side seams open and sewed about 2″ of the shirt hem by the placket
– Followed the instructions for adding the collar, placket and facing
– Attached the sleeves with flat-felled seams
– Sewed the side seams with flat-felled seams
– Finished the remainder of the hem

That worked out great! My shirt is finished with flat-felled seams and it looks beaaaaaauuuutiful on the inside as well as the out 😀

Deer & Doe Bruyere

What else? Well, I added PEARL SNAPS. God, I love those things – nothing like being able to Hulk out of our clothes at the end of the day amirite. I feel like the very top needs a pearl snap (it’s not marked on the pattern), however, I couldn’t get the prongs through all the layers so no pearl snap there!

Deer & Doe Bruyere

Here’s the inside. I finished the edge of my facing with pinking shears – I think anything else would show a ridge on the right side. Of course, I probably should have first sewed a line of stitching before pinking, because it’s already fraying like crazy, but whatev.

Deer & Doe Bruyere

Deer & Doe Bruyere

I guess that’s it! Glad I finally got this finished – plaid flannel shirt of my dreamssss ♥

Deer & Doe Bruyere

Hope everyone had a Merry Christmas! Just a couple days left until the end of the year – aiee!

Completed: Margot PJ Pants (+Love At First Stitch) (+GIVEAWAY)

31 Oct

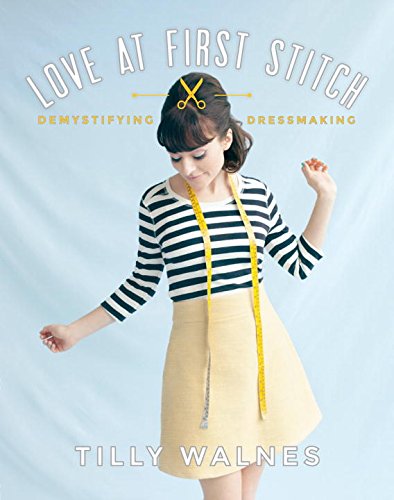
Hey everyone! Today I’m joining the US masses to help promote Love at First Stitch: Demystifying Dressmaking by Tilly Walnes, my friend and fellow blogger.

51Nr-WjrMQL

Most of y’all probably alreaddddyyyy know all about this, but in case you haven’t – Tilly is a fabulous blogger whose clear instructions and gorgeous patterns are perfect for beginner sewers who feel overwhelmed by mysterious sewing jargon and confusing instructions. She’s done so well, in fact, that now she’s got a whole book deal out of it! Which is pretty awesome! I was contacted by Roost Books to see if I’d like to help promote the US launch of the book – it’s been out for a few months now, but we’re just now getting it here! As I’ve mentioned before, I’m kind of over book reviews – but I want to support my friends in their business endeavors, so today you get a non-review-review 😉

Margot PJs

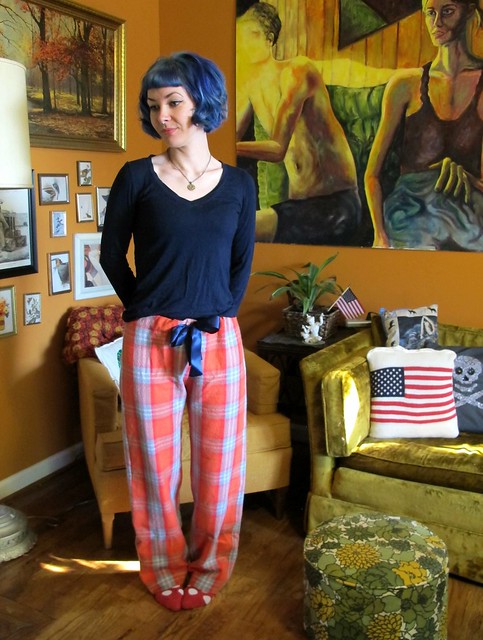
For my non-review-review, I decided to try out one of the patterns in the book – the Margot Pajamas! For someone who loves pajamas as much as I do, it’s kind of surprising to know that I’ve never actually sewn a pair of pj pants (those Lakeside Pajamas don’t count :P). I think pajamas are kind of a rite of passage for most first-time sewers, but not me, I guess! So it’s a first for me as well 🙂

Anyway, before we go too much into the pattern, I did want to talk a little bit about the book.

Margot PJs

Margot PJs

MOSTLY THAT IT’S FREAKING ADORABLE!

Everything is laid out with bright and clear photos (LOTS of photos, I might add – it’s like reading a really good blog tutorial, except in book form), and the book progresses to build the skills you need to get into dressmaking. Starting with threading the machine, to understanding how to cut fabric, to choosing a size – it’s very well thought out, very beginner friendly, and shit, I wish this existed when I was learning how to sew. Probably would have ruined about half as much fabric if that had been the case 🙂

Margot PJs

Each included pattern comes with sections to “Make It Your Own,” for customizing and, well, making it your own.

Margot PJs

There are also blurbs for making sewing a lifestyle, including this one that is my favorite – How to Behave In A Fabric Store. Haha!

Anyway, the short: it’s adorable, it’s well-written, and it’s great for a beginner. For those of us who are not beginners, the patterns are still pretty cute (you can see all the patterns in the book here). The only drawback is that the patterns are printed double-sided, which means you have to trace them. Boo! I imagine this was done to save $ on printing costs. Also, I just hate tracing. That’s a fact of life.

That being said, I did muster up the tracing stamina to at least make some damn pajama pants. Wanna see?

Margot PJs

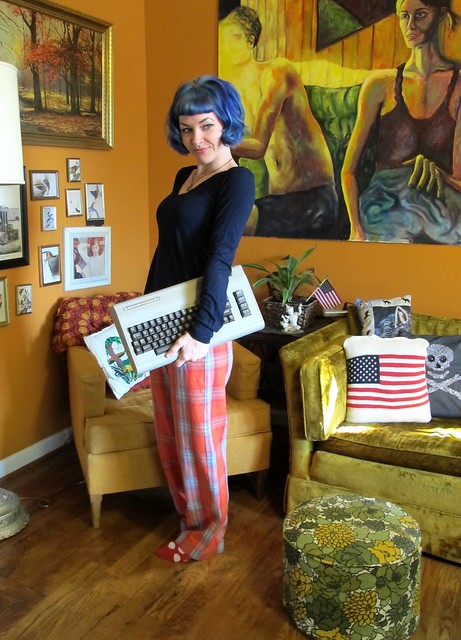
SUP, MARGOT. How YOU doin’?!

I hope you enjoy this new background that is my living room! To answer your questions: Yes, we love America here. And, yes, that’s a creepy-ass painting behind me, and no, I have no idea who painted it. I found it at Goodwill for $7 and it had to come home with me because reasons. It’s painted on plywood and literally drilled into the wall. My mom hates it.

Margot PJs

Margot PJs

I cannot believe how long it took me to finally make PJ pants! They are SO easy and satisfying to make – even with my construction modifications (more on that in a sec). I am between sizes in the book’s size chart, so I spliced between the 1 & the 2, and removed about 1/2″ of length from the crotch (just folded it out horizontally across the middle), as well as 1″ from the length. I also narrowed the legs a little – mostly because I was short on fabric (oops).

Margot PJs

I admit I didn’t much follow the instructions – mostly because they were way too hand-holdy for my needs. However, pj pants are pretty easy to throw together. To match the plaid, I cut everything on the single layer and used my walking foot to feed things evenly through the machine. All seams are serged to prevent unraveling.

Margot PJs

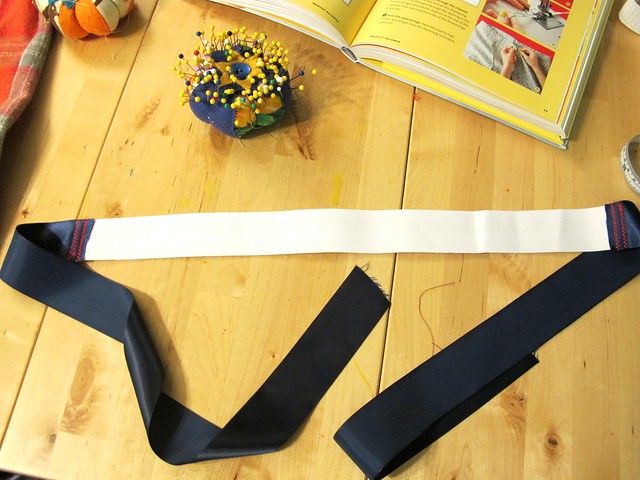
I made a couple modifications to increase the comfort level of these pants. For one, I’m not a fan of drawstring-only pj pants. I prefer a little elastic! To do this, I cut a length of elastic (1.5″ wide, because that’s what I had on hand – and it also is the same width as my ribbon) about 8″ smaller than my waist measurement (enough that it almost came around my hip bones) and sewed ribbon to either end. I threaded it through the drawstring opening as instructed, being careful not to twist the elastic.

Margot PJs

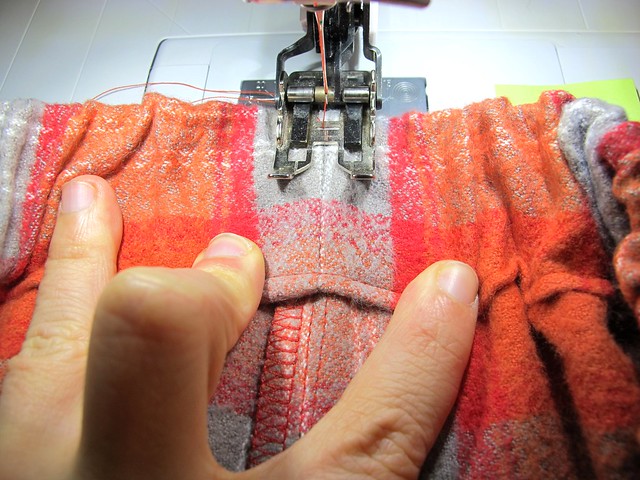
Once the elastic was in place – centered and flat – I sewed down the center back seam with a straight stitch. This keeps the elastic in place so it doesn’t shift (and I don’t accidentally pull the elastic/ribbon out!). Since the ribbon I used is polyester, I burned the edges to prevent them from fraying.

Margot PJs

The finished waistband is much more comfortable, and – bonus! I can actually pull these off without untying the ribbon. Haha!

Also, ribbon bonus: Pretty sure that stuff came from the bouquet I took home from my BFF’s sister’s wedding last year. How’s THAT for recycling? 😉 Even better – now every time I’m lounging on the couch in my comfy pjs, Landon will be reminded that I CAUGHT THE BOUQUET, HELLOOO??

Margot PJs

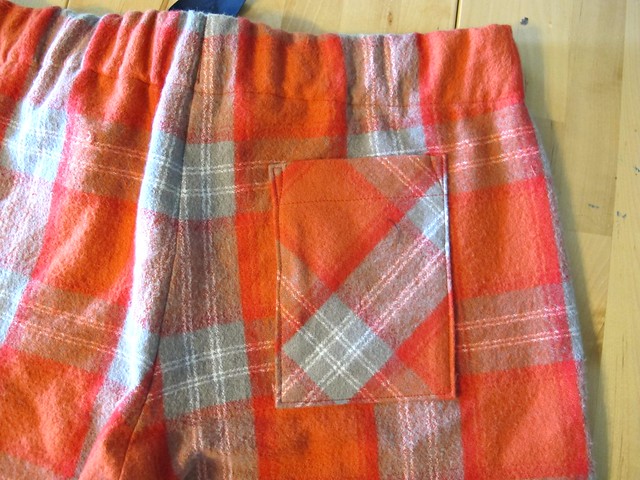
I ~made these my own~ by adding a pocket to the back – using my phone as a guide for the size (the pockets on most of my pj pants are too shallow, which I hate!). I cut the pocket on the bias for a little interest, and used my existing pj pants to determine the placement.

Margot PJs

The legs have a nice deep hem – partially because I love the way it looks, and also in case these shrink up more when they’re washed. The extra hem means I can let the length down if need be.

Speaking of which, isn’t that fabric glorious? It’s from Pink Chalk Fabrics, a lovely cotton flannel from Robert Kaufman (which appears to now be sold out – here are their other available flannels). When I say this stuff is lovely, I mean it’s AMAZING. It is SO SOFT AND SNUGGLY. I was seriously bummed when I finished these, because I wanted to put them on immediately but I knew I needed to wait to take photos (and have since not taken them off. They are the best!). Between this fabric & the polka dot chambray I used, Robert Kaufman is about to be my favorite fabric source, possibly. I kind of wish I’d bought more, especially now that I see they are sold out 😦

Anyway, I wanted to do something fun with these photos, but unlike Tilly – I don’t have a cool ~retro~ phone to pose with.

Margot PJs

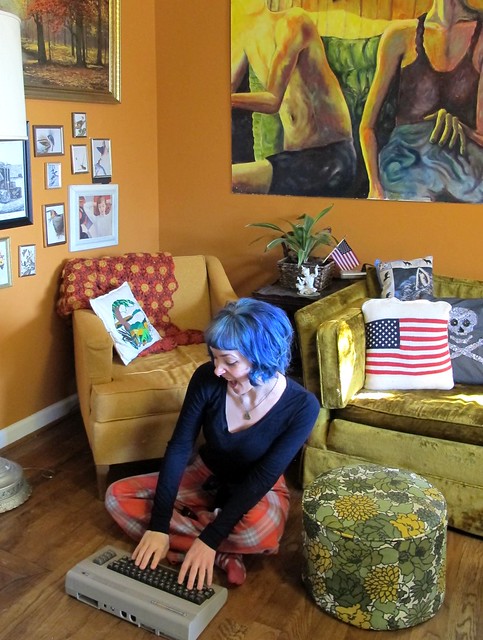
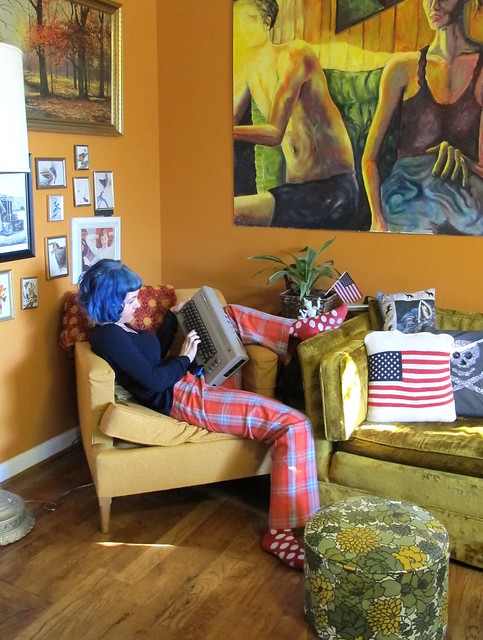
WHAT I DO HAVE, THOUGH, IS A COMMODORE 64.

Margot PJs

“Aw hell yeah, mom, this is the best Christmas present ever!”

Margot PJs

Don’t mind us, we are just having a moment here.

GIVEAWAY IS NOW CLOSED

Anyway, if you read this far- congratulations! Let’s have a giveaway! Roost Books sent me two copies, which means I have one to mail to someone! If you’d like to enter the giveaway to win your very own copy of Love At First Stitch, leave a comment on this post and tell me which pattern you’re dying to make (again, you can see all the patterns here). That’s it! Because we are celebrating the US release of this book, this giveaway is open to US READERS ONLY (sorry, my international friends! I still love you! I’ll see some of y’all in London next month!). The entries will close one week from today, Friday, November 7, 2014 at 7:00 AM CST.

GIVEAWAY IS NOW CLOSED
If you’d like to go ahead and get a copy of the book anyway, you can either buy it on Amazon or directly from Miss Tilly herself (and unlike Amazon, she will even sign it for you!). Good luck, y’all!
GIVEAWAY IS NOW CLOSED

Disclaimer: I was given Love At First Stitch for free from Roost Books, in exchange for a review. All opinions in this post are my own.
From Love at First Stitch by Tilly Walnes, © 2014 by Tilly Walnes. Reprinted by arrangement with Roost Books, an imprint of Shambhala Publications Inc., Boston, MA.

Completed: Travel Gear (aka I am a weirdo)

24 Oct

Hey everyone! This post is a little different from what I normally blog about… instead of showing y’all some (probably awesome)piece of clothing I made, today is all about the non-clothes crafty stuff! Yay!

And, before you start side-eyeing me – this isn’t in partnership or sponsorship or anything like that with anyone. I’m honestly just really excited about my upcoming trip and I wanted new ~travel accessories~ (especially since all I own is basically my old suitcase!). Except, once I started looking at the goods on Etsy (and, if we’re being honest – Amazon. And Target. Haha!), I found myself poo-pooing everything because it wasn’t cute/wasn’t exactly what I wanted/ugh I can make that myself. Rather than start doing idiot shit like buy a new suitcase (my suitcase, while definitely old – there are receipts in the pocket from when we visited Disney World as a family. In 1994, I might add. – it still perfectly functioning and absolutely does not need to be replaced unless I just suddenly run of out ways to spend my money), I figured I’d channel my energy into making these little accessories. And you know what? This kind of sewing is pretty fun – especially when there’s no fitting involved 🙂

I do want to add a small disclaimer before we dive in, though – a couple of these projects include the use of scrap leather. I know the use of leather can be a subject of hot debate, and I don’t want any of y’all to look at something you don’t want to. With that being said – none of us need to be “schooled” on the evils of leather, at least not in this post. I’ve done my research, I’m ok with leather and leather scraps (I mean, I wear leather shoes and belts), and I do not want to turn the comments here to turn into a leather debate. All right! Moving on…

Travel Sewing

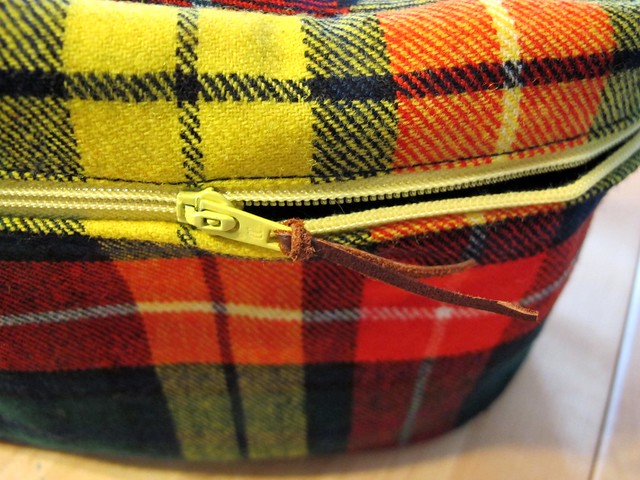
The first thing I made up was this little make up case. Isn’t she ADORABLE? Way cuter than anything I could buy, at least as far as my budget is concerned.

I used a Butterick 6072 to make the make up case. I actually got this pattern for free when I visited the McCall Pattern Company – I know, I know, I just told y’all this isn’t a collaborative post. It’s not! The pattern was in a bag of goodies that they handed to me when I walked in the door. I’m pretty sure no one is expecting me to write a review – I’m also pretty sure I looked at the pattern and thought, “Huh. Definitely never gonna make this shit.” hahaha. (I should also point out that, if I had bought this myself, I wouldn’t have paid more than $1 for it, thanks to Joann’s sales. So there’s that). At any rate, once I realized I was gonna have to make my own damn make-up bag, out came the pattern to be looked over with a set of fresh eyes. If you can get past the somewhat dowdy styling and fabrics on the pattern envelope, this is actually pretty cute. I almost made the matching jewelry case & make-up holder, until I realized that I totally don’t need or use those things. So, just this one bag! (but I still might make that jewelry case. Watch me.)
Travel Sewing

Anyway, this was REALLY easy to put together! I used a piece of beloved plaid wool blend fabric from my stash – I was a little hesitant to cut into it, because it’s sooo pretty (isn’t it?), but I ultimately decided to go for it because 1. It’s a wool blend, which I prefer to wear 100% wool; 2. It was a small yardage (maybe 1/2 yard); 3. That unbalanced plaid meant I probably couldn’t eek anything remote successful and matching out of it. Anyway, now I can enjoy it all the time 🙂 This fabric came from the flea market, by the way. I have no idea it’s origins, but it feels like a thick suiting.

The pattern is interfaced with fusible fleece (there was also some of this in my McCall bag – but honestly, it kind of sucked. I don’t remember the brand, but only about half the glue dots worked. Meh.) and then lined with some navy wool blend broadcloth from my stash (if I recall, my friend Trisha’s mom gave me that, which I believe she found at a yard sale). The zipper is from my stash.

Travel Sewing

I decided to fancy things up and use a piece of leather for the handle. Ooh la la! This leather came from my last trip to Chicago – I bought a small piece at Textile Discount Outlet, having no idea what the hell I was gonna do with it. I like it as a strap, though! I sewed the two pieces wrong sides together (eliminating the seam allowances) and then topstitched onto the bag itself. The thread is just denim thread, and I used a denim needle (alas, no leather needles currently in my arsenal). I can’t speak for *every* sewing machine, but mine was ok with the leather since it’s relatively thin. I used normal thread in my bobbin and adjusted the tension until everything looked good on both sides.

Travel Sewing

I am ridiculously pleased with how good the topstitching looks 🙂

Travel Sewing

I cut the top & bottom of the case on the bias, so I wouldn’t have to deal with matching the plaid any more than necessary (I also cut the back panel on the bias, but apparently did not take a photo of that angle. Sorry!) The pattern calls for a piece of cardboard at the bottom, to give the bag some structure. I also included some heavyweight interfacing (like… it’s so stiff, it practically feels like cardboard) on the top piece, because it felt really flimsy without it. I know they make lightweight plastic specifically for this purpose, but I really just wanted to destash so I went with what I had on hand!

Travel Sewing

Finally, here’s the inside! There are tiny pockets all around the perimeter and it’s fucking adorable.

I love this thing. It’s tiny, it’s cute, and I am pretty sure I can fit all my make-up/personal care shit in it. Yes! Win for me!

Travel Sewing

The next thing I made was this little wallet/passport case. I knew I needed something to carry my passport around it, and I also wanted it to include space for cards, cash, as well as a zippered pouch for change. I spent FOREVER looking for something on Etsy – and again, everything was just a *little* bit off from what I wanted (mostly lack of a zippered change pouch, interestingly enough. Excuse me, I need that change in case I have to pay for a toilet!). Argh!

Some more perusing of Etsy turned up this pattern – Passport Wallet from Teethy McGee Digitals. It’s a downloadable PDF with options for including card pockets and a change pouch, an elastic closure, and the whole thing costs $4.50. Perfect!

Travel Sewing

I made the option with a card holder on one side, and the change pouch on the opposite. Like I said, it is perfect! You can see my passport barely peeking out on the left side (side with my sneaky fingers). The opposite side, under the zippered pouch, can hold my cash. I know there are only 2 card holders – and I totally agonized over whether to add more, but in the end decided that I really only need 2 cards while I’m overseas – my debit card and my driver’s license (yeah, I know, the passport is ID King over there, but I feel weird without my DL!). I won’t be carrying my credit card on my person (it’s literally just for emergencies – like, actual emergencies, not “Ooh girl, are those shoes on sale?” emergencies), my health insurance card is useless over there, and…. actually, those are all the cards I have. Ha!

Travel Sewing

Here it is without the passport because, I dunno. Why not?

Travel Sewing

This was SO FUN to put together – even with matching the plaid! The instructions, while brief, were fairly straightforward. I decided to interface both large pieces of the plaid – the outer & the inner – so it would have some structure. Which brings me to my confession: I couldn’t find a decent medium-weight interfacing in my stash – everything I have is lightweight – so I ended up using my mega expensive Pro Weft Shirt Crisp Fusible Interfacing because, well, it was on hand and I haven’t even cut into it yet. And hey, it seemed to work all right! Ok, go ahead and stone me now 😛

Anyway, the whole thing is sewn by machine – no hand sewing required – and I added a rectangle of leather to the outside for a more ~masculine~ look. I also made a little leather pull for the zipper – just sliced off a thin piece and fed it though. The elastic is actually lingerie elastic – from when I made my second Soma Swimsuit. Again, it matched! What do you expect from me!?

Travel Sewing

I love that it closes with elastic, so I don’t have to worry about my passport falling out. I love that there is a zippered pouch, so no paid toilets will be out of my reach (yes, I spend a lot of time thinking about toilets, and I’m not sorry about that. When you gotta go, you gotta go!). And, obviously, I love that it matches my make-up bag! Yesss!

I would have loved to show y’all a shot of this with all my cards & such tucked in, but the pockets are shallow enough that you can really get an eyeful of the numbers on them. Sooo, yeah, you get a matchbook. Sorry.

And now, prepare for a let-down because the last thing I made is admittedly pretty boring-

Travel Sewing
Travel Sewing

A MATCHING SLEEP MASK, HEY-O!

Seriously easy. I used this free pattern from Instructables (thank you, random Google) and the same fabrics/lingerie elastic with self-made bias tape. I don’t think this one needs much explaining. It’ll be nice for my flights, though- especially that red-eye I take arriving in.

Anyway, that’s it! Super rando post, but these are some pieces I felt I needed, and I’m so happy I didn’t have to buy them (and SO delighted that they match! Yay! It’s the little things, ha 🙂 ). I am dying to make the Portside Travel Set next, but it’ll have to wait until post-London, because I don’t think I’ll have time! Someday, though!
What about y’all? Anyone else here love whooping it up with some random hobby crafts? Don’t be shy, we won’t judge you! 🙂