
Hey everyone!
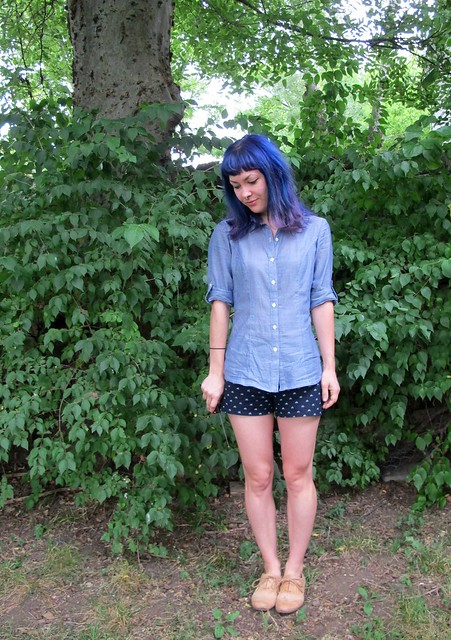
As I mentioned in my last post, I have a few workshops already lined up for the first few months of 2018 😀 I was hoping to include my sample jeans in this post, but I’ll be completely honest with you – this post ended up WAY longer than I was anticipating, so I am going to split my FO into a separate post. For this entry, I just want to talk about my upcoming workshops!
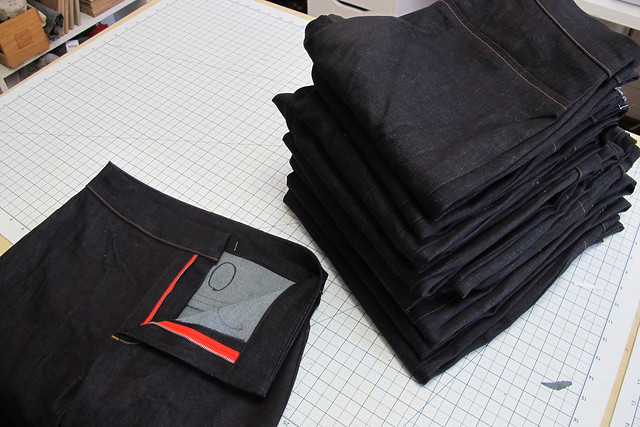
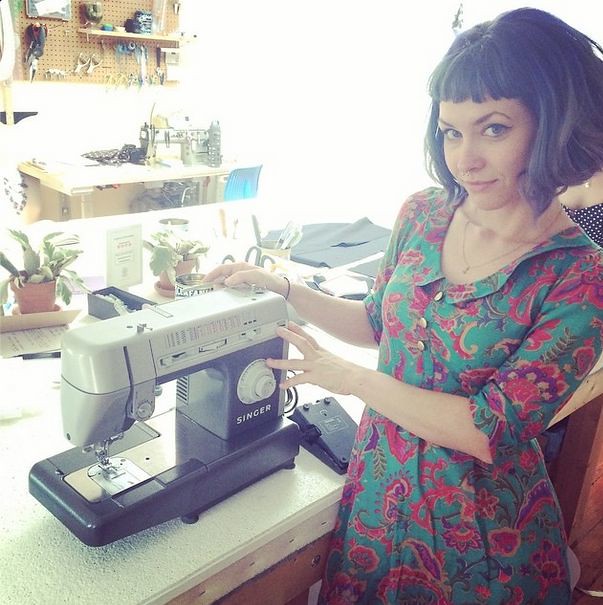
If you follow my Instagram, you may have noticed the madness when I decided to sew 11 pairs of jeans in mid-December. If that’s not crazy enough for ya, I finished all 11 pairs in LESS THAN A WEEK. Yea!! There’s a reason why my sewing industry friends call me Speedy 🙂
You’re also probably wondering why I made 11 pairs of jeans in the first place? Especially after announcing over and over that I have plenty of pants and I don’t actually need more (I’m gonna keep making pants anyway, sorry!). These jeans are actually samples for my upcoming Jeans Workshops!

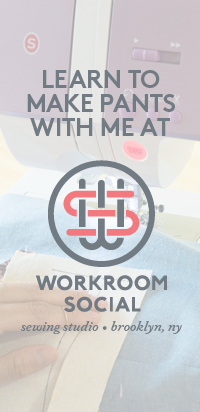
When I first started teaching sewing back in 2014, the first place to bring me in was Workroom Social in Brooklyn, NY. There are a lot of reasons why I love working at Workroom Social and have continued to teach there over the years. Jennifer is incredibly brilliant businesswoman and teacher, plus we work super well together. One of the things she does in her workshops that I thought was SO CLEVER is to have all the sizes of the pattern made up in advance of the weekend, so that students can try the samples on. This helps them not only choose the correct size to start, but also gives the ability to do basic fitting adjustments without the need to make a muslin. I have always loved this idea and I think it’s one of many things that really sets Workroom Social apart from other sewing workshops.
Toward the end of 2017, I started thinking about what kinds of workshops I wanted to offer in 2018. I have gotten a lot of requests to bring my jeans workshops to other cities, but I was lacking the samples (I realize you can totally offer this workshop without the samples, but y’all – once I’d tried it, I didn’t want to do anything else haha). After some internal debate – as well as a few conversations with Jennifer about my plans (I wanted her blessing before I did anything – I am not in the business of stepping on anyone’s toes here, y’all) – I decided to bite the bullet and make up my own batch of Ginger Jeans samples. This ended up working out perfectly because Workroom Social is moving toward offering a different pattern for future jeans classes (something that is a bit more size-inclusive than the Ginger because, as I’m sure you know, there are plenty of people who fall outside the max size range in that pattern), so I can continue to offer workshops that feature this specific pattern without being in competition with other workshops that I teach.
Having already worked with these samples for the past couple of years, I had some ideas on how I wanted to improve my own set when it came time to make them:
– Fabric: Hey, here’s a surprise for you – I didn’t use Cone Mills Denim to make my samples. I know this denim is the holy grail for sewing jeans – and for good reason, it’s a really wonderful fabric! However, it can sometimes be difficult for the average home sewist to source, and somewhat cost prohibitive depending on where you source it from (especially when you consider that you first pair of jeans may end as a wearable muslin). This was fine at Workroom Social because they were able to obtain rolls of the denim to provide to students as a kit, but y’all – I live in a small 2 bedroom house with limited storage, and I travel for my workshops. I ain’t about to buy stock in heavy-ass denim and schlep that shit around in a suitcase lol. Furthermore, Cone Mills just closed its White Oak plant at the end of 2017, which could potentially make the denim even harder to source in the future (or they move production offshore, or someone buys the plant to continue operating it – who knows? But I don’t want to bank on “maybe.”). So, with all that in mind – I wanted to make my samples out of a fabric that was easier for the average home sewist to obtain.
– Washed vs Unwashed: Plain and simple, denim feels and fits differently when it’s washed. It is softer and has more stretch. I wanted my samples to be out of washed denim, to better mimic what the finished pair would feel like.
– Familiarity with all sizes: Ok, this was NOT something I anticipated up front, but in hindsight this was a nice perk! Sewing every single size gave me a very hand-on experience with how they differ and how each one fits together. I don’t know if there is another person (other than Heather herself, obviously!) who has literally sewn every size in this pattern – but I have! Everything from fitting the pattern pieces on the fabric, to how the notches match up, even the differences in size grade. It was a surprisingly enlightening experience for me. As much as I’ve sewn this pattern up before and taught this class soo many times, y’all. I KNOW this pattern now. Like in a really creepy way almost haha.

So anyway, here are the details on my new samples:
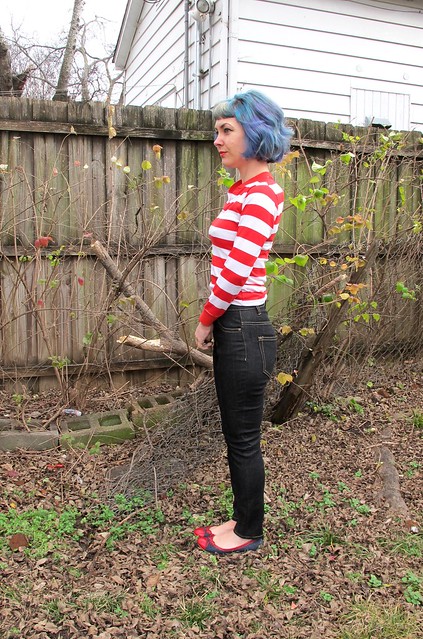
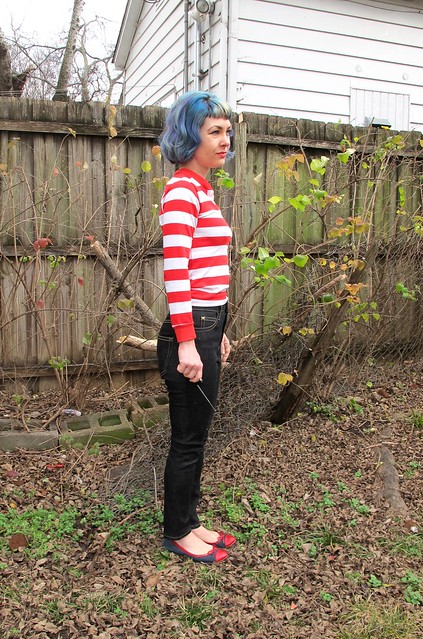
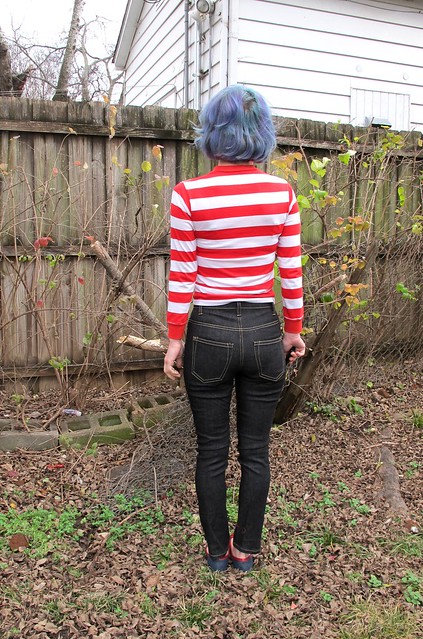
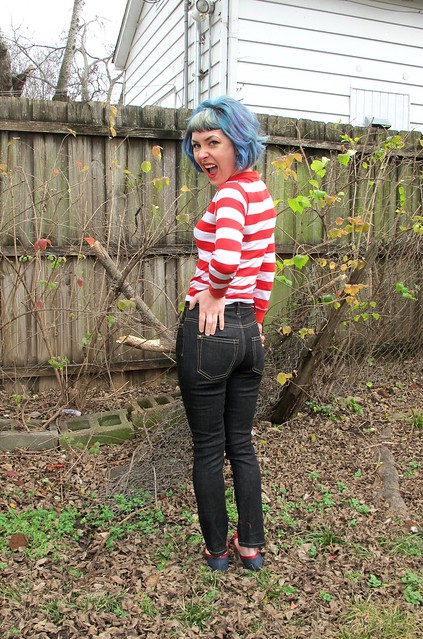
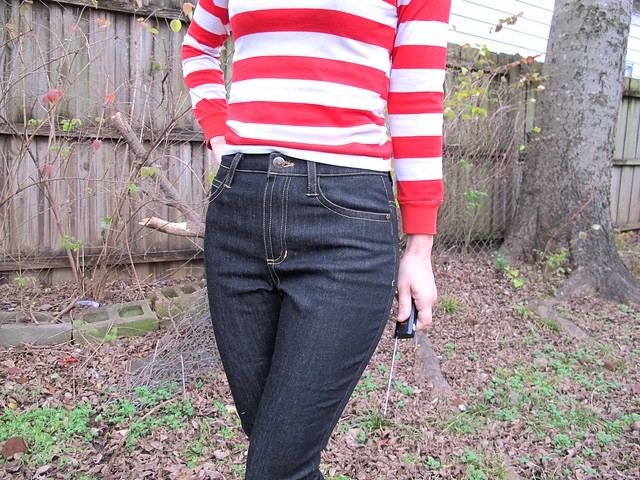
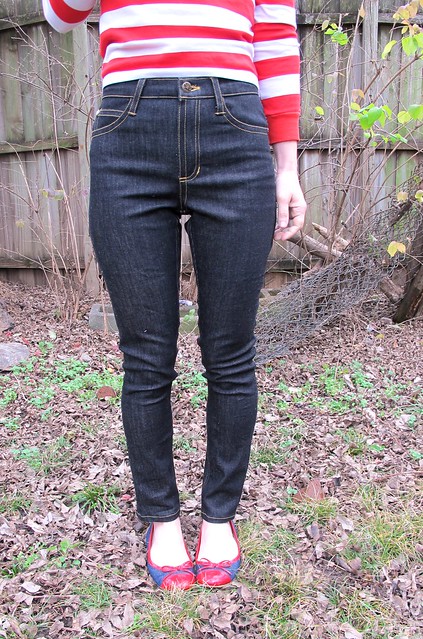
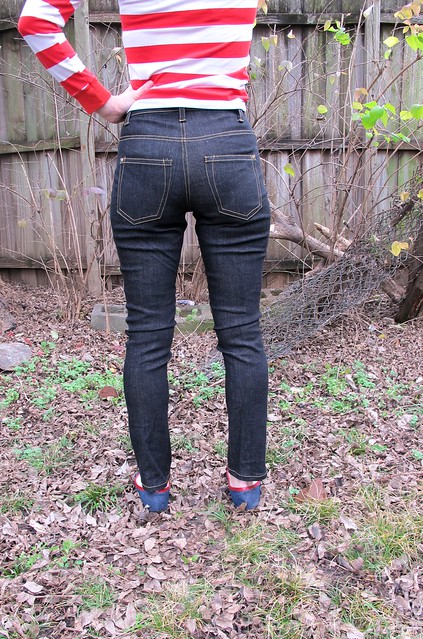
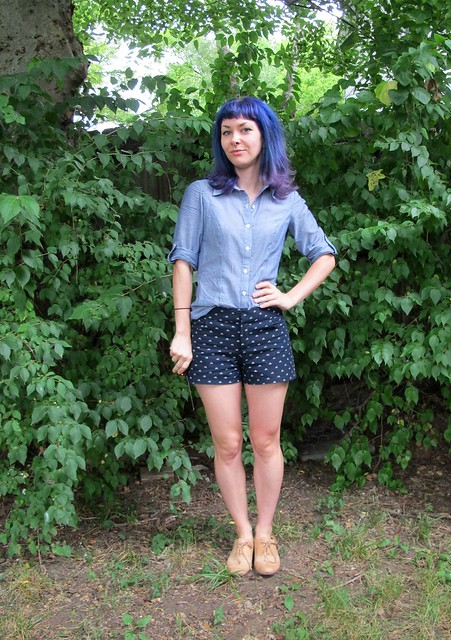
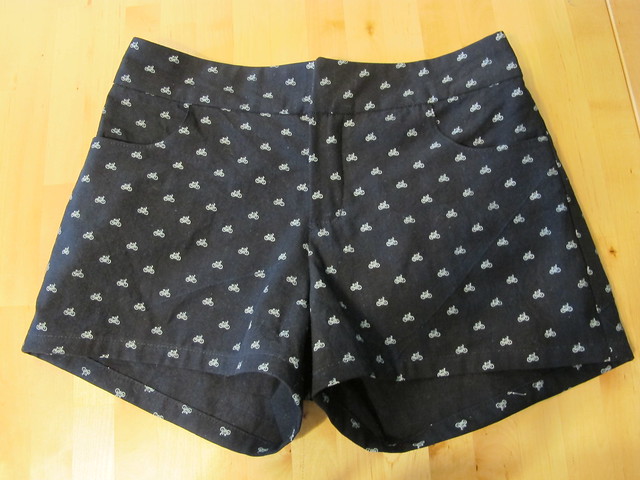
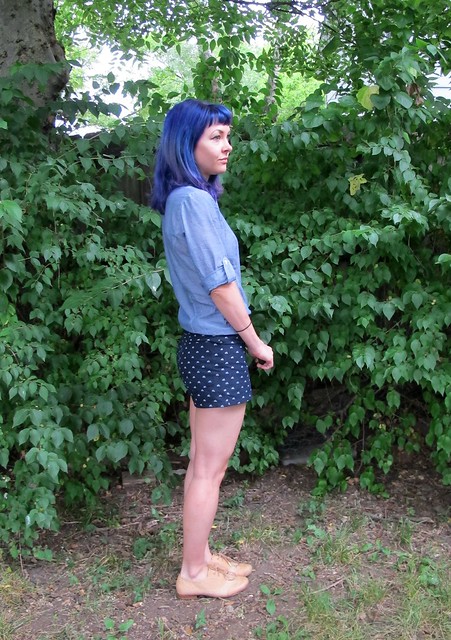
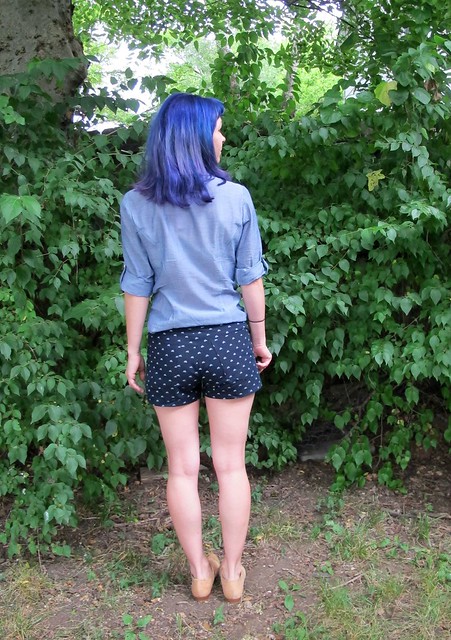
– The denim I used is Robert Kaufman Super Stretch denim! At 8.6 oz, it’s on the lighter weight side – but in my experience, a lot of people actually prefer this over heavier denim (especially for very fitted jeans like the Gingers) – it makes for a more comfortable pair of pants that feel almost like leggings. Of course, using a heavier denim and/or one with less stretch is as easy as adjusting your seam allowances to accommodate, but this particular fabric is a great starting point. The fabric costs around $15/yard and is super accessible – most fabric stores carry Robert Kaufman! And as someone who has long used Robert Kaufman fabrics, I love their quality and the company has been so easy to work with. I’m pretty excited about this!
– The denim is washed one time, to remove the sizing and soften everything up. I was hoping this would also remove the indigo bleed, but it only did so a bit – it looks like 2-3 washes is the magic number (based on my personal sample pair). I love my students but idk y’all, I wasn’t about to sit and wash 30 yards of denim multiple times. You hands will be slightly tinted blue. Don’t wear white underwear and bring hand sanitizer lol.
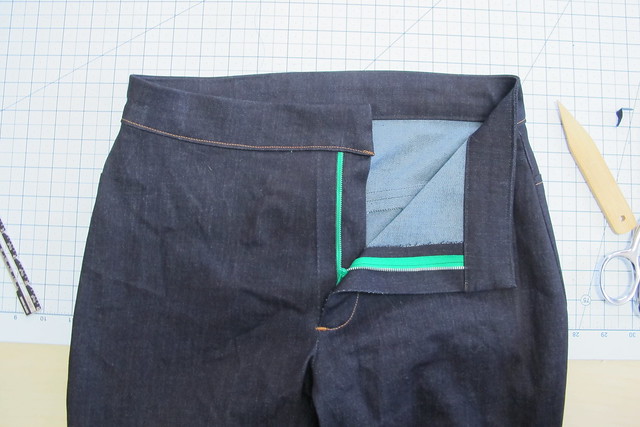
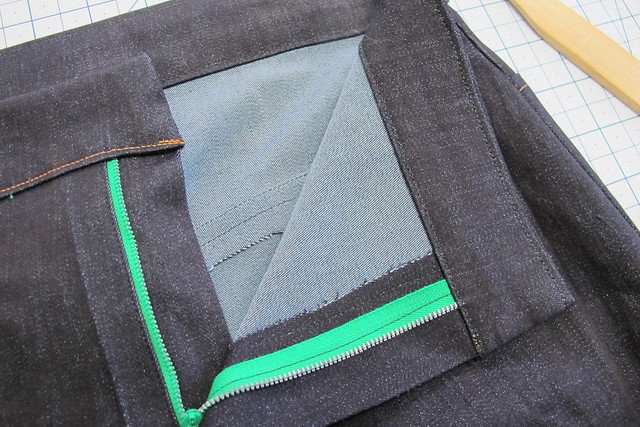
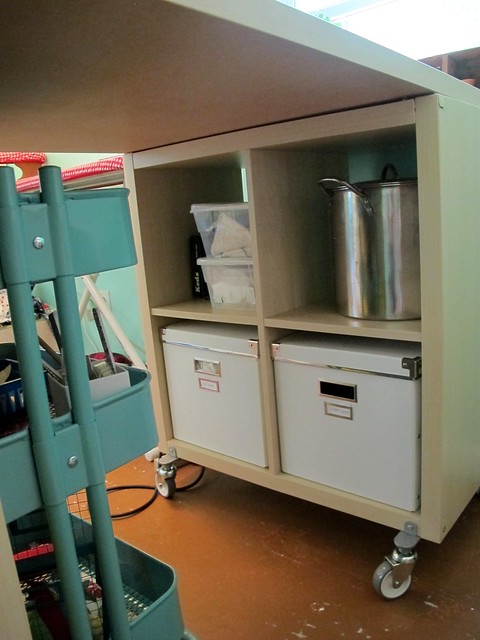
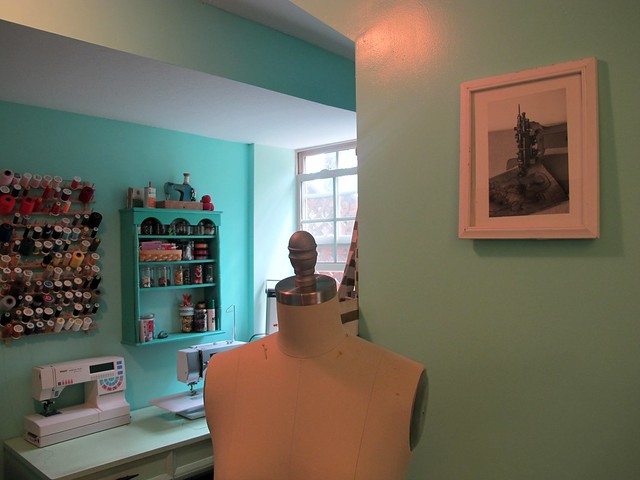
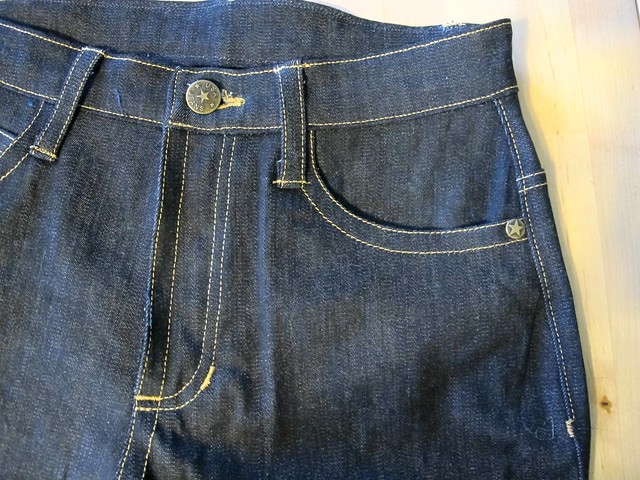
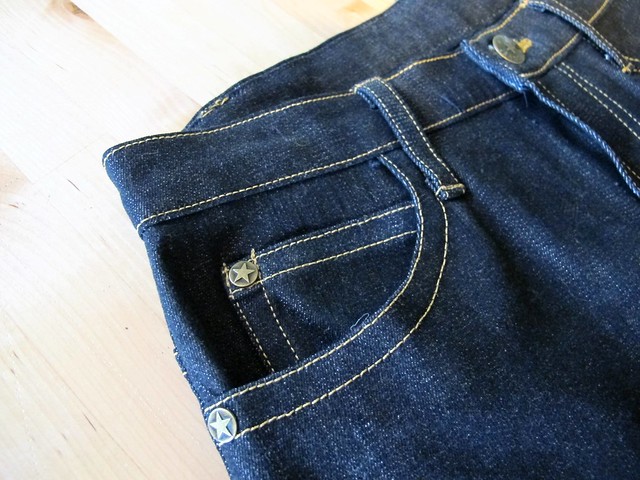
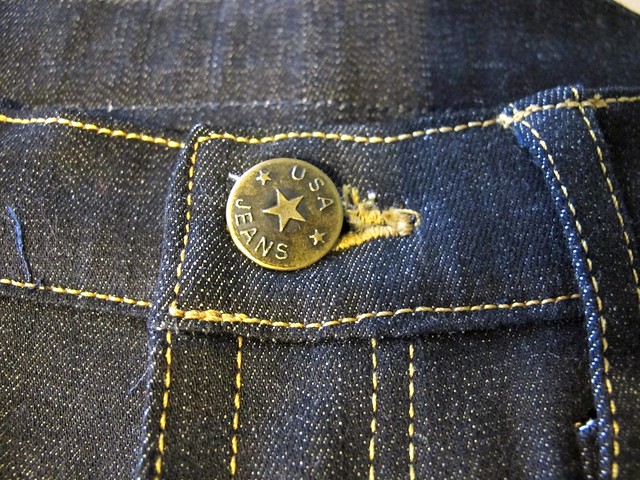
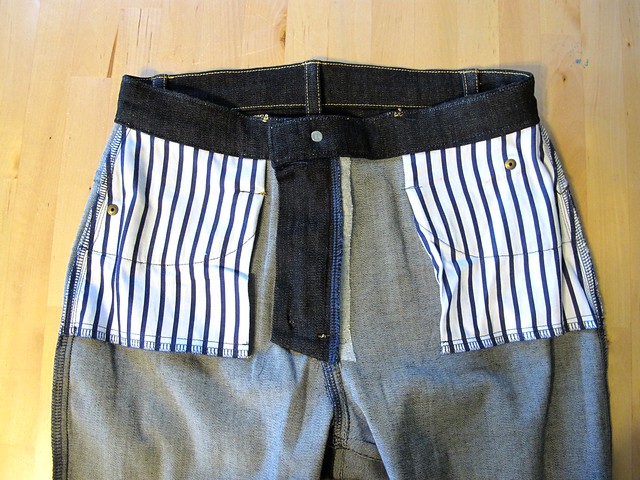
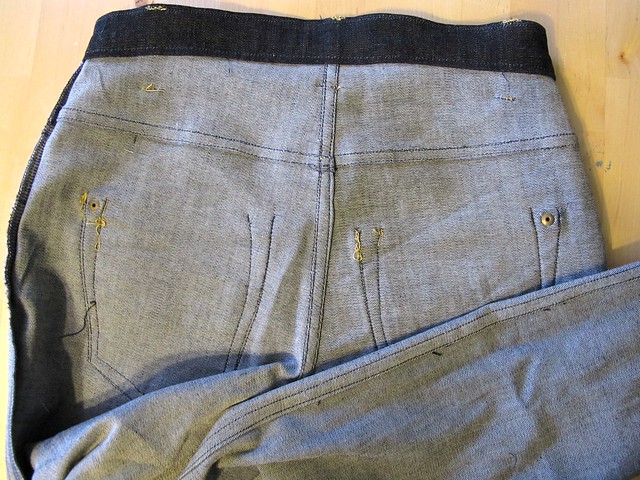
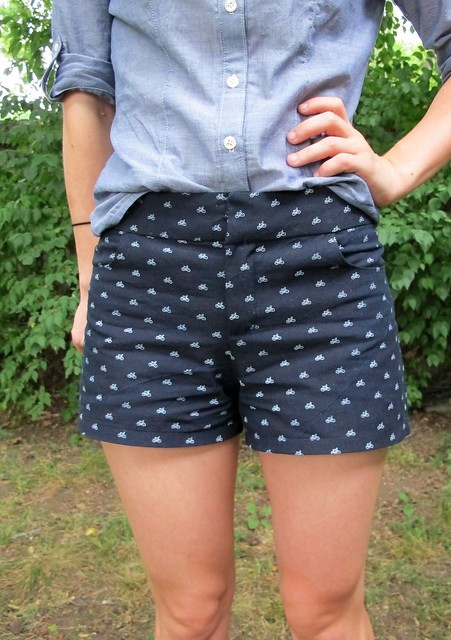
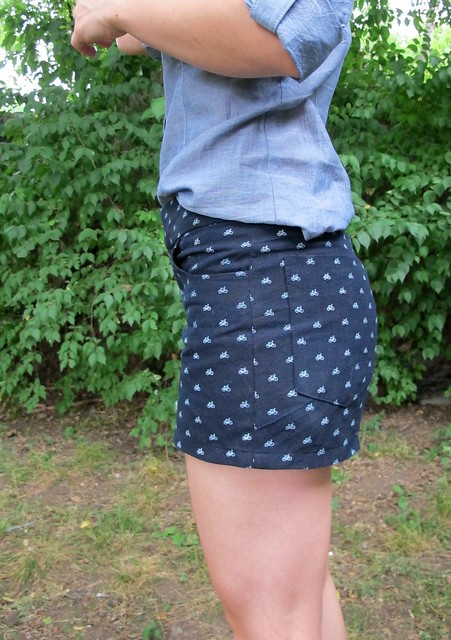
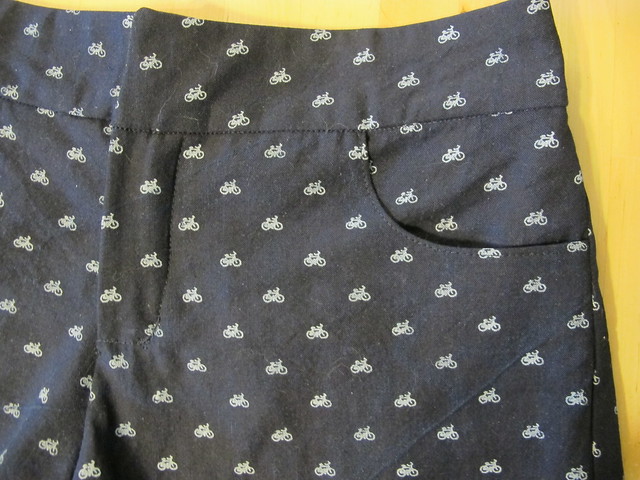
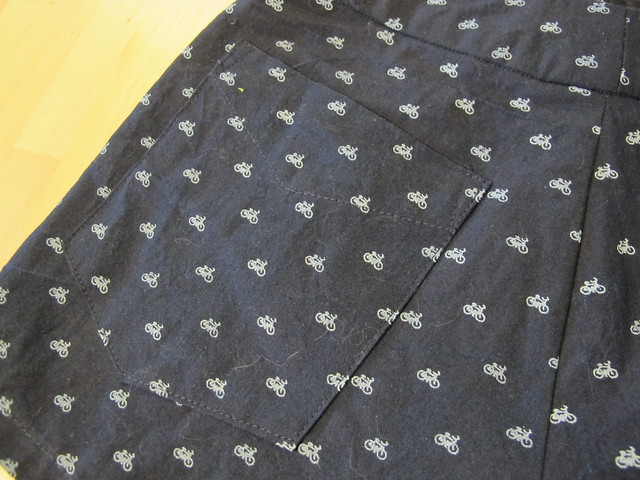
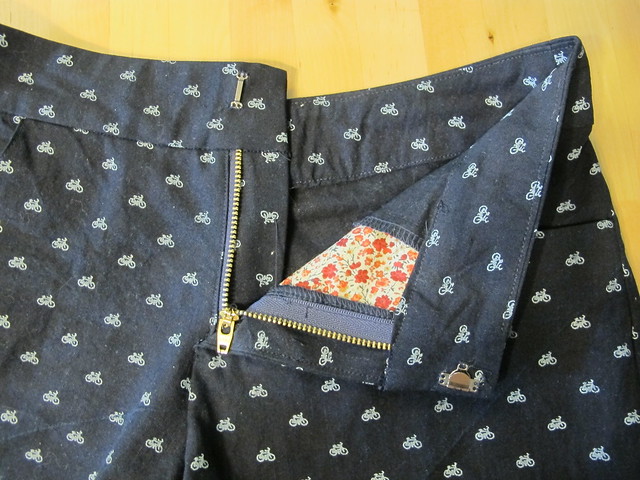
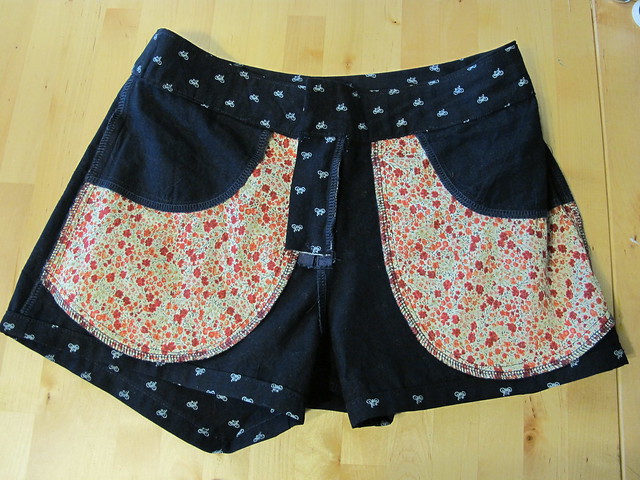
– Each sample is sewn using the key pieces necessary for fit – front and back legs, yoke, full fly (zipper, shield, etc), and waistband. There are no pockets, no seam finishes (or hems), and there is only topstitching where necessary for fit. Furthermore, the waistband is uninterfaced, except where the button would go – this is what I prefer in my jeans, and it gives students the chance to see what that feels like when they try on the pair, so they can decide for themselves whether they want to interface their waistbands. Personally, I find it way more comfortable! I also left off the buttons – students simply pin the waistband shut when they try on the sample.
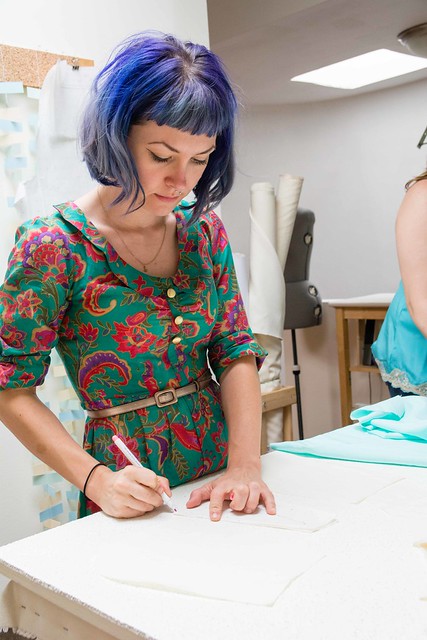
– The pattern is the Ginger Jeans pattern from Closet Case Patterns, available in sizes 0-20. My samples are View B, the high-waisted, skinny leg version.
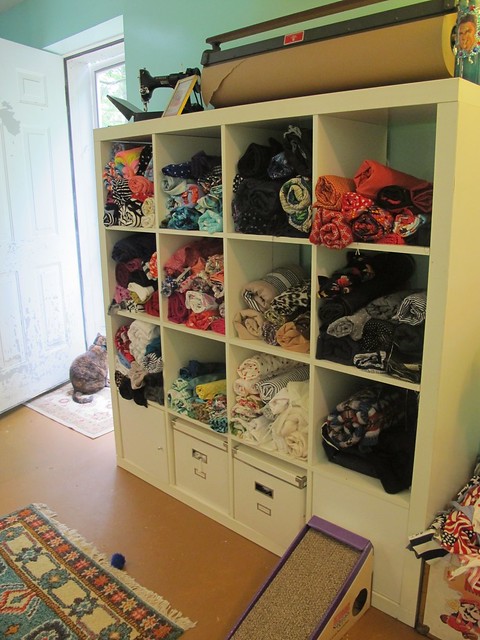
– As a fun side note, each pair of jeans has a different colored zipper. I knew that giant box of 75+ vintage zippers in weird colors that I bought at the flea market AGES ago would eventually come in handy! 😉
To get everything sewn up in a timely fashion, I had to set things in stages. Due to the number of pairs and them all being different sizes (in all the same fabric, no less), I was unable to batch sew these like one would in production. I literally sewed each pair one at a time. I found that the fastest way to do this was to cut everything first (again, individually) and batch all the pieces together with the size clearly marked. Then, starting with the largest size and working my way down – I sewed each pair of jeans from start to finish. For fun, I timed myself – the first pair took 52 minutes, but by the time I sewed that last pair I was actually down to 32 minutes!
And then I got really into it and a little time-lapse video of myself sewing one of the pairs of jeans. Because I am a huge nerd.
I also totally broke my sewing machine during this process. At some point, I sewed over a zipper (a nylon zipper, I might add) and hit it at juuuust the right angle that it snapped the needle and everything went completely haywire. I had somehow managed to completely jack up the timing – my needle was hitting the needle threader on it’s way up, and not picking up the bobbin thread. I am lucky that we have an incredible sewing machine dealer + repairshop in the area, so I brought it to him and he was able to get everything fixed and back to normal by the next morning! I can’t even tell y’all how much I love my dealer – highly recommend them if you are in Nashville and shopping for a Bernina!
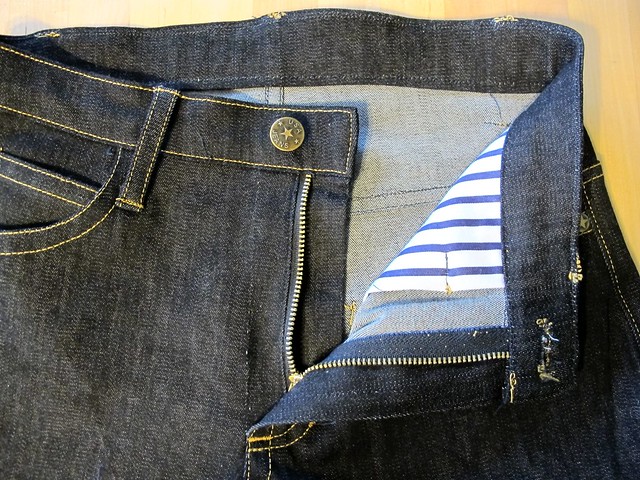
Ok one last nerdy thing! Doing the same sewing process over and over (and over and over) actually gave me some wonderful insight for finishing the waistband! In the past, I (and probably most of y’all) have attached it the waistband from the right side, then turned the facing (inside) to the inside and pinned it, then topstitched from the outside. This is unnecessarily fussy and I don’t know about you, but I always end up with a little section of facing that didn’t get stitched down. Jennifer had mentioned a few times in the past to flip and attach the facing first, then topstitch from the outside – which I’ve done before with other garments when it’s in the round, but I couldn’t get a clean finish right at the zipper opening. Well, y’all – 11 pairs later, I’ve definitely got it down! So here’s a mini tutorial: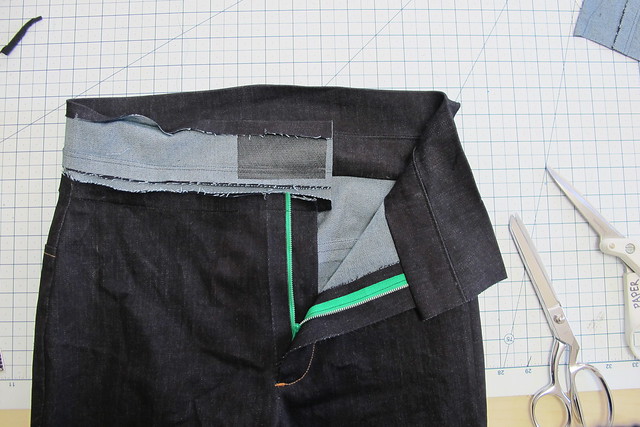
Assemble your waistband as normal (sew the waistband to the facing along the top and understitch one side), then press the seam allowance of the WAISTBAND (the side that is not understitched) under to the inside. I press about a scant less than the seam allowance – so a 5/8″ seam allowance gets pressed a little between 1/2″ and 5/8″ (this allows the waistband to fully cover your stitching). Sew the facing to the top of your jeans, with the right side of the facing against the inside of the pants, like so. It will look totally wrong at this point. Trust.
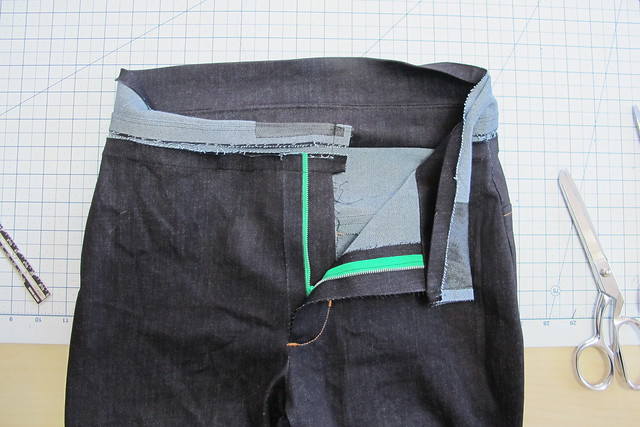
Now fold the short ends of your waistband in half, with right sides facing, and the connecting line of stitching (not the understitching) right along the top of the fold. Sew across the short end to close.
When you turn the ends right side out, the waistband should fall right into place, covering the seam allowances.
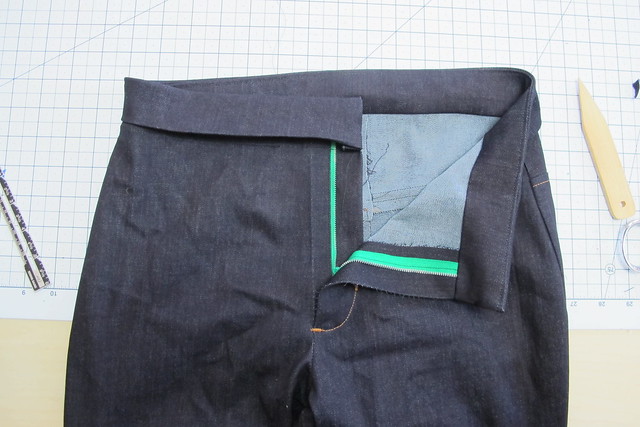
Then you just pin everything down and topstitch! Since the facing was already attached, you don’t have to worry about catching it in your topstitching 🙂 Here’s another hint – start at the center back, that way your backstitching gets covered by the belt loop.

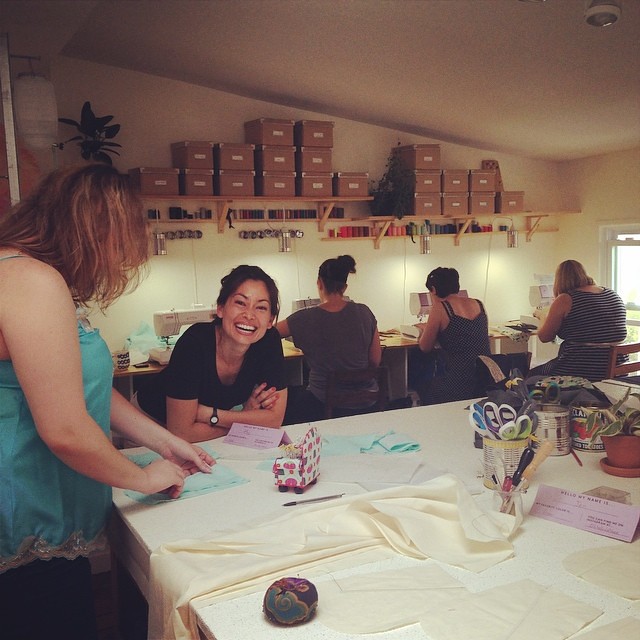
So now I want to talk about my classes! Jeans Making has been pretty popular and I am excited to take this class ~on the road~ since I realize that not everyone can come up to NYC to take a sewing class (and also, I’m selfish and I like to travel haha). I have taught this class several times at Workroom Social, and learned a lot about teaching these workshops – what works, what doesn’t work, and what I might want to change for my own classes (very little- like I said, Jennifer is VERY good at what she does! There’s a reason why I keep working with her, she is amazing and the classes at Workroom Social are wonderful!).
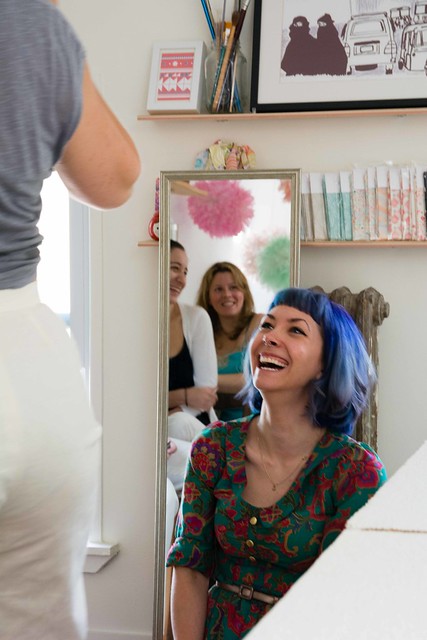
The main thing that Workroom Social focuses on in their classes – and I focus on as well – is the overall experience of the class. Yes, you are there to learn and we want you to learn as much as you can and feel empowered by your knowledge! But even beyond that – we want you to have FUN in the class. Based on what my students tell me, this is not always the case – which kind of makes me sad, and also explains why there are lots of people who get scared off from sewing after a single class. I always strive to give my students the very best experience, and give them my full undivided attention during the entirety of the class. This is why I rarely have photos from classes (unless someone else took them), or post on social media during my classes – I’m not using my phone in class because I want to be 100% involved with my students. I am also a firm believer in that there is no “right” or “wrong” way to do something – you do whatever works! Sewing isn’t like baking, it’s like cooking – whatever gets you the result you want is the “right” way to do it. My classes are less about doing things perfectly and more about having a good time, learning a lot, and actually finishing your project. Then when you go home and make that next pair of jeans – that’s when you can work on the perfection side!
One other thing about my classes that may be a little different – I don’t try to keep students at the same pace the entire time. If that means I have to repeat myself 10 times during a class, that’s ok (seriously, you’re not going to fluster or bother me haha)! I realize that everyone learns differently and operates at various speeds, and I don’t want to punish half the class for being at a different speed. Faster students can blaze ahead and not be bored, and the slower students aren’t stressed about keeping up. I find this to be a very positive overall experience, both in terms of people actually learning shit and also keeping the vibes of the class high.
The only thing I changed with my solo jeans classes is the time involved. Classes at Workroom Social are 2 full days. While you can definitely finish a pair of jeans in that time – I’ve had classes wrap up as early as 3 hours before the end time before – it can also be a little rushed sometimes. Workroom Social also speeds things up by having the patterns pre-traced and cut, and also providing lunch in the studio. After some thinking, I realized the fitting/cutting portion was really the big roadblock here – so for my classes, I am moving that to its own half day. This makes my classes 2.5 days, but those extra hours make a big difference (plus it makes things a little easier if you’re traveling to take the class – you can fly in that morning). Students have 4 hours to try on the samples, choose their size, cut or trace their patterns, make basic fitting adjustments if needed, and then cut and mark their fabric! Next two days go straight into sewing, with a little extra time built in so it’s not as rushed – and you can chat! Or take a break! Finish early? Cool, I’ll do some demos or talk about what shit you want (jeans-related or not)! Or we can drink and hang out and celebrate! I don’t care, we are here to have fun!
Oh yeah, one last thing – if you fall outside the size range of the Ginger Jeans pattern, that is ok! The Ames Jeans pattern from Cashmerette is available in sizes 12-28 and for two different body types (apple or pear fit). While I do not have samples available in this pattern, you can absolutely use it to take my classes and get you a pair of jeans that fits YOU. In other news, I cannot tell you how excited I am that Jenny released this pattern. I may or may not have fangirled for like 2 weeks straight haha.

Ok I swear I’m wrapping up! Here are my upcoming classes through the beginning of May (you can also see these on my Classes Page 🙂 )
Sew Your Own Jeans Weekend Workshop!
January 19th – 21st
Craft South / Nashville, TN
First workshop of the year! This 2.5 day workshop will cover everything you need to make your own pair of Ginger Jeans 🙂
Jeans Making Sewing Intensive
March 24th – 25th
Workroom Social / Brooklyn, NY
Pfft y’all didn’t think I leaving Workroom Social, did you? THEY CAN NEVER GET RID OF ME 🙂 This 2 day workshop in beautiful Brooklyn is all about jean-making – rumor has it we will be sewing a custom Workroom Social jeans pattern in this class 🙂
Ginger Jeans Workshop
April 27th – 29th SOLD OUT // May 1st – 3rd
Stitch Sew Shop / Alexandria, VA
Two dates for this one! Choose either Friday – Sunday (Update: The weekend is now sold out!) or Tuesday – Thursdsay (maaaaybe you are thinking about going to the Sheep and Wool Festival that weekend? ;)). This is another one of my 2.5 day workshops where we will make Ginger Jeans!
If you are a shop who would like to host me for a Jeans Workshop, please get in touch! I still have a little bit of availability for the second half of 2018 🙂 I am especially interested in teaching on the west coast or in the UK!
If you read this entire post and you’re still somehow still here – if we ever meet irl, I totally owe you a drink haha!
Ok, I’ll be back soon to discuss my jeans made with the Robert Kaufman fabric! Have a great day, everyone!


