Tag Archives: closet case patterns

Completed: Jenny Overall Shorts

29 Aug

I’m just gonna go out and say it now: these pictures are shitty, but I’m posting them anyway. Considering how long it took me to even get photos in the first place, lord knows I’m not gonna make the effort to re-shoot them. Sorry, not sorry!

Also, if you’re seeing this post twice – that’s because I mistakingly published it yesterday, realized my error, and immediately deleted it. I wasn’t going to say anything at all (honestly it’s an embarrassing mistake) but I’ve gotten several comments and emails expressing concern, so I wanted to clarify. The error post yesterday was meant for the Mood Sewing Network. I was just typing it in my blog because I like the format better, and unfortunately I hit the wrong publish button lol. Oops! If you already read the other one, I would still suggest reading this one as well because both posts are different – and this one has more (shitty) photos ! Ok that is all!

Organic Twill Jenny Overalls

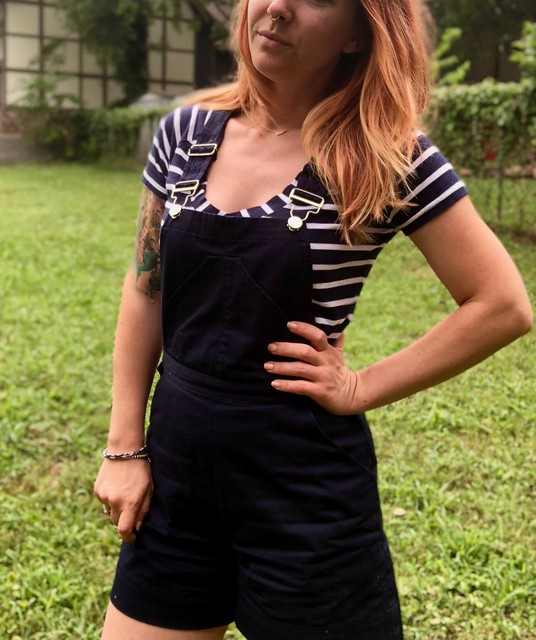
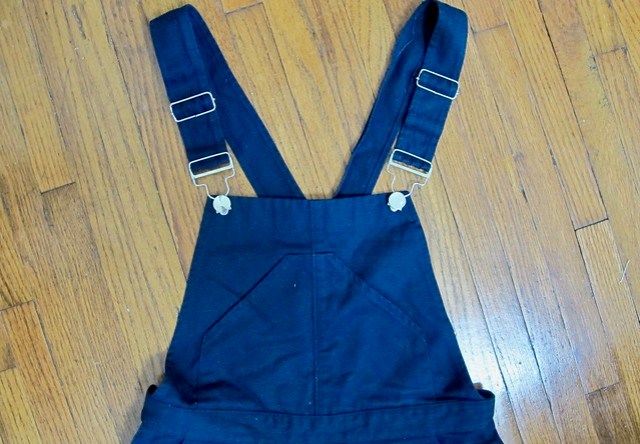
So these are the Jenny Overalls from Closet Case Patterns – one of many, many overall patterns that are currently available. I’ll be the first to admit it – I haven’t been a big fan of the current overall trend (“current” being the key word here – 90s-era Lauren definitely had a pair of denim overall shorts with Mickey Mouse embroidered peeking out of the pocket. God, I loved those things. Wore them with my purple Looney Toons baseball cap and my Adidas slides with white Tommy Hilfiger socks. You’re welcome for that mental image). In fact, when this pattern first came out – my initial reaction was “meh.” Everyone who was at my weekend workshop in Alexandria VA can attest to that, ha! I received a copy of the pattern from Heather, but truly I was more interested in the pants than anything that has a bib attached to it.

Organic Twill Jenny Overalls

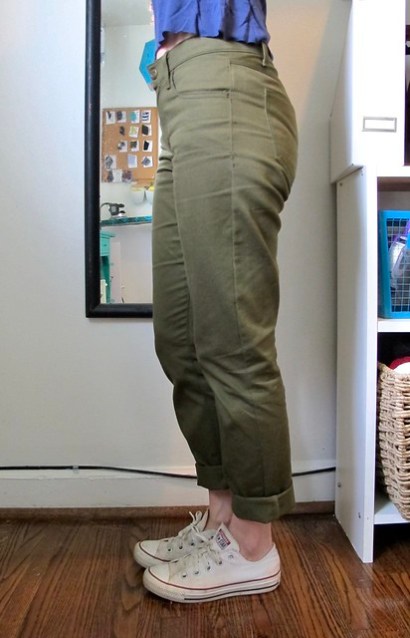
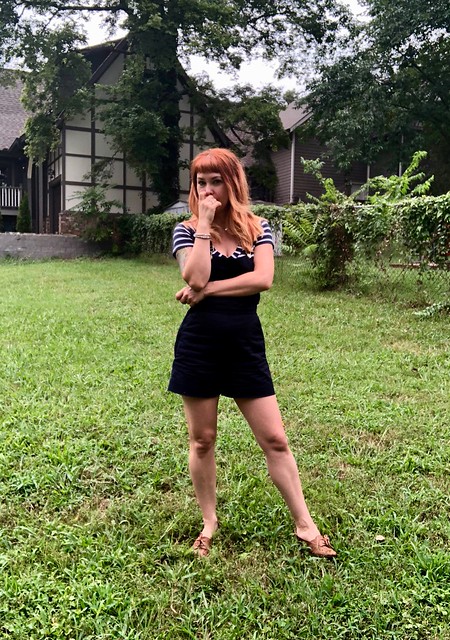
So what changed? Honestly… I blame Heather. Shortly after the pattern release, she posted an ass-load of photos of her galavanting all over London & Stockholm in her cropped Jenny Overalls. Every outfit looked rad as shit, and I eventually swayed my overall stance. I think my biggest issue is that overalls seem very utilitarian – which really is not a look I typically go for. This specific pattern is more 1940’s Rosie the Riveter glam, with a high waist and wide legs. Make them out of something other than denim, and they seem pretty sleek. I was willing to give it a go!

Organic Twill Jenny Overalls

Organic Twill Jenny Overalls

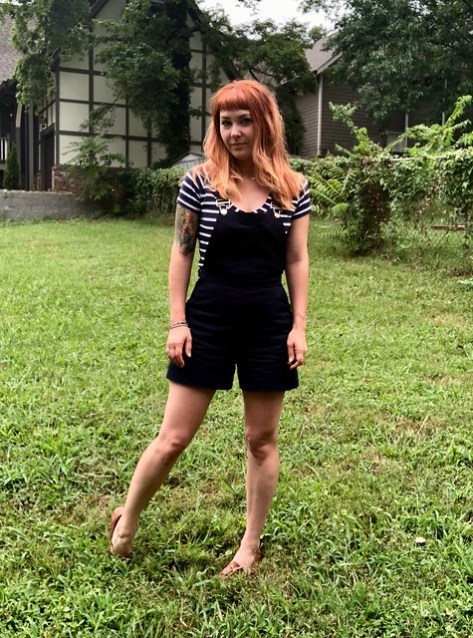
For this pair, I went with the shorts version although in hindsight I kind of wish I’d made the cropped legs (more on that in a minute). I cut a size 4 at the waist, grading out to a 6 at the hip. Those of you who have been following my blog for a while may notice a size discrepancy here – I pretty much exclusively make a size 2 in Closet Case Patterns. Well, my measurements have always been right between the 2 and 4, so I simply sized down instead of up. Aaaaand the 30s are hitting hard, which means I’ve gained a little bit of weight! Just enough that I needed to go up a size – and in the case of my hips and thighs, 2 sizes. Just a head’s up! The sizing on this pattern is still pretty consistent; MY size in particular has been the inconsistent one!

Organic Twill Jenny Overalls

Organic Twill Jenny Overalls

Organic Twill Jenny Overalls

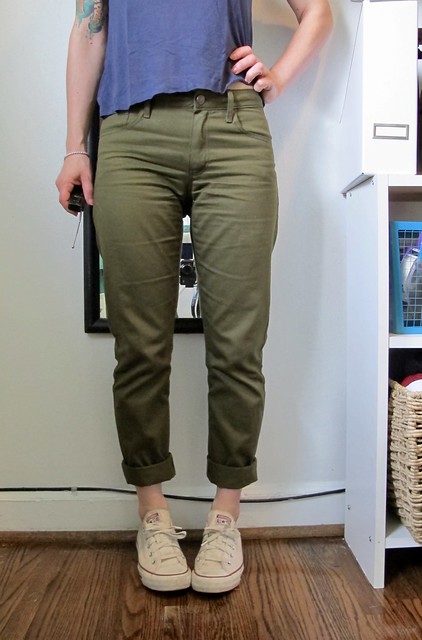
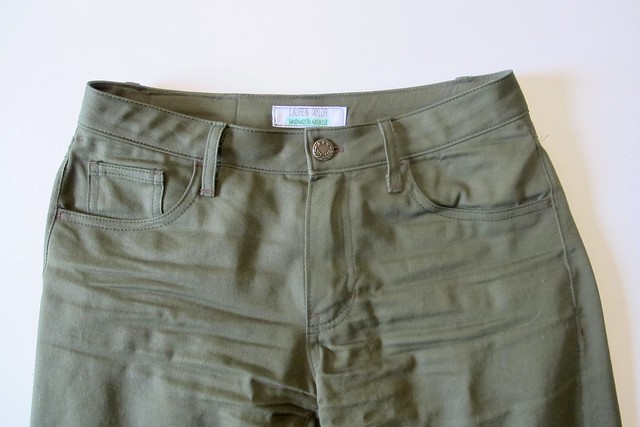
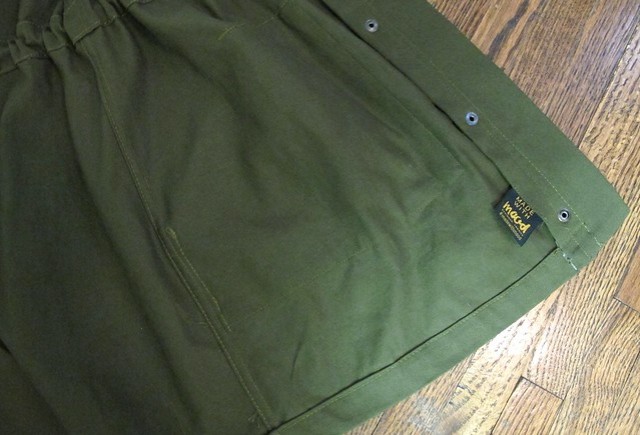
Rather than use denim, I used Organic Cotton Twill from Mood Fabrics as my main fabric. Again, if you’ve followed my blog for a long time you are probably aware that I LOOOOVE this fabric. It’s the best! A great bottomweight, 60″ wide, available in an array of great colors… and less than $15/yard? YES, SIGN ME THE FUCK UP. I can also personally vouch that this stuff washes and wears beautifully. So it was a no-brainer that I opted to use it for this particular project.

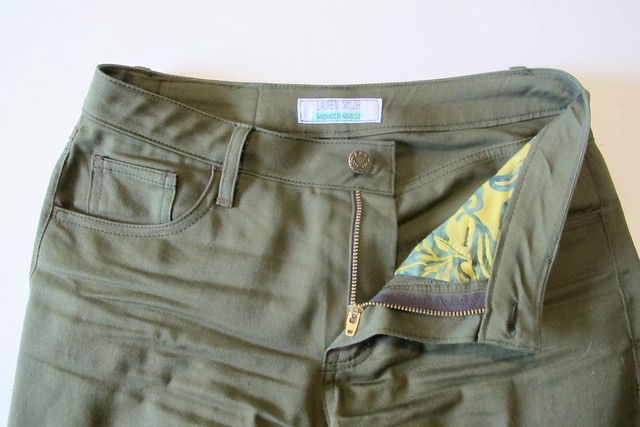
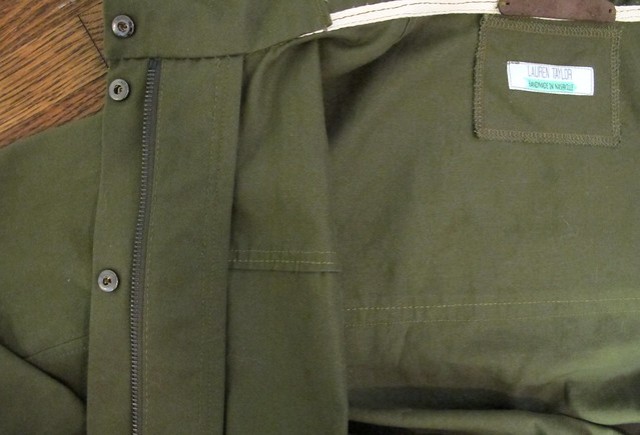
As far as construction goes… not too much to report on this particular make. The instructions are great, easy to follow, and I really found this project to be super satisfying to work on. It’s similar to making a nice pair of jeans – lots of pressing and topstitching, and working with an easy fabric. I didn’t make any fit or construction adjustments to the pattern, other than (accidentally) using too long of a zipper. The only thing I’m not crazy about is how bulky the seam allowances are by the zipper – once you factor in pockets, the lap over the zipper ends up pretty thick. I don’t think swapping out for buttons would change that, and I’d rather have the pockets and just deal with bulk, so it’s not a big deal I guess.

Organic Twill Jenny Overalls

Organic Twill Jenny Overalls

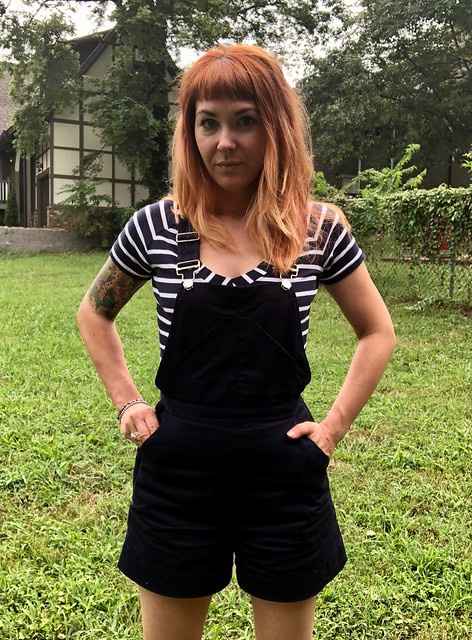
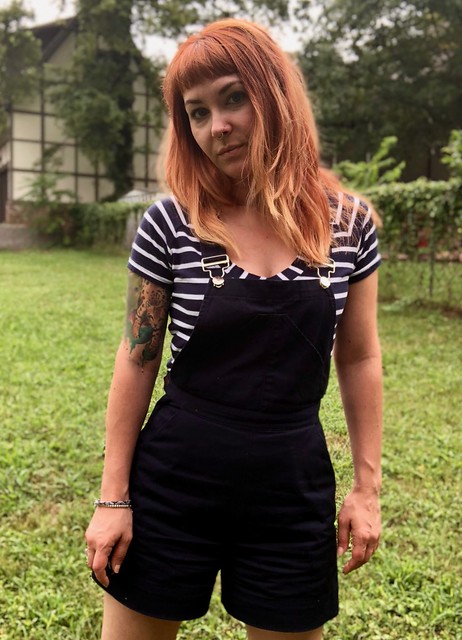
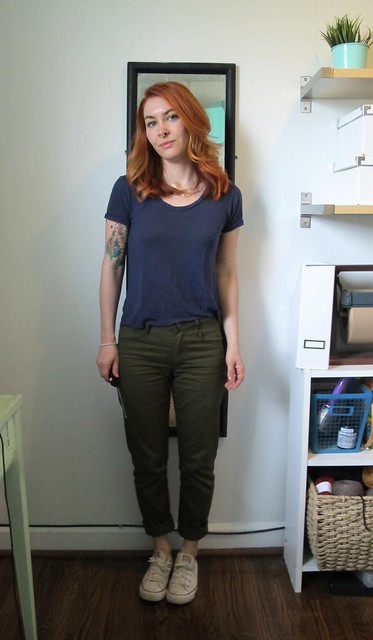
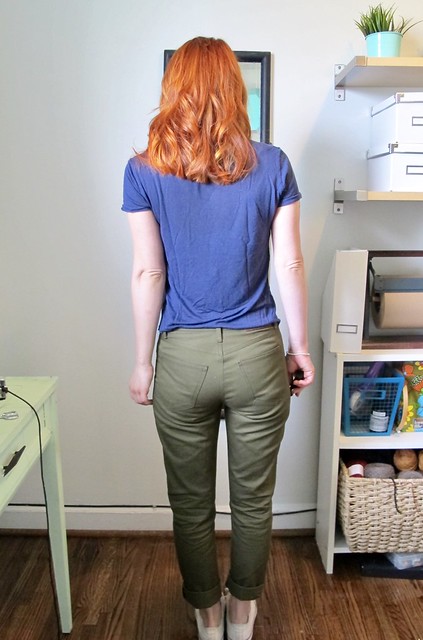
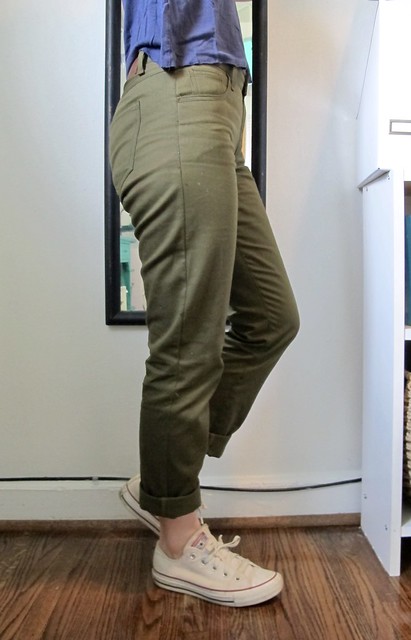
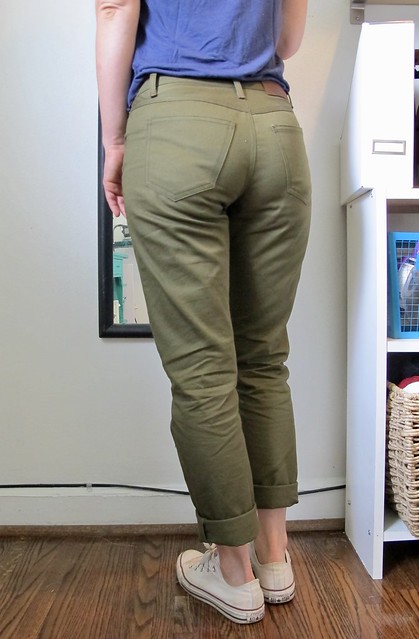
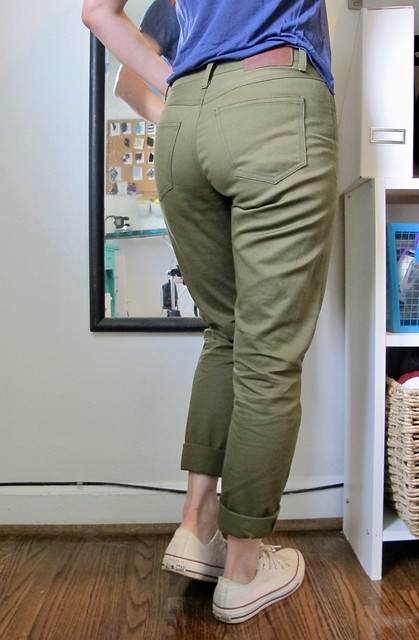
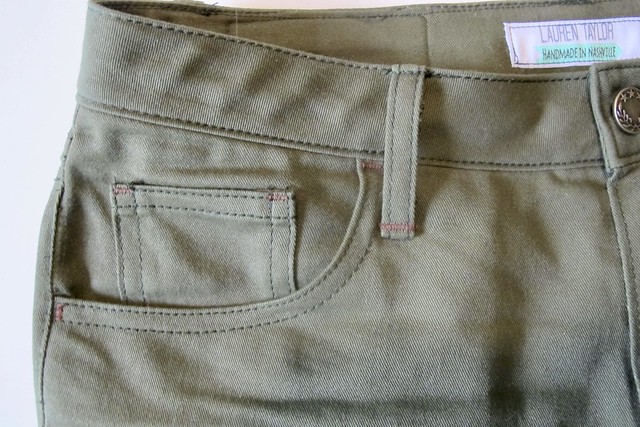
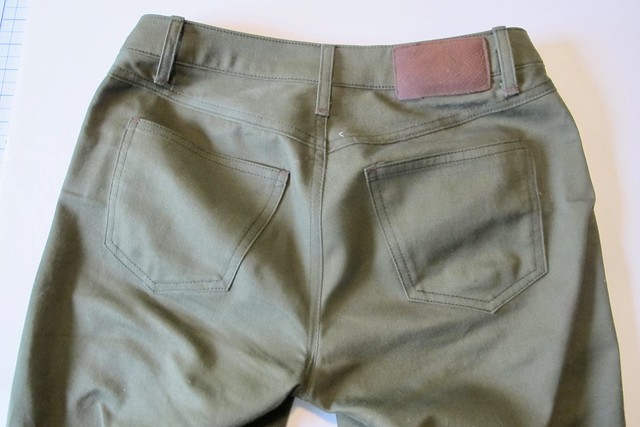
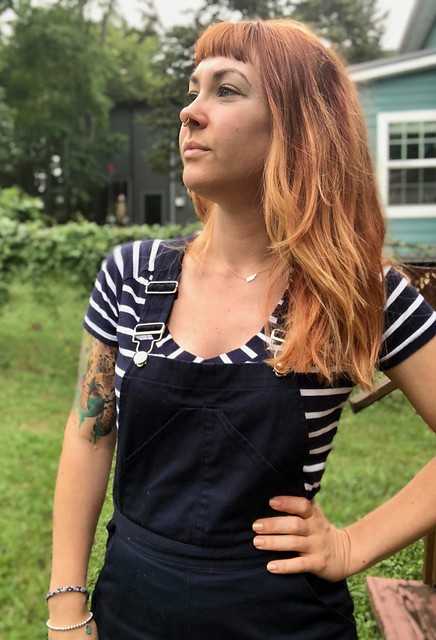
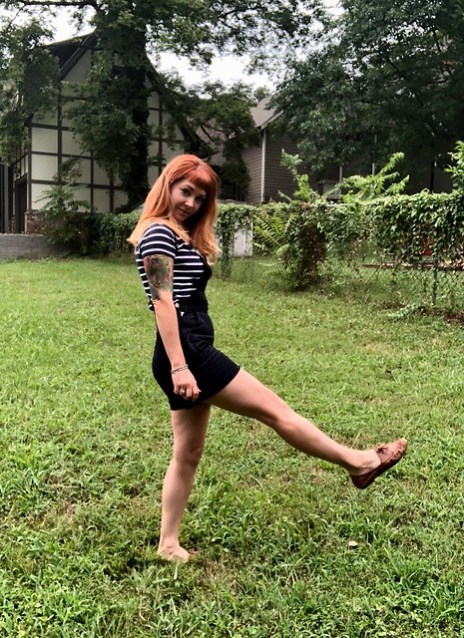
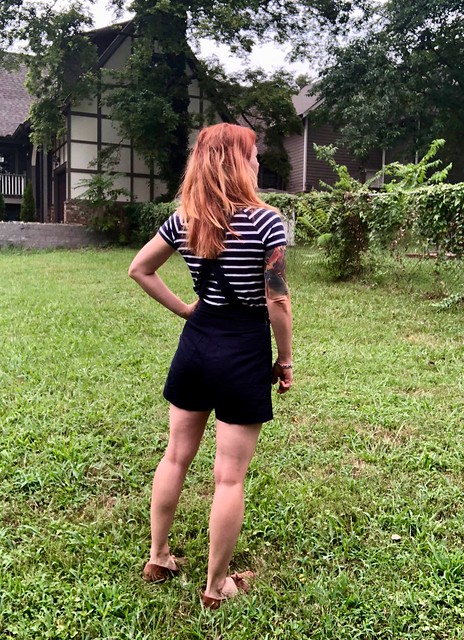
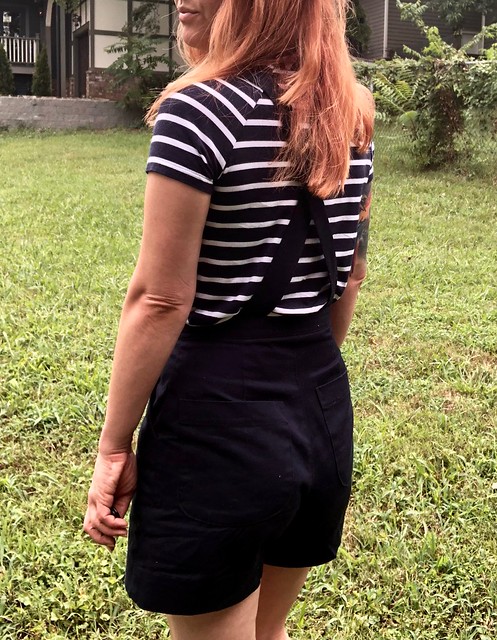
So… as for the verdict? Well, they did turn out really cute! Every time I wear these out, I get loads of compliments. I think the dark color and subtle topstitching do help to make these look a little less farmer-y (you do you, but personally I do not want to look like a farmer), and the high waist and comfortably loose leg are definitely chic. I like that the bib is proportionally small, and that the straps cross over. All in all, it’s a nice look.

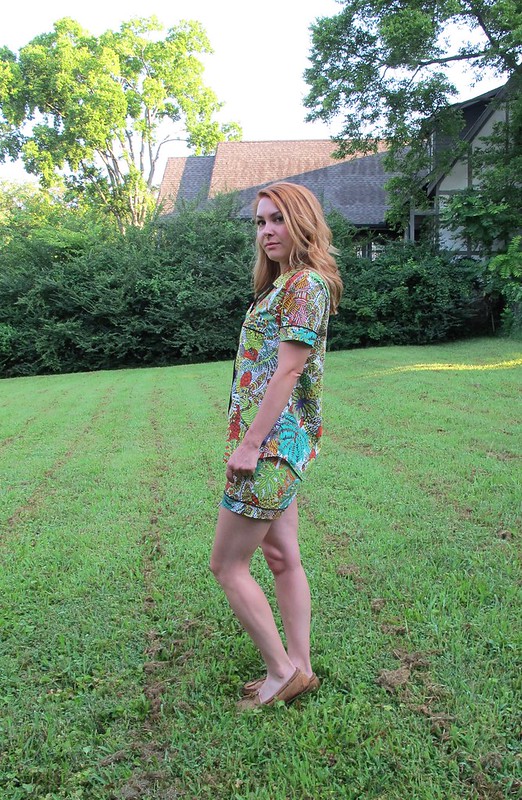
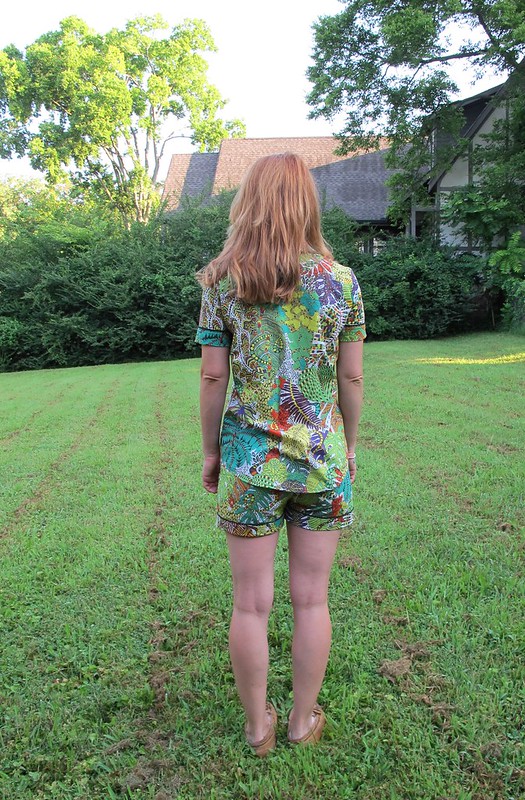
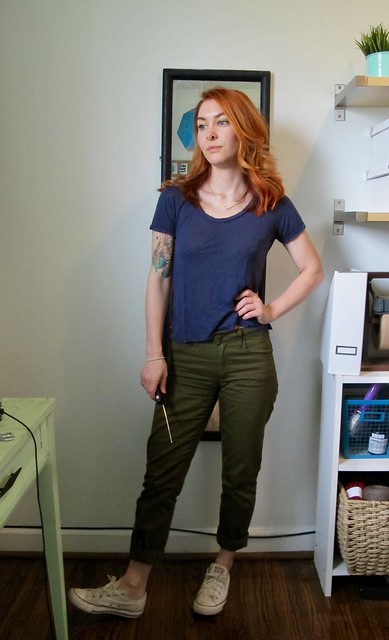
But… is it a look for me? Not really. I feel kind of uncomfortable in them, to be honest. The fit itself isn’t uncomfortable – the sizing includes an appropriate amount of ease, although I will say that I’m not used to wearing anything quite this fitted at my waist these days (with no stretch whatsoever), so that has taken some getting used to! I also feel weirdly overheated when I wear these if it’s super hot outside, so I can’t wear them if it’s higher than, say, 85 degrees (aka most of the summer in Tennessee). I don’t know why the addition of that bib makes them feel unbearable in the heat, but it’s a thing! Which is why I wish I’d made mine with longer legs – I think they’d be more practical, as I could just wear them in cooler weather. Finally, it has been surprisingly hard to style these. Since they are fitted and high-waisted, they really only work with tight or cropped tops. Anything loose- even if you tuck it in – just looks kind of weird in my opinion. I realize there are lots of tight top patterns out there (including Nettie!), but I don’t have any in my wardrobe as, again, I don’t like wearing tight things in the heat! Pretty much the *only* thing I own that looks good with these is the shirt I’m wearing in these photos – a Papercut Patterns SJ Tee.

Were I to make these again, I’d do the longer version and cut the waistband on the crossgrain so there’s a bit more stretch. Styling-wise, I actually do wear pretty fitted tops the rest of the year so that wouldn’t be a problem.

Organic Twill Jenny Overalls

Overall (lol see what I did there), I do like this pattern and the resulting overalls are pretty cute! The jury is still out on if I really feel sartorially comfortable wearing these, so I’m giving them a few more goes before I make a decision. I’m glad I made them because I did enjoy the experience, and if I decide to pass them on I’m sure someone else will love wearing them 🙂

Note: The fabrics used in this post were provided to me by Mood Fabrics, in exchange for my participation in the Mood Sewing Network. All opinions are my own!

Completed: Cropped Linen Kalle Shirt

11 Jun

I finished this shirt about 2 months ago but am just now getting around to posting it! I have worn it TONS since finishing, and it’s definitely one of my 2018 Summer Staples.

Linen Kalle Shirt

This is the Kalle Shirt from Closet Case Patterns. I made the dress version in linen last year, and I wore it a LOT, so I was interested to try the shirt for this summer. It’s a basic little collared/buttoned shirt that has plenty of options (exposed or hidden placket, collar or no collar, cropped or long), and I like the nice loose fit paired with the banded kimono sleeves. I always felt so pulled together when wearing the dress, and I figured the shirt would make me feel similarly.

Linen Kalle Shirt

I did make a few changes to the pattern due to fabric amounts & personal preferences. Having sewn a few Closet Case Patterns in my time, I find the cropped version of the tops to be VERY cropped. I measured the length of this top and realized it was going to be too short for me to comfortably wear, so I added an extra 2″ of length, which makes the finished top reach right at the waistband of my pants (the shorts I’m wearing in these photos are just thrifted jeans that I cut off, FYI, but they hit close to the same spot that my Ginger jeans do). I added length to both the front and the back, however, I thought the back looked ridiculously long once it was finished so I chopped that added length back off. The back is still longer than the front, only not as dramatic now.

The other changes I made were due to fabric shortages, as I was working with a very small piece of fabric for this shirt. I had an offcut piece of medium weight white linen that measured out at less than 1.5 yards (I don’t remember the exact amount, but it was definitely less than the suggested 2 yards that the pattern calls for), which I was bound and determined to use. It was just *barely* enough to eek out the main pieces of the shirt, and I did not have enough fabric to cut the facings or the pocket. I made an executive decision to finish the hem with a bias facing (made of an entirely different fabric – cotton lawn to be exact) and leave off the pocket.

I can’t say for certain, but I believe the fabric came from an Elizabeth Suzann sample sale last year (hence the weird size). It’s a nice medium weight linen that feels wonderful and also does not wrinkle as much as the lighter weight linens – it’s actually very similar to the Vivaldi Linen from The Confident Stitch (I think the Vivaldi is slightly softer, but that also may be because I’ve washed it more), if you are looking for a good sub 🙂 (and go back a couple posts to my OAL Announcement for a discount code that’s still good as of this writing :)). This shirt has done really well with traveling especially – the worst wrinkling I get is at the collar, which I usually end up fixing with my flat iron 😛 As you can see, it does rumple a bit but I actually like that.

Linen Kalle Shirt

Linen Kalle Shirt

Linen Kalle Shirt

Sewing up the shirt was easy – I’ve made dozens of these sorts of patterns, so I feel like I can almost do it in my sleep at this point. The seams are flat-felled and there’s lots of satisfying topstitching (albeit white). I realized about halfway through that the shirt really, really needed that pocket – I think it just looks barren without it. But, y’all, I am not exaggerating when I say that I had fumes of fabric leftover after cutting. You’d think I’d be able to squeeze out a pocket – it’s a tiny piece, after all – but I was playing some serious Fabric Tetris as it was and the leftover pieces were miniscule. After thinking on it for a minute, I realized I did have a couple of pieces that were about half the size of a pocket… so, again, I made an executive decision and decided to sew them together to make a full sized piece that I could then cut the pocket out of. To make this look a bit more intentional, I flat-felled the connecting seam. I can’t even tell you how pleased I am with this save; the shirt looks great with the pocket and that flat-felled seam look intentional as fuck amirite.

Hemming was a whole other beast that I had to work my mind through before I came to a solution. I usually just hem my curved woven hems with a bias facing – it creates a beautiful finish with minimal effort – but the way the side seams are curved on this top doesn’t work terribly well with bias, it really needs a facing. Especially when you are connecting that to a flat-felled seam (which would otherwise be hidden under the facing). I ended up hemming the front and back separately, then clipping the side seam and bartacking it down over where the curved side meets. One thing I didn’t consider is that the seam allowance for the hem (due to the facing) is 5/8″, and you sew a bias facing on at 1/4″… so my side seams have extra seam allowance and thus overlap differently than the pattern intended. It’s not a bad thing, but it is different! Something to keep in mind if you decide to omit the facing and use bias instead.

Linen Kalle Shirt

Linen Kalle Shirt

It looks cool buttoned up all the way, but let’s be real – I won’t wear it like this, like, ever haha

Linen Kalle Shirt

Linen Kalle Shirt

The aforementioned side seam with overlapping curves and a bartack!

Linen Kalle Shirt

My cool little pocket 😀

Linen Kalle Shirt

I think that’s all for this little shirt! I’m surprised at how much I love wearing it – it’s been in regular rotation since I’ve finished, as it’s light and airy in the heat but still looks very pulled together – and I get loads of compliments on it. I’d love to make another in a different color or even a patterned fabric, once I find something suitable. Making collared shirts is so much fun!

Completed: The Kalle Shirtdress

18 Sep

I’ve still got a few more summer projects that I haven’t shared yet, so bear with me here! Although, to be fair – we should be well within the throes of summer heat for at least the next month here (yes, it did warm up again!).

Chambray Kalle Dress

I made this dress a couple of months ago, so what you are seeing a dress that has been worn, washed, and loved quite a bit before taking photos! As a result, it’s probably not as crisp and perfect as it would have looked fresh off the sewing machine – but on the flip, it’s definitely something that I’ve had time to move around in and really get to know fit-wise in ways that might not have been so apparent immediately after finishing it. Plus, you can really see how this fabric looks after several trips through the laundry. For ages, I was firmly in the camp of photos before I wore anything I made, but I’ve really softened up on that lately. This makes more of a delay in posting (since nothing is stopping me from putting that shit on RIGHT AWAY), but I think it can also create more of an honest post, in the sense of seeing how something feels after it’s been worn around a bit.

Also, about these photos – sorry about the dark door background? I did take my tripod outside, but I had one neighbor chopping tree limbs in one yard creepin on me, and another literally sitting on her front porch just straight-up staring at me and it made me way too anxious hahaha. I may need to get something to hang over that door when I take photos (this is the door that leads to the back half of my house – where the bedrooms are – from my living room), but at least the light is pretty!

Chambray Kalle Dress

ANYWAY, back to the dress!!!

This is the Kalle Shirtdress, from Closet Case Patterns. I made view C in a size 2, with no alterations. This one is straight out of the envelope! I was so excited when this pattern came out and my finished dress did not disappoint – I wear it as much as I think I can feasibly get away with! The good thing about dressing kind of bland (simple shapes, solid colors, etc) means that people are less likely to realize you’re repeating an outfit. Or maybe they do and they are too polite to say anything, I dunno and I also kind of don’t care.

Chambray Kalle Dress

Chambray Kalle Dress

I made my dress up in a beautiful, lightweight linen from Mood Fabrics (which apparently is sold out now, sorry!). This fabric is great – it’s light and airy, and almost translucent. It is perfect for those hot summer days when you don’t want anything touching your body. The deep indigo color means that it will also transition nicely into fall – it still looks a bit autumnal, but I won’t be sweating to death in it. Plus, it layers really nicely for those chilly mornings and evenings – it looks great with a cardigan and boots.

I washed my linen three times before cutting it, as I wanted to make sure that it wasn’t going to shrink at all post-sewing. I believe this also helps keep the linen from wrinkling so much – Carolyn, was it you who told me this? – and I think that may be accurate since this fabric doesn’t really wrinkle much at all now! I’ve worn this dress on all my travels since finishing and it looks great going from suitcase to hanger. I have found that I do need to lightly press the sleeve bands after washing, because they get slightly bunched (probably because the bands aren’t interfaced), but the rest of the dress is fine without any ironing. In these photos, that’s exactly what I did not do. Un-ironed linen dress, y’all!

I finished the insides of my dress with French seams, and topstitched with navy thread. For interfacing, I used this super lightweight fusible interfacing, and then only sparingly – on the button band, upper collar, and outer collar stand – to keep the fabric supported but still soft. The hem is finished with a bias facing, which is an easy way to work with that exaggerated curve. The navy shirt buttons are from Textile Fabrics – and in the true spirit of Textile Fabrics, they are fancy and imported from Italy and cost over $1 each. Ugh. Who knew it was so hard to find navy shirt buttons? Anyway, they look good!

Chambray Kalle Dress

One thing you should know about this dress – it’s not a short dress, but the upper curve of the hem is quite high. And the arm holes are quite low, which means that the dress moves upwards if you need to raise your arms. See how high the dress goes when I reach the sky? Ok, granted – I rarely need to raise my arms *that* high, but it is something to keep in mind! For comparison’s sake, I wear my shorts very very short and only the bottom rose of my leg tattoo sticks out of the hem. If the dress hiked up any higher, you would literally see my underwear. FYI!

Chambray Kalle Dress

Chambray Kalle Dress

Chambray Kalle Dress

Chambray Kalle Dress

See how sheer the fabric is? It’s not noticeable when I’m wearing the dress, and also, I wear nude undergarments (nothing patterned).

Chambray Kalle Dress

Chambray Kalle Dress

Chambray Kalle Dress

Chambray Kalle Dress

I think that’s about all I have to say about this dress! I really love this pattern and I am excited to try the other versions in different fabrics. I also realize that this is like, my fourth chambray/denim shirtdress – but you know what? I don’t care. At least I’ve figured out what I like, I guess 😛

Chambray Kalle Dress

** Note: The linen fabric used for this dress was provided to me by Mood Fabrics, in exchange for my participation with the Mood Sewing Network. As always, all opinions are my own!

Completed: Liberty of London Carolyn Pajamas

7 Aug

I hope y’all are ready to look at some fancy shit today.

Liberty Carolyn PJs

Behold, my newest set of pajamas – also known as the most expensive thing I sleep in 😛

Liberty Carolyn PJs

A few months ago, I was contacted by Josephine’s Dry Goods to try out a piece of Liberty fabric from their staggering collection. They actually have a LOT of incredible, high-quality fabric from all sorts of designers (and they always happy to send samples if you are on the fence!) – but I was really keen to try the Liberty specifically because, let’s face it – you should never say no to free Liberty amirite. While I’m not generally a fan of the cutesy floral prints – they are pretty, but they definitely are not my style – there are plenty of non-cutesy non-floral prints to choose from – Adelajda, Weather Wonderland, Oxford, Melting Elements, Lauren’s Leaf (best name ever), Endurance – to name a few!

After a LOT of deliberation, I decided on Fornasetti Forest – I love the psychedelic print, as well as the colors. The colors aren’t necessarily ones that I tend to wear – but I was making PJs with my Liberty, which allows for a little more color experimentation. The fabric was shipped out quickly, and arrived in a beautiful little package.

Liberty Carolyn PJs

Liberty Carolyn PJs

Liberty Carolyn PJs

I used the Carolyn Pajamas pattern from Closet Case Patterns – having made these twice before (in summer linen and cotton flannel – both of which are still nighttime wardrobe staples for me!), I was pretty familiar with the pattern – both in terms of construction and fit – which means that I could get straight into sewing and know that I would be happy with the finished garment. I made a size 2 for both the top and the bottom, which is the same size I made for my other PJs. I went with view C, which features shorts + a short sleeved top, and added the optional piping to really make the style lines stand out.

Liberty Carolyn PJs - on dressform

Liberty Carolyn PJs - collar

Liberty Carolyn PJs - pocket

While this was a pretty straightforward project, I did put some thought into construction before I started. Since the Tana Lawn I used is so fine, I decided to use French seams for all the construction seams – yep, including the armsyces! – well, except for the mock fly, which I ultimately decided to just serge (I did consider binding that seam, but I was afraid it would be too bulky in an area that definitely doesn’t need even a hint of bulk haha). The piping and topstitching are both black – to bring out the black detail in the print and kind of ground it a little. I did have some coral-y orange lawn that exactly matched the orange in the fabric, but I went with black because I think it pulls all the colors together a little better. This print is pretty wild on its own! Getting black piping meant that I didn’t have to make my piping, either – I bought some premade stuff from a local shop here in town and that saved me a bit of effort!

Liberty Carolyn PJs - shorts flat

The top of the shorts waistband has a little ruffle, which is the result of using an elastic that is about 1/4″ too narrow. I couldn’t find elastic in the correct width that was soft enough (I like wearing the really soft PJ elastic, but sometimes you don’t get the best variety of widths), so I went a little narrower. Rather than redraft the waistband to reflect the new width, I just sewed a line of stitching 1/4″ away from the top edge and then inserted the elastic. I did this on my linen pair and I like the way it looks.

Liberty Carolyn PJs - top flat

Liberty Carolyn PJs - waistband

Liberty Carolyn PJs - cuff detail

Liberty Carolyn PJs - inside detail

Working with Liberty fabric was super easy – the Tana Lawn is a nice, tight weave that doesn’t fray much and responds well to pressing. Despite the expense (it’s about $40/yard), this is probably one of the best fabrics to make pajamas out of. Like I said, it’s SUPER easy to work with – even on a more complicated pattern – and it’s also really delightful to wear, as it’s nice and cool in the summer heat. Plus, the prints are really fun – perfect for a wacky night’s rest. Since the fabric is pretty light, I did use a really fine needle – a 70/10 sharp. I also found out that silk pins work best with this fabric, as larger pins will show pinholes (although I also learned that a quick steam will usually make the holes close up pretty easily).

I reaaaaally wanted to finish these in time to wear to Belize (I had visions of getting some island backgrounds in a photo or two), but I pretty much only managed to get them prewashed before it was time to leave. On the flip side, I was able to wear them to a little weekend cabin retreat with my book club – and everyone was really jealous of my awesome sleepwear. I think the top actually would do well on it’s own as daytime wear (with pants, I mean hahaha), which I’ve considered wearing. I just need to get past the mentality of it being PJs, you know?

Liberty Carolyn PJs - full set

Liberty Carolyn PJs

I think I’ve said enough about these PJs for now, but don’t think I don’t have more versions on the horizon – my plaid flannel ones suffered a bit of a dye transfer earlier this year (btw I’m never indigo dyeing anything ever again). While they are certainly still wearable, I’m on the lookout for a good replacement fabric to make a fresh pair!

As a side note – I have officially made all 3 versions of this PJ pattern. Heather, am I the only one? Can I have a trophy?

Note: The Liberty of London fabric that I used for these pajamas was very generously provided to me by the fine folks over at Josephine’s Dry Goods. I highly recommend them for all your Liberty needs!

Completed: Morgan Pants

27 Apr

I have a well-documented love for the Ginger Jeans pattern. In fact, I love making (and wearing!) this pattern so much, that I just stopped posting about it. After you finish the 10th pair of pants, it just feeling way too fucking redundant to keep posting the same pattern praise over and over again. Needless to say, I have a lot of pairs of these pants, and more in the works for next winter. No shame about that, but also, no blog posts. You are welcome in advance.

Morgan Jeans + Cabernet Cardi

With that being said, I loooove making pants and I found myself very intrigued with the Morgan Boyfriend Jeans pattern, which is also from Closet Case Patterns. I loved the idea of being able to make pants with a non-stretch fabric – truly, it opens up an enormous world of pants-possibilities that I hadn’t been able to consider in the past. Plus, I could keep making pants but pretend like they were like, totally different. Mostly, though, I wanted some non-stretch twill pants. I love the Organic Cotton Twill that Mood Fabrics sells (and yes, I’ve made pants with it before! And shorts!) and I know from experience that it’s a great fabric that wears and washes super well. I had about 1.5 yards leftover from my Organic Cotton Twill Kelly Anorak, so I decided to make the pattern as a sort of wearable muslin.

Truth be told, I actually got the Morgan Jeans pattern for Christmas last year. My little brother bought it for me (at my request) and while I was PUMPED to sew it up, it’s been languishing in my sewing room ever since. Every time I pulled it out of the envelope and tried to creep on the size chart, I just got overwhelmed and confused. I don’t know why this particular size chart buggered me out more than any other size chart in the history of ever – but that’s my excuse! See, I’m technically between sizes in Closet Case Patterns (I’m about 1/2″ bigger than the size 2, and a 1/2″ smaller than the 4). In my pants-making experience with this company, the size 2 fits pretty well, and the 4 is waaaay too big. However, this pattern suggests that you size up if you’re between sizes – and I kept having flashbacks of my size 4 Gingers that needed a LOT of tweaking to get a good fit, as they were just too big. I chatted with Heather about it when I saw her in DC, and she suggested going with the 2, so I took her advice and did just that.

Morgan Jeans + Cabernet Cardi

Y’all, I’m so glad I had a moment of craziness and decided to trace my pattern – I generally DO NOT trace my patterns, but the sizing question was giving me major pause and I thought I would be pretty sad if I ended up cutting the wrong one. Which is exactly what I did, because the size 2 is definitely too small! Oh well, live and learn!

With that being said – these pants I am modeling are the original size 2 that I made, so I did make them work. I had to let out the leg seams (basically the side seams from as close to the waistband as I could get, all the way to about the knee area) as much as my seam allowances allowed (it’s hard to tell now since they’re all finished, but I didn’t cut any fabric off when I serged as I was anticipating this, so, I’d reckon those seam allowances are probably about 1/4″ now). They were still pretty tight, but fortunately, woven fabrics like this tend to ease and relax throughout the course of the day. TBH, I don’t think I can ever put these pants in the drier because I don’t want them to shrink back up! (A far cry from me in my early 20s – when I’d walk around the house pantsless all day and only put on my pants literally right before I left to party, so they’d be as tight as possible haha!) But with the seam allowances let out, and the fabric all relaxed and happy – the fit on these is pretty much perfect! So no complaints on this pair – and I’m so so happy I was able to salvage them, as shit got a little hairy for a minute there – but I definitely will need to size up to a 4 for my next pair.

Morgan Jeans + Cabernet Cardi

Morgan Jeans

Morgan Jeans

Morgan Jeans

Morgan Jeans

Other than the sizing snafu, I am pretty pleased with the overall fit of these pants! I will be the first to admit that they may not be the most flattering thing I could put on my ass – but I think that’s kind of the case with a relaxed fit pant like this, regardless? And they are also a little tight, still, so sizing up on the next pair will probably help with that too.

I did not make any adjustments to the pattern – including not futzing with the rise. I usually shorten the rise as I have a bit of a short crotch, but I wanted to see how these fit out of the envelope. And again, I think it’s pretty good! Since they’re more of a relaxed fit than the tight Gingers, my calves fit in the legs just fine. FYI the inseam of these is pretty long – I think I measured it at about 32″ (I don’t know why that wasn’t included in the finished measurements, but there ya go), which is a good 4″ longer than what my lil’ legs require. Since the legs are straight, though, you can just cut off the excess length – which is what I did! These are hemmed to be a normal full-length, by the way, I just have them rolled for the pictures because that’s how I’ve been wearing them!

And speaking of wearing them – I took these photos on day 3 of wearing these pants, so they are pretty relaxed! And that also explains all the wear wrinkles. Whatever! It’s cotton, it’s gonna wrinkle!

Morgan Jeans

My favorite part about making pants is all the fun detailing you get to play with! Topstitching, contrast bartacks, fun pockets – yes please!

Morgan Jeans

Morgan Jeans

For these, I used a darker olive all-purpose thread with the triple stitch (I think it looks nicer than using topstitching thread – although it is a BITCH to unpick, so be warned if you decide to go that route!), and brown thread for the bartacks. The pocket lining is a batik fat quarter that I bought at Loose Threads, a quilt shop that I stumbled upon at random while in Harriman, TN a few weeks ago for the Barkley Marathons. I was not actively seeking a fabric store (honestly, we were just looking for coffee), but I saw the words “Quilt Shop” and we had to make a quick detour. There isn’t much that I can buy in a quilt shop – still haven’t caught the quilting bug, ha! – but I can stash some fat quarters as they are the perfect size and weight for pocket linings!

Morgan Jeans

Morgan Jeans

I skipped the back pocket topstitching as I wanted to keep these reasonably plain, but added a leather back patch like the instructions suggest. This leather was pulled out of my box of leather scraps – I’m not entirely sure where it originally came from, but it’s fairly thick. I had used this same leather to make luggage tags for my suitcases (yes I am a big dork), and that square was a leftover piece from the center cut-out. Since my machine had no problem going through the 2 layers to make the tags, I knew it would be fine with a single layer + the cotton twill. I didn’t even change the needle for this – just went to town and it turned out fine.

Morgan Jeans + Cabernet Cardi

Anyway, that’s all for now! Have you tried this pants pattern yet? What is your take on the boyfriend jeans (whether they are secretly made for females or you actually steal your *real* boyfriend’s jeans… tell me about that too)?

*Note: The main fabric used in this post was provided to me by Mood Fabrics, in exchange for my participation in the Mood Sewing Network.

Completed: The Ebony Tee

4 Apr

Whoa, hello April! It seems like it was only last week that we were celebrating the New Year – and hiding from the cold – and now here we are firmly in the middle of spring. Blooming trees, longer days, and allergies (well, not for this native heh heh heh) everywhere! I thought I’d squeeze out one more sorta-cold-weather-mostly-transitional piece, but after this – I’m sewing for the HEAT, y’all!

Cropped Ebony Tee

The is the Ebony Tee from Closet Case Patterns. I will admit that I was not super crazy about this one when it was first released – just not really my style, and the pictures weren’t doing it for me. It wasn’t under I saw Heather’s structured version and Erin’s drapey green version (yes, I realize these two are complete opposites) that I thought, this could be for me.

I got both the pattern and fabric while I was in Leesburg, VA for my workshop at Finch Sewing Studio. The pattern came directly from Heather herself – Isabelle and I met with her and Renee one evening after class, for pizza and (lots of) drinks. The fabric is from Finch – it’s a beautiful double knit, navy with grey pinstripes on one side, and grey on the other. I chose it specifically to make this pattern – I thought the body of the fabric would look great with the style of the top.

Cropped Ebony Tee

This pattern is a fun variation on the standard tshirt. It fits nice a slim through the upper bust and shoulders, and then shoots straight out into an exaggerated trapeze below the bust. The hem is longer in the back than in the front. I think you need to be careful with fabric choice and length as not to overpower yourself (especially if you are short, like I am!), but the end result is worth it when it does work out.

I made view B, with the scoop neckline, set-in sleeves, and cropped length. I made a size 2, which is my normal size with this company (and it is true to size; I’m about 1/2″ bigger than the suggested body measurements for that size). I did add about 2″to the bottom of the shirt, as it seemed like it would be REALLY cropped based on the pattern pieces. I figured I could always cut it off if it was too long, but the added length is pretty much perfect. I might actually consider adding a tiny bit more for my next shirt, but this length is great for super high-waisted pants. I chose to make elbow-length sleeves, because I didn’t want there to be too much stripe action going on, after learning that less with my Coco dress. With the length of the sleeves and weight of the fabric, this is a good mid-season top. Perfect for the weird weather that happens here in the Spring 🙂

Everything sewed together really easily – I used a serger for the main seams, and my regular sewing machine zigzag with a ballpoint needle for the hems. There are no bands on the sleeve hems, btw – that’s just the wrong side of the fabric (they are rolled up). The only thing I don’t like is that I didn’t pull the neck banding tight enough while I was attaching it, and the neckline is not exactly no-gape. It lies flat when I’m standing, but if I lean over… you can see straight to my bellybutton. I can just wear a tank (or super cute bra!) under this and call it a day, but I will shorten the neckband for future shirts. Neckline binding is so finicky about that – what may be the correct length for one fabric might not stretch enough for something else. In this case, I think my fabric was just a bit too stretchy. Lesson learned!

Cropped Ebony Tee

Cropped Ebony Tee

Cropped Ebony Tee

Since the shirt is so voluminous, I think it looks best with really slim, high-waisted pants. These pants are the Cecilia Pants from Elizabeth Suzann, btw. I think I’ve worn/mentioned these on my blog before, but they are like MAGIC PANTS. They seem to be universally flattering no matter who wears them. The stretch denim is super comfortable, and has a great recovery. The super high waist (up past my navel) looks awesome with a crop top, and the slim legs balance out really voluminous tops. I love these pants!

Also, I am not sure why I took so many pictures of myself for such a simple project. Oh wait, yes I do. My hair looked fucking fabulous that day haha. Can’t say the same about the quality of these photos, but, I’m trying! Really!

Cropped Ebony Tee

Cropped Ebony Tee

Cropped Ebony Tee

Cropped Ebony Tee

Cropped Ebony Tee

I think I’d like to make a version of this for summer, in a lighter fabric (maybe a bamboo knit) with the raglan short sleeves. Would be nice and cool when it gets super hot here!

Cropped Ebony Tee

I can’t think of anything else to say about this pattern. Short and sweet! (Well, about as short and sweet as you’ll get from my blabbermouth haha)

In other news, tell me your favorite interesting t-shirt patterns! I’m about up to my eyeballs in v-neck Renfrews; I think it’s time for something that’s a little more visual than a basic tshirt 🙂

Completed: The Kelly Anorak

14 Feb

Hey guys! Thank you for all your great comments, suggestions, and feedback on my last post! I’m so happy to hear that y’all enjoyed reading it as much as I enjoyed writing it 🙂 With that being said, my stint as a ~travel blogger~ is now officially over (well, until I save up money for my next trip – the verdict is still out on where exactly!) – back to regular sewing posts!

BUT before we get into the project – some class-related stuff!

  • I’ve got two classes at Workroom Social in March that both still have a couple of spots left, if you’ve been on the fence and are looking for a reason to treat yo’self 😉 (it IS Valentine’sDay, after all! ;)) The Jeans Making Intensive is March 2-3, and the always-popular Pants Making Intensive is March 4-5! The jeans class primarily focuses on construction and finishing a pair of jeans (we use the Ginger Jeans pattern – which, btw, I’m wearing in these photos haha), while the pants class has a little more fitting involved and sews a classic pair of trousers. Both are going to be super fun and I am so excited to be back in NYC in a couple of weeks! ♥
  • Speaking of Workroom Social – Camp Workroom Social is coming back, and I’ll be back as an assistant to Amy of Cloth Habit’s Bra Making class! Registration is currently open only to alumni, but will be open to the public soon. I cannot WAIT for another round at camp – last year was freaking amazing (and so, so, so beautiful!) and it will be so fun to reconnect with old friends and make new ones!
  • Finally, speaking of Amy and bras -she’s coming to Nashville to teach a bra making workshop at Craft South! Having worked with her at camp last year, I knew we had to have her at the shop for a workshop – she’s a fantastic teacher and so knowledgeable about bra fit! Amy will be in Nashville September 22-23 to teach her Bra Making Weekend Workshop at Craft South. The class will make Amy’s newest pattern, Harriet, as well as learn basic fitting and finishing methods. Oh, and I’ll be assisting the class 🙂 I know a lot of people have been asking when we’d do a bra workshop in Nashville – so there ya go! You can sign up for the workshop here. It’s gonna be amazing!

Ok, back to sewing!

Kelly Anorak in Organic Cotton Twill from Mood Fabrics

Today’s project is actually last month’s project that I am just now getting around to posting – the Kelly Anorak from Closet Case Patterns!

While I am not typically a fan of “vacation preparation sewing” – mainly in the sense that I get really stressed with those sorts of deadlines and thus sewing doesn’t even up being very fun – I did make this jacket specifically for my trip to Egypt. I thought it would be a useful thing to bring with me – a nice light layer to ward off the morning chill in the desert, yet breathable for when the sun got all crazy in the afternoon. I also liked that it had those big, roomy pockets and was long enough to cover my butt. My orange Minoru fills most of these slots, but I’ve worn it to death over the years and it’s starting to look ratty – plus, that poly lining isn’t exactly the most breathable thing. Also, I just really love sewing jackets. Sue me 😛

Kelly Anorak in Organic Cotton Twill from Mood Fabrics

Kelly Anorak in Organic Cotton Twill from Mood Fabrics

As I said, the Kelly Anorak is a lightweight and unlined jacket – meant to be worn between seasons, not necessarily your crazy winter coat. I’ve seen some people make it out of waterproof fabric, but in my experience I usually carry an umbrella when it rains anyway (and I also own an actual rain jacket – although I still prefer the umbrella, as I don’t like getting my shoes and pants wet!), so this is good enough for a super light drizzle. The pattern features a zippered front with a snap closure placket, a 3 piece hood (which stays on your head much better than the 2 piece kind – it also doesn’t flatten one’s hair as much), big ol’ gusseted pockets, a drawstring waist, and a sleeve placket so you can roll up the sleeves. I actually saw something real similar in JCrew while I was out holiday shopping one afternoon, so I got the added bonus of being able to try the thing on before making it!

The fabric I used for this jacket is an old favorite that’s shown up in tons of my past makes – solid organic cotton twill from Mood Fabrics. The color I used specifically is Olive, and yes, I realize the color on their website photo is way off and no, I don’t know why that is. If you are picky about color, you will definitely want to order a swatch of this stuff. Anyway, I love this fabric because it is easy to work with, has a nice brilliant color, washes/wears well, and is reasonably priced (at least in my opinion!). And it comes in so many colors! Mood pretty much always carries this fabric, FYI, so even if it’s sold out on the website – either hang tight and wait for it to get restocked (I promise it will) or just call the store and have it shipped from there.

Kelly Anorak in Organic Cotton Twill from Mood Fabrics

Kelly Anorak in Organic Cotton Twill from Mood Fabrics

Kelly Anorak in Organic Cotton Twill from Mood Fabrics

Kelly Anorak in Organic Cotton Twill from Mood Fabrics

Most of the little hardware bits and pieces were picked up in the NYC Garment District when I was there in November. I knew I was going to be nitpicky about everything matching just so, so I wanted to check out the goods in person. The drawstring, grommets, cord stoppers, metal tassel ends, and zipper are all from Pacific Trimming (I knowww there are other places in the GD to buy this stuff – and maybe even for cheaper – but I just love Pacific Trimming, esp their zipper room!). The zipper is actually a Riri zipper, cos I wanted that shit to be extra fancy. I think I paid around $20 for just the zipper – so it’s not necessarily cheap at all – but it’s really nice, both in terms of how it looks and how smooth it zips! It was also nice to have it cut to the correct size, and also be able to choose both the finish of the metal teeth and the color of the zipper tape, cos again, I was feeling nitpicky about that shit! 🙂 I knew this jacket was going to be a time commitment to make, and for that reason, I’m ok with spending extra money on nicer materials.

The only notion that I did not buy in NYC was the snaps – I just went to Elizabeth Suzann‘s studio during their lunch break and used their industrial snap setter, ha! That thing is really cool and I kiiind of wish I had one, but honestly I am always looking for an excuse to drop by and chat with my old coworkers so for that reason, I’ll continue mooching off theirs!

Since the jacket is unlined (and, for me, primarily worn wide open), I took extra care to finish all the seams for a neat interior. Most every seam is flat-felled, with the exception of the arm holes (only because I didn’t feel like futzing with that shit. I just serged them). I used two different threads to assemble the jacket – a polyester thread for the seams, and then a cotton thread for all the topstitching. I would have just sewn the entire thing with the poly thread, but the color I had on hand was off enough to where the topstitching didn’t look right – and the only thread I had in a suitable color was cotton. In my experience, cotton thread simply does not hold up as well as polyester thread, which is basically indestructible. Considering all the work that I put into this jacket, I didn’t want my threads to fail! So I just used cotton for topstitching – and used a triple stitch, partially for added durability and also because it results in a more visible stitch.

Kelly Anorak in Organic Cotton Twill from Mood Fabrics

Kelly Anorak in Organic Cotton Twill from Mood Fabrics

I will be completely honest with y’all – I didn’t exactly enjoy the process of sewing this jacket. A big part of the reason was because I was under a pretty tight deadline to finish it before my trip (even though I promised myself it was ok to take the Minoru if I didn’t finish, and that everything would be fine – I still rushed!), but I also found some of the directions to be a bit confusing. The Closet Case Patterns blog has some tutorials on the trickier steps, but some of the information actually contradicts itself in online tutorial vs pattern instructions. The zipper placket specifically was really head-scratching to me, and I had to walk away a few times. There’s a discrepancy with the seam allowances written in the pattern instructions vs the blog tutorial, which I found really confusing. I believe the version on the blog is the correct one, though, if I recall correctly! Another thing that really threw me off was that my zipper pull was on the opposite side of the tape, than what you see on the blog. Finally, I was not a fan of how wide the finished facings are – they are really really wide (too wide, in my opinion). I ended up turning them under additionally and sewing another line to make them more narrow. At the width they were as drafted, I felt like they would just end up flapping around with wear and showing my ugly white interfacing. Nope, not doing that.

Anyway, minor complaints – and may also just be personal, because all the reviews I read just gush about how clear the instructions are. So it could just be me!

As far as sizing and fit, I made a size 2 – which is my normal size for this pattern company. I actually did make a muslin, so I could double check the fit, length, and drawstring placement. The length and drawstring were perfect, and the fit was pretty good. The only thing I changed was the shape of the arm hole – it was a little too big, which made the entire jacket move along with my arms when I lifted them. I raised the bottom by about 1/2″, as well as added to the back of the arm hole, and then took a bit (maybe 3/8″) off the front of the arm hole as it was pulling. This is a pretty standard adjustment that I make to most patterns that involve sleeves. I think I just have really weird-shaped and/or small armscyes haha who knows.

One thing I wish I could have found a way to change was to make the snap on the pocket functional. It’s just there for show and to hold the flap in place – the pocket doesn’t actually snap shut. I considered adding the other side of the snap, but it would have shown on the inside of the jacket (and since you need to interface it, would not have made the inside look as nice). One idea is to interface a scrap of the twill and sew it to where the snap gets inserted, so all you see is a square of twill on the inside. I may do that in the future. It’s not a dealbreaker not being able to snap the pockets closed, but it sure would be handy.

At any rate, this jacket was TOTALLY worth the effort – I think the finished result looks pretty damn good! There’s definitely something to be said about using nice materials, as they really elevate the garment into something that looks extra nice. But I am also really happy with the craftsmanship that went into it – I’m glad I took the time to do the flat-felled seams, rip out mistakes and fix them (even though we all know that shit can be agonizing haha), and even deal with making a muslin first. All totally worth it in the end. And while I made this for Egypt and our upcoming spring weather, it’s actually been handy for the majority of January & what we’ve experienced so far in February. I realize everyone is getting pummeled by snow right now, but y’all, it’s been 70 degrees in Tennessee this past week. I am starting to wonder if we are going to skip winter entirely! I had plans to make an actual winter coat this year, but I may put it on hold until the next cold season because I’m not really feeling super motivated with the weather as it is currently!

Kelly Anorak in Organic Cotton Twill from Mood Fabrics

Kelly Anorak in Organic Cotton Twill from Mood Fabrics

Kelly Anorak in Organic Cotton Twill from Mood Fabrics

Kelly Anorak in Organic Cotton Twill from Mood Fabrics

Kelly Anorak in Organic Cotton Twill from Mood Fabrics

Kelly Anorak in Organic Cotton Twill from Mood Fabrics

Kelly Anorak in Organic Cotton Twill from Mood Fabrics

Kelly Anorak in Organic Cotton Twill from Mood Fabrics

Kelly Anorak in Organic Cotton Twill from Mood Fabrics

Kelly Anorak in Organic Cotton Twill from Mood Fabrics

Kelly Anorak in Organic Cotton Twill from Mood Fabrics

Kelly Anorak in Organic Cotton Twill from Mood Fabrics

Kelly Anorak in Organic Cotton Twill from Mood Fabrics

I used twill tape to finish the neckline (as suggested in the pattern instructions). If I’d thought about it while I was buying my supplies, I would have tried to find a tape that matched my olive fabric. Oh well! For the label, I serged around all 4 sides of a scrap of twill, then sewed my label (which is from Dutch Label Shop) on top of that before attaching it to the jacket. The hanging loop is a small piece of leather that I cut to shape and sewed on by hand.

Kelly Anorak in Organic Cotton Twill from Mood Fabrics

Kelly Anorak in Organic Cotton Twill from Mood Fabrics

Kelly Anorak in Organic Cotton Twill from Mood Fabrics

Whew! Sorry about that photo dump – I guess while I’ve gotten better at editing down and posting less photos of myself, I can’t say the same about detail shots 😉 haha.

I leave you with one last photo of me. Sorry, not sorry:

Kelly Anorak in Organic Cotton Twill from Mood FabricsNote: The fabrics used for this project was provided to me by Mood Fabrics, in exchange for my participation in the Mood Sewing Network.

Save