Tag Archives: ginger

Completed: Another B5526 + Ginger Jeans Get-up

18 May

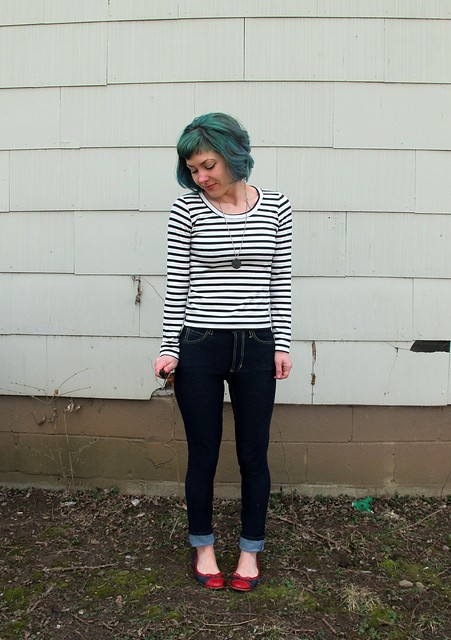
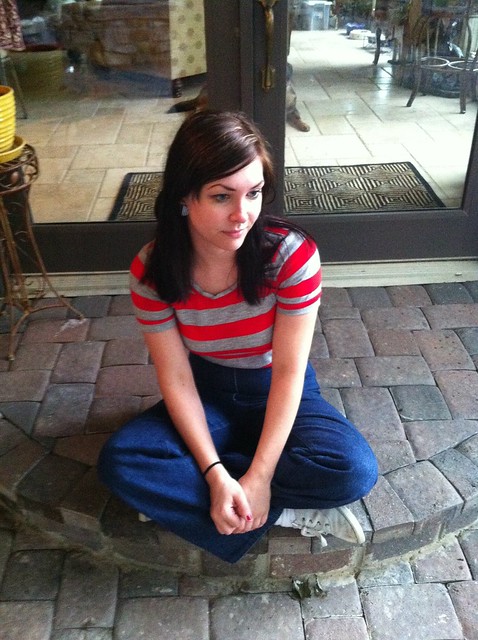
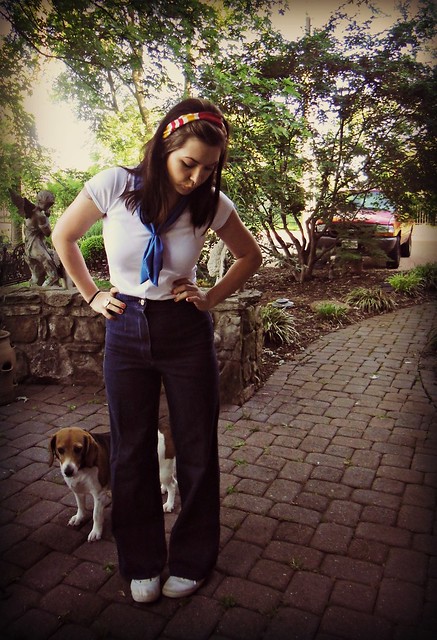
So sorry to dump this on y’all yet again – another collared shirt + jeans outfit combination. Yawn.

Gingers & B5526

Well, to backtrack – yawn for you, but 😀 😀 😀 😀 😀 for me hahahaha. I will never get tired of this outfit combination. Or, at least, not anytime soon. Maybe never is too strong of a word to use here.

Gingers & B5526

What’s mildly frustrating about writing a long-term blog (at the time of this posting, I’ve accumulated nearly 500 entries since I started waaaay back in 2009, WTF) is that you eventually reach a point when you’re just making the same thing over and over again (well… those of us who don’t make our blog our full-time income fall in this category. I’m sure if I was sponsored out the wazzoo and had all the time I spend at work to spend making content for my blog, it would be a different story, ha.). After re-assessing my wardrobe at the end of 2014 and realizing that I *still* had shitloads of clothing that I made simply for the new and shiny, I have made it a big point to really be honest with myself about whether or not I’ll actually wear something that I make. Like most people, I have a pretty predictable style. And like many sewers, I don’t want to spend a lot of time reinventing the wheel with new patterns if I can get the look I’m going for with an old TNT. So this translates to repeats upon repeats upon repeats.

So, while you might be yawning about the majority of the stuff that’s been posted in 2015… I gotta say, I am elated with the way my closet is looking these days!

Gingers & B5526

Gingers & B5526

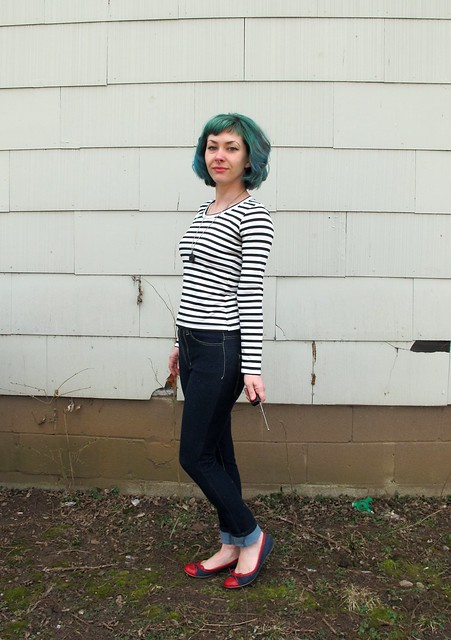
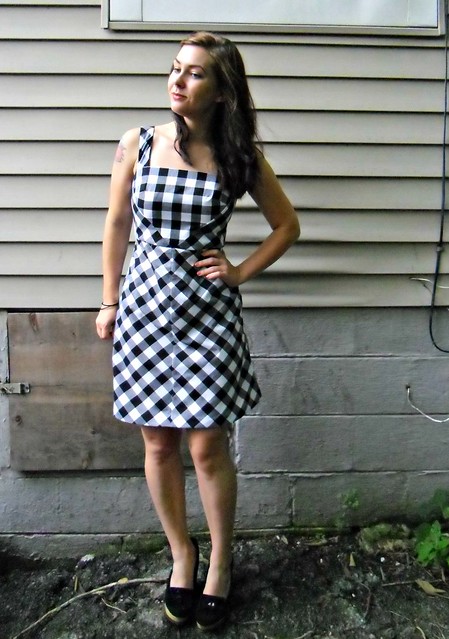
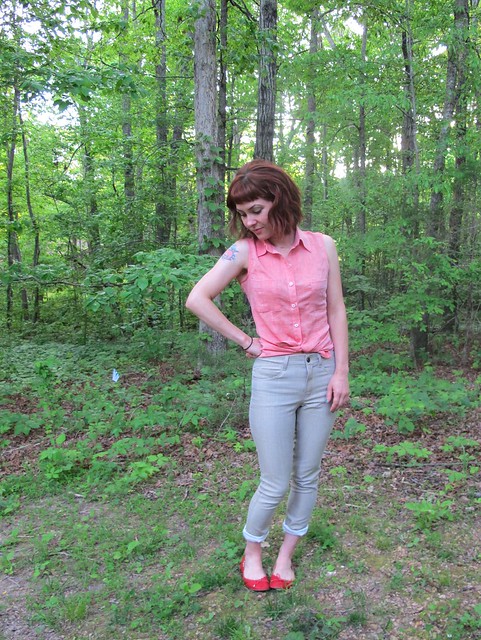
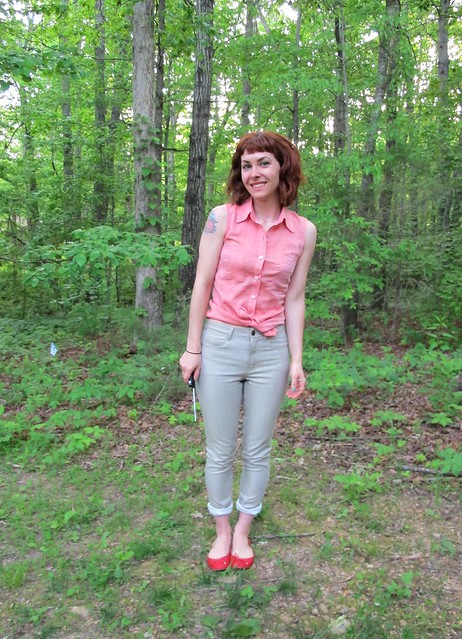
With all that being said, there’s not much to report on either of these pieces since I’ve made them soooo many damn times. Jeans + collared shirt is totally my go-to when I want to feel comfortable but still look like I made an effort in the AM. I’ve found my TNT patterns and I feel good about the way they fit and the construction methods that I use.

Gingers & B5526

Gingers & B5526

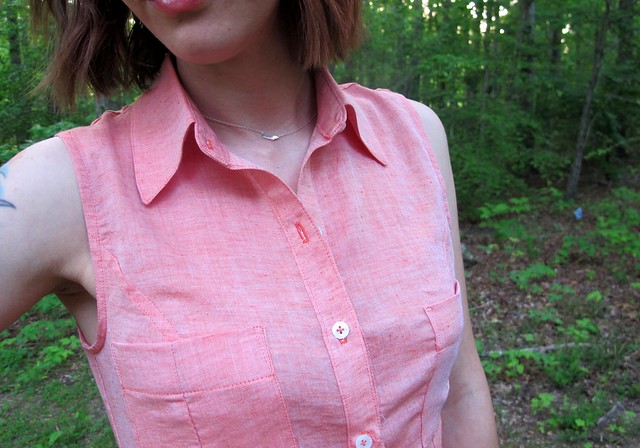
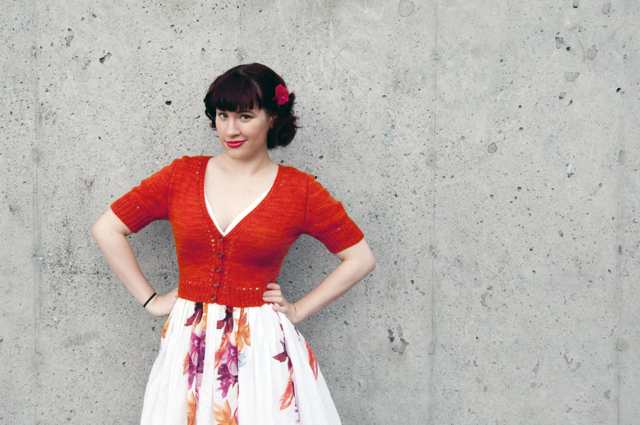
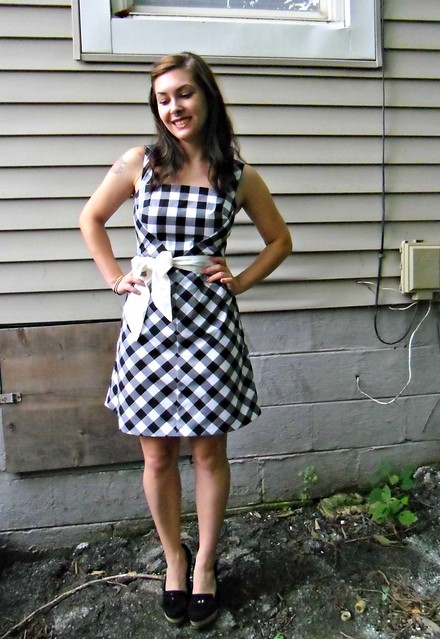
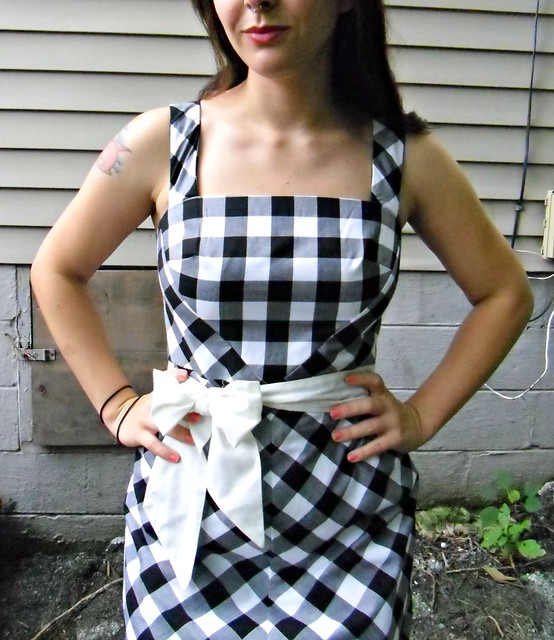
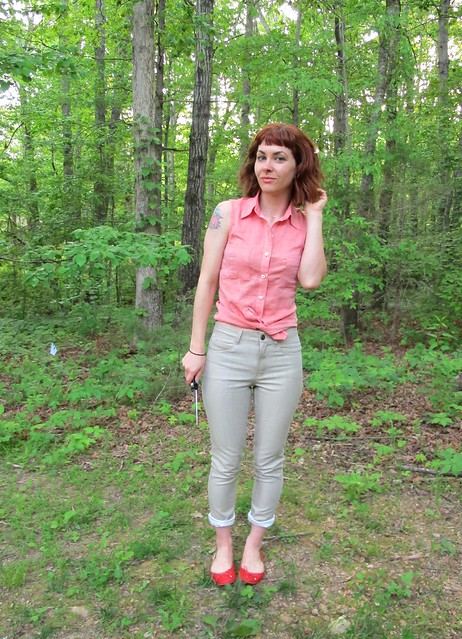
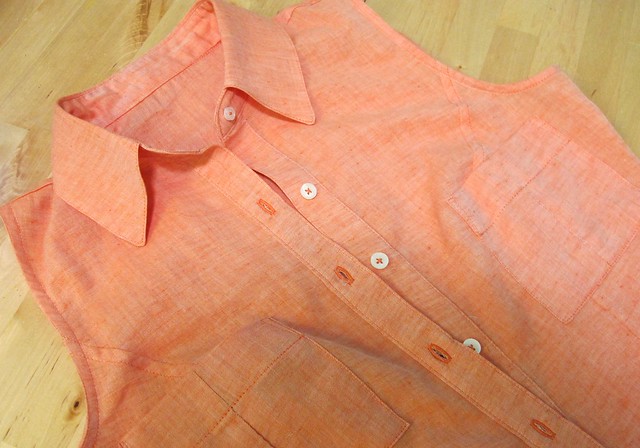
The top was made using my beloved Butterick 5526. Y’all, I don’t know if I’ll ever sew another button up pattern again! (we all know that’s a lie) I’ve gotten to the point with this one where I can bang one out in a couple of days, which is really nice when you’re coming up on a looming Mood Sewing Network deadline, ha. The fabric is this amazing tigerlily orange cotton voile from Theory, which is a bit more of a coral-y pink than it is orange in real life (I don’t know how the color translates on your screen, but on the Mood Fabrics website it’s definitely pretty muted. The real color is much closer to what you see in my photos. It’s BEAUTIFUL). It has a beautiful chambray weave, which gives the color lots of dimension. This fabric was so so nice to work with – ok, it was a shifty bitch to cut, but once I got past this point, it handled and pressed like a boss. It’s also super comfortable to wear on even the hottest day.

Since the fabric does have a tendency to fray, I used flat-felled seams every where in my shirt. I also left off the sleeves and finished the armhole with self bias binding – it makes the shirt really casual and, again, awesome for hot weather. The pockets are the same pockets that come with the pattern, but I made them slightly smaller because the original size was a little overwhelming on me. Buttons are from my stash; they’re just your standard white shirt buttons. Oh! And the matching thread also came from Mood Fabrics – I noticed that when I was ordering my fabric, there were thread suggestions at the bottom of the page. I figured I’d try out the service – you know, for science – and I’m super pleased with the color match. Even more pleased that I was saved a trip to the fabric store. Mostly because those tend to be very dangerous places for my wallet, ha.

Gingers & B5526

Gingers & B5526

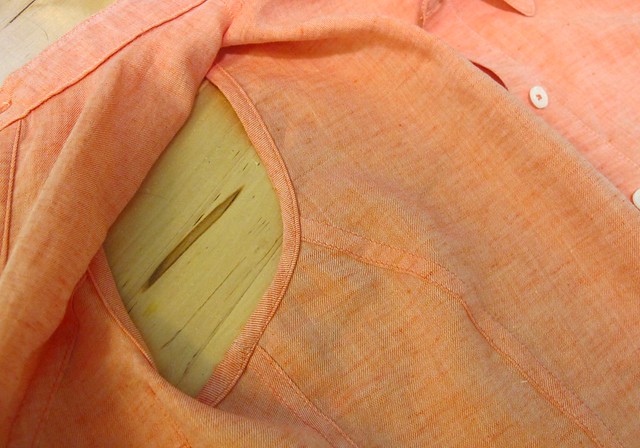
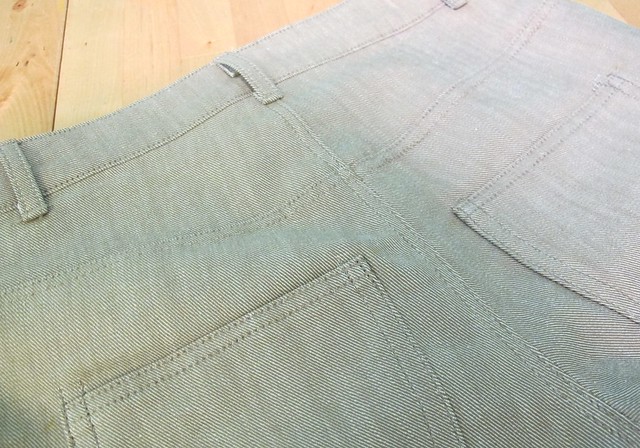
The good thing about running a long-term blog and making a bunch of pattern repeats is that you will eventually bore of just making things that are passable to wear in public, and start focusing on really honing your skills to the next level. Or, at least, that’s how it worked out for me. Look at those clean finished insides! I should wear this shit wrong-side out.

Gingers & B5526

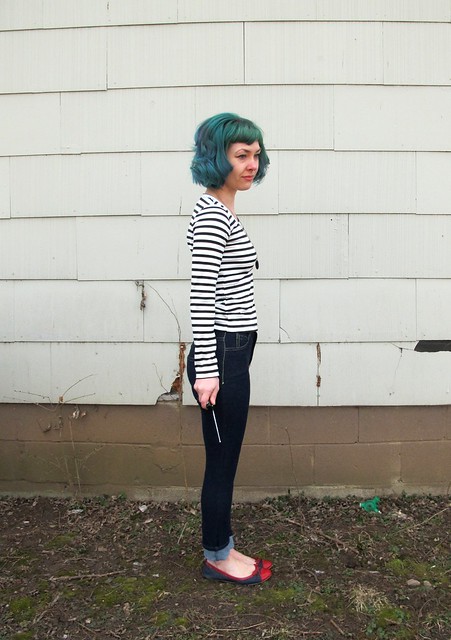
I did shorten the length of the shirt by about 2″ – I think the original length was just sliiiightly too long for my height. This way I can wear it untucked or tied at the waist. If I do a half tuck, it doesn’t pooch out all weird like some of my longer shirts tend to do. As always, I finish my shirt hems with self bias facing. I think it makes for a much cleaner finish, and it’s must easier to press and sew those curves with the bias tape instead of trying to wrangle the hem itself.

Gingers & B5526

Gingers & B5526

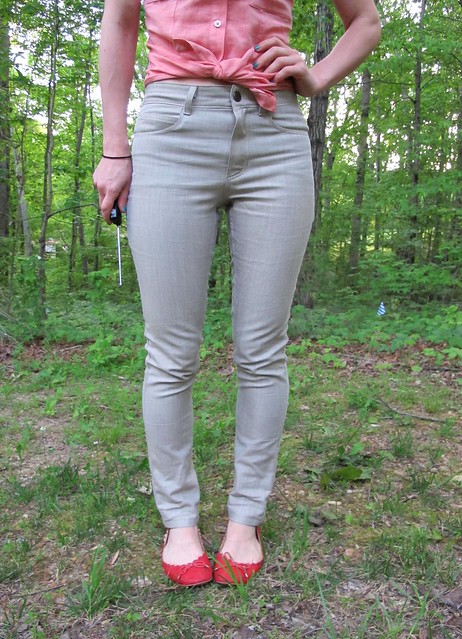
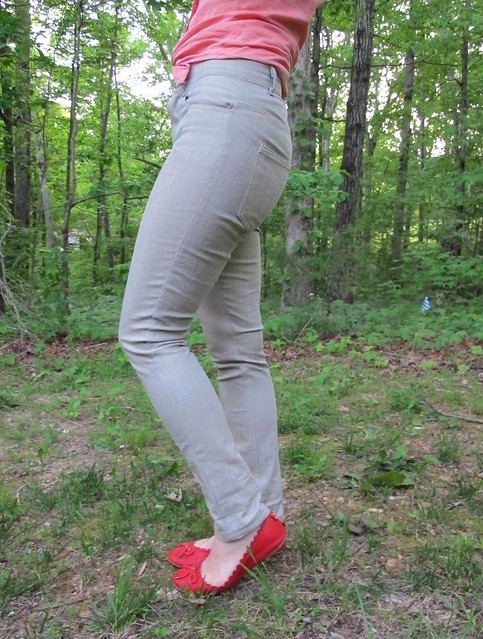
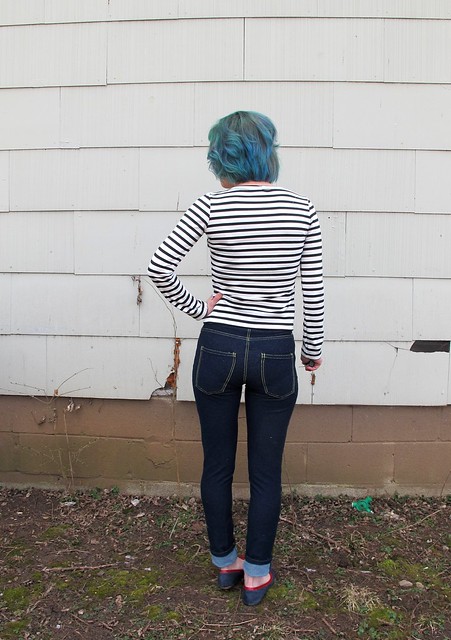
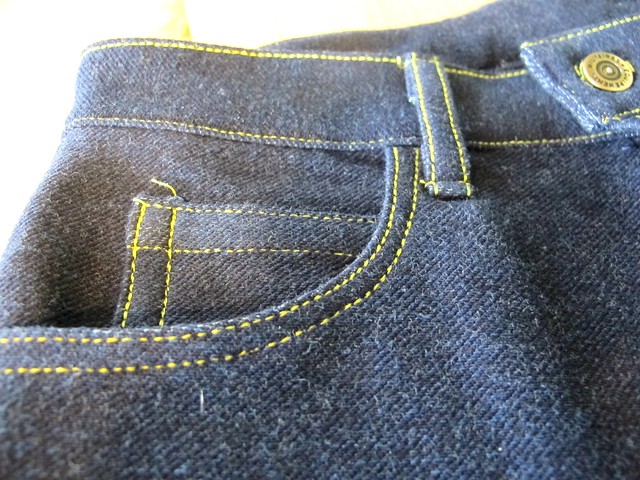
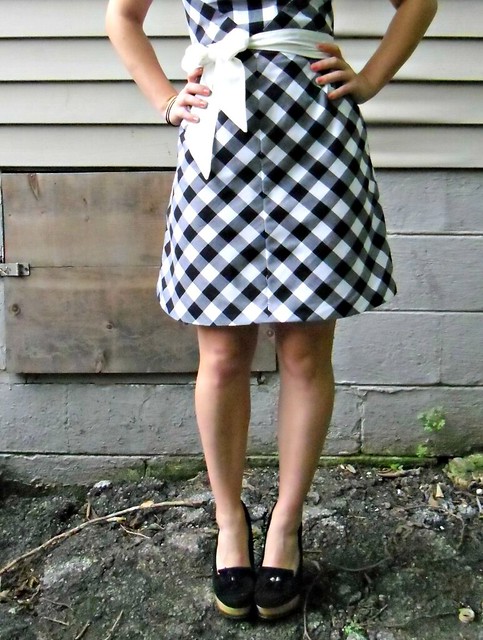
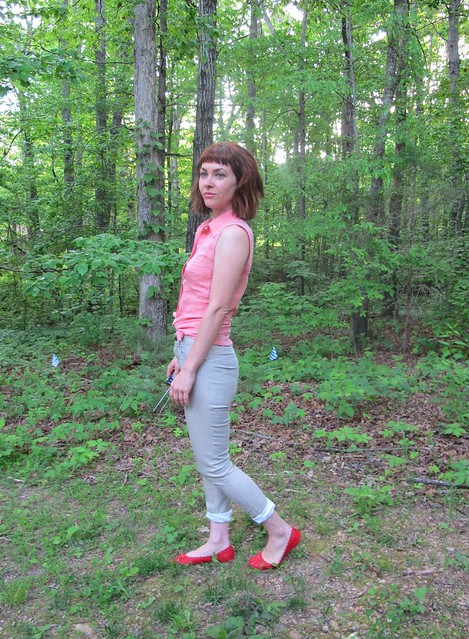
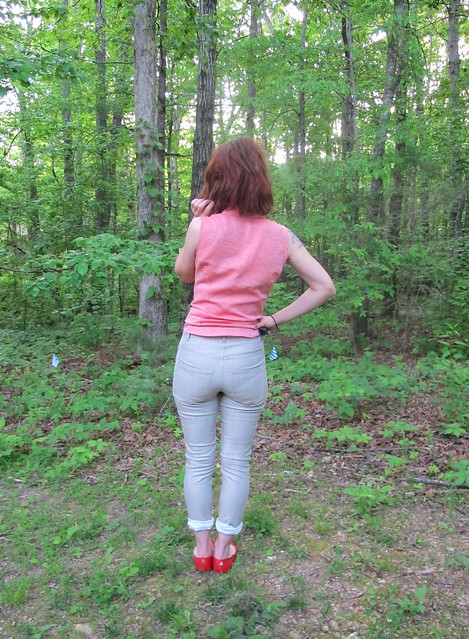
For my jeans, I used my now-favorite-ever-pants-pattern, the Ginger Jeans. I’ve made this a few times before (and I definitely don’t plan on stopping – I finally was able to invest in one of the denim kits because YAY) and I’m just really happy with the way this pattern fits my body. The fabric is a cool metallic gold stretch denim. I was actually looking for white denim to make this up, despite me being a stain magnet when it comes to white. At any rate, this denim’s wrong side actually is white flecked with very subtle bits of gold, and these very well almost became white jeans. I talked myself out of it because I was afraid the not-quite-pure-white would make the jeans look like they were dirty, plus again, stain magnet. So I stuck with the gold side. Also, this denim doesn’t have as much stretch as my other denims, so the jeans are a bit tight. I had to let the side seams out to 3/8″ or else I would have never gotten these things over my ass. They’re still a bit tight – mostly around the calves – but I’m hoping that they will loosen up a little with wear.

Gingers & B5526

Gingers & B5526

Gingers & B5526

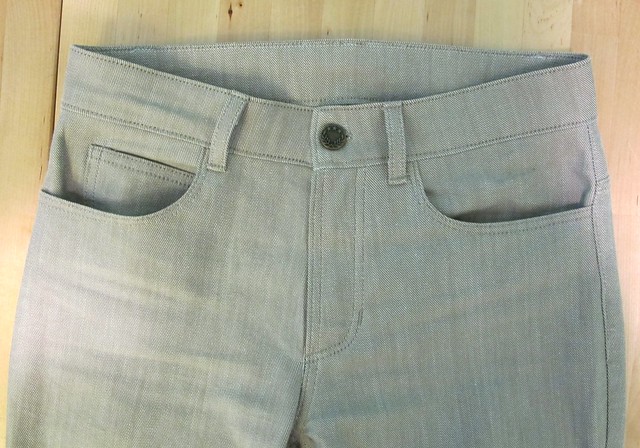
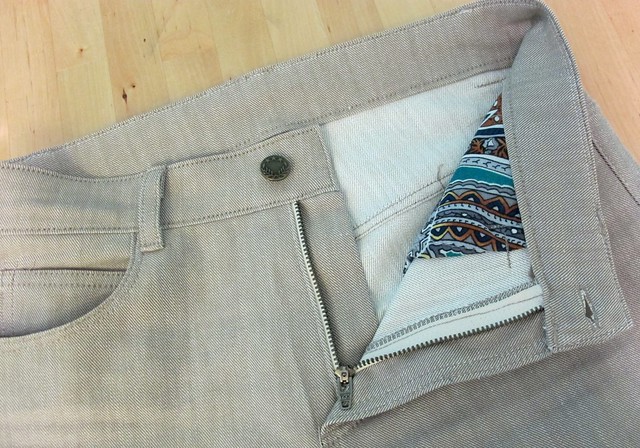
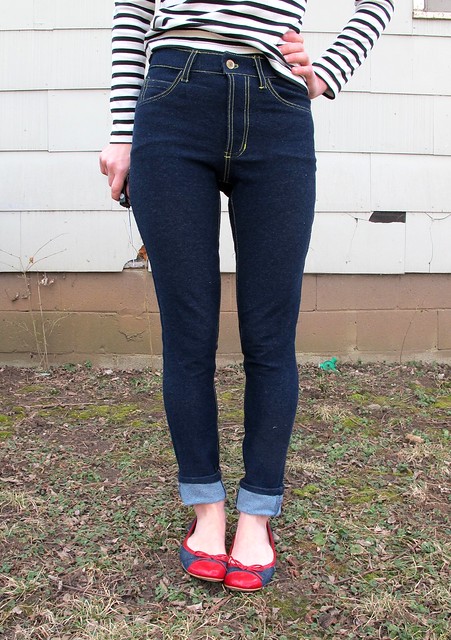
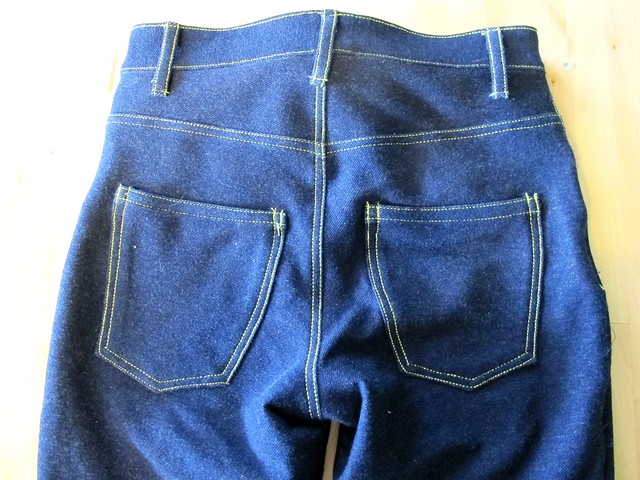
Not much to report on construction. I used a combination of flat-felled and serged seams (as how most RTW jeans are made) and a triple stitch to really make the topstitching stand out. I would have loved to use topstitching thread, but I couldn’t find a good match with what is admittedly kind of a weird denim color. It’s gold, but it’s also kind of beige. Fortunately, Mood Fabrics REALLY came through with that thread match, as you can see in these close-ups.

What else? I did not interface the waistband (I like my jeans with an uninterfaced waistband; it’s much more comfortable. Not sure how that would work with a lower rise, but for the high rise version, it’s perfect). The jeans button is from Pacific Trimming, and the cotton pocket lining is left over from this crazy blue dress.

I will admit right now that this outfit inspiration came way of my boss’ closet. Since I do all her laundry for her (if you are new to this blog and that sounds REALLY WEIRD, I should probably point out that I’m a personal assistant 🙂 ha!), I’m always lurking on her clothes and I’m always finding inspiration in some of the strangest ways. She has a similar coral chambray shirt – hers has sleeves and a lace inset at the yoke, though – and white jeans. And I wanted that outfit for me. So I made it 😛

Gingers & B5526

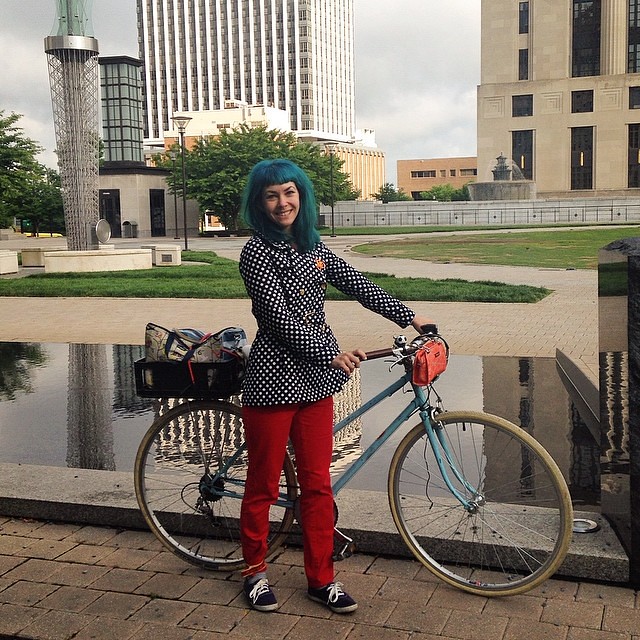
So, hey, in other news that doesn’t involve me making my fifty billionth b5526 – I’ve got an article out in the current issue of Seamwork Magazine! If you haven’t heard of Seamwork, it’s a sewing magazine that is published online by the masterminds behind Colette Patterns. The magazine is free to read and there are optional pattern downloads with each issue (the patterns you pay for, however). ANYWAY, my article is all about visiting Nashville! I had so much fun writing a city guide about my favorite city in the entire world, and I hope you have fun reading it (and are inspired to come visit because, hey, Nashville is awesome! Really really awesome!). You can read The Seamworker’s Guide to Visiting Nashville at Seamwork. My first published article! Yay!

Completed: Organic Cotton Jeggings

9 Mar

Good morning, friends! I hope this post finds you well – I have missed all of you! If you missed out on the drama last week (and/or were wondering why I suddenly fell silent and my website went poof into the night), I had a bit of an issue with an expired domain and transferring it back into my name. You can read the boring backstory about it in this post, but basically – everything should be fixed and up and running. If you’re still having problems getting to the site (I was until last night, thanks to my internet provider), try clearing your cache and cookies and see if that helps. Sorry for all the dramz! Shit should be back to normal from here on out!

Anyway, enough of that boring internet talk – let’s talk about why we’re all here! Sewing and fabric and actual fun happy stuff, yeah!

Ginger Jeggings

For this week’s project, I bring you: Jeggings. I’m not sure if this means I’ve cracked some kind of sewing power code with all the ridiculously normal/boring things I’ve made at this point, or if it means I’ve hit rock bottom (I mean, we are talking about the ultimate comfort clothing here. I am not above making fun of jeggings, just so we’re clear). You tell me. What I can tell you is that these are INSANELY comfortable and now I kind of get the hype.

Ginger Jeggings

I’m not really much of a comfort-clothes seeker/wearer – I’m ok with being a little pulled in for the sake of looking nice when I’m out in public. That being said, it’s not a very interesting story as to how I came about obtaining a pair of the ultimate comfort/secret pajama clothes. It started out as a fabric review for Organic Cotton Plus. I was prowling around on their website, looking for something to pick as my next project, when I came across their organic knit denim. The fact that it’s called “knit denim” should have raised some sort of warning flag, but I didn’t even notice it – I just saw denim and immediately got starry-eyed. I’m always on the lookout for a good denim source, and this sounded too good to be true. Organic cotton denim with 5% lycra? GET ON MY BODY. I submitted my order and anxiously waited for my shipment.

Ginger Jeggings

The spoiler here is that this definitely is not denim – not in the true sense of what you get when you buy a pair of jeans. It’s definitely a knit fabric – a very thick, stable ponte-ish type of fabric that looks exactly like denim. It’s the right color and has that twill weave look. It thick and squishy with a good, firm stretch. It’s like a marriage of a tshirt and a pair of jeans. I don’t really understand it, but I’m not going to argue with it. At any rate, I had a yard of this stuff and I realized I needed to make something with it. And that’s where jeggings came in. I wanted to see if I could actually make a pair of jeggings. I did, and now y’all get to see how they turned out.

First things first, I realize that these don’t technically classify as actual jeggings. The material does – it’s more of a knit than a denim, it’s very stretchy and it has a lot of spandex in it. However, these are constructed like an actual pair of jeans. They have working pockets (both front and back), they have an actual zip fly, and there is no elastic in the waistband. The only part about these things that makes them even remotely jeggings-like is the fabric they’re made from. However, I’m going to keep calling them jeggings because – well, I made them, and I get to call the shots. Them’s the rules.

Ginger Jeggings

When I was planning these out (after receiving the fabric, but before cutting into it), I debated on whether to make these into jeans-looking pants – aka, true jeggings, with the pockets and fly simply suggested by lines of topstitching. I thought it would be interesting to see how the fabric works when it’s treated like a woven, so I decided to use an actual jeans pattern and follow it the same way I would if I was making these out of denim. I used the Ginger Jeans pattern and basically did not make any changes for the fabric. The size is the same size I used for my woven denim and stretch twill jeans, and all finishing and topstitching uses the same methods as those pairs do. The only difference is that I didn’t flat-fell any of my seams – I figured it was enough that I was making these out of stretch material, so I just serged and topstitched (like you would with leggings). I’m surprised at how well they fit, although I think the legs could be a little tighter around the ankle. Also – they turned out surprisingly long, due to the 4 way stretch. I actually cut 3″ off the pattern legs before cutting (that was the ONLY way I could make these out of a yard of fabric – short inseam!), which should make them the correct length – but they magically grew, and now they’re too long. I’ve cuffed them for now, because I want to wash them a couple more times and eliminate any additional shrinking before I re-hem them.

Ginger Jeggings

Making these was really fun, and surprisingly quick! Like I said, I made them the same way you’d make a pair of jeans, except I didn’t flat-fell any of the seams. Everything was sewn on my sewing machine with a stretch needle and the edges were finished with my serger. For the topstitching, I used a triple stitch (thanks to Emmie for showing me the stitch on my Bernina – I guess this means I should probably read the manual more often, ha!), which makes a nice defined topstitch that also stretches quite a bit. The waistband is interfaced with my favorite stretch interfacing (seriously – this stuff is AWESOME), which gives it enough structure to look nice, but doesn’t sacrifice any of that comfy stretch. There is an actual zipper and button installed, however, I did leave off the rivets.

Ginger Jeggings

Ginger Jeggings

Basically, these look & wear like jeans – BUT THEY FEEL LIKE PAJAMAS. If that doesn’t blow your mind with amazement, then I give up.

Ginger Jeggings

Sorry ’bout that VPL, story of my life. I do think the pockets are a bit low, which is likely due to the 4 way stretch. I don’t care enough to remove them and raise them, so it’s whatever.

Ginger Jeggings

Ginger Jeggings

Here are some gut close-ups so you can better see what I was working with. The material really looks like denim! Everything handled pretty well, except attaching the belt loops did get a little difficult at the end, just because there were soo many layers (I ended up hammering them as flat as I could, which helped a little. Still broke a couple of needles in the process, argh.). All the topstitching was done with a single needle and a single piece of thread, sewn with the triple stitch. I used lemon yellow cotton thread, also from Organic Cotton Plus, which was nice and thick and worked out quite well with the triple stitch. It looks more gold than neon yellow when it’s against the dark indigo, which I really like.

Ginger Jeggings

Proof that there’s actually a zipper in there! The zipper is also from Organic Cotton Plus; it’s just a heavy brass jeans YKK zipper, but it works really nicely with this pattern. The 6″ length was just barely long enough for the high-waisted version of this pattern; I ended up cutting about 1/2″ off in excess when all was said and done. The pocket lining is just some stretch cotton sateen I had in my stash. I wanted to use something with a stretch, so it wouldn’t fight against the stretch of the exterior fabric.

Ginger Jeggings

And here’s the back! Mock-flat felled seams (just serged and topstitched) and patch pockets! I had to cut the waistband in pieces, because I didn’t have enough fabric to cut it on the fold – but the seam is covered by the back belt loop, so it can just be our secret, ok.

Ginger Jeggings

So that’s my little sewing experiment! Turns out you *can* make jeans with jegging material – with all the look of jeans, but the comfort of leggings. Love it! And since there are back pockets, I don’t feel as compelled to cover my butt haha. What do you think? Is this a win or just the weirdest garment I’ve ever made? Have you – or do you – wear jeggings? I always made fun of them, but man, can’t deny how comfy they are!!

As a side note – I mentioned this on Instagram yesterday, but it bears mentioning here too. I’m moving soon! I was finally able to get hold of my landlord with the notice and vacate date (they require 60 days, but they’re gonna let us out in 30 days because they love us for being awesome tenants haha), so we’ll be out of this house by the end of March! My best friend/life partner/former roommate just bought a house in the woods in a small town outside of Nashville, and Landon & I will be moving into the lower level as her roommates! The house is cool as shit, the land is AMAZING (did I mention it’s in the woods? Gah I can’t wait to be a hippie and raise chickens in the forest lolol), and I so look forward to living with my two very best friends in one house. Plus – I get a new sewing room! How cool is that? 🙂


** Note: Organic Cotton Plus provided the materials (denim knit, zipper, thread) for this project in exchange for a review. All thoughts and options are my own.

Completed: The Gazer – A Ginger/Hazel Hybrid

6 Aug

Ha, remember when I said I was going to be moving soon so there wouldn’t be much sewing coming out of my end? I LIED (or rather, my new landlords lied. Dur!). Move-in date has been tentatively pushed to mid-week. The awesome part is that I thought we were going to be moving on Saturday, so I packed eeeeverything in anticipation & we didn’t move on Saturday and oh wait, that’s not awesome, this shit sucks ass.

Long story short, about a quarter of my sewing room is unpacked (oops) and I have a new dress! Yay!

Gazel
So why is this dress called the Gazer? Well no shit, it’s a hybrid pattern – the top is a Hazel, the bottom is a Ginger. Hence, Gazer lolol (previous name considerations were Gazel & Hinger). Also, if you look at this dress too long you WILL get dizzy so the name could very well be a cautionary tale, if you will.

Anyway, I received this pattern as a birthday gift from reader Tracy. I actually tried to make it up a couple of months ago, but the fabric I chose was super tragic & the result was one of those wadders that lived in the corner of my sewing room until I threw it away, ahem, a couple of days ago when I was packing. Haha! I’ve come to the conclusion that gathered skirts just don’t suit my shape whatsoever. I knew that I wanted to do something with this pattern, though, so I stewed for a few weeks on what to do about the skirt. I had a lot of gingham left over from my Thurlow shorts (seriously, like 2+ yards! The fuck!?)… and then an idea was born.

First, I had to drag out my cardboard cutting mat (what? Doesn’t everyone have two cutting mats?) and somehow clear floor space for all that cutting:
Soooo I packed my whole house... And we're not moving until at least Wednesday. Living room floor is now my new cutting table, ew
My back is STILL angry at me, by the way!

I cut the bodice pieces for the Hazel and the skirt (minus the waistband) is the Ginger, version 3. Due to the gingham being sheer, everything is underlined with white cotton batiste.

Gazel
I was initially unsure whether the multiple check directions were going to result in a Hot Mess, but I think this turned out pretty cute!

Gazel
I mean – LOOK AT THAT CHECK-MATCHING!

Gazer
FORREAL, THO.

Gazer
Not to toot my own horn here (I’m totally tootin’ my own horn), but this shit ain’t half-bad.

Gazer
I do think this pattern is pretty flattering!

Gazer
The original version actually had pockets… but I must have placed them too low, or else they were fighting with the bias… either way, they kept making these weird lumps around my hips & the openings kept bagging out, so I just ripped them out & called it a day. I’m not really a pocket-person, anyway – I never put anything in them haha. So they won’t really be missed!

Gazer
Psst – the white bow isn’t part of the dress, it’s just part of my massive belt collection.

Gazer
I do love the way the skirt looks, but I don’t think I like wearing bias garments. They just feel weird to me.

Gazer
Oh, here’s how it looks without the belt – I wasn’t able to get the checks to match up at the waist 😥 Mostly because I didn’t take that into account when cutting. OOPS. I mean, it’s close enough I suppose – but also just off enough so that it bothers me.

As mentioned before, my cutting table is down for the count (it’s currently holding a lot of boxes!), so have some flat shots on my quilt. Before anyone asks – I did not make the quilt, but my great-Grandmother did 🙂
Gazer - front
The center front at the waistline totally looks like a vortex, fyi.

Gazer - back

Gazer - Insidessss

I guess that’s it! I hope they let us move this week haha. All these boxes are driving me crazy!

Gazel

Me Made May – Week 3 Roundup

18 May

Sorry for the radio silence this week, peepz. I have been house/dog sitting since Thursday night, which means I have not had access to my sewing machine for almost a week! I opted to not bring it with me since there was just so much stuff to carry around (and plus, I make giant messes when I sew ahaha), figuring I would just knit instead. Spoiler alert: didn’t get much knitting done either. Whoops! Anyway, I’m back at home now so hopefully I can get some sewing done over the weekend, maybe 🙂 I miss it so much!

5-12
5/12
Top: Sewaholic Renfrew (unblogged, sorry!)
Jeans: Vogue 2925
Shoes: Walmart
This is basically the same outfit as Friday – I had cute stuff packed, but it ended up being really cold & rainy so I stuck with jeans for the second day in a row.

5-13
5/13 – Mother’s Day!
Dress: Actually, this is two pieces… the dress made me look like a box, so I separated the skirt from the top & sewed white elastic for the skirt waistband. I can wear them together or separately, woohoo.
Cardigan: Agatha – my first sweater 🙂
Belt: Thrifted
Necklace: Fire Finch (Nashville)
Shoes: Walmart (man those things are filthy… I should wash them)
This is me & my mommy, in her sewing room. Isn’t she so pretty?! Love her 🙂

5-14
5/14
Top: Yardsale
Skirt: Style 1568; it’s supposed to be culottes but it looked awful in this linen/cotton blend (too stiff), so I converted it into a skirt. The linen would also explain why it is wrinkled as fuq – I swear I ironed the night before!
Cardigan: Thrifted – ended up wearing it tied (like how I have it on 5/15) after this picture was taken.
Belt: Thrifted
Shoes: Nine West
Earrings: Thrifted
Brooch: Flea market – it’s a skunk holding a flower ahaha

5-15
5/15
Dress: Colette Patterns Peony
Cardigan: Thrifted
Belt: Thrifted
Rose Brooch: Crocheted by me 🙂
Shoes: Target

5-16
5/16
Top: Thrifted, altered to fit by me
Skirt: Thrifted – it was originally a child’s dress. I cut the bodice off & replaced the busted shirring at the waistband. Insta-skirt!
Cardigan: Agatha
Belt: Thrifted
Scarf (worn at neck): Vintage
Shoes: Target

5-17
5/17
Dress: Colette Patterns Ceylon
Shoes: Nine West

5-18
5/18 (today!)
Top: Colette Patterns Sorbetto
Skirt: Colette Patterns Ginger
Belt: Thrifted (holy shit I wear this belt a lot lol)
Shoes: Target kids
Necklace: Flea market

ALSO, today was Bike to Work Day… don’t worry, I managed to wear something Me-Made 🙂
5-18 - before work
5/18, pre-work
Tshirt: Stenciled & resized by me
Pants: Lululemon (obviously not Me-Made, but I wrote a review on ’em if you are interested!
Shoes: Converse
It gets very hot/humid here, so I brought a change of clothes for the office haha 🙂 Oh, and I guess you could also consider my basket Me-Made – it started out as a purse from the thrift store, I just cut the handles off & zip-tied it to my bike. Baskets are expensive!

As a side/non-sewing note, Bike to Work Day was really awesome!
Bike To Work Day
There was a great turnout

Bike To Work Day
I mean, really forreal

Bike To Work Day
Tons of food & drinks (including coffee, yeeeeeah)

Bike To Work Day
The mayor even showed up to talk to us 🙂

Bike To Work Day
The best part, though, was having cycling partners on the commute 😀

Did anyone else bike to work today?

Me Made May – Week 2 Roundup

11 May

I know what you’re thinking – two posts in one day? Is the world really in the process of ending? Is Jesus coming back (no, actually, that was supposed to happen last May, except we all know SOMEONE didn’t bother to show up to his own damn party)? At any rate, I hope y’all love meee because you’re going to have to look at my mug twice today, teehee.

I left off last Friday, so we’ll pick this up starting Saturday!

5-5
5/5
Dress: BOMBSHELL
Shoes: Steve Madden
Excuse my disgusting sewing room floor, I hate vacuuming!
Ooh, but see my iPhone!? Landon bought me an early birthday present! He is the best 🙂 I’m on Instagram now if you want to follow me 🙂

5-6
5/6
Dress: Simplicity 4170
Cowboy Boots: courtesy of my mom’s closet 🙂
Necklace: Fire Finch, here in Nashville
This is actually the very first dress I made with a pattern – so it’s super pre-blog (I think I made this in 2006). Don’t get too terribly excited about how good it looks, though – the original bodice was total shit – I didn’t line it, didn’t gather under the bust (lolwut), inserted the zipper rather terribly by hand, etc. The bodice you see now is what happened after I learned some skills 6 months later, ripped it off, and re-made. It’s still kind of amateur looking, but that’s ok!

5-7
5/7
Dress: Vogue 1086
Cardigan: Thrifted, reconstructed by me
Belt: Handmade
Necklace: Thrifted bracelet, reconstructed into a necklace by me
Shoes: Target

5-8
5/8
Top: Jalie 2921
Skirt: Express
Sweater: Free People, sized down quite a bit by me (it’s supposed to be loose-fitting)
Shoes: Steve Madden

5-9
5/9
Top: Simplicity 4400
Skirt: Thrifted, sized down & repaired (the shirring at the waistband was completely busted so I sewed in new elastic… does this count as Me-Made?)
Belt: Thrifted
Shoes: Jessica Simpson
Earrings: Thrifted
The light was really bad that morning, so here you get to see the side & crawl space of my ugly house!

5-10
5/10
Top: Sewaholic Renfrew
Skirt: Colette Ginger
Cardigan: Thrifted
Belt: Thrifted
Feather Earrings: Tennessee Renaissance Festival
Shoes: Giani Bernini

5-11
5/11 (today!)
Top: Jalie 2921
Trousers: Vogue 2925
Shoes: Walmart (lol yep)
Scarf: Flea market

If you don’t recognize my top, that’s because it’s very new & very un-blogged! This top was actually the whole reason why I bought the Jalie pattern – I thought it looked quite similar to Colette’s Jasmine pattern, except in a nice knit instead of bias-cut woven. I’m not going to make a separate post for this top, just because I would basically be repeating my last one, but I will go over the minor pattern changes I made:
– I shortened the neck ties quite drastically. I can’t give you a real measurement – I just put on the pink top, pinned the ties until I liked the length, and copied that to my pattern piece.
– Instead of arranging the ties as suggested by the pattern (through a hole in the front seam, tied, or fastened with a buckle), I wrapped a small piece of matching bias tape around them & sewed it into place by hand.
– Took in a little bit at the side seams to make it more fitted.
– Shortened the sleeves to cap sleeves.
– Top-stitched the hem & sleeve hems with a double needle in matching blue thread.

I am rather pleased with the result! Although, it is quite sailor-y so I definitely run the risk of looking really costume-y… I think I kind of look costume-y in this outfit, actually, but IDGAF.

Oh, I should probably talk about that ADORABLE dog standing behind me… that’s Turtle 🙂 She is the dog of my bestie/life partner, Morgan (the one who moved to Macedonia!). Her mother is keeping Turtle while Morgan is fulfilling her time at the Peace Corps. Anyway, she’s actually out of town visiting Morgan, & the originaly dogsitter had some medical problems so I’m taking care of the dogs for her until then! I just love Turtle, she’s such a little sweetie (and Percy, the other dog, was lounging on the steps directly behind my camera FYI 🙂 I’ll try to get a picture of her at some point). This also explains why I’m suddenly standing in an area with an amazing garden backdrop – it’s her house! And look – you can see my little truck in the background 🙂

Me & Turtle :)
Man, I love this dog. She’s such a ham.

Me Made May – Week 1 Roundup

4 May

Holy cow, is it Friday already? Where did the week go?

Time for a round-up of the first week of Me-Made-May!

I wanted to put these in a cute little collage, but since Picnik died & left me all alone to grieve in private, you get individual pictures. Them’s the breaks.

5-1
5/1
Dress: Simplicity 2458
Belt: thrifted
Shoes: Target

5-2
5/2
Dress: Colette Patterns Rooibos
Belt: Handmade
Cardigan: Thrifted
Shoes: Target

5-3
5/3
Dress: Simplicity 6268
Belt: Thrifted
Shoes: Steve Madden

5-4
5/4 (that’s today!)
Blouse: Colette Patterns Violet
Skirt: Colette Patterns Ginger
Cardigan: Thrifted; reconstructed by me
Belt: Thrifted
Shoes: Target Kids

Sooo… about that Violet blouse… we need to talk.

The original incarnation just wasn’t doing it for me. I know it’s looks super cute in the pictures, but it was very uncomfortable in real life – mainly because those damn armholes were WAY too low-cut for sleeves. Every time I moved my arms, the whole shirt would ride up. As a result, I never wore it and felt very sad inside since 1. dotted swiss; and 2. cotton batiste, aka my two favorite fabrics that very instant.

So I cut the sleeves off.

Dotted Swiss Violet

I wish I could tell y’all that cutting the sleeves off immediately solved the problem, but that would be a lie. Remember those low armholes? They were so low, sans sleeves, that you could see the whole side of my bra without even being sneaky about it. Which, I mean, I’m definitely known to let it all hang out from time to time, but we’re talking about a freakin swiss dot button up with a peter pan collar here. Not really the right vessel for looking tarty.

I used part of the sleeves to add an extra wedge of fabric at the bottom of the arm hole – I ended up having to raise it a good 2″, and it’s still a little too low but I am NOT in the mood to fiddle with this blouse anymore. I finished with bias tape facing (machine-stitched because, again, NOT in the mood). I also took in the side seams a bit more at the waist to give it some more shape, since I was feeling pretty box-like at that point. I’m not 1000000000% happy with the finished result – it kind of looks, well, homemade – but it’s much better than the sleeved version.

The lesson here: don’t buy a loose, free-flowing boxy blouse pattern when you prefer to wear everything with little to no ease.

On a happy note, look at the newest addition to my house as of last night!
YES
YES YES YES
It’s actually Landon’s set, not mine 🙂 But OH MAN it’ll be SO FREAKING NICE to do laundry in my own house! I really love doing laundry (and folding it! Haha!), but I hate dragging it in & out of the house. So I’m pretty excited about this. And yes, this is absolutely relevant to MMM’12 since pretty much all the good stuff is in the dirty clothes bin right now.
Also, check out my reel mower on the right (don’t look at the recycling on the left, please & thank you). I mow my lawn with a reel mower because I’m a BAMF. And also because gas is expensive.

Oh, and my Bombshell dress is almost done – all that is left is securing the vent (seriously, a little 2″ diagonal line haha) and figuring out how I want to attach the strap. It’s lookin’ good and I’m feeling good about it!

I leave you with this –
.
In case you were ever wondering what it looks like when the plastic cone inside a spool of serger thread crumbles into pure nothing.

another ginger – western style

28 Jun

i love this ginger pattern, y’all. it’s so easy to sew, flattering to wear, etc etc. after casey posted a tutorial for scalloped pockets, i knew i needed to make another one asap. here’s the fun part of the story – i stopped by a moving sale on my way to the fabric store (i needed to have my scissors sharpened & i thought i would buy some khaki twill to make into a western-y skirt) and ended up buying a gigantic bag of fabric for $20… including 4 yards of khaki twill! haha i love it when this stuff works out in my favor!

i still got my scissors sharpened, though. they now cut like a hot knife through buttah. and the scissor man complimented my excellent choice in shears. yes, i blushed.

Continue reading

completed: the colette ginger skirt

16 Jun

ah, the colette ginger skirt. a project that should have been quick & simple (do i hear the warning bells ringing in your head yet? how about now?). of course, “quick & simple” isn’t really an option for me, so i added a few extra steps to make myself feel like i was accomplishing something. and herein lies the rub: my two hour skirt ended up turning into a 4 hour skirt. and, as much as i’d love to pass this blame on someone else, i can’t. sometimes, we just gotta take this stuff in stride & accept the fact that we make things harder for ourselves. or wait, is that just me? whatever.

Continue reading