
Good morning, OAL-gers! Today is the final post in the OAL series (which I’m sure means that a lot of y’all are dancing for joy to hear that there won’t be any more of these posts! Ha!), and we will be finishing our dresses. Yay!
You should have a mostly-finished dress at this point – everything is connected, all seams are finished, and the only thing left to do is hem the dang thing! Of course you can hem however you like (as most of y’all already have at this point), but I wanted to give a couple options for those who are unsure what to do, or just want to try something different. You know how much I love having options!
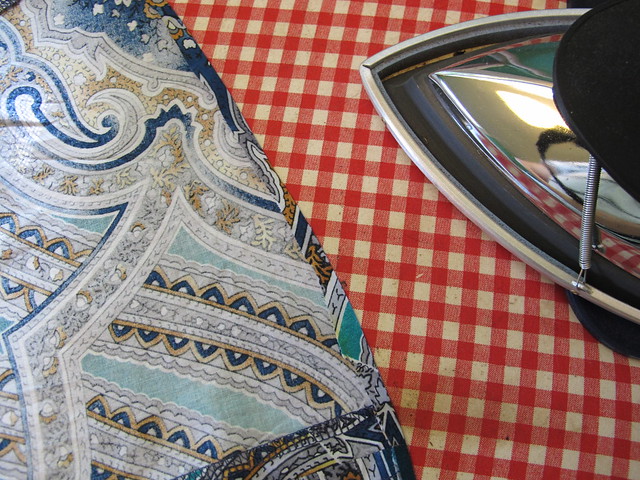
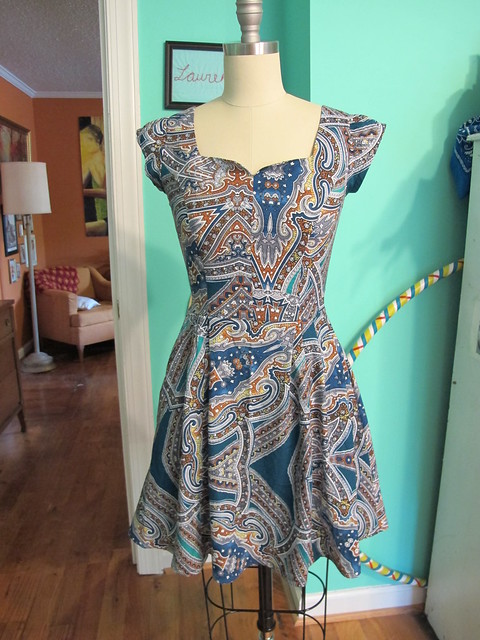
First things first, try your dress one and determine where you would like the hem to hit. I like my hemlines above the knee, and this dress runs a little long (or, rather, I’m a little short), so I ended up cutting off about 4″ from the hemline. I’ve found that the easiest way to mark my hemline is to measure the length of a skirt that I like, mark that length with a pin on my dress, and then try it on to see if it works. Before you cut, add back a hem allowance (however much you will be turning up before you stitch the hem), otherwise, your skirt will end up a little short 🙂
Option #1: The Easy Turned Hem
Fold the skirt hem under 1/4″ to the wrong side and press.
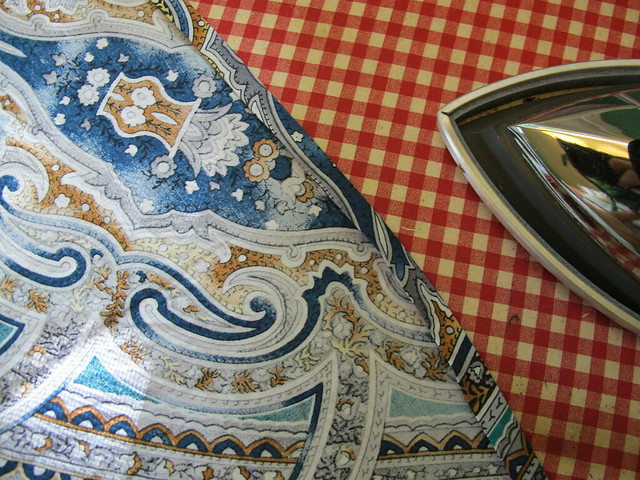
Now fold one more time, again to the wrong side, and press. However much you fold under depends on how much of a hem depth you want. I stick with about 5/8″ for this particular type of hem. You can certainly fold more for a deeper hem, but be aware that the curved hemline means that you might have difficulty easing the fullness in (since a curved hem means it’s bigger at the bottom than it is at the top) if it’s too deep.
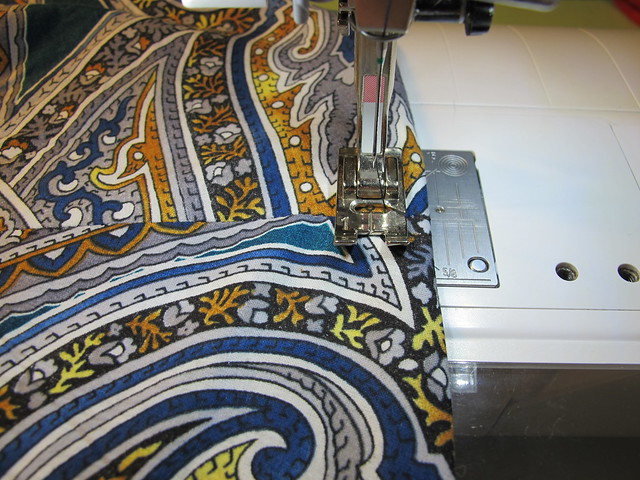
Now just topstitch that bad boy down!
Some tips for topstitching your hem:
– Start on a side seam so your backstitching doesn’t distract from the beautiful front or back of your dress
– Use a slightly longer stitch length (I use 3.0 over my machine’s standard 2.5 length); the stitches will be a little more defined
– Topstitch from the right side if you can help it – the needle stitches are much prettier than the bobbin stitches
– Use the measurement markings on your throat plate to help ensure you are stitching in a straight line
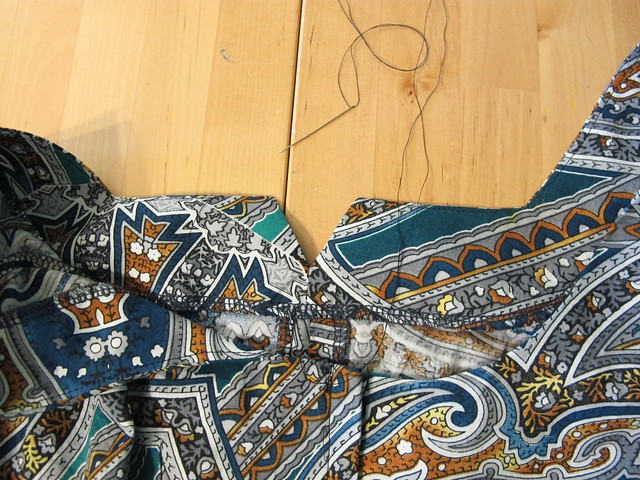
If you are sewing the version with the notched bodice, don’t forget to tack down your facing to the center front. Catch only the seam allowances and use a couple of handstitches to keep that facing inside the bodice where it belongs.
And done! 🙂
Option #2: The Extra-Fancy Hem
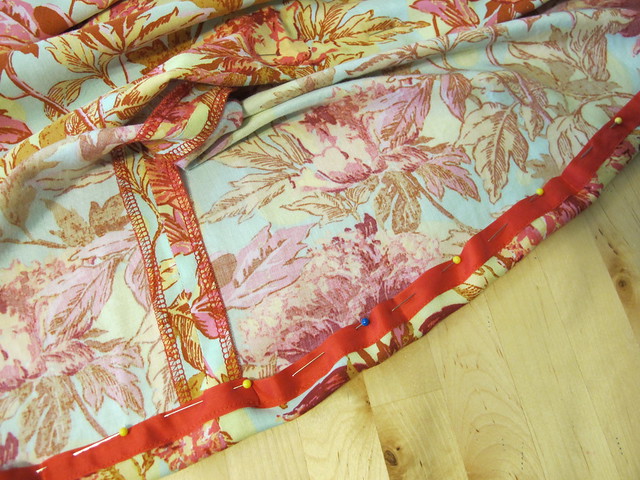
One thing I like to include with my hems is a strip of seam binding. This vinage-inspired finishing covers the raw edge (so you don’t have to fold twice) and is a fun little surprise whenever someone sees the wrong side of your skirt. You can use seam binding, bias strips, or even lace – in a matching, contrasting, or complementary color. I just think it looks really pretty and it really adds a nice professional finish to an area that most of us tend to rush through (because, duh, we just wanna wear our dresses!). For this hem, I used vintage seam binding and topstitched it down, although you can also sew the hem by hand if you’d like it to be invisible from the outside.
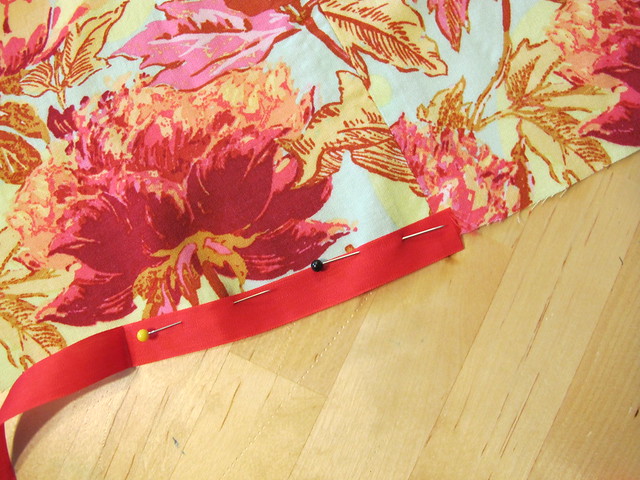
Starting at one of the side seams, pin your hem tape to the right side of your skirt hem, letting the binding hang over about halfway.
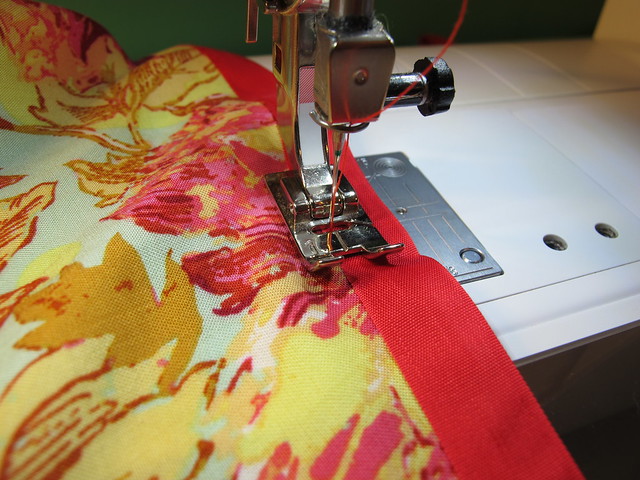
Stitch, keeping your needle as close to the edge of the binding as possible.
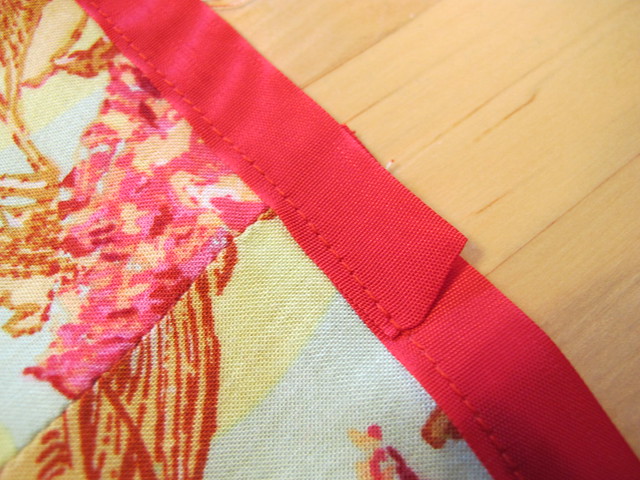
When you reach the full circle of the hem, overlap the binding by about 1″ and fold the raw edge under, as shown.

Now fold the binding to the wrong side to whatever hem allowance you prefer, measuring all the way around to ensure it is even. Pin into place.
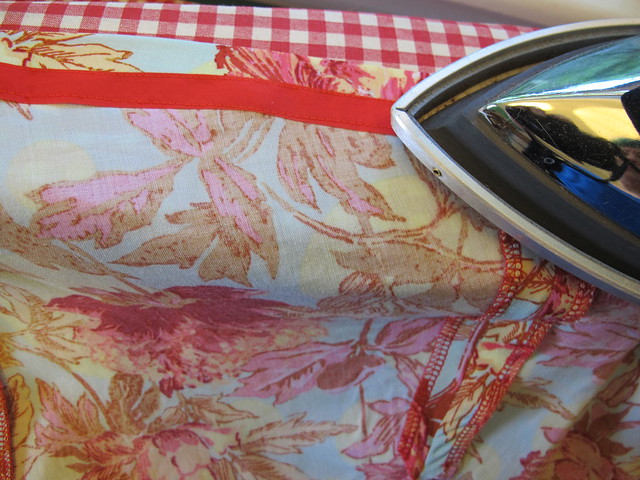
Topstitch on the opposite (unsewn) side of the seam binding – again, sewing as close to the edge of the binding as you can. Press and use steam to ease out any fullness.
Ta da!
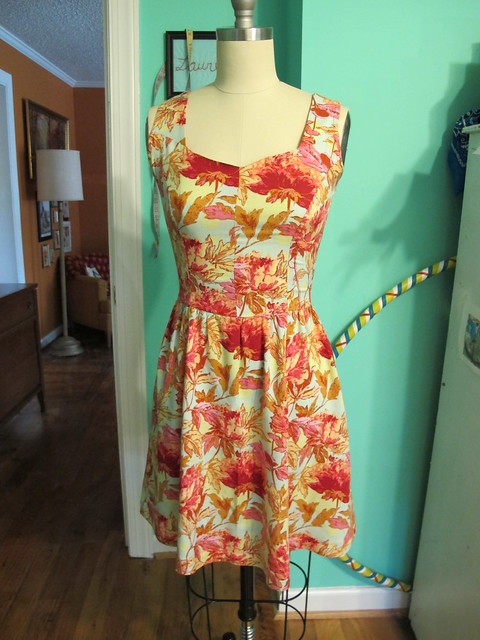
And that’s it! Give yourself a pat on the back, pour yourself a stiff cocktail, and do a little dance because YOU FUCKING SEWED A FUCKING DRESS, LIKE A FUCKING BOSS! Whoop whoop!! Don’t forget to post your finished outfit in the Offical OAL Finished Outfits Ravelry Thread – there are already sooo many beautiful dresses and cardigans lurking around there, omg. Remember that you have until 7/31 to post to be eligible for prizessss – so you’ve got a couple more weeks if you’re running behind 🙂 Don’t have a full outfit but want still want to share your dress? You can post that in the Official Unofficial OAL Flickr Group.
Stay tuned for my OAL photos in the next couple of weeks… a friend took them for me, and, well, all I’m going to say is that they are MUCH better than anything I could have tried to do haha!


Such loveliness! As a non-sewer (so far), all I keep thinking is I don’t think I could find things like this in stores, and that is a good reason to sew!
From these pictures, it looks to me as if the different hem finishes cause the dress skirt to hang a bit differently. The rolled hem looks more drapey, and the hem with the seam binding looks a bit stiffer. Is that actually true, or is it a quirk of the pictures, or maybe the different material in each dress?
Not saying I like either one better, just wondering if the hem finish really makes any such difference, and whether that might influence a person picking one over the other.
You’re right, it does make a slight difference in how the skirt hangs. Since my seam binding is a little on the stiff side (not really stiff, per say, but stiffer than the drapey rayon that the skirt is made from!), it gives the hem a slight bit of structure. Those who want to keep their hem drapey should stick with the standard turned under hem 🙂
I really like a blind hem. I know I’m probably in the minority here, but ever since I got my new machine a few years ago it’s the only one I use. I went from a 70’s Kenmore that my mother owned to a new computerized machine, so I like to use all the toys.
I really like the hem tape version as well. Just make sure you have your ruler handy for any hem, as your eye can really trick you as to the depth of your fold!
Or use your fingers to measure a hem. They’re always attached to you, and variance in length and width is minor from day to day unless you retain more water than the average bear. My hems are most usually one knuckle deep. I use that measurement when adding seam allowances to patterns that don’t come with seam allowances — hold your hand just beyond the end of a scissor’s blade length, cut to the tip of your finger. Move your hand for the next cut. Don’t cut your finger.
I love using my fingers to measure! I’ve actually considered getting the measurements actually tattooed on them… mostly because that would be hilarious (and, well, helpful haha!).
No, I’m totally with you – I love blind hems as well 🙂 although I’m not as much a stickler about them as I used to be (and anything that has topstitching anywhere else on the garment gets the topstitched hem treatment, haha!). I gotta say, though, I don’t care for doing blind hems by machine. They never turn out completely invisible for me. Blind hems by hand, though – loveee those. I even love sewing them! Gives me an excuse to watch something crappy 🙂
For a tiny, tiny machine hem (a.k.a. a baby hem) on either floaty chiffon or something that does not need the weight of a hem to hold it down, or the visual weight of a deep hem: Sew a line around the hem, micrometers below the place you want the hem to fold. Turn up the hem along that line of stitches, and sew the fold closed, just above the fold. Trim off any excess. Fold AGAIN, along the line of stitches you just sewed. Sew along the top, now-finished line. Done. Three passes on the machine, I know I know, seems excessive, etc. Weight of thread helps to hold the hem down. Easier by far than hand-rolling a chiffon hem.
Many machines (old and new) have rolled hemmer feet… takes some practice but makes a great looking hem. You cab even use fine fishing line to put flare into that kind of hem
Fishline needs to be very fine and I use the Bernina zig-zag rolled hemmer foot #63.
This is a good tip! I gotta say, I’m in the camp of using my rolled hem foot to get perfect rolled hems 🙂 However, I know not all machines use rolled hem feet (or the foot is terrible, ugh, been there done that), so it’s good to know how to do it without the foot and without having to do it by hand!
I either have a bad rolled hem foot, or did not inherit the gene to roll a hem by machine. Long ago decided that I do not have to die on that hill, so I save my strength for other battles.
I agree that a machine-rolled hem is lovely. I just cannot achieve one without maximum thread snarls and turning the air blue with cursing. Not the best habit for a church secretary, so I avoid my rolled hem foot most usually.