
Hiya OAL-gers! Today we are going to attach our sleeves and/or finish our arm hole edges with bias facing (depending on which version of the bodice you are sewing). Again, this is a long, picture-heavy post, so sorry! I will be covering my favorite way to sew bias facing (as I mentioned in my silk cherry Vogue 1395 post last week), so you may want to check this out even if you’re not sewing along with us 🙂
For the version with sleeves, read on!
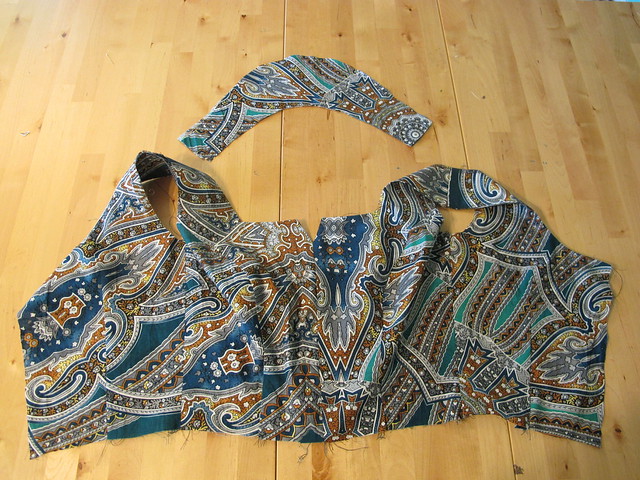
You should have a bodice and two sleeves. If you have not already done so, you may want to baste the edges of the facing along the arm hole, as that will all get attached in just a moment.

Make sure your pleat markings for the sleeves are marked on the RIGHT SIDE of the fabric. I used chalk so it will just brush out and not leave a permanent mark.
To form the pleat the top of the sleeve, fold the fabric exactly along the solid line and bring it to the dashed center line. Pin in place. Do this for both sides, forming two pleats.
Baste the pleats into place.
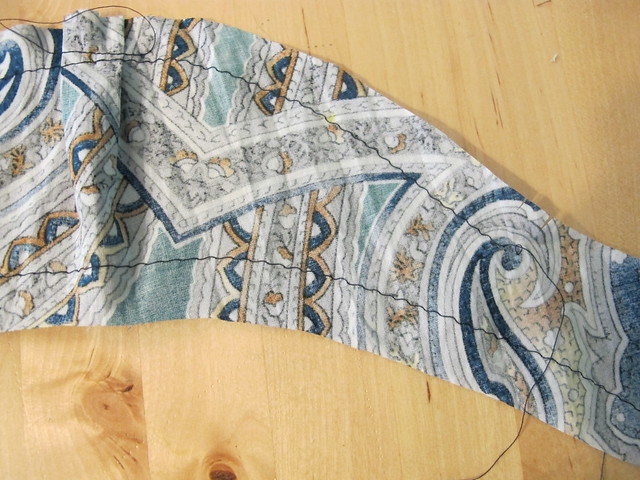
Now you are going to sew two lines of basting stitches. The first line of stitching is along the curve of the sleeve cap, starting at one set of notches and ending at the opposite set, at exactly 5/8″ from the raw edge*. Leave long thread tails. This basting will be used to ease the sleeve into the arm hole. The second line of stitching is along the hem edge of the sleeve, from end to end, at 5/8″ as well. This basting will be used to hem the sleeve. You can leave it off if you feel confident in your sleeve-hemming skills, though!
* Note: Lots of people like to ease their sleeves in with two lines of basting, at 5/8″ and 1/2″. You are more than welcome to do that if that’s your jam, but I’ve found that I get much more gentle easing with less puckering if I use one line at 5/8″. Totally up to you!
Sew the underarm seam of the sleeve, right sides together. Finish the edges and press.
To hem the sleeve, first fold up the bottom edge 1/4″ and press. Fold up the remaining hem allowance, exactly along the line of basting stitches that you created, and press again. All raw edges should be encased inside the hem at this point.

Topstitch the sleeve hem into place and press again. If you’d like, you may use a slightly long stitch length (I use 3.0 to my normal 2.5) – I personally just think it looks a little nicer 🙂
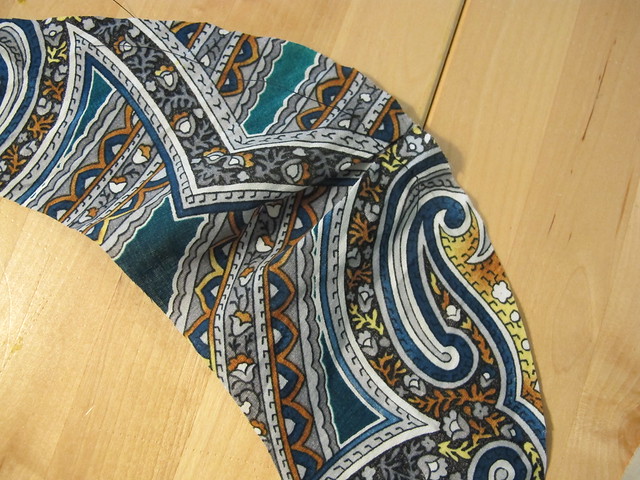
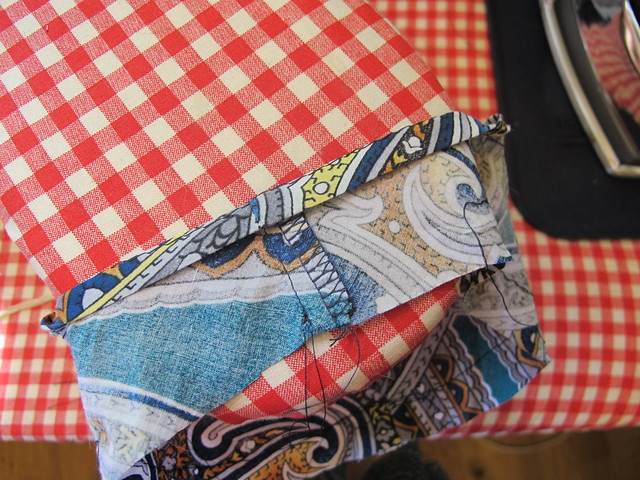
Time to stick that shit in the arm hole! Starting at the bottom, match up the side seam with the underarm seam, and match the notches. Match the dashed line at the sleeve cap (the one that both pleats are folded to) to the shoulder seam. Your sleeve will be obviously too big for the arm hole, that’s fine, we are going to fix that.

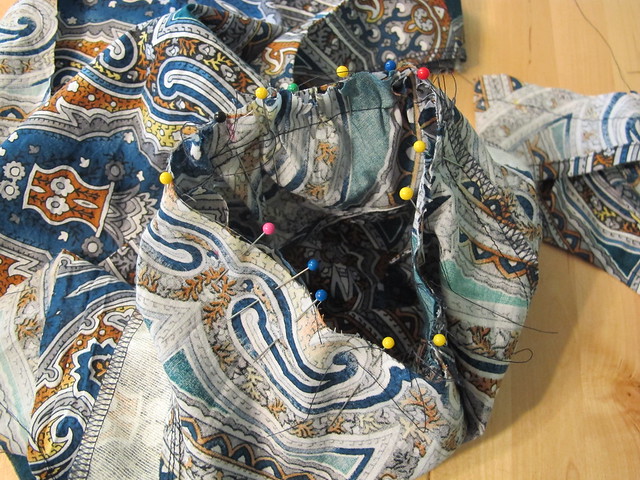
Very gently pull the line of basting stitches, easing the sleeve excess to fit the arm hole. We don’t want to create big gathers here – we just want the sleeve to be a little smaller so it fits smoothly. Once you’ve got the sleeve eased in, pin everything into place.
* Note: Easing sleeves can be a little difficult! These sleeves will ease in smoothly, but if you are having problems with puckers, you may want to open up your pleats at the top of the sleeve and make them a little bit deeper. That’ll use up some of the excess ease 🙂 Don’t go too crazy with that, though, as you do need a little bit of easing so the sleeve has a pretty curve and enables you to move your arms around and all that.
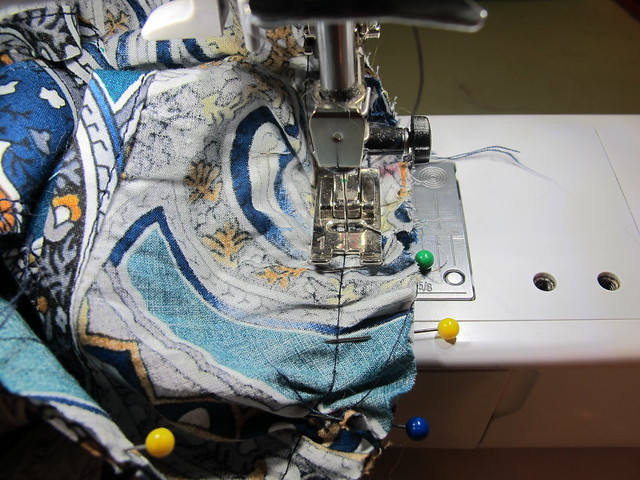
Now you can sew the sleeve in! Sew exactly along the 5/8″ line of basting, being careful to make sure there are no puckers or gathers and that your sleeve in eased in smoothly. I like to sew my sleeves in with the gathered side facing up – that way, I can periodically lower my needle, raise the presser foot, and adjust the easing as I go.
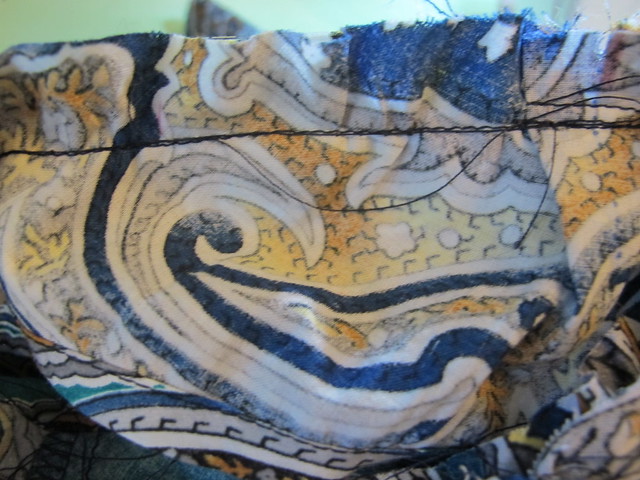
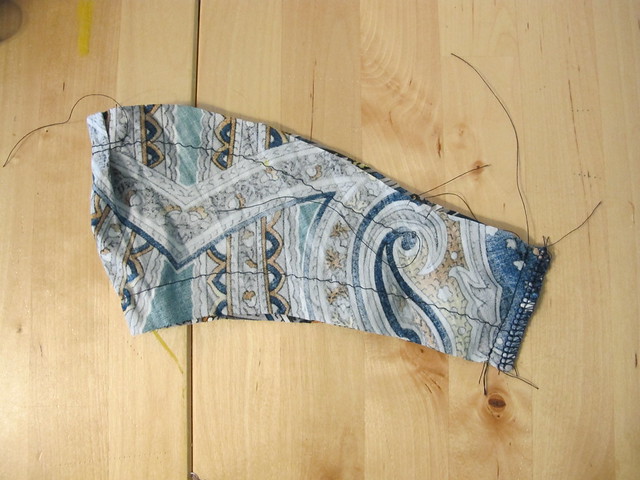
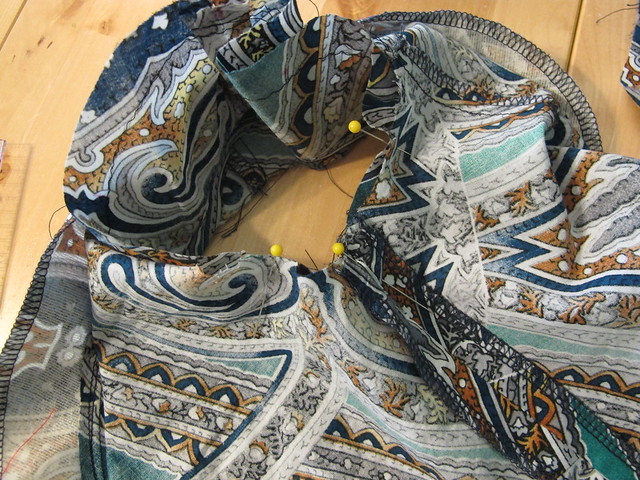
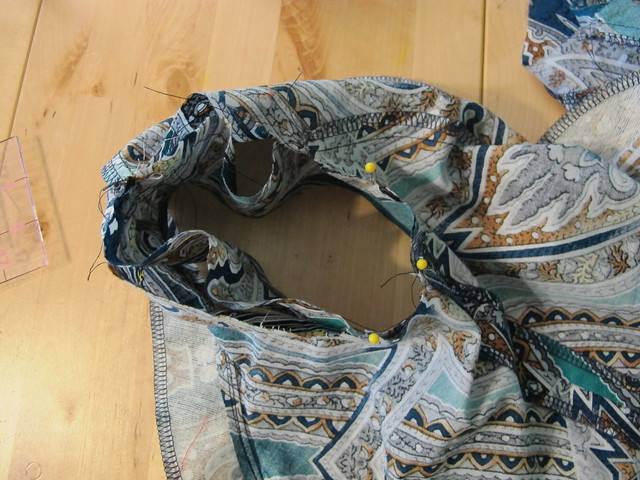
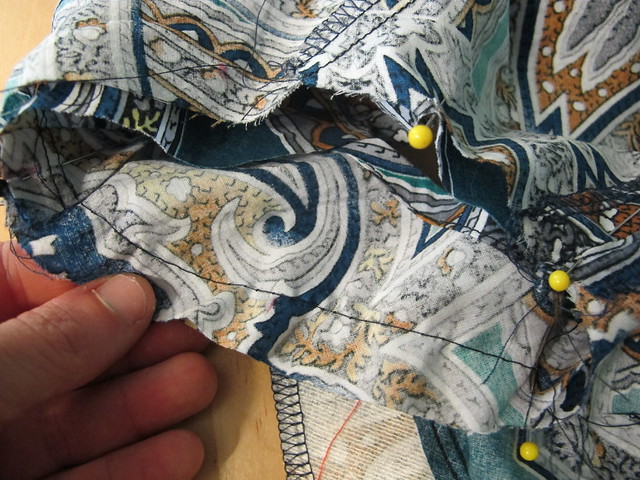
Once you’ve got the sleeve sewn in, double check both sides to be sure that there is no gathering or puckering. Your sleeve will probably have a bunch of excess at the seam allowance like I have here – that’s fine! As long as it’s smooth at the stitching line 🙂 Now go ahead and finish your seams.
* Note: The instructions tell you to sew a second line of stitching right by the first one. Honestly, I’ve never done this before – even before I had a serger – and I’ve never caused a Sewing Apocalypse, so take that as you will.
Press the seam allowances (I press toward the bodice) and steam the sleeve cap to remove any excess fullness.
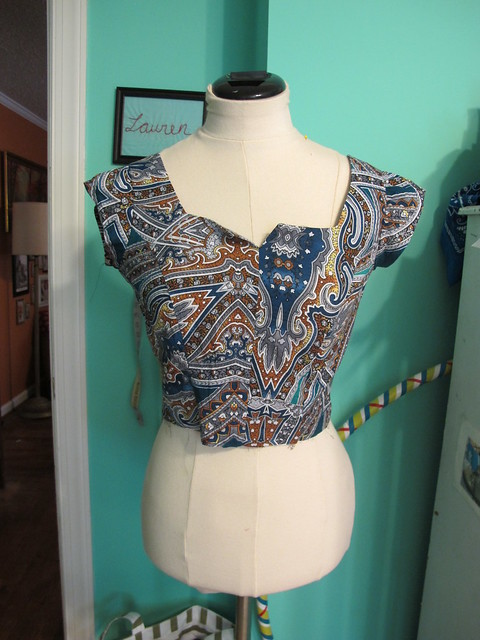
Finished: Cute little cap sleeves! Yeeeahhh!!
For the sleeveless, read on for the bias facing tutorial!
The first thing we want to do is remove some of the seam allowance from the arm hole of our bodices. This bodice is designed to be sewn with a 5/8″ seam allowance, and we will be attaching our bias strips at 1/4″. So you’ll want to shave off about 3/8″ from the entire circumference of the arm hole.
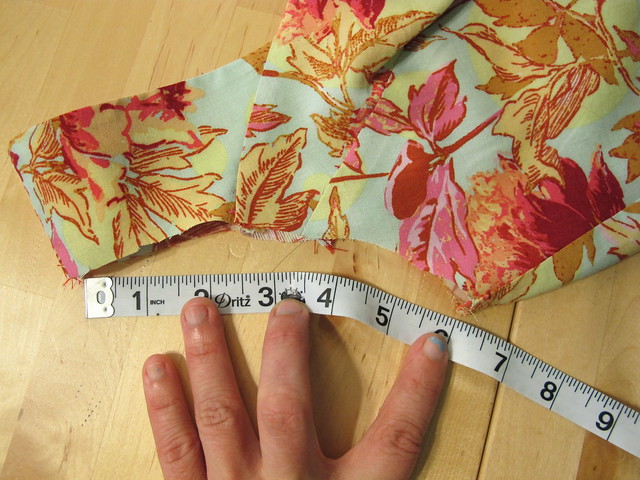
Now measure the arm hole, so you know how long to cut your bias strips.
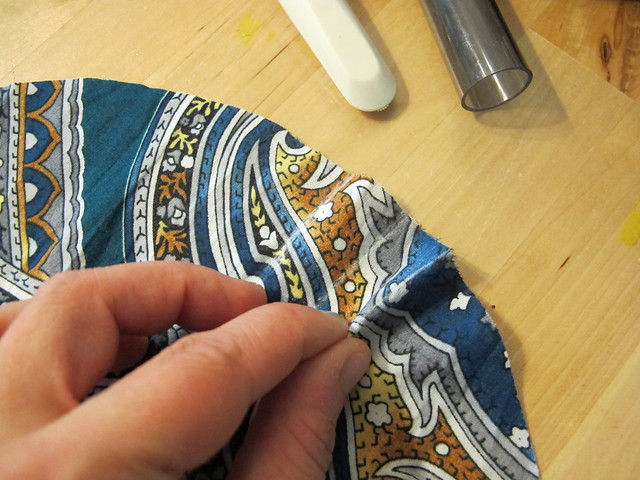
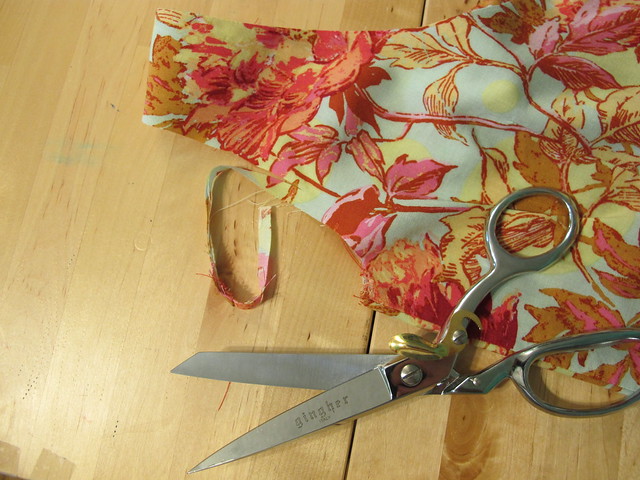
Next, we are going to cut bias strips from our fashion fabric (or cool contrasty fabric, if you want!). There are lots of tutorials on how to do this; I am just showing you my preferred method 🙂 Start with a piece of fabric that has two straight edges at a right angle. For the cross grain, you can just rip your fabric, which will give you a perfect straight edge without cutting.
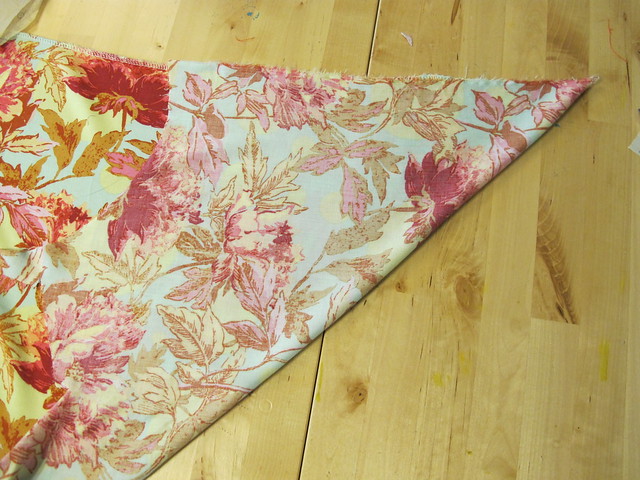
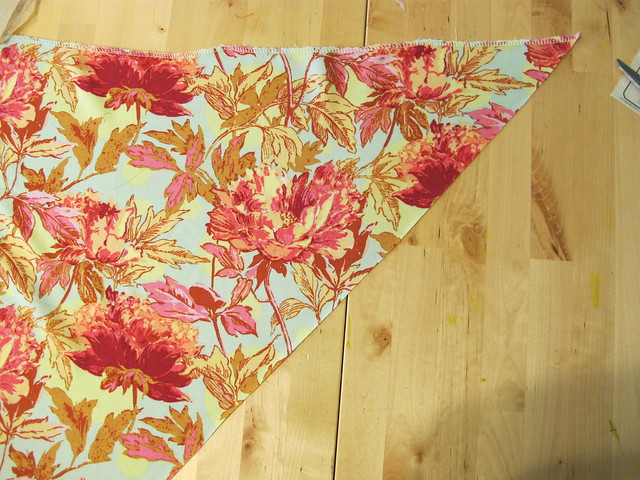
Fold the ripped edge up to meet the top straight edge, thus forming a diagonal line. Cut along the diagonal line (you may want to gently press first, if you need a guideline); you have just created a bias edge.
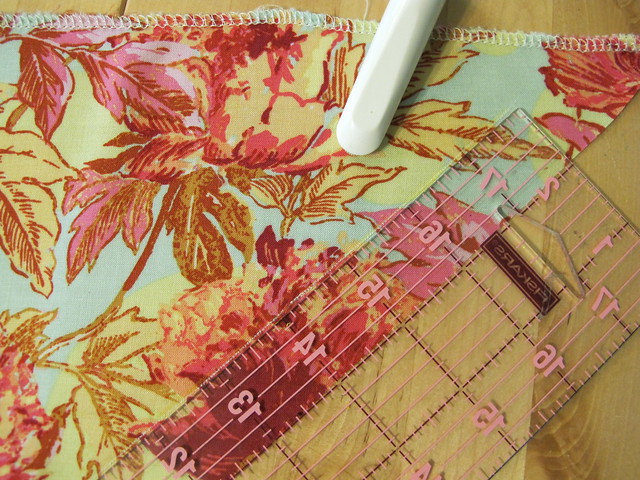
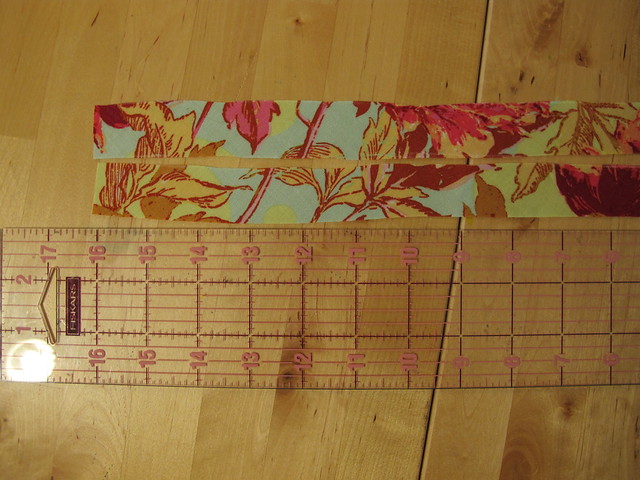
Now cut two strips on the diagonal/bias – 1″ wide and the length of your arm hole measurement. I like to draw my lines with chalk and cut with scissors; you can also use a ruler and rotary cutter if that’s your jam.
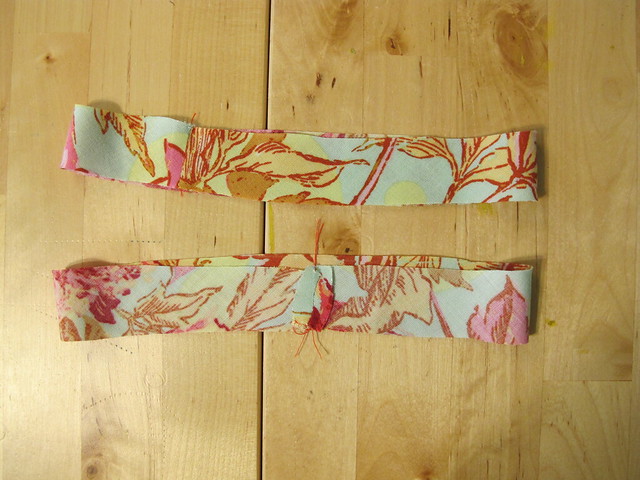
Sew each little bias strip into a circle with the right sides together, using a 1/4″ seam allowance. Press the seam allowances open.
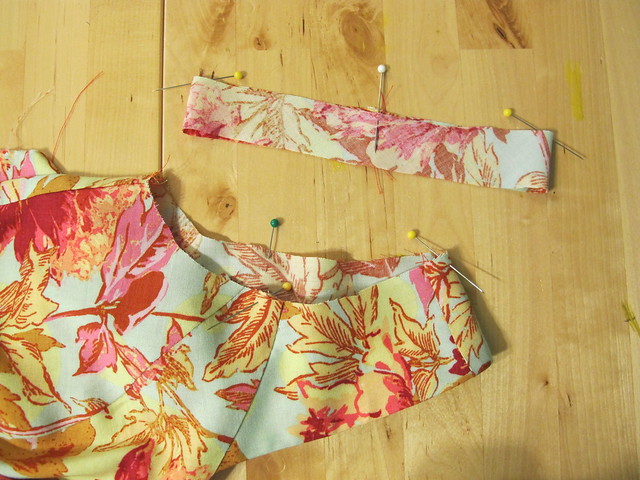
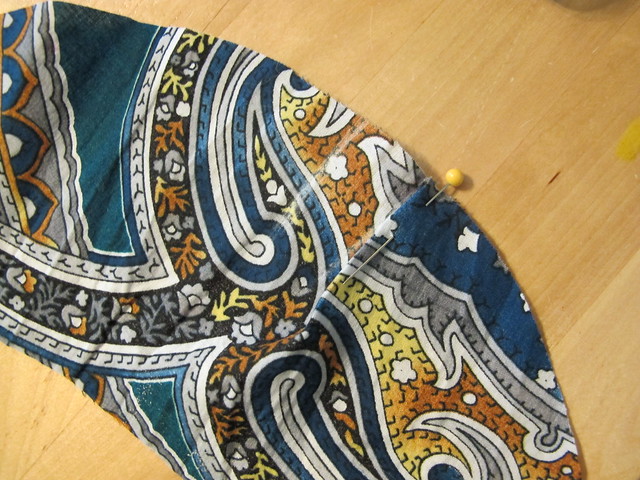
Next, we want to make sure the facing will fit inside the arm hole before we actually sew it in. *Generally* speaking, most bias facing is fine at 1/2″ shorter than the measurement of what it’s being sewn into (which is why we cut our strips at the measurement of the arm hole – 1/4″ seam allowance x2 = 1/2″), but some stretchier fabrics – such as my rayon challis – require a shorter bias strip. So we are going to check that measurement now. This pinning/sectioning also makes it easier to sew the bias strips in if you’re a newb.
Anyway, section your arm hole and bias strips into 4 equal sections, and mark with pins.
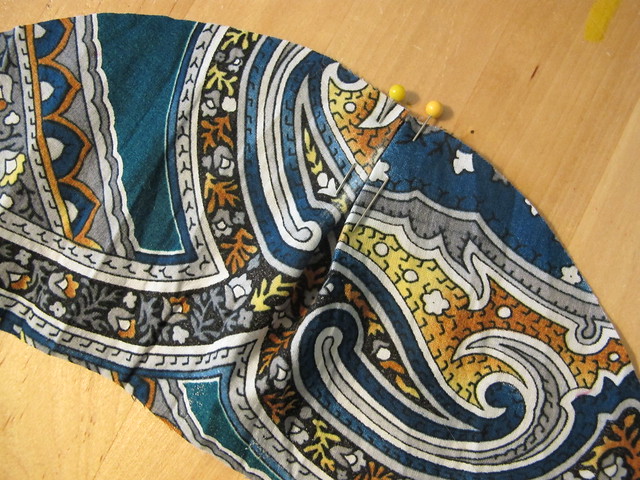
Pin the bias facing to the arm hole, starting with the seam matching the side seam, with right sides together (so your bias facing is on the outside of the garment). Match each section, so your bias facing is pinned at 4 points. From there, check one section and see if the facing is short enough for the arm hole – you just need to be able to gently stretch it to match the length of the bodice arm hole (gently, I say! We are not sewing ribbing onto tshirts here!). If it’s too long, pull it out and shorten the bias strip accordingly, then repin. I had to shorten mine by another 1/2″ to get it to fit.
* Note: If you want your bias facing on the OUTSIDE of your garment (again, cool contrasty thing), you will need to pin it to the inside of the arm hole.
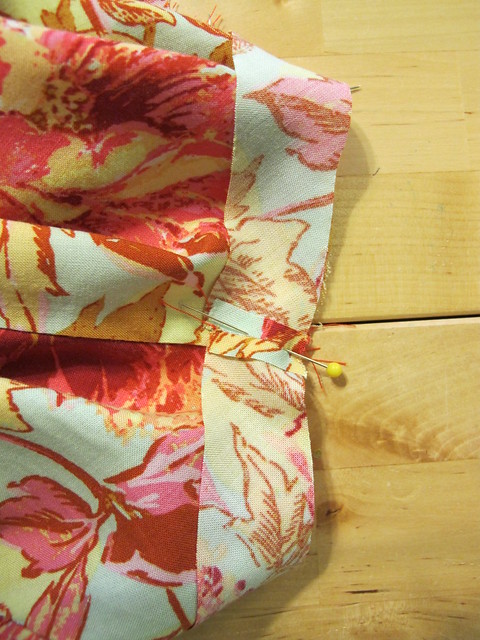
Once your facing is the correct length and pinned into place, sew it down with a 1/4″ seam allowance, catching the edges of the bodice facing in your stitching as you come across them. Again, the bias facing needs to be on the outside of the garment, right sides together.
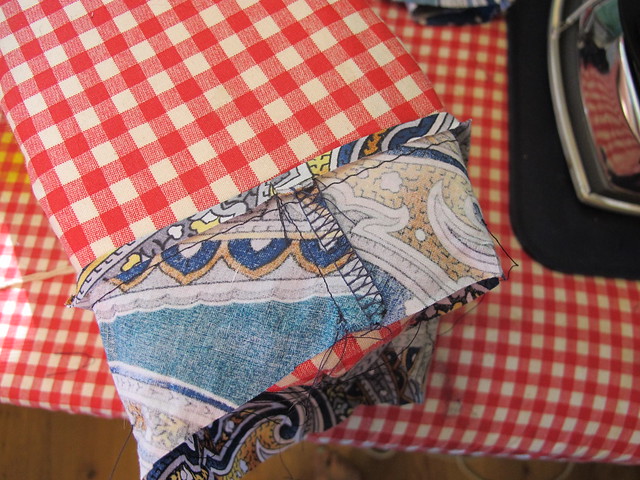
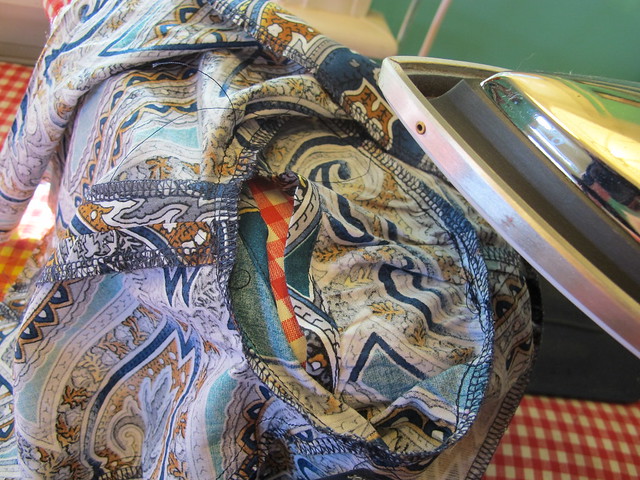
Now take the whole thing to the ironing board and press the seam allowances toward the facing.
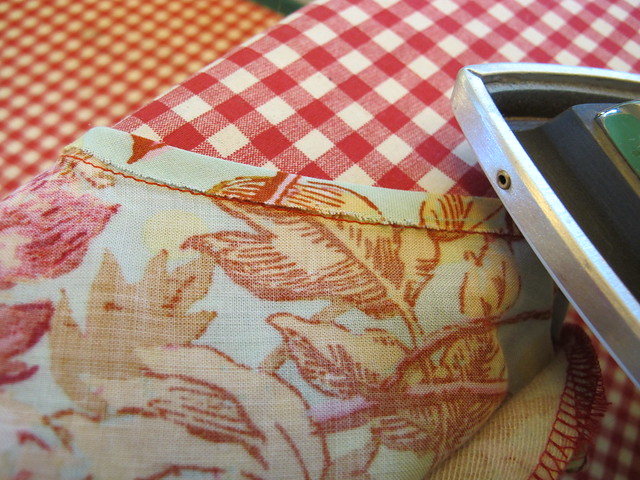
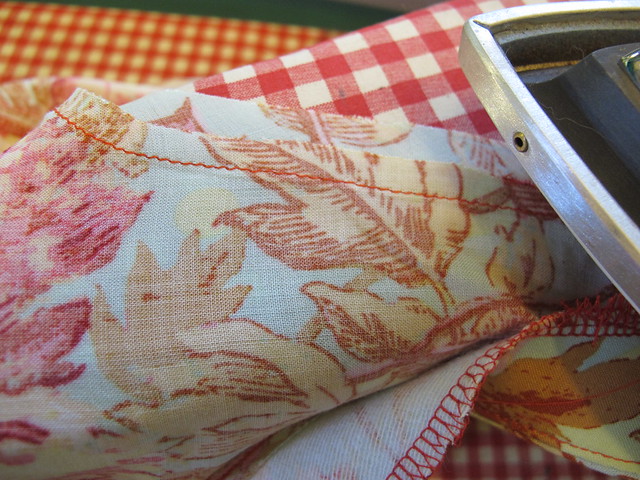
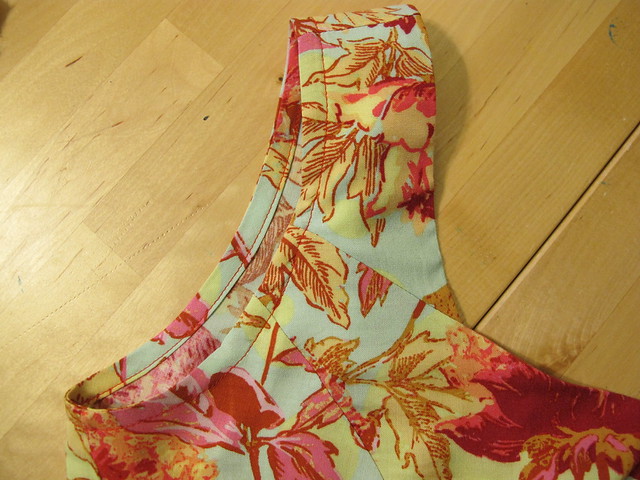
Fold the facing down toward the arm hole, wrong sides together, matching the raw edge of the facing with the stitching line you just created. Press.
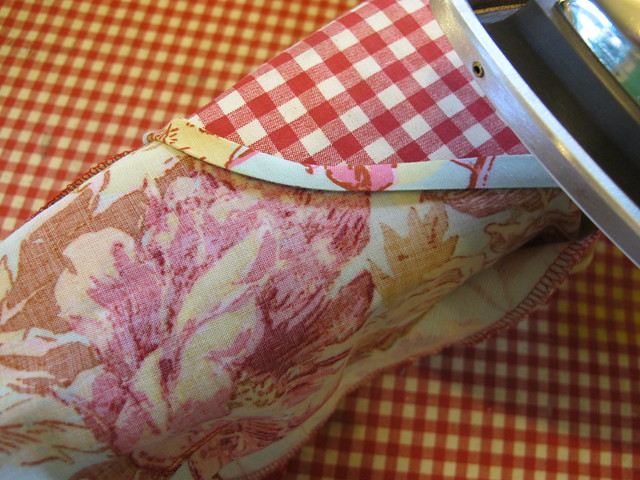
Fold the entire thing down one more time, along the stitching line, to the inside of the arm hole (or outside, if you’re going that route). All raw edges should be completely encased at this point.
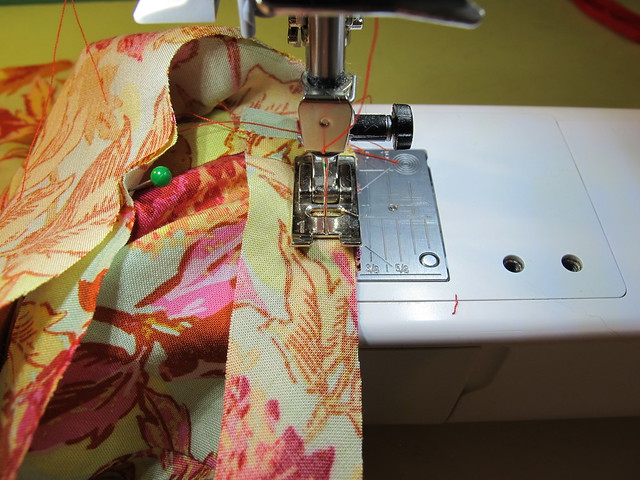
This is what your pressed/unstitched facing should look like. Note that I also caught my bodice front facing in the stitching/binding, so it’s all encased and won’t need to be tacked down later.
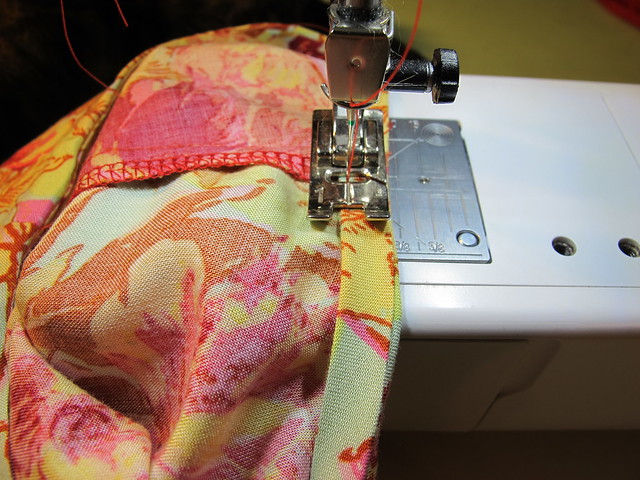
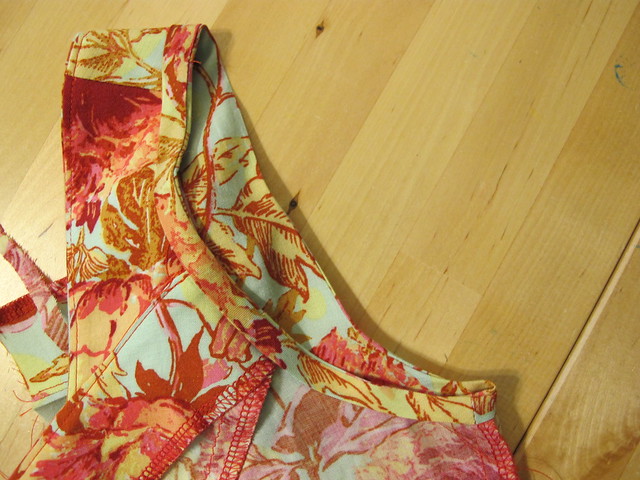
Now topstitch your facing to the arm hole, about 1/8″ from the fold. Try to keep your stitching line consistently spaced, as this will show on the outside of your garment. You may need to gently stretch the binding as you sew the curves. Alternately, you can slipstitch this binding if you don’t want the stitching to show on the outside, but I’ve found that works best if you have underlining to sew it to (otherwise you may have little thread puckers).
Once you’ve sewn down your bias facing, take it back to the iron and give it one last press, to ease out any wrinkles or fullness, and to make the edges nice and sharp.
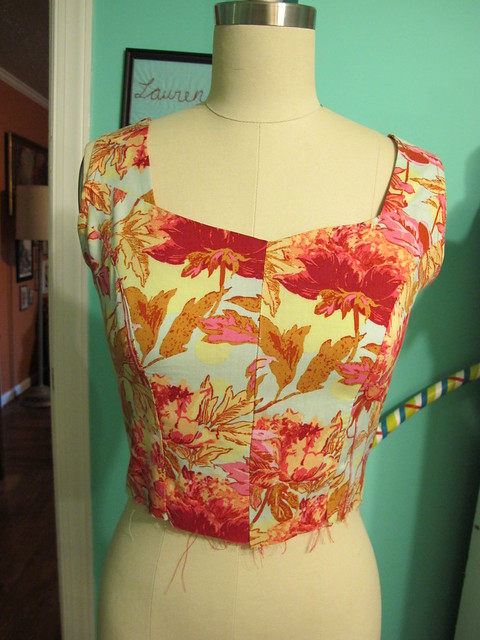
And that’s it! A gorgeous bias facing that doesn’t require using a fiddly tool (man, those things can be obnoxious). I LOVE this method and I find it much easier than any other binding method I’ve used before. This works for both necklines and arm holes, and can be done either flat or in-the-round as I demonstrated.
Phew! That’s all for this week! As always, let me know if you have any questions 🙂


I am not taking part of this OAL but I am so loving your tutorials! I came back to sewing after 25+ years & they are very helpful! Thank you!
Yay! I’m so happy to hear you find them helpful 🙂
I like your binding method and I’ll use it for sure!
You’re gonna love it!:D
Great tutorial…love your colors and fabric choices! You are helping so many newbies to show no fear in making good finishing techniques..Brava!
What can I say – I like to start ’em up with good habits early on 😉
First off thank you very much for the tutorial and pics, so very helpful. I’not making this dress in particular but as a new sewer I’m following. Something I have not been able to master is the easing of a sleeve. Here is my question . When you are sewing and a minute gather comes up to where do you push it to make it disappear ( backwards, frontwards, to the right side or left side) ?I guess I just don’t understand how to make disappear the little gathers that form .
You know, I actually just kind of smush it around until it disappears. Ha! I hope that makes sense – you can slide the fabric up and down the basting stitches, spread it apart, and kind of manipulate it with your fingers to get the gathers to spread just enough so they ease without puckering.
Thanks for the info on the bias facing. I’ve never thought to make the bias shorter than the armhole, I’m going to try this out tonight!
Oh yeah, as long as it’s a little bit shorter, it’ll stretch just enough to ease to fit whatever you’re sewing it to 🙂
That’s what I was doing wrong! You see, I’m a facing type of girl. When I have a sleeveless top, I like to attach a facing that finishes the neckline and armhole in one. It’s a little old school, but hey, let’s face it, I’m an 80-year-old in a 26-year-old’s body. I’ve tried bias binding, and although it came out, it was perfect like I wanted (or close to perfect). So, what wasn’t I doing? Cutting it 1/2″ shorter (or more) than the circumference. I had shaped it, but that didn’t work out either. It totally makes sense too and I don’t know why I didn’t think of it before. Seriously made my day. I’m might go home and bind something just for the heck of it!
Oh yeah, I love those old school all-in-one facings too! But there’s something to be said about a nice strip of bias facing – it feels so light and weightless in a summer dress 🙂 I also just recently learned the wonders of shortening the bias facing to fit whatever you’re sewing it too, and it’s magical! Go bind something and revel in the glory!
I always just fold my bias tape in half, sew the raw edge and then press the folded edge in and stitch, but I feel like your way could be done with a narrower strip to begin with. Cool!
Oh yeah! Plus, it uses a little less ironing (which is all done after the bias is sewn on – sometimes ironing unsewn bias can be tricky, not to mention make it stretch all crazy!)
Nice bias binding tips! I’ve only tried it once and didn’t like the way the fabric seemed stretched after (the bound edge leaned out – you can see it a bit here http://earthapplestudio.com/2014/06/23/colettes-sorbetto-top/). I’m guessing it’s practice makes perfect issue. The simplicity of your method (especially the ironing to the seam) is sweet. Thanks!
I’d venture to guess that your bias is sticking out because you need to shorten the length a little more 🙂 Just like adding a knit binding to a tshirt, the bias strip being shorter than the edge it’s being sewn on means it will stretch and curve to fit, and pull to the inside. Giving it a good steam press will help it lie flat and to the inside as well 🙂
I hadn’t thought of that – only gotten as far as perhaps needing to stay stitch the neckline before sewing on the bias. Will try a wee bit shorter next time. Thanks!
Ripping the cap sleeves out for the 8078th time and going for bias binding instead. I just couldn’t get the sleeves to sit in a way that I liked. Bias binding it is!! (Also, it will make me get on with the sweater! :)) Glad to have seen the tip about trimming down the hem allowance!!
errrrr…SEAM allowance. 🙂
OK, at this risk of over posting today… I am a terrible cutter, so I sewed a line of long/basting stitches around the arm hole 3/8″ in – then cut the armhole along that line. This also gave me a strip of material to measure (also not so great with that…) to ensure my bias strip would be the right size. Thought I’d add that here in case others are worried about the cutting and/or measuring part!
That is a BRILLIANT idea! Holy shit, why have I never thought of that? Thank you so much for sharing – I am totally gonna use that in the future haha 🙂
Super helpful tutorials. I was just reading the Washi dress pattern – only had it a year – and the whole bias tape thing and shirring…yikes.
Janet
Shhh don’t read the whole pattern at once! Just take it one step at a time, and only focus on the task at hand. It makes overwhelming projects seem a lot more manageable (this is how I handle knitting patterns – if I try to read through it in the beginning, I get scared haha!). You can do it!
Nice one!! I tell you what, I am going to see if I can use those two tutorials simultaneously!! That is redraft the cap sleeves, so it doesn’t go all the way around the armscye, but covers just about 2/3rds of it and then bind it using your technique!!
BTW, are you going to create a Flickr page, so we participants can showcase our makes for this sewalong?
Yes please Lauren! I’d love to see what others are doing too. And when I finally get serious about sewing along, I’ll post my dress pics too. I’m still in the middle of a muslin to check fit.
We do have a Ravelry thread for posting finished outfits, but let me check with Andi to see how she feels about creating a Flickr group for just the sewing 🙂
That would be super cute! I actually have a dress with a similar 2/3 sleeve combined with the bias binding that I was planning on posting later this week, so I can vouch that it should work out 🙂 I definitely want to see after you’ve made it up!
Andi and I decided to use a Ravelry thread for posting finished OAL projects, you can view it here – OAL Finished Outfits. Of course, if you’re not joining the knitting segment, this might be a moot point. Let me check with Andi and see how she feels about opening a Flickr page for those who are only sewing along.
I have the fiddly tools for turning edges of bias binding. They’re pretty great, actually, but I rarely remember where I have stored them. Instead, try this: Two straight pins, inserted into the padding of your ironing board, the points the distance apart you want your bias to fold. Angle the pin heads sharply toward one another, forming a little arch. You’ll pull your bias through the arch, and the pins will force the edges to roll over and toward the middle of the binding. Press the whomp out of it as it comes through the arch. Voila! Single-fold bias binding. To achieve double fold binding, fold the single fold stuff in half, cheating one edge the tiniest bit wider than the other. Press.
This method has the very great advantage of allowing an infinite range of widths for making your own bias trim. You could construct a cap sleeve from just a very wide bias band, f’rinstance.
The By Hand London blog has a visual on this tip (though using only one pin) if anyone needs it.
Oh yes, I’ve tried that before but I’ve always found it to be way more fiddly than using the tool! 🙂
Ok, so I stayed home “sick” today to catch up on the OAL. Up front, 1803 was a massive, disappointing, frigging FAIL!!! Thank goodness I made a muslin before I cut into my fashion fabric. It was too tight across the chest (it just now occurred to me I forgot about the FBA I always need with any pattern other than Burda & New Look), armholes were too small, and it was all around unsalvageable. Again, SO disappointing. So…Lutterloh, here I come.
I flipped through my Lutterloh design book until I found a similar style pattern. The bodice isn’t princess seamed, but it does have a center seam and waist darts. I measured myself to get the right starting number and then drew the pattern. After the muslin fail, I just went ahead and cut the final fabric since I’ve never had Lutterloh fail before. And VIOLA’! Perfect! Yay! Of course, the downside of Lutterloh is that there are no directions, but the 1803 directions are pretty close so I’m following those. I got it all done except for the bias strip binding which I’ll do tomorrow (great idea!). My bodice is a white linen and underlined with white suit lining so I pulled out my mad quilting skills and used Sullivan’s Quilt Basting Spray to adhere the two fabrics before I cut them. Oh wow, what a difference during the sewing process. The satiny lining didn’t shift or move at all during cutting/sewing and you know lining can be a real PITA to sew on. No bubbles or ripples…it’s like they are Borg (the two are one for you non-geeky types). The bodice is beautiful and I can’t wait to finish it!
Bummer about the failed 1803, but I’m so glad Lutterloh was able to come to your rescue! Your dress sounds like it’s going to be aaaaamzing, can’t wait to see it! 😀
I had to do a FBA for the princess bodice too and I used the techniques from the book: ‘Fit for real people’ by Pati Palmer and Marta Alto – 2nd edition from pages 150-151, adding width to the side fronts and front bodice respectively, which didn’t take long. And it worked a treat. Whenever you do go back to the Simplicity 1803 try that method.
Um, that bias binding method is genius in its simplicity! I’ve been buying premade bias binding because I hate cutting, then using the fiddly tool, then sewing it on. But why on earth do I need to use a fiddly tool to fold it when I can just use my stitch lines as guides? And now I can return to using nicer fabrics for bias binding instead of scratchy premade binding! What an awesome tip!
Damn straight! The premade stuff is awful, making your own is sooo much better! Bonus if it doesn’t involve using a fiddly tool to make it up 😀
Thanks for the bias facing tutorial. I’ve seen others that didn’t show as many photos and this one is definitely easier to follow!
Awesome, I’m so glad you found it helpful! 🙂
Thanks so much for this tutorial. Geez, you make it look easy!
This was an awesome tutorial! All of the pictures made it so clear and I will definitely use this technique over and over. Thanks!
Does the process differ when using a knit fabric?
I would not use this method for a knit fabric – it would be way too fiddly to get it on right, and the end result would be pretty bulky. I would use the method that is used for binding necklines and arm holes in tshirts – folding the binding in half wrong sides together and attaching to the right side, then flipping to the inside and topstitching.
Hi Lauren,
I know this is a really old thread, but I’m a really slow reader! In trying this method with a lightweight rayon, up to the point of the edge stitching was great and very smooth. After pressing and stitching to the inside, I ended up with little waves along the edge. Not really puckers, but like an off grain kind of look. I realized that I didn’t cut the binding shorter-do you think this could be the problem? Love your tutorials and all your great advice!
Hi! No worries at all, I still get comment notifications even on the oldest posts on my blog 🙂 It’s hard to tell without seeing a photo, but it sounds like you are getting the rippling due to the bias strip being too long. It needs to be slightly shorter (1″-3″ depending on how stretchy the fabric is on the bias), so that you can stretch it to fit. It is a similar concept to how you apply ribbing to a tshirt neckline, except with a woven fabric. That being said, if it is not super puckery and just a little wavy, you can often steam those out flat 🙂
Hope that helps!