I’m back for round two of this prom dress in-the-making extravaganza! Let’s get right to it!
After finishing the construction of the bodice, I assembled the skirt. Since I chose the option with the circle skirt, this was incredibly easy (especially compared to engineering that dang bodice!). Three pieces, three seams. I serged all the edges and pressed them open (I normally French seam my silk, but silk faille is a bit thick so it’s not really suitable for that), and also serged the edges of where the zipper will go. I don’t have a photo of all this, but, I reckon y’all know what a circle skirt looks like 🙂
 //embedr.flickr.com/assets/client-code.js
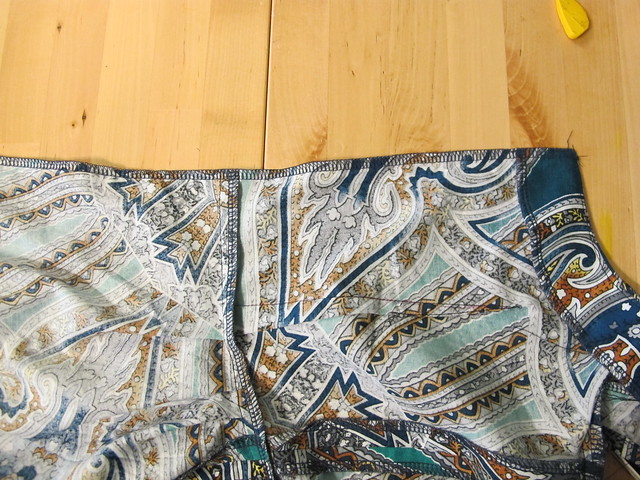
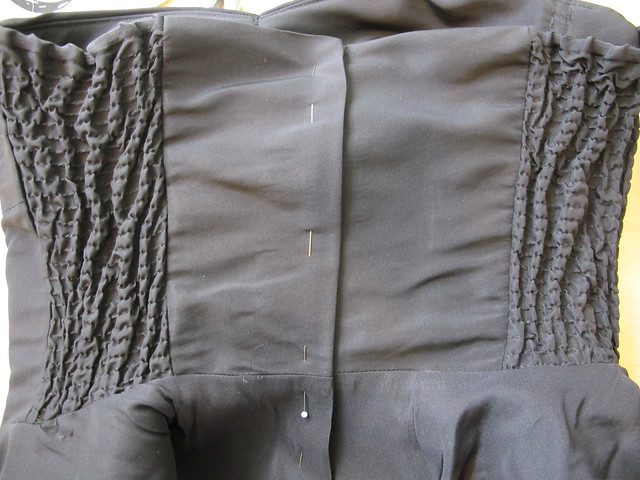
After that, I attached the bodice to the skirt and finished the raw edges (again, with my serger). Because the center back pieces include a lining, I made sure to not stitch those down (they will be slip-stitched to the zipper later).
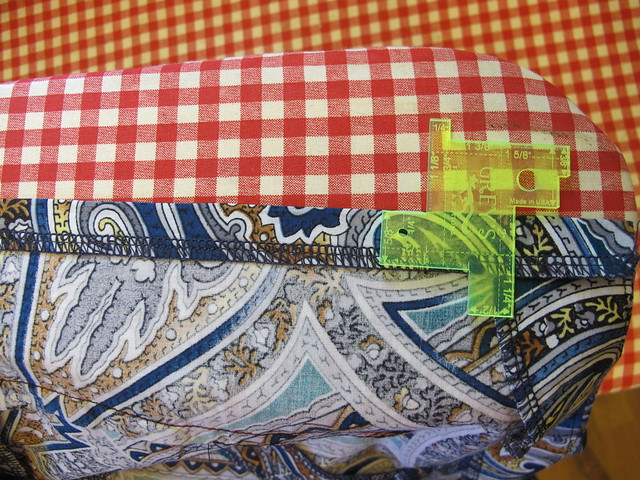
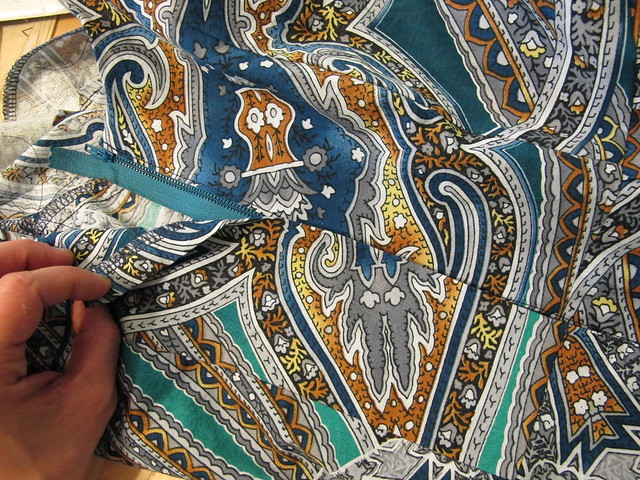
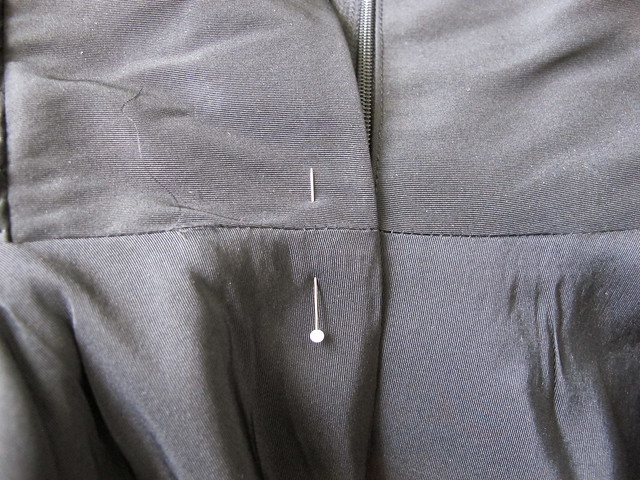
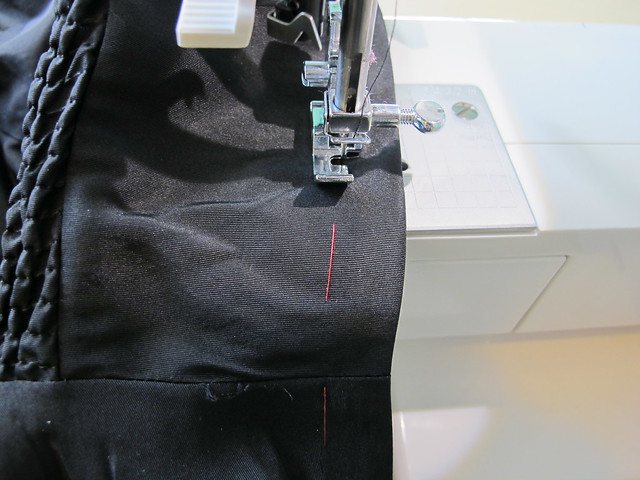
My dress will have a lapped zipper, so I prepared the back bodice by folding back and pressing – 5/8″ on the left side, and 1/2″ on the right side. The lining pieces were already folded back and pressed 5/8″, as per the instructions.
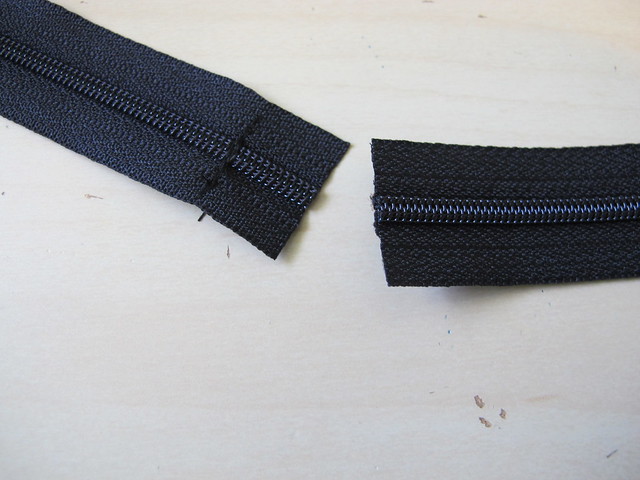
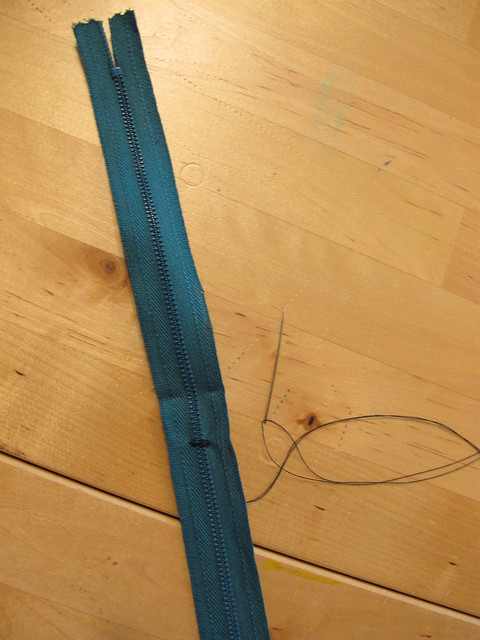
My zipper was quite a bit too long, but it’s easy to shorten! I just use the machine – no hand-stitching required! Mark where the zipper should end, and sew back and forth over that marking a few times with a straight stitch, then cut off the remaining zipper end about 1″ below the stitching. Easy! 🙂

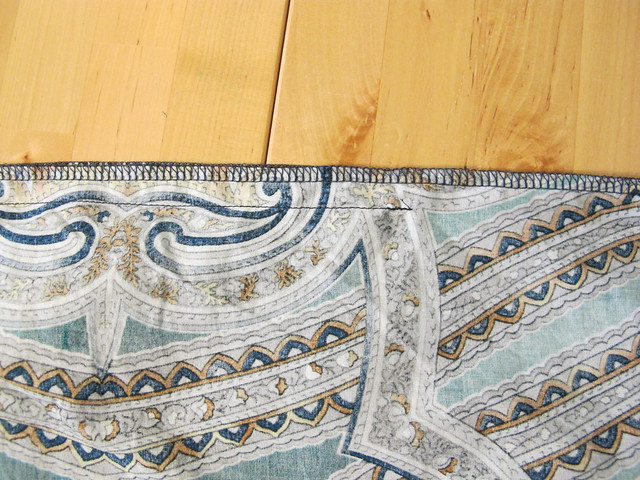
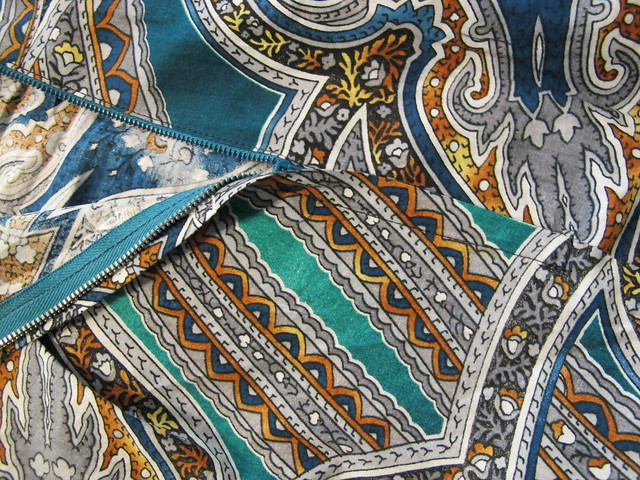
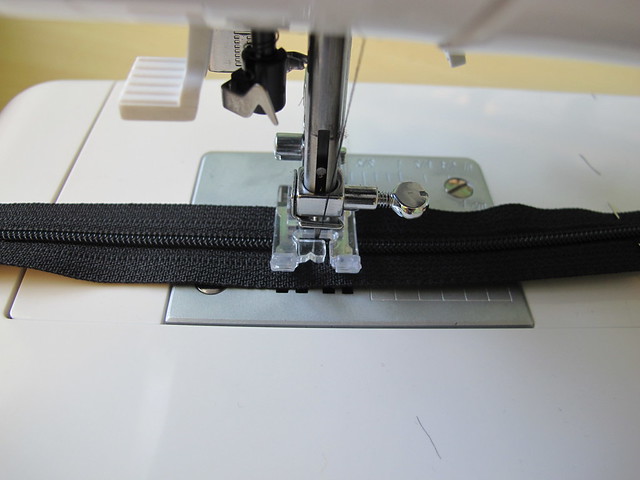
On the right side (the side folded under 1/2″), the zipper is sewn with the teeth up against the fold, like so. At this point, I don’t worry about the top of the zipper past the pull – you can push that under the lining and deal with it when everything is getting slip-stitched down. But you do want to be sure that the teeth of the zipper are riiiiight up in that fold’s business.
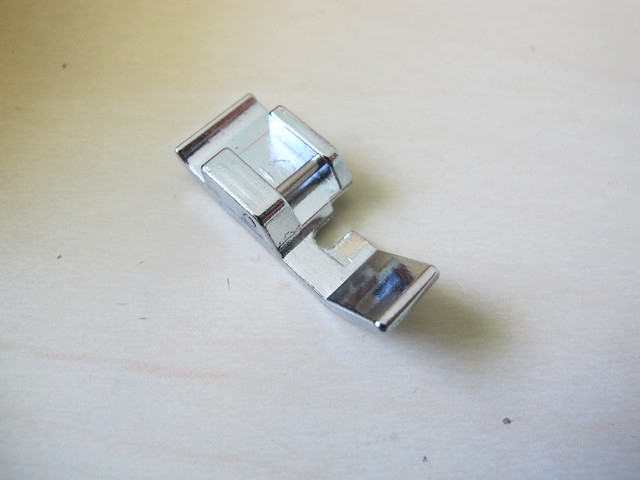
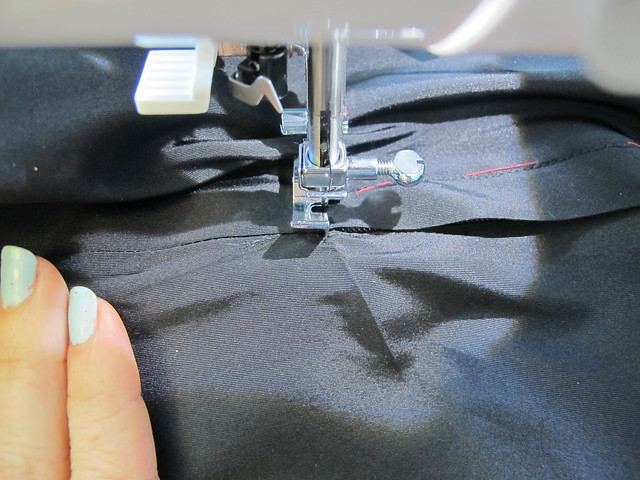
This is where the humble zipper foot comes into play. Most machines come standard with this foot. On the Spiegel 60609, it looks like this. The side is notched out to let you get really close to the zipper, like so.

Side one done, now to the second side!
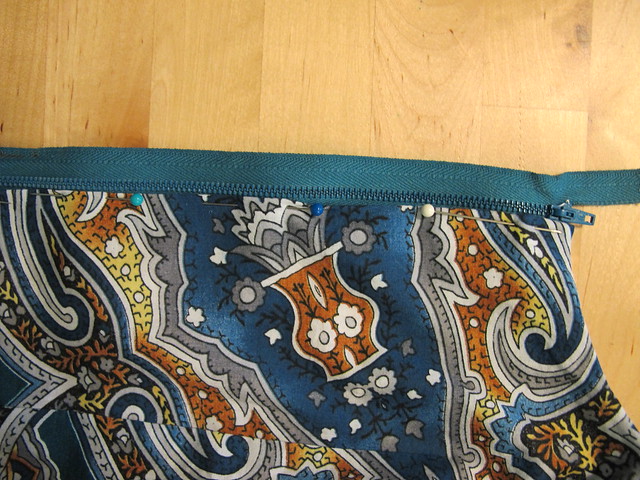
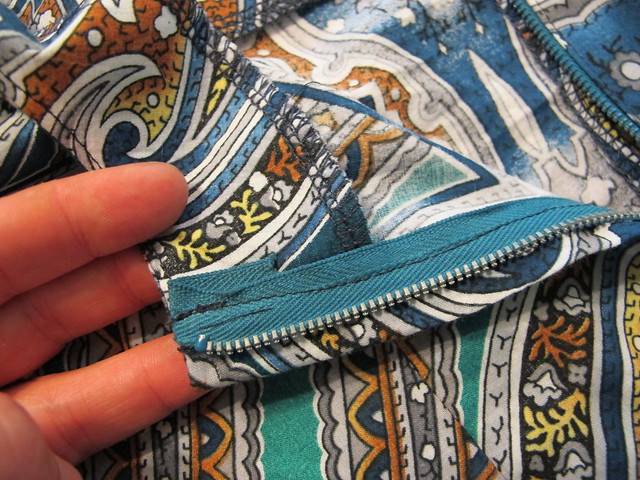
The left side (the side folded under 5/8″) will be placed along the zipper tape with the folded edge right on top of the stitching you just did (on the right side), thus creating a lap. I start by matching at the waistline seam, so I can be sure the seamline is uninterrupted.
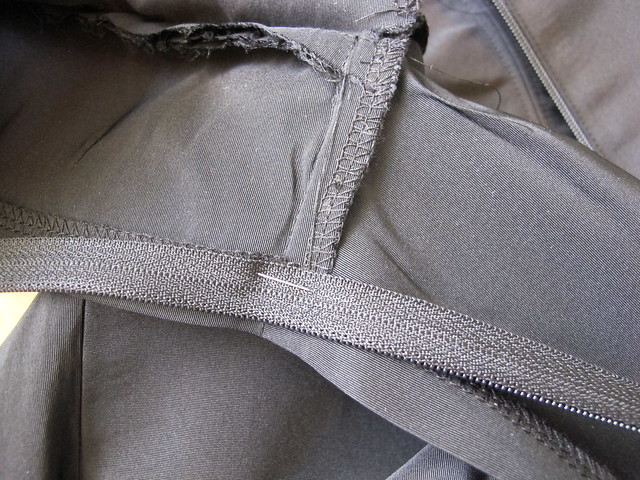
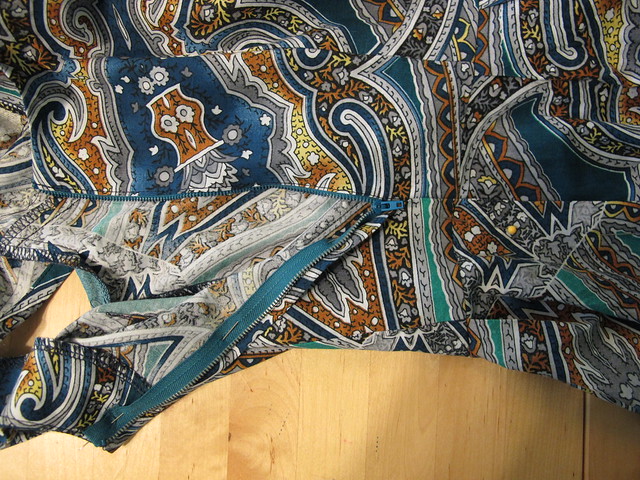
When I pull the left side open, I can see where the zipper tape needs to lay along the fold to create that overlap. I find this much easier than trying to overlap and pin while the zipper is closed.
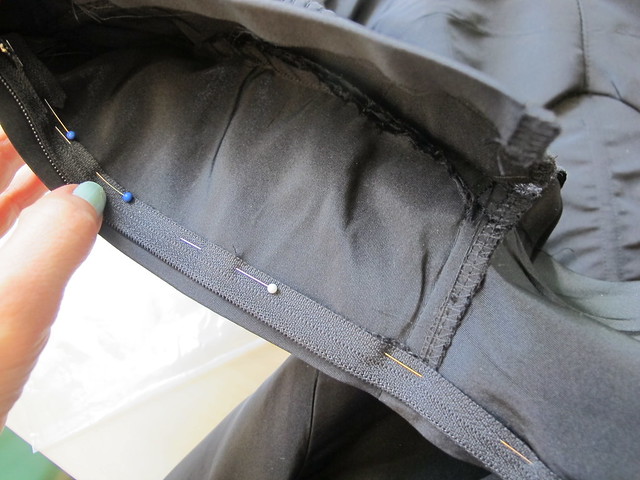
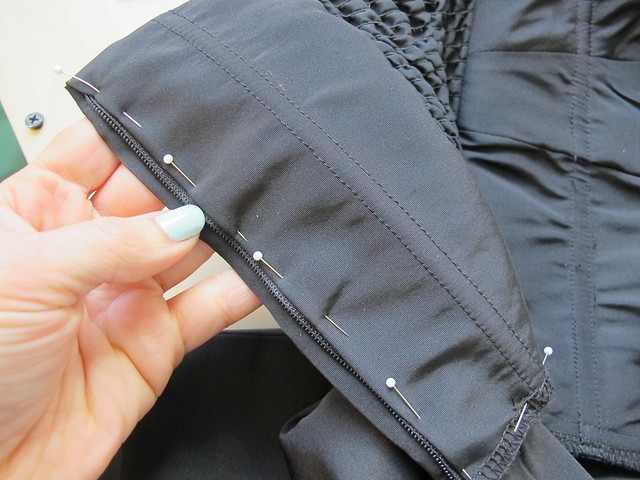
Then you just pin all the way up (to the bodice *only*, the lining should remain free). Once you get to the top, you can tuck the remaining zipper tape down and inside where the lining will cover.
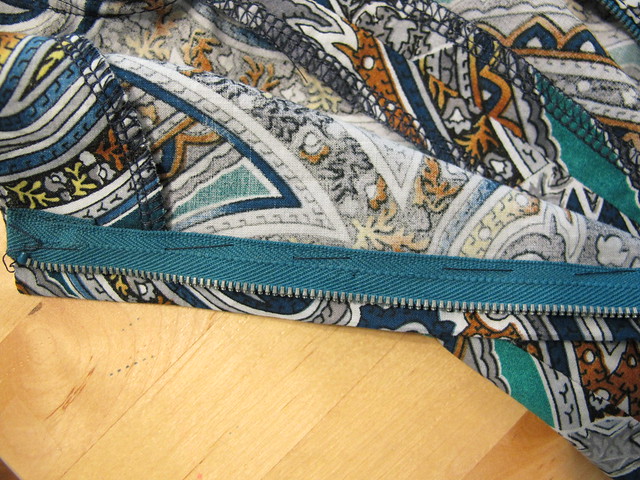
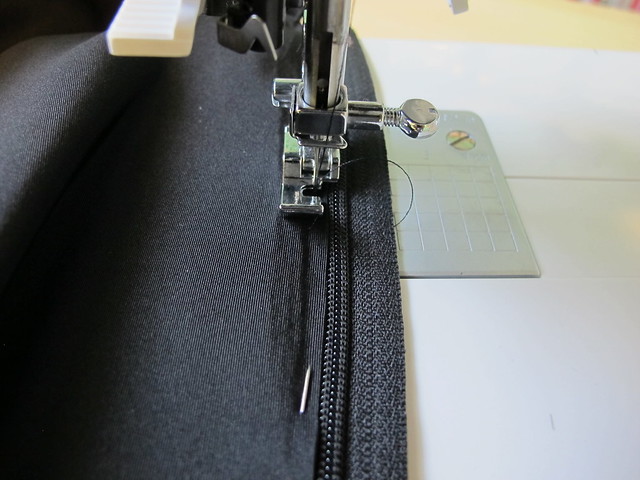
Here it is pinned front the outside. One thing I highly recommend (which I didn’t take a photo of, hm) is to hand baste the zipper into place before stitching. This ensures that everything is in the right place and won’t shift when it gets under the needle (and that you’re actually catching the zipper tape!). The topstitching step of this process is not difficult, but it can be tricky to see what you are doing! Definitely take the extra couple minutes and baste that sucker into place with some long basting stitches.
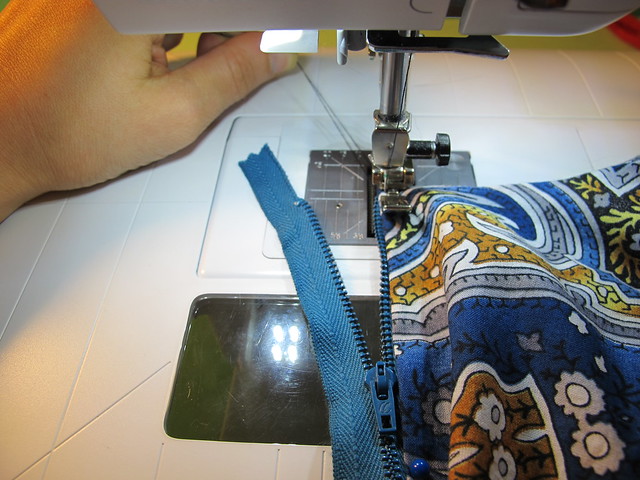
Once basted, open up the zipper and topstitch from the right side, again, keeping the lining free.
When you get to the bottom, lower your needle, lift the presser foot and pivot the fabric, then sew across the bottom of the zipper back and forth a couple times to secure everything.
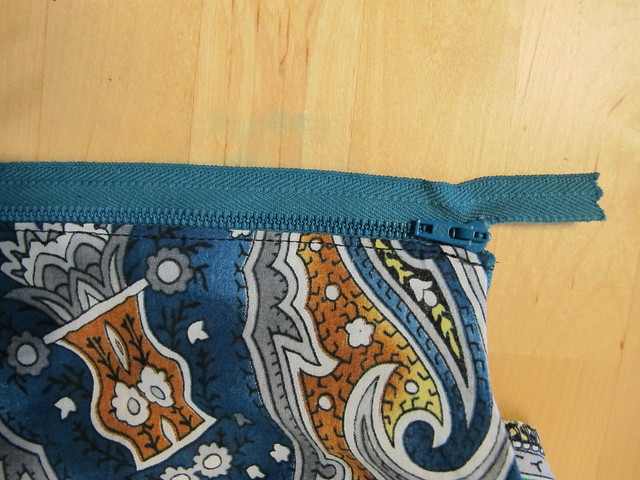
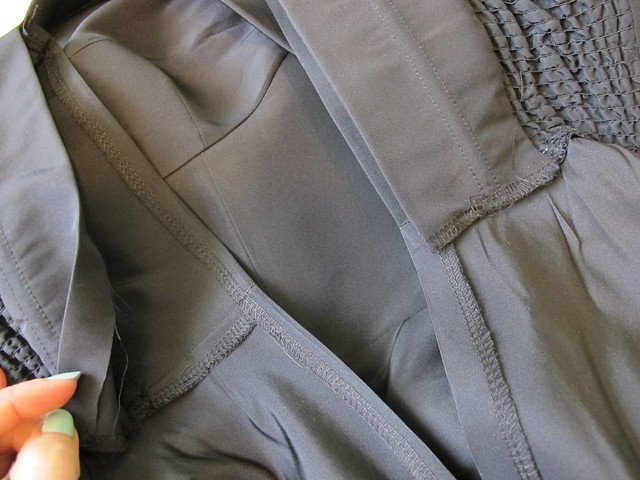
Finally, pin the lining to the zipper tape and slip-stitch everything down.
Beautiful, right? 🙂
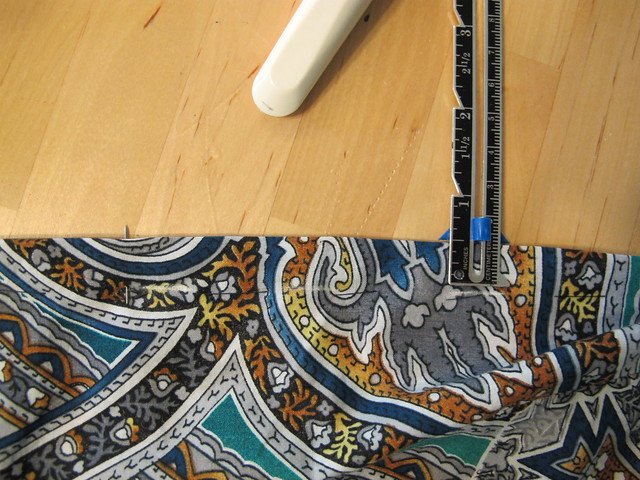
Next step is hemming! Since this dress has a circle skirt, that means the bias needs to settle before hemming (otherwise, the hem will end up being super uneven!). I have a dressform for this purpose – both for hanging and hemming (if you don’t have a dressform, you can hang bias stuff on a hanger, but you’ll probably need a second person to help you with the actual hemming. There are also doodads you can use for solo-hem jobs, but I don’t have any experience with those). Bias garments need to hang for a minimum of 24 hours to get their stretch out. Being paranoid, I let this one chill for like 5 days lolol.
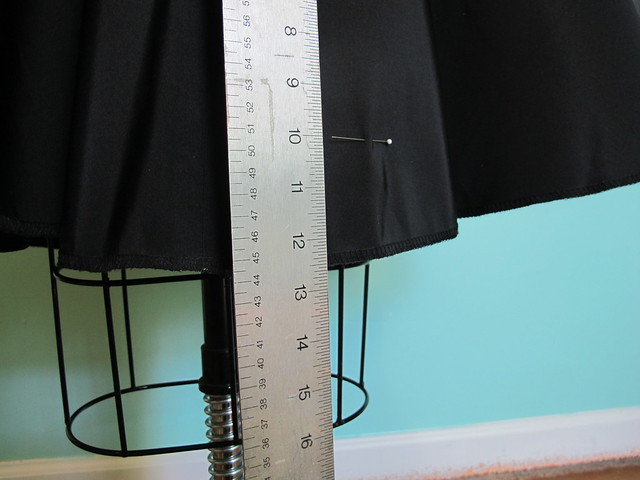
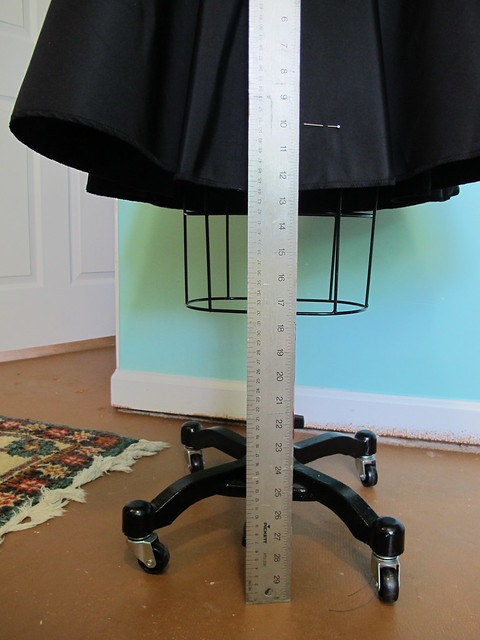
Once that’s done, you hold a yardstick (or in my case, a T Square) at the floor and measure the same point all the way around the hem.
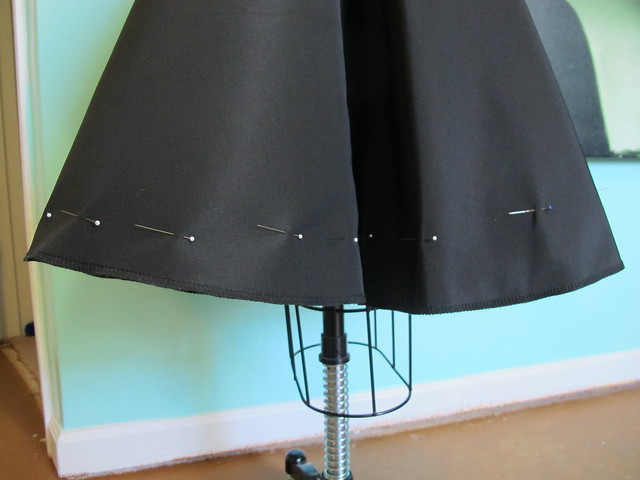
I mark every couple includes or so with a pin. Look at how uneven my skirt was!
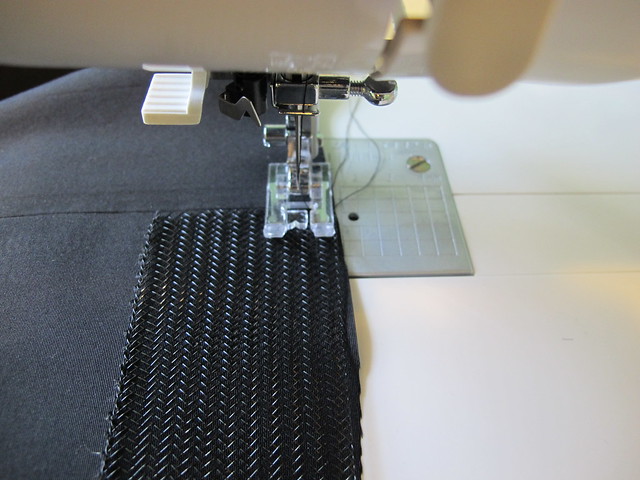
After trimming the skirt, I added 2″ wide black horsehair braid to the hem. Mostly, to give it some extra body – but also because it makes hemming easier, as the braid kind of acts like bias tape (as in it’s very flexible and curves along with the curve of the circle skirt). I started by sewing it to the right side of the side, using the width of the Spiegel 60609 presser foot as my seam allowance guide.
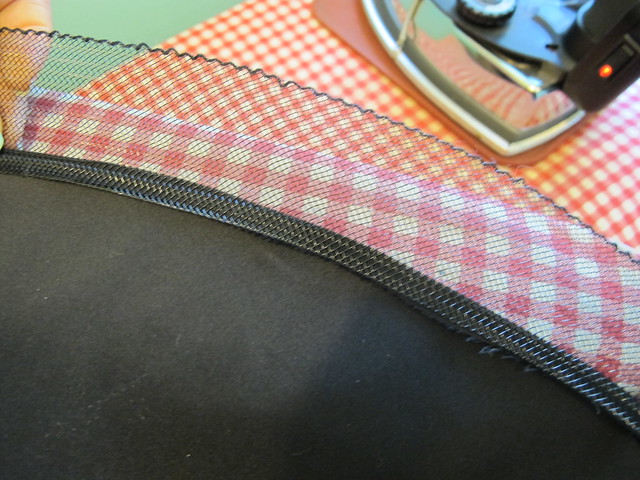
First press pushes the horsehair braid down and the seam allowances up.
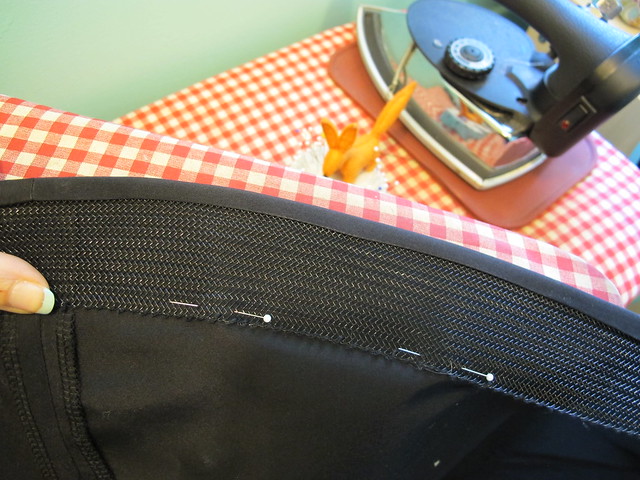
Then second press folds everything to the inside nice and flat.
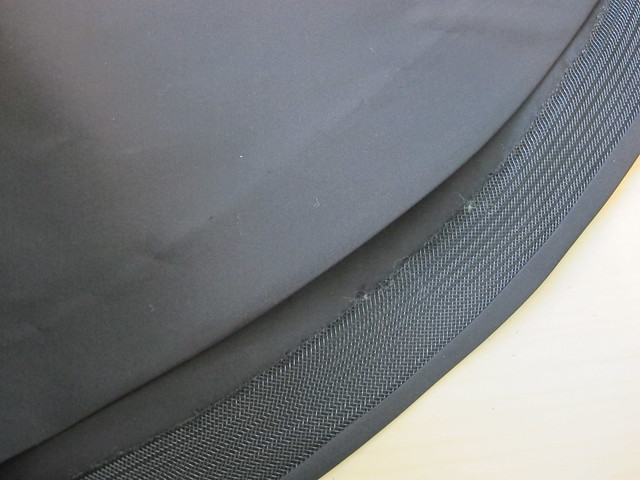
From there, it’s just endless slip stitching (well, not *too* endless – I think this took me about an episode and a half of Mad Men haha). You can topstitch at this step, but I feel like a fancy prom dress needs an invisible hem! It just looks so nice!
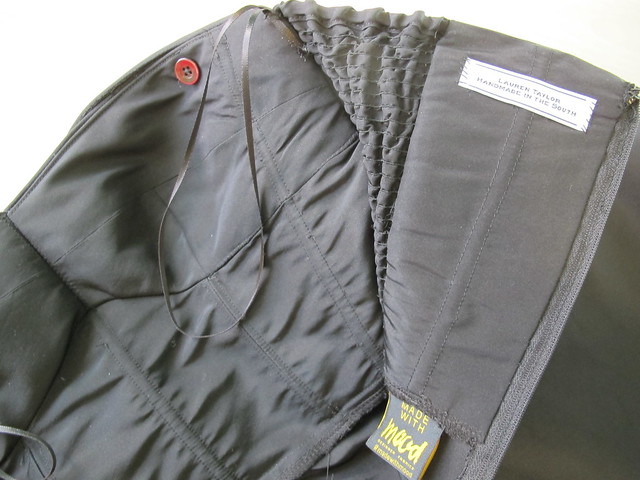
Here is some of the inside finishing – I added buttons for the strap, as well as ribbon loops for hanging (literally a piece of ribbon lopped and handstitched in). And my tags! I need a tag that says ♥Made with My Spiegel 60609♥ hahaha
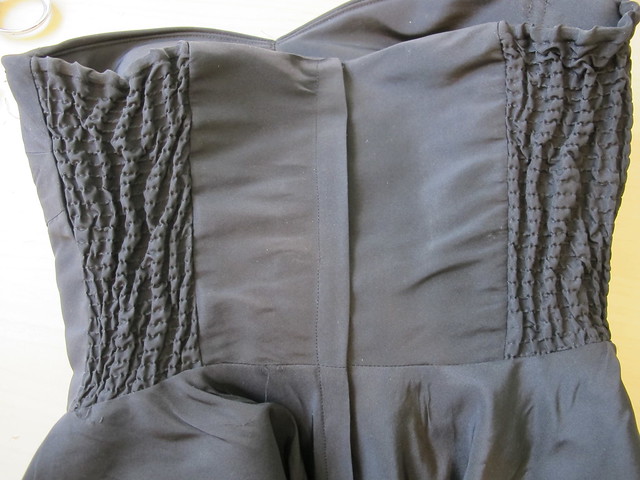
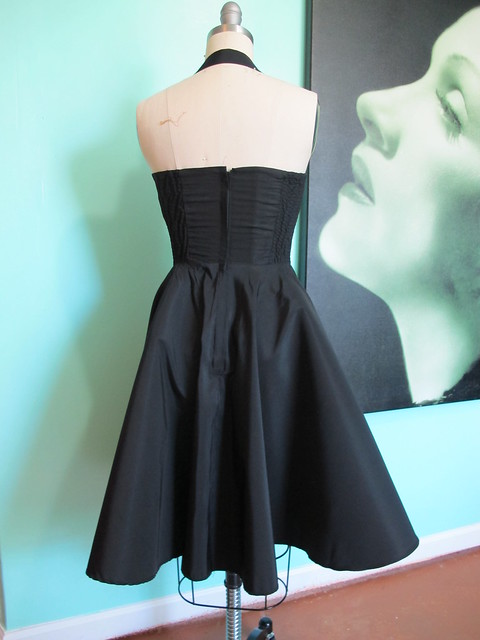
And some full shots on the form – these were taken before hemming or adding the hook & eye, but you get the idea 😉

Let me know if you have any questions about any part of this process – I tried to explain as clearly as I could, but I have a cold right now so I’m pretty medicated haha. And the fact that I’m sewing with black fabric doesn’t help!
Super pumped for prom next week!! 😀 Is it bad that I want to wear my converse with this dress? I don’t think I’ve worn heels since I quit my office job 3 years ago! :B