Tag Archives: sewing room

Sewing Studio Tour: 2023 Version

23 Mar

I just realized I’ve been in my house for 4 years now, and I never shared my studio space!

A little background before we dive in: I own my house, and it was built in 1958. It is considered a 3 bedroom, but the rooms are very small. My studio is about 10’x11′, so every square inch definitely counts. It’s not the smallest room I’ve worked in, but it is certainly a top 3 contender! Eventually, I plan on building out and moving my studio outside of the main house (whether I build an entirely separate/detached structure in the backyard, or simply add on to the existing house – I haven’t decided yet!), so this is technically “temporary.”

I’m not going to go into full detail about all the various pieces of furniture and storage in this room – I’ve talked about it extensively over the years on this blog, and you can find all that info in my last studio tour post. That post includes links to all my past studio tour posts, and a huge section of links that discusses all my furniture (including the cutting table). Short answer: Almost everything is from IKEA, and if it isn’t from IKEA, it’s likely from the Nashville Flea Market. Any questions you have about anything in this room that are not answered in this post, are answered in that post I linked so please check it out!

Anyway, I recently rearranged the room a little so I took some photos and I’m going to share them with y’all today!

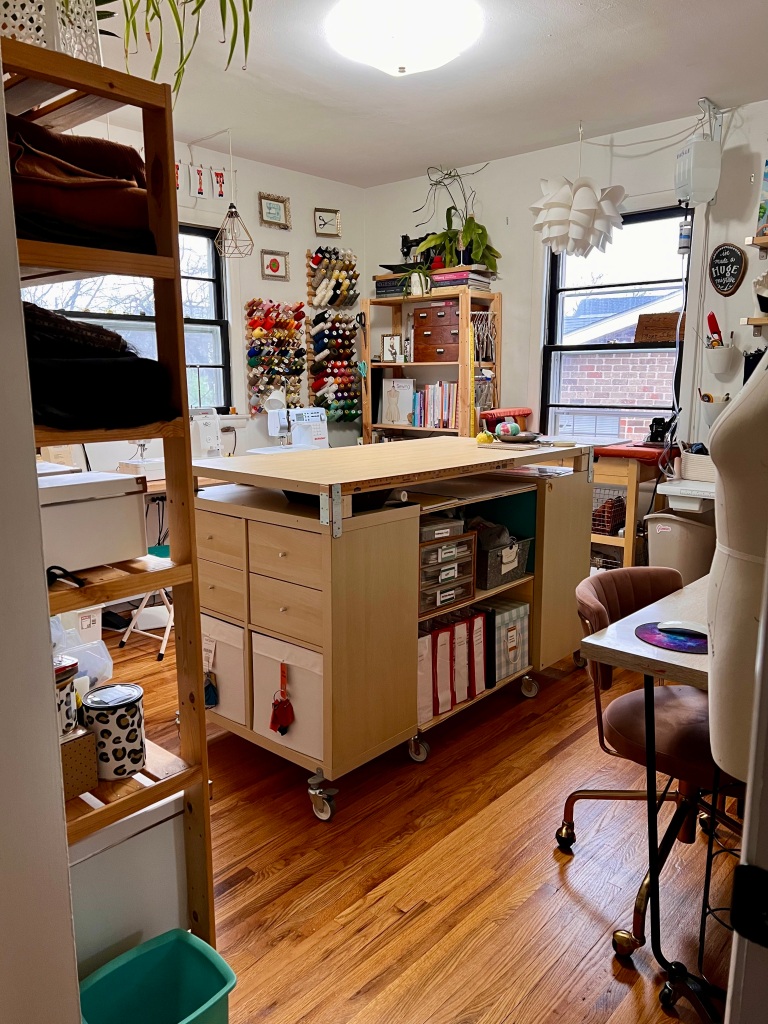
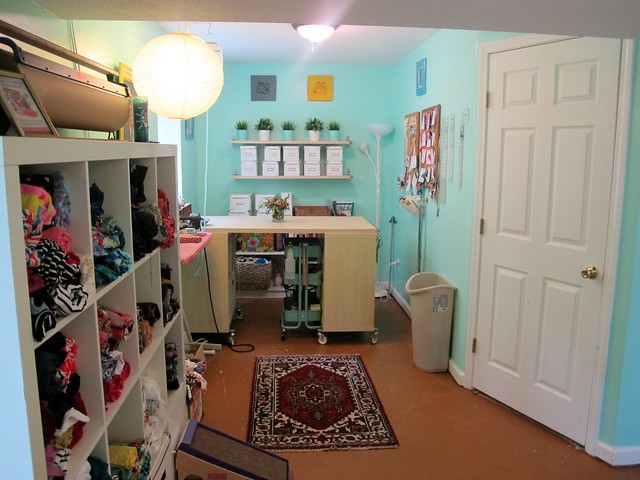
This is the view when you first walk into the doorway. Like I said, it is small! You can see almost the entire space from this viewpoint. To the left (the wall behind the shelf), there is a closet that is directly in front of the door when you walk in.

Here is the closet. You can see the entrance to the left (black door) and now the room is behind me. I’ll be honest – having a closet directly in front of the door is nice in terms of leaving lots of good available wall space in the main part of the room, but that closet shape sucks!! It runs super deep, and is hard to get to anything stored in the back. I can’t even imagine what it’s like when there are clothes hanging in it. I had a free standing shelf in here, but it was too hard to get to the back and that space ended up wasted. So earlier this month, I installed shelves in the deep part. I just used plywood and 2x4s from the hardware store, nothing fancy! The clothes rod is still up, so I can hang clothes in the empty side (useful for holding client’s pieces waiting to be altered or picked up). I also installed several hooks in the wall, to hang bags, etc. The top shelf holds sewing machine cases, my on-set tailor kit (basically a second set of sewing supplies so I don’t have to repack whenever I’m called on set), and my jeans samples. The empty space between the entrance and the closet has tension rods, and I use simple curtain hooks with a clip to hang the PDF patterns that I’m currently using. Eventually, I would like to move the closet entirely (knocking down some walls and adding to the laundry room – which is next to the back closet wall, etc) but this works for now!

Here is the wall next to the entrance! Here I have my desk + computer (I finally upgraded to a desktop and WOW WOW WOW don’t think I can ever go back to a tiny laptop screen lol), and a small drawer unit that holds various office, art, and tech supplies.

The corkboard to the left of the desk holds swatches of all the fabrics on my shelves, I swap these out based on what I plan on sewing for the current or upcoming season. And the dress form lives next to my desk now because there is literally nowhere else for her to go! I just roll her out of the way as needed. FYI that pink desk chair is from Wayfair.
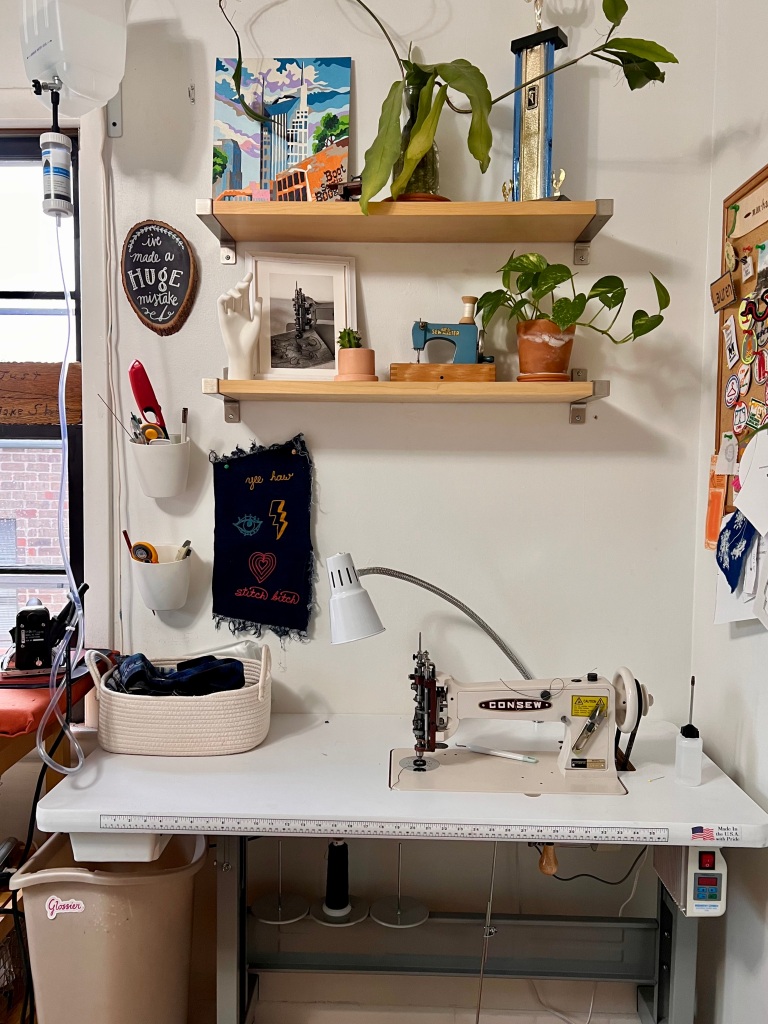
Next to my desk is my newest sewing machine (and the reason I had to rearrange this room)- a Consew chainstitch machine! This is new – I purchased it in January, and I’m deep in the throes of learning how to use it. The table is 48” long, so it took some creative maneuvering to figure out how it would fit in this space. Eventually I’ll hang spools of thread in that empty white wall behind it (or move that corkboard and put the spools there), but I gotta order them first 😇

Next to the chainstitch is my ironing station. I use a kitchen cart, padded at the top to make an ironing board. The drawers hold interfacing and pressing tools, and the shelves hold baskets with cut projects. With a small space, it’s importantly to utilize what you can so I prefer this over a traditional ironing board, since it has shelves and drawers. My scissors and pressing supplies are hung from tension rods on the side of the shelf.

Next to the ironing station is a shelf, with all my sewing books and a drawer unit that holds trims and elastics. I also keep my thread here on racks. And one of those white boxes holds my entire yarn stash (yes, the entire thing! I don’t stash a lot of yarn!).

Then we have the main sewing table, which is about 5’ long. It’s the Husky Workbench from Home Depot; I swapped this out from my old tabletop (from IKEA). It is much sturdier (absolutely no bounce), the height can be raised or lowered, and the entire thing is on castors so it can be rolled around. If I need more cutting space, I can remove the machines, raise the height, and roll it next to my cutting table for a double space. I added the small drawer on the left (underside) – that’s from Amazon. The drawer unit next to the table holds all my sewing supplies – machine supplies, notions, specialty threads, snaps, buttons, etc. And the male dress form on top is actually a shop mannequin, I grabbed it when the shop I work at was changing their floor mannequins. It’s not a true dress form for fitting, but is useful for taking photos, measurements, or designing. I do a lot of sewing for male clients and this works way better than my lady form!

BTW you may have noticed my lack of chairs – I didn’t take any out of the room for these photos, I really just have one small stool! I realized I didn’t like having chairs with backs – I never sit back and use the back support, instead, it gets in the way when I’m doing a lot of moving around. I had this little folding stool that works great. I need to buy more, but I haven’t gotten around to it. I don’t even miss having wheels – they always got thread rolled up in them.
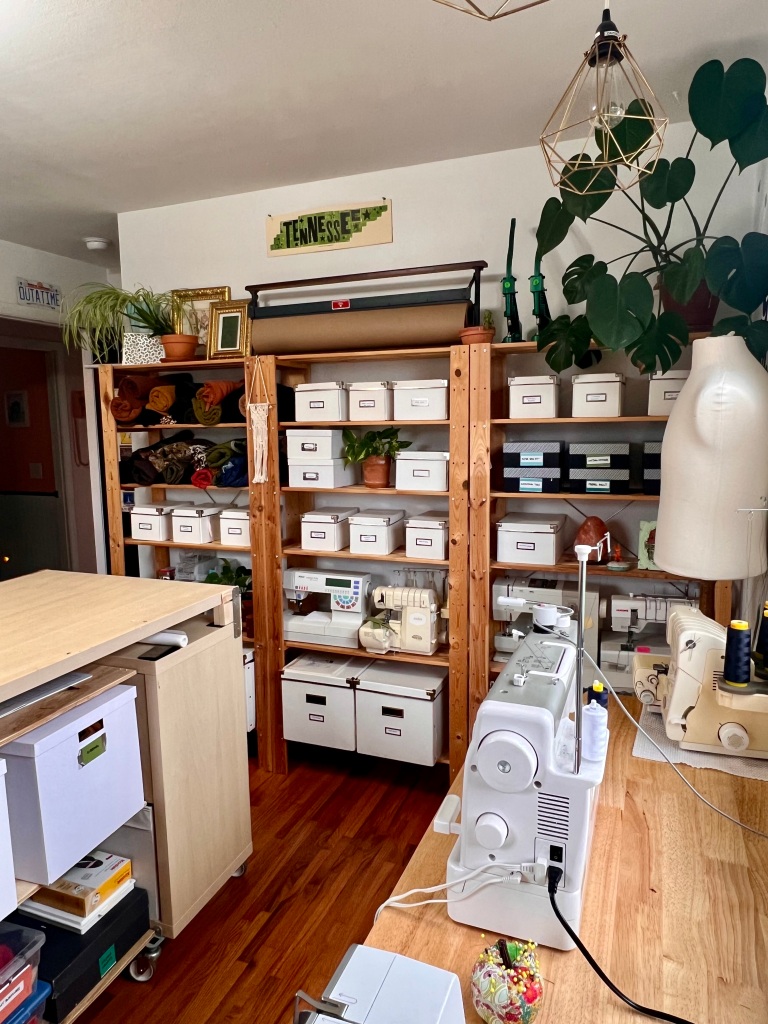
The wall next to the sewing table is just a long line of shelves! My fabric occupies a couple shelves (I keep the rest stored in my attic – check out this instagram post for the full run down), and the boxes hold specialty fabrics (lingerie, lining, scraps, etc) and notions (mainly bra making supplies). More info on that storage system can be found on this instagram post. Finally, I keep extra sewing machines on a couple of the shelves. I have a lot now and they don’t all fit on the table! I keep the plugs at the table (I installed cup hooks along the wall below the big window so they have somewhere to hang when they aren’t being used) and I store the pedals/knee lifts/and freearm tables in one of my white drawer units. This way, it’s really easy to swap the machines out. I will acknowledge that my cord system behind the table is GNARLY looking – and unfortunately, there isn’t a good way to hide them while also having regular access to them (I take my machines on set pretty frequently, so I need to be able to access the cords and hiding them would make that 10x harder!).

Speaking of machines – because I know someone will ask! – I have a Janome HD9 straight stitch, a Pfaff 7570, a Bernina 350PE, a Bernina 930 Record, a Janome coverpro 2000cpx cover stitch, a Babylock Imagine serger, a Babylock Evolve serger/cover stitch combo, plus my Singer Featherweight (on a wall shelf on the opposite wall) and the aforementioned chainstitch. It’s a lot! I don’t have a favorite – I love them all!

The last big piece in this room is my cutting table. I won’t go into detail about how I built it – it’s all IKEA pieces and again, I wrote about it extensively in the previously linked blog posts. But I recently filled in the empty center with more shelves (built with sanded plywood, and attached with metal brackets to the undersides), and I lifted the tabletop using wood blocks (2x4s that I cut and then glued 2 together to make a block, then attached to the top of the unit with metal brackets and some shims as needed). The narrow space is big enough to slide my cutting mats and rulers out of the way when I’m not using them, and just tall enough to hold the bowl of sewing tools I usually keep on top of the table. I wanted to be able to quickly move things out of the way when I need a big flat surface for cutting, without just moving them to another table area (where inevitably it’s still in the way!). I am REALLY happy with this edit! That short little shelf space is SO useful!

Here’s a close up of the block lifts. It took me a long time to figure out how to do this – I didn’t want to glue them to the table, because then they’d be permanent. So I used brackets to screw the blocks to the table and the tabletop. It is sturdy and – very important – can be taken down if I need to disassemble the table (it actually can’t leave the room without being disassembled, due to the angle at the entrance and the width of the hallway outside the door). It’s not very pretty, but I don’t care. I’m a seamstress, not a carpenter!

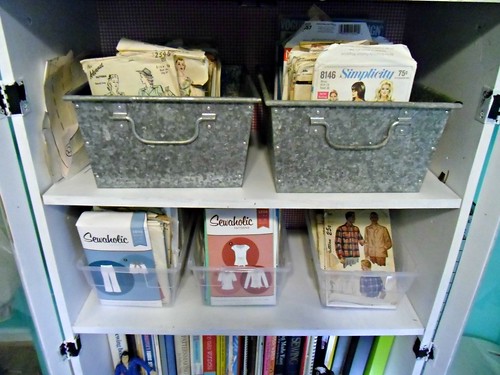
I don’t have a good photo of what I store under the table, but it’s basically everything I used to keep in the closet. Small boxes with craft and art supplies, sewing pattern storage supplies, boxes that hold big patterns (Vogue, Papercut) and binders to hold PDF patterns. I keep my other sewing patterns in boxes inside the closet, along with my printer. There’s more info in my pattern storage in a previous blog post, or check out this Instagram post.

Here are some more photos of things in the room, just because!

Fun fact – I won that big trophy in “beautiful baby” contest in 1985 LOL

Another fun fact – that framed photo is me at 14 and it’s just as hilarious up close as it is from far away. I have on fuzzy purple zebra pants and mismatched socks! Hoorary for the late 90s!

Anyway, that’s my studio tour! Like I said, it’s a small room – but I feel like I made a pretty good use to the space! Since the cutting table, sewing table, and chainstitch are all on castors, it’s also a little modular – I can roll things around as I need them (and also just *barely* fit a queen sized air mattress in the room for when I have guests over!). I really love this room – it gets beautiful light and honestly it just feels good in here. I’m excited for my future studios, but perfectly happy to sew in this one, too 🙂

I’ll leave y’all with one last photo – my mom’s boyfriend made this for me for Christmas last year. He was inspired by the letters hanging above my sewing machines 🙂

Studio Tour!

7 Sep

Hey everyone!

It’s been over a year since I moved into my new house, so you know what that means – time for an updated studio tour!! Yeahhhh!!

2018 Studio - room

Same as with my last delay, I kept putting off sharing this room with y’all because I really wanted to feel like it was “done” first. Even though, realistically, nothing is ever finished in my home – I’m always moving things around! I had a little kick in my pants via a Sewing Space feature over at Tilly & the Buttons , which forced me to suck it up and take the dang photos already. What you’re about to see is my studio in it’s natural state – it’s tidy, but not show-room perfect (i.e., I really should reorganize my fabric shelve, but, priorities).

While I was compiling the photos for this post, I ended up falling down a pretty deep rabbit hole of my past studio spaces. You may not be aware of this, but I’ve had a dedicated sewing room in some shape or form since 2006. My tastes & decorating have definitely changed a lot over the years, which I personally find pretty interesting! I think it’s also relevant as a lot of people comment on how well-organized my space is – which, it should be, I’ve been working on it for over 12 years! 😛 So before we jump into the NEW studio, I want to share a little bit of my evolution first!

Apologies in advance for the poor photos – it looks like my photography skills have also evolved, at least a little 😉

2006 sewing room - Broadway

2006: My very first dedicated sewing space, back when I lived in Midtown in Nashville TN. I loved that apartment so, so much and stayed there for several years – it was a beautiful old building with crazy cheap rent. I eventually couldn’t handle the poor maintenance or the noisy bars getting built up around me, so I moved… but not before moving my sewing room all over this one apartment. First stop was in what I think was the dining room – or possibly a small servant’s quarters (it was a 100+ year old building right by Vanderbilt with a layout that suggested this might have been the intention). It was a VERY small room – like I’ve had bigger walk-in closets than this space – but it was perfect for a tiny sewing set-up.

Also, if you are curious – the dress I’m wearing is New Look 6557, which was the first proper sewing pattern I made by myself and I made DOZENS of that dress lol

2007 sewing room - Broadway

2007 sewing room - Broadway

2007: Still in the same apartment in Midtown, but I moved shop into what was the bedroom (with my bedroom in the living room, and the tiny dining room being a sitting room). My ex boyfriend and I painted the room orange, and then he claimed it for his office (a bold move considering he never paid any rent). As soon as I kicked his ass out, I reclaimed the room for myself. So this is my “fuck you” sewing room haha. I also got Amelia, my cat, around the same time – for the same reason 🙂

Very little of this room is still in my possession! I have all new sewing machines and furniture. The only things I still have are the desk chair and that Little Prince poster. Also, lol at another New Look 6557 being on the dress form. And, yes, I had 4 irons. I did a lot of dumpster diving at Vanderbilt University back then and irons were a popular thing to throw away I guess.

2008 sewing room - Broadway

2008 sewing room - Broadway

2008 sewing room - Broadway

2008 sewing room - Broadway

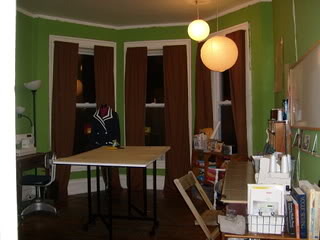
2008: Decided I was DEFINITELY worth the biggest room in the apartment, so I moved my studio to the living room (and took back the bedroom for, well, my bedroom). This room was massive and I looooved that space so much. Painted it green, which in retrospect… not my best idea. I built a makeshift long table out of some old cabinets and a piece of plywood covers with peel and stick tile. And I upgraded my machines – I still use both of those today! Actually found the receipt the other day while I was cleaning out my files; I bought them at the end of 2007 :3

2008 sewing room - Broadway

For funsies, here’s a photo of me at that time – scene hair and all! I made that dress with knit fabric from Walmart haha

2009 sewing room - Broadway

2009 Sewing Room - Broadway

2009: Same room, with some updates! I repainted the entire thing bright turquoise (which became “my color” as far as studios are concerned!), as well painted my furniture. Got a cutting table (just one of those cheap ones from Joann’s), some new storage, and made curtains. This was taken over Christmas, hence the sparkly tree (which I still have today!)

2010 sewing room - South Nashville

2010: Ok, last one! This is the saddest looking photo ever, ha, but it’s literally the only one I have! I ended up moving out of my Midtown apartment and in with a friend who lived in South Nashville. He never used his living room, so I took it over as my sewing room! I had to work around the existing furniture, but I made it work. Lived here for about 2 months and then I moved to East Nashville to live with my BFF.

Other sewing spaces have their own blog post!
2011: Yellow Sewing room in East Nashville, TN
2011: Pale Blue sewing room in East Nashville, TN
2012: Giant Turquoise sewing room in West Nashville, TN
2015: Oddly Shaped Turquoise sewing room in Kingston Springs, TN
2017: Apartment sewing room in West Nashville, TN

Whew! Ok, this post has gotten long already and we aren’t even at the good stuff yet!

Anyway, here is where I am today! I moved into this sweet 1935 Tudor in 12 South/Nashville a little over a year ago. It’s a wonderful house + neighborhood and I really love living here. I use the second bedroom as my studio – it’s very small (just barely 11′ x 11′), and there are two doors, plus a closet, which made furniture arranging a little bit of a challenge! I had to take a lot of measurements and draft up a few room layouts before I figured out a good fit for everything, but it was definitely worth it.

The back half of the house was originally carpeted, and before I moved in I negotiated with the landlord to have the carpets removed (they were gross. Not, like, “ewwww carpet, gross” but like “10+ year old covered in stains gross”) and we were both delighted to discover the original hardwoods underneath. I also had her paint the walls a bright white, which really helped the overall vibe of the room. Before I moved in, this house was dark and dirty… it’s pretty fabulous now, though. I love it so much.

Also, because this comes up often – yes, I move a lot. I’m a renter, and my city is unfortunately going through some growing pains with skyrocketing rents + half the affordable houses either getting bulldozed (to build more $1M houses) or turned into AirBNBs (do not even get me started on the tragedy that is AirBNB over here, omg. It is a big, big problem and I encourage you if you visiting a popular city like Nashville to be very weary of any AirBNB that clearly is *only* an AirBNB and not someone’s home). I would love to buy and stop moving, but right now it just is not feasible. I like to think I’ve found a great long-term home here, but this is an expensive/trendy neighborhood so fingers crossed my landlord doesn’t try to turn it into a short term rental or sell it to the highest bidder.

Details about all products (including furniture & decor) are at the end of this post!

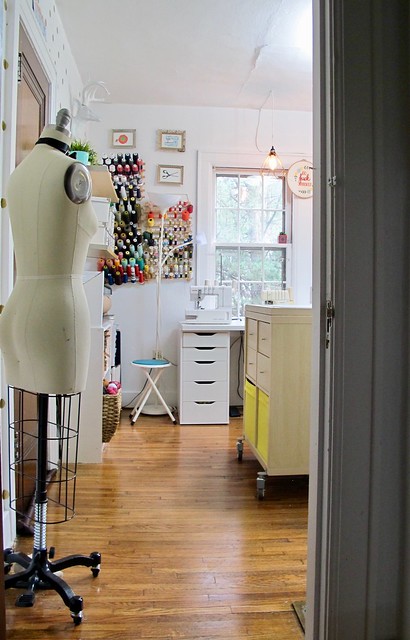
2018 Studio - doorway

Here is the studio when you enter through the hallway in the back of the house!

2018 Studio - room

As full of a view of the room that I could get!

2018 Studio - sewing machines

The back wall (facing the door you enter through) holds all my sewing machines. I built the long table with IKEA components (this will be a running theme in this room haha), because I wanted to house all my machines on one single table that I could just roll down in my chair. There are lots of drawers which is great for storing notions and supplies. The windows get a lot of light and a very pretty view, but there are several mature trees in front so I also get some privacy.

2018 Studio - sewing machines

Another view of the table and machines. You can also see part of the side porch through the window.

2018 Studio - sewing machines

Above the machines, I hung lights for some extra brightness in the room. True story – I rarely use these lights, as I realized immediately after that the main overhead light could hold 3 bulbs and 2 were blown out. I replaced all the bulbs with super high wattage daylight bulbs and HOLY SHIT BRIGHTNESS BATMAN. It’s like high noon in this room now, all the time! It’s amazing!!! Y’all can have your ~ambient lighting~ all you want but I am all bright, all the time haha

side wall

Looking to the left of the machines, this is where I keep my bookshelves that hold sewing/knitting/art books, Papercut Patterns, and knitting supplies. All my yarn fits in that one big basket 😛 I also keep WIP patterns in the magazine holder on top of the bookshelf. Over the book shelves, I hung two long wall shelves – the boxes store swatches, zippers, and lingerie supplies, and the top shelf is purely decorational. Those plants are fake as fuck, btw.

2018 Studio - books and shelves

Here’s another angle – thread racks, an extra stool, and a lamp that rarely gets used (again, daylight lightbulbs are the BOMB you guys).

2018 Studio - dressform

If you continue down that wall to the left, you’ll end up back at the door in which you entered. There is a door in the middle of the wall that leads to the side porch. This is where my dressform lives. I wasn’t crazy about the large blank wall, but didn’t want to spring for wallpaper (or bother painting… I like painting, but I’m not a fan of painted accent walls and I didn’t want to paint the entire room), so I bought these wall stickers on Amazon and made a dotty wall! It makes me so happy! 🙂

2018 Studio - fabric

So, going back to the machines and swinging right – you will get my fabric stash! Really thought about reorganizing this for the photo (it actually does need to be sorted and culled), decided not to haha. My old shelf that I’ve been using since 2009 wasn’t going to fit in this room, so I passed it on to a friend and bought something a little more modular. This area holds my fabric, PDF patterns, embroidery and art supplies, and my snap setters.

2018 Studio - ironing board

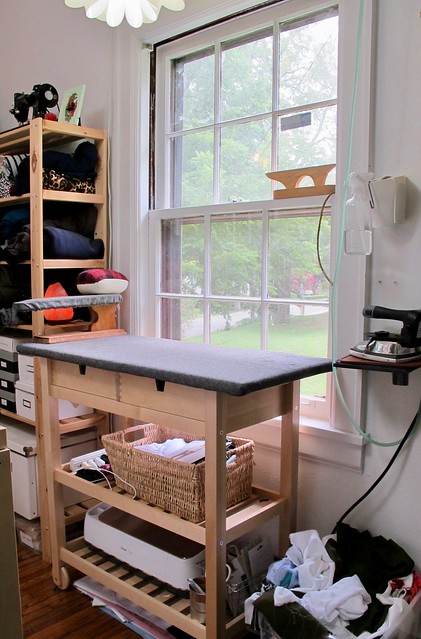
Next to my fabric is my ironing station! I started out in this room with a proper ironing board, but I desperately needed more storage so I swapped it out for a tabletop ironing board. I can’t take credit for this – I totally took the idea from Jasika as she made the exact same thing. It’s perfect! I padded out the top of an IKEA kitchen island with a few layers of cotton batting, then wrapped fabric (it’s Robert Kaufman Essex linen, specifically, if you are curious lol) around the whole thing and stapled it down. The station has drawers that hold ironing supplies and camera equipment, and shelves to hold my current projects and my Cricut Maker. The bucket of fabric next to the table holds scraps that are too big to throw away but not big enough to justify putting back on the shelf.

My iron is a gravity feed iron (I’m still using the same original one I got back in 2012!); the tank is suspended from the ceiling with a heavy duty plant hanger. Rather than keep the iron on my table, I found a small metal shelf on Amazon (used to house tv speakers) and attached that to the wall. This frees up space on my board, plus makes me feel a little less wigged-out about having an iron on top of cotton + wood. Over the station, I have a hanging light that is plugged directly into the same power strip that powers the iron. This way, I always know if the iron is on or off – and I never leave it on by accident!

The ironing station my cat’s favorite place to perch (second favorite is behind the sewing machines), so she can look out the window! I have a really great back yard, but unfortunately my crappy back neighbors tore down the entire tree line that separates us so I now have to stare at their house instead of beautiful green trees (and now no privacy! Boo!). Also, unfortunately for them, this has not deterred me from changing directly in front of that window haha

2018 Studio - desk

Next to the ironing station is my desk! This is where I get all my work done, unless I’m sitting on my porch (which is equally pretty great). On the wall beside my printer is where I hang my rulers, as well as an inspiration bulletin board and my fabric swatch board (where I keep track of the fabrics I want to sew next).

2018 Studio - closet

Next to the desk is the tiny closet. Sorry about this picture – this was the only way to not make it loo horrifying haha. I keep the rest of my patterns in here, organized in boxes. PDF patterns that I am working on are hung with clips on a small tension rod, and rolled PDF patterns are stored in a small trash can on the floor. I also keep supplies for my other job in here, on the top shelf. Rather than stack things, I built shelves with plywood so this closet is basically a giant shelf behind a door.

For more info about how I organize my patterns, please check out this blog post!

2018 Studio - cutting table

One side of my cutting table has drawers (holding pincushions, muslins, extra interfacing scraps, and lesser-used sewing tools) and bins (holding swimsuit fabric and… well I just realized that other bin is empty lol it was holding a WIP that I finished).

2018 Studio - scissors

The other side of my cutting table holds all my scissors, and more bins (boxes have leather scraps and silk scraps, bins have classroom supplies and supplies for when I need to take my machine on the road for my job).

2018 Studio - supplies cart

Finally, under the table is space for a big trash can and a rolling kitchen cart, which I use to hold sewing supplies and general art supplies.

Some detail shots:

2018 Studio - shelves

This wall makes me so happy! That jar is holding all my broken/used needles and pins.

2018 Studio - windows

These lights make me happy, too! I could only find them in black, so I spray painted them gold.

2018 Studio - Embroidery

Embroidery designed and stitched by me 😛 😛 😛

Ok, so almost done! Finally, here are the links to sources for furniture & other stuff. Most of the things in this room are either from IKEA, or secondhand. Spoiler alert! Also please be aware that a lot of these links are affiliate links, meaning I will get a small commission if you click them and end up purchasing something. Just a head’s up!

Wall paint color: Seriously, I have no idea. White?

FURNITURE:
Sewing machine table: ALEX drawer unit + LINNMON table top
Vintage desk chair: Thrifted
Cutting table: 2 KALLAX shelves + LINNMON tabletop + 2 KALLAX drawers + 4 KALLAX casters. Scissor rail is BYGEL RAIL + s-hooks
Fabric Shelves: HEJNE shelving unit
Bookshelves: thrifted
Ironing Station: FORHOJA kitchen cart + metal dvd wall shelf
Printer table: KLIMPEN drawer unit
Writing desk: Nashville flea market
Desk chair: Nashville flea market, spray painted gold and white
Wall shelves: EKBY JÄRPEN / EKBY BJÄRNUM
Turquoise utility cart: RÅSKOG
Dressform: Professional female dressform with collapsible shoulders (also: full review here!)

ACCESSORIES & DECORATIONS:
Yellow & white storage boxes: DRÖNA
Large white storage boxes: IKEA, discontinued (these are similar)
Small white storage boxes: IKEA, discontinued (these are similar)
Fake plants: FEJKA
Industrial paper roll: Given to me when my old job (advertising) was downsizing and clearing out the art room!
Ceiling light (over ironing board): KNAPPA
Ceiling lights (over machines): Geometric Light bulb cage pendant (spray painted gold) + Edison light bulbs + HEMMA cord set
DMC thread organizer: thrifted
Thread racks: given to me by Elizabeth Suzann, but here are some similars on Amazon- thread rack + serger thread rack
Sewing room art: Joanna Baker, via Madalynne giveaway
“I’ve Made A Huge Mistake” chalkboard sign: Custom made by Kaelah
Sewing machine print: Madalynne
Polka dot stickers: Gold polka dot wall decals
Baskets: thrifted & spray painted gold
White floor lamp: NOT floor lamp
White desk lamp: Another score from the art supply room cleanout at my old job
Small turquoise/white stool: Nashville Flea Market
White cutting mats: The Shop Company
White deer head: Gift from Elizabeth Suzann
Snap setters (only people people always ask!): Purchased secondhand from Elizabeth Suzann

2018 Studio - Amelia

Ok, I think that’s all! Hope you enjoyed the tour 🙂

A Very Belated Tour of My Sewing Room

3 May

Hey! Remember when I moved last year and promised I’d share photos of my new sewing room? Well, we’re almost a year overdue – but I’m finally making good on that promise! Truth be told, I kept putting off the ~big reveal~ because there was a never-ending list of things that I wanted to change about the space – first I wanted a new ironing board cover, then I needed new lights over said ironing board, then I thought I’d wait until I got new sewing tables… like I said, never-ending! I have since realized two things:

1. The list of changes is going to be never-ending. That’s the nature of decorating. Once you’re happy with one thing, you want to tweak something else. Ok, maybe you don’t decorate that way – but I do! Keeps me on my toes, keeps that DIY spirit alive or whatever.
2. I decided to move in June (more on that in a minute!), so I better document this room before it becomes a maze of boxes! Argh!

Anyway, better late that never! I always have a studio in every place that I live, and I like to document these snapshots of my life, so I wanted to include this one on the blog as well 🙂 If you’re interested in seeing my other sewing spaces from past homes, check out this tag 🙂

LLADYBIRD Studio

Here is what you see when you first walk in! It’s an average sized room (11′ x 12′, which isn’t super tiny – but it makes for a small studio, especially when you have a giant cutting table in the middle of it!), so it was hard to get good shots of everything, but I tried!

If you’ve followed my blog for a while and are familiar with my former sewing spaces, you probably noticed that this room is super white! In the past, I’ve always had lots of color on my walls – which I love, especially when it’s turquoise! – but I ended up keeping this room white. The landlord and I had a bit of miscommunication about the painting – he agreed to paint it turquoise, I sent him swatches, he said he didn’t get the swatches, I agreed to just go with white (it was originally that horrible beige-y rental color that no one loves), figuring I’d repaint it myself if it bothered me. But I’ve really grown to love it, it’s so fresh and bright!

LLADYBIRD Studio

The view from the door to the sewing station. I love having a window at my sewing station, even if the bright light makes my photos look awful 🙂

One of the things that I wanted to change about this room – and will change in my next studio – is to exchange those two sewing cabinets in favor of a long worktable that I can roll back and forth at in my chair. I love my cabinets, but they aren’t practical with multiple machines (plus, I can’t use the knee lever with my Bernina! Boo!).

LLADYBIRD Studio

Starting next to the door, on the right-hand side of the room – is my desk (or as they love to say on MTV Cribs “where the magic happens”). Since I primarily work from home, it’s great to have a dedicated desk space where I can keep my computer and all my office and art supplies. I also blog from this desk, and sometimes it holds fabric + pattern overflow when I’m on a giant cutting binge 😉

LLADYBIRD Studio

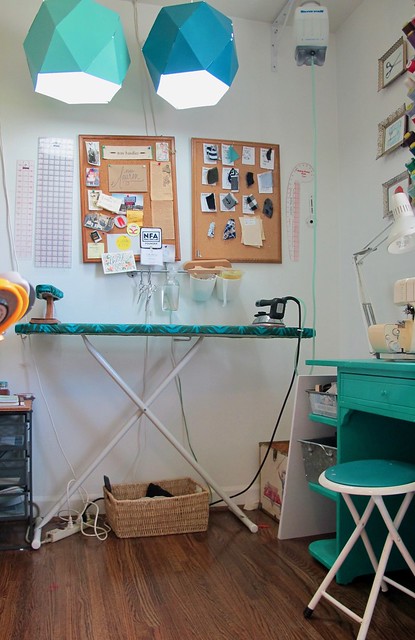
Next to the desk is my ironing station – yes, with a new ironing board cover (finally haha!). The lights over the ironing board are suspended on a cord that plugs into a power strip below. These lights provide two purposes: one, to give me more working light (despite how bright these photos are, the corners of the room are actually quite dark, so it needs a lot of light to be comfortable to work in!), and two, to let me know when the iron is on! I use a gravity feed iron that does not have auto shut off, so I keep it plugged into a power strip with lights above it. When the lights are on, I know the iron is also on!

The shades over the lights are Joxtorp shades from Ikea. They are cheap little cardboard things that I just spray painted a different color. Nothing fancy, but better than a bare bulb! I used paper lanterns in the past, but I lost one of them during the move and figured it was time for a change anyway!

LLADYBIRD Studio

Over the ironing boards, I keep my rulers and cork boards – one for inspiration and general things that make me happy, and one to plot out future projects.

LLADYBIRD Studio

LLADYBIRD Studio

My sewing machines and serger are against the wall opposite the doorway, right by that beautiful window! All my thread is on racks on the wall (serger thread by the serger, sewing machine thread by the sewing machine), and notions in the shelf above my sewing machine. Plus, my dressform!

LLADYBIRD Studio

LLADYBIRD Studio

LLADYBIRD Studio

Continuing toward the right, this wall has a full-length mirror and a few shelves. The floor shelves hold my sewing books and yarn stash (yeah, it all fits in ONE BASKET woohoo), and the wall shelves have bra making supplies and zippers. And also fake plants along the top, cos green stuff is pretty stuff. I also keep a big roll of craft paper on top of the floor shelves.

LLADYBIRD Studio

Next to the shelves is where I keep my printer (FYI there is nothing fun in those drawers – it’s all products and samples that I send out for my other job haha).

LLADYBIRD Studio

Finally, at the end of the room – next to the door – is the closet. Since this closet is really big (like 7′ wide) and didn’t have doors, I just stuck my entire fabric stash in there, shelf and all! The shelf fit in perfectly with some extra space on the sides, plus there is storage along the top closet shelf for all my sewing patterns. My apologies for the bare shelves – I’d already started packing my fabric at this point, and I wasn’t about to unpack it for one photo! Just imagine that those shelves are full of lovely, colorful fabric 🙂 hah!

LLADYBIRD Studio

Since that shelf is about 5′ wide, there’s at least a foot of space on either end to store things. One end has my sewing machine cases and tracing paper (boring), but this end I stuck a tension rod so I can hang my working PDF patterns from! I can clip all the pieces and then hang them from the rod, and that way they don’t get folds before I have a chance to use them (PDF patterns that I’m not currently using are stored in a binder system – which I keep behind one of those doors in the big shelf).

Speaking of printing PDFs – I have started using a local printer to print copyshop versions, instead of cutting + taping a million pages together. My research in the past showed that places like Kinko’s charge about $10/page, which just crazy (especially if you are unfortunate enough to have a pattern with multiple pages!). I found a local printer who will print them for $2.18 per page, and holy shit y’all they are amazing. If you are in Nashville, check out CCAD Reprographics, seriously! If you’re not local, I think they will ship 😉

LLADYBIRD Studio

This is on that time wall space between the door and the closet. The hook is good for hanging WIPs (or stuff that I need to do some alterations or repairs on), and I found that postcard at my local yarn store, Haus of Yarn!

LLADYBIRD Studio

LLADYBIRD Studio

The cutting table takes up the space in the middle of the room. On one end, I have a bar where I store my cutting tools. The boxes in the cubes hold silk scraps, leather scraps, Papercut Patterns + Vogue patterns (since they don’t fit in the comic book boxes with the rest of my patterns), and my dyeing stuff.

The opposite end of the table has some drawers where I keep a bunch of tools and interfacing scraps, and the bins at the bottom hold swimsuit fabric and an enormous stash of zippers.

I love this cutting table! I “built” it out of two shelves and a tabletop – all stuff from Ikea – and put it on casters so I can easily roll it around if I need to (the casters also lock, so that shit will also stay put if I need it to). It’s a great size and height for cutting! For more information on how I built this, check out my former sewing room post.

LLADYBIRD Studio

What’s rad about this table, is that the middle is open and tall enough for me to roll this cart underneath, so I can easily pull it out when I need supplies (or shove it under the table when it’s in the way).

hellooooo
Hi!

So that’s my sewing room! I have really loved creating in this room – it’s such a lovely, bright space and it is really the perfect size for my needs. I’m going to miss this room (not to mention THAT CLOSET), but I’m so excited about my new place!

Oh, and more about that! I really love this apartment, and I have enjoyed living here this past year. However, one of my friends got me a great hook-up on an AMAZING house (seriously, look at how cute it is!), which I jumped at the opportunity. I am excited to have yard access again, a private driveway – and I’ll be walking distance to my part time gig at Craft South (not to mention, all the other cool stuff in that area!). The house was built in 1935, which means it is incredibly charming and has really really small closets 🙂 I am seriously SO sick of moving (just thinking about my to-do list is giving me anxiety), but I know it will be worth it! My new sewing room is going to be a hair smaller than this one – it measured around 11′ x 11′ – which means I need a bit of an overhaul on my organization / storage (for example – taking advantage of all those drawers!). I am up for the challenge, though! I love decorating new studios haha 🙂

Side note to my Nashville friends – if you are looking for an apartment, this one is available! Send me an email if you want more info 🙂

LLADYBIRD Studio

Time For A Sewing Room Tour!

29 Jul

Finally, a tour of my new sewing room! This post has been a long time coming – honestly, this room has been set-up and fully functional since the first couple of weeks after we moved (because I have priorities), but I’ve put off sharing the big reveal until I felt that the room was “finished.” As always, I’ve realized that this room will never really be finished – I still want to hang some more lights, make a new ironing board cover, get a couple more rugs, etc etc – but it’s as finished as it’ll be for now. And now it’s time to share!

Soooo – welcome to my new sewing room, the Kingston Springs edition!

Sewing RoomThis room is funny shape, so getting photos was a little difficult. It’s basically an L shape – there are two little nooks off each end, and the corridor between is wide enough so that you can shove furniture against the wall and still be able to walk through. Here I have drawn you a shitty not-to-scale diagram to give you an idea of the layout. I used Comic Sans as my font choice to make it extra obnoxious. sewing room layout So, as you can see – two nooks with a bit of a walkway. The hallway going off the photo leads to our bedroom and bathroom, and the diagonal line off to the side of the cutting area is a doorway leading to our private living room/Landon’s office. The rectangles are windows and doors – one window in each the sewing and cutting nook, and the door is to the side of the desk. Our apartment is in the basement of the house, so the stairs lead up to the main floor. I’ll admit that when Morgan asked if I wanted to move into her BASEMENT, I was like, “lol no fucking way I ain’t your kid.” But, forreal, this is a pretty happy basement – it has windows and a door that leads outside, so it gets a good amount of light. Although it was a little scary when I first saw it, and it definitely took some TLC to get it to the point that it is now. The room is quite smaller than it looks – my rough measurements put it around 130 square feet. My old sewing room was about 200 square feet, so there was some downsizing and furniture Tetris in order to get everything to fit. It was a little brain-bending at times, but I think it turned out pretty awesome!

Before we moved in, we had to fix the basement up a little. We were really lucky that Morgan moved into the house a few weeks before we did, so we could do this at our leisure (and not live in the middle of a construction zone). The basement is finished and was fully carpeted. We tore out the carpet in the sewing room area – it was completely soaked with cat urine and was beyond saving. The carpet in the bedroom and living room, as well as the stairs, was ok, so that’s still there. Since the unfinished concrete floors were pretty beat-up looking (although thankfully not stained with pee odor! THANK GOD FOR THAT) and nobody wanted to invest in flooring right now, we simply stained them with.. um, some shit from the hardware store haha. We also installed the screen door outside; eventually I’d like to replace the door with one that has a window, but I ain’t got the budget for that now.

I painted the majority of the room by myself – the color is “Aquatic Mist” by Valspar, and the insides of the windows is some color called “Blanket” (I don’t recall the brand, but I will fully admit that I bought the color based solely on the name alone. Who names a paint color Blanket?? Michael Jackson?). Well, majority except for the long hallway leading to the back half – that stayed unpainted for like 2 months, because I wanted Landon to help me with rolling and we kept putting it off. He actually painted it for me as a surprise while I was in Peru, which might very well be the best welcome home gift I’ve ever been recipient of. Ok, I think I’ve talked enough! I’ll let the pictures tell the rest of the story 🙂 Sewing Room

Starting with general layout photos – here’s the desk area.

Sewing RoomThe hallway leading to the back of our living area. And that giant wall that Landon painted! Sewing Room

The top photo in this post is the sewing area – here’s a view of the wall behind the machines. That tiny nook under the stairs ended up being exactly the right size to fit my pattern cabinet.

Sewing RoomThe opposite nook is the cutting and pressing area, as well as my fabric stash along the wall. Sewing Room

The ironing station. I REALLY wish I’d been able to find a way to keep the ironing board closer to the sewing machines, but the room layout just wouldn’t work around it (and I wanted to keep my desk in the center of the room). It’s not so bad to walk to the ironing board, I guess – I tell myself that a little exercise won’t kill me haha.

Sewing RoomMore of the cutting area. Sewing Room

Standing behind the cutting table, looking back toward the desk.

Detail shots:

Sewing RoomThese bookshelves are below the wall shelves in the cutting area – I keep my collection of sewing books here, as well as my yarn stash (it’s ALL in that basket! I can’t keep my fabric stash under control, but I’ve managed ok with my yarn stash!) and embroidery supplies (in the 70s floral filing box). The blue metal basket up top is where I keep my lingerie sewing queue, and the wooden FL box is my regular sewing queue. I’ve found it’s easier for me to do all my cutting at once for a few projects, and then I can work through the bundles without having to stop and cut another project. Sewing Room

Over the bookshelf are these two wall shelves that I hung ALL BY MYSELF (like a boss). I wouldn’t normally get all riled up over hanging a wall shelf, however, these were heavy AF and I somehow even managed to get them level idk. Anyway, the boxes are for small notions/tools that I have masses of – mostly lingerie supplies and zippers. I haven’t filled all the boxes quite yet, but I figure that’ll happen in due time haha.

Oh, and the plants on top are fake. Obviously. They are the only fake plants in this room, though… for now.

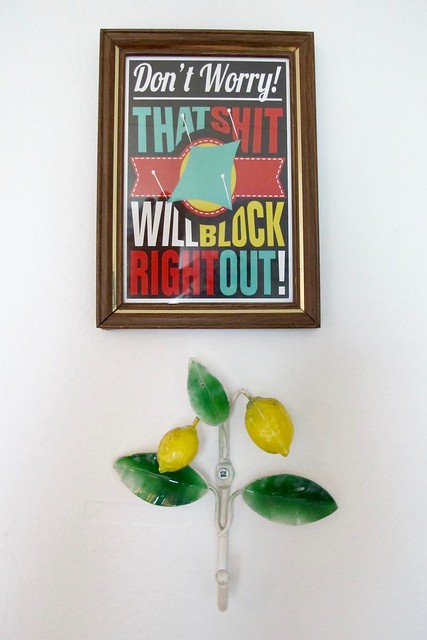
Sewing RoomI love this pattern so much, I hung it in a frame so I could admire it all the time 🙂 Sewing Room

The wall at one end of my cutting table is where I have my cork boards and tools. One board is for general inspiration/love notes – just things that make me happy. The other board is my project board – I’ve found by having a visual running list with swatches and sketches out where I can actually see it (i.e., not in a book or lurking on the internet), I can more easily keep track of my make list. Sometimes I forget what patterns or fabric I have in my gigantic stashes, and this is really helpful!

Sewing RoomHere’s the other end of the cutting table, and one of two windows! That plant is totally alive and not fake, btw. Sewing Room

This is the view from the window. Ahh! We are totally ground-level and I look straight into the woods. Amelia loves to sit in this window and watch the birds, and sometimes Turtle (the beagle) will come sniffing around when she’s outside and it always freaks Amelia out because they are eye-level haha.

Sewing RoomA little more about the cutting table! I built this myself (well – I use the term “built” loosely; it’s IKEA furniture that I screwed together haha) and it’s pretty awesome! I used two Kallax shelves and a Linnmon table top (there is a whole list of links at the bottom of the post for the specific products I used), and 4 sets of Kallax casters to raise it to counter height/make it moveable. One end, I installed 2 drawers on top, and bought 2 little fabric boxes for extra storage (if you were wondering – one box holds swimsuit fabric, and the other holds a mass of vintage zippers still in their packages – too big for the cardboard boxes on the shelves). I also installed a rod to hold my scissor collection on S hooks. They do sit in front of the drawers, but it’s easy to slide them out of the way when I need to access the drawers (which isn’t terribly often). Due to the width of the rod where it screws in, I could only install it on that side.

Those of y’all who have seen previous sewing rooms of mine (we’re on #6 as of this writing… I’m a dedicated woman for sure. I also live in an area with a low cost of living. Yay!) will recall that I had a Norden Gateleg table as my old cutting table. It was ok for a cutting table – I liked the size and that it folded down to be very narrow. However, the height was always bad for me, even when raised on blocks (and, again, I’m 5’2″, so I don’t have extra height to deal with here). I also hated that I couldn’t fit anything under the table due to how the legs were arranged to raise the leaves. And the drawers were a funny shape that I never found useful. I like this table a lot better – it’s pretty much countertop-height with the casters, and I have lots of storage options with the shelves/drawers/boxes. Plus, if I ever give up on sewing (lol no), I can always disassemble it and use the pieces individually on their own. Or sell it – Nashville doesn’t have an IKEA (we have to drive 4 hours to Atlanta), so people here seem to think that shit is made of gold and will pay top dollar for it haha. Which is exactly what I did with the Norden. Bye, Felica!Sewing Room

The inner side of the cutting table has more storage boxes – silk scraps, leather scraps, craft supplies, knit swatches, and my dye pot.

Sewing RoomThis little cart fits perfectly under the table as well. I keep a bunch of weird stuff here – cutting and marking tools, pressing supplies, extra pincushions, my hammer and a spray bottle. Sewing Room

The ironing station is right next to the cutting table. My iron is a silver star ES-300, which is a gravity feed iron and it’s AWESOME. The one thing that seems to scare people the most about using a gravity feed (other than the sheer steam power behind it) is that it doesn’t have an auto shut-off, and they are afraid they’ll accidentally leave it on and burn the house down. I solved this issue by plugging my iron into a power strip that also has paper lantern lights running from it – so if the strip is on, the lights are also on (and, thus, the iron is on). It’s pretty easy to tell if the iron is on that way! That overflowing box of fabric houses all my scraps from cutting. I try to find homes for that shit as quickly as possible because the pile can quickly get overwhelming otherwise.

Sewing RoomNext to the ironing board is my fabric stash – organized somewhat by type/color (jerseys/knits on one side, wovens on the other). I installed little cabinet doors on the bottom, to hide unsightly stash (fabric scraps and linings) and boxes for the unfoldables (interfacings and lingerie fabrics). The roll of paper on top is super handy for pattern tracing or if I just want to make a giant doodle of something. As far as *how* I stash my fabric – I used to fold, but now I roll. Folding looks really pretty, but I could never seem to keep it neat (mostly because my attitude went somewhere along the lines of “ah, fuck it.”). Now I roll my fabric and just stack it in the little cubes. It much easier to keep everything organized this way!

As you can probably tell, this area is also Cat Central. Amelia likes to hang here – on the rug, in front of the screen, all up in my silks – so I keep her scratching pad here, and there’s always at least one toy lurking around.Sewing Room

I like having my desk in the middle of the room, so I can easily hear music/videos while I’m working. It’s also close to the door (which is open 99% of the time, bc fresh air lol yay). I work from home a couple days a week, so it was important for me to have a nice workspace to sit at. I also hung those shelves above the desk, also by myself. I really love shelving. And boxes, for that matter.

Sewing RoomTo the left of the desk is the sewing area. This is where I keep my machines, patterns, and a bunch of notions. Sewing Room

And here’s the view out of that window, in case you were curious 🙂

Sewing RoomOn one table, I keep both of my standard sewing machines – I have a Bernina 350PE and a Pfaff 7570. The Bernina is my main machine, but it’s really nice having 2 when you are working on a project that requires a lot of thread changes (such as jeans). For those, I use the Pfaff for construction and the Bernina for topstitching. Above the machines are buttons, notions, and thread racks. Sewing Room

More thread racks, plus my favorite sewing room art 😀

Sewing RoomThe dedicated serger table has additional storage, which is handy. My serger is a Babylock Imagine, FYI. Sewing Room

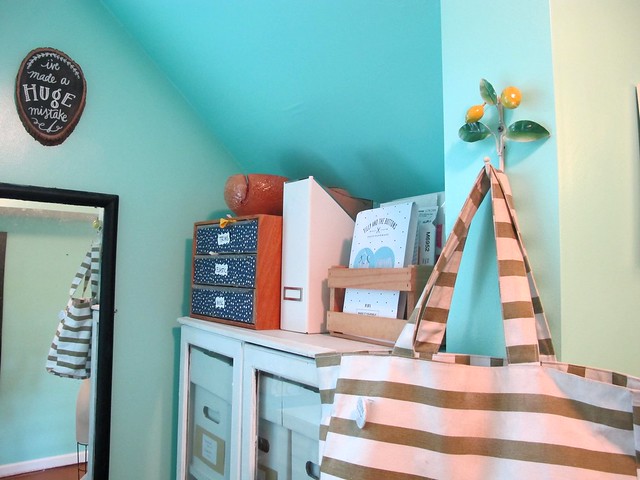
Behind the sewing machines, in the weird little nook under the stairwell, is where I keep my pattern stash. On top of the cabinet, I have storage for trims and elastics, plus a running queue of the patterns I want to make next (before I cut them and put them in the cut queue box by the cutting tables. Man! All these systems!). That bag hanging on the lemon hook is my knitting bag.

Taking photos of my sewing room is hard because it's such a funny shape! Here's a shitty panoramic to give you an idea of what I'm working with.

Finally, here’s an Instagram panorama of the room!

SHOPPING LIST:
Most of the stuff in this room is either thrifted or from IKEA. I’ve tried to compile everything here, but feel free to ask if you are curious as to where I got something! If it’s not on the list, chances are I bought it used (like from the thrift store or flea market). Like I said, I’ve had an on-going sewing room in every house I’ve lived in for nearly the past 10 years, so I’ve had a LOT of time to collect stuff and learn what works best for my set-up and organizational needs. Oh, and one more thing, because I’m always asked this – yes, it does always stay this clean! “Messy” for me is if there is a project on the cutting table. I never lets piles accumulate and I’m pretty good about putting stuff away when I’m done with it. I can’t stand to work in a messy room, plus, this area is the walk-through to get to the rest of our basement suite, so I have to be mindful of that for Landon’s sake.

Wall paint color: Aquatic Mist by Valspar

Sewing nook
Serger table: thrifted + painted
Sewing machine table: family hand-me-down + painted
Pattern cabinet: thrifted + painted (for info on the boxes inside the cabinet, check out this post!)
DMC thread organizer: thrifted
Thread racks: given to me by Elizabeth, but here are some similars on Amazon- thread rack + serger thread rack
Turquoise hanging shelf: thrifted + painted
Chairs: thrifted
Sewing room art: Joanna Baker, via Madalynne giveaway
“I’ve Made A Huge Mistake” chalkboard sign: Custom made by Kaelah
Rug: Old Time Pottery

Desk area
Desk: Nashville flea market
Chair: Nashville flea market
Ceiling light: KNAPPA
Wall shelves: EKBY JÄRPEN / EKBY BJÄRNUM
Mesh drawer unit: LENNART
Rail/basket (above desk): BYGEL RAIL + BYGEL BASKET
Dressform: Professional female dressform with collapsible shoulders (also: full review here!)
Rug: Nashville flea market
Sewing machine print: Madalynne
Kitty Cat clock: gift from Landon

Fabric // Cutting area
Fabric shelf: KALLAX with 2 doors
Industrial paper roll: Given to me when my old job (advertising) was downsizing and clearing out the art room!
Paper lanterns: IKEA, like 10+ years ago
Rug: Nashville flea market
Wall shelves: EKBY JÄRPEN / EKBY BJÄRNUM
Bookshelf: thrifted
Cutting table: 2 KALLAX shelves + LINNMON tabletop + 2 KALLAX drawers + 4 KALLAX casters. Scissor rail is BYGEL RAIL + s-hooks
Tool baskets (under the corkboards): BYGEL RAIL + BYGEL container
Turquoise utility cart: RÅSKOG
Yellow storage boxes: DRÖNA
Large white storage boxes: IKEA, discontinued (these are similar)
Small white storage boxes: IKEA, discontinued (these are similar)
Fake plants: FEJKA

Ok, I think that’s it! Let me know if you have any questions 🙂

Organizing My Pattern Stash

3 Oct

I freaking love sewing patterns, y’all. Love them. I snap them up at an alarming rate – indies, big 4, vintage, whatever I can get my hands on. I love to collect them for the artwork, the instructions, even the odd pocket or facing piece that I might need later (ok, that’s a little hoardy, but whatever). The vintage ones will fall in my lap en mass – either someone gifting me a huge box of whatever belonged to their grandma and/or they found in their attic, or I’ll find them for the flea market for less than a dollar a pop (at this point, I’m kind of convinced that I can sniff them out).

So, yeah. I have a lot of patterns. Over 300, to be exact – ranging from printed to PDF, and, lord. There’s just a lot of them.

Sewing Room

Previously, I stored them in open boxes that I sat on a shelf – that way I could easily see them and sort through them (I’m the kind of person who needs to see something to remember that I have it). This was fine when I had 20, 30… even 100 patterns. Nowdays, not so much. Despite my patterns taking up most of an ENTIRE CABINET (the photo above is from about 2 years ago, so – while I had plenty of patterns then, I have about 3x as many now, and they take up way more shelf space), there wasn’t enough room. They were crammed into boxes, which made sorting through them difficult (if not destructive, especially with the delicate vintage ones), which meant I never sorted through them at all. Which, in turn, meant my ~open shelving concept~ was BULLSHIT, because why bother if you don’t actually use it?

It was time to find a new organization system.

No doubt most of y’all have read Sarai’s post on pattern organization over at the Coletterie. If not – you should! It’s where I got this entire post idea from, ha :). Anyway, I was inspired by the post and decided to get my pattern stash under control, once and for all. Drumroll, please…

Pattern Organization

Yeah! How do you like THEM apples?!

Pattern Organization

Here’s another sexy shot, because – sexy.

Anyway, here’s what I did –

I started out by sourcing the supplies – I bought plastic bags, cardboard backing boards, plastic dividers, and cardboard boxes with lids. All of these things are made for comic book storage, but lucky for us – sewing patterns are pretty much the same size. I know Sarai had luck with getting her supplies at Bags Unlimited; I can’t personally vouch for that site as I bought all my stuff here locally, at The Great Escape, which is conveniently located right by my house. (upon linking this, I just noticed that they have an eBay store! They’re also cheaper than Bags Unlimited, because they rule). I started out with buying enough stuff to house 100 sewing patterns… then went back again. And again. This is how I know a rough estimate of how many patterns I have, ha!

Pattern Organization

Anyway, the patterns are stored in a little plastic comic book bag, with the backing board added for stability. I really love this because you can cram and push and shove the patterns around as much as you want – and even the delicate ones won’t rip, because they are protected by the bag.

Pattern Organization

You can also shove pattern pieces in the bag itself, instead of back in the envelope, if rips are a concern.

All this talk of shoving makes me sound like I’m super violent with my patterns, hahaha. Promise I’m not *that* bad!

Pattern Organization

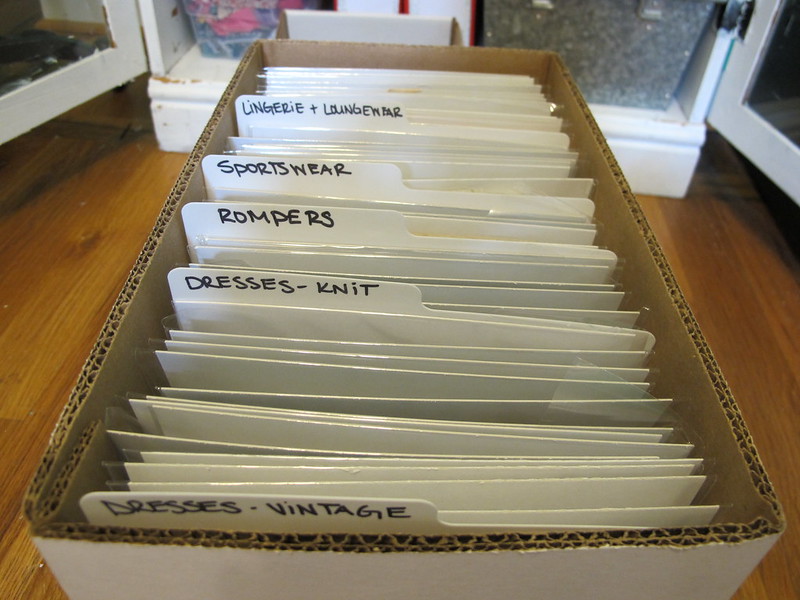
Once I got the patterns in their baggies, I could start organizing them in the boxes. I used the plastic divider boards to separate them by type, in a way that made the most sense to me.

Pattern Organization

Even if you cram them in the box super tight, it’s still relatively easy to find the pattern you’re looking for – especially with the tab dividers.

Pattern Organization

I also labeled the boxes so I would know the contents at a glance. I used scrapbooking paper and just taped the labels on – that way, if I need to switch things around, I can just peel it off the box and make a new label.

Some things to note:
– I agonized for WAY too long about what size bags to buy. I don’t know anything about comics, so I had no idea that they came in different sizes! I ended up buying the bags for regular size comics, as well as the regular size backing boards.
– The boxes, at least at my store, come in 2 sizes. I bought the smaller size – they were $5 a pop, lid included, and they are short enough to fit in my cabinet. I would estimate that each one holds around 50 patterns, give or take.
– I also played around with resealable vs non resealable bags. My personal verdict: get the resealable. You’ll end up taping the other ones shut. Just pay the extra dollar and get on with your life.

Ok, so that’s part one of the pattern organization! Next, I had to deal with patterns that didn’t fit in the boxes – PDFs, the big Vogue patterns, and my collection of Papercut Patterns.

Pattern Organization

For the Papercut Patterns, I decided to take them down from the wall (the sheer amount of them was taking over the wall and starting to look extremely sloppy!) and stack them on the one stupid shelf that I couldn’t adjust. The patterns don’t have their names printed on the sides, so I wrote it on the bottom of each one so I could sort through them in a glance.

Inside the basket is my tape gun thingy that I use to tape PDF patterns, as well as some cardstock pattern pieces (like shirt pockets) and extra bags.

Pattern Organization

The bottom shelf holds all my PDF patterns, big Vogue designer patterns, and a couple boxes of random fabric scraps.

Pattern Organization

The manhandling of those PDF patterns into submission is my FAVORITE part of this makeover! Before, I stored each one in a large manilla envelope (I scored boxes of them from my old job when we switched to digital filing for our job jackets). That was, to put it mildly, a clusterfuck. It was hard to sort through the patterns, they didn’t all fit on the shelf, they looked like a hot mess, they were always falling out of the shelf, AND THEN I ran out of envelopes (and ew, wow, those things are expensive!). While I was debating what to do about this, I came across Andrea’s Craftsy post on organizing PDF patterns. Solution #1 – that was my answer!

Pattern Organization

As with the printed patterns, I agonized for forever over what supplies to buy for storage. I know Andrea gives specific products, but they were a bit out of my budget. Plus, I have like 40 PDF patterns – so I needed to keep the budget way down. I ended up getting these clear plastic sheet protectors and these 3″ 3 ring binders, both from Amazon. As with the printed patterns, I organized them according to what made sense to me, and labeled the outside of the binders. Since my plastic sleeves are not resealable, I just paper clip them closed. Haven’t had a disaster yet (fingers crossed, tho).

For the Vogue patterns, I found that they fit perfectly in magazine-sized plastic sleeves (and they also make backing boards this size!), so that’s what I used. I didn’t even buy a whole box – my shop sells them for pennies individually, so I just took what I needed. They are stored in one of my old pattern storage boxes – which actually looks kind of nice when it’s not so full 🙂

Pattern Organization

Finally, I keep a running “list” of the patterns I want to sew on top of my sewing cabinet – they’re just pulled from the boxes and stored in their cd case holder (omg I love repurposing things hahaha). This way I can still see things to be reminded of them, but not overloaded with seeing OMG EVERY PATTERN I OWN.
(also, this picture is old. I’m not sewing that McCall pattern. Actually, I scrapped it because the very smallest size was like 4″ too big for my sad little rack. And yet everyone keeps making beautiful versions of this pattern and I’m super jealous, so stop already).

Next, I’d like to digitally organize my patterns. The second half of Sarai’s post talks about creating a digital database using Tap Forms, an app that costs like $9. I’m embarrassed to admit that I bought the app (mostly because I was so sure that actually paying for it would ensure that I actually USE it) and then uploaded like 10 patterns (so much for that theory). It’s kind of a huge time-suck! Argh! But I can’t think of a better solution, so I really just need to suck it up and deal with it.

deal with it

I don’t want to say this entire process was difficult – but it was very very time-consuming. It was also a bit more expensive than I had originally budgeted for – I think, all in all, I spent around $100 for all the supplies. It was spread out over a few paychecks, so the cost didn’t hurt *that* much – but still, that’s a chunk of change for organizing a mess! Anyway, it was worth it. It’s so much easier to find what I’m looking for (without destroying it in the process), and the clean white boxes and red binders make my entire sewing room look SO much better than the original messy piles. Woohoo!

Anyway, that’s my organization story! What about you? How do you organize your patterns? Or are you one of those cool minimalist people who has, like, seven? (ps, please teach me your ways).

Me-Made-May ’14 – My Pledge

18 Apr

MMM14logolarge

Hey everyone! Have you heard that Me Made May is open for 2014 and currently accepting pledges? Woohoo!! I admit, MMM is one of my favorite parts about keeping a blog – while taking daily photos can be a huge pain at times, it’s a wonderful exercise to keep myself on my toes as far as actually using and wearing my handmade wardrobe. Although the majority of what I wear is handmade anyway, I like this opportunity to find new ways to wear outfits and bring out old pieces that I may have otherwise forgotten about.

ha!

I’ve been thinking about my pledge for the past couple of weeks. Although I tend to wear mostly handmade (I rarely, rarely buy new clothes – they are usually thrifted, and even then, I’ve been slowing that game down dramatically – and try to make everything that enters my wardrobe), my supply is dwindling thanks to my ever-changing body. After swapping out my summer clothes and trying on everything, it’s pretty apparent that I’ve got a lot of wardrobe gaps that need to be filled asap. So, with that being said, I am modifying my pledge to suit my current closet statistics and try to keep things realistic.

‘I, Lauren of LLADYBIRD, sign up as a participant of Me-Made-May ’14. I endeavour to wear at least one handmade garment each day for the duration of May 2014, with no 100% outfit repeats.’

Last year, my pledge was no outfit repeats whatsoever. Y’all, that was hard. I quickly learned throughout the month that there are lots and lots of pieces in my wardrobe that simply don’t get worn anymore for whatever reason – either I don’t like the style on me, I don’t care for the fabric, or the fit is off (this is the main offender – the fit was good when I made it, but my body has changed and now I’ve got some glaring fit issues in many of my older garments). As a result, nearly every single one of those pieces ended up in the donation pile. I love the freedom of having an empty-ish closet that is no longer holding stuff I don’t wear hostage – but it also makes things a liiiiitle difficult when you’re trying to plan an entire month of only wearing handmade! Especially when you can’t dupe an outfit. So for 2014, I’m allowing myself partial outfit dupes – as in, I can wear the same dress during the month, but it must be accessorized/shoed/jacket’d differently. Hence the no 100% repeats. I think this is still enough of a challenge for me to really stretch myself, as well as find some wardrobe gaps to fill while I’m at it. I’m excited!

I call this look ~2nd Grade Teacher Chic~ ✏️

If you’d like to participate in Me Made May, you can view all the info here on Zo’s blog. If you just want to watch from the sidelines, I’ll be posting my daily outfits in the Flickr pool, as well as on my own Instagram. As with prior years, there will be a weekly round-up post every Friday in May. Expect to see lots of mirror-shots like the one above 😛

As a side note, I recently got a new phone that includes a panoramic camera (say what!) (yeah, y’all, I’m behind on the times). As I’ve been working on updating my sewing room – to remove clutter, reorganize what I’m keeping, and include an actual desk so I stop camping out at the dining room table – I jumped at the opportunity to take some giant, poorly lit shots. What do you think?

Sewing Room

Sewing Room

My sewing room is totally my happy space ♥

“How Do You Find The Time To Sew So Much?”

14 Aug

One question I get asked a LOT – in comments, emails, tweets, real-life conversations, you name it – is how I manage to churn out all these garments at a seemingly rapid rate. Apparently, “Uhhh, idk I guess I sew fast lol” isn’t a satisfactory answer, and after one too many gentle nudges from various people, I think it’s time to unleash a discussion post!

happy dayz

Contrary to popular belief, I do not have any of the following:
– A Vampire’s need for sleep, or lack thereof
– A collection of enslaved sewing elves tucked away in my sewing room
– A machine that stops time
– A job that lets me sew all day (but, I mean, if you want to offer me one…)

Guys, I work a full-time, non-sewing related job. I go to bed at like 10pm. I don’t have kids or a particularly needy boyfriend, but I do hang out with my friends, I ride my bike, and sometimes my after-work schedule means I don’t sew at all for an entire week. So where does the time come from?

Well, for one, I do sew fast. I’m sorry, but I just do! I’m very comfortable with my machines and most techniques I use, which means a lot more sewing and a lot less unpicking. I also just tend to do everything fast (people are very amazed when I join them for lunch and inhale my sandwich in less than thirty seconds), so don’t be discouraged if you’re not ol’ Speedy at the machine.

queue

Another big one is that I always have something in the works – once I finish a project, I immediately start the next one in my queue. The queue changes around based on current needs/wants or if I get a shiny new pattern that week… but the point is, I have a queue. Speaking of which, I found the easiest way to keep the queue in check is to pull out the patterns I plan on sewing and store them separately from the rest of my stash. On the front of each envelope, I pin a little swatch of the fabric I plan on using (see above photo). Much easier than yanking off the whole yardage and piling it on the table with the patterns… which was what I was previously doing. Anywaaaay, back to what I was saying – I literally work projects back to back to back. This means that during weekends where I have a couple marathon seshs in a row, I could easily end up finishing 2 or 3 projects – or even more, depending on how simple they are (knit tshirts, I’m looking at you). Obviously, I don’t want to post them all in a row – I think you guys would get real bored of my face real fast – so I try to spread them out a little. This is not always the case when I’m posting like I’ve got a fire under my butt, but a lot of times it is. Sometimes those Finished Objects are kind of old!

I know this is a sewing blog, but I want to point out that I also do this with knitting. What can I say – I really love knitting, I don’t want to *not* have a project in the works (same with sewing)! Not having any creative downtime may make me sound like I’m working some kind of bizarre sweatshop with horrible self-imposed deadlines, but honestly… I just really love making things, and I feel lost if I don’t have a WIP that I can tinker around with at any given time.

So anyway, here are some tips that will [hopefully]help you accelerate your sewing progress.

sewing room

#1: Have a Dedicated Sewing Space

I realize this leaves out a lot of people as not everyone can afford to set aside an entire room – or even an unused corner – dedicated only for sewing. That sucks! I’m lucky that I have the space (and I make enough money/live in an inexpensive enough area where the second bedroom is totally a dealbreaker when looking for places to rent), but I know not all of y’all have that kind of luxury. However, this is single-handedly the #1 reason why I can get so much done – I don’t have to spend half my time setting everything up and then later taking it down. My machines have their own tables and they are always plugged in, my ironing board never gets folded and stored, and my cutting table does not work part-time as a dining room table.

stash

Having a dedicated sewing space means that I can indulge in my favorite part of sewing (other than the sewing itself): STASHING. Wooohooo I love my stash!! Actually, my stash has shrunk considerably this year (this happens when you stop adding to it and start sewing from it!), but, it’s still a stash. My pride and joy when it comes to stashing isn’t actually my fabrics, though – it’s my stash of notions, trims, interfacings, linings, and all those other little sewing goodies that make you stop in the middle of a project because you don’t have one on hand. I won’t say I have enough stuff on hand to open a store, but I do have a lot. You don’t have to break the bank to build up a supply – just buy a little extra something or two when you go to the fabric store. For a few months, I concentrated on serger thread – I bought 4 spools of whatever color every time I stocked up on fabric. Eventually, I had every color of the rainbow – without having to drop mad $$ on it all at once. Most of my trims and zippers come from ~vintage~ stashes – the flea market, thrift stores, yard sales (I have friends and parents of friends who keep an eye out for me, too!) – which, if you’re not shopping on Etsy, old sewing supplies are practically given away. I have so much shit in my stash, I can make entire outfits without leaving the sewing room to stock up on something.

Obviously, pointing this out is not going to magically grant everyone access to their own sewing room (I wish!), but I do want to point out that this does give me quite a sexy leg up on the competition.

happy dayz
#2: UFOs Don’t Exist in My World

Ah, UFO – or, Unfinished Objects (altho if you want to talk about aliens, I’m down for that too), the bane of most sewer’s experiences. How many times have we started something, only to shove it in a box when something with a little more sparkle catches our eye? Guys, I know it is tempting to embrace your magpie tendencies – but it is murder on your productivity! Starting up a project takes precious time – from determining your chosen pattern and fabric, to cutting and marking the pieces, to all the boring pre-work like staystitching and fusing interfacing… and we haven’t even gotten to the actual construction! What is the point of wallowing through all that, just to set it aside and start the process over again? Not to mention, I’ve noticed a lot of people who tend to pile up UFOs rarely stop at just one.

To me, UFOs just contribute to wasting time. It’s one thing to set something aside if it’s frustrating you, but you shouldn’t make a habit of picking up a new project and starting over, because it can quickly get out of control. I made peace with myself a long time ago and decided to eliminate the UFOs in my sewing room and finish every.single.project, even if it killed me. Sometimes it does make me want to destroy things – but I soldier on and finish that fucking garment. Occasionally, it actually speeds me up because I’m so desperate to finish and move on to the next shiny object. So maybe in a way, it’s kind of bad for my productivity since I occasionally will find myself cutting corners in a desperate attempt to just be done. But on the flip side – I don’t have those half-sewn pieces creeping around my sewing room (is it just me, or do they nag at you and make you feel all stressed and sad? Say it’s not just me!), and I have a finished object to show for it! Yay!

muslin
#3: Make a Muslin

I know, it’s like toootally contradictory. When you’re short on time, ain’t nobody got time for a fuckin muslin. This is NOT even true and all of us need to collectively reprogram our brains, like, now.

Besides obviously avoiding the trauma of spending your time on something, only to discover it doesn’t fit – muslin-makin’ is also good for increasing your speed, as it will give you a chance to practice a little on the garment before you start hacking into the good stuff. This means you will spend less time pulling your hair out over the instructions – because, dude, you already did this! – and less time ripping out your seams when you inevitably made a mistake due to sucky instructions. I also feel pretty confident, post-muslin, in that I know the garment will fit (since I basically already tried it on), which means less futzing with the fit during construction-time. Of course, I do fit-check throughout my sewing process (and you should too!), but it’s one thing to put half a bodice up against your chest to ensure things are coming along smoothly, and quite another to suddenly discover you cut the wrong size… halfway through.

One point I do want to make is that muslins do NOT take a lot of time to put together, especially if you speed up the process. Unless the skirt is something that needs to be fitted, I generally only sew the bodice. I do include a sleeve, but only one. I sew all my seams with a long stitch so I can quickly rip them out if I need to (and it pushes through the machine faster). I don’t bother with facings, collars, or buttons, although I do baste in a zipper. Also, this should go without saying, but once you make a muslin and get your fit down, that’s it! You can churn out multiples of the same pattern and skip the muslin.

happy dayz
#4: Sew Whenever You Have A Chance

I’ll admit, this is probably gonna be real rough for those of you who don’t have a dedicated sewing space 😦 But I do think it’s important to maximize your time – so what if you only have 20 minutes to spend cuddling your sewing machine? You could use that 20 minutes to stay stitch some curved seams! Mark your pattern pieces! Thread your machine and decide what buttons you want to use this time! Skip ahead of your pattern and assemble the collar! The point is, there is SO MUCH that you can do in small chunks of time, so don’t waste it by subscribing to the thought that you *only* have x amount of time to do anything – think of it instead like you have enough time to sew your bodice darts, or prepare your sleeves to get set in, or whatever.

This is pretty dorky – and y’all are totally going to make fun of me for this – but I actually get a lot of my little sewing bursts done in the morning, before I go to work. I don’t necessarily get up any earlier than I need to (although sometimes I do, ok, sorry I’m a dork!), but sometimes getting ready doesn’t take as long as I need, so I try to utilize that time in my sewing room instead of just chasing Amelia around the house for 20 minutes. I set a timer on my phone so I KNOW when I have to drop everything (the timer is important, you don’t want to get carried away and make yourself super late!), and I actually listen to it when it goes off. I don’t try to rush myself – if I only have 10 minutes and I only get some stay stitching done, who cares? That’s one less seam I have to stay stitch when I get home, awesomeee!! Which brings me to my last point…

cat
#5: Enjoy It!

I treat sewing the same way I treat a bicycle ride – I’m doing this because I enjoy it, not because I’m in a hurry (if I was in a hurry, I’d take my car. Or shop at H&M. Whatever!). When I catch myself trying to rush through the process, I force myself to stop and slow down. Sometimes this can be hard because I’ve basically ingrained it in my head that I HAVE to post new stuff every week, and oh god people are going to stop reading my blog and the world will end and ughhh… but, you know. That’s not true. I’m sewing because I love the entire process, not just the finished piece (although that’s a nice bonus, let’s be real). In my experience, rushing only leads to stress, tears, and a lot of fuck-ups. Stop, take a breather, and just slow it down. It’s fine. I promise.

Anyone else have protips to share for increasing your sewing output? I’m still stuck on the couch and I’m bored as hell… let’s have a discussion!!

Introducing – My New Sewing Room!

24 Aug

I should really call this a sewing studio – it’s a HUGE room! Huge, I tell you!

Let’s back up a little. When I last left off – three freakin’ weeks ago, eeeewww! – I was still living in a sorry state of moving purgatory. You know what I’m talking about – everything is packed except one of each dish, getting anywhere requires maneuvering around piles of boxes & there are weird outlines on the wall where artwork used to hang. Pretty depressing living situation, if you ask me! We actually did not move until the end of that week, on the 10th. And lucky me – the power company refused to turn our power & water on until the following Monday, so we spent a couple of nights sleeping on the mattress in the middle of the old bedroom (I can handle living a couple of days without one or the other, but not both!). Then there was a full week of unpacking – and I refused to let myself do anything fun until the house was put together (mostly because I know me, and I know it’ll never get done otherwise. Hey, at least I’m honest haha).

Then my old landlord called & said the paint colors in the house were all wrong, and I needed to paint them back. Not wanting to spend $200+ on neutral paint, Landon & I went to Lowe’s & bought out all their OOPS paint, mixed it all together in a 5 gallon bucket & crossed our fingers. The end result was something that closely matches my flesh haha. So I had a painting party with a few awesome friends, PBR, pizza & 90s jams. We knocked out 3 rooms in about 2 hours and told ghost stories and yes, it was as fun as it sounds. And I just found out yesterday that I’m getting my full deposit back! Yay! Money!

So now let me show you my new sewing room!

Sewing Room
Standing in the doorway – aren’t the hardwoods gorgeous?! Unfortunately, this room doesn’t get as good natural light as the bedroom does. Pretty sure I’ll manage 😉

Sewing Room
Turning just a bit, my sewing & ironing stations.

Sewing Room

Sewing Room

Sewing Room
There is actually a closet & more wall that I’m not showing; Landon still hasn’t unpacked all his clothes so I’m not going to show that section because it’s a MESS. Instead – cabinet! Patterns & books & yarn, yay!

Sewing Room
I edited down my stash a bit before I moved, but I still have a metric shit ton of patterns. They are organized by garment type, fyi.

Sewing Room
Speaking of things I have a metric shit-ton of – fabric!!

I forgot to take detail shots, sorrrry! Here are a couple of close-ups:
Sewing Room
Hanging space for rulers & scissors & things that strike my fancy.

Sewing machine art
Have I posted this yet? I made this using an old frame (25¢, painted mint green), a fabric remnant & a sewing machine charm. It makes me so happy haha 🙂

Some notes on the sewing room, if anyone is curious.
– The cutting table is the Norden Gateleg (Ikea). It is on wood blocks because it’s a tad short for cutting. Eventually I’d like to buy castors, but those fuckers are expensive!
– The fabric shelf is the 4×4 Expedit (Ikea)
– Pretty much everything else (glass cabinet, sewing table, shelves, chairs, even the ironing board) was either thrifted, dumpstered, or a hand-me-down.
– The wall color is Behr Mint Majesty – my landlords painted it for me, but I got to pick the color woohooo!

Here are some other bits & pieces of my house, for those of you who want to be nosy without actually admitting to it (hey, no shame, I’m the same way :B)
Living Room
This is the living room (I’m standing by the front door). I am looooooving these hardwood floors, even if they do make my feet filthy at the end of the day.

Here is an Instagram pic of the other side of the plant:
This is the only part of the living room that is finished haha
Someone asked me the other day if the dude bust was Jesus with his hair blowing – I WISH!

His name is Saul.
His name is Saul, actually.

Living room
This is an ugly picture (I need to hang that mirror, haaa), but I’m including it so you can see the layout of the house. The turquoise doorway is my sewing room (!!), that’s the dining room straight through, and then the kitchen is farther back. The bedroom door is on the other side of the wall.

Dining Room
Here is the dining room! The table/chairs (their matching hutch is in the previous picture) & the curtains are from the flea market. There is a pile of stuff in the floor because Landon’s desk is out of the frame; he’s still organizing that mess so I cropped it out of the picture. Oh, and the lady on the wall is not Marilyn Monroe 🙂
I don’t really care for that wall color, but it does go well with my curtains.
Sorry about all the bandannas everywhere. Wtf is up with me & bandannas?

So that’s it! I’m really loving my new house – and new neighborhood!! – and I’m looking forward to actually being able to start sewing again. It’s been too long! I just started a new project last night, actually-
REUNITED AT LAST ❤
Good stuff!

a new sewing room for LT!

12 Sep

sewing room eye candy time!

Photobucket

Photobucket
yes, that is very much a duran duran poster on the door.

Photobucket
i feel like everyone has an ikea expedit at this point. gah, it’s so handy for storing fabric & patterns! don’t plan on it ever leaving the room, though. i’m actually really surprised this thing survived another move, tbh.

Photobucket

Photobucket

Photobucket

Photobucket

Photobucket

Photobucket

it is a *very* small room, so getting the furniture in was a bit of a challenge. i had to forfeit my white serger table for lack of space… not sure if i’m too keen on keeping both machines on one table, but oh well! we all make sacrifices sometimes.

the paint is “refreshing pool” by behr, i had it mixed into glidden paint (NEVER AGAIN.) it is very blue-blue in these photos, but it is a definitely tiffany blue in real life. very pretty, i love it so much!

because i was feeling super crafty yesterday, i swatched out the fabrics i want to use for my fall/winter sewing:
Photobucket
sorry ’bout the giant piece of boning. that piece of leopard print is over 5 yards! DUDE. what should i make with it??? it’s very drapey & flowy. and five yards.

and because i feel so gushy & lovey for my new house…
Photobucket
Photobucket
my kitchen 🙂

the paint is “tropical bloom” by valspar, the cabinets are “vibrant white” and i really really love back to the future.

many of these supplies purchased using these home depot coupons.

lladybird summer 2011: done!

28 Jul

just finished the rest of my stuff for lladybird’s summer 2011 line and i feel gooooood. like a weight has been lifted off my shoulders.

here is the last piece to be photo’d (not the last piece made, but i realized i forgot to take a picture!), plus a quick recap:
Continue reading