Tag Archives: winner winner chicken dinner

Completed: Popover Tank & Lander Pants (Plus: OAL Winners!)

10 Aug

Heeeey everyone!!

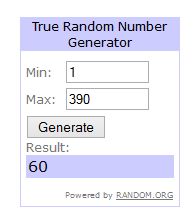
Before I dive into garment details, I want to congratulate our OAL 2018 Winners!


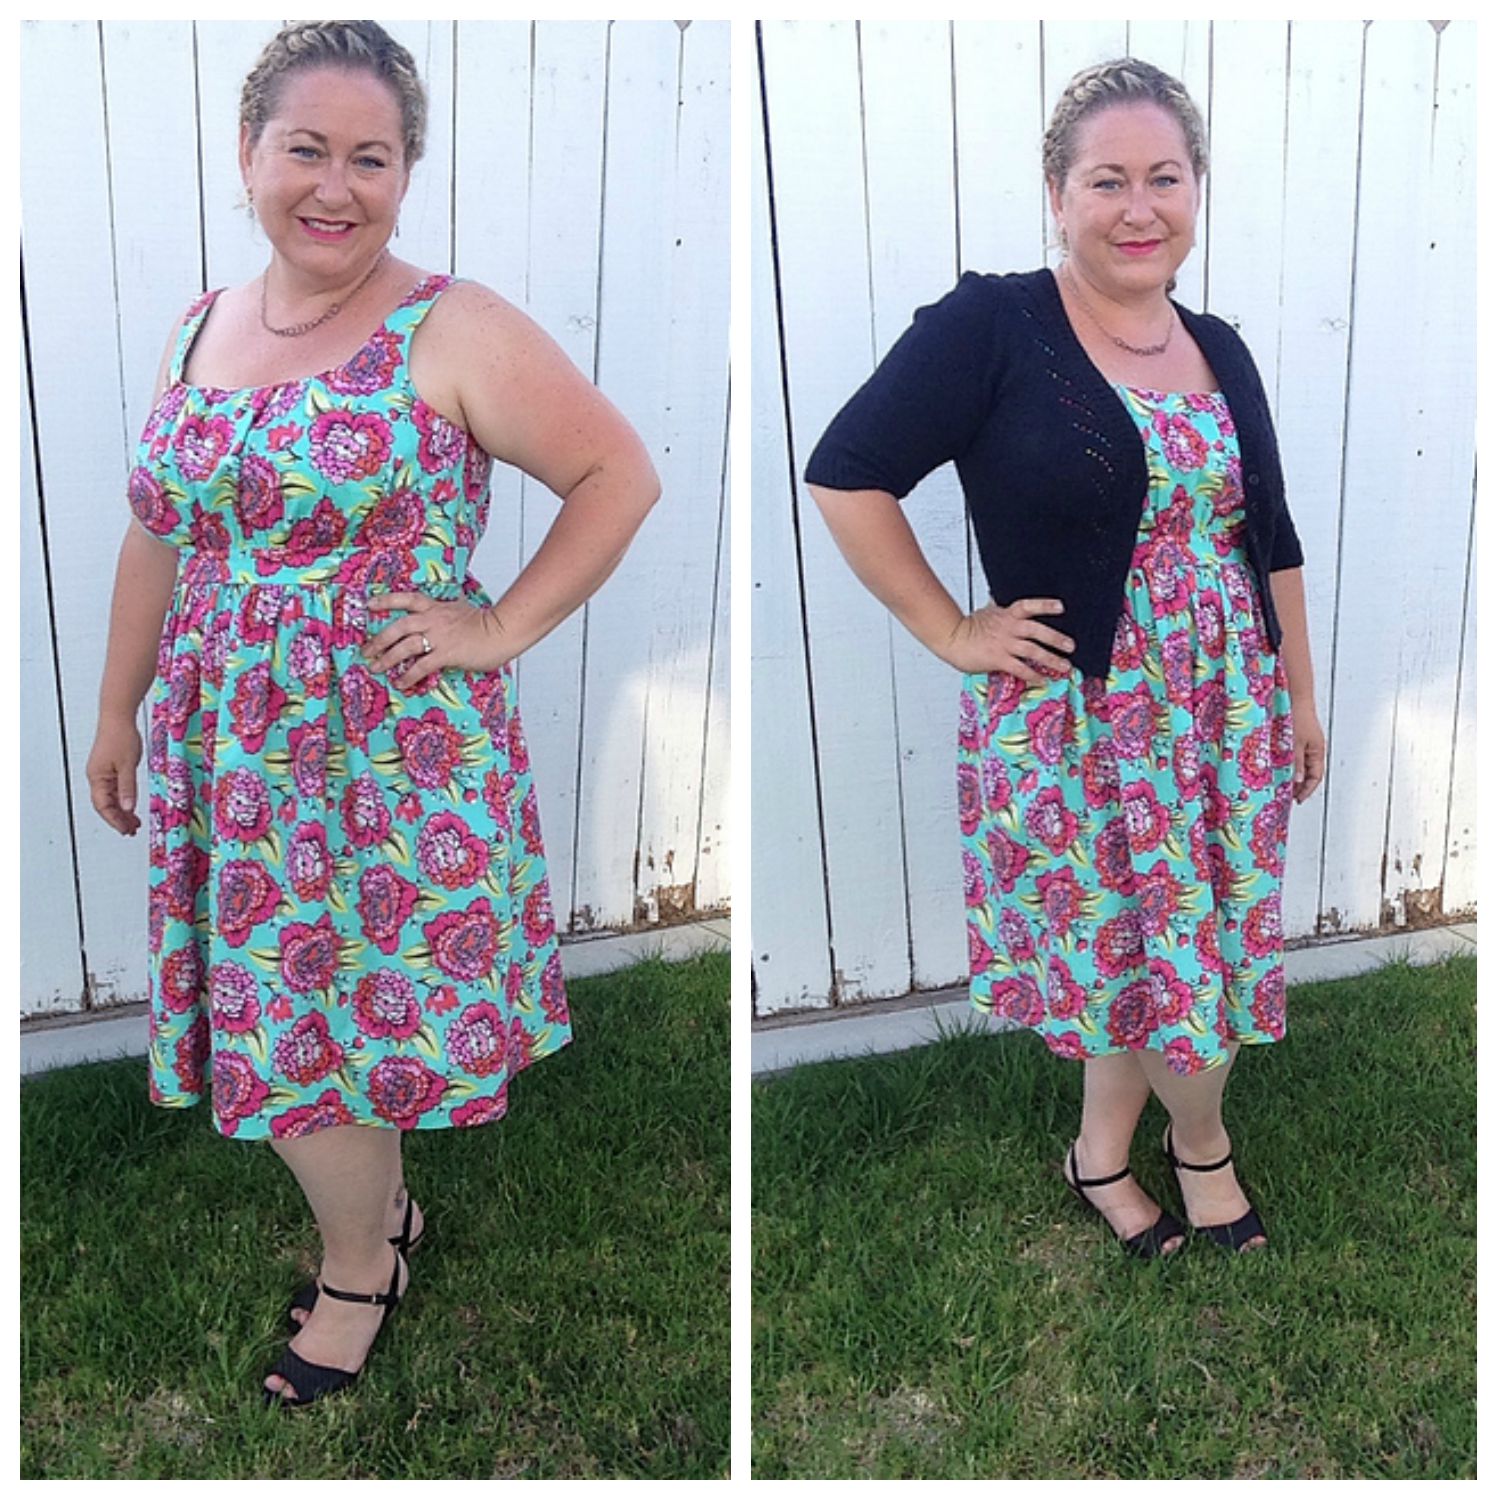
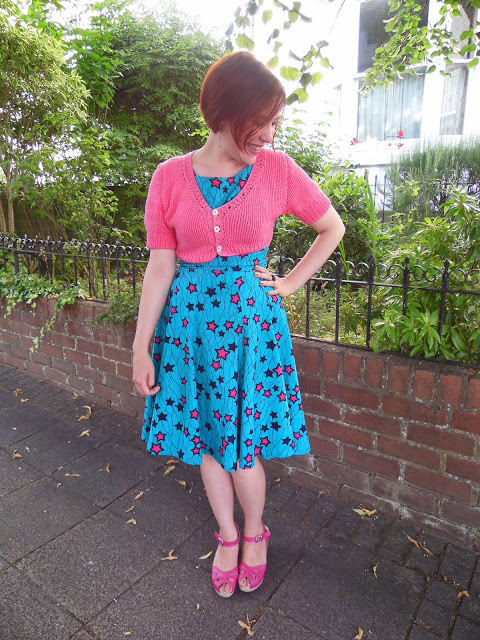
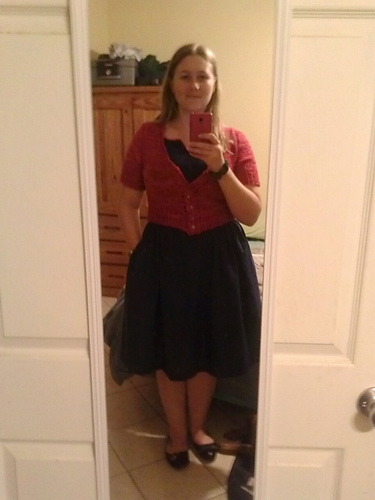
Dizzy Erica made a Lady Skater dress + Hetty Cardigan! Interestingly, I was just rediscovering my love for both these patterns the other day! I am happy to see that the Lady Skater in particular is still going strong and living up to it’s awesomeness 😀
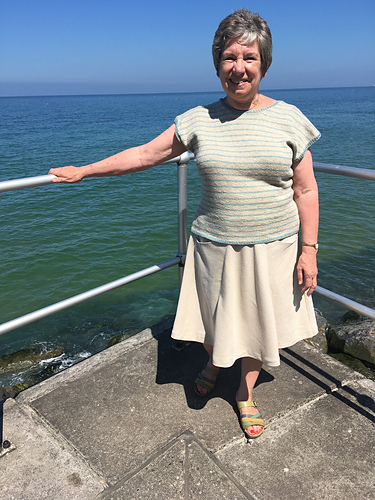
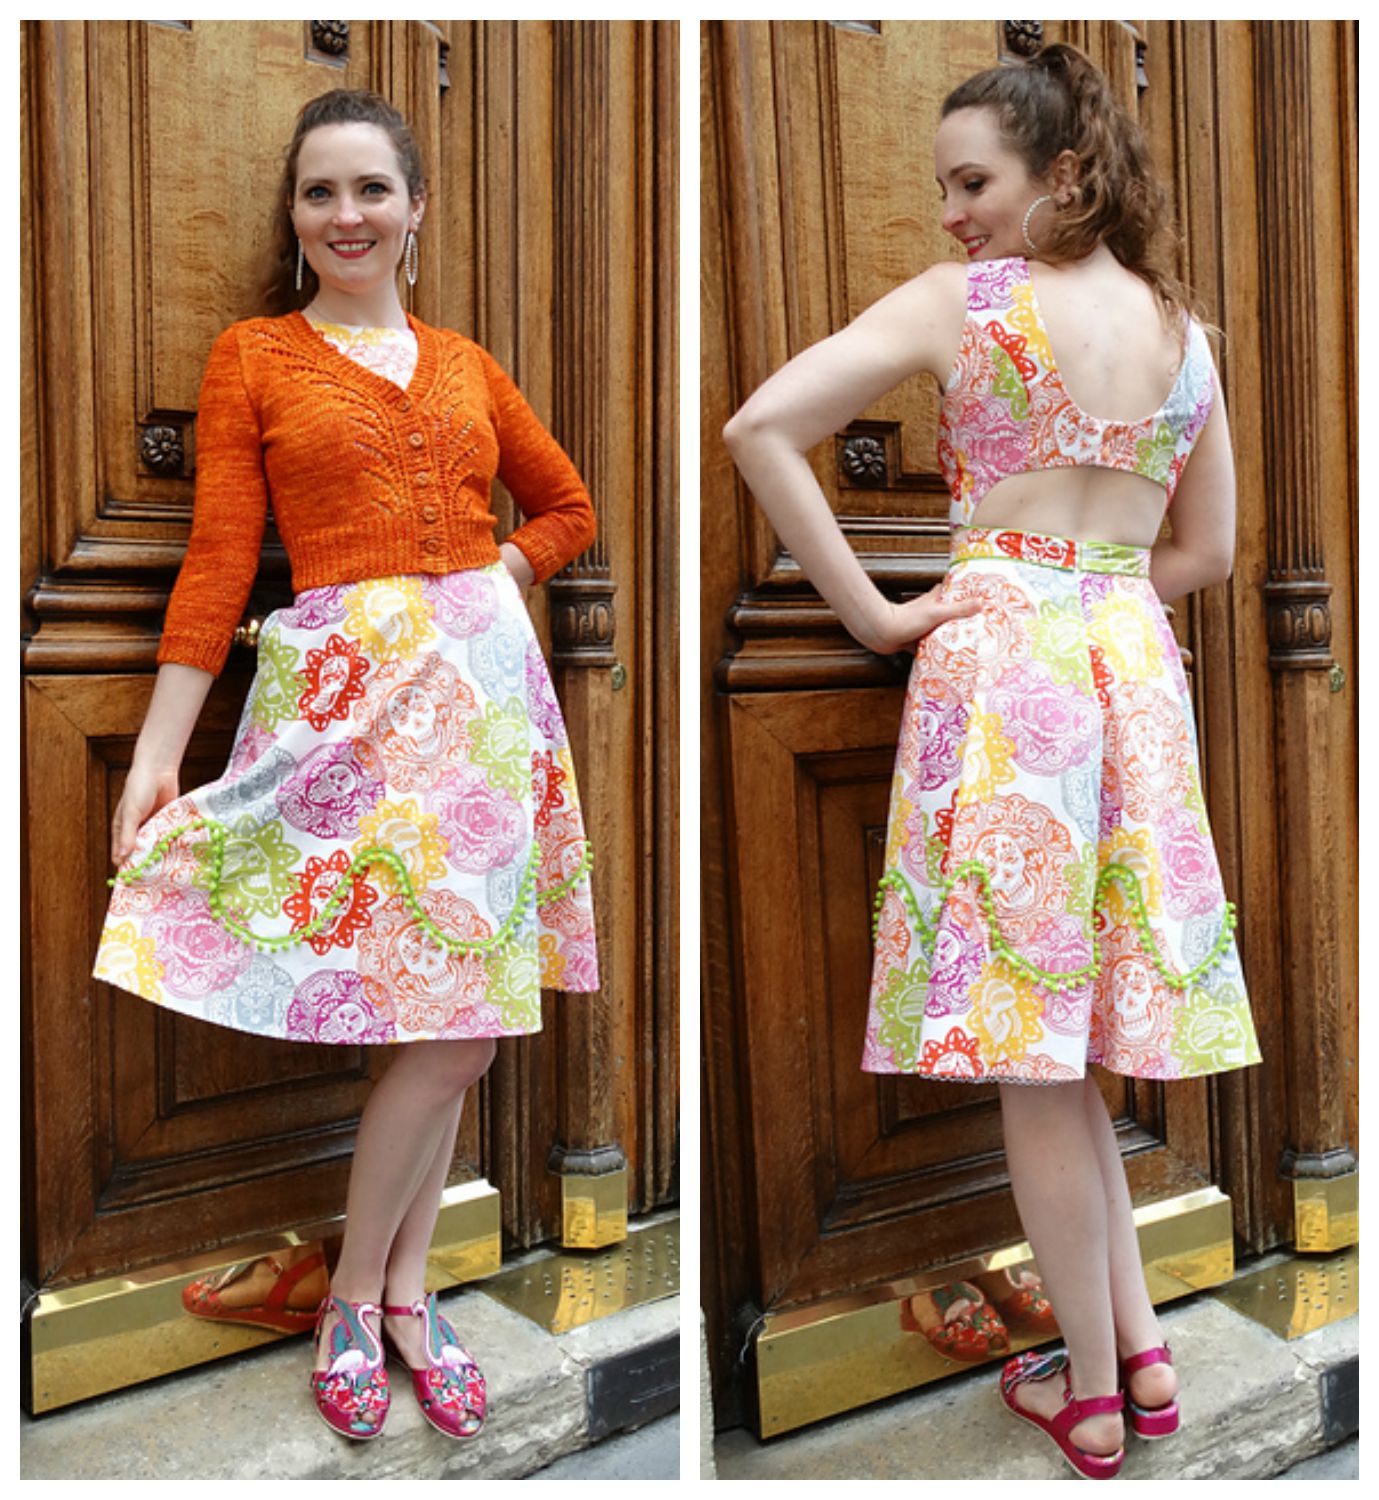
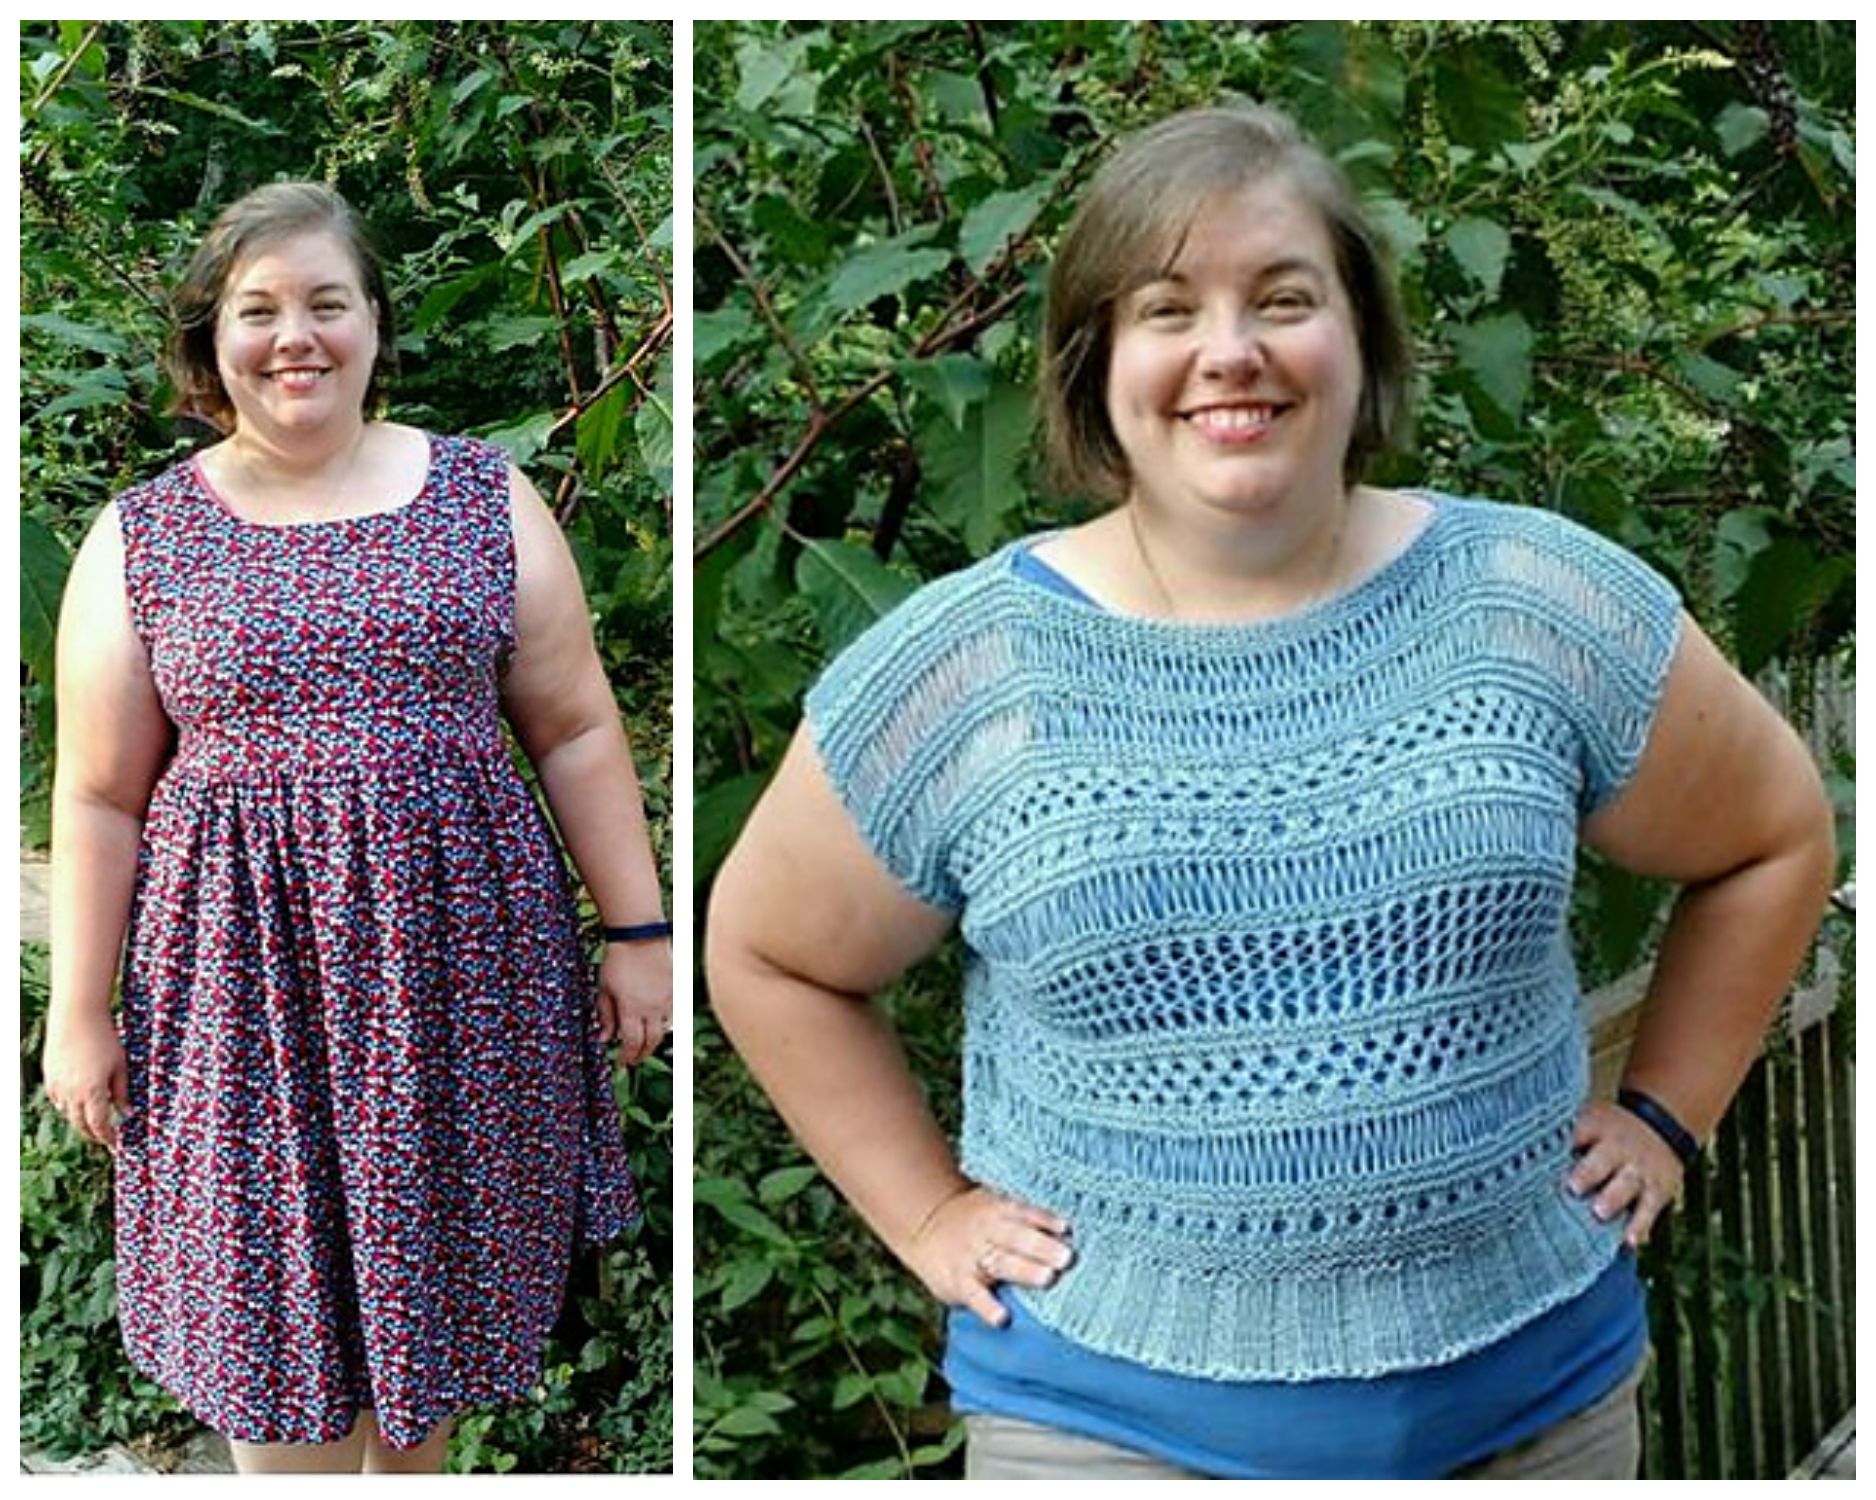
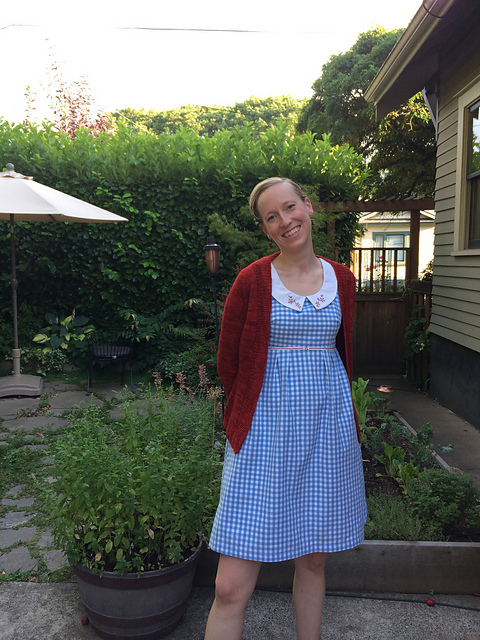
Wendy made a Waters tee + an A Frame skirt. I love the colors she choose – perfect summer outfit!


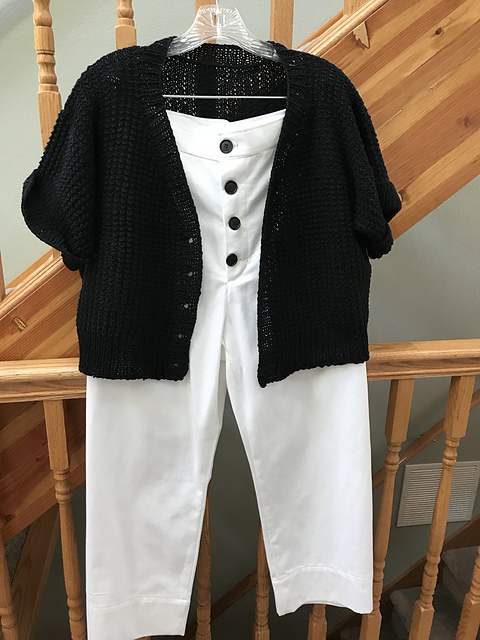
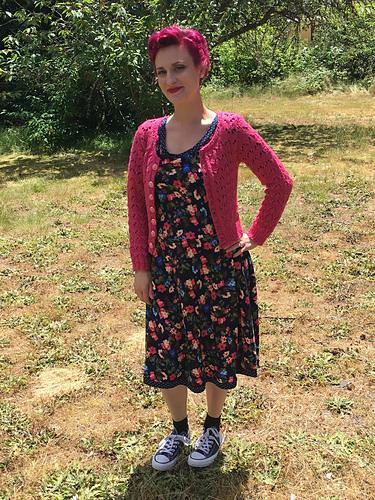
lsorenson7208 made the Rabbitbrush cardigan & Lander Pants! I am really digging this monochromatic look – I always find black and white to be so chic.

Big congratulations to our winners – and thank you to everyone who participated! You can see all the finished outfits in the OAL 2018 Finished Outfits thread on Ravelry. Also, a massive thank you to our sponsors The Confident Stitch & Indie Stitches for supplying prizes! And thank you, Andi Satterlund, for hosting this with me again!

*

You’ll notice that I didn’t share my OAL project – and it’s not in this post, either (surprise!). I did finish my Lander shorts and have worn them loads, but sadly my Waters tee is still on my needles as of this posting. Can’t even finish my own outfit in time for the OAL I am hosting, I am the worst! In all seriousness, I started to fall out of love with the project – I’m not happy with my stripe sequence, and honestly, I need to frog it and start over! Rather than force myself to finish something that I likely wouldn’t want to wear, it’s sitting in time-out until I can be sure that I need to either frog it or finish it. I don’t like keeping UFOs, but sometimes you need a breather to think about your options and next steps.

*

Ok so anyway, on to this post! Featuring a DIFFERENT pair of Lander pants, mwahahaha!

AMH Popover Tank

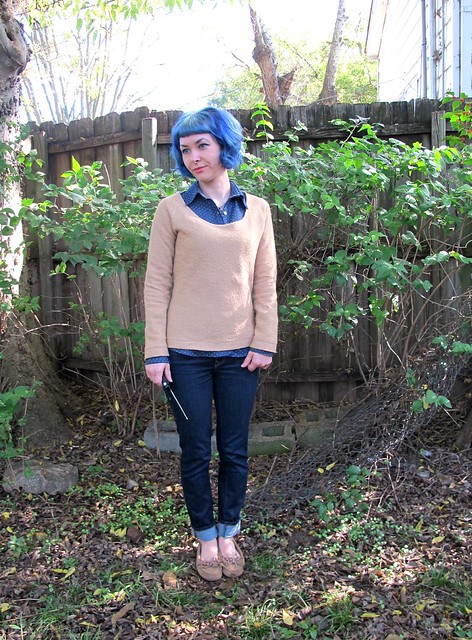
But first, I want to share my tank with you because it’s super cute!

AMH Popover Tank

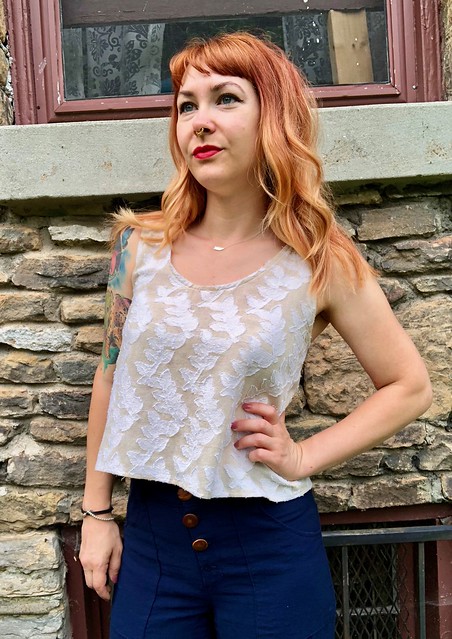
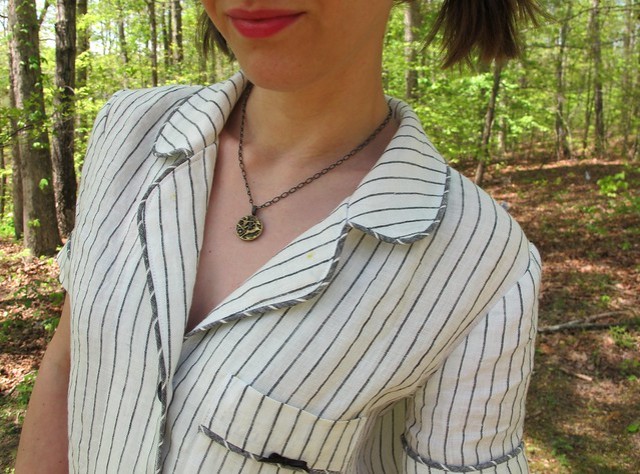
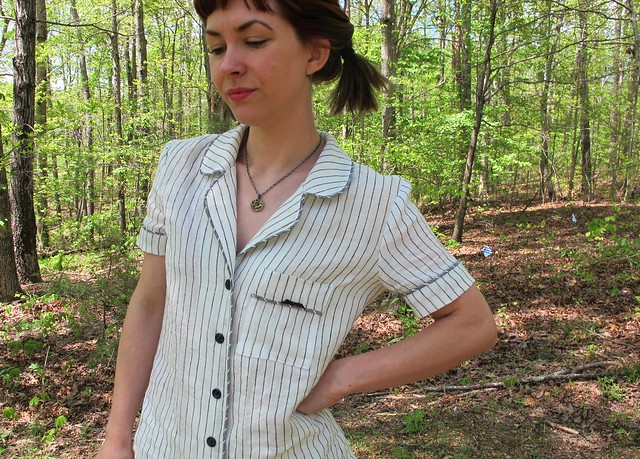
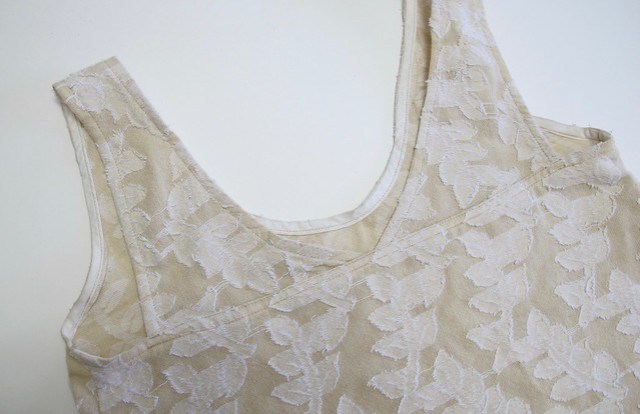
No lie – every single time I wear this top, I get people practically foaming at the mouth to ask what pattern is that! Here’s your answer – it’s the Anna Maria Horner Popover Tank! This is a pattern that Anna released to be used specifically for garment classes at Craft South. I’ve taught this class a LOT – it’s a great first project, easy to sew and looks super cute! And it can be sewn in 3 hours (YES, SERIOUSLY). But I’ve never made one for myself – just loads of samples. When Anna released it as a paper pattern and included a cropped version, I was ready to give it a try.

AMH Popover Tank

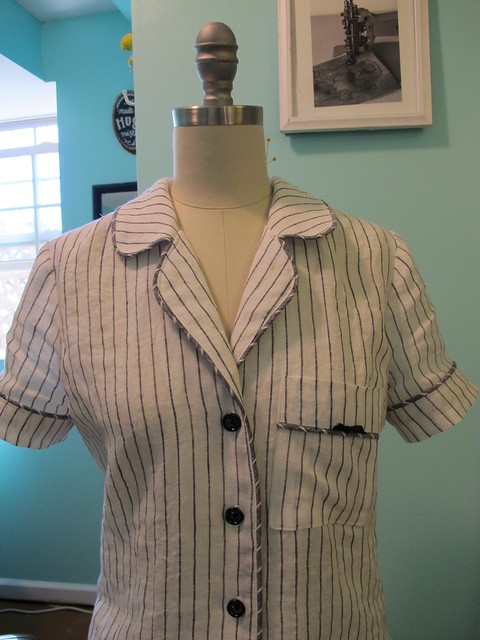
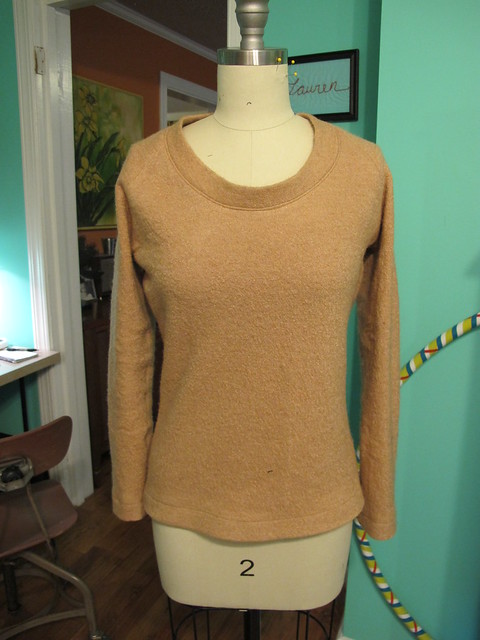
This is a super, super simple pattern. Two pattern pieces, then 1″ strips of knit fabric to be used as facings around the neck and arms. No darts, no closures, barely any pattern markings, and an easy fit. Students learn how to sew French seams, apply knit facings, and sew a 1/4″ rolled hem.

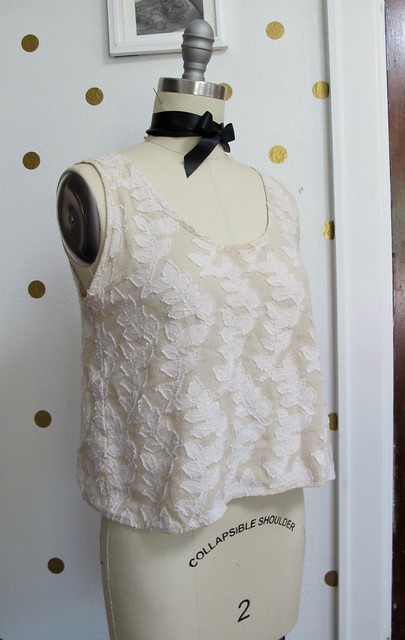
One tip I will give if you want to make this pattern is to check the finished measurements, and possibly consider sizing down. I find the recommended sizes to be a bit loose-fitting, especially around the arms, but you can go for it if that is your jam! I made the size XXS, although my measurements put me at the cusp of XS. I like the size of the armholes and the fit of the bust. My fabric is also lightweight with more give than your typical quilting cotton, so that helped.

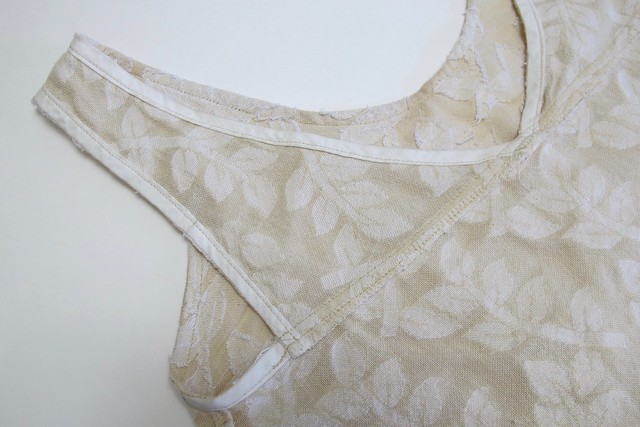
The only change I made was to swap out the knit facings for actual woven bias facings. I didn’t have any knit fabric that remotely matched my fabric, and I prefer the bias facings anyway. Knit facings are wonderful to keep the class at 3 hours, but when I’m sewing at home on my own time I do what I want! I used some beautiful lightweight cotton voile and applied the bias facings the same way I always do. No need to trim seam allowances, either – the knit strips are also sewn on a 1/4″.

AMH Popover Tank

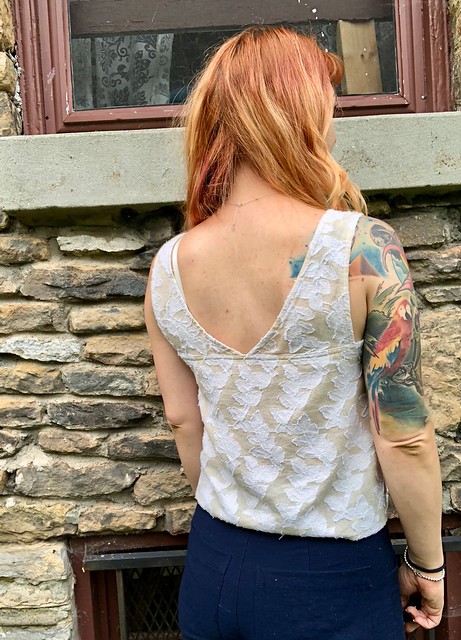
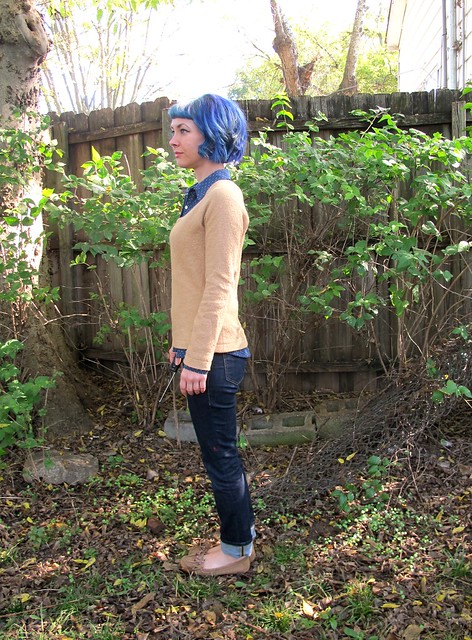
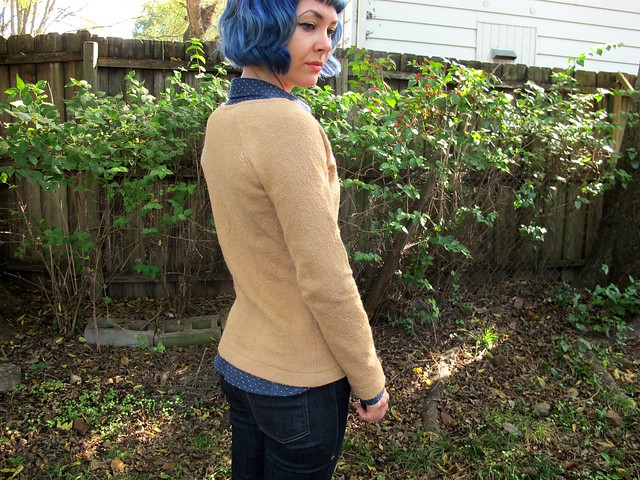
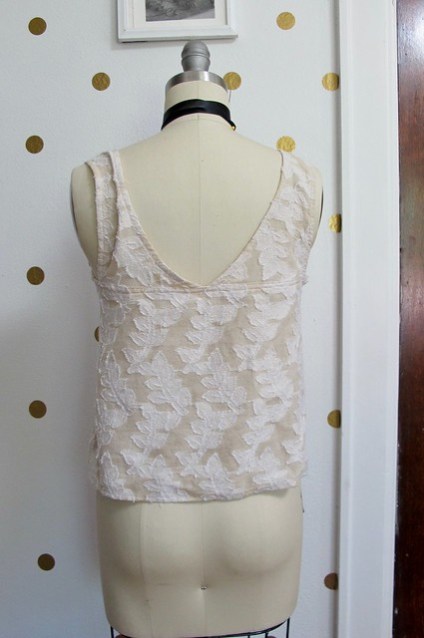
I love the back – the shoulders wrap around and make a v at the center back, which is then topstitched. I told you, this pattern is easy!

AMH Popover Tank

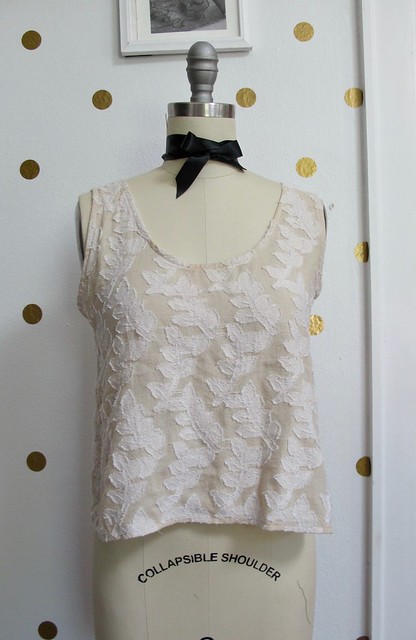
I should mention my fabric – it’s a beautiful lightweight cotton that I bought at Nagada while I was in Egypt! I only bought a yard – it was expensive, even by American standards – and waited a loooong time to find a good pattern to match it with. The raw applique reminds me of Alabama Chanin, and I love the soft neutrals.

Since the fabric has some texture that makes the thickness a bit uneven, I didn’t do the French side seams and instead just serged them. This is also why I used lightweight voile for my woven bias facings, instead of self-fabric.

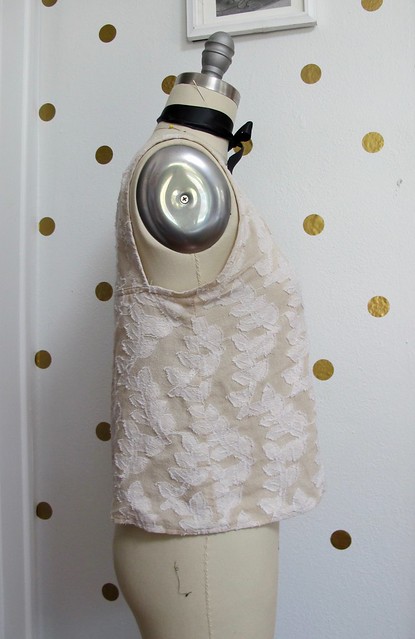
Just a head’s up – the cropped version is SHORT. Like, it will expose your belly button. I wanted to lengthen mine… but I forgot and just cut shit out. Oops. Soooo my hem is the tiniest thing ever, serged and rolled under as little as possible. It’s still short, but I like it with high-waisted pants. FYI for your Popover Project, tho.

Here, have some more photos. I don’t know why I took so many.

AMH Popover Tank

AMH Popover Tank

AMH Popover Tank

AMH Popover Tank

AMH Popover Tank

AMH Popover Tank

Whew.

BUT WAIT, THERE’S MORE!

True Bias Lander pants

True Bias Lander pants

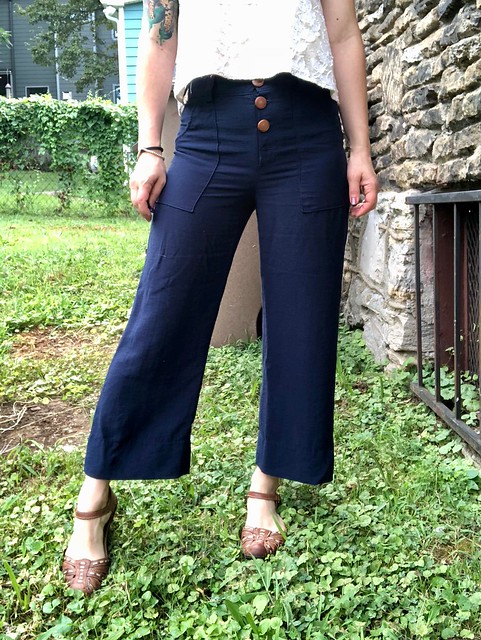
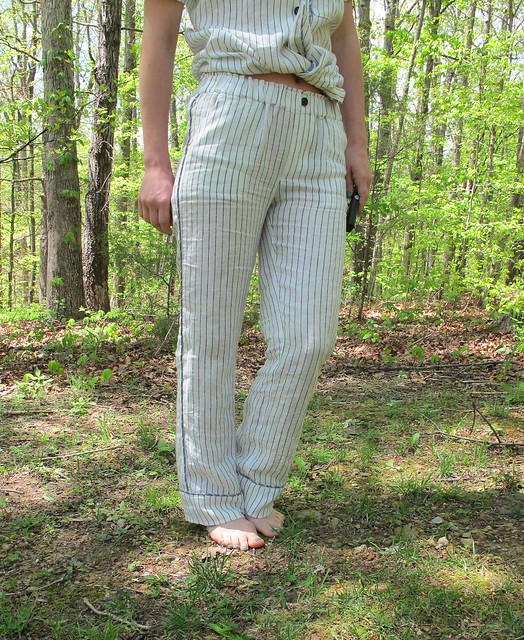
My second pair of Lander pants! Sorry these photos are basically useless, navy is super hard to photograph.

I didn’t make too many changes on these vs my red pair… according to my notes (that I now take in a little notebook whenever I sew, specifically for this reason haha), I made a size 2 but used the size 4 at the side seams. I made the pockets slightly smaller, although I still think they are a little big. I also shortened the legs by 1″ at the shorten line, and interfaced the fly shield. I’m sure I had to take a little out of the center back, but I don’t remember how much, sorry!

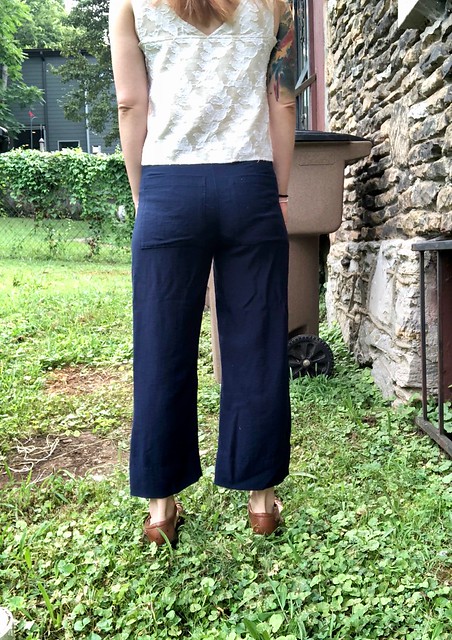
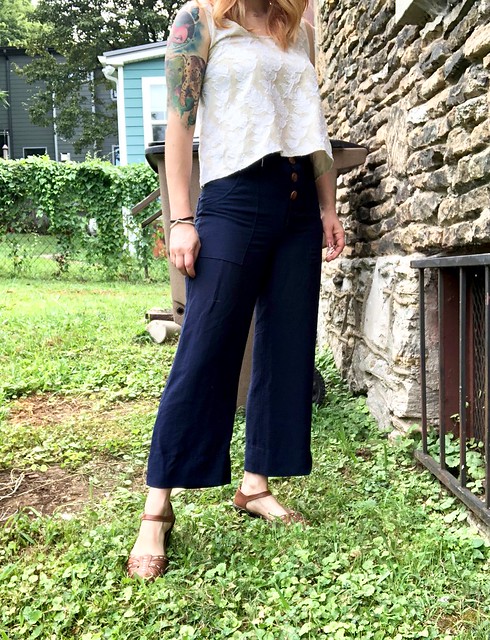
I definitely like these even more than my red ones. I think the proportions and length are a little more flattering, and the fabric is super swishy so they are fun to wear!

True Bias Lander pants

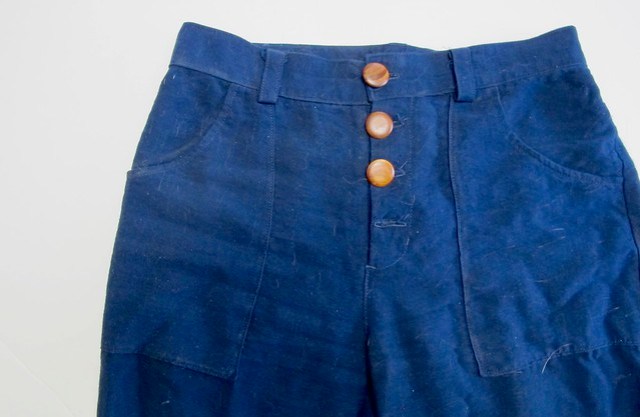
The fabric is a navy tencel twill that I bought at Mulberry Silks when I was in North Carolina earlier this year! It’s a beautiful weight with a soft drape, making my ideal pants! I found this fabric easier to work with than silk, but it was still a little wiggly… like using a heavier weight rayon challis.

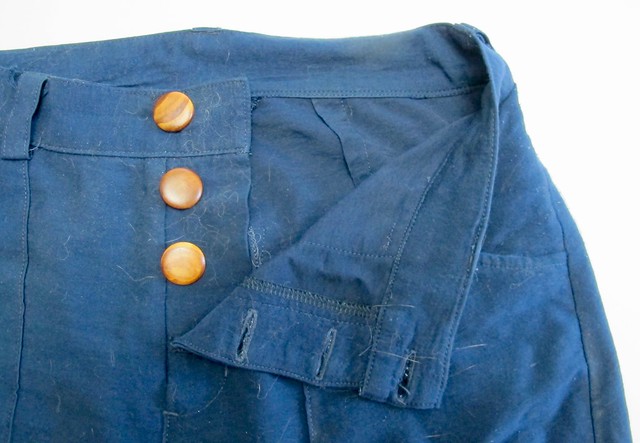
I lined the pockets with silk crepe (from my stash), and the buttons are also from Mulberry Silks! Look closely, you can see that I already lost one 😦 This is what I get for wearing my shit before I photograph it! The button stayed intact for months, and I literally lost it on a flight home (I think) the day before I took these photos. I’m sad because I really loved these buttons, but I’m also mad at myself for not buying an extra. As for how I lost it… well, they are wooden shank buttons, and that one button had a tiny crack in the shank that caused it to fly off. I found it the first time, repaired the crack (or so I thought) and decided to just sew the bottom button hole shut so there would be less stress on the button. It worked for a while, but not anymore! I will replace them when I find a suitable button that fits the holes (::sob::), but in the meantime… I’m just gonna wear them with 3 buttons. Who the fuck cares? Did you see that missing button in my photos above? Are you looking now? ZOOM IN, I DARE YOU.

True Bias Lander pants

True Bias Lander pants

Anyway, big thumbs up for these pants! I especially love them for traveling – they are my summer flying pants. I always get cold on planes and in airports, but I hate wearing skinny jeans and then sweating to death when I step in 90 degree heat once I reach my destination. These are perfect because they keep my legs covered, but they are breezy in the heat. The color goes with everything, and the high waist looks great with a cropped something or with a loose tshirt tucked in!

True Bias Lander pants

I feel like this post has gotten out of hand long, so I’m going to stop now. Have a great weekend, everyone!

In Progress: Silk Polka Dot Boylston Bra

10 May

sewing with spiegel boylston bra

Hey everyone! I’m back with another bra post… again! This time, I’m trying something a little different though – I have made this bra *entirely* on my Spiegel 60609 machine. If you’ve followed my past bra posts, you will know how much I love using my old standby Bernina 350 for assembling lingerie, especially since the variety of feet that I have make things super easy. However, I was really curious to see how the Spiegel 60609 held up when it involves fussy lingerie sewing, so I used it for this project. And now I’m going to report my findings to you!

A few things I noticed that I think bear mentioning:
– I’m not a huge fan of the way the seam allowances are marked on the throat plate of this machine, as it makes it a little difficult to get a precise 1/4″ seam allowance. However, this is really easily solved by laying a piece of tape or even a Post-it note where your 1/4″ line should be. This is what I did, and it worked fine.
– The feed dogs (what move under your needle to push the fabric along) on this machine are AMAZING. Seriously, I didn’t have to pull my thread tails at all when starting or stopping a seam. The machine just pushed everything through without any snags or chewed up fabric – even with using silk crepe and teensy 1/4″ seam allowances. Color me impressed!
– The one downside I see to this machine is that you can’t move the needle in either direction – which is what I typically do to get accurate edgestitching (on my Bernina, I use the stitch-in-the-ditch foot and move the needle all the way to one side, it gives me a perfect 1/8″ without having to even really think about it). With that being said, I used the clear foot that comes with the Spiegel 60609, and found that the opening off the center of the foot is exactly 1/8″ from the needle. As long as you line this opening with the seam that you are edgestitching, you will get an accurate stitch. It does mean that you need to pay attention and maybe sew a little slower – but the 60609 also has a speed dial to slow things down, so no excuses now! 🙂
– There are a BUNCH of zigzag stitches on this machine!! For elastic insertion (which I’ll go over next week in part 2), I used stitch #226. I found the width to be perfect for what I needed.

The pattern I am using for this bra is the Boylston Bra from Orange Lingerie. This beautiful balconette pattern works for both foam cups and fabric cups, and features self-fabric straps and a really nice rounded shape. I’ve made it a few times in the past, and it’s a favorite of mine 🙂 I am making the size 30D.

For fabric, I am using silk crepe from Mood Fabrics (look familiar? I used it to make a top! Yay for lingerie using tiny scraps, ha!) for the outer, black power mesh from Tailor Made Shop for the back band, sheer cup lining from Bra Maker’s Supply, and black foam bra padding also from Bra Maker’s Supply. The elastics and notions are from various points in the NYC Garment District – I just have a giant stash that I pull from as I need stuff 🙂

I hope you like watching step by step progress shots, because that’s what you’re getting this week! 🙂

The pattern has you start by assembling the cups – there are 3 pieces that are sewn together with a 1/4″ seam allowance. Don’t know why, but I don’t have a picture of this step. You’ll just have to trust me haha 🙂 Make sure you backstitch at each end, as it’s really easy for stuff to come unraveled and make your (lingerie-makin’)life hellish!

Making a Boylston Bra

For the foam cups, I cut all the same pieces and remove the 1/4″ seam allowances (more info on this here!). Then you butt the edges up against each other and attach them – in the same order as you sew the fabric cups – using a zigzag stitch.

Making a Boylston Bra

Here is what the pieces look like when they’re attached. Pardon my yellow marking – those are the pattern notch markings (I use wax instead of snipping, since the seam allowances are so tiny).

Making a Boylston Bra

Topstitching the pieces as instructed is also especially important, since a lot of fabrics used in lingerie don’t press very well. Here is what I was talking about in terms of using the foot as a topstitching guide – if you line up the open side with the edge of your fabric, as shown here, the needle will automatically hit exactly 1/8″ from the edge.

Making a Boylston Bra

The fabric straps are folded in half and then sewn to the top of the cups, as shown, with the folded edge facing the center of the bra (the raw edges will be finished with elastic eventually).

Making a Boylston Bra

Next, the foam cup is placed against the right side of the fabric cup, and pinned into place along the top edge. I also like to run that edge of the foam under the serger (with a 3 thread overlock) just to help flatten things a bit more, but that’s an optional step. Sew this seam at the normal 1/4″.

Making a Boylston Bra

After sewing, you flip the foam to the inside and pull the fabric cup taunt to the edges, and pin everything down. This might require a bit of finessing with the fabric, which is normal! It’s also normal to have some excess fabric that needs to be trimmed off. I love how this finishes the top edge of the cup and also catches the strap! Once everything is as smooth as you can get it, go ahead and baste around the raw edges to secure everything, and then trim off any excess fabric so it’s even with the edge of the foam.

Making a Boylston Bra

Assembling the bridge, cradle, and band are similar to assembling the cups – use 1/4″ seam allowances and follow the topstitching guide in the pattern. I chose to line my bridge and cradle with sheer cup lining, because it gives some extra stability to the silk crepe. Also, you can use the lining to encase the raw edges so the inside is nice and clean! You just want to lay your pieces so the fabric is on the right side, and the cup lining is on the wrong side – with the seam you’re attaching sandwiched in the middle. After sewing the seam, the outer fabric and cup lining flip up to cover the raw edges.


Making a Boylston Bra

After the cups and bridge/frame/band are assembled, then you put them together (and THEN it really starts to look like a bra!). This part can seem a little fiddly, but it’s doable as long as you go slow and be mindful of what you’re sewing (again, slowing down the speed on the machine helps a lot). I find it helpful to use less pins – since you’re sewing a convex curve to a concave curve, you want to be able to stretch and pull the curves as you approach them (and pinning too much can limit that, at least in my experience). I pin the beginning and end of the seam, and the notch points marked on the pattern. That’s it! Another tip is always start at the center front – it’s very important to get those edges lined up perfectly.

Making a Boylston Bra

Once everything is attached and I’m happy with how it looks, I trim down the foam seam allowance to reduce bulk. Time to add the underwire channeling! 😀 😀 😀

Making a Boylston Bra

I find this step a little weird to explain and even harder to photograph, so here’s a picture of the instructions. The channeling gets attached to ONLY the cups of the bra, right on the seam allowance. Ideally, I like to be right along the seamline that I just sewed, but close enough is good enough 🙂

Making a Boylston Bra

Again, the little notch in the clear foot that comes with the 60609 is perfect for lining up a 1/8″ seam allowance when attaching the casing. Sew all the way around until you get to about 1/2″-3/4″ away from the edge at the underarm, and leave that part unsewn (this will make it easier to attach the underarm elastic).

Making a Boylston Bra

Here’s the casing after it’s been attached! For now, only one side is sewn down – the other side will be sewn once some of the elastics have been added.

Making a Boylston Bra

I think that’s enough bra talk for today! 🙂 Next week, I’ll go over the steps for attaching the elastic and finishing the bra – aka THE FUN PART – and showing my completed Boylston! As always, let me know if you have any questions about this part of the process! 🙂

One more thing! We have a giveaway winner from last week! After some careful contemplation (aka Random Number Generator, hey-o!), our winner issssss….

winner

Yay congratulations, Rosemary!! I can’t wait to see what you make with your voucher! 😀

Thanks to everyone who entered the giveaway – and big thanks Contrado for your awesomely generous prize donation!

I’ll be back next week to finish that bra! Stay tuned!

Completed: Ginger Jeans + Silk Cami

15 Feb

Well, it’s finally too cold to take photos outdoors.

Ginger Jeans + Silk Tank

Hello, wall!

Ginger Jeans + Silk Tank

Anyway, I made another pair of Ginger jeans – and finally used up my second piece of the Cone Mills denim I’ve been hoarding since I bought it last year (FYI, in my last post it was brought to my attention that Threadbare Fabrics also sells Cone Mills denim by the yard. I haven’t ordered from them yet – but it made it much easier to cut into my precious stash knowing that I could get more of the stuff. Yay!). This is the lighter weight of the two denims I received in my kit; I think it’s a 10oz. It’s thinner and a little stretchier than what I used in my previous pair, and I like it a lot more. Actually, it’s almost identical to the denim I used in my very first pair of Gingers – same color and everything. I realize I essentially made two pairs of the same pants, but that first pair is starting to show it’s age (saying that I wear them a LOT is a huge understatement), so I am just thinking I’m ahead of the curve for once.

Ginger Jeans + Silk Tank

I was originally saving this denim to make a pair of flares – either using the Ginger jeans flare expansion add-on (um, btw, how genius is that idea?!) or the new Birkin flares that everyone is obsessing over, but in the end I just decided to remake my ol’ TNT (especially since the fabric on the first pair is a bit subpar quality, and one of these days I might have an unfortunate butt-rip happen. Hopefully not in public. I am wearing cute underwear at all times just in case, though). Like I said, I can reorder more of the Cone Mills, so perhaps there will be flares in my future. Just not this pair. No ragrets.

Ginger Jeans + Silk Tank

I wanted to improve on my last pair – they’re ok, but the bunching at the knee really bothered me way too much. I tried to research what the issue was – some people suggested that I might have knock-knees which is causing the bunching, but I’m pretty sure that’s not the case (I definitely don’t look like I have knock-knees, anyway). One of the comments in my last jeans post suggested checking out Cation Designs as she has a few posts on pants fitting. I usually refer to my pants-fitting bible, Pants for Real People, as it has never steered me wrong. However, this particular fit issue wasn’t covered in the book (I think it’s a product of tight/stretchy jeans, which they certainly don’t show any of in the book hahaha), so it was good to have a back-up resource! And this post in particular is FANTASTIC – plus, I think I found my solution! Yay! The #10 Hyperextended Calf alteration sounded like what I was dealing with – the calves of my tight pants are always REALLY tight, which then causes them to ride up and bunch at the knee (I have muscular calves, so this makes sense!). I did this alteration to my jeans pattern, adding 1 1/8″ to the calf (this was just a wild guess; I wasn’t about to slash up a pair of pants to figure out the exact amount I needed). It worked pretty well, but I think I could stand to add even a little more width. How they are now, though, is pretty magical -they only bunch a little, and I think that’s just from moving around. I don’t have giant folds of denim hanging around my knee. It is AWESOME. However, I am not a huge fan of how big it makes the ankle – I can deal with this pair, but on my next pair I would like to figure out a way to keep the tightess at the ankle while still allowing some room in the calf. Anyone have suggestions? Just tapering the ankle at the side and inseams doesn’t work, FYI. haha.

Ginger Jeans + Silk Tank

Other than that one alteration, not a lot of changes to this pair. I added the length back and then removed about 2.5″ – I wanted them to be long enough to pool a little at the ankle. I used my original Ginger pattern – the one before it was updated with a pocket stay – and sewed the size 2 instead of the 4. Topstitching and all that is pretty simple – one color of jeans topstitching thread. I did add an X to one leg in lieu of a bartack. Kind of a riff on the + on my I+W jeans haha. What, they’re made of the same denim!

Silk Tank

This silk cami is something I made ages ago and completely forgot to photograph for my blog! It’s a Ruby Slip that I modified to include gathers at the bust and silk bias finishing on the edges and straps, and then shortened to cami length. I made this slip a couple of years ago out of some really amazing 4ply silk, and I love how it looks so it was only natural to use it for a cami pattern.

The silk I used is a really wonderful new silk from Organic Cotton Plus, called Peace Silk. I really love OCP and I’ve been happy with all the fabrics I’ve received from them, and this silk is pretty fantastic too. It’s a wonderful lightweight, organic silk, with a feel similar to a thicker china silk or a less crepey crepe de chine. Really easy to work with, and feels amaaaazing after a wash in the machine. It’s called Peace Silk because it’s produced in a way that does not kill the silk worm and instead allows it to emerge from the cocoon first. While I definitely have no problem eating meat or wearing animal fibers, I thought that was a pretty neat solution! Plus, the name just makes me happy 🙂

That’s about all I have left to talk about, so here’s a bunch of pictures of my butt:

Ginger Jeans

Ginger Jeans

Ginger Jeans

Ginger Jeans

And some flat jeans shots:

Ginger Jeans

Ginger Jeans

Ginger Jeans

Ginger Jeans

Ginger Jeans

Everything was constructed on my Pfaff 7570, and topstitching was done on my Bernina 350PE. I used regular black poly thread for piecing, and Gutterman jeans topstitching thread for the topstitching. The aqua serging thread is just a fun color that matched my pocketing (which I got from the free fabric pile at A Gathering of Stitches because GOD it’s beautiful!) and my zipper (from the Garment District!). I wanted to add rivets, but they need to be trimmed down and I apparently don’t own wire cutters anymore, womp womp.

Overall: A+ jeans, would sew again (and I will – I have enough Cone Mills left to make a couple pairs of jorts! HA HA HA IT NEVER ENDS).

In closing, two things:

One, here is my Calvin Klein ~modeling~ shot. Can’t you see people just banging down my door to be a jeans model? Gah.

Ginger Jeans + Silk Tank

Two, the Spiegel 60609 winner! Yay! First of all, I cannot BELIEVE how many entries that giveaway got – over 1,100! That’s definitely the biggest one I’ve ever hosted on this blog (and I guess y’all agree with me that one should never say no to a free sewing machine, amirite). Thank you for blowing up my email last week and making me feel super duper popular haha. I enjoyed reading everyone’s comments – and yes, I read every single one of them! – but there can only be one winner:

winner1 winner2

Congratulations, thefilling!! I want to also mention that this comment filled me with delight – although, what is exactly is a snapback hat? (Can I see a picture? Can you tell me more about this cheeseburger print? We have a lot to discuss, dude) We will be in touch to get your new 60609 out to you ASAP 😀 😀 😀 Happy belated Valentine’s Day!

If you’re still trying to holler at the 60609, watch this space – I have some upcoming projects and tutorials that use the machine so you can see it in ~action~. And if you don’t care about the 60609, well, I hope you at least find the content interesting 🙂

Have a great day, everyone!

Completed: The American Flannel Archer

28 Dec

Another Archer for my winter wardrobe! Yay!

Flannel Archer shirt

I actually finished this shirt nearly 2 months ago, but here I am just now getting around to posting it. I’d apologize for the delay, but honestly, I’m not sorry. It is what it is. On the flip side, I’ve been able to wear it plenty since completion, so I can actually comment on the fit from the perspective of wearing it all day. On the other hand, I’ve already made a bunch of Archers so it’s not like this is some kind of breaking news in my personal pattern collection.

Flannel Archer shirt

Flannel Archer shirt

Since I’ve made this pattern multiple times (see: one two three… well damn, there’s another one somewhere but I can’t find it oh well), I’ll spare you the nitty gritty. Like my previous versions, I cut a size 0, sewed the side seams at 5/8″ and flat-felled all the seams for a nice clean finish on the inside. The buttons are just standard shirting buttons that I had in my stash, and I matched the plaid everywhere except on the back yoke and the pockets, which are cut on the bias. Oh, and I used the pocket piece from my Negroni pattern. It looks like it belongs on a western shirt, and I like that.

Flannel Archer shirt

I really love this fabric, but this particular shirt almost didn’t happen. See, back when I bought flannel from fabric.com for my Carolyn Pajamas, I added a few yards of this Robert Kaufman Mammoth Plaid flannel to my cart so I’d qualify for free shipping (because I just love saving money when it means I have to spend more money first :P). A few days after I placed the order, I received an email from Fabric.com saying that they didn’t have the 3 yards I requested, but they did have 3 cuts (totaling around 1.5-2 yards) of a smaller amount if I wanted that. I didn’t think I’d be able to cut a shirt – let alone plaid-match – out of that small of an amount, so I picked a different plaid from the site and asked them to just change my order. When I received my order processing notification, it said I was only getting 1 yard of the new flannel (not 3, like I’d asked for in the email). I had to call the company and sort things out, and while all this was happening – they completely sold out of my back-up flannel! Argh!! Obviously, that shit wasn’t in the cards for me. I told them to cancel the second cut of flannel and just send me the original piece that I needed to finish my pajamas (which they thankfully still had! Pretty sure I bought the last of it). I was refunded for the 3 yards that were out of stock and I got free shipping too. Cool!

And then they ended up giving me the off-cuts anyway, for free. Just threw them in the package where I was surprised (but also happy because, YAY FREE FABRIC) to find them hanging out with my actual order. That’s cool, I ain’t complaining.

Flannel Archer shirt

Flannel Archer shirt

Since I had the fabric, I decided to try my original plan and make that Archer. Like I said, had 3 cuts – one was a full yard, one was a half yard, and the last was a bit less than half a yard (I’m sorry I don’t remember the exact amounts, but it was a while ago and my order history on the site doesn’t reflect the freeb). It took some ninja cutting skills to cut everything so that the plaid lines matched, but I did manage for the most part. Cutting everything on the single layer helped immensely. That being said, I was still a tiny bit short on one of the fronts, so I ended up having to piece it and there is an extra seam. It’s only a little noticeable, but, again, free flannel shirt. Not complaining.

Flannel Archer shirt

You can see the piecing here, sort of. The top seam that I’m pointing to is the actual shoulder seam. The bottom seam is the result of piecing. By carefully matching the plaids and flat-felling the seam, I was able to get it to blend pretty well.

Flannel Archer shirt

Another minor complaint is that I wasn’t able to properly match the sleeves. The lines of the plaid are uninterrupted, which is good, but the sleeves themselves are not sleeve twins. Again, fabric restrictions. Again, free flannel shirt. Not complaining.

Flannel Archer shirt

Here’s a crappy picture of the inside, in all it’s flat-felled glory. Yay!

Flannel Archer shirt

This flannel shirt is a bit different than my other ones, since the fabric is SO thick. It almost feels like I’m wearing a light jacket, as opposed to a shirt. It’s pretty awesome and super snuggly. The fit is a little more boxy, too, since this fabric doesn’t drape as well as a shirting plaid flannel. I’m pretty ok with that, though! It works well with leggings (shown here with navy Ooh La Leggings which btw FAVORITE comfy lounge legging pattern, hands down!), but also looks good with jeans. I almost wish I’d put in pearl snaps instead of regular buttons, because I really like Hulking out of my clothes, but I think the fabric is just too thick for pearl snaps. But at least I resemble an American Flag! Can’t be mad about that, not one bit.

Oh, right, and I have some winners from the Shutters & Shuttles giveaway a couple of weeks ago! First, thanks for all your awesome comments on that post – Allison and I both really enjoyed reading through them and see what you’d do with the fabric 😀 (even if it just makes me want more of that fabric now so I can steal your ideas). Second, the plural “winners” is not a typo – there are two of you! A little belated Christmas bonus and all that 🙂 Sooo congratulations are in order to both shesewsswell and Samantha! I hope you ladies love this fabulous fabric, and I cannot WAIT to see what you make up with it! ♥

OAL2015: The Winners!

3 Aug

Hey everyone! One more OAL post for this year 🙂

OAL_Banner

This was my second year co-hosting the OAL with Andi Satterlund, and I think it’s safe to say that we both had a most excellent time! There was a great turnout of participants (61 outfits in the official Ravelry thread!) and I really enjoyed following along with everyone’s progress and lurking all those beautiful finished outfits! Thanks so much to everyone who joined in – whether you made a whole outfit, just sewed or knit one piece, or watched and cheered along from the sidelines. Y’all are the best! ♥

While making an outfit is a pretty sweet deal in itself, Andi & I wanted to draw out the fun even more by offering prizes to 4 random winners who posted completed outfits in the thread. This year, we doubled up and have two sponsors who have generously donated prizes, so I’d like to take a minute and acknowledge them! The first sponsor is Indie Stitches, who you might remember also donated prizes last year. Based in Australia, Indie Stitches sells both paper patterns and downloads, and offers selections from a huge plethora of indie designers, all of which are super good! Our other sponsor is The McCall Pattern Company, who owns and manages 3 of the famous Big 4 pattern companies (McCall’s, Vogue and Butterick, as well as Kwik Sew). I absolutely adore the McCall Pattern Company, even when I’m poking fun at them (and adore them even more for being basically the best sports ever about it!), so I’m pretty thrilled to have them on as a sponsor for OAL2015!

Both Indie Stitches and The McCall Pattern Company have offered to donate one pattern to each of the 4 winners. The winners will also get two patterns of their choosing from the Untangling Knots shop. So you will get to keep on making outfits! Yay!

Now for the winners! These were pulled from the official Ravelry thread and drawn by random number generator.

kari1276
Kari // Vianne cardigan + Carolina Mae dress

Can you believe that this is Kari’s second sewing project?? That dress fits beautifully and I just love the fabric! Also loving the idea of a black Vianne – that’s definitely a sweater you can wear with anything 🙂

feminizzle
Ann Marie // Vianne cardigan + self-drafted dress

I love the colors in Ann Marie’s outfit! That orange Vianne is especially beautiful with all the subtle color gradation. The addition of a waistband on the dress is a really nice touch!

egwene2211
Angela // Myrna cardigan + V8726

Another first-timer here – this is Angela’s first cardigan! I think it turned out awesome and, again, love that orange! The colors of her cardigan & dress remind me of sherbert 🙂 Yum!

irish1970
Jeri // Cancun Lacy Box top + Angie dress

Love everything about Jeri’s outfit, but ESPECIALLY that little lacy top! Ahh!! I never realized how much I needed a lace-knit crop top until right this second. It looks great on Jeri, both with and without the dress. The whole outfit looks so cool and comfortable, perfect for summer!

Congratulations, OAL winners! Expect some emails to get those prizes out 🙂 I’m so happy to wrap up another successful OAL, and even happier to have a few new knitting and sewing patterns to add to my never-ending queue! Starting with that lace crop top. haha!

Thanks again to everyone who participated! Thanks to Andi for hosting along with me this second year, and big thanks to our sponsors Indie Stitches & The McCall Pattern Company for the great prizes! If you’d like to see more OAL garments, check out the official Ravelry thread, as well as the hashtag #OAL2015 on Twitter & Instagram 🙂

Completed: Linen Carolyn Pajamas

27 Apr

Let’s start this post with the shocker: I don’t really care for linen.

Carolyn Pajamas

I know, I know. Linen is supposed to be a rite of passage for Southern gals – it’s cool and breathable, and the wrinkles are supposed to be there. Well, I HATE the wrinkles! Wrinkly fabric drives me insane, makes me feel rumply and unkempt. I just can’t get behind a fabric that wants to wrinkle the second I look at it, much less wear it around for a few hours. Nope nope nope.

nope

That being said – I really want to like linen. Seriously! I love the idea of a fabric that gets softer with every wash, and as someone who could probably work up a sweat in the middle of the Arctic (I don’t even know how that’s possible, considering that I’m ALWAYS cold, but leave it to my body to fuck up my heating and cooling system), I’m always on the hunt for light and breathable fabric to wear during the summer months. Linen was my nemesis, but I was willing to extend the olive branch and make an effort at friendship.

Also, I’ve been eyeballing that striped linen fabric for months now at the studio (and probably for more months to come, since stripes just launched at Elizabeth Suzann woohoo!), and I knew it needed to be in my life/on my body. Linen wrinkles be dammed.

Carolyn Pajamas

There are many, many, many important things I’ve learned through my sewing journey. One of the biggest ones (well, other than not sewing over your pins. STOP THAT RIGHT NOW) is not to fight against your fabric. If your fabric is drapey, don’t try to sew something form-fitting with it. Alternatively, fabric with a lot of body needs to be made into something that will work with the shape. And if you are sewing linen but still hating on the wrinkles… make pajamas. No one cares if your pajamas are wrinkled (and if they do – get out. Get out right now while you still can).

Also, have you slept in linen pajamas before? LORD HAVE MERCY.

Carolyn Pajamas

Making proper pajamas has been on my sewing to-do list for aaaages. I love wearing matching pajamas sets, even if Landon does think they are dorky (I did compromise and get rid of the hot pink cat pajamas though. Relationships, man!). My mom actually buys me a new pajama set from Victoria’s Secret every year for Christmas (not the hot pink cats, those came from my AWESOME Mamaw). Still, I’ve always wanted to make my own so I could have – what else? – complete control over every aspect of the design, color, and fit. But I’ve never really found a suitable pajama pattern that didn’t look like something more appropriate for an 8 year old boy, so I held off on that dream.

The winning pattern you see here is the newest pattern from Closet Case Files, the Carolyn Pajamas. I looooooved this pattern the second it graced my inbox – the slim, feminine cut of both the top and bottoms, as well as the inclusion of the piping (I mean, I know how to sew piping, but it’s pretty nice to have a pattern that was designed for optional piping, if you get my drift), were what really got my gears turning. Also, Heather Lou looks amazing in those product photos, doesn’t she? I could steal that hair right off her head. I won’t, but should it ever go missing, well…

Carolyn Pajamas

I really enjoyed sewing this pattern! While I wouldn’t exactly call the linen easy to work with (it was a shifty little bitch and was prone to constant fraying), it did respond beautifully to pressing and took all the piping and topstitching like a champ. I recall when Heather Lou first released this pattern, she mentioned how much she labored over the instructions – and it really shows. Everything is very clearly laid out with beautiful little diagrams and helpful tips, and it’s about as hand-holdy as you can get with a pattern without actually having it be part of a sewalong (there’s no sewalong for this pattern, however, there are a few posts on the CCF website to guide you through the trickier steps if you need it!). I’m especially impressed with how nice my collar turned out – piping and all!

Carolyn Pajamas

Carolyn Pajamas

I made the size 2, based on my measurements and following Heather Lou’s advice. I reeeeally wanted to make the 0 because the ease just seemed excessive, but I’m glad I followed along faithfully because this fit is pretty spot-on. It’s sleek and somewhat fitted (I mean, fitted as far as pajamas are concerned), but there’s juust enough ease to make them super comfy. I did trim about 2″ off the legs, but that’s about it. I feel like there could be some tweaking with the armhole – it seems a bit low and pulls when I reach forward – but that may just be because I’m used to wear shirts that are a lot more tailored. It’s not uncomfortable or restrictive by any means.

I chose to make the long pants with the short-sleeved top. I was originally just going to make shorts, but my new digs are in a basement (I mean, it’s a happy basement with windows and a door – but it’s still a basement, with basement chill), and it’s a bit chilly down here right now. I added piping to the pocket, cuffs, collar, and leg side seams. The piping is self-made – I used more of this glorious linen fabric in the opposite colorway, and cut bunches of bias strips and sewed it around yards of cording. I prefer self-made piping, not just for the color/print selection, but also because it tends to be a lot softer than the stuff you can buy (well, I’m sure you can get awesome soft and flexible piping at some place like in the Garment District, but here all we have is that Dritz stuff in the packages and that stuff is AWFUL if you try to sew it to a drapey fabric. Again – don’t fight the fabric!). I didn’t have wide enough elastic as was required by the pattern, so I sewed an extra line of stitching about 1/4″ away from the top of the pants edge and inserted the elastic below, resulting in a frilly little gathered edge (some of my RTW pjs have this feature and I’ve always loved it!). Here’s a post about elastic waistband finishes if that doesn’t make sense.

Carolyn Pajamas

As I mentioned, I got my fabric from Elizabeth Suzann, because I work there and I get awesome employee benefits like wholesale fabric prices (don’t be jealous). It’s striped 100% linen (I’ve seen similar fabrics to this rolling around on the internet, but most are referred to as a cotton/linen mix. The stuff I have here is definitely all linen) and it is GLORIOUS. It also wrinkles, frays, and shifts like crazy. It wasn’t the most amazing piece of fabric to work with, but I’m glad I powered through because it is pretty amazing to wear. I made sure to finish all my seam allowances with the serger to keep the fraying down (for the front facing, I just serged the edge instead of doing a rolled edge, since I thought the bulk would show through). I didn’t realize how sheer the fabric is, so some of the dark piping shows through on the right side. It’s super sheer and everyone is absolutely aware of the color of my underwear when I wear these pants, just so we’re clear (I’m wearing nude undies for these photos, to save your eyes). It’s also, like I said, super shifty – so my pocket is really wonky. I’m going to call it “charming.”

Detail shots:

Carolyn Pajamas

Carolyn Pajamas

Carolyn Pajamas

Carolyn Pajamas

Carolyn Pajamas

Pretty good stuff! I love my new pajamas and I definitely feel like a Classy Adult when I wear them, wrinkles and all. I definitely want to make a flannel pair when winter rolls around – finally, I won’t be at the mercy of whatever pink shit they’re selling at VS, woohoo! Too bad my mom is going to have to find a new Christmas gift to buy for me. Sorry, mom! Maybe I’ll make you pajamas instead 😛

One last thing – the giveaway winner from last week! Random number generator says…

winner1

winner2

Woohoo, congratulations Kayse! I’ll be in touch to get that gift certificate out to you ASAP. Can’t wait to see what you make with your fabric :DDD

Carolyn PajamasFinally, this would be my senior picture, if I was still in high school and did things like senior pictures. The end.

Completed: Leopard Cabernet Cardigan

13 Apr

Good morning, everyone! Lots of changes happening in my world over the past couple of weeks – as you know, we moved out to the country, about 20 miles west of Nashville in beautiful Kingston Springs, TN. Our house sits on a 5 acre plot of land surrounded by woods, and wow, spring is gorgeous here! The leaves are finally starting to poke out – I can’t wait until all the trees are green! As I mentioned before, my best friend bought the house, and Landon and I are occupying the lower level apartment. We are still settling in, but making good progress. I promise I will share sewing room photos as soon as the space is ready. It’s still a work in progress – for one, I need to finish painting (I mean, Landon needs to help me finish painting because I am SO OVER painting by myself!), and I need to get some rugs because the floors are coooold. So it’s not quite ready for it’s ~big reveal~, but it is totally usable for makin’ shit! Which is what I’ve been doing since the second the space was finally unpacked. And here is evidence of my first completed garment in the new place! It’s not anything fancy, but it fills a fabulous gap in my wardrobe 😉

SBCC Cabernet Cardigan

Oh, right, that’s the other big change – I changed my hair color back to something a bit more normal! 🙂 My stylist and I have been talking about this for a few months – even before I went to London in November, we were planning. I was starting to get really sick of doing the upkeep myself – redying the roots, dealing with fading, hair color rubbing off on everything, etc etc – and I knew I wanted my hair to look relatively normal for when we go to Peru in June. I actually had all this done the day before we moved at the end of March. It took about 7 hours (woof) and we’re still not done – there’s a little bit of green showing through in certain spots. I need to go back later this week and get another fill or whatever, but my scalp was just done. I gotta say – I’m REALLY happy with how the color turned out! My stylist is seriously a hair magician. And while I’m not delusional enough to think that my hair is 100% undamaged as a result, it’s still in pretty outstanding condition, considering what we put it through. Eventually, I’d like to lighten everything up to a brighter, more coppery red (still natural, but less brown), as well as let her do some fun stuff with highlights. But that’s all in due time! For now, I’m loving this red-brown 🙂

Ok, back to sewing stuff!

SBCC Cabernet Cardigan

This leopard beauty is the Cabernet Cardigan from Skinny Bitch, Curvy Chic patterns. I was REALLY excited when this shit was released because I love wearing v-neck cardigans. I really like the way they look both buttoned and unbuttoned – which is the one minor complaint I have about my Jenna cardis – the crew neck just feels like it looks really weird when it’s unbuttoned, at least on me. Also, this pattern very closely mimics the poor v-neck cardigan I ripped up to use as a pattern (which was totally in vain, because that shit DID NOT WORK. But I guess it’s ok bc the cardigan in question was destined for the scrap heap anyway, since it was holey-er than, like, the Pope at that point), so yay! V neck cardis all day, erryday!

SBCC Cabernet Cardigan

See? Looks totally legit unbuttoned. Also, I promise I’m wearing a shirt under the cardigan – it’s just a white v-neck, and the sun was VERY bright that morning. So I look nakey, but honestly, I’m not that exciting of a person.

You can’t see much of the details of this piece due to the (admittedly fabulous) fabric that I used, but it has some nice and simple finishing. The sleeves and hem are finished with a wide band (same with the Jenna cardi) and the neckline also has a folded-over band. The difference between this cardigan and the Jenna is in the neck band – on the Cabernet, it’s one long piece that is interfaced only where the buttons/button holes go, and stretched just at the back of the neck. It’s also a wider band than the one on the Jenna, which means the button holes were a helluva lot easier to get in there without fucking them up.

SBCC Cabernet Cardigan

This cardigan also features the cutest little teensy pockets! Yay pockets!

SBCC Cabernet Cardigan

SBCC Cabernet Cardigan

Not a lot of changes went into the sizing of this pattern. SBCC drafts for petite proportions, so the length of both the body and the sleeves are pretty spot-on for me. I cut the size XXS, based on the pattern suggestion, but ended up taking about 1/2″ out of each side seam because I felt that even the slim version was still a bit boxy on me. This was totally a hack alteration – I’d already finished the cardigan at that point (and Instagrammed it, so you know that shit’s forreal), and rather than pull off the bottom band and do things properly… I just nipped in the sides with my serger and continued the seam down to the bottom of the band. Better to have a slightly subpar finish than a cardigan that I never wear, right?

SBCC Cabernet Cardigan

Since this was my first rodeo with the pattern, I followed the instructions as written. I topstitched everything with a straight stitch, as recommended – I was afraid it would look kind of homemade and tacky, but I think it actually looks really nice! Since the cardigan is an easy fit that doesn’t reply on much stretch (unlike, say, a tshirt), I don’t have to worry about the stitches popping. Everything else was finished on my serger, and I used regular lightweight fusible woven interfacing for the neckband. All in all, I think this took maybe 2 hours to sew, start to finish. It’s a quick little make and it’s already getting very regular rotation in my wardrobe.

Also, speaking of instructions – the booklet that comes with the pattern is super cute! (well, the printed version, which I’m totally glad I sprang for the couple of extra dollars because yay for not having to print and tape PDF patterns!) It’s about the same size as a standard piece of paper, and the pages are stitched together along one edge. The illustrations are large and very clear, and the instructions are very much direct and to the point. There are no cutting layouts included, and not a lot of hand-holding involved (i.e., no beginning section telling you how to work with knit fabrics, for example. Kind of refreshing, honestly! I think there’s enough of that out there as it is, ha). So if you’re a super beginner and want to try this pattern, but need some help with sewing knits – definitely research beforehand. It’s an easy pattern, though, and I think it’s totally doable for the beginner knit-sewer.

SBCC Cabernet Cardigan

SBCC Cabernet Cardigan

The super fabulous leopard print ponte was one of my scores from when I was in NYC last month. It was one of the very few things I had specifically on my list to pick up – leopard print ponte, yellow stretch twill, and stone washed stretch denim, to be precise (sadly, I did not find the stonewashed stretch denim. Everything available right now is dark indigo or black – wtf? Do y’all seriously not want me 90s-mom’ing it up or something?). I actually met up with Renee during my first shopping expenditure that weekend (who is just as awesome in real life as she is on her blog – maybe even more so, actually, because she came bearing a selfie stick), and while we were in Metro Textile, I asked Kashi for leopard print ponte and everyone laughed at me for being way too specific. Well, joke’s on all y’all because I found my damn ponte the next day – in Mood Fabrics, no less! (although I did get some amazing shit from Kashi. Just wait for it.). This ponte in particular is a bit more lightweight than usual, which is nice for this warmer weather. It’s stretchy, but it’s really easy to work with. My scissors did not particularly enjoy trying to cut through all the thickness, but I’m pretty sure it’s because they desperately need sharpening.

I also realize and completely acknowledge that this v-necked leopard print cardigan kiiiind of makes me look like one of those Ladies Who Lunch, but I’m totally ok with that. I like eating lunch with my lady friends.

SBCC Cabernet Cardigan

So yeah! So much newness up here today – new cardigan, new hair, new background in mah photos. I am LOVINGGGG these woods; it’s so quiet and serene out here, and you can actually see the stars at night. And we’re still a relatively short drive from Nashville, which is nice for when I need my hot chicken fix 😛

One last thing – the Sewing for Fashion Designers giveaway winner!

winner1

Congratulations, Vickie C! I will be in touch to get that book mailed out to you ASAP 🙂 The rest of y’all – as always, the book can be pre-ordered on Laurence King’s website and Amazon 🙂 Thanks for your support, y’all are the best!

Completed: Boiled Wool SJ Sweater

7 Nov

I’m just gonna come out and say it: “boiled wool” is the grossest fabric name. It just sounds disgusting – like some kind of rubbery, overcooked fabric food that you’re only putting in your body because there is literally nothing else in the house and you are starving to death. Am I right? Am I right?

Wool SJ Sweater

When it comes to fabrics, though, boiled wool is pretty amazing. I had some spend some time working with it – sewing up a storm at Elizabeth Suzann‘s, making sweaters and kimonos and coats (so, so, so many coats. I am the coat whisperer now, y’all). After spending so much quality time handling this fabric – pressing (boiled wool loooves steam) and sewing (where the stitches just sink right in) – I found myself anxious to buy some and make a luxe sweater/sweatshirt for myself. So I bought some – off Elizabeth herself (she lets me ride the coattails of her wholesale orders and, um, you guys, I’m not even going to tell you how little I paid for this wool. NOT EVEN.).

Wool SJ Sweater

It was a borderline agonizing choice, but I ultimately decided to get the camel color (next time, though, I will be getting some black. And some moss. Dammit, I want them all!) because I had ~visions~ of it looking gorgeous with my polka dot chambray button-down. Doesn’t it? I also love camel because I feel like it looks equally good with black and brown (and navy, for that matter!).

Wool SJ Sweater

As I mentioned, I’ve had some time to work with this fabric and get an idea of how to handle it. They very first thing I did was prewash the yardage – the same way I wash/block my handknits. I soaked it in gentle wool wash (I use Soak, which I actually buy from my local yarn store, but here it is on Amazon), used a towel to wring out the excess, and then laid it flat to dry in the yard. This particular boiled wool (and maybe all boiled wools?) shrinks up quite a bit after it’s been washed, giving the fabric more of a felted quality than it is when you first pull it off the roll. You can also steam-shrink the fabric (which is what we do at the studio), but I knew I’d be washing this stuff here on out, so I wanted to get all the shrinkage eliminated before I started sewing.

Wool SJ Sweater

For construction, there is not much different you need to do from sewing, say, a very stable ponte knit. I just used a regular 70/10 needle (not even ballpoint – the wool is felted so it’s not necessary to preserve the knitted loops or anything) and sewed everything on the sewing machine. I left my seams unfinished and pressed them open with lots of steam. I think the open seams look a little neater this way, plus, they’re not as bulky as they’d be if I serged them. Again, since the wool is felted – nothing is going to unravel. Even for the hems, I just turned up the allowance and topstitched it down.

Wool SJ Sweater

The only part I struggled with (and I’m still not 100% happy about, if we’re being honest here) was the neckline. Not because it was difficult to sew – but because I didn’t know how I was going to finish it! At Elizabeth’s, we just turn the hem allowance under and topstitch. This is absolutely fine for finishing boiled wool – but we’re talking crewneck sweaters here, and mine is obviously very scooped. I needed a finish that would pull in the neckline just a little – like a ribbing. Except I didn’t want a ribbing, because I wanted this sweater to be ~fancy.

The first thing I did was try to turn the hem allowance under, and then sew clear elastic into the neckline like an invisible banding. That did not work out. I don’t have any photos, but it looked like shit and you have to trust me.

The next thing I did was try to use the boiled wool as a self-fabric band for the neckline. It sort of stretches, so it sort of works.

Wool SJ Sweater

This picture makes it look way better than it did in reality. What you don’t see here is that the binding would NOT lay flat – especially at the center front. It is standing almost straight up in some sections, like the weirdest little funnel not-collar. Believe me, I pulled and stretched as hard as I could to encourage the neckline to ease smaller (and thus lie flat), and then steamed the beejezus out of it, but there’s only so much you can do with boiled wool. It’s not a true knit, so you can’t really treat it as one. Furthermore, the inside just looked raggedy with the self fabric neckline. Too many unfinished seam allowances (I know, I know, I just said the unfinished edges were fine – but even I have neckline limits, ok), too bulky, and noooope!

nope

Wool SJ Sweater

My solution was to apply a bias facing to the neckline, stretching the bias to get it to lie snug and thus pull the neckline in. I used this method to sew it on, and the bias is a piece of silk charmeuse that I got from Elizabeth’s scrap pile (surprisingly – it was the result of a botched dye job, although it matches the wool quite beautifully, so yay for me!). I think this netted the best result, although I think the neckline is still a little wide for this sweater. Oh well. That’s just my fault for choosing this pattern. Better luck next time!

Wool SJ Sweater

The pattern I used is the SJ Tee from my beloved Papercut Patterns. I raised the neckline a couple of inches – not that you can tell! – but the rest of the pattern is sewn as-is, using my previous adjustments. Other than the bias faced neckline, I didn’t make any construction changes. Oh, no, wait, I did leave off the sleeve ribbing. I just turned that hem allowance under and topstitched it down! The boiled wool does not have nearly as much stretch as a standard knit, however, this pattern is a little loose-fitting on me as it is, so I think it turned out fine. If you want to make this in a wool and retain the design ease, I’d recommend sizing up.

Wool SJ Sweater
Wool SJ Sweater
(sorry ’bout the color discrepancy! The less-washed out photos show the true color. And that yellow tag is there to remind us NOT to wash this sweater with the laundry, since it’s wool 🙂 )

Wool SJ Sweater

As you can see, this sweater is not ideal for a completely 100% no-gape neckline. That’s ok, though, since I’ll likely be wearing it with something underneath (this boiled wool is soft, but it’s still a little bit itchy!). I am pretty happy with how this turned out – I like the shape, the raglan sleeves, and how lush the fabric is (aka makes it look expensive. Ha!) – but I’m still iffy on the neckline. I think it’s too wide. It looks ok with the collared shirt underneath, but… eh. I don’t know. Obviously I can’t do much to change this current sweater – so I’ll be wearing it regardless – but for future makes, I need to refigure that silhouette. What do you think? Too much of a scoop? Am I way out of left field and overthinking?

Speaking of the collared shirt – I still haven’t made any changes to the sleeves. I decided to wait until it’s been laundered a few times – that way, if it shrinks, I won’t be up shit creek. In the meantime, I do like the fit/length of the sleeves under a sweater, so there’s that!

Wool SJ Sweater

At any rate, I’m pretty happy with boiled wool! Gross name and all 🙂 Tell me – have you ever sewn with boiled wool? Would you? Or do you think the name just sounds nasty? 🙂

Last thing – time to announce last week’s giveaway winner! After a harrowing 208 comments, random number generator chooses….

winner2
winner1

Yay! Congratulations, Dawn! I will be in touch to get that book to you – so you can start making those pajama bottoms asap! First time for everything 😉 (also, can we kill that rumor that Random.org never chooses the first or last number? Because, clearly, not the case!).

Thanks to everyone who entered, and thanks for all your lovely comments on the post (and thank you, Roost Books, for letting this giveaway be possible!). If you’re still itching to buy yourself a small piece of Tilly, you can buy Love at First Stitch from Amazon, or directly from the magic-maker herself.

Happy Friday, everyone! 🙂

TUTORIAL + GIVEAWAY: The Sewtionary (+ last week’s giveaway winner!)

22 Sep

Sorry, y’all, I’m in giveaway overload this month! Can’t help it if my friends are releasing awesome shit all at once, you know?

Adobe Photoshop PDF

I’m sure most of y’all have heard all about this fabulous little book by now – The Sewtionary, written by Tasia of Sewaholic (one of my FAVORITE sewing pattern companies! Seriously, some top 5 shit right there). A couple of months ago, Tasia reached out and asked if I’d like to be a part of her Sewtionary Blog Tour to help promote the book. While I do realize that blog tours can be a little redundant if you read the same blogs over and over (I know I can sometimes get jaded at looking at the same photos/reading the same gushing daily for 2 weeks or whatever), I really wanted to help promote this book because I really do give a shit about Tasia and her business. She’s one of my friends, and I like to do things for my friends. Plus, the book is beyond excellent- a great resource of 101 sewing techniques, written out like a dictionary. The photos are beautiful, each technique includes why it’s necessary (something my nerdy brain just loves), and it’s spiral-bound, so it’ll lay nice and flat on your sewing table. Lots of wins here!

Anyway, that’s about as much of a review as you’ll get from me (if you want a true review, definitely check out some of the tour stops that I’ll be linking at the bottom of this post!). Today, I wanted to do something different. I’m going to share a tutorial from the book with y’all .Everyone likes tutorials, right? 🙂

How to Make a Tailor's Ham & Seam Roll - Sewtionary Giveaway

Today’s tutorial: Making a Tailor’s Ham & Seam Roll.

First up – you’re probably thinking, “What the hell are these things and why the fuck would I spend my time making them?” Well, I’m so glad you asked! Both are used as pressing aids – the Tailor’s Ham is a big pillow-shaped tool that is used for pressing curved areas (such as darts and necklines), and the Seam Roll is a long, narrow stuffed tube that is used to press hard-to-reach seams (such as the inside of a sleeve), as well as a helpful way to avoid making seam allowance impressions on the right side of your garment. While I have a Tailor’s Ham that I’ve used for for years (and no lie, my cat literally uses that shit as a pillow when she naps on my ironing board), I’ve yet to get a Seam Roll. They are both great to have, but can easily cost you $20+ a pop when you buy them from the fabric store. So here’s where we learn to make our own – at the delightful price of FREE NINETY-NINE. You heard me!

You will need:
– Large scraps of wool fabric & cotton fabric. Try to choose something with a dense weave that does not stretch, that is 100% (aka – no poly blends!). I used leftover wool coating from my Vogue Coat and black quilting cotton.
– Something to stuff it with. Traditionally, these things use sawdust. You can also use cedar shavings (from a pet supply store), wool fabric scraps, or even old nylon stockings. For the purposes of this tutorial, I am using sawdust. It is *extremely* messy. It is also extremely free. No lie, I just waltzed right into my local Home Depot and asked for a bag of sawdust, back where they cut wood to spec. I can’t speak for other countries (Tasia tells me that you can’t sell sawdust in Canada, say whaaaat), but here in the good ol’ US of A, lots of hardware stores will give you free sawdust because they would otherwise throw it away. My sawdust man also informed me that it makes a nice mulch for the garden. Isn’t that handy!
– Sewing machine, thread, and hand sewing needles.
– Outdoor space, or a really really good broom. I told you, this shit was messy. You have been warned.

How to Make a Tailor's Ham & Seam Roll - Sewtionary Giveaway

Here are the instructions, Sewtionary-Style. Told y’all that book is just lovely.

Now here are my steps.

TO MAKE THE TAILOR’S HAM:

How to Make a Tailor's Ham & Seam Roll - Sewtionary Giveaway
I found it easiest to start with a paper pattern piece, since the shape is so weird. You’ll want to make your ham 14″ long; 10″ wide at the wide end and 8″ wide at the narrower end. This will result in a bit of an egg shape.

How to Make a Tailor's Ham & Seam Roll - Sewtionary Giveaway
Using your paper pattern piece, cut one egg from both the wool and the cotton.

How to Make a Tailor's Ham & Seam Roll - Sewtionary Giveaway
Pin the pieces, right sides together, leaving a nice 5″ gap at the wide end. PROTIP: Whenever I’m sewing something that requires an unsewn gap, I mark each end with a double pin. This reminds me to stop sewing when I get to the double pin! Otherwise, I’ll just keep going my merry way and complete the circle, which is exactly what we don’t want right now.

How to Make a Tailor's Ham & Seam Roll - Sewtionary Giveaway
Using a 1/2″ seam allowance, sew around the entire circumference of the ham, again leaving that 5″ gap at the wide end. Make sure it’s 5″, too – you’ll need the room for stuffing (don’t make it more than 5″, or you’ll hate yourself for it).

How to Make a Tailor's Ham & Seam Roll - Sewtionary Giveaway
Turn the ham right side out.

How to Make a Tailor's Ham & Seam Roll - Sewtionary Giveaway
Ok, time to get messy! Take that ham outside and start stuffing your stuffing in it! If you are using sawdust, expect a big mess that will get everywhere.

How to Make a Tailor's Ham & Seam Roll - Sewtionary Giveaway
Instead of just quickly trying to fill the ham with sawdust, take the time to pack down the sawdust with each handful. The narrow end of the ham especially needs to be packed pretty tight, or else it will collapse. Once you’ve packed it down, work on the next section and pack that. Again – this IS messy, and it will take longer than you think, because sawdust loves to pretend it’s tightly packed when it’s secretly not. You want the ham to be pretty hard so it will retain it’s shape. When you think it’s full – keep stuffing. Then stuff some more.

How to Make a Tailor's Ham & Seam Roll - Sewtionary Giveaway
In the meantime, here’s a photo of my cat glaring at me for daring to sit outside without her, haha.

How to Make a Tailor's Ham & Seam Roll - Sewtionary Giveaway
Once you are sure the ham is packed as tight as it can go (Are you sure? Are you sure you’re sure?), it’s time to sew it up!

How to Make a Tailor's Ham & Seam Roll - Sewtionary Giveaway
Holding the ham between your legs (do as I say, not as I do – don’t set it on the ground; you don’t want to push the narrow end back in!), turn under the seam allowance on one side and lap it over the opposite side. Using a tight whipstitch, sew the opening shut by hand.

Next, you’ll probably want to beat the shit out of your ham (if it’s covered in sawdust like mine, anyway). I just pounded mine against the porch railing until all the dust was knocked off.

This post is turning into one long “That’s What She Said” joke, isn’t it?

How to Make a Tailor's Ham & Seam Roll - Sewtionary Giveaway
End result: Completed Tailor’s Ham!

TO MAKE THE SEAM ROLL:
How to Make a Tailor's Ham & Seam Roll - Sewtionary Giveaway
Unlike the Tailor’s Ham, I didn’t bother making a pattern piece for this one – I just drew it directly on my cotton with a Chaco pen. Draw a 14″x5″ rectangle and round the four corners.

How to Make a Tailor's Ham & Seam Roll - Sewtionary Giveaway
Cut one of each of these rectangles from both your cotton & wool.

How to Make a Tailor's Ham & Seam Roll - Sewtionary Giveaway
Using a 1/2″ seam allowance, sew the two rectangles, right sides together, leaving a 5″ opening in the middle of one long side of the seam roll (I have no idea why I don’t have a photo of this, but I trust you can work this step out). Turn the roll right side out.

How to Make a Tailor's Ham & Seam Roll - Sewtionary Giveaway
Time to stuff that bad boy!

How to Make a Tailor's Ham & Seam Roll - Sewtionary Giveaway
As with the Tailor’s Ham, really stuff and pack each long narrow end before focusing on the middle of the roll. This will ensure that your roll is nice and tightly packed, and hard enough to hold it’s shape.

How to Make a Tailor's Ham & Seam Roll - Sewtionary Giveaway
Once you’ve packed the roll nice and tight with sawdust, turn one seam allowance under and lap it over the opposite side of the opening. Sew this closed by hand.

Again, you’ll probably want to beat the shit out of that thing to get all the dust off. Be aggressive! Honey Badger Seam Roll don’t care!

How to Make a Tailor's Ham & Seam Roll - Sewtionary Giveaway
And here’s the finished seam roll!

How to Make a Tailor's Ham & Seam Roll - Sewtionary Giveaway
And here’s my new pressing family! Yay!
BTW, be sure to save some of that remaining sawdust – once you use the ham or seam roll, you may find the sawdust settling and thus need to be repacked to firm up the shape. Unless you just really love having an excuse to go to Home Depot – in that case, don’t let me stop you.

GIVEAWAY IS CLOSED
All right, I promised y’all a giveaway so let’s get on that. To win your own copy of the Sewtionary, simply comment on this post and tell me your favorite sewing technique. Are you a freak about pressing (high five!) or is sewing patch pockets your thing, or…? You tell me! This giveaway is open WORLDWIDE and I will close the entries a week from today, on SEPTEMBER 29, 2014 AT 7:00 AM CST. Good luck!
GIVEAWAY IS CLOSED

If you’d like to buy your own copy of the Sewtionary, you can pick up a signed copy at the Sewaholic website (or a boring ol’ unsigned copy on Amazon). Thanks so much, Tasia, for letting me be part of this book tour & for generously donating a copy to giveaway!

How to Make a Tailor's Ham & Seam Roll - Sewtionary Giveaway

Want to read some more Sewtionary reviews and/or enter some more giveaways? Check out the full blog tour here:

ONE LAST THING – We have a giveaway winner to announce! Lucky number generator says:

winner1

winner2

Donna, you’re a winner! Is this now offically the second time I’ve made your Monday exciting? 🙂 Congratulations! Sending your email now!

Everyone else (and there were a lot of y’all – nearly 400 entries, wow!) – I’m not turning you away completely empty-handed. Kat has generously offered a coupon code, which is awesome! Use the code LLADYBIRD to get 15% off the purchase of the Jenna Cardi from Muse Patterns, good through 9/29. Thanks to everyone who entered the giveaway! Y’all are the best 😀

OAL: The Winners!

4 Aug

Hey everyone! Sorry, one more OAL post 🙂

I had SO much fun co-hosting the OAL this year with Andi, and I love that we had so many participants (66 posted completed outfits on the Ravelry thread!). I can’t even tell you how much I loved following along with everyone’s progress, and seeing what cool outfits came out of it! I really love the variety of sewing and knitting patterns that showed up in the OAL (some having already moved over to my to-make queue ;)). Such a fun time and I’m really glad I got to host! Thanks to everyone who participated! Y’all are the best! ♥

logo

Andi & I wanted to sweeten the deal with an opportunity for prizes, so let’s get to that! Our official sponsor for the OAL is Indie Stitches, who generously donated prizes for each of the winners. Those who win get a free pattern of these choosing from Indie Stitches, plus a free knitting pattern of their choosing from the Untangling Knots shop. For the drawing, we compiled a list of all the posts on the OAL Finished Outfits thread that were submitted before the deadline on 7/31 and included a full outfit. The names were put on a numbered spreadsheet, which we used random.org to pull the winning numbers. So, without further ado – our 4 OAL winners~~

help_pj_medium2
Karen’s Helen bed jacket & PJ’s
Damn, that’s such a good idea – why didn’t I think of that? Classy pjs and a bed jacket for lounging, instead of my ratty workout shorts and an even rattier quilt.

P1020012
Roisin’s Myrna cardigan & Vogue 8998
ROISIN! I swear I did not choose her name on purpose; this was purely luck of the draw. I love her little pink Myrna and the fabric for that dress is such a perfect match!

41866102
Kristi’s Myrna & Simplicity 1803//McCall 6696
Such a pretty and classic combination! You can’t see too well in these photos, but go look at her Ravelry page – the top of the dress bodice is outlined in pink piping, which looks fabulous! And the inside is just gorgeous 🙂

image_medium2
Martinalici’s Featherweight cardigan & Washi dress
Love this – especially that hand-embroidered collar! Also, that Featherweight Cardigan is going in my queue asap 🙂

Woohoo! Congratulations, ladies! Keep an eye out for an email from me 🙂

For those who didn’t win, I still have a lil’ somethin’ for ya – a discount code! Use the code OAL2014 for 15% off your purchase at Indie Stitches shop. This code is valid for 48 hours, so through 7AM August 6 (whew! Is it August already?).

Thanks again to everyone who played along, I hope you had as much fun as we did! To see all the finished outfits in all their glory, check out the OAL Finished Outfits Ravelry thread, the Official Unofficial Flickr Group and the hashtag #oal2014 🙂