Tag Archives: pants

Completed: Tongue-Tied Sweater

26 Feb

It’s been a minute since I shared a knitting project! I actually *have* been knitting – I always have at least 1 project on my needles at any given time (usually two – one for the couch, and a smaller/simpler one for the road!), and I always keep my Ravelry account updated! But for whatever reason, I never feel super compelled to share them on my blog. Anyway, here’s one today!Tongue-Tied Sweater + Dawn Cords

This is the Tongue Tied sweater by Poison Grrls. I actually chose the yarn before the sweater pattern – a very uncharacteristic knitting move for me (usually I have my pattern selected before I start shopping for yarn). To be completely honest – I wasn’t in the mindset for planning a new sweater when all this happened, as I was still steadily working my way through my last sweater (see! There’s one I knit and never shared here lmao). But this yarn caught my eye at Pintuck & Purl and once I got my hands on it, it was all I could think about.

Tongue-Tied Sweater + Dawn Cords

The yarn is CashLuxe Spark by Sweet Georgia Yarns, a gloriously soft and cushiony fingering-weight yarn with this incredibly rich color and the cutest subtle sparkle! I’m not a super duper yarn snob (I love natural fibers, blah blah, but I don’t typically buy *really* expensive yarn. Although. That may now change haha) but I really, really, really wanted this yarn on my body. I initially considered socks – I mean, who doesn’t want to wrap their toes in cashmere? – but at $38/skein, that was a little rich even for my blood. So obviously it made sense to buy two skeins and turn it into a sweater, because that’s totally fiscally responsible.

Tongue-Tied Sweater + Dawn Cords

Tongue-Tied Sweater + Dawn Cords

I started this sweater right after I finished my last one, toward the end of December last year. It knitted up really fast – partially because, well, it’s a tiny fucking sweater, but also I just really enjoyed every part of the process. I LOVED touching that yarn, so so much. I actually would have finished this quite a bit sooner, except once I got to the point of picking up the sleeves I let it sit dormant for a couple of weeks while I worked on other stuff.

Not a lot to say about this pattern, but here are some notes:
– I knit the size Small, based on my bust measurement. My gauge called for size 2 needles (body) and 1 needles (ribbing).
– This is a really fitted sweater! I mean, I knew that going in – but trying it on, yeah, it’s basically painted on. Aggressively blocking the entire thing really well helped a lot, and now it skims my body perfectly.
– Because it was so tight, I did have some issues with getting a stretchy enough bind off (I actually had to re-do my bind off at the bottom AND the neckline twice!). I ended up using size 3 needles and a super stretchy bind off. With the neckline, that was mainly my fault for being an idiot. I thought I’d be super clever and do a fold-over neckband, but quickly discovered (while unsuccessfully trying to pull it over my head) that those don’t stretch at all. LMAO.
– Mod-wise, I added 1″ of length to the body, since I wanted to be able to wear this with high-waisted jeans (it’s pretty short!).
– If you think you see a yarn tail in the back, you’re right. I haven’t woven it in yet. I don’t know why.

Tongue-Tied Sweater + Dawn Cords

I loved knitting this pattern! It was easy to follow, simple to knit (but not boring), and the proportions are just lovely. I’ve already got a few more Poison Grrls patterns in my radar for my next sweater. I love Amy’s aesthetic and I love that she uses fingering weight yarn – perfect for our mild winters!

Tongue-Tied Sweater + Dawn Cords

Tongue-Tied Sweater + Dawn Cords

Oh, I also made my pants, too! These are more Dawn Jeans, made in Robert Kaufman non-stretch corduroy from Pintuck & Purl! (I picked it out the same time I was fantasizing about that yarn haha). Not much to say about these that I haven’t already said – I made my normal size, this time with the wide legs and the cropped length. The cropped length isn’t actually that cropped – I ended up having to take off another 3″ or so (but I also have a 28″ inseam sooo take that as you will). I’m also not super thrilled about how the back fits, but I believe that’s just what you get with wide leg pants. The wrinkles are there because there is too much fabric at the inner thigh (the issue I had with my Calvin Klein jeans), but for true wide-leg pants you really don’t want to remove width there. Whatever, I’m not the one looking at my own butt so I don’t care.

Tongue-Tied Sweater + Dawn Cords

So anyway, that’s my new sweater! Fun to knit, fun to wear, and the sparkles make me happy 🙂 Oh! And I still have some of this yarn leftover – so you better believe I’ll be making a tiny pair of socks 🙂 If anyone has suggestions for short-cuff sock patterns – preferably one with bobbles (I don’t know why but I’m feeling like I want bobbles on these), let me know!

Completed: Vogue 2442 Calvin Klein Jeans

7 Jan

Alright y’all, I’m back with one more jeans post – the ~Designer Jeans~ Edition!

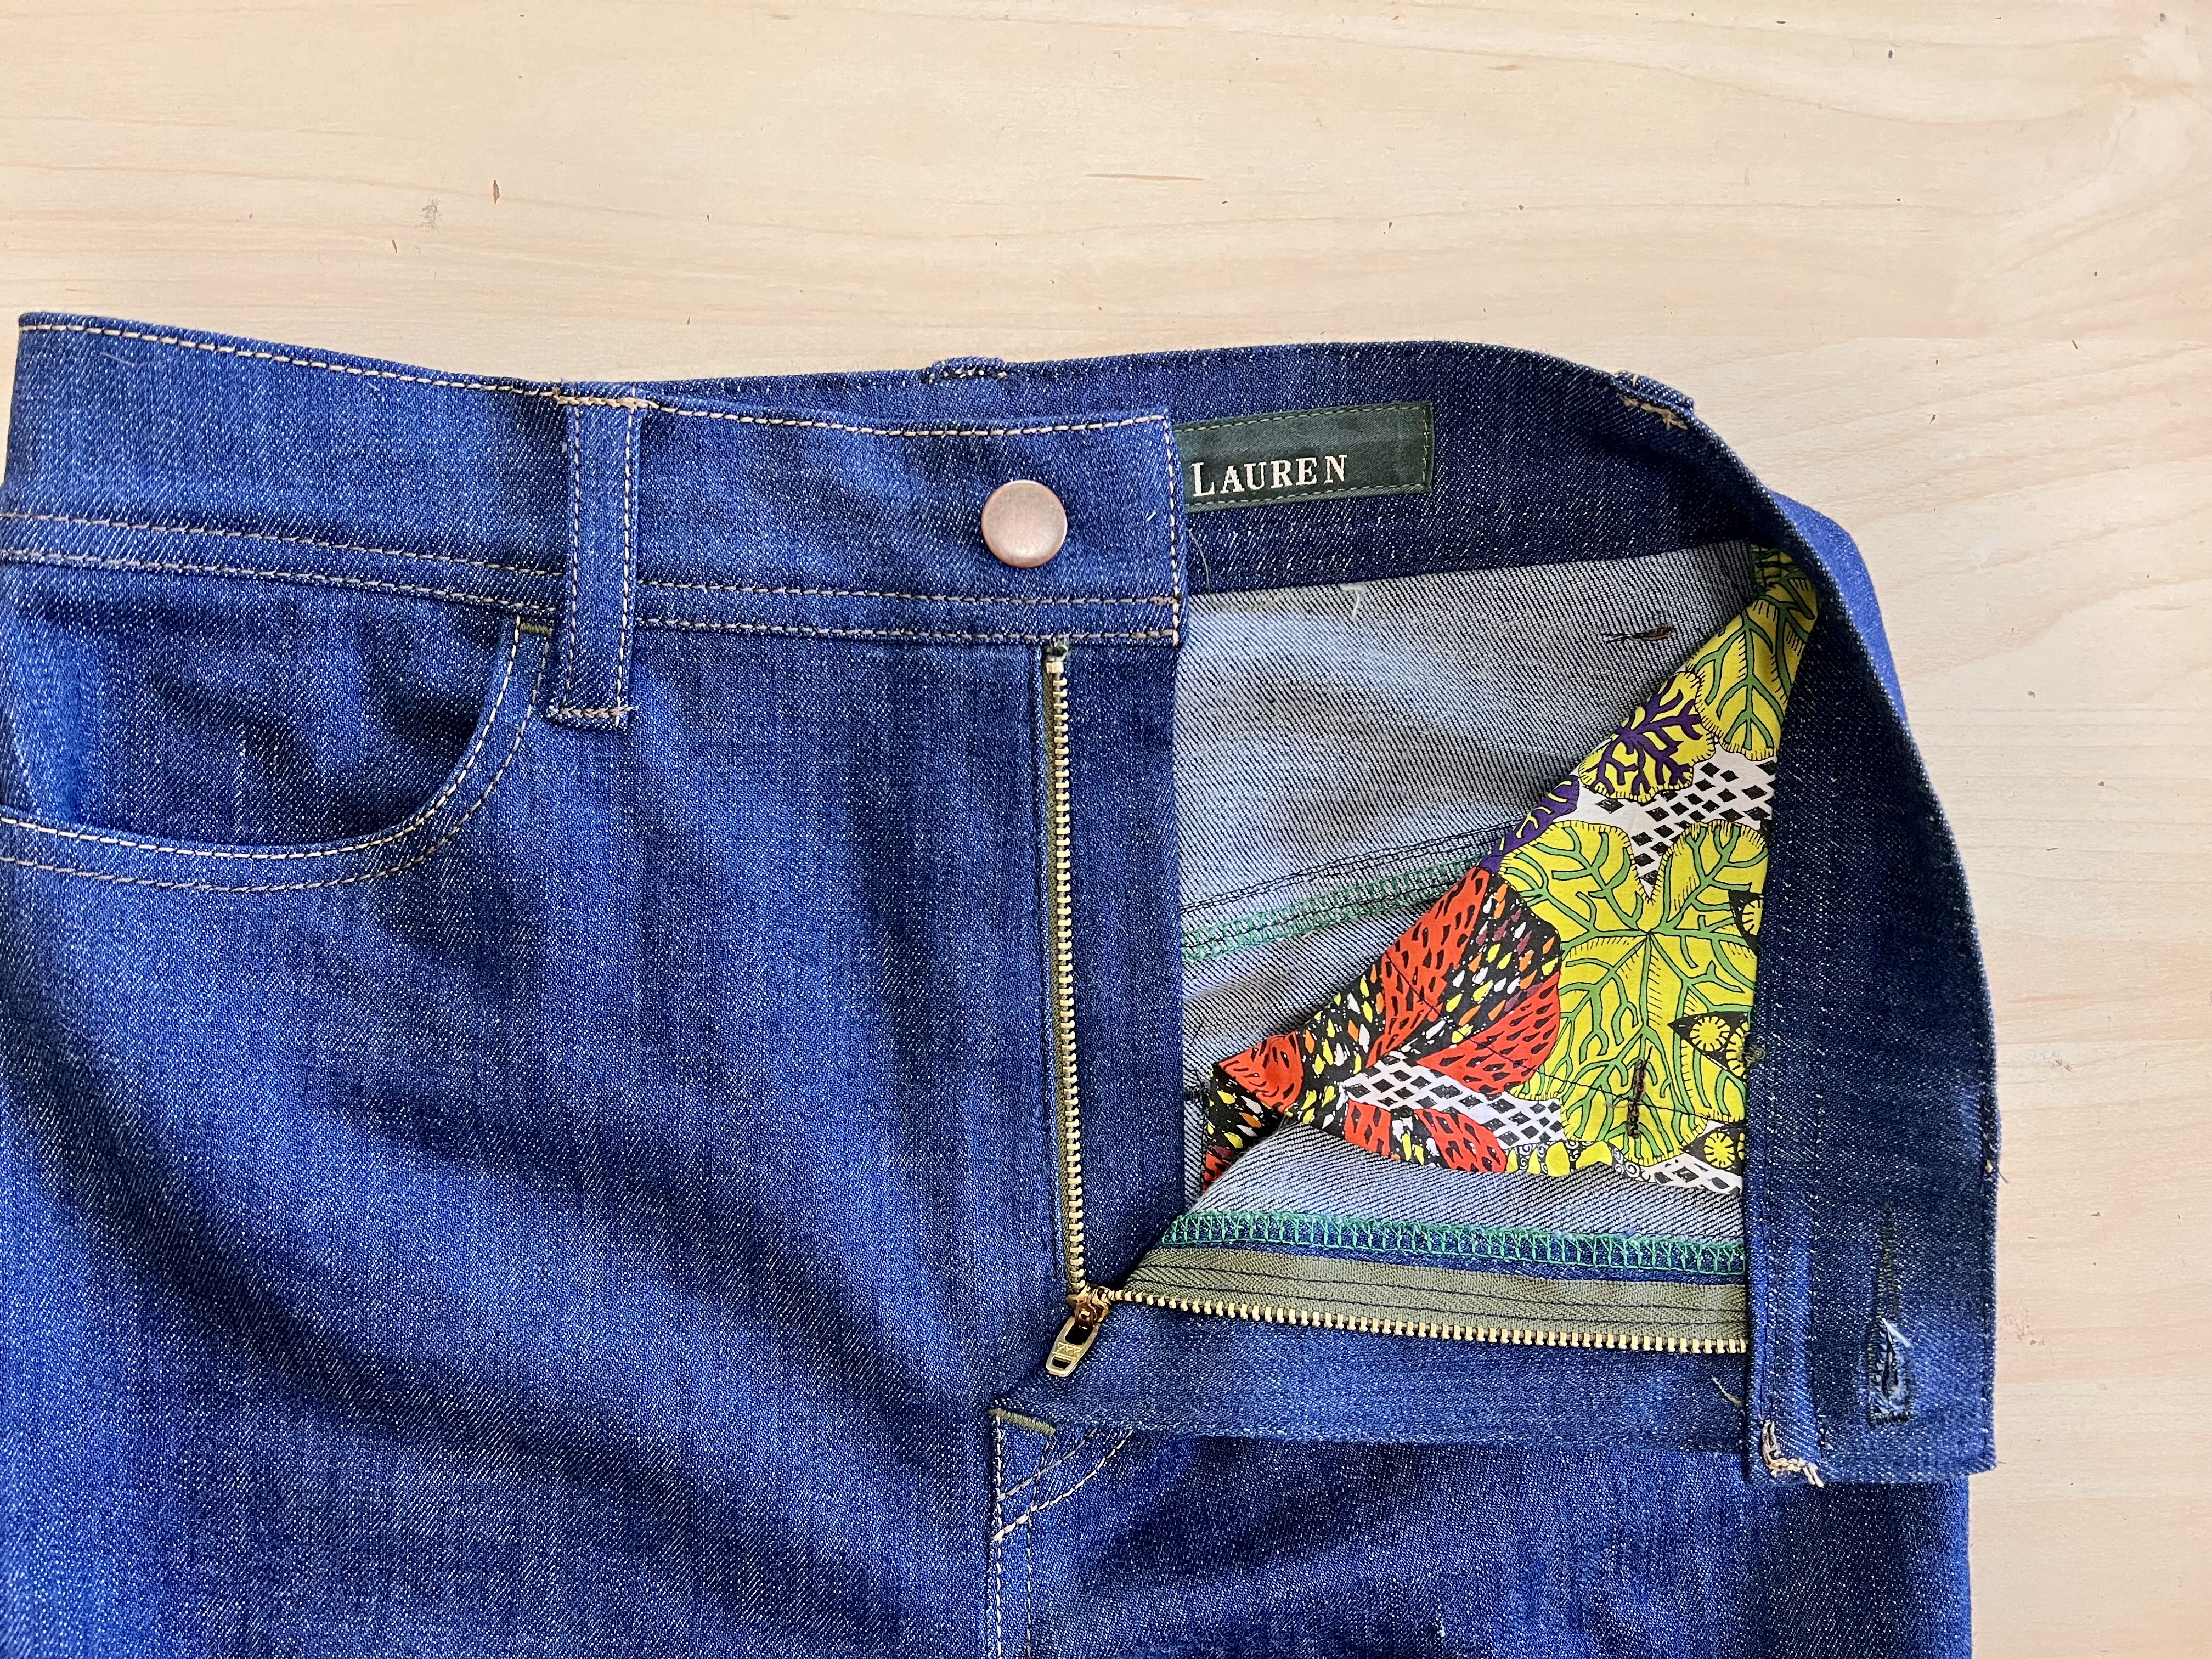
Thanks to Vogue 2442, I was able to make my own pair of Calvin Klein jeans 😀

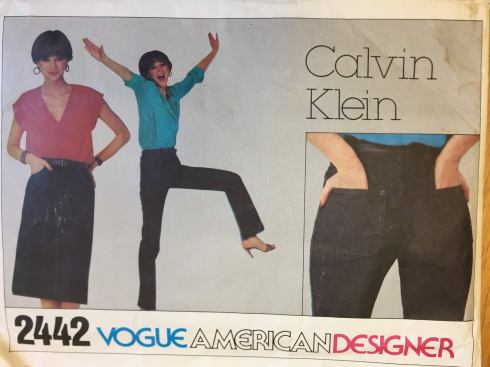
Before we get too far into the post, though, I just want to acknowledge how absolutely stupid this envelope cover is. You can barely see any of the details of the jeans (although the butt close-up is helpful, and to be completely transparent here, it’s a nice butt), and I don’t know why that woman is holding her leg up like that because you definitely can’t do it in these jeans. Nothing about this cover art (or lack thereof) makes me want to try this pattern, but nevertheless, I persevered. For science.

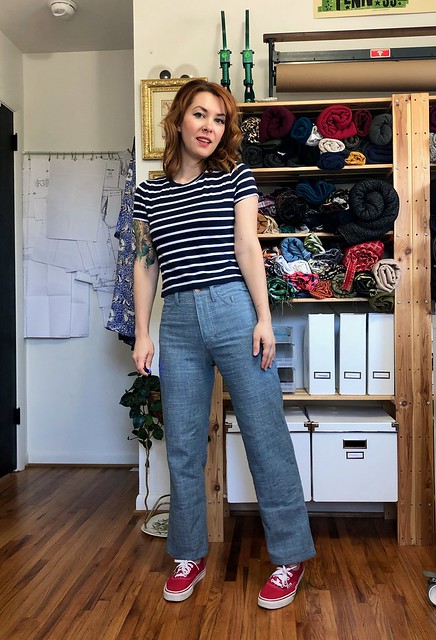
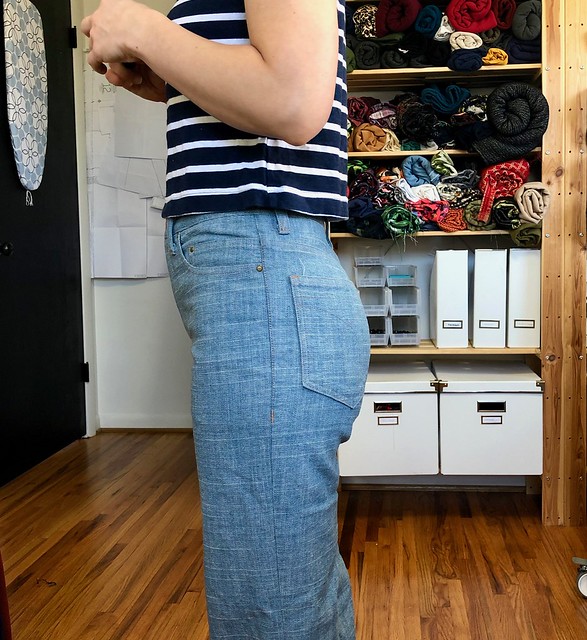
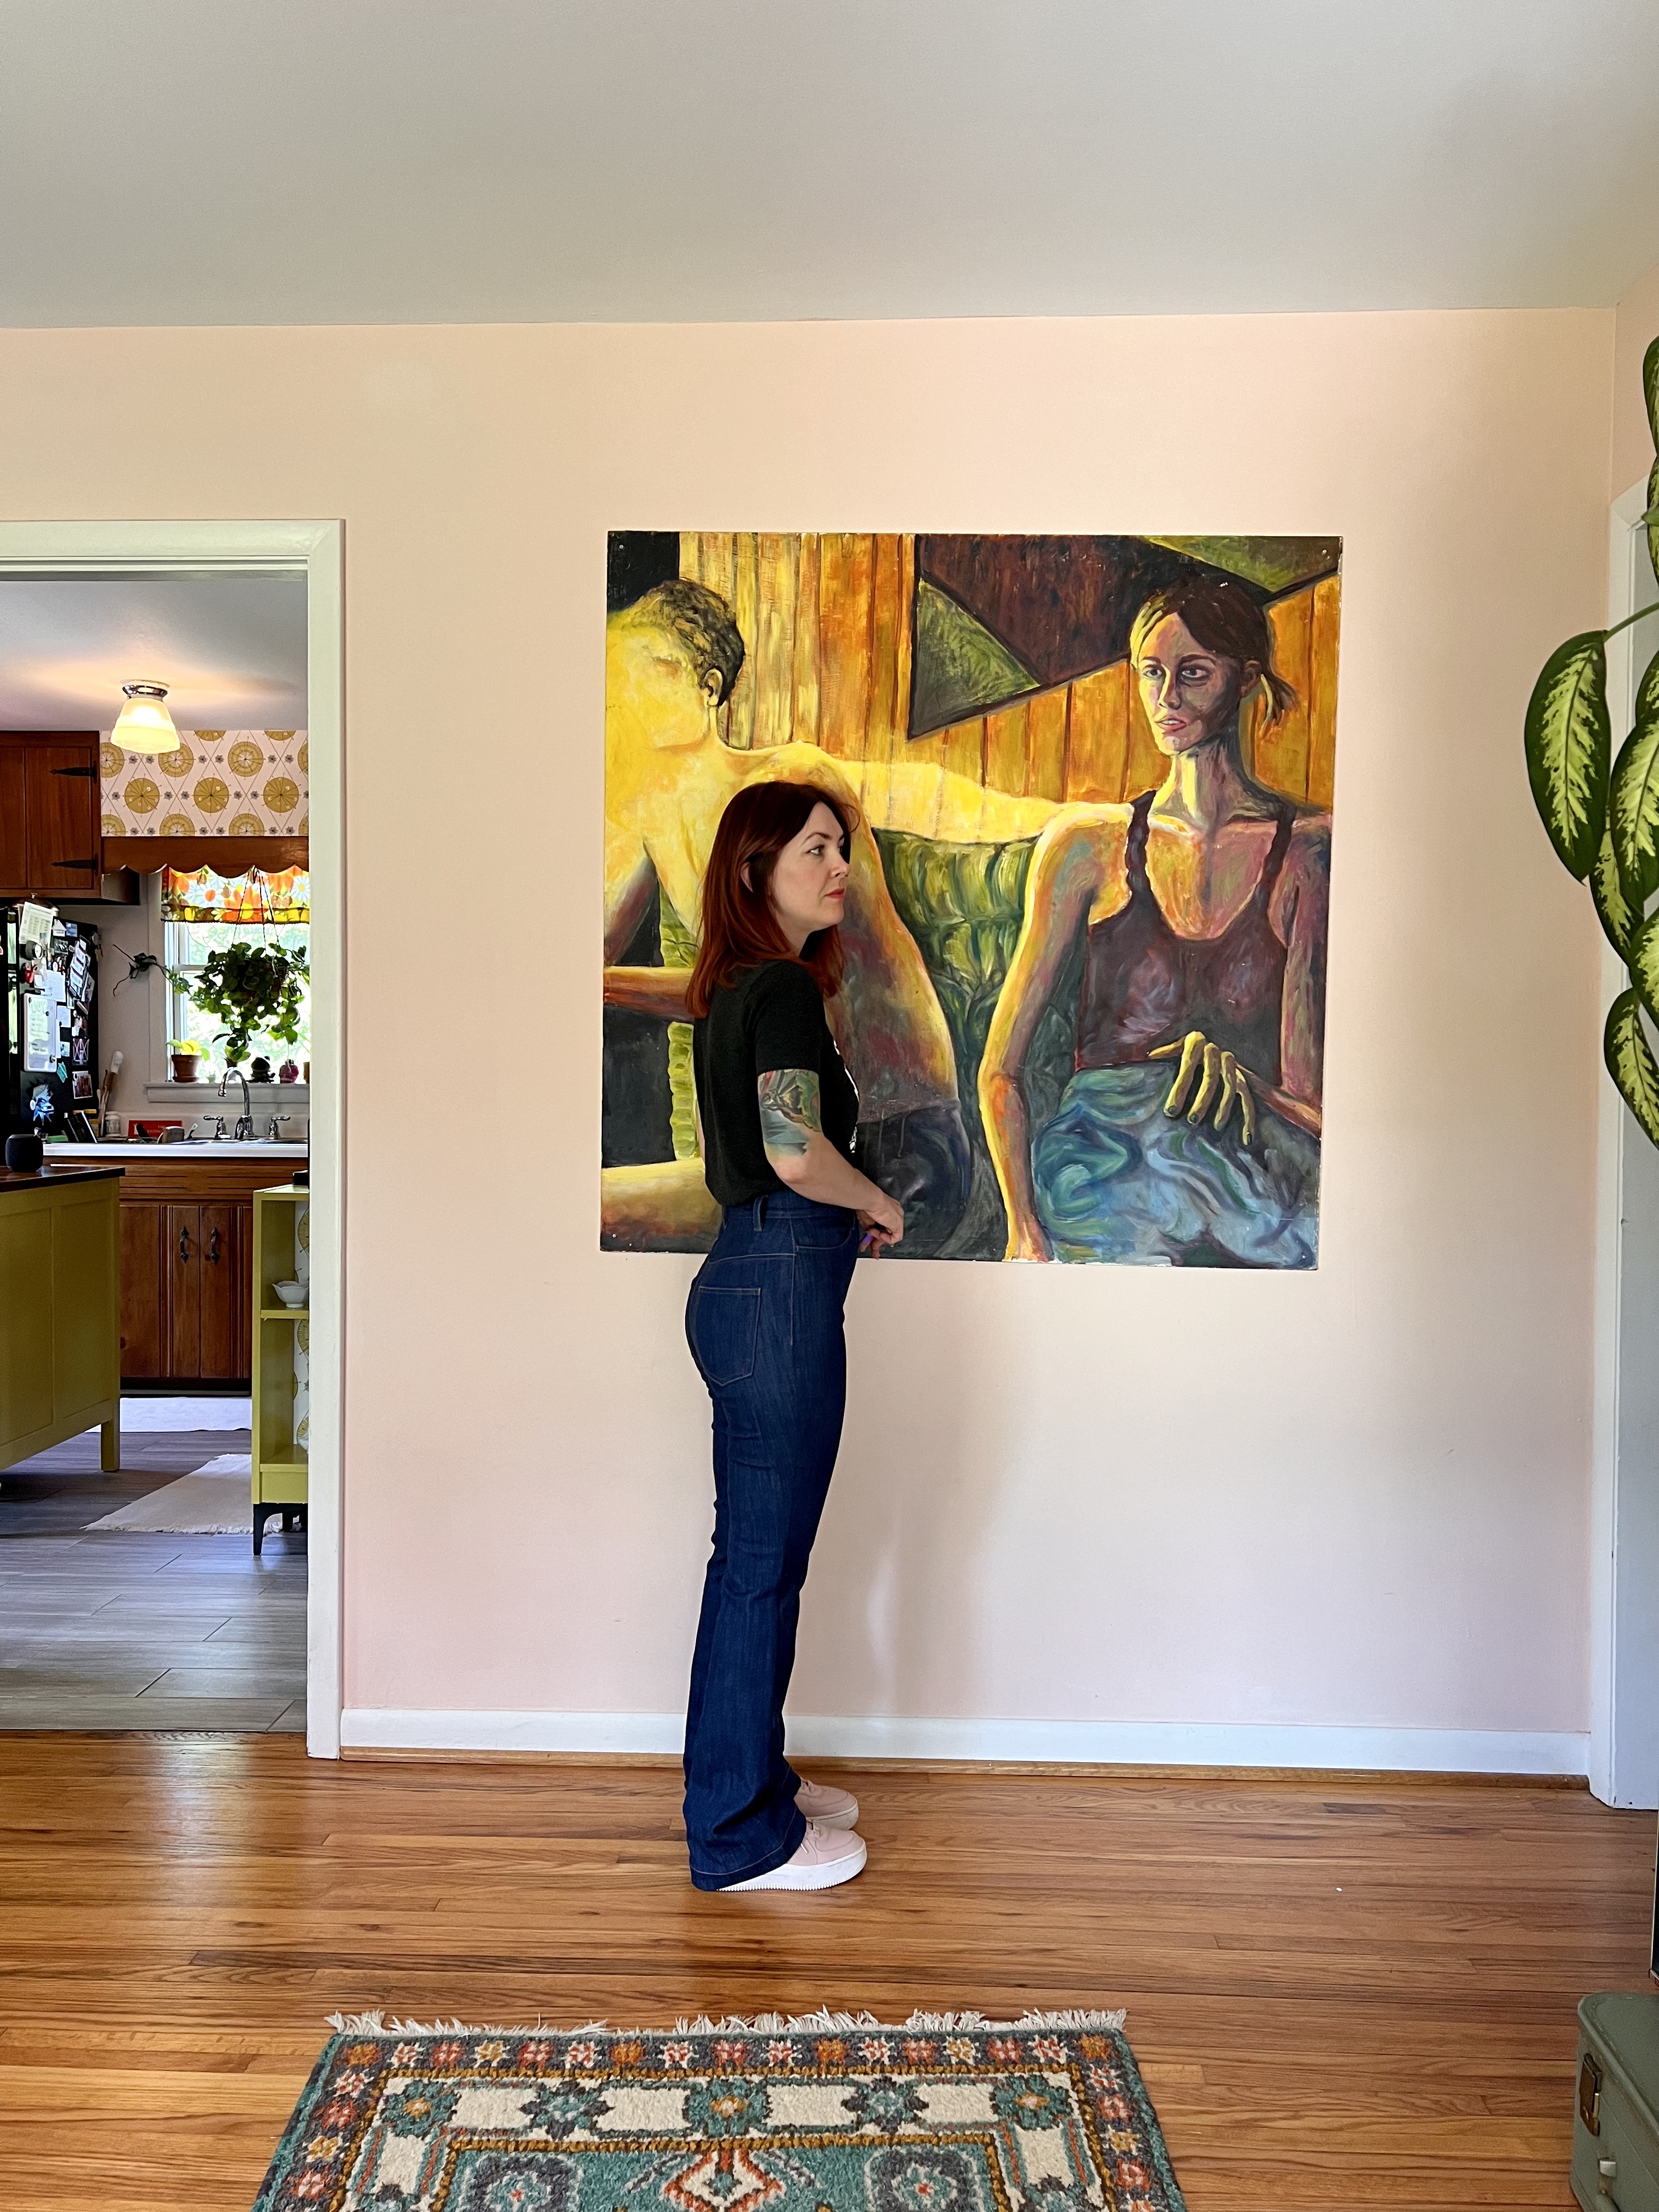
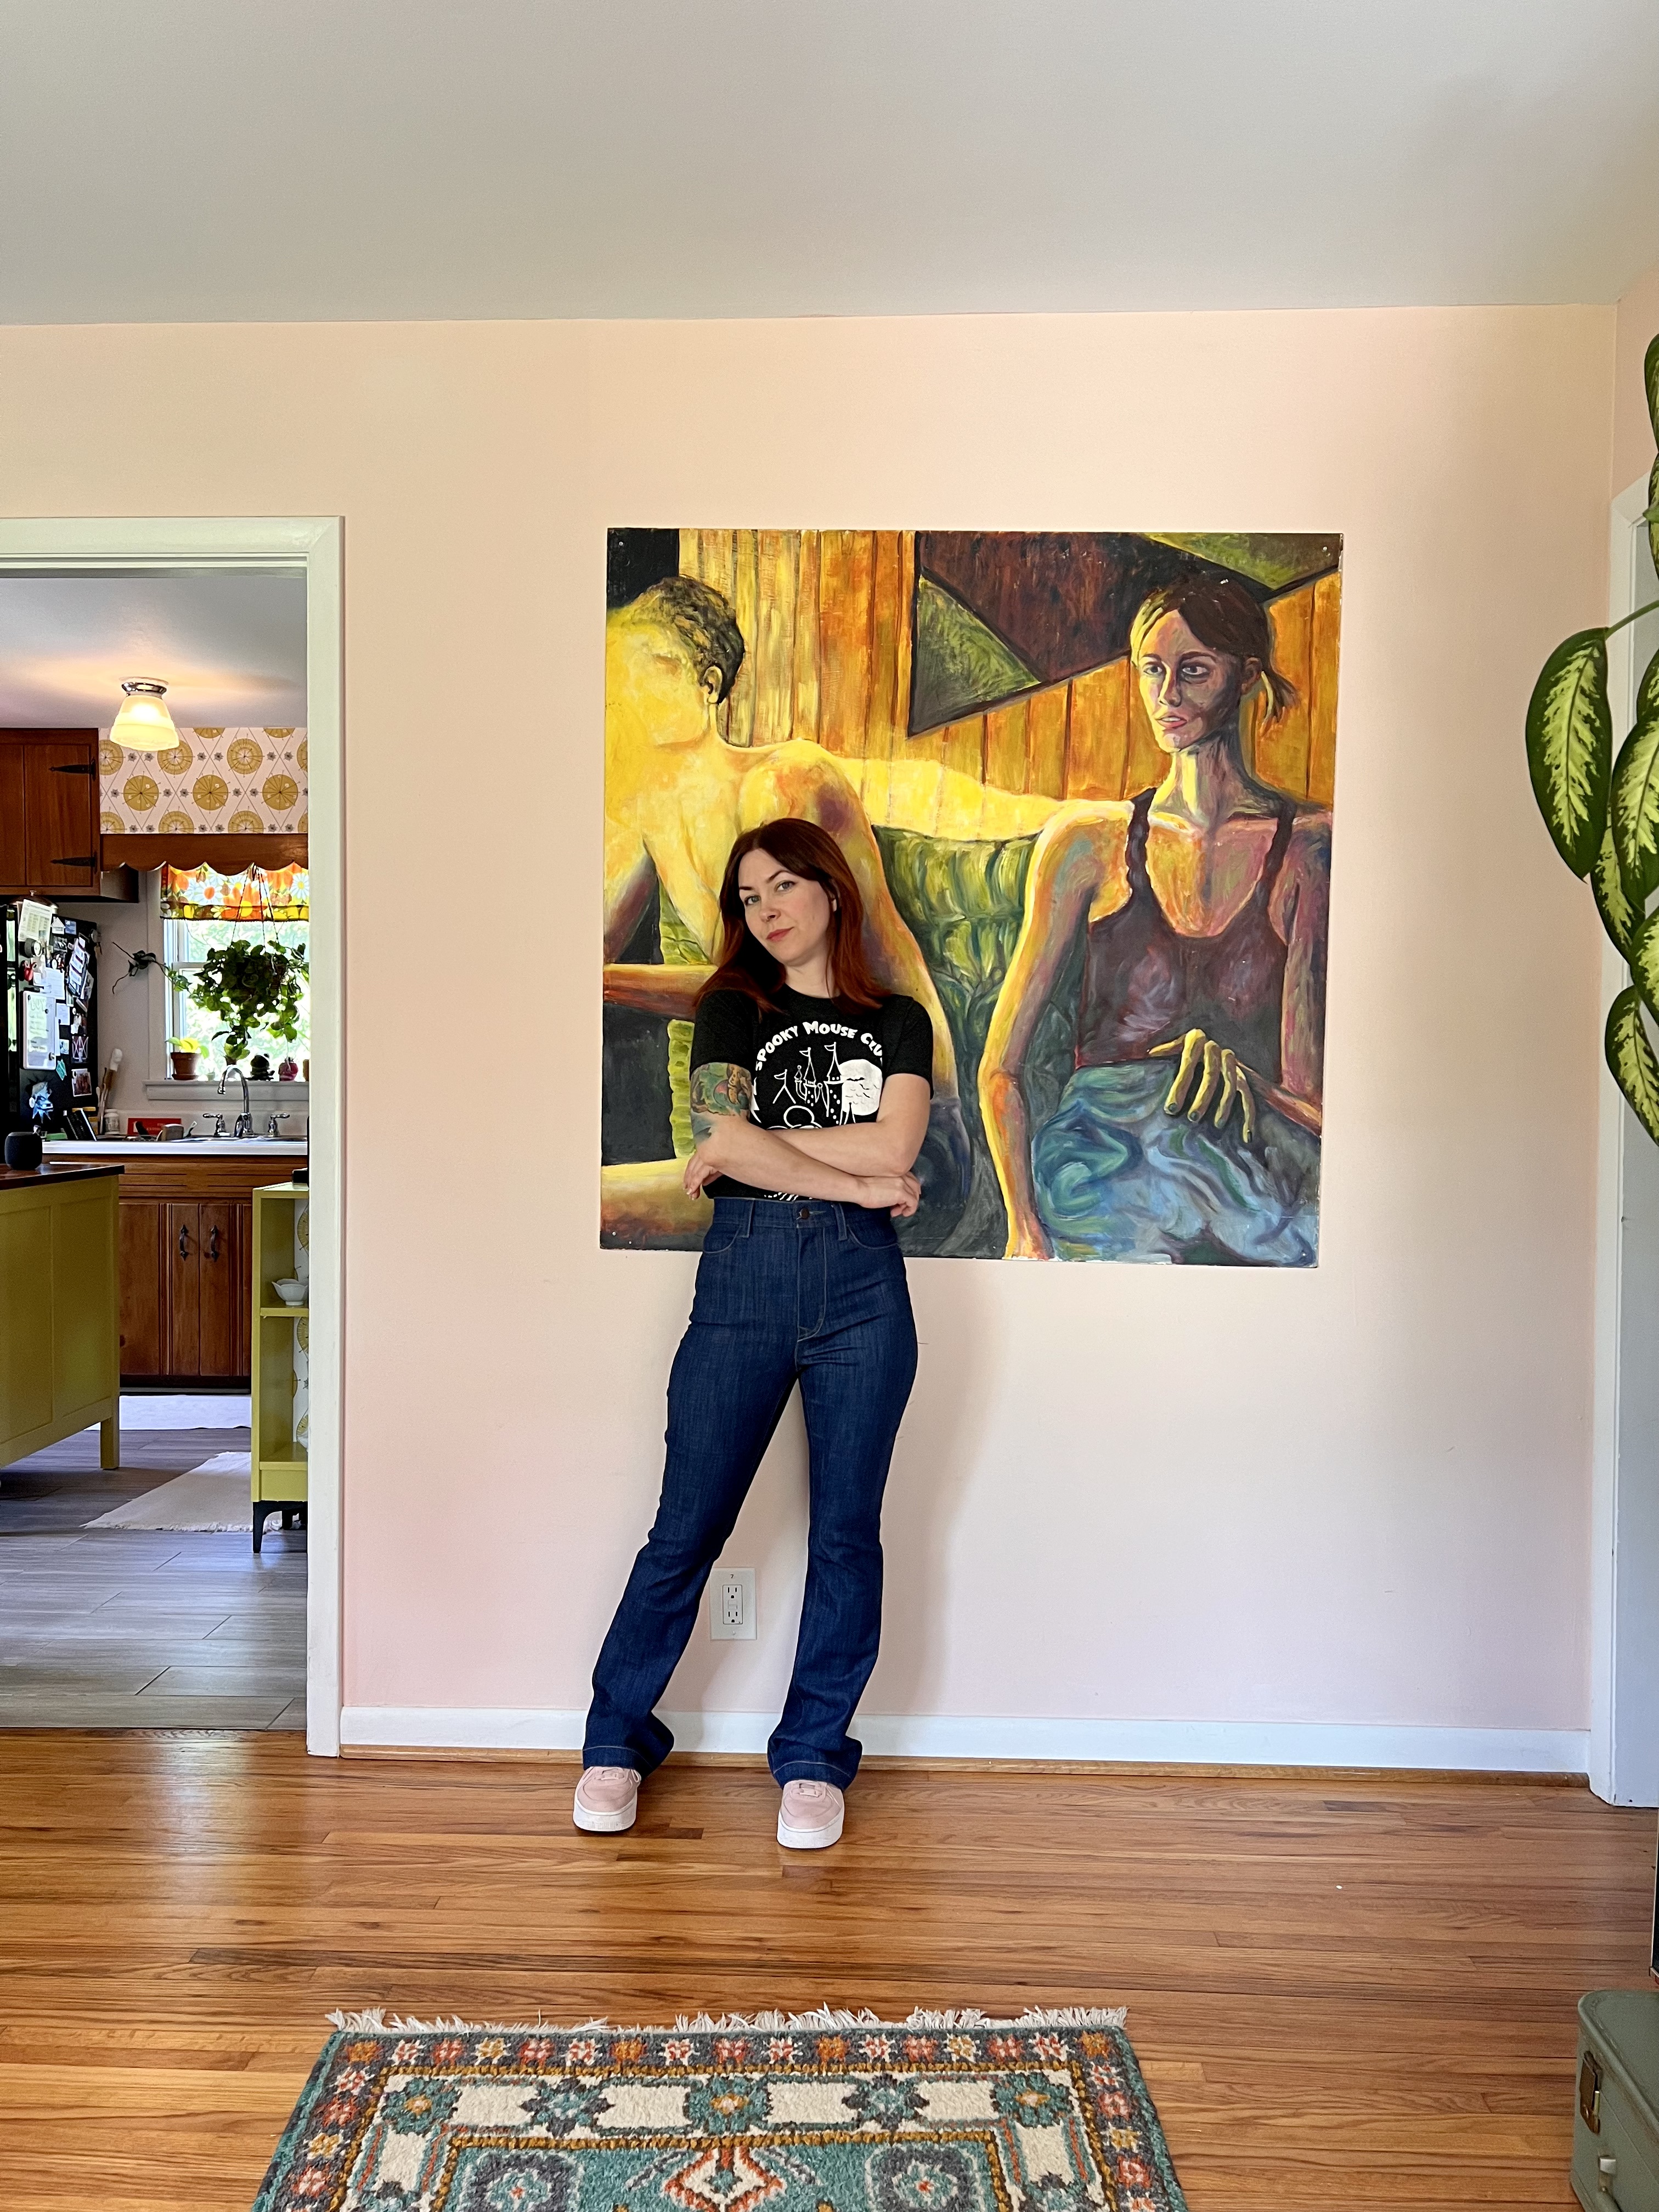
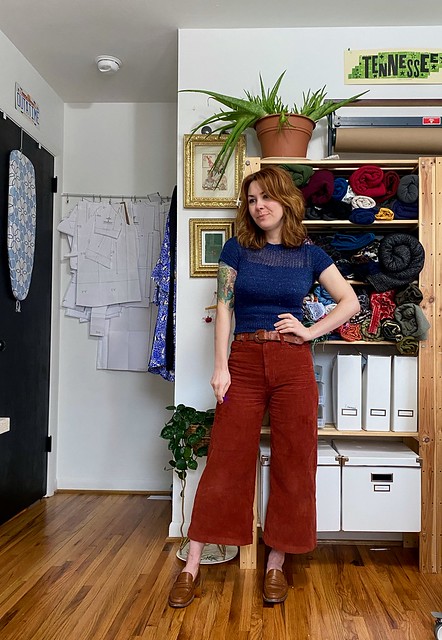
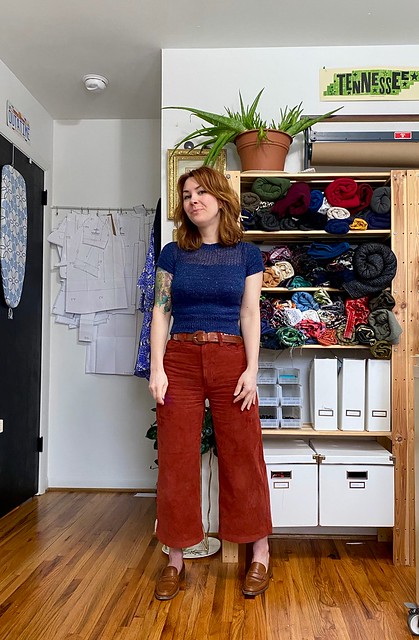
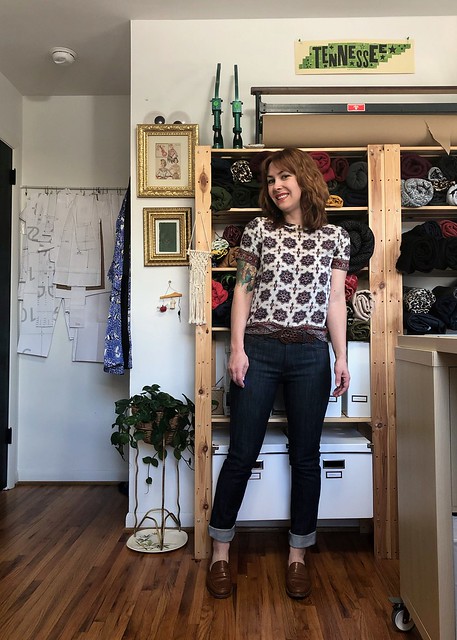
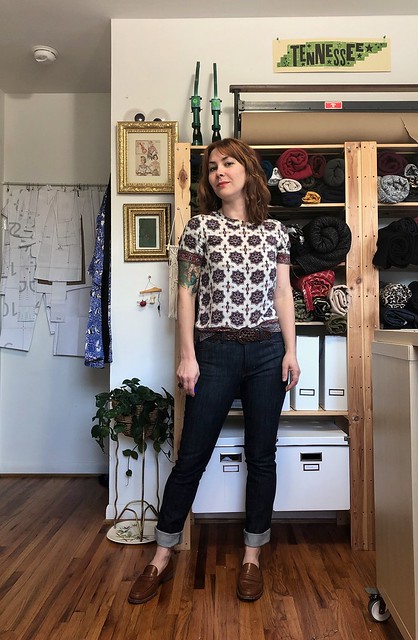
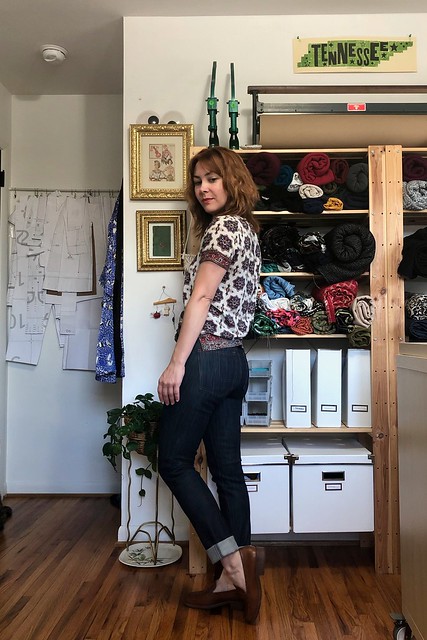
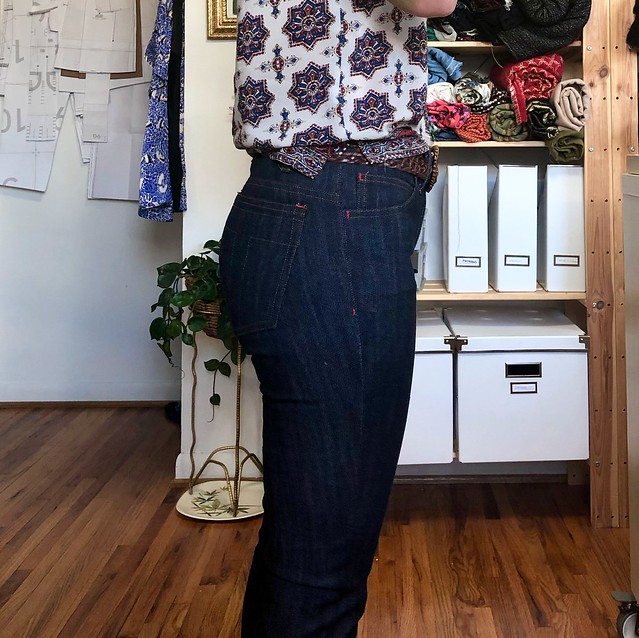
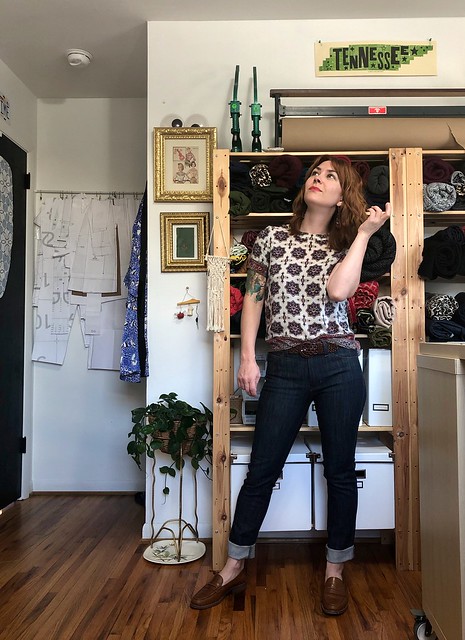
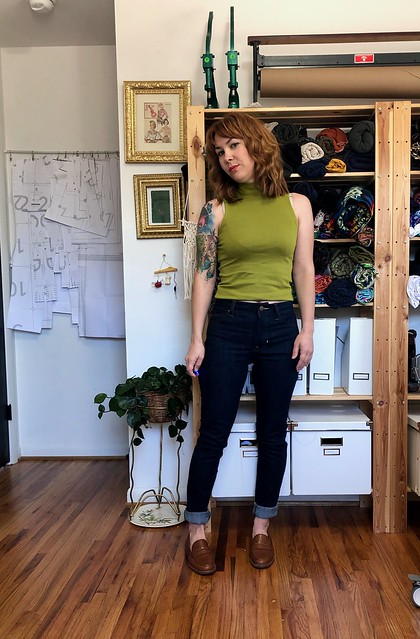
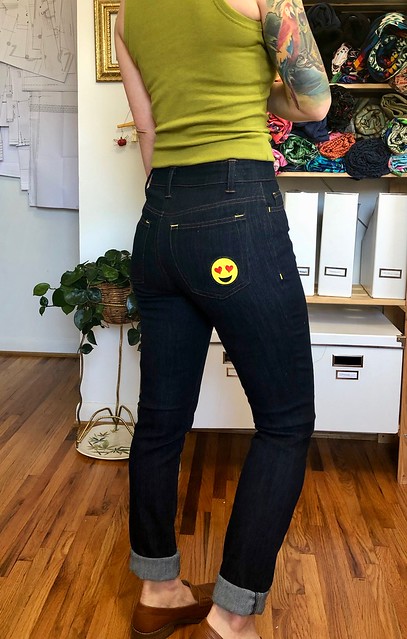
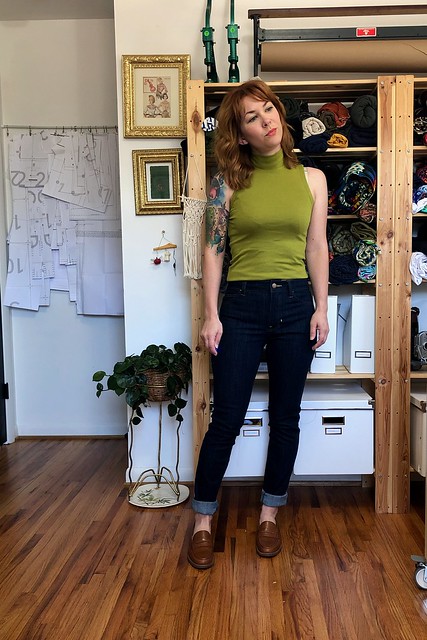
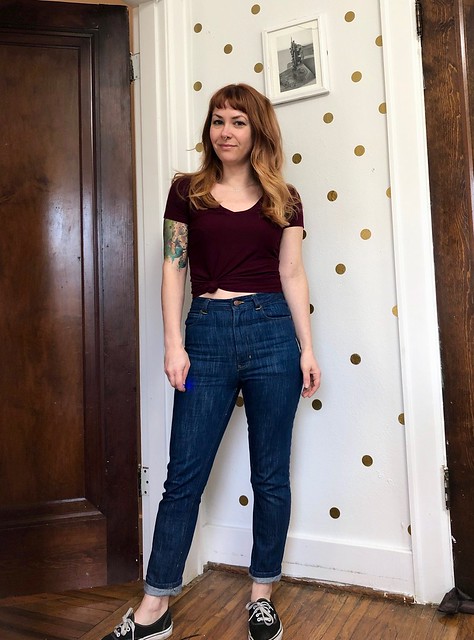
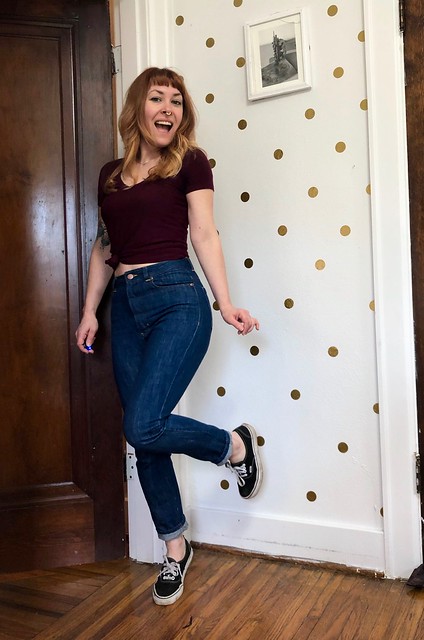
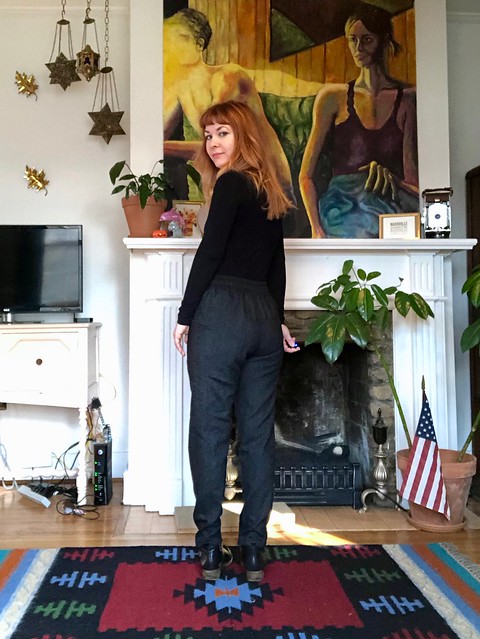
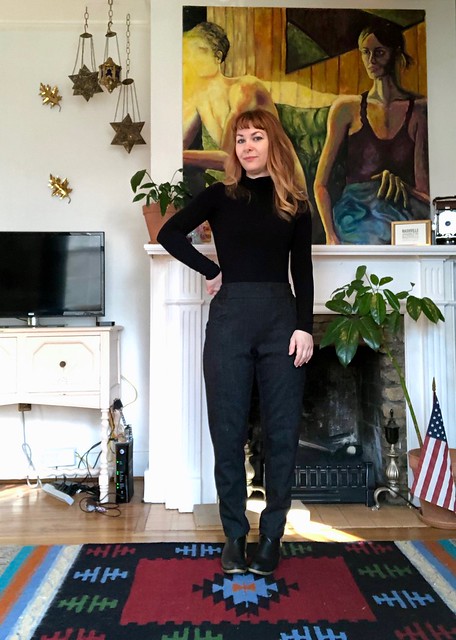
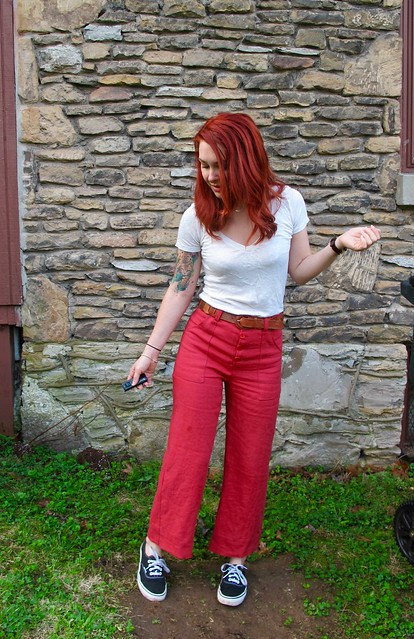
Anyway, here are mine!

Vogue 2442 Calvin Klein Jeans made with Art Gallery Fabrics denim

I went down a little rabbit hole last fall while looking at vintage jeans. I reaaaaaally wanted some vintage Calvin Kleins, if only for the brag factor, but my budget currently doesn’t allow me to spend hundreds of dollars on someone’s used jeans (RIP, the vintage market). I considered sewing them, but recalled looking up vintage CK patterns years ago and they were going for obscene wads of money. Just out of curiosity, I checked again – and was surprised to see that there are plenty to choose from for $10-$20. Calvin Klein licensed his name to Vogue patterns a bunch throughout the 80s and 90s, occasionally offering a jeans pattern. There were loads of mom jeans to choose from (including a truly horrifying Vogue 2851, I mean, come on) but I went with the OG, the Vogue 2442 from 1980. In the effort of being as science-y as possible, I re-measured myself and chose the size that closely matched my measurements – in this case, the 8.

Vogue 2442 Calvin Klein Jeans made with Art Gallery Fabrics denim

It took me a while to find a suitable denim to make these up – I wanted something non-stretch (as the pattern calls for – this was before stretch denim was really a thing!), but not too heavy, and a lighter wash. A bunch of the stuff I was coming up with ended up being way too lightweight, or had too much stretch, so this project ended up being shelved for longer than I would have liked.

Vogue 2442 Calvin Klein Jeans made with Art Gallery Fabrics denim

As you can see, I did end up finding a great denim – from Art Gallery Fabrics, of all places! I’ll admit that Art Gallery Fabrics wouldn’t be my first thought when it comes to denim, but they’ve been expanding their denim gallery and I was curious to see what the offerings entailed. There is a great selection of lightweight (4.5oz, like what you’d use to make a button-down top or a sundress) denims, both printed and dyed various colors. The heavier denims clock in at 10oz (which is the lighter end of a pants-weight denim, and my personal preference), and come in a smaller selection of colors, nonstretch only.

After playing with some swatches, I chose the Crosshatch Textured Denim, in the Bubbling Brook colorway. My other choice was the Solid Textured Denim in Bluebottle Field, but that was sold out, so hopefully I can try it out in the future!

Vogue 2442 Calvin Klein Jeans made with Art Gallery Fabrics denim

Vogue 2442 Calvin Klein Jeans made with Art Gallery Fabrics denim

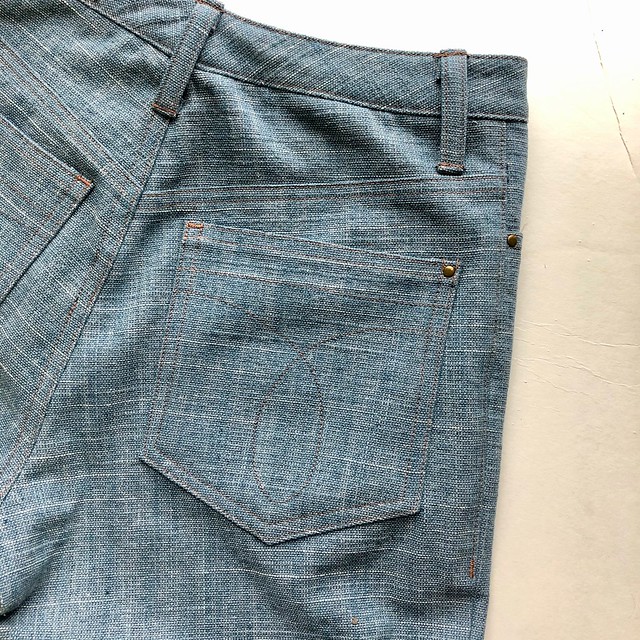
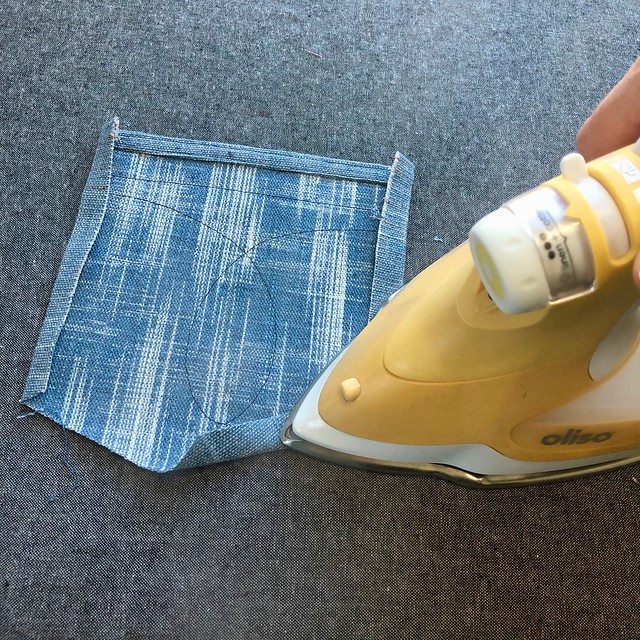
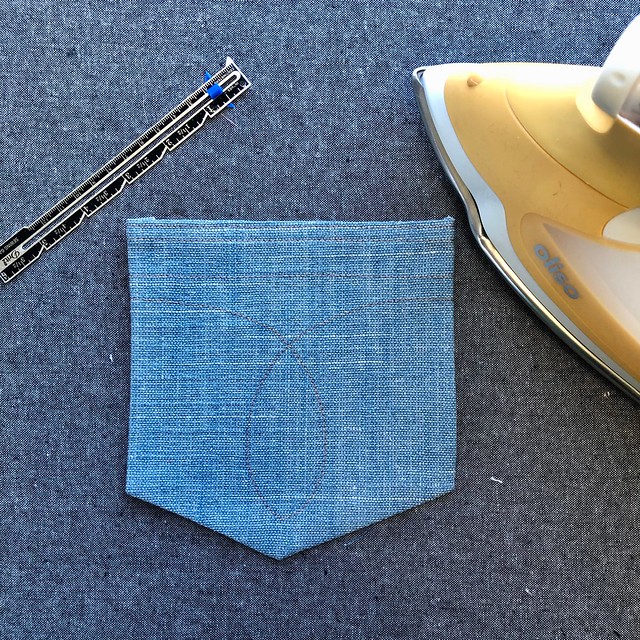
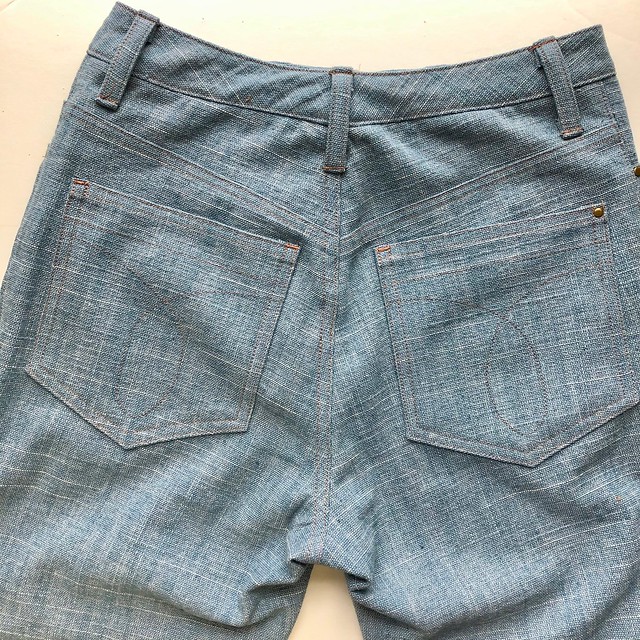
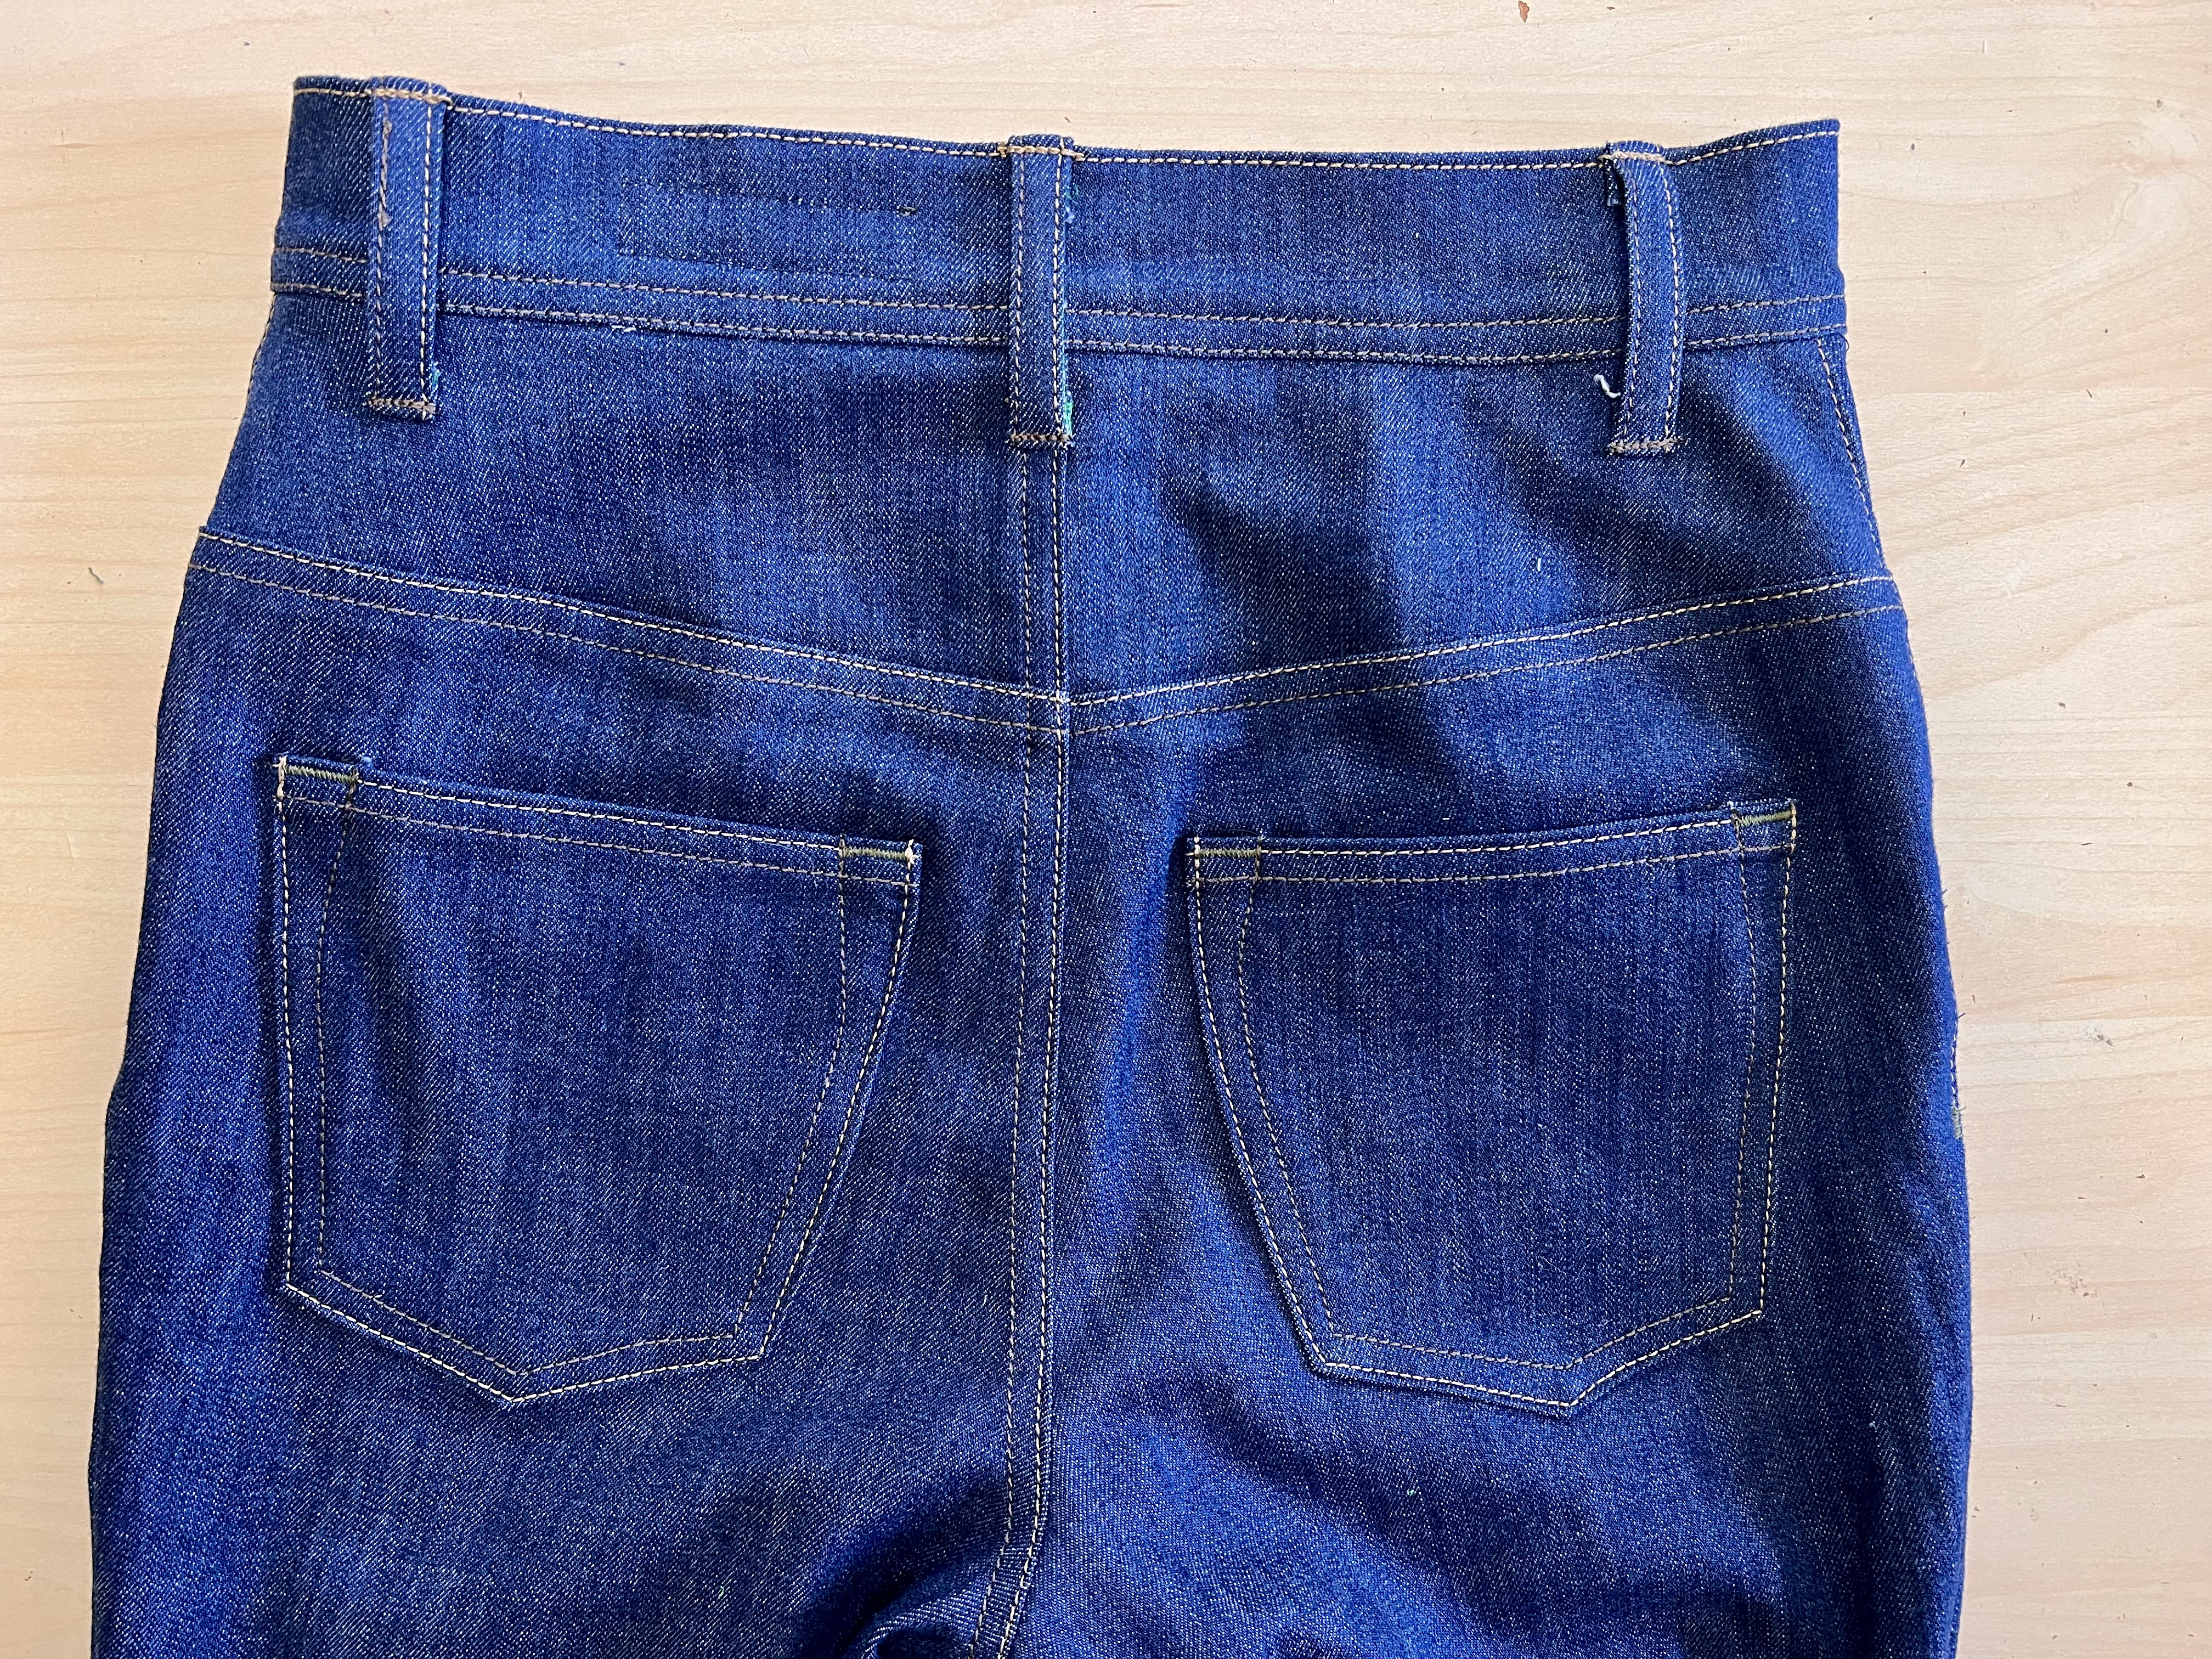
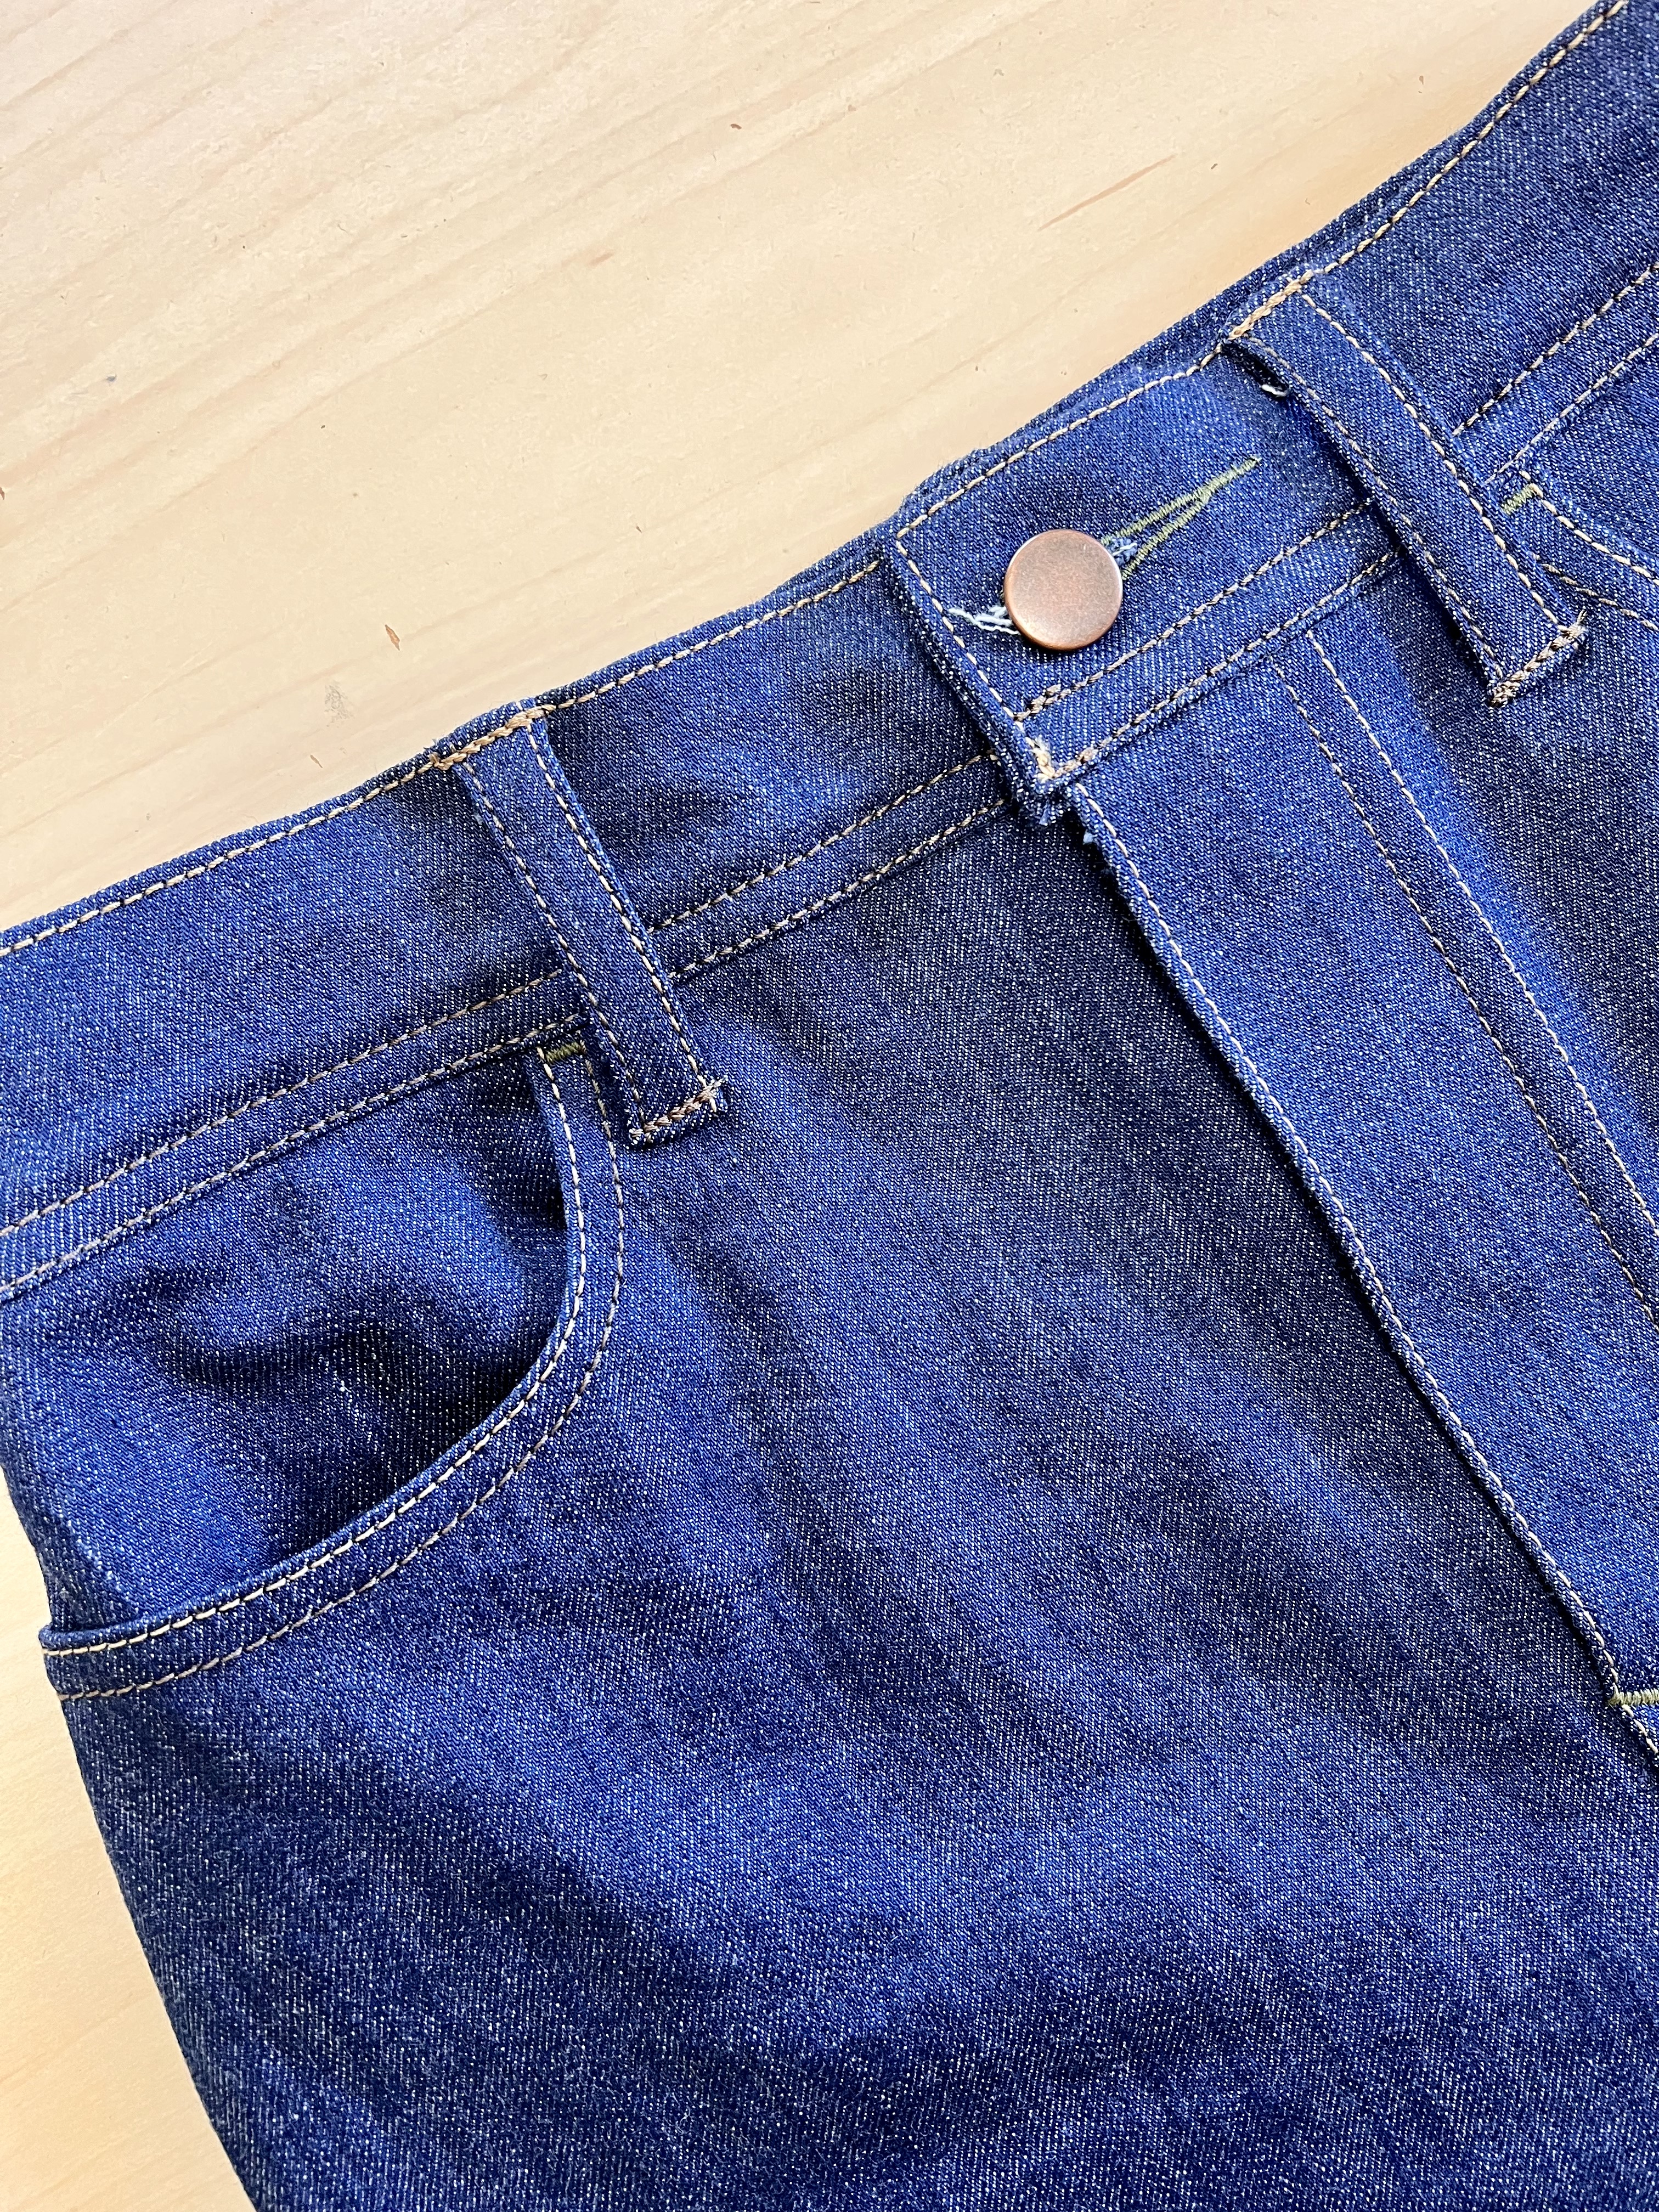
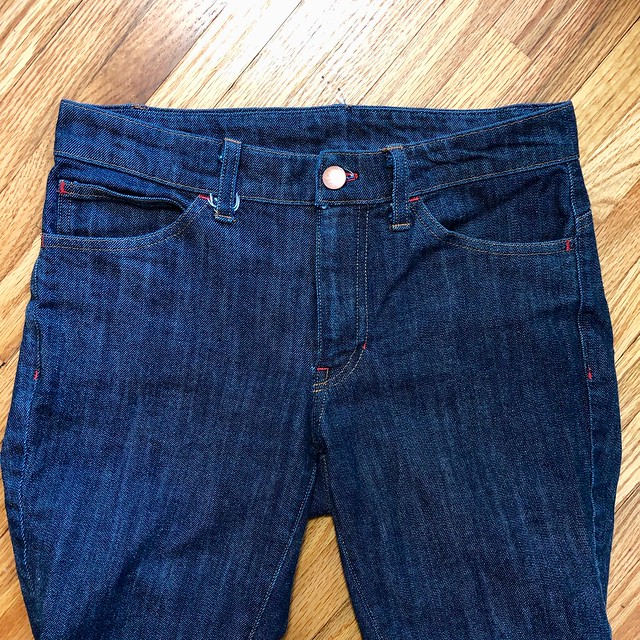
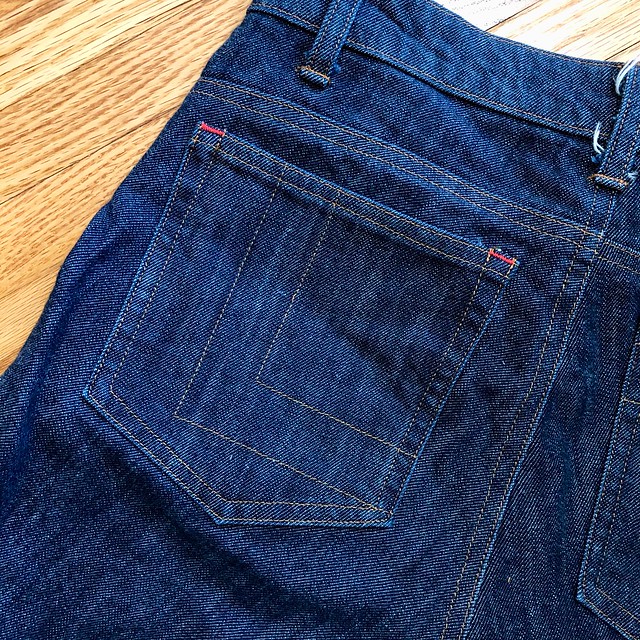
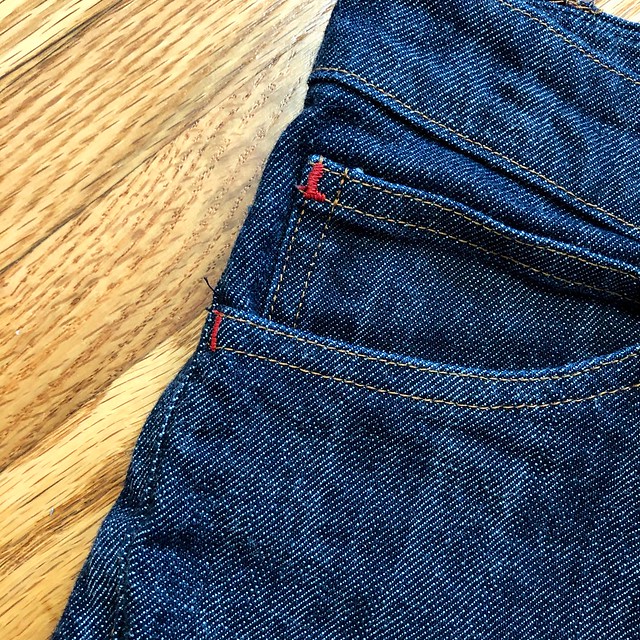
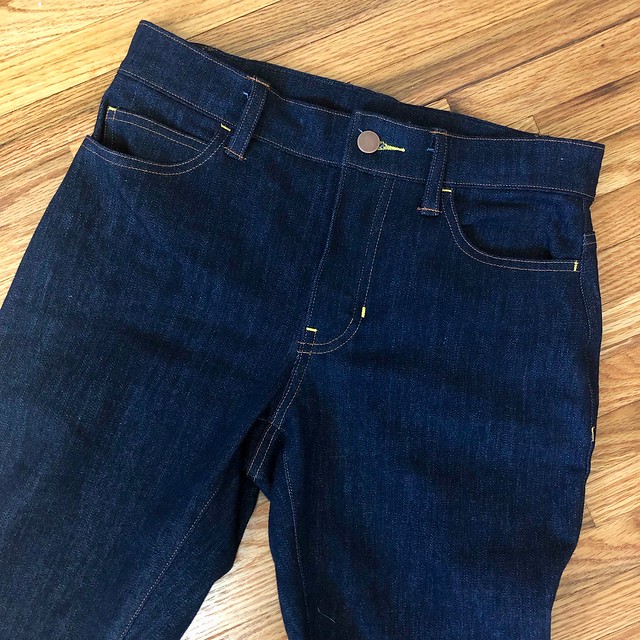
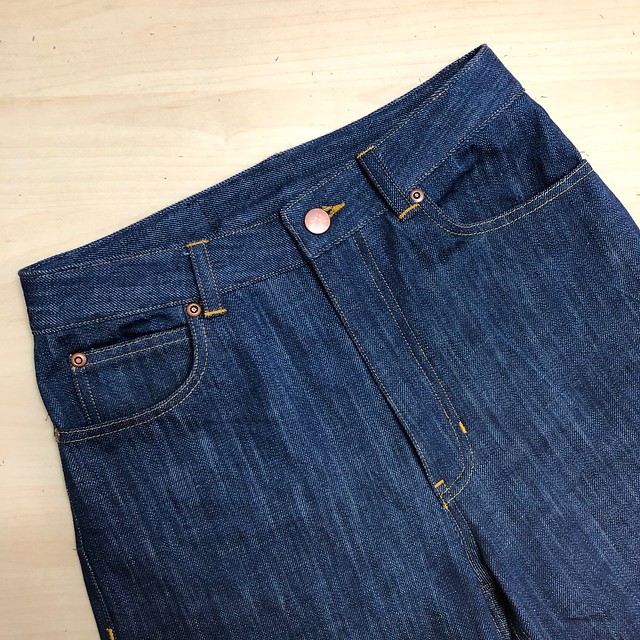
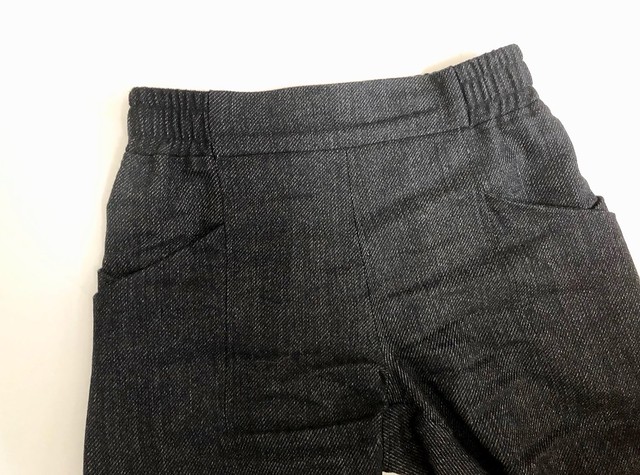
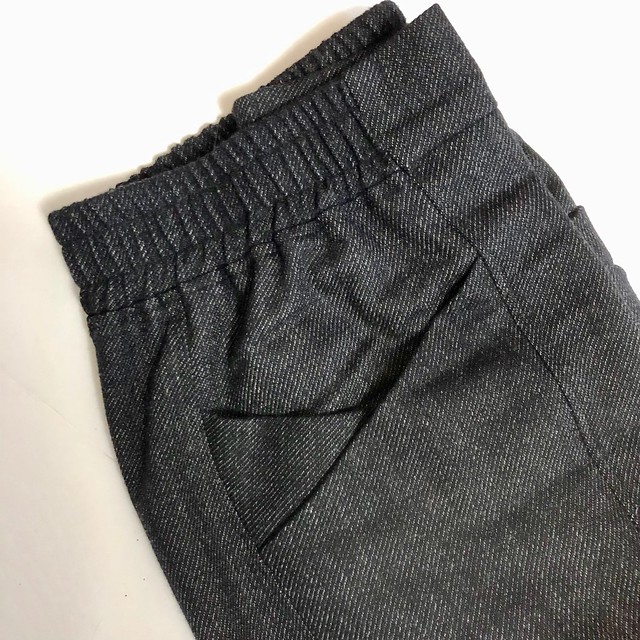
Anyway, about the Crosshatch Textured Denim! First off, you probably noticed that my jeans don’t exactly have a crosshatched design on them – that’s because you are looking at the wrong side of the fabric, baby! I actually don’t mind the crosshatch look, but upon receiving the fabric I fell in LURVE with the less contrasty wrong side of the fabric, so that’s what I went with on my jeans! My sewing project, my rules! The denim was pretty stiff and definitely not soft upon first receiving; but did get really soft and supple after just one wash. Be warned that it frays a lot, though – you’ll want to make sure you finish your seams (whether serging, or zigzaging, or even binding them) because otherwise the inside of your garment will get real hairy, real fast. If that bothers you, I mean. You do you.

Vogue 2442 Calvin Klein Jeans made with Art Gallery Fabrics denim

Other than the fraying part, this denim was easy to work with. I recently got an Oliso Steam Iron (yes, the little iron that stands up when you stop touching it and yes it never ever stops being hilarious, no matter how much I use it) and this was my first real project to use it on. It doesn’t get quite as melt-your-hands-off-hot as my industrial gravity feed iron does (granted, this is cotton, so it doesn’t really need to be beaten into submission haha), but it heats up quickly, delivers a satisfying steam burst, doesn’t auto shut off every 2 minutes, oh, and IT STANDS ON IT’S OWN LITTLE FEET. My only regret in life is that I can’t find my stick-on googly eyes, because this iron needs eyeballs. Ok moving on.

Oliso Iron!

Oliso Iron!

Oliso Iron!

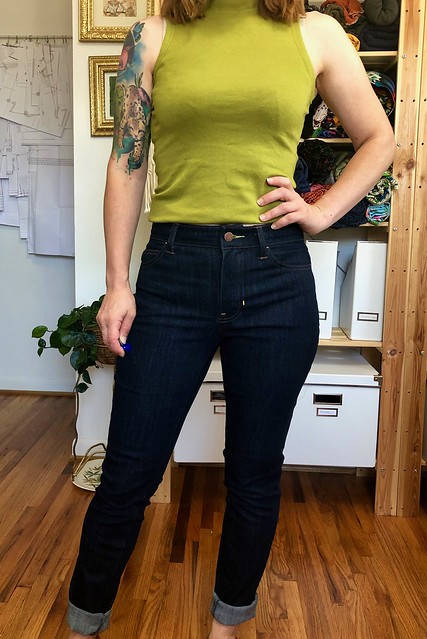
So, more about the pattern itself! Like I said, I went with the size 8, which was based on my current measurements. I did not make any prior fitting adjustments or a muslin before cutting my fabric – I just went for it! I wanted to see what would happen! (this might be my new motto for 2020). Fit-wise, this was almost perfect right out of the envelope. I did end up making a few minor tweaks before I attached the waistband – because I am extra, and I like fiddling with things! – but if I hadn’t done anything at all these still would have absolutely been wearable.

Vogue 2442 Calvin Klein Jeans made with Art Gallery Fabrics denim

Vogue 2442 Calvin Klein Jeans made with Art Gallery Fabrics denim

Vogue 2442 Calvin Klein Jeans made with Art Gallery Fabrics denim

Adjustments I made:
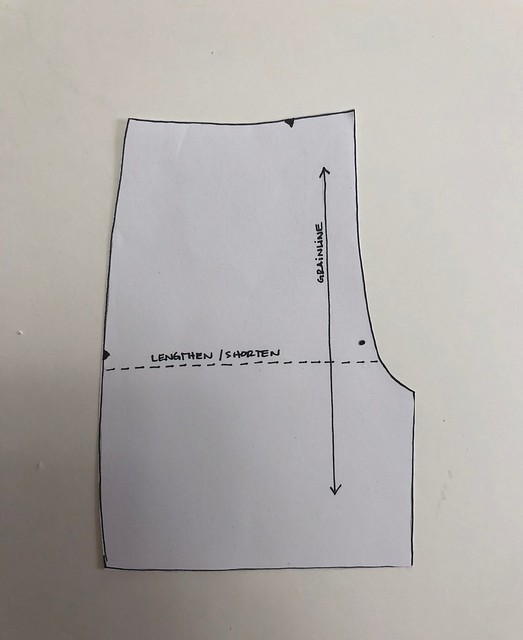
– Removed 1/2″ from the inner thighs, keeping the crotch length intact
– Scooped 1/8″ from the front crotch curve
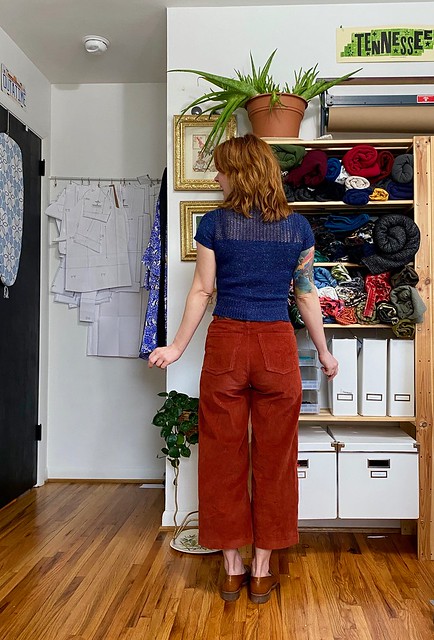
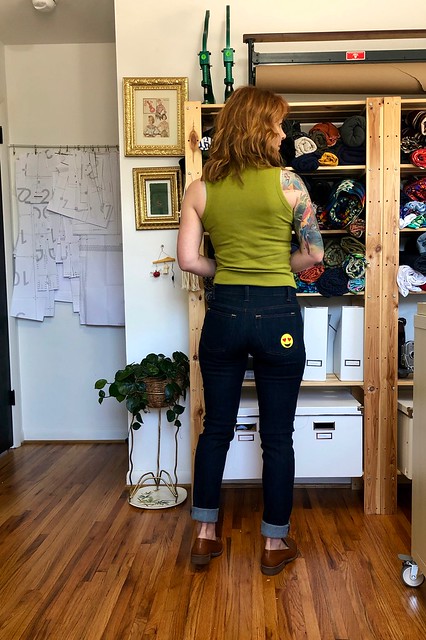
– 5/8″ wedge at the center back yoke + waistband
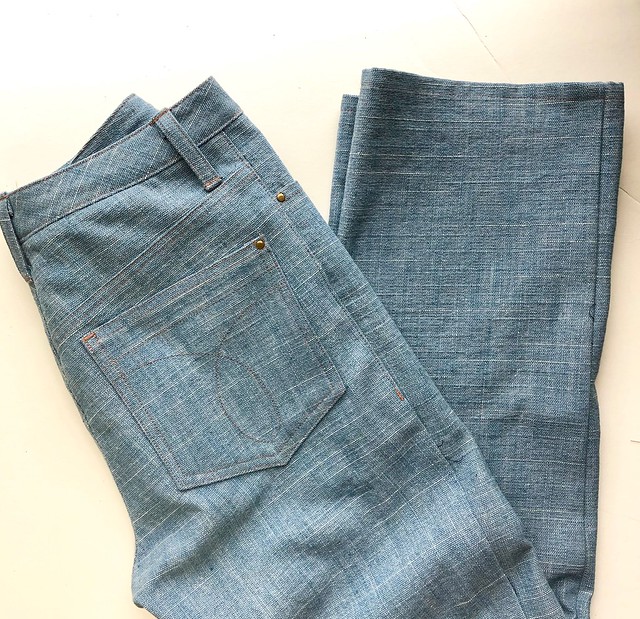
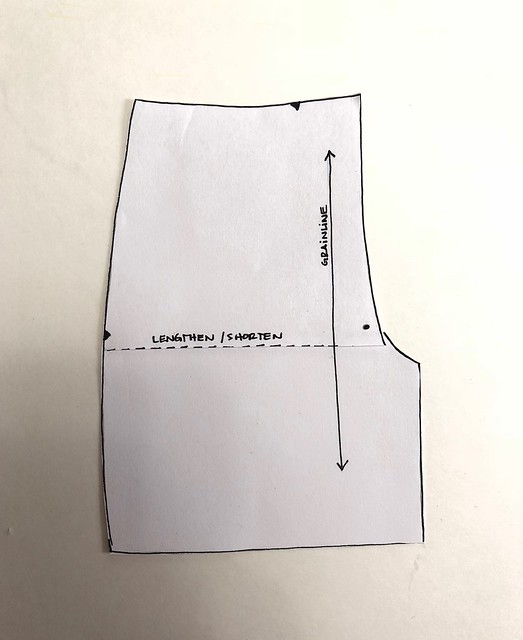
– Cut 5″ total off the hem (I have a 28″ inseam, y’all lmao)

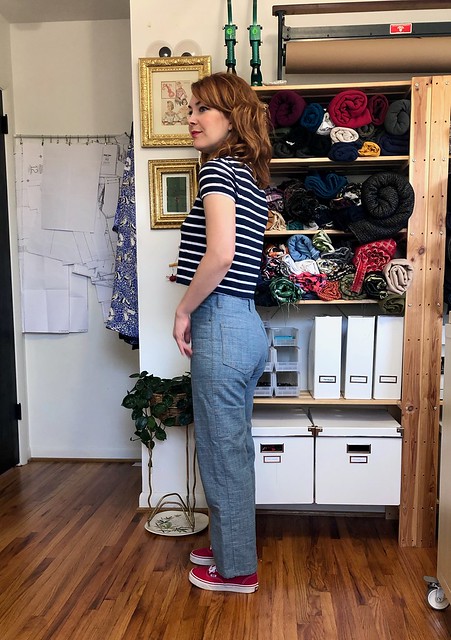
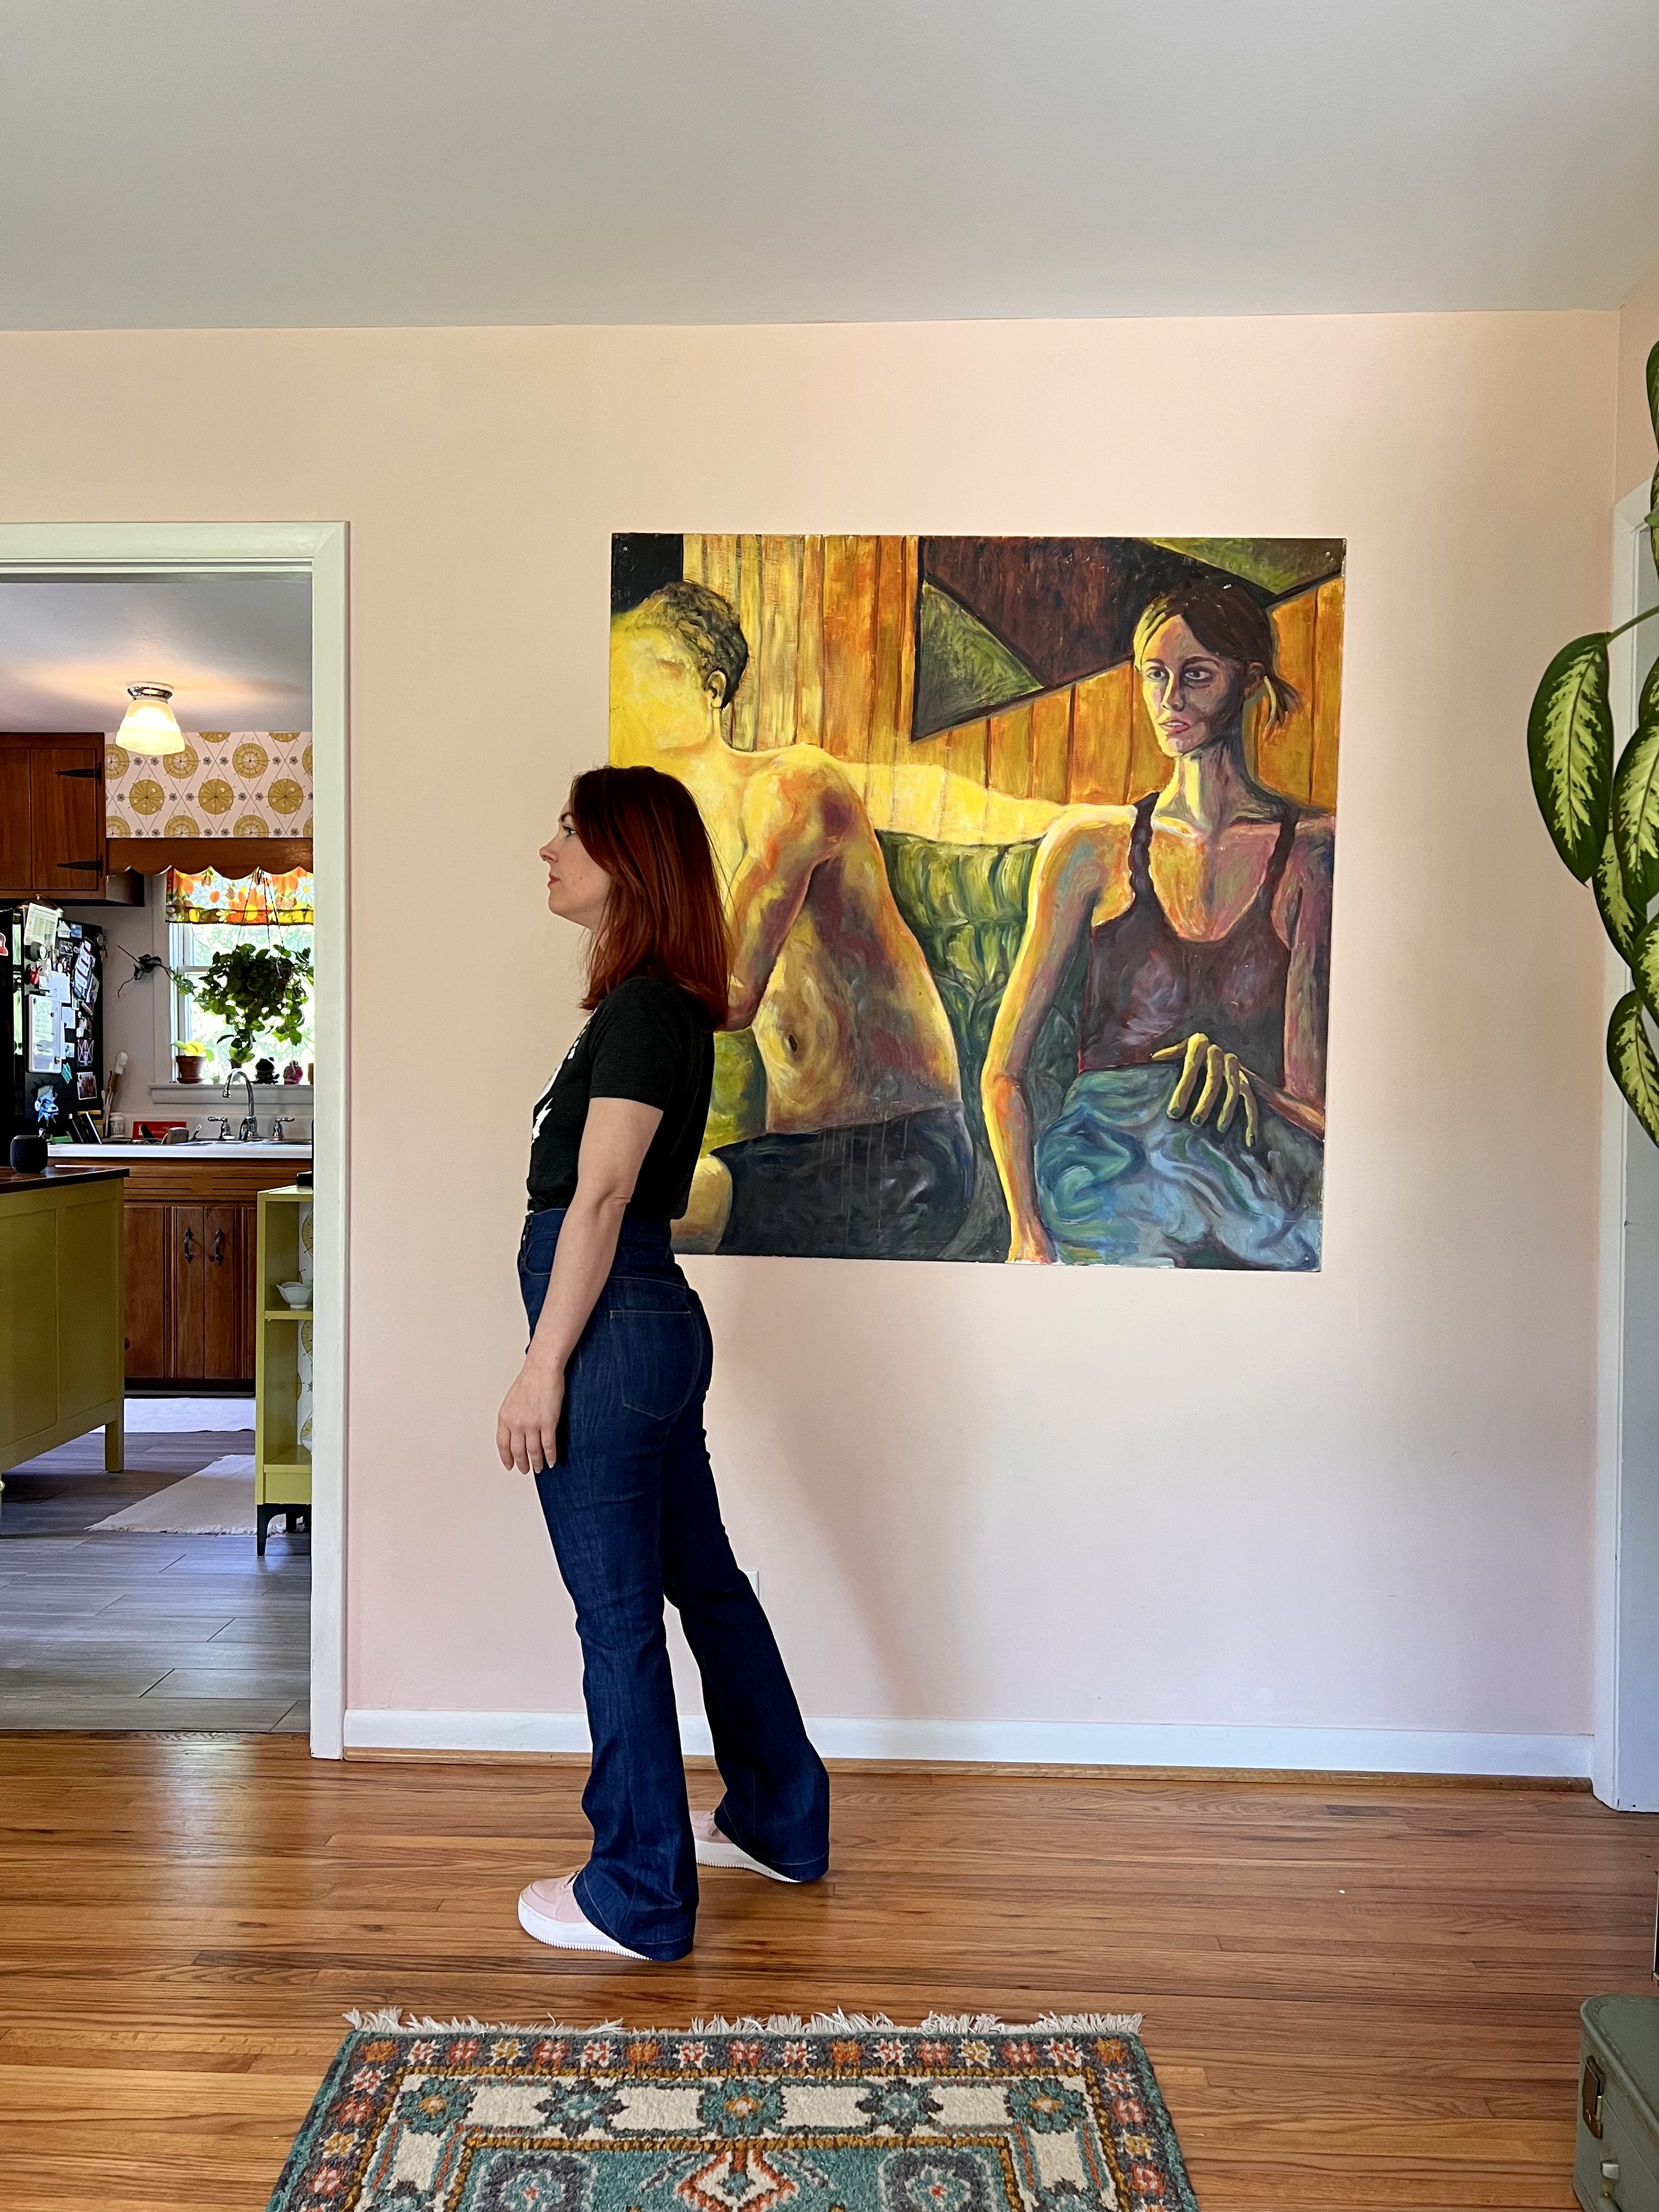
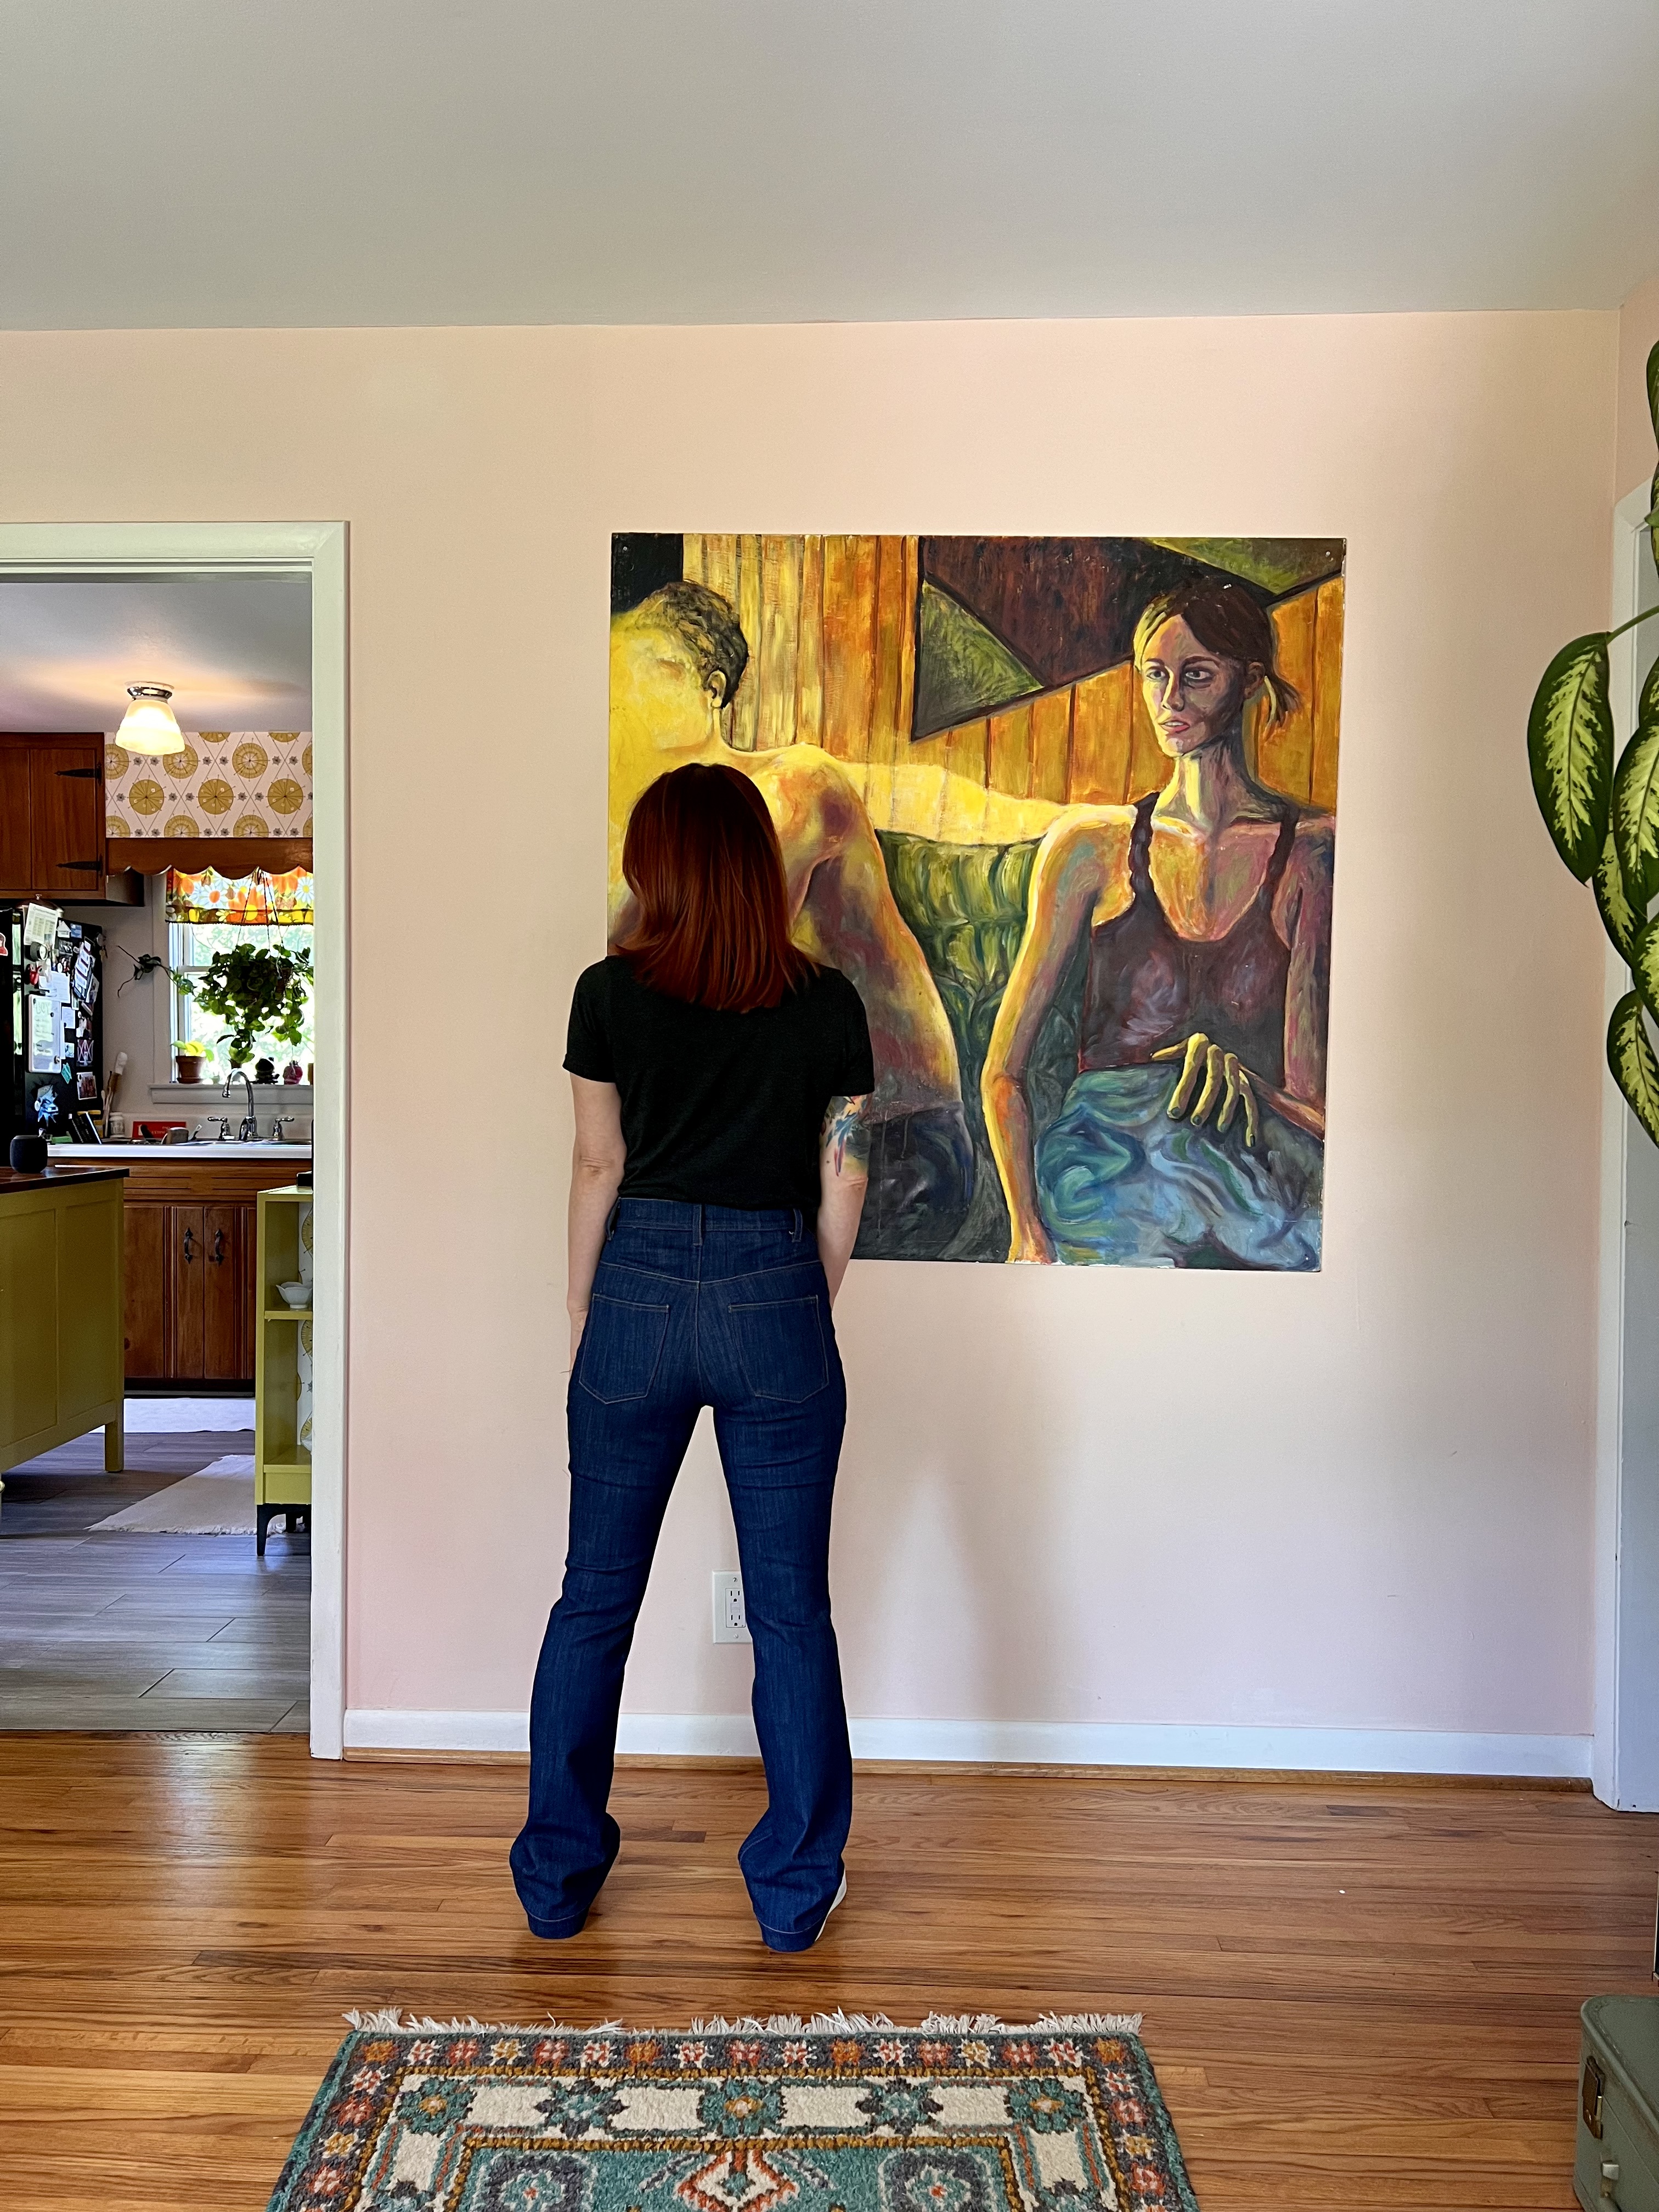
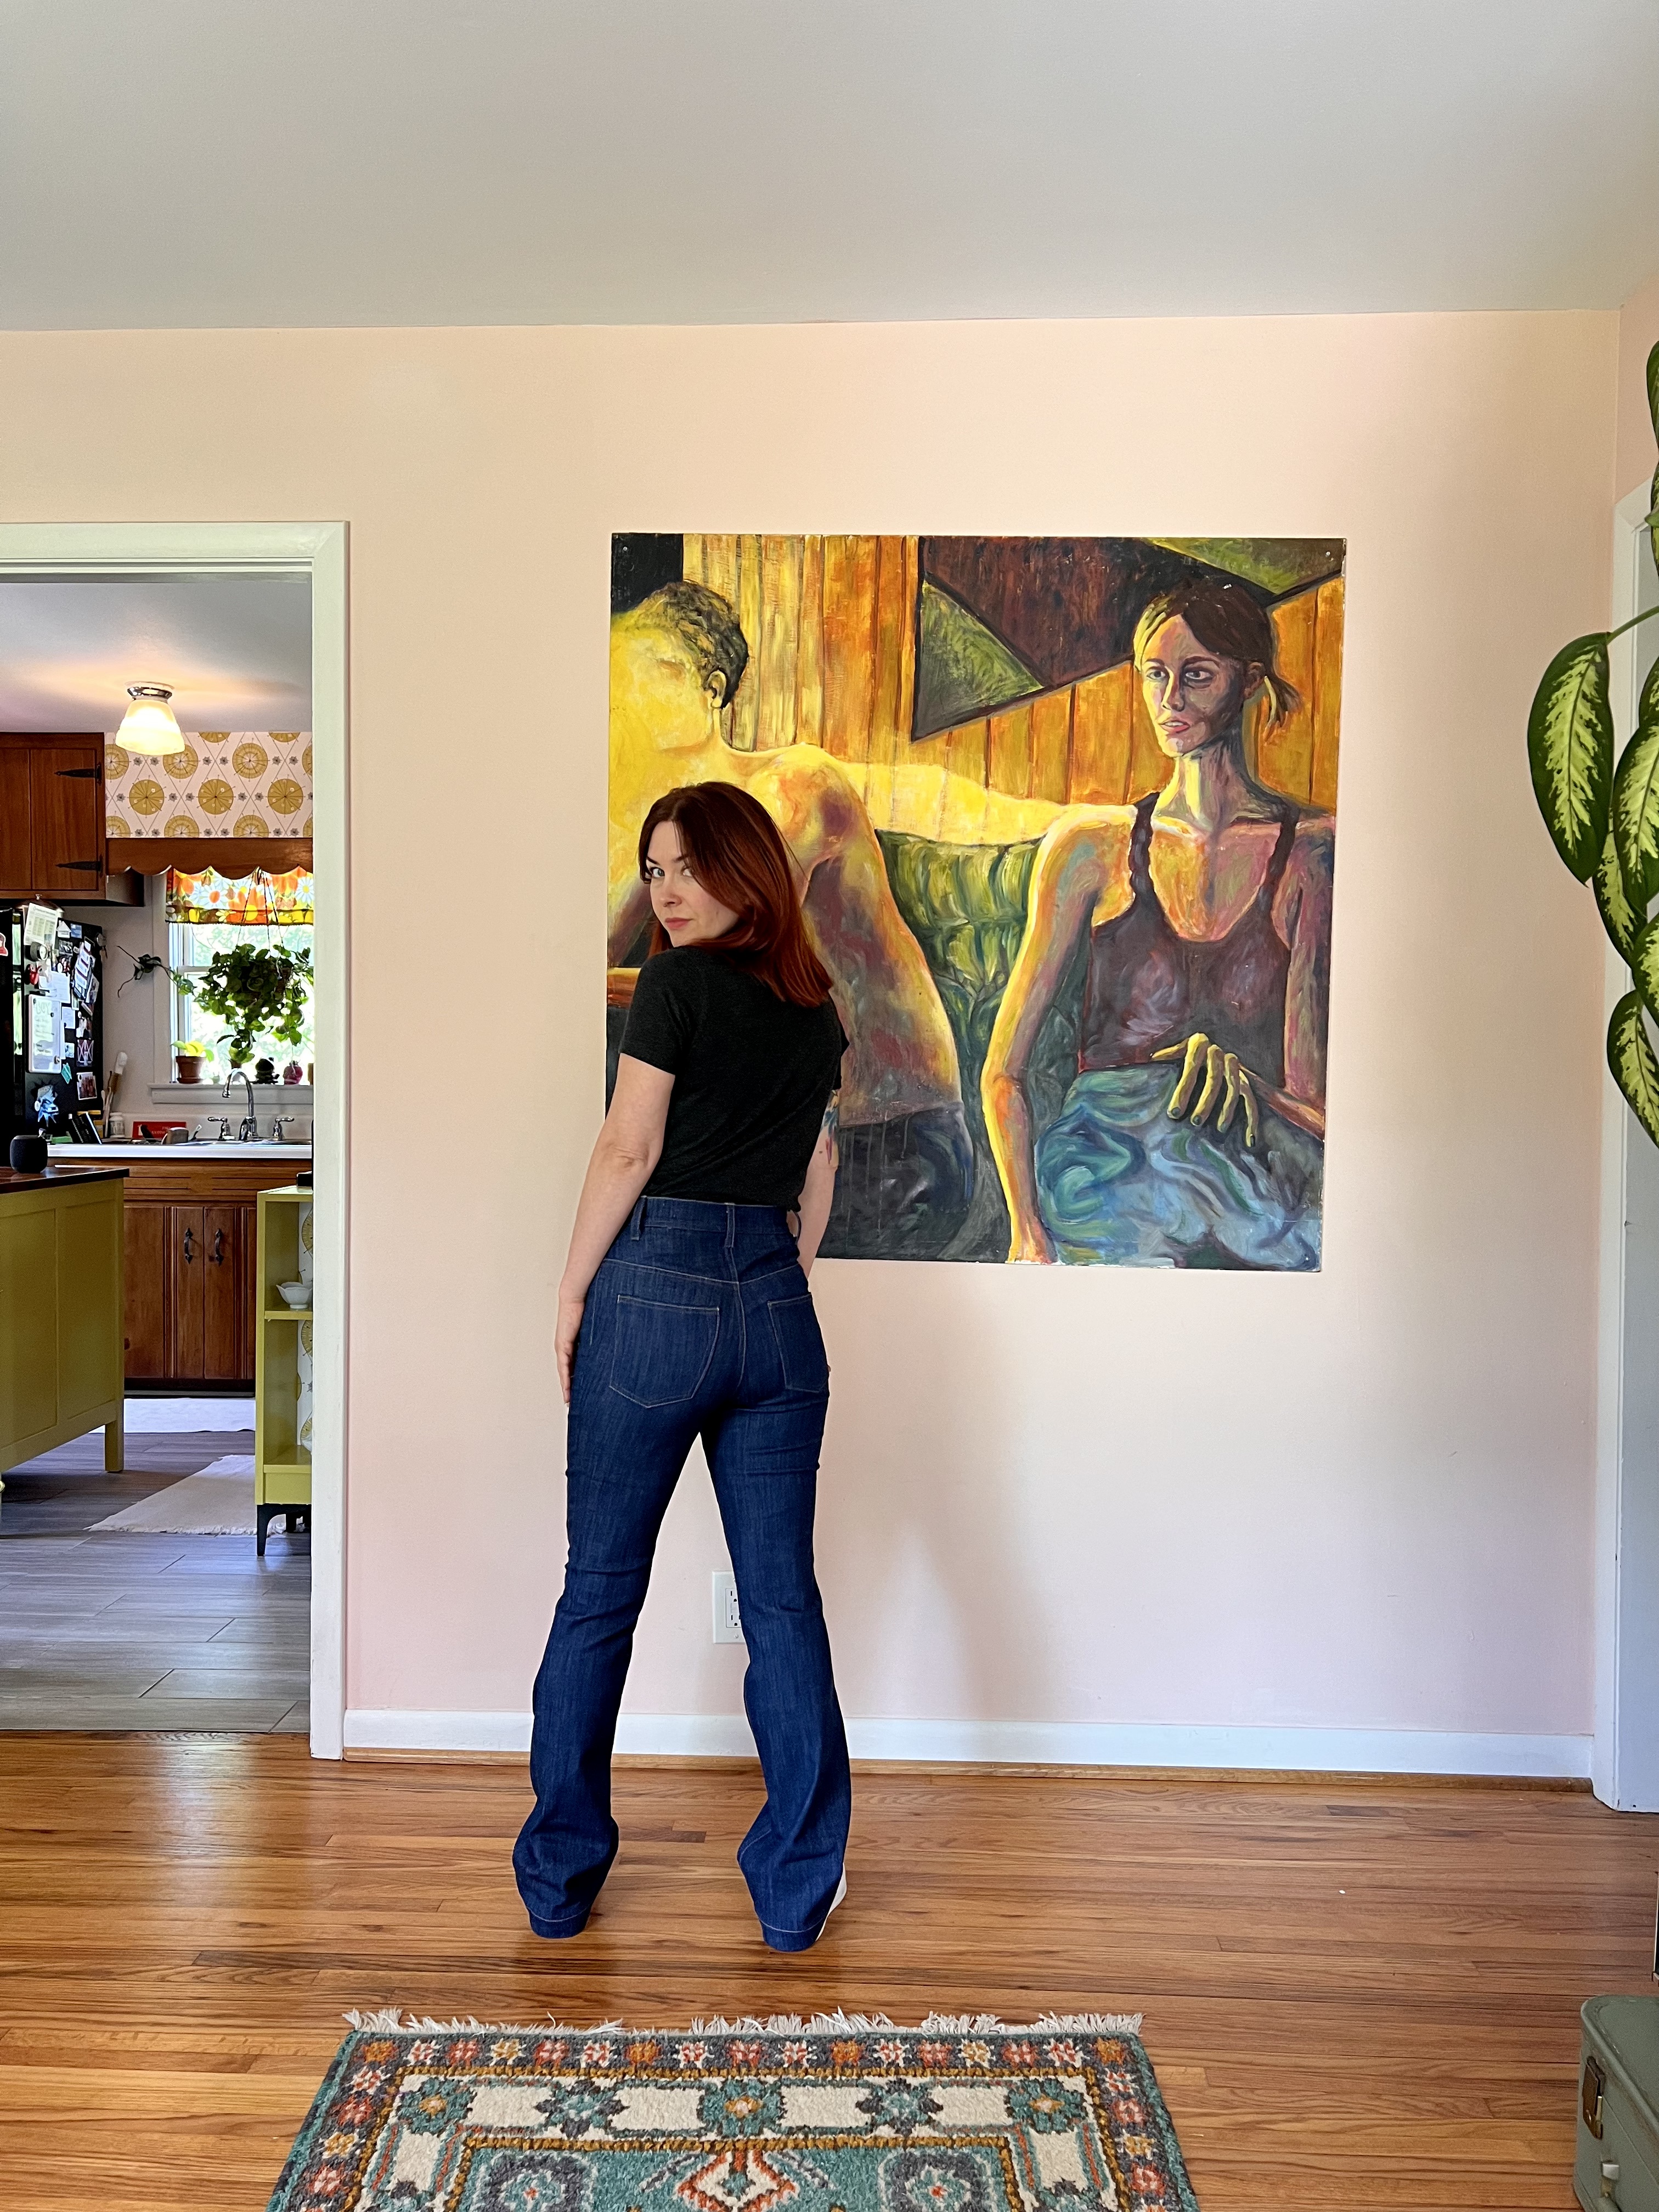
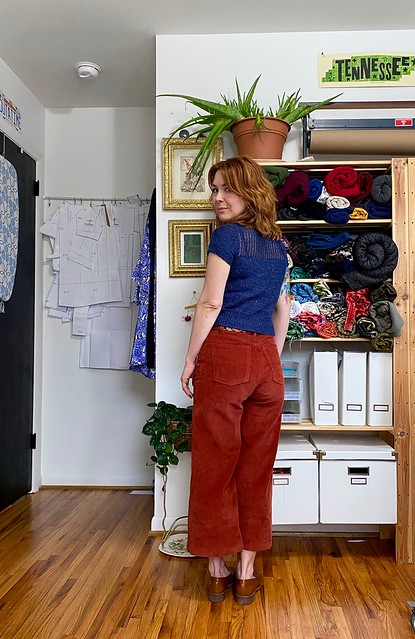
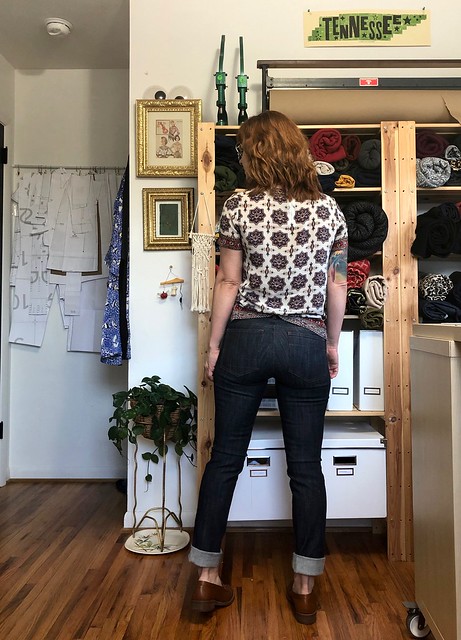
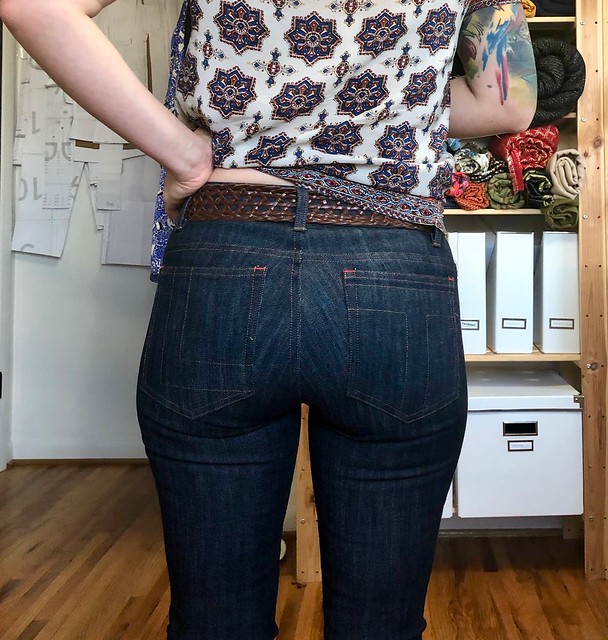
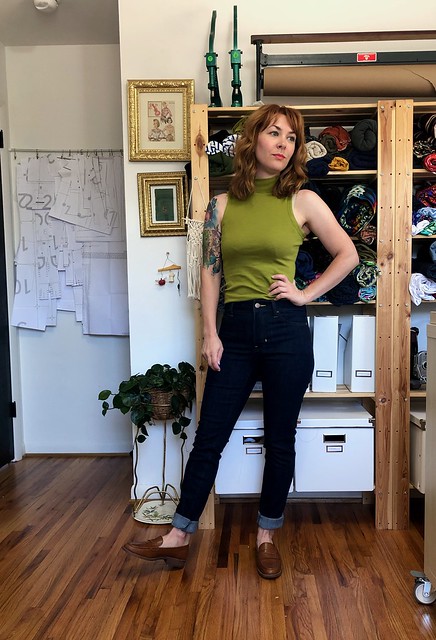
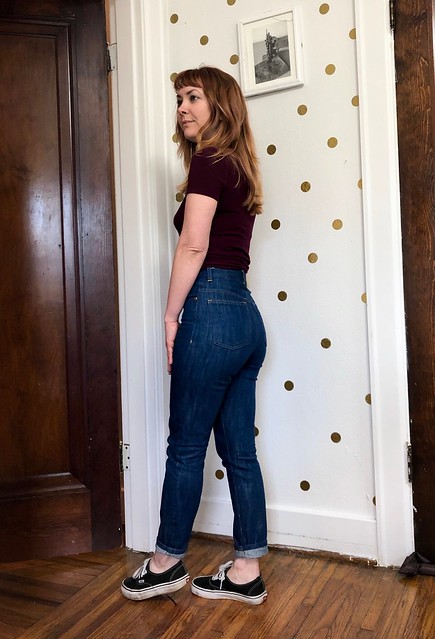
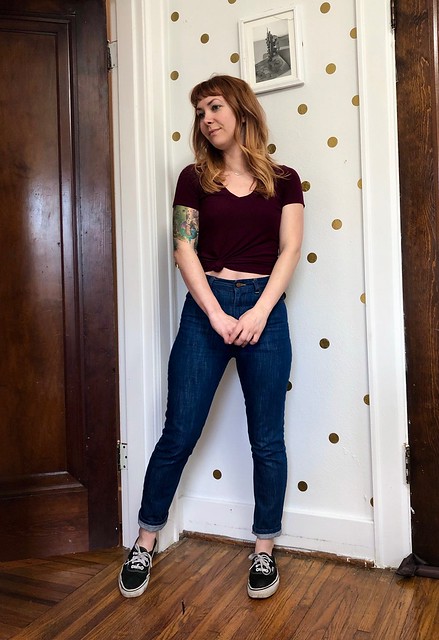
Sorry I didn’t take before photos, but these were all minor tweaks that didn’t translate very well in a photograph. Also, when I’m fitting, I don’t want to stop to take a bunch of weird ass selfies. Sorry, not sorry! Looking at these photos, I see I could have removed a little more from the inner thighs (as evidenced by the horizontal wrinkles pointing directly at my butt), but I can assure you this is a big improvement from the start, and I actually think they look worse in the photos than in real life! But, you know, it’s good enough. I spent far too much of my past sewing days overfitting myself to the point of frustration (and sometimes, actual discomfort). Nowadays, when I feel like I’m done fiddling with it, I just stop. As long as it’s not actually uncomfortable, I think it’s good enough! It has been very liberating and I encourage y’all to consider the same outlook 🙂

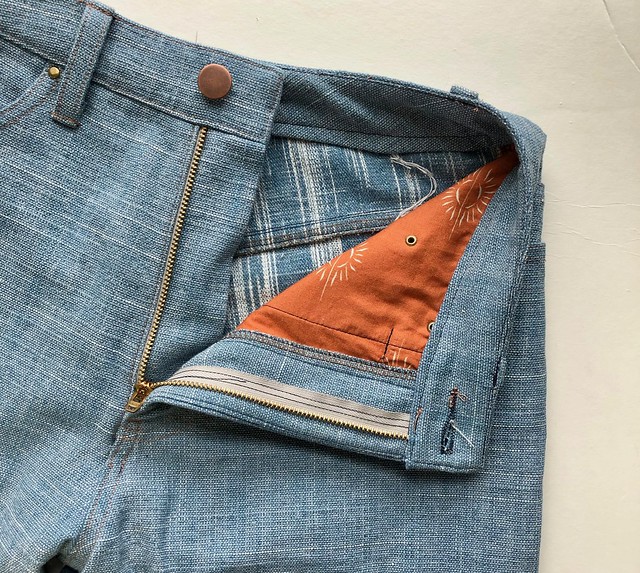
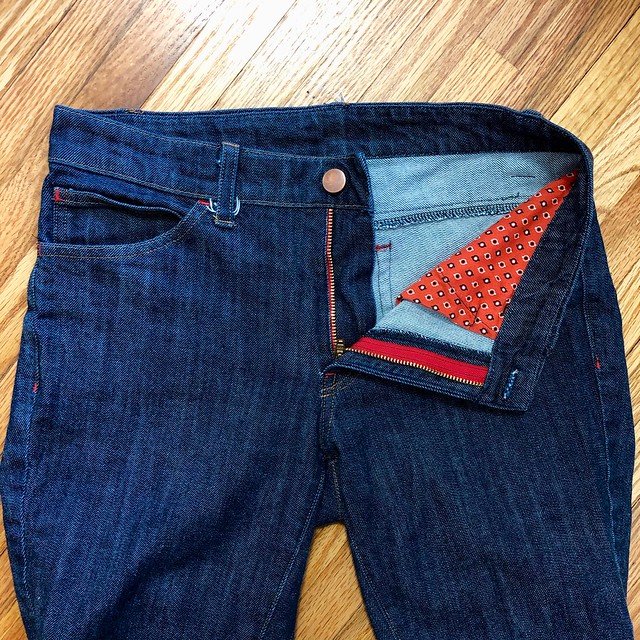
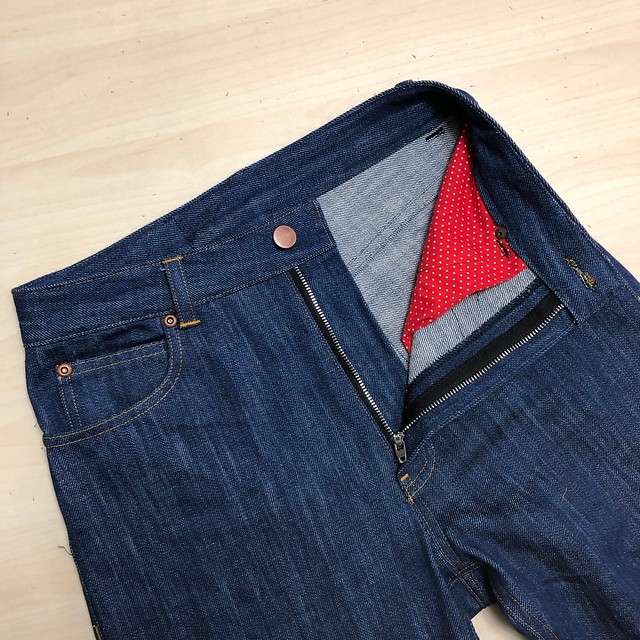
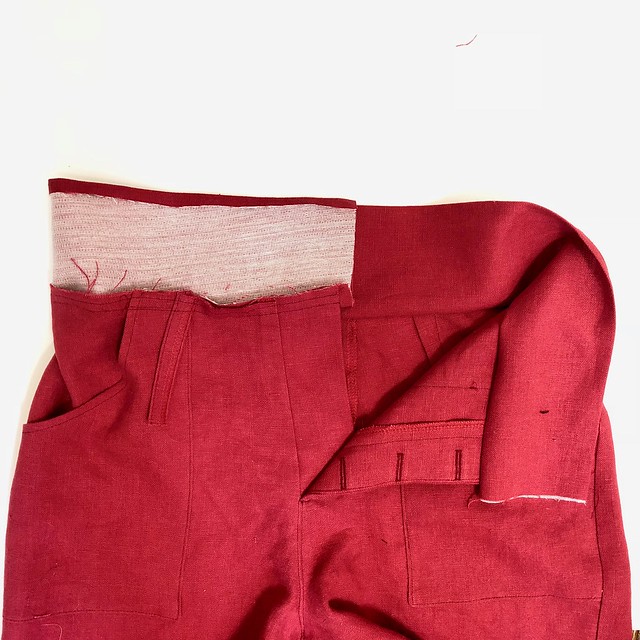
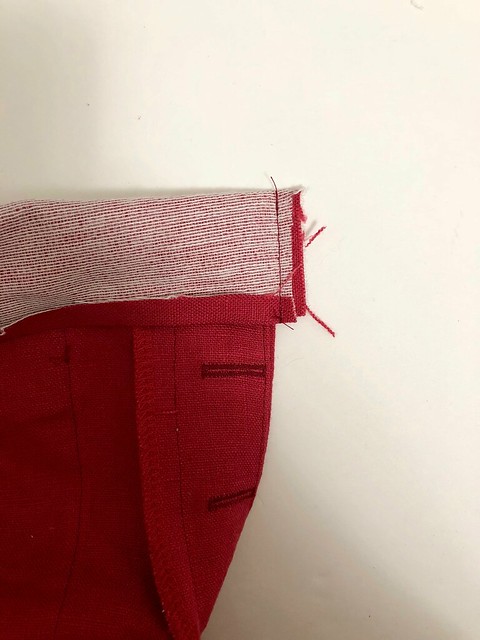
The instructions on this pattern certainly were interesting! As someone who’s made loads and loads (and loads) of jeans, these were a little more based on the home-sewer, rather than how RTW jeans are made (granted, I don’t have access to vintage jeans at this time, but the 1980s isn’t exactly the same type of vintage as, say, the 40s, and generally the construction methods back then were more similar to how they are now, i.e., serging seam allowances and such). As this is an older pattern, it wasn’t common for the average home sewist to have a serger – so the instructions include turning under edges, or finishing seams with a zigzag or overcast stitch. Interestingly, there is NO interfacing called for in this pattern (I interfaced the fly facing + outer waistband, out of habit and because I know that gets the me the result I like), but they do have you add twill tape to the top and bottom edges of the curved waistband to keep it from stretching out (that was a no from me, dawg). The other weird thing I noticed was that they have you double topstitch the side seams, and not the inseam. I also skipped that part (I prefer a stronger inseam, thnx) and did it my own way. However, I did follow the instructions for the most part.

Vogue 2442 Calvin Klein Jeans made with Art Gallery Fabrics denim

Vogue 2442 Calvin Klein Jeans made with Art Gallery Fabrics denim

Vogue 2442 Calvin Klein Jeans made with Art Gallery Fabrics denim

Vogue 2442 Calvin Klein Jeans made with Art Gallery Fabrics denim

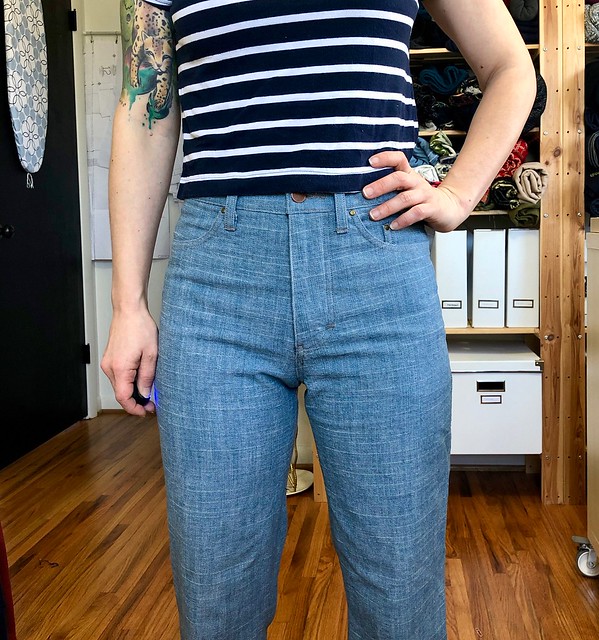
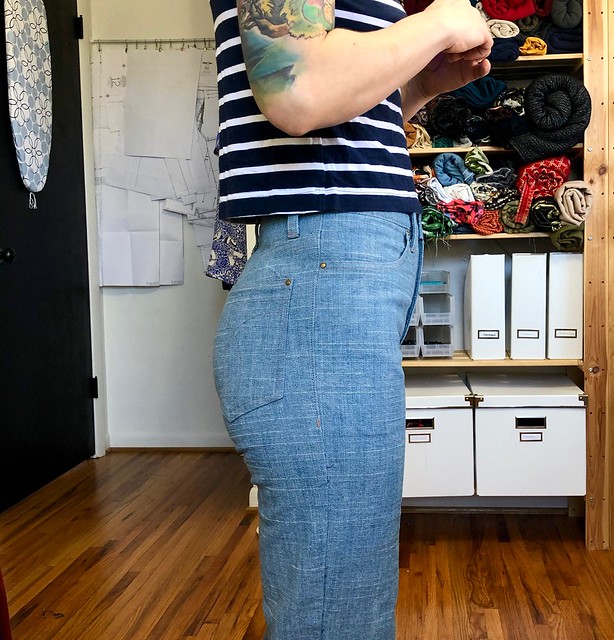
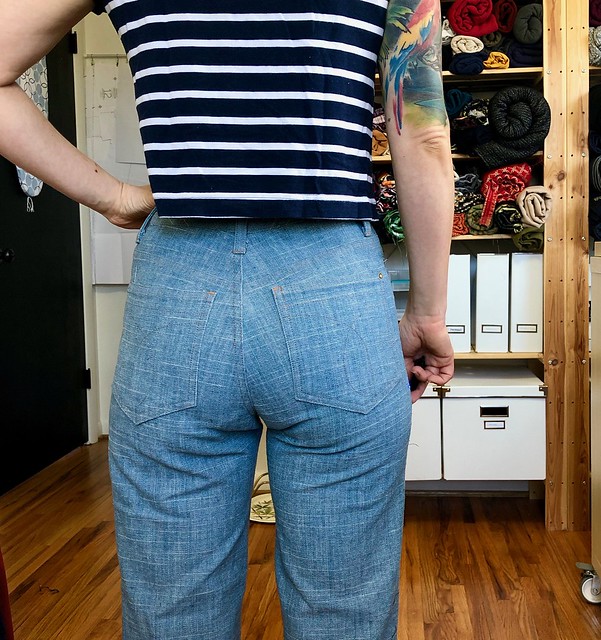
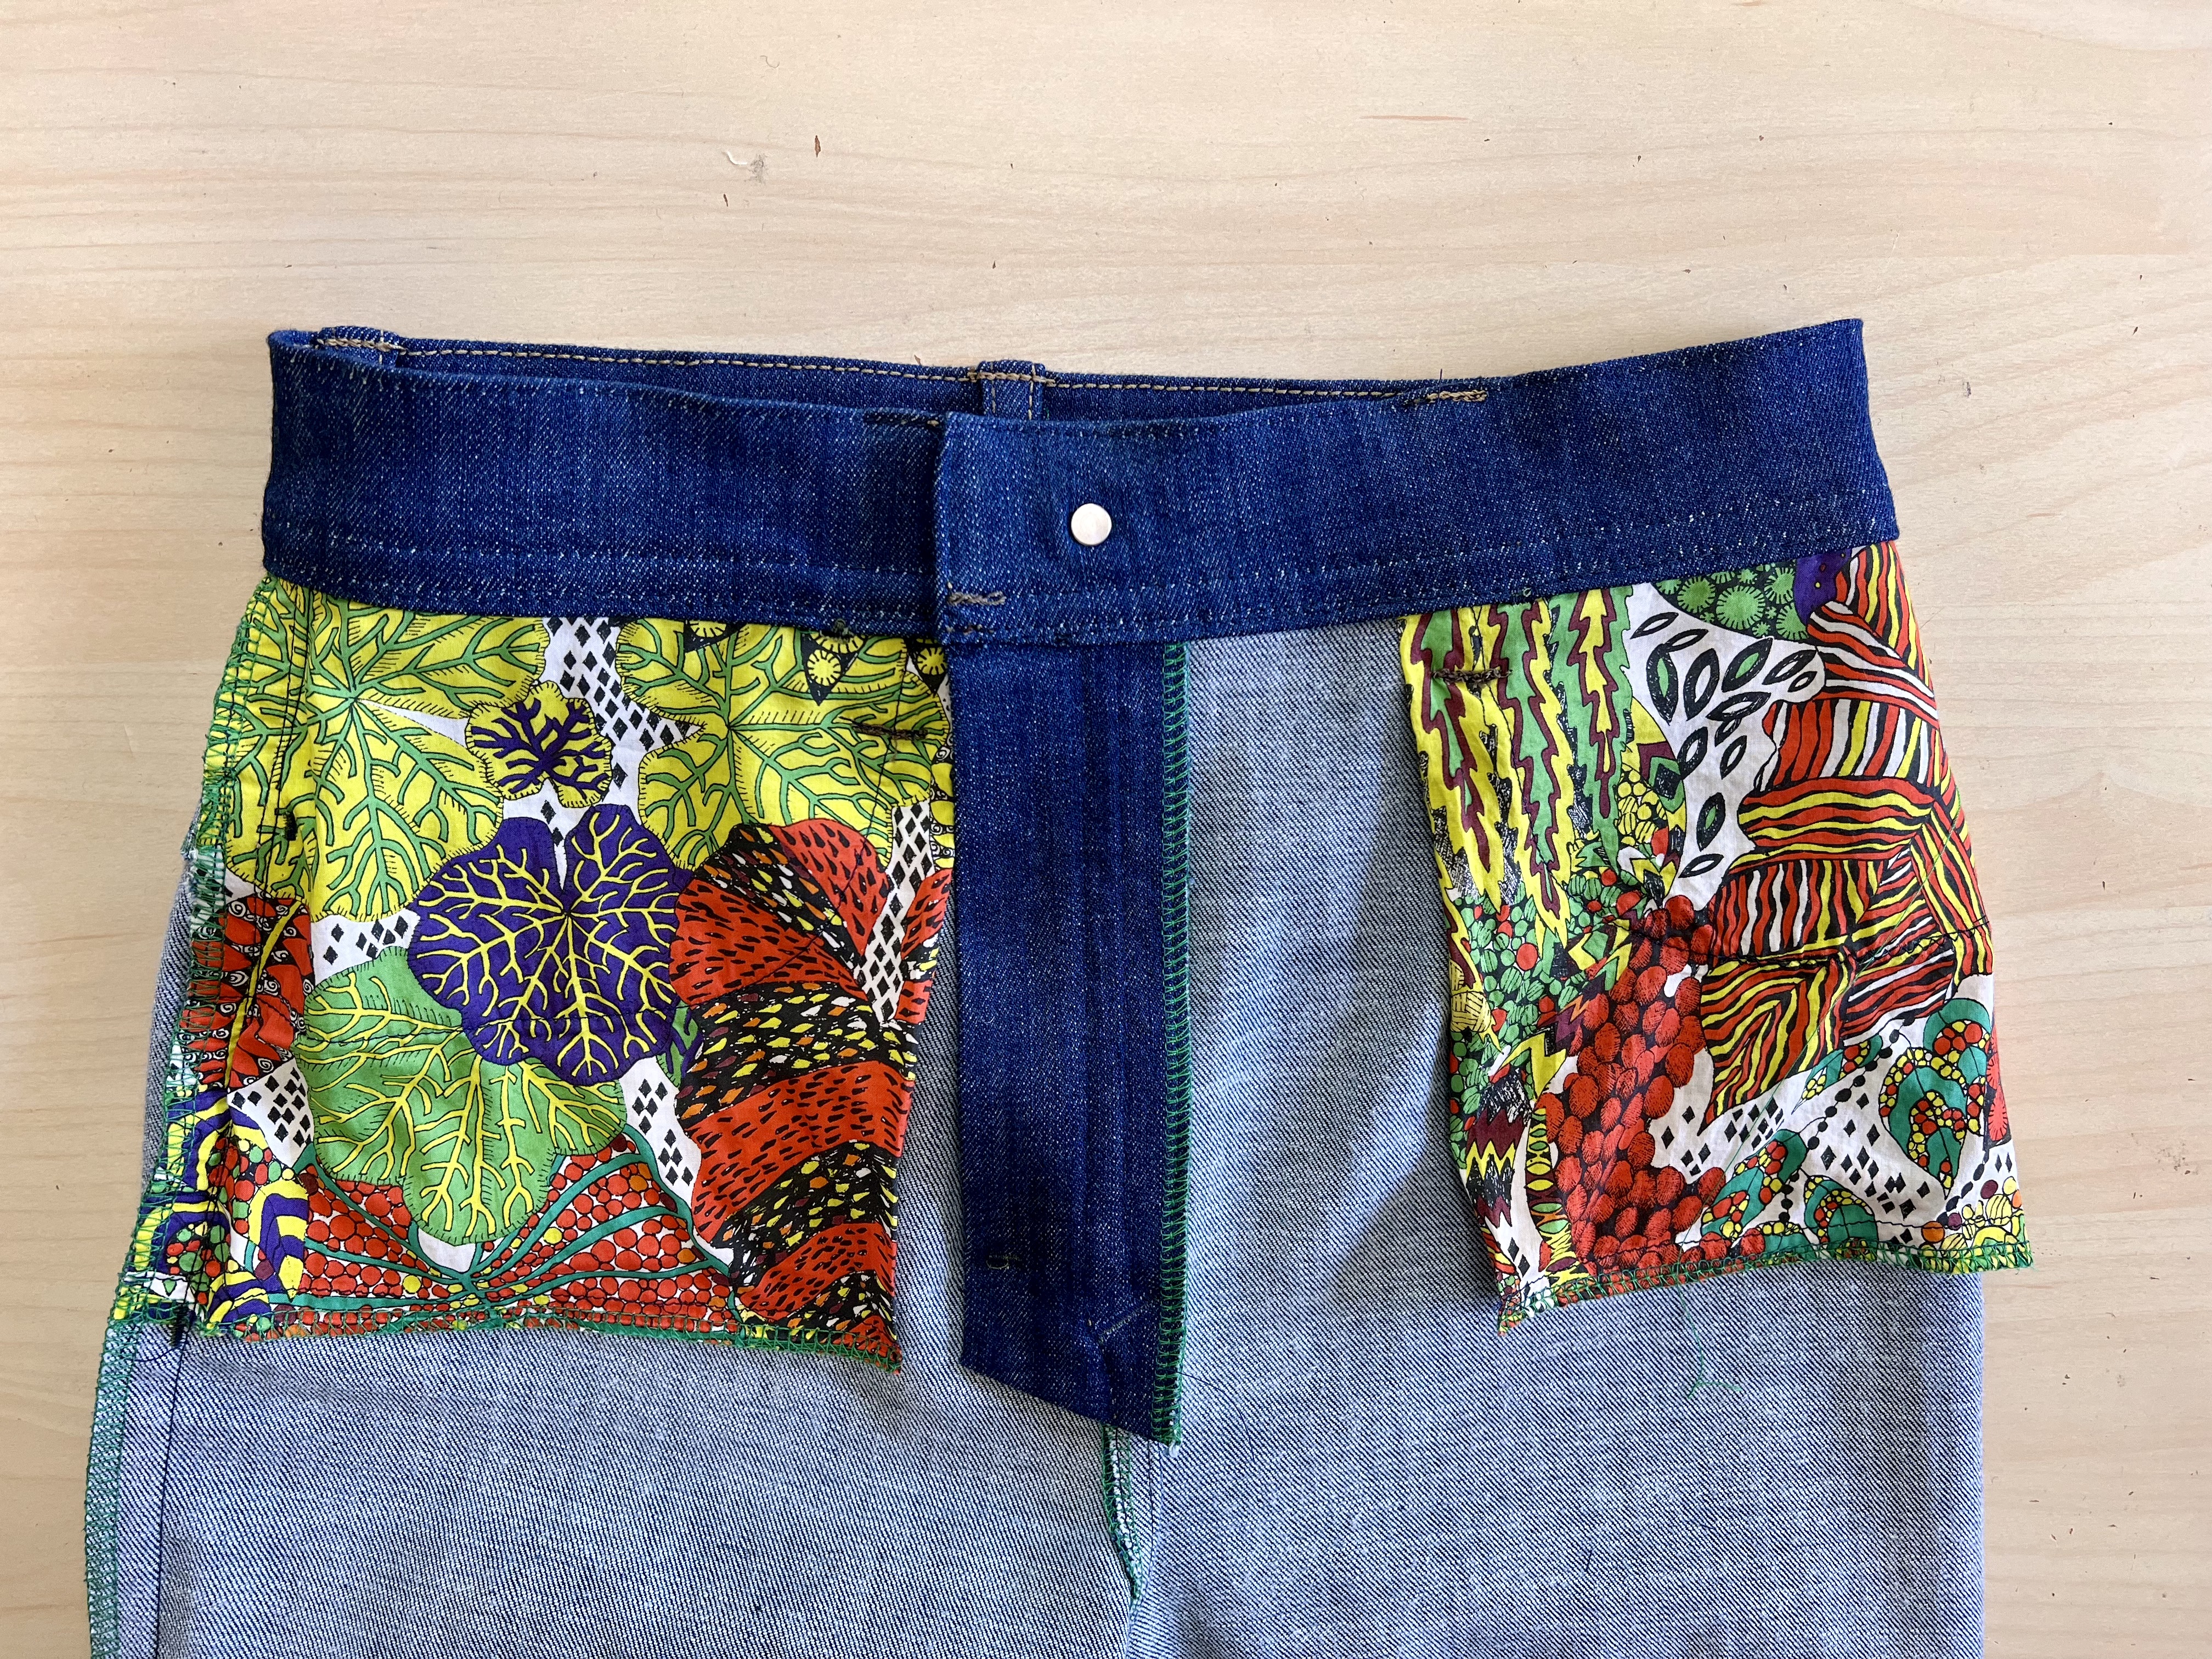
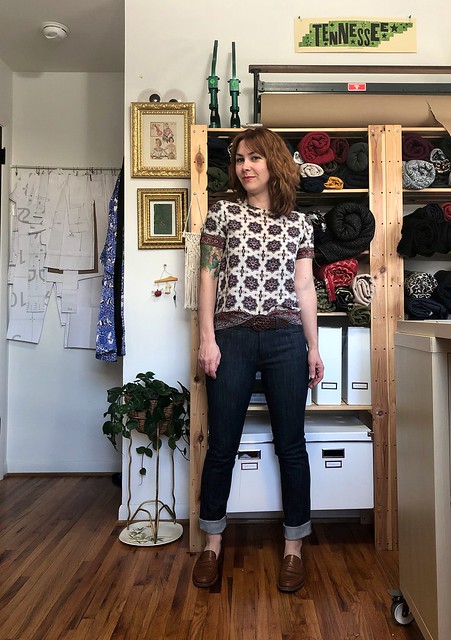
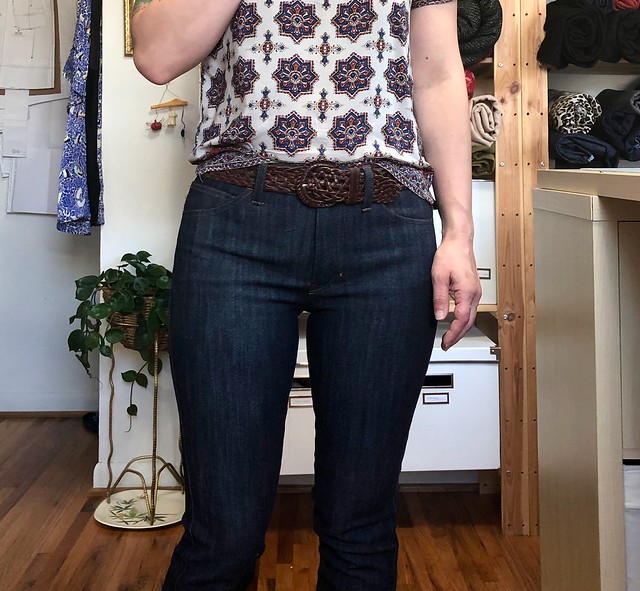
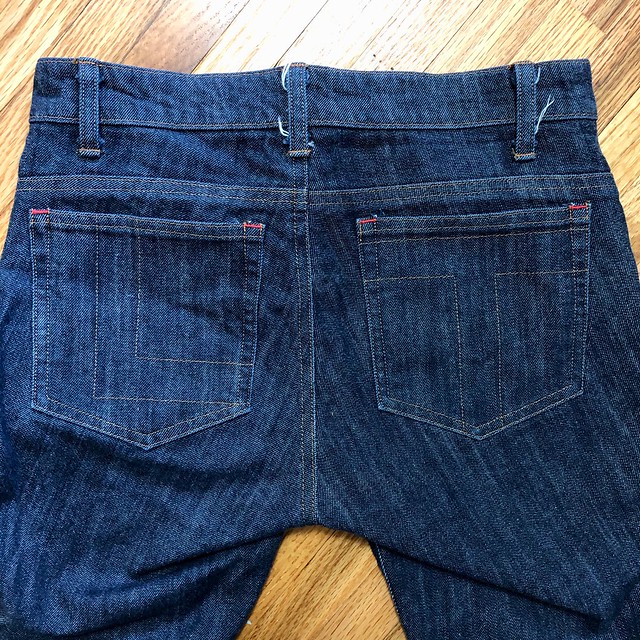
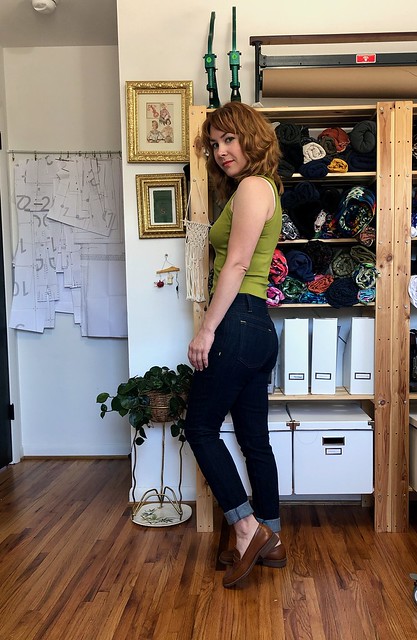
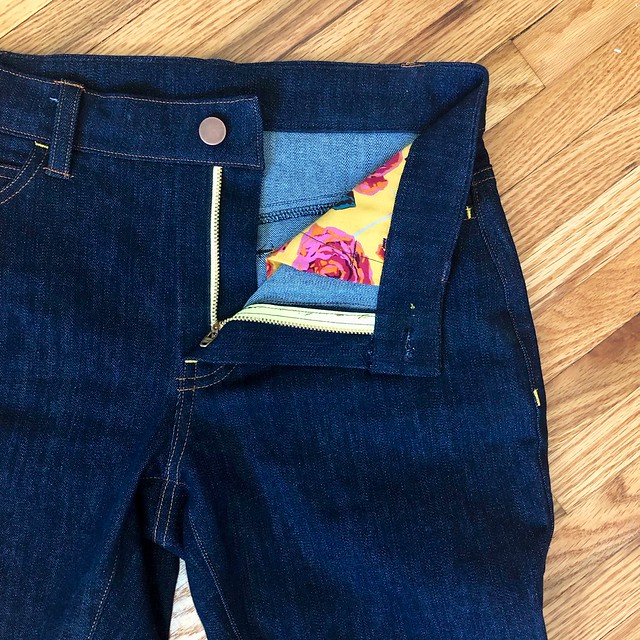
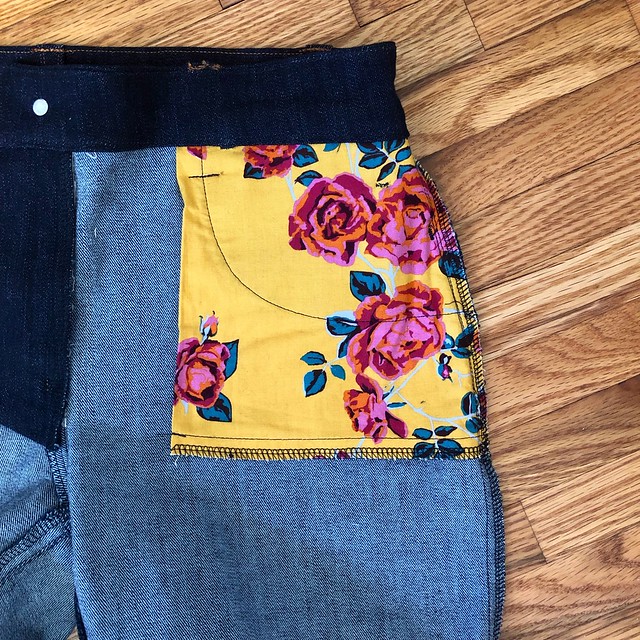
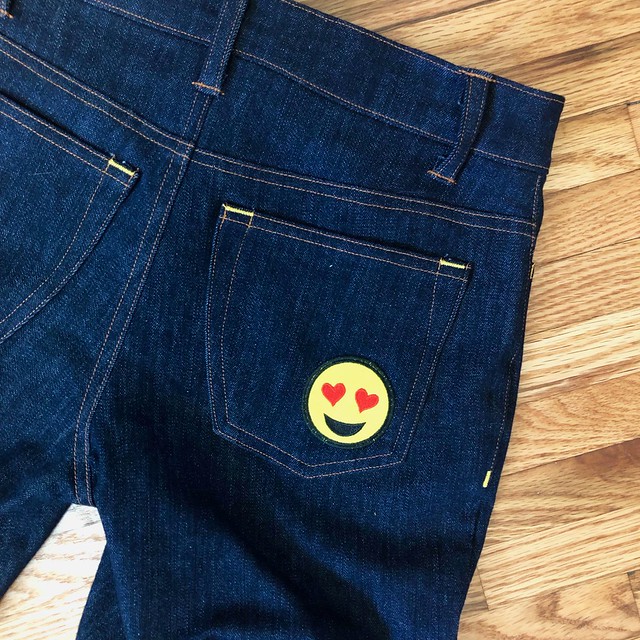
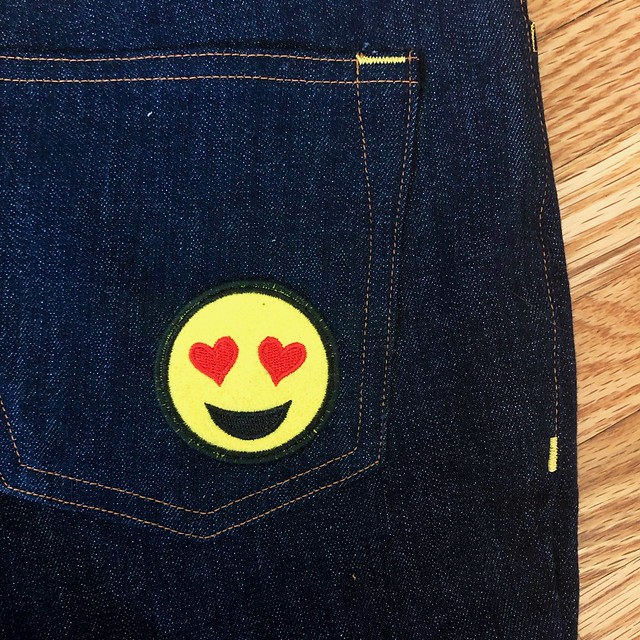
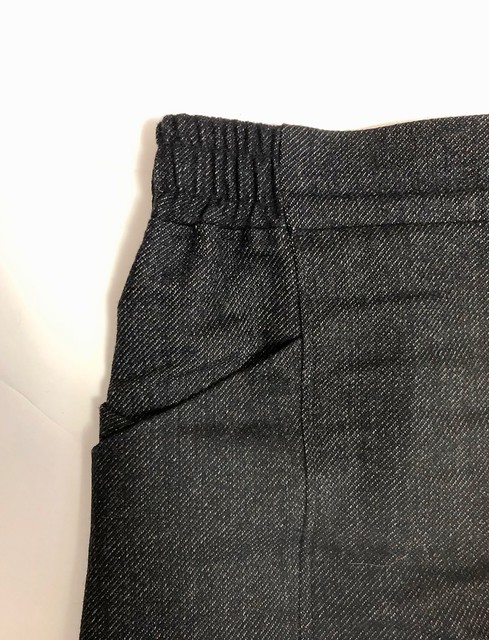
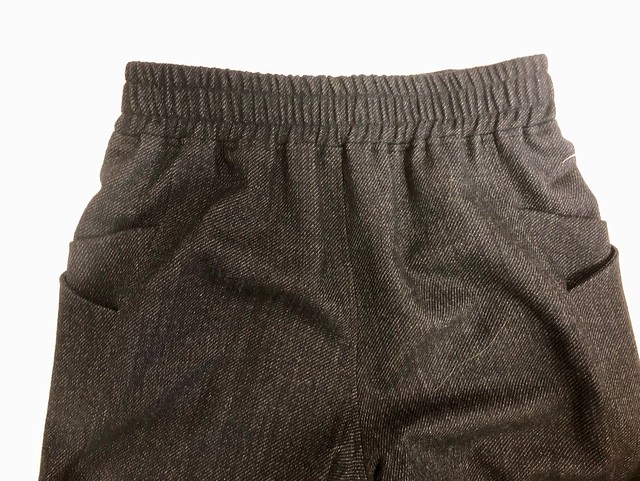
The pattern includes a back pocket topstitching design, front pocket stays (pocket lining is also from Art Gallery Fabrics, fyi!), and a two-piece curved waistband. The pants are fitted at the waist, hips and thighs, and then the leg goes straight down (which is not what the line drawing suggests; they look a little more tapered on the envelope). Since my denim is such a light color, I opted for a pale brown topstitching thread (my beloved Gutterman Mara 70), rather than gold or copper. I alter a lot of jeans for clients and one thing I’ve noticed is that most jeans use brown thread, not gold or copper! My rivets and buttons are from the Garment District (I think these rivets might actually be for bags, but whatever, I like them); I had 1 extra rivet so I attached it to one corner of the back pocket. I saw this on a pair of jeans the stylist I work with was wearing, and while I normally hate rivets on back pockets, I thought it was kinda cute.

Vogue 2442 Calvin Klein Jeans made with Art Gallery Fabrics denim

Vogue 2442 Calvin Klein Jeans made with Art Gallery Fabrics denim

Vogue 2442 Calvin Klein Jeans made with Art Gallery Fabrics denim

Vogue 2442 Calvin Klein Jeans made with Art Gallery Fabrics denim

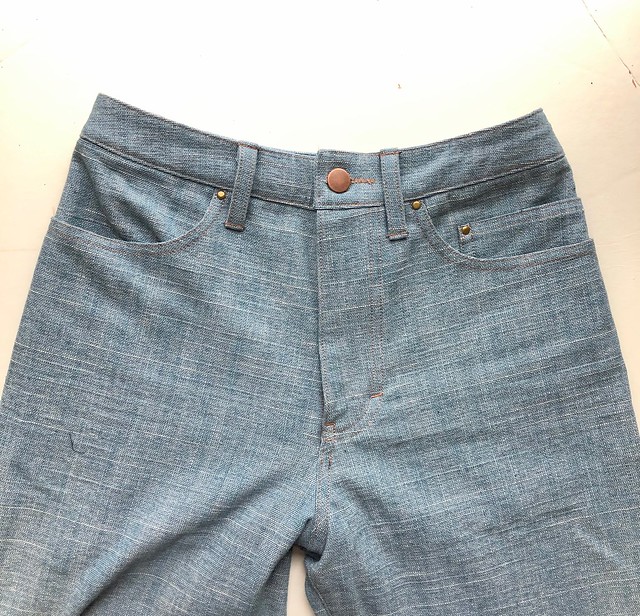
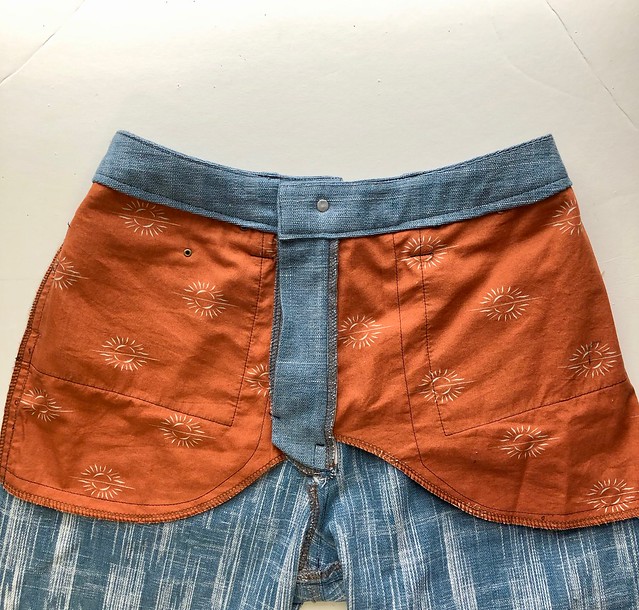
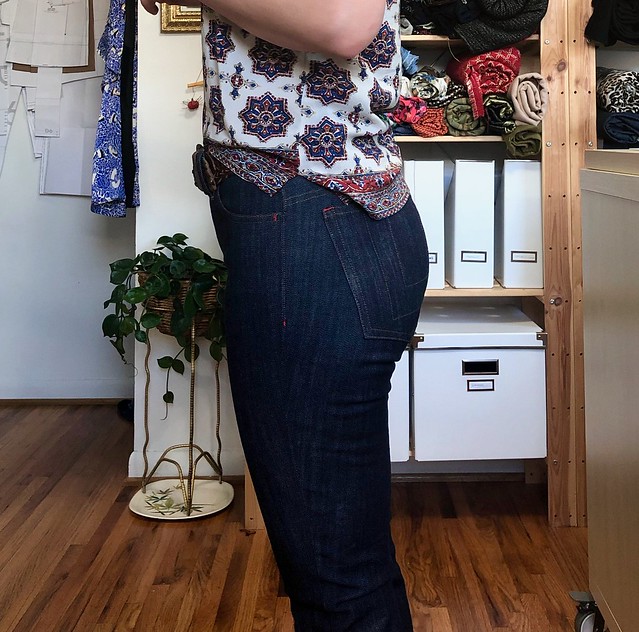
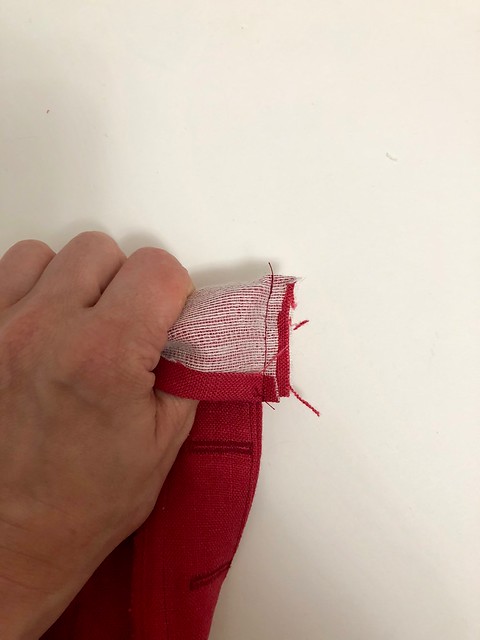
My only issue with this pattern is the two-piece curved waistband. Since it’s in two pieces, that means there a seam at the center back – great for fitting, but it also means a lot of bulk at the center back when the inner and outer waistband are sewn together (and then later, a belt loop is sewn on top of that). I also admit that I was running on fumes by the time the waistband facing was attached, so it’s not my best work. But, it’s on the inside, so who cares!

Vogue 2442 Calvin Klein Jeans made with Art Gallery Fabrics denim

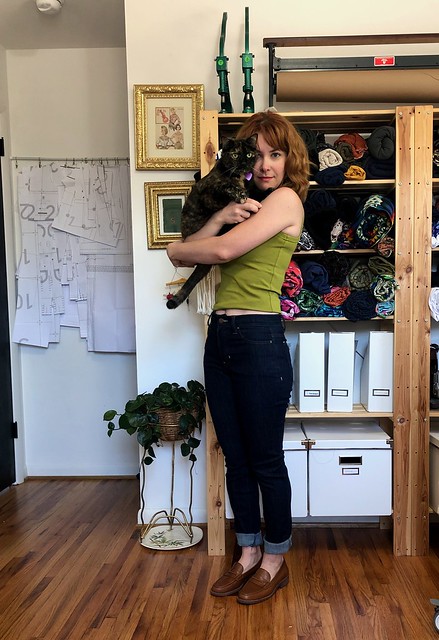
Overall, I enjoyed making this pattern and I think the finished jeans turned out great! I love the high waist (better for wearing crop tops with!), and the straight legs are a big style departure from my usual look. I love the lighter wash and subtle texture of the AGF denim, and I love love LOVE how soft it is! I don’t feel like I even really need to break these in, which is wonderful! If you’ve been looking for a good non-stretch, not-too-heavy denim, definitely check out what Art Gallery Fabrics has to offer!

** This post was sponsored by Oliso. All fabrics were provided by Art Gallery Fabrics. As always – all thoughts, opinions, and weird ideas are my own! **

Completed: Ginger Jeans, With A Heart On

25 Nov

Heart on Ginger Jeans

Fun fact: I am wearing this same outfit as I type this blog post. Don’t be fooled, though, I took these photos months ago! I don’t know what my deal is, but for whatever reason I’ve become the sort of “blogger” (I am putting this in quotes because I think I’ve maybe written 6 posts this entire year lol) who takes photos and then… hoards them? Whatever.

Anyway, here’s a new pair of jeans to share! I think I’ve made enough pairs of Ginger Jeans to probably warrant never needing to post them again – students always ask me how many I think I’ve made, and the answer is I actually don’t know! I’ve lost count! – but I feel weirdly guilty about all the blog neglect this year, so I’m posting for the sake of posting something and keeping the ol’ stomping ground alive.

Heart on Ginger Jeans

Also my hair looks really good in these photos, so there’s that. Gotta take those small victories wherever you find them!

Heart on Ginger Jeans

Even though I’ve made tons of jeans, I recently reached a point in my wardrobe where I realized I was in pretty dire need of some wearable bottoms. My wardrobe goes through a lot of shifts and purges – things don’t turn out the way I envisioned, the fabric or fit is weird (let me tell you right now that no matter how much you sew or even use TNT patterns, you will never be immune to making these mistakes from time to time!), it’s a strange color or style I don’t actually wear, my weight has fluctuated and it doesn’t fit anymore, or I’ve worn them so much they are wearing out and need to be replaced. The last 2 reasons have really hit hard this year, when it came down to me owning 1 pair of (very poorly fitted) shorts and maybe 2 pairs of jeans. So I’ve been on a pants and shorts making binge which has been quite fruitful!

I used 3 different jeans patterns to really round out my pants wardrobe, so stay tuned for the other 2! Today, I want to talk about the Gingers!

Heart on Ginger Jeans

Heart on Ginger Jeans

Heart on Ginger Jeans

If you’ve followed me for any amount of time, you probably know I have a mad love affair with this pattern. It’s one of my TNTs (tried’n’true), and like I said, I’ve sewn it so many times that I’ve literally lost count of how many pairs have passed through my sewing machine. I don’t know if it’s my favorite because it’s actually the best, or if it is just familiar. I do like the style and the fit works quite well for my body, though! It also helps that this is the pattern that I use for my Sew Your Own Jeans weekend workshops, so I feel like I truly know this pattern like I know the back of my hand.

I haven’t made this pattern since the end of 2017, and while I love that pair and still wear them regularly, I can see that they definitely have an end date – they are starting to wear very thin in some places, and the lycra is losing its elasticity. I think they still have quite a bit of life left to live, however, I think it’s always good to secure your back-up plan before it’s needed!

Heart on Ginger Jeans

Heart on Ginger Jeans

My fabric is a wonderful stretch denim that I purchased from Crafty Gemini back in August when I was in Florida for a sewing retreat. Usually whatever shop hosting my class will carry the specific denim that I recommend (this one from Robert Kaufman!), however, some shops like to source their own and that is also fine! In this case, Vanessa was able to get her hands on some very nice, dark indigo US-made stretch denim, which everyone in the retreat used. I was kind of jealous of how nice their pants were turning out so I decided to get a couple of yards for myself, too! This denim is just as stretchy as the RK, but a little heavier – maybe a 9 or 10oz. The color is nice and dark but I haven’t noticed as much dye rub-off as I tend to see with the RK denim.

I decided to go up a size in these jeans, which turned out to be a mistake. As I mentioned, my weight has gone up a bit this past year – mainly in my hips – so I’m sizing my new makes appropriately, and while I could squeeze into those 2’s if I really put my mind to it, I wanted some jeans that were a little less… painted on. Unfortunately, these ended up way too big so I should have just stuck with the 2’s! They look great now, but I did have to size down the side seams, and after taking these photos I also took in the waistband and center back a bit more. I think the issue is that 1. I’m exactly in between sizes with Closet Case Patterns (a little bigger than the 2, and a little smaller than the 4); and 2. My denim is very stretchy (about 25% stretch, the same as the Robert Kaufman that I usually use) which typically warrants sizing down, not up. Anyway, it was a fun experient and it all worked out in the end so I’m not mad about it, just making a mental note for next time!

Other than the sizing stuff, I did not make any other changes to this pattern. I added 1″ to the calf (ages and ages ago), but otherwise I get a pretty good fit out of the envelope, so that is nice and easy!

I did change the front pockets to be actual pockets, and not a pocket stay. I am fully aware that I am the minority in this thought process, but I HATE HATE HATE those pocket stays! I find them rigid, uncomfortable (which is all kinds of wrong when you’re wearing stretch denim, I mean wtf) and they make the fly area incredibly bulky. I know people loooove their pocket stays so please don’t @ me with your defense, just stating my personal choice here! Free-hanging pockets FTW! I have no issue tucking my pockets back in if it means I can eat a plate of nachos and not feel like I need to unbutton my pants! Fight me!

Heart on Ginger Jeans

Heart on Ginger JeansHeart on Ginger Jeans


Heart on Ginger Jeans

Heart on Ginger Jeans

For some fun customization, I used contrasting thread to do my bar tacks, and stitched this cute little emoji patch on the butt pocket. Mostly because it makes me laugh, but also because I love any excuse to tell people I have “a heart on” lulz omg.

I also do not use the back pocket markings as suggested in the pattern, because in my experience they are too low and kind of unflattering! I think a high-waisted jean needs a high pocket, so I always place mine a little higher. In my Sew Your Own Jeans workshops, I custom place these on each booty (oh yeah I bet you didn’t know that fee included a nice hand down your pants!). For me when I’m sewing alone, though, it requires a lot of basting, trying on in the mirror, removing pants and unpicking stitches, rebasting, putting pants back on again, repeat ad nauseum. Fortunately I’m at a point where I have a general idea of where the pockets should be placed with just a good confident eyeballing, but my point is that you too can have good pocket placement, even if you don’t have the luxury of a second person to help you! Just be prepared to take your pants off a LOT and also maybe consider taking photos of your butt (why is this starting to sound like a Tinder conversation… ?).

Heart on Ginger Jeans

I left the jeans unhemmed, because I’ve learned over the years that no matter how much you pre wash your denim (this one was 3x!), the length will continue to shrink in length over several more washes. I used to just hem my jeans on the long side, but these days I don’t bother hemming at all and just wear them rolled for a few months until I feel like they’ve gotten their shrink out. These are hemmed as of this posting, but were not as of the photographs.

Oh, I also made my top! It’s a True Bias Nikko Top, made with some really fun chartreuse knit that I bought at Fancy Tiger Crafts when I was there in June! I was very drawn to the color, but wasn’t sure how it would look on me – it took a lot of convincing from Bob, and then another few months of me staring at it on my shelf wondering if I had made a mistake. Honestly, though, I LOVE how it looks on me! I think it really works well with my skin tone and hair color, and it’s also a color that just makes me happy! So, Bob was right and I stand corrected!

Heart on Ginger Jeans

Ok, I’m wrapping up this long-ass post with a photo of me + Amelia. Don’t be fooled by the bitchface, she loves me and was purring very loud during this photo haha.

Want to learn how to make your own jeans? Join me in 2020 and let me teach you how!

Completed: Papercut Patterns Palisade Pants

31 Jan

I think I told y’all last year how much I love the new Geo Collection from Papercut Patterns. In case you missed it – I LOVE THE NEW GEO COLLECTION FROM PAPERCUT PATTERNS! As a shameless Papercut Fangirl, I am of course extremely biased regardless, but it is honestly a great collection. I’ve made the Pinnacle Top (twice, actually!), and the Fjord Cardigan (unblogged!), and now I’ve got some fresh new Palisade Pants to add to the mix!

Palisade Pants made with Mood Fabrics

I just think this pattern is so cool! I love the relaxed (but not oversized) shape, with the interesting pocket detail and elastic waist that doesn’t go all the way around (personally, I find a flat front to be more… well, flattering). These are very similar to the Elizabeth Suzann Clyde pants, with a different pocket shape and, again, a flat front with no elastic. Both pants have the same high waist and seams running down the front and back leg.

Palisade Pants made with Mood Fabrics

As much as I love a fitted pant, I didn’t want these to be too tight in the hip so I went with a size XS (based on my measurements). I ended up taking an additional 1/4″ out of the inseam to tighten up the legs ever so slightly (I don’t generally mess with the inseam, however, these pants do not have side seams), but I am very happy with how the hip and waist fits. FWIW, I did use the suggested elastic measurement and it fits perfectly without being too tight.

I made a muslin of the shorts before cutting into my fabric, because I wasn’t sure how these would fit on my body. I actually do own a pair of Clyde pants (from way back when I still worked at ES), and I always felt like the crotch was a little too long on me, so I went ahead and sewed up a test pair before committing. My test pair is actually a fully-finished wearable muslin – I used cotton bottomweight fabric, as well as the suggested interfacing, elastic, and topstitching details. So I also basically have a new pair of shorts when summer comes around haha. My sample showed that I did need to take some of the crotch length out – a full 1.5″ (crotch length refers to the measurement from front waist to back waist spanning the crotchal area, NOT the length from crotch to waist when you sit down, which is considered crotch depth. See this image for a visual) (also, every time I type crotch I accidentally type crochet instead what is wrong with me). Before you start wringing your hands on the mysteries of pants-fitting, please be aware that this is not an adjustment I see a lot of people make (and I touched a LOT of crotches last year during all my workshops). If you do need it, the explanation and process of how to fix are best outlined in Pants For Real People, which I recommend checking out for further questions!

ANYWAY, the amount that I took off the length was easily adjusted (albeit in a very hacky way) to my shorts, so yes, those are still wearable! One more adjustment I made to the pants was to change the crotch curve, as it was a little flat for my body (this is indicated by vertical folds in the fabric in a very unflattering spot). This was not necessary in my sample, but did show more prominently in my finished pants – probably because the fabric has more drape. The front still isn’t completely flat if I stand a certain way, but I think that’s pretty unavoidable with this soft fabric + pants shape combination.

Palisade Pants made with Mood Fabrics

Palisade Pants made with Mood Fabrics

Construction changes were minor. I wanted to keep the fabric soft, so I omitted about half of the interfacing (anywhere that there would be double layers of interfacing). This included the pockets and the center front waistband. In retrospect, I probably should have left the double layer of interfacing on the waistband as it does get a crease with wear, but, whatever. I used a lightweight fusible weft interfacing, which is pretty much my go-to for most fabrics.

I left off the mock fly (for aesthetic reasons), and just topstitched the center front and center back seams. I also added some topstitching to the back elastic, to keep it from twisting. And I also unintentionally shortened the pants when I shortened the crotch depth, so they are about 1.5″ shorter than the pattern – which thankfully is the perfect length for me haha.

Palisade Pants made with Mood Fabrics

Palisade Pants made with Mood Fabrics

Palisade Pants made with Mood Fabrics

Palisade Pants made with Mood Fabrics

My fabric is a gorgeous wool suiting that I bought from Mood Fabrics when I was in NY last month for Christmas. I only had one day in Manhattan, and my mom agreed to go with me while I did a quick little shop around the Garment District. Mood has tons of great wool suitings on their website, but I wanted to see the goods in person so I could get a nice feel for drape, weight, itchiness, and color. I knew I wanted something soft, lightweight, non-itchy (as I would not be lining these) and with a little bit of dimension and texture that didn’t look too suit-like. This stuff hit all those boxes, and only cost around $20/yard. It was wide, too, so the 2 yards I bought were more than enough for these pants – meaning I have leftovers to whip up something else if the mood strikes.

I actually pre-washed my wool – like, in the washing machine – because I wanted to see what would happen. Generally, wool felts due to heat combined with agitation, so I used cold water and low heat in the dryer. I didn’t measure before/after to see if anything shrunk, but this definitely isn’t felted so it worked out ok! When I wash the actual pants, I will use cold water in the washer and hang them to dry (how I treat most of my wool garments, except for handknit sweaters obviously).

The wool was really easy to sew, as wool tends to be. I suspect there is some poly blended in here, though, since it didn’t press as well as most wools do (this would also explain why the fabric was fine in the dryer when I pre-washed). I used high heat and a clapper to hold the seams down while they cooled, then for extra credit I topstitched as much as possible to keep the seams nice and flat. To sew, I used a universal 80/12 needle and finished all seams with my serger.

Palisade Pants made with Mood Fabrics

I think that about covers it! This was a fun project to make, and I really like how the pants turned out. I’m still undecided if these are really “me,” but I’ve worn them for the past 2 days while we’ve had a cold snap in Nashville and they are warm and comfortable. I do want to try this pattern with a fabric better suited for warmer weather – such as linen or tencel – and perhaps in a cropped length or even the shorts. The pocket detail just makes me so happy.

Oh! And in case you were curious – the shirt I am wearing is a mash-up of the Nikko Top and the Nettie Bodysuit. I basically just combined the bottom edge of the shirt with the lower half of the body suit, to make a Nikko Bodysuit. This piece has been really useful in my wardrobe – it looks great with high-waisted skirts and pants, and stays tucked in no matter which way I move. I made it with lightweight merino wool fabric, also from Mood Fabrics, and I love it so much!

**Note: The fabrics used in this post were provided to me by Mood Fabrics, in exchange for my participation in the Mood Sewing Network. All opinions are my own!

OAL2018: Belt Loops & Waistband

18 Jun

Good morning, everyone! If you are participating in this year’s OAL, you should be rocking and rolling along with both your sewing & knitting projects. As I mentioned in the announcement, I will not be offering full tutorials for sewing the Lander Pants – there is a great sewalong available for free on the True Bias website, should you need the additional support – but I did want to pop in and share an alternate method for sewing the belt loops & attaching the waistband. Even if you are not participating in this year’s OAL, I hope you will find this useful!

OAL 2018: Belt Loops & Waistband

You’ll want to make your belt loops before you attach the waistband (note that you can also attach the belt loops after the waistband if you prefer! For the sake of simplicity, I am following the pattern directions here). The pattern has you sew a tube that you turn right side out and press flat. This is a great method if you are sewing with a lightweight fabric, but it can be a nightmare to try to turn that skinny tube if you are using a heavier fabric, especially denim. Even my red linen doesn’t like being pulled like that! So here is an alternate method if you are using a thicker fabric, or just hate turning tubes 🙂

OAL 2018: Belt Loops & Waistband

Finish one long edge of the belt loop piece. I used a serger, but you can also sew over the edge with a zigzag stitch, or bind with fabric.

OAL 2018: Belt Loops & Waistband

The pattern is designed for the finished belt loops to be about 1/2″ wide. You may want to trim 1/8″ off the long (unfinished) edge of your piece if you want to maintain that measurement. Otherwise, your belt loops will end up being about 5/8″ wide.

OAL 2018: Belt Loops & Waistband

Starting with the unfinished side, fold the belt loop into thirds with the right sides facing. You will end with the finished edge on top, hiding all raw edges. Be nitpicky here and do your best to get the finished edge right EXACTLY on top of the first fold.

OAL 2018: Belt Loops & Waistband

Topstitch along both long sides at 1/8″. This is why it is so important to get the finished edge right on the fold – if you are too close to the center, the stitching line won’t catch it.

And that’s it! This gives the same effect as the turned-tube-belt-loop-, but I find it a lot easier to sew. From here, you can cut your belt loop into 5 pieces and attach them to the top of the pants as instructed.

Now, for the waistband!

If this tutorial seems like deja vu, it’s because I’ve showed it before on my blog! I wanted to show it again for those who missed it the first time, and also to show that it does work for one piece waistbands as well as two piece!

OAL 2018: Belt Loops & Waistband

On your interfaced waistband piece, fold up one long edge a little bit less than the seam allowance (this pattern is 1/2″, so I folded up my edge at 3/8″) and press.

OAL 2018: Belt Loops & Waistband

This is gonna seem ass-backwards – just bear with me! Attach the waistband to the INSIDE of the pants, with the right side of the waistband facing the wrong side of the pants. Sew all the way around at your normal seam allowance, making sure to leave at least 1/2″ overhang at each end (you can always cut off any excess). You will sew all the way around, from one opening to the other. If your pants have a zipper, make sure that it is unzipped and sew right across the zipper – just go slow so you don’t break your needle on the teeth.

OAL 2018: Belt Loops & Waistband

Now you’ll fold the waistband back on itself, with the right sides facing. The side that has been folded and pressed – i.e., the side that was not sewn to the pants) should hang below by about 1/8″-1/16″. This is to ensure that the stitching line you just did will be covered when you turn the waistband right side out.

Now, stitch along the short edge, keeping in line with the center front edge of the pants. It may be helpful to draw a guideline here first with a ruler (which is exactly what I do – no shame here!).

OAL 2018: Belt Loops & Waistband

Trim one of the seam allowance layers in half. Do not trim the corner, keep some seam allowance there.

OAL 2018: Belt Loops & Waistband

Now you will turn the waistband right side out! To get a nice, crisp corner, start by sticking your thumb in the waistband up to the corner.

OAL 2018: Belt Loops & Waistband

While your thumb is still in that corner, use your pointer finger to push the seam allowance down to one side (doesn’t matter which side) (Sorry, I don’t have pretty hands haha)

OAL 2018: Belt Loops & Waistband

Keeping your fingers in that weird pinch, turn the waistband out to the right side.

OAL 2018: Belt Loops & Waistband

You should end up with a nice sharp corner here! You can use a point turner to really push the edge out if you need it to be even sharper 🙂 By holding the seam allowances in place when you turn right side out, this keeps the corner sharp (rather than trying to crap the seam allowances in after the fact). Keeping a bit of fabric in the seam allowances (rather than trimming down aggressively) also adds some structure to that corner, so it doesn’t collapse on itself.

OAL 2018: Belt Loops & Waistband

Finally, you can pin the remainder of your waistband down and topstitch from the right side, making sure to cover the first stitching line. I like to start at the center back and go all the way around the long rectangle, ending where I started. You can then cover the backstitching with a belt loop 🙂

OAL 2018: Belt Loops & Waistband

And that’s it! I love this method for attaching a waistband, because it ensures you get a beautiful, even topstitch on the outside without having to worry about catching the facing on the inside! It’s just EASY and basically fool-proof! You can also use this method for sewing in the round waistbands, cuffs (buttoned or in the round) and even collar stands.

Let me know if you have any questions!

Tutorial: Adjusting Crotch Depth (OAL2018)

5 Jun

Good morning, everyone!

In light of the official start to the OAL2018, I wanted to share a little tutorial for a very common pants adjustment – adjusting crotch depth. Even if you are not participating in the OAL, I hope you will find this useful! As I mentioned, this is a very common adjustment (at least half of my students in every Sew Your Own Jeans workshop that I teach ends up needing to make this adjustment!) that is a lot easier than it sounds.

This is the only pants-fitting post I’ll be doing for this OAL – most other adjustments can be done after the pants are basted at the side seams. If you have more pants-fitting needs, I absolutely recommend getting a copy of Pants for Real People (which is where the image below is from) – it is a fantastic resource that is full of valuable information and my top reference book when I’m fitting pants! Another post to check out is the Common Fitting Adjustments in the Lander Sewalong!

Common Pants Fit Adjustments – From Pants for Real People

So what does it mean to adjust crotch depth? The depth (versus the length, which runs from front waist to back waist) is the distance from your waist to the bottom of your crotch – i.e., the determining factor between a drop crotch and cameltoe. If you’ve ever had a wedgie, your depth is too short. Pants crotch hanging WAY lower than your actual crotch? Your depth is too long.

Since we are all special little sewing snowflakes (sewflakes?), all of our bodies are different – even in ways that aren’t super visible. Which means that not every single pants draft is going to fit every single person flawlessly – it’s just not possible. Personally, I have found that I have a slightly shorter crotch depth and generally need to make this adjustment with nearly every single pair of pants I sew. It’s not a hard adjustment to make, but if you’ve never seen is done before, it can be a little difficult to wrap your head around. Hopefully this tutorial will give you some insight on how to do it!

OAL2018: Shorten Front Crotch

First, you’ll want to make a muslin of your pants (or at the very least – a shorts version of the pants). Sew the front and back as instructed. You don’t need to include the whole fly setup (unless you want to practice sewing it!) or waistband (unless you anticipate needing to change it to a curved waistband). Pin the fly shut and move around a bit. Don’t freak out over wrinkles – muslin wrinkles like crazy (mine are extra bad because I pulled these out of my rag pile, true story) and doesn’t have as much “give” as your regular fabric. Feel where the crotch is in relation to your body – is it hanging too low and causing extra folds due to excess length? Is it all up in your business and giving you cameltoe?

OAL2018: Shorten Front Crotch

For a low-hanging crotch, pinch out the excess somewhere along the depth and pin it until it feels right. DO NOT OVERPIN – you don’t want to give yourself cameltoe (learn from my mistakes, people). Walk around, make sure you can sit, and let them settle a little. Likely, you won’t need to make a massive adjustment here – between 1/4″ – 1/2″ is most common. Little tiny fractions make a big difference when it comes to fit!

If your problem is the opposite and you need to add length, the easiest way to do this is to slice across the front of the pants and insert a strip of fabric (I just pin this, although you can sew it in, too). Pull down the bottom portion until the crotch feels like it is in the correct spot, then pin to the fabric strip.

I realize you likely cannot see a difference between those two photos (I mean… I definitely can’t haha). Like I said – it’s a small adjustment, and not always visible. But you can feel it!

OAL2018: Shorten Front Crotch

Check the back to be sure there aren’t any depth adjustments needed. I’d say that maybe 1 out of every 15-20 students of mine need to actually adjust the back – it’s usually all in the front. If you do need to adjust the back, do so the same way you adjusted the front. Mine looks fine, so I left it as is.

OAL2018: Shorten Front Crotch

Now take your muslin off, and measure the distance from pin to fold – or the additional length added by the strip of fabric. If you are only adjusting the front, then only measure at center front. If you are adjusting front + back, measure at the side as well as the center front and center back. This is how much you need to either add or remove from the depth.

OAL2018: Shorten Front Crotch

Now how to translate this to your pattern? Easy! Your pattern piece should have a lengthen/shorten line that cuts across the fly (if it doesn’t – first of all, SHAME ON THAT PATTERNMAKER, but second, it’s easy to just add it somewhere in that general area nbd). If you are only shortening the front crotch, you will cut along that line from center front *just* to the side seam. Do not cut through the side seam – you want to leave a hinge. If you are also adjusting the back, cut straight across from edge to edge.

OAL2018: Shorten Front Crotch

To lengthen, spread the pieces apart until the center front matches the measurement you took, and then fill the gap with paper and tape closed. If you are only lengthening the front, it should fade to nothing at the side seam.

OAL2018: Shorten Front Crotch

To shorten, overlap the pieces until the center front is overlapped by the amount you measured. Again, if you are only adjusting the front, it should fade to nothing at the side seams/hinge.

If you need to adjust all the way around to the back, you’ll want to walk your pattern pieces to make sure that the side seams still match after making your adjustment.

Finally, redraw any wonky links or curves (such as the crotch curve if you overlapped – just smooth the curve) and straighten the grainline if necessary. You will also want to shorten or length your fly pieces (shield, facing, etc) the same amount so that they match up when you sew them together. I strongly advise making another muslin as this point to be sure that they changes didn’t wonk something up. You do you, though!

And that’s it! Like I said, a really easy adjustment that can make a world of difference in how your pants fit and feel. This is definitely the most common adjustment I see in my Sew Your Own Jeans workshops, so I wanted to share it here too!

Completed: Red Linen Lander Pants

20 Apr

Well, y’all, it’s official – I’ve given up on sewing any more cold weather clothes for this season (although I still have a coat project that I haven’t shared – yet!! Keep an eye out for that one; I promise it’s worth the wait!!). It may still be spring here with some seriously flip-flopping temperatures, but I’m planning for the heat that I now is coming!

Red Linen Lander Pants

First up, some new pants! Yah, I have ENOUGH pants, we are all aware of that – seriously, my pants drawer is a bit much! – but most of what I have are jeans and skinny pants, better suited for cooler weather. When it’s warm outside, I need some space between my legs and my pants so that I can catch that breeze! I have a great pair of linen Florence pants from Elizabeth Suzann, which I love but could use some improvements to better match my needs (pockets + a flat non-elastic waist, plus a sliiiiightly lighter weight linen). I do love the shape of those Florence pants, though – the wide leg is perfect for a warm-but-not-quite-warm-enough-for-shorts day, the cropped length looks great with both flats and heels, and the high waist means I can wear them with cropped shirts.

With these changes in mind, I find the Lander pants from True Bias fits all those needs. I still have the high waist, cropped length, and wide leg, but with a slimmer fit through the thigh, a flat waistband (no elastic!) and pockets. I’m not the sort of person who thinks pockets should be in EVERYTHING, but I do like them in my pants! And while I respect that a slim pant can’t always have a pocket without adding additional bulk, this pattern does a fine job of giving me a place to stash my stuff without ruining the sleek style lines.

Red Linen Lander Pants

Pattern in hand, the next task was to find a good linen that fit my needs and preferences. I wanted something with a lighter medium weight – not as heavy as the Florence pants (they can get a bit warm when humidity rises), but with enough heft to still look ok as a bottom weight and not be as prone to wrinkles as a light weight. Not to mention, color is important! My Florences are navy, so I wanted to try for a different color (as much as I love navy, I don’t need two pairs of navy linen pants!). I reached out to my friends at The Confident Stitch for some ideas and swatches, and y’all, did they deliver! I decided to go with the Vivaldi Linen in red, which was exactly the weight + color I was hoping for (Vivaldi linen also comes in other colors – royal blue and taupe – if red ain’t your thing! They also have a great Brussels Washer Linen from Robert Kaufman that I considered, but ultimate decided it was a hair too light for the pants look I was going for).

I washed + dried my linen 3 times to get as much shrinkage out before cutting (I have been told this also helps with preventing wrinkles, which I can’t say for sure if that’s true, but this linen hasn’t been very prone to wrinkling!), using hot water and high heat. While the color did not bleed, it did turn my dryer lint bright red which sometimes got on my clothes (I just brushed it off, it didn’t stain anything. But it did make for a delightful dryer discovery). This Vivaldi linen was absolutely lovely to work with – it pressed and sewed without any trouble, had minimal fraying (I used my serger to finish all seams to further cut down on fray potential) and I didn’t have any issues with it shifting around during cutting. Just a great experience overall!

Red Linen Lander Pants

Red Linen Lander Pants

Before sewing up my pants, I made a muslin of the shorts version to see if I had any fitting adjustments to make. Based on my measurements, I started with a size 2 but they were pretty tight. Letting out the side seams about 1/2″ (the pattern includes 1″ seam allowance at the side seams for fitting) gave me a much better fit. I also took out about 1/4″ in the length of the crotch, fading to nothing at the side seams.

For the pair in red linen, I went up to a size 4. The overall width of the legs and length of the crotch is good, however, the center back needed to be taken in quite a bit to account for my hip to waist ratio (I think this pattern is cut for a more straight figure). This is an EASY adjustment to make; you just try on the pants before you add the waistband and take in the center back as needed for a closer fit. I took out an extra 3/4″, but honestly could have stood to remove more (I didn’t want to risk making them too tight at the waist – which I am guilty of doing, like, often, so I’m wearing them with a belt to cinch them in a little more). I almost removed another 1/4″ from the side seams, because my linen has more give than the muslin.

I cut the pockets for the size 4, but I think they are too big for my frame, especially after taking in that center back. There are two back pocket sizes for this pattern – a small pocket (sizes 0 & 2) and a slightly larger size (4 and up). In retrospect, I should have cut the smaller sizes, which I will do for the next pair. I just think they are slightly too big and a little overwhelming on me.

Finally, the length is the exact length called for in the pattern for the cropped version. I am a hair under 5’3″ so I wasn’t sure if they would be too long on me. I actually think they could stand to be shortened maybe 1″, but several people told me they are the perfect length (to me, they look almost like they accidentally shrank in the wash!). I am not going to mess with this pair, but next pair I may shorten them just a bit.

Red Linen Lander Pants

Construction-wise, this pattern is great. I’ve made DOZENS of pants at this point, so I’m not exactly a n00b to this, though. I had no problem following along for the steps, including the button fly. One thing I would change for the next pair is to interface the fly shield because it can definitely use that support, especially when sewn up with a linen.

Lander pants in red linen

Lander pants in red linen

Lander pants in red linen

What else? I used bemberg rayon (a scrap in my stash) to line the front pockets, and the buttons are from my local fabric store, Textile Fabrics. Took me foreeeeever to find a perfect matching red but I’m so glad I did! As a side note, these flat photos were taken after wearing the pants around for a full day, so you can see exactly how much the linen wrinkles (i.e., not much at all!).

Red Linen Lander Pants

So I think that’s all for this post + project! I’ve already worn these pants several times (as the weather allows) and have really loved that they provide a little warmth and coverage while still being light and breathable when the sun starts getting crazy. The high waist works great with a lot of my crop tops, which I’m excited to bust out!

Big thanks to The Confident Stitch for sponsoring this post and making my red linen pants dreams come true! As a side note, the links used in this post are affiliate links and will net me a percentage of any purchases you make through that site if you click the link (which in turn gets dumped directly back into my FABRIC FUND amirite woohoo). Thank you for supporting my blog, y’all!