
Good morning, everyone! Hope y’all had a nice weekend (holiday or not!). We are just coming up on the home stretch of our OAL – just a couple more steps left until we are finished and can start rocking our gorgeous dresses! Woohoo!
Today, we will be inserting zippers into our dresses. In this post, I will be covering the insertion of a lapped zipper, which is my preferred method for this style. I won’t be covering invisible zippers here, but I do have a tutorial on inserting an invisible zipper if you’d like to use one for your dress. I put an invisible zip in my second OAL dress (the one not featured in this post), using the same method as outlined in the tutorial, and it came out beautifully! So that’s an option if you need it 🙂 Otherwise, let’s talk about the lapped zipper!
As I mentioned, I really love a good lapped zipper. I blame Gertie for sparking that obsession, btw. When I was working at Muna’s, she never understood why I preferred to use lapped zippers in most of my garments – she was of the camp that invisible zippers were more elegant. Maybe, I guess, but sometimes I like the design element of having the zipper be visible (or, at least, the stitching line of the zipper being visible). It’s definitely easier to match up seamlines and prints with a lapped zipper, since you can hand-baste into place and sew from the right side. Also, lapped zippers are a bit stronger than their invisible counterparts – which could be important if whatever you made is a little on the snug side. Of course, there’s a time and a place for everything – lapped and invisible zippers included – but for casual sundresses, I just love a beautiful lapped zipper.
Anyway, onto the zipper!
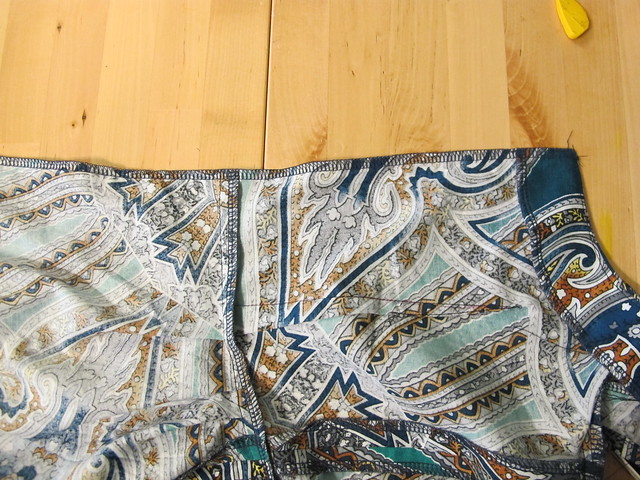
Start by finishing the raw edges of the center back – from the bottom of the skirt all the way to the top of the bodice. I catch my facings in the serging (or whatever finishing you’ll be using) so I don’t have to tack them down later. Now is also a good time to check and make sure that both back seams are the same length and that the waist seam matches up, so you know everything will also match up when it’s time to put the zipper in.
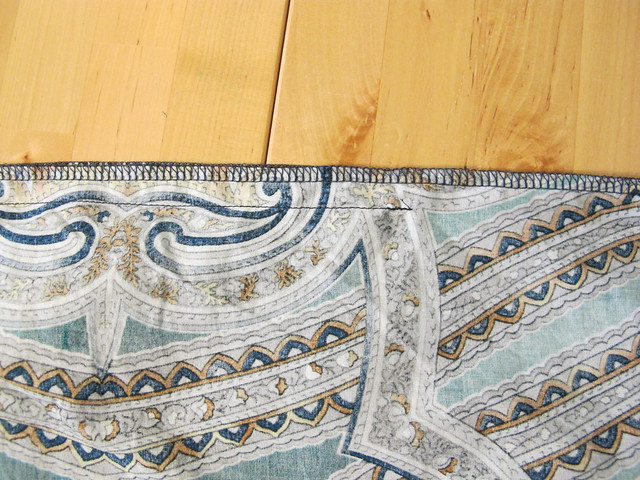
Start at the bottom of the skirt and sew up to the zipper stop, as indicated on the pattern. Backstitch a couple of times to make sure everything is secure, then press the seam open. Leave the unstitched part unpressed.
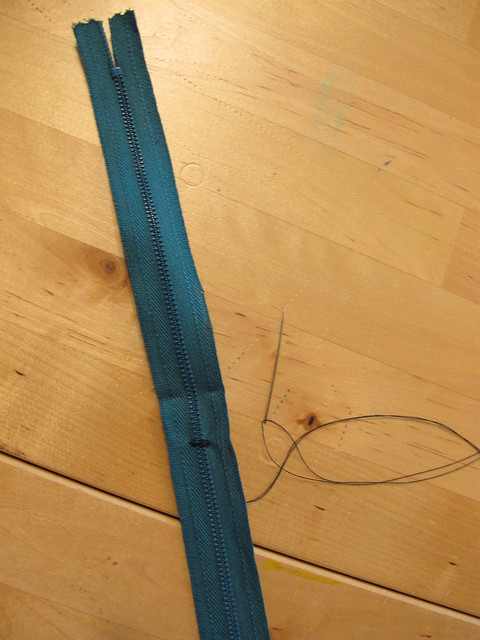
Now make sure that zipper is the right length for your dress! If it’s a bit long (I have a metric shit load of 22″ zippers, so I forever have to shorten mine), you can easily shorten it. Just mark where the zipper stop needs to go, and sew across the teeth to create a zipper stop. If you are using a nylon zipper, you can do this by machine. For zippers with metal teeth, you’ll want to sew by hand. Once you’ve made your stop (and test it!), cut the teeth about an inch below. Presto: shortened zipper!
Also, just a side note – I always have people tell me that you can’t shorten a metal zipper. Well, I guess I’m some sort of magical sewing unicorn because I shorten pretty much ALL my metal zippers! Ha! The trick is to snip both sides of the tape as far to the teeth as you can, and then you can usually get the teeth to coax apart. Use a pair of crappy scissors in case you need some assistance. Alternately, you can sew the zipper with the excess coming off the top edge of your garment, and your facing/waistband/whatever intersecting seam can act as a zipper stop. But no, it’s not difficult (nor impossible) to shorten metal zippers.
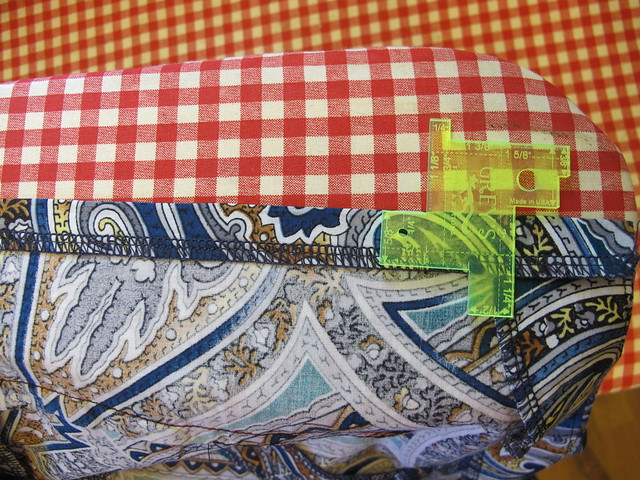
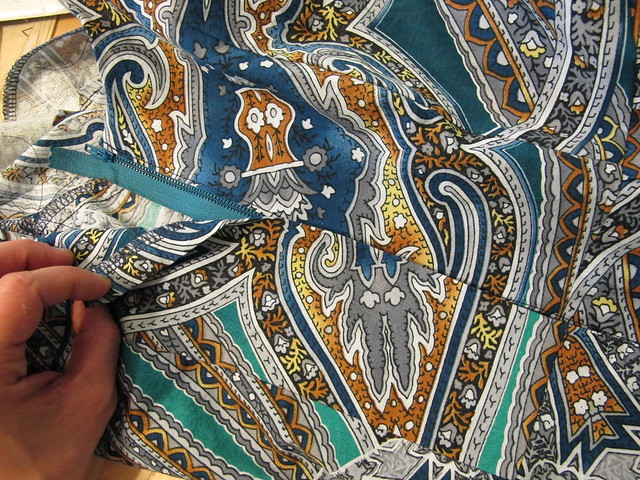
On the right side of the open seam (or left; however you want your lap to go. I like my lap to be on the left, though), press the seam allowance at 1/2″ to the wrong side of the bodice, all the way down to the stitching.
On the left hand side, press the seam allowance at 5/8″ to the wrong side, again all the way down to the stitching.
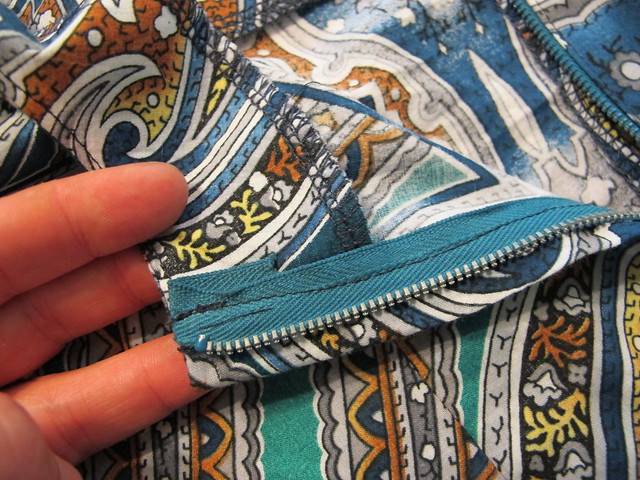
On the right hand side (or whatever side has the 1/2″ fold), pin your zipper with the teeth right along the edge of the fold. I start my zipper about 1/8″~ from the top of the fabric; but I also don’t use hooks and eyes with my lapped zippers (personal preference! I’ve found they’re not really necessary). If you are using a hook and eye, start your zipper a little lower. As far as the tape at the top of the zipper – you can just fold that under to the wrong side of the dress. If you don’t catch it with your stitching, you can tack it down by hand at the end.
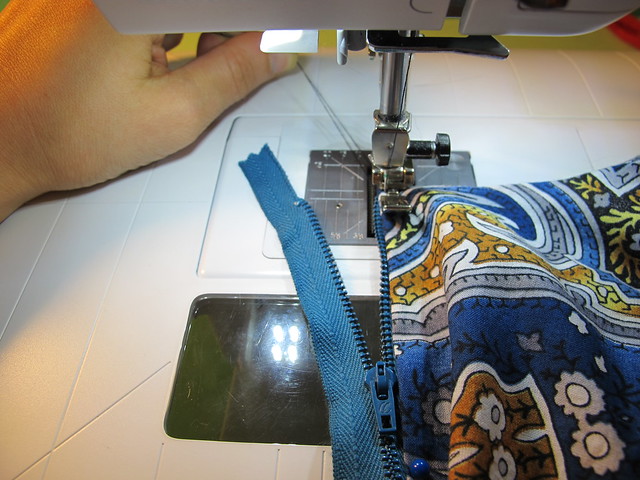
Now sew your zipper to the garment, about 1/8″ away from the fold. Use a zipper foot and/or move your needle to get close to the edge (but not so close that the zipper won’t function!). If you have trouble starting the stitching at the top of the zipper, pull both thread tails (the needle thread and the bottom thread) very gently while you press the pedal; this will keep the fabric from getting eaten by your feed dogs and making a big thread nest on the underside of your garment.
Ok, that’s one side! Onto the next!
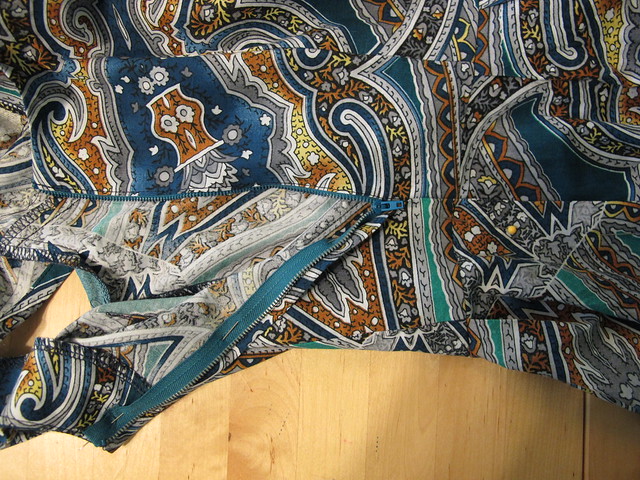
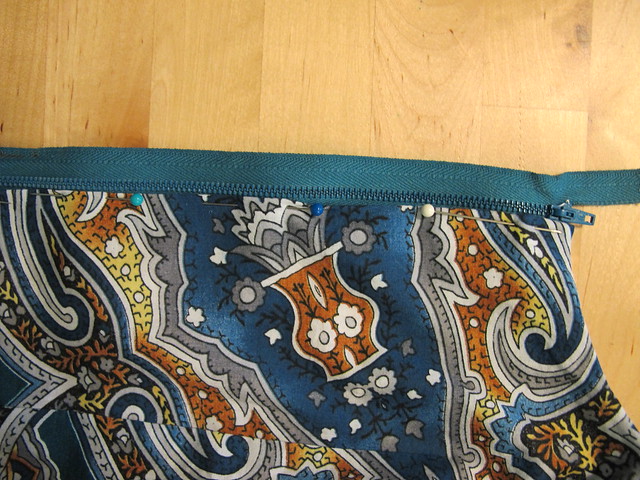
Now take the larger 5/8″ folded edge and place it on top of the zipper, with the fold meeting the stitching line you just sewed. Pin everything down, being careful to only catch the back of your garment – don’t pin all the way through the front! I just slide my hand around the inside to be sure, but you can also put a book inside the bodice and use that to keep from pinning all the way through. Once you’ve pinned the overlap down, check the zipper tape and make sure your pinning is even – it should be down the middle of the zipper tape. If it’s not, readjust.
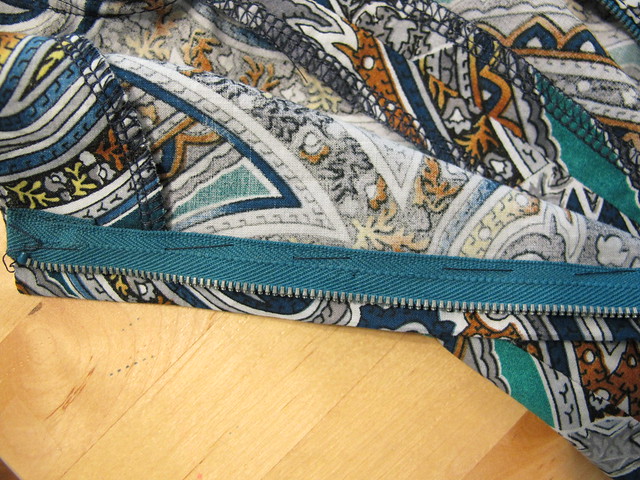
It can be helpful to hand baste the zipper tape into place before you use your sewing machine. This will keep the fabric from shifting around and gives you a very precise installation.
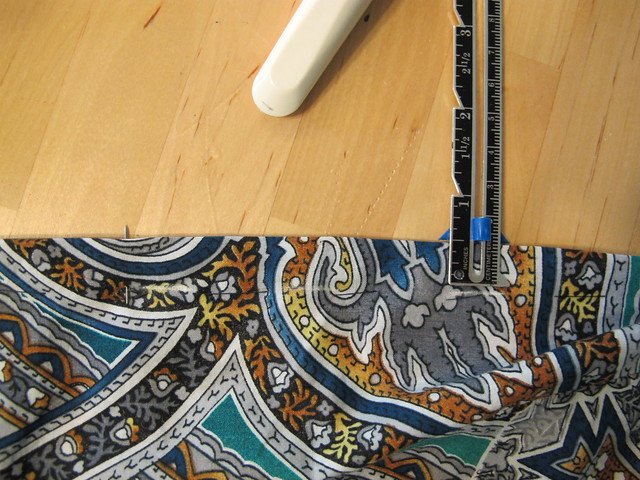
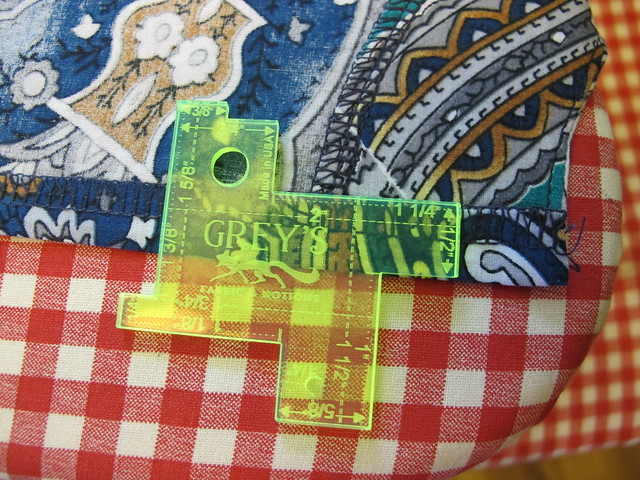
One thing I like to do before I start sewing is to mark my stitching line (otherwise it can be kind of difficult to tell where you are stitching, since the zipper is closed and you can’t see the guidelines on the throat plate!). Go about 1/2″-5/8″ from the fold – this will depend on where you’ve pinned/basted your zipper tape – stick a pin through the marked line and check the wrong side of the tape to be sure it will catch and not be too close to the teeth. If you are sewing a zipper that still has the original zipper stop (aka, you didn’t shorten your zipper), it can be helpful to mark with a pin where the zipper stop is, just so you don’t accidentally sew over it and break your needle.
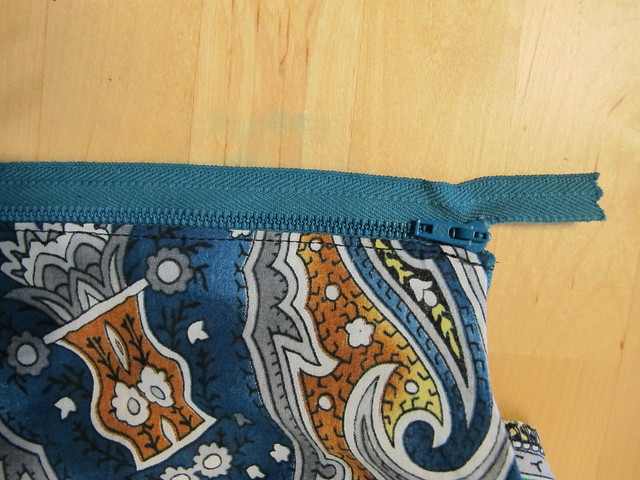
Now take the dress to the sewing machine and sew along your marked stitching line. Try to keep things as straight as possible, since this stitching is visible 🙂 Keep the zip closed and be careful not to sew through the front of the drss. When you get to the bottom of the zipper (or a couple of stitches before your marked zipper stop), lower your needle, raise the presser foot, pivot, and sew across the bottom of the zipper (be very careful and VERY SLOW if you are sewing in a zipper with metal teeth!). Backstitch a couple of times to keep everything secure.

Remove your basting threads, wipe out any markings, and the give the zipper a final press. If you were unable to catch the top of the zipper tape in your first stitching, tack it down now by hand.
And that’s it! Zipper is done! 😀 As always, please let me know if you have any questions!


Thanks for this refresher. In the old days (before invisible zippers) this was the way we sewed all of our zippers.
Long live the lapped zipper! 🙂
What the HELL is that neon green/yellow measuring thing and where can I buy approximately forty of them? Seriously. I audibly gasped when I saw that because it is the best TOOL EVER. I am forever eyeballing seam allowances because I hate messing with the stupid metal sliding measuring things. But that neon thing is perfect and I need it.
Great tutorial! I’ve never really done lapped zippers because I assumed you needed to put in extra fabric instead of just using the existing seam allowances. Brb as I go put in a million lapped zippers.
Ha! It’s the inches & bits ruler from Grey’s Fabric 🙂 (not sure if they go by a different name or if that’s the actual name!) This thing RULES. You totally need 40 of them – they’re so handy!
And nope, lapped zippers don’t need extra seam allowance added! Unless you want to do a little facing for your zipper, but even that can be added on after the seam allowances are cut 🙂
I bookmarked this for later! Fingers crossed that sometime before 2014 ends I can make a skirt and do some zippers.
You can do it!! 😀
I’m super lazy so rather than measure and mark my sewing line with chalk , I cut a piece of sellotape to the length of the zipper, stick it down and use it as my stitching guide.
That works too! 🙂
Thanks for this! I’ve found lapped zips mystifying up to this point. One question: can you do a lapped zip if the garment is lined? And if so, how?
Sure you can put a lapped zip in a lined garment 🙂 You just put it in as normal, leaving the lining free, and then slip stitch the lining to the zipper 🙂 I personally try to stick with invisible zippers specifically for this reason – don’t like hand stitching lining if I don’t have to! Ha!
I’ve never tried a lapped zip before but this makes it look quite straightforward! Thanks 🙂
You’re so welcome 🙂
I’ve never really understood why, when shortening a zipper, the convention is to create a new stop. Wouldn’t it be stronger to just cut the top and use the original stop? Or is it that you don’t want the teeth to go all the way up? Another question (sorry, I’m quite the n00b), when you sew the bottom of the lapped side, is that above or below the zipper stop? Thanks! This OAL has been REALLY helpful.
I think (and I’m speaking more for myself here), that the main reason why people don’t shorten at the top is that it’s reeeeally easy to forget that you’ve cut off the stop, and accidentally zip your zipper and ruin it. Again, that’s mostly me – I do it all the time! Ha! There’s probably also some truth in not wanting the teeth to go up all the way, esp if you are adding a hook and eye at the top. I will say that when I use zippers in my trousers, I always shorten at the top – the intersecting waistband makes a strong stop, and the original bottom stop is much stronger in an area that needs it 🙂
Oh, and when you sew the bottom – sew right above the zipper stop! You could sew right below it, but then you might end up with a tiny hole below your zipper 🙂 Hope this helps 🙂
Love that measuring tool, I am getting one also! Thanks for this, I don’t usually have trouble with the lapped zippers, but you gave me a few suggestions that will make it even easier for my next time.
It’s an awesome measuring tool, you will love it! And you are so welcome 🙂
Thank you, Lauren! I have been scouring the net to figure out how to sew a lapped zipper to the facing! Everyone seems to only show how to sew a centre zip. I have seen NOTHING for the lapped zip plus facing!! I will definitely try this way-never thought of sewing the zipper tape OVER the facing edge. What would you do if you wanted the facing to be on top of the zipper tape? How would you make sure all the edges are finished (or tucked) and that top of the zipper (corner?) works well on the lapped side? Love your tutes!
You’re so welcome! I don’t think I’ve ever seen a tutorial that involves catching the facing edge with sewing down the zipper, but I just really like the way it looks and I think it’s a nice clean finish 🙂 If you don’t want to stitch down the facing that way, you can just turn the edges under and tack them down by hand along the zipper tape (which is what most tutorials tell you to do). Hope this helps 🙂
Great tutorial on this method of installing a zipper – thanks 🙂 I use lots of invisible zippers, but sometimes the lapped is just a better choice.
On a side note…WHERE did you get that really neat Greys measuring thingy??? Definitely wanting one of those!
It’s the inches & bits ruler from Grey’s Fabric. LOVE THAT SHIT.
Wow! I totally want to insert a lapped zipper now. For some reason, I assumed they were complex, but this tute makes them look super manageable. Lapped zippers are in my future. Thanks for posting this!!
No way, dude, they are soooo easy! Go sew you some lapped zippers!
I’ve got a question that’s been burning a hole in my brain for ages. Seems like now’s as good a time as any to ask it: The insides of your garments always look so NEAT. After a few years of sewing, mine still look amateur stage-production quality. So yours give me something to aspire to. I think a lot of the neatness is down to your cleverly finishing raw edges before sewing seams. I recently bought a serger, and though I’m still finding my way around it, I’m already wondering how I lived without one! But when you cut all your pattern pieces of fabric, THEN finish some of their raw edges, doesn’t that make them fractionally smaller and change your finished garment measurements? I have a feeling this is a real rookie question, and I kinda feel like a dunce asking, but what the hell. … LOVE your blog, by the way. Have for years. Thanks!
Well, first off – I don’t normally finish my edges before sewing them together. I do occasionally (like when you need to finish the edges before inserting zipper, or on a super curved seam like a trouser butt seam), but most stuff- including this dress – gets finished after the seams have been sewn together. That way, you don’t have to worry about cutting off the seam allowance since you’ve already dealt with that when sewing the seams together. It’s not that tricky to finish edges after they are seamed – you just have to be careful not to cut a hole in your fabric 🙂 When I do have to finish before I seam, I am just careful not to cut off any of the edge 🙂 And no, that’s not a stupid question – I pondered over that one for a while when I was trying to figure out seaming and finishing 🙂
Thanks! I thought there might be some secret tip, like not using the upper knife on the serger or something. This is helpful to know, and thanks for lots of inspiration and great tutorials!
Thanks so much for your amazing sew along! I just finished my dress today. You can see it here http://ela-sews.blogspot.co.uk/2014/07/part-i-of-outfit-along-dress.html and I only used your tutorial to assemble it. It was my first time stitching an invisible zipper. It is not as perfect as yours, but it works 🙂 and doesn’t look to ugly. Thanks again Lauren!
Oohhh, it’s gorgeous!! I’m so glad you found my tutorials helpful 😀
Great instructions. I was totally bamboozled by the instructions on a new look skirt that I am making. Yours was the first blog I stumbled on in my desperation to get the zip in. Thank you so much!
If you stitch the top of the zip into the waist edge – trimming if necessary (you seem to have a lot of zip left there at the top), then fold over the facing and secure it to the side seams it is much neater. The zip is secured under the waist edge and the facing covers the zip at the sides so it all looks uniformly neat and tidy along the waist. Have a look at ready to wear skirts with a faced edge. Also at old vintage patterns (not sure about new ones).