Tag Archives: FAIL FAIL FAIL

Completed: Silk Rite of Spring Shorts

19 Sep

Hey everyone! I want to thank all of you for your kind words, thoughts and prayers in regards to my last post about my dad. I am overwhelmed (in a good way) by the outpouring of support I received via blog comments, Instagram comments, and emails. I’ve said a million times before how much I love and appreciate everyone in the sewing community, and this just really reinforced this. I sincerely appreciate all the comments and emails, all the kind words and wishes, prayers and positive thoughts, and I am so so grateful for all of you. Thank you all so much ♥

With that being said, I do have a positive update! On Saturday evening, I came to the hospital after getting off my shift at Craft South (which was a whole drama in itself – my dad is in a hospital in Hendersonville, TN, which is about 20 miles from where I am in Nashville. Not a huge deal, however, there is currently a gas shortage here that people are PANICKING over and of course I only had like 1/4 tank when it happened! But I decided not to stress about it and just deal, and that’s when I managed to find gas. A miracle in itself because most of the stations here were completely out!) and they had been able to successfully wake him up out of the sedation! They took the tube out on Sunday morning and have slowly been introducing soft foods and liquids, and he may be able to get out of the ICU and into a normal room within the next day or two – and then home after that (hopefully soon!)! There is still a lot that he needs to overcome, of course – but this is a very good, very positive improvement over last week and we are all so so so happy. I honestly wasn’t sure that he was going to pull through, but I guess I forgot that my dad is even more stubborn than I am. Literally, his first words when they took the tube out were (to my mom): “Your husband ain’t done yet.”

So anyway, back to regular posting – here’s a project I finished a couple of months ago.

Silk Rite of Spring shorts

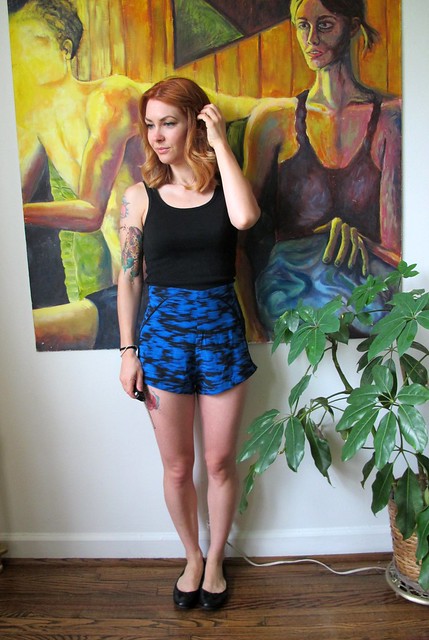
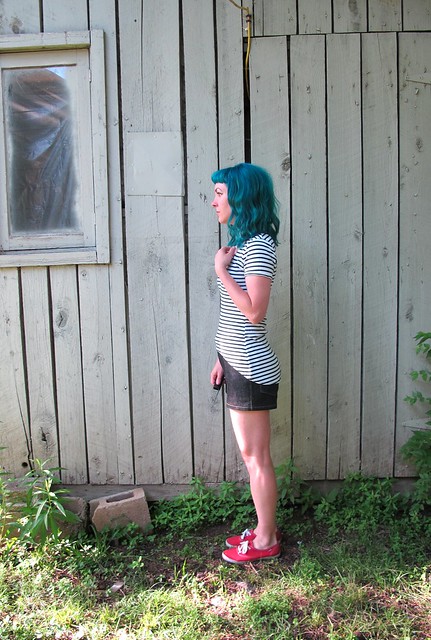
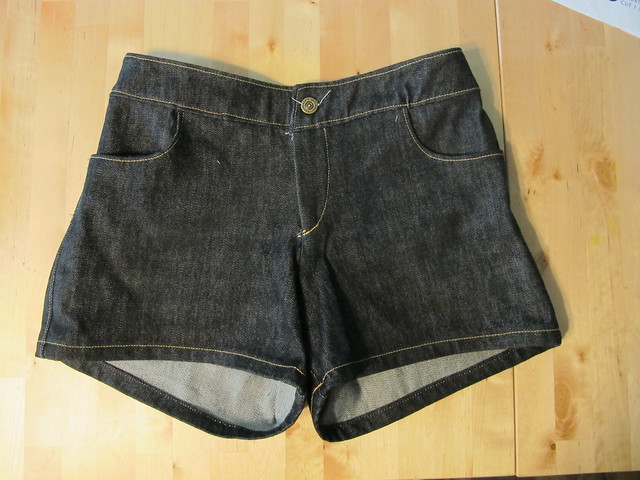
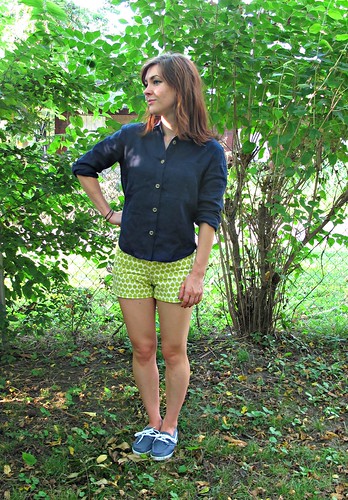
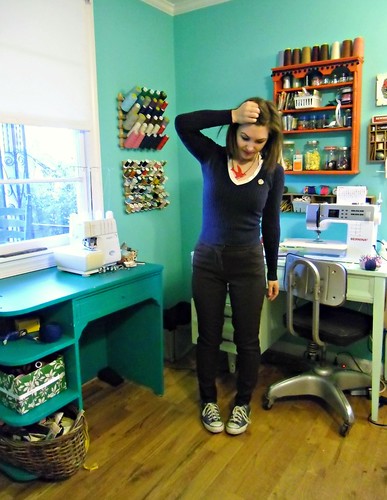
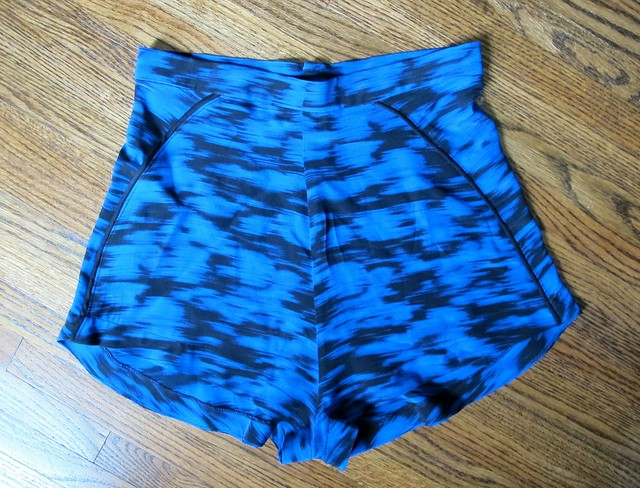
Pin-up Style silk shorts! You know, totally appropriate to combine in a post about my dad (you know what the other option was as far as photos I had on hand? Bras. Sooooo booty shorts it is hahaha):P

These are the Rite of Spring shorts from Papercut Patterns. Remember when I made a really adorable pair of these a few years ago? I have been wearing the hell out of them this summer – they look really excellent with my Elizabeth Suzann Birdie Crop (mine is the ivory one). I wanted to make a couple more pairs, so I started with this silk crepe (leftovers after making those Silk Lakeside Pajamas).

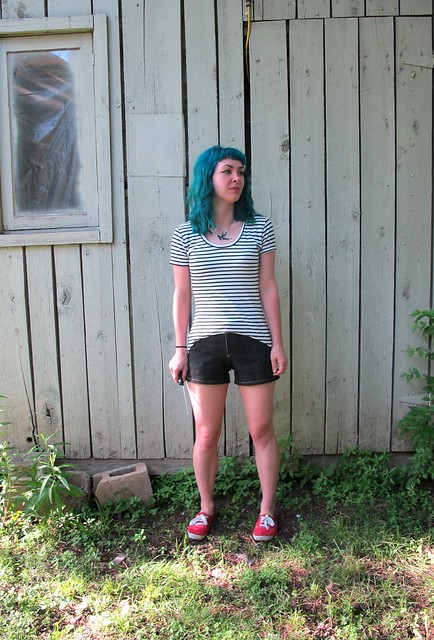
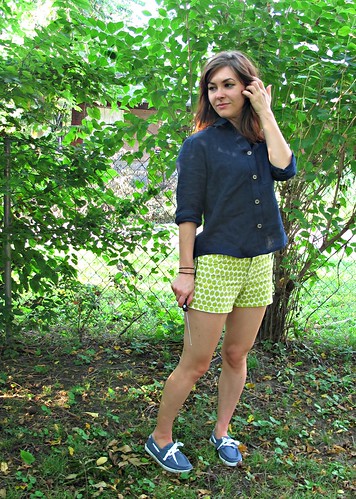
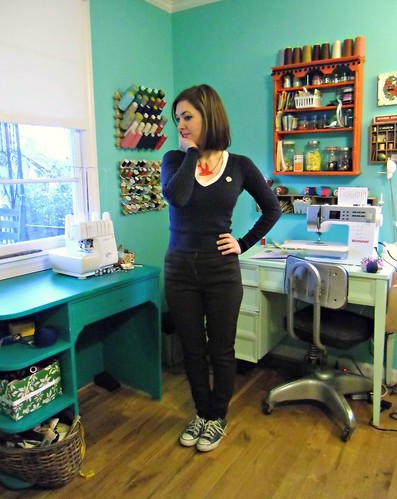
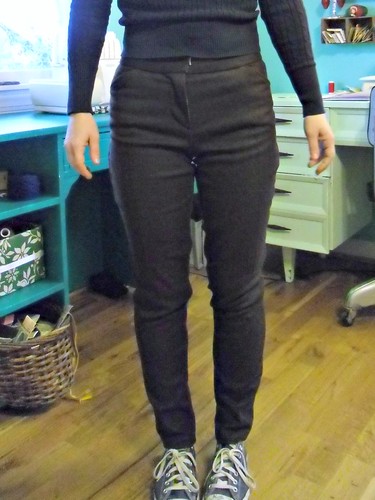
I’ll just say this right now – I don’t like these at all. I don’t think they are flattering on me – they make me look sort of boxy (maybe they look ok in the photos but I reeeeeeally HATE the way they look in real life!) – and the silk crepe feels just a bit too lightweight to be bottom coverage. I actually wasn’t planning on posting this project at all, however, I think it’s important to share the fails along with the victories.

Silk Rite of Spring shorts

Silk Rite of Spring shorts

Silk Rite of Spring shorts

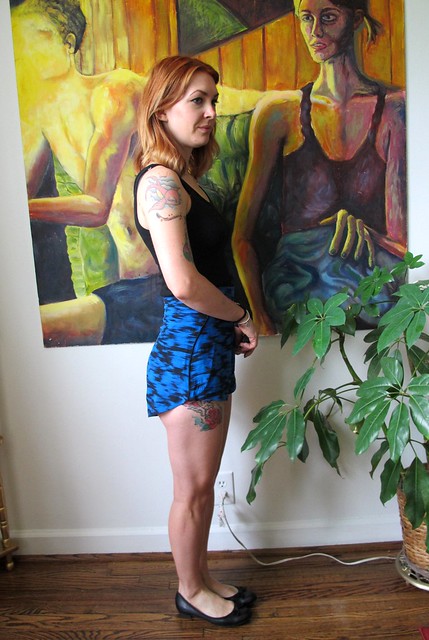
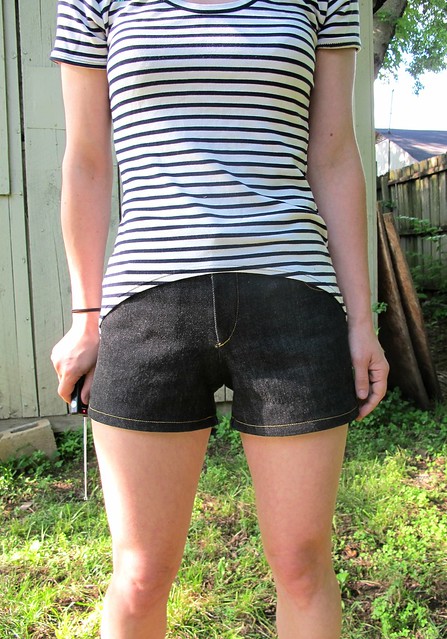
Why I’m not happy with them, I couldn’t tell you exactly. I think it’s a combination of bummers that makes the overall effect just “meh.” I do love this fabric, but I don’t like it as shorts. While I love the idea of a drapey little pair of high-waisted shorts, these just look kind of… saggy and sloppy, at least on me. They’re also too big in the waist, and while I did take them in a little – it wasn’t enough and I realized I just don’t care to keep futzing with them. I’m not going to wear them. I didn’t even bother to straighten or edit these photos. That’s how much I just don’t care about this project haha.

Silk Rite of Spring shorts

Silk Rite of Spring shorts

Silk Rite of Spring shorts

Silk Rite of Spring shorts

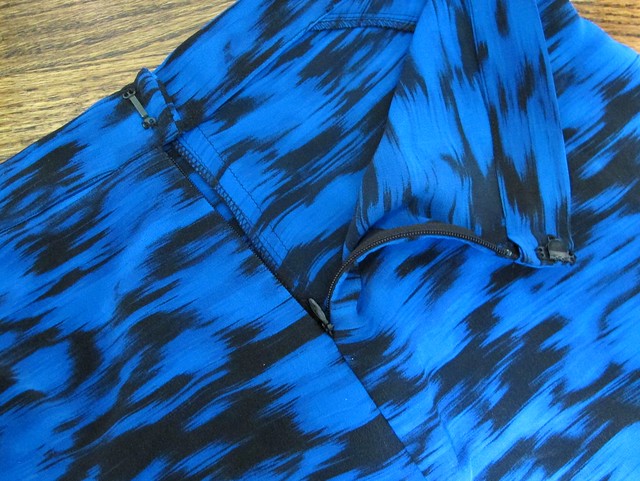
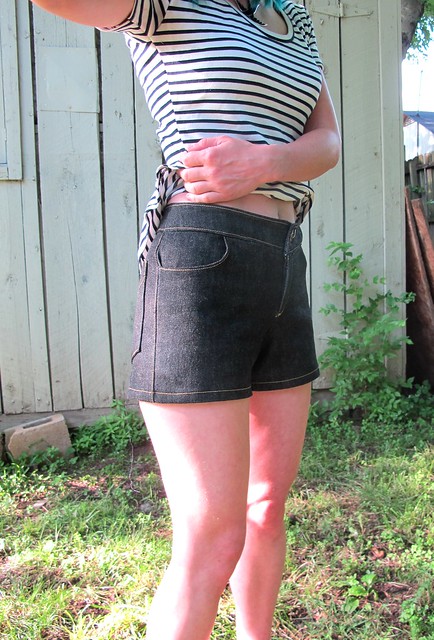
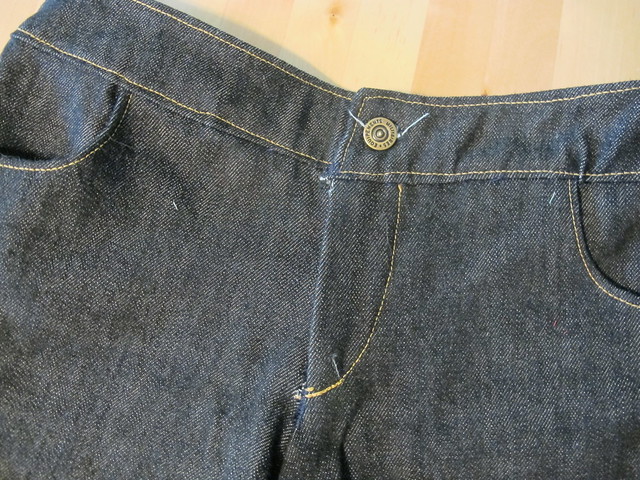
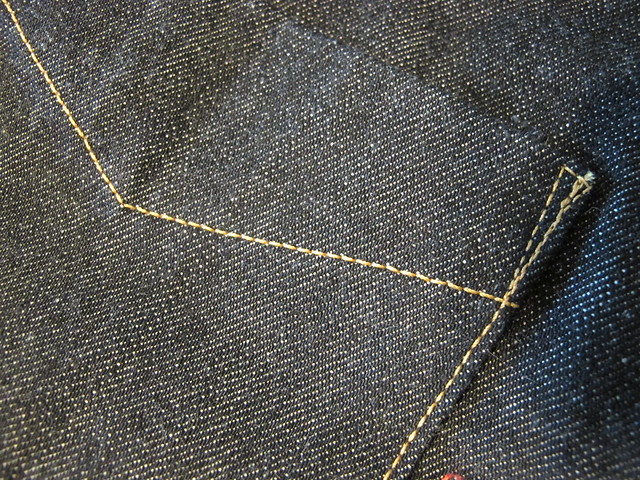
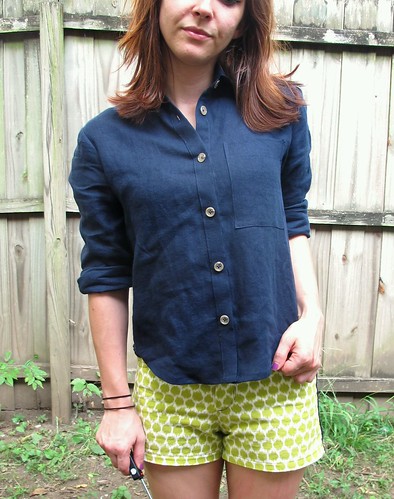
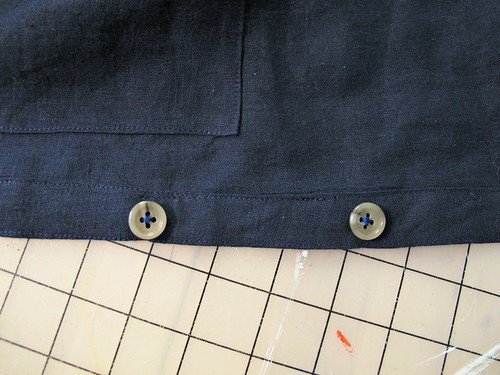
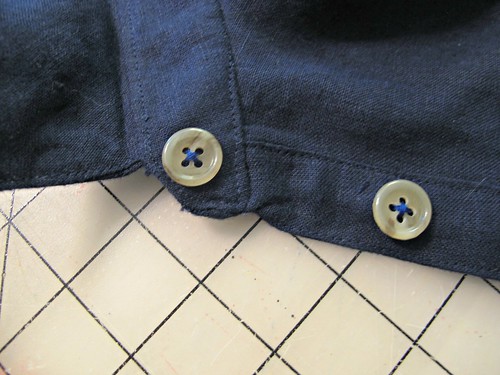
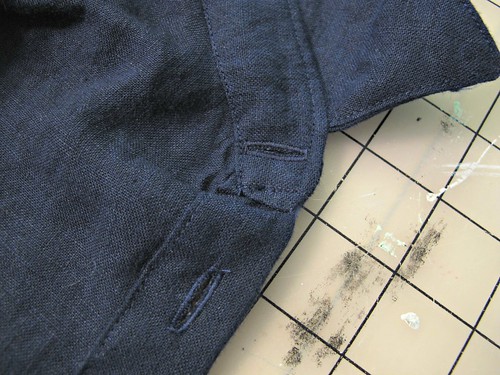
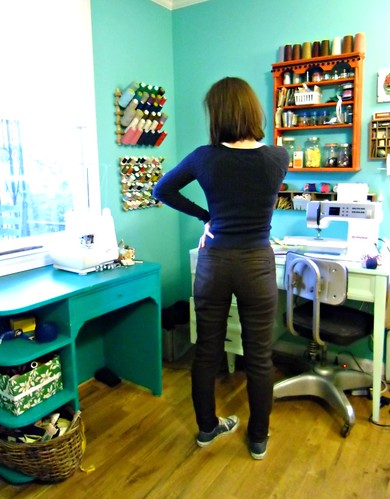
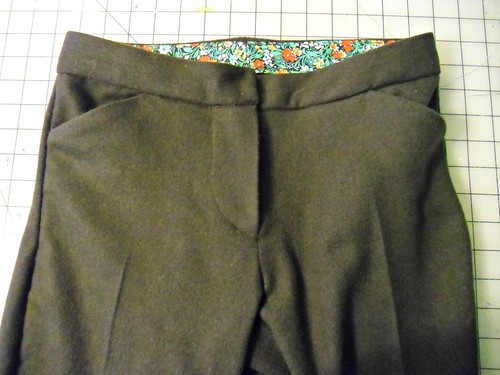
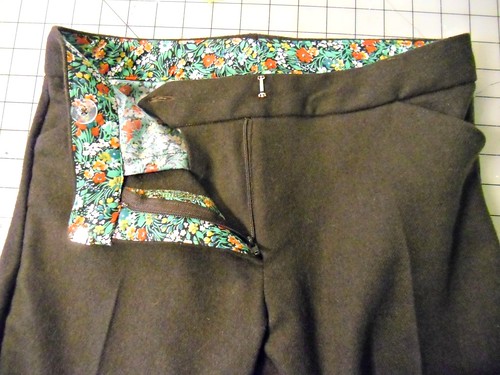
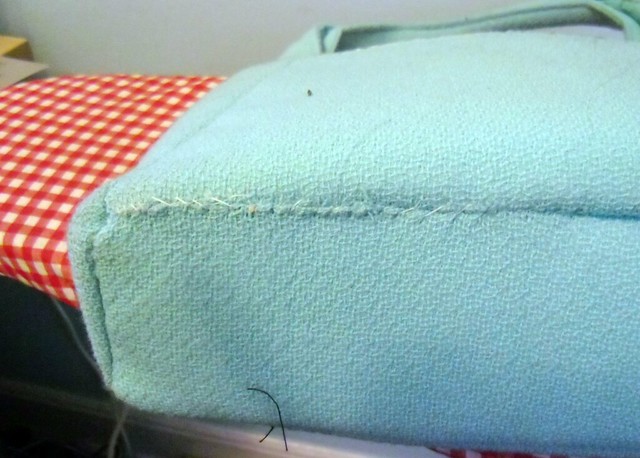
I put some real effort into the construction, so while they aren’t that great (for me) stylistically – they are great in terms of how they were made! 🙂 There is silk crepe piping at the front seams, which is topstitched to help it lie flat. Due to the piping, I opted to just sew + serge the seams (instead of using French seams, which I generally prefer for silks). The waistband is lightly interfaced with a stretch tricot, to help it maintain a little bit of stretch and stay comfortable. The invisible zipper seam is reinforced with interfacing as well, to keep the area smooth and also give it a little bit of strength. I also interfaced the hem, to give it a little of structure and so it wouldn’t be quite so floaty.

To be completely honest, I felt a bit bummed when I finished these and realized that I didn’t really like them. It’s certainly a let-down to spend time on a project, only to be unhappy with the result. These days, I am actively working on focusing on the positive (sorry, I’m big hippy dork ok)- so instead of feeling sorry for myself for “wasting” time on a project, I instead used it as an opportunity to learn from it. Why am I not happy with these shorts? What could I change next time to make the outcome a good one? It’s important to learn from the fails so you don’t repeat them!

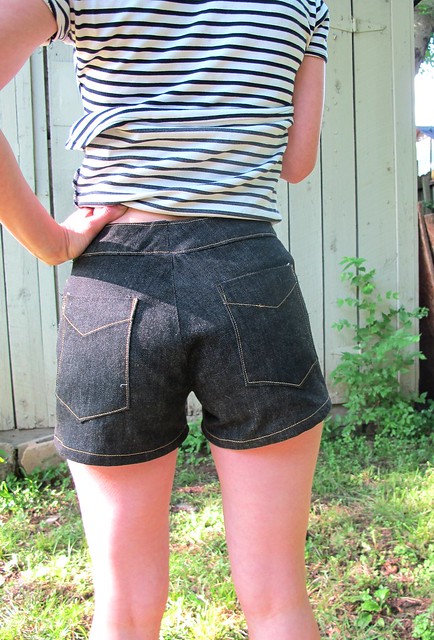
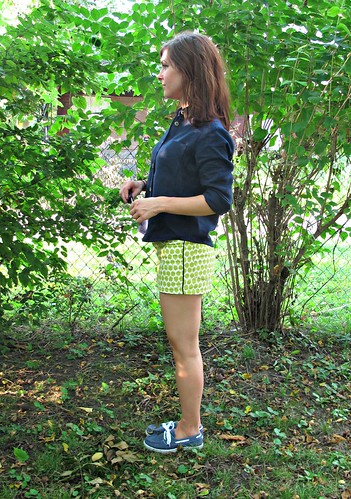
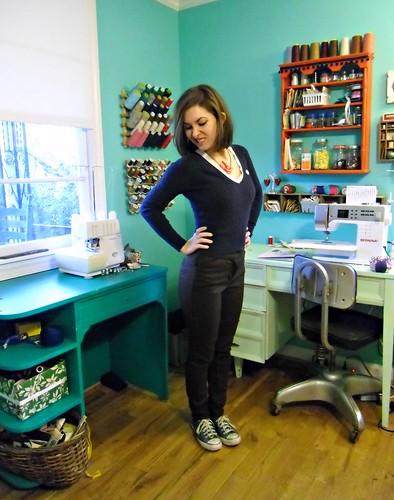
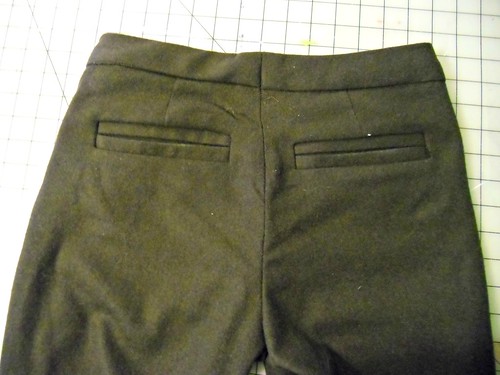
I think if I had straightened the hemline so it wasn’t curved (which I had considered doing before cutting the silk, but then decided it wasn’t worth the effort), and made them more fitted at the waist – that would have helped. But honestly, I think I just like this pattern in a heavier weight fabric with more structure. Not necessarily a bottom weight – but definitely not this floaty gossamer weight. My next pair (which will probably be next year, as it’s just too late in the season now to keep making butt shorts) will be in cotton sateen.

Silk Rite of Spring shorts

So, there you go – a sewing fail (at least in a sartorial sense – as I do feel good about the construction of these!) but a personal life WIN. I’ll take them both!

Tell me about your last sewing fail! Did you learn from it, and if so, what was that lesson?

As a side note… if anyone wants these shorts, email me with an offer (I will entertain anything at this point). They are a size XS and the waist is approximately 27″. The silk has a little bit of lycra so it’s slightly stretchy, and it’s machine washable! Seriously, someone take these before they end up in the Goodwill pile haha.

Completed: Jorts Fail

28 May

Jean shorts (or jorts, as I like to call them – because it’s ridiculous and hipster and sounds completely stupid) are something that have been on my to-sew list for a looong time. Super long. In fact, my jort supply has long run dry – I used to get those the old-fashioned way, by waiting until summer to hack the legs off my jeans so they’d be warm weather appropriate (and later realizing my huge mistake come fall – argh! Whyyyy!!). Jean shorts are an American thing – and I haven’t worn a proper pair in years. No wonder I always see pictures of bald eagles crying:

zWCcW

Anyway. Back to jorts. I knew I wasn’t going to get them by way of cut-offs (I love my jeans too much to do that to them!), so I figured I’d make a pair from scratch and call it a day.

Jorts

My denim is a bit special – I actually bought it during Imogene + Willie‘s big yard sale. I went because I knew they’d have markdowns on jeans (although, when I finally got there, they’d put all the pants away due to threat of rain, wah), but I didn’t realize they’d also have leftover yardage of fabric! For cheap! I got 4 yards of this ridiculously amazing denim for $5 – yes, it’s super narrow (it is selvedge denim, after all), but still. That’s cheap as shit.

Jorts

The denim was really nice to work with. I always complain that good-quality denim is really difficult to find for the home sewer – either it’s too lightweight, it has too much stretch, it has awful stretch recovery, it feels cheap, the color is awful, etc etc. And while I have found some really great denims that make fabulous skirts and dresses, I’m not so convinced when it comes to pants. This fabric, though, is really good. It’s very sturdy and luxurious, with absolutely no stretch.

Jorts

Jorts

Honestly, I think the lack of stretch is what did me in. These jorts are, unfortunately, a fail for me. Wah!

Jorts

They look WAY better in these pictures than they look in real life – so much, I’m almost second-guessing my fail label. But, no, they’re pretty bad.

Jorts

Jorts

I had a somewhat traumatizing experience while making these. Things were going along great – I’d unearthed my Featherweight to do the topstitching (which is BEAUTIFUL, btw! Well. Beautiful where it’s not crooked lolz), I was having a lovely time stitching that denim, I was confident in my TNT shorts pattern, Grainline Maritime shorts. I love my Thurlows, but these are a fab casual shorts pattern if you don’t want all the fuss of the lining and welt pockets! I’ve made them a couple of times before, and while I’m not going to discuss the sizing and construction in detail on this post, you can read all my thoughts on the pattern here and here.

Anyway, I decided to try them on before attaching the waistband, and the zipper immediately popped in half.

“Well, that was probably a shitty zipper. It looked kind of old, probably just gave up on life right as I was pulling them on. I’ll put in another zipper, should be fine.”

So I unpicked the zipper, inserted a new one (have you tried to insert a zipper into a front fly that’s already been assembled? It’s… weird. Not a fan.), attached the waistband, and was getting ready to stitch down the waistband facing when I decided to try the shorts on again.

Oh, right. I popped that fucking zipper too. DAMMIT!

This is when I took an emergency trip to the fabric store (guys, I never do this – but desperate times call for desperate measures and I am DESPERATE for some jorts ok) and bought the strongest denim zipper I could find. I figured the shorts were probably straining against the bottom of the zipper because there was no give in the fabric, so I decided to let out as many seams as I could. I gave myself as much extra room as I could squeeze out, and then reinserted the (third!!!) zipper and finished the waistband.

Then I tried them on. Meh.

Jorts

Jorts

The fit is just… weird. I’m guessing my emergency unpick didn’t work as well as I had anticipated, so now I’ve got some weird lumps in seams that shouldn’t have weird lumps. They also just feel vaguely uncomfortable – I get that selvedge denim is pretty tough, and needs to be worn in a bit before it’s actually comfortable, but I don’t like it. Not in shorts, anyway. I know it looks like they are painted on, but they are honestly not that tight (except I guess somewhere around the base of the zipper, where it strains when I pull them on). Then there’s that whole issue with me being terrified that I’m going to snap this zipper every time I pull them off.

Jorts

Jorts

Jorts

Here’s a closer photo of the shorts and the way they fit. You can see they’re kind of off – it’s not horrible, but it’s enough to bother me. Actually, I think the thing that bothers me the most is the fact that the damn waistband isn’t lined up. I have NO idea how that happened – it matched up perfectly the first time I attached it (right before I popped the second zipper), but it looks terrible. Oh well.

Jorts

Aside from the fit – and the laughingly terrible waistband assembly, seam pucker and all (fyi, that’s where I gave up) – the construction is something I’m moderately proud of. While I didn’t go as far as doing flat-felled seams (and thank GOD for that, since I ended up unpicking them. Well, it didn’t help in the end. But, you know), I did topstitch them with proper denim thread. It looks so good!

Jorts

Well, I guess it would look better if the topstitching were straight, haha! Oh well! Like I said, I used my Featherweight to do all the topstitching – I figured it would be better than unthreading my Bernina every couple of seams. I’m really glad I did, because being able to switch machines made things go a lot faster. Plus, the Featherweight just produces some of the prettiest topstitching! Now I understand why people flip their shits over these machines. They’re pretty fun!

Jorts

Of course, that machine handles entirely differently than the Bernina I’m so used to, so I definitely went through a bit of a curve with this project. My topstitching isn’t straight, but that’s ok. It was a good practice and I’m over these shorts anyway 🙂

I’m totally ashamed to admit that I’ve barely used that Featherweight since I bought it, btw. I used it to make a failed Amy Butler bag right after purchase, and after that it just sat on my cabinet as decoration… until I pulled it out to make these failed shorts. And now I’m wondering if this is a jinxed machine ohgod.

Jorts

Anyway, here’s that damn fly that gave me so much trouble. At least I have lots of practice sewing flys now! Haha!!

Jorts

Sorry for all the unclipped threads and general messy inside. I think I just mentally gave up on this project after the first zipper broke.

Jorts

So, overall – these jorts are definitely a fail for me. Not entirely happy with the fit, I think the topstitching looks sloppy, the back pockets are weirdly in the wrong place, they’re uncomfortable, the stupid waistband looks stupid, but most importantly… I will always always be afraid I’m going to break that zip when I’m taking the shorts off. Not worth the stress. Also, as a side note, that’s my Briar I’m wearing and I’m thinking it looks too big and droopy on me now 😦 Sad.

I’m not entirely bummed with this project, because I had a good time making them (despite the multiple zipper incidents) and I definitely learned a lot during the process. This probably makes me look bad now, considering I just announced my pants making extravaganza, but you know what? Mistakes happen. None of us are immune to the occasional sewing fail, and even if I don’t get a completed outfit out of it, I at least come away with the knowledge to improve on future makes and not repeat those mistakes. I’m also really happy that I reunited with my Featherweight! Maybe I’ll get around to actually fulfilling my sewlution of using that machine to make an entire garment. Sure, it was set for 2013, but… better late than never, right? 🙂

Completed: My First Archer, A Linen Disaster

5 Sep

Remember that Monet of an Archer I posted with my lime green Maritime shorts the other day (which turned out totally awesome, and yes, that’s me tooting my own horn, toot toot)? Remember when I said I was too traumatized to talk about it any further? Well, I think I feel like dishing today. Let’s dish!

Archer Shirt
(I took these pictures at the same time as my last batch – hence the exact same outfit – but I moved to a different side of the yard so they’d look a little different. That’s how much I love y’all. Also, this is pre-skeeter attack, fyi).

Ok! This is the Archer from Grainline Studio. I cut the smallest size and shortened the hem (too much, it looks). I think my relationship with this pattern has definitely gotten off to a rocky start, but I’m willing to give her a second chance. Funny, I thought this style looked horrible on me when I checked myself out in the mirror, but it’s not so bad in pictures!

Archer Shirt

I made this using some scrumptious Ralph Lauren linen from Mood Fabrics – doesn’t the idea of a floaty linen button-up in September sound so luxe? Nice and airy for the AM, but you can roll the sleeves down with the sun sets. Also, I just really love navy and I needed a shirt to go with my new aforementioned shorts, so I was feeling pretty confident about myself. So confident, I sliced directly into the linen without the benefit of a muslin or even reading the directions carefully. Oops.

Archer Shirt

Now, don’t get me wrong here – I don’t think a shirt like this necessarily requires a muslin, so to speak. It’s fairly loose-fitting and very forgiving in that sense. However, I do think a shirt like this requires the correct length when it comes to the body and the sleeves, and I think it is kind of a bad idea to dive into something so precise as shirtmaking without giving yourself a few test runs before you get into the good stuff. These were my mistakes. Had I made a little mock-up, I might have had the chance to try out that collar deal before I done goofed it up, ripped it out, realized that the linen was fraying at an alarming rate and oh god what have I done.

Also, the sleeves are way too long and the body is a bit on the short side (the latter isn’t the pattern’s fault, I just got a little too slash-happy with the scissors).

Archer Shirt

With all that being said, I actually really enjoyed sewing this pattern – it’s very precise, with all the top-stitching and perfect pressing, the kind of thing that I find SO relaxing to sew. Rather than get bummed that I made a shirt that isn’t up to my personal sewing standards, I consider this a muslin and I can’t wait to start my ~real~ version. The instructions are clear, albeit brief (if you get stuck, there is an entire sew-along with plenty of words and pictures), and every piece fits together nicely.

I know. The shirt looks fine in the pictures.

Which is why I took close-ups of the bad parts. You know you wanna see!

Archer Shirt

My first fuck-up was the top stitching on the button band. True, it’s not tooooo bad, but it’s definitely crooked. I’m not even sure how I managed to get that seam so crooked, but a crooked seam means crooked top stitching which means sad button band.

If you zoom in, you can even see an errant line of stitching running straight into a button. What is this I don’t even.

Then I tried to attach the collar stand.

Archer Shirt

And this is what happened. The fuck is that bump sticking out there? What the hell is going on?

Archer Shirt

And here is the crowning glory, which I obviously saved for last. This is what happens when you sew the collar stand wrong, then try to unpick it, then realize that the fabric is unraveling and now you have no seam allowances so you just sew haphazardly across a few points and hope for the best. It’s wonky and terrible and I can’t even button the top button. OOPS.

Speaking of buttons, the button holes *do* look nice. Thanks, Bernina!

If you were wondering, here is what I plan on changing for my next version:
– Shorten the length (although maybe not quite as much as this one!)
– Shorten the sleeves – they are WAY too long on me, like, the cuff starts below my wrist. I actually did not even bother sewing the buttons on the cuff here because they are so laughably long, I figured I’d just roll these up 4evs. But for my next version, I need to get the sleeves the proper length.
– Change the placket to a more traditional sleeve placket (such as the ones on the Negroni pattern). The ones on this shirt are much more simple – just a little binding, which isn’t bad, but I like the fancier look of the Negroni.
– I think I need to take out some of the width of the back, it’s super blousey on me.
– Draft smaller pockets; these are a little overwhelming on my frame.
– Get that god-forsaken collar stand under control, I mean, WOOF.

If you were also wondering, here are my suggestions should you decide to tackle this pattern yourself:
– MUSLIN IT. If you feel confident in your fitting skills, you may skip this, but I strongly encourage you to at least make a mock collar/collar stand so you can get an idea of how this shirt gets put together. You may also want to consider measuring the sleeves against some sleeves that fit you, unless you prefer the perma-roll.
– Don’t make your first version in linen. Just… don’t.

Archer Shirt

Despite an iffy start with this pattern (which I’m chalking up to user error), I think it’s a keeper and I will be making this shirt again. It’s a lovely design and a fun pattern, and I’ve already sourced my dream plaid flannel. I have an entire outfit planned around this pattern in that fabric, ain’t no one gonna stop me.

Knitting Fail: The Lauriel Cardigan

5 Feb

It was only a matter of time before I knitted something that was completely unwearable. And here it is. Woof. I’m actually surprised it took me this long to get to that point – this is my sixth sweater, ffs!

Lauriel fail
This is the Lauriel pattern by Ysolda Teague. I fell in love with the pattern after lurking Tasia’s golden version. I used Cascade 220 sport (the color in these photos is definitely off; the swatch picture on my Ravelry page is much closer to the true color) and even bought me some of them fancy flexi-cable bamboo needles. I learned two new techniques for this sweater – a super stretchy bind off (my bind offs are always soo tight, no matter how much I go up in needle size. This method is awesome!) and Magic Loop for knitting the sleeves. I actually really enjoyed knitting it, although knitting the button bands almost broke my brain. I have no idea why the instructions were so bad for that part, but they were TERRIBLE. I spent about 3 hours on just one of the bands – I know this because I watched 4 episodes of Breaking Bad during the harrowing process.

Lauriel fail
So what’s the problem? Well, it’s too fucking big! I mean – holy shit, look at that sleeve length! I can’t cuff the sleeves back. I mean, I could, but there is a lace detail right above the cuffs and it would suck to cover that. Actually, the sleeves are the least of my problem. The entire thing is just huge huge huge. It swallows me, I look like a kid playing dress-up in her mom’s clothes. I know it looks semi-ok in these pictures, but trust me on this. This sweater is way too big, and I can’t wear it.

Lauriel fail
So where did I go wrong? I knit it correctly as indicated by the pattern – knitted my little gauge swatch (actually, I knit 3, just so we’re clear here), properly blocked it, checked my gauge frequently as I knit. So my knitting itself isn’t the error.

First of all, I admit that I knit the wrong size. The pattern has you knit by your underbust measurement, so I went with the 30″ since that’s what I measured at. Unfortunately, I must have measured wrong because I was checking that shit the other day and my underbust is actually closer to 28″. FACK. Even then, this thing is too huge.

I also suspect that this pattern simply runs big. Go look at Tasia’s sweater and notice that she said the sweater ended up very loose? Uh huh. Shoulda heeded her advice right there. I’ve actually now discovered, upon actually researching, that a lot of people have reported the thing problem – specifically in the bust/shoulders area. Which, yeah, that’s exactly the issue with mine. The shoulders droop down past my shoulders, the underarms are at least a couple of inches below mine, and the bust just swallows me.

Lauriel fail
Here I am pointing my finger at where my actual underarm is. Look at how low the sweater goes! The arms are huuuge on me – and I don’t have pencil thin arms, y’all!

Lauriel fail
The back is really a shining example of this sweater being too big.

Lauriel fail

Lauriel fail
Yep.

Lauriel fail
Just for the record, this is how it is *supposed* to fit. I originally thought I might be able to just whip up the side seams with a backstitch, but the underarms are so low that I can’t do that. Wah.

Anyway, the knitting itself is really pretty:
Lauriel fail

Lauriel fail
(fuck that button band, forreal tho)

Lauriel fail

So yeah. I’m pretty bummed – I spent a little over 2 months knitting this (not to mention the money I spent on the yarn, pattern, and new needles) and I just can’t wear it. That’s the sucky part about knitting – you never really know the full extent to the fit until it’s finished and blocked. I’m afraid I can’t salvage this one.

That being said, I don’t regret knitting it. It was a fun pattern to work with, and I learned some fun new techniques. I am considering selling it for , I dunno like $50, just to recoup my costs. Anyone interested? The bust is 35″, waist is 31″ (with lots of stretch) and the length from shoulder to hem is 20″. The sleeves are also 20″ (underarm to end of cuff). I didn’t bother to sew the buttons or snaps on as I’m kind of over this sweater; I’m sure y’all understand. It has been finished and blocked, though. The sweater has found a new home! Thank you everyone for your interest 🙂

Lauriel fail
Sooo… what have you failed at lately? Let’s commiserate!

Completed: More Thurlows, With A Side Of Skinny

28 Jan

Fair warning #1: I almost resorted to calling these the Thinlows, but I refrained. You guys are welcome.
Fair warning #2: These pictures are really really terrible and I am sorry for that. I was saving to buy a new camera because mine sucks, and then I accidentally spent the money on something else that I decided I wanted more. Actually, I’m not sorry about that part.

Skinny Thurlows
Check out my new Thurlows! We are up to six pair at this point, so I understand if you are sick of this pattern now, but y’all gotta understand that I am just in love and we’re still honeymoonin’ strong over here. My TNT! My one true love! The Thurlow!

Skinny Thurlows
You’ll notice these are a bit different, in fact they went on a bit of a diet! As much as I loved those nice flared legs in the original pattern – I’m a skinny girl at heart, at least as far as my pants are concerned 😉 I’ve hemmed and hawwed for a few months now on how to properly execute the slim-down. I probably should have hemmed and hawwed just a little bit more because honestly, these aren’t exactly my best attempt! Blame it on a combination of bad pattern, er, combinations (which I’ll get to in just a second, so put your hands down!), as well as a tricky fabric choice. It was a learning curve, that’s for sure!

Skinny Thurlows
To get the legs skinny, I ended up merging the top of the Thurlow pattern with the legs of the Clover pattern. One issue I noticed right away with my tracing – and you probably notice this right away in these pictures – was that the grainlines for each pattern were TOTALLY different. Just skewing in completely different directions. So which grainline was I supposed to choose? I took a wild guess and stuck with the Thurlow grainline. Also, SPOILER: I picked wrong; look at those crazy wrinkles and folds and off-grain madness going on – the side seams are trying to so hard to wrap around my legs! WAH! First lesson learned here: pay attention to those grainlines. They need to go straight up and down the middle of the legs, which is why each pattern was so different.

Skinny Thurlows
Mistake #2 came from my fabric choice. I really like this fabric – it’s a very soft, wool-blend felt that I picked up at the Vogue store while I was in Chicago last year. It was super cheap, feels great against the skin, and I love the color/fuzzy soft texture. However, it has waaaaay too much stretch for this pattern. I don’t know if that saved the grainline fiasco or made it worse than ever, but the massive amounts of stretch definitely contribute to how these pants hang off my legs. Also, the sizing was horribly off, due to the stretch. I kept basting and taking in the sides – I took over 1″ off each side seam. The welt pockets are now too close together as a result; and the pants are still a little loose. Didn’t think that one through, I’m afraid! Second lesson learned: no stretch on these pants, at least not without sizing down first.

Skinny Thurlows
Here’s a better picture of my fails. Wrinkles all up and down the backs of the legs, and the welt pockets are sitting in a weird spot. Oh well!

Skinny Thurlows
I don’t think they’re all bad, though. They’re quite comfortable, thanks to the stretch and how soft the fabric is. And honestly – is the fit that much worse than RTW? I dunno.

Skinny Thurlows
NOPE, NEVERMIND, THAT’S PRETTY BAD. HAHAHA!

Skinny Thurlows

Skinny Thurlows

Skinny Thurlows

I plan on revisiting these again, as I have not yet satisfied my need for skinny pants. I think I’ve got a better grasp on the grainline issue, but if anyone has words of wisdom they’d like to share – let’s hear it!

Skinny Thurlows

And yes, I still plan on wearing these. In all their wrinkly, off-grain glory.

Sewing Fail: Amy Butler Sweet Harmony Handbag

15 Feb

I try to put my very best effort into every thing I make, but still a lot of my sewing projects don’t go exactly as planned. Usually I can salvage them – adjust the fit, hack a dress apart to make a skirt, add fabric panels, etc – but occasionally I end up with wadders & sewing fails. I don’t normally post them – mostly because they don’t normally happen (as far as Lord-this-can’t-be-saved pieces) – but I’m going to put myself out on a limb for y’all today. Also, I think it’s kind of funny and I like laughing.

So here it is – the Amy Butler Sweet Harmony handbag FAIL.

Bag fail
It doesn’t look too bad at the first glance – kind of lumpy, and the handle is doing something weird, but that can be overlooked, y/y? I must admit that this bag is definitely a Monet – from far away it looks ok, but up close it’s just a big ol’ mess.

Let’s look at the other side!

Bag fail
Oh, that’s nice – what the hell is that giant dent over the cell phone pocket? What the hell is the cell phone pocket even doing? And look at the handle – that seam is supposed to be at the bottom, not turned up to the side.

Bag fail
Here, I have stuffed some fabric (isn’t that fabric delightful, btw?) in to show you what it looks like closed. WHAT THE EVERLOVING FUCK.

I’m going to take a break here and explain why this bag failed. First of all, I definitely used the wrong fabric and interfacing. The pattern calls for quilting cottons or home decorator fabric… and I used some squishy wool coating (very similar to wool crepe). When I was interfacing my pieces, I realized I didn’t buy enough fusible (I went by the pattern directions, but good ol’ Amy didn’t bother to mention that her suggested fusible yardage was for 44″ wide, not the standard 22″ wide), so a lot – like, half – of the pieces are interfaced with sew-in interfacing. This does NOT provide enough structure, especially coupled up with that squishy-ass coating. Also, the coating snags quite easily, which makes the whole thing look cheap and, well, shitty. Also, Amy Butler is totally onto me.

The next problem – and the biggest one, imo – is that I got way too frustrated with the bag and rushed through it as quickly as possible. I’m a pretty fast sewer, but I absolutely have my limits and when they are reached I have to stop because otherwise I start getting sloppy. This bag is a prime example of LT being sloppy – the seam allowances are crooked, the corners are fudged pretty badly, and the whole inside is just wack. Oh god, the inside LOL. Hold on, I want to show you the inside.

Bag fail
See where I didn’t clip the seam allowance at the curve? Or how about the fact that the lining does not fit in there at all? The whole thing is just… wrinkled and poochy. Ew.

Some more Bag Fail pictures:
Bag fail
This is what the bag looks like open – gap fail. You can also see where the interfacing & outer fabric are pulling away from each other.

Bag fail
The bottom is a special piece of work all on it’s own – I sewed the bottom panel on, realized I didn’t quite catch the fabric on one side, but instead of picking the stitches out like a normal person, I just hand stitched it together. Yeah, that looks real nice.

Here is the picture that makes the laugh the hardest.

Are you ready?

Bag fail
LOL IT DOESN’T EVEN STAND UP STRAIGHT WTF.

I will have you know that I actually carried this bag around over the weekend, despite hating every second of it. I carried it aaaall the way to Atlanta, and seriously considered leaving it behind every time we stopped in a store. I still don’t know what to do with it. I actually feel bad taking it to Goodwill. I might just throw it away (after I salvage the purse snaps, of course!) – it is that bad.

As an apology for making you sit through multiple pictures of something that looks like my cat threw up, here are some images of Landon & myself wearing furry hats at the H&M in Atlanta:
LT in a furry hat

Landon in a furry hat

Anyone else have a sewing fail they want to share with the group? C’mon, it’s FUNNY.