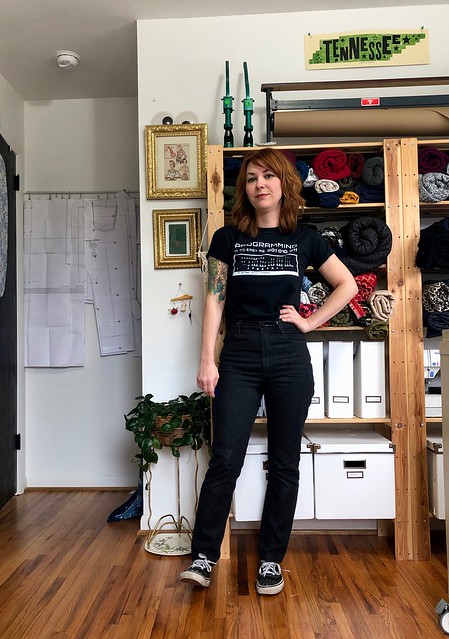
I always enjoy making a new pair of jeans for fall – after a summer of teaching jeans-making, I’m full of brilliant ideas and antsy to sew them. Now that I work part time as a tailor, I get my eyes on even more jeans with interesting design details that I’ve been dying to incorporate. For this pair, I thought I’d try out some features I’ve been seeing a lot lately, as well as a new (fashionable?) silhouette .
These are my tried and true jeans pattern – the Ginger Jeans from Closet Core Patterns. I’ve made this pattern enough times to have really nailed the fit down, and now I’m in that glorious phase where I just have to make tweaks and adjustments to change the style. I made multiple changes to this pattern:
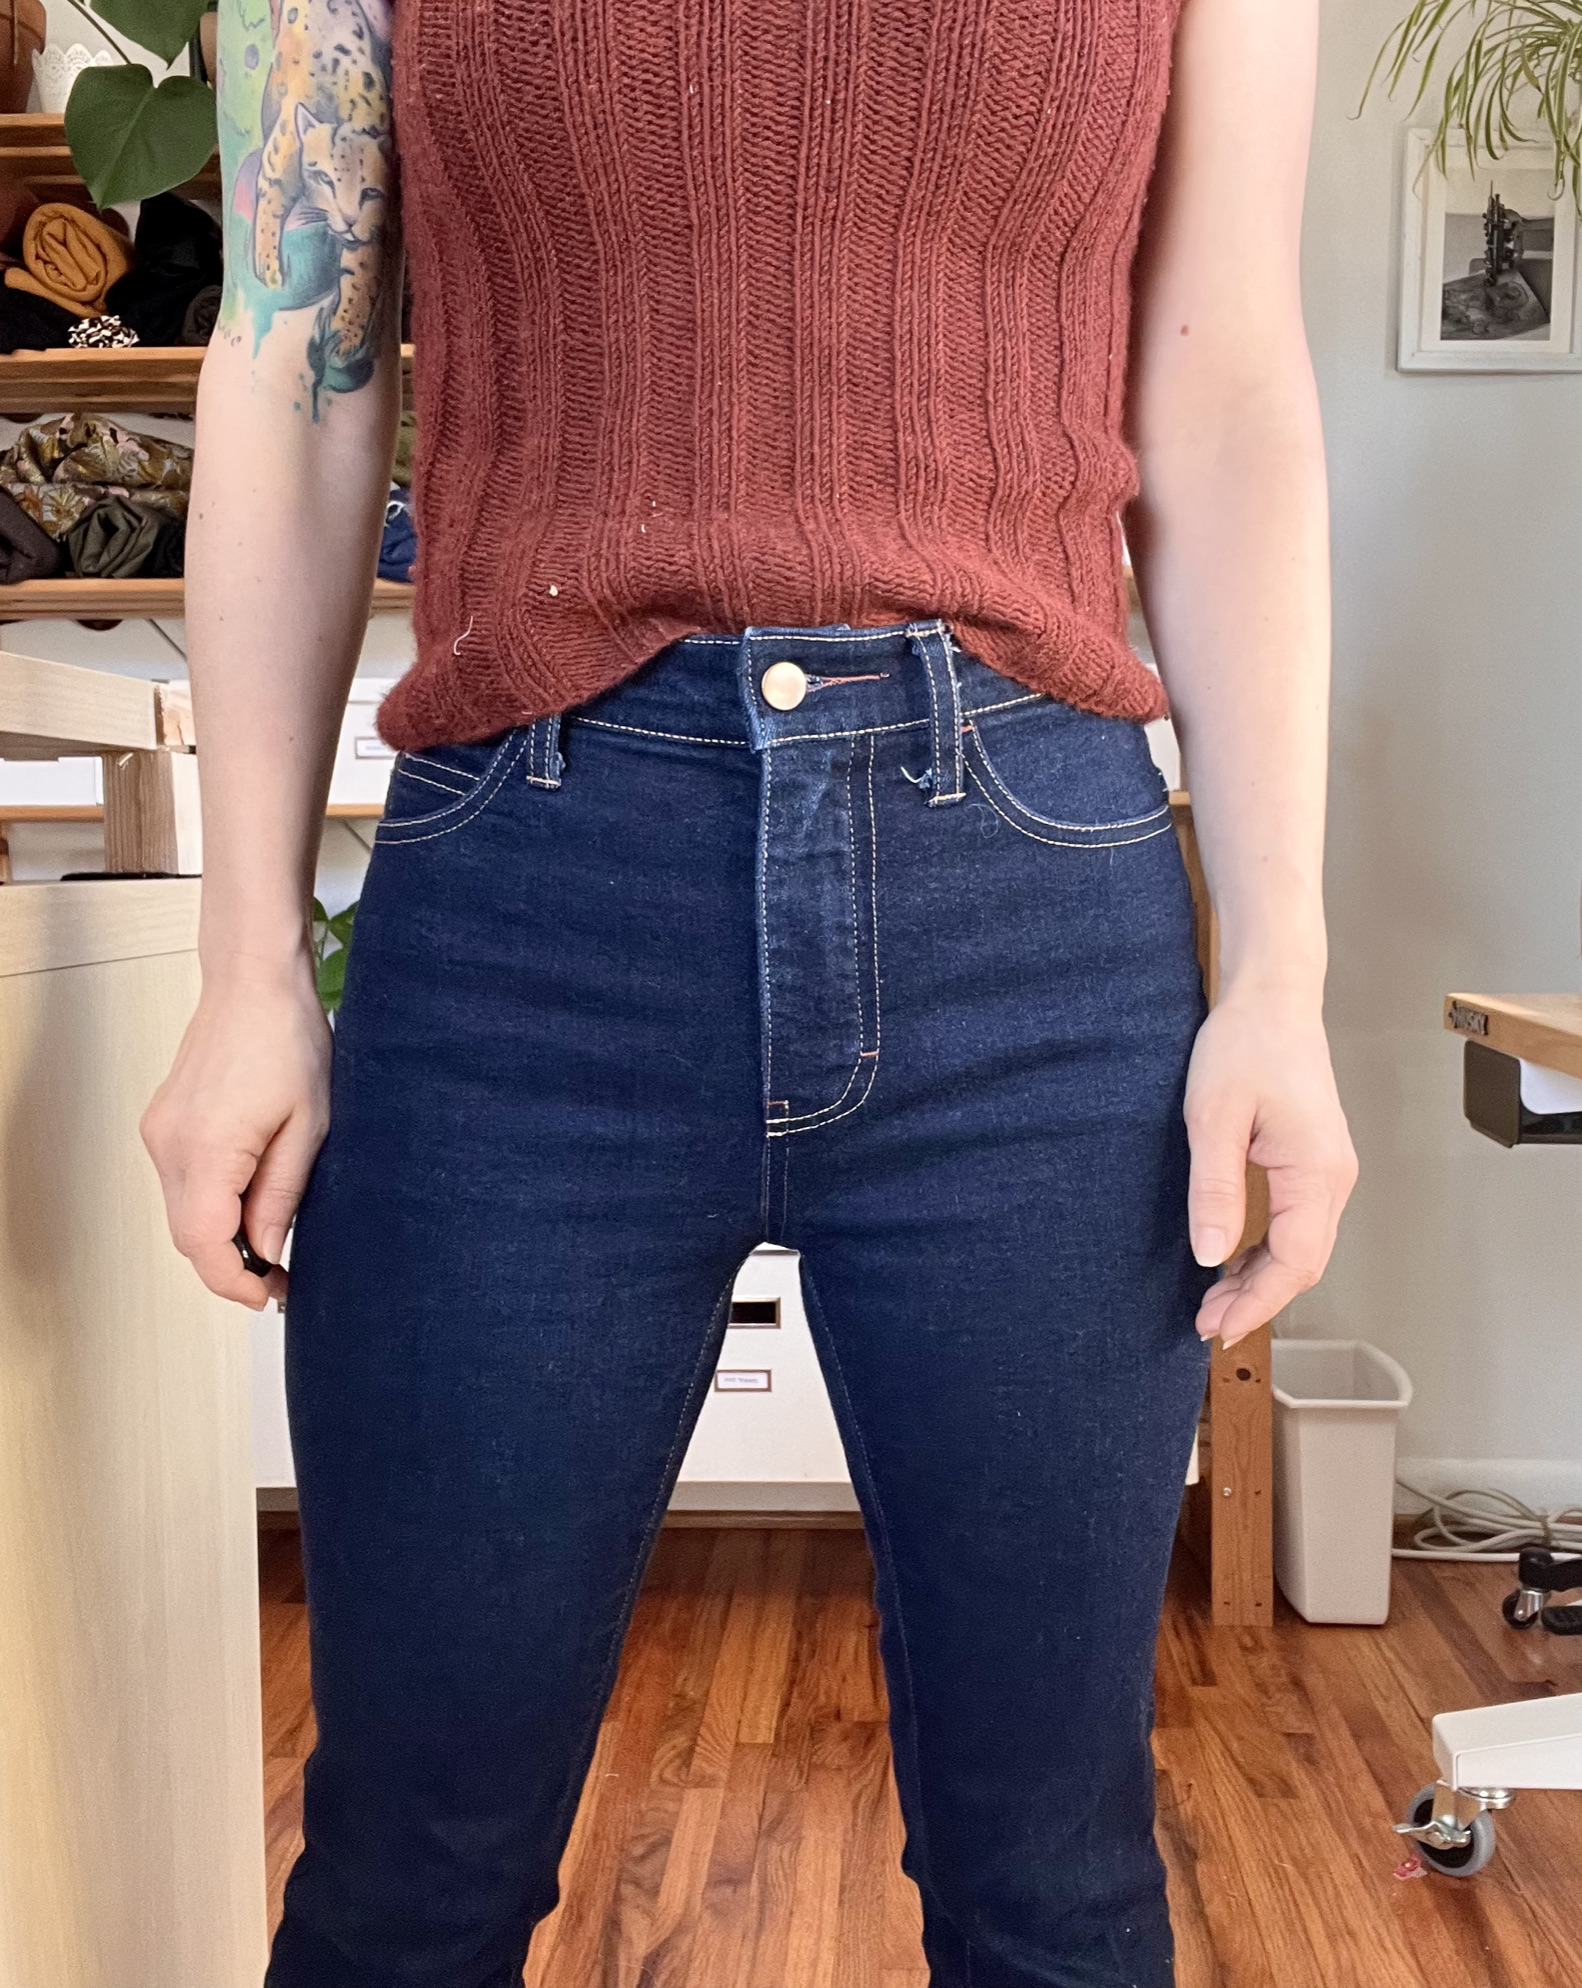
Increased the rise about about 3/4″, so it covers my belly button
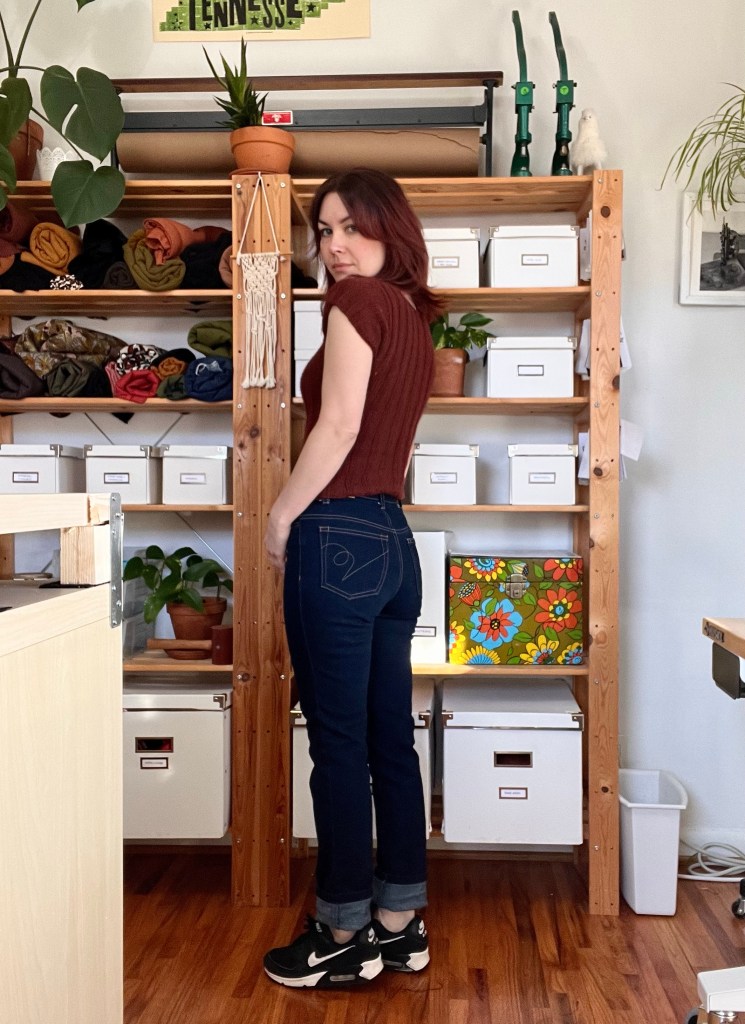
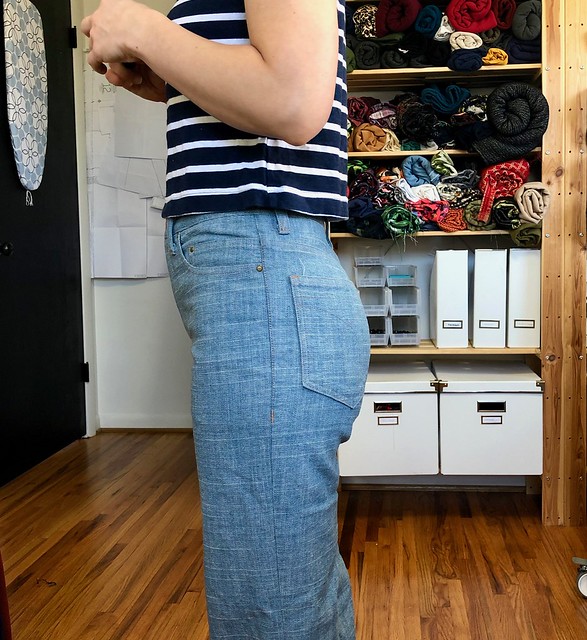
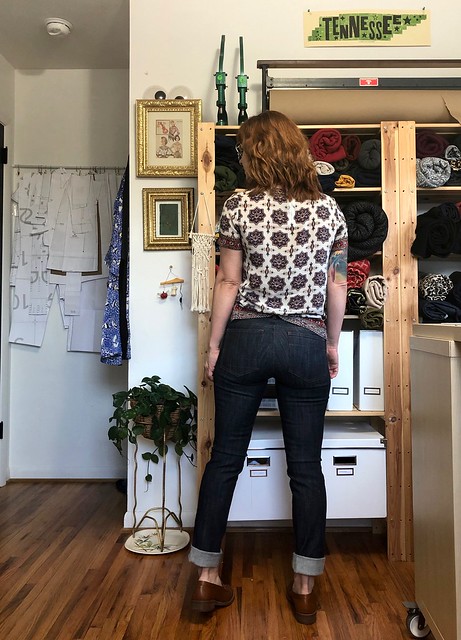
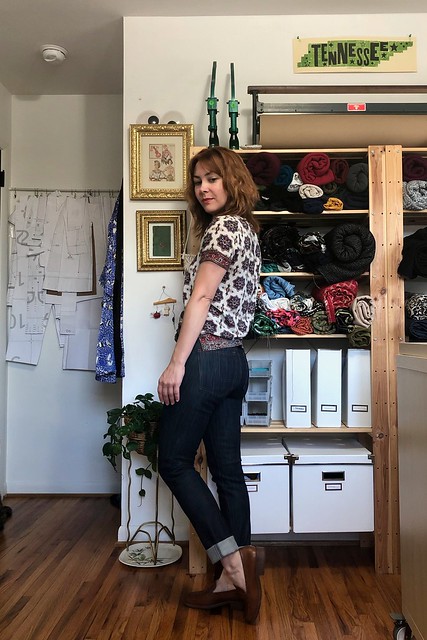
Changed the legs to bootcut, using an existing pair of flared jeans that I like as a comparison
Swapped the pocket stay for normal hanging pocket bags
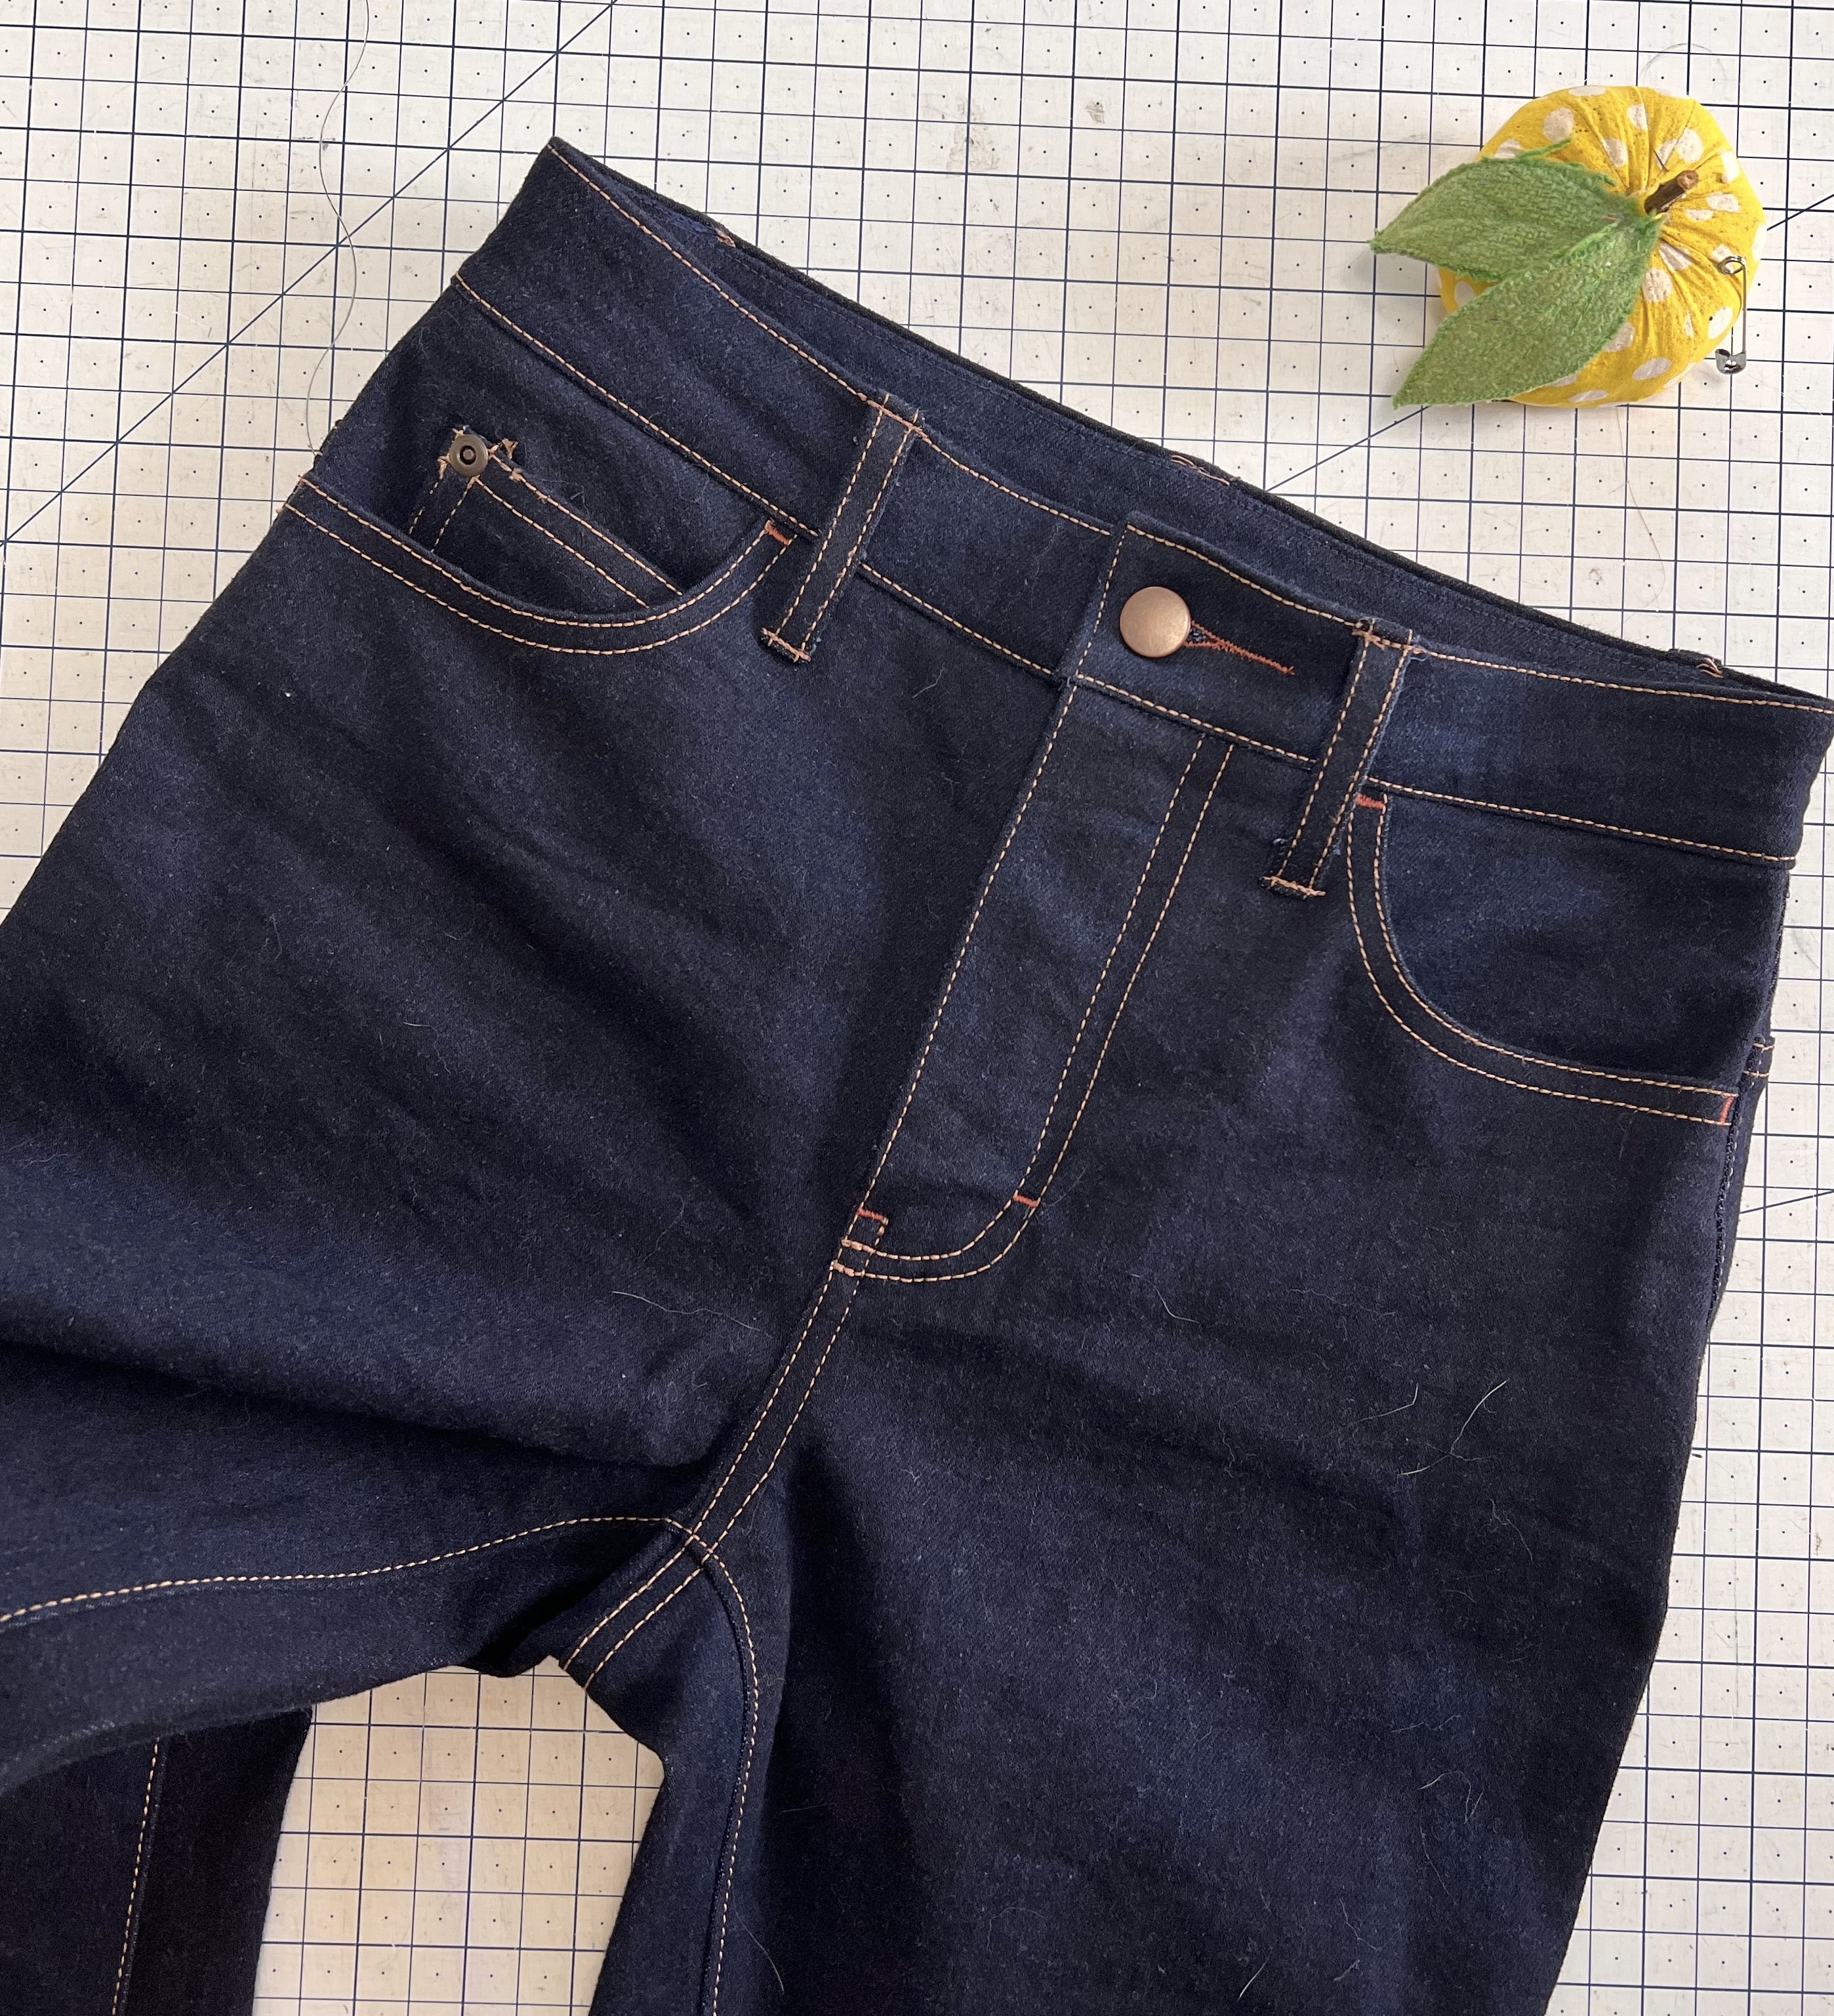
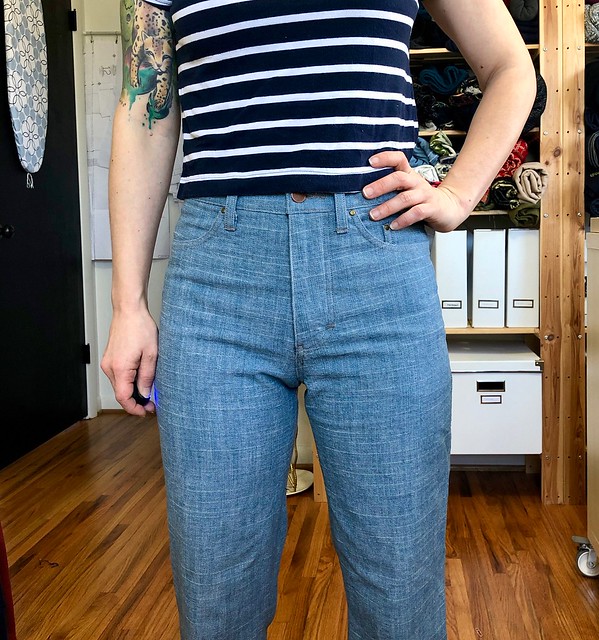
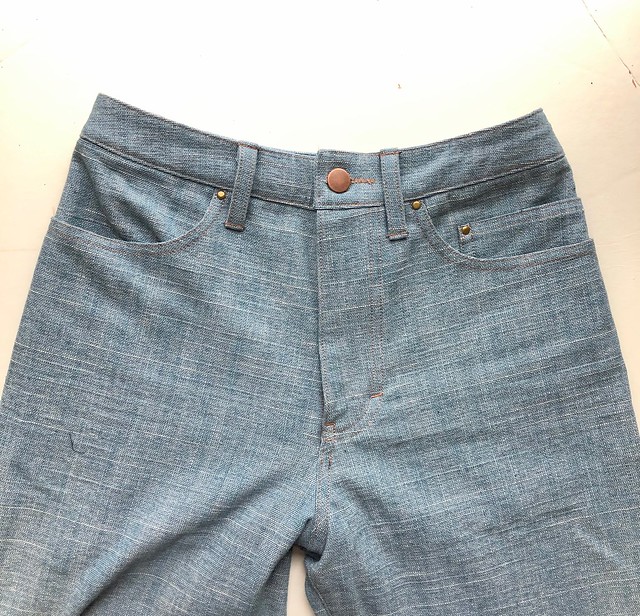
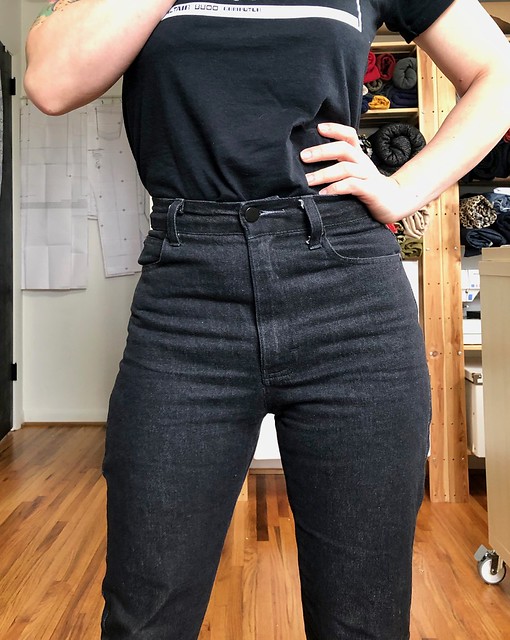
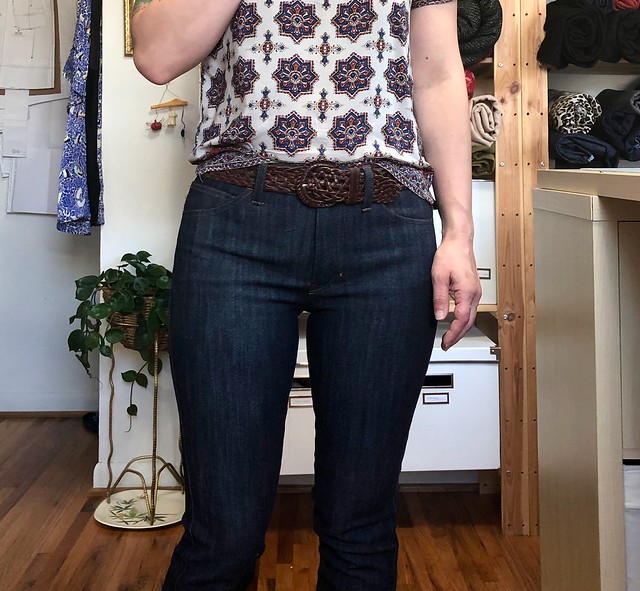
Changed the waistband to a rectangular one-piece folded waistband, instead of two pieces with subtle shaping. The shaping is obtained by easing the waistband to the top of the jeans. This is how most RTW jeans are done, btw, and it is MUCH easier to cut, sew, and alter
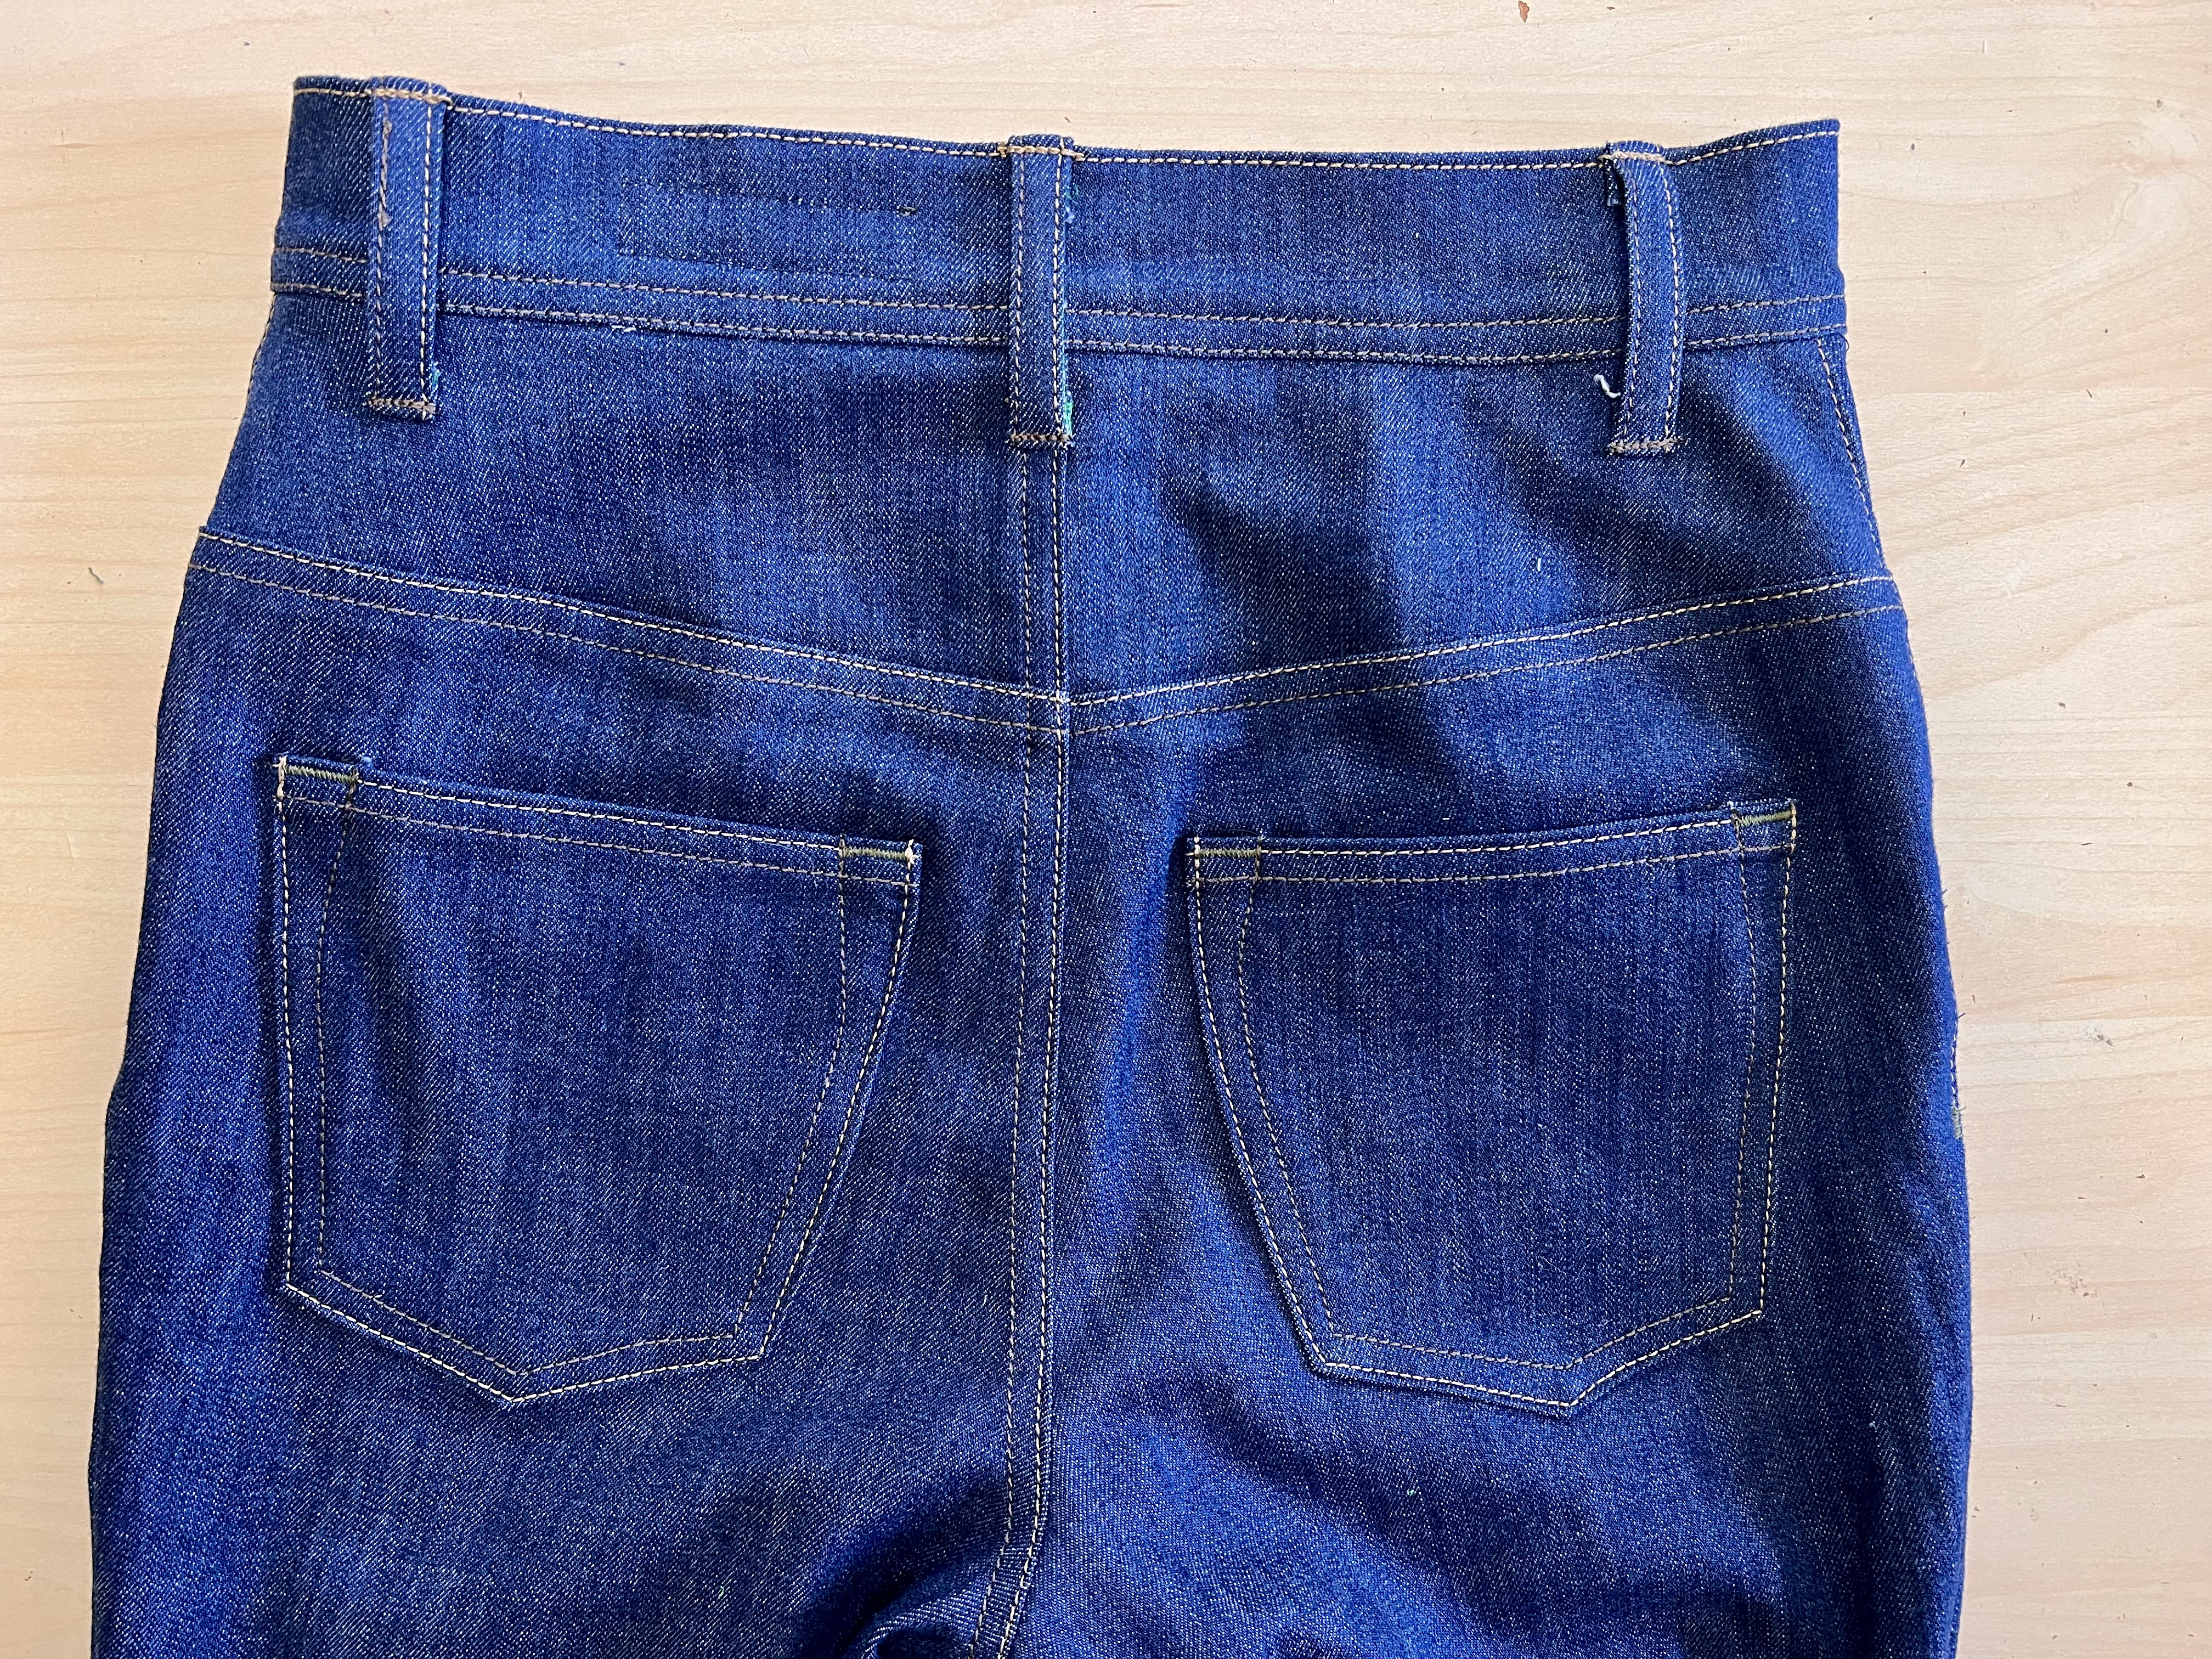
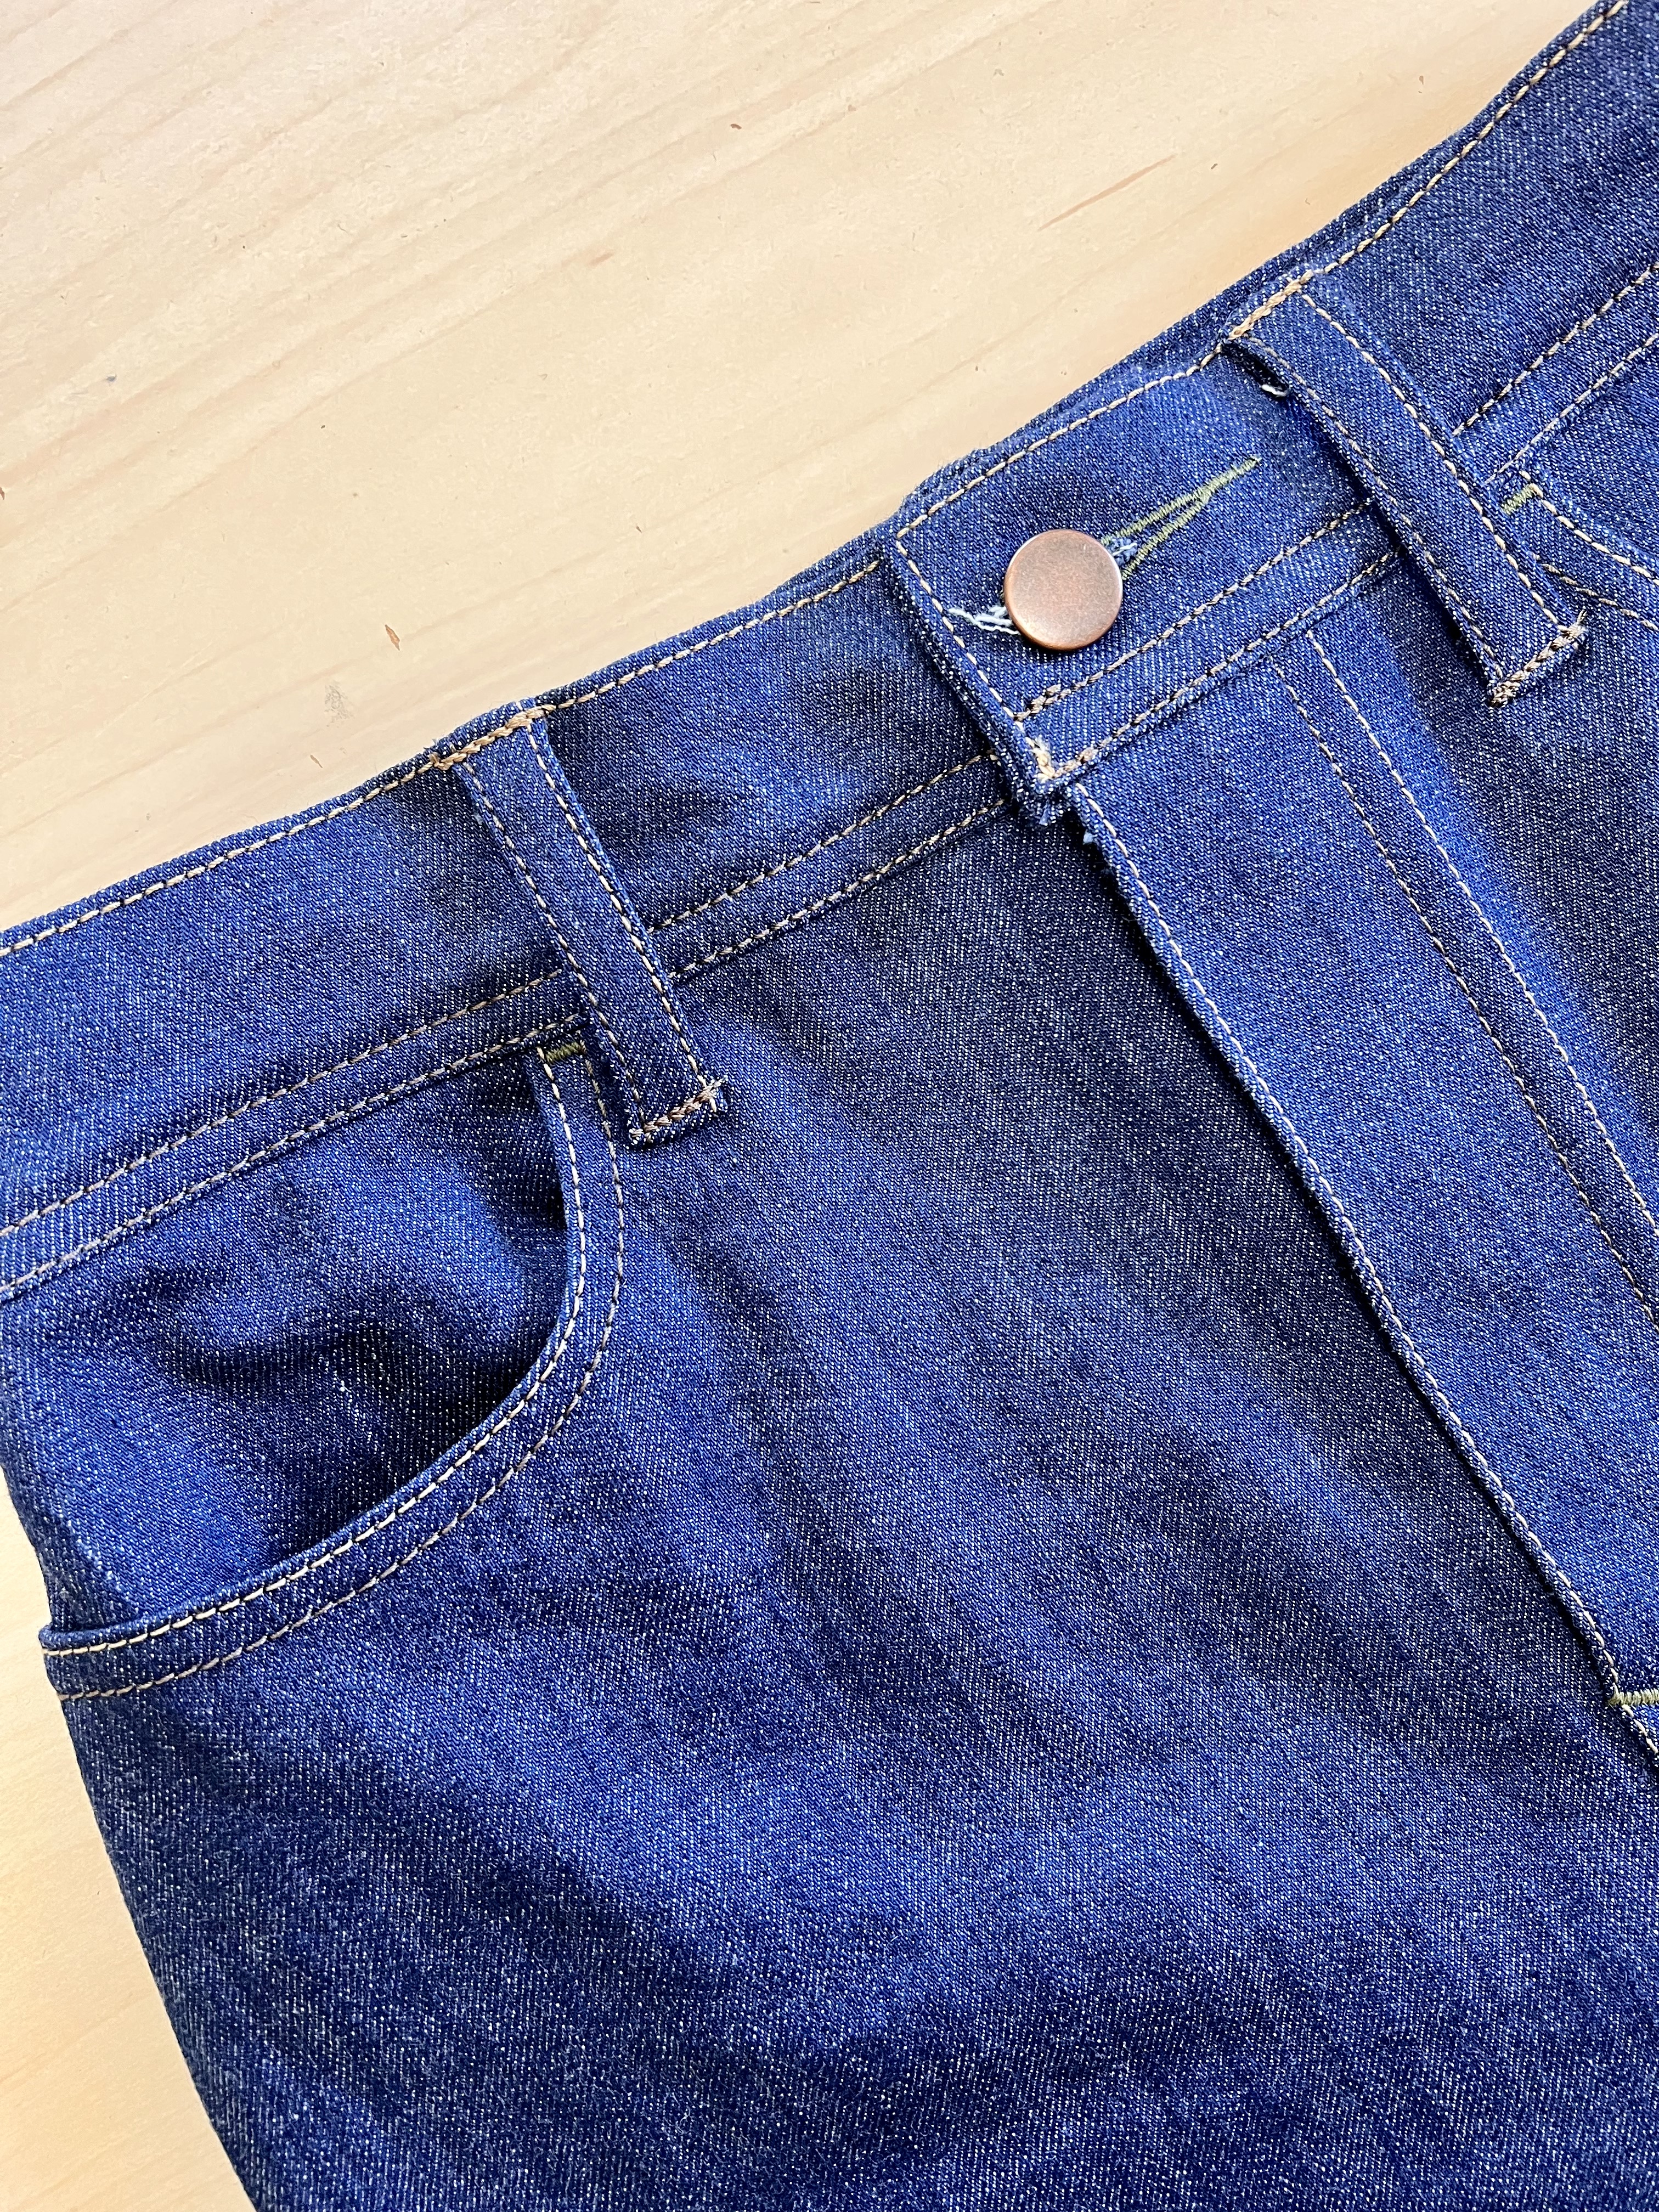
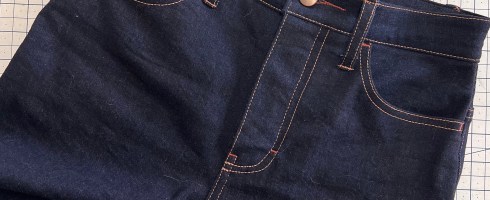
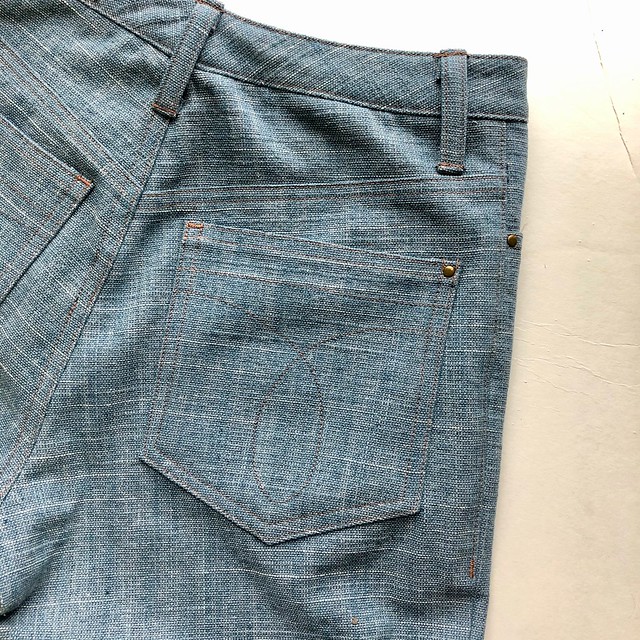
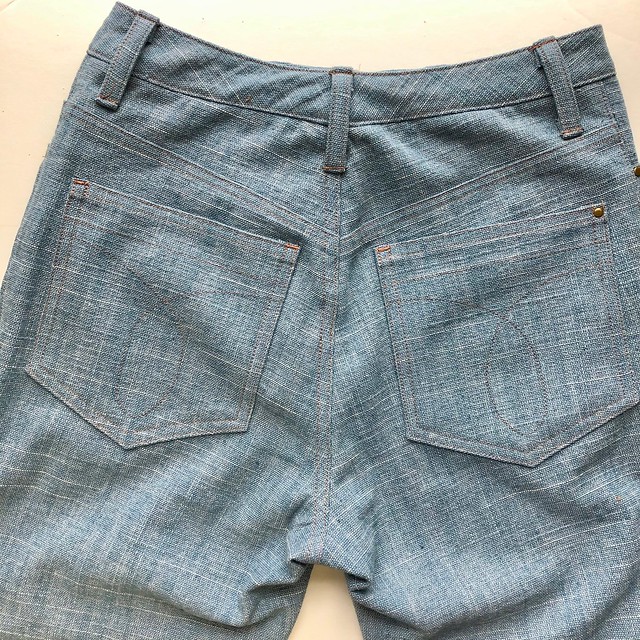
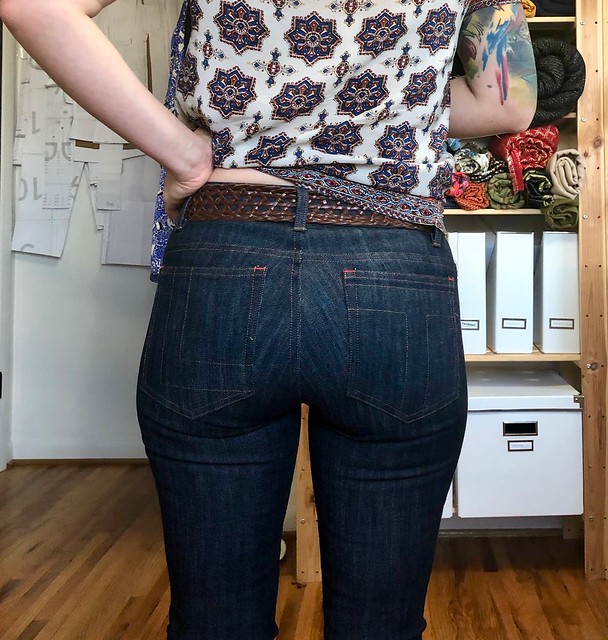
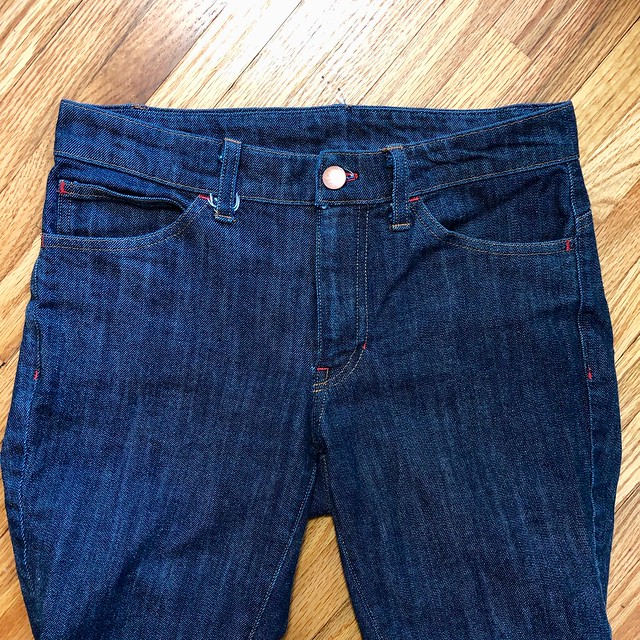
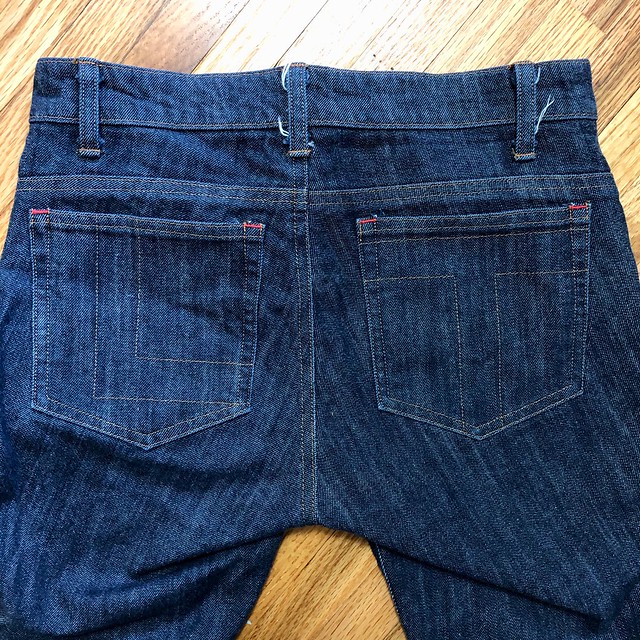
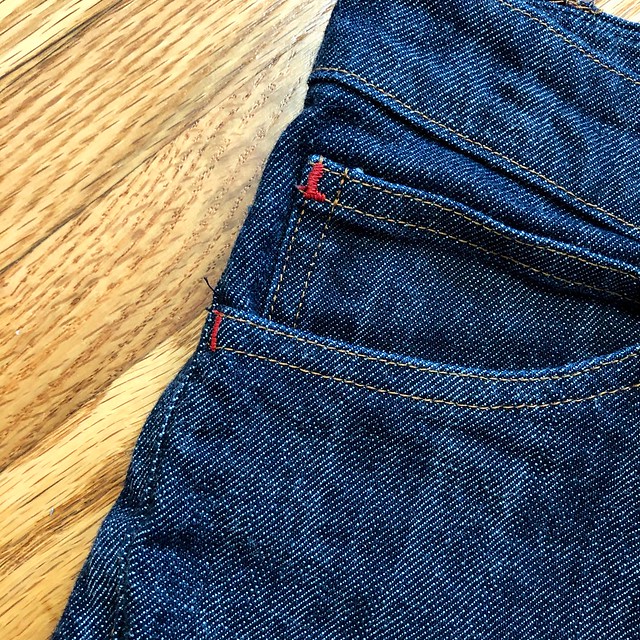
I also made some small design adjustments, such as leaving off the coin pocket, slightly changing the shape of the front fly topstitching, and sewing 2 lines of topstitching across the bottom of the waistband. I also used two different topstitch thread colors, as well as a third color for the bar tacks and button hole.
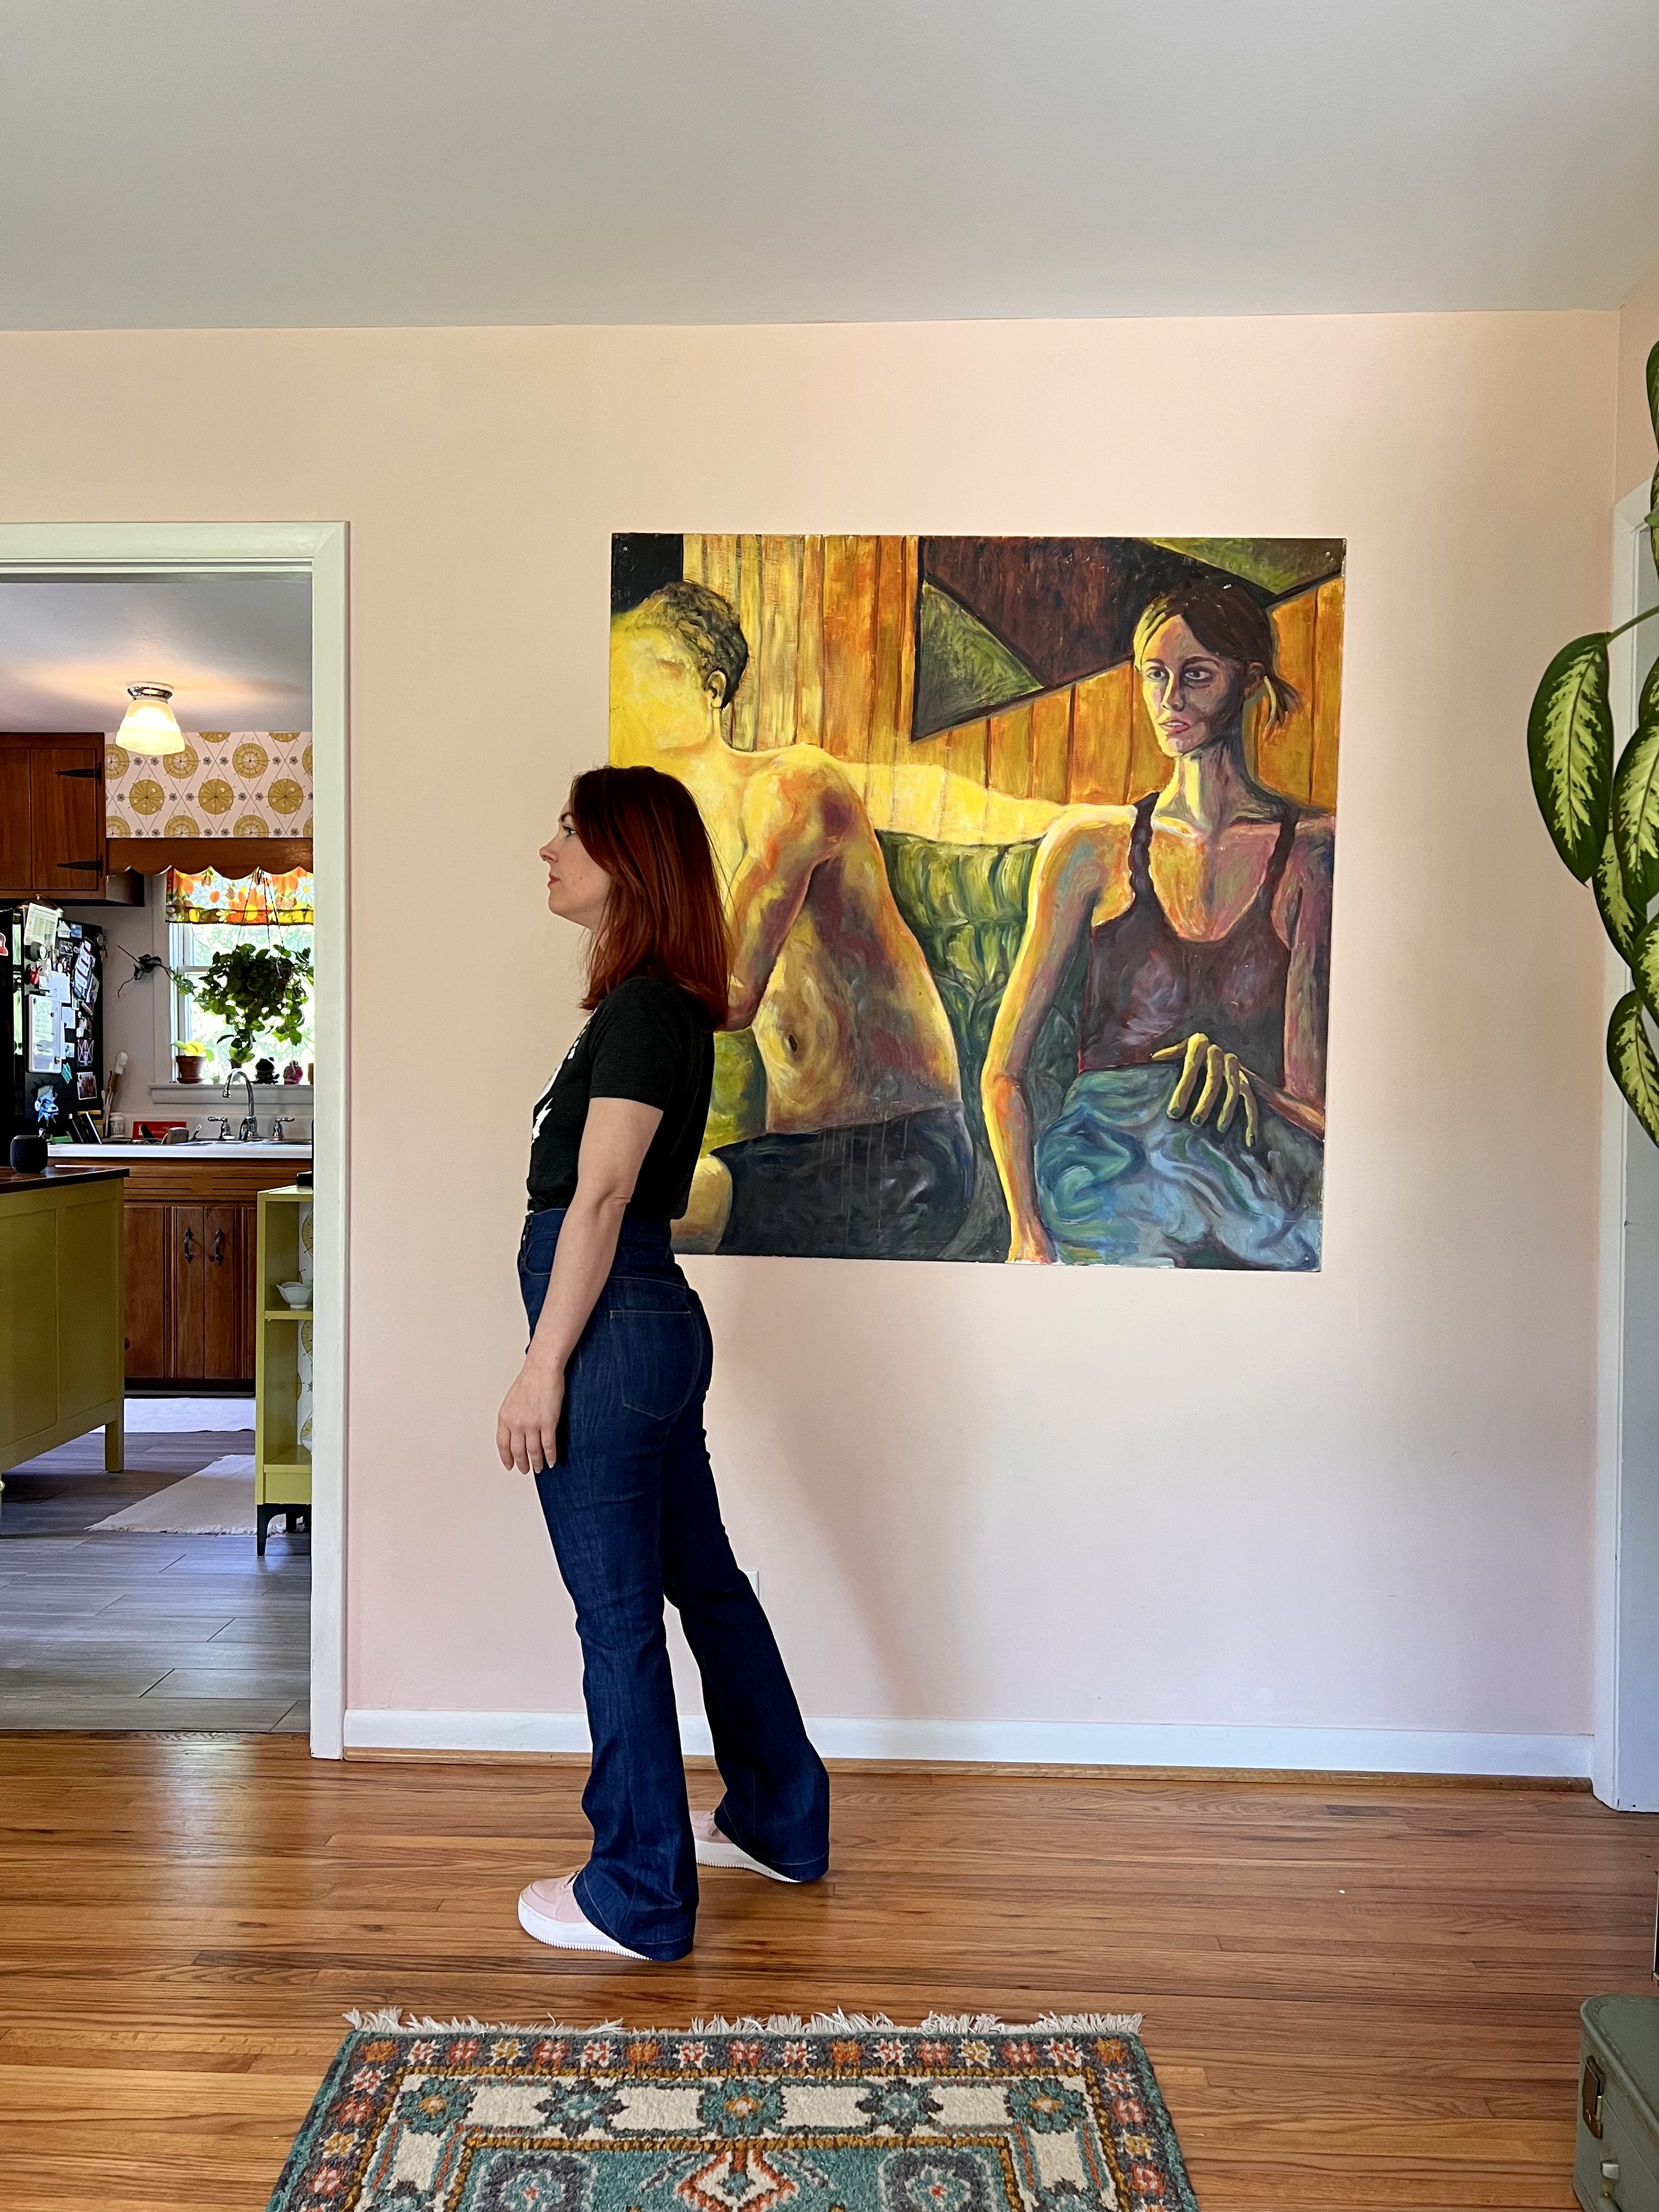
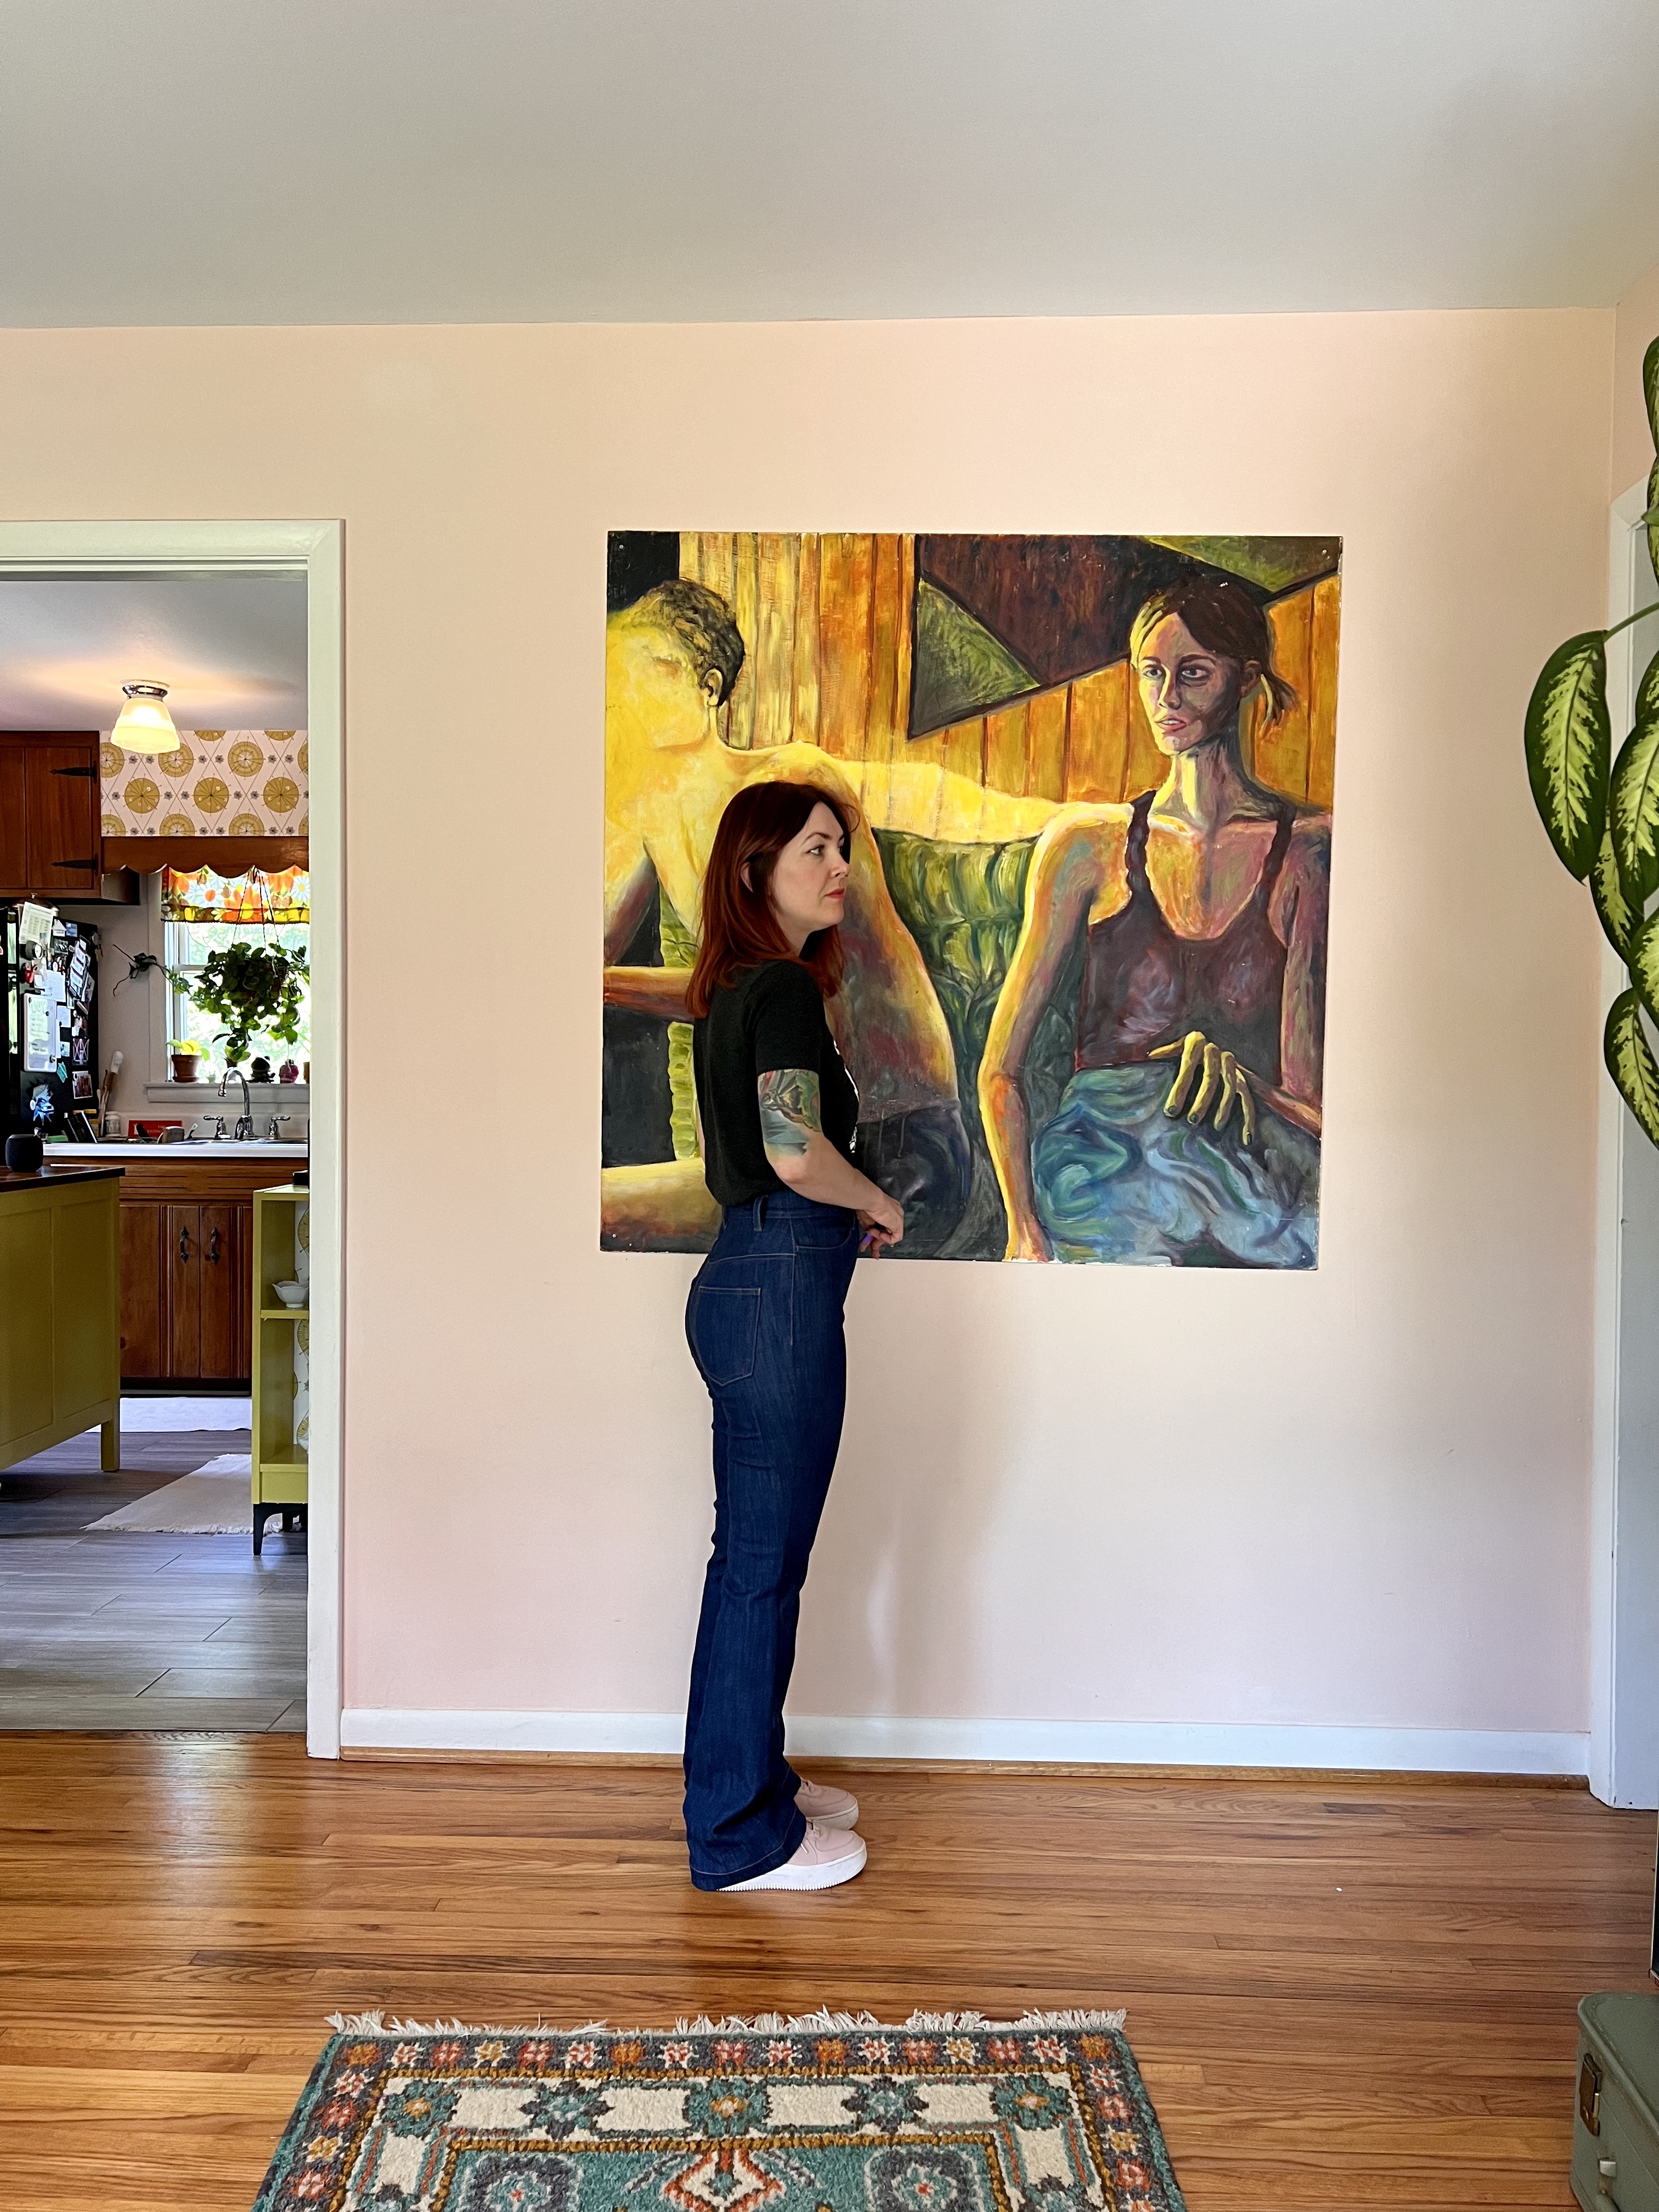
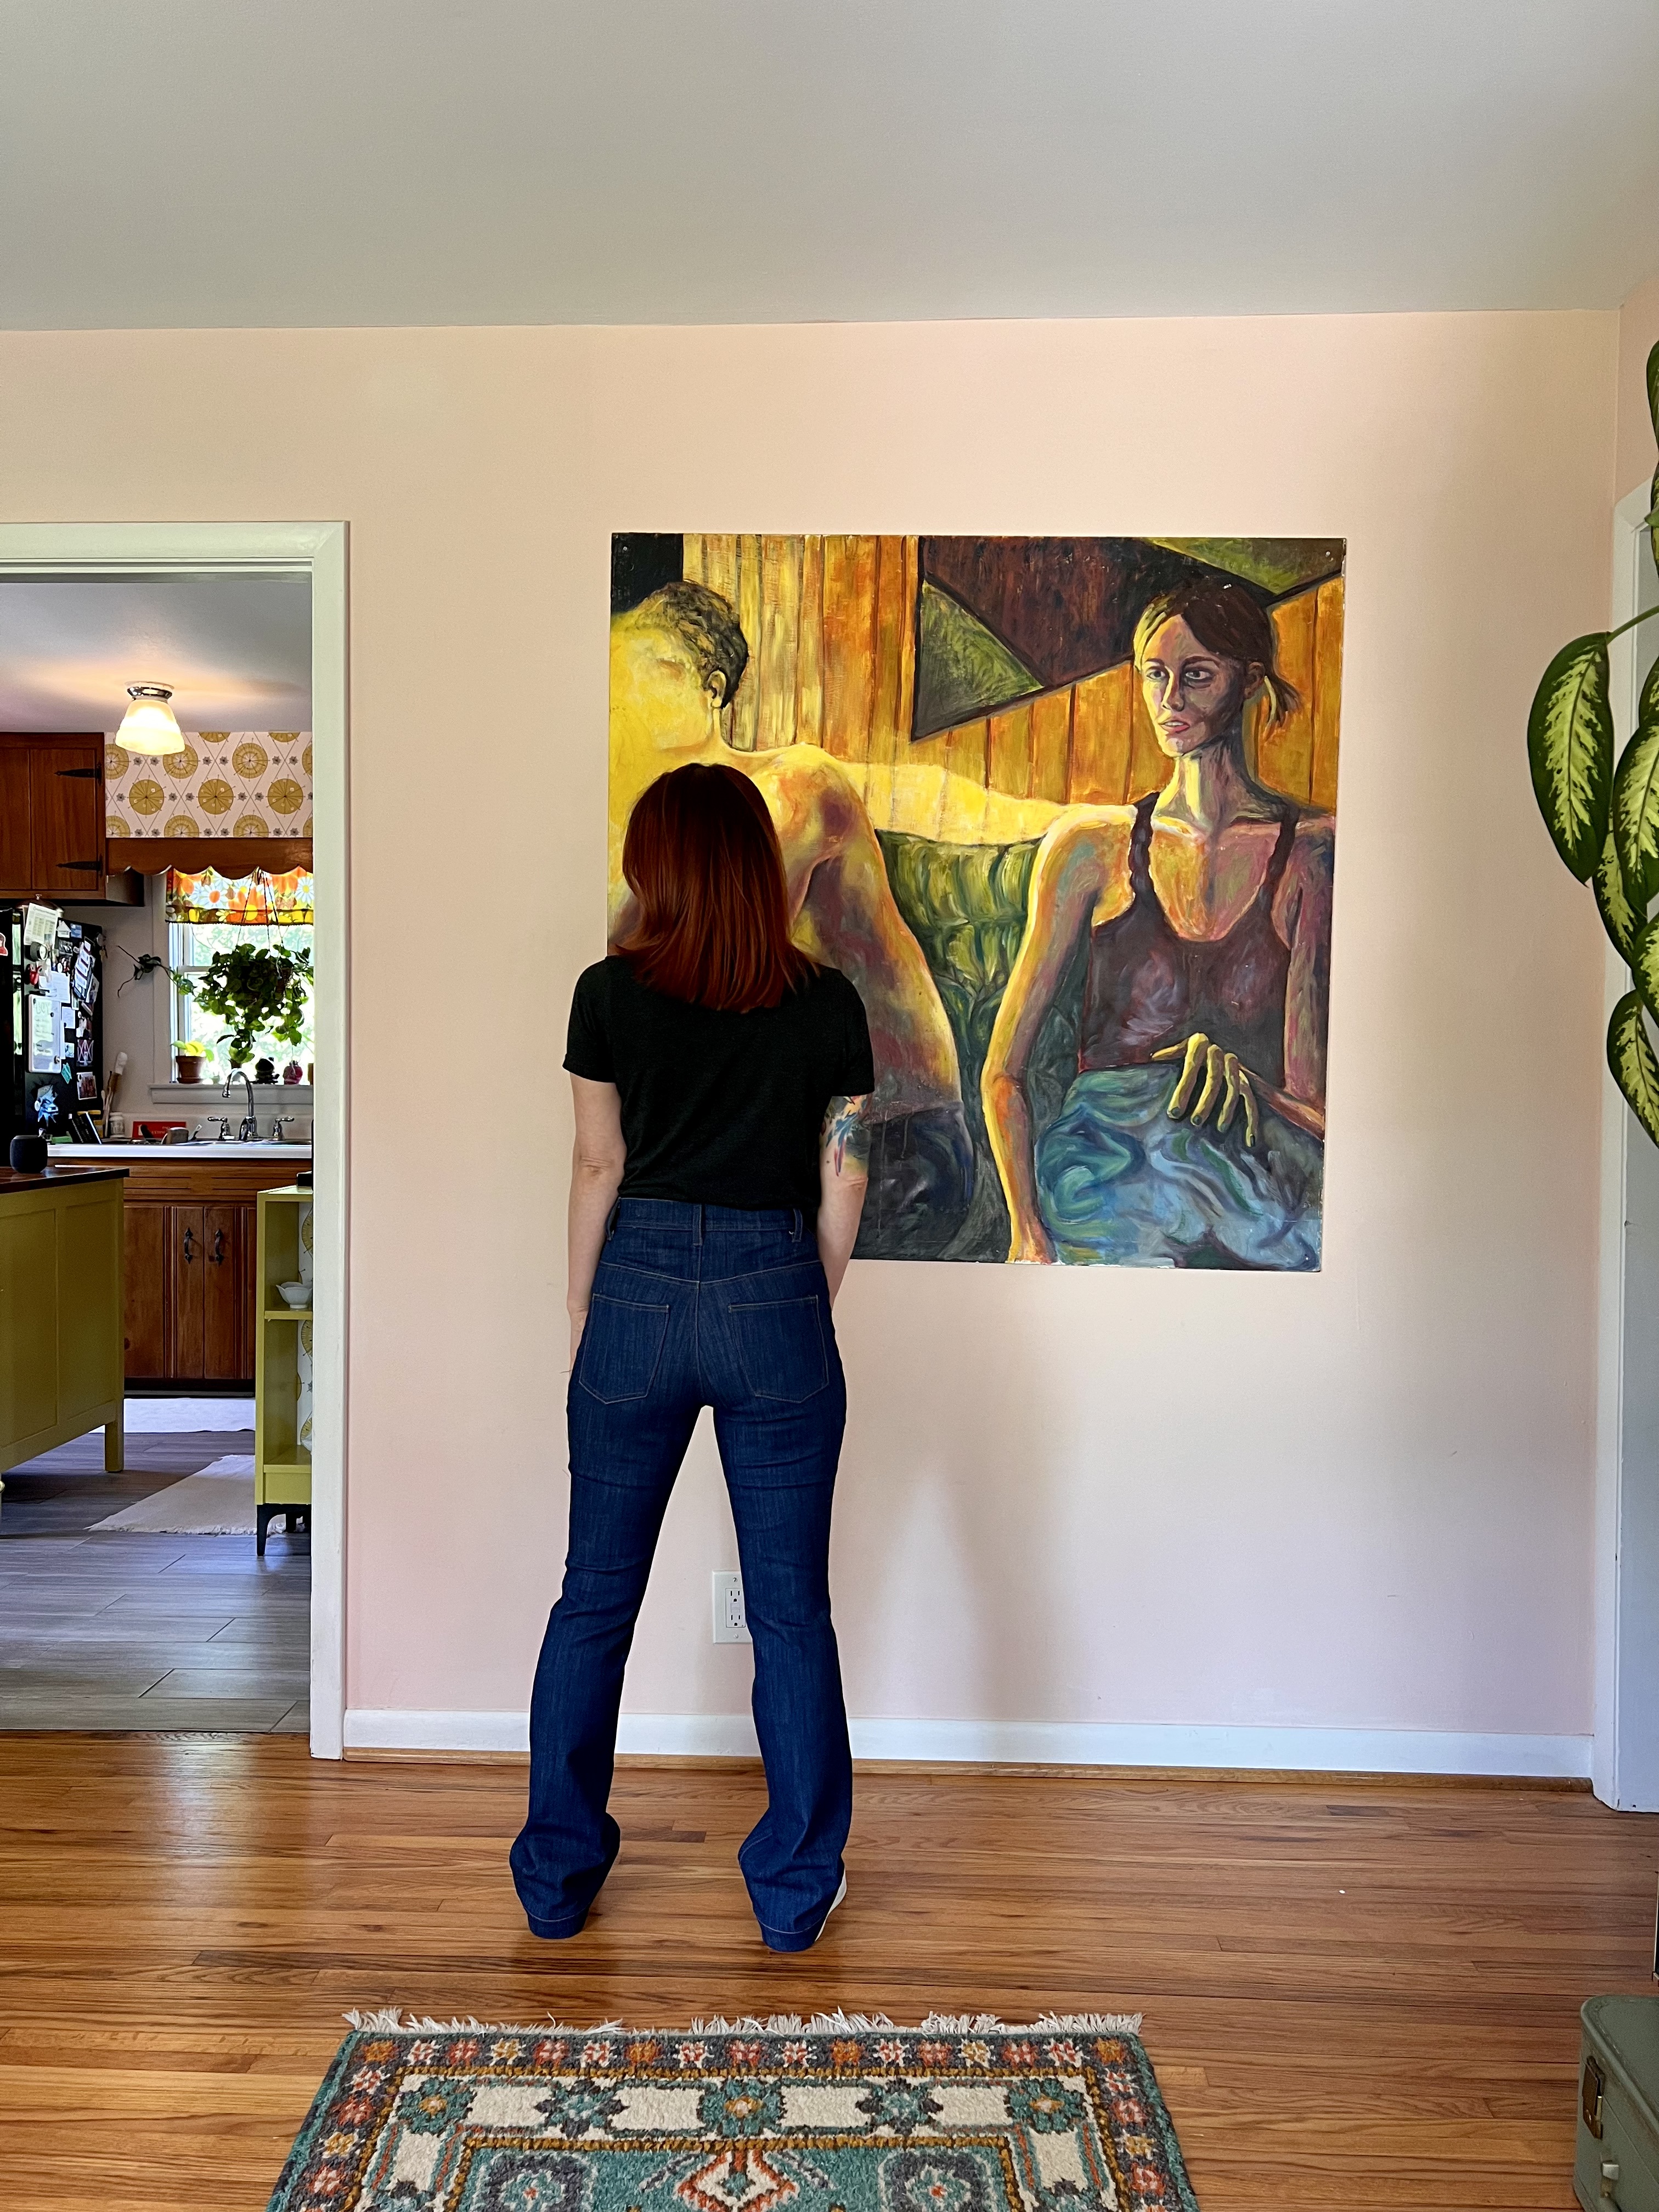
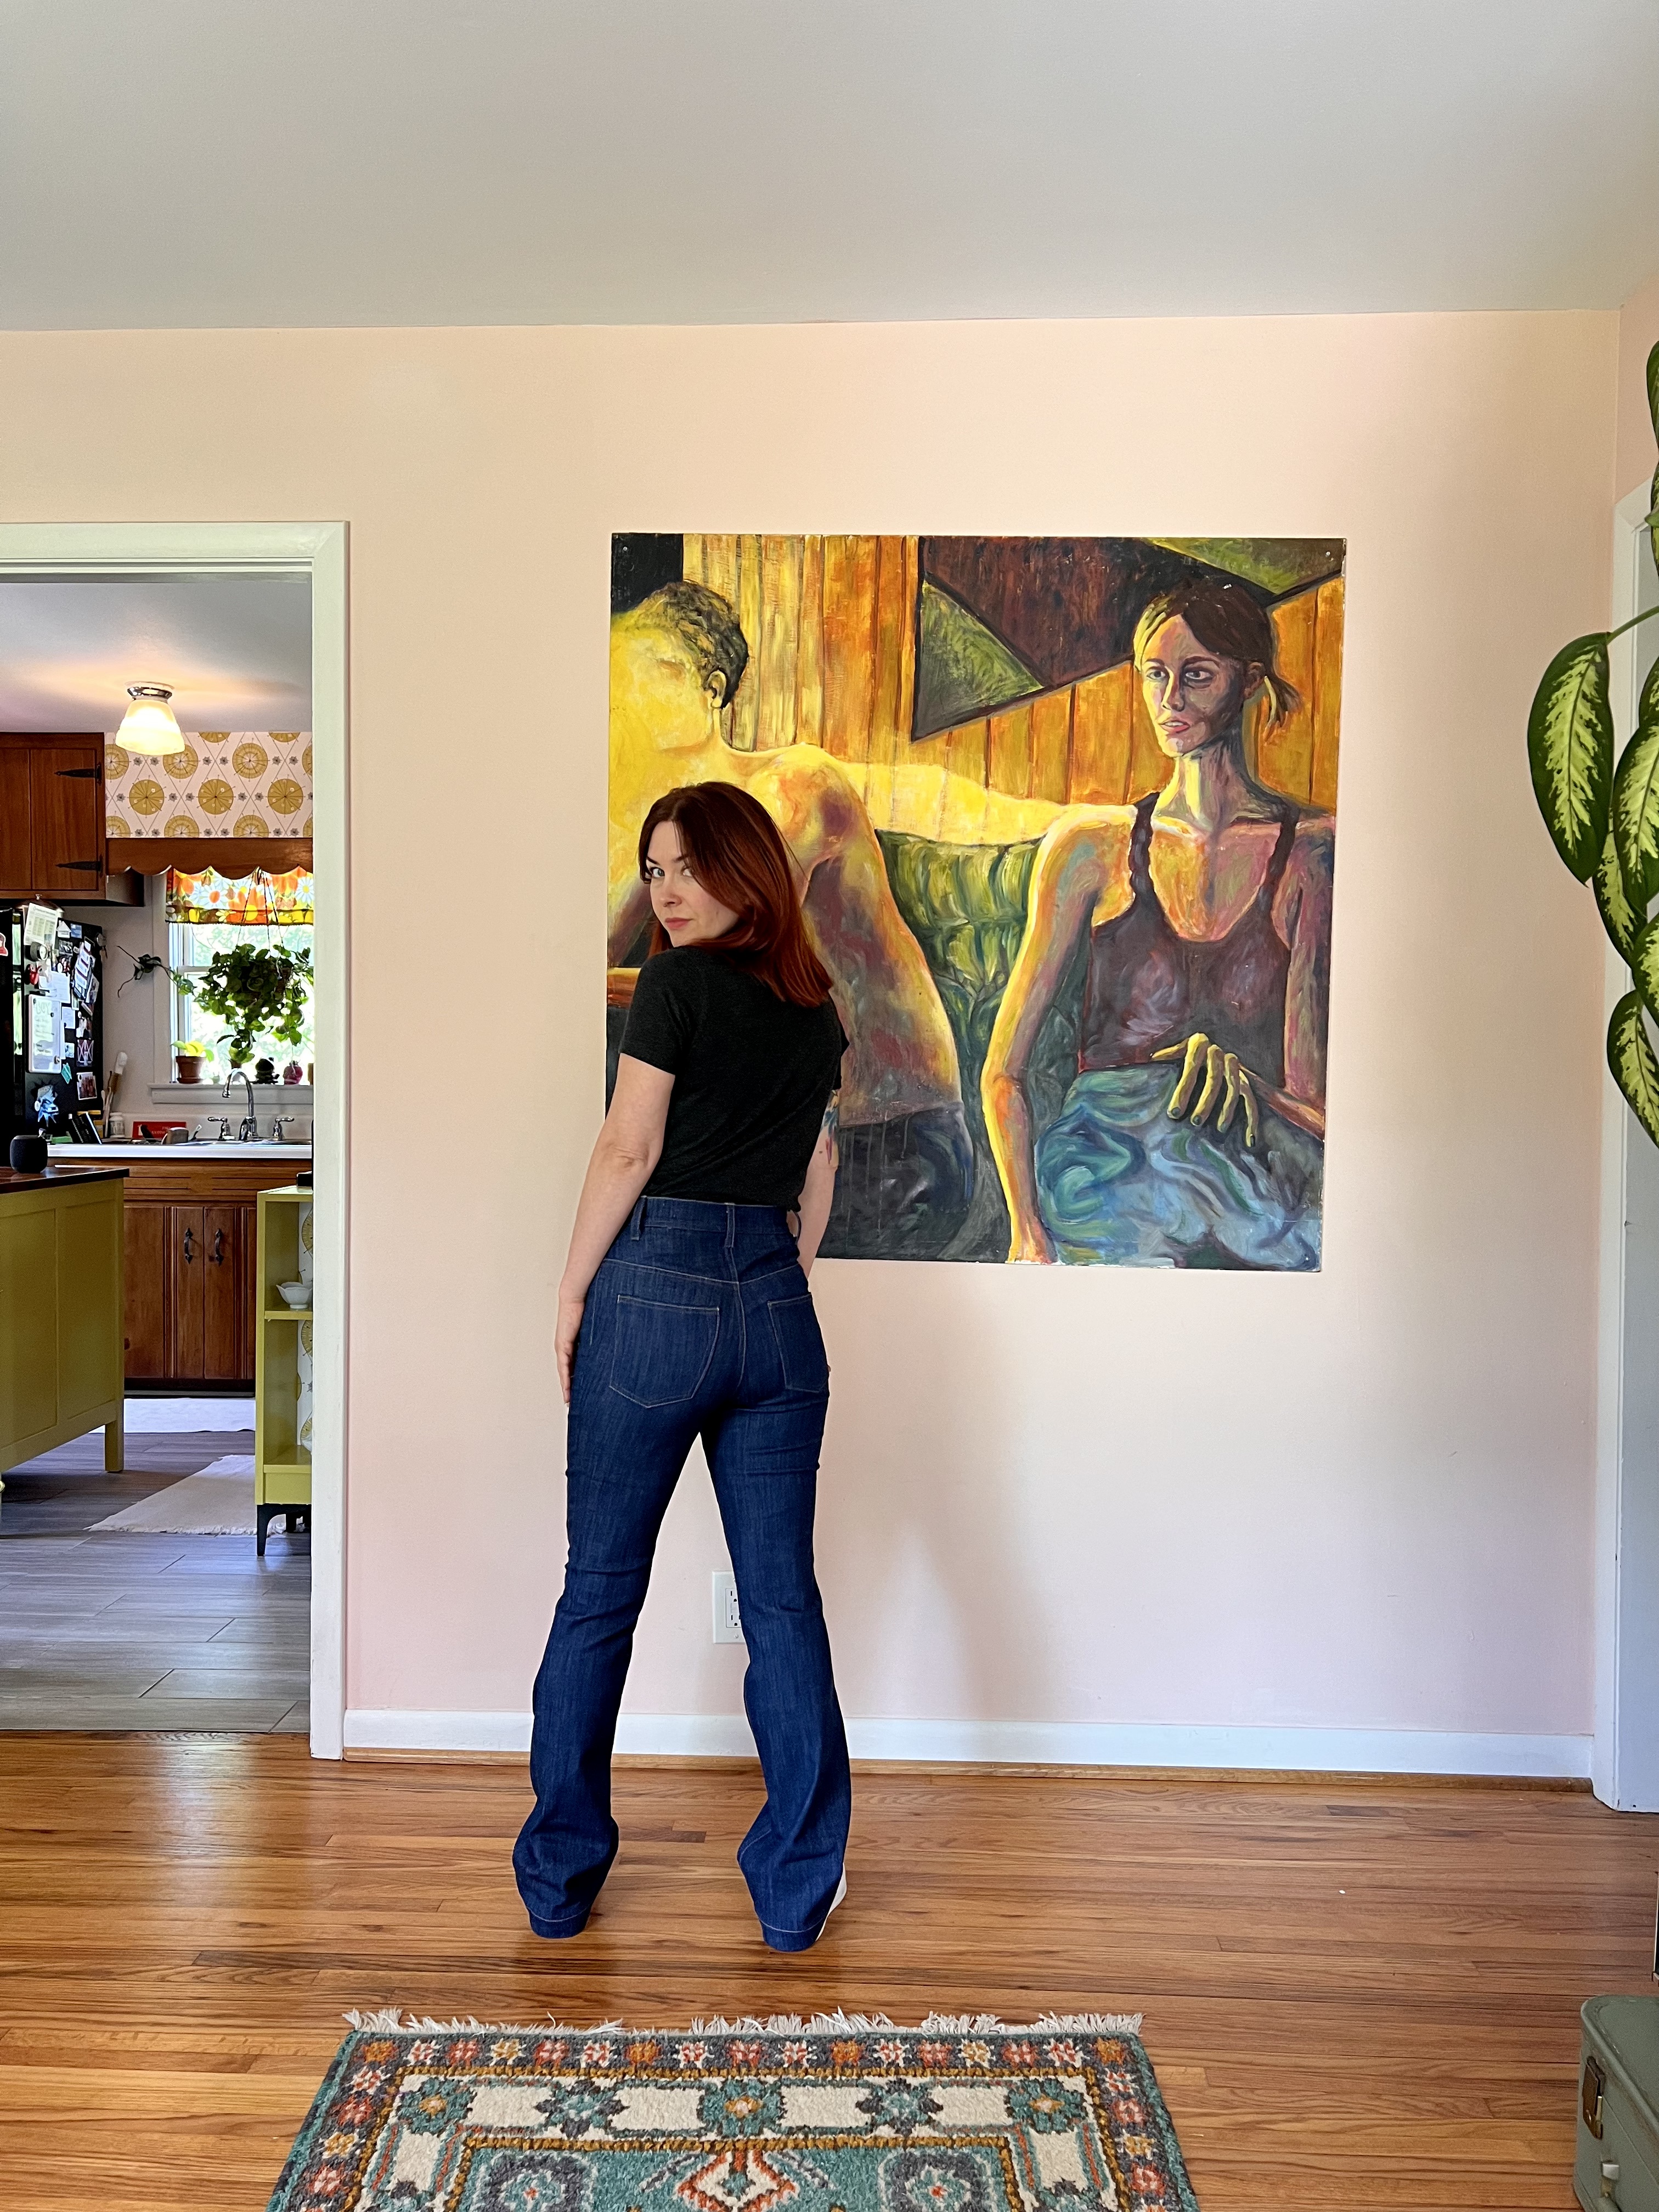
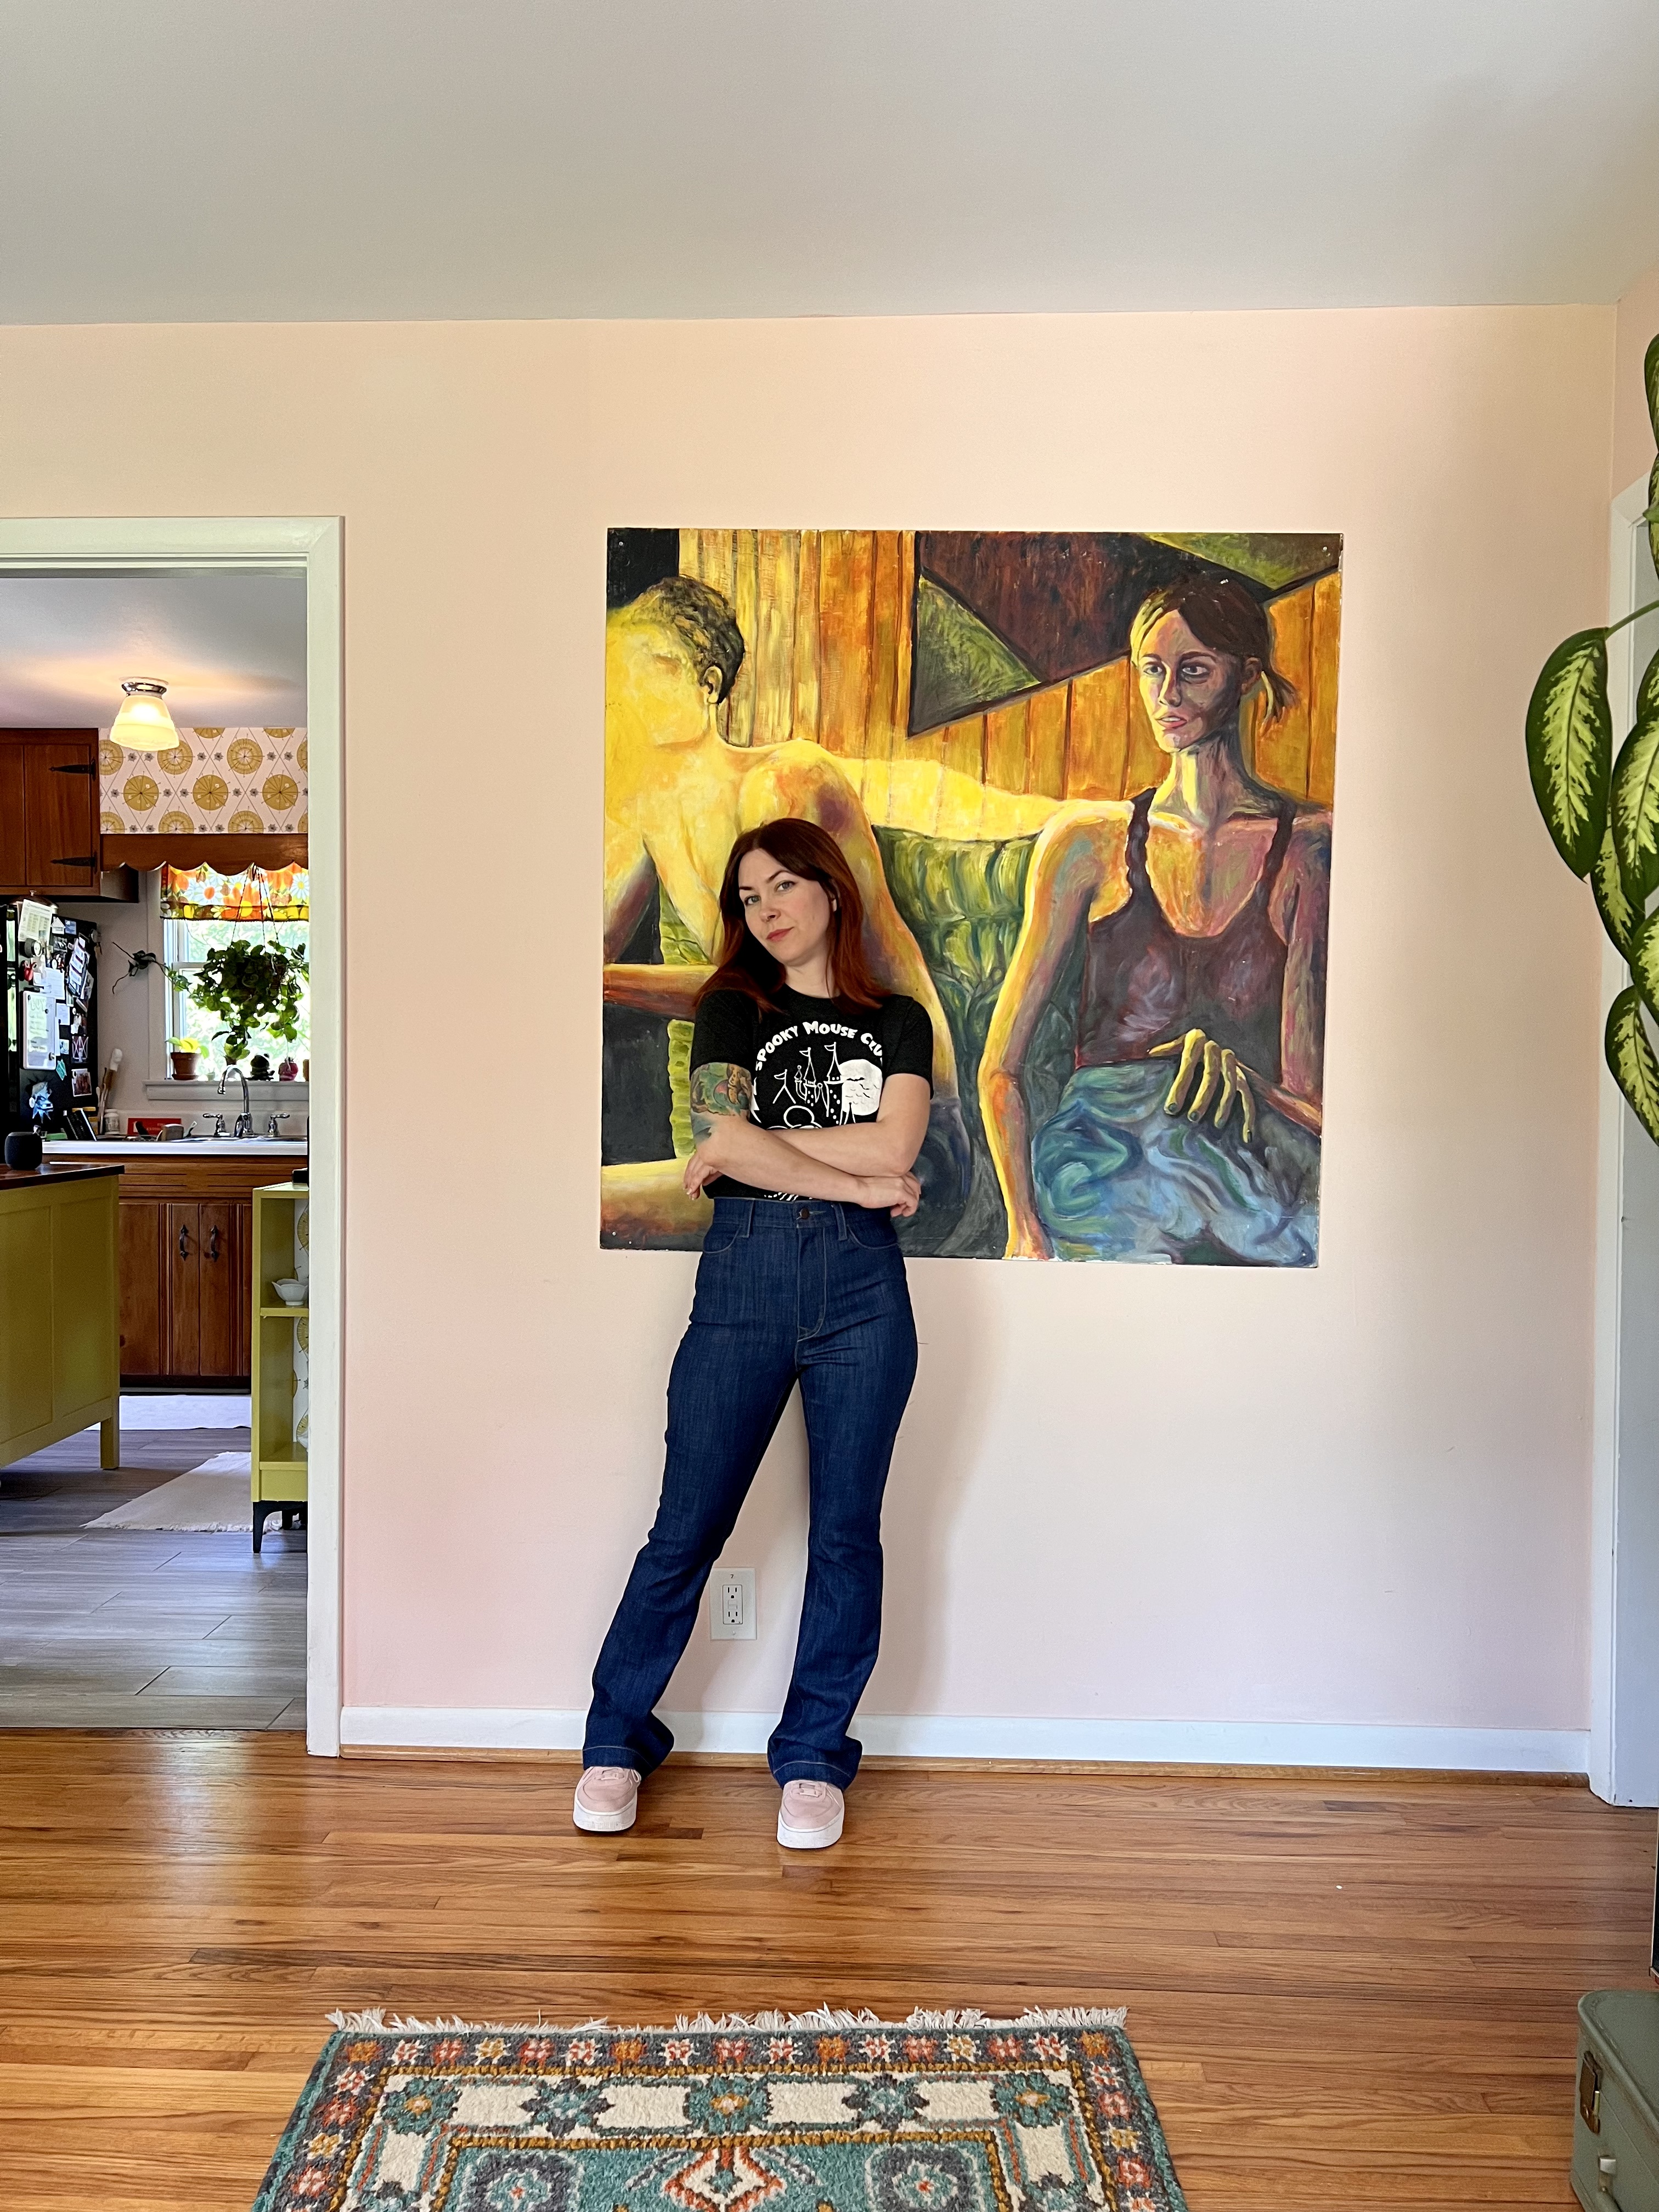
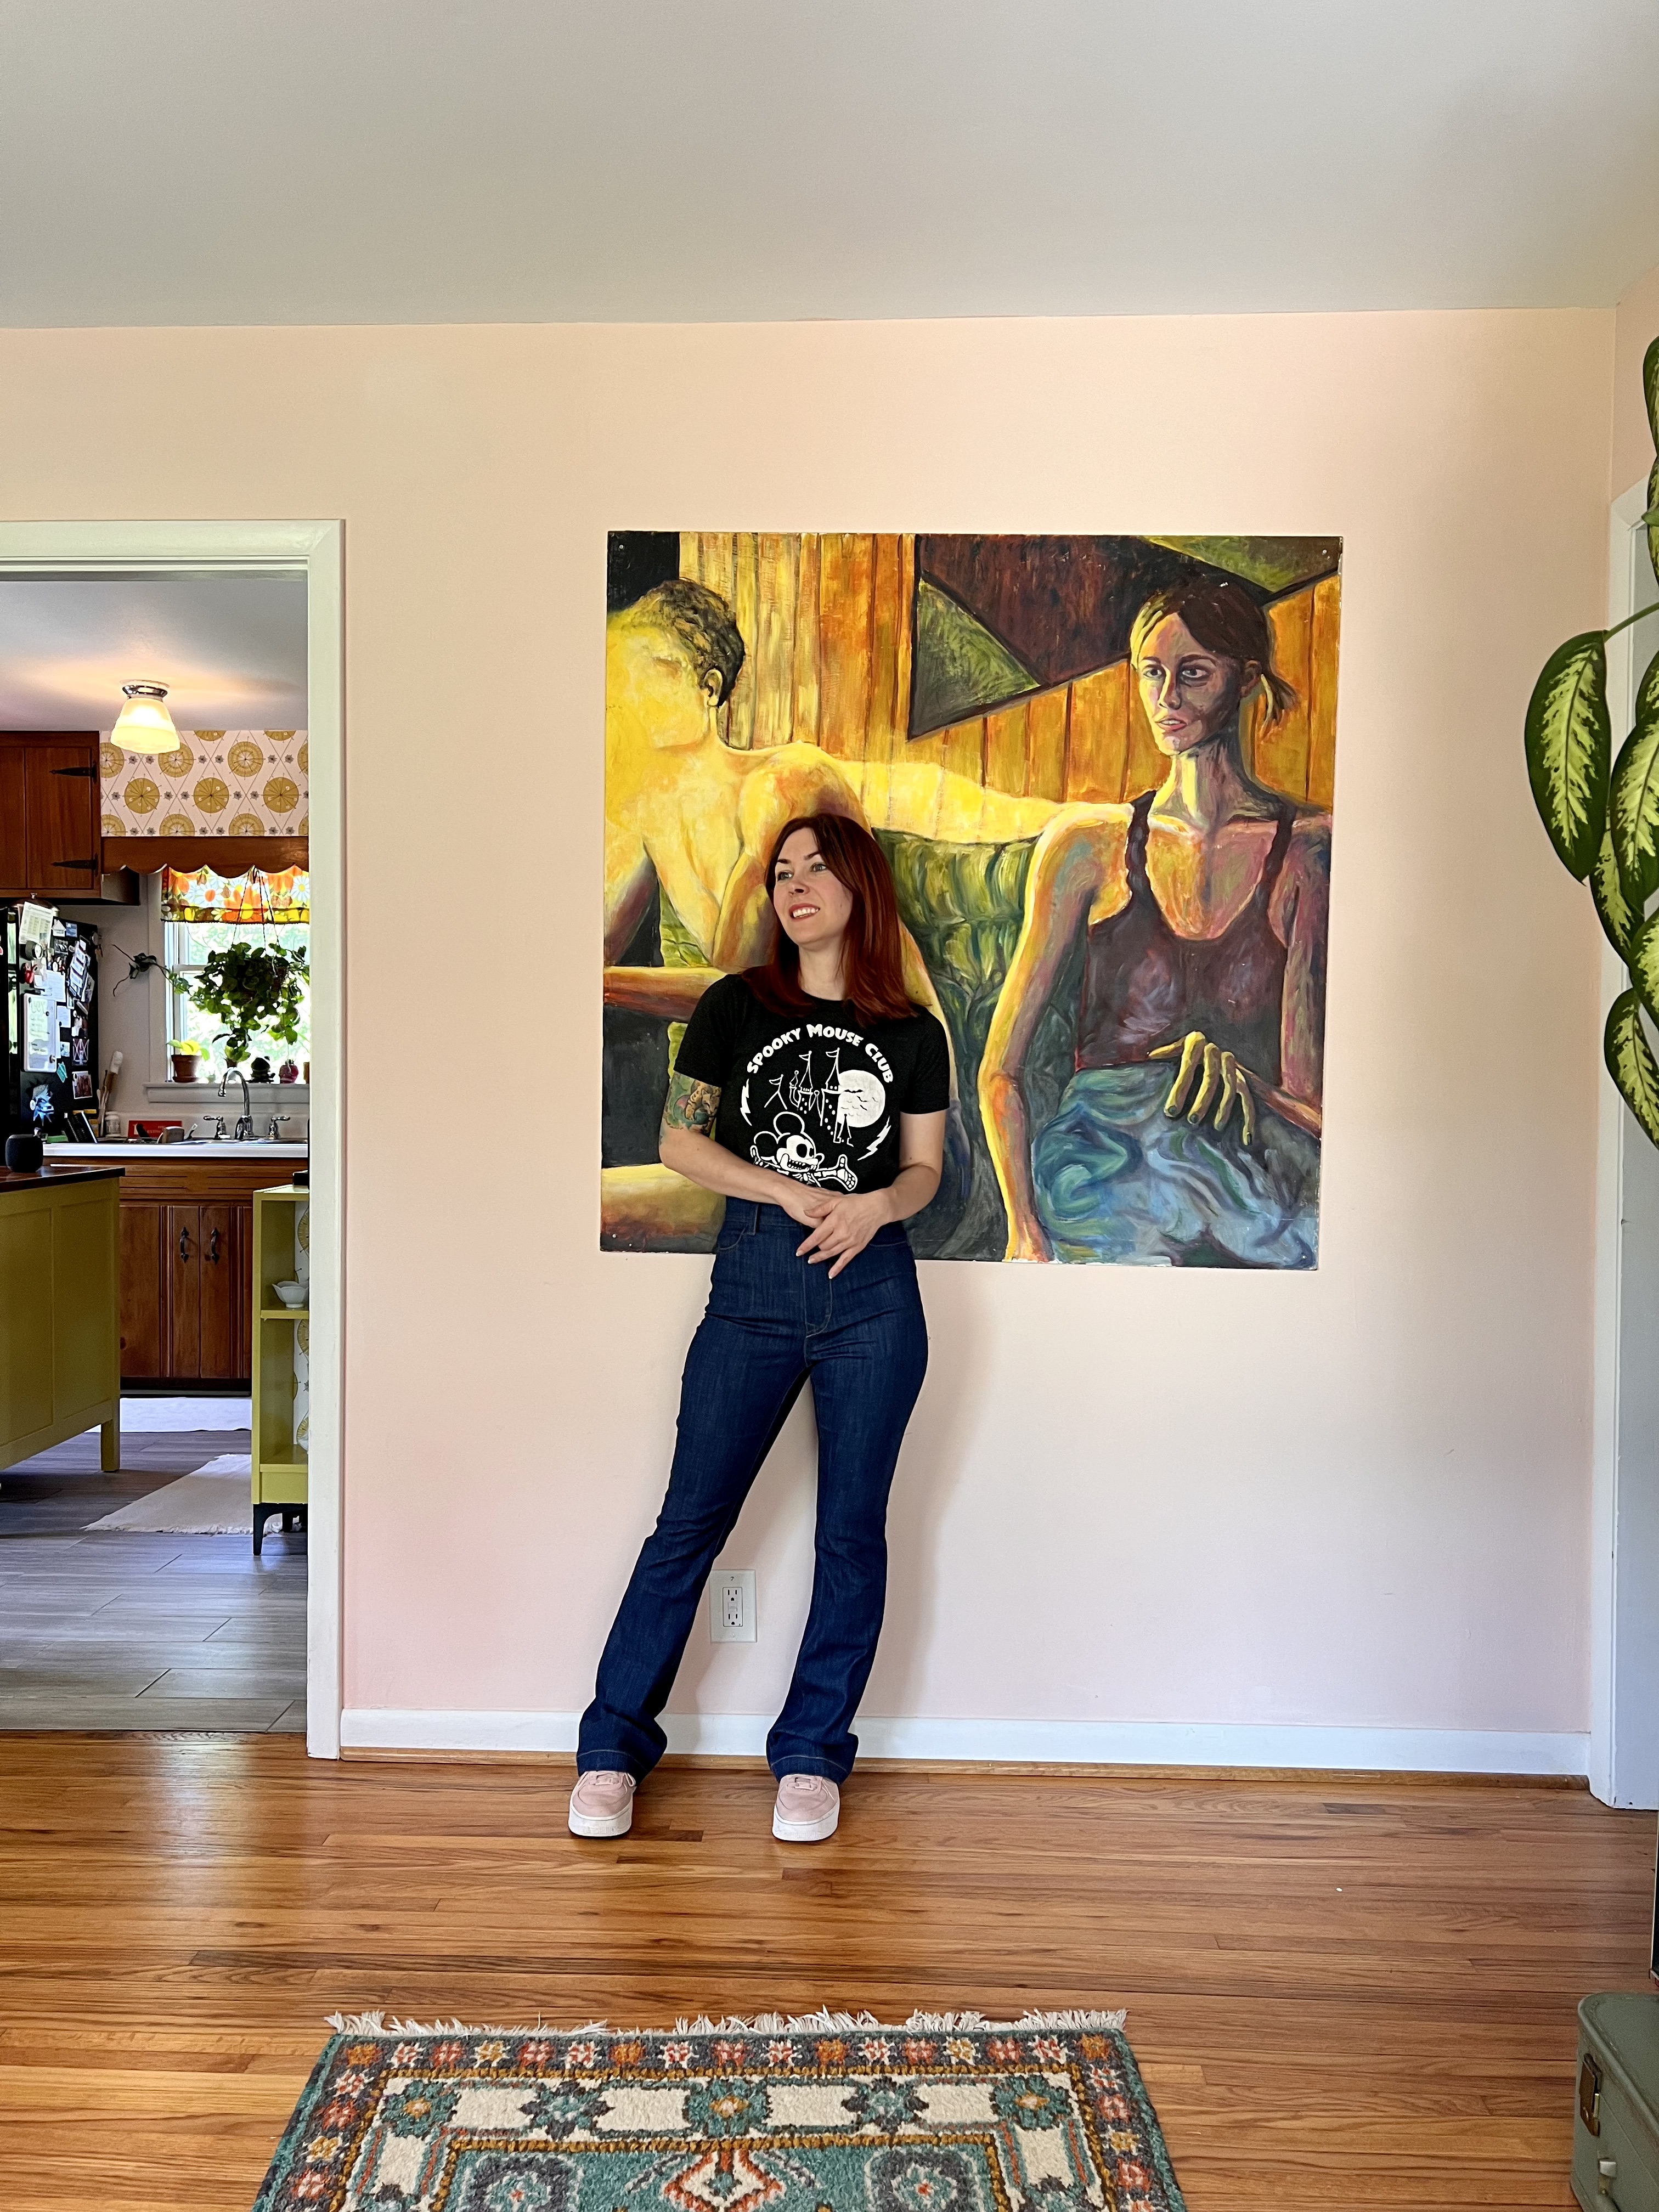
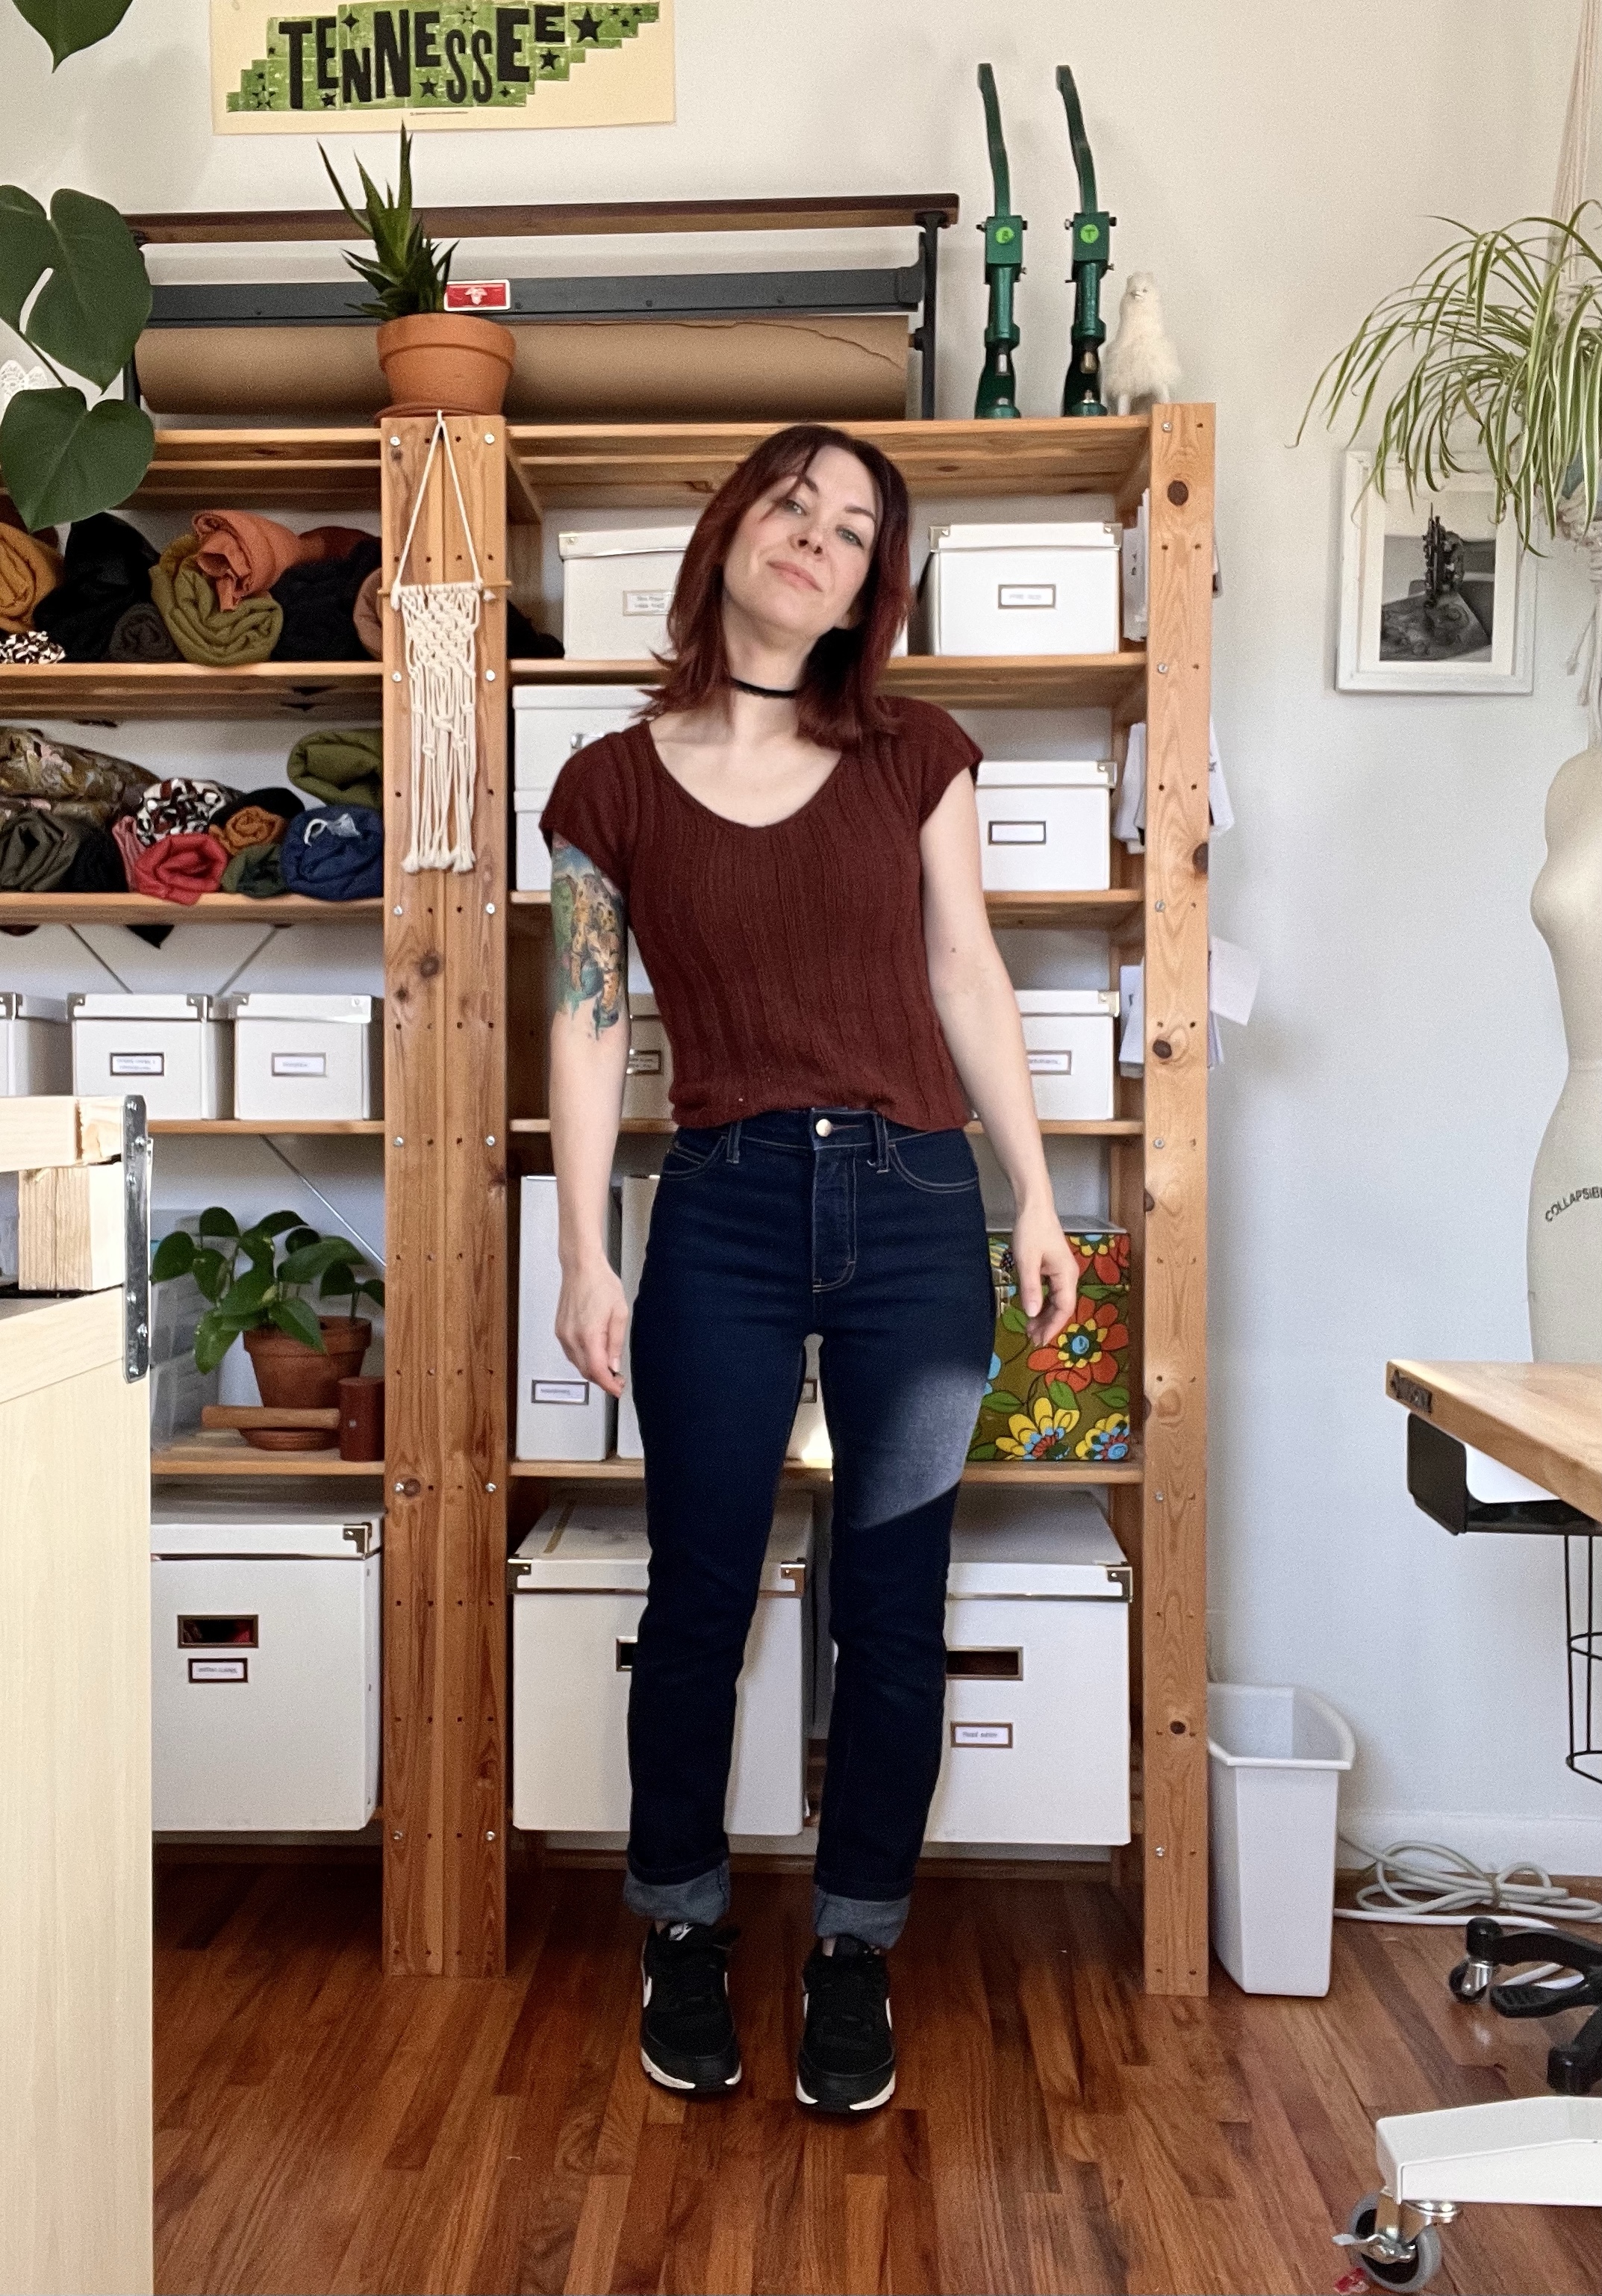
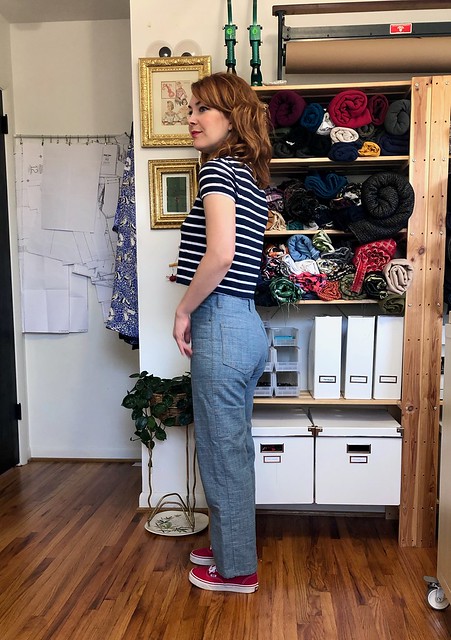
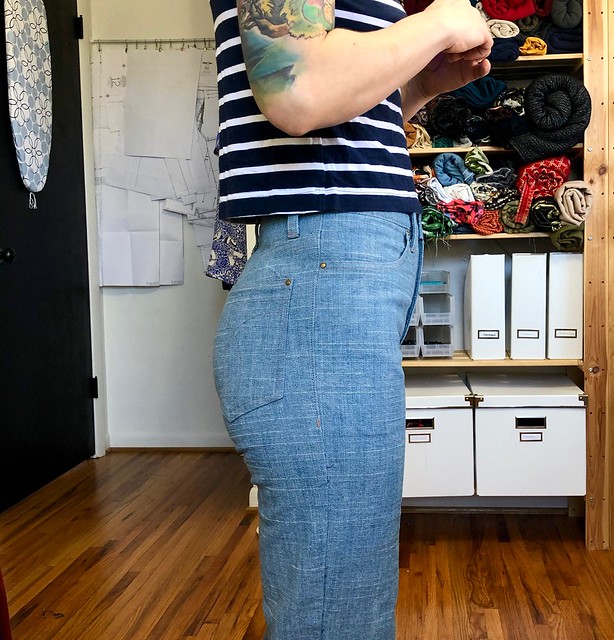
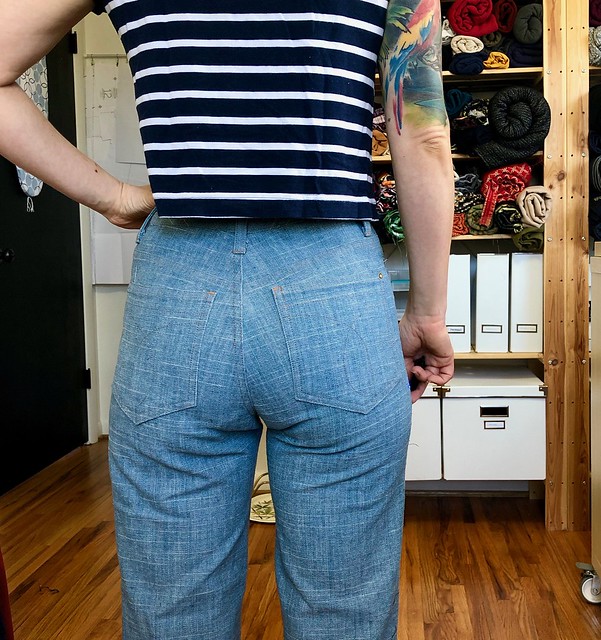
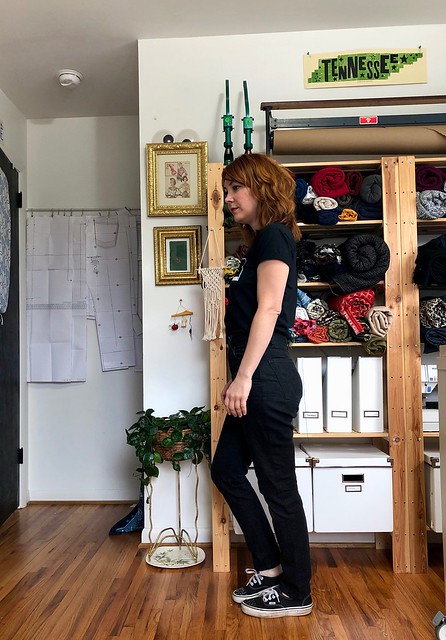
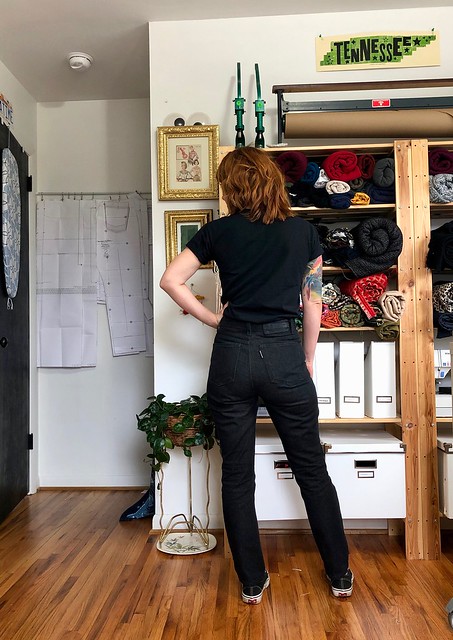
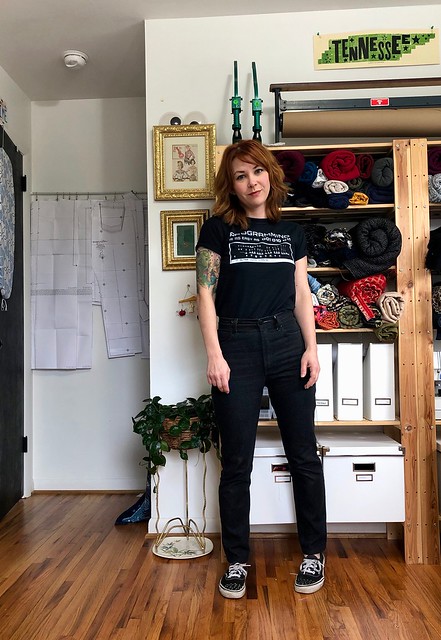
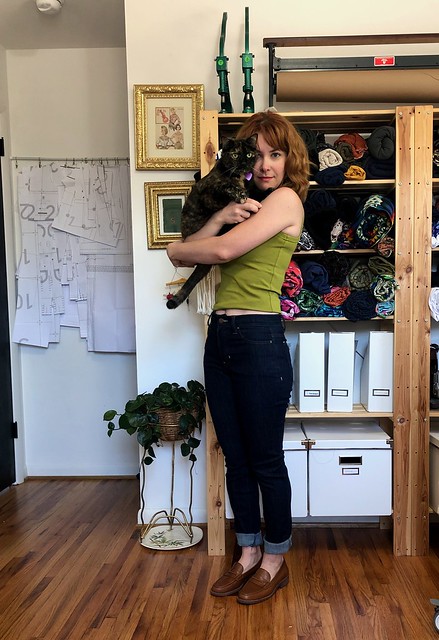
Not too much to say here that I haven’t already said before about this pattern, so here’s a bunch of photos of me + my ass.
I have no idea where I originally purchased my denim – if I had to guess, it’s either from Mood Fabrics or Pintuck & Purl, as I’ve bought loads of stashed denim from those sources. Maybe it’s Cone Mills? Who knows, it’s a mystery! All I can tell you is that it’s been in my stash for years. It is a beautiful medium blue that I think will lighten up nicely as it gets washed and worn. 4″ of my denim stretches to about 4.75″, so I was able to cut my usual size 4 and make no fit or size adjustments.
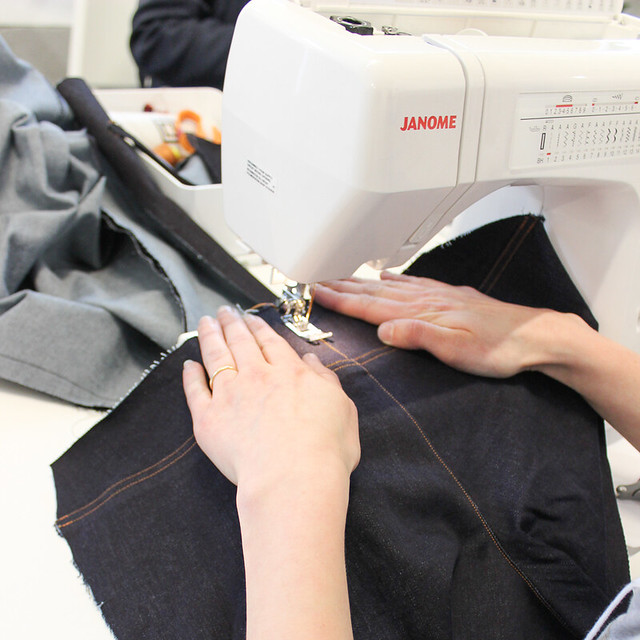
I used two sewing machines to sew this – one threaded for topstitch thread, and one for standard. Although I still had to change my thread a ton, since I was using two different topstitch colors! But I do think the effect is worth it, I see this in a lot of high-end RTW and I just think it looks really nice. I used Mara 30 topstitching thread, which is pretty thick – honestly too thick for most home sewing machines. I have a Janome HD9 that I use for topstitching, which is designed to be able to handle the super thick thread with a 110 needle. In my classes, we use the thinner Mara 70, which gives the look of thick topstitching but much more easily managed by the machines.
Love that you can’t even tell the difference between the two thread colors in this eXtReMe cLoSe Up BUT I PROMISE IT IS THERE.
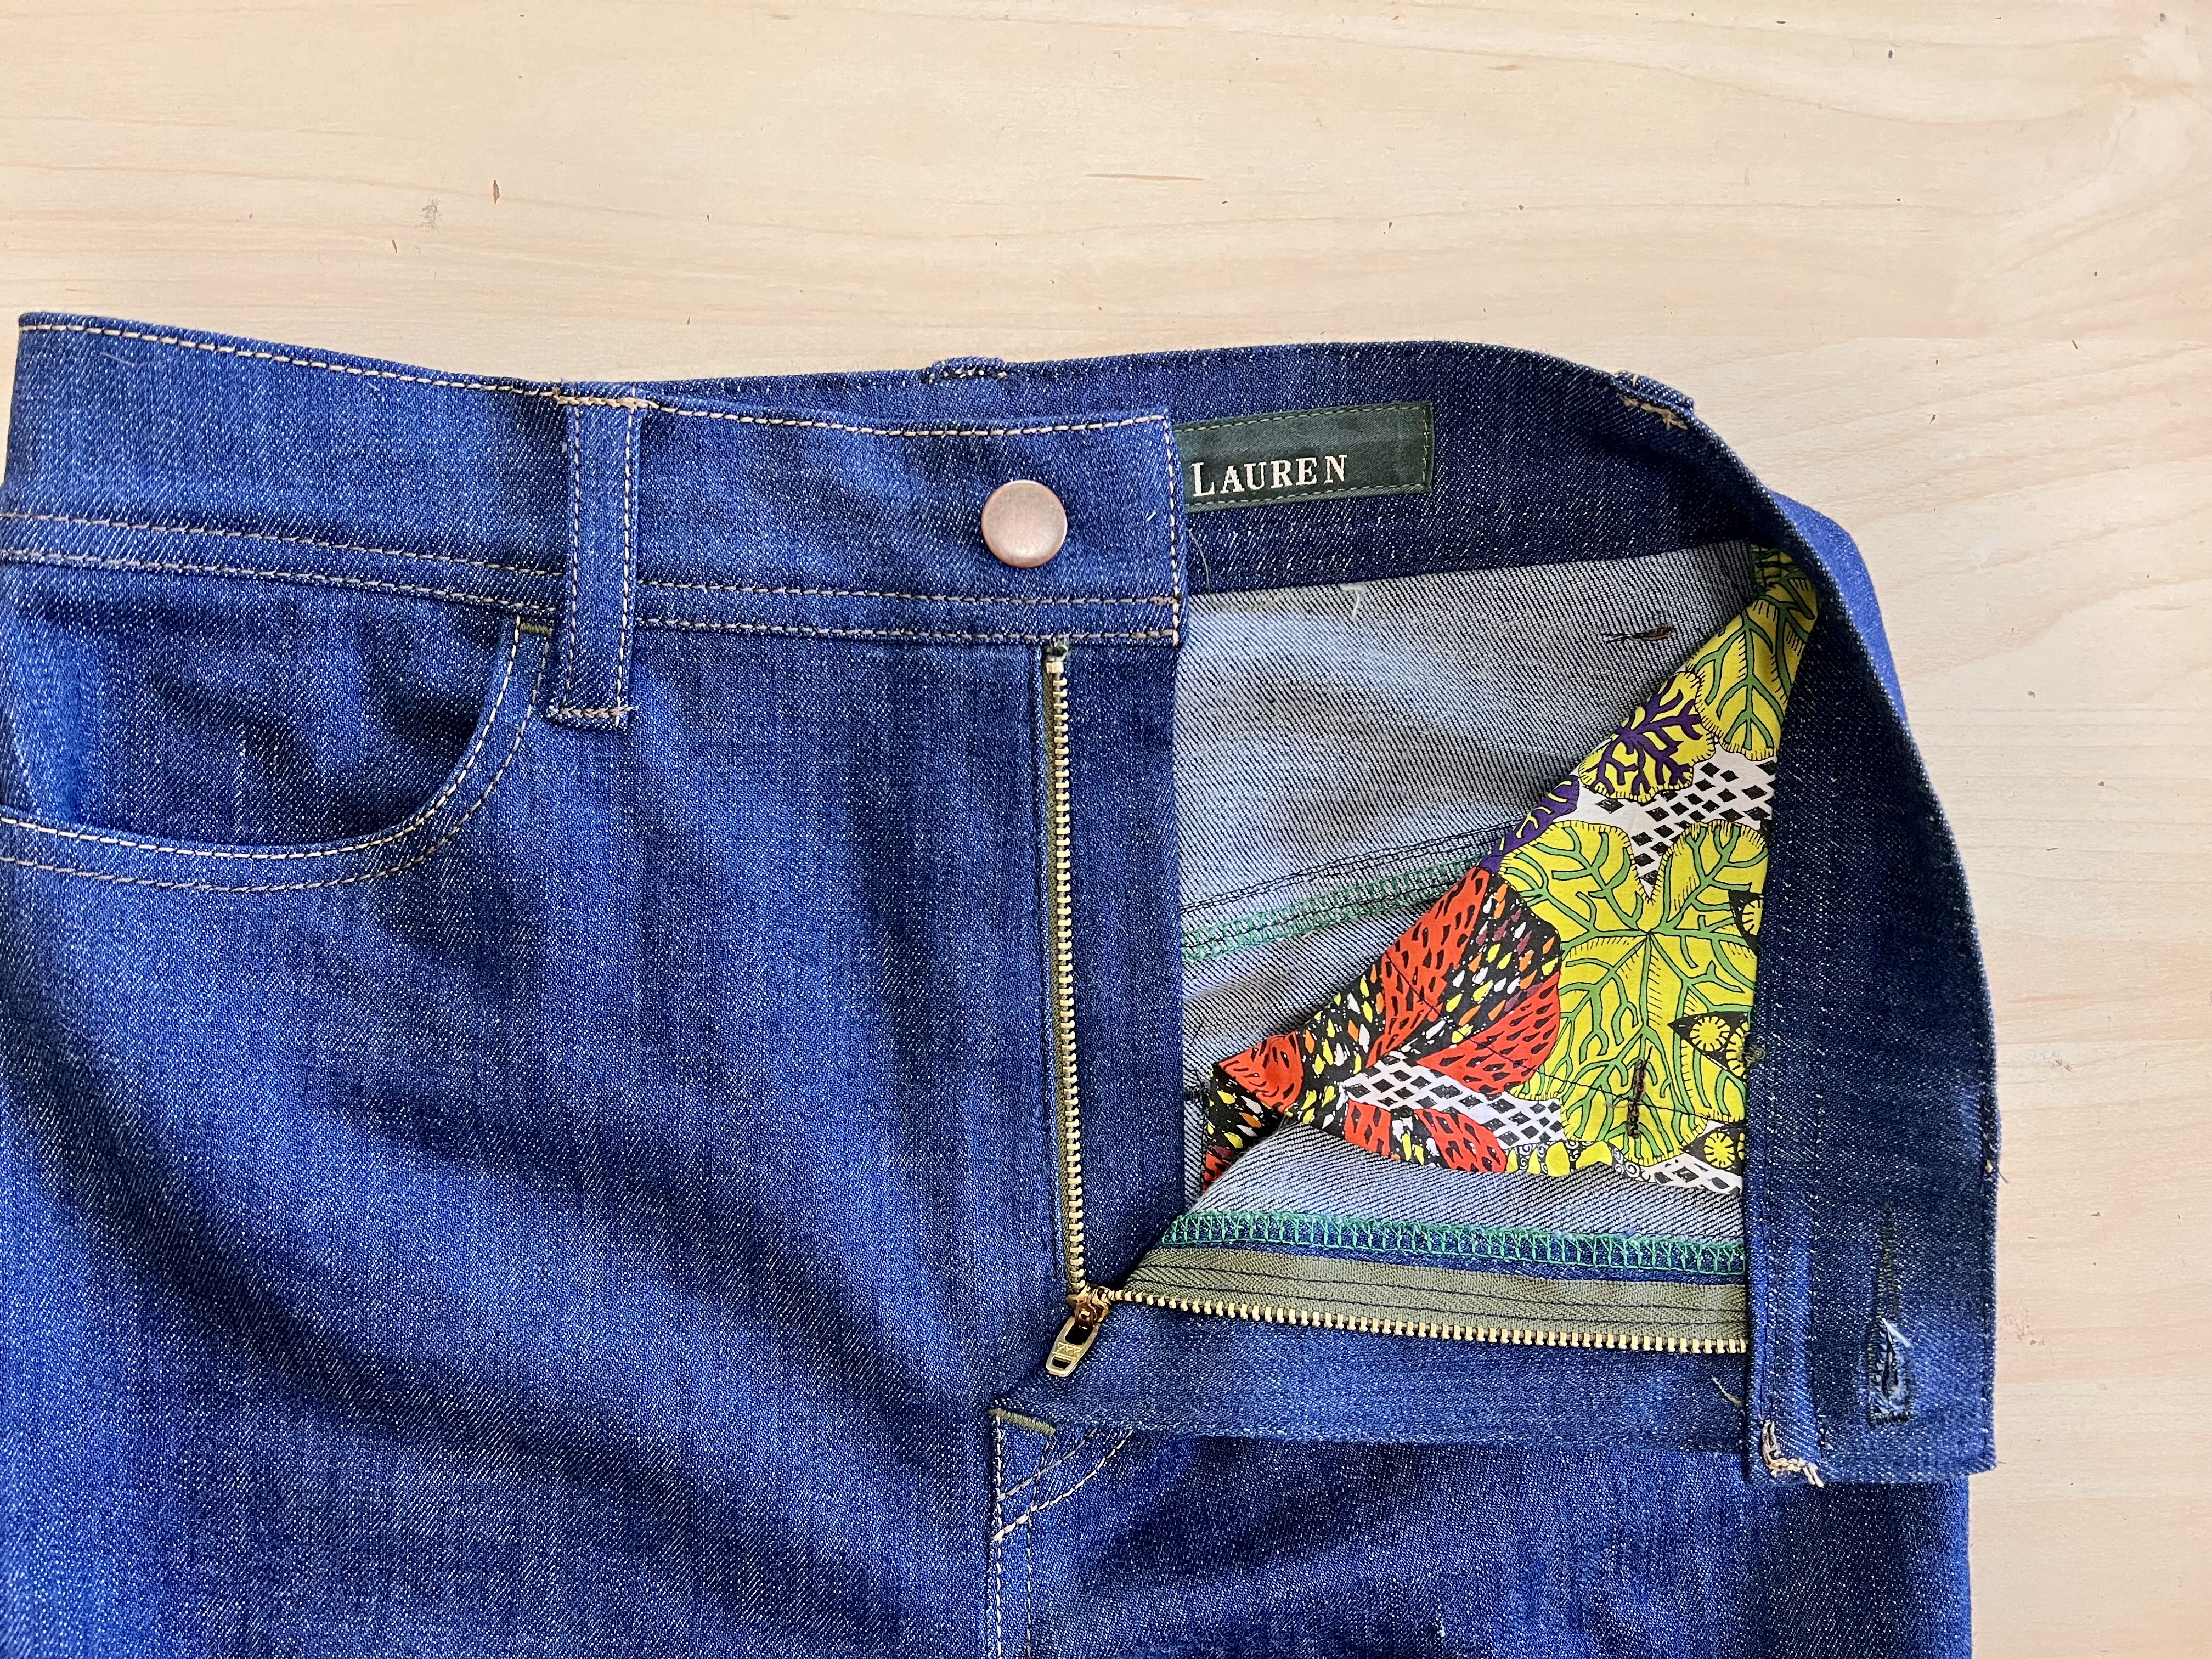
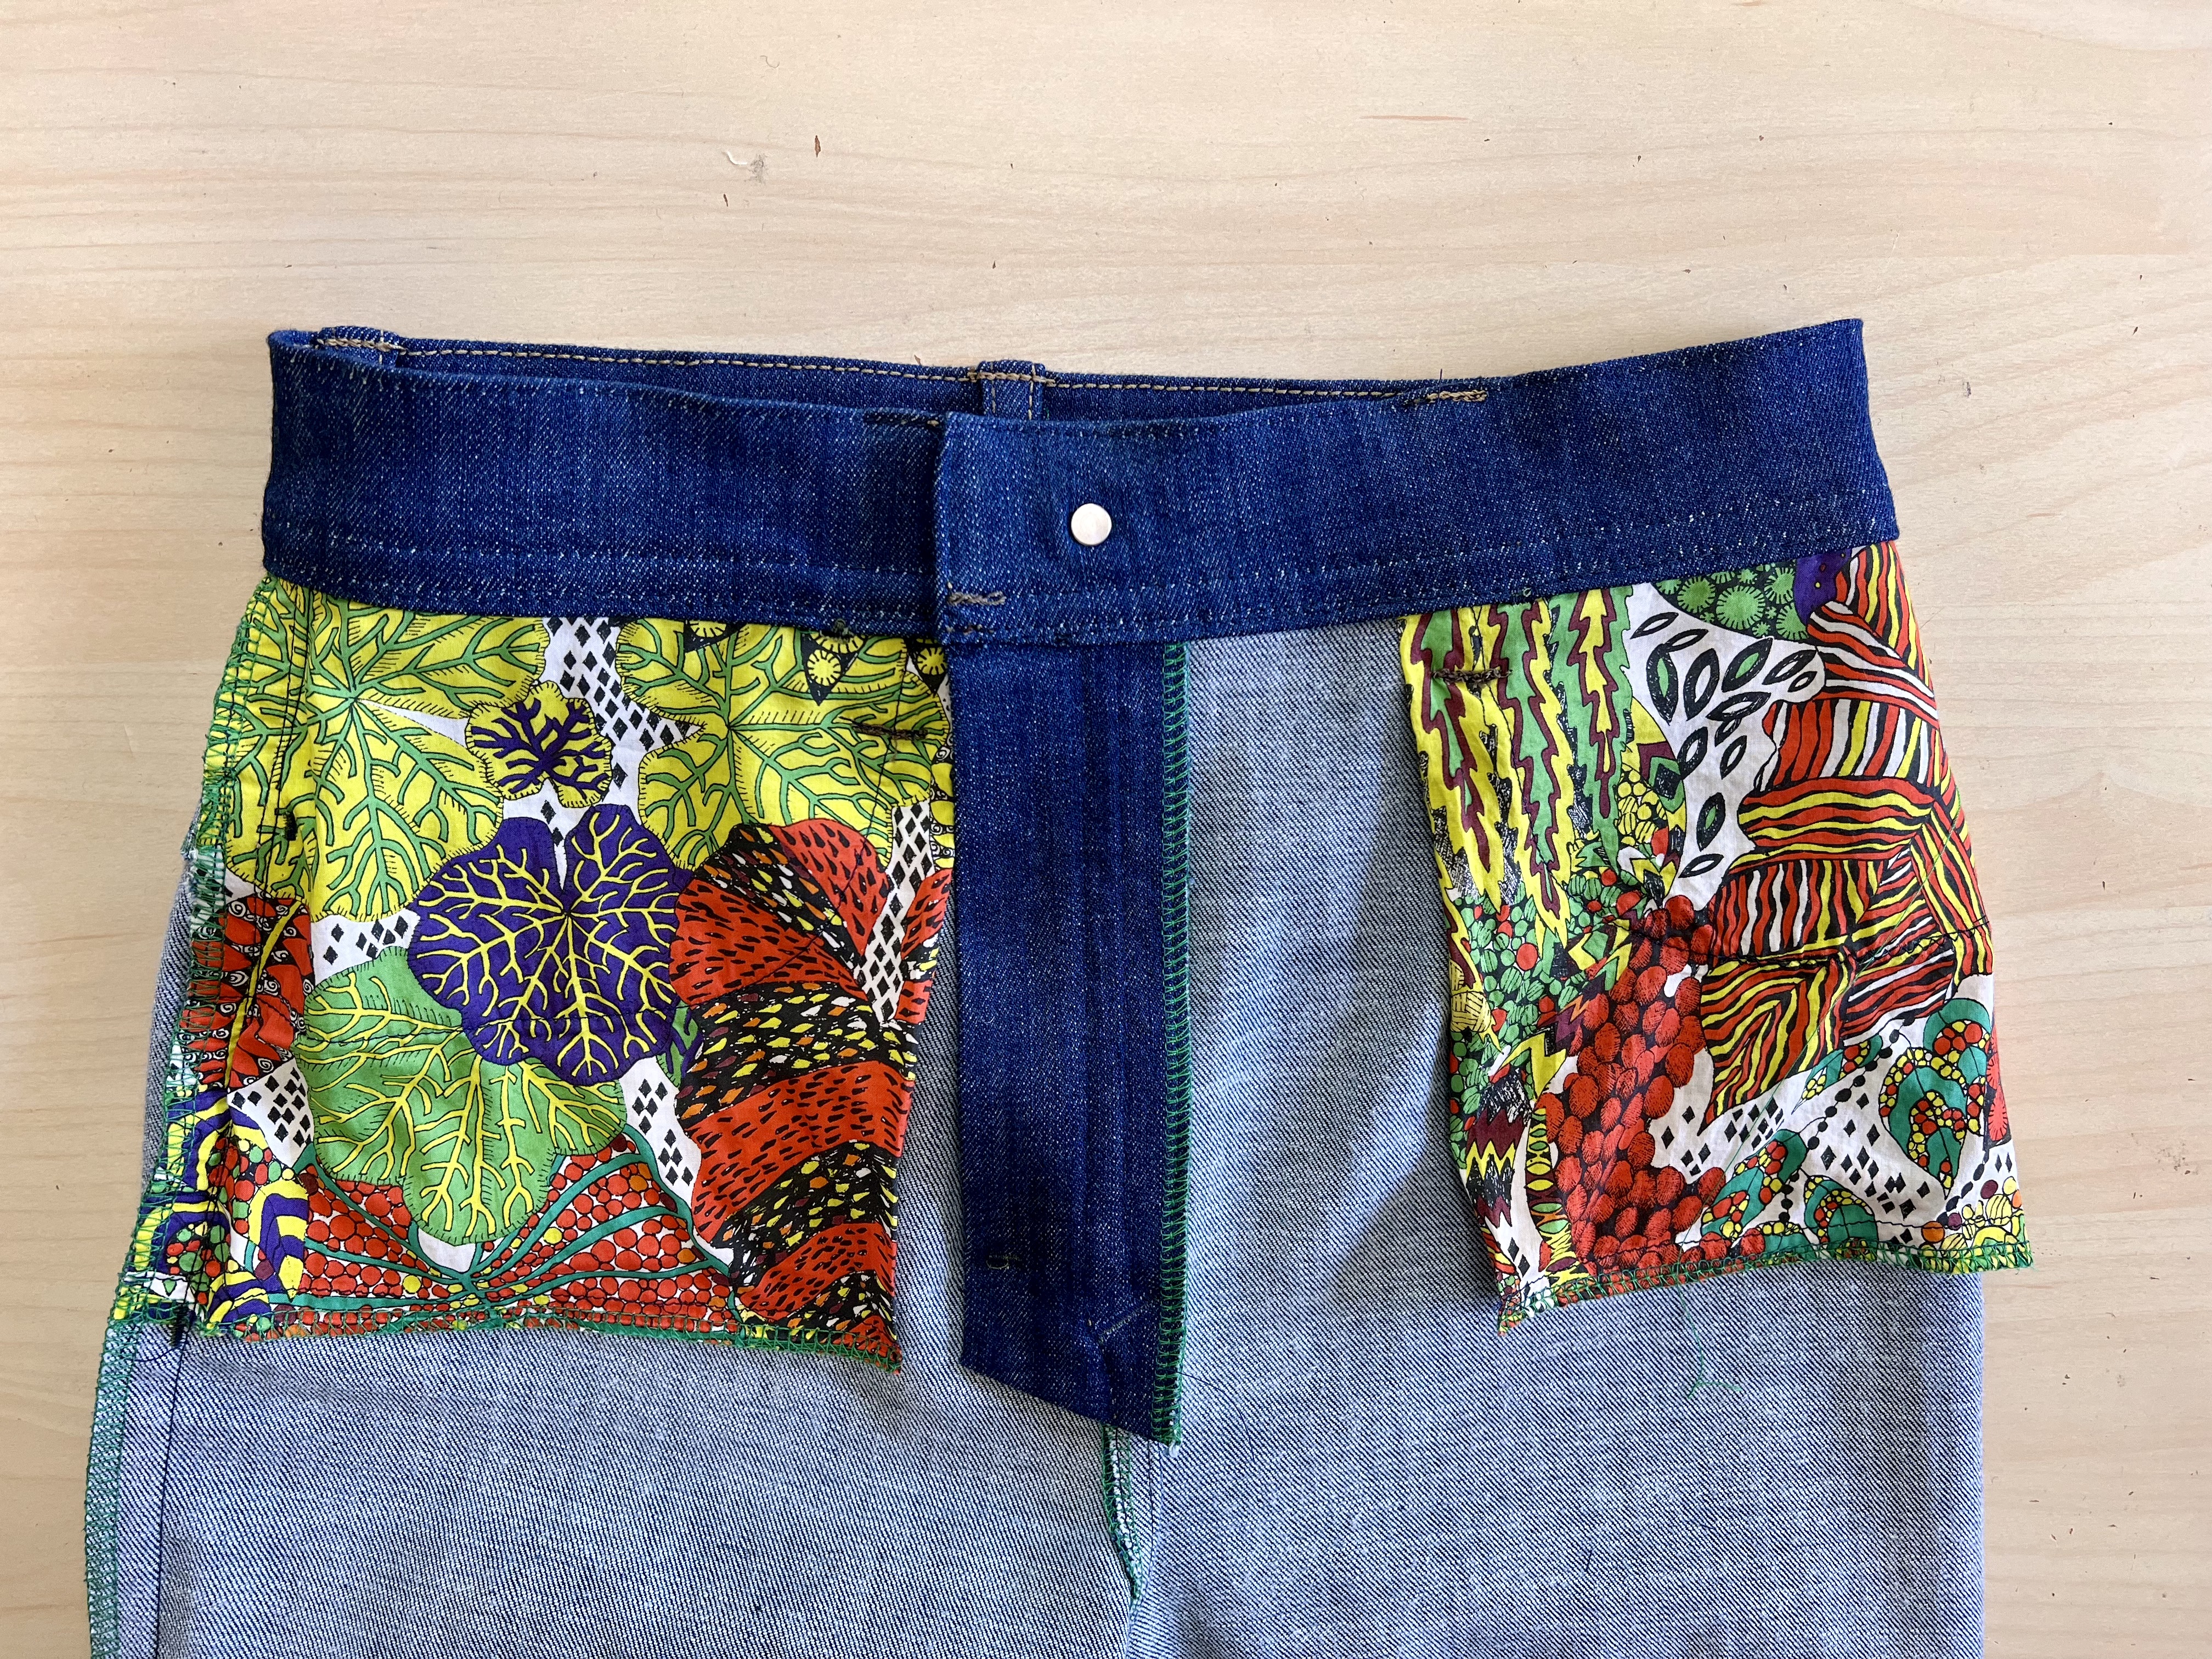
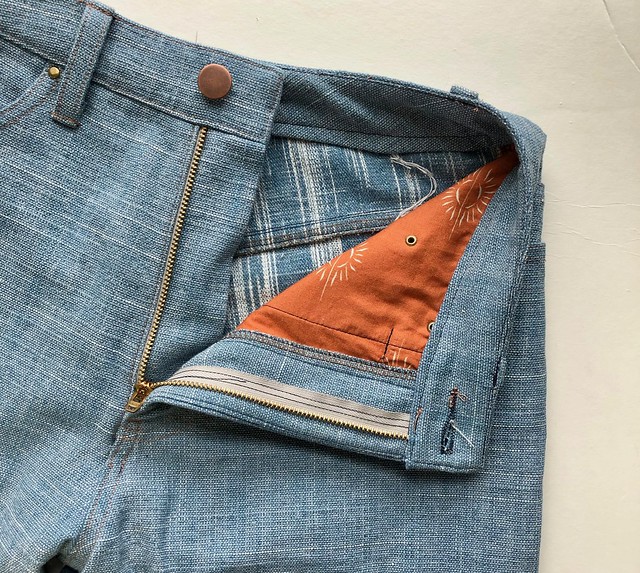
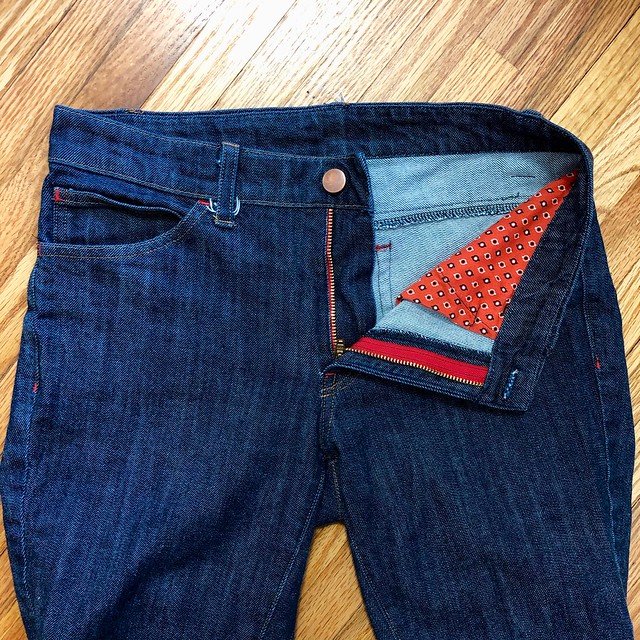
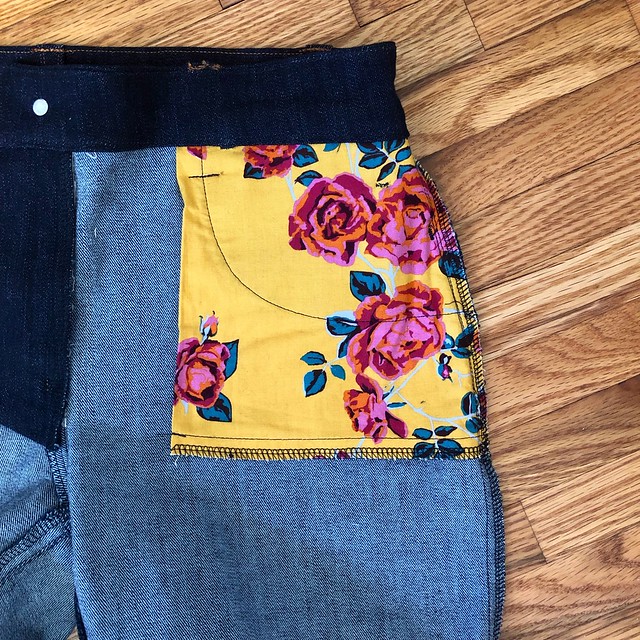
I used a leftover scrap of Liberty cotton to make the pocket bags, which I sort of regret because it’s way too flimsy and doesn’t stay in place that great but oh well the colors were just too good! My serging thread is green to match. Oh, and I found an old Ralph Lauren label that I was able to fold so my pants have my name in them! Fun stuff!
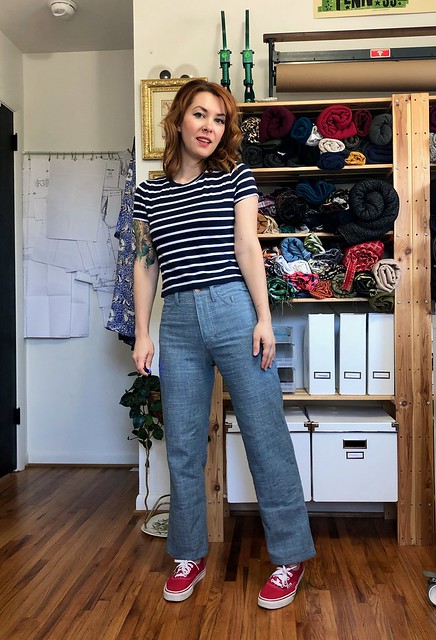
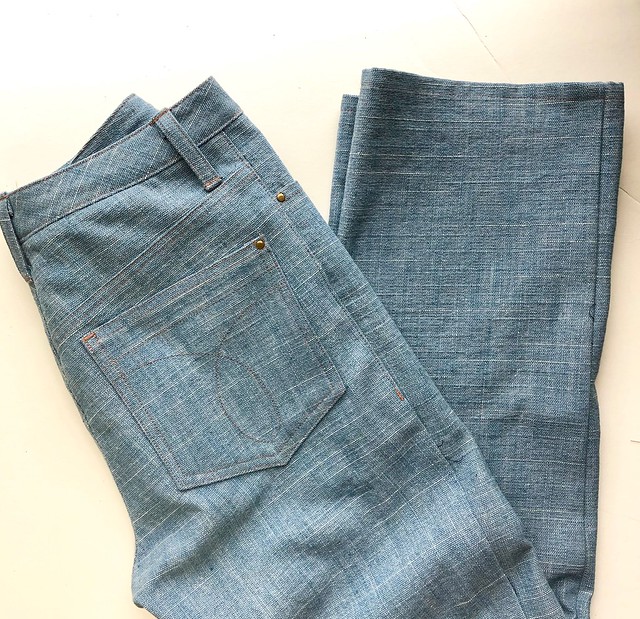
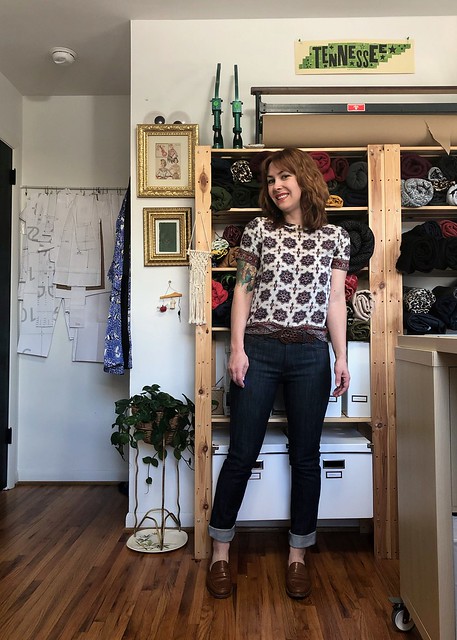
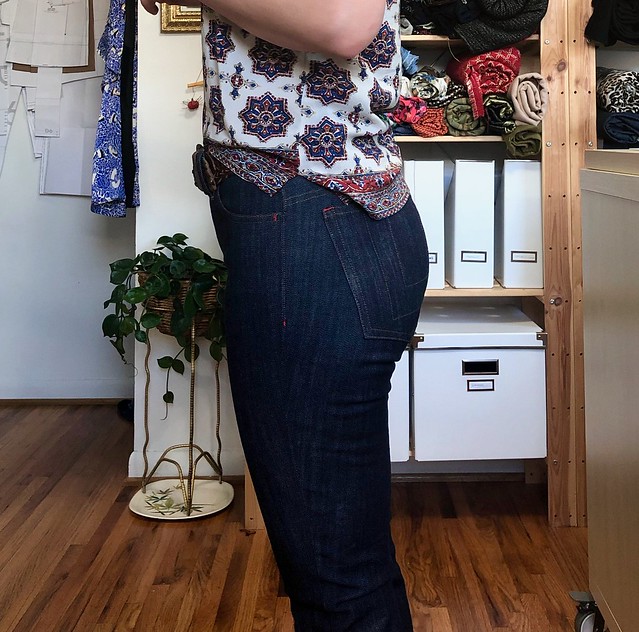
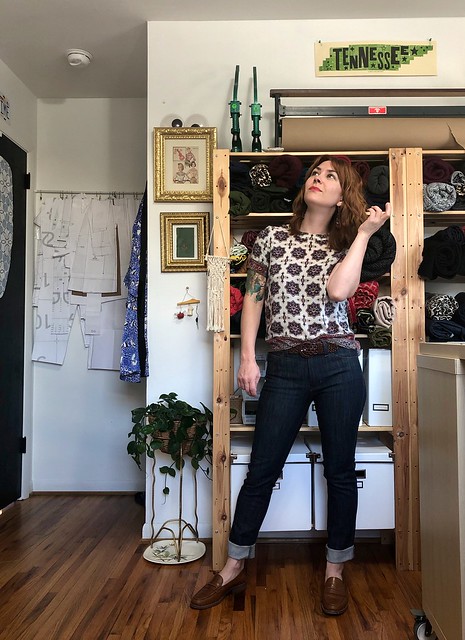
I love the little flare – it’s very different than anything else in my closet (well, other than the *other* pair of flares I own that I knocked off LOL). The length is definitely long for me, but in my experience denim tends to continue to shrink in length as you wash/dry it so I’m going to let these settle a bit before I cut anything off. Plus, longer hems are supposed to be in right now? I don’t know, I keep looking at everyone’s long ass pants and thinking about how much they need a good hemming haha.
This was a fun little project and a great way to ease back into sewing after a summer of barely having time to make anything for myself! If you’re keen to whip up your own jeans, I still have a few classes through the end of the year – check out my WORKSHOPS page to get the details! We won’t have time in class to go fully custom – but you’ll learn everything you need to know about making a pair of jeans from start to finish, and get lots of ideas for customization on your future pairs! Also, as a head’s up – I’m currently planning my schedule for 2024 (with the possibility of adding a new location or two), so if you have a local shop offering classes who you’d like to nominate, please let me know!
Thank you all so much for the warm welcome back to my blog! Feels so good to be back! And now – at long last, the jeans post I have been promising!
I’m not sure how riveting (lol) this post will be, considering I’ve shared many versions of Ginger jeans over the jeans. But this is my newest pair, in a really wonderful denim, which I wanted to highlight since it is very different than what I’ve used in the past for this pattern.
This is the very newest version of the Ginger Jeans pattern from Closet Core Patterns. I have been making this pattern since it was released in 2014 (!!!), and it’s definitely a wardrobe staple for me. I generally prefer the skinny leg version, made with a very stretchy (25%+) bottomweight, but we are doing it different this year! I’m trying new things and branching out! What a rush!!
A little backstory first – while the Ginger jeans have been around since 2014, they have only been available up to a size 20 until last year. The pattern was re-released in 2021 to include up to a size 32 (63″ hip). This is the pattern that I use for my Sew Your Own Jeans weekend workshop and I was very excited to make a new set of samples with a new denim and that whole extended size range! I spent so much time laundering large swatches of denim and agonizing over which one to use for my future classes, and then even more time sewing 22 pairs of jeans (not quite full jeans – but with zippers and finished waistbands and a faux pocket stay). It was a lot of work and I absolutely stained the shit out of everything in my house.
I chose this denim, which is Wyatt from Robert Kaufman, because it washed and sewed so beautifully. The denim is 11.4oz and has about 20% stretch, and the cotton/poly/spandex content is remarkably similar to Cone Mills denim – at a much lower price point, and much more easily accessible as most fabric stores already carry Robert Kaufman fabrics. The lower stretch means it is really easy to figure out fabric for your next pair, as it is sort of a middle ground in terms of bottomweight stretch. If you find something more or less stretchy, it’s pretty easy to size up or down (or add/remove space from the seam allowances) depending on how much the percentage changes. And because of the polyester and spandex content, this denim has a really excellent recovery. I get about 7 or 8 wears out of my jeans before they start feeling a little loose. It’s amazing! Honestly, this is my favorite denim I’ve ever used. I was SO excited to have this for my classes! Yay Wyatt!
Unfortunately, Robert Kaufman ended up discontinuing Wyatt. Which was really lovely to find out 2 months after finishing the samples. To answer your questions – no, I’m not making new samples with a new denim, and our replacement class denim will be figured on a case-by-case basis (since Robert Kaufman also discontinued my back-up denim. I tell ya, it’s been a wild year). So I’m sorry if I just sold you on the best denim ever, just to tell you now that you can’t have it! I’m sorry! Email Robert Kaufman and ask them why the hell they discontinued it!
Anyway, enough with the denim drama lets talk about these pants! Since I was using a lower stretch denim than I normally make my Gingers with, I went up a size for this pair and made them in a size 4. My general rule of thumb for this pattern is to go up or down a size for every 5% stretch you gain or lose, starting with 15% and going up to 25% (I would not stray too much beyond those percentages). This has been the case not just for me, but across the board in my classes, fitting hundreds of students into a multitude of different sizes, denims, and ease preferences.
Using myself as an example: My measurements put me at a size 6 hip, which is the size I would sew with 15% stretch. For 20%, I can go down to a size 4. With 25%, I can make a size 2. When changing sizes – you can either cut a whole ass new pattern, or you can add the difference at the side seams (whatever the size grade measurement is – you will want to refer to your pattern. It can vary between 1/4″-1/2″ depending on your size range). Of course, you always want to try the pants on BEFORE the waistband has been attached – it’s really easy to add or remove room from the side seams.
To find your stretch percentage, you have to measure a physical piece of fabric. The amount of lycra in the fabric has absolutely no bearing on the stretch percentage – I’ve seen fabric with 5% lycra that stretches 10%, and 2% lycra that stretches 20%. You have to actually stretch and measure the fabric, and do math to figure out the percentage. There are tons of tutorials online on how to do this – here’s a good one from Cloth Habit. The Wyatt denim stretches 4″ of fabric to 4.5″ (or 5″ to 6″, or 10cm to 11.5cm). My specific math percentage may not be exact (please do not come at me in the comments with “wELL aKtShUaLLy….” I really don’t care lol), but it’s a good starting point to get the ball rolling. If you want to discuss this more in depth, please sign up for a workshop! 😇
I made the stovepipe legs for this pair. The new version of this pattern includes both rises with both legs, so that you don’t have to pattern hack, which is really nice! I used the high-rise, and added an extra 3/4″ to the rise so the waistband would cover my navel. I normally need to add a full calf adjustment to my Ginger jeans, as the calf is suuuper slim, but as the stovepipe just kind of skims down the leg in a straight line this wasn’t necessary.
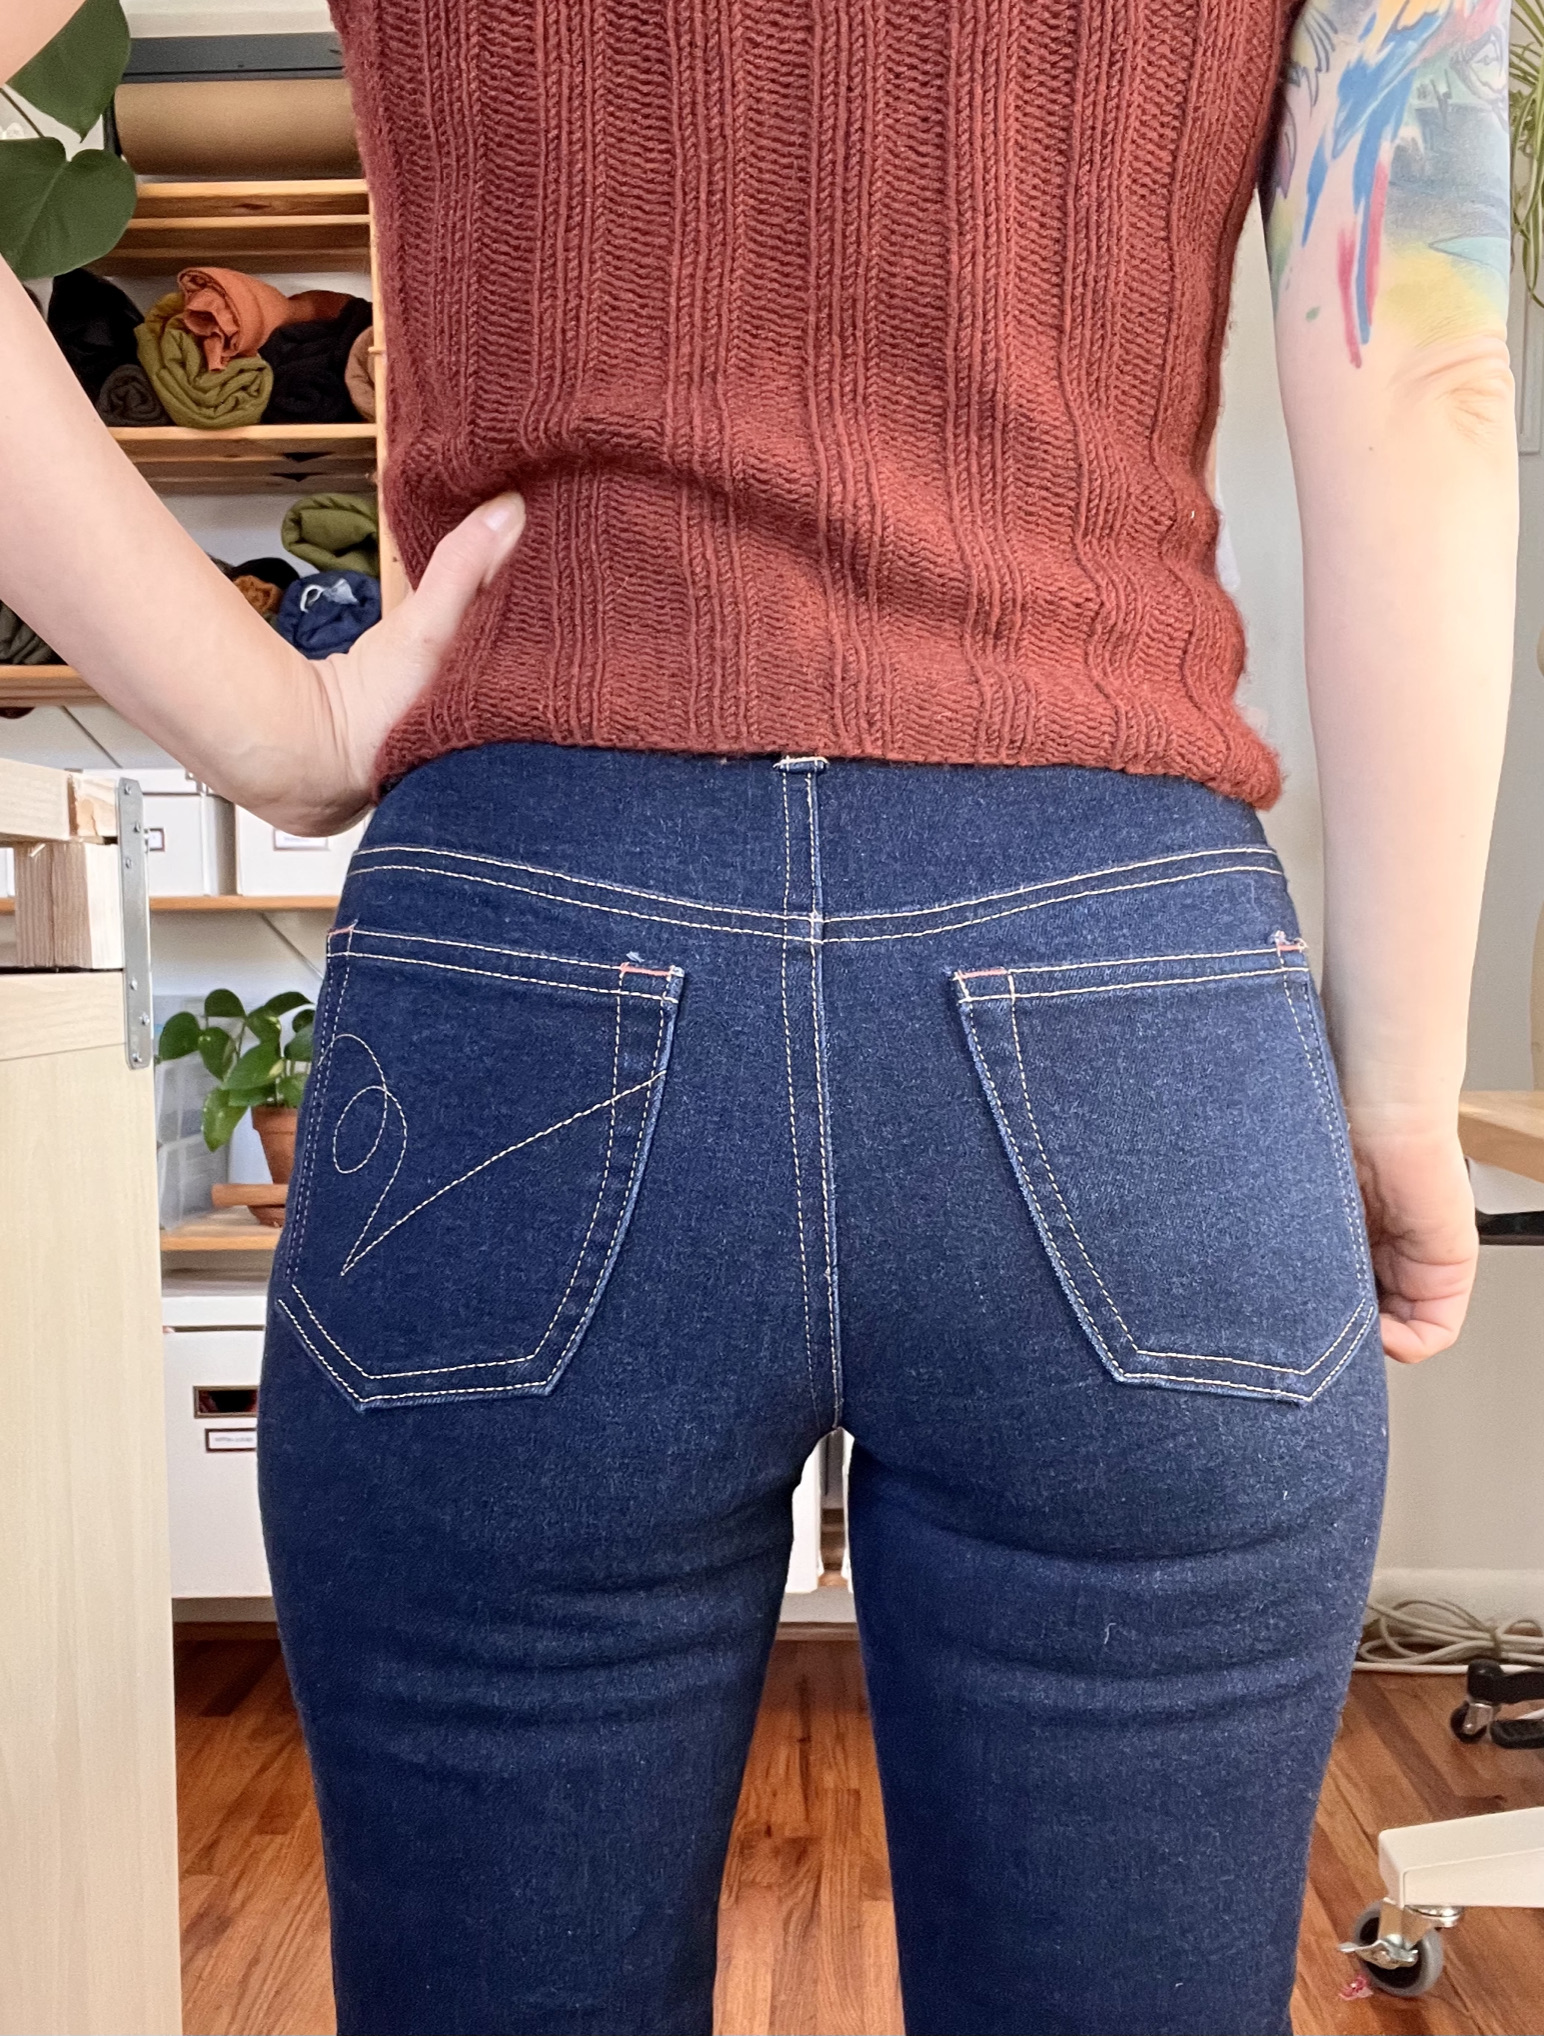
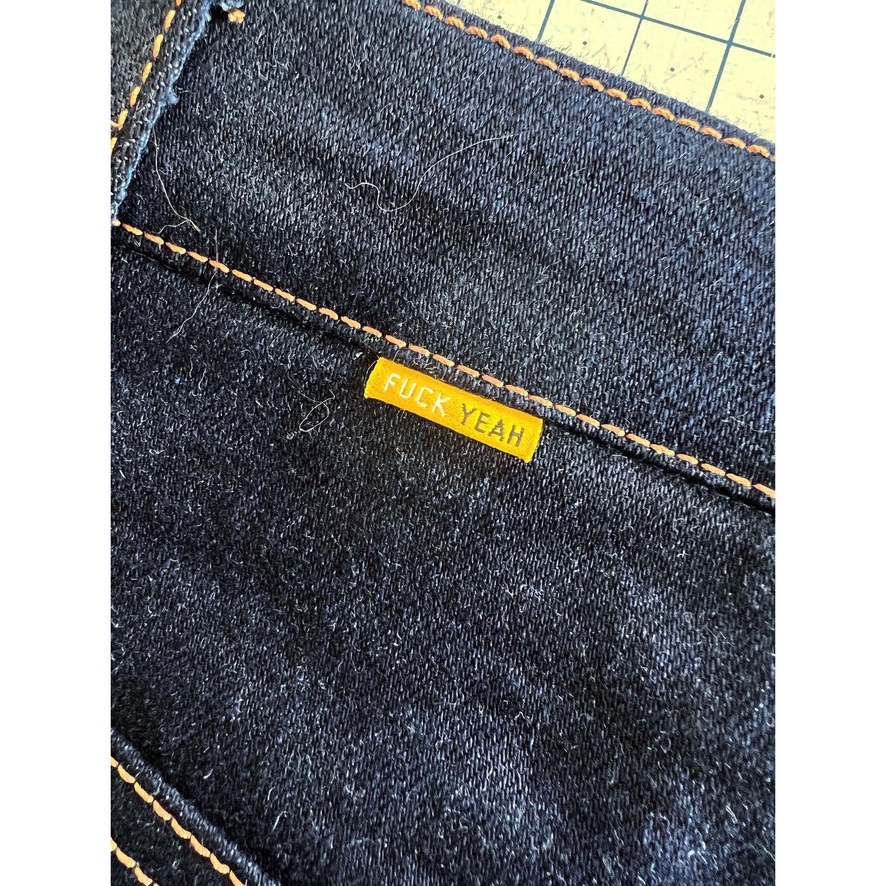
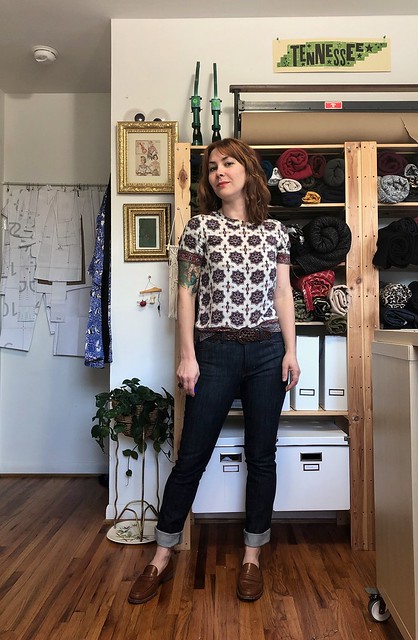
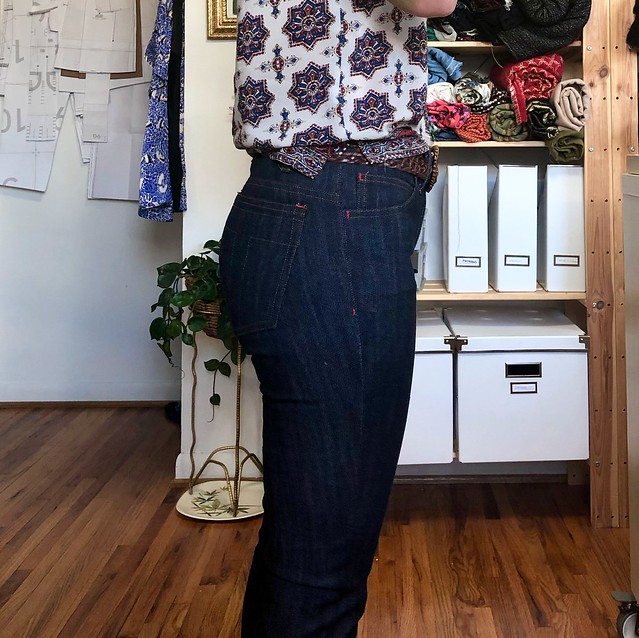
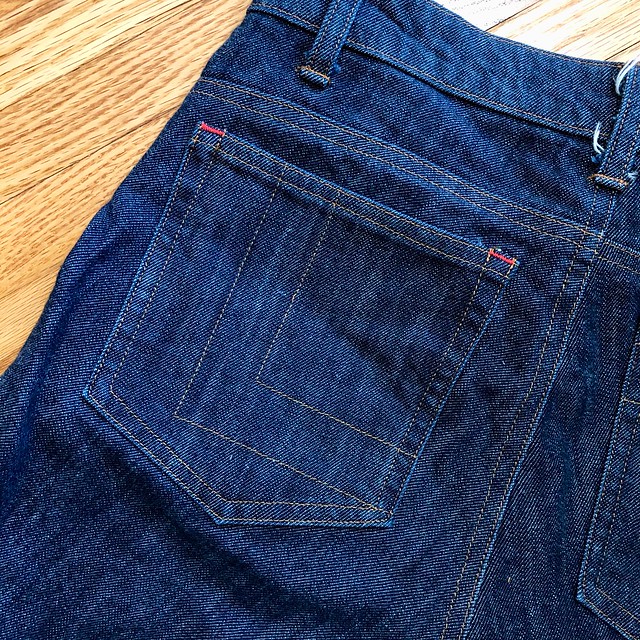
Other than that, sewing stuff is the same same same. I used 2 sewing machines for construction and topstitching, and a serger to finish the raw edges (I prefer this to flat-felled seams as it is much easier to alter if needed in the future. And I alter *everything*!). I skipped out on the rivets and went with contrast bar tacks, and added a little squiggle to my back pocket, and this fun tag from Kylie and the Machine. I think they turned out really nice! I’m still trying to get used to the slightly wider legs – I’ve worn skinnies for so long, I don’t even remember what shoes look good with a straight leg! LOL! I also need to re-hem these – I left them a little long to account for extra shrinkage, but after multiple washes, they haven’t gone up much. Speaking of washing – this denim also doesn’t bleed much. I am telling you, it’s awesome stuff! I’m so mad it isn’t being manufactured anymore!
As a side note – I also knit my sweater! The pattern is the Ripple Crop Top, I made a size Small and added a few extra inches of length. I don’t remember the yarn – maybe Woolfolk Tov? Who knows? Anyway, the extra inches I added involved some MAJOR yarn chicken – to the point where I had a mere handful of yards remaining once I cast off. What a rush that was!
For those who are interested in their own guided denim journey, check out my 2023 Sew Your Own Jeans weekend workshop dates! My next two are in March at Urban Sewciety (Westfield NJ) and in April at Domesticity (Baltimore MD)! Each one still has 1 seat remaining – maybe it’s waiting for youuuu! ❤️
Happy 2023! I’m so excited for another year of sewing and jeans-making! I announced my workshop dates over on Instagram toward the end of last year, but forgot to post them here. I also wanted to share with y’all some Frequently Asked Questions, as these tend to pop up regularly any time I announce my workshops. If you’ve got a burning question, please check the list below as I may have already answered it!
All dates and links are listed on my WORKSHOPS page, as well as at the end of this post. For more information, including pricing and a link to sign up, please visit the shop’s website or send them an email! For funsies, I’m also including a list of dates for my Alter + Repair Your Garments workshop – most shops will be hosting this one day workshop the day before or after Jeans Weekend. For more information about my Alter + Repair Your Garments 1 Day Workshop, please check out this post! I wrote so much about it!
✨SEW YOUR OWN JEANS WEEKEND WORKSHOP DETAILS✨
Ready to be your own personal denim designer? Join me for a 2 1/2 day workshop and I’ll show you all the secrets to sew up the jeans of your dreams! We will kick off the weekend with a half day to fit and cut – there will be samples you can try on to determine your size and any fit adjustments. Saturday and Sunday will be dedicated to sewing, and we will go over aaaaaall the details – front pockets, zip fly, killer topstitching, secure bartacks, serged seam finishes, creating and attaching a waistband, hardware installation, and stress-free buttonholes (yep, those exist!). Students can expect a fun, energetic, and fast-paced environment that focuses on learning and creating. You will leave with not only a new pair of jeans, but also the knowledge and empowerment to make more on your own!
😎👖
✨WORKSHOP FAQS✨
What can I expect to learn in this workshop?
My Sew Your Own Jeans Weekend workshop primarily focuses on construction – you will learn all the details that go into making a pair of jeans, including order of construction, seam finishes, topstitching, inserting a fly zipper, attaching a waistband, and loads and loads (and loads) of little tips, tricks and best practices sprinkled throughout the weekend (seriously, so many little tips!). The knowledge you obtain isn’t just jeans-specific – you can use what you learned to apply toward all sorts of future sewing adventures (Denim jackets!! Rad pants! Skirts! Dresses! Bags! Your possibilities are endless!). You will leave with a great pair of jeans, plus the confidence to go home and make more!
Does this workshop cover fit?
We will go over fit, although this is not a fit-focused workshop. The first half day is devoted to choosing our size (including trying on samples!), adjusting our preferred fit, and preparing our fabric for sewing (cutting, marking, etc). We *will* go over minor fitting adjustments as needed for each individual body. We will *not* spend a long time fussing over fit, nor can I guarantee that your first pair will be ~the most perfectly fitting pair of pants you’ve ever worn~. There simply is not enough time in class to allow for us to make multiple muslins for a perfect fit – and to be completely honest, this is hard to obtain without wearing the pants around for a few days to really get an idea of what needs to be adjusted. I don’t say this to discourage you, but rather, to set the expectation of what you will get out of your weekend. We will tweak the fuck outta your pants throughout the weekend (if it needs it – most students find they get a great fit right out of the envelope! #magicpants) and you will leave with something lovely and wearable that I promise you’ll be proud of. Should you need future adjustments, you will be armed with the knowledge to make it happen!
Is this class suitable for plus sized sewists?
Hell yeah! The Closet Core Ginger Jeans pattern is available in sizes 0-32 (up to a 63″ hip). Need a bigger size than that? Holler at me and I’ll get it sorted. This class caters to EVERY size, no butts left behind!
I’m a dude / don’t wear lady pants, can I take your class?
Hell yeah you can! The Ginger jeans pattern can be adapted with minor tweaks for more androgynous fit, or we can adapt a men’s jeans pattern for you. Please contact me in ADVANCE of the workshop so that I can be sure we’ve got the perfect pattern ready for you!
What experience level should I be at in order to take this workshop?
Beginners, rejoice: You don’t need to be a sewing superstar with years of experience under your belt to take this class. The prerequisites for class are that you should be comfortable threading and operating a sewing machine, and have experience sewing at least one sewing pattern. That’s it, that’s all you need to take this class!
If you are a very experienced sewist with lots and lots of sewing (and maybe even jeans making!) under your belt, I still believe you will learn a lot in this workshop! I have had a vast array of skill levels in my classes – from the total beginner to the seasoned professional – and everyone leaves with more knowledge than they came with.
**For all skill levels** Please note that this workshop moves really fucking fast. 20 hours of instruction sounds like a lot, until you realize that I talk through most of it and our actual sewing time is quite limited! You will feel like an absolute warrior when the weekend is over, and also very very tired. If you are a very timid or slow sewist, I encourage you to practice working quickly and confidently to prepare for class.
I don’t like that pattern, can I use a different one? Can I modify it?
I hate to be a fun sponge, but we really don’t have time in class to make huge design changes to the pattern or try to work with something entirely different. That being said, there are downloadable pattern hacks for the Ginger Jeans that you are welcome to bring to class – Ginger Mid-Rise Jeans and Ginger Flares. We can make additional small fit tweaks as needed, but plan on saving the major changes and additional patterns for your home sewing practice!
Will you ever offer this workshop as an online class?
Probably not! I don’t wanna do online classes! Sorry!
Will you ever come to _____________ (city / state / country / planet) to teach this workshop?
I get this question a lot, and the short answer is – I’d love to!! My best advice to make this happen is to holler at your local sewing shop and tell them you want to take a LLADYBIRD Jeans Workshop, and encourage them to reach out to me (lladybirdlauren AT gmail DOT com). This allows the shop to recognize that there is already interest in a workshop, which means they are more likely to get the ball rolling in terms of planning one!
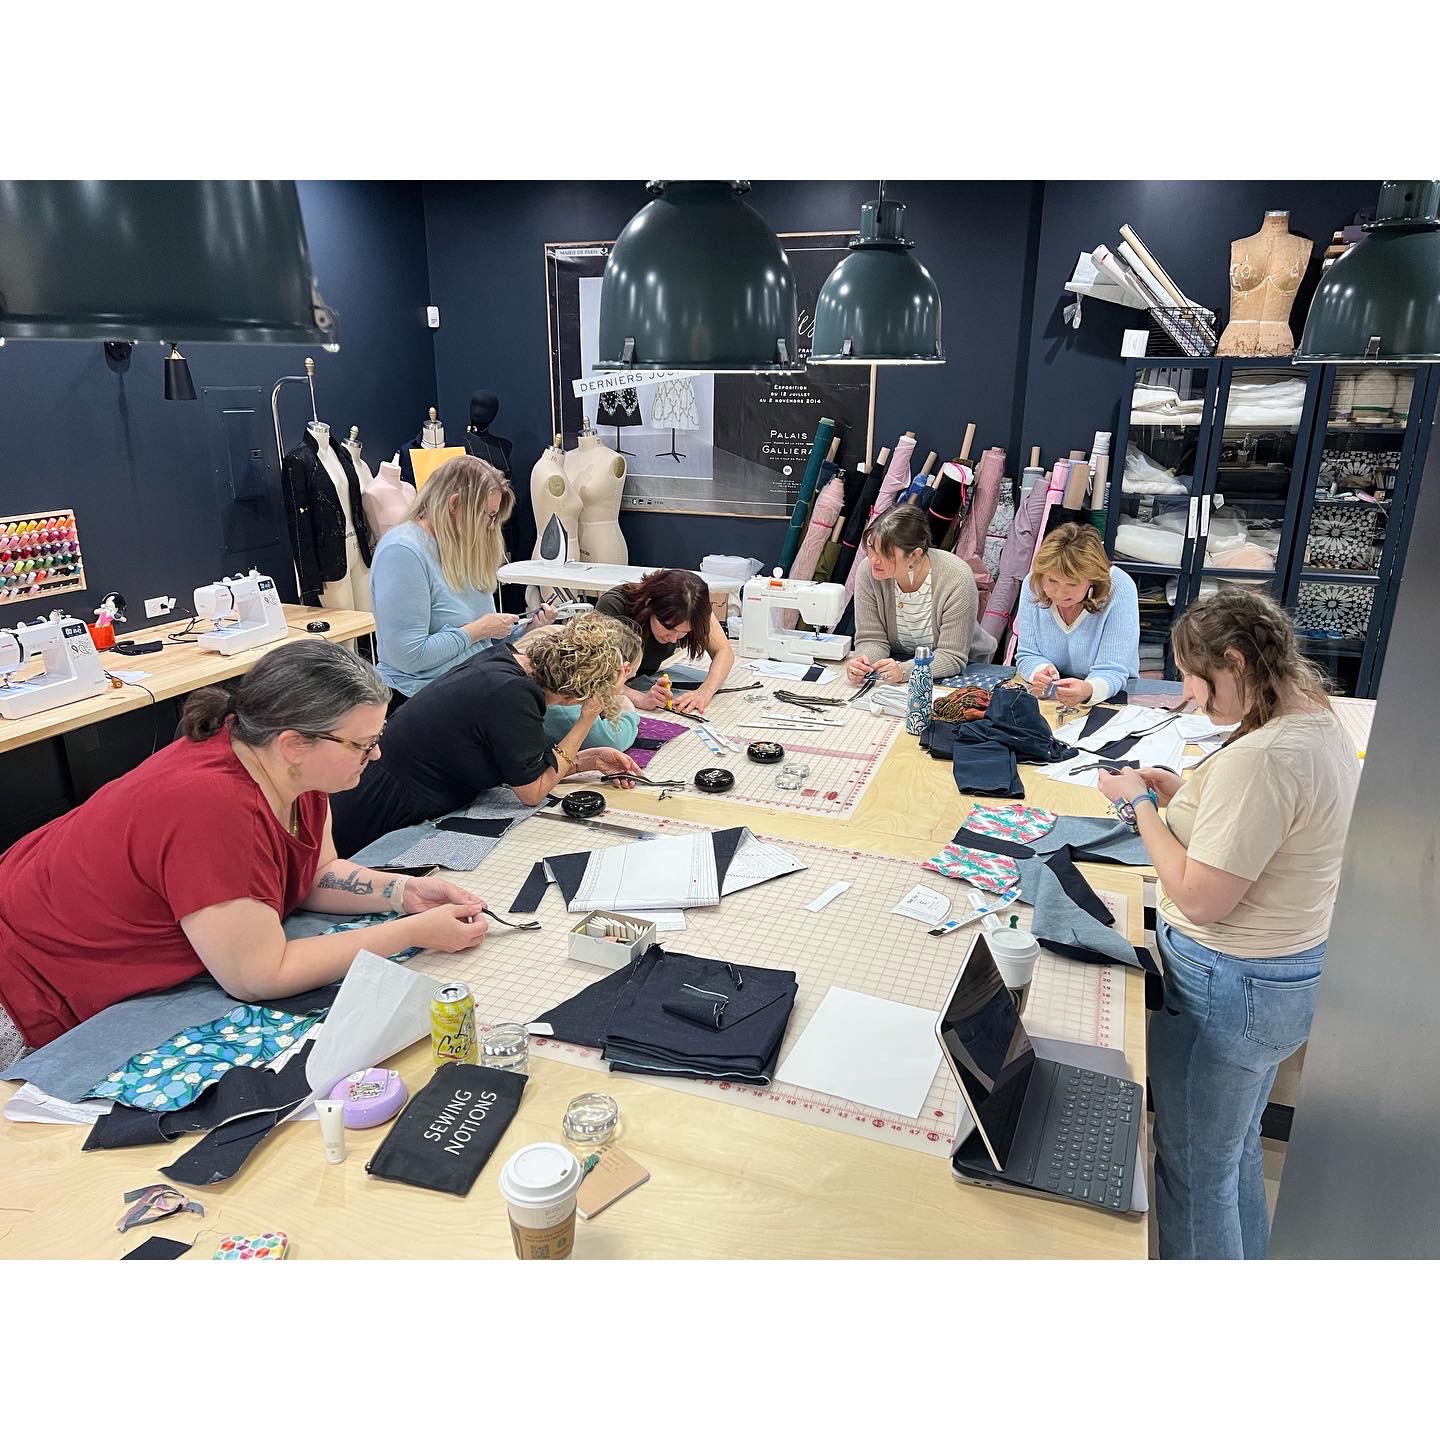
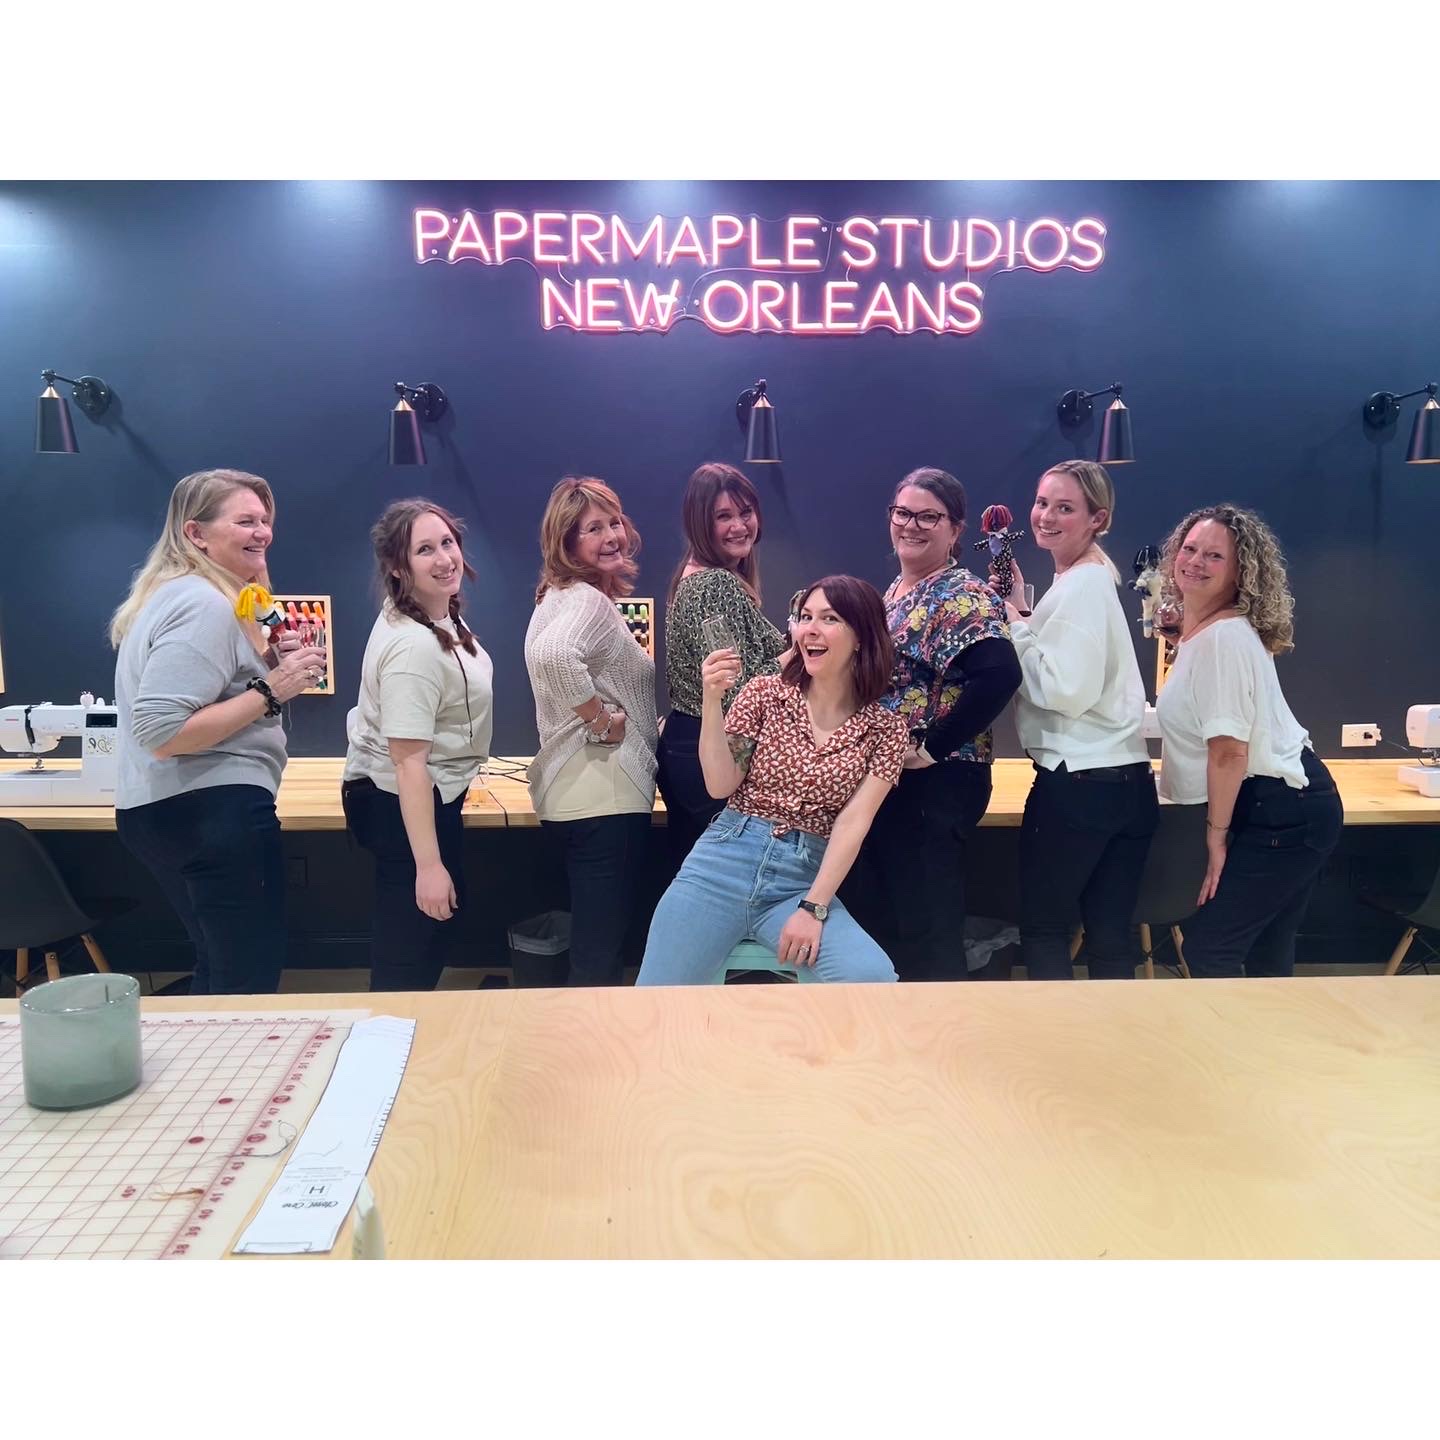
At Papermaple Studio in New Orleans!
At Domesticity in Baltimore!
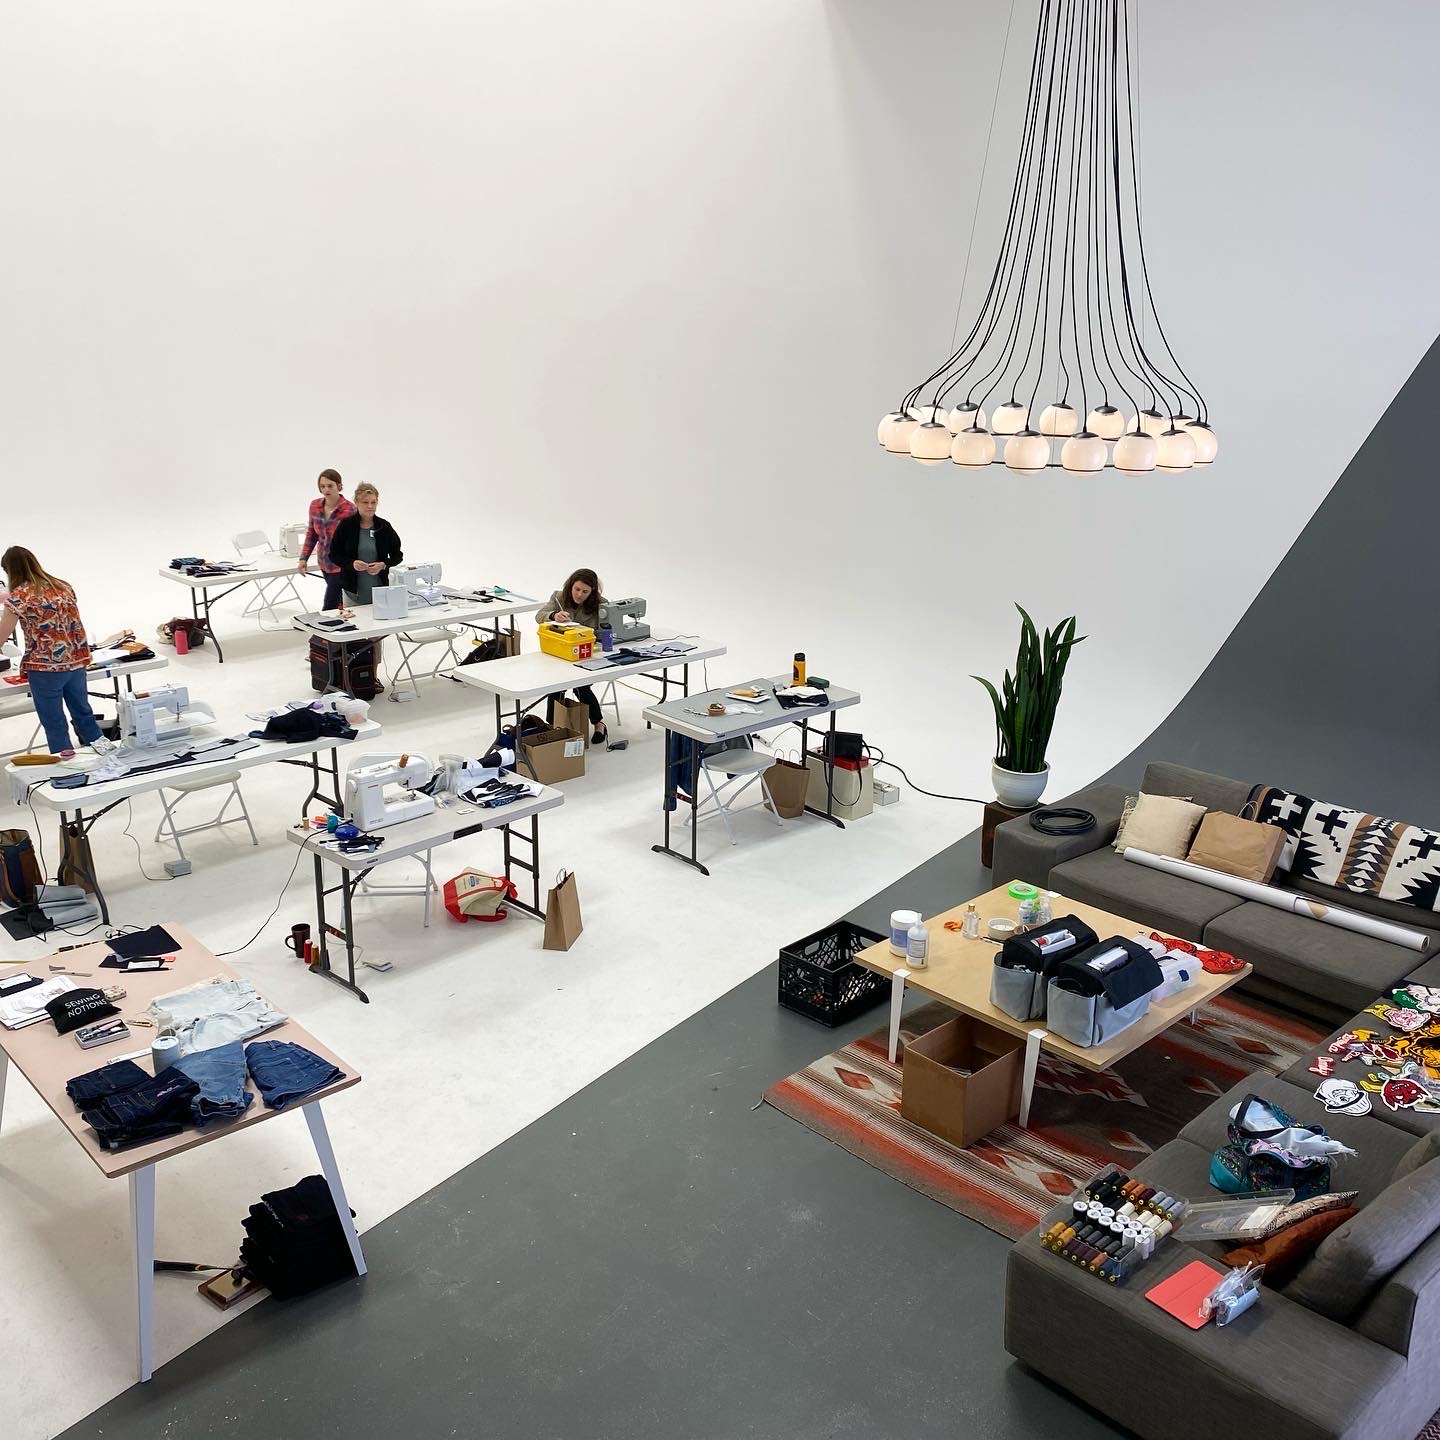
At the Maker’s Hideaway in Washington!
✨MAKE THE MOST OF YOUR WORKSHOP WEEKEND✨
So you signed up for a jeans workshop! Yay! We are so excited to have you in class and I can’t wait to make a lil’ denim believer out of you!! Here are a few tips to help you make the most out of your class weekend:
💙TIP #1: BUY THE KIT💙
Folks, I cannot stress this enough. Please, please… spend the extra money and buy the kit that I recommend for class. Please do not use this as an opportunity to “use up that old Joann’s denim that’s been languishing in the stash for several years.” Nine times out of ten, students will show up with wildly the wrong denim – non-stretch, shirting weight, unwashed, etc. Even if you do show up with bottom-weight stretch denim, the actual amount of stretch may differ from the sample you are trying on which means you will not get the same fit with your finished jeans. My samples are sewn with the exact same denim as provided in the kits, so you can get a good idea of what your finished jeans will also turn out like in terms of sizing, ease, etc. If you want the best possible results and easiest class experience, please buy the damn kit!
💙TIP #2: LET GO OF PERFECTION💙
I know this can be really hard for a lot of sewists – but in my workshops, I really encourage you to let go of any ideas of perfection and just enjoy the learning process! By allowing yourself to make mistakes, you take a lot of stress out of class. Believe me, you are going to have some wonky topstitching, and maybe your first go at bartacks will be kind of horrifying. But rather than spend your time stressing and seam-ripping and hyper-focusing on small details – I encourage you to let it go and embrace the fact that you are learning something new! As you continue your practice at home (on your own machine, with no rushing), you’ll further develop your skills and, yes, continually improve! Furthermore, there’s something really sweet and lovely about looking back on your first go at something and recognizing the vast improvement you’ve made over time.
💙TIP #3: STOP BEING SCARED💙
I know the concept of sewing jeans can be very intimidating, but there is absolutely no reason to be afraid! Can you operate a sewing machine? Do you want to make jeans? Congratulations, you are qualified for this class! In addition to being your (super fun, super awesome) teacher, I’m also your personal cheerleader. I’m here to encourage you throughout the weekend, to tell you that you got this. Bring a notebook (or plan to film lots of video), wear comfy underwear, tell your inner naysayer to shut the fuck up and come sew with us!!
Hope everyone is hanging in there after that doozy of year we’ve just been through. Allow me to grace your feed with a workshop announcement! Yes! We are gonna do some workshops this year, god-willing!
Please note that not all the classes are listed as of this posting (I will update as they are!). I strongly recommend that you follow the shop hosting the workshop, to be notified when the class is listed so you can sign up quickly and hopefully secure a seat! I will update my classes page as workshops as listed, however, I cannot guarantee they won’t be sold out by that point (this appears to be a common theme with my workshops LOL).
All dates and links are listed on my WORKSHOPS page, as well as at the end of this post. For more information, including pricing, please visit the shop’s website or send them an email!
For COVID-19 precautions, most shops are limiting class size to allow social distancing. Also, ya girl is fully vaccinated! Yay!
I also wanted to share with y’all some Frequently Asked Questions, as these tend to pop up regularly any time I announce my workshops. If you’ve got a burning question, please check the list below as I may have already answered it!
WORKSHOP FAQS
What can I expect to learn in this workshop?
My Sew Your Own Jeans Weekend workshop primarily focuses on construction – you will learn all the details that go into making a pair of jeans, including order of construction, seam finishes, topstitching, inserting a fly zipper, attaching a waistband, and loads and loads (and loads) of little tips and tricks sprinkled throughout the weekend. The knowledge you obtain isn’t just jeans-specific – you can use what you learned to apply toward all sorts of future sewing adventures (Denim jackets!! Rad pants! Skirts! Dresses! Bags! Your possibilities are endless!). You will leave with a great pair of jeans, plus the confidence to go home and make more!
Does this workshop cover fit?
We will go over fit, although this is not a fit-specific workshop. The first half day is devoted to choosing our size (including trying on samples!), adjusting our preferred fit, and preparing our fabric for sewing (cutting, marking, etc). We *will* go over minor fitting adjustments as needed for each individual body. We will *not* spend a long time fussing over fit, nor can I guarantee that your first pair will be ~the most perfectly fitting pair of pants you’ve ever worn~. There simply is not enough time in class to allow for us to make multiple muslins for a perfect fit – and to be completely honest, this is hard to obtain without wearing the pants around for a few days to really get an idea of what needs to be adjusted. I don’t say this to discourage you, but rather, to set the expectation of what you will get out of your weekend. We will tweak the fuck outta your pants throughout the weekend (if it needs it – most students find they get a great fit right out of the envelope! #magicpants) and you will leave with something lovely and wearable that I promise you’ll be proud of. Should you need future adjustments, you will be armed with the knowledge to make it happen!
Is this class suitable for plus sized sewists?
Yes! The Closet Core Ginger Jeans pattern is available in sizes 0-32 (up to a 63″ hip). Need a bigger size than that? Holler at me and I’ll get it sorted. This class caters to EVERY size, no butts left behind!
I’m a dude, can I take your class?
Of course! Men (whether cis or trans) are absolutely invited to join us for the weekend! The Ginger jeans pattern can be adapted with minor tweaks for a less feminine fit, or we can adapt a men’s jeans pattern for you. Please contact me in ADVANCE of the workshop so that I can be sure we’ve got the perfect pattern ready for you!
What experience level should I be at in order to take this workshop?
Believe it or not, this workshop is actually quite beginner-friendly! You don’t need to be a sewing superstar with years of experience under your belt. The prerequisites for class are that you should be comfortable threading and operating a sewing machine, and have experience sewing at least one sewing pattern. That’s it, that’s all you need to take this class!
If you are a very experienced sewist with lots and lots of sewing (and maybe even jeans making!) under your belt, I still believe you will learn a lot in this workshop! I have had a vast array of skill levels in my classes – from the total beginner to the seasoned professional – and everyone leaves with more knowledge than they came with.
I don’t like the pattern, can I use a different one? Can I modify it?
I hate to be a fun sponge, but we really don’t have time in class to make huge design changes to the pattern or try to work with something entirely different. That being said, there are downloadable pattern hacks for the Ginger Jeans that you are welcome to bring to class – Ginger Mid-Rise Jeans and Ginger Flares. We can make additional small fit tweaks (such as opting for a looser fit or straight legs, if you’re not a skinny-jeans kinda sewist), but plan on saving the major changes and additional patterns for your home sewing practice!
Will you ever offer this workshop as an online class?
Probably not! Due to the extremely hands-on nature of this course (including the availability of pre-sewn samples for students to try on!), it isn’t very well suited for online. Also, I don’t wanna do online classes! Sorry, I’m selfish!
Will you ever come to _____________ (city / state / country / planet) to teach this workshop?
I get this question a lot, and the short answer is – I’d love to!! My best advice to make this happen is to holler at your local sewing shop and tell them you want to take a LLADYBIRD Jeans Workshop, and encourage them to reach out to me (lladybirdlauren AT gmail DOT com). This allows the shop to recognize that there is already interest in a workshop, which means they are more likely to get the ball rolling in terms of planning one!
MAKE THE MOST OF YOUR WORKSHOP WEEKEND
So you signed up for a jeans workshop! Yay! We are so excited to have you in class and I can’t wait to make a lil’ denim believer out of you!! Here are a few tips to help you make the most out of your class weekend:
TIP #1: BUY THE KIT
Folks, I cannot stress this enough. Please, please… spend the extra money and buy the kit that I recommend for class. Please do not use this as an opportunity to “use up that old Joann’s denim that’s been languishing in the stash for several years.” On the flip side, for your very first pair of jeans – you maybe don’t want to dish out and use something really precious that you’d be devastated to not have turn out exactly right. I chose the materials in my kits specifically for their affordability, reorderability, and the fact that the shop can sell them directly to you (which in turn supports the shop). My samples are sewn with the exact same materials, so you can get a good idea of what your finished jeans will also turn out like in terms of sizing, ease, etc. If you want the best possible results, please buy the damn kit!
TIP #2: LEFT GO OF PERFECTION
I know this can be really hard for a lot of sewists – but in my workshop, I really encourage you to let go of any ideas of perfection and just enjoy the learning process! By allowing yourself to make mistakes, you take a lot of stress out of class. Believe me, you are going to have some wonky topstitching, and maybe your first go at bartacks will be kind of horrifying. But rather than spend your time stressing and seam-ripping and hyper-focusing on small details – I encourage you to let it go and embrace the fact that you are learning something new! As you continue your practice at home (on your own machine, with no rushing), you’ll further develop your skills and, yes, continually improve! Furthermore, there’s something really sweet and lovely about looking back on your first go at something and recognizing the vast improvement you’ve made over time.
TIP #3: STOP BEING SCARED
Don’t be skeered, y’all! Can you operate a sewing machine? Do you want to make jeans? Congratulations, you are qualified for this class! In addition to being your (super fun, super awesome) teacher, I’m also your personal cheerleader. I’m here to encourage you throughout the weekend, to tell you that you got this. Bring a notebook (or plan to film lots of video), wear comfy underwear, tell your inner naysayer to shut the fuck up and come sew with us!!
Sew Your Own Jeans Weekend Workshop December 4 – 6, 2021 Sew With Sonia, Menlo Park, CA
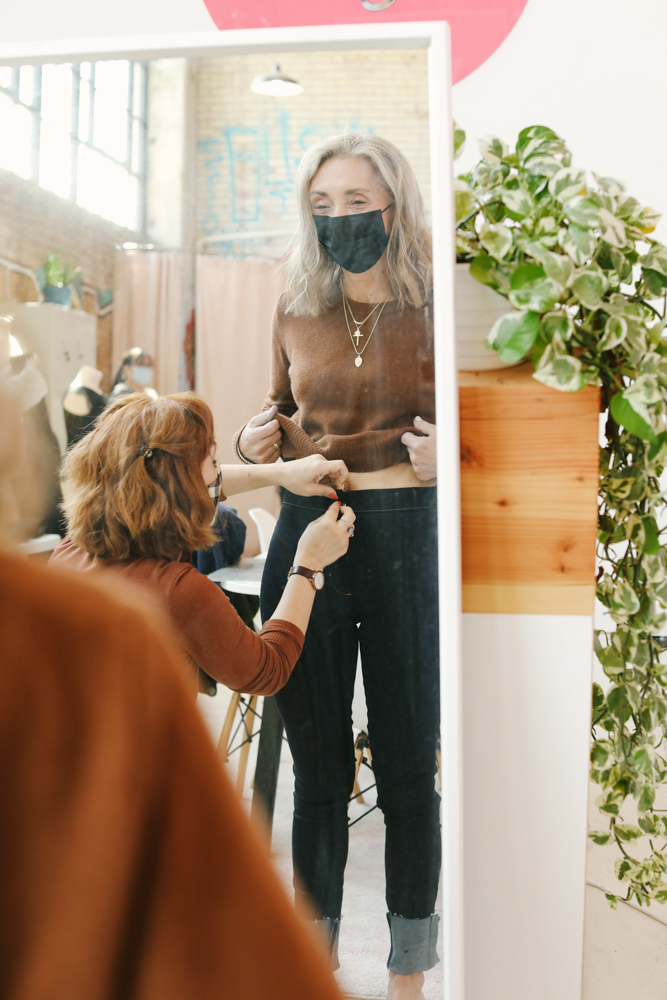
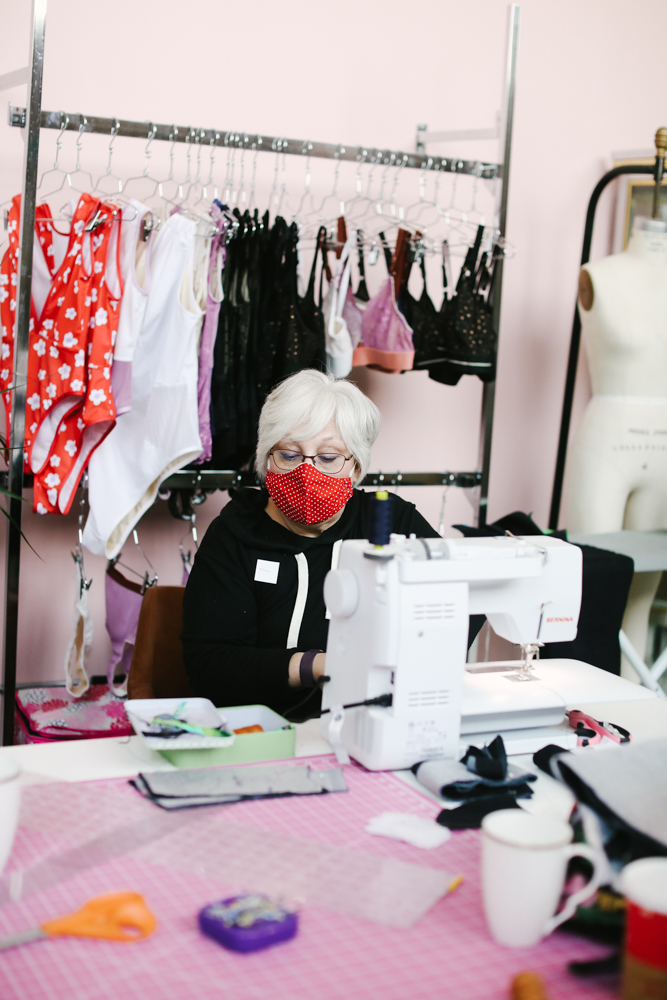
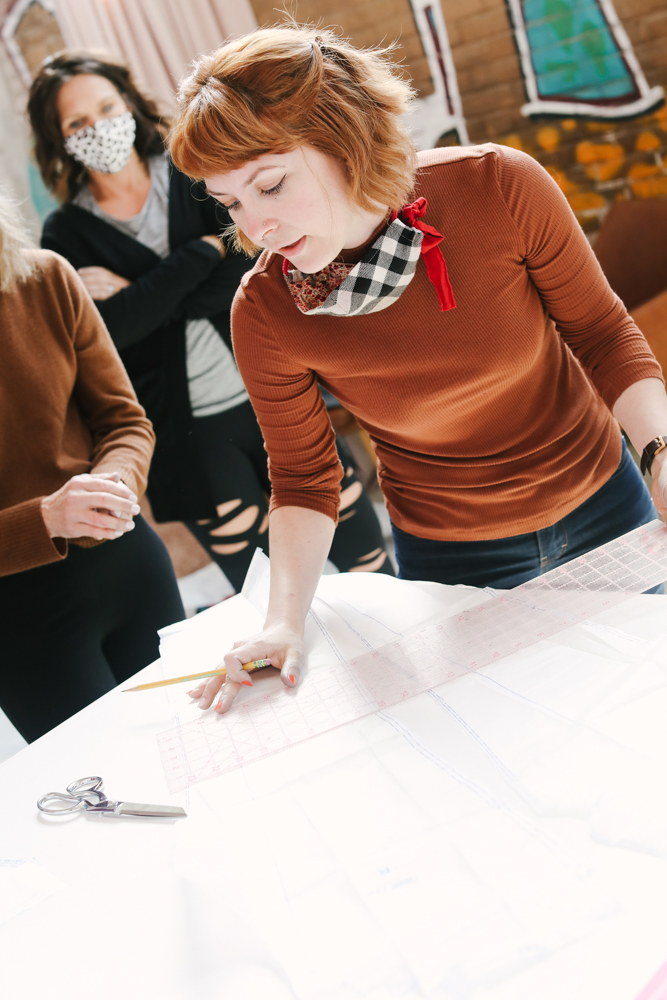
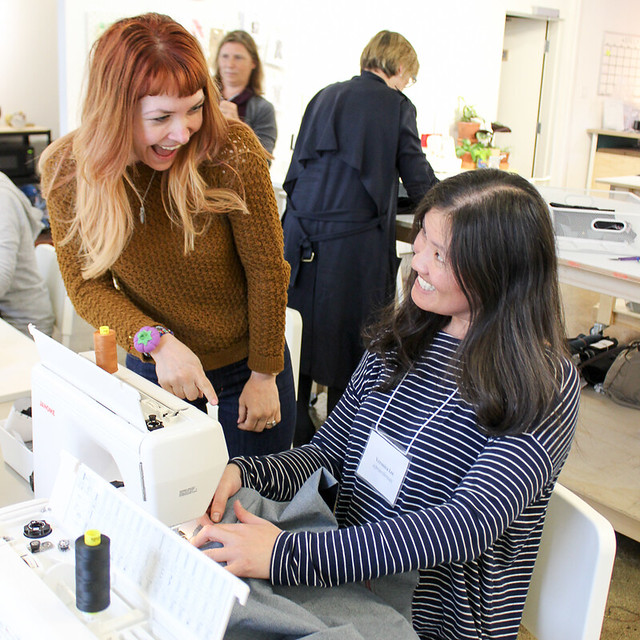
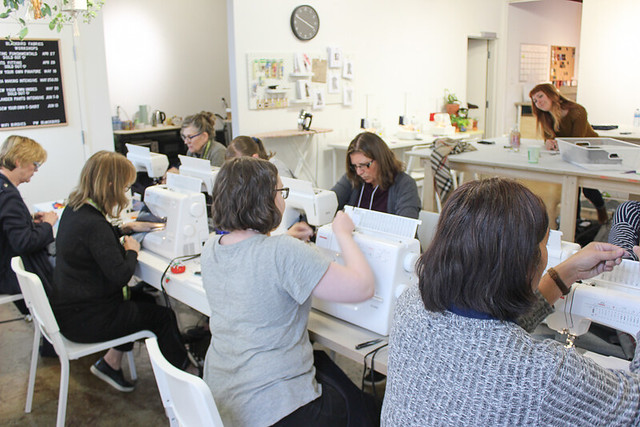
Note: All images in this post were taken by Madalynne, at her studio workshop this past April! If you are a Philly local and would like to take a workshop in a very beautiful, very pink environment with your own personal paparazzi that makes you look like a sewing model with every shot, come join us this Labor Day Weekend! 🙂
Hey friends! I hope everyone is doing well and staying healthy during these strange times. I think most of us are firmly in the “stay home and self isolate” camp (at least, I hope all y’all are! STAY HOME!!) (except for those who are, of course, on the front lines – thank you, thank you, THANK YOU, for your sacrifices every single day. Y’all the real MVPs <3), and while it’s a great excuse to catch up on all the projects we’ve been putting off… I know I’m not the only one who is experiencing a dip in their creative energy. It’s not surprising; stress can really do a number on your mental health and overall energy, and sometimes the first thing to go is the desire to do anything other than [barely] survive. However, for me – and I’m sure this can be said for a lot of us – being creative is what brings me joy, so it is important that I make at least a tiny effort every single day. Sometimes that means I sew, sometimes I draw, sometimes I just read. And sometimes I want to sew, but not necessarily start a new project. This is where alterations are so useful! I can get a little bit of sewing in – 20 to 60 minutes – and let my brain have a little stab at problem-solving. Plus, it feels pretty good to take something previously unwearable and make it wearable!
So with all that being said – today I want to share a tutorial on how to alter the waistband of your jeans! This is something you can do on both handmade and ready-to-wear jeans (I actually perform this alteration frequently for clients as one of my side-gigs). You can of course use these steps for any waistband adjustment – trousers or skirts for example – just be aware that some steps may differ depending on what you are working on.
I am sorry in advance for the quality of the photos. I originally shot these with the intention of posting them on Instagram, but while typing my caption i realized it was too long for the app! So I’m moving it here to a blog post (and I can’t re-shoot the steps since, well, all my pants fit now! LOL). For more mini-tutorials and pro tips, please follow and/or occasionally check in on Instagram – the hashtag is #lladybirdprotips
Some notes about this process – as I mentioned, this is not technically jeans-specific, as you can use this process to alter any waistband, including trousers and skirts. Keep in mind that anything you alter without belt loops will mean a visible waistband seam (which I personally thing is a worthwhile trade-off for having a fitted waistband, but you can be the judge of your own wardrobe!). If you don’t like the idea of a visible waistband seam, you can either re-cut a new waistband (I keep leftover fabric from projects specifically for this purpose!) or remove volume from multiple areas (which would make the adjustment appear more of a ~design element~ rather than an alteration).
When determining the amount of take out of your waistband, you will be tempted to overfit. Don’t do this. You want to aim for snug, but not tight. It’s hard to really articulate this into specific words, but I’ll try. A waistband should not have negative ease (unless it’s super stretchy), but should be quite close to your own actual measurements, if not slightly larger (no more than 1”, but this will vary based on body shape and personal preference). For me, I like a waistband that is fitted enough to only allow a couple of fingers, but not so snug that it gives me back fat / love handles. I know with some body shapes, this can be unavoidable – so use your best judgement, and understand that it’s totally fine if you end up needing to re-adjust later down the line. It’s a learning process, after all! Better to not take out enough and need to re-do the adjustment (think of it as another chance to practice, rather than that you did it “wrong” the first time), than take out too much and render the pants unwearable. Because of this, I tend to err on the side of a looser waistband when first sewing my pants, with the understanding that I can always make adjustments later down the line. Sometimes your fabric – especially if you are working with a rigid denim – takes a bit of wearing and washing before it really settles into its shape. A LOT of my pants start out needing a belt for the first few wears, then the waistband shapes itself over time and washing. I recommend waiting a couple of months before doing this alteration!
I know a lot of people recommend adding darts to your yoke to get a better fit, or subbing a curved waistband. While these are certainly viable solutions, I personally find a curved waistband uncomfortable (and it’s something you rarely see in RTW – most waistbands are cut straight and eased in) and I think darts in a yoke look terrible (there, I said it! Fight me!). So my method is a little different, but it works! Try it!
Now, without further ado- Altering the Waistband of Your Jeans: A Lil’ Tutorial!
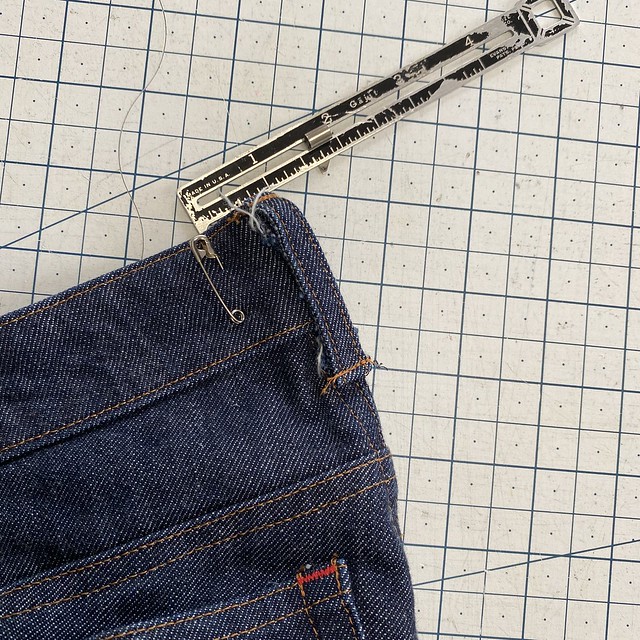
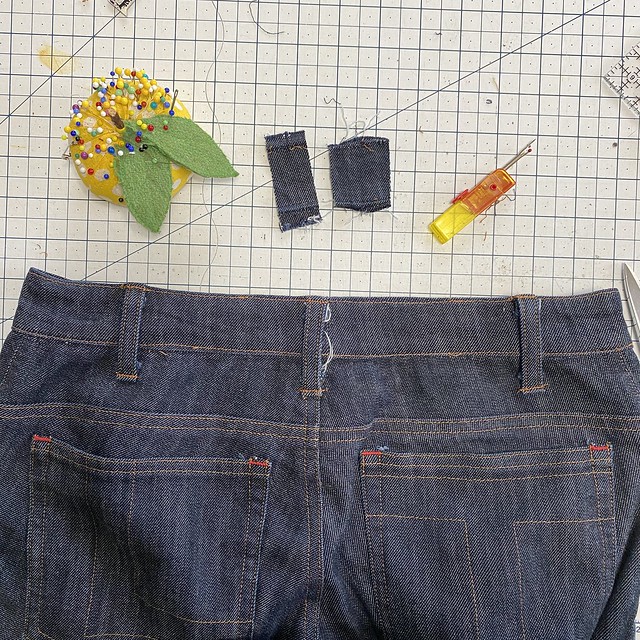
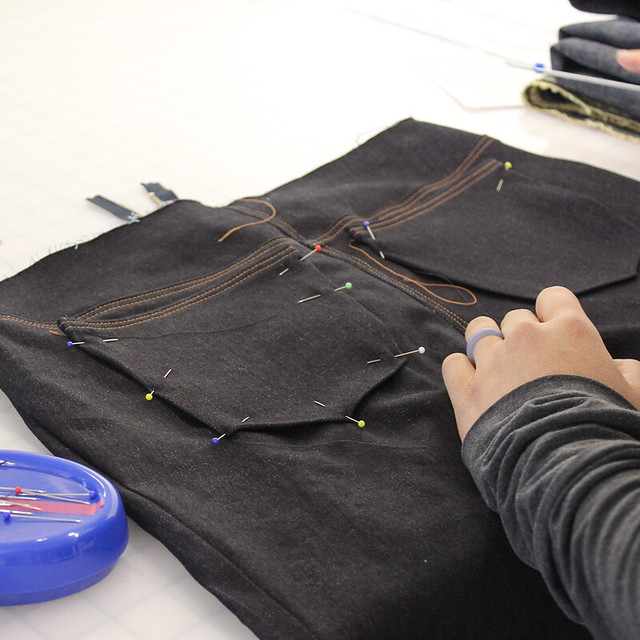
1. Try on your jeans and pinch out the center back waistband until it fits snugly. Pin this measurement (or use a binder clip), and then measure the distance from the pin to the fold. This is how much you will need to take out- in my case, 1” total. Don’t worry about doubling the measurement or anything, we aren’t mathing here! If you are fitting yourself, you may need to pinch the side seam rather than the center back.
Trying to figure out if you just need to adjust the waistband or the whole back of your pants? A good rule of thumb is if it fits everywhere *except* the waistband (like you just need a belt to snug it up, or else the waistband shelfs open when you sit down)- then you will just work on the waistband. If you’ve got quite a bit of extra space down the center back of your pants as well (like you can easily shove your whole hand down there), then you will want to also take in the center back seam in addition to the waistband. If you’ve got loads of unnecessary room everywhere in the back, you probably just cut a size too big – so take a bit out of the side seams in addition to the center back. Don’t be afraid to pin shit until you’ve got a fit that feels good!
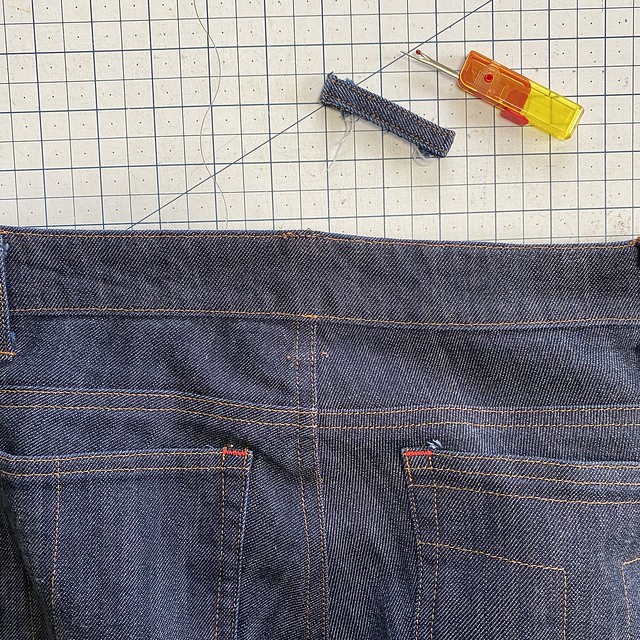
2. Ok, time to start unpicking! Completely remove the center back belt loop, and remove the bottom stitching lines from both side back belt loops.
3. Remove the back waistband from the jeans, from side seam to side seam. Depending on how much you are taking out of the waistband, you may be able to get away with unpicking less (although I tend to err on the side of removing more than less, since you’ll be closing the whole thing up later anyway). I do not recommend unpicking far beyond the side seam!
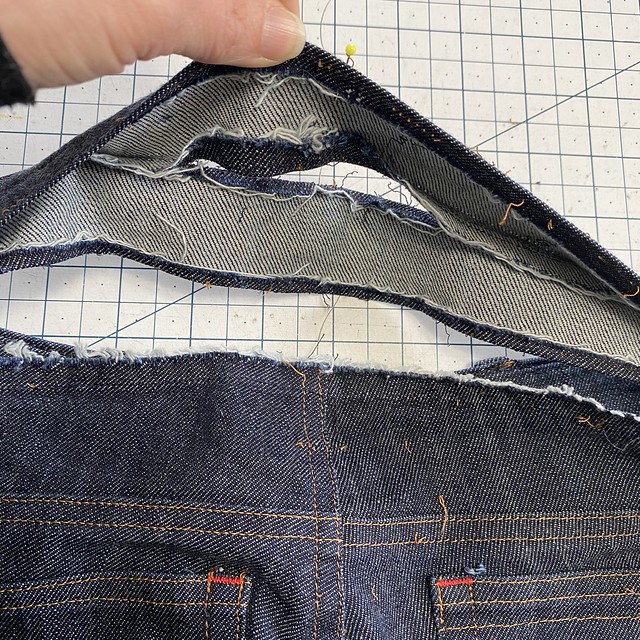
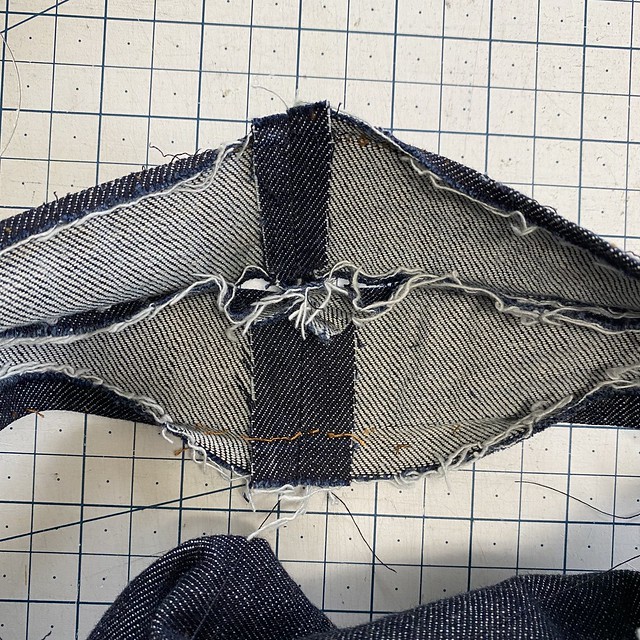
4. Remove all top stitching and under stitching from all sides of the waistband, so that you can completely separate the waistband from the facing. You don’t need to unpick completely from side seam to side seam here – 3”-5” is plenty, depending on how much you are taking out. If you are removing understitching, you will need to unpick about 1” of top stitching beyond the understitching on either end. Mark the center back of the waistband (I used a pin here).
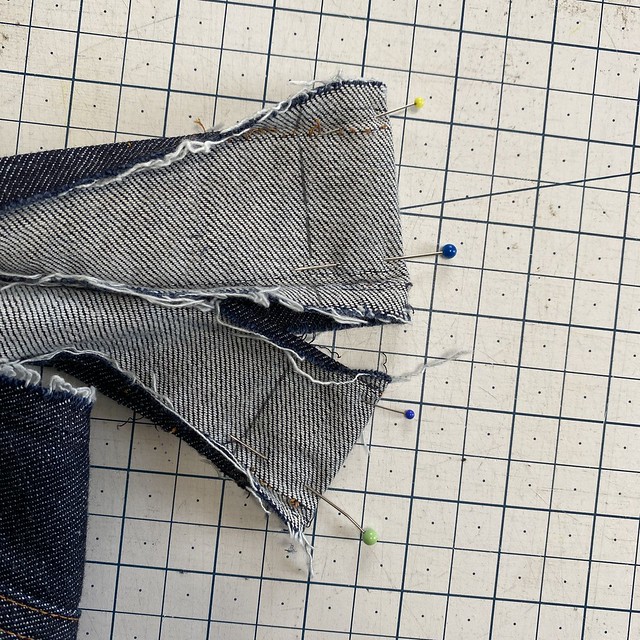
5. Fold the waistband at the center back together short ways, with the right sides facing, and open out all folded seam allowances so it is completely flat. Sew a new seam line from one end to the other, with the distance from the fold being whatever measurement you took in step #1. Repeat for the waistband facing.
6. Cut open the fold, trim seam allowances if needed (I like to trim my facing seam allowances slightly shorter so there isn’t a bunch of bulk right at the center back), and press both seams open.
7. Sew the waistband and the facing together along the top edge, and understitch.
8. Pin the center back seam of the waistband facing to the center back seam of the pants, with the right side of the facing against the wrong side of the pants, then ease the top edge of the pants to match the new length of the waistband (no photo, sorry!). You will probably need to pull the waistband quite a bit to stretch to fit (#unintentionalpoetry), but it can be done! I took out 2” total from my waistband (1” on the fold), using a very low stretch denim cut on the cross grain, and was able to ease it in with some womanpower. If your fabric is very rigid or you need to take out a lot, you may want to unpick the top stitching from the center back seam of the pants and remove some of the excess there, grading to nothing along the CB seam line. Use your best judgement here!
10. Now sew the facing to the top edge of the pants, pulling the waistband to stretch and easing the top edge of the pants to fit (pro tip – keep the facing on top and the pants against the feed dogs of your machine. This will kept ease the excess fabric, as well as give you more control over stretching the waistband). Press the seam allowances up toward the waistband, steaming out any ease wrinkles at the top edge of the pants if necessary.
11. Now just sew everything back together! Pin the waistband on the outside to cover the previous stitching line, then topstitch along the top edge of the pants. Topstitch the waistband to the facing along the top of the waistband. Re-attach the center belt loop (which ideally will cover your CB stitching line) and the bottom of the side back belt loops. Give everything a good press and you are done!
And that’s it! Honestly, this is a very easy (and very emotionally fulfilling!) adjustment – I think writing this blog post might have taken longer than actually making the alteration! I encourage y’all to give this a whirl if you have a pair of jeans that’s just a little loose in the waist – even the smallest adjustment can make a huge difference!
Alright y’all, I’m back with one more jeans post – the ~Designer Jeans~ Edition!
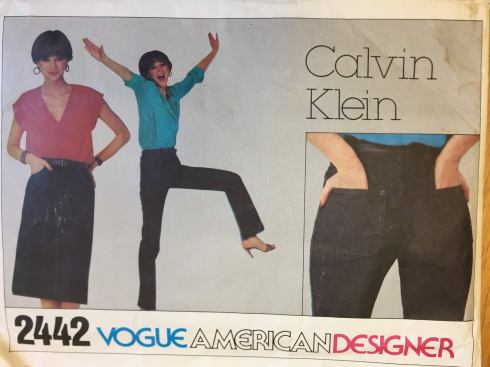
Thanks to Vogue 2442, I was able to make my own pair of Calvin Klein jeans 😀
Before we get too far into the post, though, I just want to acknowledge how absolutely stupid this envelope cover is. You can barely see any of the details of the jeans (although the butt close-up is helpful, and to be completely transparent here, it’s a nice butt), and I don’t know why that woman is holding her leg up like that because you definitely can’t do it in these jeans. Nothing about this cover art (or lack thereof) makes me want to try this pattern, but nevertheless, I persevered. For science.
Anyway, here are mine!
I went down a little rabbit hole last fall while looking at vintage jeans. I reaaaaaally wanted some vintage Calvin Kleins, if only for the brag factor, but my budget currently doesn’t allow me to spend hundreds of dollars on someone’s used jeans (RIP, the vintage market). I considered sewing them, but recalled looking up vintage CK patterns years ago and they were going for obscene wads of money. Just out of curiosity, I checked again – and was surprised to see that there are plenty to choose from for $10-$20. Calvin Klein licensed his name to Vogue patterns a bunch throughout the 80s and 90s, occasionally offering a jeans pattern. There were loads of mom jeans to choose from (including a truly horrifying Vogue 2851, I mean, come on) but I went with the OG, the Vogue 2442 from 1980. In the effort of being as science-y as possible, I re-measured myself and chose the size that closely matched my measurements – in this case, the 8.
It took me a while to find a suitable denim to make these up – I wanted something non-stretch (as the pattern calls for – this was before stretch denim was really a thing!), but not too heavy, and a lighter wash. A bunch of the stuff I was coming up with ended up being way too lightweight, or had too much stretch, so this project ended up being shelved for longer than I would have liked.
As you can see, I did end up finding a great denim – from Art Gallery Fabrics, of all places! I’ll admit that Art Gallery Fabrics wouldn’t be my first thought when it comes to denim, but they’ve been expanding their denim gallery and I was curious to see what the offerings entailed. There is a great selection of lightweight (4.5oz, like what you’d use to make a button-down top or a sundress) denims, both printed and dyed various colors. The heavier denims clock in at 10oz (which is the lighter end of a pants-weight denim, and my personal preference), and come in a smaller selection of colors, nonstretch only.
After playing with some swatches, I chose the Crosshatch Textured Denim, in the Bubbling Brook colorway. My other choice was the Solid Textured Denim in Bluebottle Field, but that was sold out, so hopefully I can try it out in the future!
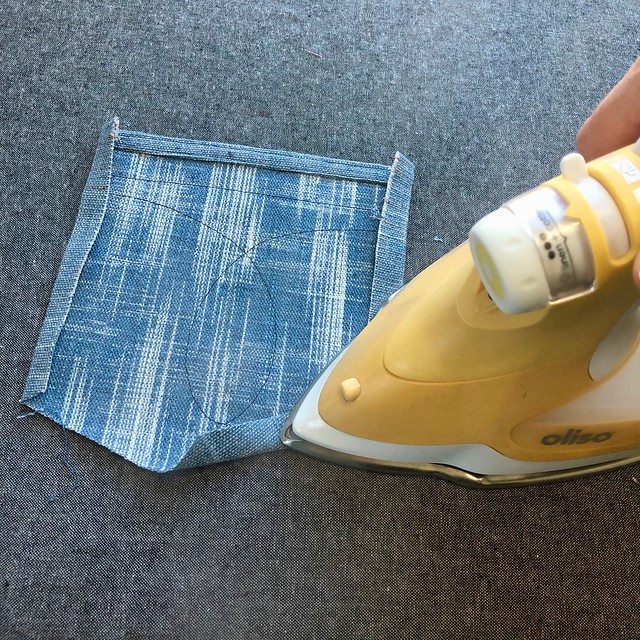
Anyway, about the Crosshatch Textured Denim! First off, you probably noticed that my jeans don’t exactly have a crosshatched design on them – that’s because you are looking at the wrong side of the fabric, baby! I actually don’t mind the crosshatch look, but upon receiving the fabric I fell in LURVE with the less contrasty wrong side of the fabric, so that’s what I went with on my jeans! My sewing project, my rules! The denim was pretty stiff and definitely not soft upon first receiving; but did get really soft and supple after just one wash. Be warned that it frays a lot, though – you’ll want to make sure you finish your seams (whether serging, or zigzaging, or even binding them) because otherwise the inside of your garment will get real hairy, real fast. If that bothers you, I mean. You do you.
Other than the fraying part, this denim was easy to work with. I recently got an Oliso Steam Iron (yes, the little iron that stands up when you stop touching it and yes it never ever stops being hilarious, no matter how much I use it) and this was my first real project to use it on. It doesn’t get quite as melt-your-hands-off-hot as my industrial gravity feed iron does (granted, this is cotton, so it doesn’t really need to be beaten into submission haha), but it heats up quickly, delivers a satisfying steam burst, doesn’t auto shut off every 2 minutes, oh, and IT STANDS ON IT’S OWN LITTLE FEET. My only regret in life is that I can’t find my stick-on googly eyes, because this iron needs eyeballs. Ok moving on.
So, more about the pattern itself! Like I said, I went with the size 8, which was based on my current measurements. I did not make any prior fitting adjustments or a muslin before cutting my fabric – I just went for it! I wanted to see what would happen! (this might be my new motto for 2020). Fit-wise, this was almost perfect right out of the envelope. I did end up making a few minor tweaks before I attached the waistband – because I am extra, and I like fiddling with things! – but if I hadn’t done anything at all these still would have absolutely been wearable.
Adjustments I made:
– Removed 1/2″ from the inner thighs, keeping the crotch length intact
– Scooped 1/8″ from the front crotch curve
– 5/8″ wedge at the center back yoke + waistband
– Cut 5″ total off the hem (I have a 28″ inseam, y’all lmao)
Sorry I didn’t take before photos, but these were all minor tweaks that didn’t translate very well in a photograph. Also, when I’m fitting, I don’t want to stop to take a bunch of weird ass selfies. Sorry, not sorry! Looking at these photos, I see I could have removed a little more from the inner thighs (as evidenced by the horizontal wrinkles pointing directly at my butt), but I can assure you this is a big improvement from the start, and I actually think they look worse in the photos than in real life! But, you know, it’s good enough. I spent far too much of my past sewing days overfitting myself to the point of frustration (and sometimes, actual discomfort). Nowadays, when I feel like I’m done fiddling with it, I just stop. As long as it’s not actually uncomfortable, I think it’s good enough! It has been very liberating and I encourage y’all to consider the same outlook 🙂
The instructions on this pattern certainly were interesting! As someone who’s made loads and loads (and loads) of jeans, these were a little more based on the home-sewer, rather than how RTW jeans are made (granted, I don’t have access to vintage jeans at this time, but the 1980s isn’t exactly the same type of vintage as, say, the 40s, and generally the construction methods back then were more similar to how they are now, i.e., serging seam allowances and such). As this is an older pattern, it wasn’t common for the average home sewist to have a serger – so the instructions include turning under edges, or finishing seams with a zigzag or overcast stitch. Interestingly, there is NO interfacing called for in this pattern (I interfaced the fly facing + outer waistband, out of habit and because I know that gets the me the result I like), but they do have you add twill tape to the top and bottom edges of the curved waistband to keep it from stretching out (that was a no from me, dawg). The other weird thing I noticed was that they have you double topstitch the side seams, and not the inseam. I also skipped that part (I prefer a stronger inseam, thnx) and did it my own way. However, I did follow the instructions for the most part.
The pattern includes a back pocket topstitching design, front pocket stays (pocket lining is also from Art Gallery Fabrics, fyi!), and a two-piece curved waistband. The pants are fitted at the waist, hips and thighs, and then the leg goes straight down (which is not what the line drawing suggests; they look a little more tapered on the envelope). Since my denim is such a light color, I opted for a pale brown topstitching thread (my beloved Gutterman Mara 70), rather than gold or copper. I alter a lot of jeans for clients and one thing I’ve noticed is that most jeans use brown thread, not gold or copper! My rivets and buttons are from the Garment District (I think these rivets might actually be for bags, but whatever, I like them); I had 1 extra rivet so I attached it to one corner of the back pocket. I saw this on a pair of jeans the stylist I work with was wearing, and while I normally hate rivets on back pockets, I thought it was kinda cute.
My only issue with this pattern is the two-piece curved waistband. Since it’s in two pieces, that means there a seam at the center back – great for fitting, but it also means a lot of bulk at the center back when the inner and outer waistband are sewn together (and then later, a belt loop is sewn on top of that). I also admit that I was running on fumes by the time the waistband facing was attached, so it’s not my best work. But, it’s on the inside, so who cares!
Overall, I enjoyed making this pattern and I think the finished jeans turned out great! I love the high waist (better for wearing crop tops with!), and the straight legs are a big style departure from my usual look. I love the lighter wash and subtle texture of the AGF denim, and I love love LOVE how soft it is! I don’t feel like I even really need to break these in, which is wonderful! If you’ve been looking for a good non-stretch, not-too-heavy denim, definitely check out what Art Gallery Fabrics has to offer!
** This post was sponsored by Oliso. All fabrics were provided by Art Gallery Fabrics. As always – all thoughts, opinions, and weird ideas are my own! **
Hello everyone and welcome to my third installment of Operation-Jeans-Drawer!
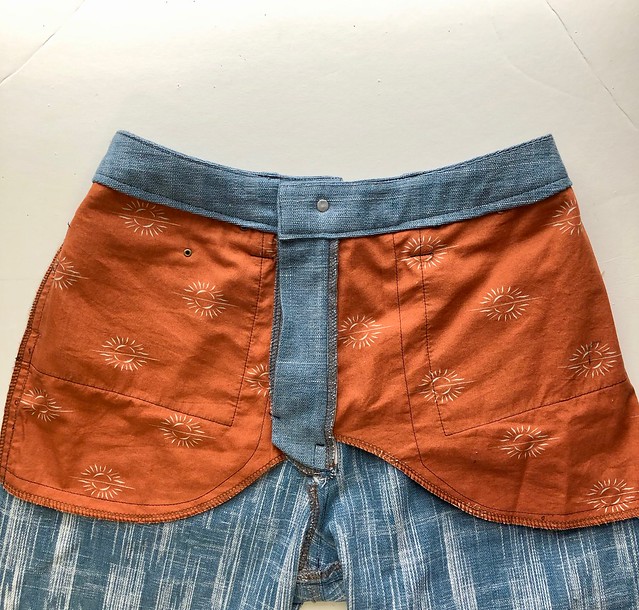
This time, I’m sharing the Dawn jeans by Megan Nielsen. This is another great jeans pattern that, again, has some major differences from the other 2 that I previously shared. I don’t like to say that I have a “favorite” jeans pattern – since they are all so good and serve different purposes! – but right now, I gotta say, this is the one that is getting sewn the most in my studio these days. I shared the first pair I made at last year, and they still get lots of wear (they’ve truly broken in beautifully). I’ve actually made the shorts several times this summer, but this is only the second time I’m sharing the pattern here on this blog.
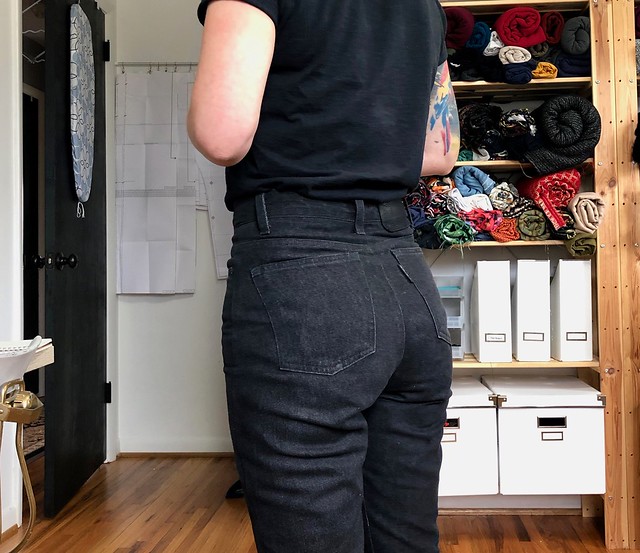
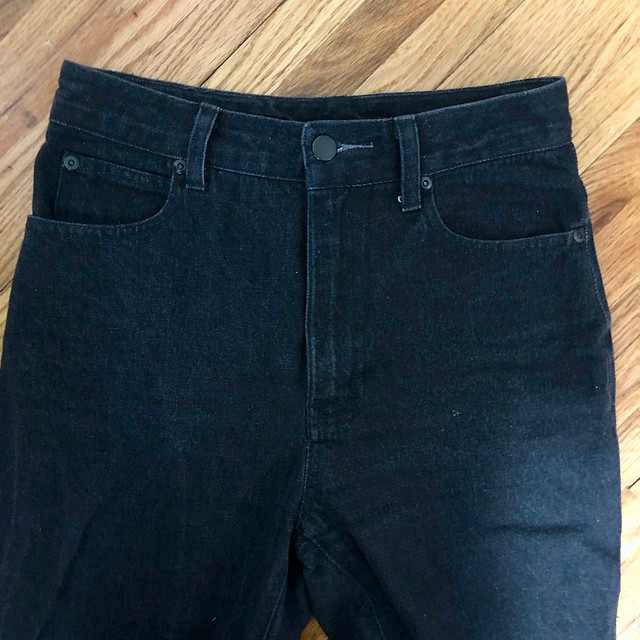
So, again, I can’t really compare these jeans to the Ginger or the Claryville since they are very different – but I’ll tell you what their key features are: BODY TYPE: I don’t think these are necessarily designed for a specific body shape? I will say that they fit me pretty well straight out of the envelope. I did not make a muslin, just cut according to my measurements on the envelope. FIT: These are slim-fitting, rigid jeans with a high, high waist! Like, the rise will completely cover your belly button (I love it!). If this is not your jam then this definitely is not the pattern for you lol. They aren’t a true “mom” jean – the legs and hips are a little more slim fitting than that – but they do have that suuuuper high rise. I should also add – the standard size pattern comes in sizes 0-20, and there is also a Curve range that includes sizes 14-30! Yay! FABRIC: You want rigid denim for these! No stretch whatsoever! The good news is it means you don’t have to interface anything except maybe the fly facing (yup, I don’t interface my waistband! Not even at the button hole! Fight me!). The not as good news means that these are not gonna be the most comfy jeans you ever wear. I don’t mean to say that they are uncomfortable… I just mean, you can’t do, like, yoga in them (I can, and have, done yoga in my Ginger jeans lmao). I would not say the jeans are tight so much as they are restrictive. I hope that makes sense. Think pencil skirt vs circle skirt. I love them and I wear them all the time but I will be damned if I wear these on a 5 hour cross country flight, you know what I mean? Also, there is no law saying you can’t make these with stretch denim (def size down tho) but why? Just use a stretch pattern, save this one for those cool rigid denims, twills, and corduroys that you don’t know what to do with!
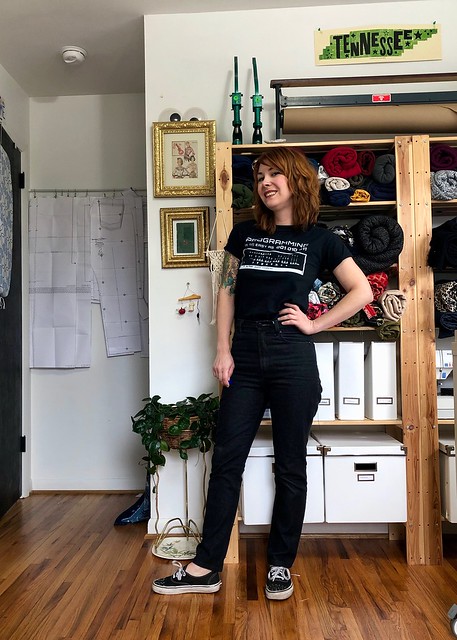
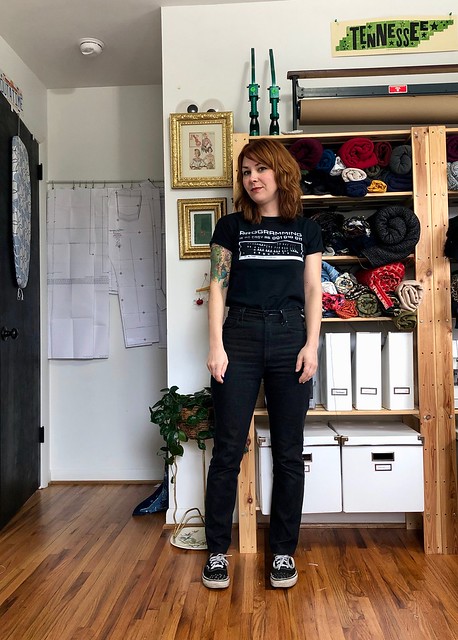
So, with that out of the way – here’s my newest pair! I wanted some black jeans because I made black shorts for the summer (also with the Dawn pattern) and I got a surprising amount of wear out of them. This fabric is a rigid denim from Darrell Thomas Textiles, which I bought when I was there this summer for a Jeans Workshop. When I say “rigid,” I mainly mean denim with no added stretch. A little bit of mechanical stretch is good. I have learned that I don’t like the suuuuper rigid denim that does not stretch at all; I find them hard to move in (granted, most of my moving involves a lot of squatting and crawling around the floor so maybe that doesn’t apply to you lol). Anyway, this is a nice denim and no I don’t know the weight! I felt it, it felt good, I bought 2 yards.
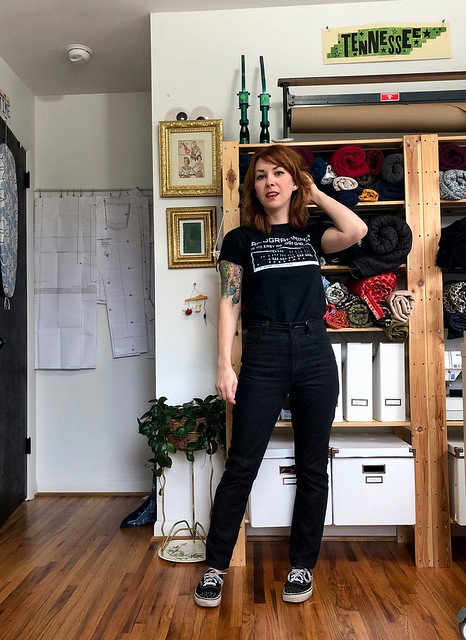
My only grief with this style of jean is the time that it takes to properly break in. Ugh! Like I said in my previous post, washing them a lot up front does help quite a bit. But you do still have to wear them around and get the wrinkles to soften up and have the denim mold to you body. One of these days I’ll woman up and sit in a bathtub full of warm water with the jeans on and let them dry that way. I’m not brave enough quite yet to try that tho lol. Please don’t be scared of my talk about the breaking in… it’s really not that bad, and it is ABSOLUTELY worth it. But if you make these jeans and they are super uncomfortable… that’s why! Give them some time (and WEAR THEM!) and they will soften up quite a bit.
Anyway, this denim wasn’t too bad as it was already pretty soft. I washed it three times before I cut it (I always do this with new denim) and that helped a lot. As you can see in these photos – it does relax out (compare these to the Dawn Jeans in my first post and you’ll see what I mean. They are the same size, those were just more fresh!). What you’re seeing is a pair of non-stretch jeans that I wore for probably a week without washing. They don’t bag out so much as they just relax. Yes, there are wrinkles under my butt but they are there to help me move. Otherwise I don’t think I’d be able to sit in these things haha.
Size-wise, I made a straight 4 but ended up letting the hips out a little. I think my hips are more in the size 6 range now, which makes sense (when I originally made these, the size 4 was fine but since then I have gained weight and also had to let my original ones out lol). I also reduced the height of the yoke by 1″ because it was too tall for me – I just ended up with a 1″ fold right in the middle when I put them on, so I cut it off the top. Finally, I also adjusted the pocket bags on this pattern. They are CRAZY deep. Like… I understand wanting deep pockets (I guess, I dunno, I don’t really use my front pockets) but with pants this tight they are absolutely fucking useless. I just cut the bottom curve off so now they are straight. Mainly it was really annoying trying to push them back into place after using the bathroom, and not being able to reach the bottom. They were THAT deep. Absolutely useless.
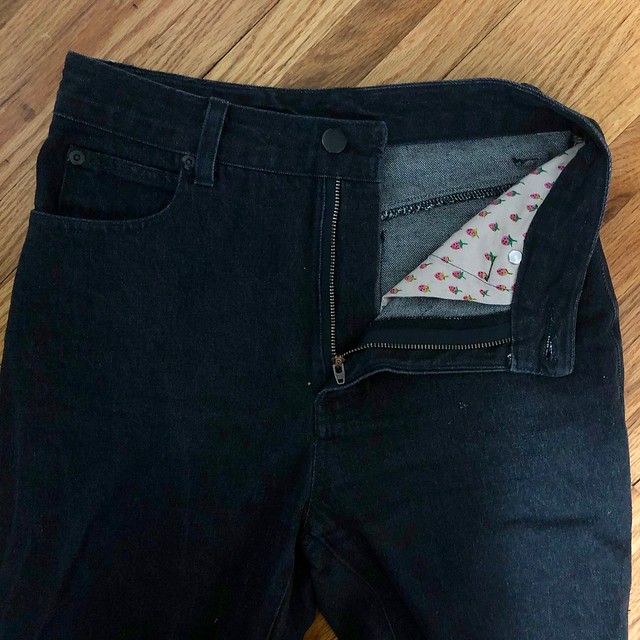
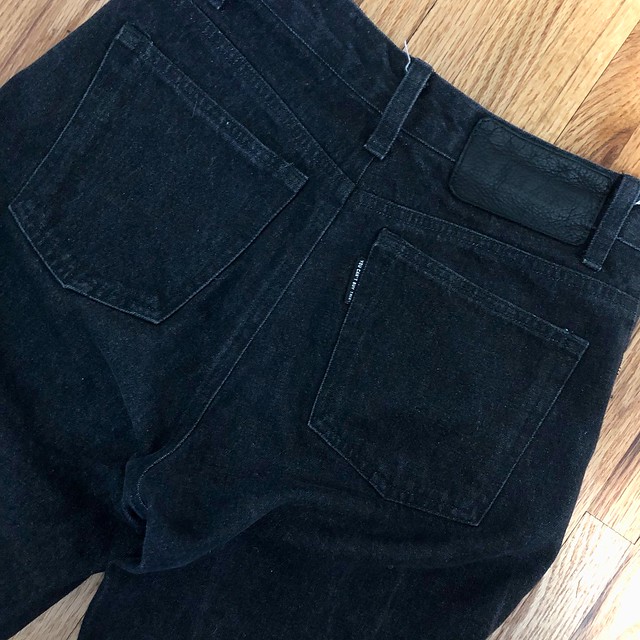
I kept these pretty simple, with black topstitching thread, black rivets and buttons (matte black from Blackbird Fabrics and I love them!), and a black leather back patch. One of the back pockets actually has a design topstitched in it (yes it’s the TCB lightning bolt, thanks for noticing) but it’s quite subtle. I am hoping that over time, as the jeans are washed and started to fade and crinkle, the design will be more noticable. We shall see! Oh, and you can’t really read the tag in the back pocket, but it says “You Can’t Buy This” Ha!
Forgot to say – this is the slim leg version, with the short inseam (and yes they are actually hemmed in these photos haha). This pants pattern comes with 4 different leg versions – skinny, straight, wide, and shorts – but I’ve only tried this one and the shorts. I have plans to make a pair of cropped wide-legs out of some corduroy, but we’ll see when I actually get around to it (not anytime soon now that I can’t leave the house without socks on haha).
Anyway, that’s it for this post, as well as for this series of “Lauren Talks About Her Favorite Jeans Patterns While She Also Revamps Her Pants Selection”! I have one more pair of jeans/pattern to share, but I need to sew them first (it’s been a busy month!). Hoping to get that accomplished before the end of the year, we’ll see!
Have you sewn jeans yet? What’s your favorite pattern?
The Claryville Jeans are a new release from Workroom Social, but hardly a new pattern – Jennifer has been working on it for at least a couple of years at this point! I actually sewed an earlier version of the pattern (before it was finalized), but I do like the small updates of the new one better! It was cool to be able to “work” with Jennifer on this pattern – I put that in quotes because she definitely did ALL of the work – I didn’t even test the pattern – but I offered lots and lots of opinions, both from an instructor perspective and as someone who has sewn a lot of jeans! Overall, I think the finished pattern is absolutely fabulous and I’m really proud of Jennifer for all the work she put into it to make it so great!
Anytime I mention this jeans pattern, the very first question I get (like, every single time lol) is “How does it compare to the Ginger Jeans pattern?” The short answer: It doesn’t. They are very different patterns, made to work with different types of denim, and fit in a different way on different bodies. You can’t really compare them, I’m sorry. What I can tell you is some of the key features of this pattern (this is all in the official description of the pattern, btw, which most companies should be including anyway!): – BODY TYPE: This pattern is designed to fit a pear or hourglass shape; i.e., one with a large hip-to-waist ratio. If you are more straight/square, it probably won’t work for you without some adjustments. – FIT: This is a mid-rise fit (right below the bellybutton), with a close fit through the hip and thigh, with a bit of extra room for the calf. It is a true jeans pattern, not necessarily “skinnies” or “jeggins” like the Gingers tend to veer toward. – FABRIC: The Claryville uses denim with a very low stretch (I have heard rumors of people using non-stretch fabric to make this with great results, although I haven’t tried it myself), unlike the Gingers, which are stretch. You *can* make these in a stretch (just size down!), but the pattern is designed for low to no stretch.
Construction-wise, these go together like any other pair of jeans (although I will give a big shoutout to the 3/4″ side and inseam allowances which make fit tweaking SO MUCH EASIER!). The fly is constructed with multiple pieces (rather than a fold back fly like the Gingers), which definitely intimidates the shit out of my students when they first start the class, but honestly, it’s really easy and fun to do! TBH, I find it quite fool-proof and I think the instructions given are **far** easier than any other multi-piece fly instructions I’ve come across.
My favorite parts about this pattern are the small back yoke (so flattering!), the giant back pockets (there are 3 sizes to choose from, depending on the size of your butt! These are the small pockets), and the extra calf room (lord knows I need it). I also like that it uses a low-stretch fabric; it certainly is not as melt-on-the-couch comfortable as a good stretch denim, but they are quite nice regardless after a solid break-in. My pro tip for quickly breaking in your jeans: Wash them a LOT! I basically throw my jeans in the wash/dryer every single time something goes in there. After 5-10 washes they soften up considerably.
Fit-wise, these are great for me right out of the envelope. I made a size 2, with no adjustments other than length (these are 31″ inseam and mine is like… 28″ lol). The waistband is straight, and is supposed to be eased into the top of the pants which will naturally create a curve. In my workshops, we baste the inner waistband on first and check the fit, which is easy to adjust if you tend to get waistband gape.
I know someone is going to ask me about the denim I used, and here’s my answer: I know nothing about it! It’s from Workroom Social, the same denim that we use in the Jeans Intensive classes. I think it’s Japanese. There, now you know everything I know!
I kept these pretty simple as far as embellishments go, and used red for the bartacks and zipper, to match my pocket lining. The pocket lining is just a fat quarter, which is my FAVORITE fabric to use for pocket lining. It is sturdy, it is colorful, it is inexpensive and easy to source – what’s not to love? One thing I see a lot of students bring to class is cotton lawn (Liberty is especially popular for this) – my biggest advice is DO NOT DO THIS. Cotton lawn is very lightweight and not really suitable for a pocket bag. You will rip your pockets far before your jeans show even an inkling of wear. I cannot stress this enough.
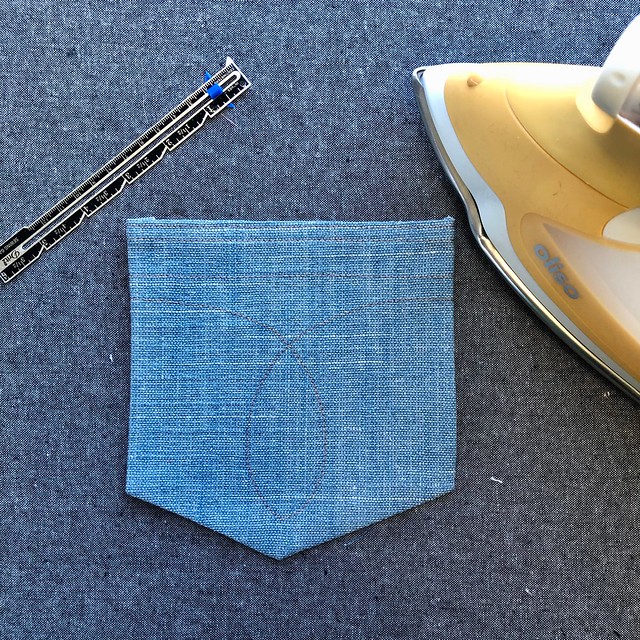
My favorite part, though, is the back pockets! I had a stroke of a good idea earlier this year and decided to give them my initials 🙂 It is subtle for sure – and really fun to hear people make the connection!
To do this, I drew the lines with chalk and a ruler, and stitched over them with topstitching thread. Easy!
I also snuck a little L on the coin pocket bartack, because why not?
Ok that’s all for these jeans! If you want to learn how to make the Claryville Jeans with me next year, you can sign up here at Workroom Social! Please be aware that my classes are in March, July, and November. There is a May class, but I am not instructing it 🙂 Just FYI!
Fun fact: I am wearing this same outfit as I type this blog post. Don’t be fooled, though, I took these photos months ago! I don’t know what my deal is, but for whatever reason I’ve become the sort of “blogger” (I am putting this in quotes because I think I’ve maybe written 6 posts this entire year lol) who takes photos and then… hoards them? Whatever.
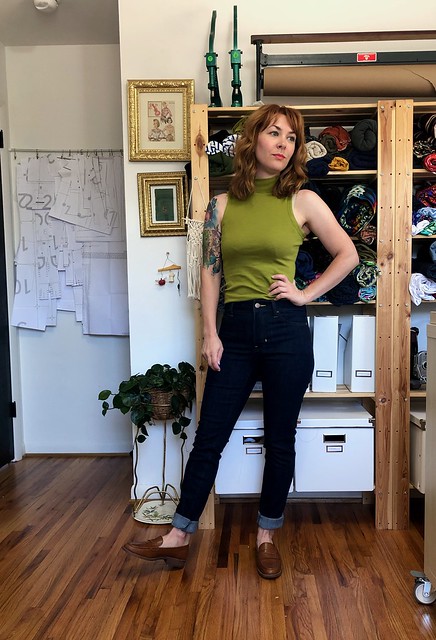
Anyway, here’s a new pair of jeans to share! I think I’ve made enough pairs of Ginger Jeans to probably warrant never needing to post them again – students always ask me how many I think I’ve made, and the answer is I actually don’t know! I’ve lost count! – but I feel weirdly guilty about all the blog neglect this year, so I’m posting for the sake of posting something and keeping the ol’ stomping ground alive.
Also my hair looks really good in these photos, so there’s that. Gotta take those small victories wherever you find them!
Even though I’ve made tons of jeans, I recently reached a point in my wardrobe where I realized I was in pretty dire need of some wearable bottoms. My wardrobe goes through a lot of shifts and purges – things don’t turn out the way I envisioned, the fabric or fit is weird (let me tell you right now that no matter how much you sew or even use TNT patterns, you will never be immune to making these mistakes from time to time!), it’s a strange color or style I don’t actually wear, my weight has fluctuated and it doesn’t fit anymore, or I’ve worn them so much they are wearing out and need to be replaced. The last 2 reasons have really hit hard this year, when it came down to me owning 1 pair of (very poorly fitted) shorts and maybe 2 pairs of jeans. So I’ve been on a pants and shorts making binge which has been quite fruitful!
I used 3 different jeans patterns to really round out my pants wardrobe, so stay tuned for the other 2! Today, I want to talk about the Gingers!
If you’ve followed me for any amount of time, you probably know I have a mad love affair with this pattern. It’s one of my TNTs (tried’n’true), and like I said, I’ve sewn it so many times that I’ve literally lost count of how many pairs have passed through my sewing machine. I don’t know if it’s my favorite because it’s actually the best, or if it is just familiar. I do like the style and the fit works quite well for my body, though! It also helps that this is the pattern that I use for my Sew Your Own Jeans weekend workshops, so I feel like I truly know this pattern like I know the back of my hand.
I haven’t made this pattern since the end of 2017, and while I love that pair and still wear them regularly, I can see that they definitely have an end date – they are starting to wear very thin in some places, and the lycra is losing its elasticity. I think they still have quite a bit of life left to live, however, I think it’s always good to secure your back-up plan before it’s needed!
My fabric is a wonderful stretch denim that I purchased from Crafty Gemini back in August when I was in Florida for a sewing retreat. Usually whatever shop hosting my class will carry the specific denim that I recommend (this one from Robert Kaufman!), however, some shops like to source their own and that is also fine! In this case, Vanessa was able to get her hands on some very nice, dark indigo US-made stretch denim, which everyone in the retreat used. I was kind of jealous of how nice their pants were turning out so I decided to get a couple of yards for myself, too! This denim is just as stretchy as the RK, but a little heavier – maybe a 9 or 10oz. The color is nice and dark but I haven’t noticed as much dye rub-off as I tend to see with the RK denim.
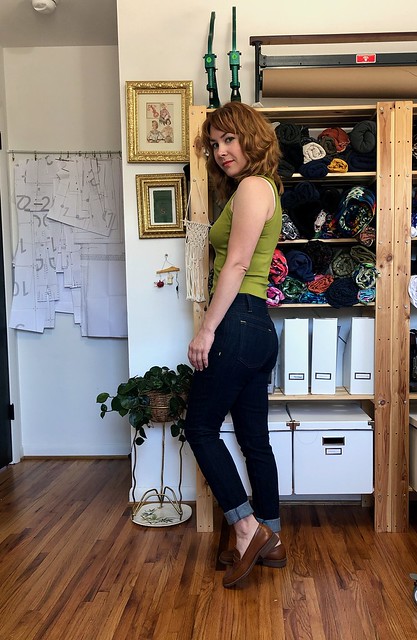
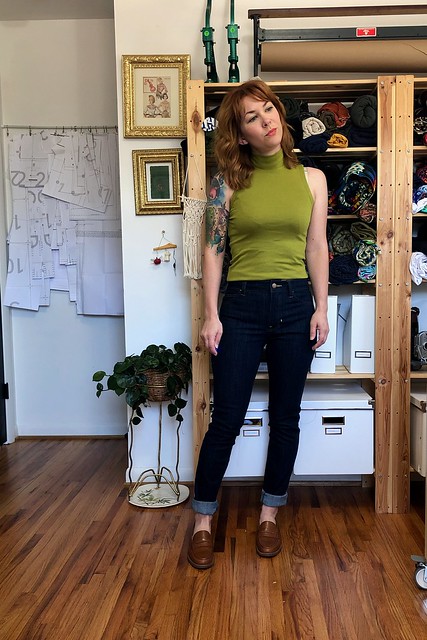
I decided to go up a size in these jeans, which turned out to be a mistake. As I mentioned, my weight has gone up a bit this past year – mainly in my hips – so I’m sizing my new makes appropriately, and while I could squeeze into those 2’s if I really put my mind to it, I wanted some jeans that were a little less… painted on. Unfortunately, these ended up way too big so I should have just stuck with the 2’s! They look great now, but I did have to size down the side seams, and after taking these photos I also took in the waistband and center back a bit more. I think the issue is that 1. I’m exactly in between sizes with Closet Case Patterns (a little bigger than the 2, and a little smaller than the 4); and 2. My denim is very stretchy (about 25% stretch, the same as the Robert Kaufman that I usually use) which typically warrants sizing down, not up. Anyway, it was a fun experient and it all worked out in the end so I’m not mad about it, just making a mental note for next time!
Other than the sizing stuff, I did not make any other changes to this pattern. I added 1″ to the calf (ages and ages ago), but otherwise I get a pretty good fit out of the envelope, so that is nice and easy!
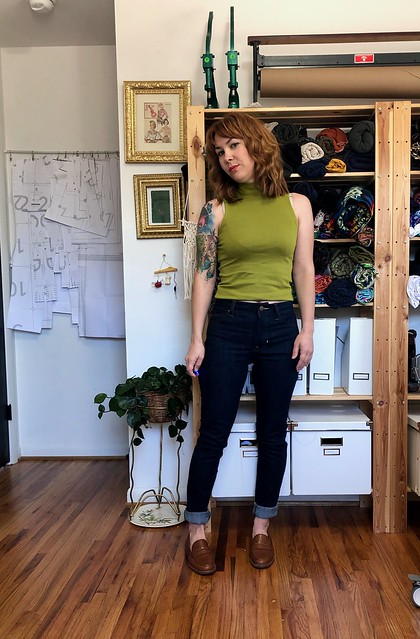
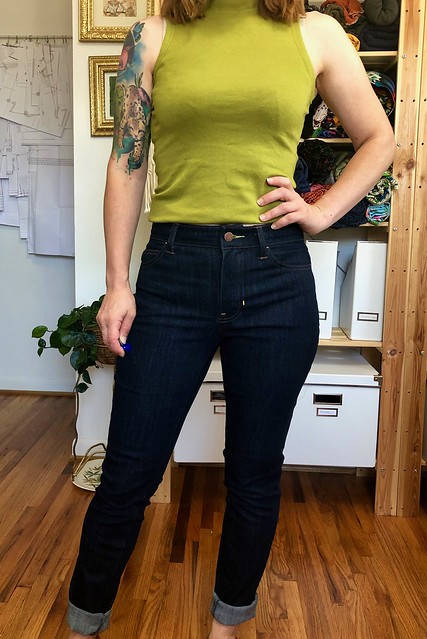
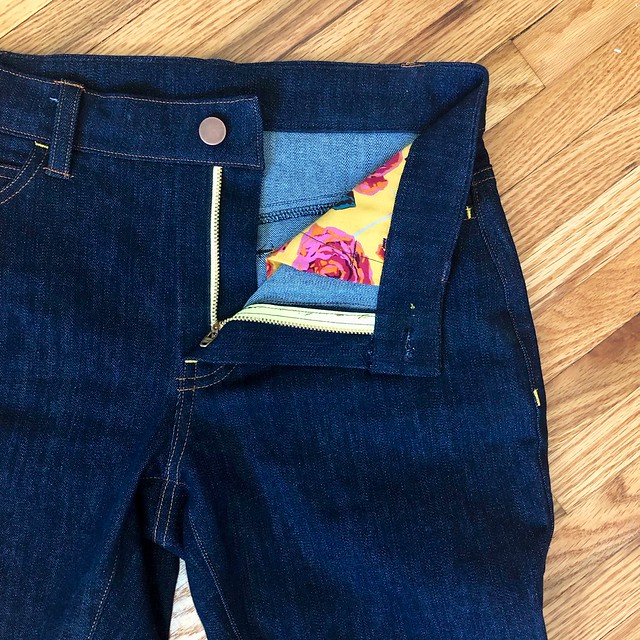
I did change the front pockets to be actual pockets, and not a pocket stay. I am fully aware that I am the minority in this thought process, but I HATE HATE HATE those pocket stays! I find them rigid, uncomfortable (which is all kinds of wrong when you’re wearing stretch denim, I mean wtf) and they make the fly area incredibly bulky. I know people loooove their pocket stays so please don’t @ me with your defense, just stating my personal choice here! Free-hanging pockets FTW! I have no issue tucking my pockets back in if it means I can eat a plate of nachos and not feel like I need to unbutton my pants! Fight me!
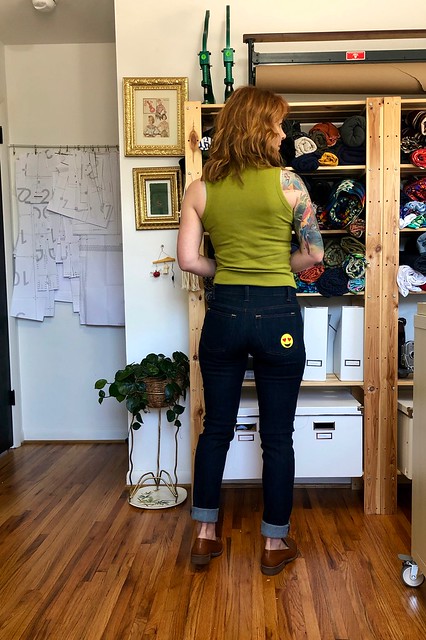
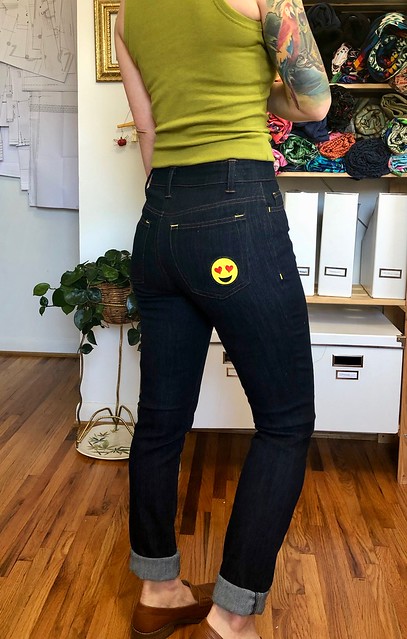
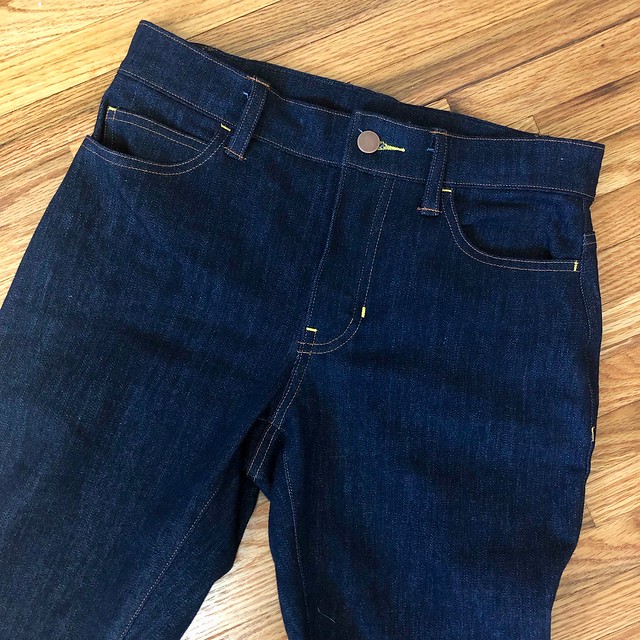
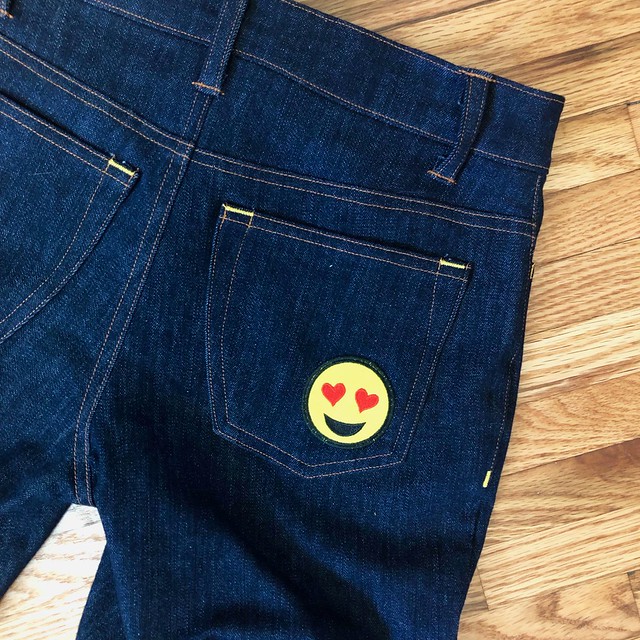
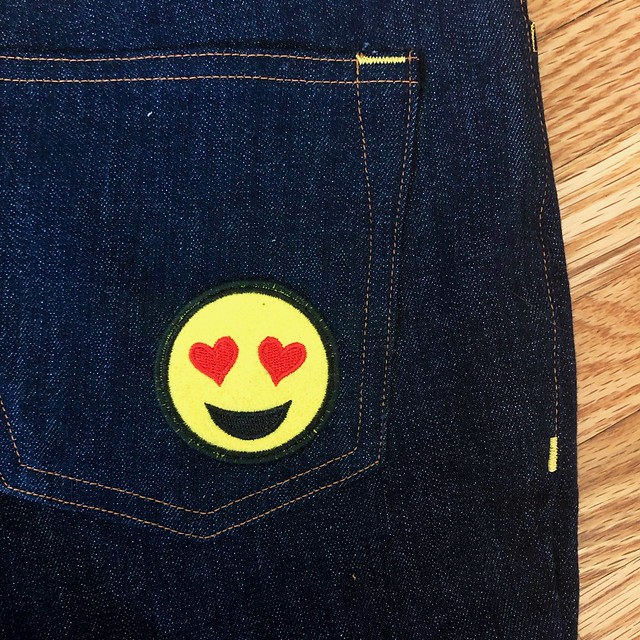
For some fun customization, I used contrasting thread to do my bar tacks, and stitched this cute little emoji patch on the butt pocket. Mostly because it makes me laugh, but also because I love any excuse to tell people I have “a heart on” lulz omg.
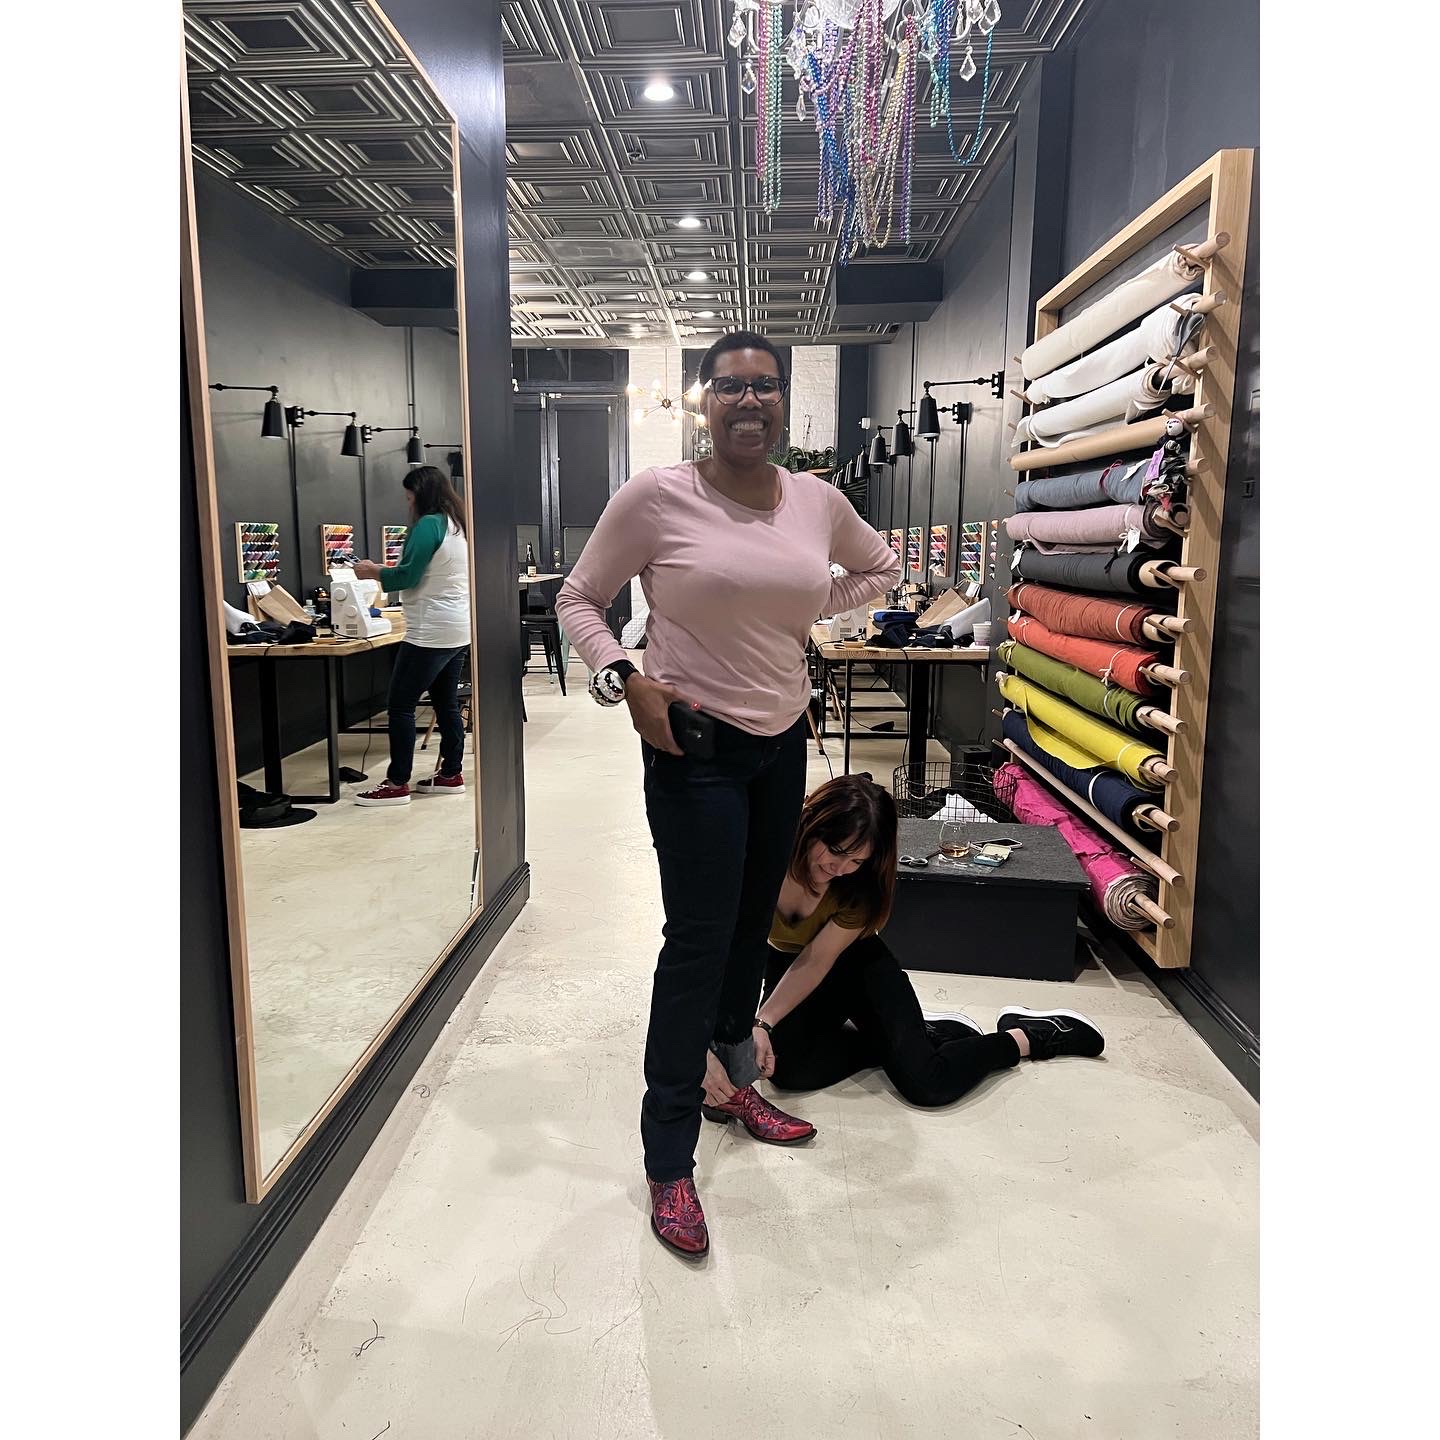
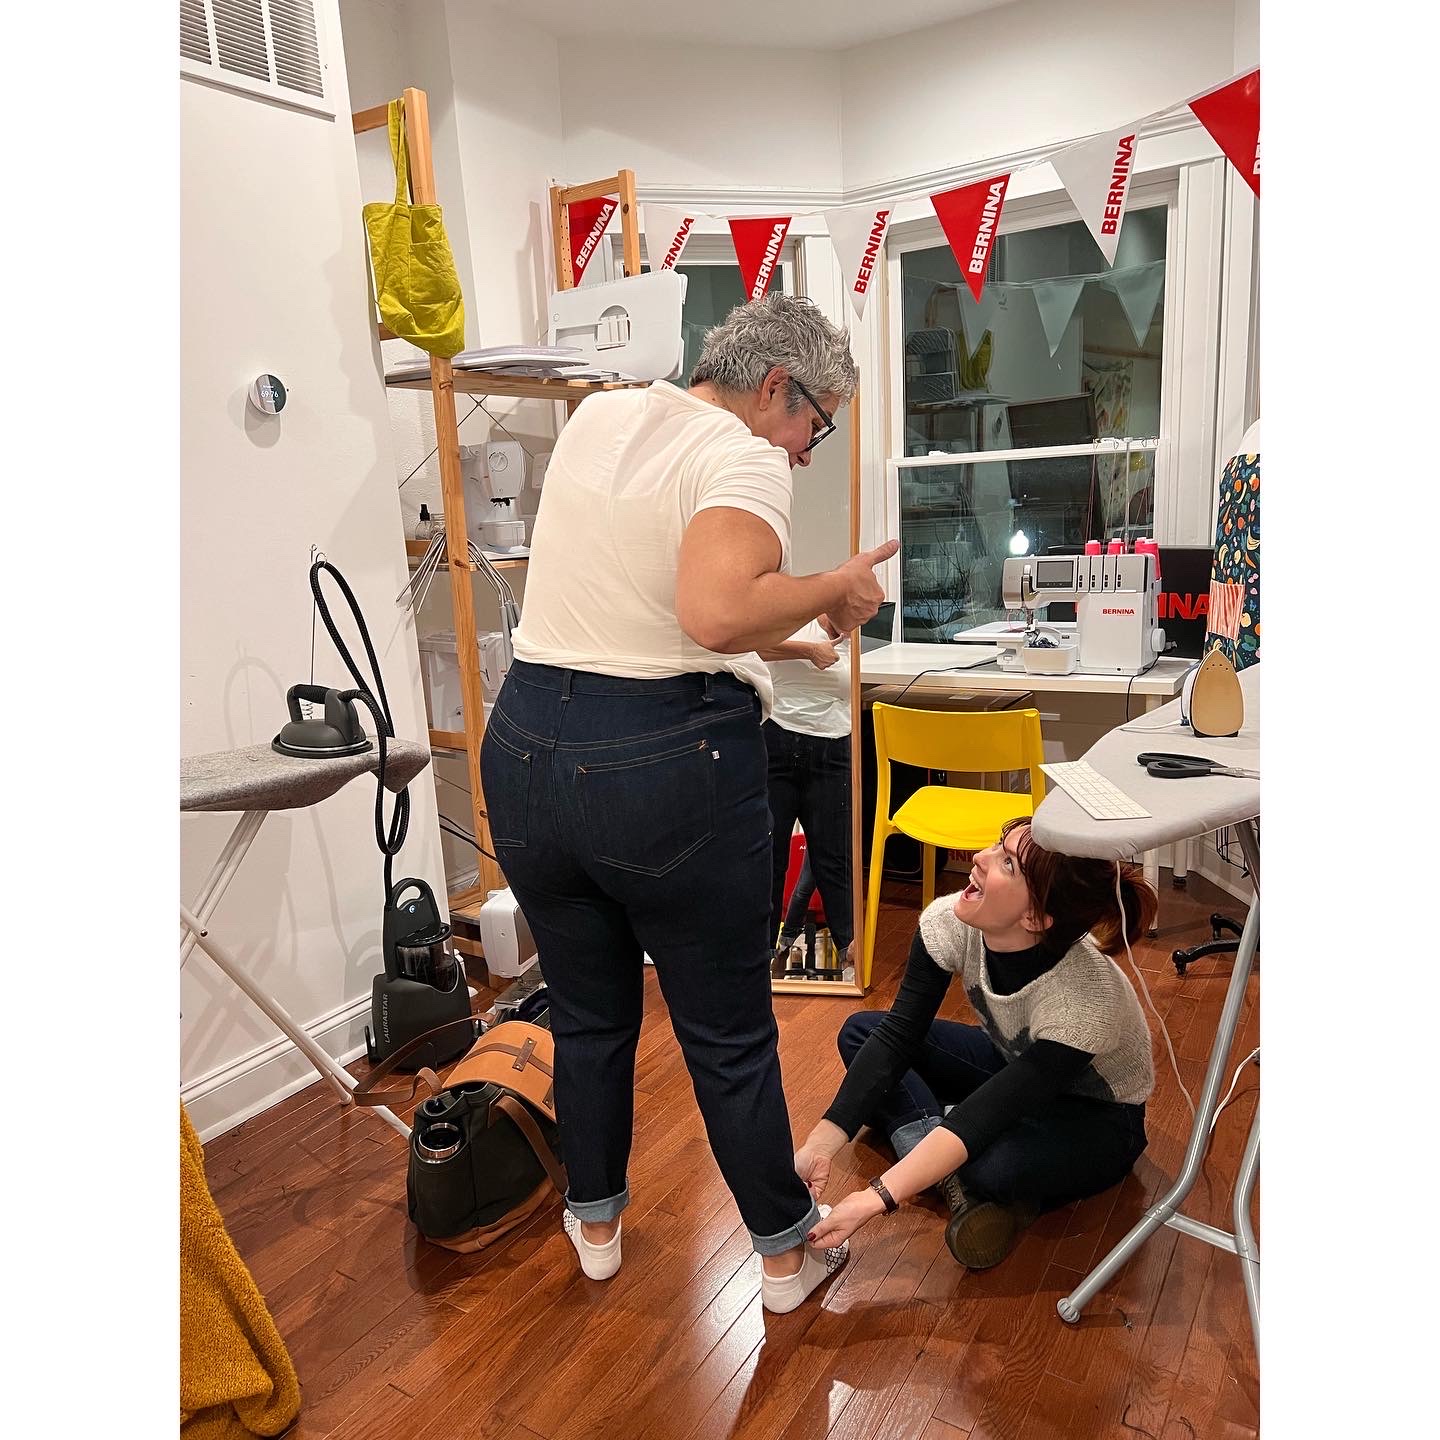
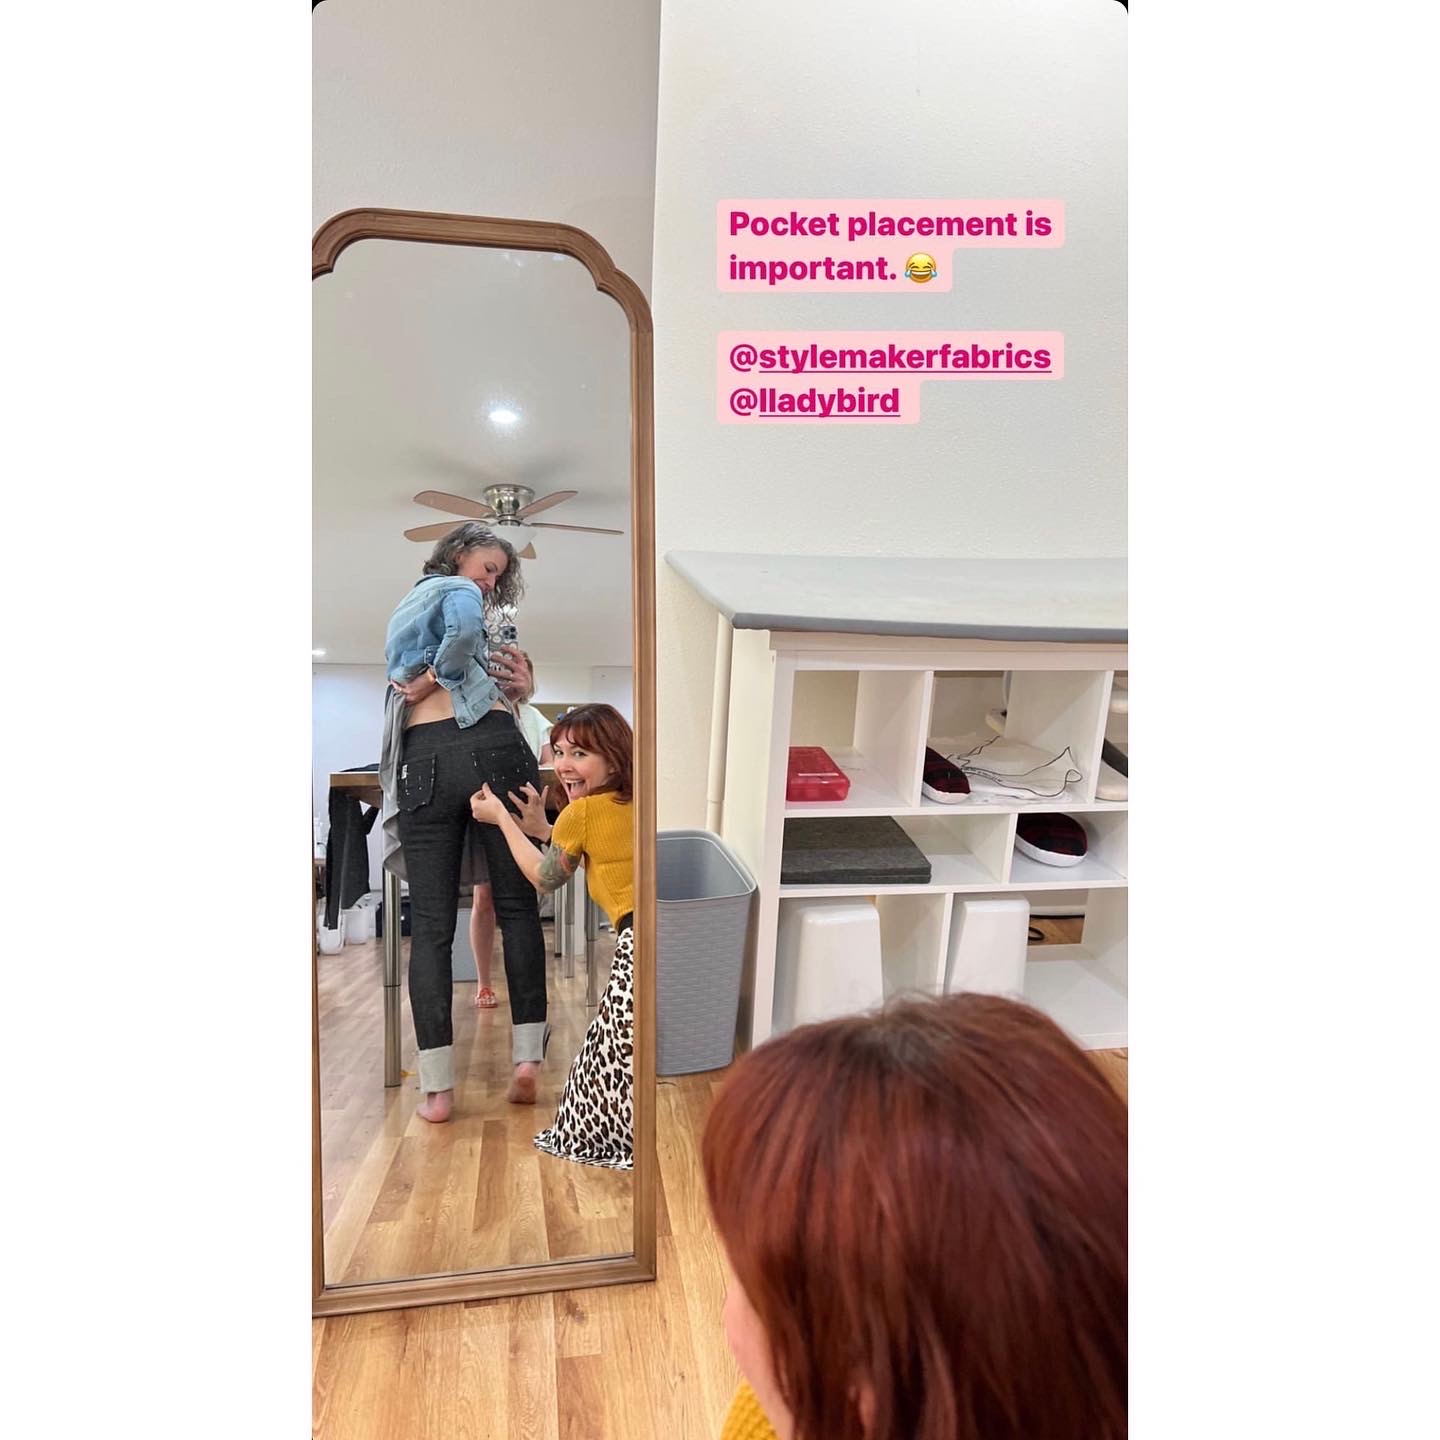
I also do not use the back pocket markings as suggested in the pattern, because in my experience they are too low and kind of unflattering! I think a high-waisted jean needs a high pocket, so I always place mine a little higher. In my Sew Your Own Jeans workshops, I custom place these on each booty (oh yeah I bet you didn’t know that fee included a nice hand down your pants!). For me when I’m sewing alone, though, it requires a lot of basting, trying on in the mirror, removing pants and unpicking stitches, rebasting, putting pants back on again, repeat ad nauseum. Fortunately I’m at a point where I have a general idea of where the pockets should be placed with just a good confident eyeballing, but my point is that you too can have good pocket placement, even if you don’t have the luxury of a second person to help you! Just be prepared to take your pants off a LOT and also maybe consider taking photos of your butt (why is this starting to sound like a Tinder conversation… ?).
I left the jeans unhemmed, because I’ve learned over the years that no matter how much you pre wash your denim (this one was 3x!), the length will continue to shrink in length over several more washes. I used to just hem my jeans on the long side, but these days I don’t bother hemming at all and just wear them rolled for a few months until I feel like they’ve gotten their shrink out. These are hemmed as of this posting, but were not as of the photographs.
Oh, I also made my top! It’s a True Bias Nikko Top, made with some really fun chartreuse knit that I bought at Fancy Tiger Crafts when I was there in June! I was very drawn to the color, but wasn’t sure how it would look on me – it took a lot of convincing from Bob, and then another few months of me staring at it on my shelf wondering if I had made a mistake. Honestly, though, I LOVE how it looks on me! I think it really works well with my skin tone and hair color, and it’s also a color that just makes me happy! So, Bob was right and I stand corrected!
Ok, I’m wrapping up this long-ass post with a photo of me + Amelia. Don’t be fooled by the bitchface, she loves me and was purring very loud during this photo haha.
Friends, readers, and random people who just dropped in via an interesting Google suggestion – I’m happy to announce that my 2020 dates are finalized and I’m ready to announce my ~2020 workshop tour~! Yay!
I’m trying something a little different this year and announcing everything at once, rather than as they are listed and available for registration. Last year, it felt like a lot of people missed out on signing up because the seats would sell out before I even had a chance to announce them! I also felt like I was posting WAY too much about workshop stuff, which I completely understand can be super annoying for those who are not interested in ever signing up for one! My hope is that this burst of dates (as opposed to the slow trickle last year) will allow everyone interested to plan in advance, and be informed when the seats are available to sign up for.
Please note that not all the classes are listed as of this posting (I will update as they are!). I strongly recommend that you follow the shop hosting the workshop, to be notified when the class is listed so you can sign up quickly and hopefully secure a seat! I will update my classes page as workshops as listed, however, I cannot guarantee they won’t be sold out by that point (this happened quite frequently last year!).
All dates and links are listed on my WORKSHOPS page, as well as in this post. For more information, including pricing, please visit the shop’s website or send them an email!
A few notes and frequently asked questions about my workshops:
– These are the ONLY workshops that I am offering for 2020! I am completely booked! Once they are sold out, they are sold out (i.e., I will not be adding additional dates) so I encourage you to sign up ASAP!
– For my jeans classes, we will be sewing the Ginger Jeans from Closet Case Patterns. This pattern is a high-waisted, stretch denim jeans pattern that is available in sizes 0-20. Plus sized? Girl, I got you! You can make the Cashmerette Ames Jeans, which is available in sizes 12-28 and includes options for both an apple shaped torso or pear! Dudes or Non-Binary, i.e., don’t wanna wear girl pants? Yo, I got you too! You can make either the Quadra or the Fulford jeans pattern from Thread Theory. Jeans for everyone!
– “I don’t wear high-rise jeans – will we have the option to make this change in class?: If you are interested in sewing a mid-rise jean, there is a Mid-Rise Ginger jeans pattern available for purchase on the Closet Case Patterns website that you are welcome to use instead. Additionally, there is a Flared Leg add-on if you don’t do skinny! Unfortunately, there is not enough time in class to make drastic changes to our patterns, especially with adjusting the rise, outside of minor fitting issues. It is definitely something that we can go over in class, though, so you can apply the changes to all your future jeans!
– Required Skill Level: You don’t need to be a Sewing Master to tackle this class, however, you absolutely need to have experience using a sewing machine and following a sewing pattern. All skill levels are welcome!
DECEMBER
Sew Your Own Jeans Weekend Workshop
December 4 – 6, 2020 Sew With Sonia, Menlo Park, CA
Whew! I was going to share a pair of my own recently finished Ginger Jeans, but I think that’s enough for this post! Actually I have 3 pairs of finished jeans so stay tuned for a ~Jeans Extravaganza~ here on this blog shortly! In the meantime – who’s taking a workshop next year?! I am so excited!!
Note: All photos in this post were taken at my workshop at Blackbird Fabrics this past April!