Tag Archives: simplicity

Completed: Simplicity 9215

30 Sep

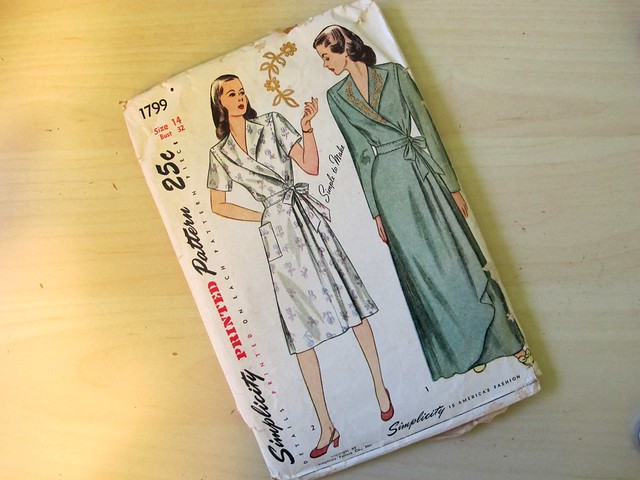
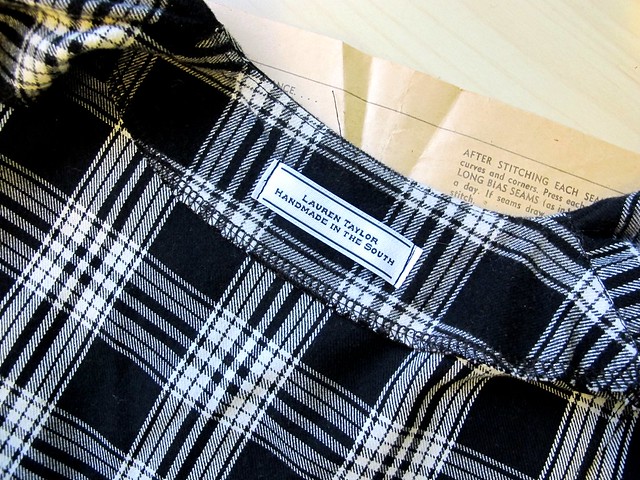
I don’t know exactly how long I’ve had this Simplicity 9215 pattern for, but it has been at least a few years. Maybe even a full decade.

Garfield Top

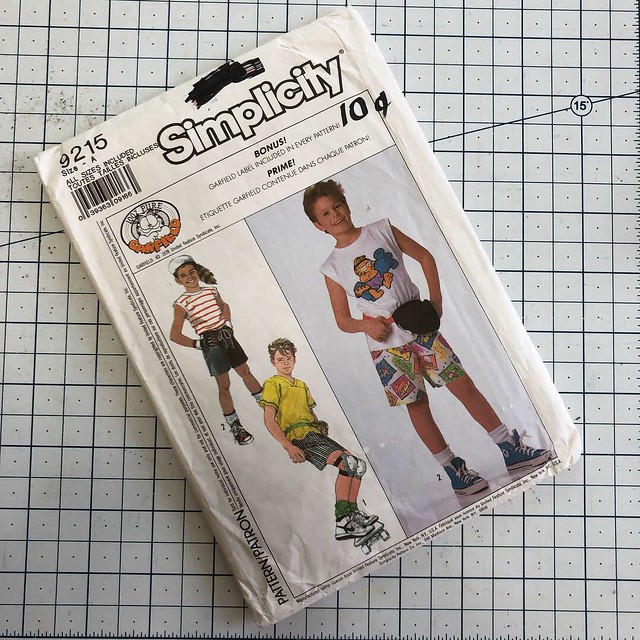
I originally bought it for the lol factor. I love these old licensed patterns – not necessarily anything hilarious about that – but the cover art is just something else. How cool is that kid with his (handmade)(but properly licensed) Garfield tshirt, matching shorts, and FANNY PACK*? How about those drawings? The cool sk8r boi with kneepads? The coonskin cap (and, bizarrely… wrist guards? Which would make more sense if he was also on wheels). Everything about it delights me to no end. I love it so much.

*It’s a fanny pack, y’all. Stop calling it a ~belt bag~ and get real here.

Garfield Top

Even better – the pattern still had the Garfield iron-on transfer intact. It was just a matter of time before I set about making it myself.

Garfield Top

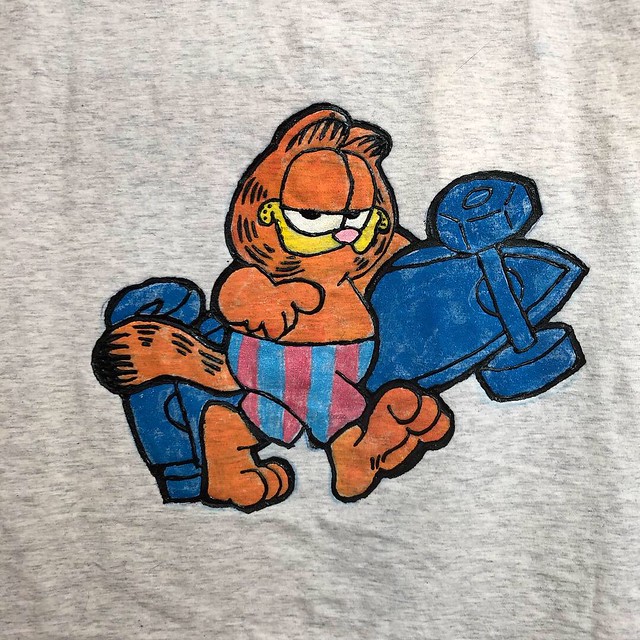
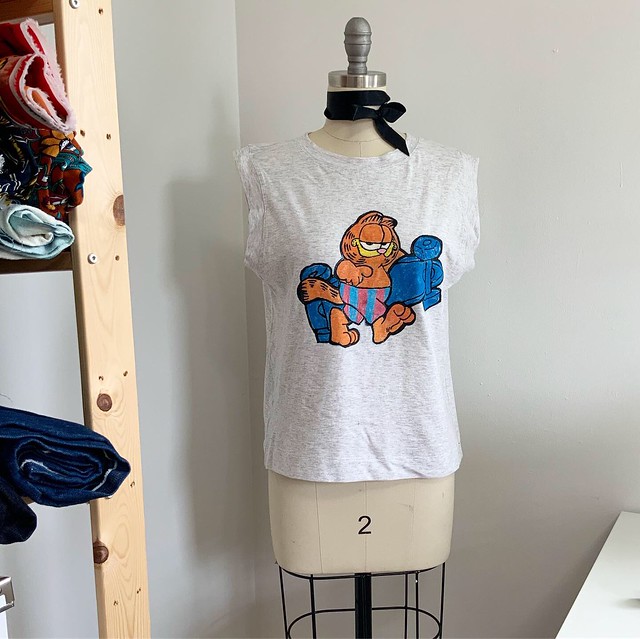
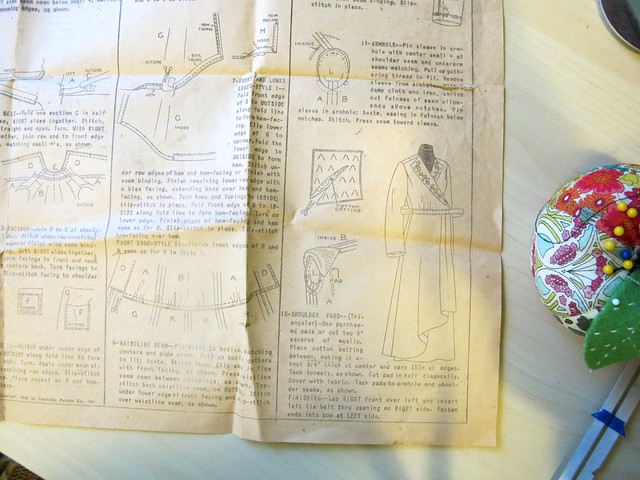
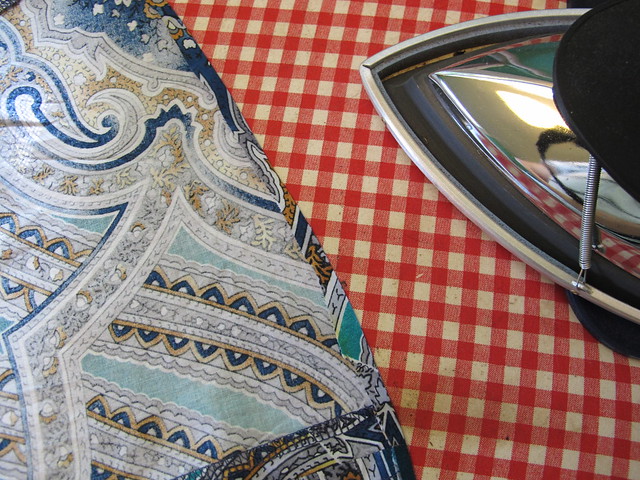
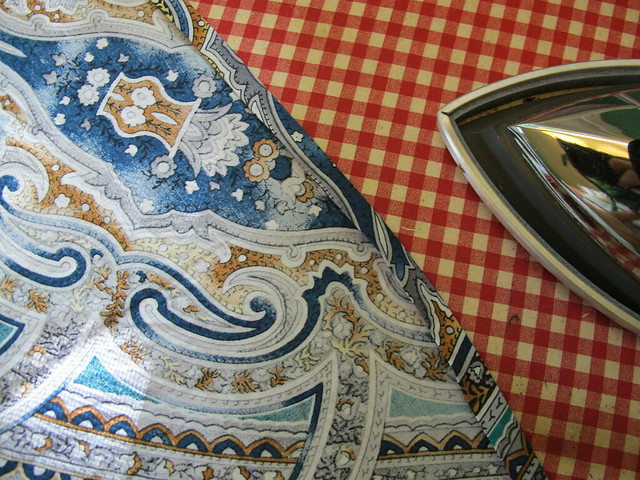
The pattern actually has you applique the image, using fabric scraps for the main colors and then black thread for all the outlines. I intentionally bought very soft, lightweight knit fabric to sew up the shirt portion, and I was afraid the applique would make it too stiff and it wouldn’t hang right (and while I considered using jersey for my applique pieces, I didn’t want to go through the headache of trying to find the right colors that were also a similar weight). So rather than use fabric, I decided to paint the entire thing directly to the front of my shirt. I did still use the iron-on transfer to get the lines in the right spot – but as this pattern is over 30 years old, it didn’t *completely* transfer so I ended up re-drawing a lot of the lines before starting to paint. After that was done, I spent an afternoon with a small paintbrush and tulip brand fabric paint (this is literally the same brand I bought, and yes it’s from Walmart. Keepin it cheap today, guys!) filling in all the areas with color. After a few coats, I outlined everything with puffy 3D paint (obviously black, not turquoise, but I’m not seeing black on the website for some reason).

Here’s a fun (and also disappointing) fact about modern puffy paint – it’s not actually 3 dimensional! All the beautiful dimension totally flattened as it dried (and before you @ me, I will point out that I grew up during the Puffy Paint Renaissance and yes I know how to apply this shit properly), which is a little surprising considering that they say right on the bottle that it should be 3D. Alas.

Garfield Top

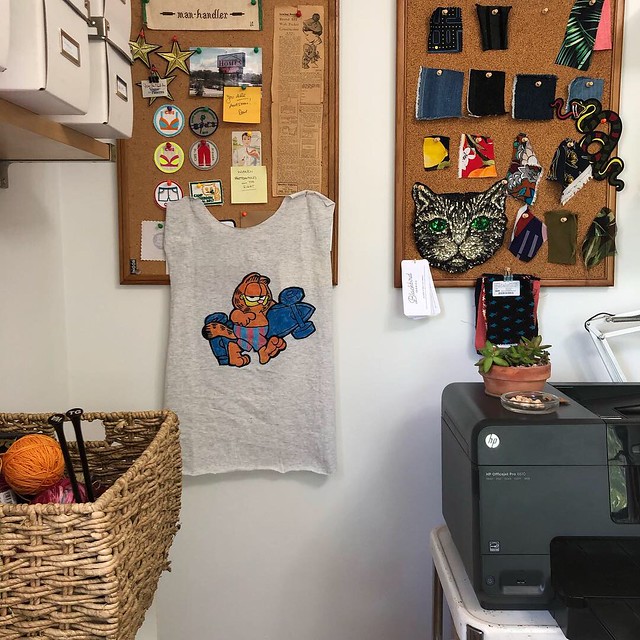
I let my masterpiece dry for a few days before moving onto step 2 (also, hello sparkly cat patch!). Step 2 was sewing it into a shirt, spoiler.

Garfield Top

Garfield Top

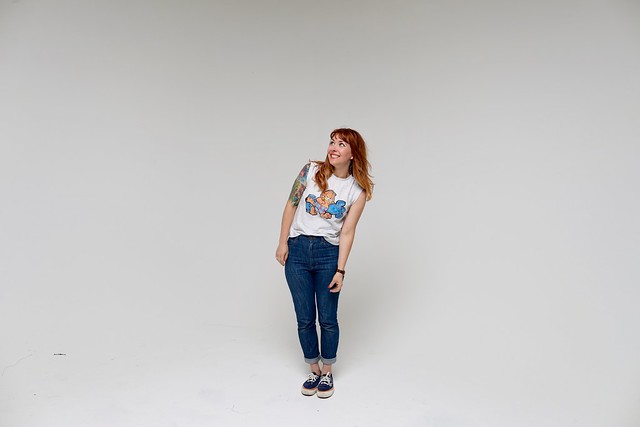
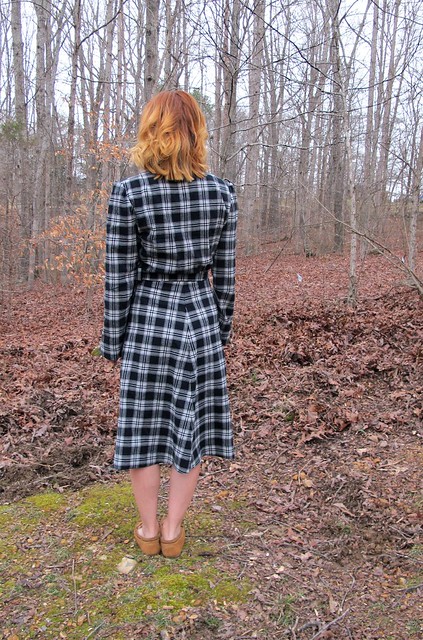
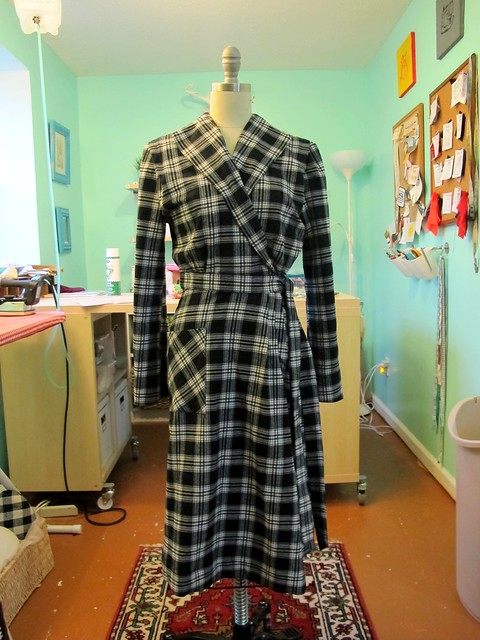
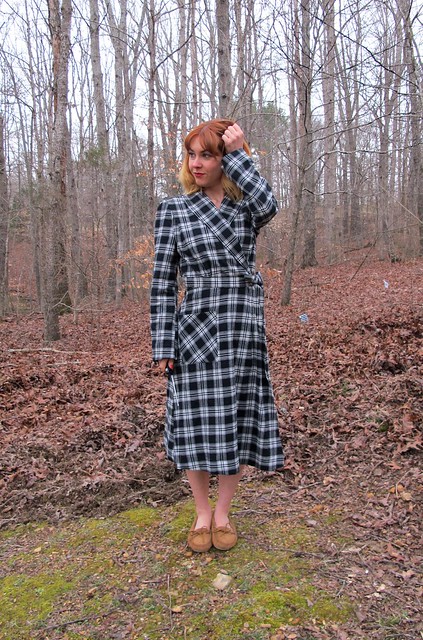
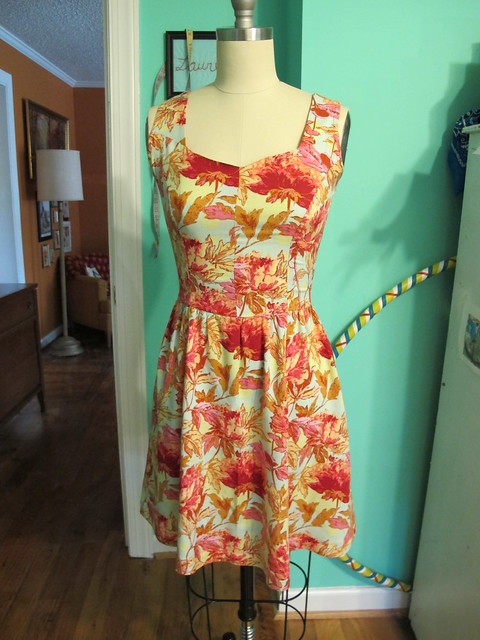
Yes, I used the pattern pieces to make the shirt! My copy of the pattern was already cut into a size Small, but after comparing the finished measurements to my own body measurements, I knew that it would fit me just fine. I added about 1/2″ to the side seams for some extra insurance/wiggle room, but ended up removing it when I tried the shirt on. I probably could have swung a little FBA to add more boob room to the front but tbh I’m not that concerned about it.

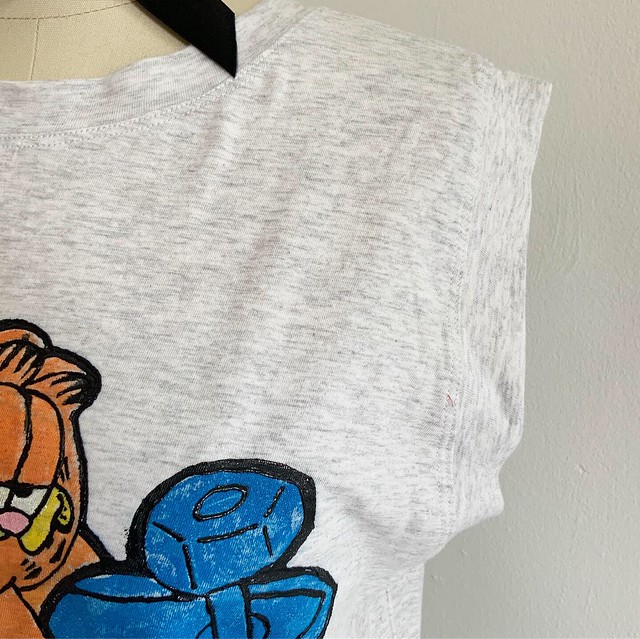
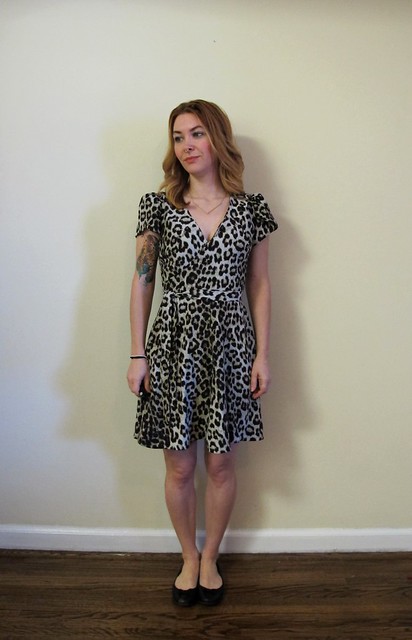
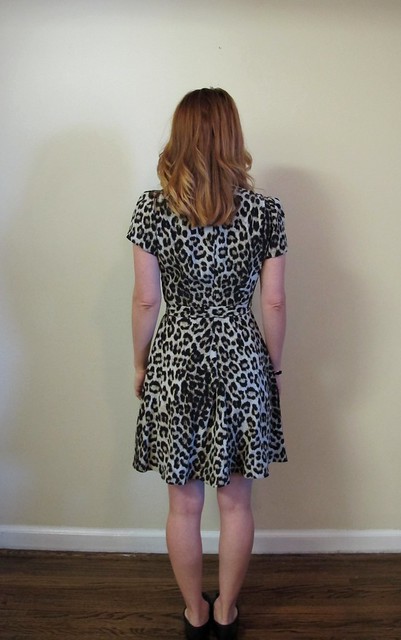
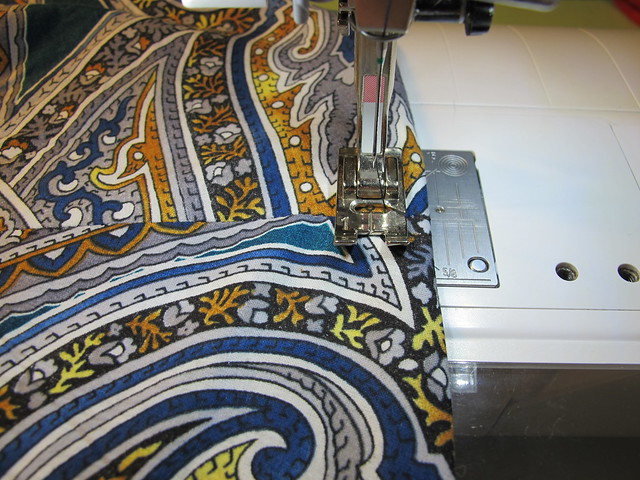
The fabric is a wonderful organic cotton jersey knit from Blackbird Fabrics (I used a light heathered grey colorway, which I’m not seeing on their website at this time). I was aiming for an “old and loved vintage tshirt” look, which I think this perfectly emcompasses. It was also relatively stable, which meant it was easy to paint on. I used my serger to sew everything together, and coverstitched the hems and sleeve and neck bands.

Garfield Top

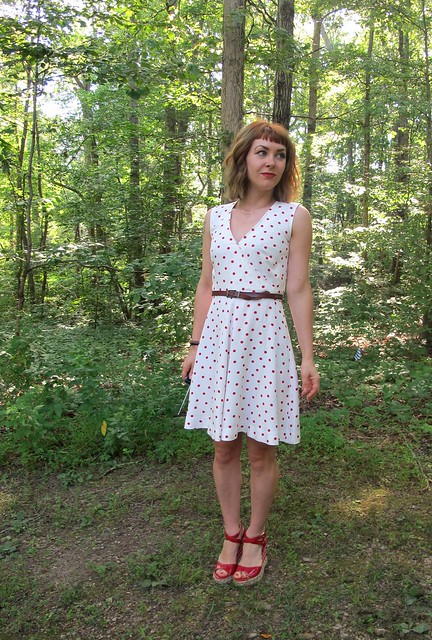
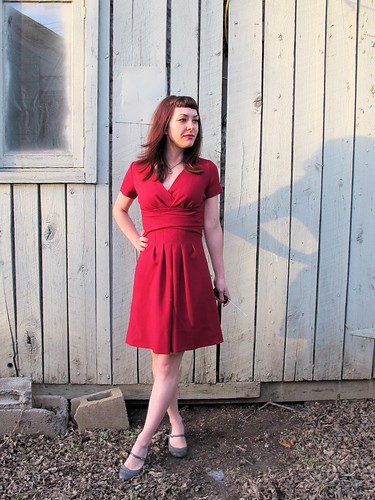
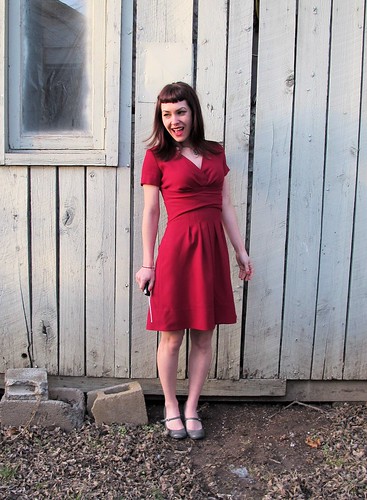
The fabric paint instructions have you heat set the paint to keep it bright and intact, but since I was going for a vintage look I chose to skip that step. Look at the difference between the finished Garfield and the one I’m wearing – it faded quite a bit! All of the fading happened in the initial wash – I’ve worn and washed this piece plenty throughout the summer and it really hasn’t faded more than what you see here. And if you can’t tell from the photos – the paint dried to a nice flexible finish, so the image isn’t stiff at all. It feels pretty similar to a screen print.

Garfield Top

Garfield Top

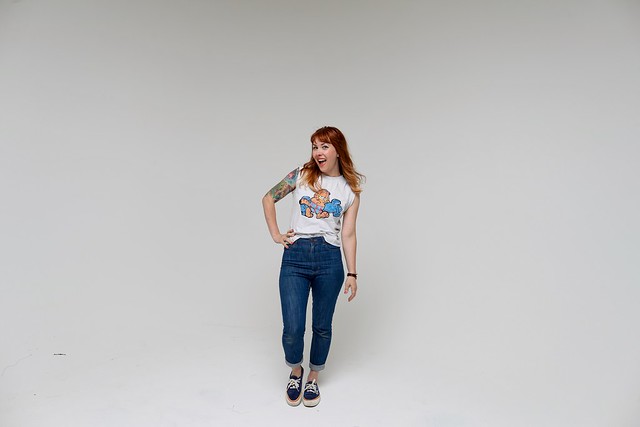
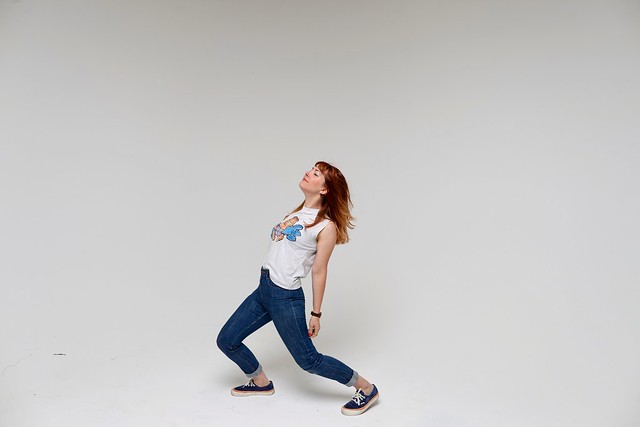
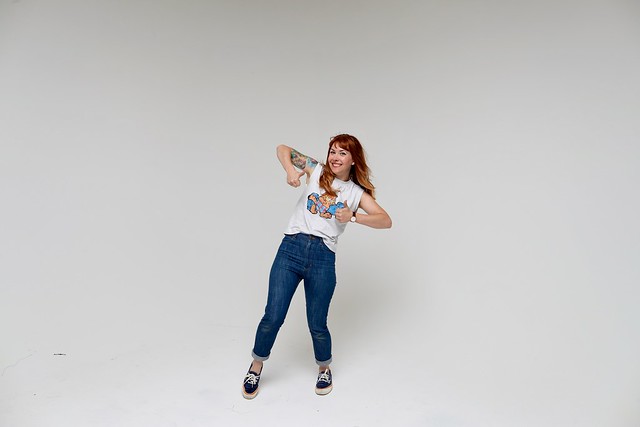
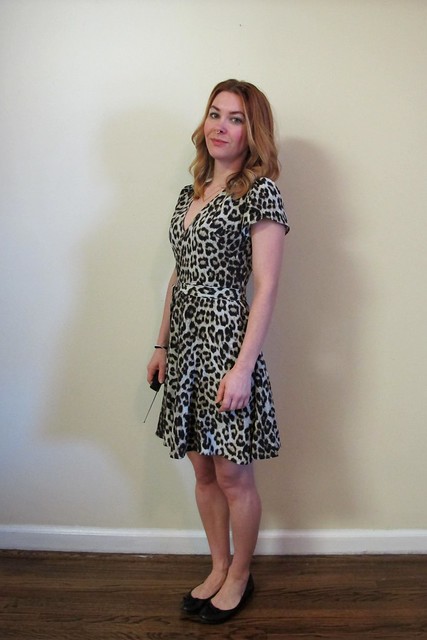
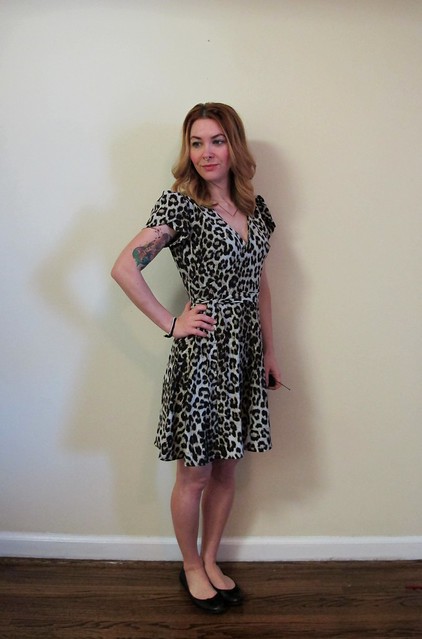
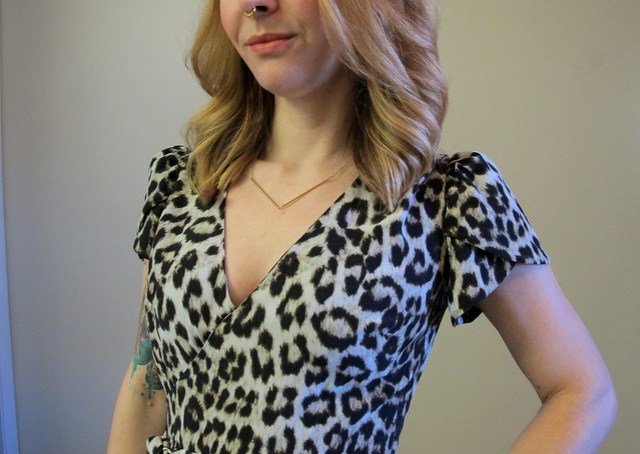
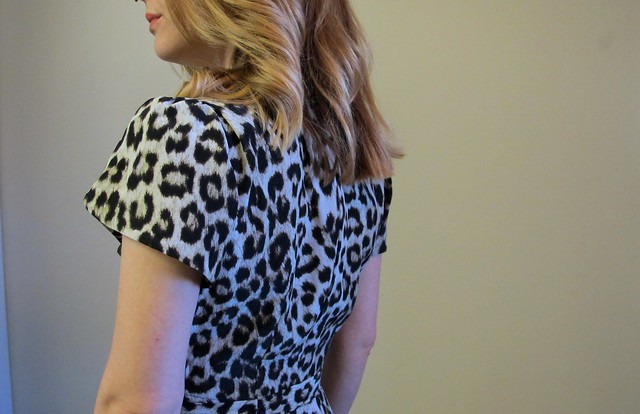
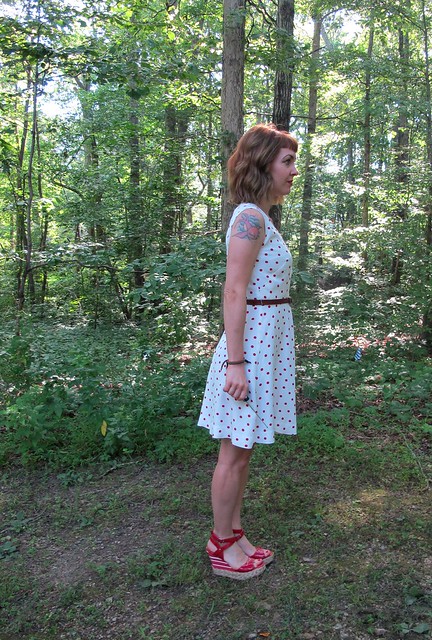
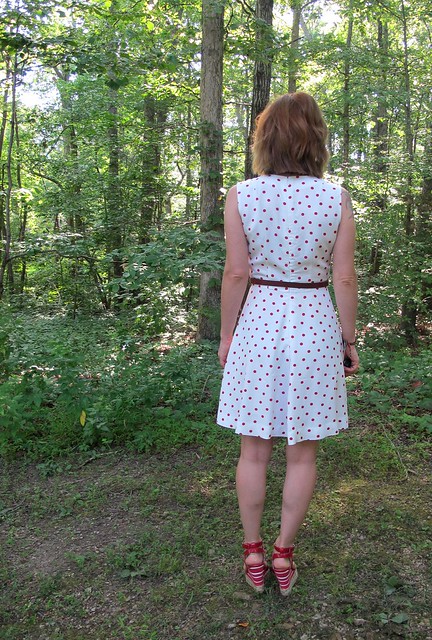
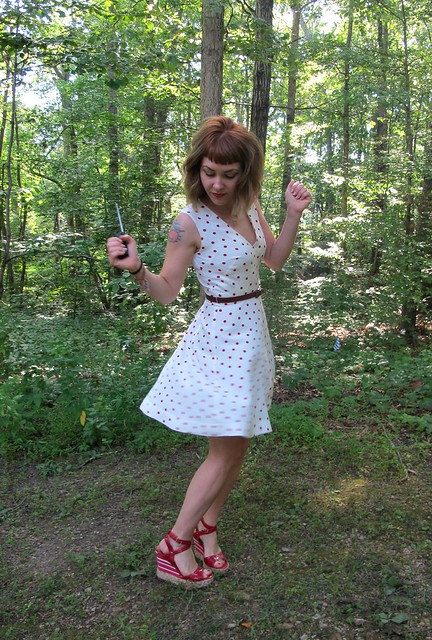
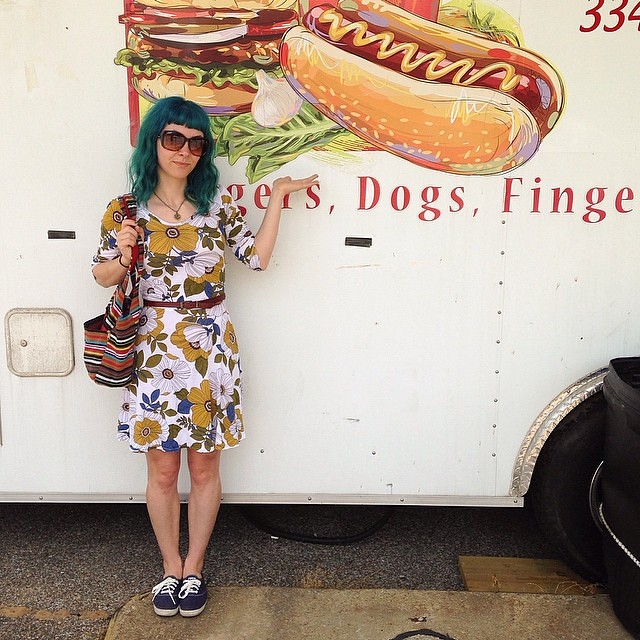
These photos were also taken at Clutch Camera while teaching my second jeans workshop for Josephine’s Dry Goods while I was in Portland OR earlier this year! All weird poses are courtesy of me feeling awkward in front of the camera (I mean, that’s not new – but having an audience is).

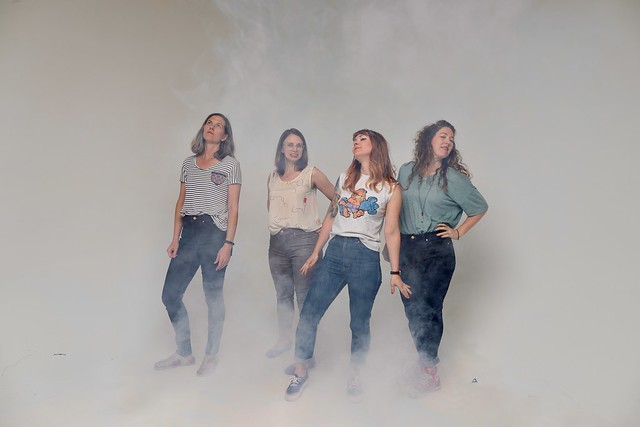
We also had a fog machine available, so I’d like to introduce you to my band: LLADYBIRD and the Jeans Queens. Unfortunately I did not have time to make a proper pair of graphic shorts or a fanny pack, sorry.

Garfield Top

Anyway, this was a fun project that gave a nice breath of fresh air to the things I’m used to making. I feel like it focused more on the artistic/creative side of sewing (not that sewing is not creative, but I was literally painting a picture to make this piece), similar to the stuff I was into when I originally started making my own clothes. I used to dress real goofy, which is something I’ve lost over the years (prob because I’m not 16 anymore, who would have guessed?), and it has been fun trying to incorporate a little bit of that back into my sewing practice + wardrobe.

Completed: Madalynne x Simplicity 8711 Lingerie Set

23 Aug

I am currently in the process of updating my lingerie drawer – turns out I’ve managed to gain a cup size, which means none of the stuff that I originally made fits right anymore. On the plus side, this is right around the same time that everything was starting to get ratty, so it’s not a total loss. And now I have an excuse to make fun underwear, or, as I like to call it – FUNDERWEAR lololol amirite gosh I’m hilarious.

In all seriousness, new undergarments are happening! You’ve probably seen a few in previous Watson makes, as well as on Instagram. I don’t blog too much in the way of lingerie these days, just because the redundancy gets boring (for me, that is), but this one is a little different and fun, which I think warrants a post!

Simplicity 8711 bra

It’s a bralette! But wait, there’s more – it has an underwire!

Simplicity 8711 bra

This bralette is made possible by Simplicity 8711, a collaboration with Madalynne (you can read more about the bra here on her blog!). S8711 looks like a basic bralette, but includes a continuous underwire (or “monowire”) to provide lift, support, and prevent monoboob (which I think we can all safely agree that no one likes. Don’t @ me). The bra includes, um, bra-like features – such as a hook and eye and adjustable straps – but the bralette design looks a bit more low-key casual than a full-on bra.

I actually just discovered the monowire pretty recently – my boss gave me a gift card to Agent Provocateur last Christmas and I have been CLEANING UP when I travel up to NYC. The Essie is my newest one, and my first introduction to the monowire. Btw, do you seen what I mean about having fun lingerie? That shit is FUN.

Simplicity 8711 bra

Soooo anyway, back to the thing I made.

I used a Madalynne kit (the cream & black floral lace) for all my fabric & notions, which meant I didn’t have to source anything on my own. The kit includes enough fabric and elastic to make at least 1 bra, if not an entire set of bra & panties (depending on your size). I was also pleased to see that I received 2 hooks and eyes, so I have an extra for a future bra. I also received 3 monowires – my size, plus one size up and one size down, to really determine which one I needed. The one that was my suggested size fit perfectly, but now I have 2 more for, again, future bras.

The kit comes packed in a beautiful reusable drawer box, which was helpful for storing all my supplies in between sewing sessions (and supplies for a future bra, now!).

Simplicity 8711 bra

Simplicity 8711 bra

Based on the size chart in the pattern – as well as Maddie’s suggestion – I cut the size 32DD. I typically wear a 28E so I was a liiiiiittle apprehensive of this – it sounds really, really off to me! But I trusted and I’m happy to report that this little bralette actually fits perfectly. The 32 band is nice and tight, and the cup size is exactly the size I need. I’m not sure how Simplicity’s grading works in that I’m such a different size, but I would definitely suggest trusting the size chart for the bra.

Instructions-wise, this pattern was easy to follow. There is a pattern guide that you can download if you need additional help (it includes a photo tutorial and more information about monowires in general), but the instructions on their own are perfectly suitable. The only part that wasn’t inherently clear to me was which way to insert the monowire into the bra – it is designed so that the center isn’t completely flat, so I wasn’t sure if that goes flat against my chest or the other way around (the AP bra was no help, as the center of that monowire is actually flexible). I ended up making it flat against my chest, which I hope was right! And speaking of putting that shit in the channeling… LORD, it’s a tight squeeze! Be prepared to wrestle with it a bit, ha.

The bra lined with mesh – there is a lightweight mesh for the front, and a heavier powernet for the band. The ruffle is unlined. Interestingly, the bottom band is topped with strapping elastic – so it’s less stretchy, giving that nice tight fit.

Simplicity 8711 bra

I debated leaving the lace ruffle off, but I’m glad I kept it on! I think it’s a really sweet addition.

Simplicity 8711 lingerie set

I had plenty of fabric and elastics to make the matching panties, so I did! I left off the butt ruffles because I knew those would be useless in my wardrobe (most of my pants are pretty tight in the butt) – and also, I’m just not a butt ruffle type of girl! The ruffles are sewn on top of the back, so it was easy to omit them.

Simplicity 8711 lingerie set

The panties are fully lined with the lightweight mesh, and I added a piece of cotton lining to the crotch (this was the only thing not included in the kit; but I had some in my stash so no problem there). The pattern is, again, true to size if you use your measurements + the size chart, however, I was not thrilled with the elastic lengths. They were WAY too tight. Like, gave me massive amounts of muffin top (I may not be the skinniest girl in the room but man you gotta squeeze me quite a bit to get some muffin top). I unpicked the top elastic and patched a piece in, then re-sewed – which helped, but I need to also do this to the legs. They are very, very tight. I would recommend ignoring the elastic guides and just applying your elastic on freely, with minimal stretching. The guides had you stretch them very tight, which is what causes the muffin top.

Simplicity 8711 bra

I think that’s about all I have to say about this set! I really love the bra; it’s a fun addition to my lingerie drawer. I like that it looks casual but gives the same lift and silhouette as a standard underwired bra. The coverage is pretty solid, in that I could probably get away with wearing this more exposed… I debated including a photo of it on me here, but in all honesty I’m just not that comfortable posting bra shots here. Sorry! There are plenty of shots of women wearing this bra on Madalynne’s Instagram, though, if you are curious. Once I muster up the energy to unpick the elastic from the legs of the underwear, it should be an easy fix to re-sew so they are less tight. The lace is just far too pretty to waste!

Note: The pattern & bra kit were provided to me by Madalynne, in exchange for a blog post. I was not compensated for this post, and all opinions are my own!

Completed: Simplicity 8012

29 Dec

As I mentioned in my last post, I also made a clutch to go with my dress, using leftover scraps of fabric!

Simplicity 8028 clutch

As silly as it sounds, this is something that I have been needing – particularly for this dress, but also in general. See, I own a very nice leather purse – but it’s brown, and it’s a decent-sized handbag (it is actually quite small as far as most handbags go, but it’s bigger than one would need for an evening out). I have been wanting a black bag in a smaller size, something big enough to just hold the essentials (wallet, keys, lipstick, gum, phone). While I normally find clutches pretty silly (you mean I have to HOLD my purse wtf), I think they are fine for evening wear. Gives me something to do with my hands that isn’t smoking a cigarette 😛

Anyway, I decided to make a small bag after I cut my dress and realized I had quite a bit of yardage left over – both with the outer and the lining. I also chose to use this opportunity to try out the fabric cutting function on my Cricut Maker!

Simplicity 8028 clutch

Using the Maker to cut my purse was pretty straightforward. I looked through the available projects on the app and decided to make Simplicity 8028, which is a simple clutch with a zippered top. After purchasing, I changed out to a rotary blade on the Cricut and started loading up my fabric mats.

In addition to cutting, the Cricut Maker also marks your pattern pieces using a water soluble marking pen (both the actual pattern markings and it also numbers the pieces so you know which one is which). The notches are cut in outward triangles (the old school way). One thing I didn’t notice until after the fact is that the screen before you start the project labels all your mats with pieces + fabric (i.e., “Mat #2 will cut pieces 2 and 3 out of lining fabric” or whatever). This is not anywhere in the app once you start the project, so I would recommend writing them down so you know which piece gets cut from which fabric. I was losing my MIND trying to figure out which fabric to load on which mat and ended up cutting a few pieces from the wrong fabric (fortunately, I had enough to re-cut). Learn from my mistakes!

FYI, I was unable to use the pattern marker with my fabric, since it is so dark (it’s one of those light blue marking pens). This was not a huge problem – the pieces are basic shapes, and the app actually shows you them on a gridded mat so you can easily figure out where, say, the strap marking is based on the size of the pattern piece + the measurements on the mat behind it.

After everything was cut, I downloaded the PDF instructions and sewed up my bag! That part was pretty easy. If you’ve sewn up any sort of zippered pouch, this bag goes together in a similar way. It took me about 45 minutes to sew, start to finish!

Simplicity 8028 clutch

Simplicity 8028 clutch

I debated on using the other side of the fabric for this clutch, but in the end – I decided the predominantly black side would work better with the rest of my dresses, should I need a black clutch for any of them. The leather piece + wrist strap is leftover from my Pulmuu skirt kit, and the bag is lined with black silk charmeuse.

Simplicity 8028 clutch

Simplicity 8028 clutch

The clutch is basically a long rectangle pouch with a zipper at one end, that folds in half and closes with a magnetic snap. The snap, zipper, and gold D ring were all sourced from my local fabric store.

Simplicity 8028 clutch

Simplicity 8028 clutch

Simplicity 8028 clutch

The pattern calls for a swivel hook to be sewn into the wrist strap, so you can remove it if you want a plain clutch. While I loved that idea, I couldn’t find a swivel hook in the correct size (my fabric store only had really big ones in stock, plus, the were silver and I wanted gold). So instead I used my industrial snap setter to put a snap in the wrist strap; now it just snaps on or off. Easy!

Simplicity 8028 clutch

Overall, I think it turned out quite nice! It’s the perfect size for the handful of things I need to carry when I go out, and easy to hold (it also fits in the giant pocket of my faux jaguar coat, so that’s pretty rad haha). Not to mention, it feels good to use the last scraps of something – especially when it’s an expensive fabric!

Ok friends, that’s all for this project! I will be back in a couple of days with my year in review post 🙂

** Note: Cricut generously sent me the Cricut Maker machine + a bunch of supplies at no cost to me, in exchange for writing about my experience. All opinions are my own! Also, FYI, this blog post contains affiliate links. That is all!

Completed: Leopard Silk Simplicity 6266

3 Jan

Happy 2017, everyone!! I’m going to kick off this year with one of my last makes from 2016 – featuring some uhhh-mazing leopard print silk charmeuse!

Leopard Silk Simplicity 6266

Having spent the last 1-2 years of my sewing working on essential wardrobe basics, my handmade wardrobe is quite practical these days. Lots of pants and jeans, lots of tshirts and button ups, lots of comfortable and stylish casual sundresses. I feel really good about where I’m at when it comes to those needs, and as I mentioned before – right now I am just updating the old/worn out and not really scrambling around to make new stuff anymore. WITH THAT BEING SAID, I ended up with a surprising hole in my wardrobe – fancy dresses! This is somewhat hilarious to me, considering I spent the first several years of my sewing career endlessly making frilly party dresses that I rarely wore (or stopped wearing after I got over the novelty of wearing a party dress to, say, the bar. Hey, if that’s your jam, you keep doing you! Me, I will put on leggings and a giant sweater instead haha). I ended up with a closetful of impractical clothing, and have spent all these years trying to rectify that with the practical. I also did a bunch of purging with what was already hanging around, getting rid of things that no longer fit (or never fit right in the first place) or in colors/styles that I didn’t feel like suited me.

I have done such a great job that once the holiday season hit, I quickly realized that I have nothing to wear. lolwut.

I still have my glorious Marc Jacobs birds dress (which is still my favorite favorite thing EVER), this blue cotton sateen dress via the Sew Bossy challenge, and my sparkly brocade skirt. Both of these have been great to have for festive holiday parties, or the occasional wedding ceremony, or that one fancy date that I get to on on like every 6 months. I am also totally not opposed to wearing the same thing multiple times – having been the sort of person who needed a new dress for every occasion, I would rather now just have a handful of things I really really love that I know I look and feel good in – I felt that it was time to give myself permission to make another fancy dress. Just in time for the holiday season to end, ha! Whatever, I’ll take myself out for a steak date and wear this shit!

Leopard Silk Simplicity 6266

Leopard Silk Simplicity 6266

Leopard Silk Simplicity 6266

After some deliberation, I ended up with Simplicity 6266, cos I just can’t get enough of that 70s mock-wrap neckline and those sweet tulip sleeves. Honestly, I wanted to make this version with the long sleeves – but I didn’t have enough fabric to cut everything (which, in restrospect, was probably for the best – I think that sort of style would do better in a solid color. That much leopard print could be overwhelming!) because I’d already cut a little bit off and used it to make a bra. I’ve made this pattern before twice (one and two), and yes, I realize that I basically just made a duplicate of the first version. I totally still have that dress – after a couple rounds of alterations when my weight started changing – and I love it, but the polyester content of the fabric makes it not such a great choice for summer. I’ve always wanted to make another version in a more breathable fabric, so here we are.

My leopard print silk charmeuse is from Mood Fabrics, and while it hung around on the site for months after I bought it, it’s sold out now. I think it was originally Rag and Bone, and it’s been in my stash since 2015 hahaha. It’s a nice weight with a gorgeous drape, and I gave it a cold wash before cutting which helped make the shiny side a little more matte (and now I can wash this dress like any other old thing in my laundry basket, ha!). The shiny side was still a little too shiny for my tastes, so I used the matte side as the right side of my fabric. The added bonus to doing this is that the dress feels REAL nice on the inside now, heh heh heh.

I wanted to try a new way to stabilize the silk for this project – in the past I’ve used Sullivan’s Spray Stabilizer, which works GREAT but it can be $$$. I was tipped off to try using gelatine – yes, basically unflavored Jell-o – and I decided this was the project to test this theory with. You can read the full instructions on how to do this here, but basically – you cook the gelatine in water until it boils, add more water, stir in your fabric and let it sit for an hour to soak everything up, then wring it out and lay it flat to dry. I folded mine in half lengthwise and then used a series of chairs and my drying rack to get it as smooth as possible so it would dry reasonably flat. Once the fabric was dry, it had a much more stiff body – similar to a silk organza before you pre-wash it. To remove the gelatine, you just wash the garment as normal (so, this will only work with something that’s been pre-treated – you can’t use it to sew something you wouldn’t wash, such as a coat lining that’s not removable) and it will soft right back up to how it was originally. It’s still not the easiest thing in the world to sew – I mean, we are talking about silk charmeuse here, y’all, it’s never going to be completely fool-proof – but it was a HELLUVA lot easier to manhandle than it had been before the treatment.

Because of the gelatine treatment, assembling this dress was reasonably easy. I used a brand new, 70/10 sharp needle to sew it, and finished all my seams with a serger and then pressed them open (I know that traditionally you sew silk with French seams – and this is what I usually do – but I was anticipating alterations with this. More on that in a sec). For the hems, I turned them under 1/4″ twice and blind-stitched them by hand. The stiffness of the fabric only moderately affects things, if you’re a fit-as-you-sew kind of person (I am!) – as in, the fit is still accurate, but everything just kind of hangs weird because it’s lacking that drape. My sleeves in particular looked RIDICULOUS, but they are fine now that they are soft again. I left off all the topstitching, except at the waist (only because I felt like the silk needed the topstitching for extra stability), and sewed the ties together into a removable waist tie instead of attached at the side seams. Oh, and I used an invisible zipper instead of a lapped zipper. I added a strip of fusible interfacing to both edges of the dress where the zipper would go, which keeps the area smooth and supported.

Leopard Silk Simplicity 6266

Leopard Silk Simplicity 6266

I did have some snafus with the fit on this dress, which at least I was anticipating. See, my pattern isn’t exactly my size – it’s for a 33″ bust, and I’m closer to 32″. This is why I had to take in the original cheetah version, and I had some fitting tweaks that needed to be made on the polka dot one as well. With both dresses, I didn’t actually record my changes – so I had to start from scratch, again. Awesome. For this dress, I sewed the side seams and shoulder seams at 3/4″, instead of the usual 5/8″. This helped a bit – the dress still isn’t super tight, but I like the drape of charmeuse with a little bit of ease. Interestingly, it was the sleeves that gave me trouble with this dress. First, I sewed them with the wrong side on top – and I didn’t notice until after I had finished the dress (including all the serging) and I was comparing it to the original cheetah version. They look really awful when they are the wrong way, in case you were wondering – and I had to unpick and resew them. Also, the shoulders were strangely wide on this dress – the armscye was the correct depth (thanks to that 3/4″ seam allowance), but the sleeves started past the edge of my shoulder and it was channeling some serious linebacker shit. Of course, I noticed this AFTER I had fixed the sleeves – and I wasn’t about to unpick that shit again! So I added a 1/2″ tuck on top of the shoulder, which only goes about 2″ and then folds into a soft pleat over the bust and down the back. This was enough to pull in the sleeve cap so it actually started where a sleeve cap was supposed to start – and also made the bodice fit a little better, too. It’s not the most elegant of solutions – it’s a total hack job, tbh – but it worked!

I also tacked down the center front invisibly, because the dress wanted to gape open (probably cos my boobs don’t quite fill it out lolz).

Leopard Silk Simplicity 6266

Leopard Silk Simplicity 6266

Leopard Silk Simplicity 6266

Leopard Silk Simplicity 6266

As a side note, I am trying a new spot to take photos. I had a few people tell me that my other location was too distracting, and, well, it totally is haha 🙂 I don’t know why I never tried this wall – it’s pretty empty and gets ok light. What’s weird is how different it looks with me standing there vs the dress form (I took all these photos in one session). The background is boring as hell but it’s not like anyone is here for my stunning photography. Also I’m not really sure how to get rid of that giant shadow behind me.

And because I’ve gotten some comments on it recently – the thing I’m holding is my camera remote (my camera is old and the only remote that works with it has a giant antennae), not a screwdriver hahaha.

Leopard Silk Simplicity 6266

Anyway, thanks for all of your great comments and insights on my last post. I had a great time ringing in 2017 and I look forward to what this year has to offer!

Note: The leopard print silk charmeuse was purchased with my allowance from Mood Fabrics, as part of my participation in the Mood Sewing Network.

Completed: Vintage Simplicity 1799

29 Feb

Raise your hands if you’re ready for spring!

Simplicity 1799 robe

This is the time of year that I spend the majority of my day wrapped up in a robe, at least those days when I’m hanging around the house. My old fleece robe has truly served me well during these trying times, but its really starting to look its age (nearly a decade, I have recently realized!). I wanted to upgrade to something that was a little classier than the ugly fleece – something that wouldn’t make me feel quite so embarrassed to run to the mailbox in. I know, I live in the middle of nowhere – but the moment you run to the mailbox in your robe, that’s the moment someone you know decides to cruise on by.

Simplicity 1799 robe

Simplicity 1799 robe

Simplicity 1799 robe

Since more fleece was out of the question, I went with a soft cotton plaid flannel from Mood Fabrics. Mood has tons of great cotton flannels on their site, but I picked this particular one because it kind of matches my plaid flannel Carolyn pajamas. It’s a thinner plaid, with one brushed side (the other side is smooth, which I used on the inside of the robe). My only complaint is that it’s quite a bit off-grain – which, combined with using a pattern that was decidedly NOT plaid-matching-friendly, meant that I really fucked up the plaid matching on this garment. Or, rather, just threw my hands in the air and gave up about halfway through cutting. I did manage to get the center back and sleeves to have a nice continuous line, but those side seams are all kinds of wrecked. Whatever. Sometimes in sewing, we have to pick our battles. I’m not going to argue with a garment that will get the majority of it’s judgement from my cat.

Simplicity 1799 robe

Simplicity 1799 robe

The pattern I used is Simplicity 1799, a 1940s vintage pattern I’ve had my stash for quite some time. I don’t really sew much with vintage patterns these days – I find the styles to be a little too cutesy and/or dated for how I roll with my clothes lately – but I still collect and appreciate them. And sometimes, you need a little cutesy glamour to make your day prettier, especially when we’re talking about an otherwise ugly robe. Look at how classy those ladies are!

One thing I really love about vintage patterns are all the beautiful details that they include in the design. This pattern has tucks and gathers all over the places, elbow darts, and a boxy 1940s upper silhouette paired with strong shoulders. The instructions are pretty sparse as you can see, but anyone with common sewing sense can easily figure them out. I mostly went my own way – finished all the seams with my serger, left out the shoulder pads, and gave nice 2″ hems on the sleeves and bottom.

It’s really hard to see the pretty details in this, thanks to the plaid clusterfuck I’ve got going on, but I’ll try to show you some highlights:

Simplicity 1799 robe

Simplicity 1799 robe

Simplicity 1799 robe

Simplicity 1799 robe

Simplicity 1799 robe

Simplicity 1799 robe

Not much else to say about this one! Keepin’ it simple and cozy this month!

Simplicity 1799 robe

Note: This fabric was provided to me as part of my participation in the Mood Sewing Network. All declarations and opinions are my own!

Completed: Simplicity 6266

14 Aug

How often do we fall in love with a pattern and swear that we’re going to make a million versions, and then end up with just the original one? Yeah. I definitely made this pattern like 3 years ago, and I definitely have been saying ever since then that I need to make it again. Whoops. Better late than never, anyway!

Simplicity 6280

The pattern in question is Simplicity 6266, which, 3+ years later, I STILL can’t find anywhere on the internet. EDIT: Definitely had the pattern number wrong. Dunno what that was all about hahah! This post has been corrected 🙂 I made this forever and ever ago in a slinky poly cheetah print, with adorable little tulip sleeves. It’s the best dress. I still wear it all the time – it is kind of awful in the summer (polyester not being breathable and all), but I do it for the ~fashion~. Truth me told, the OG cheetah version is one of the few dresses that I actually altered to fit my new size after I lost weight, rather than get rid of it (which happened to most of my closet, if you were around for the Great Closet Etsy Purge a couple years ago). Now you know that’s true love!

Simplicity 6280

I knew I eventually wanted to make it again – it stayed in my pattern queue piles for years, and I waffled back and forth on fabric choices. I finally decided to bite the bullet and just fucking make it – and I used a special/hoardy fabric to do it. Might as well kill two birds with one stone! Get’er done and all that!

Simplicity 6280

Simplicity 6280

Remember when I said that I had to alter the original dress after I lost weight? Well. I knew the pattern was going to need some adjustments, since it was completely unaltered and thus the original size (which was for a 33.5″ bust, sadly larger than what I’m rocking these days), but I threw all fucks to the wind and just charged ahead with making this before I changed my mind. So, there were a lot of last-minute fitting alterations to get this thing even remotely sized like I am. I took quite a bit out of the side seams, as well as raising the shoulders a bit (not much, less than 1/2″. Maybe more like 1/4″. I don’t remember! Sorry!). The resulting fit is pretty good, I think, but it definitely added quite a bit of unnecessary unpicking and re-adjusting that I could have avoided had I bothered to make a muslin and do some flat pattern adjustments. With that being said… did I make those adjustments to the pattern after these alterations? Hell no! Do I look like I operate on common sense?? 😛

Simplicity 6280

All that aside, once I got the fitting sorted out – the rest of the dress came together beautifully. This is the kind of project that I just love doing – working with a pattern that I know I love to wear, made up in a beautiful and special fabric, and spending the extra time on parts of the construction, such as blind-stitching the hem by hand (I can’t even remember the last time I did that! What is wrong with me?)

Simplicity 6280

Simplicity 6280

I kept most of the construction true to the pattern, but I did change out a few things. For one, I left off the arm hole facing and used bias facing instead. Since there’s a lot of topstitching going on with this dress, the topstitching for the bias facing doesn’t stand out like a sore thumb. I also traded out the lapped zipper for an invisible zipper, because it looks a bit more polished. I did not make the waist tie for this dress (on my cheetah dress, I made it, just didn’t attach it to the dress), instead I added some thread loops to hold my belt in place.

Simplicity 6280

The fabric was another gift from the fabric goddess herself, Sunni. This, too, was part of the awesome care package she sent me last year. I’ve been waiting so long to figure out what to use with it, but I’m happy that I decided to match it up with this pattern! This fabric is rayon challis that has the most gorgeous, fluid drape. Really really lovely stuff. It shed like a hairy little monster, but otherwise sewed and pressed well. It is slightly translucent, so you can see the facings shining through the front in some lights, but that doesn’t bother me. I just wear skin-colored undergarments and get on with my life.

Simplicity 6280Similar to the cheetah version of this dress, I tacked the front surplice together to prevent it from gaping when I bend over. Unlike the cheetah version, I literally just sewed the two pieces together (see the stitching line? It’s aligned with the topstitching so it doesn’t show from the outside), instead of using a snap. A snap seems kind of silly with a mock-wrap dress – I mean, when am I going to unsnap it? Never, that’s when!

Simplicity 6280

Because the fabric is so drapey and shifty, I added a strip of stay tape to the waist seam to prevent it from stretching over time. Just sewed it to the seam allowance at the waist, and then topstitched it down on the outside. Not shown but also there – I interfaced the zipper seam allowance with a strip of fusible interfacing, before I added the zipper. This not only adds strength, but also keeps the fabric from wrinkling by the zipper. I know there are still a few puckers – alas, the nature of the beast – but it’s not nearly the horrifyingly wavy thing that it was threatening to be pre-interfacing.

Simplicity 6280

I love making belt thread loops! Ha!

Simplicity 6280

Simplicity 6280

Simplicity 6280

Simplicity 6280

One of my favorite parts of this dress is this section right here – the dart + the lines of the surplice neckline. I just think it’s so pretty!

Simplicity 6280

Really glad to finally get a good idea for that fabric so I could give it the love it deserved! I actually almost made a Hawthorn with it – but decided at the last minute that it might look a little too cutesy with the polka dots. This sleek 70s mock-wrap is a good alternative because it’s a classic style in it’s own right, and I know I love wearing it. Ideally, I’d like to make this again for winter with the long sleeves – but I also know I’d have to do a lot of pattern adjustments to the tissue before that happens. We’ll see!

In the meantime – I used some of the remaining fabric to make a really adorable bra, so stay tuned for that!

made-up-logo-ii

As a side note – have y’all heard about the Made Up Initiative that was just launched yesterday? Karen and Love Sewing Magazine have dreamed up a great fundraiser, where you pledge a donation and set your own challenge to make something before September 10 (it doesn’t have to be sewing related! It can be anything!). There will be prizes for those who complete their personal challenge on or before the deadline. All the money raised goes to the National Literacy Trust.

I love the idea of pulling the sewing community together to accomplish something like this, and bonus if it’s for literacy! Reading was a huge part of my childhood and I fell in love with it at a very early age. I come from a family of voracious readers and it saddens me that not every child (or adult, for that matter) has those same opportunities that I did. So I’m definitely on board with this, and have contributed and made my pledge – I will be making a swimsuit before we go on vacation next month. It’s a pretty simple pledge – I really wanted to make something show-stopping, like a coat or some shit – but I realized that time is pretty short right now and I need something low-key if I actually want it to be finished by the deadline. Plus, I want an excuse to use this 70s-fabulous string bikini pattern that I bought at the flea market a couple of months ago. We are going to Cancun, Mexico, the first weekend of September, so time is short!

I encourage all of you to consider joining the Made Up Initiative and set your own challenge! Again, it doesn’t have to be a big fancy project – it can be as small as making a couple of napkins – or even sewing related. You just need to make something by the deadline. And even if you don’t think you can manage anything by the deadline, maybe consider donating anyway. Even $5 makes a difference!

For all the info on the Made Up Initiative, check out Karen’s blog post. You can also donated directly to the Just Giving page – as of this publish, it’s at 91%, which is awesome. Think we can double that? C’mon, y’all! Do it for the books! ♥

OAL: Hemming & Finishing

14 Jul

Good morning, OAL-gers! Today is the final post in the OAL series (which I’m sure means that a lot of y’all are dancing for joy to hear that there won’t be any more of these posts! Ha!), and we will be finishing our dresses. Yay!

You should have a mostly-finished dress at this point – everything is connected, all seams are finished, and the only thing left to do is hem the dang thing! Of course you can hem however you like (as most of y’all already have at this point), but I wanted to give a couple options for those who are unsure what to do, or just want to try something different. You know how much I love having options!

First things first, try your dress one and determine where you would like the hem to hit. I like my hemlines above the knee, and this dress runs a little long (or, rather, I’m a little short), so I ended up cutting off about 4″ from the hemline. I’ve found that the easiest way to mark my hemline is to measure the length of a skirt that I like, mark that length with a pin on my dress, and then try it on to see if it works. Before you cut, add back a hem allowance (however much you will be turning up before you stitch the hem), otherwise, your skirt will end up a little short 🙂

Option #1: The Easy Turned Hem

OAL - Hemming
Fold the skirt hem under 1/4″ to the wrong side and press.

OAL - Hemming
Now fold one more time, again to the wrong side, and press. However much you fold under depends on how much of a hem depth you want. I stick with about 5/8″ for this particular type of hem. You can certainly fold more for a deeper hem, but be aware that the curved hemline means that you might have difficulty easing the fullness in (since a curved hem means it’s bigger at the bottom than it is at the top) if it’s too deep.

OAL - Hemming
Now just topstitch that bad boy down!

Some tips for topstitching your hem:
– Start on a side seam so your backstitching doesn’t distract from the beautiful front or back of your dress
– Use a slightly longer stitch length (I use 3.0 over my machine’s standard 2.5 length); the stitches will be a little more defined
– Topstitch from the right side if you can help it – the needle stitches are much prettier than the bobbin stitches
– Use the measurement markings on your throat plate to help ensure you are stitching in a straight line

OAL - Hemming
If you are sewing the version with the notched bodice, don’t forget to tack down your facing to the center front. Catch only the seam allowances and use a couple of handstitches to keep that facing inside the bodice where it belongs.

OAL - Hemming
And done! 🙂

Option #2: The Extra-Fancy Hem
One thing I like to include with my hems is a strip of seam binding. This vinage-inspired finishing covers the raw edge (so you don’t have to fold twice) and is a fun little surprise whenever someone sees the wrong side of your skirt. You can use seam binding, bias strips, or even lace – in a matching, contrasting, or complementary color. I just think it looks really pretty and it really adds a nice professional finish to an area that most of us tend to rush through (because, duh, we just wanna wear our dresses!). For this hem, I used vintage seam binding and topstitched it down, although you can also sew the hem by hand if you’d like it to be invisible from the outside.

OAL - Hemming
Starting at one of the side seams, pin your hem tape to the right side of your skirt hem, letting the binding hang over about halfway.

OAL - Hemming
Stitch, keeping your needle as close to the edge of the binding as possible.

OAL - Hemming
When you reach the full circle of the hem, overlap the binding by about 1″ and fold the raw edge under, as shown.

OAL - Hemming
OAL - Hemming
Now fold the binding to the wrong side to whatever hem allowance you prefer, measuring all the way around to ensure it is even. Pin into place.

OAL - Hemming
Topstitch on the opposite (unsewn) side of the seam binding – again, sewing as close to the edge of the binding as you can. Press and use steam to ease out any fullness.

OAL - Hemming
Ta da!

And that’s it! Give yourself a pat on the back, pour yourself a stiff cocktail, and do a little dance because YOU FUCKING SEWED A FUCKING DRESS, LIKE A FUCKING BOSS! Whoop whoop!! Don’t forget to post your finished outfit in the Offical OAL Finished Outfits Ravelry Thread – there are already sooo many beautiful dresses and cardigans lurking around there, omg. Remember that you have until 7/31 to post to be eligible for prizessss – so you’ve got a couple more weeks if you’re running behind 🙂 Don’t have a full outfit but want still want to share your dress? You can post that in the Official Unofficial OAL Flickr Group.

Stay tuned for my OAL photos in the next couple of weeks… a friend took them for me, and, well, all I’m going to say is that they are MUCH better than anything I could have tried to do haha!

Me-Made-May ’14: Week 5 Round-Up

30 May

Ahhhh, you guys! Me Made May (and thus, the daily photographs) is almost over! Can I get a FUCK YEAH!?

This is going to be a longer than usual round-up, because I went on vacation and obviously I had to change outfits a couple times each day. That’s what you do on vacation, right? ps, sorry in advance.

5/24
5/24, Saturday
Dress: Lady Skater
Shoes: Keds

First day of our vacation! Here we are en route to Santa Rosa Beach, at a food truck somewhere in Alabama. I knew we’d spend the day in the car, so I opted for a comfy knit dress. I’ve always thought this dress was very fall-like, due to the colors, but the fabric is definitely summer-appropriate as well 🙂

5/25 pt. 1
5/25, Sunday I
Pajamas: Lakeside pajamas

I’ve been wearing various other me-mades throughout the month that haven’t made it into photos (workout wear, pajamas, leggings, underwear, etc), so here’s some proof! I brought two pairs of Lakeside pajamas to wear while on vacation – the ones you see here, plus a new set I made a couple days before (I used this cute strawberry print cotton lawn to make them, if you were wondering!)- and wore them all week. In addition to being awesome pajamas, they also make a great swimsuit cover-up! Although, to be fair, I started out wearing the set and ended up in only the shorts(+ bikini top, obvs) by the end of the week.

Speaking of bathing suits…

5/25, pt. 2
5/25, Sunday II
Swimsuit: Papercut Patterns Soma Swimsuit (no blog post on this… yet! But here’s the link to the pattern :))
Sunglasses: Franco Sarto
Hat: Scarlet Begonia

Hell yes I came with a handmade swimsuit! THREE, in fact! This is the first – the result of my pattern testing for Papercut Patterns a couple of months ago 🙂 I haven’t had a chance to write up a proper blog post, but here’s a sneak preview 🙂

5/25, pt. 3 (sorry! Last one for today)
5/25, Sunday III
Top: Refashioned from a men’s Hawaiian shirt
Shorts: Rite of Spring shorts
Shoes: Keds

After spending all afternoon at the beach (no, really, I laid up on a float and bobbed around in the ocean for hours and it was glorious), I reluctantly put on clothes and walked around the shops with Landon. I didn’t buy stuff, but I did buy liquor. Priorities, y’all.

Also, that shirt. This is the third vacation I’ve dragged it to (and no shit, I literally wore that same outfit last May HAHAAHAHA whatever, it’s good, I’m not apologizing for shit), so it’s basically my official vacation shirt at this point. Unfortunately, it’s also way too big now. My alterations were pretty shoddy (it was a very last-minute job), and I’m thinking I may just need to send it to the nice Goodwill Bin in the sky at this point.

5/26, pt. 1- my other @papercutpatterns Soma bikini + a photo bombing niece  #mmm14 #mmmay14
5/26, Monday I
Swimsuit: Papercut Patterns Soma Swimsuit
Sunglasses: Franco Sarto
Hat: Scarlet Begonia

Exact same get-up as the day before, but check out how different it turned out! This is version 2 of the Soma Swimsuit, and the second one I tested (yeah, I tested both. I wasn’t asked to, but after making the first one I kind of went crazy. I almost made 3, tbh). I used this version to play with stripes and decorative elastic, and I LOVE how it turned out. Seriously, my favorite swimsuit ever! Again, expect a blog post on these bad boys soon 🙂

Oh yeah, and that bratty kid in the background is my niece 🙂 I told her she could photobomb my picture and she sure did me proud.

5/26, pt. 2- dress: Sewaholic Lonsdale; shoes: Fergalicious.  #mmm14 #mmmay14
5/26, Monday II
Dress: Sewaholic Lonsdale
Shoes: Fergalicious

I wore this for a dinner out with my parents+Landon’s parents (the first time they met! It went very well :)), and unfortunately forgot to take a photo until right before bed. Oh well! Also, I love this dress and I should totally make it again.

5/27, pt. 1- swimsuit: closet case files bombshell  #mmm14 #mmmay14
5/27, Tuesday I
Swimsuit: Closet Case Files Bombshell
Sunglasses: Franco Sarto
Hat: Scarlet Begonia

Last bathing suit! This is one I made last year, and I still love it 🙂 Especially good for those days when I realized I’ve just been drinking beer and eating key lime pie all weekend and oh god it’s time for the beach. Hahahaha!!

5/27 forgot to upload this yesterday! Drinking wine in Seaside, FL :) top: thrifted; skirt: Tilly's Miette (tie-less); shoes: Fergalicious #mmm14 #mmmay14
5/27, Tuesday II
Shirt: Thrifted
Skirt: Tilly’s Miette
Shoes: Fergalicious

Post beach, Landon and I spent the afternoon in Seaside, checking out the cute houses, the shops, and drinking free wine (the best part!). Again, with the top – that’s another unofficial vacation top (that I bought… 3 years ago, at the Goodwill on Santa Rosa Beach, ha!) that’s about to get the Goodwill shaft. It’s just too big 😦

5/28 channeling my inner mermaid before heading back to Tennessee ☀️ top: Megan Nielsen cropped briar; skirt: Megan Nielsen cascade.  #mmm14 #mmmay14
5/28, Wednesday
Top: Cropped Briar
Skirt: Cascade

Last day on the beach! I thought it would be fun to take the photos of my Cascade by the cascading waves (you can’t even tell in this picture but they were AMAZING that day!). The wind was blowing like crazy, and I think it makes for a really cool picture 🙂 This picture also vaguely reminds me of <a href="this picture from the Little Prince, which makes me happy 🙂

5/29 dress: deer & doe Belladone; shoes: Sam Edelman; necklace: Fabu #mmm14 #mmmay14
5/29, Thursday
Dress: Belladone
Shoes: Sam Edelman
Necklace: Fabu

Back to Nashville! It was at this point that I realized we were almost at the end of May – and I haven’t worn some of my favorite stuff! So out comes the Belladone 🙂 I tried to style this a little differently than usual – I generally wear it with brown or yellow, but I do like the red 🙂

5/30
5/30, Friday (today!)
Dress: Simplicity 1803
Belt: Thrifted
Necklace: Chatterblossom
Shoes: Born

My other favorite dress – and our star pattern for the OAL. I love this pattern and I’m glad I finally have a reason to buckle down and make another! Which reminds me – the sewalong starts on Monday! Eep! 🙂

Speaking of which – those of you who are participating, do you feel like you need a post that covers fabric selection? I was planning on skipping straight ahead to cutting and marking, since I figured most everyone’s already chosen their fabric (and thus makes a post on fabric selection a moot point) – not to mention a lot of y’all are sewing different patterns (which means different fabric requirements) – but you tell me!

Sooo I guess that’s almost it for Me Made May! We do have one more day of the month (and you bet I’ll be wearing me-mades and begrudgingly taking a photo, ha), but I’m not going to include it in this round-up because it doesn’t fit with my ~schedule~. Sorry! If you want to view the rest of the weeks, here they are:
Me-Made May: Week 1
Me-Made-May: Week 2
Me-Made-May: Week 3
Me-Made-May: Week 4
I also have a Flickr Album of all my MMM photos, if that’s more your jam.
If you’re sick of looking at me, that’s ok too – I’m sick of looking at myself at this point :B

I am glad I participated this year, because I definitely learned a lot about what’s lurking in my closet – namely, that there is WAY more than I think there is! Seriously, so many pieces didn’t even make it out this month, and that’s kind of sad considering I only repeated one skirt and a couple of tshirts. I’ve had some size fluctuations over the past couple of years, which means a lot of my summer wear doesn’t fit anymore (and while I altered some of it – such as the Simplicity dress I’m wearing today – a whole bunch of it got sold/donated instead). After that giant purge, I was under the impression that I didn’t have a lot left to wear in warm weather – which is clearly not the case! With that being said, despite my overabundance of clothing, there are still tons of pieces that my wardrobe is lacking. I’ve got plans to make more separates, including shorts (gah, I can’t believe I didn’t wear shorts once this month, wtf?) and tshirts, as well as workout wear, loungewear, and more bathing suits! Serious question… how many bathing suits is too many? They are REALLY fun to make, ok.

How did your Me-Made-May turn out (if you participated)? Did you learn anything life-changing about your closet? Are you SO sick of taking photos? 🙂

Ohh, I almost forgot – I promised y’all outtakes! Let’s revel in the unflattery together:

MMM'14- Outtakes
Most of my photos end up looking like this haha. I dunno why, but I always close my eyes when the picture is being taken (not to mention… whatever my mouth is doing. I guess I was in the middle of talking haha. OK FINE I BASICALLY NEVER SHUT UP)

MMM'14- Outtakes
If anyone happens to see where I left my arm, I’d appreciate your help.

MMM'14- Outtakes
Original photobomb did it better

MMM'14- Outtakes
Look at the fear in Amelia’s eyes hahahahahaha

MMM'14- Outtakes
I just think this is cute. Amelia doesn’t care much for being held (despite my consistent grabby hands at her), but she loooves having her butt scratched.

MMM'14- Outtakes
Hey, that’s almost a good picture! Until you zoom in a bit…

MMM'14- Outtakes
That, my friends, is the face of a cat who’s completely given up on life.

MMM'14- Outtakes
Ok, this is my favorite outtake and the one that made me laugh the hardest. This is a really unflattering picture of both of us – I’m pulling some kind of weird face (again, seriously, probably in the middle of talking) and Amelia just looks PISSED.

MMM'14- Outtakes
If that doesn’t look like the devil incarnate, I don’t know what does.

Have a great weekend, everyone!

Completed: Simplicity 2145

10 Feb

Happy Monday, everyone! I have some good news and I have some bad news. The bad news is – I didn’t make it through the first round of Project Sewn. Bummer! Although, I’ll be honest right now – as soon as I saw who I was competing up against, I immediately figured I’d be one of the first to go 🙂 On the flip side, my girl Oona made it as the winner for the first round! YAY OONA GET IT GIRL. Can’t wait to get some celebratory drinks with you when I’m in NYC next month!

Speaking of my short stint with Project Sewn – I’ve received lots of sweet messages and comments since I was eliminated, and I am absolutely floored by all the support. Aw! You guys! I think some of you were more upset about the elimination than I was 🙂 I’m actually a tiny bit relieved to have that heavy workload off my shoulders. I’m not gonna lie – it was tough trying to coordinate all that sewing (for PS, as well some other ~secret~ side projects, stuff for the Mood Sewing Network, not to mention this blog!), and it got a bit stressful. SO MANY UFOS ALL OVER MY SEWING ROOM. Which is certainly a first world problem, don’t get me wrong, but it is what it is. I really don’t know if sewing contests are for me at this point – I always feel too rushed when I’m making my shizz, and half the time I end up with something that isn’t up to my personal standards. I really loved participating in Project Sewn, and I don’t regret my decision to join one bit, but but I think from here on out, I’ll be staying out of contests like that 🙂

So, anyway, the GOOD news – my pink dress is already finished and photographed, and since I’m not one to let a perfectly good project go to waste, I’ll be showing y’all a whole DAY earlier than originally planned. Woohoo!

Simplicity 2145

The color is a deep magenta, although it looks quite red in these photos.

Simplicity 2145

This is Simplicity 2145, which is one of those ~be your own designers~ Project Runway patterns. I’m just going to throw this out there – I don’t like the PR patterns. Sorry! The drafting is fine for what it is, but the method of construction (and instructions) is usually pretty subpar in my experience. I suppose the drafting is more important than the instructions (ok, I KNOW the drafting is more important than the instructions, ha), but they are generally intended for “emerging designers” and I think they just set a bad example. I’ve sewn lots of these patterns in the past – they usually have some neat style lines that I don’t find replicated in other patterns – and if I was dealing with those instructions as a beginner, I think I’d give up on sewing entirely. Lots of unfinished edges, missing information (I can’t remember the particular pattern, but I do recall one that spent 3 paragraphs explaining how to sew a dart, and then forgot to tell you to close the side seams. Really!), and the yardage requirements are waaaay too generous.

I guess my point is – if you want to sew these patterns, great, but make sure you have a good instruction book close by. That is all.

Simplicity 2145

ANYWAY, back to the matter at hand – I think this particular dress turned out great! I really love the front wrap and the pleated skirt, and I think it’s a cute (and flattering!) look. I believe this pattern was intended to be a knockoff of Princess Kate’s engagement dress, although let’s all take a moment to acknowledge that she looks 1000x better in hers than I do. Must be the silk jersey 😉

Simplicity 2145

My version is made from wool crepe, which I picked up at Textile Discount Outlet while I was in Chicago last year. It was cheap, too – I think I paid less than $10 a yard for it (and it’s pure wool, according to my burn test. Nice!). I used a scrap of baby pink Bemberg Rayon to underline the bodice, and left the skirt unlined (only because that’s all the lining I had). I decided to go with underlining because the thought of trying to draft a lining for this style gave me a headache, haha. Underlining also meant that I got to keep the facings without there being a lot of bulk. I like facings.

Simplicity 2145

One thing I will warn y’all about this pattern is that it runs LARGE – like, super duper large! Holy shit! According to Simplicity’s size chart, I should be wearing a size 10. Well, I know how much they (and the rest of the Big 4) looove to make things way too fucking big, so I double-checked those finished measurements and ended up sewing the 4. So freaking ridiculous!

On the flip side, I didn’t have to make many adjustments to get a good fit. I did make a muslin – this has become a very regular thing for me (more so than usual) because I’ve learned that my posture means the back is too large at the top and needs a flat pattern adjustment. So I have to muslin everything I make now. It’s a pain for sure, but I will admit that it is REALLY nice to not have a big gape at the back of my neck! This one didn’t need much of an adjustment – I did a 3/8″ rounded back adjustment, and the fit at the back is pretty much spot-on now. The only other alteration I made was to shorten the sewn-down part of the skirt tucks. They were a little too long on me and it just looked weird.

Simplicity 2145

The dress also has two tucks at the back, which upon viewing these pictures appears to hit a somewhat unflattering spot right above my ass. Oops.

Also, for some reason, I had a DEVIL of a time inserting that invisible zipper. I don’t know why – invisible zips don’t really give me much trouble! – but my feed dogs were trying to make it gather on one side. So weird! I’ve since inserted several invisible zips, and they go in flawlessly. I don’t know if it had something to do with the wool crepe or what. If you super zoom into this photo (which, I mean, uh, don’t. Haha), you can see that my waistline seam at the zipper is off by about 1/4″. That was the closest I could get it, after ripping the zip out like 4 times. Stupid zipper!

Simplicity 2145

Another thing I don’t care much for about this dress is that the sleeves are SUPER tight and it’s difficult to raise my arms very high. So it’s ok for wearing if I’m going to be sitting all day/not moving around, but that’s about it. I need to rip them out and reinsert them and see if that helps. I’ve been told that if the sleeve isn’t eased in the right areas, it can make it difficult to move your arms, but I was pretty careful about that while I was setting these in. I’m thinking it might be another pattern adjustment that I need to address, because it happens a lot to me. Anyone have a suggestion on what I should be looking for? The armhole is high enough (I believe) and the circumference around my bicep is the correct size, so I’m not sure where to go from here, or even what to research.

Simplicity 2145

Sleeve issues aside, the rest of the dress is right up my style alley. You can get a better idea of the true color here – it’s a very rich, deep pink, and it looks super fabulous with all the wool crepe-y texture.

Simplicity 2145

Simplicity 2145

Simplicity 2145

Wish I’d actually had the correct thread color on hand – I had a pale pink, which in retrospect was a horrible decision (you can sort of see it at some seams when I’m wearing the garment, ugh), but at least it matches the lining, I guess?

Simplicity 2145

Oh yeah, and if you were wondering why my hair looks SO good in these pictures – I’d just had a haircut and that blowout they gave me was LEGIT. God, I wish I could afford regular blowouts haha! As it stands right now, my hair doesn’t even look like this anymore. I had it bleached last week, and now it’s neon orange. More on that later 😉

A couple things before I dip outta here:
– Remember Joanna Baker, she of the sweet sewing prints giveaway? Well, I just heard back from her (she’s been busy getting married since then!) and she has listed the 3 sewing prints in her shop for a limited time. I know some people were interested in purchasing them, so if that’s you – here are the dressform, button collection and thread prints.
– Also, She’ll Make You Flip is currently offering a nice discount – use the code VALENTINE25 for 25% off your entire purchase, good through 2/24/14! Someone should go buy this and hang it on their wall, because that is EXACTLY what I would do with that pattern. Ok ok, in all seriousness, how cute is this pattern?? AND IT’S IN MY SIZE. EEP, my neverending quest for the perfect stripe fabric continues!