Tag Archives: wool knit

Completed: Cozy Loungewear

7 Dec

It’s officially that time of year – black and grey layers from head to toe. My favorite!

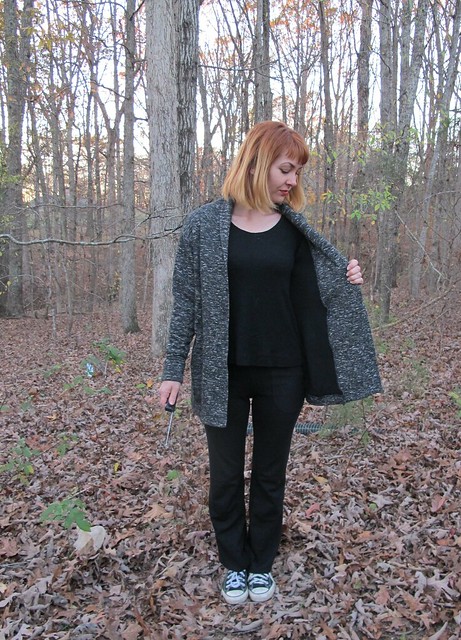
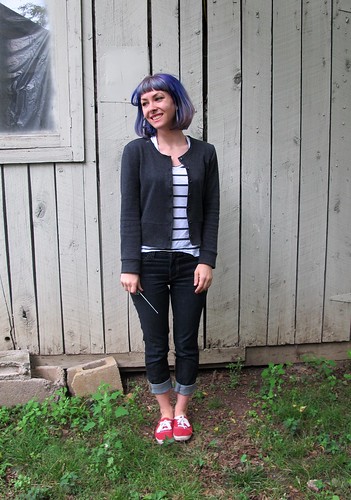
Colette Oslo Cardigan - front

I feel like I spend the beginning of every winter on the prowl, looking for pieces that will keep my warm and comfortable, without looking like a complete slob (only, like, 30% slob. I have my limits, you know). Every year, I wear said pieces until they are ratty beyond repair, so each new season means new duds. Honestly, none of the pieces in this post are particularly earth-shattering, which is why you get a 3-fer post, ha.

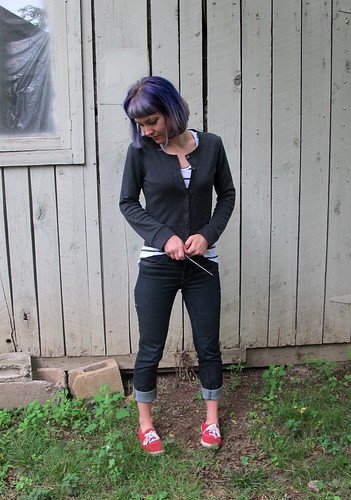
Colette Oslo Cardigan - side

Colette Oslo Cardigan - side

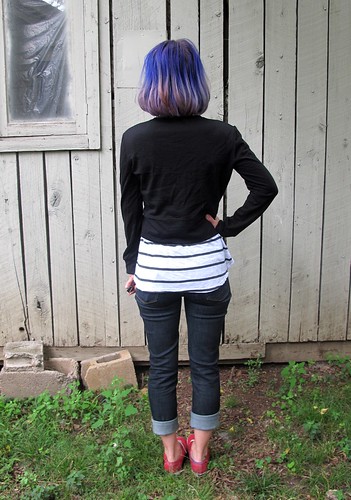
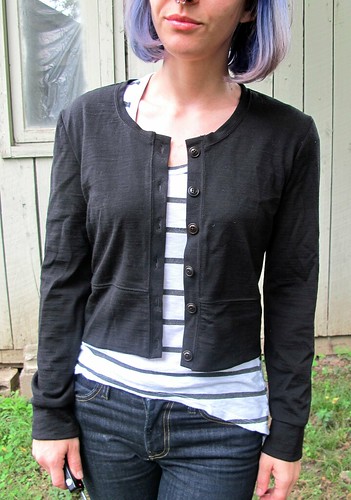
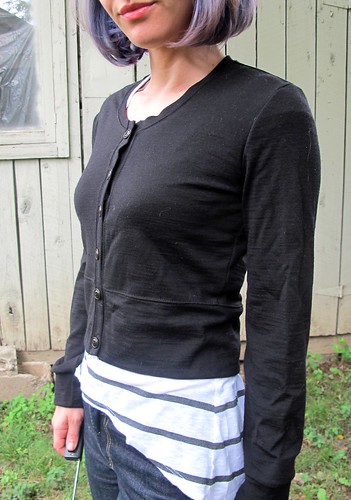
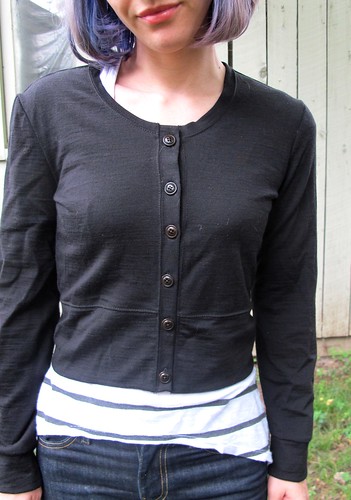
The grey/black cardigan is hands-down the coziest cardigan I have ever made – it even works as a light coat! The pattern is the Oslo from Colette’s Seamwork Magazine. I didn’t care much for the pattern when it was first released, however, I kept noticing cool versions popping up and eventually became mildly obsessed with the idea of making my own. I love the long, butt-covering length, as well as the big shawl collar. In September, Oslo was granted the glory of being “Pattern of the Month,” which knocked the price down to $5 and thus justified my immediate purchase.

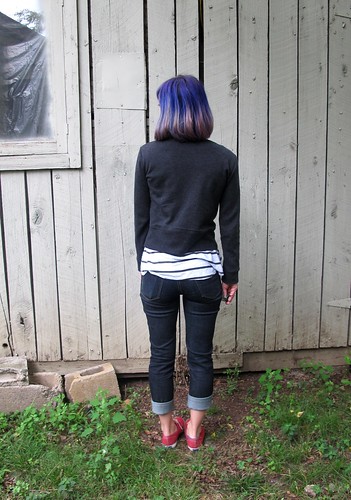
Colette Oslo Cardigan - back

Anyway, I can see why everyone and their mom has made an Oslo – it’s a great pattern! It’s a super simple, super quick make, and the resulting garment is a great layering piece that I find vaguely reminiscent of those knit duster cardigans we all wore back in the late 90s (I bought mine at Rave. SUP.). It works especially well with heavier knits – which is great, because I keep buying them but I never know what to make them into! I don’t want a super heavy tshirt. I’ll wear a super heavy cardigan/duster hybrid, though, hell yeah I will.

Colette Oslo Cardigan - inside

Speaking of heavy knits, this was certainly one of those! I bought this double-cloth Italian wool sweater knit months ago, and while it’s really awesome – it’s also super thick. It’s basically two layers of wool knit – black on one side, grey on the other – fused together to make one really heavy layer. It makes for the perfect Oslo, because it’s super warm, but I had no idea what to do with it when I originally bought it. Also, it was kind of expensive, so I only bought 1.5 yards. I BARELY had enough yardage to eek this out – I had to do some piecing at one shoulder, and cut everything on the single layer, but I managed!

Colette Oslo Cardigan - front

Tetris-ing the shit out the cutting layout took a long time, but the actual sewing part did not take long at all! I used my serger for everything – shit got REAL bulky when I was attaching the shawl collar, but other than that was smooth sailing. I cut the size XS and sewed the pattern as drafted with folded back cuffs, although I didn’t add the buttons. I wish I’d had enough fabric to add front patch pockets, as I feel like that’s the only thing this pattern is missing.
Vespa Patterns Grail tshirt - front

The next piece is a boring ol’ black tshirt! Haha! Well, I used a new pattern to make this – so that makes things a little less boring 🙂

Vespa Patterns Grail tshirt - front

This is the Grail tshirt from Vesta Patterns, a new company in the pattern world. These patterns are drafted and produced for 3 different body shapes, so that you don’t have to do so much futzing with the flat pattern for a good fit. I’ve been super interested in the idea but haven’t had a chance to try out the patterns, despite having them in my arsenal for a few months now. I have both the patterns for E & S (well, I had A too, but I gave it to an A-shaped friend 😉 ), so I started with the E in a size Small. The patterns are drafted to have a bit of ease, which I found to be too much for my personal fit preferences – I had a bit of excess from the underarm down to the waist, but that was easy to nip in before I hemmed the sleeves and bottom. Next time, I may go down a size for a closer fit, or use a more stable fabric like the pattern suggests. That being said, I am really impressed with how well and proportional the neckline and shoulders fit!

Vespa Patterns Grail tshirt - back

Like the cardigan, construction was straightforward and simple. The pattern doesn’t include a lot of information for construction – the steps are written out, but they are short, concise, and don’t include pictures or line drawings. Having made zillions of tshirts in my time, this does not phase me. I don’t need a full booklet with step-by-step instructions for sewing a shoulder seam, you know? But if you need the hand-holding, you may want to consider finding a tutorial online or consulting a book for further assistance.

The one construction element about this pattern that differs from most knits that I’ve sewn, is how the neckline was finished. Strips of fabric are sewn as a sort of binding around the neckline, wrapping the raw edges. It’s similar to how I did the binding on my Mission Skater dress, although without the serged edge. I think it makes a really nice, clean finish that looks really good from the outside. I hemmed the sleeves and bottom at 1″, and just used the zigzag on my sewing machine.

Vespa Patterns Grail tshirt - front

I stayed on the wool bandwagon with this top, and used another wool knit to make it up. I found this weird “black cozy knit” (their description, not mine) on the Mood website – appears to be sold out now. Y’all, this was a WEIRD fucking fabric! I don’t know what I was expecting to get, but what I received was what I would describe as a wool crepe knit. It has that crepey, spongey texture – but it’s a true knit, and stretches as so. I’ve never seen fabric like this before. It’s borderline semi-sheer, but works well for a tshirt. Because of the crepey texture, it has a fantastic drape – perfect for a loose-fitting shirt. It’s also surprisingly not itchy. Just, well, cozy 🙂 It also attracts cat hair like a magnet, sooo, sorry bout that!

SBCC Pinot pants - front

Finally, pants! These are the Pinot Pants from SBCC Patterns and they are my FAVORITE lounge pants ever ever. These are just basically yoga-style pants – not true yoga pants, as they don’t have a crotch gusset, but they do have the flared leg and elastic waistband. I have actually practiced yoga in these pants (not my preferred style of yoga pants – I like slim leggings – but I went to yoga with Jenny when I was in Boston, and hey, I actually had yoga pants in my suitcase!), and they worked just fine. Terrible fabric choice for hot yoga, but I had a great range of movement hahaha.

I made the size XS and cut a longer inseam so I’d have some length to play with (which I immediately cut off, and now they’re a smidge too short. Wah!). I added the free pocket add-on, which was the best decision ever! There aren’t any instructions for attaching these, but I just topstitched them on with a straight stitch (and left the edges raw – other than the top opening edge, which is finished with a self-fabric band). Leaving the edges raw is fine with this sort of fabric, as it’s not prone to unraveling or fraying (and, speaking of raw edges – these pants are unhemmed. Like I said, I cut them too short as it is and I couldn’t afford to lose any length! haha!). I also left off the elastic waistband, and instead used some heavy-duty power mesh in it’s place. Betsy had mentioned once that she preferred power mesh over elastic for a flat, yet stretchy, waistband, and I was immediately intrigued. I actually have some heavy power mesh that is way too heavy for general lingerie (I believe it’s probably good for shapewear, though), so I used that in the waistband. Just cut a waistband layer in the mesh, basted it to the wrong side of the fabric waistband, and sewed as normal. It holds as well as elastic does, but it’s flat like a traditional yoga waistband. I love it!

For fabric, I used black nylon/rayon ponte de roma, which is AWESOME and I wish I had more! It holds shape really nicely and doesn’t stretch out. Like I said, it’s not so great for shit like actual yoga – it retains heat a little too well – but for general lounge pants, it’s perfect.

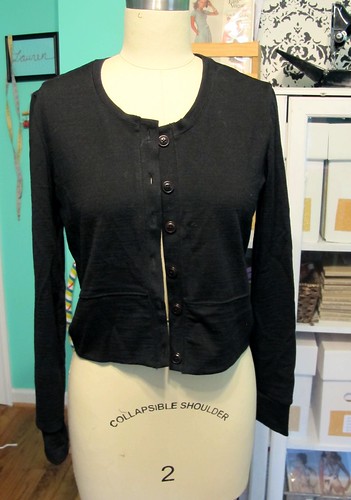
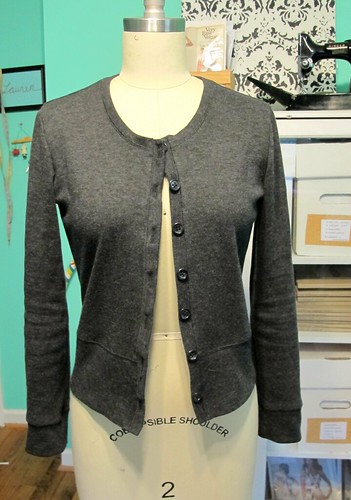
Colette Oslo Cardigan - on dressform

Vespa Patterns Grail tshirt - on dressform

Vespa Patterns Grail tshirt - neckline detail

You can really see the texture of the knit here. And check out that bound neckline!

Colette Oslo Cardigan - flat

Here is where I had to piece the shoulder area of my Oslo, in order to get the pattern pieces to fit on my limited yardage. You can’t really tell it’s there when I’m wearing it.

Colette Oslo Cardigan - flat

SBCC Pinot pants - flat

Ok, that’s it! Sorry for the overwhelming amount of black + cat hair, ha.

Colette Oslo Cardigan - front

This is the kind of ensemble I reach for when I’m feeling crappy (sick, sad, hungover, etc) but still need to look somewhat presentable out of the house. As much as I love my plaid flannel Carolyn pajamas, they definitely look like pajamas! With these pieces – either all worn together, or individually with other garments – they keep the comfy factor without compromising the yes-i-put-on-pants-to-leave-the-house element. I consider that a win!

Completed: Rose Hip Tights

5 Nov

Hey everyone! Before we get into the fun part of this post, a couple things that bear mentioning but don’t quite warrant their own post:
– Have you signed up to join The Sewing Party yet? The party starts on November 8 (this Saturday!), where over 30 educators will be teaching a plethora of online classes – including sewing a tank top, bra making, intro to sewing knits, and cross stitch (those last two were actually shot here in Nashville, in the same place/same day I filmed my class! Check out Devon’s post if you want some ~insider info~). I’ll be participating with my own class – Apparel Zippers 101! In my segment, I’ll show y’all how to insert both lapped and invisible zippers, how to deal with facing/lining, and what types of zippers are suitable for what garments. The classes are viewable for 90 full days after the day of the actual party, so no worries if you can’t watch them all in one day! Who else is going to The Sewing Party? Have you seen the trailer for my class yet? EEP.
– Speaking of sewing classes – and Jennifer! – I’m excited to announce that I’ll be back at WORKROOM SOCIAL again to teach another round of the Weekend Pants-Making Intensive on March 21-22! YES! I am SO excited about this; the last class I taught there was ridiculously fun and I met so many awesome ladies that weekend (and, you know, crotch-grabbing). Can’t wait to come back and do it again (and hit up the Garment District while I’m at it, because, obviously.). You can see all the details of the class on the website, but the general gist – it’s a 2 day class, which includes snacks & lunch, use of all machines & tools in the studio, plus the tuition itself – where we we will be covering basic pants-fitting, installing the front fly, pockets and waistband, and little sewing tips and tricks for increasing speed and accuracy. It’s going to be INSANELY fun and I’m so excited! The space will fill up fast, so get your registration in before the class sells out! Who else is coming to our PANTS PARTY? 😀
– US Readers – if haven’t already done so, don’t forget to throw your name in the hat for the Love at First Stitch giveaway! Entries close on Friday, so you still have time 🙂

Ok! Now for the make! This might qualify for one of the most random things I’ve ever made for myself (my hairstylist busted out laughing when I told her my plans for these – thank god she hadn’t started cutting my bangs yet! Ha!) – tights!

Not leggings or stirrup pants (I saw somewhere a couple of years ago that those might be making a comeback? Huh? Can someone please tell me if stirrup pants are about to a thing again?) – but, like, actual literal tights. Pantyhose. Whatever you call those things that completely cover your feet like there are socks attached to them. I MADE THOSE THINGS.

Rose Hip Tights

So why make your own tights? Well… why not? Personally, I wanted something with wool so that I could use them to layer and stay warm in the winter (either layered under my pants – like long underwear – or layered under a thinner pair of tights and worn with a skirt. I’m so cold-blooded that I’m practically reptilian, so I’m always looking for new ways to stay warm in the winter.). I love wool tights, but those things are expensive. Plus, you’re limited to the colors and styles that are available in stores – which, depending on where you shop, could mean you get a shitty selection. No thank you!

Rose Hip Tights

So I made my own. Surprisingly, they were REALLY easy and fast to make – the hardest part is choosing fabric, since you want something with a good 4 way stretch and a superb recovery (otherwise you’ll end up with baggy tights – this means no cotton or rayon, unless there’s a loooot of spandex thrown in the mix). For the pattern, I used the Rose Hip Tights from Seamster Patterns. I’ve been eyeballing this pattern ever since it came out – first, with curiosity (“Do I want to make something like that?”), later, with lust (“God, I wish I could just make some fucking wool tights!”), and last month I finally went ahead and bought it. I was apprehensive at first, because I had NO idea how these were going to come together – or if they’d even be wearable – but my experience with Mari’s patterns in the past have been nothing but positive, so I trusted. I trusted hard and Mari did not let me down.

Rose Hip Tights

First of all, the instructions on this pattern are crazy good. There were a few parts where I scratched my head for a couple of minutes before it made sense, but for the most part – everything is very clearly laid out, with great diagrams included. The instructions don’t just cover construction, by the way. They also cover fabric selection and alterations – finally, I could make tights that are actually the right length (can I get a halleluiah up in here?). For fabric selection, you need a knit with a 4 way stretch and good recovery, and your stretch percentage will determine what size you cut. There’s a little chart to help you determine stretch percentage, if you don’t know that for your particular fabric (I didn’t, nor did I know how to calculate it, so that was very helpful!). For this fabric – which is a lightweight wool knit I bought from Paron’s while I was in NYC in August – I had a 75% 4 way stretch, so I cut the size 2XS and shortened the legs. I don’t remember exactly how much I shortened the legs, sorrrrry (it’s been about a month since I made these), but I based the length off a pair of RTW tights that does fit me correctly. I also used maths, calculating my stretch percentage with the length. They ended up perfect. I am so tickled.

Like I said, the construction part was NOT bad! These came together super quickly, everything matched up, and everything fit. That’s pretty impressive! I used my serger to whip everything together – the only change was that I changed to a 3 thread overlock instead of my usual 4 thread overlock (I figured the 3 thread would be a little less bulky, and I was right!).  I think these were finished in about 20 minutes. Forreal. Even the gussets were easy to sew, which – if you’ve ever sewn a gusset in something woven, you know that’s quite a feat. Fortunately, knits are very forgiving and you can just stretch them into submission if need be. Which is exactly what I did!

Rose Hip Tights

AND JUST LIKE THAT, I MADE TIGHTS.

Rose Hip Tights

There are some interesting design details in this pattern (I’d love to show y’all a photo of them without the skirt, but, um, last I checked, I get a lot of fetishists creeping on my site & Flickr and I don’t want to fuel the fire any more than I apparently already am SORRY GUYS); it’s not just a plain pair of tights. The foot is formed with the seam on top (so it doesn’t irritate your foot to walk on it – genius!) and across the toes, and then it V’s into a back seam that runs all the way to the top. There is a gusset at the crotch for comfort. The pattern includes options for a low rise, a high rise, and thigh-highs, plus the foot gusset means you can colorblock the hell out of these for some mega fun tights. I made the high rise version, and omitted the optional elastic at the waist.

Rose Hip Tights

For my second pair, I used this awesome printed lace from Funki Fabrics. I LOVE the way these turned out, at least appearance-wise. They are soo pretty, and since the lace is printed – they are very opaque and warm!

Rose Hip Tights

The print is too busy to really showcase the seams up the back, but, whatever. They’re still pretty cool!

Rose Hip Tights

Unfortunately, the fit on these is not as good as the fit on my grey pair 😦 This is 100% my fault, as I did not calculate the stretch percentage of the fabric before cutting it – I just assumed it would be the same. This fabric is very stretchy – but it’s not the same 75% stretch as my grey fabric. More like 50%. Because of this, the tights are PRETTY FREAKING SNUG. It’s like wearing shapewear! I would almost be ok with that, except that they’re also a little too short (again, stretch percentage calculation error on my part). I can get them on – but it’s a pretty intense struggle, and they really just aren’t comfortable because the crotch hangs too low 😦 It’s not the end of the world – I can gift them to my smaller/shorter preteen niece, or even turn them into thigh-highs – but, ugh. Learn from my mistakes, y’all. All knits are not created equal!

Rose Hip Tights

Anyway, I had a fun time sewing the second pair – the lace ones (well, I had fun sewing the gray pair too, but more in a ~learning~ sense). I took them with me to the Open Sewing Lab that I run at The Fabric Studio here in Nashville (I like to bring a simple project with me so I can be doing something if no one needs me – I always hated having teachers who breathed down my neck! Give me some space, lady!), and everyone was laughing hysterically at how small they were while they were being constructed. I mean – they do have to stretch a LOT to fit properly, but they still look insanely tiny when not on a body. At least I got them on when they were finished! Barely! haha!

Rose Hip Tights

Rose Hip Tights

Rose Hip Tights

I just love all the little details on these tights – especially how ridiculous the foot looks when there’s not a foot in it 🙂

So yep, that’s it! I’m anxious to try more tights – I’d love to have them in black, brown, and dark grey (the tight colors I wear most), and I’d LOVE to try these with something textured or cabled, or even a full-on sweater knit! Sweater tights! Yesss!! If anyone knows where I can get wool knit with a 4 way stretch of at least 50% (but preferably 75%), holler! Most of the merinos I have are only 2 way stretch 😦 I’m also curious to try some tights in super crazy fabric – such as this awesomeness?! I love celebrating Halloween year-round, ha! What about you? Would you ever make your own tights? Did I just change your mind? 🙂

Oh, and yes, that’s a Mabel skirt I’m wearing. I wanted to show y’all how it looks with a shorter tshirt –  I think the overall balance of my silhouette looks MUCH better, don’t you think? A bunch of y’all were equally mystified with how to style these skirts, and so at least one answer! It’s amazing how much better it looks with the slightly shorter shirt hem, yeah? Also, I didn’t make that tshirt, although I did hem and size it down to fit me better (which is something I do with most of my tshirts, just because the out-of-the-box shape doesn’t tend to be very flattering on me).

Disclaimer: I received the lace knit fabric from Funki Fabrics in exchange for a review.

Completed: A Black Wool Jersey Wrap Dress

14 Oct

Something that has been missing from my closet for a very very (very!) long time has been the class Little Black Dress. I know, it’s supposed to be a staple, and lord knows I’ve noticed the hole more than a couple of times over the past few years. Part of the reason why I’ve never bothered trying to rectify the situation is that black fabric is so BORING to sew. Send me to the fabric store with black intentions, and I’ll come home with acid-washed polka dots. Or something.

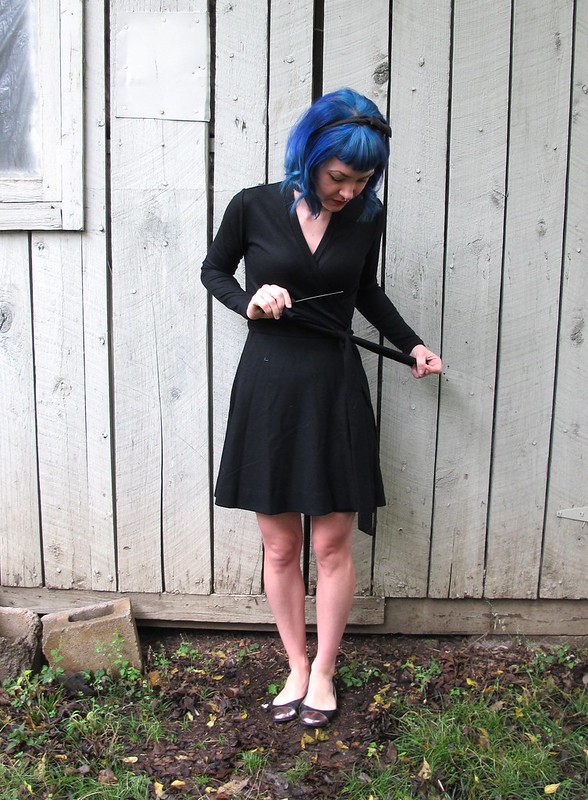
DVF Black wool dress made with Mood Fabrics

That being said, I knew I needed to eventually make one of these bad boys – they’re so versatile and useful to have (and I guess they’d be convenient to have should I need to attend any funerals or KISS concerts, but I’m keeping my fingers crossed that I can prolong both situations for a very very long time). My upcoming trip kind of sealed the deal for me – well, that and this fucking fabulous fabric. It’s like fate, y’all!

DVF Black wool dress made with Mood Fabrics

To keep things interesting (while still retaining the whole This-Needs-To-Be-A-Plain-Backdrop-Type-Dress), I decided to make my LBD a Little Black Wrap Dress. And who else to use as my inspiration than the Lady of the Wrap Herself – Diane Von Furstenburg! Yeah!!

Actually, this dress is kind of a bastardization of my beloved Vogue 1610/DVF. But, you know, sometimes we have to make sacrifices.

DVF Black wool dress made with Mood Fabrics

I started with the bodice from the pattern – I’ve got the fit pretty much perfect as far as those things go. However, I knew I wanted to try a non-gathered skirt and I also needed long sleeves (which this pattern does not provide). Rather than buy myself a copy of Vogue 1548 (and probably sacrificing some goats or some shit as well because, holy mother of god, that price) (ugh, still want that pattern with every fiber in my soul, tho), I decided to take advantage of my favorite pattern – the Frankenpattern. Oh yes, I Frankensteined the shit out of this pattern.

Like I said, the bodice is indeed the original Vogue 1610. I sewed everything as normal (for me – I’ve made some construction modifications to get the neckband to fit better), except I left off the back tucks. For the sleeves, I used the long sleeves from my Lady Skater pattern. For the skirt, I used the Miette pattern and simply flipped it around so the wrap was in the front.

DVF Black wool dress made with Mood Fabrics

And you know what? I think it turned out PRETTY FREAKING LEGIT, which is great considering I just started cutting without any muslins/testing/second thought. This could have been a Disaster Dress. Thank god it’s not.

If you want to Frankenpattern, you definitely need to check beforehand that the measurements for whatever you’re attaching match – so, your bodice will be the same size at the bottom as the top of the skirt (or the sleeve caps match, or whatever). For the sleeves, I just cut them and sewed them as whatever (although, looking back, I think I sewed them with a 5/8″ seam allowance instead of the included 3/8″, so they’re very fitted. Ah! It worked out here ok, but better pay attention to those seam allowances in the future). For the skirt, I did add an extension to the front pieces, so I’d have a facing to fold back (same as on the original gathered skirt). I took a little bit out of the center back seam – enough so that the back skirt measurement matched the back bodice where they connect – but other than that, I didn’t do any other modifications.

DVF Black wool dress made with Mood Fabrics

DVF Black wool dress made with Mood Fabrics

So. This fabric. I picked this up at Mood Fabrics in NYC when I was there most recently (how many more times can I say that? Sorry, I’m just blasting through all the AWESOME SHIT I BOUGHT). It was up there on the 3rd floor, being my dream wool jersey and all. I can’t remember what designer claims this wool, but, you know… it’s ~designer (ooh la la). It’s also the softest wooly knit I’ve ever been privy enough to touch and omg it’s like a little black cloud of softness. I love it so much.

Pretty sure there was a hoard of women behind me all getting grabby hands as I was getting this cut, too. Raise your hands if you came home with the dream black wool knit! And then please share with the group what you’ll be making from it 🙂

DVF Black wool dress made with Mood Fabrics

Sewing this up was very easy, very fast. I used my serger for almost the entire thing, and then just slip stitched down the facings and hems by hand. What’s nice about this fabric is that it has a little bit of texture, so stitches don’t show on the outside 🙂

DVF Black wool dress made with Mood Fabrics

Here’s a horrible picture of the hem/facing. I just serged the edges and sewed them down by hand. Easy!

DVF Black wool dress made with Mood Fabrics

This is probably my favorite part of the dress – an official tag! Yesss!! Kelly sent me this as a little surprise – originally intended for my silk jersey DVF, but it’s been sitting on my pinboard this whole time because apparently I hate modifying things after I’ve finished them (even tags, I guess). I decided to save it for this dress because, well, why the hell not? It looks so good in my neckline, woohoo.

Also, while we’re talking about Kelly – can we talk about her DVF 1548 and oh my god that is stunning and now I’m jealous.

As a side note – that yellow tag is just a little piece of ribbon. I added it so Landon & I would have an easier time doing laundry – anything with the yellow tag can’t be washed in the machine (because, you know, wool). After destroying some wool garments by accidental washing (the saddest were my brown old man trousers, wah), I figured we probably needed a tagging system. I first thought about creating – or buying – care tags, until I realized that was dumb and ribbon is free. So there you go.

DVF Black wool dress made with Mood Fabrics
Anyway, this dress will make a fine addition to my traveling capsule wardrobe. Solid black, easy to dress up or down, warm (!!!) wool, and check out that wrap! I’d like to see a gusty London wind try to turn me into a panty flasher! Ha ha ha!

DVF Black wool dress made with Mood Fabrics

And now, I have nothing more to say. So instead, tell me – what kind of jewelry would look good with this dress? I just realized I own, like, 3 necklaces and help me I need to adult.


*Disclosure: This fabric was provided to me for free, in exchange for contribution to the Mood Sewing Network (well… I think it was free. I got a LOT of stuff that day and dropped a WAD of cash! Ha!).

Fall/Winter Sewing Plans for 2014

10 Oct

It just occurred to me that I haven’t share any seasonal sewing plans in… well, a while. Which is lame, because these are some of my favorite types of posts (both to write *and* to read) – I mean, who doesn’t like lurking inside someone’s brain, even if it’s just to see what they plan on doing over the next couple of months? Too creepy? Naw.

Anyway, now that London/Paris is looming on the horizon (less than 2 months! Omg less than a month and a half! Eee!), it’s really time that I start figuring out what I’ll be bringing with me (and making, for that matter! Don’t want to end up with another frantic last-minute sewing disaster, ugh). Especially since my luggage space will be very limited – I’m only allowed to bring one suitcase with me overseas (well… I use the word “allowed” loosely here. I can bring two suitcases if I want to – but I get to pay $130 for the second one! LOL GURL NO.), and I want to fabric shop while I’m there! So, I will be packing a capsule wardrobe, one that mixes and matches with itself, for maximum outfit options, as well as warmth. This is much different than how I usually travel (as I fly Southwest, where you can bring 2 bags free – so why the hell not, you know?), but I’m up for the challenge! 🙂 Adulting and all that 🙂

I’ve already made/chosen a couple of pieces to base my capsule around, as well as chosen my theme (like Devon, I think all vacation wardrobes should have themes, because, duh) – Minimalist Parisian Chic. Mostly because my capsule will be very minimal – or, as minimal as I can get it down to, because I am still one of those people who delights in overpacking – with lots of black. Not much on the Parisian Chic side (I’m sure Parisian women will be horrified when they see what I wear to stomp around their city, ha!), but it has a nice ring to it 🙂

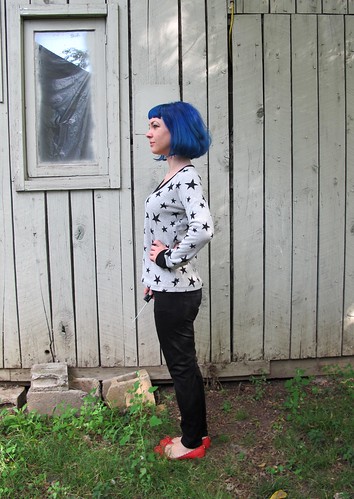
Anyway – to start – I have these black Jamie jeans that I made a couple of weeks ago:
Jamie Jeans + SJ Sweater Made with Mood Fabrics
I haven’t decided yet if I’ll be bringing the star sweater. It’s a little bulky! On the flip side, regarding the jeans – I just finished wearing them for the 5th time in a row (sans wash), and they’ve stayed very close to their original shape. No bagging out, woohoo! So that makes me feel good, because I’ll be wearing these a LOT come London.

Stripey Renfrew
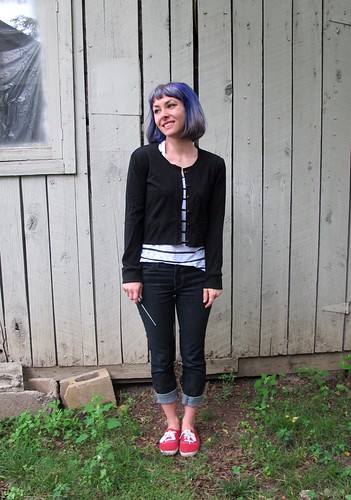
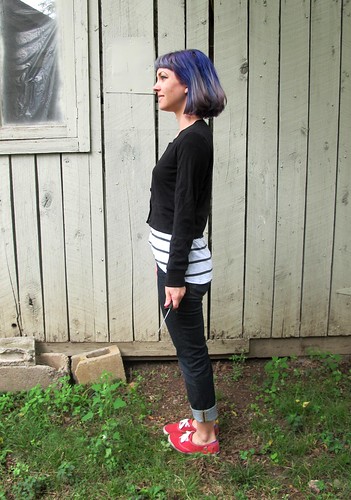
I will also be bringing my Imogene + Willie slim jeans (pictured here), because they are basically the best jeans ever. Oh, and probably that stripey Renfrew top. Can’t have enough tshirts!

Now for the sewing plans! Sidenote: By the time of publishing this post, I’ve already finished more than half these makes. Whoops! Guess y’all see where my priorities lie when it comes to posting vs sewing hahaha. Oh well!

Ikat Lady Skater
The Cowl-Necked Skater Dress
I’ve had this idea in my head for a while now – a Lady Skater dress // Renfrew top mash-up! This cotton Ikat knit fabric (purchased at The Fabric Studio here in Nashville) will be the perfect match for this dress – like a giant, snuggly Christmas sweater! I actually don’t know if I’ll be bringing this one to London, due to bulk factor (my capsule really only allows for one dress, which I’m thinking will be the one below – but we’ll see!), but the plans were too good to keep to myself 🙂

DVF Wool wrap
The Wool Wrap dress
Another big mash-up – I’m starting with the DVF Wrap dress pattern, but adding long sleeves (stolen from the Lady Skater, naturally) and swapping out the gathered skirt for a wrap A-line (Miette Wrap skirt – I’m looking at you). The black wool knit fabric was picked up at Mood in NY a couple of months ago – it’s SO soft! Like, cashmere soft. I’m so in love ♥

Silk v neck
The Silk Button-down
I already have a nice white button-down – made from the same pattern, Butterick 5526 (my favorite!) – but it’s not really cold weather appropriate, due to the length of the sleeves. Since they are 3/4, they don’t really layer nicely with my long sleeve sweaters! I’d love to make another one, but up the ante with some beautiful silk double georgette, and modify the neckline to be more of a v shape (likely using this V-Neck variation tutorial by Jen!)

Chambray Button down
The Polka Dot Chambray Button-down
Another thing I already have one of, but need a winter version. This one will be made using a gorgeous cotton polka dot chambray, picked up here locally at Textile Fabrics.

SJ Sweater
The Wool Sweater
Button downs need a nice sweater, yeah? I want to try sewing a sweater, using the SJ Tee as a basis (with a higher neckline, and omitting all bindings). The fabric I have is a lovely camel-colored boiled wool, that I bought from Elizabeth Suzann (aka I totally jacked her wholesale order hahaha). I think it’ll look equally good over both those button down shirts I have planned!

rigel bomber
The Bomber Jacket
I know – I’m already planning a pretty sweet coat. However, the weather in London (and Tennessee, for that matter!) can be fickle, so I’d like to bring a lighter-weight jacket for days when the temperature isn’t as low. I’ve been meaning to make the Rigel Bomber for, well, months now. Just been waiting on the perfect fabric – and I think I found it! Check out this black wool coating – to be paired with gold china silk for the lining.

Other plans I have (no photos, sorry! Use that imagination of yours, ha!)
– Need some thin long sleeve shirts for layering – maybe just a couple out of wool knit, such as this textured black wool jersey (that’s apparently already sold out?! Wah!). I wear these pretty much daily in the winter – and sometimes I like to sleep in them if it’s really cold – so it’ll be nice to have a few to choose from.
– Speaking of sleeping – I need some new pajama pants! Currently lurking Margot pj pants in Tilly’s book, Love at First Stitch, since they seem to be a pretty quick/easy make (I really want to make the Tofino pants, but right now I need quick and easy!). I picked up some really fun orange plaid flannel to make them with – I know, that fabric is ridiculous, which is exactly why I chose it. It’s nothing like I already own! When it comes to pjs, why not, you know?
– I would like to make a flared A-line wool skirt to make as well – thinking about using the Delphine pattern (also from Love at First Stitch), because I love the shape. A little stuck on fabric selection, though! My go-to is usually wool crepe, but that will be too drapey for this shape. Thoughts? I need it to be 100% wool (pretty nitpicky about this, sorry!) and I’m looking for lipstick red. Budget is no more than $25 a yard (and obviously I’d be delighted if it was less than that!)
– Bras! I want to finish at least one bra before I leave – using the Marlborough pattern and one of my kits from Bra Maker’s Supply. Obviously I want new bras, but even more – Norma will be in Paris while I’m there, and you better believe I’m going to drag her into a bathroom and make her assess and critique my fit. Haha! Man, sewing people are weird 😛

I think that’s it for now! It feels good to get everything listed out in one place. I’m hoping I can get all this done before I leave – but if not, no worries. It’s not like I’m lacking clothing or anything as it is!

As a side note, I was just notified that one of my lovely sponsors, Indie Sew, is holding a pretty sweet contest where you can win a YEAR of free patterns! Fuck yes! You can read all about the contest and the reasoning behind it on this blog post, but the general gist is that Indie Sew wants to help you transform your entire wardrobe into handmade and end the cycle of cheap/fast fashion. And what better way to jump start a new handmade wardrobe than with some FREE FREAKING PATTERNS AMIRITE? Such a cool idea, and I really really hope the winner shares their journey via blog or social media so we can follow along! Anyway, soapbox rant over – go throw your name in the hat!

What’s on the table for your fall/winter sewing plans? Do you have any capsule wardrobe suggestions for me? Tips for packing light? Are you going to judge me if you see me wearing the same thing for 3 days in a row while I’m on my trip? 🙂

Completed: Some Tshirts!

26 Sep

Oh hey, head’s up – this post is all cake and no frosting. No apologies, though! Lord knows I can never have enough Tshirts.

Rather than bore y’all with a bunch of posts featuring patterns I’ve made before, though, I’ve compiled a trio of 3 different tshirt patterns – ranging from Free to You Gotta Pay For That Shit – for science and comparison purposes. Who doesn’t love a good Tshirt debate, amirite? Also, I took these pictures before I redyed my hair, fyi. Just in case you were curious, haha.

LET’S TALK ABOUT TSHIRTS NOW, GUYS.

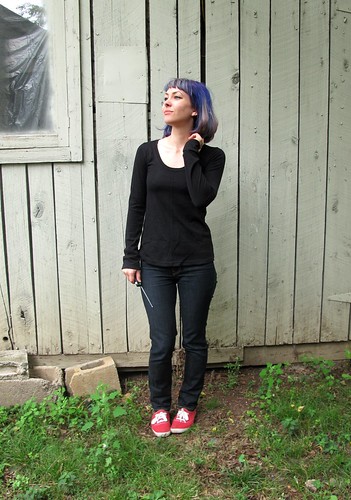
Plantain Tee

First up is the Plantain Tshirt, from Deer & Doe Patterns. This is that free pattern I was telling y’all about. This is a great beginner tshirt pattern – there aren’t a lot of pieces, it includes some new techniques for beginners (such as sewing the neck binding), the instructions are very clear, and the fitting is quite loose at the bottom. I was initially afraid that I wouldn’t like this shape on me AT ALL, but I’m surprised at how much I love it!

Plantain Tee
Plantain Tee

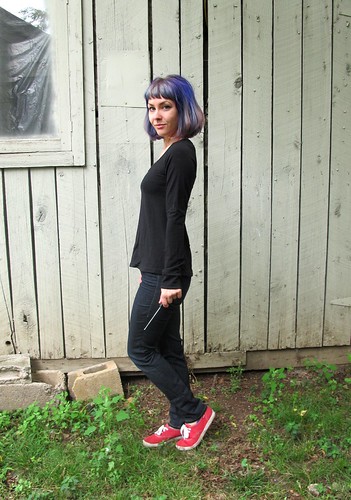
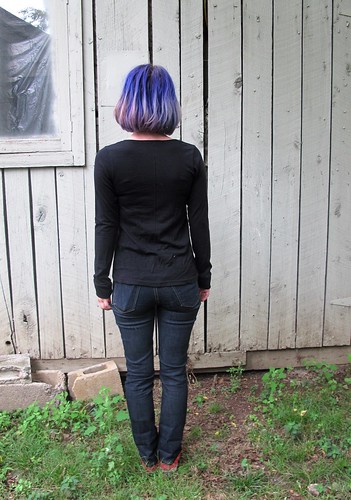
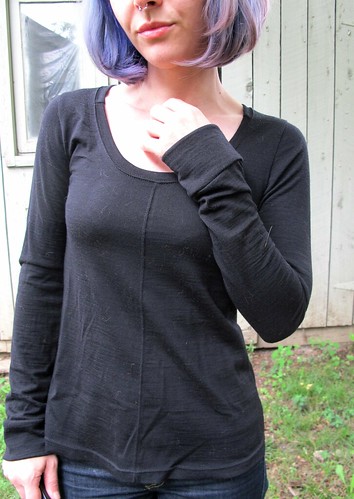
Even though it’s a free pattern, I think it’s far from being a “crappy” pattern, if that makes sense. The sizing is perfect – I sewed up a straight 34, with no tweaks. I used the last scraps of my black merino wool from Organic Cotton Plus to sew this up – I like how the wool gives the bottom some structure (and the wrinkles? Not as much a fan of those, but I’ll live :P). And it’s SO COZY. Cozy tshirts, FTW!

Plantain Tee

I did make a couple of changes to the design of the pattern itself – the main one being that seam that runs down the front and back of the top. This was done out of necessity, as I didn’t have enough fabric to cut on the fold. I simply added a seam allowance and created a CF and CB seam. I topstitched the seams so they’d look more intentional, ha. I also added cuffs to the sleeves – because, I dunno, I like them! There’s a bit of piecing at the neckline binding as well. Since I was making this out of leftover scraps, I didn’t have a long enough piece to cut continuous binding. I don’t think it’s that noticeable, and hell, I’ll deal with some seams if that means I get a merino wool top out of it amirite.

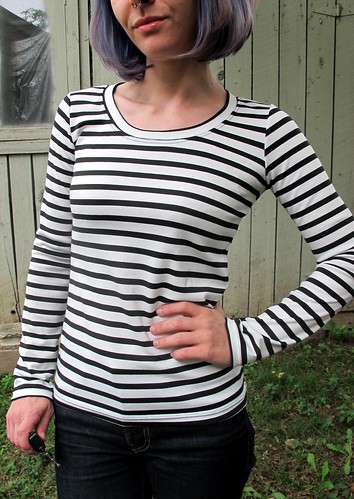
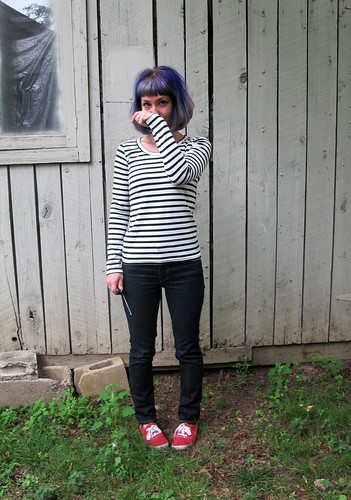
Stripey Renfrew

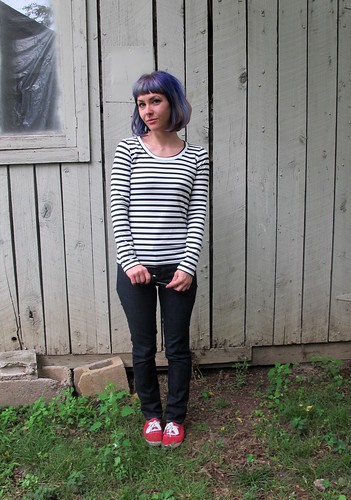
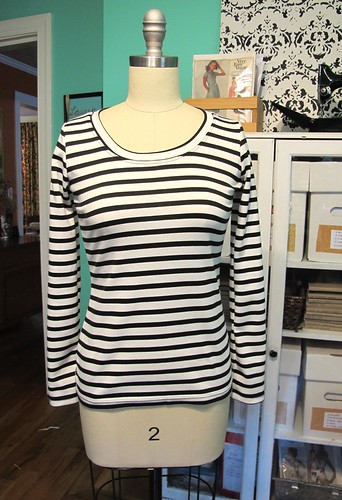
Next up is my tried-and-true tshirt allstar – the Renfrew from Sewaholic Patterns! I LOVE this pattern, a fact that I believe is pretty well documented. Renfrew is favored by me because I think it most resembles what we think of when we think of a tshirt – slightly fitted, set-in sleeves, and 3 neckline options (in addition to the scoop, there’s also a cowl and a v-neck), as well as sleeve length options. The pattern is written to have a band of self-fabric at the sleeve cuffs and hem, in addition to the neckline. I’ve found that I prefer to hem my tshirts (rather than use the fabric band), and some of the more casual ones I like to hem the sleeves as well. One thing to keep in mind – should you decide to join me in my tshirt anarchy – is to add that length to the sleeves and hem before you cut them out. Otherwise, they might end up short! Ask me how I know about THAT 😉

Stripey Renfrew

Fitting-wise, this is a great pattern, although I did make a lot of tweaks to get to the point I am now. It’s been a long time since I tweaked, but if I recall – this is a size 0, with additional ease removed from the waist. I also shortened the shoulders a smidge and made them slightly narrower. All those tweaks paid off, because this is a pattern I reach for again and again when I need a tshirt. At any given time, if you see me in a tshirt – ask me if it’s a Renfrew, the answer will probably be yes! Seriously! Oh, and my fabric is a striped ponte from Mood Fabrics (the store, not online).

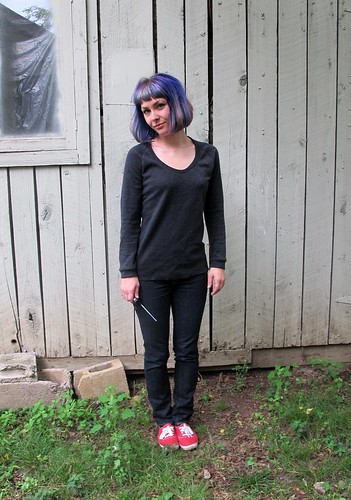
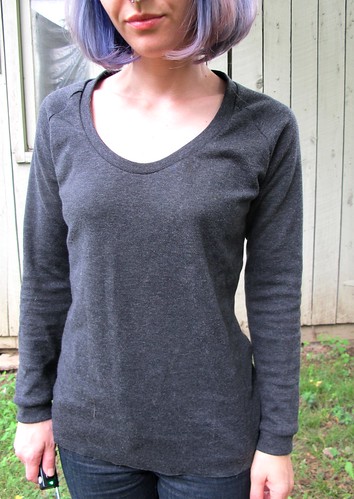
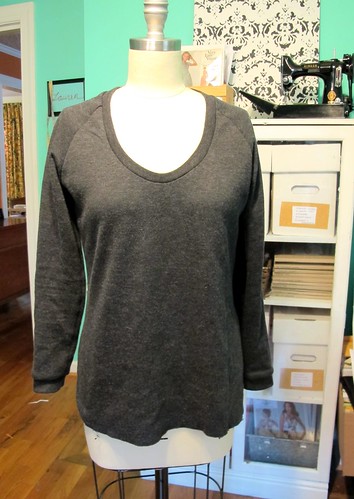
SJ Tee

The last top in this trifecta is the SJ Tee from Papercut Patterns. Another new-to-me top, and I admit this is more like a sweatshirt than a true tshirt (but mostly due to fabric choice). It’s kind of like a sexy sweatshirt, tbh – raglan sleeves and WHOA SCOOP NECK. Forreal, make this in something too stretchy and you’ll end up in boobie city. Again – want to ask me how I know about that? 🙂 haha!

SJ Tee

I’m surprised at how much I like the fit of this, considering that I don’t normally go for things so loose. I did end up taking the CB in by about 1″ – I’d already sewn the neck binding in at that point, so the seam runs clear from the bottom to the top of the binding, oops. But that made a HUGE difference in the fit, especially at the back. I used the size XXS and – other than the chunk taken out of the CB – it’s relatively unchanged. Oh, and I did shorten the cuffs so they’d look more like a sweatshirt. The fabric I used here is the last of my wool knit from Mood Fabrics (the same knit I used to make my grey Jenna cardi), and I had JUST ENOUGH. It’s amazing how much I love such a simple sweatshirt, by the way – I’ve been wearing it every night. It’s so cozy!

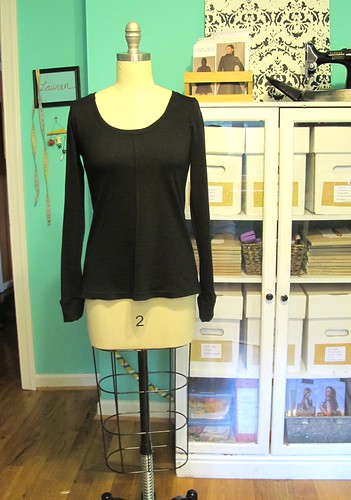
Here are the three patterns as modeled on my form:
Plantain Tee
Plantain Tee

Stripey Renfrew
Renfrew Top

SJ Tee
SJ Tee

I think it’s really interesting how something so simple as a damn tshirt can yield such different results, based on pattern and fabric choice. These are all pretty basic designs in the grand scheme of things, but they’re different to stand on their own. Obviously there are many, many more tshirt patterns out there (off the top of my head, these come to mind: Ensis, Briar, Bronte, Coco, and Lord, don’t get me started on dresses that can be hacked into tees), but I stuck with these three because I feel they’re the most basic/versatile. Also, let’s be real – if I fall down a tshirt rabbit hole, it might be months before this post sees the light! Ha!

Stripey Renfrew

Out of all these, I think my favorite is the Renfrew, just because it’s so damn versatile and I love how it fits (not to mention, the slim fit is ideal for layering). It might also have something to do with the Renfrew being my first love – can’t ever abandon her now 😉

I can’t stop thinking about that SJ tee too, though – I already have some future plans for her, including camel-colored boiled wool. Yum!

Plantain Tee

What’s your opinion on tshirt patterns? Do you have a favorite – and if so, dish please!

(psst! Don’t forget to enter the Sewtionary Giveaway, if you haven’t already done so! Entries close on Monday morning!)

Sweaters & Skinnies for Fall!

24 Sep

Ok, I’ll admit – when I first started working on this outfit, the air was a LOT more fall-like than it currently is at the moment. Stupid fickle season, ha!

Jamie Jeans + SJ Sweater Made with Mood Fabrics

Anyway, I’m totally a trooper so I’m modeling this outfit for y’all nonetheless (photos taken early morning before the temperatures got too high, because, woof.). My first real cold-weather makes – like I said, it’s a little early in the season here, but I like to get a head start so I can actually start wearing this stuff when the weather cools down 🙂 This outfit – or at least the skinnies – is also part of my London wardrobe. I’m officially less than 2 months out, EEEEEP! – so it’s time to really start cranking down and getting my wardrobe act together. Since I’m very limited in suitcase space, I’m trying to capsulate everything to mix and match. So I can bring less clothes, so I can bring home more fabric 🙂 You know – priorities!

ANYWAY, I have a lot of ground to cover with these two pieces, so let’s get started! Sorry in advance for the big photo overload!

Jamie Jeans + SJ Sweater Made with Mood Fabrics

Let’s start with the sweater. I bought this fabric last month while I was in NYC. This was my first non-spring trip to the city, which meant my fabric shopping was focused on woolens and winter weights (instead of summer fabrics, which I am usually bee-lining for in March). I immediately found this star printed WOOL sweater knit, and promptly flipped my shit over it. It’s SO fabulous – and soft! Even softer than you can imagine, forreal. At $25 a yard, it wasn’t the cheapest sweater knit – but stars and wool? Totally worth it. Plus, it’s not like a sweater takes a lot of yardage – at least not for me. I bought a yard and a half (and I have some leftover.. hmm, what to make with?).

Jamie Jeans + SJ Sweater Made with Mood Fabrics

The pattern I used to make this bad boy was actually suggested by Devra (who also bought some of the prized star wool knit, after I peer pressured her into it 😉 ) – the SJ Tee from Papercut Patterns. I made a wearable mock-up before the real deal – which I will show y’all later this week – so I was able to figure my fitting before cutting into my precious wool knit. I cut a size XXS and took 1″ out of the center back. The length is the long version (aka, not cropped) and the sleeves are long as well.

Jamie Jeans + SJ Sweater Made with Mood Fabrics

I used rib knit to finish the neckline and cuffs – it was in my stash, I have no idea where it came from. This knit was way stretchier than the sweater knit, so I had to keep retrying the neckline to get it to lie flat. I ended up cutting the rib to half the length of the neckline and stretched the everloving shit out of it – it could still stand to be a little tighter, but this will do. The neckline also can’t stand to be a little lower, it’s already a little risque (which I LIKE!). The cuffs are a bit looser than I’d prefer, but I wanted to be able to push the sleeves up, like so.

Jamie Jeans + SJ Sweater Made with Mood Fabrics

I sewed the entire sweater on my serger – you could use a sewing machine (this particular knit does not unravel or shed), but serger is faster 🙂 I did use a twin needle to topstitch the raglan lines, as well as the neckline & hem. Really loved topstitching this sweater; the stitches just sink right in and look soooo good!

Jamie Jeans + SJ Sweater Made with Mood Fabrics

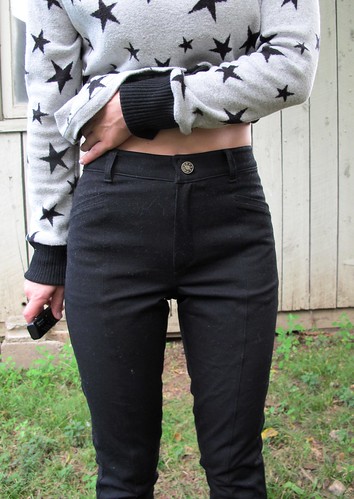
For the black skinnies, I used a really great stretch twill. I’ve had some hits and misses when it comes to stretch bottom weights – they tend to be a weird weight (either too heavy, or not heavy enough), and the stretch can bag out over time. One thing I’ve learned is that you need a pretty high spandex/poly content to get them to snap back into shape – 5-10% – and you need to make sure they are bottom weight. I actually made Heather Lou source this fabric for me, also in the Mood store. We were initially looking for black denim, couldn’t find a good one (I still don’t really know what constitutes as a good one- you’ll have to ask her! I just blindly followed, ha), and decided on the twill. We did end up finding a black denim, fyi, but not at Mood. Once I sew that one up, I’ll share more about it 🙂

Jamie Jeans + SJ Sweater Made with Mood Fabrics

Anyway, this twill is great! It’s pretty similar to what you get with stretch RTW pants – thick enough for a bottom weight, but not tooooo thick (I still only used an 80/12 needle, so no heavy denim shit or whatev). The stretch is crazy good, and it actually snaps back into shape. I can’t give y’all a true verdict on a full day’s worth of wear – the weather jumped back up to hot, so I haven’t had a chance to wear these yet. However, I tried the jeans on a LOT during construction, and they haven’t bagged out yet. So that’s a good sign!

The only drawback to this stuff is that it attracts cat hair like a magnet. It’s not as bad in real life as it is in photos (else I would have lint-rolled that shit, I mean, come on), but it also doesn’t bother me that much. When you have a cat and you wear black pants, cat hair is sorta just a way of life, you know?

Jamie Jeans + SJ Sweater Made with Mood Fabrics

The pattern I used to make the skinnies is the Jamie Jeans, from Named. I’ve actually had this pattern in my stash for a few months – my friend Carla bought me these (plus a few other Named patterns) as an early birthday gift earlier this year. Then I was a total ass and didn’t do anything with them until just now 😛 Hey, it’s been too hot! Anyway, I’m glad I put these off because there is no way I would have had such stretch twill success if it hadn’t been for Heather doing that side of the shopping for me. So there’s that.

Jamie Jeans + SJ Sweater Made with Mood Fabrics

Anyway, this was my first experience with Named. My understanding is that a few things have changed since they initially released this pattern – for one, the instructions include some diagrams now (they used to be text-only), and the prices are a little more competitive. The pieces also aren’t quite as overlapped as they were the first go-round – because, ugh, tracing patterns, ugh. I only had to trace the waistband for these. Everything else was, thankfully, not super overlapped.

I started with the size 2, and made these initial modifications, based on my muslin:
– Added 1″ to the back crotch, for butt room
– Removed 2″ of length at the legs
– Removed 5/8″ at the center back yoke, blending to 1/4″ at the bottom (where the pants meet the yoke)
– Removed 1/4″ from the center back, blending to nothing

Once I started sewing, I ended up doing a few more fit adjustments. I don’t know why these weren’t prevalent in my muslin – perhaps my fabric wasn’t quite stretchy enough? At any rate, these are my additional modifications (and now you know why I pulled them on and off so many times!):
– Sewed the side seams at 1/2″
– Took a 1″ wedge out of the center back of the waistband, tapering to nothing at the bottom
– Removed an additional 3/4″ from the length
– Did some crazy witchcraft to reshape the crotch to be a J (again, NO IDEA why this wasn’t an issue with the muslin, but argh – at least I fixed it? Mostly.).

Things I will change for my next rendition:
– Need to remove some length from the front crotch – you can see that it’s slightly too long (it’s not toooo bad – I doubt anyone will point and be all “HA HA YOUR CROTCH IS TOO LONG HA HA!” But I know it’s there and hey, it bothers me, ok?). Maybe 3/8″ish.
– Rescoop that J a little more out of the crotch. It’s still not perfect, but it’s damn good considering that I did this while the pants were already mostly assembled (for those of you who are all, “Wtf is this J crotch you keep talking about?” Here’s the post where I talk about my pants adjustments, including J crotches. Also, in case you were wondering- those crotch rulers *do* work. I found one in Elizabeth’s studio last week, immediately stuck it on my crotch – and hey, there’s a J! Cool!)
– Need to take a little pinch of fabric out of the inner leg seam – maybe 1/2″

Despite my nitpicky fit adjustments, these aren’t so bad! I’ll still totally wear the shit out of them, at any rate.

Jamie Jeans + SJ Sweater Made with Mood Fabrics

Constructing these was REALLY fun! The instructions – honestly, they’re kind of useless about 70% of the time, but I’ve made enough pants to where I don’t really need them. The seams are all finished with my serger – except the crotch seam, which is flat-felled – and I made use of my edgestitching foot to get all that beautiful topstitching. For the waistband, I used fusible tricot knit interfacing – I fused both the outside and the facing, to give it some stability but retain that lovely stretch. The button & jean zip are both from Pacific Trimming in NYC.

Jamie Jeans + SJ Sweater Made with Mood Fabrics

I really love the back pockets! And hey, that double line of stitching at the yoke? That was done with a single needle, twice. No twin needle!

Jamie Jeans + SJ Sweater Made with Mood Fabrics

For the hem, I used the lightning bolt stitch, so it would retain some stretchiness. It looks pretty similar to a straight stitch, but it, you know, stretches.

What else? Here are some sweater close-ups:

Jamie Jeans + SJ Sweater Made with Mood Fabrics

YUM!

Jamie Jeans + SJ Sweater Made with Mood Fabrics

One last thing – here’s the little watercolor fashion illustration I made for this outfit. GOD, I love painting watercolors! So much fun!

Jamie Jeans + SJ Sweater Made with Mood Fabrics

Ok, I guess that’s it! Now if the cooler weather could please come back – I hate working up a sweat while I drink my morning coffee 🙂 Oh, and in case you were wondering – that’s a fresh dye job you’re looking at, in regards to my hair! I love how neon electric is is 🙂 Yay for fun-colored hair!

PS: Ralph Rucci V1419 Sewalongers – in case you missed it, there’s a new post up on the McCall blog regarding the sewalong. Just some general housekeeping, including blog buttons (yes!) and social media chat. The burning question this week – for general sewalong chat outside of our blogs, do y’all prefer to use a Facebook page or a Flickr Group? Trying to decide which platform to us. Let us know which side you swing!

Completed: The Jenna Cardi (+GIVEAWAY)

15 Sep

In my wardrobe, I have a very small selection of RTW clothing that is quickly dwindling to nothing. Out of those pieces, the majority of them are lightweight knit cardigans. You know the kind I’m talking about – sewn, rather than knitted, lightweight enough to throw in a purse, wearable for all seasons (I dunno about y’all, but I wear my cardigans throughout the summer – air conditioning is tooooo cold for me!). As I’m quickly replacing all my clothes with handmades, the one major hole – other than undergarments (which I’m working on!) – has been those damn cardigans. I love knitting cardigans, don’t get me wrong – but those take loads of time, not to mention even the lightest fingering weight yarn can’t compete with how lightweight a knit fabric is, you know?

I’ve been on the lookout for a good cardigan pattern – not even really for the pattern itself, but rather, the instructions. Y’all, the one time I tried to sew button holes on a knit, it ended up being slightly traumatizing. Then there was that time recently that I tried to use an old RTW cardigan to copy into a handmade one (cutting it apart to use as a pattern – same concept as how I made my striped hoodie). Spoiler alert: it didn’t work out at all. Clearly I can’t hack this on my own. I need someone else to do it for me.

20121202-210149

Also, that cardigan I chopped up? As much as it wasn’t really my favorite – it was the one grey cardigan that went with basically everything. And here it was, chopped up into little bits and, uh, I kinda needed it back.

Jenna Cardi

Anyway, all that being said – right about the time I realized I was making a huge mistake (chopped up cardigan and all), Kat emailed me, saying she’d just launched her new pattern company, Muse Patterns, and would I like to try and review the Jenna Cardi?

UM. YES.

Jenna Cardi

HI GUYS, LOOK, DREAM CARDI PATTERN RIGHT OVER HERE.

Jenna Cardi

The Jenna Cardi comes with a few different options, so you mix and match to create the cardigan of your dreams (I’m not the only one who dreams about cardigans, am I?). You can choose a cropped or waist length version, sleeves ranging from full, to three quarter, to short, and then there’s also an option to include a beautiful curved yoke detail.

I’m a boring person with no imagination when it comes to wardrobe basics, so I chose something plain and simple for my first hurrah – cropped length, long sleeves. The thing about this cardigan that makes it so special, though (I mean, other than the fact that I SEWED IT MYSELF yaaaay for not buying RTW!), is the fabric I used! HOMEGIRL GOT HER HANDS ON SOME MERINO WOOL.

Jenna Cardi

Are we all still freaking out about merino wool or has that ship sailed? Whatever, *I’m* still freaking out over it! Ever since Katie started pushing it on me like an extraordinarily effective drug, I have been trying in vain to locate a US source. That stuff isn’t cheap, even in the best of times – and to ship it all the way from NZ obviously adds some dollarz to the cost.

So where did I find this golden merino ticket, you might ask? Surprise – Organic Cotton Plus, of all places! They are starting to branch out to include other natural fibers than just cotton, which is all kinds of awesome. When they asked me if I’d like to try a little piece of whatever caught my fancy from the website, I stumbled across the merino wool and, forreal you guys, my heart stopped for a nanosecond. There aren’t a whole lot of options on the site at the moment – just the black I have here, as well as a natural colorway (which I almost got, but then the idea of dying that shit seemed too overwhelming. Plus, black is so useful! Even if it photographs like crap). At $33 a yard, it is not cheap – but it’s worth it. That black merino is a whopping 61″ wide, plus, IT’S MACHINE WASHABLE WOOL. Oh, and you don’t pay NZ shipping prices! Win win!

Jenna Cardi

Having used both merino wool from Organic Cotton Plus, as well as the stuff straight from New Zealand – I can confidently say that this is pretty good stuff. It’s soft and lightweight without being see-through, it has a nice stretch and drape to it, and it cuts and sews like a dream. Wait till you see the topstitching on this baby – it’s ridiculously beautiful. Ahh I just love this fabric.

Jenna Cardi

The only downside I can think of is that it does wrinkle up a bit, as you can see in these photos (it’s not nearly as noticeable in real life – otherwise, I would’ve steamed things up before taking photos. Womp whomp, deal with it). Kind of the same thing as linen – just natural wear wrinkles. If that bothers you, you’ll want to stick to something with a poly blend. For me, though, wrinkles are an ok trade-off for natural fibers!

Jenna Cardi

Anyway, I loved my Jenna cardigan so much – I immediately made a second one!

This one is pretty boringly similar to the black merino one, except it’s longer. It’s not quite the longer version – I cropped some off for my proportions – but it does look better with the shirt I’m wearing underneath it, ha 🙂 Instead of using merino wool, I used some wool knit that I picked up at Mood Fabrics when I was recently in the store. This stuff is less drapey than the merino – it’s almost like sweatshirting, except without a fleecy side. It’s also not machine washable, so there’s that. I’ll have to handwash it like I do all my hand knits, oh well.

Jenna Cardi

Sewing both of these was ridiculously easy, by the way. My second version took me all of 2 hours – not bad! I made the bust 32″ and took in the sleeves a bit because they were a little wide. I also had to shorten the sleeves by a couple of inches.

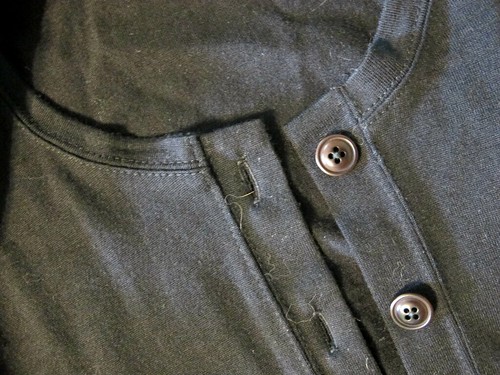
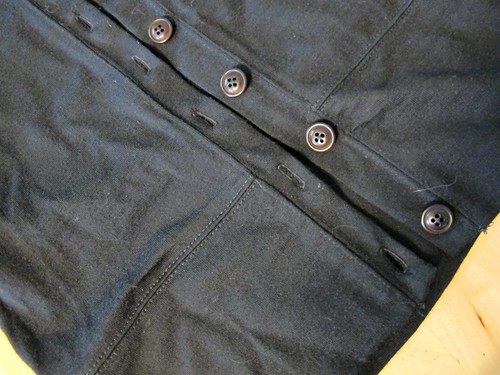
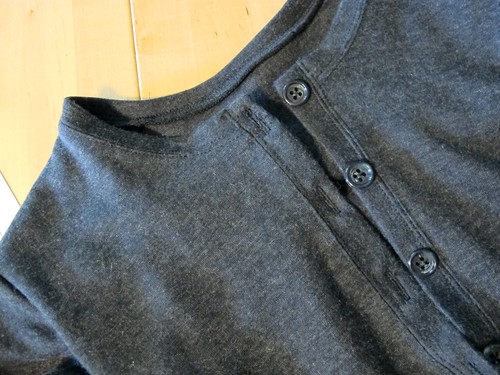
As I mentioned, I was pretty apprehensive about the button bands – but surprisingly enough, the button holes were way less problematic than I was anticipating! I made some test button holes – experimenting with interfacing, tear-away stabilizer, no interfacing – but ultimately went with the instructions, as I figure Kat knows more than I do when it comes to knit button holes 🙂 The button band is stabilized with woven fusible interfacing, and it’s sewn on with a 1:1 ratio (meaning it’s not stretched at all). This gives the knit fabric enough heft to tolerate a button hole stitch without getting eaten into the bobbin area (my former experience with this sort of thing). For the black merino cardi, I also used tear-away stabilizer in addition to the interfacing. For the grey cardi, I skipped the tear-away stablizer and just kept things purely interfaced. Both worked out splendidly!

Jenna Cardi

Another thing I’ll point out is that, while these cardigans are somewhat fitted, there’s just enough ease included to keep the button bands from gaping open. Always a plus in my book!

Jenna Cardi

Jenna Cardi

I’m thrilled that they both look just as good unbuttoned as they do buttoned – which is important to me, as a cardigan-wearer. I usually button things up, but it’s nice to have unbutton options:)

Jenna Cardi

Jenna Cardi

Here are some ~extreme~ close-ups of the merino wool cardigan. Check out that topstitching! Ughhh it’s so beautiful! I did add a little more topstitching than called for in the pattern – I wanted to tie in the topstitched button bands and button holes, so I included it at the shoulder seams and along the bottom band. Plus, it’s just beautiful. Seriously.

Also, how bout them buttons? These are also from Organic Cotton Plus. I know black and brown is generally frowned upon as a color combination, but I like it 🙂

Jenna Cardi

Grey cardigan close-up 🙂 Boring buttons are from my boring stash.

So what do you think – are you team sew-your-own-cardi yet? I hope so, because Muse Patterns has hooked me up with an extra pattern to giveaway! 😀

Jenna Cardi

GIVEAWAY IS NOW CLOSED
To enter to win your very own Jenna Cardi, just leave a comment on this post and tell me what you plan on makin’! Which view? Any particular fabric? Do you have a wild card up your (cardigan)sleeve? Inquiring minds want to know! 🙂 This giveaway is open WORLDWIDE and I will close the comments a week from today, on MONDAY, SEPTEMBER 22, 2014 7:00 AM CST. Good luck, y’all!
GIVEAWAY IS NOW CLOSED

**Some disclosures now – I was given the Jenna cardi pattern from the patternmaker herself, for free, to try and review. I was *also* given the organic merino wool fabric & butons from Organic Cotton Plus, again, for free to try and review. The grey wool knit was purchased at Mood Fabrics NYC out of my own pocket. No one paid me for this post – I’m just doing it for the freebs! As always, all opinions are my own 🙂

Completed: A Manly Striped Sweater for Landon

19 Dec

Guys, I’m such a mess. It’s December 19th and this is literally the first Christmas present I’ve come up with – I made Landon a sweater!

Men's Sweater made with wool sweater knit from Mood Fabrics

Or, I should say, I SEWED Landon a sweater. Ain’t fuckin’ around with no Sweater curse.

Men's Sweater made with wool sweater knit from Mood Fabrics

Y’all know I don’t do much sewing with men’s clothing… I think I average about one piece per year, so here’s 2013’s edition! I don’t know what the hang-up is, because every time I get started on a new Landon-garment, I realize that I really enjoy the process of men’s sewing because it’s so straightforward. No weird fitting (I mean, there’s fitting, but not like fitting a woman’s body with boobs and a butt), no frills, and lots of exact topstitching and mitered corners and fun things like that. It’s also very safe.

Men's Sweater made with wool sweater knit from Mood Fabrics

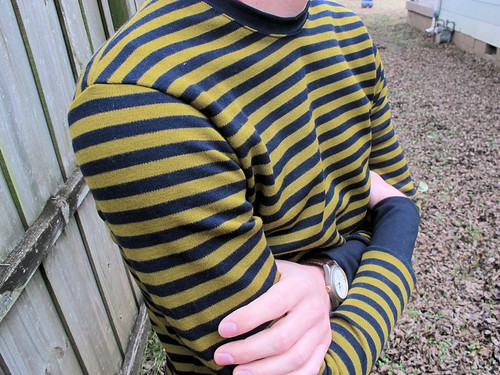
We found this navy/pea striped wool knit on Mood Fabrics and Landon immediately pointed out how much he loved it. I’m not surprised- like 3/4 of his closet consists of these colors, or stripes, or this particular cut of shirt. So I’ve basically just created the holy trinity of sweaters for him, I guess.

Men's Sweater made with wool sweater knit from Mood Fabrics

Anyway, I was iffy about the fabric when I ordered it, but a sweater was promised and I’m a girl who keeps her promises (plus, like I said, I didn’t have to knit is, sooo..). The fabric is actually quite lovely in person – it’s a nice, stable knit, sort of like a ponte, so it holds stitches beautifully without getting all weird and wavy. It’s also wool, which means it steams up beautifully and doesn’t get that weird shine that you sometimes get when you stick a hot iron on ponte. I sewed this up on my serger – because it’s fast and durable (and this is a dude sweater, after all) – but this is totally the type of fabric that can handle a standard sewing machine making the seams, so fear not if you’re part of the serger-less population.

Men's Sweater made with wool sweater knit from Mood Fabrics

I’ll be straight with y’all – this was a very last-minute project. My original plan for December was the glorious plaid coat I’m working on, but I’ve had some issues with time management this month (and hand-tailoring takes foreeeever, and no, I don’t care if Peter can make a beautiful coat in a week STOP COMPARING ME TO A LITERAL SEWING MACHINE), so the coat, while still in the works, is not quite ready for her debut. Fortunately, knits sew up pretty fast, so I had this finished in a couple of hours – just in time to take some pictures and send the man off on a week-long business trip.

I did not use a pattern for this (see above: time management), but simply traced off an existing sweater that already fit him. From there, I sewed up the main pieces (front, back, and sleeves), tried it on him, and then added the binding for length. I somehow messed up the length of the sleeves (pretty certain that the original traced-off sweater had too-short sleeves, since these were exactly the same length, gr), but I was able to adjust the ribbing width and they turned out fine. Speaking of the ribbing, I tried to source a good navy but ended up with nothin’, so I just used this navy ponte knit from Mood Fabrics, left over from last month’s dress. The color match is perfect, and the lack of visible ribs actually looks pretty polished. So there’s that!

Men's Sweater made with wool sweater knit from Mood Fabrics

To get the neckline ribbing to lay nice and flat, it needs to be short enough to stretch perfectly within the opening. Even a fraction of an inch too long, and it will wave and flap out. Not a good look! Since I was working pattern-less and didn’t feel like getting my math on, I switched up the sweater construction so the neck ribbing is applied flat. It’s really easy – see my tutorial on the Papercut Patterns blog. I pretty much get perfect results across the board every time when I use this technique, and it doesn’t require any intense maths or measurements. This is what I love about knits!

Men's Sweater made with wool sweater knit from Mood Fabrics

I also topstitched the ribbing at the neck with a twin needle, making sure to have the seam exactly between the two needles. I just like the way it looks!

Men's Sweater made with wool sweater knit from Mood Fabrics

Men's Sweater made with wool sweater knit from Mood Fabrics

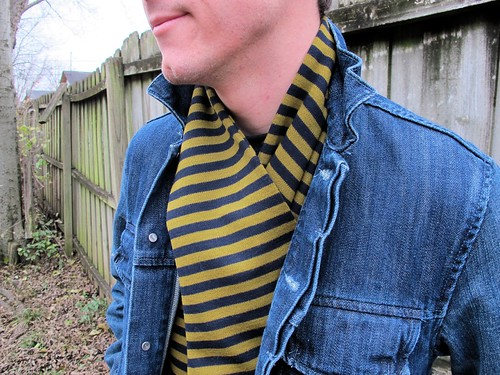
Since I had quite a bit of wool knit left over, I made a quick scarf for Landon as well. Super, super quick – just cut two lengths of fabric, sewed them together down the long side, turned the tube right side out and then closed up the open ends with a bit of Stitch Witchery. Landon loves his scarf, and he promises not to wear it with the sweater like I forced him to in these pictures.

Men's Sweater made with wool sweater knit from Mood Fabrics

I don’t know why I thought modeling the scarf in a bush was a great idea, but it sure seemed hilarious at the time.

Men's Sweater made with wool sweater knit from Mood Fabrics

So, I guess the moral of the story is, when in doubt, make a sweater! Or if you’re super short on time, make a scarf! Either way, my knit scrap stash has just made itself incredibly appealing to me…

Completed: the Zinnia Skirt

8 Nov

Who doesn’t love to wear wool in the winter time?

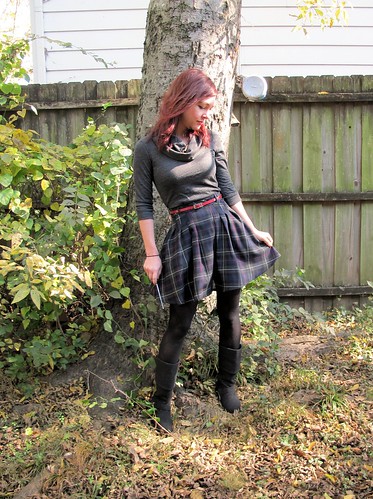
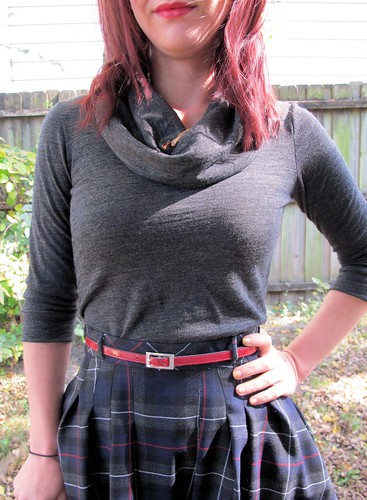
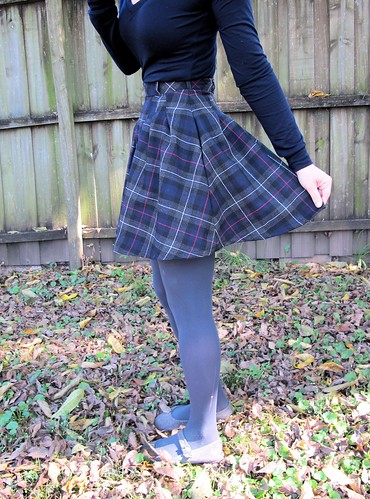
Zinnia Skirt made with plaid wool from Mood Fabrics

I feel like a broken record when I start singing the praises of wool, but foreal you guys – this stuff is awesome. It’s super warm and cozy, breathes very well (so you don’t get overheated in all that warm and cozy-ness), and it’s also antimicrobial, which means it naturally repels odors. Which means now you know why I wear so much wool and still manage to keep up with the laundry – it doesn’t need to be washed very frequently! Airing out is fine for day-to-day. Yay for being lazy!

Zinnia Skirt made with plaid wool from Mood Fabrics

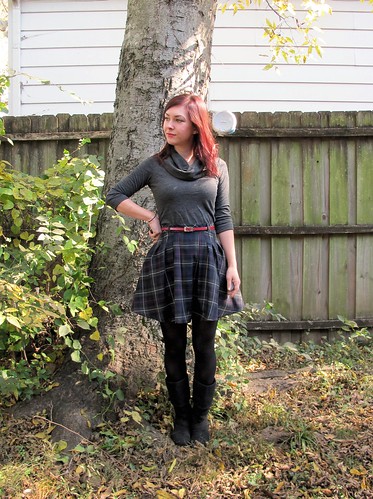
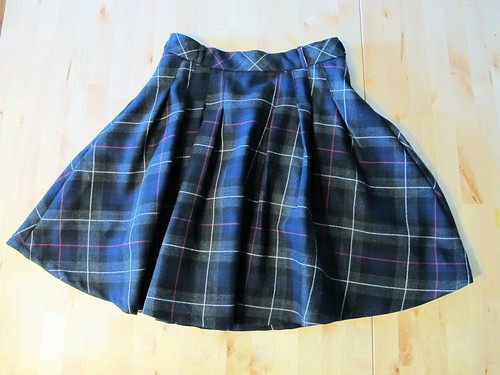
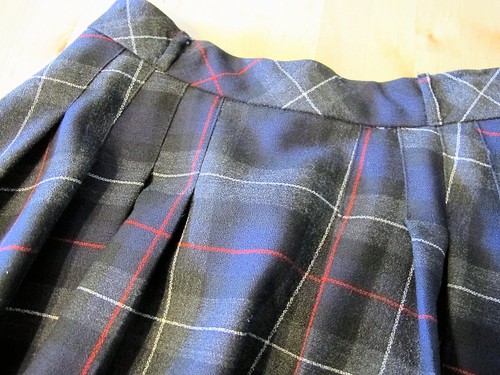
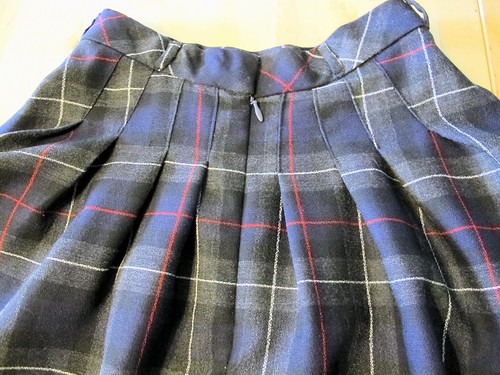
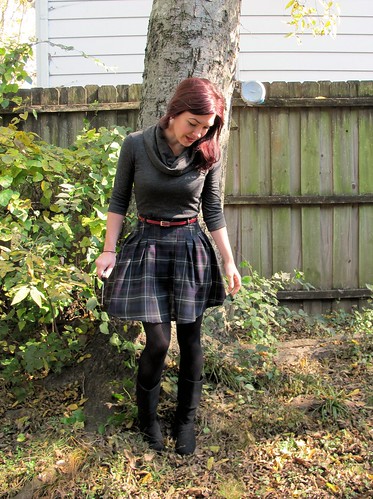
So obviously, I was ready to bust the wool out just as soon as the temperatures started dipping. I’ve had my eyeball on that Zinnia pattern, and I paired it up with this beautiful lightweight wool plaid suiting from Mood.

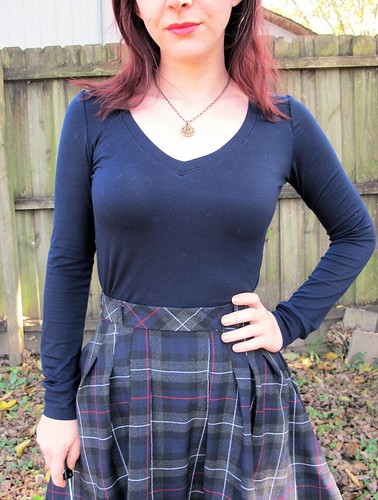
Zinnia Skirt made with plaid wool from Mood Fabrics

I didn’t take any special precautions when sewing this – it’s wool, it’s just easy! The stitches sink in (bad for unpicking, but great for hemming since you can’t see the top stitching ;)), it presses beautifully, and as weird as this is gonna sound – it was really fun to cut, too. My scissors just sliced right through that yardage. I love the colors and it looks just as good paired with black as it does with navy. Double duty fabric and all that.

Zinnia Skirt made with plaid wool from Mood Fabrics

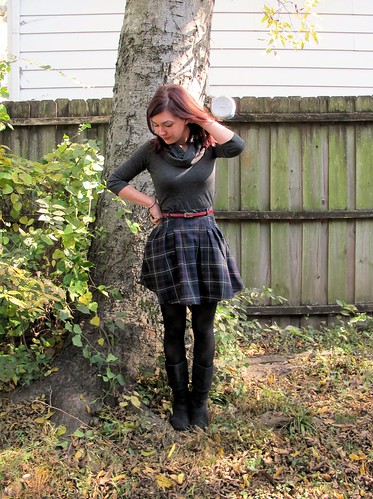
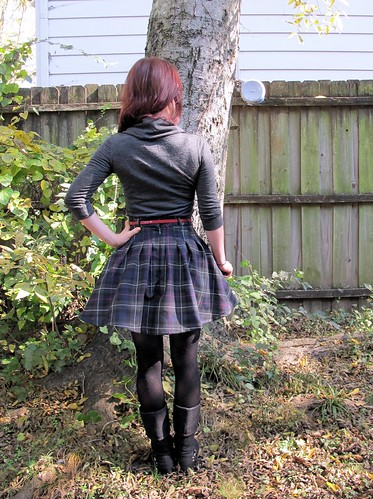
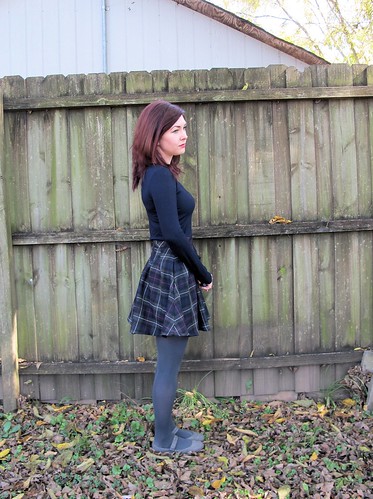
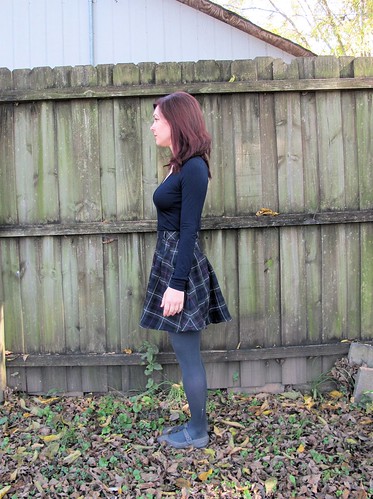
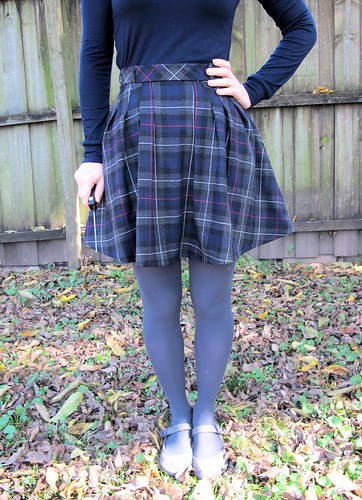
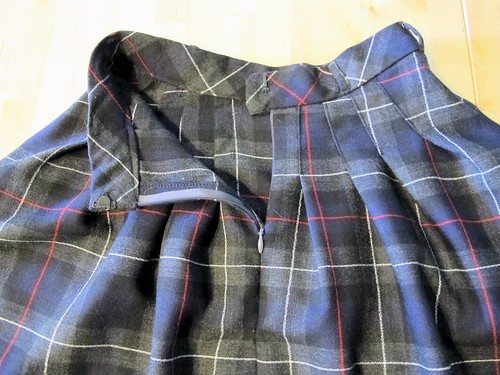
For the skirt, I cut the size 2 (although I did end up taking in the waist so maybe the 0 would have been better). I left the skirt unlined and shortened the hem by about 3″ so I could have a mini. The waistband is cut on the bias and, despite what you might think you see, I promise that the plaid matches up at the side seams 🙂

Zinnia Skirt made with plaid wool from Mood Fabrics

See?

Zinnia Skirt made with plaid wool from Mood Fabrics

Oh yeah, and I did totally just change shirts. We’ll discuss those in a second.

Zinnia Skirt made with plaid wool from Mood Fabrics

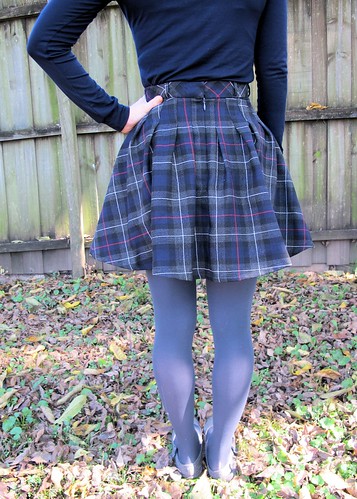
So. About working with this skirt in a plaid fabric. It works – kind of. Matching those side seams was HELL ON EARTH and I’m not really sure why. There are only two pattern pieces, for fuck’s sake! That was also the same day I got my kidney stone (which, if you’re still wondering… it’s still here. Just hangin’ out. Ugh ugh ugh), so I blame it on the pain meds. Anyway, I don’t really think this patterns works very well with a stripe – at least not the stitched-down-pleats version. They just look like a hot mess at the front and back. Might want to save your plaids – or at least your large-scale plaids – for another project.

Zinnia Skirt made with plaid wool from Mood Fabrics

I also had to drastically shorten the hemline – like I said, 3″ and WOO IT’S A MINI – because the longer length just looked dumpy as hell on me. Which means my plans for using a border print probably won’t work with this pattern, at least not the print I had in mind. It’s just too tall for the skirt length.

Zinnia Skirt made with plaid wool from Mood Fabrics

Also, the fabric I chose maaaay be a little too much for this pattern – seeing as how it sticks out like I have a teeny petticoat underneath it, ha – but I actually like the flared look.

Renfrew top made with wool knit from Mood Fabrics

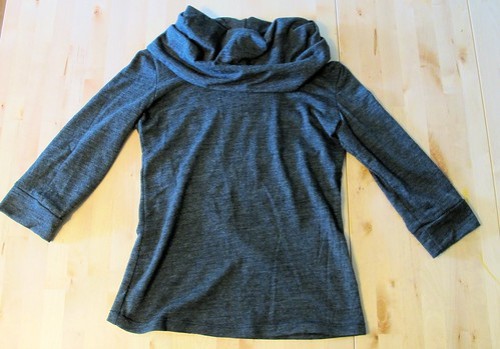
Oh yeah, my tops! This is a Calvin Klein wool jersey, also from Mood Fabrics (attached link isn’t the same color – looks like they’re sold out of the grey, SORRY – but it’s the same fabric type) and it is deeeelicious. So soft and cozy, and not itchy at all! I used the Renfrew pattern and made the cowl version with 3/4 sleeves. I just love the way the fabric drapes at the cowl – it has enough body so it’s not droopy, yet it’s also not huge and standing up on it’s own or anything.

Also, sorry about the rouge leaf. Didn’t see that during the photos, haha!

Renfrew top made with rayon knit from Mood Fabrics

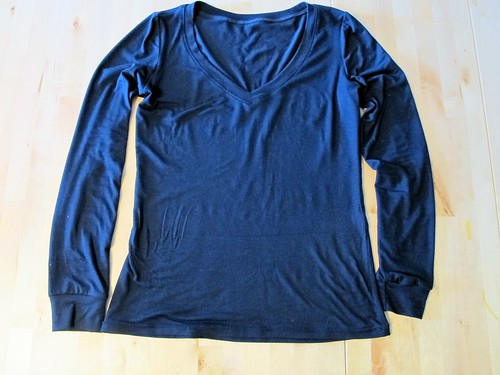
I made the navy v-neck because I felt like my contribution was a little boring, and also because I wanted to see how good navy looks with this skirt (it does! it does!). I used a rayon jersey from Mood Fabrics that’s been in my stash for ages – originally considered for leggings, until I realized that it was a tiny bit too sheer aka I would be baring my bum. I’m so glad I found a use for it, though, because it is some of the most luxurious fabric I have ever handled! It may just be a rayon knit, but it’s silky smooth and amazing. I really wish I had it in every color! I’m also, like, stupid proud of how that V turned out, by the way.

As usual, I took waaay too many pictures, so I’m just going to dump the rest here.

Zinnia Skirt made with plaid wool from Mood Fabrics

Zinnia Skirt made with plaid wool from Mood Fabrics

Zinnia Skirt made with plaid wool from Mood Fabrics

Renfrew top made with wool knit from Mood Fabrics

Renfrew top made with rayon knit from Mood Fabrics

Zinnia Skirt made with plaid wool from Mood Fabrics

Zinnia Skirt made with plaid wool from Mood Fabrics

The tiny belt loops are my favorite part! So tiny and cute!

Zinnia Skirt made with plaid wool from Mood Fabrics

See what I mean about the plaid? It looks like a hot mess at the pleats. Oh well.

Zinnia Skirt made with plaid wool from Mood Fabrics

One last thing – I wanted to thank y’all for all your advice regarding my muslin, as well as my kidney stone. I’ve decided to set the muslin aside for now; I may revisit it in the future but I think my coat for 2013 will have to be a totally different pattern! So I guess I’ve got that to figure out. As far as the kidney stone… well, it’s still there, taking up residence. Y’all will probably be able to hear me scream from the rooftops once it finally emerges haha. A few people urged me to to go the doctor, and I did want to follow up and let y’all know that I went to both a doctor and a specialist last week, got the x-rays as well as a variety of medications. There’s not much else we can do at this point beyond surgery or shooting lasers (which my uninsured ass is reeeeally trying to avoid), which means I gotta shoot it out! For the past couple days I’ve been on an essential oil regimen, and tonight I will be trying some Coke/asparagus concoction that sounds fucking disgusting but is supposed to work. Anyway, sorry for the TMI, keep thinking happy kidney stone thoughts! haha!
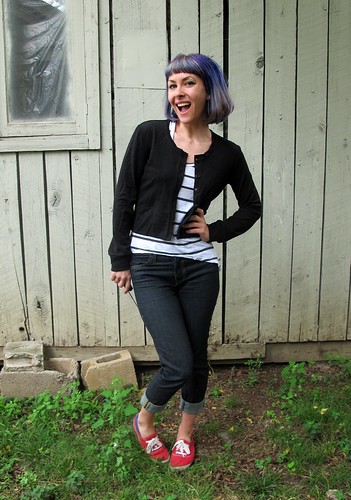
Zinnia Skirt made with plaid wool from Mood Fabrics

Completed: An Emerald Green Wool Jersey Lady Skater

13 Sep

Before I start, two things:

1. I know. Another Lady Skater. Y’all are probably getting sick of looking at this, but uhhh sorry not sorry! Honestly, I wanted to put both of these dresses in the same post, but I hadn’t managed to get pictures of the green one and I wanted to post the floral one RIGHT THAT SECOND and, well, you know how it goes.

2. Much more important, but thank you thank you thank you for all of your lovely comments on my last post! Again, I wasn’t posting that bit to fish for compliments, or anything like that… it has just been on my mind for a long time. I wholeheartedly believe that sewing + the blogging community (not to mention taking pictures of oneself and posting them on the internet, eep) is so wonderful for helping us maintain a healthy body image, and I would be lying if I said the outpouring of support and consolation stories didn’t make me feel a trillion times better about my insecurities and why they shouldn’t even matter in the first place. Y’all are just lovely, and I love you 🙂

Now, back to the matter at hand…

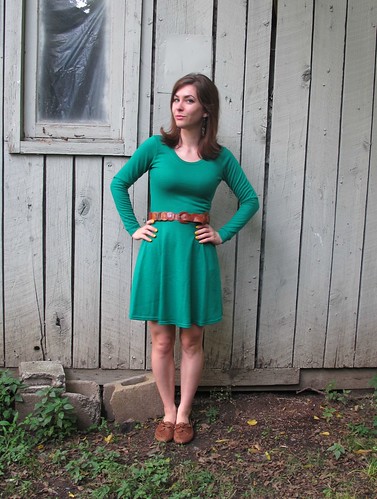
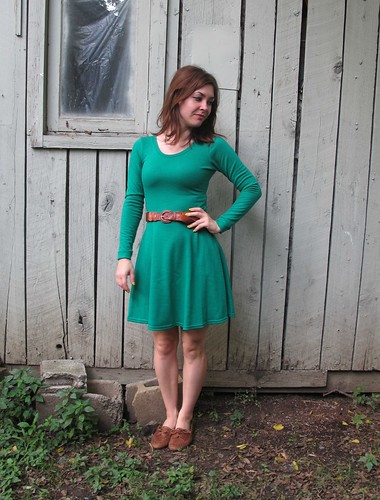
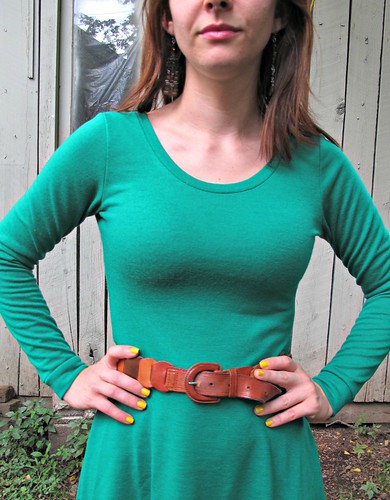
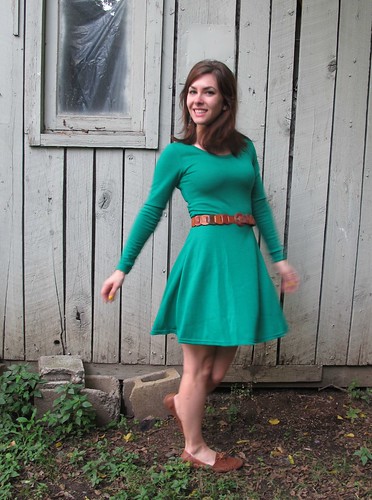
Emerald Wool Jersey Lady Skater

I made another Lady Skater! This one comes with bonus surprise Duck Lips!

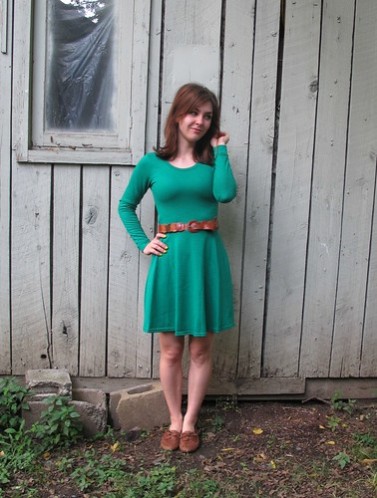
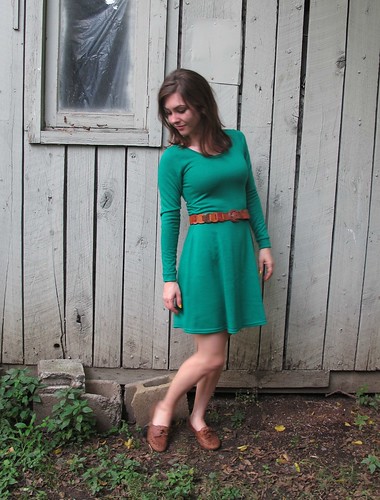
Emerald Wool Jersey Lady Skater

I know I don’t have to justify myself when it comes to things I sew, but just in case you were looking for justification – I made this twice in a row because it’s an awesome pattern and I wanted to try out every sleeve version. I have made short sleeves, I have made 3/4 sleeves, and today we have long sleeves!

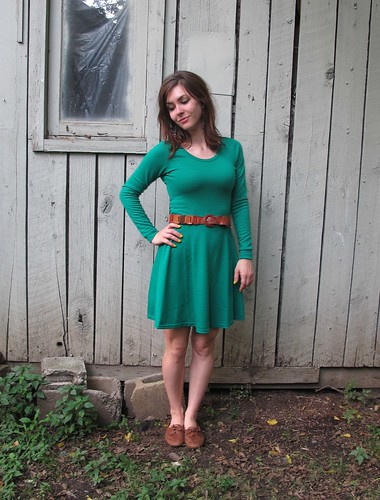
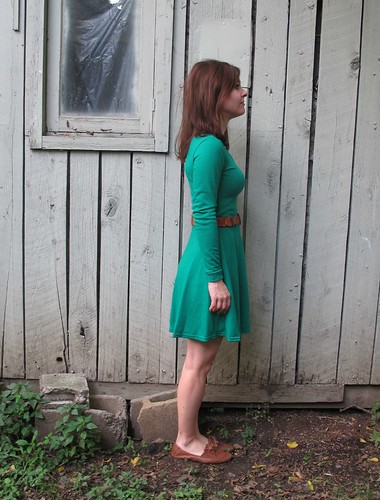
Emerald Wool Jersey Lady Skater

I really love seeing how a pattern can look totally different depending on the fabric that is used to make it up, and this one is no exception. My last Lady Skater was a thin, drapey, VERY stretchy cotton knit. For this version, I used wool jersey that is fairly stable, and look at what a difference it makes!

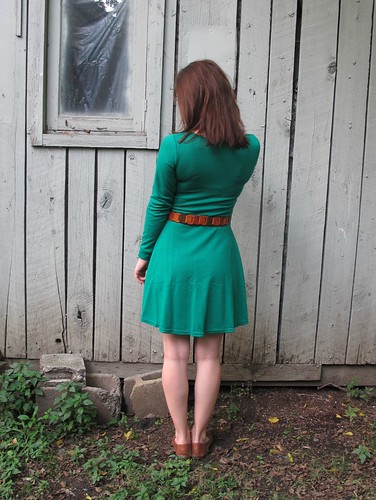
Emerald Wool Jersey Lady Skater

My green wool jersey is from – where else? – Mood Fabrics. Having tried Merino Wool and now Wool Jersey, I am now going to give you my opinion on them and how they are different.
Merino Wool – due to the chemicals in the wool, this stuff can be washed and dried as normal in your machine without felting. It also tends to be less scratchy, in my experience. Elasticity and stretch recovery are excellent. Fabric can be a bit sheer, at least based on the pieces I’ve personally handled.
Wool Jersey – ok, I’m going to be real gross and weird here and admit that I didn’t pre-wash my Wool Jersey. I plan on washing it the same way I wash my sweaters – which is a lukewarm sink bath with no agitation, and laying flat to dry. The stretch recovery on this is good, however, it doesn’t have as much elasticity (see the difference in fit vs my previous dress? Wool Jersey is a bit more stable than cotton jersey). It is also pretty scratchy! It’s not unbearably scratchy by any means, but it does feel like I’m wearing a wool sweater… which, I kind of am! It is much more opaque than the Merino. I am wearing neon undies under this dress and you can’t even tell, ha.

Emerald Wool Jersey Lady Skater

It is also REALLY warm. Which will be good, when it eventually gets cold here 😛

Emerald Wool Jersey Lady Skater

Emerald Wool Jersey Lady Skater

I kind of feel like a Girl Scout in this dress, what’s with the bright green and slightly scratchy fabric. I know the green looks sort of muted in these pictures, but trust me and not my inexperience with my camera. This shit is BRIGHT FUCKING KELLY GREEN. It is amazing.

Emerald Wool Jersey Lady Skater

See what I mean about the fabric not being as elastic? You can totally see bra straps and back fat here. Which doesn’t bother me, personally, but if you don’t like looking like you were poured into your clothing that morning, you maaaay consider sizing up if you choose to make this pattern with a more stable knit 🙂

Emerald Wool Jersey Lady Skater

I should also point out that the stability of this fabric makes it really easy to sew. Just like Merino Wool – it doesn’t curl up, doesn’t slide around (actually, it’s slightly lofty so the pieces kind of stick together and that’s MAGICAL), stitches and presses like a dream. I really enjoyed the sound my scissors made when they cut into it, strangely enough. It’s the little things.

Emerald Wool Jersey Lady Skater

Ok, so who’s jumping on the Wool Jersey bandwagon with me? ALL ABOARD, LET’S GOOOO!!