Tag Archives: workshop

2024 Workshop Dates

18 Dec

I’m so excited to finally announce my 2024 workshop dates!!

I currently offer two workshops, let’s talk about them! (Scroll to the end of this post if you just wanna get to the dates, or holler at my WORKSHOPS page!)

👖SEW YOUR OWN JEANS WEEKEND WORKSHOP👖

Ready to be your own personal denim designer? Join me for a 2 1/2 day workshop and I’ll show you all the secrets to sew up the jeans of your dreams! We will kick off the weekend with a half day to fit and cut – there will be samples you can try on to determine your size and any fit adjustments. Saturday and Sunday will be dedicated to sewing, and we will go over aaaaaall the details – front pockets, zip fly, killer topstitching, secure bartacks, serged seam finishes, creating and attaching a waistband, hardware installation, and stress-free buttonholes (yep, those exist!). Students can expect a fun, energetic, and fast-paced environment that focuses on learning and creating. You will leave with not only a new pair of jeans, but also the knowledge and empowerment to make more on your own!

✨JEANS WORKSHOP FAQS✨

What can I expect to learn in this workshop?

My Sew Your Own Jeans Weekend workshop primarily focuses on construction – you will learn all the details that go into making a pair of jeans, including order of construction, seam finishes, topstitching, inserting a fly zipper, attaching a waistband, and loads and loads (and loads) of little tips, tricks and best practices sprinkled throughout the weekend (seriously, so many little tips!). The knowledge you obtain isn’t just jeans-specific – you can use what you learned to apply toward all sorts of future sewing adventures (Denim jackets!! Rad pants! Skirts! Dresses! Bags! Your possibilities are endless!). You will leave with a great pair of jeans, plus the confidence to go home and make more!

Does this workshop cover fit?

We will go over fit, although this is not a fit-focused workshop. The first half day is devoted to choosing our size (including trying on samples!), adjusting our preferred fit, and preparing our fabric for sewing (cutting, marking, etc). We *will* go over minor fitting adjustments as needed for each individual body. We will *not* spend a long time fussing over fit, nor can I guarantee that your first pair will be ~the most perfectly fitting pair of pants you’ve ever worn~. There simply is not enough time in class to allow for us to make multiple muslins for a perfect fit – and to be completely honest, this is hard to obtain without wearing the pants around for a few days to really get an idea of what needs to be adjusted. I don’t say this to discourage you, but rather, to set the expectation of what you will get out of your weekend. We will tweak the fuck outta your pants throughout the weekend (if it needs it – most students find they get a great fit right out of the envelope! #magicpants) and you will leave with something lovely and wearable that I promise you’ll be proud of. Should you need future adjustments, you will be armed with the knowledge to make it happen!

Is this class suitable for plus sized sewists?

Hell yeah! The Closet Core Ginger Jeans pattern is available in sizes 0-32 (up to a 63″ hip). Need a bigger size than that? Holler at me and I’ll get it sorted. This class caters to EVERY size, no butts left behind!

I’m a dude / don’t wear lady pants, can I take your class?

Hell yeah you can! The Ginger jeans pattern can be adapted with minor tweaks for more androgynous fit, or we can adapt a men’s jeans pattern for you. Please contact me in ADVANCE of the workshop so that I can be sure we’ve got the perfect pattern ready for you!

What experience level should I be at in order to take this workshop?

Beginners, rejoice: You don’t need to be a sewing superstar with years of experience under your belt to take this class. The prerequisites for class are that you should be comfortable threading and operating a sewing machine, and have experience sewing at least one sewing pattern. That’s it, that’s all you need to take this class!

If you are a very experienced sewist with lots and lots of sewing (and maybe even jeans making!) under your belt, I still believe you will learn a lot in this workshop! I have had a vast array of skill levels in my classes – from the total beginner to the seasoned professional – and everyone leaves with more knowledge than they came with.

**For all skill levels** Please note that this workshop moves really fucking fast. 20 hours of instruction sounds like a lot, until you realize that I talk through most of it and our actual sewing time is quite limited! You will feel like an absolute warrior when the weekend is over, and also very very tired. If you are a very timid or slow sewist, I encourage you to practice working quickly and confidently to prepare for class.

I don’t like that pattern, can I use a different one? Can I modify it?

I hate to be a fun sponge, but we really don’t have time in class to make huge design changes to the pattern or try to work with something entirely different. That being said, there is a downloadable pattern for the Ginger Mid-Rise Jeans that you are welcome to bring to class. We can make additional small fit tweaks as needed, but plan on saving the major changes and additional patterns for your home sewing practice!

Will you ever offer this workshop as an online class?

Probably not! I don’t wanna do online classes! Sorry!

🪡ALTER + REPAIR YOUR GARMENTS 1 DAY WORKSHOP🧵

What about those garments that aren’t quite right? Whether they need basic adjustments or a full-on overhaul, we all have pieces that we want to keep but don’t necessarily want to wear. Garment alterations are a truly empowering way to level up your own sewing skills and expand your wardrobe options. This one day workshop is a fantastic opportunity to dip your toes into the world of alterations and garment repairs, while having a knowledgable teacher on hand to throw around ideas, show you the ropes, and get you out of any trouble that might arise! Students will work on garments of their choosing, meaning you won’t be stuck learning techniques that you aren’t interested in. Bring those pieces have been languishing in your closet – whether handmade or RTW, vintage or new – and let’s elevate them into pieces that give you real joy!

⚡️ALTERATIONS WORKSHOP FAQS⚡️

What can I expect to learn in this workshop?

My Alter + Repair Your Garments workshop is an absolute wildcard in terms of what you learn – that’s entirely up to you, the student! Since you will be bringing your own pieces to work on, it’s really a matter of what do YOU want to learn? In general, students can expect to learn a variety of basic alteration techniques such as pin fitting a garment, transferring the fit adjustments for sewing, techniques for successful seam ripping, and how to make adjustments and repairs to your particular garments.

Does this workshop cover fit?

Yep, that’s kind of the whole point of alterations! 🙂

Please note that this is a fitting class that focuses entirely on COMPLETED garments only. We do not work with muslins, or handle flat-pattern adjustments (this is likely something already offered by your local sewing shop!). We fit for style, for comfort, for wearability. You will learn new fit techniques and be able to see fit from a different perspective, which will aid you will your personal fitting quest!

What experience level should I be at in order to take this workshop?

This is a truly “all skill levels are welcome” sort of class. Since we work at a slower pace, there is plenty of opportunity for help with the beginner students, and more advanced students will not be bored. Students will get loads of one-on-one time, as well as a healthy of amount of self-guided sewing. For this reason, I do recommend that students have *some* sewing experience taking this class – you should know how to use a sewing machine and understand basic clothing construction (including how to press) – as you will get a lot more out of the experience.

The thought of doing alterations makes me want to die, why the hell should I take this class?

Hey, I get it – alterations are a bit unpopular in the sewing world. Hemming someone else’s pants for free ~just because you know how to sew~ is not how any of us want to spend our free time! And maybe you don’t want to work as a tailor, that’s understandable! But beyond boring pants-hemming, there are so many other benefits to understanding how to execute successful alterations. You will be able to fit and wear clothes that have alluded your body in the past. Your handmade items with weird issues that you didn’t notice during muslin (or maybe you skipped the muslin, you little rule-breaker!) can be rectified. Your understanding of fit, and how to execute it, will explode. You will learn interesting things about clothing construction that can be applied to your own handmades. Alterations are the most sustainable way to sew, and quite a bit faster than making an entire garment from scratch (I like to refer to it as “micro-sewing” 😉). And let me tell you – just because you know *how* to do something, doesn’t mean you *have* to do it for someone else. And that includes hemming pants. You can absolutely be smug about it when you tell people no 😘

🗓️ 2024 WORKSHOP DATES 🗓️

So, about my workshop dates! Next year is going to be a little different from previous years. I’ve scaled back my travel a lot (by choice; I’m tired and I’d like to focus more on my freelance alterations business) which means I’ll only be offering one jeans workshop per shop for the calendar year. So if you aren’t able to get in this year, you’ll have to wait until 2025! For this reason, I recommend signing up as early as possible, as my workshops tend to sell out!

Additionally, based on student response, I’ve added a couple weekends of Alterations workshops that are not connected to a Jeans workshop (scandalous!). My Alterations workshop has been suuuuper popular, and especially so in a couple particular cities. So if you’ve been trying to get in one at Pintuck & Purl or Stitch Sew Shop and have been stuck on the waitlist, I would recommend checking out those options as there are finally more of them (hooray!).

More information is available on my WORKSHOPS page. Please note that while dates are confirmed, not all workshops are listed yet! I have included links where the listings are active and currently accepting registration. For all other workshops, you will want to visit the website of the hosting shop for information on when the class will be active, and how to sign up.

Alter + Repair Your Garments
February 29, 2024
Former + Latter Fabrics / Edmonton, AB Canada

Sew Your Own Jeans Weekend Workshop
March 1 – 3, 2024
Former + Latter Fabrics / Edmonton, AB Canada

Alter + Repair Your Garments
March 23, 2024
Stitch Sew Shop / Alexandria, VA

Alter + Repair Your Garments
March 24, 2024
Stitch Sew Shop / Alexandria, VA

Alter + Repair Your Garments
May 18, 2024
Pintuck & Purl / North Hampton, NH

Alter + Repair Your Garments
May 19, 2024
Pintuck & Purl / North Hampton, NH

Alter + Repair Your Garments
June 6, 2024
Old Spool Sewing Studio / Brielle, NJ

Sew Your Own Jeans Weekend Workshop
June 7 – 9, 2024
Old Spool Sewing Studio / Brielle, NJ

Alter + Repair Your Garments
July 11, 2024
Sew On Central / Evanston, IL

Sew Your Own Jeans Weekend Workshop
July 12 – 14, 2024
Sew On Central / Evanston, IL

Alter + Repair Your Garments
August 22, 2024
BARN / Bainbridge Island, WA

Sew Your Own Jeans Weekend Workshop
August 23 – 25, 2024
BARN / Bainbridge Island, WA

Alter + Repair Your Garments
September 12, 2024
Pins & Needles NY / Mt Kisco, NY

Sew Your Own Jeans Weekend Workshop
September 13 – 15, 2024
Pins & Needles NY / Mt Kisco, NY

Alter + Repair Your Garments
October 3, 2024
Domesticity / Baltimore, MD

Sew Your Own Jeans Weekend Workshop
October 4 – 6, 2024
Domesticity / Baltimore, MD

Alter + Repair Your Garments
October 24, 2024
Pintuck & Purl / North Hampton, NH

Sew Your Own Jeans Weekend Workshop
October 25 – 27, 2024
Pintuck & Purl / North Hampton, NH

Sew Your Own Jeans Weekend Workshop
November 15 – 17, 2024
Papermaple Studio / New Orleans, LA

Alter + Repair Your Garments
December 5, 2024
Stitch Sew Shop / Alexandria, VA

Sew Your Own Jeans Weekend Workshop
December 6 – 8, 2024
Stitch Sew Shop / Alexandria, VA

A note on locations: I know that there are plenty of requested cities that ultimately did not make this list. Please know that I took all suggestions seriously and I reached out to a lot of shops! However, a lot of them aren’t able to host for many reasons – or they just didn’t respond to my inquiry. If you’d like me to come to your town, my best advice is to talk to your local shop/studio and tell them you are interested in taking my workshop! My success rate in scheduling a workshop is far higher when a potential student expresses interest, as opposed to me emailing out of the blue. For 2024, though, I am fully booked and no longer accepting any more dates. 

⚡️👖🧵🪡✨

This last year was such a blast, and I’m looking forward to 2024! Slingin’ denim, ripping into all the clothes, working wardrobe miracles, touching endless butts… I love what I do so, so much! Will you be joining me next year?

All About My New Workshop: Alter + Repair Your Garments!

11 Oct
Teaching my new workshop, Alter + Repair Your Garments, at Camp Workroom Social in 2021!

Hey all! Long time no chat 🙂

Don’t expect a return of regular blog posts (sorry! Real talk; this shit took me multiple days to write and I am exhausted lol), but I did want to pop in and talk about my new workshop that I’ve been offering this year. That’s right – I went away for a full 12 months, just to come back around and try to sell y’all some of my crap! HA HA! Wait, come back, I promise this is some interesting quality shit!

As you [probably] already know, I’ve been a sewing teacher for many years – almost a decade, actually (crazy!). I’ve been teaching my Sew Your Own Jeans workshop now for years, and it’s awesome and fun and you should totally believe all the good hype you hear about it. As much as I love making jeans, though, a new sewing skill has entered my repertoire that I just cannot get enough of and I’m dying to share it with everyone! So I created a new one-day workshop, Alter + Repair Your Garments. And today, I’m dusting off this old blog to tell you more about it! And even if you don’t care about my new workshop, I hope that you will at least enjoy the absolute avalanche of photos in this post.

Alterations are a really sensitive subject in the sewing community. We love to say things like “Yes I sew – no I won’t hem your pants.” I’ve seen sewers literally make an entirely new garment, rather than address fit issues in a current garment. Things like seam ripping and making adjustments get a really bad rap in this inner circle. Why is that? I don’t know, but I had a similar attitude up until a few years ago. I would happily upcycle clothes – that’s how I really learned how to sew, by taking weird things from the thrift store and turning them into something even weirder (what can I say? I love weird shit). But I, like many other home sewists, didn’t touch alterations. Until recently, anyway.

I’ve touched on this a little on my blog – and a lot more on Instagram – but I actually do alterations for a living now. I started out as a freelance tailor, which I still do, and I also work part time in a tailor shop that is connected to a high-end clothing store. The tailor shop is stable and occasionally a bit redundant (which I honesty like), and the freelance work is… sometimes redundant, and sometimes just absolutely wild. As a freelance tailor who also lives in Nashville, the majority of my clients are musicians, mainly country and gospel artists. I work closely with my clients and their stylist to get their clothes to do whatever they want them to do. Sometimes that means proper fittings and alterations for things like red carpet events and tour outfits. Sometimes it means I’m sitting in a parking lot with my sewing machine powered by a generator, while I furiously take in something in the absolute shittiest and fastest way possible so they can film a music video. I also do a lot of adjustments to clothing in ways that aren’t traditional alterations – changing the style and fit of a garment (in a way that was not originally intended by the designer), adding or removing elements to make it wearable for performing, or to work with a stylist’s ~vision~. It’s all different and it’s all fun and I love it so much!

My new 1 day workshop, Alter + Repair Your Garments, allows students to dip their toes into the world of alterations and garment changes, with the support of someone who has quite a bit of experience under her belt (that would be me!). This class is a little different than what you might imagine when you think of doing alterations, though. Yes, we can (and we will) cover the basic stuff – hemming pants, taking up sleeves, adjusting waistlines, etc. The not as exciting bits that we like to tell people we don’t do as sewists. It’s totally valid and useful sewing and can be very handy if you think you might want to pursue a career as a tailor, or if you just want to handle your own alterations and save some cash, or in the case of some of my students – to show you the involvement in alterations, and release some of that sewist’s guilt when you realize you’d rather just continue to pay someone else to do it so you can keep your free sewing time entirely selfish and fun!

A big part of alterations, though, is a lot more exciting – the creative problem solving! This is where we take our garment sewing to the next level by changing things that might not be so obvious on the first go. Sometimes it’s a simple fix – shortening a hem, taking in excess. Sometimes it’s more involved, like replacing a zipper or a shredded panel of fabric. Sometimes it’s something really wacky, like making a new neckline or turning a dress into a top. The beautiful thing about sewing is that *most* things can be changed – I mean, it’s all sewn, after all. So go ahead and put pockets in that dress! Chop 6” off the bottom of your jeans and keep that original ratty hem! Dye your favorite sweater to a color that better suits your complexion (ok, no dyeing in this class but we can talk! We can talk!)!

Every class is different, and the curriculum is based on whatever students choose to bring into class. This means you aren’t signing up for a class that teaches you shit you don’t care about – you’re going to bring in your own garments (ready to wear or handmade, vintage or modern, yours or someone else’s! Whatever you want to work on!), and we are going to address those pieces specifically. Some students love the opportunity to watch what everyone else is doing – it’s like extra little bonus lessons! Some students like to bring in an entire pile of clothing and try them all on, chat their way through all the changes and how to do them, and save the actual sewing for home. Some students will just bring a couple big projects, and let their class session focus on finishing them. Some students use class time as an excuse to finally tackle the pile of clothing alterations they’ve been avoiding dealing with. However you decide to treat the class is up to YOU!

This is not a “fitting” class per se – although, most alterations do involve fit. We fit for style, for comfort, for wearability. We are not worried about getting “perfect fit” because that does not exist (and any photos you see without wrinkles? That’s due to the magic of Photoshop and standing completely still in a garment that probably isn’t very comfortable!). A fun bonus effect of this class is that this sort of fitting – on completed, wearable garments – can actually increase your understanding of fit and it’s adjustments on the future garments that you make. Fit adjustments are much more obvious on a finished garment, rather slogging through a book and trying to figure out the strange name that is supposed to describe the wrinkles you see.

As a tailor who works in the entertainment industry, I bring a unique point of view that you might not necessarily find in other classes. I’m not afraid to do something wild to a garment if I think it will improve it in some way. I love using elastic to sneakily take things in, and I’m a huge fan of turning mistakes into design elements. My goal for this class is to teach students how to approach this in a systematic way that makes sense and can be replicated with any garment, not just the pile you worked on in class. Of course, I want you to leave with a pile of pieces that you definitely will wear now – but I also want you to leave equipped with the knowledge and confidence to do this on your own, too!

Alter + Repair Your Garments is perfect for any sewist who wants to improve their sewing, as well as learn a whole new range of skills. Do you have a pile of clothes in your closet that you don’t wear, but you also can’t quite figure out why? You need this class. Do you want to be able to smugly tell those acquaintances who ask you to sew for them “Actually, yes I do know how to do that type of hem – but sorry, I don’t sew for other people :]”? This is your class, baby! Have you taken my jeans class and you just really want to hang out with me again but you are good with all things denim? COME ON DOWN AND SEE ME, MY FRIEND!

You do *not* need to be a sewing super star to take this class! I wouldn’t recommend this class to an absolute beginner – you should have a little experience under your belt, a general understanding of the basics of clothing construction, and be comfortable using a machine. But you know what the other beauty about alterations is? There’s the easy way, and there’s the “proper” way. And you get to choose the method you want to use (because those are your damn clothes and there aren’t any sewing police!)! From adventurous beginners to seasoned pros – I truly believe this is a class for everyone!

Here are some things you can expect to learn in this one day workshop:

  • Effective seam ripping techniques for a variety of stitches, including straight stitches, serged finishes, and chainstitches
  • How to assess a garment’s fit and style, and how to determine what changes need to be made
  • How to pin fit a garment and transfer the adjustments in preparation for sewing
  • How to take apart a garment, look inside, and determine the best method for executing whatever adjustment needs to be made based on the construction of the original garment
  • Basic garment repair
  • How to determine whether a garment can successfully be altered or repaired,
  • Best practices for using trial-and-error to approach for alterations on existing garments, and how to troubleshoot any problems that may arise
Maybe you just need help getting the right hem length on your long dresses? I got you!

A couple notes on what *not* to expect in this class – we are working on finished garments only, so no muslins and we will not cover flat pattern adjustments (that’s an entirely different class, one that your local sewing shop likely already offers!). We cannot work on specialty (or messy) materials, such as leather, sequins, or fur. Pls leave that shit at home!

Altering your clothes to better suit your body, style, and comfort needs is truly the most sustainable way to sew. In this class, I hope to show you how to see flaws in garments as exciting opportunities for improvement. Whether you are buying used or new clothes that need a little tweaking, or perfecting the fit + style finish on your own handmade goods (side note: *most* of my handmade clothes go through at least one round of alterations after they are finished! This is totally normal – even with a preliminary muslin fitting, clothes are going to fit different when you wear them out and around vs standing in front of a mirror with a shell made of a stiff fabric), the possibilities are endless and exciting!

Does this count as an alteration? Old RTW jacket that I thrifted and painted on the back! Full Instagram post here.

Don’t worry – I’m still teaching my Sew Your Own Jeans workshops (got a lot more butts I need to touch!). I will be offering Alter + Repair Your Garments in tandem with the weekend dates of my Sew Your Own Jeans workshops. I’m finalizing my 2023 workshop dates right now and will be announcing them soon – stay tuned! Can’t wait until 2023? There are still a couple seats left at Domesticity (Baltimore, MD) and Papermaple Studio (New Orleans, LA)!

For more information on my Alter + Repair Your Garments workshop, check out this interview I did with Workroom Social earlier this year.

For a list of all my upcoming workshops – check out my WORKSHOPS page.

Announcing Sew Your Own Jeans 2020 Workshop Dates!

19 Nov

Sew Your Own Jeans weekend workshop at Blackbird Fabrics 2019

Friends, readers, and random people who just dropped in via an interesting Google suggestion – I’m happy to announce that my 2020 dates are finalized and I’m ready to announce my ~2020 workshop tour~! Yay!

I’m trying something a little different this year and announcing everything at once, rather than as they are listed and available for registration. Last year, it felt like a lot of people missed out on signing up because the seats would sell out before I even had a chance to announce them! I also felt like I was posting WAY too much about workshop stuff, which I completely understand can be super annoying for those who are not interested in ever signing up for one! My hope is that this burst of dates (as opposed to the slow trickle last year) will allow everyone interested to plan in advance, and be informed when the seats are available to sign up for.

Sew Your Own Jeans weekend workshop at Blackbird Fabrics 2019

Please note that not all the classes are listed as of this posting (I will update as they are!). I strongly recommend that you follow the shop hosting the workshop, to be notified when the class is listed so you can sign up quickly and hopefully secure a seat! I will update my classes page as workshops as listed, however, I cannot guarantee they won’t be sold out by that point (this happened quite frequently last year!).

All dates and links are listed on my WORKSHOPS page, as well as in this post. For more information, including pricing, please visit the shop’s website or send them an email!

Sew Your Own Jeans weekend workshop at Blackbird Fabrics 2019

A few notes and frequently asked questions about my workshops:

These are the ONLY workshops that I am offering for 2020! I am completely booked! Once they are sold out, they are sold out (i.e., I will not be adding additional dates) so I encourage you to sign up ASAP!
For my jeans classes, we will be sewing the Ginger Jeans from Closet Case Patterns. This pattern is a high-waisted, stretch denim jeans pattern that is available in sizes 0-20. Plus sized? Girl, I got you! You can make the Cashmerette Ames Jeans, which is available in sizes 12-28 and includes options for both an apple shaped torso or pear! Dudes or Non-Binary, i.e., don’t wanna wear girl pants? Yo, I got you too! You can make either the Quadra or the Fulford jeans pattern from Thread Theory. Jeans for everyone!
“I don’t wear high-rise jeans – will we have the option to make this change in class?: If you are interested in sewing a mid-rise jean, there is a Mid-Rise Ginger jeans pattern available for purchase on the Closet Case Patterns website that you are welcome to use instead. Additionally, there is a Flared Leg add-on if you don’t do skinny! Unfortunately, there is not enough time in class to make drastic changes to our patterns, especially with adjusting the rise, outside of minor fitting issues. It is definitely something that we can go over in class, though, so you can apply the changes to all your future jeans!
Required Skill Level: You don’t need to be a Sewing Master to tackle this class, however, you absolutely need to have experience using a sewing machine and following a sewing pattern. All skill levels are welcome!

Sew Your Own Jeans weekend workshop at Blackbird Fabrics 2019

+ + + 2020 LLADYBIRD Workshops + + +

JANUARY
Sew Your Own Jeans Weekend Workshop
January 10 – 12, 2020
Urban Sewciety, Westfield, NJ

Sew Your Own Jeans Weekend Workshop
January 24 – 26, 2020
Crafty Gemini, Gainesville, FL

FEBURARY
Sew Your Own Jeans Weekend Workshop
February 21 – 23, 2020
Craft South, Nashville, TN

MARCH
Jeans Making Sewing Intensive
March 7 – 8, 2020
Workroom Social, Brooklyn, NY

Sew Your Own Classic Shirt Weekend Workshop
March 20 – 22, 2020
Hello Stitch Studio, Berkeley, CA

APRIL
Sew Your Own Jeans Weekend Workshop
April 17 – 19, 2020
Blackbird Fabrics, Vancouver, BC

MAY
Sew Your Own Jeans Weekend Workshop
May 1 – 3, 2020
Pintuck & Purl, North Hampton, NH

Sew Your Own Jeans Weekend Workshop
May 29 – 31, 2020
Darrell Thomas Textiles, Ottawa, ON

JUNE
Sew Your Own Jeans Weekend Workshop
June 12 – 14, 2020
Josephine’s Dry Goods, Portland, OR

Sew Your Own Jeans Weekend Workshop
June 26 – 28, 2020
Fancy Tiger Crafts, Denver, CO

JULY
Jeans Making Sewing Intensive
July 18 – 19, 2020
Workroom Social, Brooklyn, NY

Sew Your Own Jeans Weekend Workshop
July 31 – Aug 2, 2020
Darrell Thomas Textiles, Ottawa, ON

AUGUST
Sew Your Own Jeans Weekend Workshop
August 14 – 16, 2020
Crafty Gemini, Gainesville, FL

Sew Your Own Jeans Weekend Workshop
August 28 – 30, 2020
Blackbird Fabrics, Vancouver, BC

SEPTEMBER
Sew Your Own Jeans Weekend Workshop
September 11 – 13, 2020
Stitch Sew Shop, Alexandria, VA

Sew Your Own Jeans Weekend Workshop
September 25 – 27, 2020
Fancy Tiger Crafts, Denver, CO

OCTOBER
Sew Your Own Jeans Weekend Workshop
October 2 – 4, 2020
Hello Stitch Studio, Berkeley, CA

Sew Your Own Jeans Weekend Workshop
October 30 – Nov 1, 2020
Pintuck & Purl, North Hampton, NH

NOVEMBER
Jeans Making Sewing Intensive
November 14 – 15, 2020
Workroom Social, Brooklyn, NY

DECEMBER
Sew Your Own Jeans Weekend Workshop
December 4 – 6, 2020
Sew With Sonia, Menlo Park, CA

Sew Your Own Jeans weekend workshop at Blackbird Fabrics 2019

Sew Your Own Jeans weekend workshop at Blackbird Fabrics 2019

Sew Your Own Jeans weekend workshop at Blackbird Fabrics 2019

Sew Your Own Jeans weekend workshop at Blackbird Fabrics 2019

Whew! I was going to share a pair of my own recently finished Ginger Jeans, but I think that’s enough for this post! Actually I have 3 pairs of finished jeans so stay tuned for a ~Jeans Extravaganza~ here on this blog shortly! In the meantime – who’s taking a workshop next year?! I am so excited!!

Note: All photos in this post were taken at my workshop at Blackbird Fabrics this past April!

Completed: Polyester Chiffon Archer Shirt (+ Announcing the Sprout Sew-Along!)

23 Feb

It’s that time of the year again – when we start our spring sewing in a desperate attempt to hurry the warm weather up. And by we, I mean me.

While it’s still a little warm here – not quite shorts and tank tops warm, but no-socks warm – I know that we’ll get at least one more cold snap before the temperatures steadily start rising. So while my wardrobe needs to maintain a bit of coverage, I’m using lighter colors and designs that look decidedly more spring than my standard black and grey winter wear.

Polyester Chiffon Archer Shirt / Sprout Patterns

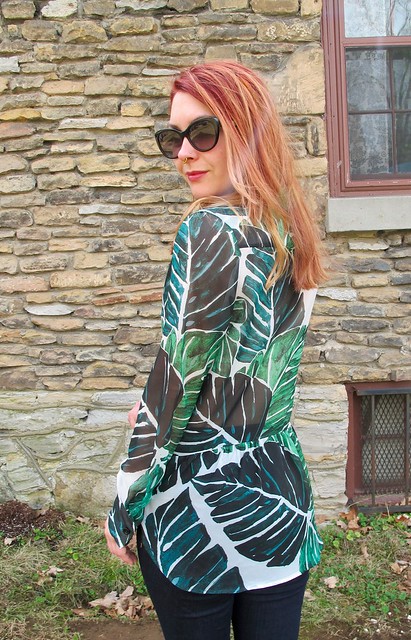
Like giant tropical leaves. Now THAT is a spring statement, amirite

Polyester Chiffon Archer Shirt / Sprout Patterns

As the title of this post says, this shirt is the Archer button up from Grainline Studio. But wait, there’s more! I ordered my fabric from Sprout Patterns, meaning I got to choose the fabric design as well!

I feel like most people are pretty familiar with Sprout Patterns at this point, but in case you aren’t – owned by Spoonflower (beloved on-demand printer of fabrics, wallpapers, and more) – Sprout offers the same on-demand fabric printing but with the additional twist of also printing your pattern pieces directly on the fabric. This not only makes cutting a breeze (no giant flat table space needed – just sit at your couch and cut along the solid lines), but it also gives you total control over pattern placement without the additional brainbending. There are a few catches to this service – one, you are limited to the patterns they have on their site; two, you are also limited to the types of fabrics they offer; and three, having the pattern printed on your fabric does not leave room for flat pattern adjustments – but overall, I think the pros absolutely outweigh the cons.

I’ve heard of this service before – both through blogs and website ads, and also because one of my students at at Workroom Social class actually works for Spoonflower (!!!) – but I hadn’t actually tried the service until now. This year, I’m cooking up some fun plans with Spout pattern and Spoonflower (Spoiler: It’s a class. More info at the end of this post!!), so they offered to send me one to try out!

Polyester Chiffon Archer Shirt / Sprout Patterns

Polyester Chiffon Archer Shirt / Sprout Patterns

Polyester Chiffon Archer Shirt / Sprout Patterns

The Archer shirt works in a variety of fabrics, with the most common/easiest ones being the Basic Cotton Ultra and the Kona Cotton Ultra. While the cottons are definitely great, I love being difficult and asked if I could instead try the Polyester Chiffon. I really love this style of shirt in a soft, drapey fabric and I REALLY loved the idea of the cutting being way easier since the pieces are printed on the fabric. I made a size 2, View B (with the butt ruffle, because, butts) printed on Spoonflower’s Polyester Chiffon. The design is Monstera Leaves. You do have the ability to create your own design, but I’ve learned over time that I am decidedly NOT a fabric designer and would rather use something already made by someone who knows what they are doing. I chose this design because I liked the predominantly dark colors over a white background – it feels breezy without actually being super see-thru – and, of course, who doesn’t love some big ass tropical leaves?

Polyester Chiffon Archer Shirt / Sprout Patterns

Polyester Chiffon Archer Shirt / Sprout Patterns

Polyester Chiffon Archer Shirt / Sprout Patterns

Some notes about this fabric:

  • Polyester is not something that gets a lot of praise in the sewing community, present company included. To be completely honest, I generally HATE the stuff. Hard to wear, hard to sew, sweaty pit dump USA, etc etc. I gave this one a chance because, one, there were no other options for sheer drapey fabric (no silk!); and, two, I thought the sheer chiffon would offset the fact that poly doesn’t really breathe. I am happy to report that my hunches were right, and I actually really enjoyed working with – and now wearing! – this fabric. It’s a great quality poly, feels very nice against the skin, and while I can’t yet report on its heat-retaining properties (it just ain’t hot enough here yet, y’all), I can say that it’s been really pleasant to wear on our warmer days. It also took really well to pressing, so no problems there.
  • I told you this shirt is chiffon, and it is. I should also tell you that I’m only wearing a bra underneath it – no cami. It’s only slightly see-thru, and even then mostly shadows. This chiffon is slightly thicker than some chiffons I’ve tried – almost like a double chiffon – and the dark colors also help with preventing a peepshow. Not having to wear a cami under this really helps me feel, you know, ~breezy~.
  • Chiffon can be tricky to work with, as it is very lightweight and VERY shifty. My first combat against this was to get the pattern via Sprout, which saved me the drama of worrying about whether I was cutting the pattern pieces on grain. Since the fabric has the pattern pieces printed directly on it, cutting is WAY easier – seriously, you can just sit on the couch and cut it with scissors like you’re making a paper snowflake (this was me, in case you were wondering). My other combat for dealing with the chiffon was to soak the entire yardage in a gelatine mixture before cutting, which stiffened up the fabric to more of an organza weight/hand, making it much easier to cut and sew. I talked about using a gelatine mixture in this blog post (and here is the method I used on the Threads website), and ugh you guys it is is a LIFESAVER. Made the fabric soooo much easier to manage, and it washed right out when I was finished with the shirt (machine wash cold, normal dry). If you want to try a tricky pattern like this in a tricky fabric, I really encourage this method – it was one of the easiest experiences I’ve ever had with chiffon! Like, even my sleeve plackets look amazing. Super stoked.

Polyester Chiffon Archer Shirt / Sprout Patterns

Polyester Chiffon Archer Shirt / Sprout Patterns

Anyway, I LOVE how this turned out! The soft, drapey fabric – the shape of the shirt – and the leaves offering a bit of modesty so I can continue to be immodest 😛 This shirt looks equally good with the sleeves rolled up or left down, with the front buttoned or unbuttoned (ok, I guess THEN I’d wear that cami), or even knotted into a crop.

Polyester Chiffon Archer Shirt / Sprout Patterns

Some additional sewing notes:

  • I used French seams to construct the shirt, 1/4″ for each pass (for a total of a 1/2″ seam allowance). Since the fabric is so sheer, I like how the visible seams look this way.
  • I used black thread for constructing and topstitching, and a new 70/10 microtex needle for this lightweight fabric.
  • For interfacing, I made a few test swatches (there is plenty of extra fabric around the perimeters of your pattern pieces that is ideal for this use) to determine what would work best. I ended up using this lightweight woven fusible interfacing (from Workroom Social), which was a perfect match for the chiffon – it offers enough support for the collar and buttons, but it is light enough that it doesn’t interfere with the drape of the chiffon. And since is it white, it brightens up the white background of the fabric without looking super obvious. I also considered interfacing the back of the yoke for this same reason (since the yoke is a double layer of fabric), but I found that I actually preferred the look of the 2 layers so I left them as-is.
  • Like I said, this chiffon pressed without a problem. I use a gravity feed iron (affiliate link) with a shoe, which works the same as using a press cloth. This allows me to press at a high heat without melting my fabric or giving it a weird shine. I definitely do not recommend trying to sew a shirt like this in a fabric that won’t hold a press, however, this fabric didn’t give me any issues!
  • Buttons are just plain black plastic buttons from my local fabric store. Nothing fancy there!

Polyester Chiffon Archer Shirt / Sprout Patterns

Polyester Chiffon Archer Shirt / Sprout Patterns

Polyester Chiffon Archer Shirt / Sprout Patterns

Polyester Chiffon Archer Shirt / Sprout Patterns

Polyester Chiffon Archer Shirt / Sprout Patterns

Ok, so here’s the fun part! I was sent this fabric + pattern by Sprout patterns, in preparation for a workshop that I will be teaching at Spoonflower! Here are the details:

Spoonflower presents the 2018 Sprout Sew-Along with Lauren Taylor (also known as Lladybird)! With the help of Lauren and her sewing expertise, students will be led through the construction of a Grainline Studios’ Archer Button Up from start to finish using their custom printed Sprout Pattern. Our intimate class setting ensures all students the chance to get one-on-one instruction from Lauren as we tackle this wardrobe staple. This class is sure to build your confidence in garment construction! We hope you can join us!

Class fee includes the printed Archer button-up, and there is an early bird discount for those who register before March 3! The workshop is April 6 – April 8, and will be held at Spoonflower Greenhouse in Durham, NC. If you’ve been wanting to tackle this pattern but feel a little overwhelmed with the steps, this is a great opportunity to have a little bit of guidance and hand-holding for your first go! While we will be sewing exclusively with the Kona Cotton Ultra for this class (just because we gotta speed everyone along so we actually finish in two days!), it will give you the skills you need to try this pattern later with a more complicated fabric – such as the polyester chiffon 😛

You can find all the details of the workshop – as well as sign up – here!

Polyester Chiffon Archer Shirt / Sprout Patterns

A side note about the sunglasses – it was very bright outside and I thought I would pretend like I was a fAsHuN bLoGgEr. Suffice to say, I am not happy with how these pictures turned out (and I had to delete more than half of them because it bothered me that you could see the tripod in my lenses haha) but I also don’t care enough to retake them. No more sunglasses photos for me. It weirds me out that you can’t see my eyes. Oh well, you live and learn!

**Note: The fabric for this shirt was given to me by Spoonflower, in preparation for my workshop with them in April! Will I see you there? 🙂

OAL2017: My Completed Anaheim Sweater / OAL Winners / Updates

4 Aug

Hello hello! A bit of a long post ahead – including my finished OAL sweater (yes! I finished it!) and the randomly selected winner for this year. A few updates/housekeeping before I get into everything-

  • I love Kickstarter, and I love funding new projects and ideas from brilliant people. MyBodyModel is a new one that sounds really incredible – a web app that creates a croquis based on your specific measurements (no more 9-heads-tall fashion sketches amirite)! You can then print the images or edit them from a tablet. I am actually a tester for this service – which I’m pretty excited about! – but they need quite a bit of funding to get it started. You can see all the details on their Kickstarter page (they do a way better job of describing the service than I am doing, ha), as well as back the project. No amount is too small!
  • Totally forgot to mention this, like, AT ALL – but I’m going back to Finch Knitting + Sewing Studio for another weekend garment sewing workshop! The dates are 9/29 – 10/1, and the project is WHATEVER THE HELL YOU WANT IT TO BE. Seriously! Whether you need a cheerleader to encourage you to start a scary project, a little help whenever you get stuck, or just want to be surrounded by other people who are also doing amazing creative things – this is a great place to do it! Finch is located in download Leesburg, VA; the cutest little sewing shop in the cutest little historic town. We had an amazing time when I was there earlier this year, and I am so excited to come back! You can see more details, as well as sign up for the workshop here 😀
  • OAL winners! I used the handy Random Number Generator to draw our 3 winners this year – and here they are!


First up is Helen, who actually made TWO dresses this year, in addition to her incredible cardigan. I can’t even tell you how much I love that cardigan, y’all. Everything about it – from the color, to the fit, to the beautiful lace work – is perfect. I am bummed that there is not a pattern for it, bc I’d knit that shit up in a heartbeat!


Our second winner is Linda, who also made a cardigan + dress combo! I have had my eye on that Blaster cardigan for a while now, and Linda’s outfit is making me want to add that pattern to my queue! It’s wonderful!


The third winner is Lycaenid, who took things in a completely different direction by crocheting a skirt! I never would have considered a crocheted skirt, but man, it looks pretty great – especially paired with a crisp white shirt. We get a lot of questions every year about if people can crochet instead of knit, or make something other than the standard knitted top/sewn bottom (or dress) – and here’s a perfect example of that working out beautifully!

Congratulations to our 3 OAL winners – please check your emails and/or Ravelry accounts for a note from me about claiming your prize! Each winner receives 2 patterns+shipping of their choice from Indie Stitches, plus 2 patterns of their choice from Untangling Knots. Woohoo!!

Ok, now let’s talk about MY finished sweater!

OAL2017 Anaheim Sweater

I actually finished knitting this the day that I wrote my post on the OAL dress – I was feeling inspired to get it done so I could move onto other things. There wasn’t too much left to do – I think I had maybe a total of 50 rounds for one sleeve, and then blocking. Not bad! I’m so glad it’s done – partly because it opens up my queue to whatever else I want to work on, and also because it’s a pretty sweater that goes with a lot of stuff in my closet! I’m especially happy with how good it looks paired with my Kim dress.

OAL2017 Anaheim Sweater

OAL2017 Anaheim Sweater

In case you missed it, the pattern I used is Anaheim, which is the official knitting pattern for the OAL2017. This is a relatively simple garment, knitted top-down in one piece with an easy to memorize lace pattern (which I say easy to memorize, I mean that even my dumbass could handle remembering it! Ha!). It’s pretty mindless – so you can work on it while doing something else, such as watching tv or working in a craft shop (guilty!), but it’s also interesting to knit so you don’t get bored. I really enjoyed working on this pattern, although I did have a bit of trouble with the icord edging – I simply could not wrap my head around the instructions. I chatted with Andi about and she wrote a blog post that goes into a lot more detail, which was immensely helpful. Unfortunately for me, I stalled waaaay too long with even starting the icord edging, which is a huge reason why I didn’t finish my sweater in time. Oh well! It’s done now, and that’s really what matters!

For yarn, I used Quince + Co Phoebe, which is a DK weight merino wool yarn, purchased from Craft South. This yarn is incredibly soft and just lovely to touch – and it’s so beautiful! I really enjoyed knitting it and it’s a great color for my personal wardrobe palette.

I knit the size XS – which is my usual size for Andi’s patterns – and was able to get gauge with my yarn, so I didn’t need to change needle sizes. Besides the icord edging drama, this knit up easily and quickly. I will be honest – I wasn’t sure if I’d ever wear this sweater because it didn’t seem like really my ~style~, but I am really really happy with how it’s turned out, and how it looks with other pieces in my wardrobe! I think it’ll be great for the transitional weather in spring and fall, and again, the color is spot-on to pair with basically everything I already own. I am even scheming ways to wear it without a shirt underneath – just a pretty bralette! We’ll see how brave I get when the time comes, though, ha!

OAL2017 Anaheim Sweater

The sweater is intended to be worn with the fronts crossed over and buttoned at the side – can I just say how happy I am that there are NO ties involved?! – but you can also wear it open. I’m not really a fan of the open look – I don’t think it looks quite right, as much yarn doesn’t have very much drape. But I love how it looks buttoned up! I just used buttons that were in my stash, although I think I need to reposition them slightly.

OAL2017 Anaheim Sweater

OAL2017 Anaheim Sweater

OAL2017 Anaheim Sweater

OAL2017 Anaheim Sweater

OAL2017 Anaheim Sweater

OAL2017 Anaheim Sweater

OAL2017 Anaheim Sweater

OAL2017 Anaheim Sweater

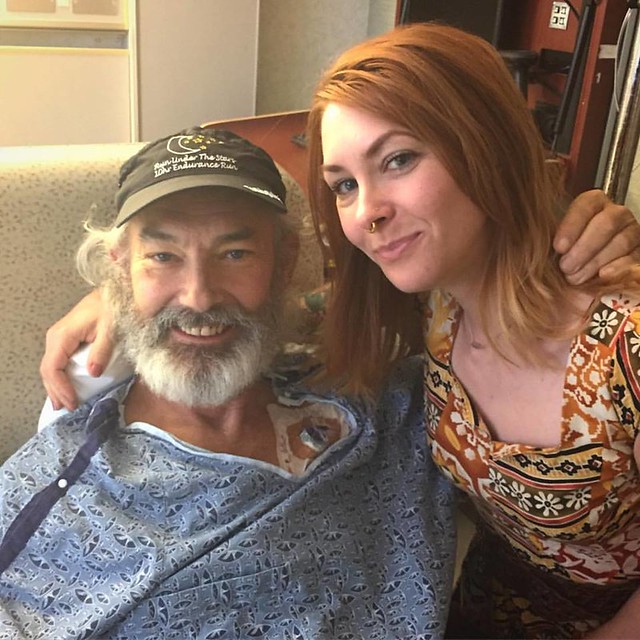
I do want to touch on something I brought up in my last post – about not having any creative energy. Since losing my dad in February, it has been a strange and very sad year. I think that’s to be understood- losing anyone is hard, losing a parent is absolutely traumatizing. After the shock of the first week and then immediately trying to dive back into “normal life,” I thought I was ok. I thought, oh, I’ve dealt with my grief and I have survived this. You know what though? That’s not how grief works. Grief is sneaky, and it will creep up on you when you are not expecting it. It will affect your life in ways that you don’t even realize it is doing, and you won’t know why. At least, that was what I found myself dealing with when May rolled around. All of a sudden, I just felt sad all the time and I didn’t know why. I slowly lost the ability and desire to do anything – I didn’t want to be active, I didn’t want to see anyone, I didn’t want to leave my house, and I didn’t want to spend any time in my studio. All of this is stressful, but my lack of creativity was stressing me out the most and just making it so much worse. I make things because I find it therapeutic and calming – so losing that outlet was very worrying to me. I had a lot of trouble making any sort of emotional connection with people, and I was just sad all the time. This is NOT how I normally am, and I didn’t know what to do about it. I ended up having a meltdown while with a group of friends, and I realized that shit was not normal and I needed to do something about it if I ever wanted to feel like myself again.

So, I started seeing a grief counselor, which has been immensely helpful. I’ve slowly incorporated exercise back into my routine (running and yoga), which makes me feel good both mentally and physically, as well as helps my sleep. The creative energy has taken the longest to return – I had to stop trying to force it. I have been gentle and kind to myself, and patient. I really had no interest in sewing whatsoever during the OAL – it just felt like a chore. It wasn’t until the very end that I could feel my creativity reigniting, and I started getting excited about future projects. Knitting wasn’t as much of a struggle, as you can do that pretty mindlessly (I just like keeping my hands busy, really). I actually got a lot of knitting done during this time because it was the only thing I could really bring myself to do, in those weird weeks where I was so incredibly lonely but also completely isolating myself from everyone. For those who have reached out to me in the past months – whether it was to offer condolences, or to see how I was holding up – thank you. I really appreciate every single message I received, even if I couldn’t necessarily bring myself to reply to all of them.

I’m happy to say that my creativity has come back with a vengeance – it was hard for me to sit down and write this post, because I really want to go back in my studio and make some stuff! 🙂 I feel inspired again, and that’s such a good feeling. More importantly – I feel happy. I still have a ways to go – and I know that the grief will never truly go away. But I am learning how to deal with it when it rears its ugly head, and I know now when to give myself kindness and grace.

Bra-Making with Madalynne

9 Feb

As you no doubt already know by now (mostly because I’ve talked about it to death by this point ahaha), I recently spent a long weekend in Philadelphia with Maddie, to help her set up for her bra making workshop – as well as attend the damn thing myself! I was obviously really excited for this adventure – for the hangs, to explore a new city (truth: the only time I’d been to Philly prior was for a one-way flight back to Nashville after helping my friend move to NYC when I was 22. A 14 year old boy hit on me while we were waiting for the plane to take off. I think he was the most traumatized between the two of us, though), and of course, because of boobs. And now you guys get to hear/see a recap! Yay!

049

I won’t bore y’all with a full weekend recap – I flew in on Thursday afternoon, and spent nearly the entire time up until Saturday morning with Maddie to help her prepare for the workshop. We ran errands, we prepped handouts and the (adorable) little kits, and helped with getting the machines set up in the space the night before. I was able to sneak away for a few hours with Andrea, who took me to the Mütter Museum (my request – and also this is your head’s up of knowing that Andrea is an amazing sport when it comes to visiting weird places with an almost total stranger haha) and her favorite yarn shop (where I bought sock yarn. It’s red. That’s about all that’s worth knowing :P).

089

No, what we are here to discuss is a recap of the workshop! Actually, I don’t think this post warrants too much typing – you can get a good sense of how things went just based by the photos alone (and yes, those were professionally taken. OBVIOUSLY my hands didn’t go anywhere near the camera that weekend, ha!).

029

Honestly, the entire day was more of an event and less of a workshop. I knew Maddie had something special planned when we were cahooting about this shit months ago (well, my side of the cahooting was just being a personal cheerleader. I love cheerleading my friends while they are doing amazing things 🙂 ), but I was surprised when I started seeing things coming together. Of course, I probably shouldn’t have been surprised – anyone who’s lurked up Maddie’s blog knows that that woman is all about turning everything around her into beautiful art (y’all should see her condo. I couldn’t even DEAL) – but yeah, it was all lovely. The production for the workshop, as well as all the styling and catering, was handled by The New Old Fashioned, and the event took place in the Love Me Do Photography studio. There was beautiful vintage furniture everywhere, fresh flowers, a never-ending supply of coffee (and later, prosecco. Yay!), a catered lunch, a light breakfast, adorable cakes, a photo booth – even a freaking spot to get your make-up professionally touched up. I’m telling you, this shit was an EVENT. It was amazing and there was obviously a lot of love and attention that went into every detail. Definitely not the kind of half-assed workshop that I’d throw together – but that’s what you get when you are dealing with Maddie. You get something that’s just as beautiful as it is useful.

031

To be completely honest, I wasn’t expecting to learn a whole lot at the workshop itself – I’ve already made a couple of bras at this point, and I have an ok handle on how they come together. I knew I’d be hitting Maddie up for fitting advice outside of the classroom, and I knew that the environment itself would be amazing and fun. I’m happy to report that I was wrong, at least in the subject of “learning new things.” I definitely learned a whole bunch of new tips and trips – a more effective way of cutting the fabric and lace, when to use certain zigzag stitches and widths, a way to beautifully finish the top of the bridge, amongst other things. And duh, of course the class was fun as HELL! I had such a great time meeting everyone, talking boobs, and making bras together. My kind of awesome day!

058

(I am sharing this photo because I have no idea why I’m making that expression! At least my hair color doesn’t look like swamp sludge haha)

168

167

152

Oh yeah – and the food was fucking fantastic!

065

132

085

Here are some more photos so that you can be good & jealous of our fabulous day. Our take-home goodie bags included those beautiful cookies, a tiny bottle of prosecco (again – yay!) and a fresh bouquet with a handmade medal.

104

105

111

We also had temporary sewing-themed tattoos – which, by the way, who else thinks Maddie should get a pair of shears tattooed on her neck? Amirite?!

180

181

177

I was REALLY excited to see that Carolina and Jen were also part of the class! I met both of these ladies last time I was in NY – Jen was one of my students in the Pants Making Intensive at WORKROOM SOCIAL, and Carolina randomly asked me for coffee (which clearly ended up being a match made in heaven – I mean, we make a pretty adorable prom couple). It was great to be able to see both of them – in a completely different city than before, even.

I know that my friendship with Maddie does make me a bit biased, but this workshop was seriously fabulous. I’ve never felt so pampered while in a class – it’s kind of a nice feeling (I might be kind of spoiled now! Ha!)! And, hey, the bra didn’t turn out so bad, either 🙂 Want to see?

IMG_1265

IMG_1269

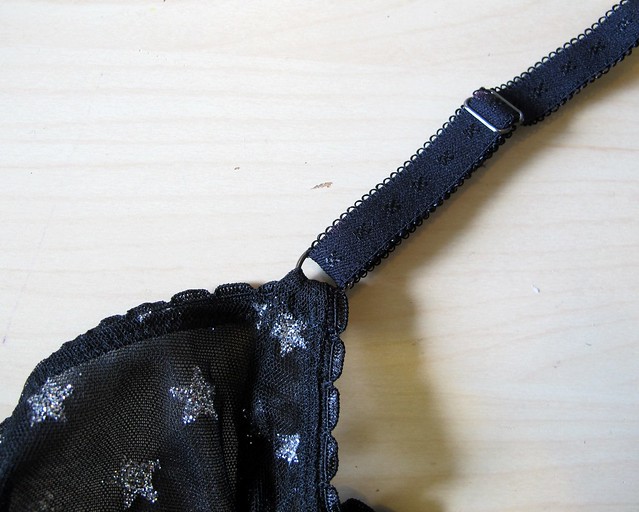
If you recognize the fabric, it’s because I used it before on a Bambi bra; it was originally given to me from Maddie. Let me just say – the kits that we got with this workshop were seriously nice. Everything was included – all the fabric, notions, hardware, even a tiny rotary cutter and a really nice marking pen – and it was all super high quality stuff. I think most of it came from Bra Maker’s Supply – which, if you’ve ever ordered from them before, you know how nice their products area. No cheap plastic sliders or questionable elastic here! I would have found this very helpful had I been making my first bra – it gives you a good idea of what the good-quality stuff feels like, so you know what to shop for (plus, it’s easier to sew!).

IMG_1261

We used the Marlborough pattern for our bras; I brought my own copy (everyone got a copy with their kits) since I already had some fitting tweaks done. The lace we used is really stretchy, so everything is backed with power mesh to make it more stable. It still has more stretch than the duoplex I get from Bra Maker’s Supply, but the resulting bra actually fits pretty nicely! I’ve spared y’all the floating ghost bra photos for this post (mostly because I’m feeling lazy haha sorry), but, just trust me.

IMG_1268

IMG_1267

Our tableware at the workshop was tied with this cute twill tape that looks like a measuring tape – I saved a little piece to make a bow for my bra. Love it 🙂 And check out that pretty gold hardware! Honestly, that’s my favorite part of the whole damn bra. Looks so luxe.

Let’s see, what else? Sunday, Carolina & I walked all over Philly (ok, seriously, maybe 5 miles, tops. haha) and it was cold but also really fun! I really enjoyed getting to spend some time with her and get some bonding done. We visited Andrea at Butcher’s Sewing Shop, where she was teaching a class. Actually, we crashed that shit and drank their mimosas, but everyone was really friendly and the shop is just adorable. No ragrets. Finally, I made it home just before the next snow storm – and I’m happy to report that I wasn’t hit on by a 14 year old this time. Also, the Philadelphia airport is WAY nicer than I remember.

I had an amazing time – the workshop obviously being the highlight of the trip, but it was so wonderful getting to hang with everyone and meet some great new people (and reunite with people I know I already love 🙂 ). If you were interested in taking the workshop, but were put off by the price or didn’t know what to expect – hopefully this revs your engine a little 🙂 It’s definitely an experience! For a more in-depth recap, with lots more photos (as well as a run down of all the vendors who contributed to all the pretty that you see), check out Maddie’s blog.

175

I am just gonna leave this picture here, because I think it really illustrates the class well. There is alcohol and cookies on that table – and we can’t tear ourselves away from the machines. TYPICAL.

Disclaimer: I was given a free ticket to the Bra Making Workshop, in exchange helping with prep, set up, and trouble shooting – as well as keeping Maddie’s nerves calmed for her first class (I shit you not, she started VACUUMING her condo like 30 minutes before we had to leave that morning hahaha). I paid for all my travel and food expenses, but my workshop ticket was gratis! This review is just cos I think the class was awesome, and I wanted to talk about it.