Tag Archives: linen

Completed: Cropped Linen Kalle Shirt

11 Jun

I finished this shirt about 2 months ago but am just now getting around to posting it! I have worn it TONS since finishing, and it’s definitely one of my 2018 Summer Staples.

Linen Kalle Shirt

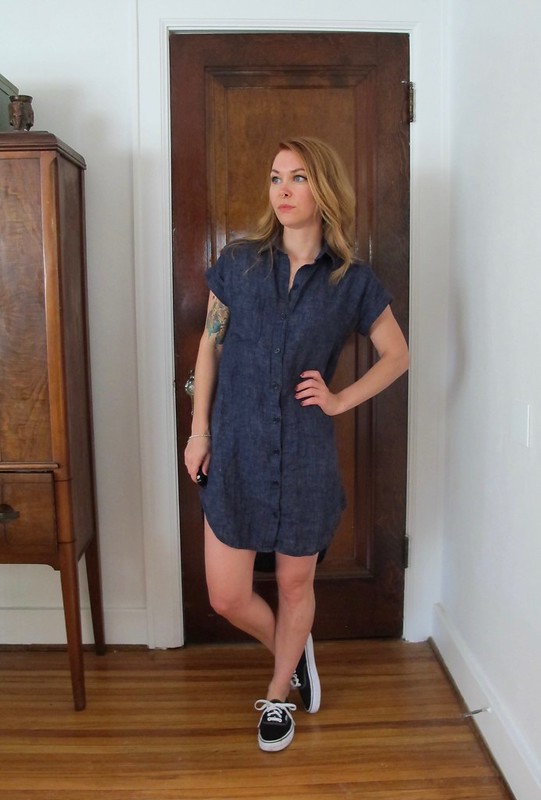
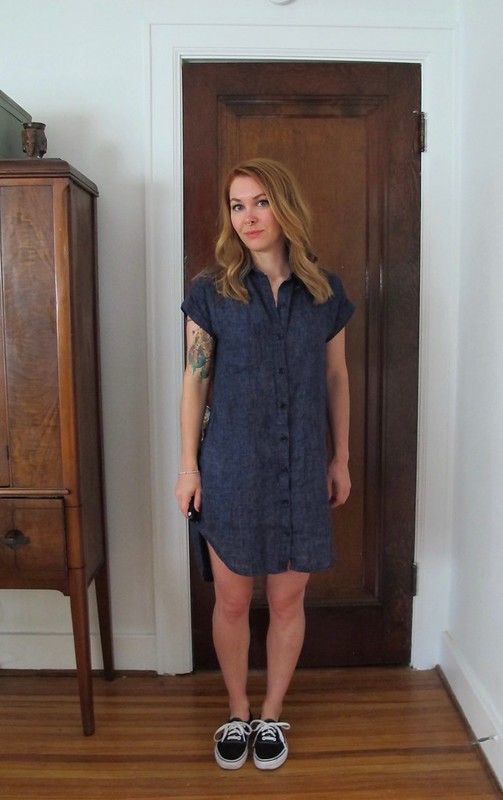
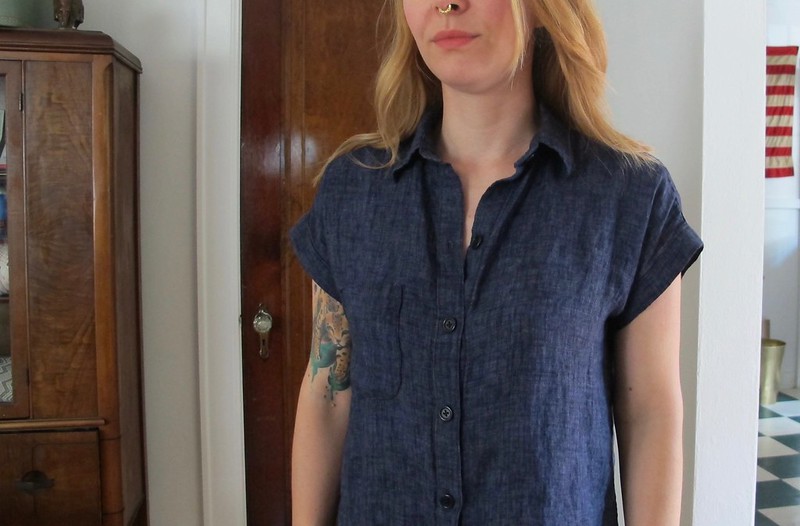
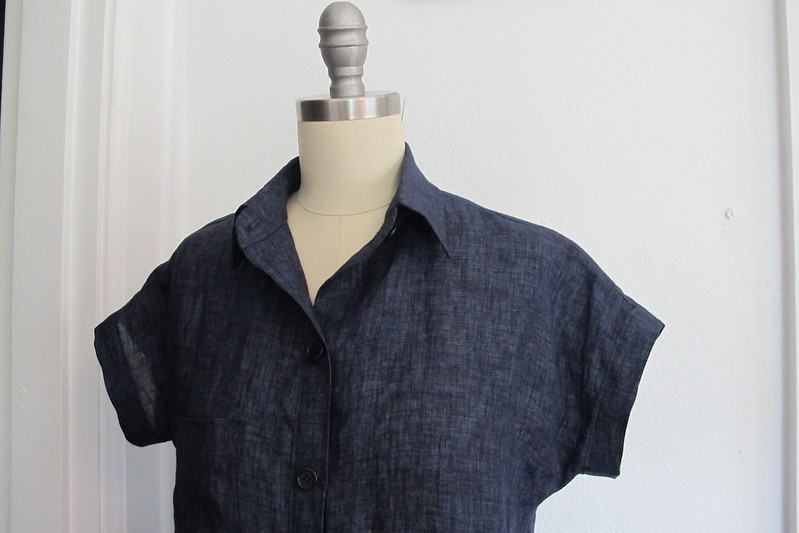
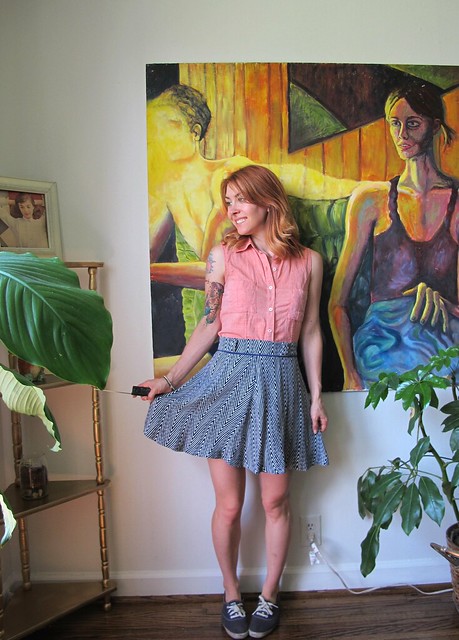
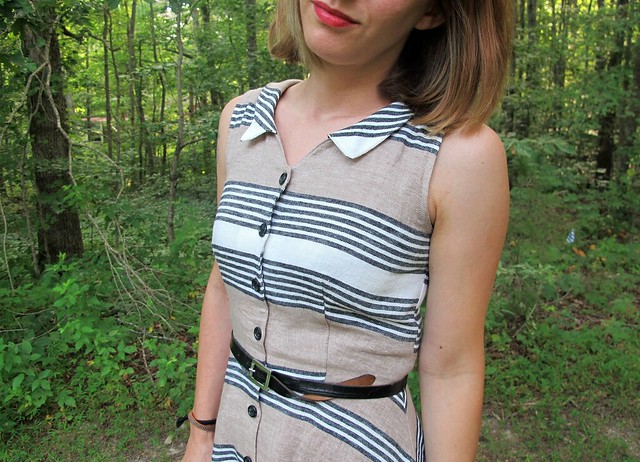
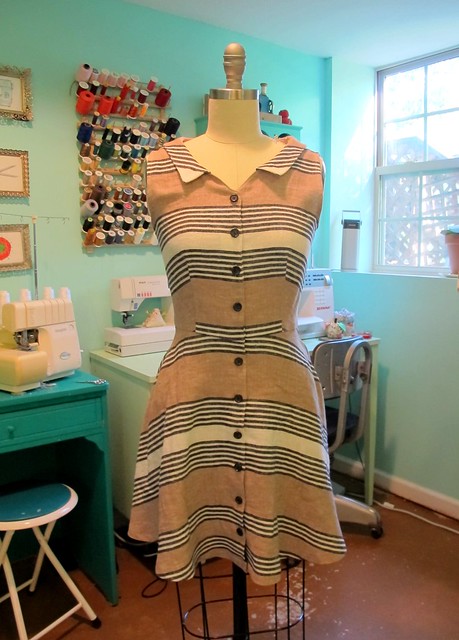
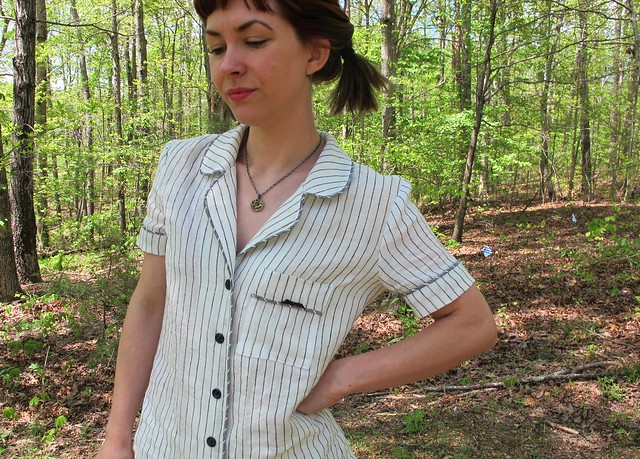
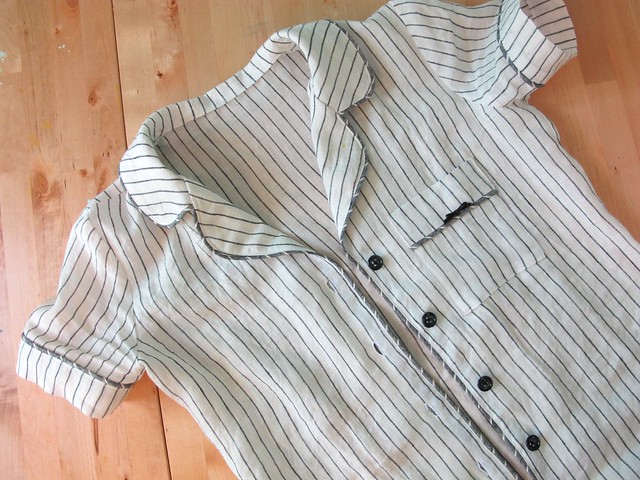
This is the Kalle Shirt from Closet Case Patterns. I made the dress version in linen last year, and I wore it a LOT, so I was interested to try the shirt for this summer. It’s a basic little collared/buttoned shirt that has plenty of options (exposed or hidden placket, collar or no collar, cropped or long), and I like the nice loose fit paired with the banded kimono sleeves. I always felt so pulled together when wearing the dress, and I figured the shirt would make me feel similarly.

Linen Kalle Shirt

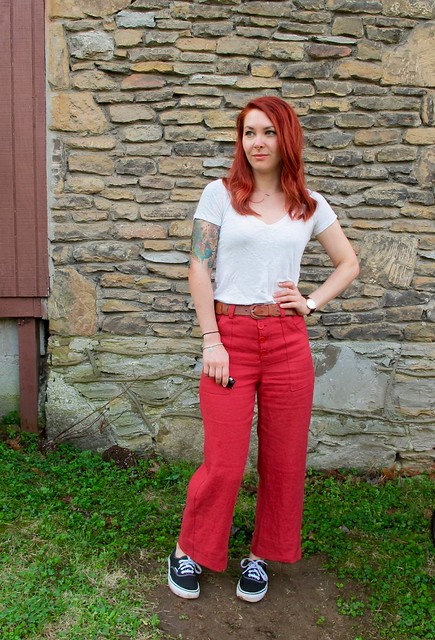
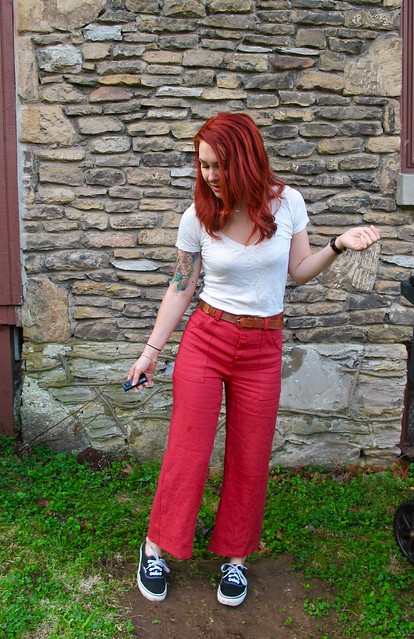
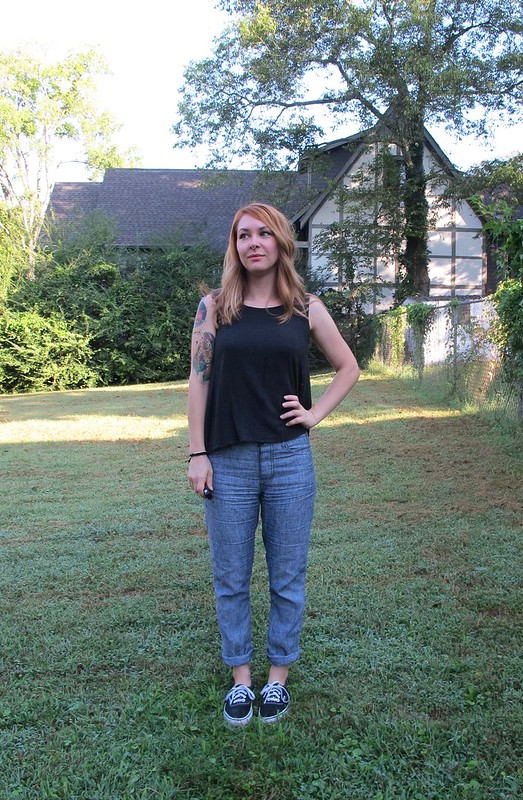
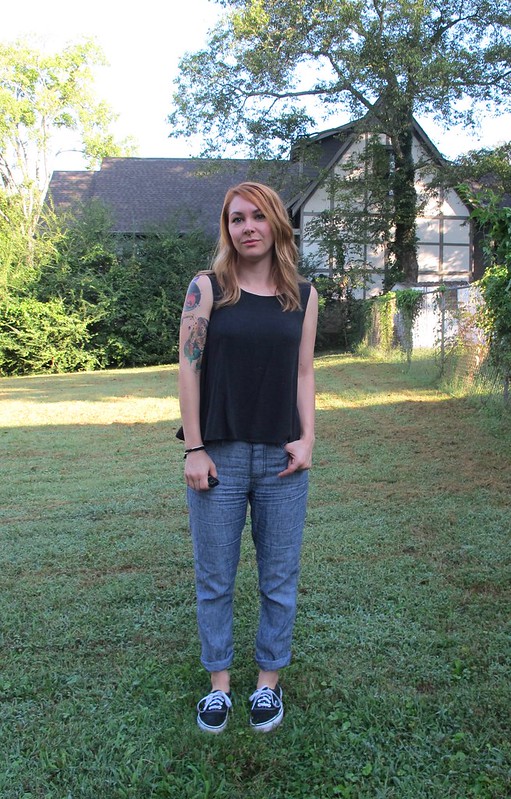
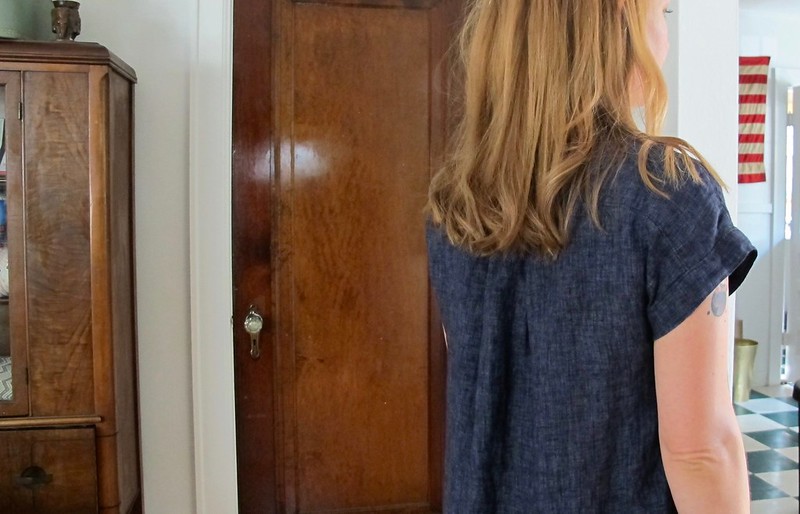
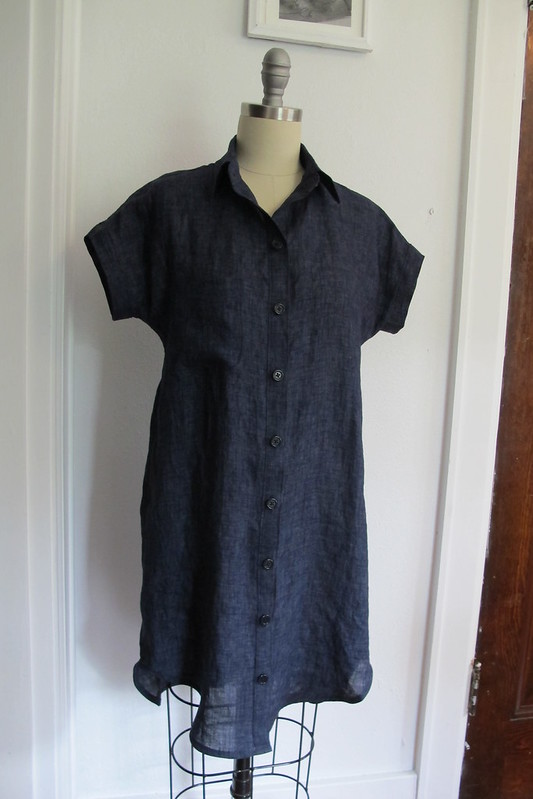
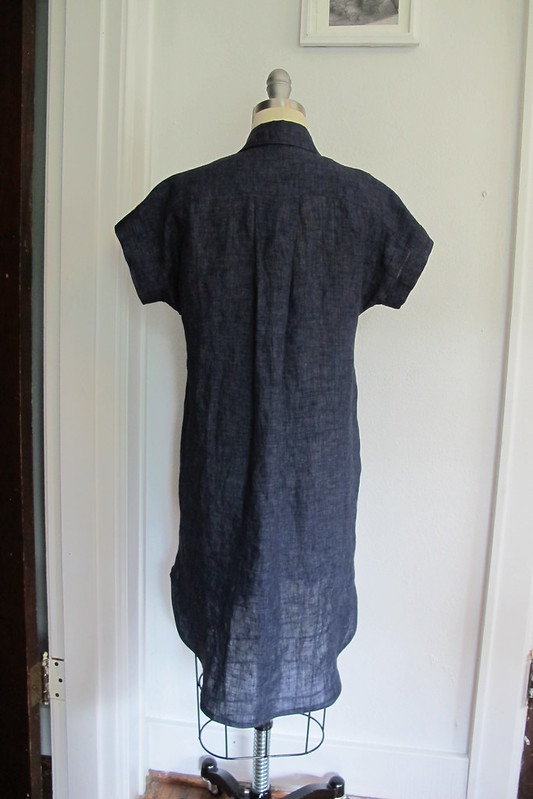
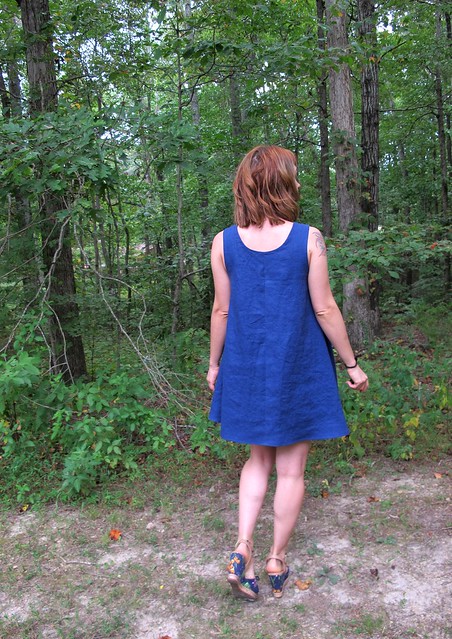
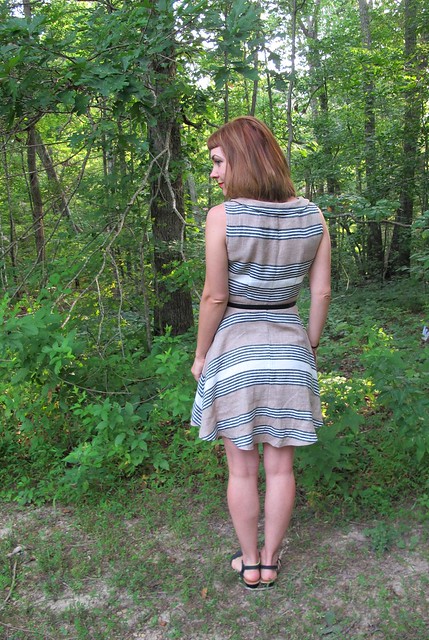
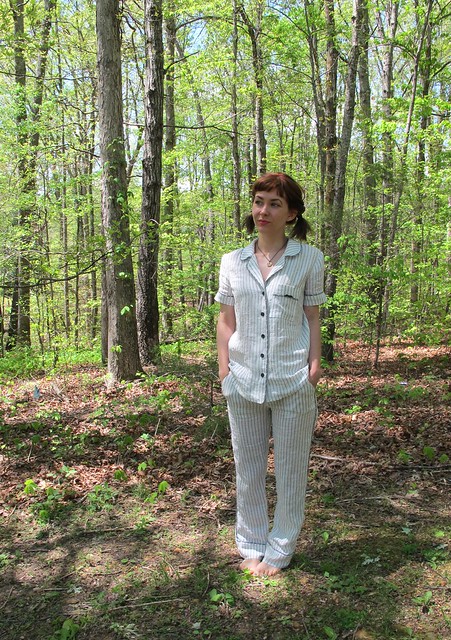
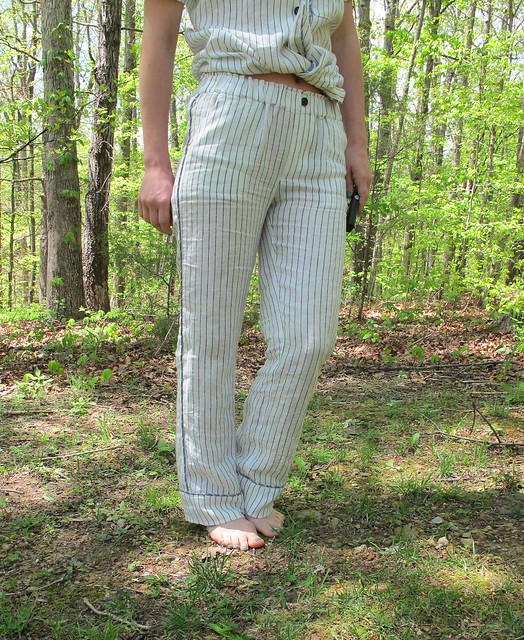
I did make a few changes to the pattern due to fabric amounts & personal preferences. Having sewn a few Closet Case Patterns in my time, I find the cropped version of the tops to be VERY cropped. I measured the length of this top and realized it was going to be too short for me to comfortably wear, so I added an extra 2″ of length, which makes the finished top reach right at the waistband of my pants (the shorts I’m wearing in these photos are just thrifted jeans that I cut off, FYI, but they hit close to the same spot that my Ginger jeans do). I added length to both the front and the back, however, I thought the back looked ridiculously long once it was finished so I chopped that added length back off. The back is still longer than the front, only not as dramatic now.

The other changes I made were due to fabric shortages, as I was working with a very small piece of fabric for this shirt. I had an offcut piece of medium weight white linen that measured out at less than 1.5 yards (I don’t remember the exact amount, but it was definitely less than the suggested 2 yards that the pattern calls for), which I was bound and determined to use. It was just *barely* enough to eek out the main pieces of the shirt, and I did not have enough fabric to cut the facings or the pocket. I made an executive decision to finish the hem with a bias facing (made of an entirely different fabric – cotton lawn to be exact) and leave off the pocket.

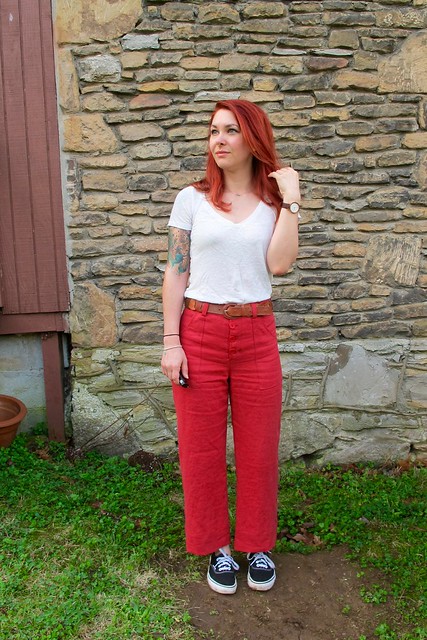
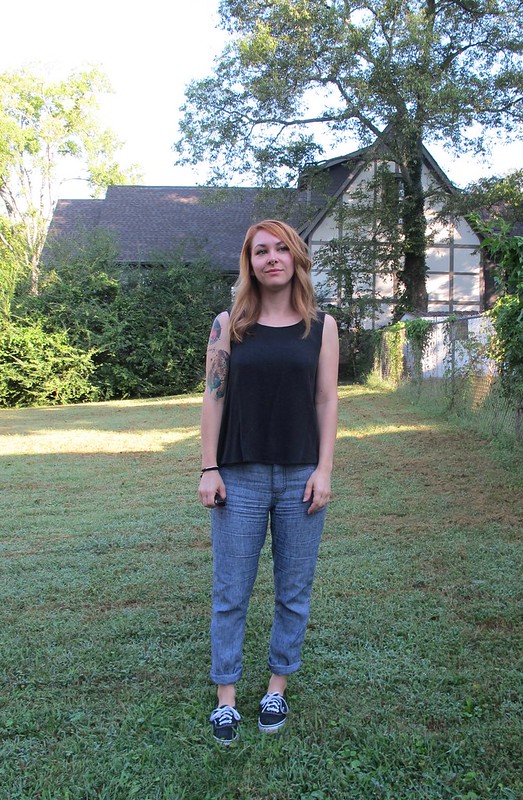
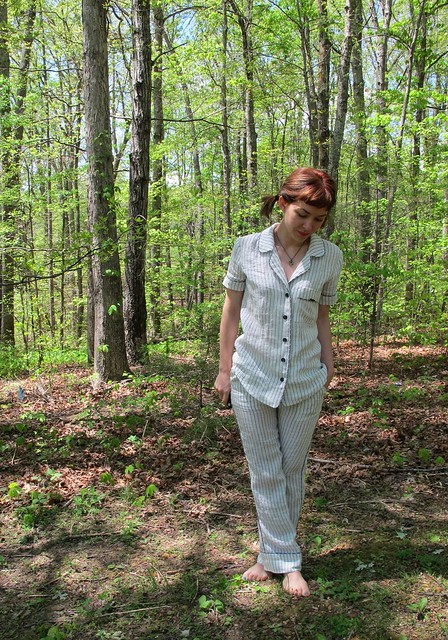
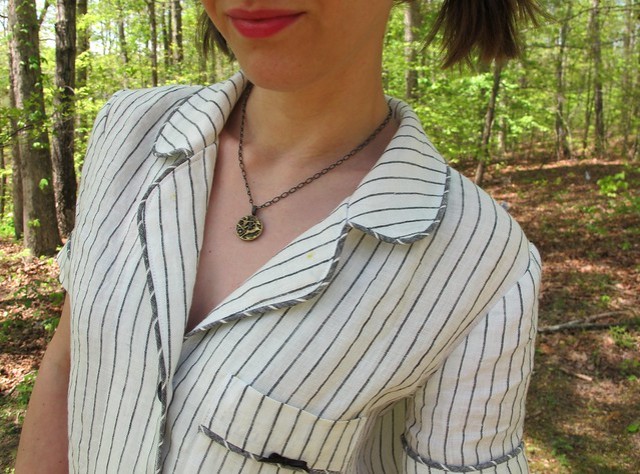
I can’t say for certain, but I believe the fabric came from an Elizabeth Suzann sample sale last year (hence the weird size). It’s a nice medium weight linen that feels wonderful and also does not wrinkle as much as the lighter weight linens – it’s actually very similar to the Vivaldi Linen from The Confident Stitch (I think the Vivaldi is slightly softer, but that also may be because I’ve washed it more), if you are looking for a good sub 🙂 (and go back a couple posts to my OAL Announcement for a discount code that’s still good as of this writing :)). This shirt has done really well with traveling especially – the worst wrinkling I get is at the collar, which I usually end up fixing with my flat iron 😛 As you can see, it does rumple a bit but I actually like that.

Linen Kalle Shirt

Linen Kalle Shirt

Linen Kalle Shirt

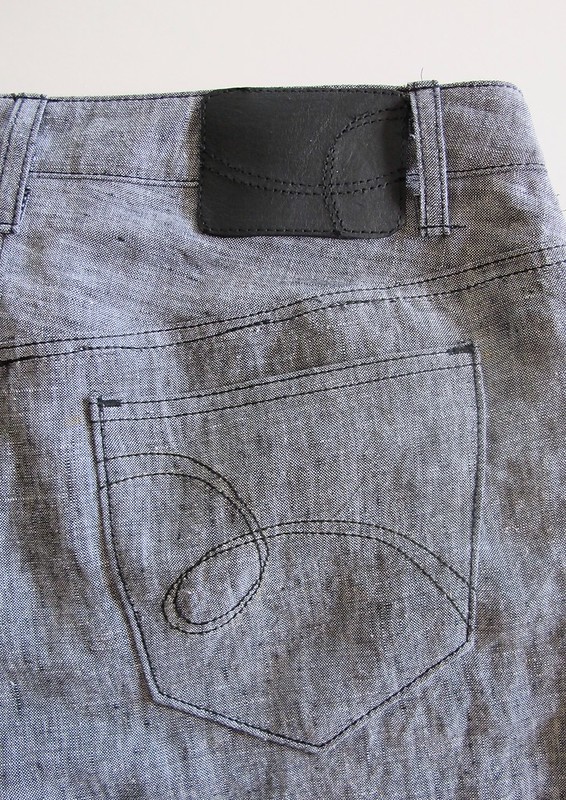
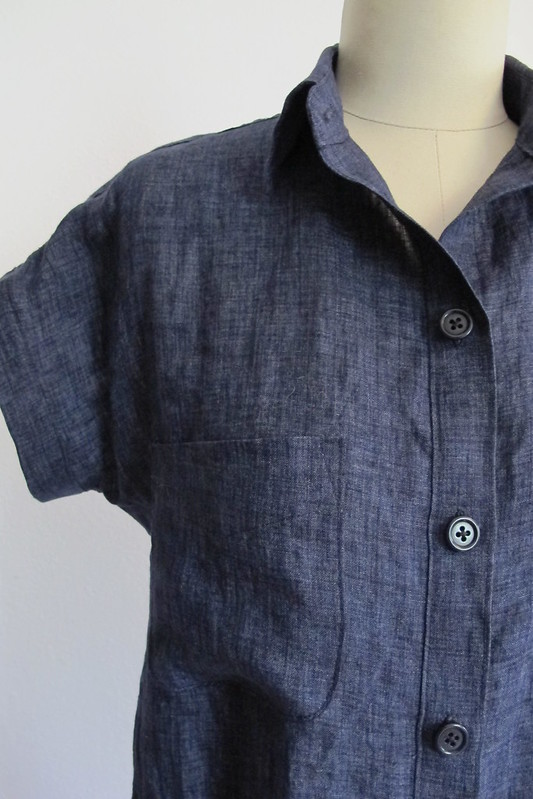
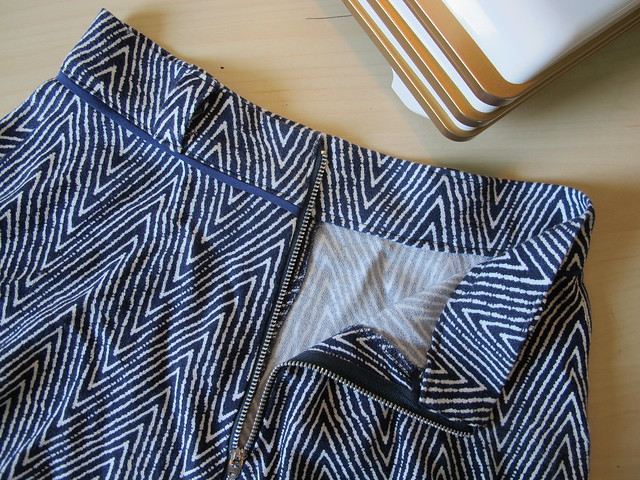
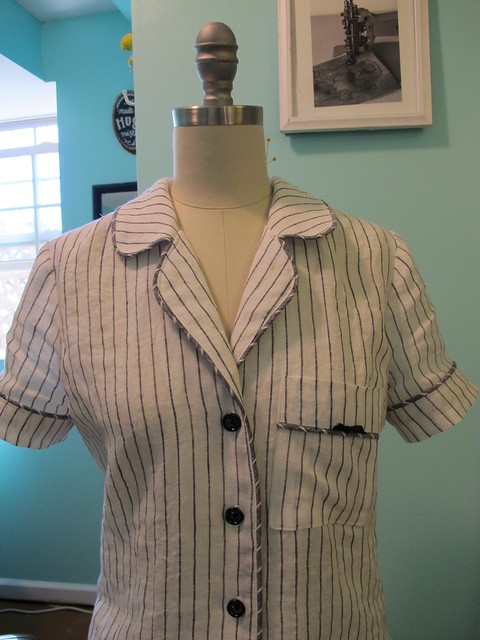
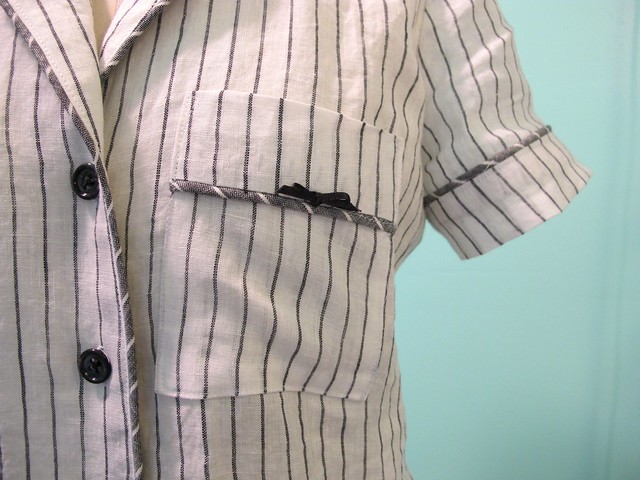
Sewing up the shirt was easy – I’ve made dozens of these sorts of patterns, so I feel like I can almost do it in my sleep at this point. The seams are flat-felled and there’s lots of satisfying topstitching (albeit white). I realized about halfway through that the shirt really, really needed that pocket – I think it just looks barren without it. But, y’all, I am not exaggerating when I say that I had fumes of fabric leftover after cutting. You’d think I’d be able to squeeze out a pocket – it’s a tiny piece, after all – but I was playing some serious Fabric Tetris as it was and the leftover pieces were miniscule. After thinking on it for a minute, I realized I did have a couple of pieces that were about half the size of a pocket… so, again, I made an executive decision and decided to sew them together to make a full sized piece that I could then cut the pocket out of. To make this look a bit more intentional, I flat-felled the connecting seam. I can’t even tell you how pleased I am with this save; the shirt looks great with the pocket and that flat-felled seam look intentional as fuck amirite.

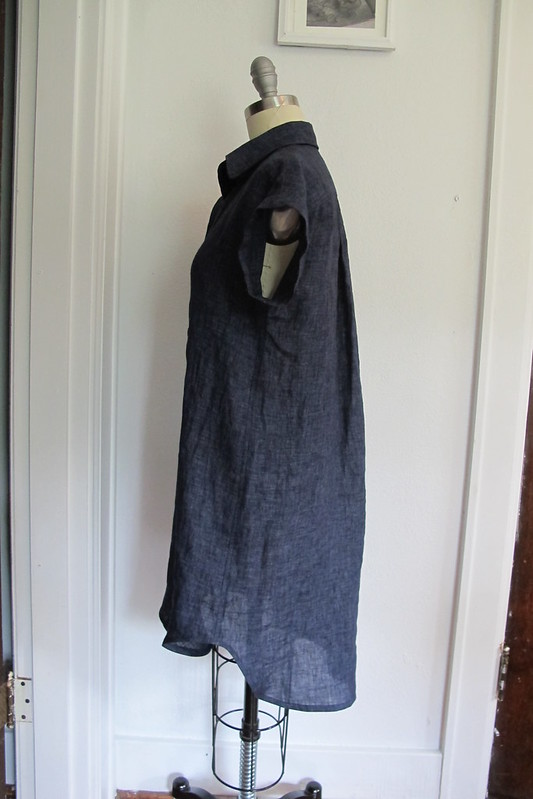
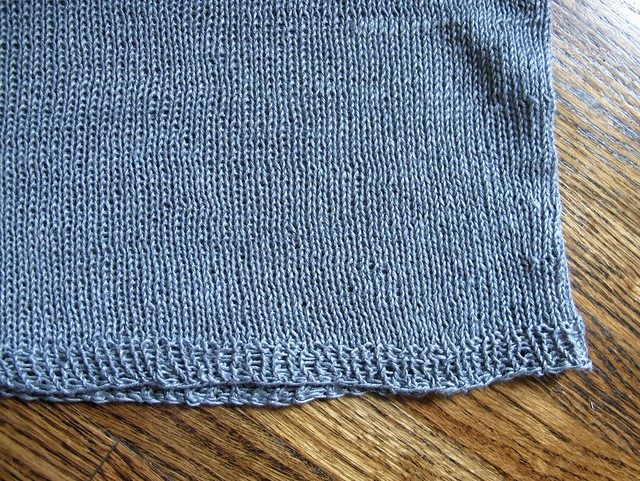
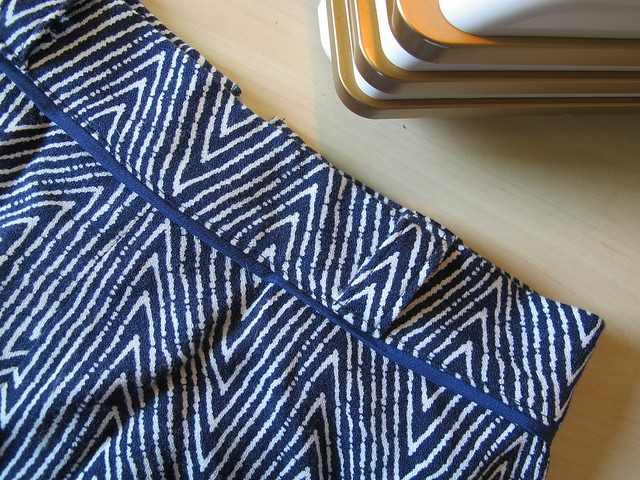
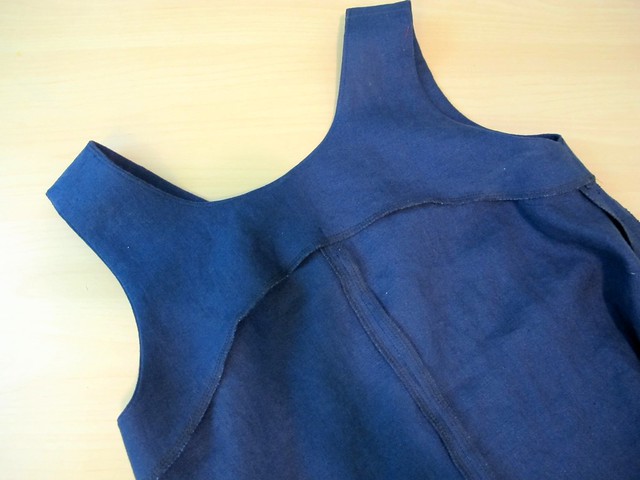
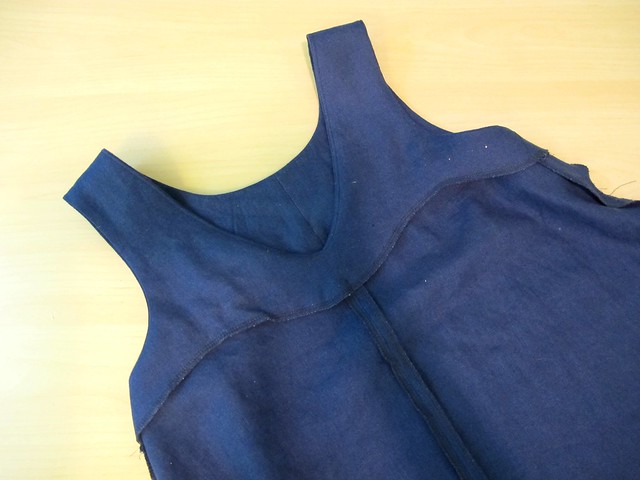
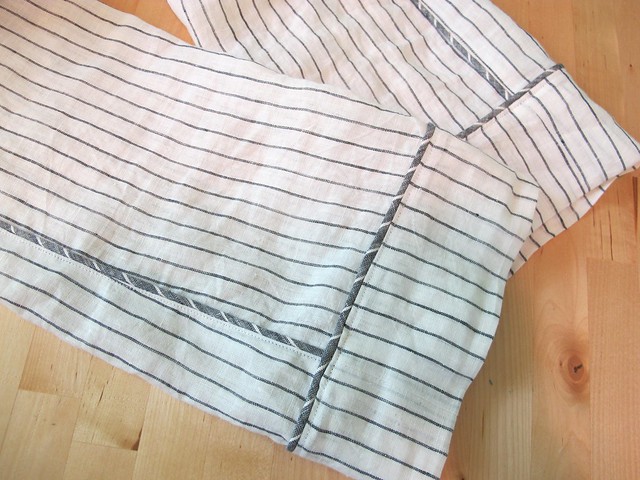
Hemming was a whole other beast that I had to work my mind through before I came to a solution. I usually just hem my curved woven hems with a bias facing – it creates a beautiful finish with minimal effort – but the way the side seams are curved on this top doesn’t work terribly well with bias, it really needs a facing. Especially when you are connecting that to a flat-felled seam (which would otherwise be hidden under the facing). I ended up hemming the front and back separately, then clipping the side seam and bartacking it down over where the curved side meets. One thing I didn’t consider is that the seam allowance for the hem (due to the facing) is 5/8″, and you sew a bias facing on at 1/4″… so my side seams have extra seam allowance and thus overlap differently than the pattern intended. It’s not a bad thing, but it is different! Something to keep in mind if you decide to omit the facing and use bias instead.

Linen Kalle Shirt

Linen Kalle Shirt

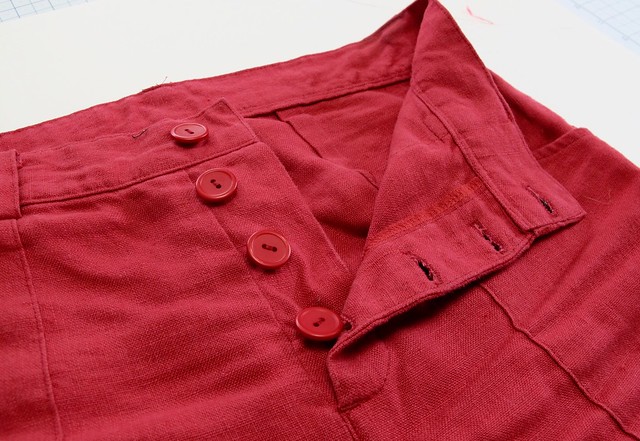
It looks cool buttoned up all the way, but let’s be real – I won’t wear it like this, like, ever haha

Linen Kalle Shirt

Linen Kalle Shirt

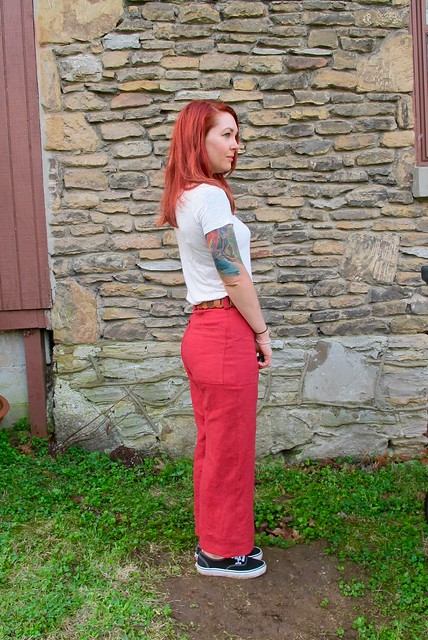
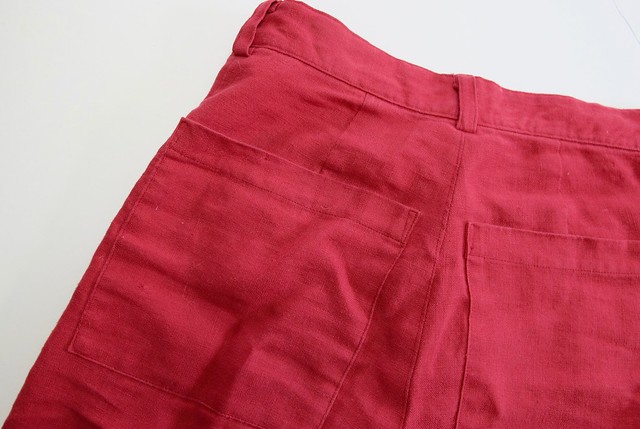
The aforementioned side seam with overlapping curves and a bartack!

Linen Kalle Shirt

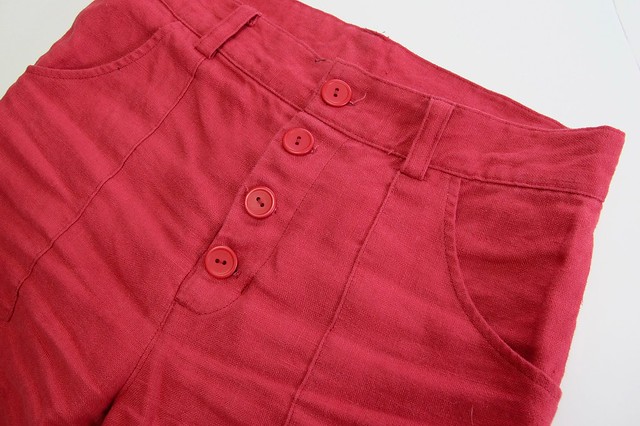
My cool little pocket 😀

Linen Kalle Shirt

I think that’s all for this little shirt! I’m surprised at how much I love wearing it – it’s been in regular rotation since I’ve finished, as it’s light and airy in the heat but still looks very pulled together – and I get loads of compliments on it. I’d love to make another in a different color or even a patterned fabric, once I find something suitable. Making collared shirts is so much fun!

Completed: Red Linen Lander Pants

20 Apr

Well, y’all, it’s official – I’ve given up on sewing any more cold weather clothes for this season (although I still have a coat project that I haven’t shared – yet!! Keep an eye out for that one; I promise it’s worth the wait!!). It may still be spring here with some seriously flip-flopping temperatures, but I’m planning for the heat that I now is coming!

Red Linen Lander Pants

First up, some new pants! Yah, I have ENOUGH pants, we are all aware of that – seriously, my pants drawer is a bit much! – but most of what I have are jeans and skinny pants, better suited for cooler weather. When it’s warm outside, I need some space between my legs and my pants so that I can catch that breeze! I have a great pair of linen Florence pants from Elizabeth Suzann, which I love but could use some improvements to better match my needs (pockets + a flat non-elastic waist, plus a sliiiiightly lighter weight linen). I do love the shape of those Florence pants, though – the wide leg is perfect for a warm-but-not-quite-warm-enough-for-shorts day, the cropped length looks great with both flats and heels, and the high waist means I can wear them with cropped shirts.

With these changes in mind, I find the Lander pants from True Bias fits all those needs. I still have the high waist, cropped length, and wide leg, but with a slimmer fit through the thigh, a flat waistband (no elastic!) and pockets. I’m not the sort of person who thinks pockets should be in EVERYTHING, but I do like them in my pants! And while I respect that a slim pant can’t always have a pocket without adding additional bulk, this pattern does a fine job of giving me a place to stash my stuff without ruining the sleek style lines.

Red Linen Lander Pants

Pattern in hand, the next task was to find a good linen that fit my needs and preferences. I wanted something with a lighter medium weight – not as heavy as the Florence pants (they can get a bit warm when humidity rises), but with enough heft to still look ok as a bottom weight and not be as prone to wrinkles as a light weight. Not to mention, color is important! My Florences are navy, so I wanted to try for a different color (as much as I love navy, I don’t need two pairs of navy linen pants!). I reached out to my friends at The Confident Stitch for some ideas and swatches, and y’all, did they deliver! I decided to go with the Vivaldi Linen in red, which was exactly the weight + color I was hoping for (Vivaldi linen also comes in other colors – royal blue and taupe – if red ain’t your thing! They also have a great Brussels Washer Linen from Robert Kaufman that I considered, but ultimate decided it was a hair too light for the pants look I was going for).

I washed + dried my linen 3 times to get as much shrinkage out before cutting (I have been told this also helps with preventing wrinkles, which I can’t say for sure if that’s true, but this linen hasn’t been very prone to wrinkling!), using hot water and high heat. While the color did not bleed, it did turn my dryer lint bright red which sometimes got on my clothes (I just brushed it off, it didn’t stain anything. But it did make for a delightful dryer discovery). This Vivaldi linen was absolutely lovely to work with – it pressed and sewed without any trouble, had minimal fraying (I used my serger to finish all seams to further cut down on fray potential) and I didn’t have any issues with it shifting around during cutting. Just a great experience overall!

Red Linen Lander Pants

Red Linen Lander Pants

Before sewing up my pants, I made a muslin of the shorts version to see if I had any fitting adjustments to make. Based on my measurements, I started with a size 2 but they were pretty tight. Letting out the side seams about 1/2″ (the pattern includes 1″ seam allowance at the side seams for fitting) gave me a much better fit. I also took out about 1/4″ in the length of the crotch, fading to nothing at the side seams.

For the pair in red linen, I went up to a size 4. The overall width of the legs and length of the crotch is good, however, the center back needed to be taken in quite a bit to account for my hip to waist ratio (I think this pattern is cut for a more straight figure). This is an EASY adjustment to make; you just try on the pants before you add the waistband and take in the center back as needed for a closer fit. I took out an extra 3/4″, but honestly could have stood to remove more (I didn’t want to risk making them too tight at the waist – which I am guilty of doing, like, often, so I’m wearing them with a belt to cinch them in a little more). I almost removed another 1/4″ from the side seams, because my linen has more give than the muslin.

I cut the pockets for the size 4, but I think they are too big for my frame, especially after taking in that center back. There are two back pocket sizes for this pattern – a small pocket (sizes 0 & 2) and a slightly larger size (4 and up). In retrospect, I should have cut the smaller sizes, which I will do for the next pair. I just think they are slightly too big and a little overwhelming on me.

Finally, the length is the exact length called for in the pattern for the cropped version. I am a hair under 5’3″ so I wasn’t sure if they would be too long on me. I actually think they could stand to be shortened maybe 1″, but several people told me they are the perfect length (to me, they look almost like they accidentally shrank in the wash!). I am not going to mess with this pair, but next pair I may shorten them just a bit.

Red Linen Lander Pants

Construction-wise, this pattern is great. I’ve made DOZENS of pants at this point, so I’m not exactly a n00b to this, though. I had no problem following along for the steps, including the button fly. One thing I would change for the next pair is to interface the fly shield because it can definitely use that support, especially when sewn up with a linen.

Lander pants in red linen

Lander pants in red linen

Lander pants in red linen

What else? I used bemberg rayon (a scrap in my stash) to line the front pockets, and the buttons are from my local fabric store, Textile Fabrics. Took me foreeeeever to find a perfect matching red but I’m so glad I did! As a side note, these flat photos were taken after wearing the pants around for a full day, so you can see exactly how much the linen wrinkles (i.e., not much at all!).

Red Linen Lander Pants

So I think that’s all for this post + project! I’ve already worn these pants several times (as the weather allows) and have really loved that they provide a little warmth and coverage while still being light and breathable when the sun starts getting crazy. The high waist works great with a lot of my crop tops, which I’m excited to bust out!

Big thanks to The Confident Stitch for sponsoring this post and making my red linen pants dreams come true! As a side note, the links used in this post are affiliate links and will net me a percentage of any purchases you make through that site if you click the link (which in turn gets dumped directly back into my FABRIC FUND amirite woohoo). Thank you for supporting my blog, y’all!

Completed: The Kalle Shirtdress

18 Sep

I’ve still got a few more summer projects that I haven’t shared yet, so bear with me here! Although, to be fair – we should be well within the throes of summer heat for at least the next month here (yes, it did warm up again!).

Chambray Kalle Dress

I made this dress a couple of months ago, so what you are seeing a dress that has been worn, washed, and loved quite a bit before taking photos! As a result, it’s probably not as crisp and perfect as it would have looked fresh off the sewing machine – but on the flip, it’s definitely something that I’ve had time to move around in and really get to know fit-wise in ways that might not have been so apparent immediately after finishing it. Plus, you can really see how this fabric looks after several trips through the laundry. For ages, I was firmly in the camp of photos before I wore anything I made, but I’ve really softened up on that lately. This makes more of a delay in posting (since nothing is stopping me from putting that shit on RIGHT AWAY), but I think it can also create more of an honest post, in the sense of seeing how something feels after it’s been worn around a bit.

Also, about these photos – sorry about the dark door background? I did take my tripod outside, but I had one neighbor chopping tree limbs in one yard creepin on me, and another literally sitting on her front porch just straight-up staring at me and it made me way too anxious hahaha. I may need to get something to hang over that door when I take photos (this is the door that leads to the back half of my house – where the bedrooms are – from my living room), but at least the light is pretty!

Chambray Kalle Dress

ANYWAY, back to the dress!!!

This is the Kalle Shirtdress, from Closet Case Patterns. I made view C in a size 2, with no alterations. This one is straight out of the envelope! I was so excited when this pattern came out and my finished dress did not disappoint – I wear it as much as I think I can feasibly get away with! The good thing about dressing kind of bland (simple shapes, solid colors, etc) means that people are less likely to realize you’re repeating an outfit. Or maybe they do and they are too polite to say anything, I dunno and I also kind of don’t care.

Chambray Kalle Dress

Chambray Kalle Dress

I made my dress up in a beautiful, lightweight linen from Mood Fabrics (which apparently is sold out now, sorry!). This fabric is great – it’s light and airy, and almost translucent. It is perfect for those hot summer days when you don’t want anything touching your body. The deep indigo color means that it will also transition nicely into fall – it still looks a bit autumnal, but I won’t be sweating to death in it. Plus, it layers really nicely for those chilly mornings and evenings – it looks great with a cardigan and boots.

I washed my linen three times before cutting it, as I wanted to make sure that it wasn’t going to shrink at all post-sewing. I believe this also helps keep the linen from wrinkling so much – Carolyn, was it you who told me this? – and I think that may be accurate since this fabric doesn’t really wrinkle much at all now! I’ve worn this dress on all my travels since finishing and it looks great going from suitcase to hanger. I have found that I do need to lightly press the sleeve bands after washing, because they get slightly bunched (probably because the bands aren’t interfaced), but the rest of the dress is fine without any ironing. In these photos, that’s exactly what I did not do. Un-ironed linen dress, y’all!

I finished the insides of my dress with French seams, and topstitched with navy thread. For interfacing, I used this super lightweight fusible interfacing, and then only sparingly – on the button band, upper collar, and outer collar stand – to keep the fabric supported but still soft. The hem is finished with a bias facing, which is an easy way to work with that exaggerated curve. The navy shirt buttons are from Textile Fabrics – and in the true spirit of Textile Fabrics, they are fancy and imported from Italy and cost over $1 each. Ugh. Who knew it was so hard to find navy shirt buttons? Anyway, they look good!

Chambray Kalle Dress

One thing you should know about this dress – it’s not a short dress, but the upper curve of the hem is quite high. And the arm holes are quite low, which means that the dress moves upwards if you need to raise your arms. See how high the dress goes when I reach the sky? Ok, granted – I rarely need to raise my arms *that* high, but it is something to keep in mind! For comparison’s sake, I wear my shorts very very short and only the bottom rose of my leg tattoo sticks out of the hem. If the dress hiked up any higher, you would literally see my underwear. FYI!

Chambray Kalle Dress

Chambray Kalle Dress

Chambray Kalle Dress

Chambray Kalle Dress

See how sheer the fabric is? It’s not noticeable when I’m wearing the dress, and also, I wear nude undergarments (nothing patterned).

Chambray Kalle Dress

Chambray Kalle Dress

Chambray Kalle Dress

Chambray Kalle Dress

I think that’s about all I have to say about this dress! I really love this pattern and I am excited to try the other versions in different fabrics. I also realize that this is like, my fourth chambray/denim shirtdress – but you know what? I don’t care. At least I’ve figured out what I like, I guess 😛

Chambray Kalle Dress

** Note: The linen fabric used for this dress was provided to me by Mood Fabrics, in exchange for my participation with the Mood Sewing Network. As always, all opinions are my own!

Completed: Linen Archer Button-Up

11 May

Does anyone remember my first linen Archer shirt, and the disaster that it was? Like, I don’t even think I wore that thing out in public one time. I’m pretty sure it went straight to Goodwill, where a less discerning eye was hopefully excited to find it. Hopefully.

Well, I always said I’d revisit this pattern+fabric combination again, once I’d had a little more practice with it – and here we are! I can’t believe it’s taken me nearly 4 years to actually get around to making that linen button-up of my dreams, but better late than never, I reckon!

Linen Archer Button-Up Shirt

Basic details first: This is the Archer button-up from Grainline Studio. Sewn up in a size 0, with all my former modifications (shortening the hem, shortening the sleeves, and also adding a tower placket to the sleeve instead of the bias placket, which I’m sorry but I just don’t like). I’ve made this shirt several times, so if you want more in-depth info from an earlier version – check out this tag! The only former modification that I did NOT make to this version was to sew the side seams at their 1/2″ seam allowance (all my other versions, I used a 5/8″ seam allowance for this, to make the the body a smidge narrower. But for this one, I kept it as-drafted).

Linen Archer Button-Up Shirt

Linen Archer Button-Up Shirt

Linen Archer Button-Up Shirt

Ok, boring shit out of the way – what makes this one so special is the fabric I used! Omg you guys. It’s hard to convey in a photo – even harder with these less than sub-par ones I have going on (and yah, I’ve already started packing for my move at the end of the month. Backgrounds are about to get a lot sadder ’round here haha) – but this particular linen is one of the prettiest solids I’ve ever seen! It looks like a basic chambray from a distance, but once you get closer – it’s really more of a periwinkle blue, with a definite purple sheen to it. I am not a huge fan of purple – and honestly, wasn’t a huge fan of linen until recently (something about getting old idk but god bless I feel like I sweat more than ever now, which is disgusting I know) – but this one is pretty freaking special.

I got my magical linen from South Street Linen, waaay back in 2015 when I was in Portland, ME for my first retreat at A Gathering of Stitches. We took an impromptu class field trip to the shop after we’d been told there was a linen sample sale going on… and DUDES WHAT A SAMPLE SALE. So many amazing pieces of absolutely beautiful linen, priced according to their yardage. You couldn’t get the pieces cut, but it was easily enough to split with someone else (we’re talking bundles of 6-10 yards per piece, so some people split 3 ways and still had tons). I personally got 2 pieces myself – both shared splits – and this is one of them. It’s been so long that I don’t actually remember what I paid, but I’d guess probably $30-$40 for 3 yards. Maybe less, again, I don’t remember!

Again, these pictures do not do this fabric justice – but it is even more beautiful in person. It’s also incredibly soft – not rough at all like some linens can be. It’s a slightly heavier weight, too, which means it’s more opaque and a bit less prone to wrinkling and fraying. I’ve been sitting on this piece of fabric for a very long time, waiting for inspiration to strike, and I’m glad I waited! I like the idea of having a summery button-up shirt (I’m not opposed to wearing my flannels in the summer, but this just looks better, yeah?) that is made of a nice breathable linen, with long sleeves that can protect my skin from the sun and/or insects (seriously, Morgan had one of these in Peru and I was SO JEALOUS of it!)…. or more specifically, air-conditioning, ha!

Construction-wise, this was waaaaay easier than my first linen attempt. I suspect part of that has to do with my now experience sewing this type of pattern- and part because of the fabric itself. Being a heavier linen means it is less shifty and less prone to fraying, which made the entire experience a BREEZE to navigate.

Linen Archer Button-Up Shirt

Linen Archer Button-Up Shirt

An unexpected perk of this style is how good it looks when it’s unbuttoned to be borderline scandalous. Since I’m not rocking much in the boob department these days, I can totally get away with these things hahahaha.

Linen Archer Button-Up Shirt

Linen Archer Button-Up Shirt

Linen Archer Button-Up Shirt

Linen Archer Button-Up Shirt

Linen Archer Button-Up Shirt

A few more minor construction notes: the shirt is finished with flat-felled seams, for a neat and durable finish. I did add a tower placket to the sleeve, as mentioned, so it would be easier to roll up (I use the placket pattern piece from the Colette Negroni pattern, but there are other options available). I also added button tabs (nabbed from my copy of B5526) to further aid with rolling up the sleeves (sorry, I didn’t think to take a photo of them rolled up – but you can see a shot here on my Instagram). The topstitching is off-white, and the buttons are just standard off-white shirt buttons, nothing fancy.

Linen Archer Button-Up Shirt

I guess that’s all for this make! I have already worn it several times since finishing (hence the wear-wrinkles in my “modeling” photos – but as you can see, it doesn’t wrinkle that much! And there are pressed fresh-off-the-sewing-machine shots on my dressform, if you’re a hater of wrinkles!) and it’s been a nice and cool alternative to my standard cardigan. I like that the purple makes it a little less plain than an ordinary chambray, yet it’s still a really versatile color that can be worn with most of my wardrobe.

OAL2016: My Finished Outfit!

29 Jul

What up, everyone! It’s practically the end of the July – two days left to go! – which means one thing ’round these parts… The Outfit-Along is nearly over!

OAL_Banner

I’ve had a lot of fun with the pieces this year – both making and wearing them! – and I’m excited to finally show you guys my finished sweater + skirt!

OAL2016: Zinone Sweater + Hollyburn Skirt

Here is the complete outfit!

The sweater is Zinone by Andi Satterlund, and the skirt is a Hollyburn from Sewaholic Patterns.

OAL2016: Zinone Sweater + Hollyburn Skirt

OAL2016: Zinone Sweater + Hollyburn Skirt

OAL2016: Zinone Sweater + Hollyburn Skirt

OAL2016: Zinone Sweater

Zinone was made using the suggested yarn, Quince + Co Sparrow (the color is Moon), which is a fingering weight linen yarn. This was my first time working with linen and OMG TRUE LOVE Y’ALL. Very easy to work with and felt so good on my hands! My gauge swatch put me at size 2 needles, and I knitted the size XS (which is my usual size for Andi’s patterns and corresponds with my bust measurement). I chose to knit the version with the partial lace back, and slightly cropped. I was originally going to do the full lace version, but I guess I’m way out of lace-knittin’ practice because I had a helluva time working this one out. Fortunately, the directions for the partial and full lace back at the same for a bit at the beginning of the pattern, which gave me plenty of time to change my mind 😛 I also completely frogged the entire thing and started over after finishing the lace section, because I realized way too late that I had read the pattern wrong (which is why I was having issues in the first place). I was trying to be clever and separate my repeats with stitch markers – you can’t do that with this pattern, as some of the stitches borrow from previous repeats. Whoops. Once I realized I’d done goofed, let me tell you… it was hard to rip everything out and start over. But I’m glad I did, because my second attempt at the lace looks pretty bomb-ass, if I do say so myself 😉

I made some slight sizing and length modifications to the sweater as well – I knitted the correct number of rows for the cropped version, but somehow it ended up really short (I am thinking I read the pattern wrong). I just continued knitting until I got to the length that I wanted, and did a couple more rounds of decreases as well. Speaking of length, this sweater is only about an inch shorter than the schematics – it’s 16.5″ long from the shoulder, which hits me right about at the belly button. The cropped version on Andi appears to be a lot shorter than mine, even though it says it’s an inch longer.

Anyway, this was a very easy and satisfying knit. I did nearly run out of yarn at the end – I bought enough for the cropped version, and ended up frogging about 3 rows of my gauge swatch. Actually, I had an extra skein but I was trying really hard not to use it so I could be cheap and return it to the store 😉

OAL2016: Zinone Sweater

OAL2016: Zinone Sweater

I LOVE how this linen feels in the summer heat – finally, an excuse to wear my handknits even in July! 😀 And it’s pretty awesome that it’s machine washable. I haven’t done the recommend 3 washing cycles yet, though – I did one Soak wash (this is how I wash all my knits… and my lingerie for that matter. Soak is AMAZING, cannot recommend enough) and then one wash in the washing machine. My new place has me doing laundry at the ‘mat, so running 3 loads back to back to back isn’t exactly doable for me! (well, it is. But I’m not about to pay for that haha) So far, though, it has softened up considerably after even 2 washes. Can’t wait to see how it softens even more with additional wear and washing 😀

OAL2016: Zinone Sweater

OAL2016: Zinone Sweater

OAL2016: Zinone Sweater

OAL2016: Zinone Sweater

OAL2016: Zinone Sweater

Sorry, loads of photos!

OAL2016: Hollyburn Skirt

OAL2016: Hollyburn Skirt

Now for the Hollyburn!

I already wrote a couple posts about the modifications to make this particular skirt (see: Choosing Your Fabric, Flat Piping, and Installing an Exposed Zipper), so I’ll just brief over the key details here.

The navy rayon crepe is from StyleMaker Fabrics (who is one of our sponsors for this year’s OAL!). I added flat piping at the waistband (sewn with silk crepe – from my stash) and an exposed metal zipper to the back. I also shortened the length considerably, omitted the pockets, and used stretch interfacing on the waistband.

I sewed the entire skirt on my Spiegel 60609, and it did pretty well overall! While I don’t want to say I was concerned to see how it would handle that shifty fabric (I have sewn straight-up silk and a bra on the 60609, and it hasn’t given me any problems thus far with my fabric choices), I was still pleasantly surprised at the entire experience. I didn’t use any special stitches, and only feet that came with the machine. The zipper foot in particular was great for both applying the piping and the invisible zipper, as well as making sure the topstitching was nice and straight and close to the edge. I did find that I needed to increase the stitch length just a smidge for this fabric, as it wanted to bunch a little bit otherwise, but overall I’m pretty happy with it! I am glad that moving the needle over is an option with this machine (you just increase the zigzag width while on a straight stitch), however, I’d love to see some new feet released to use with this machine. Maybe a 1/4″ foot or an edgestitching foot? 😉 HINT HINT.

OAL2016: Hollyburn Skirt

OAL2016: Hollyburn Skirt

OAL2016: Hollyburn Skirt

For me, the most fun part about this challenge is ending up with TWO pieces that I can mix with other garments in my wardrobe. I love this top + skirt together… but honestly, I like them even more with different things from my closet! They are definitely wearable with a bunch of what I already have (which is part of the reason why I got a little boring with the colors 😉 I wanted the versatility!); here are a couple of examples:

OAL2016: Zinone Sweater

Zinone top + Ginger jean shorts
I don’t know about y’all, but I am LOVING the cropped trend! Slightly cropped with a slightly high-waisted bottom is my new favorite thing right now (not your cup of tea? This is the beauty of knitting your own – you get to decide the length!). I love the way this top looks tucked into a skirt, but the combination with my high-waisted Ginger shorts really makes my heart sing the most.

OAL2016: Hollyburn Skirt

Hollyburn skirt + sleeveless coral B5526 button up
I did not realize when I made this shirt that it was going to be one of my top 10 handmade garments of all time, but it is. It goes with everything. The sleeveless option + lightweight cotton fabric make it a great option for summer, and it layers beautifully under sweaters in the winter. The color is perfection and looks especially great with navy (my go-to summer dark neutral). It’s as easy to wear as a knit tshirt, but looks a helluva lot more refined and classy.

OAL2016: Zinone Sweater + Hollyburn Skirt

Anyway, I guess that’s it for this post! Those of you still scrambling to finish your outfits – you have 2 days before the deadline! Make sure you upload your finished outfit to the Official OAL2016 Finished Outfit Thread on Ravelry before 7/31/16 Midnight PDT if you wanna win one of those sweet prizes! Andi and I will be drawing 3 winners at random, who will win fabric, sewing pattern, and knitting pattern vouchers! Even if you’re not participating, do take a look at that thread! There are some amazing outfits to drool over 🙂

Sewing For My New Apartment!

28 Jun

All right, y’all, time for something different – another round of HOME SEWING PROJECTS (heh heh heh!). No wait, come back! I promise it’s at least somewhat interesting!

So, as I’ve mentioned repeatedly – I moved this month! Yay! From a basement apartment in the middle of the woods, to a second floor apartment with masses of windows in my favorite part of Nashville. Literally movin’ on up, here! :B Since things go all kinds of haywire during moving month (from packing, to moving, to unpacking, to figuring out your new neighborhood bar, etc etc), I knew I probably shouldn’t devote myself to trying to make a whole outfit or something crazy for this month’s MSN project. Never mind that I actually unpacked and set up everything in 3 days hahaha. I decided to focus my efforts on sprucing up and decorating, to get the new place real pretty instead. Not to mention, this gave me an opportunity to actually shop the home decor selection at Mood Fabrics. Yes! I don’t normally sew with home decor fabrics, like, ever (too stiff to wear, at least for me!), so that whole side of the website was so fresh and new and different and ahh I love it.

Linen apron

First up is a basic (but so useful!) apron, made using this Blue and White Striped Linen. I know, aprons are generally one of those things that people make when they are first learning how to sew haha. To be completely honest – I’ve never actually sewn an apron before (as with all my adult learning, I jumped straight into the “difficult” stuff). But I knew I needed one because I am a helluva messy cook – I get splatters everywhere and I’m always wiping my hands off on my clothes. I’m also a really clean cook – in the sense that I clean as I cook (seriously – I won’t even sit down to eat until all the cooking dishes are washed, unless there’s something that needs to be soaked. A sink full of dirty dishes stresses me out!) – so I’m also usually covered with water by the end of the prep. Using an apron might actually make me feel more like a grown-up. Plus it would be cool to wear one while whipping up a delicious meal to impress whatever man I have over. If that ever happens. BTW, Tinder is incredibly depressing hahaha. ANYWAY, MOVING ON NOW.

I didn’t use a pattern to make this, just this adjustable Unisex Apron tutorial from Purl Soho. You basically make a series of measurements directly onto the fabric to get your pattern. From there, it’s just a lot of folding, pressing, and topstitching. The tutorial was really easy to follow, and this linen was even easier to sew up. I did find that the straps were a bit too low to hit my waist – so to fix this, I folded over the top by another couple of inches and topstitched it down, which shortened the apron enough so that everything hit me in the right spot. A better fix would be to reduce the angle and length of the diagonal cuts, obviously, but since my pieces were already cut at this point, this was a quick and dirty fix!

Other changes I made to the ~design~ was to leave off the pocket (what’s the pocket for, anyway? Dirty spoons? Secret snacks? Seriously, I am not putting my phone in that mess) and also to change the webbing to some 1″ twill tape. I did try the webbing, but it was WAY too stiff to be comfortable or even tie easily. The twill tape is nice and soft and it’s much more comfortable. I also topstitched along the edge of the apron where the twill tape goes around the neck, because otherwise it tends to slide off when you’re putting it on. The topstitching anchors everything so it stays in place at the neck, but the sides/back are still adjustable 🙂

Linen apron

Linen apron

Linen apron

Linen apron

Linen apron

Once I finished with the apron, I realized I had quite a bit of fabric left over (I had bought 2 yards). Not enough to make a full garment, but certainly enough for some kitchen linens! Yeah, Friday night just got WILD up in here!

Linen napkins

Linen napkins

I was able to squeeze out 7 cloth napkins, and 3 dishtowels. Yay! For the napkins (pictured above), I cut 13″x13″ squares (I know there are lots of sizes for cloth napkins, but I personally like mine to be about 12″ square) and folded each edge under 1/2″ twice, and then topstitched. Really easy, and very fast when you sew it assembly-line style 🙂 This was definitely not the most exciting project, but it is certainly useful! I am trying to move away from using disposable products as much as I can, including paper products like napkins, mostly cos I’m sick of having to buy them over and over. Plus, cloth really does wipe your face off better than paper does. Now if I could just get my visiting friends to stop using paper towels to dry their hands (whyyyy do people do this, use a real towel ffs).

Linen kitchen towel

The dishtowels have a finished measurement of 25″ x 14.5″, and were sewn in the same manner as the napkins. Again, definitely a useful thing for my kitchen! I prefer smooth tea towels over the really plush terrycloth kind, at least for kitchen use, and these work exactly the same way. I love the blue stripes and I love how they look in my (admittedly boring off-white) apartment kitchen 🙂

Now, linen does tend to wrinkle up like crazy and this particular linen was no exception! I will point out that it was very stiff and flat when it arrived, but washing it made it soften up very nicely. I actually washed my linen 3x in hot water (and dried on extra hot) before cutting into it, to get it to shrink as much as possible and also because that does help with preventing future wrinkles. As you can see, they still wrinkle when they are laundered, but it’s not terrible. I’ve learned that just giving them a good shake after pull them out of the wash helps a lot. I do put mine in the dryer, however, line-drying will also prevent wrinkles as well.

My last home project doesn’t involve sewing at all – just fabric and hot glue 🙂

Recovered Lampshade

I’ve had this cool gold floor lamp for several years (and my grandpa had it in his home for even MORE years before I got my hands on it), but the drum shade has definitely seen better days. It’s pretty old and brittle and will crack if you so much as look at it funny. I also wasn’t a big fan of the yellow-y off-white color, especially not for my new place. Rather than try to buy a new drum shade (because those things are $$$ – if you can even find one!), I recovered this one!

Recovered Lampshade

Recovered Lampshade

The fabric is this beauuuuutiful Peacock Geometric Chenille. The colors were perfect for my new living room, and I just love the chenille texture! The fabric was wide enough so that I only needed a half yard to cover my lampshade, but I may end up buying more to cover some pillows for my couch as well 🙂 Because it’s THAT beautiful!

Anyway, covering the shade was really simple! I cut the fabric to be a couple inches taller than what I needed to cover the shade, and then turned under one long edge by 1/4″ and hot glued that to the wrong side of the fabric (since it does fray a lot, you’ll want to cover your raw edges or double turn them). Then I carefully wrapped the shade with the fabric, hot gluing as I went. The edge at the top of the shade was left raw, and then covered with this gold metallic braid. The bottom has an overlap of about 2″ of fabric (the edge with the 1/4″ turn under). When I came back around to where I started, I turned the fabric under 1/4″ and glued it down before overlapping. Done and done!

Recovered Lampshade

Here is the shade in all it’s glory, in my NEW LIVING ROOM 😀 😀 😀 (psst – see that chair in the background? I recovered that bad boy a couple of years ago – also thanks to Mood Fabrics! 😉 ). Also, I totally knit that white blanket – using size 50 needles and fluffy wool roving that basically feels like a cloud. It’s a simple k2 p2 rib, and just big enough for me + my cat to cuddle up. Ravelry notes are here, if you are interested!

Ok, so real talk – sewing things for the home doesn’t exactly top my list of favorite things to make, but it’s fun to switch things up every now and then! Not to mention, in a world where greys and chevrons are the current fashion, it’s really nice to have full control over my decor (even if it means I have to be a little bit more hands-on than just throwing something in my shopping cart at Target). What about you? Do you even sew (or hot glue) for your home?

Note: Fabrics were provided to me by Mood Fabrics, as part of my involvement with the Mood Sewing Network.

Completed: The Sway Dress

3 Sep

Y’all, this heat is making me do crazy things this year. As in, I made a tent dress. Out of LINEN. I’ll just let that one soak in for a minute.

Papercut Patterns Sway dress - front

I doubt it’s the most flattering thing I could be putting on my body, but you know what? Fuck it. This shit is BEYOND COMFY.

Papercut Patterns Sway dress - front

Papercut Patterns Sway dress - front

Katie sent me this pattern, the Sway dress, right after the launch of her most recent collection, Chameleon. While I loooove the way it’s styled on the envelope (especially that winter version with the turtleneck! Ahhh it looks so chic and cozy!), I was pretty sure there was no way in hell I’d be putting this kind of tent shape over my body. My waist, the world has to know that I have a waist!!!1!

Then I turned 30, then it got really hot, and then Katie is basically like my mom because she knew better before I even realized it for myself.

Papercut Patterns Sway dress - side

Papercut Patterns Sway dress - side

If this dress looks like it took 2 hours to put together, that’s because it did. It was super fast, super easy, and a really satisfying project to work on. The pattern is extremely simple – front, back, facings, and then pockets. That’s it! No darts, no tricky seamlines, no closures. I cut the size XXS with no alterations, and made this up in an afternoon. The directions are clear and straightforward, and I really like that the facings are all-in-one, so that the arm holes and neckline are all encased at the same time and everything stays in place really well. it’s a nice, clean finish, and it looks really good from both the outside and the inside. Letting the dress hang for 24 hours to stretch out the bias was the most time-consuming part of the whole sewing process, but even leveling the hem wasn’t that bad.

Papercut Patterns Sway dress - front

Papercut Patterns Sway dress - back

AND, because the dress only really fits at the shoulders and falls loose everywhere else – it’s totally reversible! You can wear the front to the back, or vice versa. Say what now?! I was originally Team V-neck, but after wearing the dress around a bit, I actually like the v in the back.

Papercut Patterns Sway dress - pockets

Since the dress is already totes appropriate for hot weather, I went the extra mile and made it out of some dark blue heavyweight linen to keep things extra cool and breezy. I really did not know what to expect with this linen – I’ve bitched and moaned before about how much I don’t like linen for it’s shifty nature and constant wrinkles – but this particular linen is a lot more tame than most of the ones I’ve sewn with. Because it’s so heavy, it’s not as prone to shifting around or wrinkling (while I did take these photos before wearing it around, I have since worn it for a full day and even with a couple hours of driving involved, it barely wrinkled at all). It does still fray like mad, so I made sure to finish all my seams with the serger and that solved that problem. This is the kind of linen that would get me sewing with the fiber on the regular – and now that I’m looking at the Mood Fabrics website, it looks like they added more colors! Yay!

Papercut Patterns Sway dress - neckline

Papercut Patterns Sway dress - necklineThe only part where I deviated from the pattern was to cut the pockets out of a lightweight china silk, instead of the heavy linen. I’m sure the linen would have been fine, but I like how light and not-bulky the silk pockets are. Plus, they feel gooood on my hands!

One thing I will change for future makes of this pattern is to raise the arm holes, because they are pretty low on me! It might just be because I’m petite, but I was showing a little bit of bra when I first tried on the dress. I took in the underarm seam just a bit, which helped a lot, but I do need to be careful of which bra I wear with this dress because it definitely can and will still show at my underarms. I think raising the underarm about 1/2″ will take care of that. Also, if you plan on making this pattern – watch the length! I did not adjust the length whatsoever and it’s preeeeeeetty short on me (I’m 5’2″). Like, if I raise my arms too high… y’all are gonna see some cheeks. No, seriously, I tested that shit in front of a mirror. The struggle is real.

That being said, I love the micro-mini length combined with the exaggerated tent shape. I especially want to put this into action in a cozy black wool, and wear it with black tights.

Papercut Patterns Sway dress - detail

Papercut Patterns Sway dress - detail

Inside guts. It’s a simple dress, so really not much to see here!

Papercut Patterns Sway dress - twirl

I’m still not 100% that this is the best look for my body (I’m sure there is someone out there who thinks I’m trying to hide a pregnancy), but I am 100% in that this dress is SUPER comfortable and perfect for the summer heat!

As a side note – I’m off to Cancun, Mexico this weekend! Gonna lay poolside with my bae and drink something with an umbrella sticking out of it (wearing my new Made Up bikini, naturally! Yay for finishing by my self-imposed deadline!). Cannot even wait. Suffice to say, this blog will be pretty quiet for the next few days. This girl needs a vacation!

Note: The fabric for this dress was purchased with my allowance for the Mood Sewing Network. Pattern was given to me as a gift. All comments on this blog post are just, like, my opinion, man.

Completed: Striped Linen Hawthorn Dress

24 Aug

Same as with Simplicity 6266 (which, by the way – when I first published that post – I had the pattern # all kinds of wrong and have since been corrected and updated the blog post – if you were trying to find the pattern and couldn’t, maybe try again with the correct number! Just FYI!), the Colette Patterns Hawthorn is one of those patterns that I LOVE to wear and swore I’d make a million more of… then never actually did. It’s the sweetest little pattern – a very feminine shirt dress with an interesting collar and a beautiful, swirly skirt – and I get loads of compliments whenever I wear any of my other versions (especially the Chambray version – which I wear at least once a week in the summer because it’s soooo good). Alas, it’s been over a year since I did anything with the pattern, despite it being in my pile of “patterns to make next” for, well, over a year. Whoops.

This year, I have been all about settling down, sewing-wise, and making repeats of things I know I love (instead of constantly being distracted by the new and shiny). So I made a Hawthorn.

Striped Linen/Cotton HawthornI think it turned out pretty good! We had a few harrowing moments there for a bit, but it all worked out in the end. Yay for the TNT and knowing what works! Striped Linen/Cotton Hawthorn

I’ve already talked quite a bit about this pattern, considering that I’ve made it three times (see: Sweet Cherry Hawthorn, Organic Cotton Sateen Hawthorn, and the aforementioned Chambray Hawthorn WHICH IS THE BEST ONE BTW). I cut my usual/adjusted size, and mostly followed the instructions as they are written. All harrowing moments were due to fabric, not pattern.

Striped Linen/Cotton HawthornStriped Linen/Cotton Hawthorn

The fabric is another piece that I bought from Elizabeth; the striped cotton/linen blend (at least, I think there is cotton in there – it doesn’t wrinkle as much as 100% linen tends to do) was from her SS15 collection, which is currently no longer available (but, btw, FW15 LAUNCHES TODAY EEEE). I’ve seen some makes using this fabric – in the same brown/black/white colors (Kelly’s Southport dress!) and in a blue/white/black colorway (Sewaholic’s Cambie dress!) – so if this stuff looks familiar, well, it’s making the rounds!

As a side note – not that this really matters, but I know I’ve mentioned before that I’ve gotten some pieces gratis as part of an ES destash, but this particular piece was one that I paid for. Granted, I got it for wholesale price – but it wasn’t free :). Elizabeth isn’t in the fabric business at all (I only get to buy as part of an employee perk, basically), so I don’t think it matters, but I thought I’d mention it anyway!

Striped Linen/Cotton HawthornI originally bought my little piece to make a woven tshirt – like, maybe a Scout or something – so I only bought about 1.5 yards. I decided it would be better as a dress, but it took me a long time to decide on which pattern to use. The Hawthorn was a good choice, except that I didn’t have quite enough fabric and had to do some creative piecing to get all the pieces to fit and to get the stripes to mostly match (all I can say is, I did my best). Check out that photo of the back – see the center back seam that I added? Yes. I also pieced the top of the back bodice, right along the black stripes. You can’t see that shit at all because I matched it up pretty well, and the stripes make the seam lines disappear. But it is there! Striped Linen/Cotton Hawthorn

I had NO IDEA how to cut the collar with the stripes, so I just kind of winged it. Surprisingly, the stripes match up kind of cool with the bodice stripes. I didn’t plan that whatsoever, and I was somewhat concerned I’d have a hot mess of a bodice on my hands once I added the collar and the stripes started going every which way, but I really like how it turned out. It actually looks intentional.

Striped Linen/Cotton HawthornHere’s the back again. Can you see my piecing? On the right hand side (the side where my tattoo is), the very first batch of stripes – the bottom black stripe is where the seamline is. On the left side (opposite of tattoo), the second batch of stripes – the seamline is in the top black stripe. Can you see it now? Can you UNSEE it now? (sorry about that) I honestly thought this dress was a goner about halfway through cutting it and realizing that I didn’t have enough fabric, but thank god for stripes making seamlines invisible. Yay! The stripe-matching worked out pretty well, but I did have one big snafu that kind of sucked… Striped Linen/Cotton Hawthorn

Whatever the hell is going on with the waistline here, that’s what. I’m not really sure how I managed to cut those stripes so they’d suck THAT bad, but it looks like I’m wearing a bow right over some part of my intestine. How dainty! Except it actually looks pretty stupid. Thankfully, as you’ve probably (not)noticed from the pictures – a belt covers it quite well, so that’s my solution. It does mean that I can’t really wear the dress without a belt, but I am pro-belt at this point in my life, so I’m not terribly concerned about that.

Some more photos:
Striped Linen/Cotton HawthornStriped Linen/Cotton Hawthorn

The linen is SO soft, with a slight little drape that’s just lovely. It’s really comfortable to wear in the heat. Because of the drape, the bodice is a little softer and less structured than my other Hawthorns, which is a nice change. This also meant that I needed to let the skirt hang for something like 48 hours to get all the bias settle before hemming (and it was crazy uneven before I evened it out).

Striped Linen/Cotton HawthornThe inside is very simple – stitched and serged (this fabric sheds like a mofo, so finishing the edges with a serge was very necessary). I serged the facing edges so they’d have less bulk, and finished the arm holes with polka dot bias binding because it’s a little thinner and less bulky (and easier to work with, since it sheds less) than the linen. Stripe-matching the facings was probably a little bit of overkill on my end. Whatever 🙂 Striped Linen/Cotton Hawthorn
The buttons are just black shirting buttons I had in my stash. I originally wanted to use wooden buttons, but black ended up looking best with the fabric. Instead of putting a button at the waistline, I used a hook and eye. This makes the area nice and smooth so it’s more comfortable to wear a belt.

Striped Linen/Cotton Hawthorn

Making this up definitely reminded me of why I love this pattern so much! It’s really beautiful and feels good to wear. A similar look would be the new Sewaholic Nicola dress, which has that same V-neck with collar, but it’s designed for a drapier fabric, thanks to all the soft gathers, and looks quite a bit more 70s. I’d love to try this pattern (talking about Hawthorn now, but I want to try Nicola too!) with long sleeves, sewn up in a plaid, for a cozy winter version. That, too, has been on my list for waaaay too long. Maybe this winter I’ll actually get around to making it 🙂

Completed: Linen Carolyn Pajamas

27 Apr

Let’s start this post with the shocker: I don’t really care for linen.

Carolyn Pajamas

I know, I know. Linen is supposed to be a rite of passage for Southern gals – it’s cool and breathable, and the wrinkles are supposed to be there. Well, I HATE the wrinkles! Wrinkly fabric drives me insane, makes me feel rumply and unkempt. I just can’t get behind a fabric that wants to wrinkle the second I look at it, much less wear it around for a few hours. Nope nope nope.

nope

That being said – I really want to like linen. Seriously! I love the idea of a fabric that gets softer with every wash, and as someone who could probably work up a sweat in the middle of the Arctic (I don’t even know how that’s possible, considering that I’m ALWAYS cold, but leave it to my body to fuck up my heating and cooling system), I’m always on the hunt for light and breathable fabric to wear during the summer months. Linen was my nemesis, but I was willing to extend the olive branch and make an effort at friendship.

Also, I’ve been eyeballing that striped linen fabric for months now at the studio (and probably for more months to come, since stripes just launched at Elizabeth Suzann woohoo!), and I knew it needed to be in my life/on my body. Linen wrinkles be dammed.

Carolyn Pajamas

There are many, many, many important things I’ve learned through my sewing journey. One of the biggest ones (well, other than not sewing over your pins. STOP THAT RIGHT NOW) is not to fight against your fabric. If your fabric is drapey, don’t try to sew something form-fitting with it. Alternatively, fabric with a lot of body needs to be made into something that will work with the shape. And if you are sewing linen but still hating on the wrinkles… make pajamas. No one cares if your pajamas are wrinkled (and if they do – get out. Get out right now while you still can).

Also, have you slept in linen pajamas before? LORD HAVE MERCY.

Carolyn Pajamas

Making proper pajamas has been on my sewing to-do list for aaaages. I love wearing matching pajamas sets, even if Landon does think they are dorky (I did compromise and get rid of the hot pink cat pajamas though. Relationships, man!). My mom actually buys me a new pajama set from Victoria’s Secret every year for Christmas (not the hot pink cats, those came from my AWESOME Mamaw). Still, I’ve always wanted to make my own so I could have – what else? – complete control over every aspect of the design, color, and fit. But I’ve never really found a suitable pajama pattern that didn’t look like something more appropriate for an 8 year old boy, so I held off on that dream.

The winning pattern you see here is the newest pattern from Closet Case Files, the Carolyn Pajamas. I looooooved this pattern the second it graced my inbox – the slim, feminine cut of both the top and bottoms, as well as the inclusion of the piping (I mean, I know how to sew piping, but it’s pretty nice to have a pattern that was designed for optional piping, if you get my drift), were what really got my gears turning. Also, Heather Lou looks amazing in those product photos, doesn’t she? I could steal that hair right off her head. I won’t, but should it ever go missing, well…

Carolyn Pajamas

I really enjoyed sewing this pattern! While I wouldn’t exactly call the linen easy to work with (it was a shifty little bitch and was prone to constant fraying), it did respond beautifully to pressing and took all the piping and topstitching like a champ. I recall when Heather Lou first released this pattern, she mentioned how much she labored over the instructions – and it really shows. Everything is very clearly laid out with beautiful little diagrams and helpful tips, and it’s about as hand-holdy as you can get with a pattern without actually having it be part of a sewalong (there’s no sewalong for this pattern, however, there are a few posts on the CCF website to guide you through the trickier steps if you need it!). I’m especially impressed with how nice my collar turned out – piping and all!

Carolyn Pajamas

Carolyn Pajamas

I made the size 2, based on my measurements and following Heather Lou’s advice. I reeeeally wanted to make the 0 because the ease just seemed excessive, but I’m glad I followed along faithfully because this fit is pretty spot-on. It’s sleek and somewhat fitted (I mean, fitted as far as pajamas are concerned), but there’s juust enough ease to make them super comfy. I did trim about 2″ off the legs, but that’s about it. I feel like there could be some tweaking with the armhole – it seems a bit low and pulls when I reach forward – but that may just be because I’m used to wear shirts that are a lot more tailored. It’s not uncomfortable or restrictive by any means.

I chose to make the long pants with the short-sleeved top. I was originally just going to make shorts, but my new digs are in a basement (I mean, it’s a happy basement with windows and a door – but it’s still a basement, with basement chill), and it’s a bit chilly down here right now. I added piping to the pocket, cuffs, collar, and leg side seams. The piping is self-made – I used more of this glorious linen fabric in the opposite colorway, and cut bunches of bias strips and sewed it around yards of cording. I prefer self-made piping, not just for the color/print selection, but also because it tends to be a lot softer than the stuff you can buy (well, I’m sure you can get awesome soft and flexible piping at some place like in the Garment District, but here all we have is that Dritz stuff in the packages and that stuff is AWFUL if you try to sew it to a drapey fabric. Again – don’t fight the fabric!). I didn’t have wide enough elastic as was required by the pattern, so I sewed an extra line of stitching about 1/4″ away from the top of the pants edge and inserted the elastic below, resulting in a frilly little gathered edge (some of my RTW pjs have this feature and I’ve always loved it!). Here’s a post about elastic waistband finishes if that doesn’t make sense.

Carolyn Pajamas

As I mentioned, I got my fabric from Elizabeth Suzann, because I work there and I get awesome employee benefits like wholesale fabric prices (don’t be jealous). It’s striped 100% linen (I’ve seen similar fabrics to this rolling around on the internet, but most are referred to as a cotton/linen mix. The stuff I have here is definitely all linen) and it is GLORIOUS. It also wrinkles, frays, and shifts like crazy. It wasn’t the most amazing piece of fabric to work with, but I’m glad I powered through because it is pretty amazing to wear. I made sure to finish all my seam allowances with the serger to keep the fraying down (for the front facing, I just serged the edge instead of doing a rolled edge, since I thought the bulk would show through). I didn’t realize how sheer the fabric is, so some of the dark piping shows through on the right side. It’s super sheer and everyone is absolutely aware of the color of my underwear when I wear these pants, just so we’re clear (I’m wearing nude undies for these photos, to save your eyes). It’s also, like I said, super shifty – so my pocket is really wonky. I’m going to call it “charming.”

Detail shots:

Carolyn Pajamas

Carolyn Pajamas

Carolyn Pajamas

Carolyn Pajamas

Carolyn Pajamas

Pretty good stuff! I love my new pajamas and I definitely feel like a Classy Adult when I wear them, wrinkles and all. I definitely want to make a flannel pair when winter rolls around – finally, I won’t be at the mercy of whatever pink shit they’re selling at VS, woohoo! Too bad my mom is going to have to find a new Christmas gift to buy for me. Sorry, mom! Maybe I’ll make you pajamas instead 😛

One last thing – the giveaway winner from last week! Random number generator says…

winner1

winner2

Woohoo, congratulations Kayse! I’ll be in touch to get that gift certificate out to you ASAP. Can’t wait to see what you make with your fabric :DDD

Carolyn PajamasFinally, this would be my senior picture, if I was still in high school and did things like senior pictures. The end.