Tag Archives: knit fabric

Completed: Black Merino Wool Joni Dress

31 May

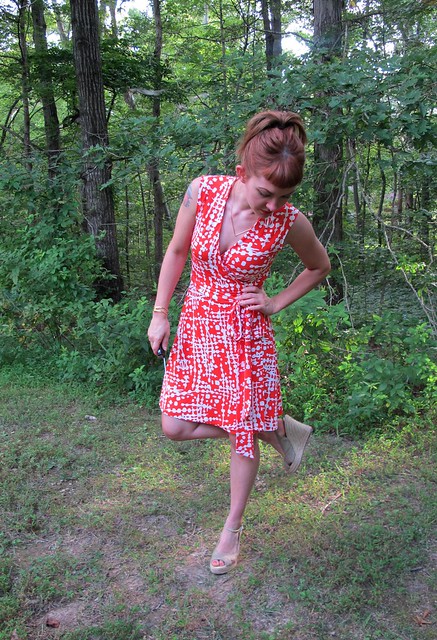
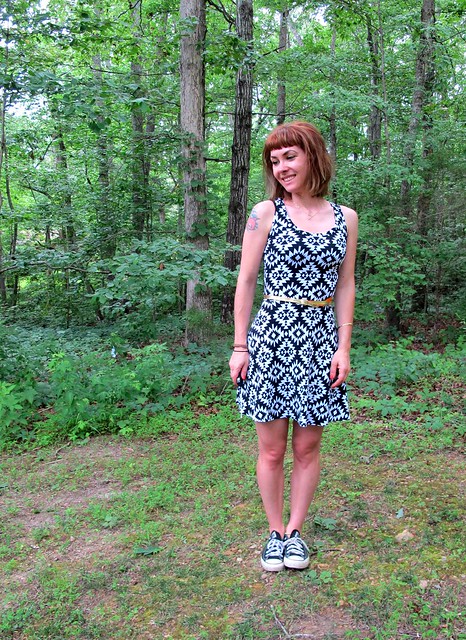
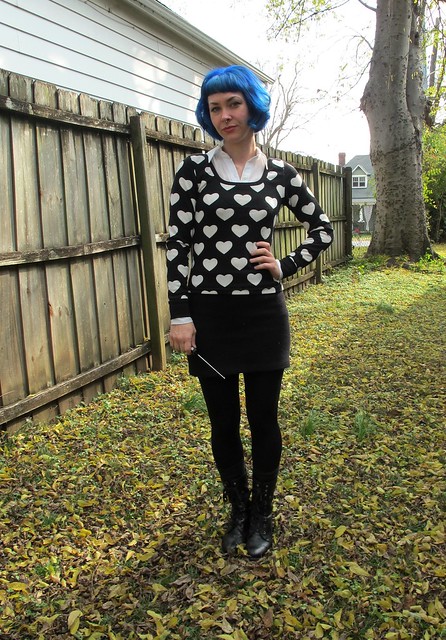
Well, I definitely made a wool dress and here are photos of me modeling it in 90 degree heat.

Merino Joni Dress

To be somewhat gentle on myself, I started (and finished) this dress when there was still a bit of a chill in the air. I didn’t think to take photos until the other day, and even by 8AM it was solidly hot and humid outside. Case in point: I curled my hair about 15 minutes prior. Can you tell? Nope!

This isn’t even my worst offense when it comes to seasonally-inappropriate garments… I still have a (truly fabulous) coat that hasn’t made it’s rounds yet. I even took photos, but I just looked at them and am pretty sure they need to be retaken. But probably not until next year because LOOOOL Y’ALL IT BE HOT OUTSIDE.

Merino Joni Dress

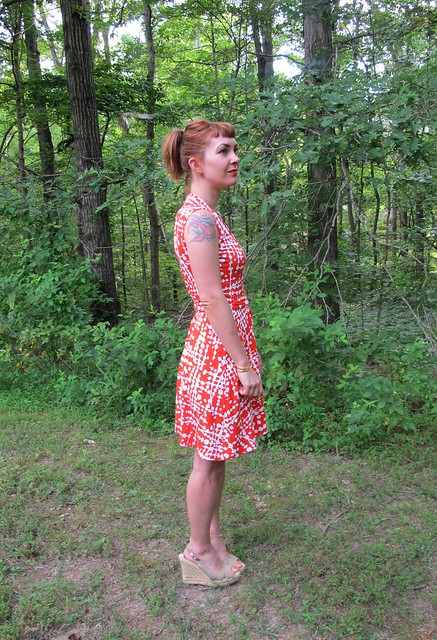
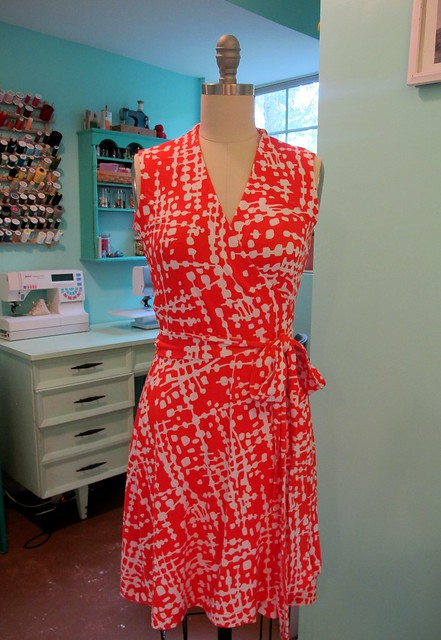
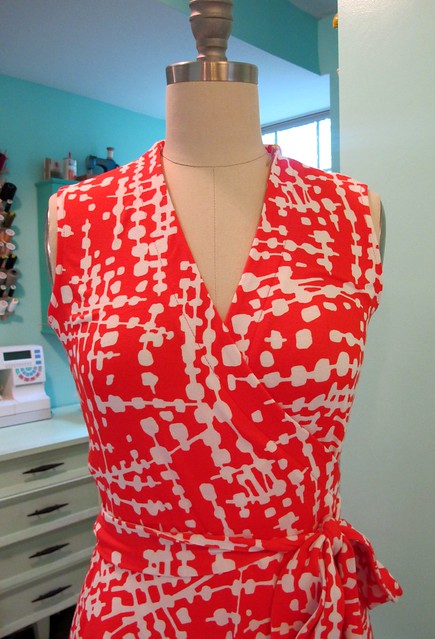
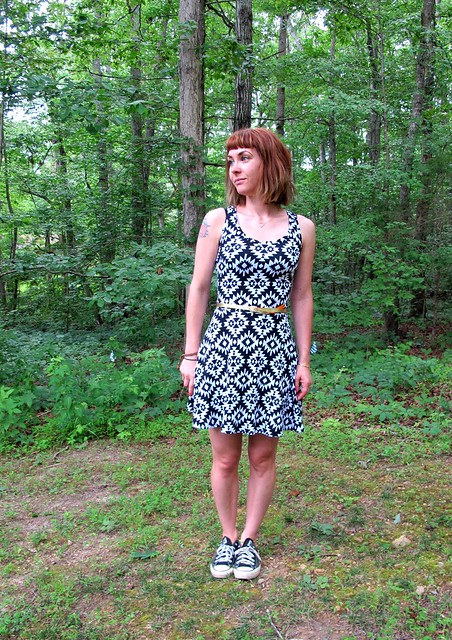
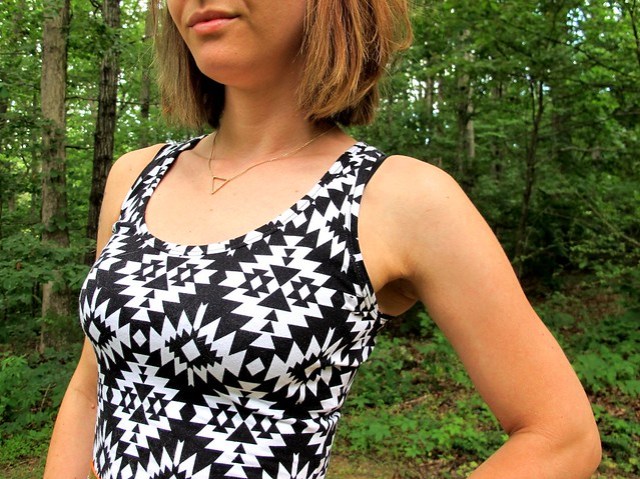
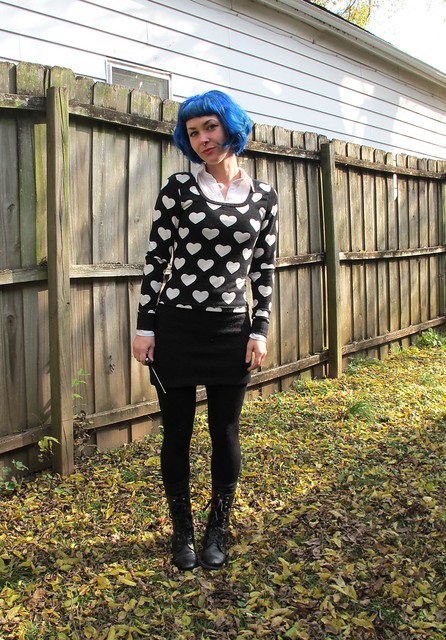
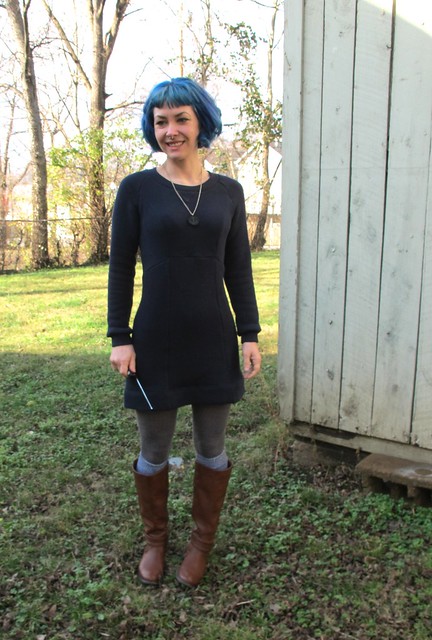
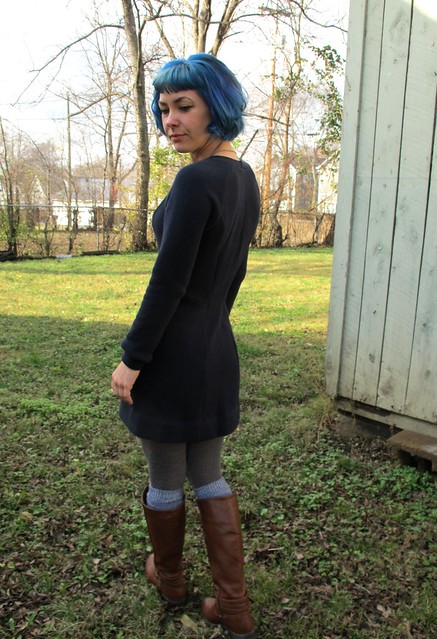
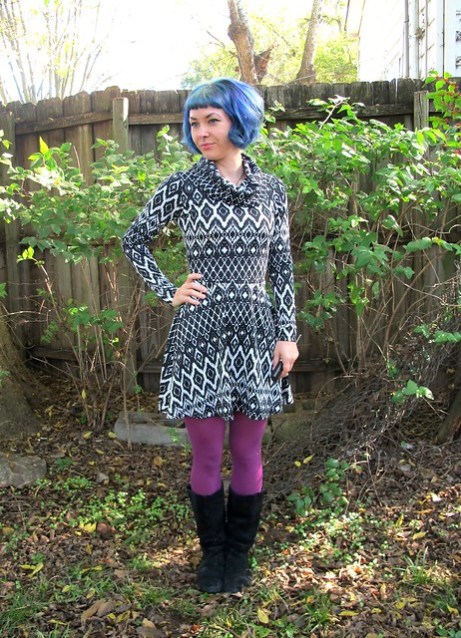
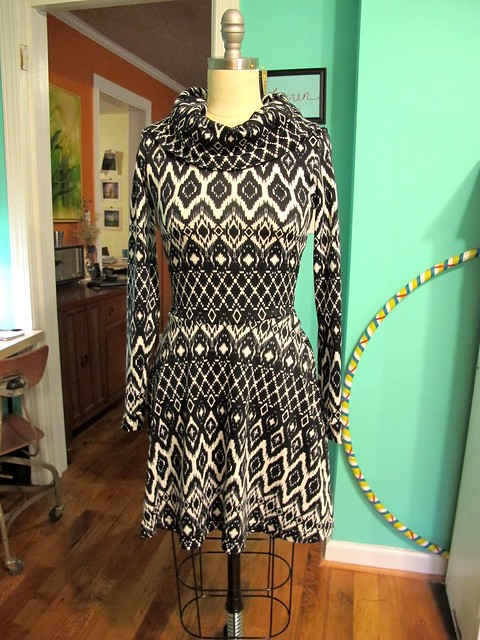
Anyway, I posted a dress so I’ll talk about the dress! This is the Joni Dress from the new Tilly & the Buttons book, Stretch! – it is also the same dress Tilly is wearing on the cover. While the twisty front looks complicated (I’m not going to pretend that I didn’t feel a LITTLE intimidated to start sewing it! We all get our weird cold feet sewing hang-ups from time to time!), it is deceptively simple! This is a book designed to introduce beginner sewists to working with knits, after all!

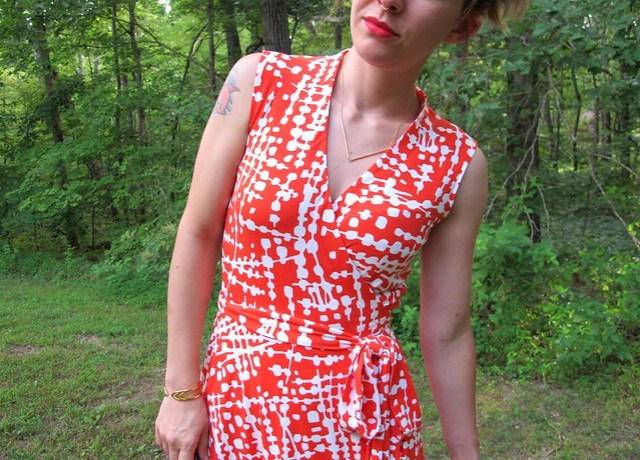
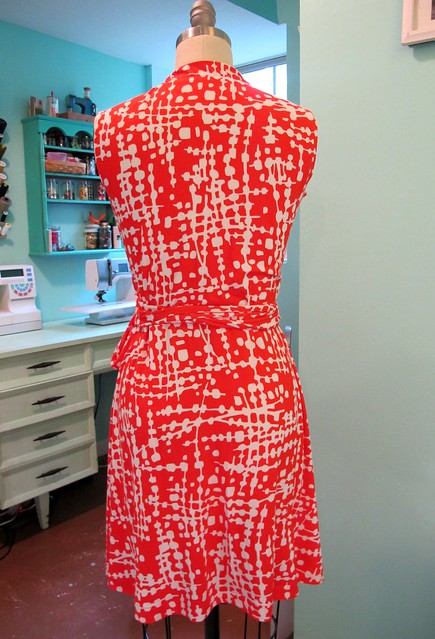
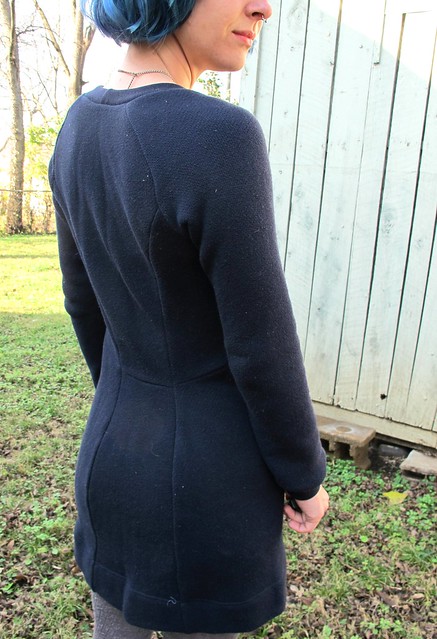
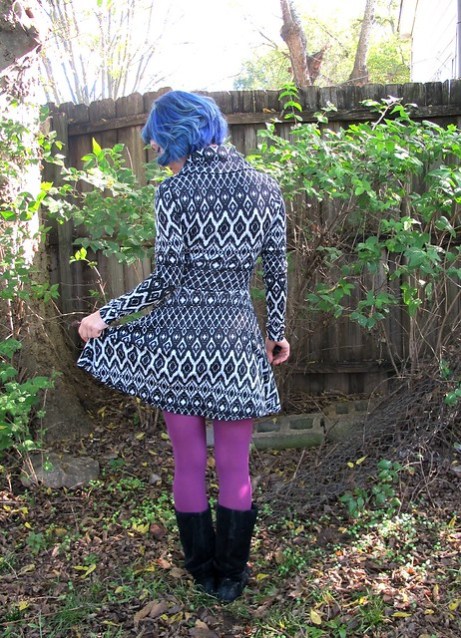
Anyway, what I liked about this dress – other than that twisty goodness – was the fitted shape with the swirly skirt. I have seen a lot of knit patterns with the twisted detail (JFC how many more times am I gonna say twist in this post I’m so sorry), but not many with the very fitted look in conjunction. I like, I like!

Merino Joni Dress

Merino Joni Dress

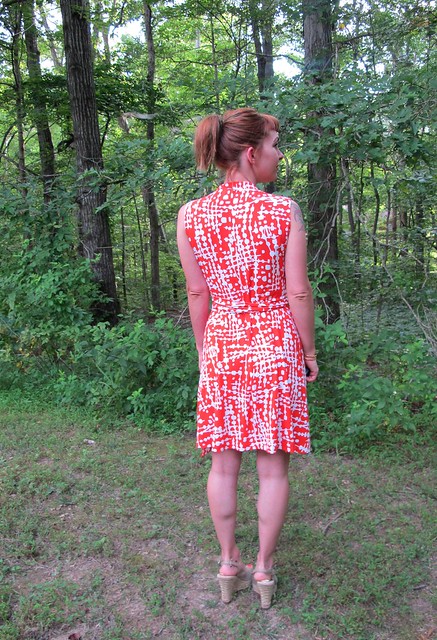
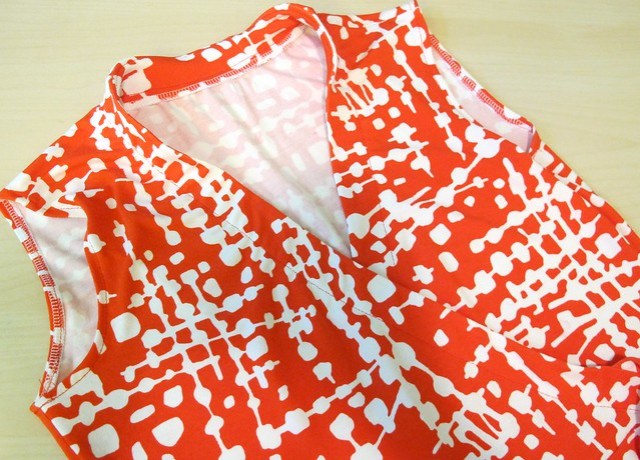
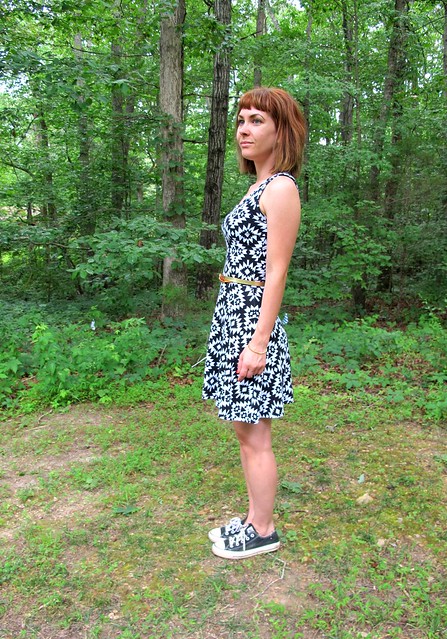
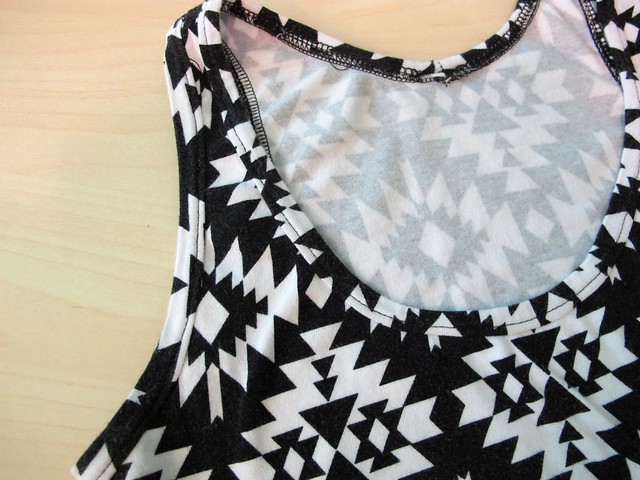
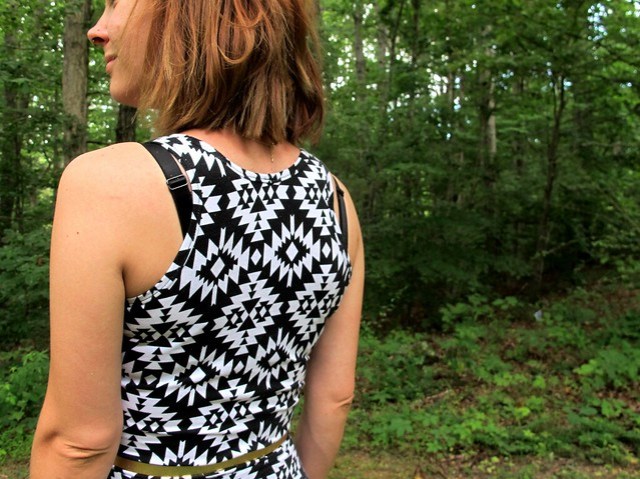
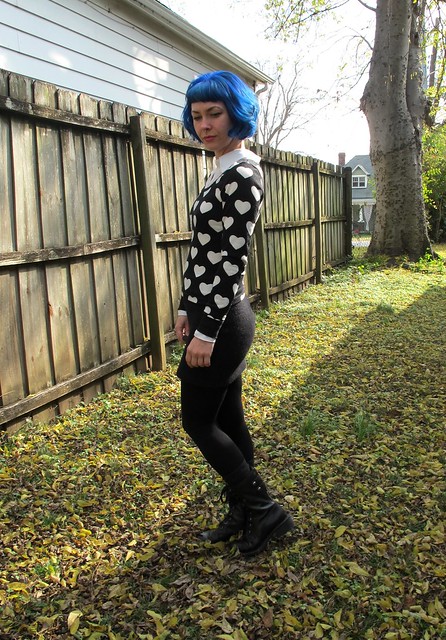
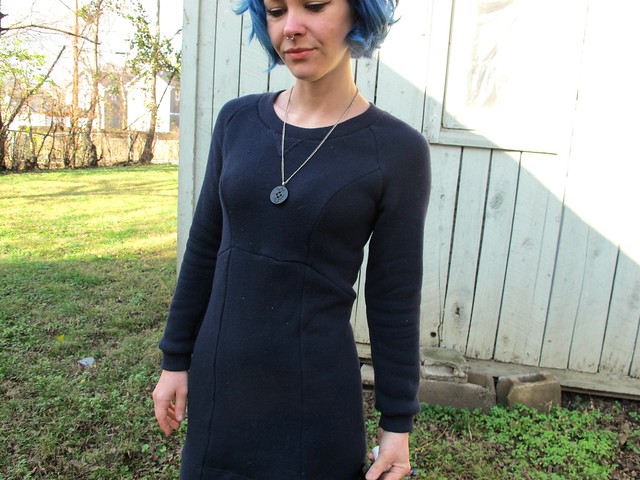
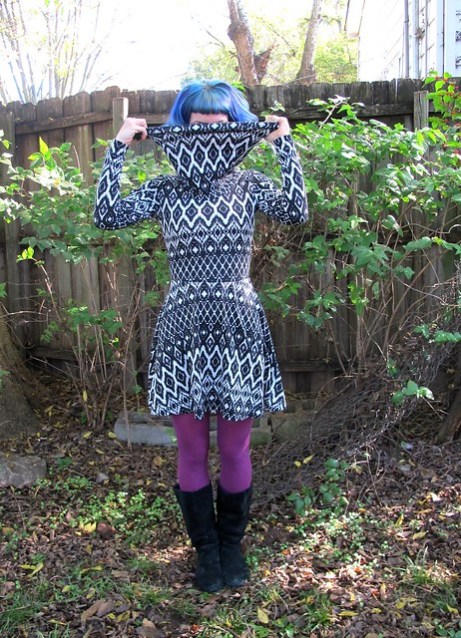
As I said, sewing this dress up was pretty easy. There’s a little bit of stay-stitching, a clever twist (sorry), and then your basic knit fabric sewing construction. The waist has a length of elastic sewn to it to keep the skirt from drooping over time, which is a feature I always appreciate in a knit dress. The neckline is finished with a self fabric facing, which gets topstitched down. I used a serger to sew most of the dress, except that facing part – the first time I tried that, it was too damn bulky! So I seam ripped it out and started over, using a regular sewing machine with a zigzag stitch to attach the pieces. This made for a much smoother and less bulky finish. Other than that, really straightforward for the most part. I added the little elastic runching to the sleeves (a hack option outlined in the book) and let the skirt hang for a couple of days before hemming, which I used my coverstitch to do. Oh, and I made a size 2 with no other fit adjustments (including length).

Merino Joni Dress

Merino Joni Dress

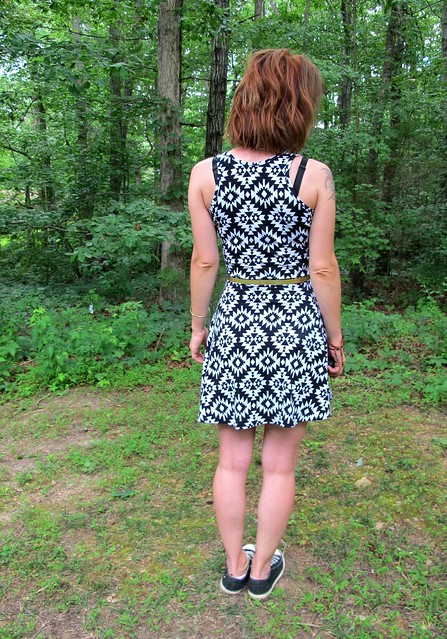
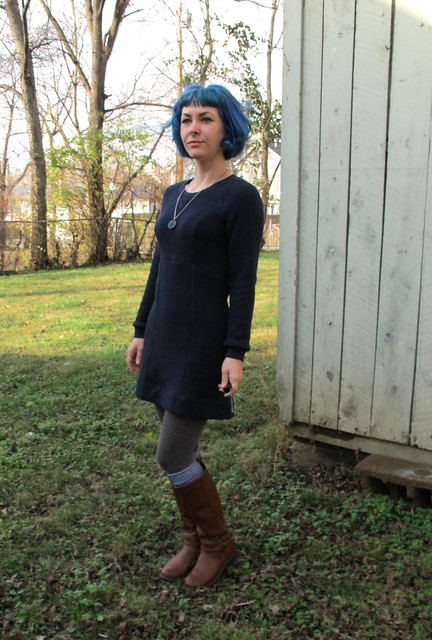
A little chat about the fabric now: wool, huh? Yeah baby THIS IS MERINO WOOL! Or, specifically, merino/bamboo jersey – and it is DREAMY. I found it on the Mood Fabrics website, which has delighted to me to no end. You may or may not know my love for merino – it’s been a hot minute since I had my hands on a piece to sew up. I love merino for it’s warmth and breathability, that it’s anti-microbial, and machine washable. It is my dream fabric and I’d probably use it for nearly every knit I make (at least in the winter), but unfortunately it can be a bit cost-prohibitive. The stuff I found at Mood Fabrics is still a little high at $30/yard, however, it’s here in the US so at least there are no international shipping fees to deal with (in the past, most of my merino came from New Zealand!). There’s not a huge color selection available on their website at the moment, but, y’all know I dress like a tragic goth in the winter so black is totally fine with me!

Merino Joni Dress

Merino Joni Dress

Merino Joni Dress

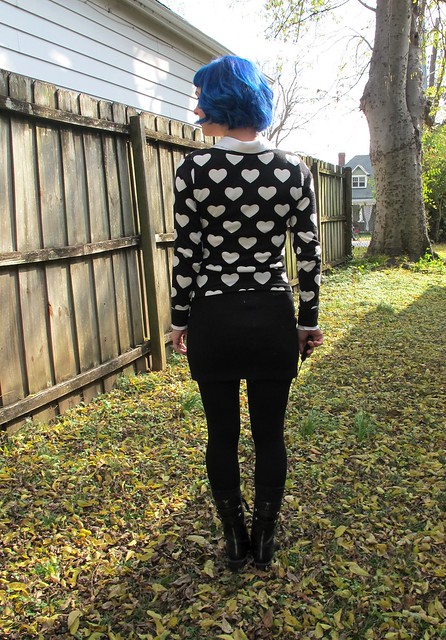
This merino is pretty lightweight, with a lovely drape and a nice soft hand. Mood’s website says that it is slightly translucent, but idk I’m wearing this with some pretty neon undergarments and you can’t see through shit – so take that as you will. It was very easy to work with – reasonably stable (as much as 4 way stretch jersey knits can be, anyway) and it did not curl when I cut it. I only had a chance to wear this dress twice before it got too hot, but I look forward to snuggling back up in it again when the weather allows! It is super comfortable and I think it looks pretty good!

Merino Joni Dress

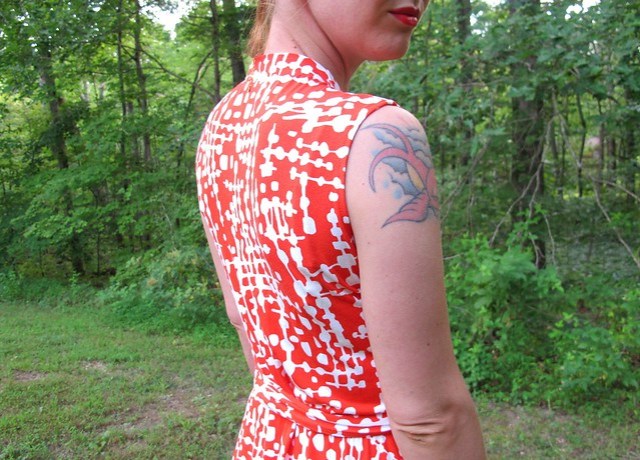
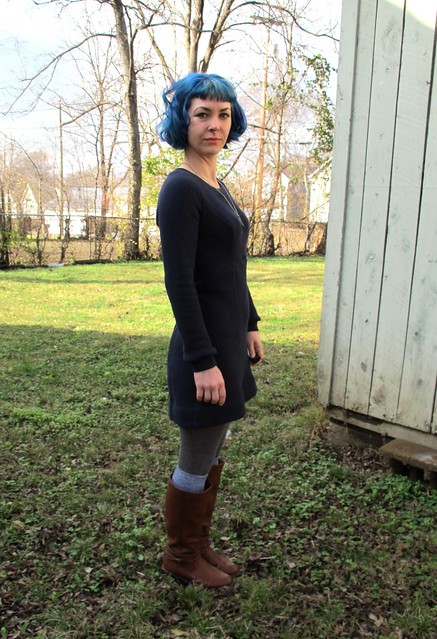
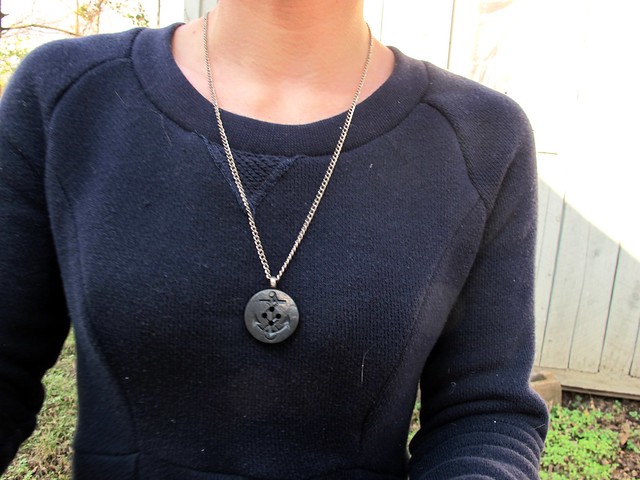
Here’s a terribly overblown photo so you can see a little more detail.

Merino Joni Dress

That’s all for this dress! I’ve love to have a summer version – maybe made up in a patterned (or striped!) knit – but I’m trying to be realistic about how many clothes I truly *need* in my closet. So we’ll see if that actually happens or not. And, as a side note – yes, I got bangs again! Felt tired of looking at my face and decided to change up my look 🙂

** Note: The fabric used in this post was provided to me by Mood Fabrics, in exchange for my participation in the Mood Sewing Network. As always, all opinions are my own!

Completed: The Summer DVF Wrap Dress

17 Aug

What? Did you think I was going to make it an entire year without busting out this pattern? Ha ha! Forget about it!

Vogue 1610 // DVF(No idea why I’m standing pigeon-toed in this photo, eh.)

ANYWAY. If you’ve been following my blog for a while now, you’ll know that I loveeeee me some knit wrap dress action. Specifically, some Diane Von Fürstenberg knit wrap dress action. I just think she makes the prettiest dresses and I can’t get enough of them (and by “them,” I mean “knock-offs”) in my closet! I have a few that I made last year – The Wearable Muslin, The Silk Jersey and The Chic Black Wool. And now, here’s #4: The Bold Graphic Print. Just in time for the last few weeks of summer! Vogue 1610 // DVF

I have an original copy of Vogue 1610, which is a (vintage) Vogue American Designer pattern (this one featuring Diane Von Fürstenberg, obviously). I found it – in my size, no less – at an estate sale for around $1 a few years ago. It’s a beautiful pattern that really lends itself well to all the hacking and modifying I’ve put it through. It’s certainly a bummer that Vogue won’t re-release this pattern for the modern sewist – and before you start pointing fingers, this has nothing to do with Vogue and everything to do with DVF not renewing the license. I’m pretty sure the McCall Pattern Company wants to re-release some DVF love just as much as you want to buy it (I mean, can you imagine how much $$ they’d make? Who can say no to that?), but it’s not really up to them to decide. Seems like the designer just doesn’t want her name on sewing patterns anymore 😦 DIANE, WHYYYY.

Anyway, back to my dress!

Vogue 1610 // DVFVogue 1610 // DVF

Taking a cue from the black wool version, I kept the original bodice from the pattern and changed out the skirt for a simple wrap skirt (specifically, I used Tilly’s Miette skirt and just made it so the wrap is in the front). I added 1″ to the overlap, so I’d have a little bit of fabric to fold back and topstitch. I like the gathered skirt that the pattern is drafted for, but I wanted this version to be a little more sleek. I originally planned this dress to include small cap sleeves – I was going to take them off my Lady Skater dress pattern – but when I tried the dress on sans sleeves, I really liked the way it looked so I kept it as-is.

Vogue 1610 // DVFI also kept a slightly longer skirt length (I know, I know… nothing about “practically knee-length” qualifies as “long,” but considering I’ve basically been exposing ass cheeks all summer, this is long for me), again, something I liked when I tried it on during construction. Vogue 1610 // DVF

Vogue 1610 // DVFI also tried something different with the front band. Normally, I sew it on like how you finish the neckline of a tshirt – stretching the band so that it fits snugly against the bust when worn. However, I lurked in on some actual DVF wrap dresses while I was in Harrod’s last year in London, and noticed that they finish their necklines a little differently. No knit bands to be found anywhere – most of them use a binding or a facing. I was keen to try this myself, so that’s what I did. I cut the band as usual and interfaced it with a lightweight knit fusible (so it has a little bit of structure, but it’s still quite stretchy). I finished one edge, sewed the facing to the outside of the garment, flipped it to the inside and understitched, and then topstitched 1″ away from the edge on the outside. I was 100% certain that I’d fucked up the dress beyond repair at that point – the back had some puckers and everything just looked kind of strange – but it all sorted itself out once I put it on and my body stretched it into shape. The addition of the interfacing gives the neckline a little bit of height, almost – especially around the neck itself. The facing is much smoother and sleeker than any band. And I can pull the dress apart a little and show some 1970s ~natural cleavage~ if I feel so inclined. Yeehaw! Vogue 1610 // DVF

Vogue 1610 // DVFNot really much else to report on construction – much of the same old, same old. I used my serger to construct, my Bernina (+ walking foot // ballpoint needle) to topstitch. For the arm holes, I just serged them and turned the hem under and topstitched with a straight stitch. So easy! I think I finished this whole thing in less than 3 hours. Vogue 1610 // DVF

Isn’t the fabric so good? When I saw it on Mood Fabrics recently, it immediately screamed WRAP DRESS and it knew it had to be mine. Sometimes, I find buying knit fabric online to be a bit of a gamble – you can’t really tell weight/hand/stretch recovery (not to mention color) from a photo and description, and occasionally I end up with stuff that wasn’t at all what I was expecting. This fabric definitely exceeded my expectations – it’s so beautiful! Very dense with a good stretch (and an awesome recovery; I wore this all day last week and it didn’t bag out at all), and the color is super saturated. It’s a little on the heavy side – but not bulky. It feels very fluid and luxurious. I wish all knits were like this. This stuff is awesome! Also, the color is “poppy” which I kept seeing as “poppy,” so, like, there’s that.

Vogue 1610 // DVFHere’s a shot of the inside. Super clean finish, yay! Vogue 1610 // DVFI think the color and style of this dress will be good for transitioning into the fall months here – where we want to pretend like it’s tall boot and wool hat weather, but it’s actually still 90+ degrees. Which means I can wear this and look cool, but still be cool. Also, I am not ready for summer to end just yet – I have a few more projects left to finish!

Note: The fabric for this dress was purchased with my allowance for the Mood Sewing Network. All comments on this blog post are just, like, my opinion, man.

Completed: The Mission/Skater Mash-up

10 Jul

Now HERE’S an obvious gap in my summer wardrobe that’s finally been filled! A knit tank dress!

Knit tank dress

I think we can all agree that wearing knit dresses is the ultimate in comfort/secret pajamas. Especially when it’s nasty hot outside!! I looove my knit dresses in every season, but most of them have sleeves and I don’t like wearing sleeves when it’s more than 95 degrees outside. No way.

Knit tank dress

Since I wasn’t seeing a pattern that fit the look I was going for (and I’ll be honest – I didn’t search very hard. I have a LOT of patterns in my stash and I’d rather mash ’em up whenever possible), I used 2 patterns from my stash to create this awesome mash-up Frankenpattern. Most of this pattern – the skirt, the bodice sizing and proportions – were taken from the Lady Skater dress pattern, which is my favorite knit dress pattern ever and is basically the gift that keeps on giving. For the neckline and arm hole finagling, I copied that straight from the Mission Maxi dress pattern. The result you see here is a fitted racerback tank top with a flared skirt attached to it. Which is exactly the look I was going for. Whew.

Knit tank dress

I am all about some Frankenpattern magic, and it’s 1000x easier when you’re working with a knit fabric. Much easier to tweak with the fit, and much more forgiving if you decide to forgo a muslin (like I did. Yay! Consider this my wearable muslin, ha). Plus, if you already have a garment that fits the way you like – in my case, the bodice of this skater dress is ACE – then it’s super easy to change up the neckline/sleeve options/skirt and have a totally different garment that still fits the way you like. I love buying new patterns, but I REALLY love knocking out projects that don’t require too much fit futzing. The only fitting I had to do with this dress was take a little bit out of the underarm side seam – maybe 1/4″ on each side. Since there aren’t sleeves there, the sides need to be a little more fitted so they don’t pooch out.

Knit tank dress

I guess the one downside to this is that you don’t have a set of instructions that are tailored to your garment – but that’s never been a problem for me, as I just kind of pick and choose what techniques to use from which pattern (or I ignore the instructions completely and forge my own method). Again, this dress is a knit, so it’s pretty straight forward. I stabilized the waistline with 1/4″ woven elastic, which keeps it from sagging over the course of the day (truth: these photos were taken on day #2 of wearing this dress. Pretty good recovery there, I’d say!). The neckline and arm holes are finished with the same method outlined in the Mission Maxi instructions – it’s similar to applying bias facing, but you’re not pressing that last 1/4″ under. Instead, you just finish the edge and topstitch it down. Here’s a photo of the guts so you can see –

Knit tank dress

Clear as mud, yeah? 🙂 It resembles a coverstitch, sort of. More like a binding and less like the knit bands that are used on the Lady Skater (and it feels a bit sturdier, which made me feel ok about not stabilizing the shoulder seams). Oh, and I did all my topstitching with a straight stitch/single needle (on my regular sewing machine). A twin needle or zigzag would be fine for this, but I like the way the single needle looks. Since this isn’t an area that gets a lot of stretch, it’s ok to use a stable stitch here. I also did the same with the hem – just sewn with a straight stitch. Again, as long as it doesn’t need to stretch, it’s fine to use a non-stretch stitch!

Knit tank dress

The cotton knit fabric is from Mood Fabrics in NYC, which I bought at the store while I was there in March. I wasn’t sure what I was going to make with it (honestly, I was probably thinking Lady Skater at the time), but I was prettttty happy to use it for this dress! I didn’t bother to match the print – it’s a casual dress, and meh – and I think it looks fine.

Knit tank dress

Here’s the back, again! I like the shape of this racerback because it’s a bit more covered than your standard beater tank. Of course, my bra straps still show – again, meh, whatever. I didn’t bother hiding them for this post, mostly because I don’t hide them in real life and I’m just tryin’ to kEeP iT rEaL~

noragrets

Knit tank dress

Conclusion: this dress was easy to make, is comfortable to wear, and SECRET PAJAMAS. Expect to see more of these as I churn them out.

LLadybird_175_175

One last thing! I wanted to direct your attention to my newest sponsor – Wawak Sewing! Unfamiliar with Wawak Sewing? They’re a giant sewing supply company – offering everything you need for your sewing studio, from Gutermann thread (Mara 100 is the jam – 1000+ yards for $2.50, oh yes oh yes) to invisible zippers (24″ for 88¢? Don’t mind if I do) to professional boiler irons (ok, that’s probably waaay too much iron for the average home seamstress, but we use these at the studio – as well as when I worked at Muna Couture – and they are seriously incredible) to hymo canvas (for tailoring! I always get my hymo/horsehair interfacing from here because the price is unreal). A lot of the items can be bought in bulk, and the price is pennies on the dollar for what you’d pay at a brick & mortar store (I’m not just talking about cheaper than Joann’s – some of this stuff is cheaper than places in the Garment District, but you get the same quality). Plus, shipping is less than $5 (and free if you buy more than $100 worth of stuff)! I highly recommend you get a free catalog because it’s really fun to flip through – like the Toys’R’Us catalog, except for grown-ups 🙂 They occasionally have sales and discounts, so it’s worth it to be on their mailing list! International peeps – you can also join this sewing party, but you’ll need to call or email to place your order (and I’m going to assume your shipping might be a little more than $5, ha).

I’ve been a loyal customer/rabid fan of Wawak Sewing for years – I started with them back when they were still Atlanta Thread Company – and I’ve had nothing but great experiences with both the service and the products. So I’m pretty thrilled to have them on board as a sponsor, as well as to join their affiliate program (sooo any purchase you make after clicking these links is gonna net me a small commission, fyi!). And you should be thrilled, too, because right now through 9/30/15, you can get 10% off your order of $50 or more at Wawak Sewing if you use the code WLB915. Can’t beat that with a stick! Thanks, Wawak Sewing! ♥


Completed: The Watson Bikini

11 May

I don’t know about where y’all are, but swimsuit season is BASICALLY upon us over here. Sure, they haven’t opened the pools – yet (that always happens on Memorial Day weekend, coincidentally right around my birthday as well. Pool parties every year for this kid!) – but it’s only a matter of time. Plus, I want to be ready when the water is warm – and not be scrambling to finish something the night before I hit the pool. Last-minute sewing is for people who work well under pressure. Which is not me.

Watson Bikini

So, anyway, I made a bikini! Yeah!!!

Watson Bikini

If this pattern looks familiar, it’s because I’ve made it before (not to mention it’s made some ROUNDS ’round the internet). It’s not a swimsuit pattern, per se – it’s actually a lingerie pattern. This here is the Watson Bra & Bikini pattern from Cloth Habit, modified into the swimsuit you see here. And yes, I realize that these pictures basically mean y’all are seeing me in lingerie. Whatever.

Watson Bikini

Watson Bikini

I have made this pattern before a couple of times (see one and two), so I knew I was good with the fit and I had strong feelings that this pattern would work equally well as swimwear with a few modifications. It was just a matter of finding a good swimwear lycra and figuring out how to stabilize that cradle in a way that wouldn’t deteriorate in chlorine and salt water.

Watson Bikini

Watson Bikini

Since I’ve gone into detail about the making of this pattern before, I won’t talk too much about the sizing or construction outside of making it into swimwear. I sewed my regular size – the 30D – and the fit was good except a did have a bit of gaping right between the side of the cup and the underarm. I think it has more to do with my elastic application – it might not have been stretched enough – but it was on both sides so I dunno. It may have been due to the stretch of my fabric, but the rest of the top fits great and the 4 way stretch is similar to the millskin I used for my first Watson. Anyway, I fixed it by taking in a dart and topstitching it down (at this point, the swimsuit was complete so there was nooo way I was unpicking all that shit haha). Not the most elegant solution, but the print is super busy so you can’t really see it, plus it’s right at my armpit. If anyone is looking and notices that shit, we’ve got bigger problems on our hands.

Other than that, the fit was good! I add a little bit of extra to the bottoms – about 1/2″ extended out from the back for more butt coverage, and about 1/2″ extended at the top to make them slightly higher. They’re still a little cheeky, but I think it’s pretty cute 🙂

Watson Bikini

Like I said, there were a couple of things that needed to be addressed in order to convert this into proper swimwear. For one, I knew it needed lining (maybe you wear unlined swimsuits, but I don’t!). I cut an extra of every piece out of swimsuit lining, and was able to origami it so that there aren’t any raw edges, except where the cups meet the band. Couldn’t figure that one out, so I just serged the seam. I also needed to change out aaaall that elastic to be swimsuit elastic- the picot and lace edges elastics that you use in lingerie are beautiful, but they aren’t made to hold up to salt water and chlorine (not to mention, they totally make that shit look like a bra). This was easy – I used braided swimsuit elastic and attached it opposite of how you attach lingerie elastic. Meaning, you sew the first swipe on the inside of the garment (I used my serger, but you can zigzag this), and then fold it one more time and zigzag topstitch. I did this everywhere except at the top of the cups, where I sewed it as you normally would for a bra (hadn’t thought that far ahead, whoops).

Watson Bikini

Watson Bikini

Watson Bikini

The strapping at the back band also totally stumped me for about a month. In the pattern, the top of the back band is finished with strapping that extends to go over your shoulders. It’s beautiful, but it’s not really good for swimwear (again, can’t stand up to the elements/chemicals, and – again, looks like lingerie). Of course, you can just finish the top edge with elastic the same way you finish all the other edges – but I liked the look of the strapping, plus, I have a feeling it’s sewn that way to help with the fit. After a bit of thought, I decided to do elastic covered straps and apply them the same way that the strapping is done on a regular bra. I used Ada Spragg’s tutorial on making elastic swimsuit straps (GIRL THANK YOU SO MUCH FOR THIS SHIT), and they turned out pretty nice! I left off the adjustable sliders since the elastic was so thick, but I did keep the little O-rings at the top.

The only downside is that I wasn’t quite precise with my seam allowances, so one strap has a tendency to twist (I’m pretty sure that’s from the elastic inside trying to roll up). It’s annoying, but not enough to make me unpick and start over. We’ll see how I feel after I get back from the beach 😛

Watson Bikini

Watson Bikini

Another thing that needed to be addressed was changing out the hook and eye for something that looks, you know, not like a bra. I used a swimsuit hook and eye – I know it doesn’t match, but it’s all I had on hand and anyway, you can’t really see it when it’s on – and just adjusted the back to fit the hook. I did this after the swimsuit was assembled, but before I attached the straps. There’s a tutorial on how to do this over at Cloth Habit, it’s for a bra, but same concept. For the opposite side, I just folded over the edge and sewed it down to make a tunnel for the hook to go through. Easy!

Watson Bikini

Finally, I had to figure out a way to stabilize the cradle while still making this thing hold up in water. For most lingerie patterns, this might not be a problem – but with this particular pattern, the cradle (the part of the band that attaches to the cups) needs to be stabilized so it does not stretch. The pattern has you use lightweight tricot, but I wasn’t sure if that would deteriorate over time. Instead, I cut two pieces of heavy powermesh running in opposite directions, and stacked them on top of each other with the swimsuit lycra on top and the lining on the bottom. Powermesh is water-friendly (well, so I’ve been told!) and it does a pretty good job of keeping everything stable.

Watson Bikini

The rest of the bikini was as straightforward as making lingerie. All pieces are cut from swimsuit lyrcra and swimsuit lining (other than the powermesh to stablize the cradle), and I included lots of zigzag topstitching to give it a sporty look.

In case you were wondering, my swimsuit lycra is from Spandex House in NYC. I bought it while I was in the Garment District in March. My lining is also from Spandex House, and the elastics I used are from Joann’s. I think the bra rings came off an old bra, and I don’t remember where the swimsuit hook is from. Other than using the serger to attach the elastic, I sewed everything on my sewing machine. Even with me stopping and researching and scratching my head, this shit only took a couple of hours to make. And just like that – I’m ready for the beach! Yay!

Oh, and how ’bout that AWESOME necklace I’m wearing?? I can’t take credit for choosing that – its from Rocksbox, which is a new online service where you rent 3 pieces of jewelry every month, chosen for you by a stylist. You can swap out the jewelry as much as you like during the month, and any pieces you buy are discounted. I’ve been trying it for about a month and it’s really fun – and definitely got me wearing jewelry that I otherwise neverrrr would have picked up. I was given a couple of months free by the company to try it out, but I’m seriously thinking of maintaining the account afterwards because I like this shit waaaay more than I thought I would! It’s only $19 a month, the shipping is free both ways, and I’ve received (and bought :I) some really cool pieces! So there’s that. Anyway, bringing this up now because you can use the code lladybirdxoxo and try your first month of Rocksbox for freeeeee. Who doesn’t like free, amirite? Also, SHINY.

Watson Bikini

Can’t wait to try this bad boy out in the water when we go to the beach in a couple of weeks! Also bonus for having a suit that no one else will be wearing (I used to buy aaaall my suits at Target. Do you know how many Target swimsuits run up and down Santa Rosa Beach? Do you know how many of those said swimsuits look better on the other person than they do on me? The shame.). I have tons more of this lycra – the minimum cut was 1 yard and you really only need like 1/4 yard to make a bikini – so I’m already trying to justify having a fleet of geometric swimsuits. We’ll see!

Completed: Some Tshirts, + thoughts on Me-Made-May

5 May

Good morning & happy May, everyone! Today we are gonna talk about my tshirts! I briefly touched over this pattern in my last post (and also when I made this ~heart-on~ sweater), but I’ve done some more tweaking to my pattern so I thought I would share some updates.

My first renditions were pretty awesome as far as the fit of the body was concerned, but were quite lacking in the neckline department. I love a deep scoop neck, but something about that neckline was practically square and it just drove me way crazier than it should have. I ended up retracing my pattern and substituting the Briar neckline and binding, which I think makes for a much more flattering scoop neck. I also lengthened the body just a bit more and copied the hem off the Ensis Tee because I really loved that subtle curve.

Just to be clear – I did not do ANY drafting with this pattern. I’m not a pattern drafter; I’m a copier and a tracer and I loves me a good Frankenpattern. I copied the body and cap sleeves from the Lady Skater. Obviously this pattern is just for my personal use, but it’s pretty easy to hack out your own if you’ve got patterns on hand with elements that you like and want to mash up into one pattern 🙂

Soooo anyway, here are my finished tees as of these latest adjustments. I used a few different types of fabrics, so they’re all slightly different looking and feeling (probably not so much in the pictures, but definitely so much in real life).

IMG_1499

THE PINK LADY: This is the first one I made – I used some fabric in my stash that I only sort of cared about (cared enough to wear if it worked out, cared little enough to not cry if it didn’t) to make sure my adjustments all translated into something cohesive at the end. I bought this fabric at Textile Discount Outlet when I was in Chicago like… 2 years ago. Eep. It’s a soft poly knit that was pretty inexpensive but has held up surprisingly well and resisted pilling. I actually bought enough to make a maxi dress – I 100% blame this on the girl who was cutting it, because she told me she would make a maxi with it and then that’s all I could see for the rest of the day – and then I cut said maxi dress and SOMEHOW LOST THE BACK PIECE. I honestly have noooo idea where that piece went. I literally crawled around on the floor of my sewing room like a dog in search of it. It disappeared into the Bermuda Triangle or something, idk. I’ve even purged my sewing room and moved since them, and still can’t find that damn back piece. No idea, y’all. No idea.

Also – green hair & different background! How old is this picture?! Ha! Before you get all up in arms about how bad my hair looks – I know it looks bad. This was during the very end of my green, when I was intentionally fading it so it would be easier to color correct at the salon.

Some flat shots:

IMG_1475

IMG_1478

IMG_1474

To make these, I just whip them through my serger and use this method to apply the neck binding. The hem and sleeves are finished with a twin needle. Super easy!

IMG_0008

IMG_0009

IMG_0013

IMG_0012

THE WALDO: To be honest, this particular tshirt is 100% the reason why I was hacking around with this pattern so much. The fabric is an amazing rayon/spandex that I bought/splurged on at Cloth House during my big shopping day with Tilly (don’t ask me which Cloth House; we went to both but I can’t remember which one ended up taking my money haha). It was pretty pricy – I think around £18 per meter – but I only needed a small amount to make a tshirt, so I justified it. Also, it came in an adorable little bag that made me feel like I was carrying around a present, so that was nice haha. It’s a thin knit, but it’s not sheer. The added spandex gives the fabric a bit of heft, so it kind of sucks in and holds up and doesn’t really drape. It also holds it’s shape REALLY well. I wish I had more of this fabric in every color of the rainbow, it’s incredible.

ANYWAY, I have a similarly-striped vintage Henley that has 3/4 sleeves (well, long sleeves… but it’s child-sized, so 3/4 sleeves on me, ha) that I love wearing, but it’s falling apart so I’ve been looking for a replacement ever since. This is not an exact replacement – lack of Henley buttons and short sleeves and all that – but it’s a bit more appropriate for the climate I live in, as I can wear short sleeves almost year round. Awesome.

IMG_0016

IMG_0019

THE BLAQUE: I’ve been lacking a simple black tshirt (and white, for that matter) for a looong time, so obviously that was the next wardrobe filler to make. This fabric is from Metro Textile, and I bought it back in March. It’s another rayon/spandex, similar to the Cloth House fabric, but a little lesser quality (that’s not to say it’s bad quality – but nothing can compare to that striped dream above. Nothing.). It has the same sucking-in and holding-it’s-shape qualities as the striped rayon, but it has a little bit of a drape. The fact that it doesn’t bag out over the course of the day means that this one will get a lot of wear. Hate having clothing that grows 3 sizes by the end of the day.

Also, um, sorry bout the deo stain by the hem. Whoops. At least you know my pits smell fresh.

IMG_0031

IMG_0020

THE WHITE W(H)INE: My least favorite of the bunch, if only because of fabric choice. It’s funny how you can make the same freaking pattern and still have each finished garment look different depending on the fabric you used. This fabric was also from Metro Textiles, and it’s also a rayon, but it’s lacking that sweet, sweet spandex. As a result, the fabric is very lightweight, borderline sheer, and drapes like a dream. It also meant that the shirt was a bit too big, especially around the bicep. I tried it on before hemming and sucked in the side seams about 1/2″ on each side and took about 1″ off the sleeve circumference. It’s still a little loose – and the lack of elasticness in the fabric means this will grow over the course of the day – but I think it looks all right. Next time, though, I’m sticking with knits that have some spandex.

Couple of other things – my shorts are linen Thurlows from a couple of years ago. They’re a little big in the legs, but the looseness is ok for now because that is a pretty fresh tattoo you’re seeing on my thigh. No close-ups because it’s in the gross peeling stage right now, but here’s a shot taken immediately after it was finished.

So anyway, going back to the title of this post – Me-Made-May has just started, and my Instagram feed is delightfully full of endless selfies featuring handmades. To those of y’all who are unfamiliar with MMM, it’s a month-long challenge to get you wearing your handmades and figuring out wardrobe gaps (check out the link; Zo does a much better job of explaining it than I do). I have participated for a few years now – 2012, 2013 and 2014 – and I always enjoy it, except for the whole daily photo part 😛 This year, though, I have decided to opt-out.

For one, I make everything I wear now. I own very little RTW, and none of it is new – it’s just stuff that managed to survive several closet purges. Wearing handmade is something that I do daily, from my pajamas to my jeans to my tshirts to even my freaking underwear. It seems a bit silly and redundant to spend a month documenting it at this point. There’s nothing novel about it for me, it’s just my daily life. Also, I HATE taking daily photos. Gets old after about 3 days.

The bigger reason why I’m choosing to opt out is because my participation has given me this weird complex about repeating outfits. I don’t know why! Outfit repeats used to be a big part of my style (I like it and I latch onto it, ain’t no shame in that) – but something about spending a month documenting your wardrobe and trying to intentionally wear different outfits every day really started to make me feel like I *needed* to always have something fresh and new. That’s not really a sustainable way of dressing – and having a giant closet of things I only sorta like is surprisingly stressful. I went down a weird rabbit hole of not ever wearing my favorite pieces, because I wanted to “save” them for… something. Which is REALLY stupid! I wear (and make!) clothes because I like them and I feel good in them. If I want to wear the same dress three times in one week, I should just do it. If anyone notices that I’m wearing the same dress 3x in one week, then that’s their problem, not mine. Unless I smell, which in that case someone should definitely say something.

While I love and appreciate what Me-Made-May stands for and how it helps people get out of clothing ruts and determine wardrobe holes, it’s just not working for me. So I won’t be participating this year, and y’all can all breathe a collective sigh of relief that you don’t get blasted with 31 extra photos of my mug this month 🙂

IMG_0022

On that note – how’s your Me-Made-May going? Are you participating? Have you opted out? Are you enjoying the daily updates of outfits as much as I am?

Completed: A Cardigan, a Skirt, and a Tshirt!

30 Apr

Woohoo y’all get a damn TRIFECTA of garments for today’s post! Lucky you!

Striped Cabernet Cardigan + Yellow Hollyburn

For my monthly Mood Sewing Network post, this month I wanted to focus on that amazing striped sweater knit that you’re probably staring at (you should be staring at it, it’s fucking awesome). But I felt really boring just making *a* sweater (a sweater that took maybe 2 hours, tops, to complete), so I overcompensated and made my entire outfit. Yay!

Striped Cabernet Cardigan + Yellow Hollyburn

We’ll start with the cardigan because it truly is the star of this outfit. It’s another SBCC Cabernet cardigan, this time with my minor adjustments made to the flat pattern (you can see my leopard Cabernet cardigan here, btw!). Since I’ve already made the pattern once, there’s not really anything new to report in terms of construction.

Striped Cabernet Cardigan + Yellow Hollyburn

Striped Cabernet Cardigan + Yellow Hollyburn

I bought the navy and white striped fabric while I was at the Mood Fabrics flagship store in NYC in March. I got soooo much good stuff while I was there, but this particular piece really takes the cake. I swear, if the bolt hadn’t been so heavy, it probably would have jumped off the shelf and fallen directly into my arms. We were like star-crossed lovers when we caught sight of one another.

ANYWAY, gushing aside – what we have here is a cotton double knit that works and feels like the perfect sweater knit. It’s wonderfully thick and squishy, and while it does drape a little bit, it also hold it’s shape quite well. It was really the perfect fabric for this pattern, as it responds really nicely to pressing and topstitching. I was careful in my cutting to not only match up the stripes at the side seams, but also the stripes blending into the sleeve cuffs and hem bands. The neckband is actually the same striped fabric – I just positioned the pattern piece so that the widest navy stripe was the only thing that showed when it’s folded in half. I knew I wanted a solid color at that neckband, but I didn’t want to try to color match, because nope.

Striped Cabernet Cardigan + Yellow Hollyburn

Because the striped knit is so thick, it was a bit of a beast to manhandle. Cutting it was painful (I REALLY need to get my scissors sharpened, dammit!) and the sewn seams were lumpy and wavy before I pressed them. It’s super important to press if you’re dealing with a fabric like this – the flatness is what makes the finished piece look so polished. Topstitching down the seam allowances also helped. As with my last cardigan, I used the straight stitch on my machine and a walking foot. The rest of the seams are serged.

Striped Cabernet Cardigan + Yellow Hollyburn

The skirt is another one of my beloved Hollyburn skirts. I cannot stress this enough, but I LOOVE this pattern. SO MUCH. As soon as I finished the denim polka dot Hollyburn, I started lurking hard for a yellow twill to make another one. I really love this neon delight of a yellow, but it’s hellish looking against my skin – so obviously, the next best thing is a skirt.

I found the fabric also while I was in NYC, also at the Mood Fabrics flagship store (sorryyyyy not sorry). I actually spent a good deal of time looking for this one – I knew I wanted yellow twill, but the stuff in the twill section wasn’t quite up to snuff. Too pale, too lightweight, too much of something. This particular fabric was actually located in the denim section – I imagine there is someone, somewhere, who has made an amazing pair of jeans with this fabric.

Striped Cabernet Cardigan + Yellow Hollyburn

This is a stretch cotton twill with lots of lycra in the content, giving it a super heavy stretch. Even though it’s on the lighter side (heavy enough to be considered a bottomweight, however), it has plenty of body that gives this skirt a great structure. The only downside to all that lycra is that it made the fabric really hard to get a good press. I ended up topstitching all the seams to keep them flat, about 1/4″ distance (as opposed to my usual 1/8″). The wider topstitching paired with this fabric really gives it a nice denim-y look, which I like. I thought about topstitching around the pocket bags to give those definition too, and “thought,” I mean I tried it and it looked absolutely terrible so I ripped it out. Don’t do that.

Striped Cabernet Cardigan + Yellow Hollyburn

The back closes with a simple lapped zipper, and all the inside seams are serged. Basic stuff!

Striped Cabernet Cardigan + Yellow Hollyburn

Finally, the most basic of the basics – my tshirt!

Striped Cabernet Cardigan + Yellow Hollyburn

This is SUCH a simple tshirt that it hardly bears a mention, however, we’re here and it’s here so let’s just roll with it. The fabric is this sheer white slubbed rayon jersey, which was WAY more sheer than I was expecting but it’s sort of awesome. It’s suuuuper soft, drapey, and the texture of the fabric makes it a tiny bit more interesting than your average plain white tshirt. I used my always-tweaking-almost-done-tweaking Frankenpattern’d tshirt to make this. The neckline is bound using Megan Nielsen’s bound neckline method, which is hands-down my FAVORITE way to finish a neckline on a slinky knit like this. It just looks really really good, and it’s nice and sturdy. I love the traditional method, of course, but some of the more drapey fabrics don’t do so hot with that method because you have to REALLY stretch them to keep them from being floppy, which ends up with a tight neckline that’s practically gathered.

Speaking of slinky knits, binding that neckline was about the only easy part of sewing this tshirt. Talk about the slinkiest knit ever! It was worth it, though, because I can always use more white tshirts. Even if they are see-through. And yes, the pocket is totally in the wrong place and I’m totally not picking it off because I don’t think the fabric can survive that kind of trama.

Detail shots:

Striped Cabernet Cardigan + Yellow Hollyburn

Striped Cabernet Cardigan + Yellow Hollyburn

Striped Cabernet Cardigan + Yellow Hollyburn

Striped Cabernet Cardigan + Yellow Hollyburn

Striped Cabernet Cardigan + Yellow Hollyburn

Striped Cabernet Cardigan + Yellow Hollyburn

Striped Cabernet Cardigan + Yellow Hollyburn

Striped Cabernet Cardigan + Yellow Hollyburn

(that’s a Sewn with Mood Fabrics tag, by the way! 🙂 )

Striped Cabernet Cardigan + Yellow Hollyburn

Striped Cabernet Cardigan + Yellow Hollyburn

PHEW.

Ok, one more picture:

Striped Cabernet Cardigan + Yellow Hollyburn

Only including this one because I look like I’m about to eat whatever is in my line of vision haha.

** Note: All fabrics for this project were provided to me in exchange for a review post as per my involvement with the Mood Sewing Network.

Completed: Leopard Cabernet Cardigan

13 Apr

Good morning, everyone! Lots of changes happening in my world over the past couple of weeks – as you know, we moved out to the country, about 20 miles west of Nashville in beautiful Kingston Springs, TN. Our house sits on a 5 acre plot of land surrounded by woods, and wow, spring is gorgeous here! The leaves are finally starting to poke out – I can’t wait until all the trees are green! As I mentioned before, my best friend bought the house, and Landon and I are occupying the lower level apartment. We are still settling in, but making good progress. I promise I will share sewing room photos as soon as the space is ready. It’s still a work in progress – for one, I need to finish painting (I mean, Landon needs to help me finish painting because I am SO OVER painting by myself!), and I need to get some rugs because the floors are coooold. So it’s not quite ready for it’s ~big reveal~, but it is totally usable for makin’ shit! Which is what I’ve been doing since the second the space was finally unpacked. And here is evidence of my first completed garment in the new place! It’s not anything fancy, but it fills a fabulous gap in my wardrobe 😉

SBCC Cabernet Cardigan

Oh, right, that’s the other big change – I changed my hair color back to something a bit more normal! 🙂 My stylist and I have been talking about this for a few months – even before I went to London in November, we were planning. I was starting to get really sick of doing the upkeep myself – redying the roots, dealing with fading, hair color rubbing off on everything, etc etc – and I knew I wanted my hair to look relatively normal for when we go to Peru in June. I actually had all this done the day before we moved at the end of March. It took about 7 hours (woof) and we’re still not done – there’s a little bit of green showing through in certain spots. I need to go back later this week and get another fill or whatever, but my scalp was just done. I gotta say – I’m REALLY happy with how the color turned out! My stylist is seriously a hair magician. And while I’m not delusional enough to think that my hair is 100% undamaged as a result, it’s still in pretty outstanding condition, considering what we put it through. Eventually, I’d like to lighten everything up to a brighter, more coppery red (still natural, but less brown), as well as let her do some fun stuff with highlights. But that’s all in due time! For now, I’m loving this red-brown 🙂

Ok, back to sewing stuff!

SBCC Cabernet Cardigan

This leopard beauty is the Cabernet Cardigan from Skinny Bitch, Curvy Chic patterns. I was REALLY excited when this shit was released because I love wearing v-neck cardigans. I really like the way they look both buttoned and unbuttoned – which is the one minor complaint I have about my Jenna cardis – the crew neck just feels like it looks really weird when it’s unbuttoned, at least on me. Also, this pattern very closely mimics the poor v-neck cardigan I ripped up to use as a pattern (which was totally in vain, because that shit DID NOT WORK. But I guess it’s ok bc the cardigan in question was destined for the scrap heap anyway, since it was holey-er than, like, the Pope at that point), so yay! V neck cardis all day, erryday!

SBCC Cabernet Cardigan

See? Looks totally legit unbuttoned. Also, I promise I’m wearing a shirt under the cardigan – it’s just a white v-neck, and the sun was VERY bright that morning. So I look nakey, but honestly, I’m not that exciting of a person.

You can’t see much of the details of this piece due to the (admittedly fabulous) fabric that I used, but it has some nice and simple finishing. The sleeves and hem are finished with a wide band (same with the Jenna cardi) and the neckline also has a folded-over band. The difference between this cardigan and the Jenna is in the neck band – on the Cabernet, it’s one long piece that is interfaced only where the buttons/button holes go, and stretched just at the back of the neck. It’s also a wider band than the one on the Jenna, which means the button holes were a helluva lot easier to get in there without fucking them up.

SBCC Cabernet Cardigan

This cardigan also features the cutest little teensy pockets! Yay pockets!

SBCC Cabernet Cardigan

SBCC Cabernet Cardigan

Not a lot of changes went into the sizing of this pattern. SBCC drafts for petite proportions, so the length of both the body and the sleeves are pretty spot-on for me. I cut the size XXS, based on the pattern suggestion, but ended up taking about 1/2″ out of each side seam because I felt that even the slim version was still a bit boxy on me. This was totally a hack alteration – I’d already finished the cardigan at that point (and Instagrammed it, so you know that shit’s forreal), and rather than pull off the bottom band and do things properly… I just nipped in the sides with my serger and continued the seam down to the bottom of the band. Better to have a slightly subpar finish than a cardigan that I never wear, right?

SBCC Cabernet Cardigan

Since this was my first rodeo with the pattern, I followed the instructions as written. I topstitched everything with a straight stitch, as recommended – I was afraid it would look kind of homemade and tacky, but I think it actually looks really nice! Since the cardigan is an easy fit that doesn’t reply on much stretch (unlike, say, a tshirt), I don’t have to worry about the stitches popping. Everything else was finished on my serger, and I used regular lightweight fusible woven interfacing for the neckband. All in all, I think this took maybe 2 hours to sew, start to finish. It’s a quick little make and it’s already getting very regular rotation in my wardrobe.

Also, speaking of instructions – the booklet that comes with the pattern is super cute! (well, the printed version, which I’m totally glad I sprang for the couple of extra dollars because yay for not having to print and tape PDF patterns!) It’s about the same size as a standard piece of paper, and the pages are stitched together along one edge. The illustrations are large and very clear, and the instructions are very much direct and to the point. There are no cutting layouts included, and not a lot of hand-holding involved (i.e., no beginning section telling you how to work with knit fabrics, for example. Kind of refreshing, honestly! I think there’s enough of that out there as it is, ha). So if you’re a super beginner and want to try this pattern, but need some help with sewing knits – definitely research beforehand. It’s an easy pattern, though, and I think it’s totally doable for the beginner knit-sewer.

SBCC Cabernet Cardigan

SBCC Cabernet Cardigan

The super fabulous leopard print ponte was one of my scores from when I was in NYC last month. It was one of the very few things I had specifically on my list to pick up – leopard print ponte, yellow stretch twill, and stone washed stretch denim, to be precise (sadly, I did not find the stonewashed stretch denim. Everything available right now is dark indigo or black – wtf? Do y’all seriously not want me 90s-mom’ing it up or something?). I actually met up with Renee during my first shopping expenditure that weekend (who is just as awesome in real life as she is on her blog – maybe even more so, actually, because she came bearing a selfie stick), and while we were in Metro Textile, I asked Kashi for leopard print ponte and everyone laughed at me for being way too specific. Well, joke’s on all y’all because I found my damn ponte the next day – in Mood Fabrics, no less! (although I did get some amazing shit from Kashi. Just wait for it.). This ponte in particular is a bit more lightweight than usual, which is nice for this warmer weather. It’s stretchy, but it’s really easy to work with. My scissors did not particularly enjoy trying to cut through all the thickness, but I’m pretty sure it’s because they desperately need sharpening.

I also realize and completely acknowledge that this v-necked leopard print cardigan kiiiind of makes me look like one of those Ladies Who Lunch, but I’m totally ok with that. I like eating lunch with my lady friends.

SBCC Cabernet Cardigan

So yeah! So much newness up here today – new cardigan, new hair, new background in mah photos. I am LOVINGGGG these woods; it’s so quiet and serene out here, and you can actually see the stars at night. And we’re still a relatively short drive from Nashville, which is nice for when I need my hot chicken fix 😛

One last thing – the Sewing for Fashion Designers giveaway winner!

winner1

Congratulations, Vickie C! I will be in touch to get that book mailed out to you ASAP 🙂 The rest of y’all – as always, the book can be pre-ordered on Laurence King’s website and Amazon 🙂 Thanks for your support, y’all are the best!

Completed: My Perfect Tshirt

18 Dec

One neverending sewing quest of mine (that is admittedly quite stupid, to be honest) is the lifelong search of my perfect tshirt fit. Nice and fitted with good scoop neck – you’d think this would be easy to find, but nooo. I haven’t really found a tshirt pattern that was 100% exactly what I wanted, through and through. There have been plenty of “almosts” – you know the kind, you wear them around for a day, perform a little machine surgery in the evening, and after a couple of tweaks, they’re pretty spot-on. Those are nice. Sometimes, though, you want it to be right the first time. And therein lies my problem.

Heart Sweater

I do love the Renfrew pattern. Loooove it! It’s a really really good beginner tshirt pattern, and I love all the options it comes with. My only complaints are that it’s a bit too loose for my tastes (I think you guys have figured out by now that I prefer my clothing to be painted on), and I feel like the scoop neck sits a little too high. As far as super basic tshirt patterns go – that’s about the only option I’ve tried. Other patterns (Plantain, Briar, SJ, Coco, Bronte, etc etc) are lovely, but they’re a bit more specialized than what I’m going for (aka, PLAIN. Plain tshirt!). Nettie was real close, but it’s just a smidge too tight (I mean, that makes sense – it’s a bodysuit ffs) and I couldn’t get the shoulders and back to work with my body, no matter how much I tweaked them.

The really stupid part about this is that once I started my ~Tshirt quest~, it got harder and harder (or I got pickier and pickier). I admit, I even tried some RTW shirts to see if maybe I should just suck it up and buy them from now on – but those are even worse, not to mention most of them require some kind of tweaking (taking in the side seams, cutting off length, shoulder seams in the wrong spot, *something*). Which, I’m sorry, but I’m not going to pay $30 for a fucking tshirt that I have to then ALTER. That’s just dumb. So I kept looking for a pattern, kept not finding exactly what I wanted.

Heart Sweater

Soooo I *made* my own pattern. Before you get too excited – I didn’t draft this thing (I don’t want to say I’ll never draft a pattern ever, because I know things change – but, right now, I don’t ever want to draft patterns. Nope.). It’s a Frankenpattern that combines my favorite elements of my favorite patterns, and is now my favorite tshirt pattern. Yay for Frankenpatterns!

To make this baby up, I started with the Lady Skater bodice, because I really love the way it fits. I then compared the neckline to the one on the Nettie bodysuit, because, seriously, Nettie has the best neckline options. This resulted in me scooping the front neckline of the traced pattern just a bit more, to get that nice deep scoop (the kind of scoop that would show cleavage, if I still had cleavage to show off. Wah, I miss my boobs!). I kept the back neckline high, like a normal tshirt. I measured the length of the Lady Skater against the length of the Renfrew and some of my favorite finished tshirts, then adjusted accordingly (if you’re curious – I added the length via relatively straight line, aka, did not flare out into an hourglass shape. I don’t wear my shirt hems around my hips, so having the extra room there just looks silly. A straight cut looks better on me). Finally, I traced off the sleeves and bindings for the Lady Skater – this isn’t completely necessary, but I’ve learned that when I steal my pattern pieces from the envelope, sometimes they don’t make it back. It’s easier to just give the Frankenpattern it’s own pieces so I don’t end up digging and hunting later down the line, you know?

Heart Sweater

Heart Sweater

I think the resulting shirt is pretty close to being perfect for me! I probably need to redraw that neck curve – it looks a little square – and maybe add one more inch of length. The length here is fine-ish; I hemmed it that long so it would work with the skirt I’m wearing. But I sort of hate how it looks with pants. Or maybe I should just make higher-waisted pants? That would totally be easier, right?

Heart Sweater

Isn’t this fabric so fun? It reminds me of some of the ridiculous shit I wore in my early 20s – lots of cutesy patterns, hoodies, and hearts (I used to buy a lot of my clothes on the sales rack after Valentines Day and/or Halloween, because those are the best prints haha). I found it on the remnants rack at one of my local fabric shops, Textile Fabrics. There was a yard and a half waiting for me, and the price was something crazy good (I think it was around $11? Yay for the remnant rack! Too bad the normal prices at Textile aren’t that awesome 😛 haha). It’s acrylic, which is kind of lame and not at all warm (and honestly doesn’t wear toooo well – it’s already starting to pill a little), but at least I can throw it in the washing machine and not worry about wool shrinkage! It’s also fine for layering, as evidenced by my silk georgette button up underneath.

Oh yeah, I should add – if this outfit looks eerily similar, that’s because I took these photos on the same day I took the photos for my last blog post. HAHA. Whatever, my hair looked good that day and I had to take advantage of that.

Heart Sweater

Heart Sweater

Here it is without the under layer. I used a black rib knit for the neckband and cuffs (originally from Mood Fabrics, but it appears to be sold out on their website now), and assembled everything on my serger. The hem is finished with a twin needle. That’s it! Pretty sure this whole thing from start to finish – once I made the pattern, that is – took less than an hour to make.

Heart Sweater

Anyway, it’s nice to have a go-to pattern now that I know I can whip up and not have to fiddle with fitting! I think this particular pattern could use a couple more small tweaks, but it’s definitely on it’s way 🙂 I’ve already made a few lightweight undershirts with it, and those are great in this cold because they are fitted enough to keep the heat around my body where it belongs.

What about you? Do you have a perfect-fitting tshirt pattern (either one I’ve mentioned that just ~does it~ for you, or maybe you have a new love that you want to introduce me to!)? Have you ever Frankenpatterned something to suit your needs, or are you the sort of lucky person who gets their TNT from a purchased pattern? Are you sick of me talking about tshirts? Man, I love tshirts.

deal with it

Completed: A French Terry Lola Dress

11 Dec

Good morning, everyone! I guess I’m back to posting about sewing things… it was a nice hiatus, anyway! I had a lovely vacation, a very relaxing weekend at home, and now working on a new big sewing project (a coat for Landon!). In the meantime, I have a small backlog of projects that I’ve been meaning to post, so obviously I will start with the most recent one first, because it is my most favoritest.

French Terry Lola Dress

LOLA LOLA, I LOVE LOLA.

Y’all remember the Lola sweatshirt dress, right? Gah, sometimes I feel like – with the influx of new patterns coming out at such a rapid pace (which is not necessarily a bad thing – but it can get overwhelming at times!), we forget about the really good ones that are just a little bit older. And by older – sometimes that’s as “old” as a few months! So I’ve made it a point to re-visit some of my favorites and make them up in new fabrics. I mean, they’re a favorite for a reason, yeah? 🙂 (but don’t worry – I’ll obviously still sew up new releases as well because, ooh, new and shiny!).

Anyway, Lola was always one of my favorites! A really fun and flattering twist on the sweatshirt – here’s a princess-seamed sweatshirt dress! I’ve made this pattern twice before (see: one and two), so I knew it was a winner. Side note: While version 1 gets worn aaaallll the time (love that dress!), version 2 is gone. The cheap fabric I used meant that the dress was constantly pilling and just looked old and shitty, so I removed it from my house. So that’s that. Also, wow, I sort of almost miss having brown hair now.

French Terry Lola Dress

French Terry Lola Dress

Since I’ve already made this pattern before, this was a very quick and satisfying sew. I sewed up the size 2, and then made further adjustments to get the fitted/streamlined look you see here. I started by using 5/8″ seam allowances (the pattern calls for 3/8″, but I’m a little bit smaller than the smallest measurements so this helped with sizing down a little), and then took in the waist another 1/2″ or so at every seam. Speaking of which, I really ought to adjust my pattern pieces for this shit because I go through this damn trying on/adjusting/trying on/adjusting rigamarole EVERY DAMN TIME I make this dress! Maybe that should be my New Year’s resolution – adjust my pattern pieces when I do fitting changes haha. That would save me a lot of trouble.

One thing to keep in mind if you’re making this pattern – if you want to adjust the fit at the waist, try on the dress before you attach the skirt. From there, you can pinch out the princess seams to get the fit you like (just remember to do the same to the skirt pieces so the seams match up!), but be careful not to overfit, as this really isn’t that type of dress.

Other changes I made to the pattern: I lengthened the sleeves to full-length (and redrafted the cuff piece accordingly), left off the hem band (and sewed a deep 2″ hem), and left off the pockets. Actually, those are the same changes I made to my last 2 dress. Whateverrr!

Also, wtf is going on with my hair in the last picture? And why do I look so… disgruntled?

French Terry Lola Dress

The fabric that I used for this dress is pretty fabulous! I’ve mentioned before that I get fabric from Elizabeth Suzann’s wholesale orders (ah, the perks of working in sewing!) – that’s where this stuff came from. It’s French Terry, and it came with MATCHING RIB KNIT, which I used for the neckline and cuffs. The right side of the French Terry is a smooth knit with defined stitches, and the wrong side has the most beautiful, plush loops that make this shit SO FUCKING COZY. We use it at Elizabeth Suzann to make sweaters and sweater dresses – although there, we sew the fabric wrong-side out because it looks so cool (see the Billie Sweater). For me, though, I wanted my dress to be warm and cozy – so the loops stayed to the inside. Funny, after sewing all those sweaters – this side looks rather plain 🙂 It is, however, easier to see the cool seaming details this way, so that’s good!

Sewing this fabric was fine, if not a little messy (French Terry will shed like NO OTHER, so I would really hesitate to sew this without a serger – you need some way to finish the seams). Because the fabric is so thick, my serger had some difficulties at first with stitch tension – everything was super wavy. I just upped the differential feed to the max and tweaked the stitch size, and that spaced out the stitches enough so that the seams lie flat. Speaking of which, pretty sure that’s the first time I’ve ever had to tinker with the settings on my serger. For the most part, it does everything automatically without my input (it’s a BabyLock Imagine, in case you were curious. The queen of sergers!).

French Terry Lola Dress

French Terry Lola Dress

Sorry these pictures are kind of crappy/all over the place. I guess I’m out of habit at this point, ha!

French Terry Lola Dress

Here’s an accidental picture that really showcases the fabric! I used the wrong side for the little sweatshirt V. And check out that ribbing! Love it when it matches 😀

French Terry Lola Dress

I guess that’s it! Really glad to have another cozy winter dress to add to my arsenal – and this one is pretty freaking cozy (while still being cute!).

One last thing – ChatterBlossom (one of my sponsors + an all-around gorgeous gal) is currently having a holiday sale! Use the code LLADYBIRD15 for 15% off your purchase, good through 12/15 (so, soon!). Whether you need a last-minute gift for someone – or for yourself (I always buy myself Christmas gifts, because I always ALWAYS get myself the best presents! Such as this necklace, ahem) – definitely check her out! I love Jamie’s stuff, and the detail in some of the pieces (such as this elephant or this mosquito) is INSANE. Actually, that’s a ChatterBlossom piece I’m wearing in these photos – the navy anchor button 🙂 Love it!

Completed: The Lady Renfrew

12 Nov

Question: What do you get when you combine the Lady Skater with the Renfrew??

Lady Renfrew

Answer: The awesomest, snuggliest, Lady Renfrew dress, of course!

Lady Renfrew
Lady Renfrew

There’s not much to say about this dress – I basically just summed it up in the first sentence. This will be a relatively short post, ha (is that even possible for me to accomplish? Time will tell). Anyway, I used a combination of the two patterns to create this Frankenpatterned dress. The bodice, skirt and sleeves came from the Lady Skater, which after much careful testing, I’ve decided is my favorite favorite favorite knit dress pattern. The bodice fits me really well, the sleeves are a good fit/length (all sleeve length options, I mean), and I love the flared-but-not-costumey-looking skirt. Everything about this pattern is exactly what I like in a knit dress, so it was the obvious choice for the base of this dress. To get the cowl neck, I left off the neck binding and instead used the cowl from view C of the Renfrew tshirt. I compared the two patterns to see if I’d need to make any modifications, and the necklines were surprisingly similar (fwiw, I use the size 2 Lady Skater and the size 0 in the Renfrew). So similar, that all I did was just sew the pieces together and that was it. I don’t remember what seam allowance I used to attach the two (Lady Skater is drafted for 3/8″, and Renfrew is 5/8″), knowing me – probably 1/2″ because it’s in the ~middle~. Or something dumb like that. Whatever, it worked out regardless! 😀

Lady Renfrew

The real bitch part of making this dress was cutting the dang fabric. I had 3 things to pay attention to while I was cutting this – matching the print horizontally across the seams; being mindful of fabric usage (I barely had enough!); and actual print placement. I cut it so the darker stripes cross my waist, and the lighter stripes cross my bust. I think that’s a flattering look for me, plus, I love the way the white print kind of frames my head (that’s a bonus, because I totally cut it that way with the intention of it making my boobs look slightly bigger hahaha). I didn’t do any print matching on the cowl. I ran out of fabric and actually had to cut the underlayer with a seam. It worked out, though!

Lady Renfrew

AND NOW I HAVE THIS BIG SNUGGLY COWLLLLLL WOOHOO!

Lady Renfrew

I think the fabric is what really makes this dress! And by makes, I mean it’s slightly over-the-top – I’m almost afraid to wear it before Christmas season, ha. It’s like a giant, awesome black and white Ikat Christmas sweater. I bought it from The Fabric Studio here in Nashville; it’s the same fabric I used to make my Ooh La Yoga Pants. While it wasn’t 100% ideal for yoga pants, it’s pretty freaking fabulously good for this sort of dress. The fabric is nice and stable, cozy, and works really well for this sort of pattern.

Lady Renfrew

I especially love how the cowl looks. Yay cowls!

Lady Renfrew

So, what do you think? Lady Skater+Renfrew – do we have a perfect partnership here, or what?

Two more things:
1. Giant thanks to everyone who attended my class at The Sewing Party on Saturday! I had so much fun chatting with y’all (although I’ll admit – I kept my video on mute! Can’t handle the sound of my own voice blaring at me ahaha) and I’d love to do more video-related stuff if the opportunity ever arises again 🙂 Y’all are the best! Just wanted to give all my students (and future students, for those of you who will be watching the class sometime during the next 90 days) a head’s up – I forgot to remind you to download the handout for my class! I know, bad teacher! Anyway, it’s a little PDF document with all the class info written out – along with photo tutorials for each zipper insertion. You can find it to the left of the video, under handouts and chats.

2. The big closing sale at Sweet Little Chickadee is still going strong! Juli has upped the ante a little bit – now use the code SHOPCLOSINGSALE to get 35% off your entire order! This code is good until all the stock runs out!

3. I recently found out that I was named one of the top 50 sewing blogs in Budrastyle‘s Best of Blogging contest. COOL! I’ll be honest – I had no idea I was even nominated (or that this contest was even a thing) until I got the congratulatory email. Big huge thank you to whoever nominated me, and even bigger huger thank you to everyone who voted for me! Y’all are seriously the best! I’m not worthy! 😉