Tag Archives: organic

Completed: Jalie 2567

4 Oct

I know what you are thinking.

Wine French Terry Jalie 2567

“don’t you already have a robe you made?”

Yes. Also, don’t tell me how to live my life.

Wine French Terry Jalie 2567

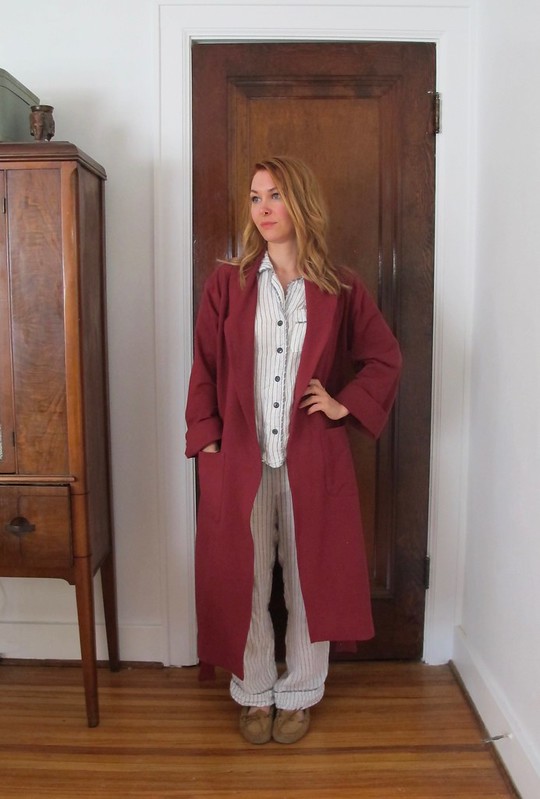
Honestly, I like that plaid flannel robe in theory – but not so much in practice. One, the arm holes are low on me – which makes the whole thing a bit binding to move around in when it’s tied shut. And because of how the ties are attached the fronts, it’s not the sort of robe that you can leave hanging open (which is honestly how I prefer to wear my robes). As pretty as it is, it’s not terribly practical for my daily wear – as evidenced by how much I kept going back to the fleece robe (my Mamaw gave me a new one for Christmas that same year, so at least it was a fresh fleece amirite). Making a robe seems like a terribly boring thing – in terms of sourcing a pattern and supplies, then sewing it together… yawn. I suppose you could make it more interesting by using really nice materials or embellishing the pieces, but we’ve already established that pretty isn’t always practical for me.

So I made another one, and it’s boring, and it’s perfect. Yay!

Wine French Terry Jalie 2567

Wine French Terry Jalie 2567

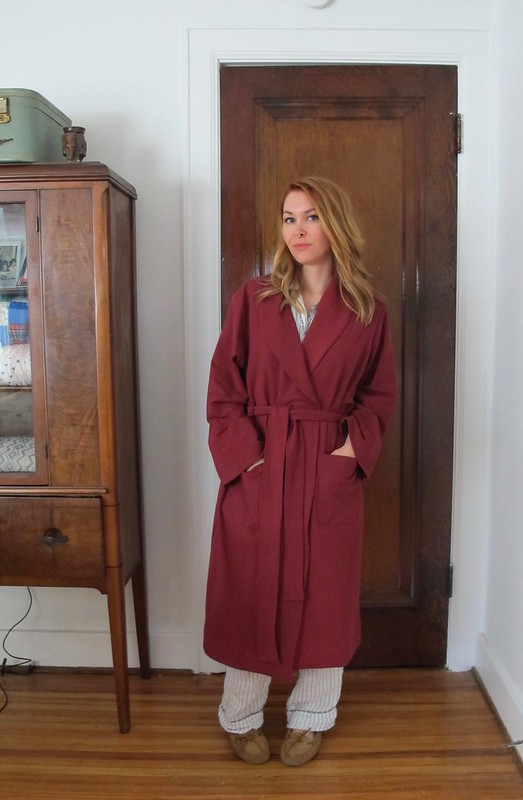
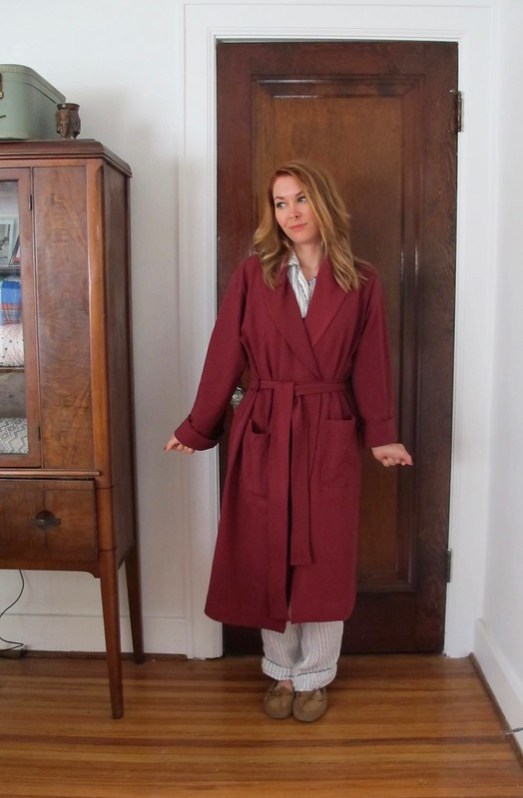
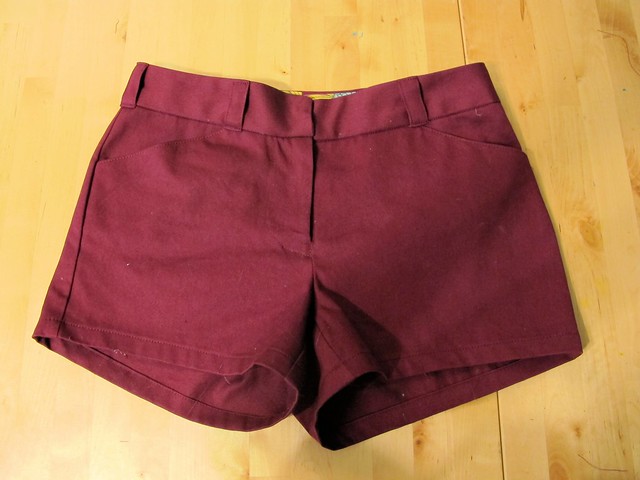
The pattern is Jalie 2567, which is your classic oversized, cushy bathrobe. No lie – I compared the pattern pieces to my existing fleece robe and they are almost exactly the same, even down to the pocket size. If you are looking for a no-frills, classic style that wouldn’t be out of place on a rack in Macy’s during December, this is the pattern for you. If you want something fancier, tbh I have no idea why you are still reading this blog post get out now.

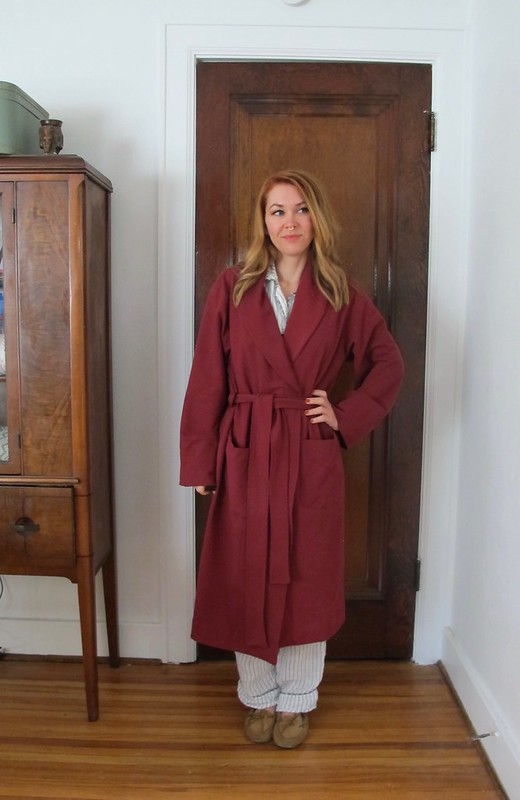
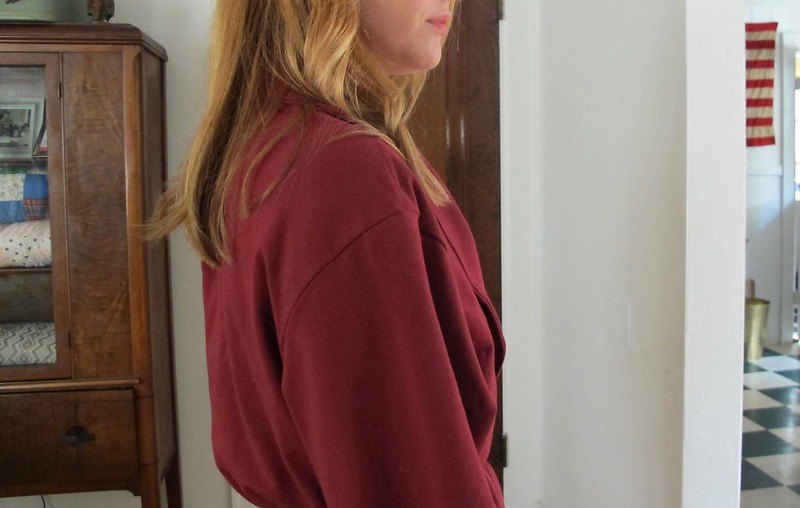
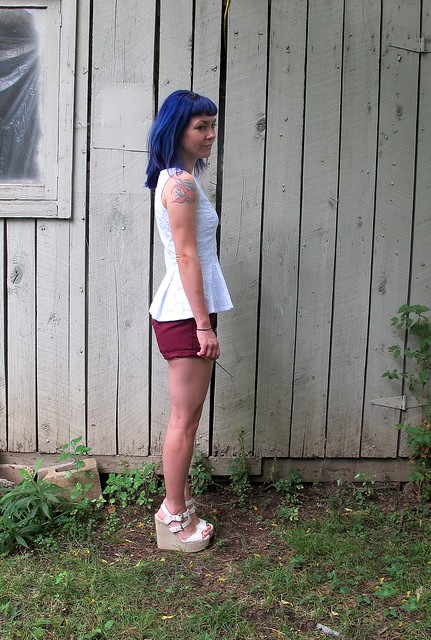
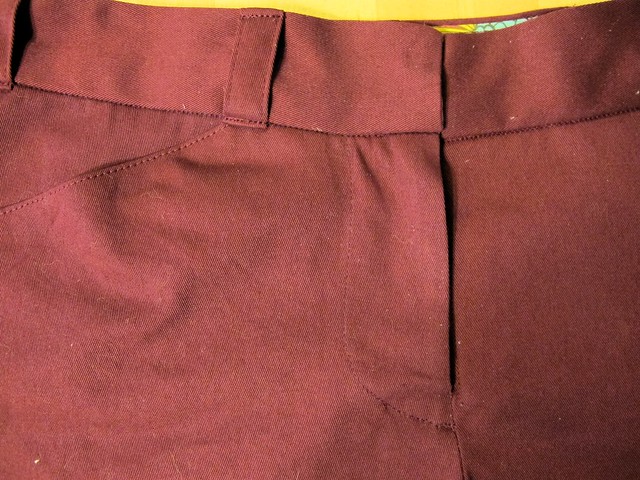
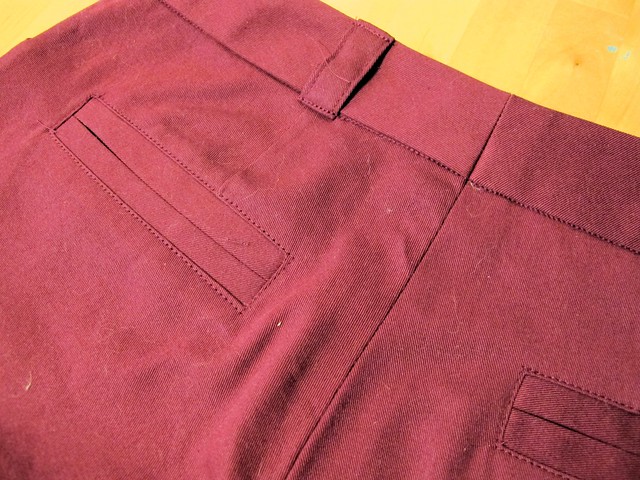
The robe features a giant shawl collar, set-in sleeves (that are super wide so you can wear layers underneath), gigantic pockets, and a tie that is totally separate (but is held in place with 2 belt loops). Exactly what I was looking for. The thing about Jalie patterns is that they are super cheap (this one is like $10) and they come in 27 fucking sizes. Forreal, you could make every single person on your Christmas list their own personal robe. I can’t, because I cut straight into that paper like the barbarian I am #noragrets

The downside to Jalie patterns is that the instructions are a bit sparse. However, we are talking about a simple bathrobe here. It’s pretty easy to figure out with the text instructions (and the smattering of illustrations that they include for certain steps), this certainly is not a difficult pattern.

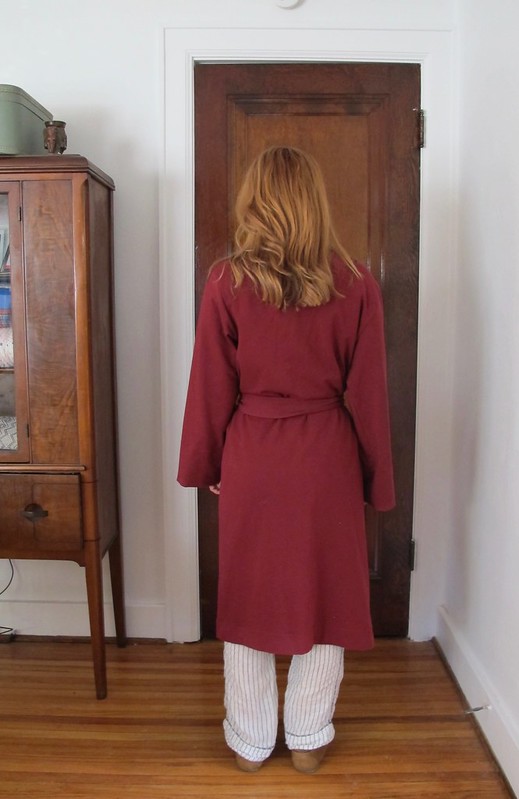
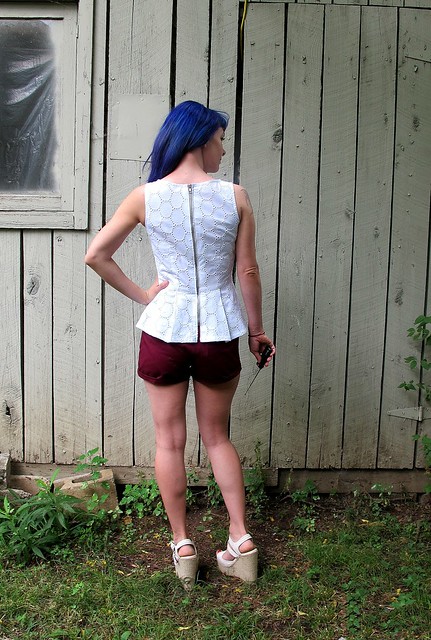
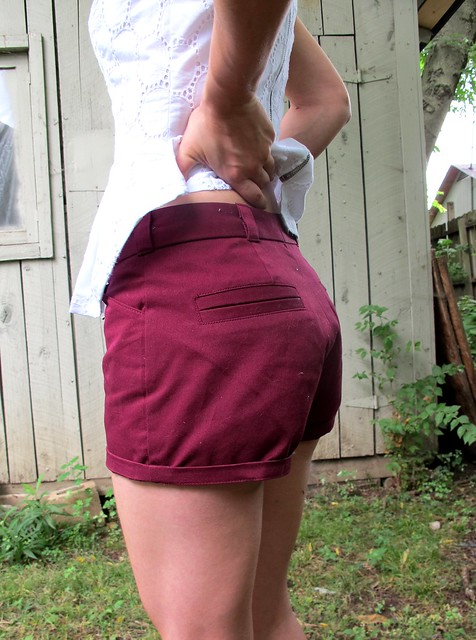
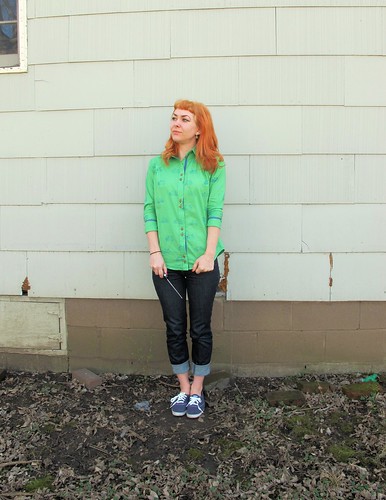
After much much MUCH deliberation, I cut a size R, which is actually a little bigger than my measurements. The next size down dropped me into Kid’s sizes, which I was having a hard time getting my head around. In retrospect – I think the Q would have been a slightly better fit, but I’m happy with the oversize of the R. I live in an old house and we are expecting a crappier-than-usual winter this year, so I’ll likely be wearing a few layers underneath this thing anyway. As you can see in these pictures, the sleeves ended up a little long – so I cuffed them back for now; I am thinking I will probably want that extra length when it gets cold. If not, it’s easy to rip out the stitching and re-hem!

Wine French Terry Jalie 2567

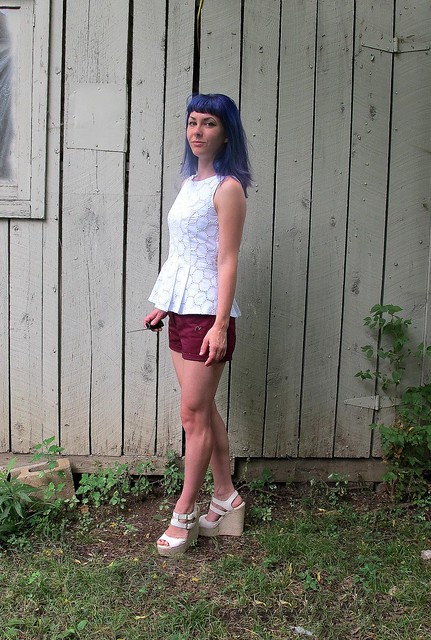
As I mentioned, I wanted a pretty basic bathrobe pattern – but I did opt to fancy it up a little with my fabric choice. I was originally considering another fleece (this grey cotton fleece to be exact. Like your favorite sweatshirt except even better!), but Kate at The Confident Stitch suggested I try one of their Soy French Terrys instead. I chose the wine French Terry, but there is also grey, black, and aubergine, FYI!

I don’t know what differentiates soy French terry from other fibers (other than, well, the literal fiber content haha), but this stuff is pretty awesome! It’s just as warm as your standard fleece, but a lot more luxurious. And heavy! Weight might be an issue if you are planning to lug this thing around on trips or whatever, but mine will be staying at home with me. It washed up super soft and the color has stayed nice and rich. The downside to having a wine red robe means I look like I’m trying to channel my inner Hugh Hefner, but, you know, maybe we can just agree that the man had good taste in robes.

Wine French Terry Jalie 2567

Wine French Terry Jalie 2567

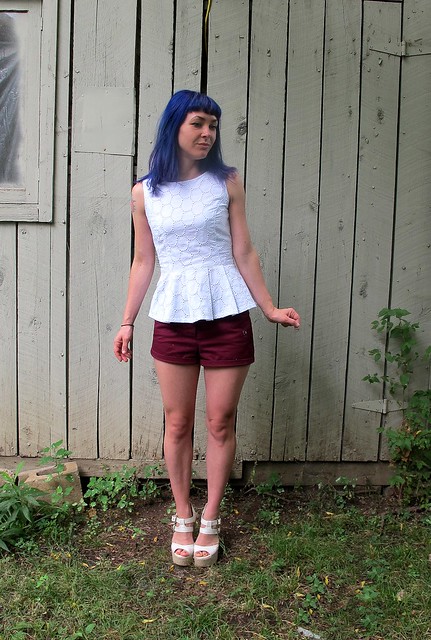
This fabric was pretty thick, which made it a bear to cut – and the pattern pieces are large, which again added to the strain. Once that was all done, though, sewing it together was pretty fast and efficient. I serged all my seams (you don’t need to do this for this pattern, but I liked that it sewed and finished my seams in one go) and then topstitched as directed. The fabric took to pressing very well and show topstitching beautifully, which makes the finished piece look pretty good! I didn’t do any fancy seam finishing or stabilizing or whatever – just a basic cut and sew job. This is the type of project that is really simple, but a little elevated due to fabric choice.

Wine French Terry Jalie 2567

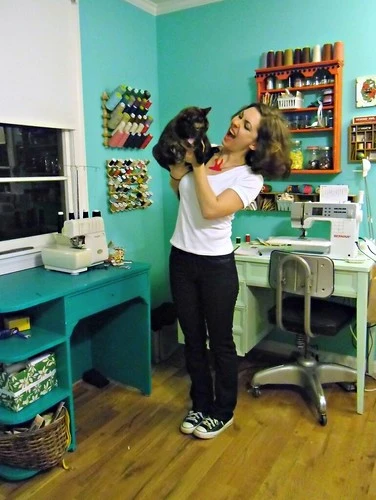
I actually finished this a couple of months ago, and while it hasn’t gotten a ton of wear just yet – I did get to take it for a spin during our random post-Labor-Day-cold-snap. It’s so warm and snuggly, and much more comfortable than my last robe – I feel cozy, but not restrained. Even Amelia likes snuggling up to it 😉

Big thanks to The Confident Stitch for sponsoring this post, for which I might have never found my true love lies within that of a bathrobe. Guys, if you haven’t checked out the Confident Stitch, give them a holler – they have merino wool. Wouldn’t that make an AMAZING robe?! Damn, now I kind of wish I’d thought of that first haha.

Completed: The Jenna Cardi (+GIVEAWAY)

15 Sep

In my wardrobe, I have a very small selection of RTW clothing that is quickly dwindling to nothing. Out of those pieces, the majority of them are lightweight knit cardigans. You know the kind I’m talking about – sewn, rather than knitted, lightweight enough to throw in a purse, wearable for all seasons (I dunno about y’all, but I wear my cardigans throughout the summer – air conditioning is tooooo cold for me!). As I’m quickly replacing all my clothes with handmades, the one major hole – other than undergarments (which I’m working on!) – has been those damn cardigans. I love knitting cardigans, don’t get me wrong – but those take loads of time, not to mention even the lightest fingering weight yarn can’t compete with how lightweight a knit fabric is, you know?

I’ve been on the lookout for a good cardigan pattern – not even really for the pattern itself, but rather, the instructions. Y’all, the one time I tried to sew button holes on a knit, it ended up being slightly traumatizing. Then there was that time recently that I tried to use an old RTW cardigan to copy into a handmade one (cutting it apart to use as a pattern – same concept as how I made my striped hoodie). Spoiler alert: it didn’t work out at all. Clearly I can’t hack this on my own. I need someone else to do it for me.

20121202-210149

Also, that cardigan I chopped up? As much as it wasn’t really my favorite – it was the one grey cardigan that went with basically everything. And here it was, chopped up into little bits and, uh, I kinda needed it back.

Jenna Cardi

Anyway, all that being said – right about the time I realized I was making a huge mistake (chopped up cardigan and all), Kat emailed me, saying she’d just launched her new pattern company, Muse Patterns, and would I like to try and review the Jenna Cardi?

UM. YES.

Jenna Cardi

HI GUYS, LOOK, DREAM CARDI PATTERN RIGHT OVER HERE.

Jenna Cardi

The Jenna Cardi comes with a few different options, so you mix and match to create the cardigan of your dreams (I’m not the only one who dreams about cardigans, am I?). You can choose a cropped or waist length version, sleeves ranging from full, to three quarter, to short, and then there’s also an option to include a beautiful curved yoke detail.

I’m a boring person with no imagination when it comes to wardrobe basics, so I chose something plain and simple for my first hurrah – cropped length, long sleeves. The thing about this cardigan that makes it so special, though (I mean, other than the fact that I SEWED IT MYSELF yaaaay for not buying RTW!), is the fabric I used! HOMEGIRL GOT HER HANDS ON SOME MERINO WOOL.

Jenna Cardi

Are we all still freaking out about merino wool or has that ship sailed? Whatever, *I’m* still freaking out over it! Ever since Katie started pushing it on me like an extraordinarily effective drug, I have been trying in vain to locate a US source. That stuff isn’t cheap, even in the best of times – and to ship it all the way from NZ obviously adds some dollarz to the cost.

So where did I find this golden merino ticket, you might ask? Surprise – Organic Cotton Plus, of all places! They are starting to branch out to include other natural fibers than just cotton, which is all kinds of awesome. When they asked me if I’d like to try a little piece of whatever caught my fancy from the website, I stumbled across the merino wool and, forreal you guys, my heart stopped for a nanosecond. There aren’t a whole lot of options on the site at the moment – just the black I have here, as well as a natural colorway (which I almost got, but then the idea of dying that shit seemed too overwhelming. Plus, black is so useful! Even if it photographs like crap). At $33 a yard, it is not cheap – but it’s worth it. That black merino is a whopping 61″ wide, plus, IT’S MACHINE WASHABLE WOOL. Oh, and you don’t pay NZ shipping prices! Win win!

Jenna Cardi

Having used both merino wool from Organic Cotton Plus, as well as the stuff straight from New Zealand – I can confidently say that this is pretty good stuff. It’s soft and lightweight without being see-through, it has a nice stretch and drape to it, and it cuts and sews like a dream. Wait till you see the topstitching on this baby – it’s ridiculously beautiful. Ahh I just love this fabric.

Jenna Cardi

The only downside I can think of is that it does wrinkle up a bit, as you can see in these photos (it’s not nearly as noticeable in real life – otherwise, I would’ve steamed things up before taking photos. Womp whomp, deal with it). Kind of the same thing as linen – just natural wear wrinkles. If that bothers you, you’ll want to stick to something with a poly blend. For me, though, wrinkles are an ok trade-off for natural fibers!

Jenna Cardi

Anyway, I loved my Jenna cardigan so much – I immediately made a second one!

This one is pretty boringly similar to the black merino one, except it’s longer. It’s not quite the longer version – I cropped some off for my proportions – but it does look better with the shirt I’m wearing underneath it, ha 🙂 Instead of using merino wool, I used some wool knit that I picked up at Mood Fabrics when I was recently in the store. This stuff is less drapey than the merino – it’s almost like sweatshirting, except without a fleecy side. It’s also not machine washable, so there’s that. I’ll have to handwash it like I do all my hand knits, oh well.

Jenna Cardi

Sewing both of these was ridiculously easy, by the way. My second version took me all of 2 hours – not bad! I made the bust 32″ and took in the sleeves a bit because they were a little wide. I also had to shorten the sleeves by a couple of inches.

As I mentioned, I was pretty apprehensive about the button bands – but surprisingly enough, the button holes were way less problematic than I was anticipating! I made some test button holes – experimenting with interfacing, tear-away stabilizer, no interfacing – but ultimately went with the instructions, as I figure Kat knows more than I do when it comes to knit button holes 🙂 The button band is stabilized with woven fusible interfacing, and it’s sewn on with a 1:1 ratio (meaning it’s not stretched at all). This gives the knit fabric enough heft to tolerate a button hole stitch without getting eaten into the bobbin area (my former experience with this sort of thing). For the black merino cardi, I also used tear-away stabilizer in addition to the interfacing. For the grey cardi, I skipped the tear-away stablizer and just kept things purely interfaced. Both worked out splendidly!

Jenna Cardi

Another thing I’ll point out is that, while these cardigans are somewhat fitted, there’s just enough ease included to keep the button bands from gaping open. Always a plus in my book!

Jenna Cardi

Jenna Cardi

I’m thrilled that they both look just as good unbuttoned as they do buttoned – which is important to me, as a cardigan-wearer. I usually button things up, but it’s nice to have unbutton options:)

Jenna Cardi

Jenna Cardi

Here are some ~extreme~ close-ups of the merino wool cardigan. Check out that topstitching! Ughhh it’s so beautiful! I did add a little more topstitching than called for in the pattern – I wanted to tie in the topstitched button bands and button holes, so I included it at the shoulder seams and along the bottom band. Plus, it’s just beautiful. Seriously.

Also, how bout them buttons? These are also from Organic Cotton Plus. I know black and brown is generally frowned upon as a color combination, but I like it 🙂

Jenna Cardi

Grey cardigan close-up 🙂 Boring buttons are from my boring stash.

So what do you think – are you team sew-your-own-cardi yet? I hope so, because Muse Patterns has hooked me up with an extra pattern to giveaway! 😀

Jenna Cardi

GIVEAWAY IS NOW CLOSED
To enter to win your very own Jenna Cardi, just leave a comment on this post and tell me what you plan on makin’! Which view? Any particular fabric? Do you have a wild card up your (cardigan)sleeve? Inquiring minds want to know! 🙂 This giveaway is open WORLDWIDE and I will close the comments a week from today, on MONDAY, SEPTEMBER 22, 2014 7:00 AM CST. Good luck, y’all!
GIVEAWAY IS NOW CLOSED

**Some disclosures now – I was given the Jenna cardi pattern from the patternmaker herself, for free, to try and review. I was *also* given the organic merino wool fabric & butons from Organic Cotton Plus, again, for free to try and review. The grey wool knit was purchased at Mood Fabrics NYC out of my own pocket. No one paid me for this post – I’m just doing it for the freebs! As always, all opinions are my own 🙂

Completed: Simplicity 1425

22 Jul

Today’s outfit inspiration comes from a completely new realm for me – watercolor painting!

Eyelet Peplum Top & Thurlow Shorts made with Mood Fabrics

Remember that watercolor class that I signed up for earlier this summer? Well, here’s a shot of one of the paintings I did in my final class (no, it wasn’t a fashion illustration class, but the teacher was open to letting us paint whatever wanted – and she was tickled that I went with fashion illustration, ha!). I had some swatches from Mood Fabrics that I knew I wanted to turn into an outfit for my next MSN post, but the outfit inspiration didn’t come until my pen er, watercolor hit the paper 🙂

Eyelet Peplum Top & Thurlow Shorts made with Mood Fabrics

Let’s start at the top and work our way down! I used Simplicity 1425 for the pattern, and cut the most simple version (sleeveless, no yoke, no collar). I cut the size 4 and took a little in at the waist, as well as made my normal gaping-upper-back alteration that seems to be a running theme for me when it comes to sewing Simplicity patterns.

Eyelet Peplum Top & Thurlow Shorts made with Mood Fabrics

My fabric is this beautiful white cotton eyelet from Mood fabrics, which I underlined with this bright white cotton batiste (also from Mood Fabrics), for modesty and some opacity. It’s still a little on the sheer side – as in, I have to watch what color undergarments I’m wearing! – but the two fabrics together make such a fun light and airy top.

Also, I just noticed that there is a fly on my boob in this picture (at least, I’m pretty sure it’s that fly that was buzzing around). Gross.

Eyelet Peplum Top & Thurlow Shorts made with Mood Fabrics

Sewing was very simple and straightfoward – not to mention fast! Seriously did all this (minus the initial muslin) in the space of a Saturday afternoon. Not too bad! I underlined all the pieces by hand with silk thread (it’s not totally necessary to use silk thread, but it does make it easier to pull out the basting when you attach the seams – which, if you’re as anal-retentive as I am about sewing, you will totally appreciate that, ha!) and I used a 70/10 Microtex needle to prevent puckering, since the fabric is so lightweight. Most of the inside seams are serged, although I did finish the armholes and neckline with bias facing (cut from the same batiste). I can’t really speak for the instructions on this pattern as I didn’t use them at all, but the overall finished top is pretty nice!

Eyelet Peplum Top & Thurlow Shorts made with Mood Fabrics

For an extra lil’ punch, I stuck an exposed separating zip right up the center back. Kind of toughens up the overall sweetness of the eyelet, yeah? 🙂 This pattern was actually written for there to be buttons down the back – which is a cute idea in theory, but they only called for 3. THREE. How that doesn’t look like a fucking hot mess when you’re wearing the top and moving around is beyond me. I imagine that would gape a lot! So I swapped out my buttons for a fun zipper and I’m loving the way it turned out.

Eyelet Peplum Top & Thurlow Shorts made with Mood Fabrics

Getting the zipper in was kind of an adventure in itself. I tried googling around for directions on inserting an exposed zipper (I mean, I had a vague idea of how to do it, but I always like to check and see if my technique is right first), but everything I was pulling up was for close-ended zippers. Since my zip is separating (you know, so I can get the top off and on without destroying something in pure rage during the process), those particular tutorials were kind of a moot point. In the end, I kind of winged it, but I think it worked out!

Eyelet Peplum Top & Thurlow Shorts made with Mood Fabrics

As far as the style of the top – well, I like it. I know it’s super trendy- especially with the dang exposed zipper! – but I’m ok with being trendy. I think peplum tops are super cute and the white eyelet will go with lots in my summer wardrobe. Plus, I can tuck that peplum into high-waisted skirts, so it’s like two tops in one! Woohoo!

Eyelet Peplum Top & Thurlow Shorts made with Mood Fabrics

Eyelet Peplum Top & Thurlow Shorts made with Mood Fabrics

Now for the shorts! I used my beloved Sewaholic Thurlow pattern, matched up with my other beloved plum organic cotton twill from Mood Fabrics. My love affair with that organic cotton twill should be well known at this point, I hope. That stuff is amazing. Soft and cottony with a bright, saturated color… a dream to sew, and a dream to wear. I’ve made so much with this particular fabric in different colorways – including moreeee Thurlows! – and I’m sorry y’all have to see it again. Just kidding, I’m not sorry! These shorts rule! Get you some of that organic cotton twill, you won’t regret it!

Eyelet Peplum Top & Thurlow Shorts made with Mood Fabrics

I don’t really know how much more I can talk about these shorts until y’all tell me to shut up. I’ve seriously made them so many times, it’s kind of like autopilot at this point. I found that I did have to take quite a bit of excess out of the legs this go-round… I think I might be getting too un-curvy to wear this particular pattern 😦 I’m already at the smallest size, so it’s not like I can size down. I’m hoping my adjustments will work for future Thurlow shorts, but I’m kind of afraid to try the pants at this point since there is soo much that needs to be changed now, ugh. I reckon I could find another pants patterns to sub out, but wah! I want to keep making Thurlows forever!

Eyelet Peplum Top & Thurlow Shorts made with Mood Fabrics

Anyway, fitting issues aside, these shorts were a delight to put together. I played around with the topstitching on this pair and I really love how the it looks so gorgeous and crisp against this fabric. I tried topstitching around the welts this time – something I’ve seen in RTW and always wanted to try – and I think it looks pretty nice!

Eyelet Peplum Top & Thurlow Shorts made with Mood Fabrics

Oh, and check out that fun lining! Yeah girl! That comes courtesy of this crazy/awesome psychedelic cotton voile print, which is unfortuanately sold out now (but take a look at the other cotton voiles from Mood Fabrics. Sweet!). I love putting crazy prints in my pants because, dude, why not? Business in the front, party on the inside. Or something like that!

Since we’re on a roll with all these detail shots, here are some of the top:

Eyelet Peplum Top & Thurlow Shorts made with Mood Fabrics

I took waaay too many pictures, but there was so much detail to capture! Sorry bout that!

So I guess the next question is – does she have that outfit from the fashion illustration?

Eyelet Peplum Top & Thurlow Shorts made with Mood Fabrics

Fuck yeah I do! Ok, maybe not so much the shoes, but I’ve got the purse! Ha! This shit’s from Kate Spade – I bought it after I was having a really rough week (retail therapy totally works, y’all.). It was on sale, but it is still also the most expensive purse I’ve ever bought – and it’s totally worth it! I knew I couldn’t find that lemon fabric anywhere, so I justified it with the purse hahah 🙂

Eyelet Peplum Top & Thurlow Shorts made with Mood Fabrics

Just for fun, here I am trying to strike a pose like my fashion illustration. Hmm… probably should stick to painting, not posing! 🙂

Completed: the Meissa Blouse

28 Feb

I think every sewist has a dream fabric that they’ve spent years searching for in vain. It’s not necessarily a weird combination of prints and colors on a totally inappropriate weave, but whatever the specific end result is, it’s nowhere to be found. I have two – a wide (like 3″ or more) white and navy striped twill, and a bicycle print that is NOT quilting cotton.

Meissa Blouse

I gave up on the stripes, but the bicycle print really haunts me. I’ve seen some cute little stylized bikies (see my Bicycley Belladone for an example), but I was holding out for that literal printed-bike-on-some-lightweight-cotton-in-a-nice-color-combination that didn’t seem to exist. And NO pennyfarthings! I want real bikes, not some super hipster twiddly mustache crap.

Meissa Blouse

I had this particular fabric in mind when I was contacted by Organic Cotton Plus with offers to try out some of their yardage. I’d just been back from snooping at Brooks Brothers, specifically zeroing in on this Bicycle print button-up. Isn’t that shit amazing? Argh! So I thought to myself, “Cool, well I’ll just get a stamp and make my own, yeah? Oh, they don’t have any batiste in good colors… but they do have dye…”

And this, my friends, is how I ended up with two yards of white cotton batiste, emerald green Procion dye and some weird little bag of soda ash. Have I gotten in over my head? Probably.

Meissa Blouse

My first couple of days were preparing the fabric – first, I dyed it in a bucket (for real; I stood at the kitchen sink with a my Kindle on Netflix and squished it around the water while wearing gloves, ha!). I wish I would have used a bit more dye in my mix; the end result color is pretty, but it is lighter than the emerald green I was anticipating. On the flip side, though, the dye took evenly all the way across the fabric, so yay!

After I finished the dye bath and let the fabric dry, I took to stamping the entire yardage with a rubber stamp and fabric paint (I blobbed my paint into a dried-up ink pad to make it easier to use). I thought this part was gonna take forever, but it wasn’t too bad! Since stamping tends to look pretty, well, stamped (i.e., it’s not exact and you won’t get a perfect image transfer every single time), I didn’t follow any straight lines and just kind of stamped around haphazardly. After I cut the pieces, I re-stamped a few that had big gaps. This particular ink is great because you don’t have to heat-set it to keep it from washing out (which is good bc I’d spent long enough prepping the fabric, so one less end task is good in my book!), and the ink itself absorbs into the fabric and is not stiff.

Meissa Blouse

Other than the dye reaction it had (which is I think my fault for not making a strong enough dye bath, oops. Live and learn!), I really enjoyed working with this fabric. The batiste is one of those good ones that feels like there’s silk or something smooth and luscious blended in the fabric, but it is truly 100% cotton (and organic, no less!). Because it is cotton, it presses well, which makes it perfect for shirtmaking. It’s also not super sheer like some batistes – even the virgin white would be fine for a shirt. Always a plus in my book!

Meissa Blouse

The pattern I used is the Meissa Blouse from my beloved Papercut Patterns. I love this pattern because it’s a casual button-up without being an Archer (which I obviously LOOOVE, but hey yo, a girl’s gotta branch out!), ha. The little feminine details – the rounded collar, the shoulder yokes with the little gathers, the double buttons – seemed like a good match for this fabric, and a nice nod to my original inspiration without being a blatant copy.

Meissa Blouse

The pattern instructions make this thing really, really easy. Katie has had lots of praise around the webs for how good they are, and it’s all try! Really basic, really straightforward, and beautiful results. I did change a few things just because I’ve hit my personal shirtmaking stride – I flat-felled every seam (the way the shirt is made, only the side and underarm seams are not enclosed, so it’s not like you have a flat fell a million seams to do this) and I pulled in the waist an additional 1/2″ or so. I also shortened the sleeves by about 1″.

Meissa Blouse

Meissa Blouse

Whatever I did to the sleeve seams now means that I cannot button the cuffs around my wrist – they are WAY too small! Whoops! Oh well, this is totally a summer shirt, and I’ll never wear those sleeves rolled down anyway. Ha!

Meissa Blouse

Meissa Blouse

To keep the shirt from being overwhelmingly green, I added some cotton braid to the inside of the button band (butted up right against the stitching line) and inside the sleeve cuffs.

Meissa Blouse

Meissa Blouse

The sleeve cuff treatment is something I saw on the Brook’s Brothers shirt (seriously… if you have a Brooks Brothers in your area, you should snoop it. Some of the finishing inside the clothes there was pretty awesome!). There was a little piece of petersham ribbon tucked in the seam at the top of the cuff, which shows when you flip up the cuffs. Using that inspiration, I tried to do the same thing with my shirt. It’s a liiiiiittle sloppy because I was experimenting, but I like how it turned out! It even makes me ok with the fact that I can’t use the cuffs 🙂

Meissa Blouse

I’m super happy with all the detailing on the shirt. I used lots of topstitching so it would really stand out.

Meissa Blouse

And hey, check it out – the shirt is long enough to where I can tie the bottom in a knot, like a fashion blogger or some shit.

Meissa Blouse

Meissa Blouse

~So fashun.

Meissa Blouse

I still have quite a bit of the dye & soda ash left over. I’m thinking I may buy a load of silk and sandwash the shit out of it. My friend Elizabeth uses soda ash to prewash her silks into this amazing textured wonderland, so I can’t wait to try that! I will definitely report back with results. First, I gotta find a washing machine, though 😉

Ok, ONE last thing – and I promise this is a good one! Remember The Great British Sewing Bee and how we (we as in Americans, ha) bitched about not having a US version of the show? Well, I was contacted by a Love Productions, who is in the process of producing and casting a pilot for – you guessed it – an American version, called The Sewing Bee! They are currently on the hunt for amateur sewists in the NY, CT & NJ area (although if they get picked up, they will expand to nationwide). I actually ended up talking to one of the producers on the phone and I’m really excited to hear about the plans they have in the works – such as, the show will differ slightly from the UK version in that there will be a different set of contestants and winners every week. One thing that is similar is how they plan on editing – as far as I know, it will be as drama-free as the UK version, which is what I like most about it!

img-227171148-0001
Click here for a bigger version of the flyer

If you’re in the area (or don’t mind traveling and camping out for a couple of weeks, I guess), you should definitely try out for the show! And then report back to me, because I want to see y’all on the teeeveeee!

Completed: the Organic Hawthorn

7 Aug

First of all, thanks to everyone who voted for me in the Colette Hawthorn Contest – I somehow ended winning second place! Such a wonderful surprise, and do check out those other winners – because, guys, I’m not worthy.

With that being said, I love this pattern and I’ve already made a second dress.

Navy Hawthorn

I realized that my wardrobe was severely lacking some basic, work-appropriate, tattoo-covering clothing (we are fairly casual here at my office, but I think it’s good to have a few pieces that err more on the professional side should I need it for meetings or important clients dropping in), and a Hawthorn with sleeves pretty much fits the bill here.

Navy Hawthorn

It’s modest and sleek without being frumpy, vintage-inspired without being costumey. Win!

Navy Hawthorn

I am super happy with how it turned out, however, I am NOT happy with those bust dart points. I promise you they look 1000% worse in the pictures than they do in real life – according to these photos, I have two sets of eyes D: I resewed the dart tips more times than I care to admit – lowering them, raising them, tapering them more subtly – as well as pressing the everloving fuck out of them. No dice. Like I said, they’re not as bad in real life as they look here, but now I can’t stop staring at them oh god I’m sorry.

Navy Hawthorn

Anyway, dart issues aside – we’ve already discussed the pattern, so today we are going to talk about the fabric!

Navy Hawthorn

This is organic cotton sateen, from my pals at Organic Cotton Plus (my second review for this – they liked my my first review so much, they came back for a second round :P). I’ve not had much experience with cotton sateen – most of what I’ve seen has been the sort of fabric I shy away from. Think super shiny (if you like shiny, that’s totally fine, but personally I always feel like I’m wearing a prom dress!), too much stretch, and much too stiff for my liking. This stuff is NOTHING like what I described, though. Don’t let the boobie-eyes deter you; there ain’t much shine on this fabric, other than a spectacular luster that comes from high-quality cotton and a gorgeously deep pigment.

Navy Hawthorn

The fabric has a great drape – it just floats and creates the most lovely folds. It’s pretty lightweight, with no stretch, which makes it ideal for this pattern. And since it’s cotton, it’s super comfortable to wear. It also wrinkles like crazy, because of the aforementioned cotton, but I’m ok with a few wrinkles – I’d rather have wrinkles than pools of sweat from polyester!

Navy Hawthorn]

This is a great basic if you want to make something in a solid color but feel bored with the idea of, well, solid colors.

Navy Hawthorn

Both the buttons and the monogram are from the flea market. I think they both add something special to the dress, while still keeping it office-appropriate.

Navy Hawthorn

I love the monogram! It’s actually metal, and has sharp bars at the back that pierce the fabric and bend to keep it in place. Which means it’s never coming off this dress… except to wash, I guess. I’m not sure how old it is, but it’s pretty sweet! I’ve been hoarding it for a few months now, waiting on the perfect shirtwaist backdrop.

Navy Hawthorn

Soo, as you can see here, I tried splitting the dart on this version, following the tutorial at the Coletterie. I’m not totally happy with how the darts turned out – they are too close together at the top (and I suspect that, while they likely aren’t 100% of my nipple-eye problems, they likely contribute to it, ugh). I didn’t realize how they looked until after I’d put the bodice front together- and cut up all my fabric. Shoulda made a muslin, shoulda woulda coulda.

Navy Hawthorn

Oh well!

Navy Hawthorn

Quick, look at this! Shiny!!

Navy Hawthorn

I trimmed the hem with matching rayon seam binding, and catch-stitched it down for a clean finish (and yeah, that took forrrever haha). I’m mostly including this picture because it really shows the color best. It’s so rich!

Navy Hawthorn
Navy Hawthorn

The dart points aren’t as prominent here – this is much more accurate of how they look in real life. Still… how do I fixxxx thiisssss????

Navy Hawthorn

Navy Hawthorn

I think this dress will end up getting a lot of wear this fall! I can’t wait to pair it with future Kelly Green cardigan – navy and green is one of my favorite color combinations at the moment. I better get knittin’!

Completed: White Tshirts. Yes, Tshirts.

1 Feb

At the risk of really beating this dead horse to the ground- I like making solid, every day basics. Boring shit like plain pants, tshirts, solid knit dresses, and I’ve got my eye on making underwear as well. I mean, making a bunch of party dresses is super fun, don’t get me wrong – but there are only so many frilly/froofy dresses I can fill my closet with before I start pulling my hair out on Saturday morning whining that I don’t have anything to weeeear. And I, too, have read Overdressed, which basically punched me in the face the same way that Fast Food Nation punched the rest of the world in the stomach. I can’t even walk in the mall anymore now without yelling about polyester and stitch lengths. It’s insane and no one wants to go shopping with me these days… not that I do much “shopping” as it is.

So, I’m ok with sewing my own basics. I like that I make a tshirt for roughly the same cost as something from the mall, except I can control the fit as I like it and I also know the hem stitches aren’t going to fall out the first time I throw it in the wash. Maybe making tshirts is simple and the exact opposite of exciting, but sometimes I’m having a bad day and I just want to make something without thinking to much about it – and for me, that perfect something is the tshirt. Some people bake when they’re in a bad mood. I make tshirts.

A couple of weeks ago, I was contacted by Organic Cotton Plus and asked if I would like to sample some of their organic fabrics. Yeah! I chose the white interlock knit and set to work making some basics. In organic because, yeah, I be fancy.

Organic Renfrew- V-Neck
I used my beloved Renfew pattern and made two tops. Here’s the v-neck -probably could have stood to make that v a little more, uh, v-like, but it ain’t too bad for a first attempt. The secret, I’ve learned, is to sew the neck band on a regular sewing machine first, and then serge the edges after. Otherwise, the blades of the serger will chop a big ol’ hole in the middle of your tshirt when you try to pivot (and disabling the blades just makes a huge mess, oh god). I know this because I actually tried to do the v-neck version several months ago, and it failed. Also, I realize I just lied to y’all about this being a first attempt. I’m sorry, I’ll never lie to you again~.

Organic Renfrew- V-Neck
I made no changes to the pattern (other than my initial fitting changes), except I did not add the hem band. I just hemmed the bottom with a double needle and used my walking foot.

Organic Renfrew- V-Neck

Organic Renfrew- V-Neck

Organic Renfrew - Scoop Neck
I also made a scoop neck!

Organic Renfrew - Scoop Neck
Making tshirts is FUN!

Organic Renfrew - Scoop Neck
I actually really really love this fabric. It is the *perfect* weight for a basic Renfrew – super soft, a bit of stretch (but not all slinky like jersey – which I love, but there is a time and a place for slinky jersey) with a good hefty weight. Even though it’s white, it’s actually quite opaque – the scoop-neck top has neon yellow twill tape on the shoulders. Can you see it? NOPE. I’m pretty sure I could get away with wearing a neon bra under these and on one would be the wiser.

Organic Renfrew
Plus, the fabric is less than $9 a yard. So yes, a teeny bit more expensive than F21 – but it’s also light years nicer, as well as ethically-sourced. Which I’m totally willing to pay extra for.

Organic Renfrew

Organic Renfrew

Organic Renfrew

And while we’re on the subject of paying extra for ethical fashion… didja see my new jeans?

Imogene Stretch
WELL LOOK AT THEM.
Before you get all excited and start freaking out, I didn’t make these. As much as I wish I was a jean-making-master like Taylor Tailor, I can’t make a good pair of jeans to save my life. I don’t even think it’s a matter of fit anymore – I just don’t like the denim that is currently available. As much as I love love love my Thurlow jeans, I rarely wear them because the fabric just sucks. They stretch out so much over the course of the day, they are huge and baggy by the time I take them off – and I’ve sized them down twice now. Ugh. So I give up. Jeans, you win. I will buy you from now on.

Imogene Stretch
So here’s the deal – like, I dunno, every single woman I know, standard jeans just don’t fit me right. They are too big in the waist, too tight in the thighs, and the length is always much too long (and I’m too lazy to hem my own jeans, let’s be real here). I guess I could fix the waist issue by wearing a belt, but I hate wearing belts with pants, not to mention I don’t even own any belts that fit around my hips. Plus, the denim is just shitty. I bought some GAP jeans a couple of years ago and they’re already getting holes – and I barely even wear them! So I recently got rid of all my jeans – I had almost a dozen pairs – and bought one pair. I only own one pair of jeans now, and here they are.

Imogene Stretch
These are made by Imogene and Willie, and they are the Imogene Stretch. I’m not going to sugar coat – they were fucking expensive. Actually, these jeans are the most expensive piece of clothing I have ever owned. This is also the first piece of new/non-sale clothing I’ve bought in several years (and yes, I bought them with my own money. Ha, I WISH I+W would give me free jeans!). So, why would I spend $200+ on one pair of jeans, you might ask?
– They are made here in Nashville, TN, by a small business. I like supporting small businesses. I like knowing my money is going back into my community.
– The materials are amazing. The denim is high-quality and wears beautifully (and it’s woven in the USA! Yeah!). I also get 3 free repairs, should I happen to gouge a hole in them or some shit.
– The fit is better than any pair of pants I’ve ever owned. I dunno about you, but I’d rather own one pair of well-fitting pants than a dozen pairs of ill-fitting pants. I have no waist gap, the legs fit perfectly, and the length was hemmed to my exact measurements when I bought them.
– THEY LOOK DAMN GOOD ON ME.

Also, the workmanship is just beautiful-
Imogene Stretch
The topstitching is three different colors. Can you see it?

Imogene Stretch

Imogene Stretch

Imogene Stretch

I’m not posting this because I secretly want everyone to stop shopping at fast fashion places (ok, I kinda do – in a perfect world. But that’s not really attainable right now, and not everyone has that kind of budget! ;)). I mean, I just bought a pair of Keds the other day. Whatever. But… know when to pick your battles. Know what matters to you, and what you can let slide. And personally for me – I’ll make what I can, and buy local when I can find and afford it, and not feel bad if I occasionally have to buy shoes at Macy’s. Small changes eventually equal big changes.

Organic Renfrew

Organic Renfrew

~*~Disclosure: I was not financially compensated for this post, although I did receive a fabric sample from Organic Cotton Plus to review & keep. All opinions on this product are my own.