Tag Archives: cotton twill

Completed: Jenny Overall Shorts

29 Aug

I’m just gonna go out and say it now: these pictures are shitty, but I’m posting them anyway. Considering how long it took me to even get photos in the first place, lord knows I’m not gonna make the effort to re-shoot them. Sorry, not sorry!

Also, if you’re seeing this post twice – that’s because I mistakingly published it yesterday, realized my error, and immediately deleted it. I wasn’t going to say anything at all (honestly it’s an embarrassing mistake) but I’ve gotten several comments and emails expressing concern, so I wanted to clarify. The error post yesterday was meant for the Mood Sewing Network. I was just typing it in my blog because I like the format better, and unfortunately I hit the wrong publish button lol. Oops! If you already read the other one, I would still suggest reading this one as well because both posts are different – and this one has more (shitty) photos ! Ok that is all!

Organic Twill Jenny Overalls

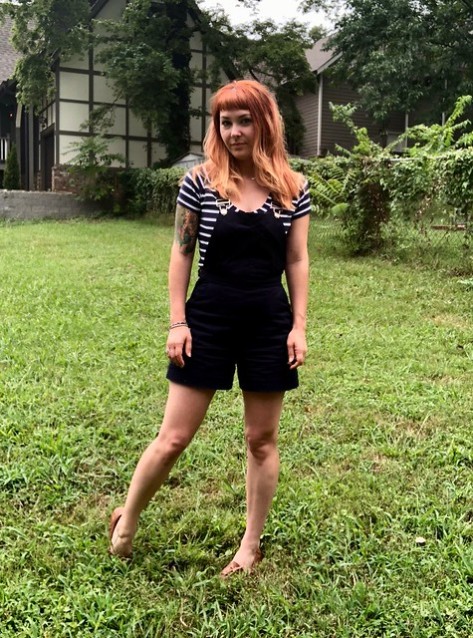
So these are the Jenny Overalls from Closet Case Patterns – one of many, many overall patterns that are currently available. I’ll be the first to admit it – I haven’t been a big fan of the current overall trend (“current” being the key word here – 90s-era Lauren definitely had a pair of denim overall shorts with Mickey Mouse embroidered peeking out of the pocket. God, I loved those things. Wore them with my purple Looney Toons baseball cap and my Adidas slides with white Tommy Hilfiger socks. You’re welcome for that mental image). In fact, when this pattern first came out – my initial reaction was “meh.” Everyone who was at my weekend workshop in Alexandria VA can attest to that, ha! I received a copy of the pattern from Heather, but truly I was more interested in the pants than anything that has a bib attached to it.

Organic Twill Jenny Overalls

So what changed? Honestly… I blame Heather. Shortly after the pattern release, she posted an ass-load of photos of her galavanting all over London & Stockholm in her cropped Jenny Overalls. Every outfit looked rad as shit, and I eventually swayed my overall stance. I think my biggest issue is that overalls seem very utilitarian – which really is not a look I typically go for. This specific pattern is more 1940’s Rosie the Riveter glam, with a high waist and wide legs. Make them out of something other than denim, and they seem pretty sleek. I was willing to give it a go!

Organic Twill Jenny Overalls

Organic Twill Jenny Overalls

For this pair, I went with the shorts version although in hindsight I kind of wish I’d made the cropped legs (more on that in a minute). I cut a size 4 at the waist, grading out to a 6 at the hip. Those of you who have been following my blog for a while may notice a size discrepancy here – I pretty much exclusively make a size 2 in Closet Case Patterns. Well, my measurements have always been right between the 2 and 4, so I simply sized down instead of up. Aaaaand the 30s are hitting hard, which means I’ve gained a little bit of weight! Just enough that I needed to go up a size – and in the case of my hips and thighs, 2 sizes. Just a head’s up! The sizing on this pattern is still pretty consistent; MY size in particular has been the inconsistent one!

Organic Twill Jenny Overalls

Organic Twill Jenny Overalls

Organic Twill Jenny Overalls

Rather than use denim, I used Organic Cotton Twill from Mood Fabrics as my main fabric. Again, if you’ve followed my blog for a long time you are probably aware that I LOOOOVE this fabric. It’s the best! A great bottomweight, 60″ wide, available in an array of great colors… and less than $15/yard? YES, SIGN ME THE FUCK UP. I can also personally vouch that this stuff washes and wears beautifully. So it was a no-brainer that I opted to use it for this particular project.

As far as construction goes… not too much to report on this particular make. The instructions are great, easy to follow, and I really found this project to be super satisfying to work on. It’s similar to making a nice pair of jeans – lots of pressing and topstitching, and working with an easy fabric. I didn’t make any fit or construction adjustments to the pattern, other than (accidentally) using too long of a zipper. The only thing I’m not crazy about is how bulky the seam allowances are by the zipper – once you factor in pockets, the lap over the zipper ends up pretty thick. I don’t think swapping out for buttons would change that, and I’d rather have the pockets and just deal with bulk, so it’s not a big deal I guess.

Organic Twill Jenny Overalls

Organic Twill Jenny Overalls

So… as for the verdict? Well, they did turn out really cute! Every time I wear these out, I get loads of compliments. I think the dark color and subtle topstitching do help to make these look a little less farmer-y (you do you, but personally I do not want to look like a farmer), and the high waist and comfortably loose leg are definitely chic. I like that the bib is proportionally small, and that the straps cross over. All in all, it’s a nice look.

But… is it a look for me? Not really. I feel kind of uncomfortable in them, to be honest. The fit itself isn’t uncomfortable – the sizing includes an appropriate amount of ease, although I will say that I’m not used to wearing anything quite this fitted at my waist these days (with no stretch whatsoever), so that has taken some getting used to! I also feel weirdly overheated when I wear these if it’s super hot outside, so I can’t wear them if it’s higher than, say, 85 degrees (aka most of the summer in Tennessee). I don’t know why the addition of that bib makes them feel unbearable in the heat, but it’s a thing! Which is why I wish I’d made mine with longer legs – I think they’d be more practical, as I could just wear them in cooler weather. Finally, it has been surprisingly hard to style these. Since they are fitted and high-waisted, they really only work with tight or cropped tops. Anything loose- even if you tuck it in – just looks kind of weird in my opinion. I realize there are lots of tight top patterns out there (including Nettie!), but I don’t have any in my wardrobe as, again, I don’t like wearing tight things in the heat! Pretty much the *only* thing I own that looks good with these is the shirt I’m wearing in these photos – a Papercut Patterns SJ Tee.

Were I to make these again, I’d do the longer version and cut the waistband on the crossgrain so there’s a bit more stretch. Styling-wise, I actually do wear pretty fitted tops the rest of the year so that wouldn’t be a problem.

Organic Twill Jenny Overalls

Overall (lol see what I did there), I do like this pattern and the resulting overalls are pretty cute! The jury is still out on if I really feel sartorially comfortable wearing these, so I’m giving them a few more goes before I make a decision. I’m glad I made them because I did enjoy the experience, and if I decide to pass them on I’m sure someone else will love wearing them 🙂

Note: The fabrics used in this post were provided to me by Mood Fabrics, in exchange for my participation in the Mood Sewing Network. All opinions are my own!

Completed: Morgan Pants

27 Apr

I have a well-documented love for the Ginger Jeans pattern. In fact, I love making (and wearing!) this pattern so much, that I just stopped posting about it. After you finish the 10th pair of pants, it just feeling way too fucking redundant to keep posting the same pattern praise over and over again. Needless to say, I have a lot of pairs of these pants, and more in the works for next winter. No shame about that, but also, no blog posts. You are welcome in advance.

Morgan Jeans + Cabernet Cardi

With that being said, I loooove making pants and I found myself very intrigued with the Morgan Boyfriend Jeans pattern, which is also from Closet Case Patterns. I loved the idea of being able to make pants with a non-stretch fabric – truly, it opens up an enormous world of pants-possibilities that I hadn’t been able to consider in the past. Plus, I could keep making pants but pretend like they were like, totally different. Mostly, though, I wanted some non-stretch twill pants. I love the Organic Cotton Twill that Mood Fabrics sells (and yes, I’ve made pants with it before! And shorts!) and I know from experience that it’s a great fabric that wears and washes super well. I had about 1.5 yards leftover from my Organic Cotton Twill Kelly Anorak, so I decided to make the pattern as a sort of wearable muslin.

Truth be told, I actually got the Morgan Jeans pattern for Christmas last year. My little brother bought it for me (at my request) and while I was PUMPED to sew it up, it’s been languishing in my sewing room ever since. Every time I pulled it out of the envelope and tried to creep on the size chart, I just got overwhelmed and confused. I don’t know why this particular size chart buggered me out more than any other size chart in the history of ever – but that’s my excuse! See, I’m technically between sizes in Closet Case Patterns (I’m about 1/2″ bigger than the size 2, and a 1/2″ smaller than the 4). In my pants-making experience with this company, the size 2 fits pretty well, and the 4 is waaaay too big. However, this pattern suggests that you size up if you’re between sizes – and I kept having flashbacks of my size 4 Gingers that needed a LOT of tweaking to get a good fit, as they were just too big. I chatted with Heather about it when I saw her in DC, and she suggested going with the 2, so I took her advice and did just that.

Morgan Jeans + Cabernet Cardi

Y’all, I’m so glad I had a moment of craziness and decided to trace my pattern – I generally DO NOT trace my patterns, but the sizing question was giving me major pause and I thought I would be pretty sad if I ended up cutting the wrong one. Which is exactly what I did, because the size 2 is definitely too small! Oh well, live and learn!

With that being said – these pants I am modeling are the original size 2 that I made, so I did make them work. I had to let out the leg seams (basically the side seams from as close to the waistband as I could get, all the way to about the knee area) as much as my seam allowances allowed (it’s hard to tell now since they’re all finished, but I didn’t cut any fabric off when I serged as I was anticipating this, so, I’d reckon those seam allowances are probably about 1/4″ now). They were still pretty tight, but fortunately, woven fabrics like this tend to ease and relax throughout the course of the day. TBH, I don’t think I can ever put these pants in the drier because I don’t want them to shrink back up! (A far cry from me in my early 20s – when I’d walk around the house pantsless all day and only put on my pants literally right before I left to party, so they’d be as tight as possible haha!) But with the seam allowances let out, and the fabric all relaxed and happy – the fit on these is pretty much perfect! So no complaints on this pair – and I’m so so happy I was able to salvage them, as shit got a little hairy for a minute there – but I definitely will need to size up to a 4 for my next pair.

Morgan Jeans + Cabernet Cardi

Morgan Jeans

Morgan Jeans

Morgan Jeans

Morgan Jeans

Other than the sizing snafu, I am pretty pleased with the overall fit of these pants! I will be the first to admit that they may not be the most flattering thing I could put on my ass – but I think that’s kind of the case with a relaxed fit pant like this, regardless? And they are also a little tight, still, so sizing up on the next pair will probably help with that too.

I did not make any adjustments to the pattern – including not futzing with the rise. I usually shorten the rise as I have a bit of a short crotch, but I wanted to see how these fit out of the envelope. And again, I think it’s pretty good! Since they’re more of a relaxed fit than the tight Gingers, my calves fit in the legs just fine. FYI the inseam of these is pretty long – I think I measured it at about 32″ (I don’t know why that wasn’t included in the finished measurements, but there ya go), which is a good 4″ longer than what my lil’ legs require. Since the legs are straight, though, you can just cut off the excess length – which is what I did! These are hemmed to be a normal full-length, by the way, I just have them rolled for the pictures because that’s how I’ve been wearing them!

And speaking of wearing them – I took these photos on day 3 of wearing these pants, so they are pretty relaxed! And that also explains all the wear wrinkles. Whatever! It’s cotton, it’s gonna wrinkle!

Morgan Jeans

My favorite part about making pants is all the fun detailing you get to play with! Topstitching, contrast bartacks, fun pockets – yes please!

Morgan Jeans

Morgan Jeans

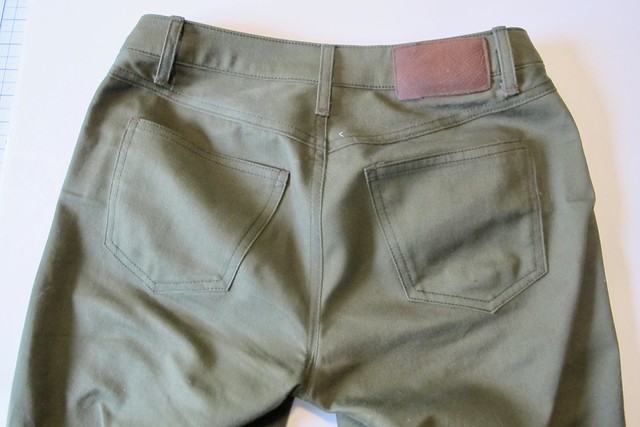
For these, I used a darker olive all-purpose thread with the triple stitch (I think it looks nicer than using topstitching thread – although it is a BITCH to unpick, so be warned if you decide to go that route!), and brown thread for the bartacks. The pocket lining is a batik fat quarter that I bought at Loose Threads, a quilt shop that I stumbled upon at random while in Harriman, TN a few weeks ago for the Barkley Marathons. I was not actively seeking a fabric store (honestly, we were just looking for coffee), but I saw the words “Quilt Shop” and we had to make a quick detour. There isn’t much that I can buy in a quilt shop – still haven’t caught the quilting bug, ha! – but I can stash some fat quarters as they are the perfect size and weight for pocket linings!

Morgan Jeans

Morgan Jeans

I skipped the back pocket topstitching as I wanted to keep these reasonably plain, but added a leather back patch like the instructions suggest. This leather was pulled out of my box of leather scraps – I’m not entirely sure where it originally came from, but it’s fairly thick. I had used this same leather to make luggage tags for my suitcases (yes I am a big dork), and that square was a leftover piece from the center cut-out. Since my machine had no problem going through the 2 layers to make the tags, I knew it would be fine with a single layer + the cotton twill. I didn’t even change the needle for this – just went to town and it turned out fine.

Morgan Jeans + Cabernet Cardi

Anyway, that’s all for now! Have you tried this pants pattern yet? What is your take on the boyfriend jeans (whether they are secretly made for females or you actually steal your *real* boyfriend’s jeans… tell me about that too)?

*Note: The main fabric used in this post was provided to me by Mood Fabrics, in exchange for my participation in the Mood Sewing Network.

Completed: The Kelly Anorak

14 Feb

Hey guys! Thank you for all your great comments, suggestions, and feedback on my last post! I’m so happy to hear that y’all enjoyed reading it as much as I enjoyed writing it 🙂 With that being said, my stint as a ~travel blogger~ is now officially over (well, until I save up money for my next trip – the verdict is still out on where exactly!) – back to regular sewing posts!

BUT before we get into the project – some class-related stuff!

  • I’ve got two classes at Workroom Social in March that both still have a couple of spots left, if you’ve been on the fence and are looking for a reason to treat yo’self 😉 (it IS Valentine’sDay, after all! ;)) The Jeans Making Intensive is March 2-3, and the always-popular Pants Making Intensive is March 4-5! The jeans class primarily focuses on construction and finishing a pair of jeans (we use the Ginger Jeans pattern – which, btw, I’m wearing in these photos haha), while the pants class has a little more fitting involved and sews a classic pair of trousers. Both are going to be super fun and I am so excited to be back in NYC in a couple of weeks! ♥
  • Speaking of Workroom Social – Camp Workroom Social is coming back, and I’ll be back as an assistant to Amy of Cloth Habit’s Bra Making class! Registration is currently open only to alumni, but will be open to the public soon. I cannot WAIT for another round at camp – last year was freaking amazing (and so, so, so beautiful!) and it will be so fun to reconnect with old friends and make new ones!
  • Finally, speaking of Amy and bras -she’s coming to Nashville to teach a bra making workshop at Craft South! Having worked with her at camp last year, I knew we had to have her at the shop for a workshop – she’s a fantastic teacher and so knowledgeable about bra fit! Amy will be in Nashville September 22-23 to teach her Bra Making Weekend Workshop at Craft South. The class will make Amy’s newest pattern, Harriet, as well as learn basic fitting and finishing methods. Oh, and I’ll be assisting the class 🙂 I know a lot of people have been asking when we’d do a bra workshop in Nashville – so there ya go! You can sign up for the workshop here. It’s gonna be amazing!

Ok, back to sewing!

Kelly Anorak in Organic Cotton Twill from Mood Fabrics

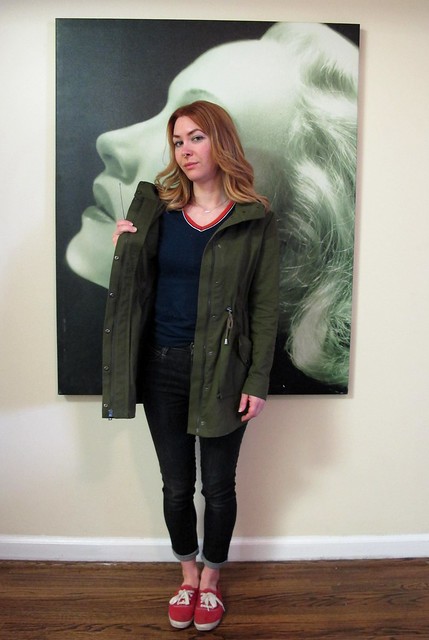
Today’s project is actually last month’s project that I am just now getting around to posting – the Kelly Anorak from Closet Case Patterns!

While I am not typically a fan of “vacation preparation sewing” – mainly in the sense that I get really stressed with those sorts of deadlines and thus sewing doesn’t even up being very fun – I did make this jacket specifically for my trip to Egypt. I thought it would be a useful thing to bring with me – a nice light layer to ward off the morning chill in the desert, yet breathable for when the sun got all crazy in the afternoon. I also liked that it had those big, roomy pockets and was long enough to cover my butt. My orange Minoru fills most of these slots, but I’ve worn it to death over the years and it’s starting to look ratty – plus, that poly lining isn’t exactly the most breathable thing. Also, I just really love sewing jackets. Sue me 😛

Kelly Anorak in Organic Cotton Twill from Mood Fabrics

Kelly Anorak in Organic Cotton Twill from Mood Fabrics

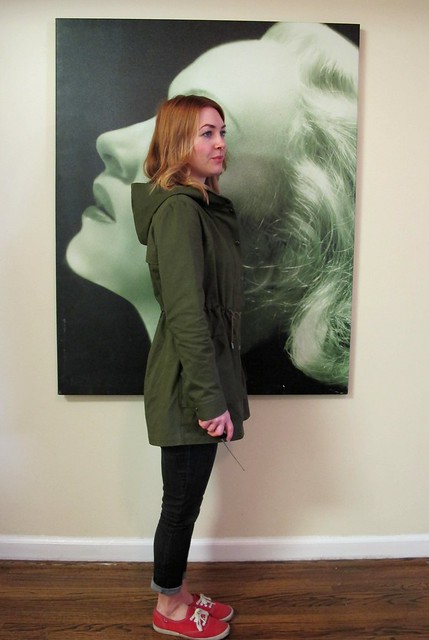
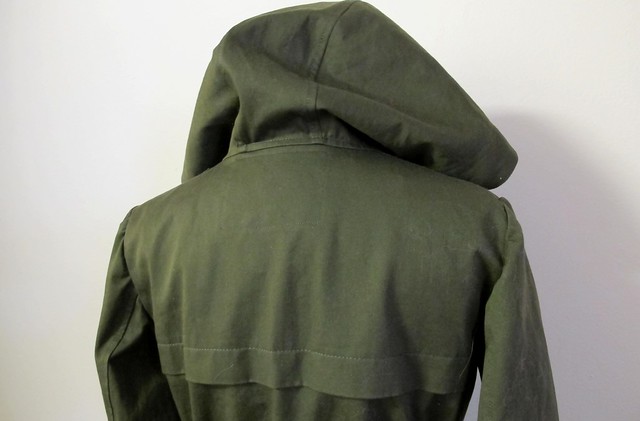
As I said, the Kelly Anorak is a lightweight and unlined jacket – meant to be worn between seasons, not necessarily your crazy winter coat. I’ve seen some people make it out of waterproof fabric, but in my experience I usually carry an umbrella when it rains anyway (and I also own an actual rain jacket – although I still prefer the umbrella, as I don’t like getting my shoes and pants wet!), so this is good enough for a super light drizzle. The pattern features a zippered front with a snap closure placket, a 3 piece hood (which stays on your head much better than the 2 piece kind – it also doesn’t flatten one’s hair as much), big ol’ gusseted pockets, a drawstring waist, and a sleeve placket so you can roll up the sleeves. I actually saw something real similar in JCrew while I was out holiday shopping one afternoon, so I got the added bonus of being able to try the thing on before making it!

The fabric I used for this jacket is an old favorite that’s shown up in tons of my past makes – solid organic cotton twill from Mood Fabrics. The color I used specifically is Olive, and yes, I realize the color on their website photo is way off and no, I don’t know why that is. If you are picky about color, you will definitely want to order a swatch of this stuff. Anyway, I love this fabric because it is easy to work with, has a nice brilliant color, washes/wears well, and is reasonably priced (at least in my opinion!). And it comes in so many colors! Mood pretty much always carries this fabric, FYI, so even if it’s sold out on the website – either hang tight and wait for it to get restocked (I promise it will) or just call the store and have it shipped from there.

Kelly Anorak in Organic Cotton Twill from Mood Fabrics

Kelly Anorak in Organic Cotton Twill from Mood Fabrics

Kelly Anorak in Organic Cotton Twill from Mood Fabrics

Kelly Anorak in Organic Cotton Twill from Mood Fabrics

Most of the little hardware bits and pieces were picked up in the NYC Garment District when I was there in November. I knew I was going to be nitpicky about everything matching just so, so I wanted to check out the goods in person. The drawstring, grommets, cord stoppers, metal tassel ends, and zipper are all from Pacific Trimming (I knowww there are other places in the GD to buy this stuff – and maybe even for cheaper – but I just love Pacific Trimming, esp their zipper room!). The zipper is actually a Riri zipper, cos I wanted that shit to be extra fancy. I think I paid around $20 for just the zipper – so it’s not necessarily cheap at all – but it’s really nice, both in terms of how it looks and how smooth it zips! It was also nice to have it cut to the correct size, and also be able to choose both the finish of the metal teeth and the color of the zipper tape, cos again, I was feeling nitpicky about that shit! 🙂 I knew this jacket was going to be a time commitment to make, and for that reason, I’m ok with spending extra money on nicer materials.

The only notion that I did not buy in NYC was the snaps – I just went to Elizabeth Suzann‘s studio during their lunch break and used their industrial snap setter, ha! That thing is really cool and I kiiind of wish I had one, but honestly I am always looking for an excuse to drop by and chat with my old coworkers so for that reason, I’ll continue mooching off theirs!

Since the jacket is unlined (and, for me, primarily worn wide open), I took extra care to finish all the seams for a neat interior. Most every seam is flat-felled, with the exception of the arm holes (only because I didn’t feel like futzing with that shit. I just serged them). I used two different threads to assemble the jacket – a polyester thread for the seams, and then a cotton thread for all the topstitching. I would have just sewn the entire thing with the poly thread, but the color I had on hand was off enough to where the topstitching didn’t look right – and the only thread I had in a suitable color was cotton. In my experience, cotton thread simply does not hold up as well as polyester thread, which is basically indestructible. Considering all the work that I put into this jacket, I didn’t want my threads to fail! So I just used cotton for topstitching – and used a triple stitch, partially for added durability and also because it results in a more visible stitch.

Kelly Anorak in Organic Cotton Twill from Mood Fabrics

Kelly Anorak in Organic Cotton Twill from Mood Fabrics

I will be completely honest with y’all – I didn’t exactly enjoy the process of sewing this jacket. A big part of the reason was because I was under a pretty tight deadline to finish it before my trip (even though I promised myself it was ok to take the Minoru if I didn’t finish, and that everything would be fine – I still rushed!), but I also found some of the directions to be a bit confusing. The Closet Case Patterns blog has some tutorials on the trickier steps, but some of the information actually contradicts itself in online tutorial vs pattern instructions. The zipper placket specifically was really head-scratching to me, and I had to walk away a few times. There’s a discrepancy with the seam allowances written in the pattern instructions vs the blog tutorial, which I found really confusing. I believe the version on the blog is the correct one, though, if I recall correctly! Another thing that really threw me off was that my zipper pull was on the opposite side of the tape, than what you see on the blog. Finally, I was not a fan of how wide the finished facings are – they are really really wide (too wide, in my opinion). I ended up turning them under additionally and sewing another line to make them more narrow. At the width they were as drafted, I felt like they would just end up flapping around with wear and showing my ugly white interfacing. Nope, not doing that.

Anyway, minor complaints – and may also just be personal, because all the reviews I read just gush about how clear the instructions are. So it could just be me!

As far as sizing and fit, I made a size 2 – which is my normal size for this pattern company. I actually did make a muslin, so I could double check the fit, length, and drawstring placement. The length and drawstring were perfect, and the fit was pretty good. The only thing I changed was the shape of the arm hole – it was a little too big, which made the entire jacket move along with my arms when I lifted them. I raised the bottom by about 1/2″, as well as added to the back of the arm hole, and then took a bit (maybe 3/8″) off the front of the arm hole as it was pulling. This is a pretty standard adjustment that I make to most patterns that involve sleeves. I think I just have really weird-shaped and/or small armscyes haha who knows.

One thing I wish I could have found a way to change was to make the snap on the pocket functional. It’s just there for show and to hold the flap in place – the pocket doesn’t actually snap shut. I considered adding the other side of the snap, but it would have shown on the inside of the jacket (and since you need to interface it, would not have made the inside look as nice). One idea is to interface a scrap of the twill and sew it to where the snap gets inserted, so all you see is a square of twill on the inside. I may do that in the future. It’s not a dealbreaker not being able to snap the pockets closed, but it sure would be handy.

At any rate, this jacket was TOTALLY worth the effort – I think the finished result looks pretty damn good! There’s definitely something to be said about using nice materials, as they really elevate the garment into something that looks extra nice. But I am also really happy with the craftsmanship that went into it – I’m glad I took the time to do the flat-felled seams, rip out mistakes and fix them (even though we all know that shit can be agonizing haha), and even deal with making a muslin first. All totally worth it in the end. And while I made this for Egypt and our upcoming spring weather, it’s actually been handy for the majority of January & what we’ve experienced so far in February. I realize everyone is getting pummeled by snow right now, but y’all, it’s been 70 degrees in Tennessee this past week. I am starting to wonder if we are going to skip winter entirely! I had plans to make an actual winter coat this year, but I may put it on hold until the next cold season because I’m not really feeling super motivated with the weather as it is currently!

Kelly Anorak in Organic Cotton Twill from Mood Fabrics

Kelly Anorak in Organic Cotton Twill from Mood Fabrics

Kelly Anorak in Organic Cotton Twill from Mood Fabrics

Kelly Anorak in Organic Cotton Twill from Mood Fabrics

Kelly Anorak in Organic Cotton Twill from Mood Fabrics

Kelly Anorak in Organic Cotton Twill from Mood Fabrics

Kelly Anorak in Organic Cotton Twill from Mood Fabrics

Kelly Anorak in Organic Cotton Twill from Mood Fabrics

Kelly Anorak in Organic Cotton Twill from Mood Fabrics

Kelly Anorak in Organic Cotton Twill from Mood Fabrics

Kelly Anorak in Organic Cotton Twill from Mood Fabrics

Kelly Anorak in Organic Cotton Twill from Mood Fabrics

Kelly Anorak in Organic Cotton Twill from Mood Fabrics

I used twill tape to finish the neckline (as suggested in the pattern instructions). If I’d thought about it while I was buying my supplies, I would have tried to find a tape that matched my olive fabric. Oh well! For the label, I serged around all 4 sides of a scrap of twill, then sewed my label (which is from Dutch Label Shop) on top of that before attaching it to the jacket. The hanging loop is a small piece of leather that I cut to shape and sewed on by hand.

Kelly Anorak in Organic Cotton Twill from Mood Fabrics

Kelly Anorak in Organic Cotton Twill from Mood Fabrics

Kelly Anorak in Organic Cotton Twill from Mood Fabrics

Whew! Sorry about that photo dump – I guess while I’ve gotten better at editing down and posting less photos of myself, I can’t say the same about detail shots 😉 haha.

I leave you with one last photo of me. Sorry, not sorry:

Kelly Anorak in Organic Cotton Twill from Mood FabricsNote: The fabrics used for this project was provided to me by Mood Fabrics, in exchange for my participation in the Mood Sewing Network.

Save

Completed: Navy Cotton Twill Ginger Pants

1 Nov

Gah, it has been WAY too long since I made a pair of pants – according to my blog, that last pair was published in a February! LAME, TIME TO RECTIFY IMMEDIATELY.

Also, damn, my hair has gotten long since then. It seems to grow soo slowly until you look back and realize you’ve really gained some inches over the months, yay.

Navy Cotton twill Ginger Pants - front

Anyway, Ginger Jeans! Again! I love this pattern so much, it’s definitely my pants TNT. The style is so classic, I can make a million pairs and have no one be the wiser that I’ve been wearing the same pattern for 6 months straight. I’m still tweaking the leg fit, but I really think the waist/hip fit is nailed down solid. And I love how it looks in different fabrics. While I primarily make this pattern up in denim, I’ve really wanted to try more colorful stretch twills. And here we are with that!

Sorry in advance for the terribly quality of these photos. Navy is almost as difficult to shoot as black, who would have thought!?

Navy Cotton twill Ginger Pants - front

Navy Cotton twill Ginger Pants - back

Anyway, I bought this navy stretch cotton twill from Mood Fabrics, back when I was in the NYC storefront in March – specifically with the intention of making myself some sweet pants out of the yardage. It’s a good stretch bottomweight for the kind of pants I like to wear – a lighter bottom weight (it’s still technically bottom weight, however, it’s about the lightest you can get away with – if that makes sense!) with a really good, solid amount of stretch. I have learned that I don’t like wearing really heavy fabric as pants – just don’t care at all for the way it feels. Maybe I’m sliding quickly into knit-fabrics-for-every-garment fabric territory, but I really like lightweight, super stretchy fabrics on my booty. Since that’s so freaking DIFFICULT to find with denim (get the right weight, and you lose out on recovery. Get the good recovery, and it’s like wearing raw denim in terms of stiffness, ew), cotton twill is where it’s AT. Bonus if that shit is colorful. I like colorful things.

This cotton twill seems to be a lot more along the lines of a cotton sateen, to be honest -it’s pretty shiny, for one. I rather like the effect – I think it looks a little more luxe than just a normal pair of pants – but as you can see, it highlights EVERY SINGLE wrinkle that shows up. It makes these pants look a lot more ill-fitting than they actually are… not that anyone would notice, except someone else who sews/fits, but it is what it is. I ain’t worried about it. Coupled with the fact that I like to wear my pants as skintight as if they are basically painted on, it’s pretty much wrinkle-city up in here. That’s ok, though. I will live.

Navy Cotton twill Ginger Pants - front

Navy Cotton twill Ginger Pants - side

Navy Cotton twill Ginger Pants - back

I wanted to improve on the fit of my last pair – the full calf adjustment has been good in terms of allowing room for my calves and reducing the amount of knee wrinkles, however, I wasn’t happy with how wide the ankle ended up as a result. This is part of the reason why I’ve been reluctant to make this pattern again until now – that, and it’s been way too hot to wear pants for the past few months 🙂 Anyway, I have that Ginger Jeans Intensive at Workroom Social this week, so I wanted to make the pattern before I left just to brush on the construction. Which meant that I also had to figure out the leg situation. Boo.

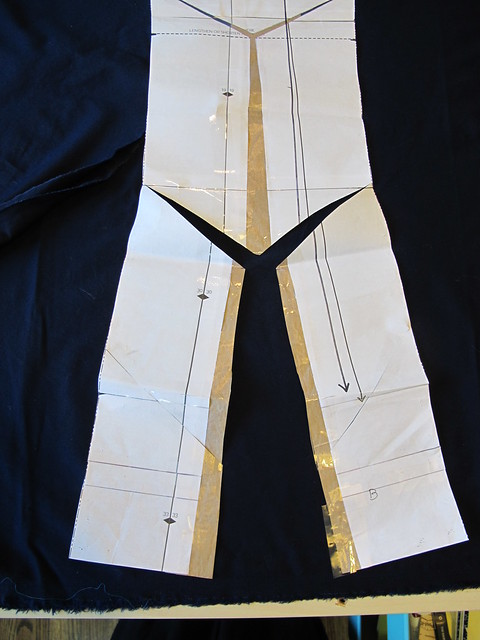
Ultimately, I figured that since the full calf adjustment was kind of the same concept as a full bust adjustment – i.e., you slash and spread to add width to a certain part of your pattern – then reducing the circumference of the ankle would basically be the opposite of that, like a small bust adjustment.

Navy Cotton twill Ginger Pants - full calf adjustment

Here is my pattern piece after adding that extra room for my calves. As you can see, quite a bit of width was added at the ankle – 1 1/8″, to be exact. I wanted to reduce that amount without actually reducing the calf width, and also maintain the grainline of the pattern so the fabric wouldn’t twist and go all haywire (this is why you can’t just… shave down the side seams to remove the width. I tried that on the jeans with a basting stitch and it was just AWFUL. Did not work at all).

Navy Cotton twill Ginger Pants - full calf adjustment

My Y-shaped slash and spread worked to add that width, so I did another Y-shaped slash right around where my calf starts to taper back into “normal width” category, using the super scientific method of holding the pattern piece up to my body and drawing wild lines on the paper with a pencil. (btw, that second slash line was my first try – and I realized it was way too low, so I taped it back together haha)

Navy Cotton twill Ginger Pants - full calf adjustment

Navy Cotton twill Ginger Pants - full calf adjustment

Instead of spreading, I overlapped the pieces together so that the original pattern paper (without my brown craft paper addition) butted up as normal right at the ankle. As you can see, it makes a very gradual curve to the side seams – they bellow out a little where the extra width is needed, and then gently curve back to their normal width tapering to nothing at the ankle. I also straightened the grainline, after I took the photo. Sorry bout that.

I had no idea if this was going to work – this is how I do my pattern adjustments (if I can’t find the answer in a book, anyway): mulling over the issue for a few months, doing some wild slashing that seems legit, and then cutting them off into shorts if it doesn’t work 🙂 Fortunately, it worked! I still have the room I need for my calves, but the ankle is fitted as it should be. And I ended up with pants instead of having to cut them into shorts, so woohoo me:)

Navy Cotton twill Ginger Pants - flat

Navy Cotton twill Ginger Pants - flat

Navy Cotton twill Ginger Pants - flat

Navy Cotton twill Ginger Pants - flat

The only other change I made to these pants, in terms of construction, was how I applied the topstitching. I usually use topstitching thread – whether matching or in a contrast color – but I didn’t have any of that on hand when I made these pants (to be frank, I barely had ANY navy thread at all during this phase. I did have a bunch of bobbins filled with navy thread, which is what I used as my main thread hahaha AND MIRACULOUSLY HAD ENOUGH YAY). Instead, I used normal polyester thread – just whatever you’d use to, I dunno, assemble a garment – and set my machine to sew on the Triple Stitch. The Triple Stitch automatically lengthens your stitch just a few mm, and then sews over the same stitch a couple of times – which results in a nice, thick, dense stitch. It looks great for topstiching and solves the problem of not having the proper thread. I actually like it better than using topstitching thread, as you are less likely to get thread nests on the underside of your fabric! The only downside is that it is a giant ass bitch to unpick, so definitely be really really sure of what you’re sewing 🙂

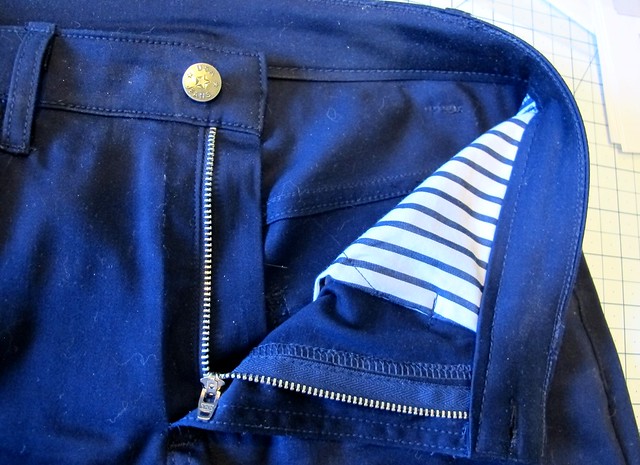
Anyway, I used the Triple Stitch to topstitch all my seams – including the flat-felled seams. To keep my lines even and consistent, I used my edgestitching foot to get that 1/8″ from the seamline, and then my 1/4″ foot for the second pass. The bartacks are just teensy little zigzag/satin stitch blobs, using the same navy as the topstitching. I didn’t add any rivets or contrasty anything to these pants – I wanted them to be plain and a little sleek. The pocketing is the same striped cotton I use for pretty much all my pocketing – I bought a shitload of that yardage ages ago at Mood Fabrics, and it’s like the gift that keeps on giving forever haha 🙂 I kept the longer length, just so these don’t end up being super high-waters after a couple of washes, but they look good cuffed, too 🙂

Navy Cotton twill Ginger Pants - front

I have only had a chance to wear these once since finishing them, so I can’t 100% comment on the recovery of the stretch fabric – but at the end of the day on their inaugural wear, they stayed pretty tight and did not bag out. I’m interested to see how long they keep their shape before bagging happens, but so far so good, I think!

** Note: The fabrics used to make these pants were provided to me by Mood Fabrics, as part of my participation in the Mood Sewing Network. In case you were curious, the gingham for that shirt is also from Mood Fabrics 🙂 it’s Butterick 5526 !

Completed: Red Cotton Twill Thurlows

11 Sep

I’m pretty sure I’ve added “make red shorts” to my summer sewing list for at least the past couple of years. I had a really awesome high-waisted pair that I made a few years ago and wore the hell out of (red shorts go with everything, don’t ya know), but eventually they got too big and I sold them off. I’ve been meaning to replace them for years, but never got around to it – partly because I couldn’t find a good fabric that I liked, but mostly because I kept getting distracted by the new & shiny.

Sooo, this post is dedicated to those red shorts. I finally made some! Although they’re nothing like the OGs – no high waist, no pleats, none of those – but they’re red, and that’s the most important part.

Red cotton twill Thurlows

Red cotton twill Thurlows

I’m going to keep this (relatively, for me) brief, because nothing about this project is new information as far as my blog is concerned. I used the Sewaholic Thurlow trousers as my pattern. This is a really, really fantastic pants pattern and I’ve made it up numerous times – from jeans to red skinnies to shorts to more shorts to MORE SHORTS. (+ even more that I did not link because, well, that’ll be enough for now). I even had a Thurlow Sewalong on this here blog like, a thousand years ago! I loooveeeeeee me some Thurlows! They are beautifully drafted, have an awesome butt-fit, and they look really nice and professional when they are sewn up. Thurlows win.

That being said, I’ve talked about the Thurlows a LOT on this blog. It’s kind of hard to keep waxing poetic about something you’ve already publicly loved on to the point of it becoming embarrassing PDA, so I’m going to refrain in this post. Nothing new about this project. I made my usual size with my usual adjustments (for more details on that, see one of the many MANY posts I’ve written about this pattern hahaha) and followed the instructions. Yawn.

Red cotton twill Thurlows

Red cotton twill Thurlows

Even my fabric choice doesn’t really offer much in terms of exciting and new. I used an Organic Cotton twill from Mood Fabrics – it’s the same fabric I used last year to make my tie-less Miette skirt. I had just enough to squeeze out a lil’ pair of shorts, so, awesome! I love using this twill to make Thurlows (yeah, even fabric choice isn’t a first – I’ve made this pattern using the deep wine color before, too hahaha), as it holds it’s shape really well and is comfortable to wear. It also washes and wears beautifully, which is, well, pretty important too. The only thing that sucks about this fabric is that it tends to sell out pretty quickly on the website!

Red cotton twill Thurlows

Red cotton twill Thurlows

Red cotton twill Thurlows

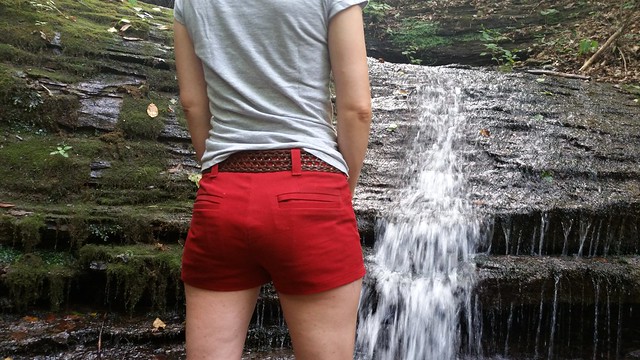
To make up for an unexciting pattern review – here’s an ~exciting~ photoshoot! Well, this isn’t nearly so much exciting as it is just different from the mess of trees I usually have going on in my photos (which I ain’t complaining about one bit, because I can – and will – stare at those trees all day long. They are so beautiful!). Landon and I took a hike a couple of weeks ago, in search of this waterfall, and we ended up taking these photos just because the scenery was so awe-inspiring. My hair is a rat’s nest of a mess and these were taken with his phone – but I like them! I don’t normally go for photo-shooty type pictures on this blog (I personally don’t think artsy photos do a good job of showing details. Also, I abhor the idea of having to leave my house to take pictures for a blog haha), but I’ve posted about this pattern a zillion times, so I think it’s ok if you can’t see every little detail.

Red cotton twill Thurlows

What’s exciting about these pictures is that, even though we were hiking to get to this point – it’s not like we hiked very far, or even had to drive anywhere to begin the journey. We started out in our backyard and traveled through the neighbor’s yard to find this spot (I should add – our neighbor has repeatedly invited us to explore and enjoy his land. He’s the one who told us about the waterfall in the first place). So, while this isn’t literally in my backyard – it’s close enough! We only had to walk about 30 minutes. Yeah, neighbor has a LOT of land hahaha. Way more than our puny-by-comparison 5 acres!

Red cotton twill Thurlows

Red cotton twill Thurlows

God, I love living in the country 😀

And because this is still at sewing blog, here at Thurlow short gut photos:

Red cotton twill Thurlows

Red cotton twill Thurlows

Red cotton twill Thurlows

Red cotton twill Thurlows

Red cotton twill Thurlows

Oh, I did change up what pieces I cut from the lining. The waistband and fly facing are self-lined (instead of using contrasting lining fabric); only the pockets are cut with lining. I did this because I always felt like the lining showed from the right side, which I wasn’t a fan of. I guess this may not work for really heavyweight fabrics, but it was fine with the cotton twill. Everything else stayed pretty much the same. Also, I dunno why my fly shield doesn’t cover the bottom of my zipper, but, oh well. Finally, I have come to accept the fact that I use this striped cotton for pretty much all my pocket linings, and I will not apologize for that. It makes a really good pocket lining hahaha.

Red cotton twill Thurlows

That’s all for today! I have a few more projects that are patiently awaiting a post (I told y’all, I’m behind), and then it’s on to sewing for the next season! I’ve been writing out my plans and gathering supplies, and I’m really looking forward to switching gears for the cozy. Another thing I’m looking forward to is seeing what this area looks like when the leaves start changing. I am pretty sure it’s gonna be insanely gorgeous 😀

Sweaters & Skinnies for Fall!

24 Sep

Ok, I’ll admit – when I first started working on this outfit, the air was a LOT more fall-like than it currently is at the moment. Stupid fickle season, ha!

Jamie Jeans + SJ Sweater Made with Mood Fabrics

Anyway, I’m totally a trooper so I’m modeling this outfit for y’all nonetheless (photos taken early morning before the temperatures got too high, because, woof.). My first real cold-weather makes – like I said, it’s a little early in the season here, but I like to get a head start so I can actually start wearing this stuff when the weather cools down 🙂 This outfit – or at least the skinnies – is also part of my London wardrobe. I’m officially less than 2 months out, EEEEEP! – so it’s time to really start cranking down and getting my wardrobe act together. Since I’m very limited in suitcase space, I’m trying to capsulate everything to mix and match. So I can bring less clothes, so I can bring home more fabric 🙂 You know – priorities!

ANYWAY, I have a lot of ground to cover with these two pieces, so let’s get started! Sorry in advance for the big photo overload!

Jamie Jeans + SJ Sweater Made with Mood Fabrics

Let’s start with the sweater. I bought this fabric last month while I was in NYC. This was my first non-spring trip to the city, which meant my fabric shopping was focused on woolens and winter weights (instead of summer fabrics, which I am usually bee-lining for in March). I immediately found this star printed WOOL sweater knit, and promptly flipped my shit over it. It’s SO fabulous – and soft! Even softer than you can imagine, forreal. At $25 a yard, it wasn’t the cheapest sweater knit – but stars and wool? Totally worth it. Plus, it’s not like a sweater takes a lot of yardage – at least not for me. I bought a yard and a half (and I have some leftover.. hmm, what to make with?).

Jamie Jeans + SJ Sweater Made with Mood Fabrics

The pattern I used to make this bad boy was actually suggested by Devra (who also bought some of the prized star wool knit, after I peer pressured her into it 😉 ) – the SJ Tee from Papercut Patterns. I made a wearable mock-up before the real deal – which I will show y’all later this week – so I was able to figure my fitting before cutting into my precious wool knit. I cut a size XXS and took 1″ out of the center back. The length is the long version (aka, not cropped) and the sleeves are long as well.

Jamie Jeans + SJ Sweater Made with Mood Fabrics

I used rib knit to finish the neckline and cuffs – it was in my stash, I have no idea where it came from. This knit was way stretchier than the sweater knit, so I had to keep retrying the neckline to get it to lie flat. I ended up cutting the rib to half the length of the neckline and stretched the everloving shit out of it – it could still stand to be a little tighter, but this will do. The neckline also can’t stand to be a little lower, it’s already a little risque (which I LIKE!). The cuffs are a bit looser than I’d prefer, but I wanted to be able to push the sleeves up, like so.

Jamie Jeans + SJ Sweater Made with Mood Fabrics

I sewed the entire sweater on my serger – you could use a sewing machine (this particular knit does not unravel or shed), but serger is faster 🙂 I did use a twin needle to topstitch the raglan lines, as well as the neckline & hem. Really loved topstitching this sweater; the stitches just sink right in and look soooo good!

Jamie Jeans + SJ Sweater Made with Mood Fabrics

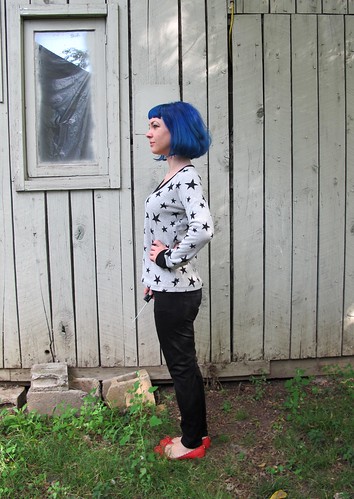
For the black skinnies, I used a really great stretch twill. I’ve had some hits and misses when it comes to stretch bottom weights – they tend to be a weird weight (either too heavy, or not heavy enough), and the stretch can bag out over time. One thing I’ve learned is that you need a pretty high spandex/poly content to get them to snap back into shape – 5-10% – and you need to make sure they are bottom weight. I actually made Heather Lou source this fabric for me, also in the Mood store. We were initially looking for black denim, couldn’t find a good one (I still don’t really know what constitutes as a good one- you’ll have to ask her! I just blindly followed, ha), and decided on the twill. We did end up finding a black denim, fyi, but not at Mood. Once I sew that one up, I’ll share more about it 🙂

Jamie Jeans + SJ Sweater Made with Mood Fabrics

Anyway, this twill is great! It’s pretty similar to what you get with stretch RTW pants – thick enough for a bottom weight, but not tooooo thick (I still only used an 80/12 needle, so no heavy denim shit or whatev). The stretch is crazy good, and it actually snaps back into shape. I can’t give y’all a true verdict on a full day’s worth of wear – the weather jumped back up to hot, so I haven’t had a chance to wear these yet. However, I tried the jeans on a LOT during construction, and they haven’t bagged out yet. So that’s a good sign!

The only drawback to this stuff is that it attracts cat hair like a magnet. It’s not as bad in real life as it is in photos (else I would have lint-rolled that shit, I mean, come on), but it also doesn’t bother me that much. When you have a cat and you wear black pants, cat hair is sorta just a way of life, you know?

Jamie Jeans + SJ Sweater Made with Mood Fabrics

The pattern I used to make the skinnies is the Jamie Jeans, from Named. I’ve actually had this pattern in my stash for a few months – my friend Carla bought me these (plus a few other Named patterns) as an early birthday gift earlier this year. Then I was a total ass and didn’t do anything with them until just now 😛 Hey, it’s been too hot! Anyway, I’m glad I put these off because there is no way I would have had such stretch twill success if it hadn’t been for Heather doing that side of the shopping for me. So there’s that.

Jamie Jeans + SJ Sweater Made with Mood Fabrics

Anyway, this was my first experience with Named. My understanding is that a few things have changed since they initially released this pattern – for one, the instructions include some diagrams now (they used to be text-only), and the prices are a little more competitive. The pieces also aren’t quite as overlapped as they were the first go-round – because, ugh, tracing patterns, ugh. I only had to trace the waistband for these. Everything else was, thankfully, not super overlapped.

I started with the size 2, and made these initial modifications, based on my muslin:
– Added 1″ to the back crotch, for butt room
– Removed 2″ of length at the legs
– Removed 5/8″ at the center back yoke, blending to 1/4″ at the bottom (where the pants meet the yoke)
– Removed 1/4″ from the center back, blending to nothing

Once I started sewing, I ended up doing a few more fit adjustments. I don’t know why these weren’t prevalent in my muslin – perhaps my fabric wasn’t quite stretchy enough? At any rate, these are my additional modifications (and now you know why I pulled them on and off so many times!):
– Sewed the side seams at 1/2″
– Took a 1″ wedge out of the center back of the waistband, tapering to nothing at the bottom
– Removed an additional 3/4″ from the length
– Did some crazy witchcraft to reshape the crotch to be a J (again, NO IDEA why this wasn’t an issue with the muslin, but argh – at least I fixed it? Mostly.).

Things I will change for my next rendition:
– Need to remove some length from the front crotch – you can see that it’s slightly too long (it’s not toooo bad – I doubt anyone will point and be all “HA HA YOUR CROTCH IS TOO LONG HA HA!” But I know it’s there and hey, it bothers me, ok?). Maybe 3/8″ish.
– Rescoop that J a little more out of the crotch. It’s still not perfect, but it’s damn good considering that I did this while the pants were already mostly assembled (for those of you who are all, “Wtf is this J crotch you keep talking about?” Here’s the post where I talk about my pants adjustments, including J crotches. Also, in case you were wondering- those crotch rulers *do* work. I found one in Elizabeth’s studio last week, immediately stuck it on my crotch – and hey, there’s a J! Cool!)
– Need to take a little pinch of fabric out of the inner leg seam – maybe 1/2″

Despite my nitpicky fit adjustments, these aren’t so bad! I’ll still totally wear the shit out of them, at any rate.

Jamie Jeans + SJ Sweater Made with Mood Fabrics

Constructing these was REALLY fun! The instructions – honestly, they’re kind of useless about 70% of the time, but I’ve made enough pants to where I don’t really need them. The seams are all finished with my serger – except the crotch seam, which is flat-felled – and I made use of my edgestitching foot to get all that beautiful topstitching. For the waistband, I used fusible tricot knit interfacing – I fused both the outside and the facing, to give it some stability but retain that lovely stretch. The button & jean zip are both from Pacific Trimming in NYC.

Jamie Jeans + SJ Sweater Made with Mood Fabrics

I really love the back pockets! And hey, that double line of stitching at the yoke? That was done with a single needle, twice. No twin needle!

Jamie Jeans + SJ Sweater Made with Mood Fabrics

For the hem, I used the lightning bolt stitch, so it would retain some stretchiness. It looks pretty similar to a straight stitch, but it, you know, stretches.

What else? Here are some sweater close-ups:

Jamie Jeans + SJ Sweater Made with Mood Fabrics

YUM!

Jamie Jeans + SJ Sweater Made with Mood Fabrics

One last thing – here’s the little watercolor fashion illustration I made for this outfit. GOD, I love painting watercolors! So much fun!

Jamie Jeans + SJ Sweater Made with Mood Fabrics

Ok, I guess that’s it! Now if the cooler weather could please come back – I hate working up a sweat while I drink my morning coffee 🙂 Oh, and in case you were wondering – that’s a fresh dye job you’re looking at, in regards to my hair! I love how neon electric is is 🙂 Yay for fun-colored hair!

PS: Ralph Rucci V1419 Sewalongers – in case you missed it, there’s a new post up on the McCall blog regarding the sewalong. Just some general housekeeping, including blog buttons (yes!) and social media chat. The burning question this week – for general sewalong chat outside of our blogs, do y’all prefer to use a Facebook page or a Flickr Group? Trying to decide which platform to us. Let us know which side you swing!

Completed: Simplicity 1425

22 Jul

Today’s outfit inspiration comes from a completely new realm for me – watercolor painting!

Eyelet Peplum Top & Thurlow Shorts made with Mood Fabrics

Remember that watercolor class that I signed up for earlier this summer? Well, here’s a shot of one of the paintings I did in my final class (no, it wasn’t a fashion illustration class, but the teacher was open to letting us paint whatever wanted – and she was tickled that I went with fashion illustration, ha!). I had some swatches from Mood Fabrics that I knew I wanted to turn into an outfit for my next MSN post, but the outfit inspiration didn’t come until my pen er, watercolor hit the paper 🙂

Eyelet Peplum Top & Thurlow Shorts made with Mood Fabrics

Let’s start at the top and work our way down! I used Simplicity 1425 for the pattern, and cut the most simple version (sleeveless, no yoke, no collar). I cut the size 4 and took a little in at the waist, as well as made my normal gaping-upper-back alteration that seems to be a running theme for me when it comes to sewing Simplicity patterns.

Eyelet Peplum Top & Thurlow Shorts made with Mood Fabrics

My fabric is this beautiful white cotton eyelet from Mood fabrics, which I underlined with this bright white cotton batiste (also from Mood Fabrics), for modesty and some opacity. It’s still a little on the sheer side – as in, I have to watch what color undergarments I’m wearing! – but the two fabrics together make such a fun light and airy top.

Also, I just noticed that there is a fly on my boob in this picture (at least, I’m pretty sure it’s that fly that was buzzing around). Gross.

Eyelet Peplum Top & Thurlow Shorts made with Mood Fabrics

Sewing was very simple and straightfoward – not to mention fast! Seriously did all this (minus the initial muslin) in the space of a Saturday afternoon. Not too bad! I underlined all the pieces by hand with silk thread (it’s not totally necessary to use silk thread, but it does make it easier to pull out the basting when you attach the seams – which, if you’re as anal-retentive as I am about sewing, you will totally appreciate that, ha!) and I used a 70/10 Microtex needle to prevent puckering, since the fabric is so lightweight. Most of the inside seams are serged, although I did finish the armholes and neckline with bias facing (cut from the same batiste). I can’t really speak for the instructions on this pattern as I didn’t use them at all, but the overall finished top is pretty nice!

Eyelet Peplum Top & Thurlow Shorts made with Mood Fabrics

For an extra lil’ punch, I stuck an exposed separating zip right up the center back. Kind of toughens up the overall sweetness of the eyelet, yeah? 🙂 This pattern was actually written for there to be buttons down the back – which is a cute idea in theory, but they only called for 3. THREE. How that doesn’t look like a fucking hot mess when you’re wearing the top and moving around is beyond me. I imagine that would gape a lot! So I swapped out my buttons for a fun zipper and I’m loving the way it turned out.

Eyelet Peplum Top & Thurlow Shorts made with Mood Fabrics

Getting the zipper in was kind of an adventure in itself. I tried googling around for directions on inserting an exposed zipper (I mean, I had a vague idea of how to do it, but I always like to check and see if my technique is right first), but everything I was pulling up was for close-ended zippers. Since my zip is separating (you know, so I can get the top off and on without destroying something in pure rage during the process), those particular tutorials were kind of a moot point. In the end, I kind of winged it, but I think it worked out!

Eyelet Peplum Top & Thurlow Shorts made with Mood Fabrics

As far as the style of the top – well, I like it. I know it’s super trendy- especially with the dang exposed zipper! – but I’m ok with being trendy. I think peplum tops are super cute and the white eyelet will go with lots in my summer wardrobe. Plus, I can tuck that peplum into high-waisted skirts, so it’s like two tops in one! Woohoo!

Eyelet Peplum Top & Thurlow Shorts made with Mood Fabrics

Eyelet Peplum Top & Thurlow Shorts made with Mood Fabrics

Now for the shorts! I used my beloved Sewaholic Thurlow pattern, matched up with my other beloved plum organic cotton twill from Mood Fabrics. My love affair with that organic cotton twill should be well known at this point, I hope. That stuff is amazing. Soft and cottony with a bright, saturated color… a dream to sew, and a dream to wear. I’ve made so much with this particular fabric in different colorways – including moreeee Thurlows! – and I’m sorry y’all have to see it again. Just kidding, I’m not sorry! These shorts rule! Get you some of that organic cotton twill, you won’t regret it!

Eyelet Peplum Top & Thurlow Shorts made with Mood Fabrics

I don’t really know how much more I can talk about these shorts until y’all tell me to shut up. I’ve seriously made them so many times, it’s kind of like autopilot at this point. I found that I did have to take quite a bit of excess out of the legs this go-round… I think I might be getting too un-curvy to wear this particular pattern 😦 I’m already at the smallest size, so it’s not like I can size down. I’m hoping my adjustments will work for future Thurlow shorts, but I’m kind of afraid to try the pants at this point since there is soo much that needs to be changed now, ugh. I reckon I could find another pants patterns to sub out, but wah! I want to keep making Thurlows forever!

Eyelet Peplum Top & Thurlow Shorts made with Mood Fabrics

Anyway, fitting issues aside, these shorts were a delight to put together. I played around with the topstitching on this pair and I really love how the it looks so gorgeous and crisp against this fabric. I tried topstitching around the welts this time – something I’ve seen in RTW and always wanted to try – and I think it looks pretty nice!

Eyelet Peplum Top & Thurlow Shorts made with Mood Fabrics

Oh, and check out that fun lining! Yeah girl! That comes courtesy of this crazy/awesome psychedelic cotton voile print, which is unfortuanately sold out now (but take a look at the other cotton voiles from Mood Fabrics. Sweet!). I love putting crazy prints in my pants because, dude, why not? Business in the front, party on the inside. Or something like that!

Since we’re on a roll with all these detail shots, here are some of the top:

Eyelet Peplum Top & Thurlow Shorts made with Mood Fabrics

I took waaay too many pictures, but there was so much detail to capture! Sorry bout that!

So I guess the next question is – does she have that outfit from the fashion illustration?

Eyelet Peplum Top & Thurlow Shorts made with Mood Fabrics

Fuck yeah I do! Ok, maybe not so much the shoes, but I’ve got the purse! Ha! This shit’s from Kate Spade – I bought it after I was having a really rough week (retail therapy totally works, y’all.). It was on sale, but it is still also the most expensive purse I’ve ever bought – and it’s totally worth it! I knew I couldn’t find that lemon fabric anywhere, so I justified it with the purse hahah 🙂

Eyelet Peplum Top & Thurlow Shorts made with Mood Fabrics

Just for fun, here I am trying to strike a pose like my fashion illustration. Hmm… probably should stick to painting, not posing! 🙂

Completed: A Solid, Structured Hollyburn

19 May

It’s official. Hollyburn is my new favorite skirt pattern. Also, that post title makes this skirt sound like it can stand up on it’s own. Well, it practically can, I guess.

Navy Twill Hollyburn

After knocking out a drapey rayon version, I was ready to try this pattern in a fabric with a little more body, like you see on the Sewaholic site. I’m a flared skirt girl at heart, but I’m kind of over circle skirts for the time being (I don’t know what happened, but I suddenly feel like I’m in costume every time I try to wear one!), so this marriage of flared-but-not-circle skirt combined with a fabric that has some structure was pretty perfect.

Navy Twill Hollyburn

I used this navy solid organic cotton twill from Mood Fabrics that I bought while I was in NY (but, thankfully, you can also buy it on the website. Which is good, because I’m definitely gonna need to buy more asap!). This stuff is AWESOME. It’s a great, bottom-weight cotton twill with no stretch, and very saturated color. I’ve used this fabric to also make my tie-less Miette and my Red skinny Thurlow pants (albeit in different colors, obviously) and it’s just a joy to both sew and wear. Seriously, those red Thurlows get the HELL worn out of them and the fabric still looks totally pristine. I love them!

Navy Twill Hollyburn

There is not much more to say about this pattern, apart from what I wrote in my previous post. I almost didn’t want to post this skirt because I feel like it’s a little redundant… like, cool, Lauren, you made another flared skirt. YAWN. However, I felt it was important to at least show what a major role fabric choice plays in when it comes to putting together a garment. This skirt is obviously much more structured than my previous Hollyburn – it practically stands out on it’s own. That’s just the fabric, by the way – I didn’t add anything to the hem, nor am I wearing anything under it. I like it though!

Navy Twill Hollyburn

The only change I made from the first skirt (and the pattern itself) was to put in a lapped zipper. I don’t think invisible zippers are strong enough for this sort of fabric, so I like to go lapped in that case. The zipper goes all the way to the top of the skirt, and then the waistband is finished at the top with a hook and eye closure. I should have taken a picture, but, I didn’t (I actually did try, but it was already late and every photo ended up super dark and grainy). You’ll just have to trust me on this one 🙂

Navy Twill Hollyburn

Although I didn’t take these photos on the same day I wore this outfit, I decided to repeat the overall look because I think it works really well – and why mess with a good thing, you know? Seriously, I think this combination of Nettie+Hollyburn is probably going to end up being a sort of summer uniform for me. It’s just sooo good and EXACTLY what I like to wear.

Navy Twill Hollyburn

Speaking of Nettie, I did want to show y’all one downside to the scooped back version – it ain’t bra friendly, at least not on me! Of course, my particular top has a few things going against it that probably keep the scoop back from providing full coverage behind the shoulders. For one, I cut this a size smaller than I should have (this was during testing; the sizing issue has since been fixed). I also used a thick pontie-ish knit that doesn’t have a lot of stretch, which means it doesn’t stretch at key points – such as to cover a bra strap. A prior Nettie in a lighter/stretchier knit (which I’m sure will turn up at some point on this blog, ha) doesn’t have quite as much bra-showing. So, something to keep in mind, again, with fabric playing a huge role in how a finished garment looks!

I also realized after making this that I don’t really like the way the scoop back looks on my body. I’ll continue to wear this Nettie because, dammit, I love this fabric!, but future makes will probably stick with being high back.

Navy Twill Hollyburn

Also, in case you were wondering, those shoes are Fergalicious brand. Yes, I know. lol forever. They’re really cute, though – and surprisingly comfortable (says the girl who hates wearing heels. Flats 4life).

Navy Twill Hollyburn

Landon took these photos, by the way! He’s such a good sport – and I’m 99% sure he offered to do these because I told him we would go for a run after, and my solo ~photoshoots~ (if you can even call them that; I mean, let’s be real – no one comes to this blog to look at pretty photos or whatever) take about 3x as long haha.

Also: outtakes!

Navy Twill Hollyburn

Navy Twill Hollyburn

Ok, so these aren’t that great… but I’ve been saving some of my better outtakes from MMM (as Landon has been taking most of my pictures for that, too, bless him), which I am going to subject all of you to at the end of the month. Well, there’s two of them, and they both involve Amelia being pissed, ha!

Navy Twill Hollyburn

I guess that’s it! What are your thoughts on Hollyburn now? Are you camp swingy or camp structured?

Completed: The Tie-less Miette

31 Mar

Ever since I made up my my first version of Tilly’s Miette wrap skirt, I’ve been meaning to make a second one. Isn’t that how it is, though? You find a pattern you like, you vow to make another one post haste, and it falls to the backburner in favor of something more *new* (I’m the same way with knitting socks. I’ve been meaning to knit a pair since I started knitting, but I keep getting seduced by gorgeous sweater patterns. Someday, I guess!). Miette fell by the wayside for, oh, a year.

Red Miette - no ties

What’s even dumber is that I finally sat down and made that shit up, and it took me all of two hours. Oh, priorities.

Red Miette - no ties

So, back to Miette. Like I said, I’ve made this pattern before – and I still wear it aaaaall the time. That polka dot fabric goes with everything as far as I’m concerned, and it’s a great skirt for “oooh I have nothing to wear” because any top you wear with it looks instantly polished. I wish Mood Fabrics still had some of that navy, by the way. I tried to find it in the store while I was there a couple of weeks ago but all they had left was brown with white polka dots (which I totally bought, by the way).

Red Miette - no ties

This fabric in question is Organic Cotton Twill. It was one of the first things I grabbed in my first NYC-Mood-store-run (I also bought some navy because, c’mon, it’s just beautiful), and one of the only *basic* fabrics I bought the entire weekend (truth, I realized I should save my money & suitcase space for stuff that’s more special/can’t be later bought online). I love this stuff; it’s the same twill I made my skinny red Thurlows with, and I can personally vouch that it wears and washes beautifully. The only drawback is that it also attracts thread and cat hair like it’s going out of style. Oh well, you win some, you lose some.

Red Miette - no ties

Back to the skirt. The only thing I didn’t care much for in the original pattern was the waist ties. I knowwww, the waist ties are basically the whole point of the damn pattern! But on me, I always felt like they looked a little too twee and added too much bulk to my waist. I usually wear the bow tied to the back (it’s a tiny bow, but I make it work, dammit!), which is fine, but it means I can’t wear belts with the skirt. Y’all know how much I love abusing my belt privileges, too. I briefly experimented with tucking the ties in the waistband so I could put a belt over it, but that added even more bulk.
Red Miette - no ties

So I just made the skirt without the damn ties. Instant win!

Red Miette - no ties

This was sooo easy. Using my original skirt as reference, I sewed up the 3 waistband pieces as normal and attached them to the top of the skirt. Before I sewed the facing on, I tried on the skirt and measured how much waistband to cut off to get a good fit (the waistband does not sit completely in line with the skirt top; there’s some excess on either side). I wanted the underlap to have about 1.5″ of excess, and the overlap to be completely flush with the skirt. After I finished the waistband (sewing it as you would normally sew a plain waistband), I sewed a button hole + button to both the underlap and over lap. easy!

Red Miette - no ties

Red Miette - no ties

The inside of this skirt is very plain. I just serged all my seams, pressed them open, and topstitched them down. The topstitching helps keep the seams open (one thing I always need to re-press with my former Miette), and makes the skirt look more casual.

Red Miette - no ties

I think the pooling at the back is due to how I’m standing, btw. After seeing these photos, I checked in the mirror and that shit is smooth.

Red Miette - no ties

This is a great, full-coverage wrap skirt. I can personally vouch that I’ve worn my other Miette on some SUPER windy days and that shit stays put. I also ride a bike in this skirt, no fear of flashing! The fact that it wraps in the back helps things stay perfectly in place.

Red Miette - no ties

Also, in case you were wondering – I did make my tshirt as well! It’s a Renfrew, and the fabric is from Elizabeth. It’s a bit on the sheer side (ok, a LOT on the sheer side hahah), but it’s great for layering during this weird, fickle season. This is the same top I wore during the NYC meet-up, btw. I have lots of handmades like this – basic, simple, didn’t take a lot of time to sew up – and I’m reluctant to post them because it just seems like a such a boring post on my end. This is not to say that I think people who post about a tshirt are making a boring post – I love reading that kind of stuff! But I personally make soo many, it just seems really redundant for me to keep posting the same pattern over and over. So I try to sneak them in posts like this. A twofer, if you will. lolz.

Red Miette - no ties

Huh, I guess I should clean the lens of my camera tho.

Red Miette - no ties

Um. Sorry in advance for all the cat hair you’re about to see :X

Red Miette - no ties

Topstitching! For this, I used my blind hem foot and stuck the little blade in the ditch, then stitched down each side (single needle). This gave me a perfectly straight line that mirrors both sides 🙂 With my topstitching, I also like to increase the stitch length a bit (going from 2.5 to 3), as I think it looks a bit nicer.

Red Miette - no ties

Decorative button at the over lap.

Red Miette - no ties

Plain button at the underlap.

Red Miette - no ties

So there you go! Plain Miette, perfect wardrobe basic that I assure you will get worn a LOT this summer. I just love making wardrobe basics; I know the pretty/fancy stuff is more interesting to make for some people, but I really find a good basic to be a great way to work on really perfecting my technique. Plus, unlike fancy piece – this shit gets worn to death.

What about you? Do you like making basics? Or are you a special-occasion-only sewer?

Completed: Leopard Skinnies

21 Jan

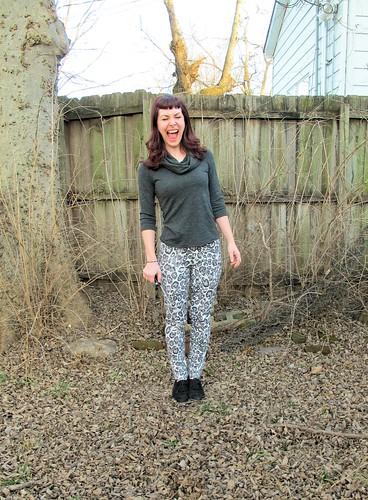
I never thought I would actually be saying this – but I made myself a pair of leopard skinnies. Wheee!

Leopard Skinnies made with stretch twill from Mood Fabrics

Grey leopard is a neutral… right?!

Leopard Skinnies made with stretch twill from Mood Fabrics

I’m trying to get more into wearing pants that aren’t, well, denim. As much as I love my I+W jeans (so much, in fact, that I went out and bought myself a second pair a couple of weeks ago. I’m bordering on “collector” at this point, eep), sometimes I find myself gazing jealously at the girls in their wacky print leggings and purple skinny jeans. NO FAIR, I WANT TO JOIN THAT PARTY. So when I saw this leopard print stretch twill at the Mood Fabrics site, I knew I’d found the perfect piece for a lil’ toe-dipping.

Leopard Skinnies made with stretch twill from Mood Fabrics

This twill is pretty awesome, honestly. It’s got a nice stretch, but it’s hefty enough so you don’t see panty lines (a must with pants this tight… and I don’t wear thongs. TMI? Oh well. Maybe you need magical undie-covering fabric too!). The lycra content keeps the seam allowances from shedding too much – which is good, cos this pattern had me going crazy over the fitting, 1″ seam allowances and everything. Not a good time to start unraveling!

Leopard Skinnies made with stretch twill from Mood Fabrics

Since the twill is a brushed cotton, it’s even a little bit fuzzy. Love it!

Leopard Skinnies made with stretch twill from Mood Fabrics

For my pattern, I used McCall 6440. This pattern is… ok. The fitting was a pain in the ASS, pardon the pun, mostly because the pattern has way too much ease. I’ve actually made these up one time before (but it’s ~top secret~ so you can’t see those quite yet… oops I’ve said too much already ;)), so I knew kinda sorta what I was getting into. The main issue with sewing something out of stretch fabric is that every fabric has a different stretch factor (well, maybe not *every* fabric, but there are certainly enough differences to keep one guessing!), so you generally end up doing some tweaking to get the pieces to look right, in addition to going down a size or two to make up for the negative ease.

Leopard Skinnies made with stretch twill from Mood Fabrics

These are a size 6, with some additional tapering taken out at the legs and the waistband. FWIW, the body size for a 6 is supposed to have a 23″ waist. While I can assure you that I do not have a waist that small, I did have to take an extra inch out of the waistband to get it to fit. See what I mean about excessive ease? Measure those pattern pieces, folks! Don’t trust the lies of McCall.

Leopard Skinnies made with stretch twill from Mood Fabrics

I know, this pattern is super duper similar to the Clover pants from Colette, which is another pattern I have. I ended up with this one because I’ve never really gotten those Clovers to fit right, despite all my tweaking a couple of years ago. I wanted to try a new pattern, and I liked that this is a Palmer/Pletsch – I love their fitting books Fit for Real People and Pants for Real People, so I was banking that I’d love the pattern, too! And I guess I kind of did, minus that ease thing. For one, the crotch curve is pretty much perfect for me – something of a Holy Grail among pants sewists. That Clover pattern, not so much 🙂 (but maybe it’ll be perfect for you!). I also liked how high the waist is, the seam down the back of the legs (that you can’t see because it’s ~camouflaged~ by the leopard, ooh, see what I did there?), and the leg options included with the pattern. Spoiler alert – I went for the straight leg, but maybe I’ll experiment more in the future! Baby steps for now, starting with this outta control print. Oh yeah, and just an advance warning – these were exactly the right length for me, and I’m 5’2″! Tall ladies, beware!

Leopard Skinnies made with stretch twill from Mood Fabrics

Speaking of how high the waist is – see what I mean!? I don’t think this is supposed to reach *quite* as high as it does on my petite frame, but the waistband just covers my belly button. Which means, obviously, I’m gonna be Bettie Pagin’ the shit out of these with heels and a crop top come spring, yaaay!

Leopard Skinnies made with stretch twill from Mood Fabrics

Whenever I post a photo of myself wearing something with a ridiculously high waist, someone always inevitably comes out of the woodwork to tell me that my outfit isn’t flattering. So, here I am, brushing the dirt off my shoulder in advance because la la la I don’t care!

Leopard Skinnies made with stretch twill from Mood Fabrics

Leopard Skinnies made with stretch twill from Mood Fabrics

Leopard Skinnies made with stretch twill from Mood Fabrics

Like I said, I had to adjust the leg seams to get everything as fitted as it is. Not to say the leg width of this pattern is bad – it’s just more straight than what I wanted for these pants. I wanted to be able to tuck them into boots! Since the pattern is drafted with 1″ seam allowances on all side/leg seams, this made things a tiny bit difficult once it came time to start poking myself with pins – those seam allowances get bulky when you’re sewing something like twill!

What I ended up doing was just focusing on one leg – pinning, basting, fitting, and then stitching the final line once I got to the desired tightness. To mirror the second leg, rather than taking measurements or repinning, this is what I did- I learned this trick at my stint with Muna!:

Leopard Skinnies made with stretch twill from Mood Fabrics

First, I stacked my legs on top of one another and pinned along the seam lines, making sure they matched on the opposite side.

Leopard Skinnies made with stretch twill from Mood Fabrics

Then, with the adjusted leg on top, I pinned along the new stitching line I had created.

Leopard Skinnies made with stretch twill from Mood Fabrics

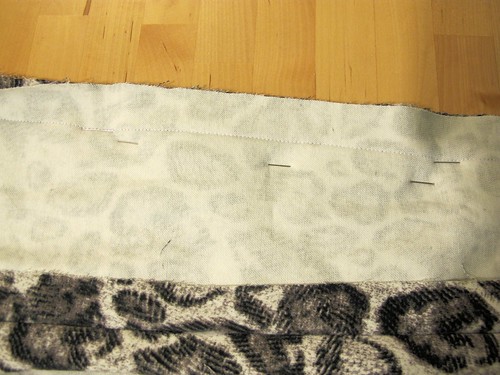
When you flip the fabric over, you can see the pinned original seam line and the new seam line marked by a second row of pins. Make sense?

Leopard Skinnies made with stretch twill from Mood Fabrics

From there, I just connected the pin lines with a my handy marking tool, which gave me a new stitching line. Super easy, and now both legs exactly mirror each other!

Leopard Skinnies made with stretch twill from Mood Fabrics

These pants are finished with serged seam allowances and an invisible zipper. Speaking of which – I learned a slightly different way to insert an invisible zip, also courtesy of Muna. Anyone interested in a tutorial? It’s not OMGSODIFFERENT, but there are a couple of tweaks that make insertion practically flawless.

Leopard Skinnies made with stretch twill from Mood Fabrics

One thing that made me irrationally happy was that the fabric is lightweight enough so I could face my waistband with self-fabric, instead of trying to find a matching cotton. As much as I like contrasty facings, I also like matchy-matchy!

Leopard Skinnies made with stretch twill from Mood Fabrics

Not sure what I was thinking when this photo snapped, but it looks like a roar so we’ll leave it at that.

Finally, we have a winner Andi Satterlund knitting patterns giveaway! Before I drop that bomb, I just gotta say… that was by far the biggest response I’ve ever had to a giveaway. Who woulda thunk I’d have so many knitters who follow this blog and love Andi as much as I do? 🙂 Thanks y’all – I appreciate every single one of you! Wish I could give you all patterns, too, but unfortunately I’m not that rich… yet 🙂

Anyway, without further ado – who’s the lucky number today?

winner47yay

winnerAlexandra

Yay, congratulations, Alexandra! Expect an email from me with how to collect your prize – I can’t wait to see how your sweaters turn out 🙂

Thanks to everyone who participated, and big huge thanks to Andi for providing the big prize 🙂 For everyone who didn’t win – Perhaps I can entice you with one of Andi’s many freebies?