Tag Archives: renfrew

Completed: My Perfect Tshirt

18 Dec

One neverending sewing quest of mine (that is admittedly quite stupid, to be honest) is the lifelong search of my perfect tshirt fit. Nice and fitted with good scoop neck – you’d think this would be easy to find, but nooo. I haven’t really found a tshirt pattern that was 100% exactly what I wanted, through and through. There have been plenty of “almosts” – you know the kind, you wear them around for a day, perform a little machine surgery in the evening, and after a couple of tweaks, they’re pretty spot-on. Those are nice. Sometimes, though, you want it to be right the first time. And therein lies my problem.

Heart Sweater

I do love the Renfrew pattern. Loooove it! It’s a really really good beginner tshirt pattern, and I love all the options it comes with. My only complaints are that it’s a bit too loose for my tastes (I think you guys have figured out by now that I prefer my clothing to be painted on), and I feel like the scoop neck sits a little too high. As far as super basic tshirt patterns go – that’s about the only option I’ve tried. Other patterns (Plantain, Briar, SJ, Coco, Bronte, etc etc) are lovely, but they’re a bit more specialized than what I’m going for (aka, PLAIN. Plain tshirt!). Nettie was real close, but it’s just a smidge too tight (I mean, that makes sense – it’s a bodysuit ffs) and I couldn’t get the shoulders and back to work with my body, no matter how much I tweaked them.

The really stupid part about this is that once I started my ~Tshirt quest~, it got harder and harder (or I got pickier and pickier). I admit, I even tried some RTW shirts to see if maybe I should just suck it up and buy them from now on – but those are even worse, not to mention most of them require some kind of tweaking (taking in the side seams, cutting off length, shoulder seams in the wrong spot, *something*). Which, I’m sorry, but I’m not going to pay $30 for a fucking tshirt that I have to then ALTER. That’s just dumb. So I kept looking for a pattern, kept not finding exactly what I wanted.

Heart Sweater

Soooo I *made* my own pattern. Before you get too excited – I didn’t draft this thing (I don’t want to say I’ll never draft a pattern ever, because I know things change – but, right now, I don’t ever want to draft patterns. Nope.). It’s a Frankenpattern that combines my favorite elements of my favorite patterns, and is now my favorite tshirt pattern. Yay for Frankenpatterns!

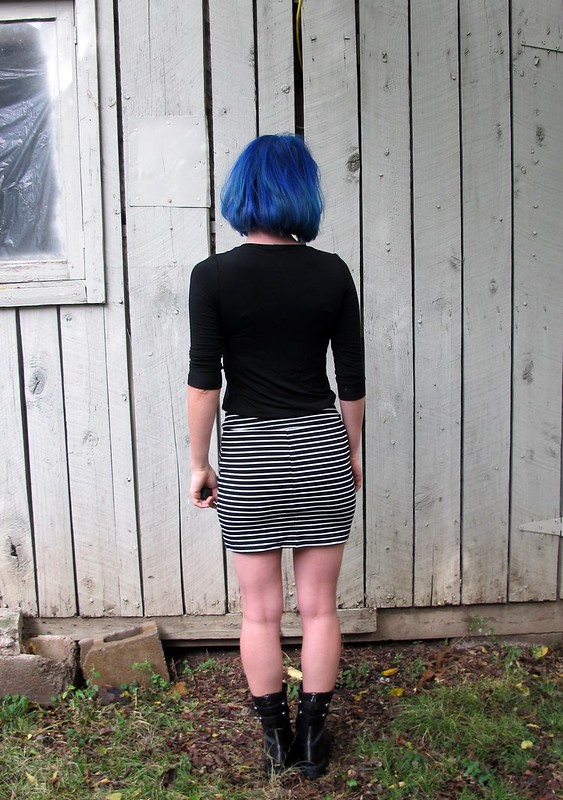
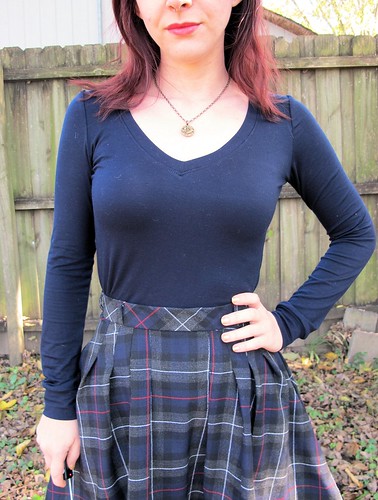
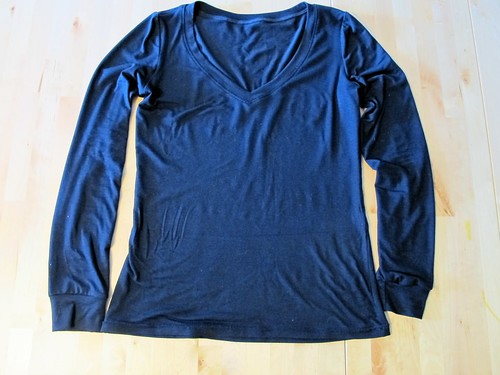
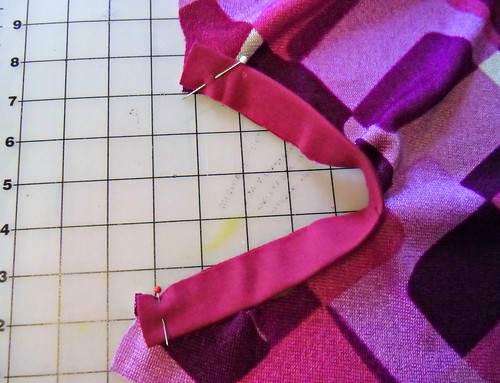
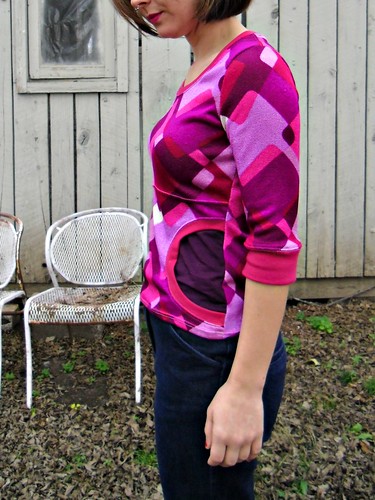
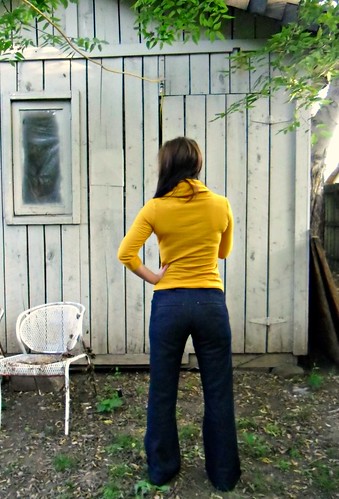
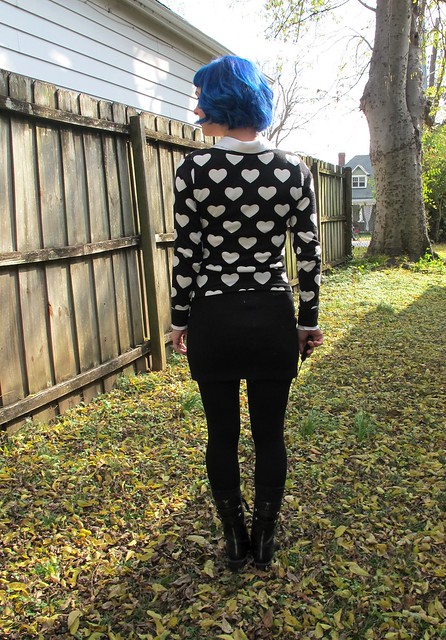
To make this baby up, I started with the Lady Skater bodice, because I really love the way it fits. I then compared the neckline to the one on the Nettie bodysuit, because, seriously, Nettie has the best neckline options. This resulted in me scooping the front neckline of the traced pattern just a bit more, to get that nice deep scoop (the kind of scoop that would show cleavage, if I still had cleavage to show off. Wah, I miss my boobs!). I kept the back neckline high, like a normal tshirt. I measured the length of the Lady Skater against the length of the Renfrew and some of my favorite finished tshirts, then adjusted accordingly (if you’re curious – I added the length via relatively straight line, aka, did not flare out into an hourglass shape. I don’t wear my shirt hems around my hips, so having the extra room there just looks silly. A straight cut looks better on me). Finally, I traced off the sleeves and bindings for the Lady Skater – this isn’t completely necessary, but I’ve learned that when I steal my pattern pieces from the envelope, sometimes they don’t make it back. It’s easier to just give the Frankenpattern it’s own pieces so I don’t end up digging and hunting later down the line, you know?

Heart Sweater

Heart Sweater

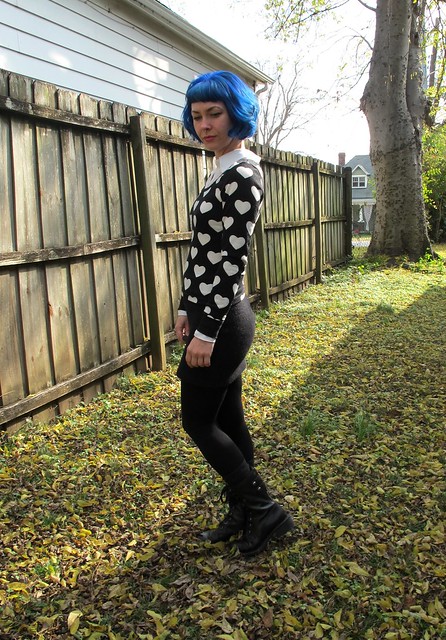
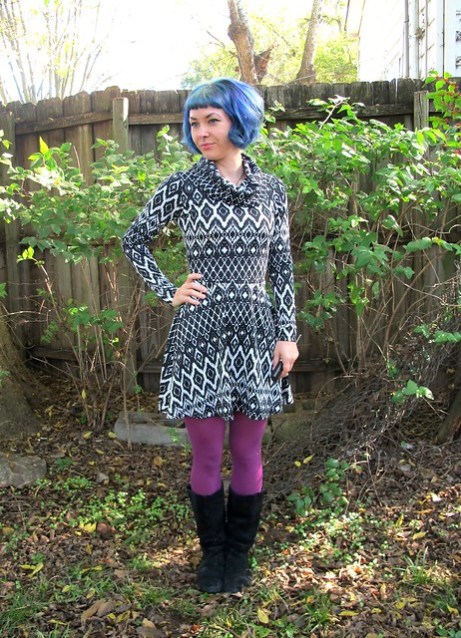
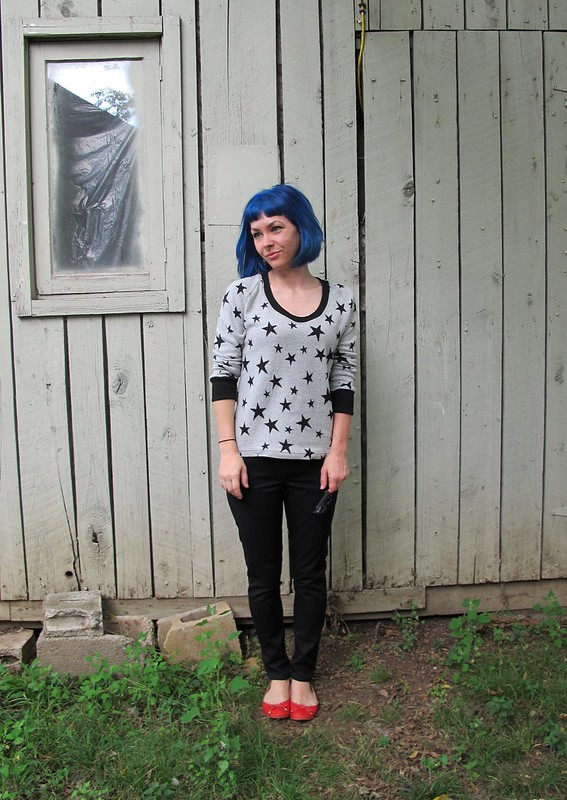
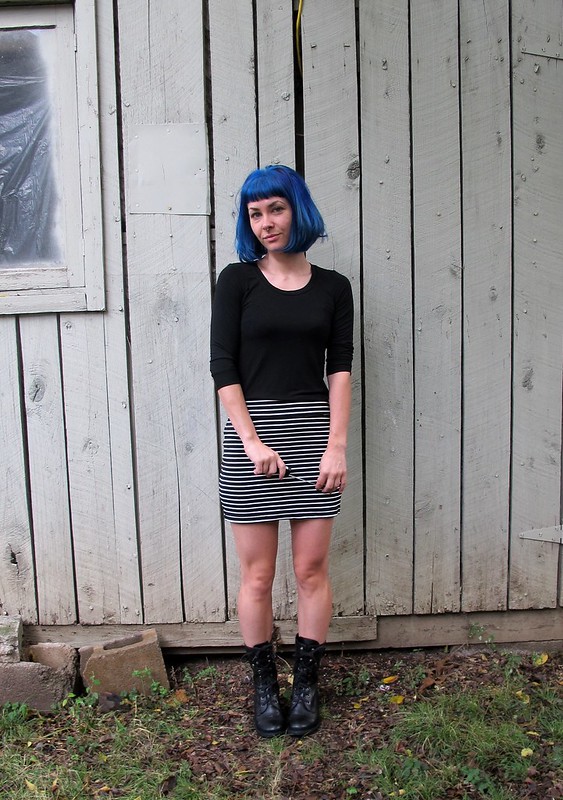
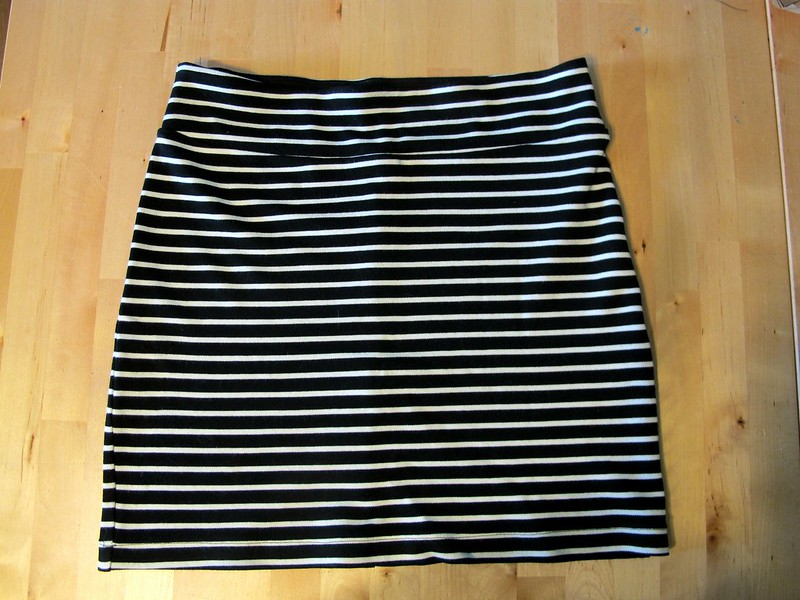
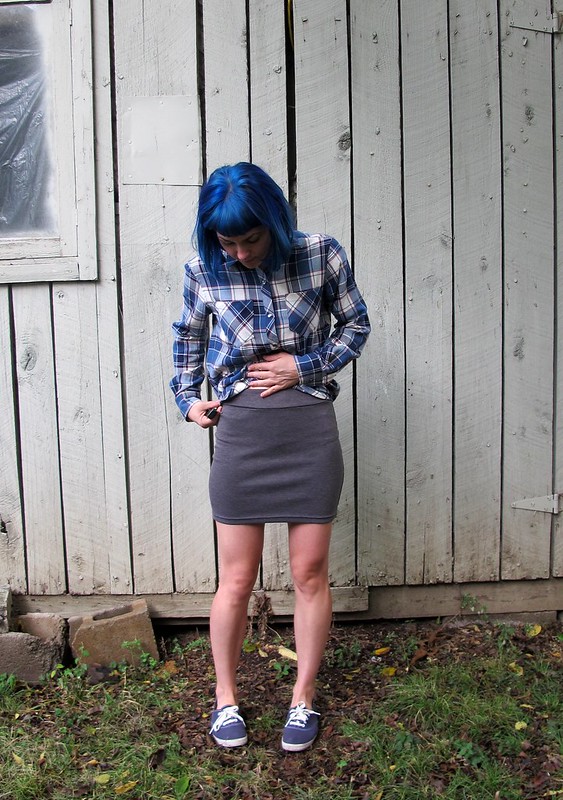
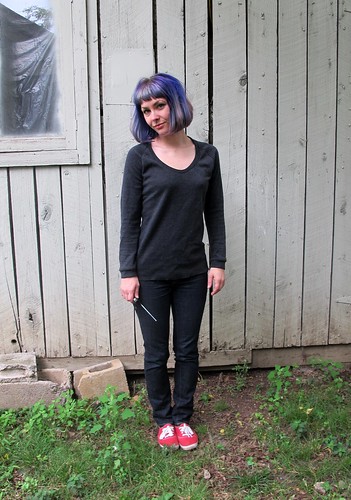
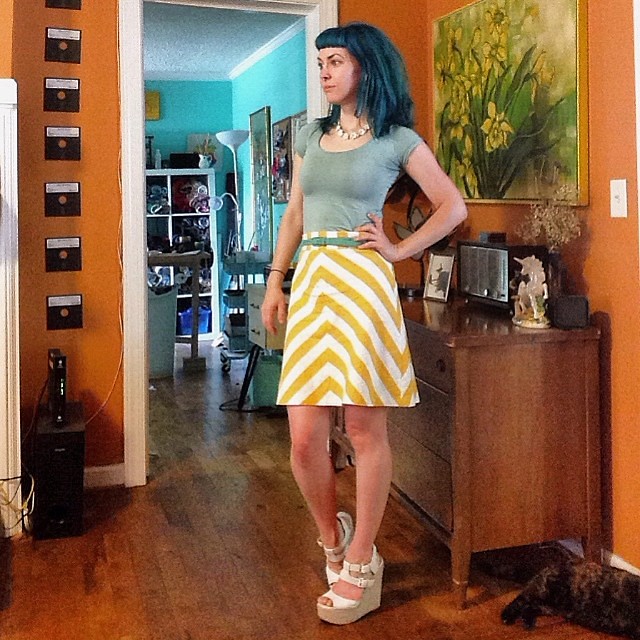
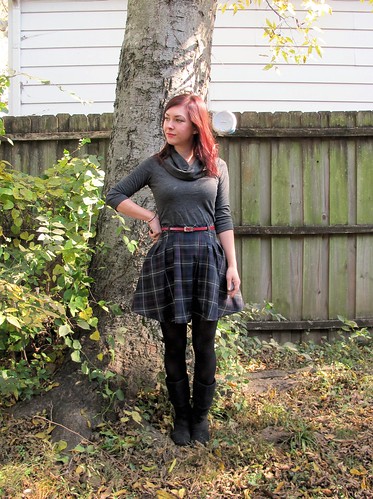
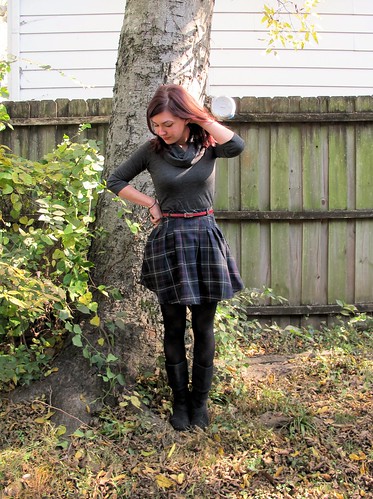
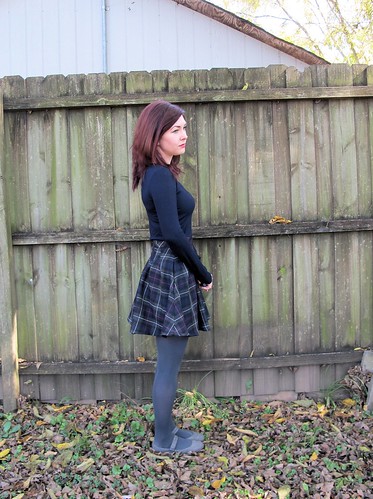
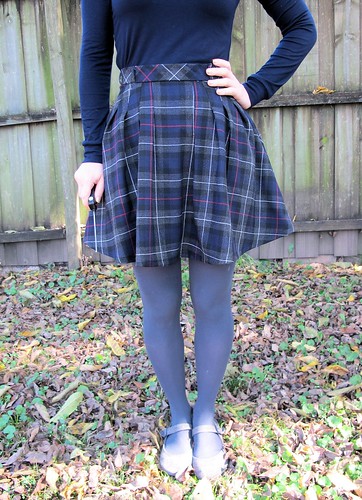
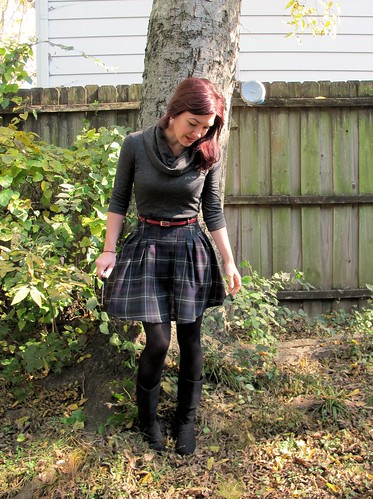
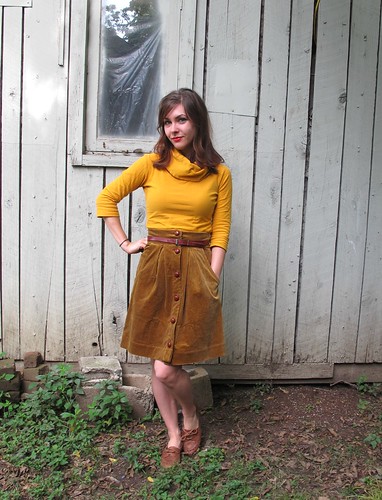
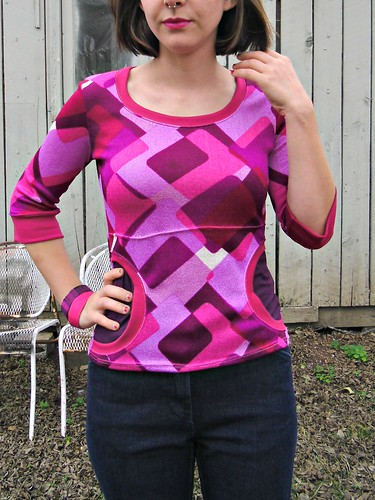
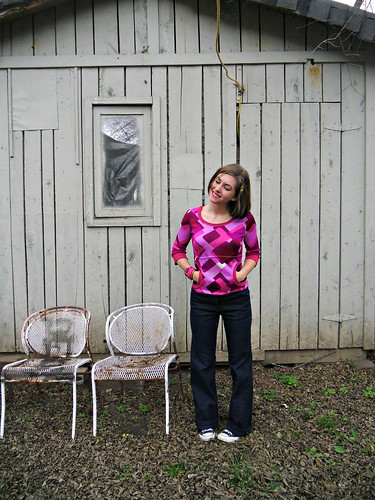
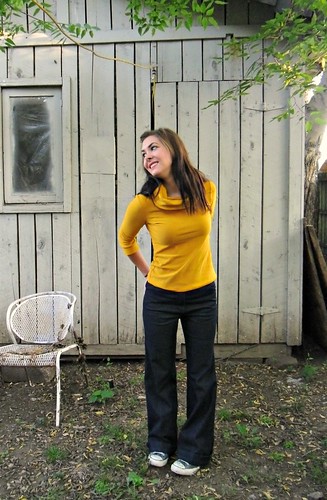
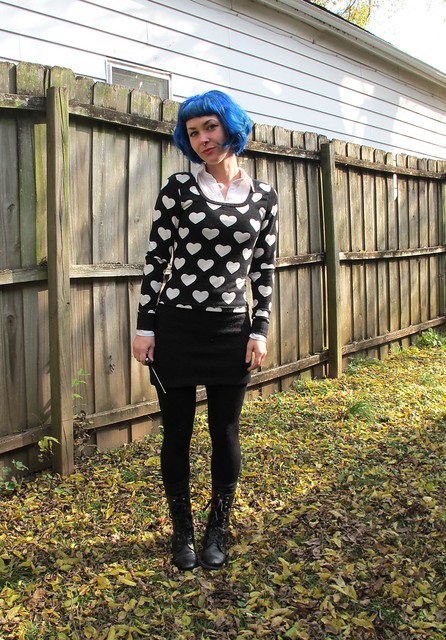
I think the resulting shirt is pretty close to being perfect for me! I probably need to redraw that neck curve – it looks a little square – and maybe add one more inch of length. The length here is fine-ish; I hemmed it that long so it would work with the skirt I’m wearing. But I sort of hate how it looks with pants. Or maybe I should just make higher-waisted pants? That would totally be easier, right?

Heart Sweater

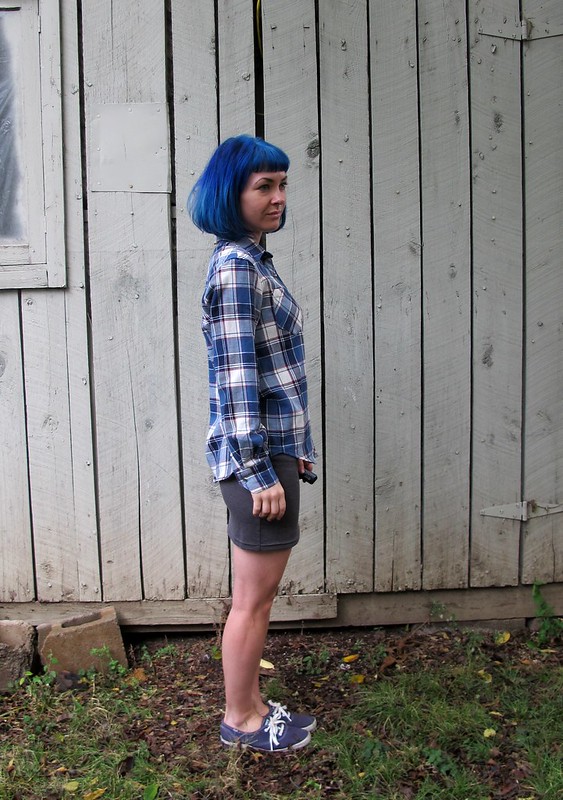
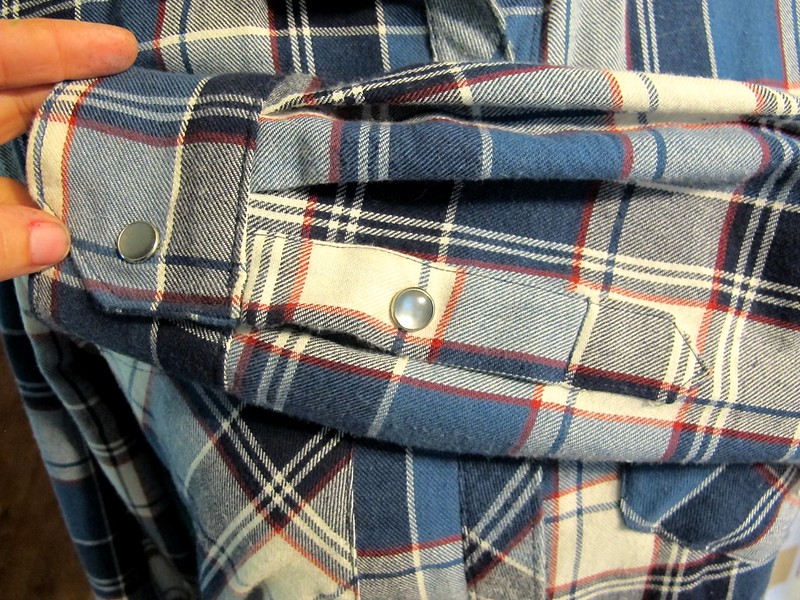
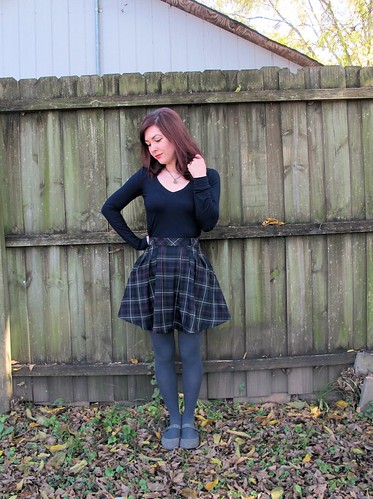
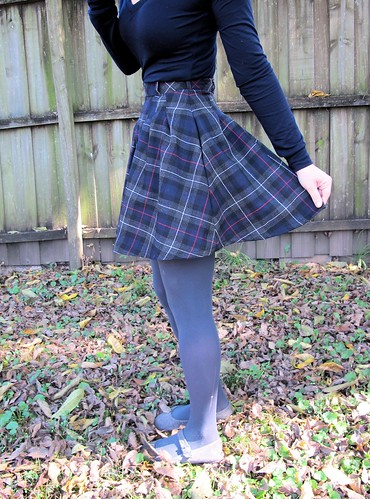
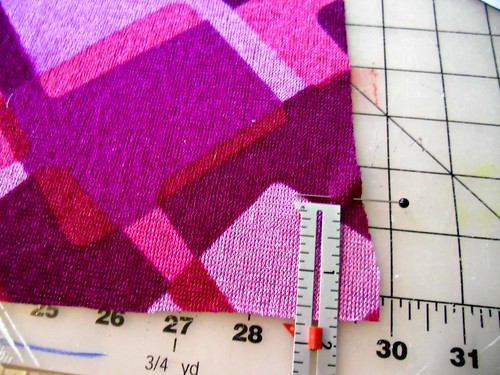
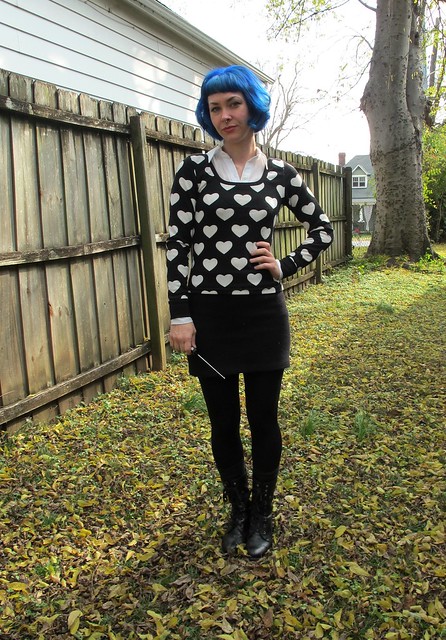
Isn’t this fabric so fun? It reminds me of some of the ridiculous shit I wore in my early 20s – lots of cutesy patterns, hoodies, and hearts (I used to buy a lot of my clothes on the sales rack after Valentines Day and/or Halloween, because those are the best prints haha). I found it on the remnants rack at one of my local fabric shops, Textile Fabrics. There was a yard and a half waiting for me, and the price was something crazy good (I think it was around $11? Yay for the remnant rack! Too bad the normal prices at Textile aren’t that awesome 😛 haha). It’s acrylic, which is kind of lame and not at all warm (and honestly doesn’t wear toooo well – it’s already starting to pill a little), but at least I can throw it in the washing machine and not worry about wool shrinkage! It’s also fine for layering, as evidenced by my silk georgette button up underneath.

Oh yeah, I should add – if this outfit looks eerily similar, that’s because I took these photos on the same day I took the photos for my last blog post. HAHA. Whatever, my hair looked good that day and I had to take advantage of that.

Heart Sweater

Heart Sweater

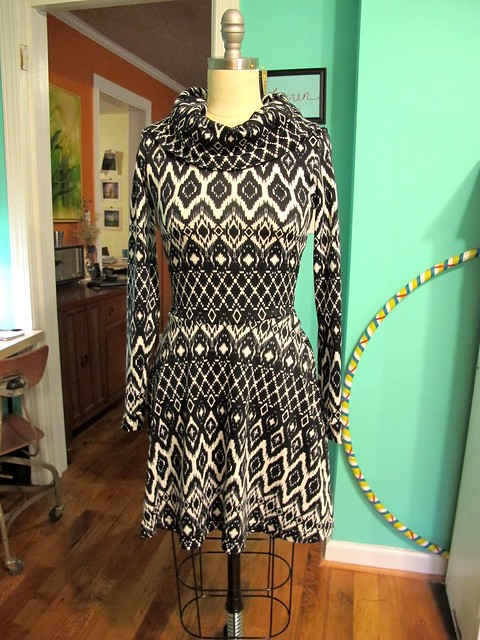
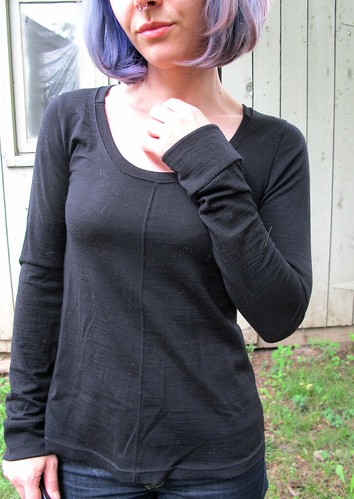
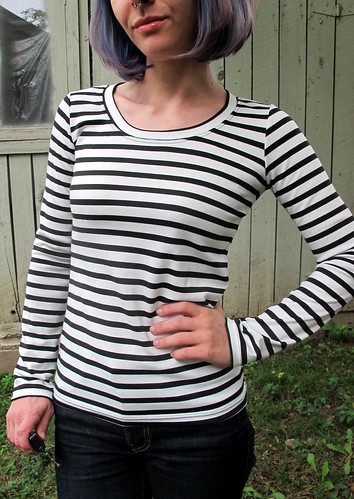
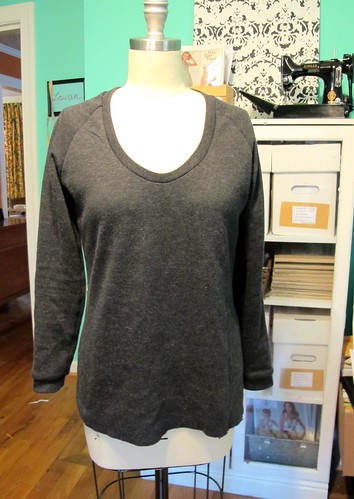
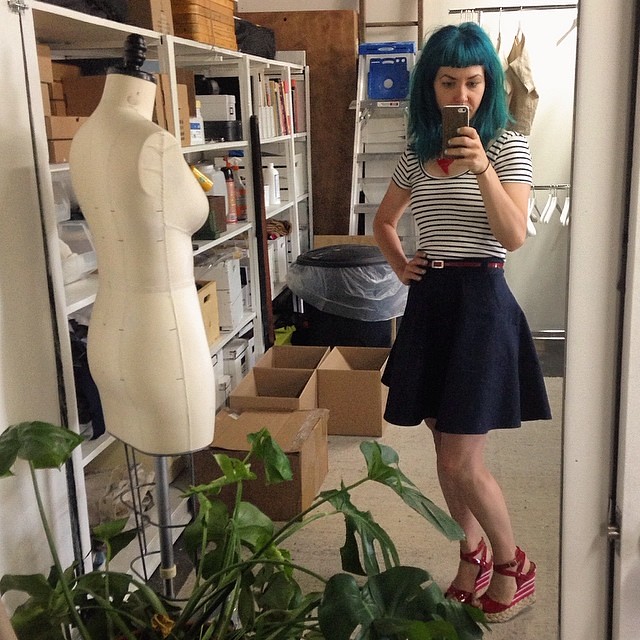
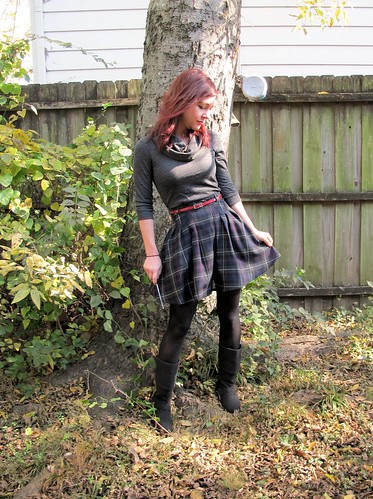
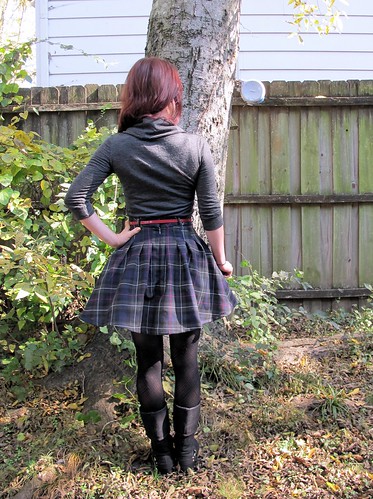
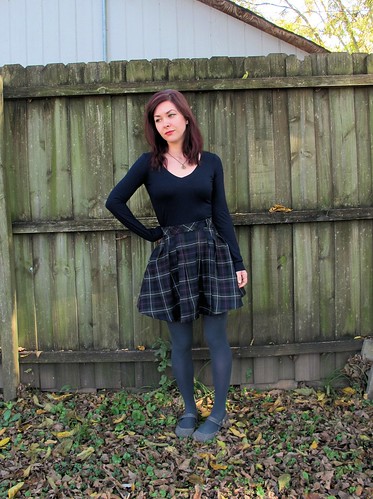
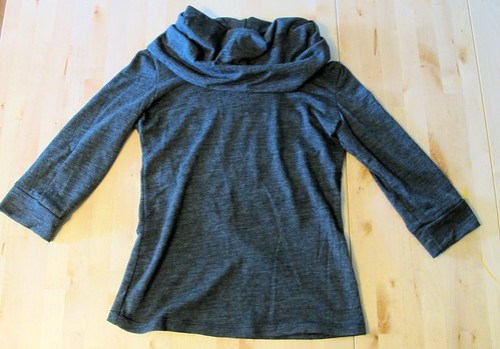
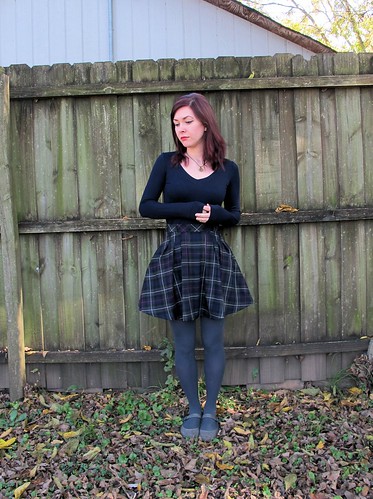
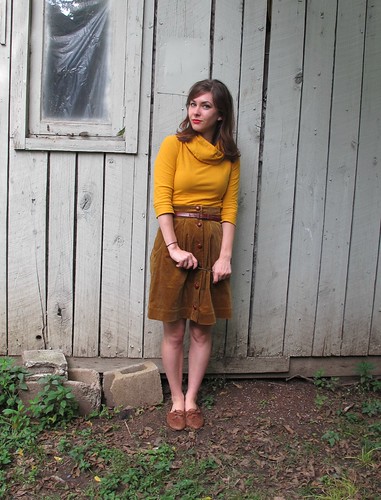
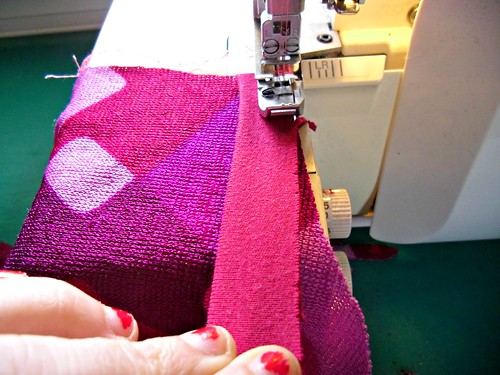
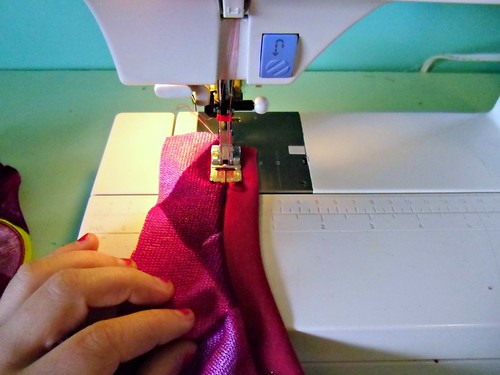
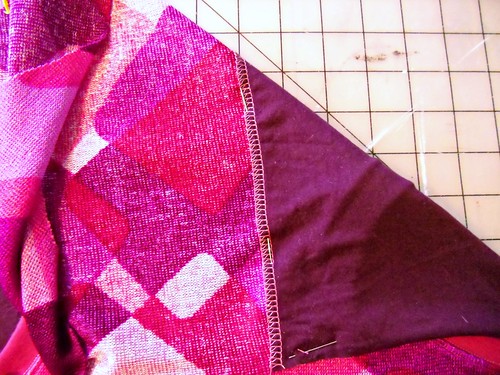
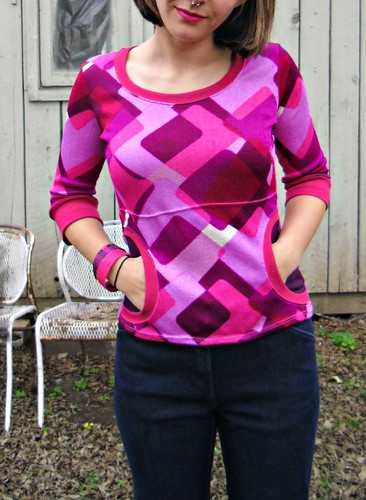
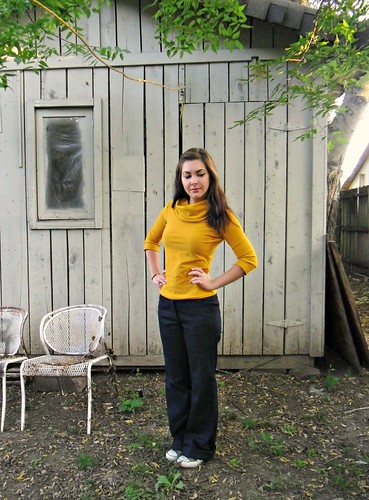
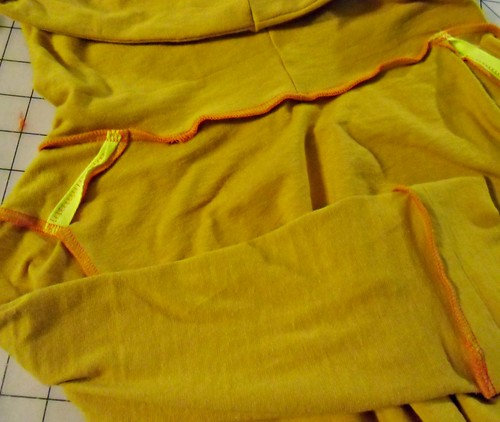
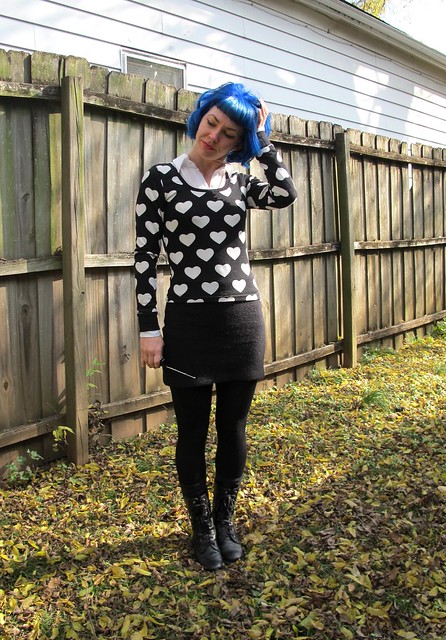
Here it is without the under layer. I used a black rib knit for the neckband and cuffs (originally from Mood Fabrics, but it appears to be sold out on their website now), and assembled everything on my serger. The hem is finished with a twin needle. That’s it! Pretty sure this whole thing from start to finish – once I made the pattern, that is – took less than an hour to make.

Heart Sweater

Anyway, it’s nice to have a go-to pattern now that I know I can whip up and not have to fiddle with fitting! I think this particular pattern could use a couple more small tweaks, but it’s definitely on it’s way 🙂 I’ve already made a few lightweight undershirts with it, and those are great in this cold because they are fitted enough to keep the heat around my body where it belongs.

What about you? Do you have a perfect-fitting tshirt pattern (either one I’ve mentioned that just ~does it~ for you, or maybe you have a new love that you want to introduce me to!)? Have you ever Frankenpatterned something to suit your needs, or are you the sort of lucky person who gets their TNT from a purchased pattern? Are you sick of me talking about tshirts? Man, I love tshirts.

deal with it

Completed: The Lady Renfrew

12 Nov

Question: What do you get when you combine the Lady Skater with the Renfrew??

Lady Renfrew

Answer: The awesomest, snuggliest, Lady Renfrew dress, of course!

Lady Renfrew
Lady Renfrew

There’s not much to say about this dress – I basically just summed it up in the first sentence. This will be a relatively short post, ha (is that even possible for me to accomplish? Time will tell). Anyway, I used a combination of the two patterns to create this Frankenpatterned dress. The bodice, skirt and sleeves came from the Lady Skater, which after much careful testing, I’ve decided is my favorite favorite favorite knit dress pattern. The bodice fits me really well, the sleeves are a good fit/length (all sleeve length options, I mean), and I love the flared-but-not-costumey-looking skirt. Everything about this pattern is exactly what I like in a knit dress, so it was the obvious choice for the base of this dress. To get the cowl neck, I left off the neck binding and instead used the cowl from view C of the Renfrew tshirt. I compared the two patterns to see if I’d need to make any modifications, and the necklines were surprisingly similar (fwiw, I use the size 2 Lady Skater and the size 0 in the Renfrew). So similar, that all I did was just sew the pieces together and that was it. I don’t remember what seam allowance I used to attach the two (Lady Skater is drafted for 3/8″, and Renfrew is 5/8″), knowing me – probably 1/2″ because it’s in the ~middle~. Or something dumb like that. Whatever, it worked out regardless! 😀

Lady Renfrew

The real bitch part of making this dress was cutting the dang fabric. I had 3 things to pay attention to while I was cutting this – matching the print horizontally across the seams; being mindful of fabric usage (I barely had enough!); and actual print placement. I cut it so the darker stripes cross my waist, and the lighter stripes cross my bust. I think that’s a flattering look for me, plus, I love the way the white print kind of frames my head (that’s a bonus, because I totally cut it that way with the intention of it making my boobs look slightly bigger hahaha). I didn’t do any print matching on the cowl. I ran out of fabric and actually had to cut the underlayer with a seam. It worked out, though!

Lady Renfrew

AND NOW I HAVE THIS BIG SNUGGLY COWLLLLLL WOOHOO!

Lady Renfrew

I think the fabric is what really makes this dress! And by makes, I mean it’s slightly over-the-top – I’m almost afraid to wear it before Christmas season, ha. It’s like a giant, awesome black and white Ikat Christmas sweater. I bought it from The Fabric Studio here in Nashville; it’s the same fabric I used to make my Ooh La Yoga Pants. While it wasn’t 100% ideal for yoga pants, it’s pretty freaking fabulously good for this sort of dress. The fabric is nice and stable, cozy, and works really well for this sort of pattern.

Lady Renfrew

I especially love how the cowl looks. Yay cowls!

Lady Renfrew

So, what do you think? Lady Skater+Renfrew – do we have a perfect partnership here, or what?

Two more things:
1. Giant thanks to everyone who attended my class at The Sewing Party on Saturday! I had so much fun chatting with y’all (although I’ll admit – I kept my video on mute! Can’t handle the sound of my own voice blaring at me ahaha) and I’d love to do more video-related stuff if the opportunity ever arises again 🙂 Y’all are the best! Just wanted to give all my students (and future students, for those of you who will be watching the class sometime during the next 90 days) a head’s up – I forgot to remind you to download the handout for my class! I know, bad teacher! Anyway, it’s a little PDF document with all the class info written out – along with photo tutorials for each zipper insertion. You can find it to the left of the video, under handouts and chats.

2. The big closing sale at Sweet Little Chickadee is still going strong! Juli has upped the ante a little bit – now use the code SHOPCLOSINGSALE to get 35% off your entire order! This code is good until all the stock runs out!

3. I recently found out that I was named one of the top 50 sewing blogs in Budrastyle‘s Best of Blogging contest. COOL! I’ll be honest – I had no idea I was even nominated (or that this contest was even a thing) until I got the congratulatory email. Big huge thank you to whoever nominated me, and even bigger huger thank you to everyone who voted for me! Y’all are seriously the best! I’m not worthy! 😉

Fall/Winter Sewing Plans for 2014

10 Oct

It just occurred to me that I haven’t share any seasonal sewing plans in… well, a while. Which is lame, because these are some of my favorite types of posts (both to write *and* to read) – I mean, who doesn’t like lurking inside someone’s brain, even if it’s just to see what they plan on doing over the next couple of months? Too creepy? Naw.

Anyway, now that London/Paris is looming on the horizon (less than 2 months! Omg less than a month and a half! Eee!), it’s really time that I start figuring out what I’ll be bringing with me (and making, for that matter! Don’t want to end up with another frantic last-minute sewing disaster, ugh). Especially since my luggage space will be very limited – I’m only allowed to bring one suitcase with me overseas (well… I use the word “allowed” loosely here. I can bring two suitcases if I want to – but I get to pay $130 for the second one! LOL GURL NO.), and I want to fabric shop while I’m there! So, I will be packing a capsule wardrobe, one that mixes and matches with itself, for maximum outfit options, as well as warmth. This is much different than how I usually travel (as I fly Southwest, where you can bring 2 bags free – so why the hell not, you know?), but I’m up for the challenge! 🙂 Adulting and all that 🙂

I’ve already made/chosen a couple of pieces to base my capsule around, as well as chosen my theme (like Devon, I think all vacation wardrobes should have themes, because, duh) – Minimalist Parisian Chic. Mostly because my capsule will be very minimal – or, as minimal as I can get it down to, because I am still one of those people who delights in overpacking – with lots of black. Not much on the Parisian Chic side (I’m sure Parisian women will be horrified when they see what I wear to stomp around their city, ha!), but it has a nice ring to it 🙂

Anyway – to start – I have these black Jamie jeans that I made a couple of weeks ago:
Jamie Jeans + SJ Sweater Made with Mood Fabrics
I haven’t decided yet if I’ll be bringing the star sweater. It’s a little bulky! On the flip side, regarding the jeans – I just finished wearing them for the 5th time in a row (sans wash), and they’ve stayed very close to their original shape. No bagging out, woohoo! So that makes me feel good, because I’ll be wearing these a LOT come London.

Stripey Renfrew
I will also be bringing my Imogene + Willie slim jeans (pictured here), because they are basically the best jeans ever. Oh, and probably that stripey Renfrew top. Can’t have enough tshirts!

Now for the sewing plans! Sidenote: By the time of publishing this post, I’ve already finished more than half these makes. Whoops! Guess y’all see where my priorities lie when it comes to posting vs sewing hahaha. Oh well!

Ikat Lady Skater
The Cowl-Necked Skater Dress
I’ve had this idea in my head for a while now – a Lady Skater dress // Renfrew top mash-up! This cotton Ikat knit fabric (purchased at The Fabric Studio here in Nashville) will be the perfect match for this dress – like a giant, snuggly Christmas sweater! I actually don’t know if I’ll be bringing this one to London, due to bulk factor (my capsule really only allows for one dress, which I’m thinking will be the one below – but we’ll see!), but the plans were too good to keep to myself 🙂

DVF Wool wrap
The Wool Wrap dress
Another big mash-up – I’m starting with the DVF Wrap dress pattern, but adding long sleeves (stolen from the Lady Skater, naturally) and swapping out the gathered skirt for a wrap A-line (Miette Wrap skirt – I’m looking at you). The black wool knit fabric was picked up at Mood in NY a couple of months ago – it’s SO soft! Like, cashmere soft. I’m so in love ♥

Silk v neck
The Silk Button-down
I already have a nice white button-down – made from the same pattern, Butterick 5526 (my favorite!) – but it’s not really cold weather appropriate, due to the length of the sleeves. Since they are 3/4, they don’t really layer nicely with my long sleeve sweaters! I’d love to make another one, but up the ante with some beautiful silk double georgette, and modify the neckline to be more of a v shape (likely using this V-Neck variation tutorial by Jen!)

Chambray Button down
The Polka Dot Chambray Button-down
Another thing I already have one of, but need a winter version. This one will be made using a gorgeous cotton polka dot chambray, picked up here locally at Textile Fabrics.

SJ Sweater
The Wool Sweater
Button downs need a nice sweater, yeah? I want to try sewing a sweater, using the SJ Tee as a basis (with a higher neckline, and omitting all bindings). The fabric I have is a lovely camel-colored boiled wool, that I bought from Elizabeth Suzann (aka I totally jacked her wholesale order hahaha). I think it’ll look equally good over both those button down shirts I have planned!

rigel bomber
The Bomber Jacket
I know – I’m already planning a pretty sweet coat. However, the weather in London (and Tennessee, for that matter!) can be fickle, so I’d like to bring a lighter-weight jacket for days when the temperature isn’t as low. I’ve been meaning to make the Rigel Bomber for, well, months now. Just been waiting on the perfect fabric – and I think I found it! Check out this black wool coating – to be paired with gold china silk for the lining.

Other plans I have (no photos, sorry! Use that imagination of yours, ha!)
– Need some thin long sleeve shirts for layering – maybe just a couple out of wool knit, such as this textured black wool jersey (that’s apparently already sold out?! Wah!). I wear these pretty much daily in the winter – and sometimes I like to sleep in them if it’s really cold – so it’ll be nice to have a few to choose from.
– Speaking of sleeping – I need some new pajama pants! Currently lurking Margot pj pants in Tilly’s book, Love at First Stitch, since they seem to be a pretty quick/easy make (I really want to make the Tofino pants, but right now I need quick and easy!). I picked up some really fun orange plaid flannel to make them with – I know, that fabric is ridiculous, which is exactly why I chose it. It’s nothing like I already own! When it comes to pjs, why not, you know?
– I would like to make a flared A-line wool skirt to make as well – thinking about using the Delphine pattern (also from Love at First Stitch), because I love the shape. A little stuck on fabric selection, though! My go-to is usually wool crepe, but that will be too drapey for this shape. Thoughts? I need it to be 100% wool (pretty nitpicky about this, sorry!) and I’m looking for lipstick red. Budget is no more than $25 a yard (and obviously I’d be delighted if it was less than that!)
– Bras! I want to finish at least one bra before I leave – using the Marlborough pattern and one of my kits from Bra Maker’s Supply. Obviously I want new bras, but even more – Norma will be in Paris while I’m there, and you better believe I’m going to drag her into a bathroom and make her assess and critique my fit. Haha! Man, sewing people are weird 😛

I think that’s it for now! It feels good to get everything listed out in one place. I’m hoping I can get all this done before I leave – but if not, no worries. It’s not like I’m lacking clothing or anything as it is!

As a side note, I was just notified that one of my lovely sponsors, Indie Sew, is holding a pretty sweet contest where you can win a YEAR of free patterns! Fuck yes! You can read all about the contest and the reasoning behind it on this blog post, but the general gist is that Indie Sew wants to help you transform your entire wardrobe into handmade and end the cycle of cheap/fast fashion. And what better way to jump start a new handmade wardrobe than with some FREE FREAKING PATTERNS AMIRITE? Such a cool idea, and I really really hope the winner shares their journey via blog or social media so we can follow along! Anyway, soapbox rant over – go throw your name in the hat!

What’s on the table for your fall/winter sewing plans? Do you have any capsule wardrobe suggestions for me? Tips for packing light? Are you going to judge me if you see me wearing the same thing for 3 days in a row while I’m on my trip? 🙂

Completed: Two Colette Mabels

8 Oct

I totally skipped all the hullabaloo that came out when the Colette Patterns Mabel skirt was released – but that’s ok! I’m here now, reporting for duty!

Colette Mabel & Sewaholic Renfrew

I actually made two – just to be safe!

Colette Mabel & Grainline Archer

Let’s start with a basic Mabel lowdown. I made the grey version first, out of some leftover ponte knit that I used to make a pair of Ooh La Leggings (not pictured – because neither photographed nor blogged, but they are basically the same thing as these black ponte leggings except, you know, grey). I actually have no idea why I bothered saving that little piece of fabric, because it was about half a yard and thus not enough to do anything with – and the ponte is pretty thick, which means it wouldn’t work for something like, say, colorblocking a tshirt (which can be a good use of leftover knit scraps, if you tend to get hoardy like I do). Anyway, it’s a good thing I did, because I had exactly enough to make a little Mabel mini! Yay! I love it when these things work out!

Colette Mabel & Grainline Archer

Colette Mabel & Grainline Archer

Mabel Mini 1 is view A, size XS. I sewed the pattern exactly as per the directions, except I opted to understitch the waistband lining (I used my machine’s lightning bolt stitch – kind of like a very short zig zag stitch), to keep it from sticking out. The seams of the skirt were sewn on my serger, and the hem is done with a twin needle. From cutting, to sewing, to hemming – this entire thing took… I dunno, maybe 30 minutes? It was VERY fast.

I didn’t really use the instructions – I mean, it’s a knit skirt, it doesn’t need much introduction – but they looked to be pretty good, based on my glance over. Like the Moneta pattern, they include lots of tips and info on how to sew knits with a regular machine, which is always nice. The only thing I did not like about this pattern was taping it together (I have the PDF). Holy shit, talk about too many pages! My disdain for PDFs is no secret (I get why other people like/need them… no defense necessary 🙂 But for me? Nope, no way! Can’t do it!), so maybe I’m biased – but this one seemed to be unnecessarily large & unwieldy. My advice: get the paper pattern. Ha!

Colette Mabel & Sewaholic Renfrew

Anyway, speedy instaskirt is the reason why I obviously needed to jump right into Mabel Mini 2 immediately after 😛

Colette Mabel & Sewaholic Renfrew

I made a couple very minor changes for this one – I took in the center back and side seams by about 3/8″ (in retrospect, I should have taken in more, because it’s still a little loose around the waist and thus rides down farther than I want the rise to sit), as well as the waistband by the same amount. I used the last of my black striped ponte from Mood Fabrics NYC store. Again – 30 minute skirt. Talk about fast fashion, amirite.

Colette Mabel
Colette Mabel
Colette Mabel

For both skirts, I used a lightweight black rayon jersey (the same jersey that my black tshirt is made out of, incidentally. That tshirt is a Renfrew, by the way!) to line the waistband. I considered using a self-lining – but decided the fabric was a smidge too bulky, so I went with a lighter weight lining, which ended up being a Good Decision.

Oh yeah! I made that plaid flannel button down too! SUP!

Grainline Archer

This was made using the Archer pattern. I actually finished it waaaay back in… March. Yep. I got it in my head that I needed to make a new plaid Archer to wear when I went to NY, so I nearly killed myself trying to finish the shirt in something crazy like 2 days. I did end up finishing it – and bringing it to NY to wear – and I learned two things about the experience:
1. My life did not suddenly become more fabulous because I had a new shirt to wear while on vacation; and
2. Pushing myself to the point of exhaustion to finish something for a self-imposed deadline is not fun at all. Seriously – it’s shitty, it makes me anxious for no reason, and I didn’t enjoy any part of sewing that shirt. Which is sad, because button downs are one of my favorite things to sew! I love how precise the stitching is, and all the little details that make it special. I unfortunately didn’t get to enjoy any of that because I was too rushed trying to hurry up and finish (when, realistically, I should have either started earlier, or accepted that I just wouldn’t finish before I left), and yeah, that’s just lame.

So, with that being said – no more unnecessary last-minute vacation sews with shitty deadlines! If I need clothing that quickly, I will buy it (lol jk I’LL NEVER BUY CLOTHES AGAIN)(ok, seriously, kidding with that last part… mostly.). So far, I’ve done a decent enough job of putting this into practice, so that’s good!

Grainline Archer

And, for what it’s worth – I do like the shirt. I could have done a better job with it – the topstitching is not my best, and the grain is all wonky because the plaid fabric was hideously off grain (like, to the point where I actually cut the entire shirt twice. Yes. I did that. And it’s still pretty bad) – but it is what it is. It’s snuggly, it’s warm, and I also just realized that I made it to match the leggings that I made with the rest of that grey ponte fabric hahaha omg my life is fabulous.

Grainline Archer

Anyway, I hope you liked my Archer story. Have some pearl snaps.

Grainline Archer

And a sleeve placket while we’re at it!

Ok, so here’s my dilemma – and I’m hoping y’all can help me. I HAVE NO IDEA WHAT TO WEAR WITH THESE SKIRTS. I feel like everything I put on just gives me weird proportions! The tops I’m wearing here are ok, I guess, but that’s about the extent of what my closet can offer. Most of my other tops just look… weird? I think the biggest problem is the waist line- it kind of hits at a strange place:

Colette Mabel & Grainline Archer

See what I mean? It’s about right at my belly button – which isn’t quite high waisted, and not quite low waisted. I can’t tuck anything in – partially because it’s very lumpy under the ponte, and partially because the waistline hits at a sort of wide point on my body. Untucked, most stuff just looks sloppy or gives me that weird long-abdomen proportion that we just loved soo much in the early 00s (y’all know what I’m talking about!). So yeah, can’t figure that one out. Any suggestions? Should I stick with more fitted, cropped sweaters (such as what the model is wearing on the website)? HELP ME I CAN’T ADULT.

Colette Mabel & Sewaholic Renfrew

Anyway, let’s talk! Answer one or more of the following:
– What shirts should I be wearing with these skirts?
– Have you ever made yourself sick by rushing to complete a garment before going somewhere?
– What happened when you finished it? Did a unicorn grant you 3 wishes or did you just realize that life was still doing life things and dammit is it Monday already?
– Seriously, though, what should I wear with these skirts?

** Necessary disclaimer: I received the Colette Mabel skirt from Sarai of Colette patterns, gratis. No review was requested – but as always, all opinions are my own. All fabrics in this post were purchased by me 🙂 I do get a monthly Mood allowance, but that doesn’t mean that I don’t also spend plenty of my own money there! Just wanted to clear that up 🙂

Completed: Some Tshirts!

26 Sep

Oh hey, head’s up – this post is all cake and no frosting. No apologies, though! Lord knows I can never have enough Tshirts.

Rather than bore y’all with a bunch of posts featuring patterns I’ve made before, though, I’ve compiled a trio of 3 different tshirt patterns – ranging from Free to You Gotta Pay For That Shit – for science and comparison purposes. Who doesn’t love a good Tshirt debate, amirite? Also, I took these pictures before I redyed my hair, fyi. Just in case you were curious, haha.

LET’S TALK ABOUT TSHIRTS NOW, GUYS.

Plantain Tee

First up is the Plantain Tshirt, from Deer & Doe Patterns. This is that free pattern I was telling y’all about. This is a great beginner tshirt pattern – there aren’t a lot of pieces, it includes some new techniques for beginners (such as sewing the neck binding), the instructions are very clear, and the fitting is quite loose at the bottom. I was initially afraid that I wouldn’t like this shape on me AT ALL, but I’m surprised at how much I love it!

Plantain Tee
Plantain Tee

Even though it’s a free pattern, I think it’s far from being a “crappy” pattern, if that makes sense. The sizing is perfect – I sewed up a straight 34, with no tweaks. I used the last scraps of my black merino wool from Organic Cotton Plus to sew this up – I like how the wool gives the bottom some structure (and the wrinkles? Not as much a fan of those, but I’ll live :P). And it’s SO COZY. Cozy tshirts, FTW!

Plantain Tee

I did make a couple of changes to the design of the pattern itself – the main one being that seam that runs down the front and back of the top. This was done out of necessity, as I didn’t have enough fabric to cut on the fold. I simply added a seam allowance and created a CF and CB seam. I topstitched the seams so they’d look more intentional, ha. I also added cuffs to the sleeves – because, I dunno, I like them! There’s a bit of piecing at the neckline binding as well. Since I was making this out of leftover scraps, I didn’t have a long enough piece to cut continuous binding. I don’t think it’s that noticeable, and hell, I’ll deal with some seams if that means I get a merino wool top out of it amirite.

Stripey Renfrew

Next up is my tried-and-true tshirt allstar – the Renfrew from Sewaholic Patterns! I LOVE this pattern, a fact that I believe is pretty well documented. Renfrew is favored by me because I think it most resembles what we think of when we think of a tshirt – slightly fitted, set-in sleeves, and 3 neckline options (in addition to the scoop, there’s also a cowl and a v-neck), as well as sleeve length options. The pattern is written to have a band of self-fabric at the sleeve cuffs and hem, in addition to the neckline. I’ve found that I prefer to hem my tshirts (rather than use the fabric band), and some of the more casual ones I like to hem the sleeves as well. One thing to keep in mind – should you decide to join me in my tshirt anarchy – is to add that length to the sleeves and hem before you cut them out. Otherwise, they might end up short! Ask me how I know about THAT 😉

Stripey Renfrew

Fitting-wise, this is a great pattern, although I did make a lot of tweaks to get to the point I am now. It’s been a long time since I tweaked, but if I recall – this is a size 0, with additional ease removed from the waist. I also shortened the shoulders a smidge and made them slightly narrower. All those tweaks paid off, because this is a pattern I reach for again and again when I need a tshirt. At any given time, if you see me in a tshirt – ask me if it’s a Renfrew, the answer will probably be yes! Seriously! Oh, and my fabric is a striped ponte from Mood Fabrics (the store, not online).

SJ Tee

The last top in this trifecta is the SJ Tee from Papercut Patterns. Another new-to-me top, and I admit this is more like a sweatshirt than a true tshirt (but mostly due to fabric choice). It’s kind of like a sexy sweatshirt, tbh – raglan sleeves and WHOA SCOOP NECK. Forreal, make this in something too stretchy and you’ll end up in boobie city. Again – want to ask me how I know about that? 🙂 haha!

SJ Tee

I’m surprised at how much I like the fit of this, considering that I don’t normally go for things so loose. I did end up taking the CB in by about 1″ – I’d already sewn the neck binding in at that point, so the seam runs clear from the bottom to the top of the binding, oops. But that made a HUGE difference in the fit, especially at the back. I used the size XXS and – other than the chunk taken out of the CB – it’s relatively unchanged. Oh, and I did shorten the cuffs so they’d look more like a sweatshirt. The fabric I used here is the last of my wool knit from Mood Fabrics (the same knit I used to make my grey Jenna cardi), and I had JUST ENOUGH. It’s amazing how much I love such a simple sweatshirt, by the way – I’ve been wearing it every night. It’s so cozy!

Here are the three patterns as modeled on my form:
Plantain Tee
Plantain Tee

Stripey Renfrew
Renfrew Top

SJ Tee
SJ Tee

I think it’s really interesting how something so simple as a damn tshirt can yield such different results, based on pattern and fabric choice. These are all pretty basic designs in the grand scheme of things, but they’re different to stand on their own. Obviously there are many, many more tshirt patterns out there (off the top of my head, these come to mind: Ensis, Briar, Bronte, Coco, and Lord, don’t get me started on dresses that can be hacked into tees), but I stuck with these three because I feel they’re the most basic/versatile. Also, let’s be real – if I fall down a tshirt rabbit hole, it might be months before this post sees the light! Ha!

Stripey Renfrew

Out of all these, I think my favorite is the Renfrew, just because it’s so damn versatile and I love how it fits (not to mention, the slim fit is ideal for layering). It might also have something to do with the Renfrew being my first love – can’t ever abandon her now 😉

I can’t stop thinking about that SJ tee too, though – I already have some future plans for her, including camel-colored boiled wool. Yum!

Plantain Tee

What’s your opinion on tshirt patterns? Do you have a favorite – and if so, dish please!

(psst! Don’t forget to enter the Sewtionary Giveaway, if you haven’t already done so! Entries close on Monday morning!)

Completed: the Zinnia Skirt

8 Nov

Who doesn’t love to wear wool in the winter time?

Zinnia Skirt made with plaid wool from Mood Fabrics

I feel like a broken record when I start singing the praises of wool, but foreal you guys – this stuff is awesome. It’s super warm and cozy, breathes very well (so you don’t get overheated in all that warm and cozy-ness), and it’s also antimicrobial, which means it naturally repels odors. Which means now you know why I wear so much wool and still manage to keep up with the laundry – it doesn’t need to be washed very frequently! Airing out is fine for day-to-day. Yay for being lazy!

Zinnia Skirt made with plaid wool from Mood Fabrics

So obviously, I was ready to bust the wool out just as soon as the temperatures started dipping. I’ve had my eyeball on that Zinnia pattern, and I paired it up with this beautiful lightweight wool plaid suiting from Mood.

Zinnia Skirt made with plaid wool from Mood Fabrics

I didn’t take any special precautions when sewing this – it’s wool, it’s just easy! The stitches sink in (bad for unpicking, but great for hemming since you can’t see the top stitching ;)), it presses beautifully, and as weird as this is gonna sound – it was really fun to cut, too. My scissors just sliced right through that yardage. I love the colors and it looks just as good paired with black as it does with navy. Double duty fabric and all that.

Zinnia Skirt made with plaid wool from Mood Fabrics

For the skirt, I cut the size 2 (although I did end up taking in the waist so maybe the 0 would have been better). I left the skirt unlined and shortened the hem by about 3″ so I could have a mini. The waistband is cut on the bias and, despite what you might think you see, I promise that the plaid matches up at the side seams 🙂

Zinnia Skirt made with plaid wool from Mood Fabrics

See?

Zinnia Skirt made with plaid wool from Mood Fabrics

Oh yeah, and I did totally just change shirts. We’ll discuss those in a second.

Zinnia Skirt made with plaid wool from Mood Fabrics

So. About working with this skirt in a plaid fabric. It works – kind of. Matching those side seams was HELL ON EARTH and I’m not really sure why. There are only two pattern pieces, for fuck’s sake! That was also the same day I got my kidney stone (which, if you’re still wondering… it’s still here. Just hangin’ out. Ugh ugh ugh), so I blame it on the pain meds. Anyway, I don’t really think this patterns works very well with a stripe – at least not the stitched-down-pleats version. They just look like a hot mess at the front and back. Might want to save your plaids – or at least your large-scale plaids – for another project.

Zinnia Skirt made with plaid wool from Mood Fabrics

I also had to drastically shorten the hemline – like I said, 3″ and WOO IT’S A MINI – because the longer length just looked dumpy as hell on me. Which means my plans for using a border print probably won’t work with this pattern, at least not the print I had in mind. It’s just too tall for the skirt length.

Zinnia Skirt made with plaid wool from Mood Fabrics

Also, the fabric I chose maaaay be a little too much for this pattern – seeing as how it sticks out like I have a teeny petticoat underneath it, ha – but I actually like the flared look.

Renfrew top made with wool knit from Mood Fabrics

Oh yeah, my tops! This is a Calvin Klein wool jersey, also from Mood Fabrics (attached link isn’t the same color – looks like they’re sold out of the grey, SORRY – but it’s the same fabric type) and it is deeeelicious. So soft and cozy, and not itchy at all! I used the Renfrew pattern and made the cowl version with 3/4 sleeves. I just love the way the fabric drapes at the cowl – it has enough body so it’s not droopy, yet it’s also not huge and standing up on it’s own or anything.

Also, sorry about the rouge leaf. Didn’t see that during the photos, haha!

Renfrew top made with rayon knit from Mood Fabrics

I made the navy v-neck because I felt like my contribution was a little boring, and also because I wanted to see how good navy looks with this skirt (it does! it does!). I used a rayon jersey from Mood Fabrics that’s been in my stash for ages – originally considered for leggings, until I realized that it was a tiny bit too sheer aka I would be baring my bum. I’m so glad I found a use for it, though, because it is some of the most luxurious fabric I have ever handled! It may just be a rayon knit, but it’s silky smooth and amazing. I really wish I had it in every color! I’m also, like, stupid proud of how that V turned out, by the way.

As usual, I took waaay too many pictures, so I’m just going to dump the rest here.

Zinnia Skirt made with plaid wool from Mood Fabrics

Zinnia Skirt made with plaid wool from Mood Fabrics

Zinnia Skirt made with plaid wool from Mood Fabrics

Renfrew top made with wool knit from Mood Fabrics

Renfrew top made with rayon knit from Mood Fabrics

Zinnia Skirt made with plaid wool from Mood Fabrics

Zinnia Skirt made with plaid wool from Mood Fabrics

The tiny belt loops are my favorite part! So tiny and cute!

Zinnia Skirt made with plaid wool from Mood Fabrics

See what I mean about the plaid? It looks like a hot mess at the pleats. Oh well.

Zinnia Skirt made with plaid wool from Mood Fabrics

One last thing – I wanted to thank y’all for all your advice regarding my muslin, as well as my kidney stone. I’ve decided to set the muslin aside for now; I may revisit it in the future but I think my coat for 2013 will have to be a totally different pattern! So I guess I’ve got that to figure out. As far as the kidney stone… well, it’s still there, taking up residence. Y’all will probably be able to hear me scream from the rooftops once it finally emerges haha. A few people urged me to to go the doctor, and I did want to follow up and let y’all know that I went to both a doctor and a specialist last week, got the x-rays as well as a variety of medications. There’s not much else we can do at this point beyond surgery or shooting lasers (which my uninsured ass is reeeeally trying to avoid), which means I gotta shoot it out! For the past couple days I’ve been on an essential oil regimen, and tonight I will be trying some Coke/asparagus concoction that sounds fucking disgusting but is supposed to work. Anyway, sorry for the TMI, keep thinking happy kidney stone thoughts! haha!

Zinnia Skirt made with plaid wool from Mood Fabrics

Completed: A Cozy Kelly Skirt

16 Sep

Look at me, I’m like a 1970s Sherwin Williams swatch book all up in hurr.

Corduroy Kelly Skirt

I know I haven’t talked about her much since the denim version came out to play, but OMG I LOVE KELLY. I seriously can’t get enough of this pattern – it’s very simple, but delivers maximum effect!

Corduroy Kelly Skirt

This is my second corduroy Kelly, same difference as the first, although this cord is a much thicker wale with a softer hand. I snatched it up during my trip to NYC – it was part of a swap, although I am a terrible swapper and I don’t remember who it came from 😦 Sonja? I know the majority of the goods came from your stash haha 🙂

Corduroy Kelly Skirt

Anyway, origin aside, this fabric is pretty fabulous! It’s super soft with a fair amount of body, and the color is one of those great browns that goes with everyyyyything (except the new top I made, apparently, which is not the same top I’m wearing in these pictures btw. Oh well haha!). I love corduroys, but sometimes finding a good one that’s pure cotton with no stretch and a nice color can be surprisingly difficult!

Corduroy Kelly Skirt

I can’t speak much on this pattern because obviously I’ve already made/discussed it, but I will tell you what I did differently this time ’round. For one, I used sew-in interfacing instead of my regular fusible… corduroy can be kind of finicky when you press it (specifically – you risk squishing the wales flat and ruining your fabric and WAH), and a quick test of the fusible proved that I would be making a huge mistake. I used muslin as my sew-in – just cut the pieces, basted them to the waistband and button hole placket, and then proceeded as usual.

Corduroy Kelly Skirt

I did topstitch my skirt as directed, but it’s not really noticeable due to the thickness of the fabric. It doesn’t bother me – I like the subtle look – but if you’re planning on making this with a similar fabric and want the topstitching to be visible, you will need to use top stitching thread and the accompanying needle.

Corduroy Kelly Skirt

Obviously, you want to be careful when pressing corduroy – but some stuff does need a good sharp crease, like these pleats and the hem. To do this, I laid a scrap piece of corduroy on my ironing board, right side up, and put my skirt on top of the scrap right down down (this keeps the nap from getting crushed, as the fabric on the bottom provides some support). I used my silk organza press cloth and steamed the beejeezus out of everything, and then used my clapper to hold everything down until it cooled off.

I love that clapper. I always feel like such a fancy-pants when I use it, ha.

Corduroy Kelly Skirt

I also omitted the second button on the waistband – I want to wear this skirt with belts, which I can’t do if there’s a giant button in the way. I put in the top button and added a hook and eye where the second button should be.

Corduroy Kelly Skirt

Here you can see my hook and eye. The skirt in unlined, but it works fine with a slip underneath in the winter, for wearing with tights. Well, the other corduroy one does, anyway, haha.

Corduroy Kelly Skirt

Oh yeah, my buttons were free too! They’re some faux-leather suiting buttons that my Mamaw gave me. She gave me HUNDREDS of them (and my mom took half… but still… that’s a lot of buttons) and I rarely find a change to use them since they’re just really big. But I think they work here! The color looks great with the color of the fabric.

Corduroy Kelly Skirt

I almost forgot – look at this cute pocket lining! It’s a tiny little scrap I got at the flea market. The seller threw it in for free (lord, can I say “free” enough in this post??? FREE FREE FREEEEEEEE) with a few other scraps, after I made a purchase pile. It was just big enough to use to line the pockets. I love those colors, wish I could find a big yardage that looked like it!

Corduroy Kelly Skirt

I guess that it’s! Kind of a boring staple to make, but these kinds of basic pieces get a lot of wear in my life 🙂 Plus, it looks sooo good with my mustard Renfrew, which is always a plus in my book.

Tutorial: The Paulie Pocket Top

18 Jan

stretch yourself header
This post is part of the Stretch Yourself Series hosted by Miriam of Mad Mim and Miranda of One Little Minute. This two week series is ALL ABOUT the love of knits, so go check it out!
I’ll be showing y’all some embellishment twist on a classic, along with Jessica of A Little Gray

Here she is – the Paulie Pocket Top!
Paulie Pocket Top
I KNOW. The name of this top is totally ridiculous & tacky – but what part about my life isn’t? 🙂

Paulie Pocket Top
You will need 3 different kinds of fabric to make this – something for the majority of the shirt (in whatever yardage you need to make your top), something to line the back of the pocket with (half a yard or so should be enough), and scraps for the pocket binding. For the binding, you don’t want to use anything that is too thin/floppy, or it’s not going to sit right – try something with a bit more body, like ribbing or a cotton knit.

Don’t forget your pattern! You can download it here. The edges of the paper are part of the band pieces; the lines just didn’t transfer over during the scan.
Be sure the test square prints out to 4″x4″ (or 10cmx10cm, if you fancy). The stretch guide is there for the binding fabric – you just want to make sure the 4″ piece stretches up to the length provided (or else your binding will not fit in the cut-outs). If it stretches more or less, that is fine, but you will need to adjust your pattern pieces accordingly.

Paulie Pocket Top
Cut all your pattern pieces from the main fabric as normal. For this tutorial, I am using the Renfrew pattern. Sew the shoulder seams as instructed (you don’t *have* to sew the shoulder seams first, but I like to because it helps with pocket placement – you can pull the shirt over your head and double-check in the mirror).

Now push the back of the shirt out of your way. We won’t be touching it for the rest of this tutorial.

Paulie Pocket Top
On the shirt front, measure on both sides the distance from where you want the bottom of your pockets to hit, keeping seam allowance in mind. I usually go with 1 3/4″. Mark this with a pin.

Paulie Pocket Top
Align the bottom of the pocket template with the pin and cut from the front of the shirt only.
(pst! I know my template has different wording – while putting together this tutorial, I hadn’t decided on a ~name~ for my pattern embellishment yet ;))

Paulie Pocket Top
Give the pocket piece to your cat to play with, idk.

Paulie Pocket Top
Cut 2 pieces of pocket ribbing, using the pocket band pattern piece.

Paulie Pocket Top
Fold in half lengthwise, wrong sides together, and press.

Paulie Pocket Top
Pin the pocket band to the pocket opening on the outside of the shirt, matching raw edges, notches, and ends. The pocket band will be smaller than the pocket opening – this is good, we are going to stretch that band to fit and give our pockets a nice curve. Do not overpin this – 3 pins is plenty.

Paulie Pocket Top
Start by anchoring one end of the pocket band to the pocket edge, and stop with the needle in the down position.

Paulie Pocket Top
Sew the band to the edge, stretching the band to fit as you go (don’t stretch the raw edge of the pocket- just the band! It’s much easier if you position it so the band is on top). Sew slowly and take your time. We ain’t in a hurry here.

Paulie Pocket Top
Once the band is sewn down, you can topstitch it on your sewing machine – using a twin needle or a regular ol’ zigzag stitch.

Paulie Pocket Top
You should end up with something like this. Ain’t that fancy! Let’s put a back to those pockets so our sides aren’t hanging out in the glory of the sun – unless you’re into that kinda stuff, eh, no judgement here.

Paulie Pocket Top
Measure from the bottom of the shirt front to about an inch above the pocket band. Mine is 9.5″, which is approximately how tall I need my pocket lining piece to be.

Paulie Pocket Top
Measure that same measurement from the bottom of your shirt front pattern piece and cut that from your pocket back fabric.

Paulie Pocket Top
Finish the top edge of your pocket back fabric – this is optional as we all know jersey doesn’t exactly unravel, but it’ll make the next step a little easier 🙂

Paulie Pocket Top
Lay the shirt front over the pocket lining piece you just cut, matching all raw edges. Pin along the pocket openings and shirt bottom to keep everything in place.

Paulie Pocket Top
Now, using your fingers to feel the edge of the top of the pocket lining underneath, carefully pin across the front of the shirt so both pieces are pinned together.

Paulie Pocket Top
Flip back periodically to make sure you catch both layers.

Paulie Pocket Top
Topstitch (again – you can use a twin needle or a zigzag) along the line you just pinned. Baste the side and bottom edges together.

And that’s it! You can go ahead and sew your shirt together as instructed by your pattern – treat the pocket-ed front as one piece.

Yay for embellished shirts!

Paulie Pocket Top

Paulie Pocket Top

Paulie Pocket Top

Special shout-out to this awkward picture:
Paulie Pocket Top
No idea why I look so emo here haha

Paulie Pocket Top
There! That’s better 😀

Completed: The Mustard Renfrew (plus some announcements!)

26 Sep

Let’s get down to business, shall we?

First of all, you guys definitely want a sew-along. And I aim to please! So let me introduce my first sew-along (ahhh!!), for the Thurlow trousers:


Feel free to snag this button for your blog, so everyone will know how cool you are BECAUSE YOU ARE MAKING PANTS.

As it is, I am a bit swamped right now, and I know a lot of you guys are working on jackets & coats with other sew-alongs, so we won’t actually start sewing until the end of October. I am aiming for a start date of Monday 10/29, so there will be plenty of time for everyone to work on their muslins, choose fabric (but maybe hold up a week or two, I’ve got a fabric post cooking right now :)) and of course finish your coat if you’re working on one!

I also opened a Thurlow Sew-Along Flickr Group, so please join so we can all share pictures 😀 We will be posting our muslins for advice on fit, and since I’m not a muslin-master, I’m really hoping y’all can pitch in and help when you see something you know the answer to. Open discussion!

A few people asked if they could join with a different trouser pattern – and the answer is OF COURSE! We will be focusing on the Thurlow pattern specifically, but these techniques should work with any ol’ pants pattern, including the gorgeous new Juniper. However, you may need to draft pieces if your pattern doesn’t have all the cool welts & fly facings & shit.

Also, this specific pattern includes an option for shorts, so if you’d rather make shorts… make shorts! All the construction techniques will still be the same 🙂

Ok, for those of you who dgaf about a sew-along… I have something for you too. But you still have to look at my Thurlows. HEH HEH HEH.

Renfrew & Thurlows
Thought I’d whip up a little tshirt last night 🙂

Renfrew & Thurlows
This is the Renfrew top by Sewaholic patterns. I know what you’re thinking – and I promise I’m not getting paid to wax poetic about Tasia’s patterns every day lol. I just really love them and I want everyone to get excited about them too!

Renfrew & Thurlows
Anyway, I wanted to try the cowl in view C, but I was holding off for the right fabric (and weather conditions). This fabric actually came from the flea market last week – this lady was trying to dump off the remainder of her late mother’s fabric stash and this was in it. It was actually really scratchy & smelled awful, like a moldy basement in the 60s, but I took a chance. Especially since I got a big stack of fabrics for $1 lolz. Anyway, it softened up quite nicely with a wash – and the smell is gone. I just think the color is so perfect!

Renfrew & Thurlows
Here’s a back view. BACK FAT ALERT, BRO.

Renfrew & Thurlows
I feel like it also bears mentioning that this is a perfect every day wardrobe ensemble. Sure, it’s a boring concept – jeans & a tshirt. Who the fuck makes jeans & a tshirt? Actually – I think that’s the beauty of it. Instead of focusing all my sewing power on stuff that rarely gets worn, this is some straight-up cake. I am going to snuggle into this outfit all the time – I would be wearing it right now, if I didn’t work in an office with a dress code 🙂 – and it just tickles me that the entire thing is handmade by meeeee.

Oh, speaking of cake – StephC of 3hourspast just kicked off a presale for her new pattern line, Cake! And it’s a casual knit dress – designed to be worn as every day wear, or, the aforementioned cake. Mmmm, cake.

One thing I hear people mention when they discuss not wanting to sew “every day” items is that they are boring to sew. Boring fabrics (not as many pretty prints!), boring patterns, boring boring. And I get that – I really love digging my teeth into something deliciously challenging. But there are ways to make your plain garments more fun – like making the inside a party:
Renfrew - HAPPY SHIRT
GOD, what a happy shirt!

At any rate, stick around for Thurlow Extravaganza! I’ll be back next week to start muslin’ing, and we also need to talk FABRIC!!

Renfrew & Thurlows