Tag Archives: spiegel 60609

OAL2016: My Finished Outfit!

29 Jul

What up, everyone! It’s practically the end of the July – two days left to go! – which means one thing ’round these parts… The Outfit-Along is nearly over!

OAL_Banner

I’ve had a lot of fun with the pieces this year – both making and wearing them! – and I’m excited to finally show you guys my finished sweater + skirt!

OAL2016: Zinone Sweater + Hollyburn Skirt

Here is the complete outfit!

The sweater is Zinone by Andi Satterlund, and the skirt is a Hollyburn from Sewaholic Patterns.

OAL2016: Zinone Sweater + Hollyburn Skirt

OAL2016: Zinone Sweater + Hollyburn Skirt

OAL2016: Zinone Sweater + Hollyburn Skirt

OAL2016: Zinone Sweater

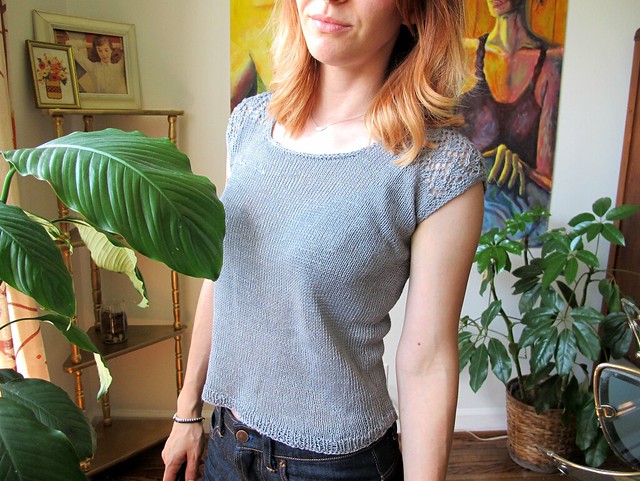
Zinone was made using the suggested yarn, Quince + Co Sparrow (the color is Moon), which is a fingering weight linen yarn. This was my first time working with linen and OMG TRUE LOVE Y’ALL. Very easy to work with and felt so good on my hands! My gauge swatch put me at size 2 needles, and I knitted the size XS (which is my usual size for Andi’s patterns and corresponds with my bust measurement). I chose to knit the version with the partial lace back, and slightly cropped. I was originally going to do the full lace version, but I guess I’m way out of lace-knittin’ practice because I had a helluva time working this one out. Fortunately, the directions for the partial and full lace back at the same for a bit at the beginning of the pattern, which gave me plenty of time to change my mind 😛 I also completely frogged the entire thing and started over after finishing the lace section, because I realized way too late that I had read the pattern wrong (which is why I was having issues in the first place). I was trying to be clever and separate my repeats with stitch markers – you can’t do that with this pattern, as some of the stitches borrow from previous repeats. Whoops. Once I realized I’d done goofed, let me tell you… it was hard to rip everything out and start over. But I’m glad I did, because my second attempt at the lace looks pretty bomb-ass, if I do say so myself 😉

I made some slight sizing and length modifications to the sweater as well – I knitted the correct number of rows for the cropped version, but somehow it ended up really short (I am thinking I read the pattern wrong). I just continued knitting until I got to the length that I wanted, and did a couple more rounds of decreases as well. Speaking of length, this sweater is only about an inch shorter than the schematics – it’s 16.5″ long from the shoulder, which hits me right about at the belly button. The cropped version on Andi appears to be a lot shorter than mine, even though it says it’s an inch longer.

Anyway, this was a very easy and satisfying knit. I did nearly run out of yarn at the end – I bought enough for the cropped version, and ended up frogging about 3 rows of my gauge swatch. Actually, I had an extra skein but I was trying really hard not to use it so I could be cheap and return it to the store 😉

OAL2016: Zinone Sweater

OAL2016: Zinone Sweater

I LOVE how this linen feels in the summer heat – finally, an excuse to wear my handknits even in July! 😀 And it’s pretty awesome that it’s machine washable. I haven’t done the recommend 3 washing cycles yet, though – I did one Soak wash (this is how I wash all my knits… and my lingerie for that matter. Soak is AMAZING, cannot recommend enough) and then one wash in the washing machine. My new place has me doing laundry at the ‘mat, so running 3 loads back to back to back isn’t exactly doable for me! (well, it is. But I’m not about to pay for that haha) So far, though, it has softened up considerably after even 2 washes. Can’t wait to see how it softens even more with additional wear and washing 😀

OAL2016: Zinone Sweater

OAL2016: Zinone Sweater

OAL2016: Zinone Sweater

OAL2016: Zinone Sweater

OAL2016: Zinone Sweater

Sorry, loads of photos!

OAL2016: Hollyburn Skirt

OAL2016: Hollyburn Skirt

Now for the Hollyburn!

I already wrote a couple posts about the modifications to make this particular skirt (see: Choosing Your Fabric, Flat Piping, and Installing an Exposed Zipper), so I’ll just brief over the key details here.

The navy rayon crepe is from StyleMaker Fabrics (who is one of our sponsors for this year’s OAL!). I added flat piping at the waistband (sewn with silk crepe – from my stash) and an exposed metal zipper to the back. I also shortened the length considerably, omitted the pockets, and used stretch interfacing on the waistband.

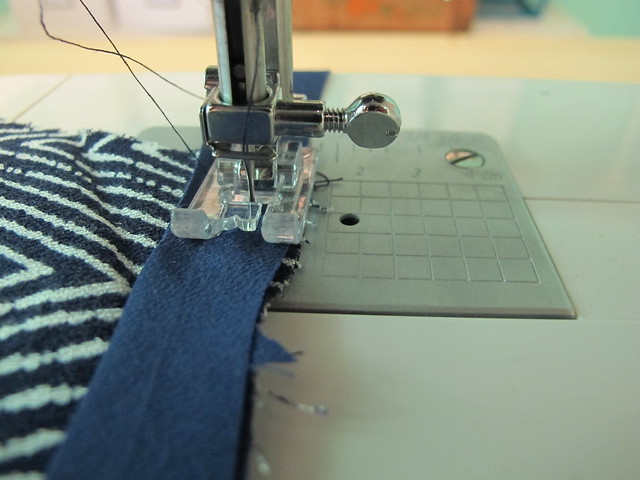
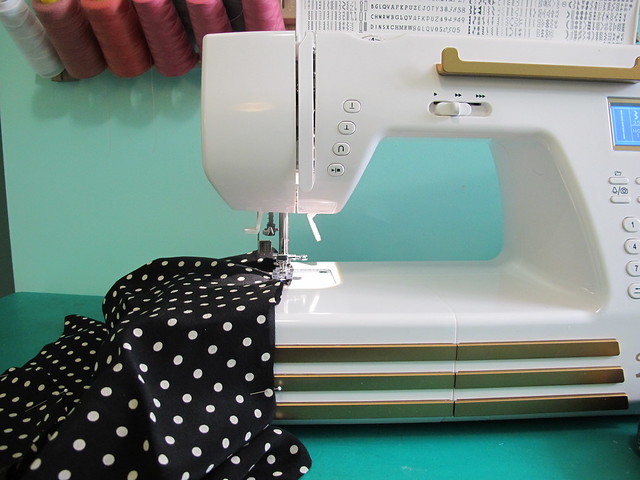
I sewed the entire skirt on my Spiegel 60609, and it did pretty well overall! While I don’t want to say I was concerned to see how it would handle that shifty fabric (I have sewn straight-up silk and a bra on the 60609, and it hasn’t given me any problems thus far with my fabric choices), I was still pleasantly surprised at the entire experience. I didn’t use any special stitches, and only feet that came with the machine. The zipper foot in particular was great for both applying the piping and the invisible zipper, as well as making sure the topstitching was nice and straight and close to the edge. I did find that I needed to increase the stitch length just a smidge for this fabric, as it wanted to bunch a little bit otherwise, but overall I’m pretty happy with it! I am glad that moving the needle over is an option with this machine (you just increase the zigzag width while on a straight stitch), however, I’d love to see some new feet released to use with this machine. Maybe a 1/4″ foot or an edgestitching foot? 😉 HINT HINT.

OAL2016: Hollyburn Skirt

OAL2016: Hollyburn Skirt

OAL2016: Hollyburn Skirt

For me, the most fun part about this challenge is ending up with TWO pieces that I can mix with other garments in my wardrobe. I love this top + skirt together… but honestly, I like them even more with different things from my closet! They are definitely wearable with a bunch of what I already have (which is part of the reason why I got a little boring with the colors 😉 I wanted the versatility!); here are a couple of examples:

OAL2016: Zinone Sweater

Zinone top + Ginger jean shorts
I don’t know about y’all, but I am LOVING the cropped trend! Slightly cropped with a slightly high-waisted bottom is my new favorite thing right now (not your cup of tea? This is the beauty of knitting your own – you get to decide the length!). I love the way this top looks tucked into a skirt, but the combination with my high-waisted Ginger shorts really makes my heart sing the most.

OAL2016: Hollyburn Skirt

Hollyburn skirt + sleeveless coral B5526 button up
I did not realize when I made this shirt that it was going to be one of my top 10 handmade garments of all time, but it is. It goes with everything. The sleeveless option + lightweight cotton fabric make it a great option for summer, and it layers beautifully under sweaters in the winter. The color is perfection and looks especially great with navy (my go-to summer dark neutral). It’s as easy to wear as a knit tshirt, but looks a helluva lot more refined and classy.

OAL2016: Zinone Sweater + Hollyburn Skirt

Anyway, I guess that’s it for this post! Those of you still scrambling to finish your outfits – you have 2 days before the deadline! Make sure you upload your finished outfit to the Official OAL2016 Finished Outfit Thread on Ravelry before 7/31/16 Midnight PDT if you wanna win one of those sweet prizes! Andi and I will be drawing 3 winners at random, who will win fabric, sewing pattern, and knitting pattern vouchers! Even if you’re not participating, do take a look at that thread! There are some amazing outfits to drool over 🙂

OAL2016: Part 2 (Zipper + Finishing)

15 Jun

Hey everyone! Welcome back for the second (and final!) sewing post of the Outfit Along 🙂

OAL_Banner

At this point, you should have your skirt mostly assembled (all seams except the center back seam) with the waistband partially attached (not finished). Today, we will insert the zipper and finish the waistband in one go! I  am making my skirt with this awesome rayon crepe from StyleMaker Fabrics (don’t forget that there is free US shipping/discounted international shipping on all orders through 6/30/16 when you use the code OAL2016 😉 ), using my Spiegel 60609 sewing machine. If you missed the previous posts, here is Part 1!

For this particular skirt, I am sewing an exposed metal zipper. If you hate exposed zippers, that’s ok! You have options! Check out my tutorial for sewing a lapped zipper, and also my tutorial for sewing an invisible zipper.

For sewing the exposed zipper:

OAL2016- Sewing an Exposed Zipper
Start by marking a rectangle where the zipper is to be inserted. For a 9″ exposed zipper on a garment with a 5/8″ seam allowance (if your measurements differ, you will need to adjust these accordingly!), make a rectangle that is 10″ long and 7/8″ across. I use a Chaco Pen liner, but again – anything works! Then go over your markings with a long basting stitch on your machine. Don’t be lazy and skip this step. I know it’s tempting, but trust me on this one. The stitches will make it visible from both sides, and also won’t rub off.

OAL2016- Sewing an Exposed Zipper
If your fabric is very lightweight and/or drapey, you will want to interface the area where the zipper is going, just to give it some extra support. I cut strips of lightweight fusible and applied them over my basting lines.

OAL2016- Sewing an Exposed Zipper
Clip into the bottom corner of the rectangle at a 45 degree angle, being careful not to snip into your basting lines.

OAL2016- Sewing an Exposed Zipper
Fold along the vertical basting stitches and press.

OAL2016- Sewing an Exposed Zipper

OAL2016- Sewing an Exposed Zipper
Starting at the horizontal basting stitches, sew the center back seam at 5/8″, ending at the hem.

OAL2016- Sewing an Exposed Zipper
Press the seam allowances open.

OAL2016- Sewing an Exposed Zipper
On the right side of the skirt, lay the zipper face down with the bottom facing toward the waistband. Line the horizontal basting stitching just below the zipper stop.

OAL2016- Sewing an Exposed Zipper

OAL2016- Sewing an Exposed Zipper
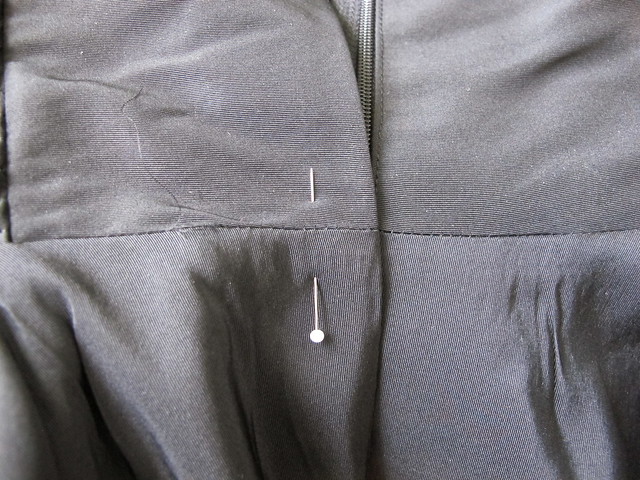
Sew along the horizontal basting ONLY, using a zipper foot. PROTIP: I just found this out, but you *can* move the needle of the Spiegel 60609. While the machine is on straight stitch (#1), increase the zigzag width to 7.0 and that will move the needle! So you can get RIGHT UP IN THERE to do that zipper!

OAL2016- Sewing an Exposed Zipper
Here is the bottom of my zipper after it is attached. You only need to sew along the basting stitches – not the entire width of the zipper tape.

OAL2016- Sewing an Exposed Zipper
Flip the zipper to the inside of the skirt and press the line you just sewed.

OAL2016- Sewing an Exposed Zipper

OAL2016- Sewing an Exposed Zipper
Now turn back the skirt pieces, one at a time, and sew the zipper tape to the skirt along the vertical basting stitches, starting at the zipper top stop and ending at the bottom stop (don’t sew all the way to the very end of the tape). Again, use a zipper foot and move your needle over to one side if you can.

OAL2016- Sewing an Exposed Zipper
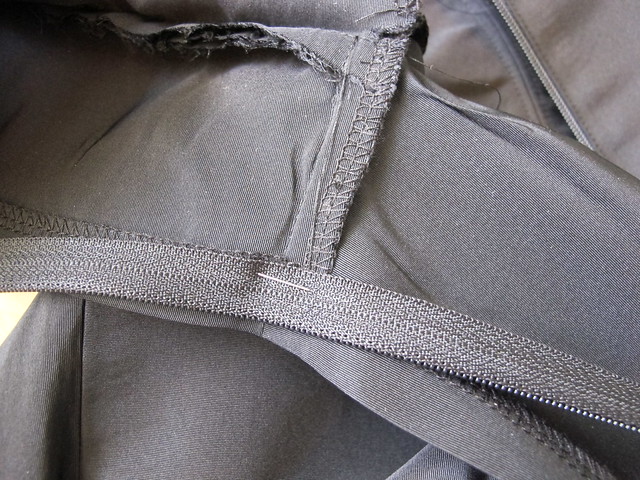
Here is what things should look like after you’ve attached both sides. Note that the top of the zipper will NOT reach the top of the waistband – it should only go about halfway, since we are folding the waistband to the inside. On the Hollyburn, there is a notch to indicate where the waistband folds – so the zipper  stop should reach that notch.

OAL2016- Sewing an Exposed Zipper
Now we need to finish the waistband. Fold the seam allowance (5/8″) along the long raw edge to the inside, and press. You may trim this seam allowance down to 1/4″ if it’s bulky.

OAL2016- Sewing an Exposed Zipper
Fold the remaining bits of the top of the zipper tape toward the inside of the waistband, and pin to keep them out of the way (if you accidentally sewed down this part, you gotta unpick 😉 ).

OAL2016- Sewing an Exposed Zipper

OAL2016- Sewing an Exposed Zipper
Now fold the waistband down to meet right below (about 1/8″) the stitching line at the top of the skirt, making sure that the top zipper stop is even with the top of the waistband fold. Make sure the raw edges are tucked in around the zipper and pin everything into place.

OAL2016- Sewing an Exposed Zipper

OAL2016- Sewing an Exposed Zipper
Now to topstitch! Starting at the top of the zipper, topstitch 1/8″ from the edge down to the seamline where the skirt meets the waistband, lower your needle and pivot. Then continue around the entire waistband until you reach the other side of the zipper, pivot, and sew back up to the top.

Alternately, you can also topstitch around the entire exposed zipper – but you’ll need to sew down the waistband in a second pass 🙂

OAL2016- Sewing an Exposed Zipper

OAL2016- Sewing an Exposed Zipper
Now pat yourself on the back for sewing an AWESOME EXPOSED ZIPPER WTF.

Finally, just a couple more things to finish your skirt! If you want to add belt loops or the waistband tabs, you can do so now. Then you just need to hem. I ended up taking about 3″ off my skirt length to make it more of a mini, and then finished with a double turned hem (1/4″ on the first turn, 3/4″ on the second) that is simply topstitched. Here are my hemming tutorials if you need a refresher!

That’s all for today! As always, please let me know if you have any questions!! How is your sewing coming along? 🙂

OAL2016: Part 1 (Pockets + Piping)

8 Jun

Good morning, everyone! Time to get some sewin’ done for this OAL!

Before we get into the post, a few things I wanted to mention:
– Unlike previous years, I will not be doing a full step-by-step of sewing the pattern. Part of the reason is because this is a really easy pattern and the instructions are super straightforward and simple to understand on their own.
– Now, before you freak out – there IS a sewalong for the Hollyburn skirt! Not hosted on this blog, but a sewalong nonetheless! You can find it here on Lavender Lane. So if you reeeally need the help and the instructions just aren’t cutting it for some reason or another, there is that option!
– Instead of step-by-steps, I am splitting the OAL sewing stuff into 2 posts – today and next week – both with modification tutorials. I will also include links to relevant tutorials from older posts as they are needed. That way, those of you who are not following the OAL and/or don’t care about sewalong posts (I’ll be honest – I skip over them too!) – this is less for you to skip over 🙂 And for those who are here for the OAL and love reaching sewalong posts – they’re still here! 🙂
– And DUH, I’ve made like a zillion of these skirts – so feel free to ask me questions as well! Either in the comments, or you can email me! Don’t worry! I got ya covered!
– FINALLY, I should mention that I’m using my Spiegel 60609 sewing machine to construct my Hollyburn, so you’ll see it in the photos! I wanted to see how it handled my mega-shifty fabric 🙂

Ok, back to the OAL!

OAL_Banner

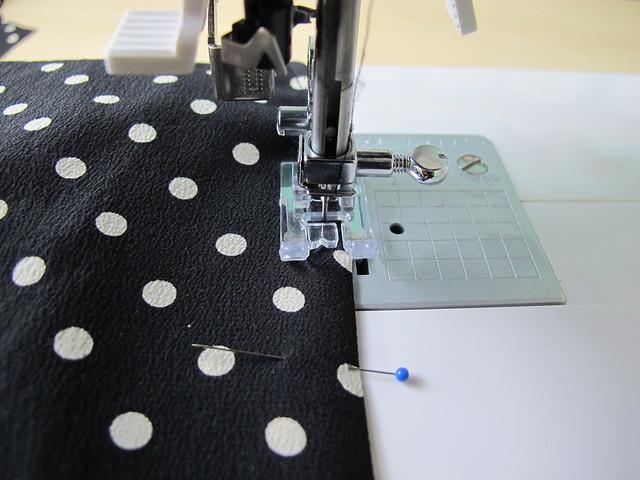
Before you do anything, it’s a good idea to prewash your fabric in the same manner you will be washing/drying it once the garment is complete. Some fabric reeeeally likes to shrink, so you want to get that out of the way before it’s cut! I am using this cool zigzag rayon crepe from Style Maker Fabrics and it certainly shrunk a LOT! It’s a bit shifty to work with, but I think the payoff will be pretty sweet – it has the dreamiest, swishiest drape! I found that my increasing my stitch length just a hair (the standard stitch length on the Spiegel 60609 is a little short for sewing really delicate and shifty fabrics, I’ve learned) and using lots of pins was enough to keep the fabric in check for the most part.

Some notes on cutting:
Here is a post I wrote for the 2014 OAL on cutting and marking. Different pattern, same concept.
– It is entirely possible to make this pattern with a striped or plaid fabric! You will need extra fabric to allow for matching and it may take longer to cut, but it can be done! Depending on your stripe/plaid, you may only be able to match 2 seams instead of 4 – if this is the case, match the center front and center back seam. Mismatched side seams are less noticeable 🙂 Here is my tutorial for matching plaids. Also relevant: my tutorial on matching the stripes at the pocket.
– This pattern calls for you to cut the waistband on the straight grain (parallel to the grain line). If your fabric has a bit of stretch, though, you may want to consider cutting on the cross grain (perpendicular to the grain line). This is what I did 🙂 Keep in mind that if you cut on the cross grain, you’ll want to interface the waistband with a tricot interfacing to retain that stretch. I personally love the PROtricot at Fashion Sewing Supply, but most fabric stores have something similar 🙂
– If your fabric is super drapey and you don’t want the pockets to bag out, you may consider eliminating them entirely (go ahead, gasp or whatever). This is what I did on my skirt, to allow for a smooth front. You can always add in-seam pockets if you’d like.

Eliminating the pockets is super easy:
OAL2016- Removing Pockets
You’ll need your pocket piece and your skirt front piece.

OAL2016- Removing Pockets
Fold the pocket piece in half along the foldline, matching the notches.

OAL2016- Removing Pockets
Lay the pocket piece behind the skirt front at the pocket opening, again matching the notches. Then just tape it down into place – I am using surgical tape because it peels off easily without tearing the paper (I can’t take credit for this – I got it in my goody bag at A Gathering of Stitches. Sam makes the BEST goody bags!), but you can also use regular tape, painter’s tape, pins, or even just trace off the pattern pieces. Whatever works!

Next steps are to construct the skirt as per the directions. Sew the pockets (if you still got ’em!). Sew the center front and side seams at 5/8″, but leave the center back seam open. If you would like to finish your seams, now is the time. I used my serger to overlock the seams after I sewed them, and then I pressed them open. Finally, staystitch the waist of your skirt (just a straight stitch about 1/2″ from the edge) to keep it from stretching out.

At this point, I decided to add flat piping to my waistband seam. So you get a tutorial!

OAL2016- Flat piping
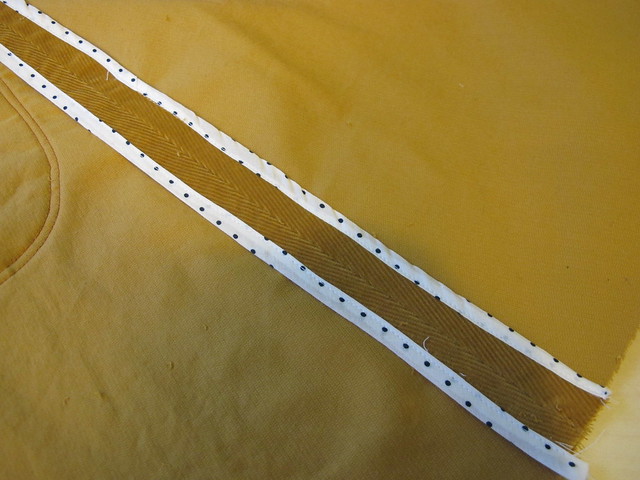
I started with a strip of bias-cut silk crepe that was 1.5″ wide. The width of your piping will determine how wide to cut your bias – you’ll want 2x the finished width, plus 2x seam allowance. Cut enough bias to go all the way across the waist of your skirt. Fold the strip in half, length-wise, with the WRONG sides together, and press.

I promise I will get a new ironing board cover eventually. Ew, that yellow stain. haha.

If you don’t know how to cut bias, here are two really great tutorials: continuous bias (my favorite!) and bias strips.

OAL2016- Flat piping

Lay the folded bias along the waist edge of your skirt, matching raw edges at the top, and pin into place.

OAL2016- Flat piping

Sew the bias in place just within the seam allowance (I sewed at 3/8″) to hold it there. You can use a basting stitch for this step; it’ll get a second sewn pass in a minute!

OAL2016- Flat piping

Lay your interfaced waistband on top of your skirt, with right sides facing and raw edges matching. The bias strip should be sandwiched between the two.

OAL2016- Flat piping

Now sew your second pass to secure all the layers at 5/8″. Make sure to shorten your stitch back to it’s normal setting if you were basting 🙂 I ended up sewing another line a little more than the seam allowance, because I wanted the piping a little bit narrower.

OAL2016- Flat piping

Check the right side to make sure that everything looks good. I have no idea how I managed that unintentional perfect pattern matching, but hey, I’ll take it!

OAL2016- Flat piping

Press all the seam allowances up toward the waistband, using lots of steam so the piping lays nice and flat. If your fabric is bulky, you may want to trim down your seam allowances and/or grade them (trimming them in staggering layers) to prevent bulk from showing from the outside.

OAL2016- Flat piping

Now admire your pretty, flat piping! Isn’t that dainty? 🙂

Ok, that’s all for this week! Let me know if you have any questions about these steps 🙂 Next week, we sew in the zipper and finish the thing! Woohoo!

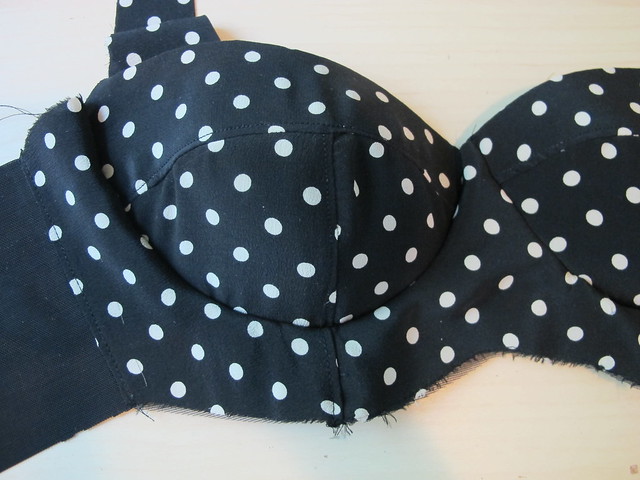
In Progress: Silk Polka Dot Boylston Bra

10 May

sewing with spiegel boylston bra

Hey everyone! I’m back with another bra post… again! This time, I’m trying something a little different though – I have made this bra *entirely* on my Spiegel 60609 machine. If you’ve followed my past bra posts, you will know how much I love using my old standby Bernina 350 for assembling lingerie, especially since the variety of feet that I have make things super easy. However, I was really curious to see how the Spiegel 60609 held up when it involves fussy lingerie sewing, so I used it for this project. And now I’m going to report my findings to you!

A few things I noticed that I think bear mentioning:
– I’m not a huge fan of the way the seam allowances are marked on the throat plate of this machine, as it makes it a little difficult to get a precise 1/4″ seam allowance. However, this is really easily solved by laying a piece of tape or even a Post-it note where your 1/4″ line should be. This is what I did, and it worked fine.
– The feed dogs (what move under your needle to push the fabric along) on this machine are AMAZING. Seriously, I didn’t have to pull my thread tails at all when starting or stopping a seam. The machine just pushed everything through without any snags or chewed up fabric – even with using silk crepe and teensy 1/4″ seam allowances. Color me impressed!
– The one downside I see to this machine is that you can’t move the needle in either direction – which is what I typically do to get accurate edgestitching (on my Bernina, I use the stitch-in-the-ditch foot and move the needle all the way to one side, it gives me a perfect 1/8″ without having to even really think about it). With that being said, I used the clear foot that comes with the Spiegel 60609, and found that the opening off the center of the foot is exactly 1/8″ from the needle. As long as you line this opening with the seam that you are edgestitching, you will get an accurate stitch. It does mean that you need to pay attention and maybe sew a little slower – but the 60609 also has a speed dial to slow things down, so no excuses now! 🙂
– There are a BUNCH of zigzag stitches on this machine!! For elastic insertion (which I’ll go over next week in part 2), I used stitch #226. I found the width to be perfect for what I needed.

The pattern I am using for this bra is the Boylston Bra from Orange Lingerie. This beautiful balconette pattern works for both foam cups and fabric cups, and features self-fabric straps and a really nice rounded shape. I’ve made it a few times in the past, and it’s a favorite of mine 🙂 I am making the size 30D.

For fabric, I am using silk crepe from Mood Fabrics (look familiar? I used it to make a top! Yay for lingerie using tiny scraps, ha!) for the outer, black power mesh from Tailor Made Shop for the back band, sheer cup lining from Bra Maker’s Supply, and black foam bra padding also from Bra Maker’s Supply. The elastics and notions are from various points in the NYC Garment District – I just have a giant stash that I pull from as I need stuff 🙂

I hope you like watching step by step progress shots, because that’s what you’re getting this week! 🙂

The pattern has you start by assembling the cups – there are 3 pieces that are sewn together with a 1/4″ seam allowance. Don’t know why, but I don’t have a picture of this step. You’ll just have to trust me haha 🙂 Make sure you backstitch at each end, as it’s really easy for stuff to come unraveled and make your (lingerie-makin’)life hellish!

Making a Boylston Bra

For the foam cups, I cut all the same pieces and remove the 1/4″ seam allowances (more info on this here!). Then you butt the edges up against each other and attach them – in the same order as you sew the fabric cups – using a zigzag stitch.

Making a Boylston Bra

Here is what the pieces look like when they’re attached. Pardon my yellow marking – those are the pattern notch markings (I use wax instead of snipping, since the seam allowances are so tiny).

Making a Boylston Bra

Topstitching the pieces as instructed is also especially important, since a lot of fabrics used in lingerie don’t press very well. Here is what I was talking about in terms of using the foot as a topstitching guide – if you line up the open side with the edge of your fabric, as shown here, the needle will automatically hit exactly 1/8″ from the edge.

Making a Boylston Bra

The fabric straps are folded in half and then sewn to the top of the cups, as shown, with the folded edge facing the center of the bra (the raw edges will be finished with elastic eventually).

Making a Boylston Bra

Next, the foam cup is placed against the right side of the fabric cup, and pinned into place along the top edge. I also like to run that edge of the foam under the serger (with a 3 thread overlock) just to help flatten things a bit more, but that’s an optional step. Sew this seam at the normal 1/4″.

Making a Boylston Bra

After sewing, you flip the foam to the inside and pull the fabric cup taunt to the edges, and pin everything down. This might require a bit of finessing with the fabric, which is normal! It’s also normal to have some excess fabric that needs to be trimmed off. I love how this finishes the top edge of the cup and also catches the strap! Once everything is as smooth as you can get it, go ahead and baste around the raw edges to secure everything, and then trim off any excess fabric so it’s even with the edge of the foam.

Making a Boylston Bra

Assembling the bridge, cradle, and band are similar to assembling the cups – use 1/4″ seam allowances and follow the topstitching guide in the pattern. I chose to line my bridge and cradle with sheer cup lining, because it gives some extra stability to the silk crepe. Also, you can use the lining to encase the raw edges so the inside is nice and clean! You just want to lay your pieces so the fabric is on the right side, and the cup lining is on the wrong side – with the seam you’re attaching sandwiched in the middle. After sewing the seam, the outer fabric and cup lining flip up to cover the raw edges.


Making a Boylston Bra

After the cups and bridge/frame/band are assembled, then you put them together (and THEN it really starts to look like a bra!). This part can seem a little fiddly, but it’s doable as long as you go slow and be mindful of what you’re sewing (again, slowing down the speed on the machine helps a lot). I find it helpful to use less pins – since you’re sewing a convex curve to a concave curve, you want to be able to stretch and pull the curves as you approach them (and pinning too much can limit that, at least in my experience). I pin the beginning and end of the seam, and the notch points marked on the pattern. That’s it! Another tip is always start at the center front – it’s very important to get those edges lined up perfectly.

Making a Boylston Bra

Once everything is attached and I’m happy with how it looks, I trim down the foam seam allowance to reduce bulk. Time to add the underwire channeling! 😀 😀 😀

Making a Boylston Bra

I find this step a little weird to explain and even harder to photograph, so here’s a picture of the instructions. The channeling gets attached to ONLY the cups of the bra, right on the seam allowance. Ideally, I like to be right along the seamline that I just sewed, but close enough is good enough 🙂

Making a Boylston Bra

Again, the little notch in the clear foot that comes with the 60609 is perfect for lining up a 1/8″ seam allowance when attaching the casing. Sew all the way around until you get to about 1/2″-3/4″ away from the edge at the underarm, and leave that part unsewn (this will make it easier to attach the underarm elastic).

Making a Boylston Bra

Here’s the casing after it’s been attached! For now, only one side is sewn down – the other side will be sewn once some of the elastics have been added.

Making a Boylston Bra

I think that’s enough bra talk for today! 🙂 Next week, I’ll go over the steps for attaching the elastic and finishing the bra – aka THE FUN PART – and showing my completed Boylston! As always, let me know if you have any questions about this part of the process! 🙂

One more thing! We have a giveaway winner from last week! After some careful contemplation (aka Random Number Generator, hey-o!), our winner issssss….

winner

Yay congratulations, Rosemary!! I can’t wait to see what you make with your voucher! 😀

Thanks to everyone who entered the giveaway – and big thanks Contrado for your awesomely generous prize donation!

I’ll be back next week to finish that bra! Stay tuned!

Completed: Butterick 6019

27 Apr

Butterick 6019

DRESS IS DONE, Y’ALL.

Butterick 6019 - complete!

As much as I *truly* enjoyed all the work and care that went into the making of this dress – it sure feels good to be finished with it!

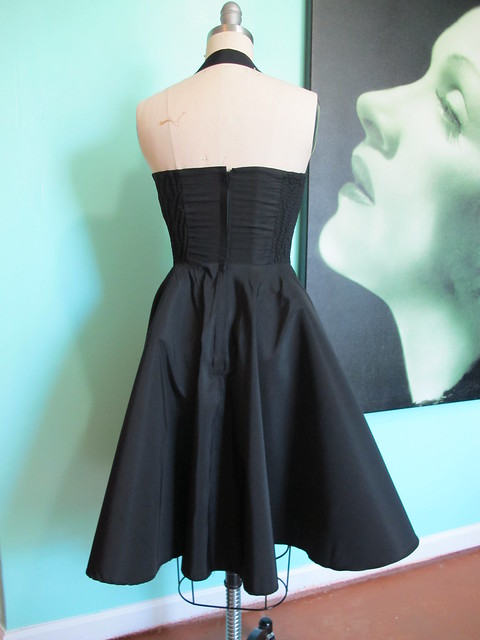
A brief overview, before we go into a major picture dump – the pattern is Butterick 6019, and I made the view with the circle skirt and the halter strap. I sewed a size 6 at the bust, grading to an 8 at the waist. I also shortened the bodice 1/2″ and raised the neckline by 5/8″.

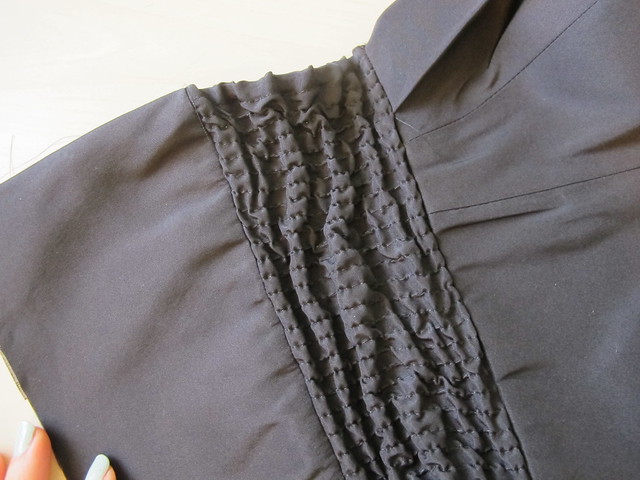
My fabric is solid black silk Faille from Mood Fabrics, which is used for the entire outside of the dress as well as the partial self-lining of the bodice. The bust cups are padded with bra foam (from my stash), the side back pieces are shirred with black elastic thread, the bodice includes lots of fabric covered boning, and the hem has 2″ wide soft black horsehair braid to give it that lovely fullness (that’s right – no petticoat or crinoline was worn for these photos!).

This dress was made entirely on my Spiegel 60609 sewing machine! It handled all those Faille layers like a champ, and even pleasantly surprised me with how well it shirred the back panels. In case you missed them, here are the posts I wrote detailing the making of this dress: Part 1 & Part 2.

There’s not much else to discuss since I went into a lot of detail already, so have some pictures!

Butterick 6019 - complete!

Butterick 6019 - complete!

Butterick 6019 - complete!

Butterick 6019 - complete!

Butterick 6019 - complete!

Butterick 6019 - complete!

Butterick 6019 - complete!

Butterick 6019 - complete!

So did I actually wear it to prom? You bet I did! Pretty much exactly as you see here (yeeeeah I ain’t about to spend $$ getting my hair or make-up done for some high school event lolz) – I ended up wearing simple black flats, instead of my Converse, because they seemed like a nice compromise of comfy and still a little fancy. Although my Converse would not have been out of place there – I saw lots of sneakers! Except mine are pretty dirty in comparison 🙂 Speaking of high school fashions, everything is quite… sparkly these days. I definitely had THE plainest dress out of everyone there, due to my lack of beading and rhinestones. Not complaining! And it seems like long dresses – especially ones with cut outs, or two pieces that show a little midriff – are still the majority rule, at least for the school that I was at.

Here’s a picture of me + my bestie on prom night! Sorry for the grainy quality – it was dark. Hopefully we’ll have some good professional photos to share once those are developed 😀

Butterick 6019 - complete!

That’s all for now! Thanks for indulging my fancy dress dreams, y’all! And thanks to Mood Fabrics and Spiegel for letting this lil’ former homeschooler finally make it to prom! 🙂

Note: The materials for this dress were provided to me from Mood Fabrics as part of my participation in the Mood Sewing Network.

In Progress: Butterick 6019 (Continued!)

20 Apr

Butterick 6019

I’m back for round two of this prom dress in-the-making extravaganza! Let’s get right to it!

After finishing the construction of the bodice, I assembled the skirt. Since I chose the option with the circle skirt, this was incredibly easy (especially compared to engineering that dang bodice!). Three pieces, three seams. I serged all the edges and pressed them open (I normally French seam my silk, but silk faille is a bit thick so it’s not really suitable for that), and also serged the edges of where the zipper will go. I don’t have a photo of all this, but, I reckon y’all know what a circle skirt looks like 🙂

Butterick 6019 - progress//embedr.flickr.com/assets/client-code.js

After that, I attached the bodice to the skirt and finished the raw edges (again, with my serger). Because the center back pieces include a lining, I made sure to not stitch those down (they will be slip-stitched to the zipper later).

Butterick 6019 - progress

My dress will have a lapped zipper, so I prepared the back bodice by folding back and pressing – 5/8″ on the left side, and 1/2″ on the right side. The lining pieces were already folded back and pressed 5/8″, as per the instructions.

Butterick 6019 - progress

Butterick 6019 - progress

My zipper was quite a bit too long, but it’s easy to shorten! I just use the machine – no hand-stitching required! Mark where the zipper should end, and sew back and forth over that marking a few times with a straight stitch, then cut off the remaining zipper end about 1″ below the stitching. Easy! 🙂

Butterick 6019 - progress

On the right side (the side folded under 1/2″), the zipper is sewn with the teeth up against the fold, like so. At this point, I don’t worry about the top of the zipper past the pull – you can push that under the lining and deal with it when everything is getting slip-stitched down. But you do want to be sure that the teeth of the zipper are riiiiight up in that fold’s business.

Butterick 6019 - progress

Butterick 6019 - progress

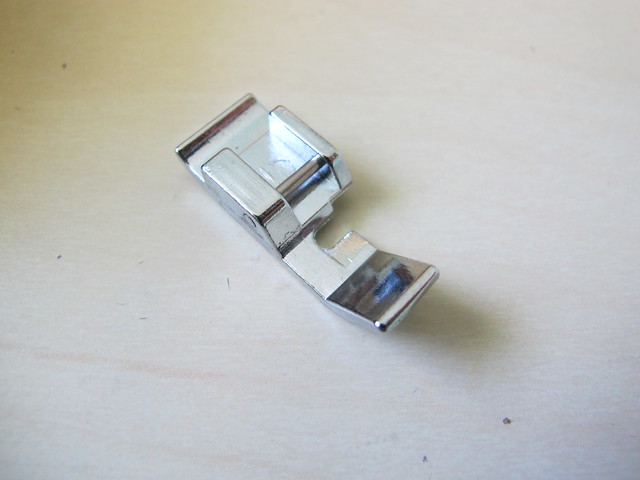
This is where the humble zipper foot comes into play. Most machines come standard with this foot. On the Spiegel 60609, it looks like this. The side is notched out to let you get really close to the zipper, like so.

Butterick 6019 - progress

Side one done, now to the second side!

Butterick 6019 - progress

The left side (the side folded under 5/8″) will be placed along the zipper tape with the folded edge right on top of the stitching you just did (on the right side), thus creating a lap. I start by matching at the waistline seam, so I can be sure the seamline is uninterrupted.

Butterick 6019 - progress

When I pull the left side open, I can see where the zipper tape needs to lay along the fold to create that overlap. I find this much easier than trying to overlap and pin while the zipper is closed.

Butterick 6019 - progress

Then you just pin all the way up (to the bodice *only*, the lining should remain free). Once you get to the top, you can tuck the remaining zipper tape down and inside where the lining will cover.

Butterick 6019 - progress

Here it is pinned front the outside. One thing I highly recommend (which I didn’t take a photo of, hm) is to hand baste the zipper into place before stitching. This ensures that everything is in the right place and won’t shift when it gets under the needle (and that you’re actually catching the zipper tape!). The topstitching step of this process is not difficult, but it can be tricky to see what you are doing! Definitely take the extra couple minutes and baste that sucker into place with some long basting stitches.

Butterick 6019 - progress

Once basted, open up the zipper and topstitch from the right side, again, keeping the lining free.

Butterick 6019 - progress

When you get to the bottom, lower your needle, lift the presser foot and pivot the fabric, then sew across the bottom of the zipper back and forth a couple times to secure everything.

Butterick 6019 - progress

Finally, pin the lining to the zipper tape and slip-stitch everything down.

Butterick 6019 - progress

Beautiful, right? 🙂

Butterick 6019 - progress

Next step is hemming! Since this dress has a circle skirt, that means the bias needs to settle before hemming (otherwise, the hem will end up being super uneven!). I have a dressform for this purpose – both for hanging and hemming (if you don’t have a dressform, you can hang bias stuff on a hanger, but you’ll probably need a second person to help you with the actual hemming. There are also doodads you can use for solo-hem jobs, but I don’t have any experience with those). Bias garments need to hang for a minimum of 24 hours to get their stretch out. Being paranoid, I let this one chill for like 5 days lolol.

Butterick 6019 - progress

Once that’s done, you hold a yardstick (or in my case, a T Square) at the floor and measure the same point all the way around the hem.

Butterick 6019 - progress

I mark every couple includes or so with a pin. Look at how uneven my skirt was!

Butterick 6019 - progress

After trimming the skirt, I added 2″ wide black horsehair braid to the hem. Mostly, to give it some extra body – but also because it makes hemming easier, as the braid kind of acts like bias tape (as in it’s very flexible and curves along with the curve of the circle skirt). I started by sewing it to the right side of the side, using the width of the Spiegel 60609 presser foot as my seam allowance guide.

Butterick 6019 - progress

First press pushes the horsehair braid down and the seam allowances up.

Butterick 6019 - progress

Then second press folds everything to the inside nice and flat.

Butterick 6019 - progress

From there, it’s just endless slip stitching (well, not *too* endless – I think this took me about an episode and a half of Mad Men haha). You can topstitch at this step, but I feel like a fancy prom dress needs an invisible hem! It just looks so nice!

Butterick 6019 - progress

Here is some of the inside finishing – I added buttons for the strap, as well as ribbon loops for hanging (literally a piece of ribbon lopped and handstitched in). And my tags! I need a tag that says ♥Made with My Spiegel 60609♥ hahaha

And some full shots on the form – these were taken before hemming or adding the hook & eye, but you get the idea 😉

Butterick 6019 - progress

Butterick 6019 - progress

Let me know if you have any questions about any part of this process – I tried to explain as clearly as I could, but I have a cold right now so I’m pretty medicated haha. And the fact that I’m sewing with black fabric doesn’t help!

Super pumped for prom next week!! 😀 Is it bad that I want to wear my converse with this dress? I don’t think I’ve worn heels since I quit my office job 3 years ago! :B

In Progress: Butterick 6019

13 Apr

Hey guys, guess what.

I’M GOING TO PROM.

This is 100% not a joke. I am going to a literal high school prom.

Butterick 6019

Before anyone starts thinking that I’m dating someone WAY too young for me, I should probably use this opportunity to point out that my date is my BFF, who happens to be a high school English teacher and gets 2 free tickets to prom every year 🙂 I will take any excuse I can get when it comes to dressing up, though – especially if it means I get to make a party dress! The bulk of my sewing used to involve a lot more frosting than cake, and while I’ve reverted to making a lot of useful basics, I still get starry-eyed when I think about ridiculous party dresses. Prom is the *perfect* excuse to get some fancy sewing out of my system!

My pattern of choice is Butterick 6019, which I have been wanting to make for ages. I’m going with view A, which includes removable halter straps and a circle skirt. The fabric is a black solid silk faille from Mood Fabrics. I ain’t gonna lie – I originally tried to buy something with actual color, red being my first choice. But it being prom season and all, Mood ended up selling out before my order was fulfilled and I had to choose a different color on the spot. Since I didn’t have time to get swatches for color comparison (and I didn’t want to end up with a bad color, considering this silk is $50/yard and non-returnable!), and the selection was super limited at that point, I ended up getting basic black. This means I probably am sewing the most practical formal dress ever. Oh well! 🙂 At least I’m ready for my next black tie wedding, ha!

One more thing I want to point out about silk faille – it’s pronounced “FILE.” Not fail or foll (both of which I have tried and been laughed at for. Ok, y’all, it’s been like 10 years since I studied French and I wasn’t very good at it to begin with! Give me a break). I already made an ass out of myself, so now you don’t have to! ♥

Butterick 6019 - In progress

This project is definitely a labor of love – there’s a lot of work (and notions!) that go into a dress like this. The bodice is lined with self fabric, and features boning, shirring, a lapped zipper, bust padding, and that beautiful bias-cut crossover piece. For the skirt, I decided to add horsehair braid to give it some extra body and really make it flare out. Whenever I start a project that includes a lot of notions, I like to corral them into one place so they are easy to find. In the past, it’s been Ziploc bags – which are super useful, but not really that pretty! I recently received this sewing notions pouch from Tailor Made Shop and it’s perfect for this use! The pouch is roomy enough to hold everything I need (it even fits a pair of 8″ Gingher scissors – not really necessary for this particular use, but GREAT for when I’m teaching and I need to take some tools with me!) and it zips securely so nothing spills out. And it’s way prettier than a Ziploc bag 🙂

Butterick 6019 - In progress

I don’t want to freak anyone out here – but I actually TRACED my pattern pieces for this project. lolwut right!? I had a hard time determining my size (even with the finished measurements and cup sizing – the sizing on this pattern just doesn’t make sense to me at all), and so I needed to keep the sizes intact in case I cut the wrong one. Fortunately, the bodice of this pattern involves a lot of small pieces, so it wasn’t a huge time suck. I ended up going with a size 6 A/B cup at the bust (FWIW, I wear a D/DD bra so yeah, um, the cup sizing is a bit skewed here!) and graded out to an 8 at the waist. Since the skirt is just a giant circle, I didn’t trace those pieces.

I made a muslin of the bodice – shirring included, but no boning. The shirring is extremely necessary if you’re muslining this dress, as it drastically affects the fit. The sizes I traced and cut ended up being perfect, albeit the top of the dress itself is quite low (which I had read about in reviews, so no surprise there!). The pattern changes I made were to add 5/8″ to the top of the bodice all the way around, and then shorten every piece by 1/2″ at the lengthen/shorten line so the skirt seam would hit my waist. I also traced the cup pieces a second time and removed the seam allowances all the way around. These pieces ended up making the bust padding, which is constructed the same way a foam cup bra is made (with the pieces butted up together and zigzagged across the seam). Rather than cut my pieces and then remove the seam allowance – which is wasteful as hell, sorry – I did this instead. Look at the difference in their size!

Butterick 6019 - In progress

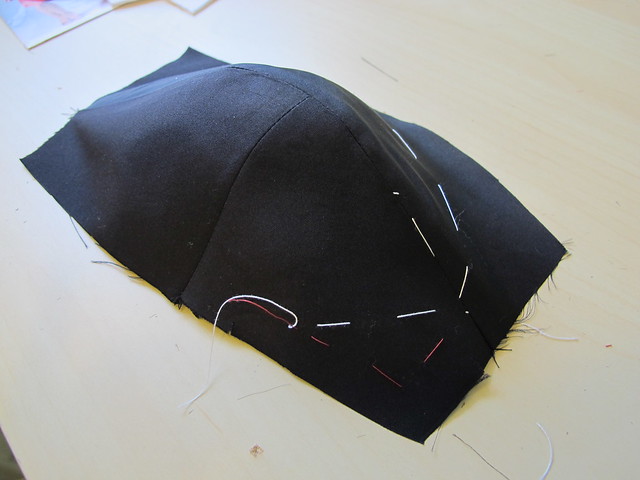
The pattern has a lot of markings for placement – boning placement, the bias strip, and just basic construction seam allowances. Since I didn’t want to risk a permanent stain on my dress, I marked the wrong side and then thread traced the markings with silk thread. The silk thread allows the markings to be seen from both sides, and can easily be removed. I used a different color for the type of markings – tan for the strip, white for boning, red for construction. This was MASSIVELY helpful when putting together the puzzle that is this dress.

Butterick 6019 - In progress

To keep the cups curved against my body and to prevent them from stretching out, I added twill tape to the seam allowance. This isn’t instructed in the pattern, but it’s good practice for anything that runs the risk of gaping (such as bustier tops like this, or woven wrap dresses). You basically just cut 1/4″ twill tape the length of the neckline minus 1/4″, then place it inside the seam allowance, up against the seam line. Since the tape is shorter than the neckline, the neckline gets eased into the length of the tape. The easing means the neckline curves with your body, and the twill tape provides some stability to an area that would otherwise stretch out over time.

Butterick 6019 - In progress

Assembling the bodice is pretty easy and straightforward. I trimmed down, clipped, and graded my seam allowances pretty aggressively to prevent a bunch of bulk (silk faille is quite stiff), and pressed the life out of everything. #1 reason why I went with silk faille instead of cheaper polyester faille – it’s just easier to work with. I really shudder at the thought of trying to make this dress with something that doesn’t press well.

And now it’s time to shirr! I STRONGLY recommend testing this out on a scrap of your fabric first, as you might need to tweak your machine settings a bit.

Butterick 6019 - In progress

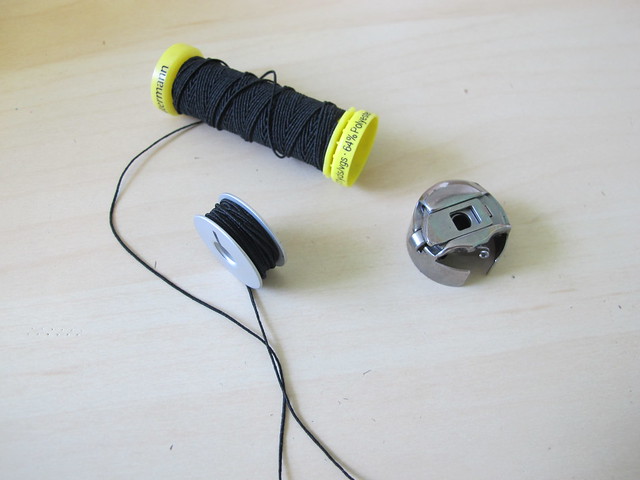
For shirring, you need elastic thread. Be *very* aware of the yardage amounts that your spool contains, by the way – I didn’t realize this brand only has like 11 yards, which is not enough for this project and I unfortunately ran out and had to stop and buy more (also, black elastic thread is harder to find than white, ugh). I used 2 spools, even though the pattern has you only buy one. Just FYI! Anyway, the elastic thread goes in the bobbin, and it is wound by hand with only a slight tension in the thread. The upper thread is your basic all purpose polyester.

Butterick 6019 - In progress

Set your machine with a longer stitch length. For the Spiegel 60609, I used a 4.0 length.

Butterick 6019 - In progress

At this point, you’ll want to test the stitches and make sure the tension is good. If it’s not, you can adjust the tension in the bobbin (the little screws you see here). The needle tension (the numbered dial at the top of the machine) can also be used. If you mess with the bobbin tension, its a good idea to mark the location of the screws before you start twisting them around – just use a really fine point marker and draw directly on the bobbin. Otherwise, you might have trouble getting the tension balanced again when you’re done shirring – and you’ll need to take the machine in for a service to set things back to default (and this question has come up a few times – you can get a Spiegel machine serviced at pretty much any sewing machine dealer, regardless of the brand that they sell. *Most* dealers will service all machine brands, even if they sell something different). My Spiegel 60609 did not require any tension adjustments for shirring, so yay!

Butterick 6019 - In progress

To shirr, you’ll sew long lines of parallel stitching 1/4″ apart. Some people draw guidelines for this, but I just use the edge of my presser foot as a guide. The foot on the Spiegel 60609 is the perfect width for this. Start your first line of stitching a little outside of the seam allowance, and continue sewing parallel lines until the whole piece is covered. Leave long thread tails at the beginning and end of each line, otherwise your shirring will come undone.

Here are what my shirred pieces look like after stitching. Also, I know my nail color keeps changing. I told you, I had to go out and buy more elastic thread! Sewing came to a stall for a few days! blech!

Butterick 6019 - In progress
Right side

Butterick 6019 - In progress
Wrong side

After you’ve finishing sewing all those lines, you’ll have a really hairy looking piece of fabric that still doesn’t stretch. The real magic happens with you steam the crap out of it, which shrinks up the elastic thread and makes the whole piece really stretchy and awesome. It’s fun to watch it shrink up! However, I recommend skipping this step for now and waiting until the bodice is constructed first. It is a lot easier to sew those pieces when they are flat and non-stretchy. You’ll see the shirred pieces in all their glory at the end of this post 🙂

Ok, back to the bodice construction!

Butterick 6019 - In progress

As I mentioned at the beginning of this post, the bust cups are slightly padded (to give that area some structure and also for modesty reasons, if you’re wearing this dress without a bra). The pattern calls for cotton batting, which I did not have on hand. Instead, I used foam padding that is used for bras. The pieces have the seam allowances removed, and then the edges are butted up next to each other and sewn across the split with a zigzag stitch.

Butterick 6019 - In progress

Then the little padded cups are nested in the cups of the bodice lining, and sewn in. The pattern has you catchstitch this part, but I don’t particularly care if you see stitching inside my lining so I zigzagged those pieces in. YOLO, y’all.

Butterick 6019 - In progress

Butterick 6019 - In progress

I used plastic sew-in boning for this dress – the kind that comes pre-covered (purchased at Mood Fabrics, if you’re curious!). Spiral steel boning is nice, but a pain to work with (it has to be cut *exactly* to size and capped, and no). This stuff is much easier to use. I straightened out the pieces by blasting them with steam while they were still in their fabric casing (you can also dunk them in hot water to relax the plastic), and then removed the boning and sewed the empty casing to the bodice lining. Like I said, the boning can be sewn through – but it’s easier to get a consistent straight line if the casing is completely flat. After the casing is sewn down, you can just slide the boning in. I trimmed off the sharp corners at the top of the boning so it won’t tear through my dress fabric, and left the ends long (those will be trimmed when I attach the skirt).

Here is the bodice lining once assembled:

Butterick 6019 - In progress

Butterick 6019 - In progress

I added a couple extra pieces of boning for additional support – the center front was especially necessary to keep things smooth. Looking good so far!

Butterick 6019 - In progress

Finally, time to attach those shirred pieces and cut off the thread tails! The pattern has you tie off each individual line of shirring… I don’t know about y’all, but pretty sure ain’t nobody got time for that. Instead, I shortened my stitch length and sewed two lines of stitching when attaching the shirred panels to the rest of the bodice. Once those were secure, I gave all those thread tails a haircut and then steamed the elastic.

Butterick 6019 - In progress

Butterick 6019 - In progress

It shrunk up quite nicely!

Butterick 6019 - In progress

Here is the finished bodice flat.

Butterick 6019 - In progress

And here it is on my dressform! 🙂

WHEW that was a lot of post! Next week, I’ll go over the rest of the construction. Can’t wait for prom! Yay for fancy dress making! 😀

Completed: Silk Polka Dot Blouse + Corduroy Skirt

29 Mar

Its time for the ~big reveal~ – my first completed outfit, sewn entirely on my new Spiegel 60609 sewing machine 😀

IMG_2438

I love that this machine is pretty enough to make even a subpar photo look great 🙂 Ha!

Silk Top & Corduroy Mini Skirt

I covered a lot of ground about the making of these garments in my previous posts, however, I’ll include some notes and highlights in this post in case you missed/skimmed/didn’t care then but suddenly care now 🙂

Silk Top & Corduroy Mini Skirt

The silk top was made using silk crepe from Mood Fabrics (purchased at the NYC store last year) and a combination of Butterick 5526 (my TNT button-up shirt pattern) for the body of the blouse, and vintage Simplicity 4676 for the tie neck. I used Sullivan’s Spray Stabilizer to wrangle the drapey silk into submission for ease of cutting and sewing, which worked great! The shirt is finished with French seams and self-bias facing at the arm holes and hem.

Full details on the silk top can be found in this blog post 🙂

Silk Top & Corduroy Mini Skirt

Silk Top & Corduroy Mini Skirt

I wanted my first project on the Spiegel 60609 to be something silk, because, honestly – I wanted to see how it could handle working with a notoriously difficult fabric. Of course, stabilizing the whole yardage first definitely helped, but that doesn’t solve all issues (such as when your sewing machine tries to eat delicate fabrics – not a problem with this one, I will add!). I’m really impressed with how the machine sewed through this fabric with absolutely no issues – it even did a great job on the button holes! I do wish that the measurements on the throat plate were marked differently, as it’s hard to get a narrow seam with what’s standard on this machine, but that’s a relative non-issue (I just use post-it notes to mark my seam allowance lines and it works fine). So yeah, Spiegel 60609 + silk gets a thumbs up from me!

Silk Top & Corduroy Mini Skirt

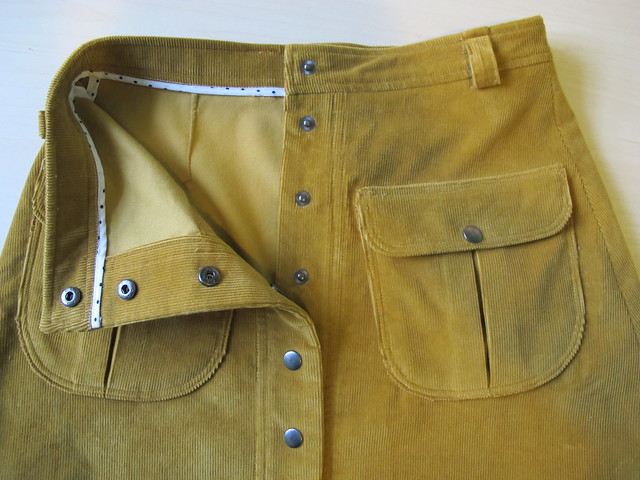
The mini skirt was made also on my Spiegel 60609! I used the Rosari skirt from Pauline Alice Patterns and some lightweight/stretch corduroy from Mood Fabrics. The skirt includes pockets, bound seams on the inside (for a bit of extra pretty cos why not?) and professionally set snaps down the front.

Full details on the corduroy mini can be found in this blog post!

Silk Top & Corduroy Mini Skirt//embedr.flickr.com/assets/client-code.js

I don’t necessarily find corduroy difficult to sew – most of the problem lies in making sure everything is cut and pressed correctly, as not to mess too much with the nap. Sometimes, depending on what machine I’m using, it’s a good idea to use a walking foot to help keep all layers feeding evenly, but I didn’t have any of these problems with the Spiegel 60609. The feed dogs were good enough on their own without any extra help. Always a plus! 🙂

Silk Top & Corduroy Mini Skirt

Silk Top & Corduroy Mini Skirt

Silk Top & Corduroy Mini Skirt

Corduroy Mini Skirt

Corduroy Mini Skirt

That’s all for this outfit! Stay tuned next month for that project – all I can say is, it’s gonna be FANCY 😀

Silk Top & Corduroy Mini Skirt

Note: The fabric used is part of my monthly allowance from Mood Fabrics, as part of my involvement with the Mood Sewing Network. The Spiegel 60609 was given to me by Spiegel, and it’s awesome!

In Progress: Corduroy Mini Skirt

22 Mar

IMG_2367

Following up on part one of my Spiegel 60609 sewing project for March (here is that post, in case you missed it!), let’s get to part 2! The bottom half 🙂

bdg-corduroy-button-front-mini-skirt-mustard-6

My original inspiration came from a skirt I saw at Nordstrom a couple of months ago – the most adorable a-line mini skirt, made in mustard corduroy with pocket flaps and snap closures down the front (above is an image of it – I think. It’s been a while and I’m forgetful!). I liked it enough to actually try it on (which was weird enough in itself – I haven’t been in a fitting room in ages, ha), but the fit wasn’t very good so it didn’t leave the store with me. Instead, I thought I’d try to make my own (surprise!).

I found this mustard cotton corduroy on the Mood Fabrics website and immediately set about finding a good skirt pattern for the fabric (unfortunately, that fabric is already sold out – sorry! I guess a lot of us snapped it up at the same time – it’s really the perfect shade of mustard, and a nice light weight with a subtle stretch. Just gorgeous!). Lots of googling around led me to eventually settle on the Rosarí skirt as it included pretty much all the elements of the original inspiration skirt, minus the separate side panels and with big (usable) pockets instead of just flaps. Honestly, it totally looks like something I’ve already made, I still wanted to give it a try. The patterns were just different enough to justify a second purchase, and plus, I’ve been wanting to try a Pauline Alice pattern.

Going by the finished measurements, I cut a size 34 and made the mini length with pocket C. Spoiler: The fit is really excellent and I’m totally gonna make this again with those zippered pockets. Anyway, back to the corduroy!

Corduroy Mini Skirt - cutting

One of the most important things to keep in mind when dealing with corduroy is the very visible nap. On fabrics with a pile (basically… hairs. Velvet, velour, corduroy, even fake fur – are all examples of fabric with a pile), the hairs lie in a particular direction, which is referred to as “nap.” If you run your hands up or down the pile, you can feel the pile. The pile can change color very subtly depending on the direction of the nap, so it’s extremely important to cut everything in the same direction – or else you run the risk of your pieces looking like they are slightly different colors. For my skirt, I made sure to lay all my pieces with the top facing the same end of the yardage, as shown in the picture.

Corduroy Mini Skirt - pressing naps

Another issue with naps and piles is that it’s *really* easy to crush the pile with your iron if you’re not careful. To prevent, this, the fabric can’t be pressed against a flat surface (like the ironing board, or the iron itself). One way to do this is to use a velvet needleboard, which has a million tiny wires to make a not-flat surface that the pile can lay against while you press. However, needleboards are freaking expensive (that one is $40, there, I just saved you a click haha)! They are fun to use, but ain’t kind on the wallet. So the cheap alternative is to just use a scrap piece of your napped fabric, and lay it right side up on your ironing board. You can press all your pattern pieces with the right side down, against the scrap fabric, and that provides enough texture to keep the nap from crushing. I had about 1/4 yard leftover from cutting my skirt, so I had a nice big piece to lay on my ironing board for pressing. Look at the picture above – do you see the iron imprints around my interfaced pieces? That’s what happens if you don’t protect the nap before pressing!

So those are two big things to keep in mind if you’re sewing with corduroy (or any other napped fabric, for that matter). Mind the nap 🙂 And just FYI – some napped fabrics (especially velvet and faux fur) require a little more finesse with sewing as they don’t like to feed evenly through the sewing machine. That being said, I didn’t have any problems with this particular fabric. Normally, I would use a walking foot – but the feed dogs on the Spiegel 60609 did a good job on their own, no extra foot required. Yea!

Since this is a really straightforward pattern with very few seams, I thought it would be fun to go the extra mile and do some pretty seam finishing on the inside 🙂 I decided to bind my seams with bias tape, which not only looks nice, but prevents the seam allowances from unraveling as the skirt gets washed/worn. This particular corduroy frays like a MOTHER, so it’s a very necessary step. I could have used my serger, but this looks prettier (and I didn’t have matching thread, ha!)!

Corduroy Mini Skirt - bound seams

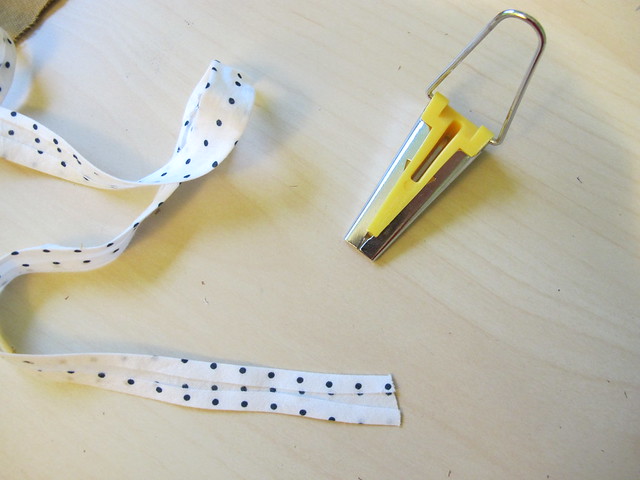
You can use pre-packaged bias tape to bind your seams, but I like to make my own because it’s a bit softer (and you get a waaaay better selection of colors and prints). This particular fabric has showed up on soooo many of my makes – I made a truckload of bias strips with it and it’s like the gift that keeps on giving! 🙂 I will be so sad when it runs out hahaha. Anyway, I like the Clover 1/2″ bias tape maker – I find the width is great for this finish, and the Clover brand ones in particular work really well. I’ve tried cheaper bias makers and they just don’t work as well for me. This one is tight enough at the opening to really fold the bias, and then it’s easy to press it flat so it stays that way.

Corduroy Mini Skirt - bound seams

For this skirt, I did a Hong Kong bound finish – so both sides of the seam allowance are bound and then pressed open. You can also press the seam allowances to one side, and bind them together.

Corduroy Mini Skirt - bound seams

On the first seam allowance, sew the bias binding to the underside (the side that is against the garment when it’s pressed into place),  keeping your stitching line right along the pressed crease of the binding.Corduroy Mini Skirt - bound seams

Corduroy Mini Skirt - bound seams

Pull the unsewn side of the bias around so it comes to the top and just covers the stitching line you created. Pin into place, and then topstitch close to the fold. Repeat for the opposite seam allowance, then press the seam allowances open.

Corduroy Mini Skirt - bound seams

Here is what the underside of the seam allowance looks like. I do the first pass on the underside, so any stray topstitching is hidden when the seam allowances are pressed open 🙂

Corduroy Mini Skirt - bound seams

And here are both sides bound 🙂

Corduroy Mini Skirt - bound seams

AND HERE IS THE WHOLE DAMN SKIRT 😀

I love this finish! It’s definitely a time-consuming addition, but it’s not so bad when the garment in question only has 3 seams to bind 🙂 And it looks soooo pretty on the inside!

Corduroy Mini Skirt - grading seam allowances

Last corduroy tip! This fabric tends to be really bulky, so it is important to really grade down your seam allowances in any part where there are multiple layers – such as the waistband. I trim my seam allowances down at staggering heights so that there isn’t a giant bulky ridge showing from the outside once the skirt is complete.

Corduroy Mini Skirt

And that’s it! Here’s a little sneak of the pretty insides 🙂 I also bound the lower edge of the waistband – instead of turning it under 1/4″ to hide the raw edge – as I’ve always liked the way that looks in dress pants hahaah. Oh, and my snaps were set using a professional snap setter (cos I work for a clothing manufacturer!)! They look GOOD.

Corduroy Mini Skirt

Corduroy Mini Skirt

Some shots of the finished skirt on my form 🙂 I’ve already worn the hell out of this thing – the fit is great, I love the mini length, and the mustard color goes with pretty much everything in my closet. It looks EXTRA good with black and white polka dotted silk, though 🙂 I will be sharing the completed outfit next week!

In Progress: Polka Dot Silk Crepe Blouse

15 Mar

Hey everyone! A little different sort of post for today – instead of showing you a finished project, I want to share some progress pictures and tips. I used to do these kinds of posts in the past, and I’ve missed nerding out on construction talk. Since this is my blog and I do what I want, that’s what you get today 🙂

Silk Tie Blouse

Plus, I’m gonna make it on my new Spiegel 60609 sewing machine! Woohooo! 😀

This is *also* part of my Mood Sewing Network project for March, so you’ll have to wait a couple weeks until the Big Reveal 🙂

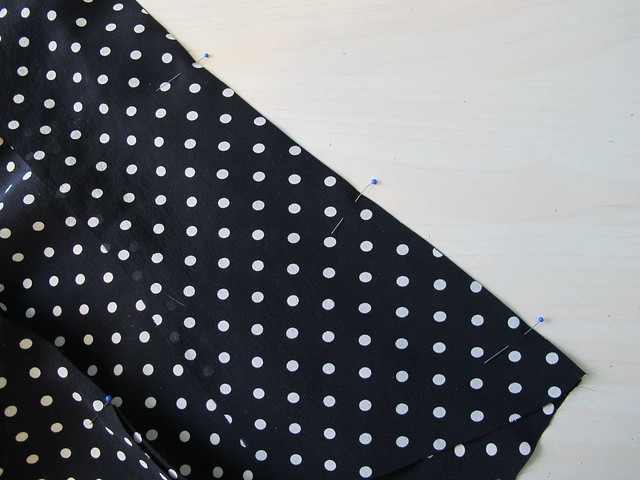
Anyway, I bought this fabulous black with white polka dot silk crepe while I was in Mood Fabrics flagship NYC store last November. I decided to make a silk button up shirt with it, although originally I planned to do a shirt with the standard collar (as I tend to do). Right before cutting into it, I thought it might be cool to give the shirt a big floppy bow at the neck instead, just to mix things up a little bit. I have vintage Simplicity 4676 in my stash, which I’ve made before. While I love the way the bow looks, I’m not as big a fan for the shape of the actual shirt – so I just put the bow on my beloved TNT Butterick 5526 and it worked out perfectly! As long as the neck measurements on the two patterns are similar (which for these, they are), then it’s easy to sub one neckline for another.

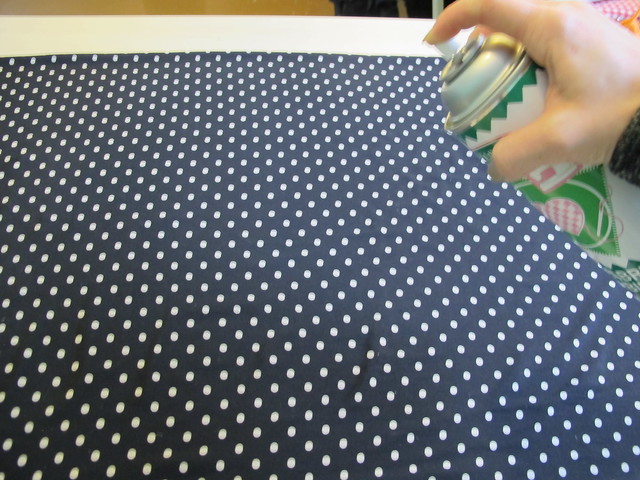
Silk crepe is one of the easier silks to work with, as the texture gives the fabric some grip, but it can still be quite shifty. It doesn’t have to be a nightmare, though, if you know how to work it! And, honestly, I think the hardest part about dealing with shifty fabrics (this isn’t necessarily limited to only silk, btw!) is getting an accurate cut without the piece morphing into a map of the United States once you move it around. There are tons of ways to accomplish this, but my personal new absolute favorite method is to use a stabilizer to make the fabric crisp, which gives it less chance to shift around. I use Sullivan’s Spray Stabilizer, as I like that I can direct that ~stable flow~ to whatever part of the fabric I need it to (sometimes you don’t need to cut your entire yardage, you know?), and it dries very fast. I have received some really good tips on other things to use for stabilizing fabric, such as gelatin, which I will eventually try! But spray stabilizer is also the bomb.

Silk Tie Blouse - cutting silk fabric

I spray it on evenly, then lay my fabric flat and straight on the table and allow it to dry (I guess you could do this on the floor if you don’t have a table, but my cat thinks that things laid on the floor are a special running obstacle course I have created just for her, so I personally try to avoid that route!). Since the fabric dries into whatever shape you leave it in, it helps to fold it in half and pin along the selvedges. Once the fabric is dry, it will feel like a silk organza – MUCH easier to handle. For pieces that really need to be accurate, such as a collar, it’s easy to reapply a second layer after you’ve cut, just to make sure there’s not shifting happening. Once your garment is completely assembled, you simply wash it out and it softens right back up. I always prewash my silks on cold water, so I don’t have to worry about water spots or shrinkage when I wash the garment.

Silk Tie Blouse - mirroring fronts

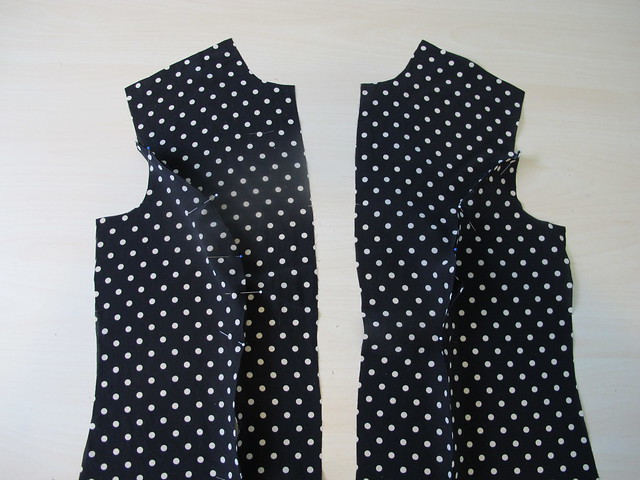
When I’m sewing a fabric that doesn’t have a definite right or wrong side, I try to be extra careful that I don’t sew two of the same piece. Unpicking sucks, and it’s even worse on a delicate fabric (that has been French seamed, no less!). To prevent this, I lay my pieces out so they mirror each other, and pin them like so before I take them to the machine. That way, I don’t accidentally sew two right fronts or whatever.

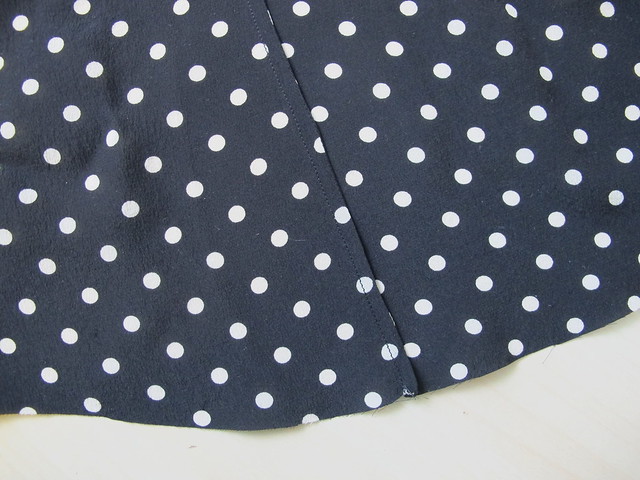
Speaking of French seams, the entire blouse is constructed using them. I love French seams because they are a beautiful finish, and they work really well with delicate fabrics. They do take some extra time because you are essentially sewing the same seam twice, but I think it’s totally worth the effort.

Silk Tie Blouse - sewing French seams

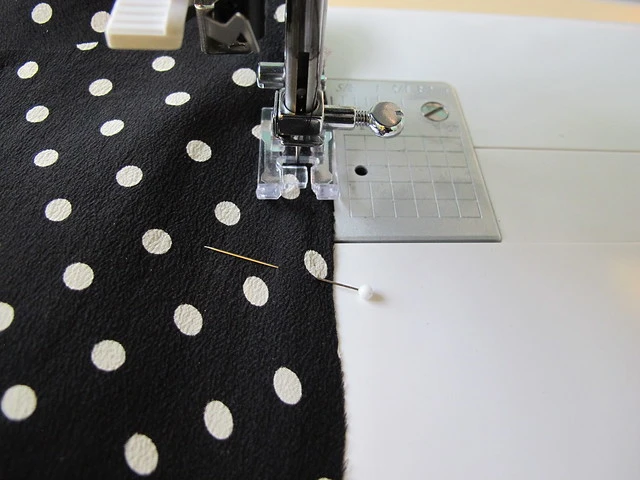
With WRONG SIDES TOGETHER, sew the first line at 3/8″ (this is assuming a 5/8″ seam allowance, which otherwise you’ll want to adjust accordingly). I know, sewing wrong sides together sounds totally backwards and all kinds of wrong, but trust.

Silk Tie Blouse - sewing French seams

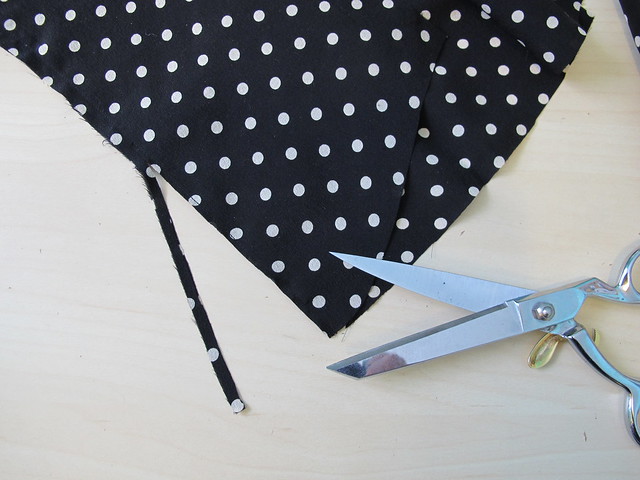
Trim the seam allowance down to about 1/8″.

Silk Tie Blouse - sewing French seams

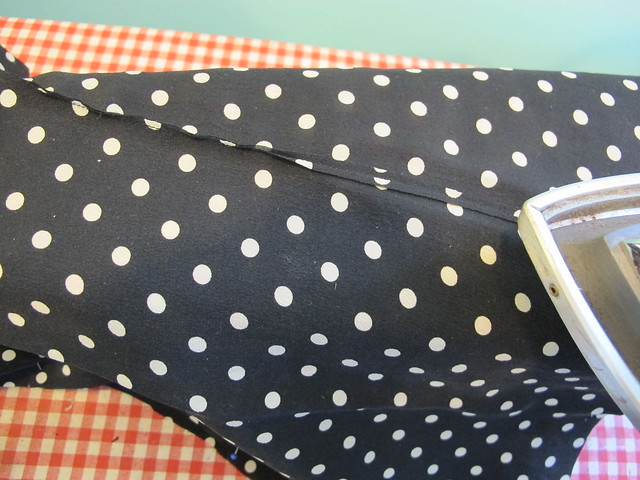
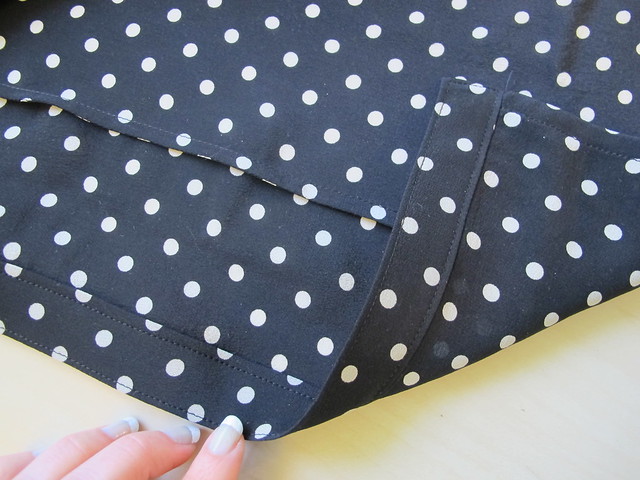
Press the seam allowances open. This can be kind of difficult if your seam allowances are super tiny, so do the best you can. I have a really hot iron and that helps a lot 🙂 Otherwise, you can press both seam allowances to one side – but I think pressing open gives a better end result.

Silk Tie Blouse - sewing French seams

Fold the fabric so the right sides are facing and all the seam allowances are encased on the inside, and press.

Silk Tie Blouse - sewing French seams

Sew again at 1/4″, then press one more time.

Silk Tie Blouse - sewing French seams

You should end up with something that looks like this – the seam allowances beautifully encased 😀

Silk Tie Blouse - bias faced hem

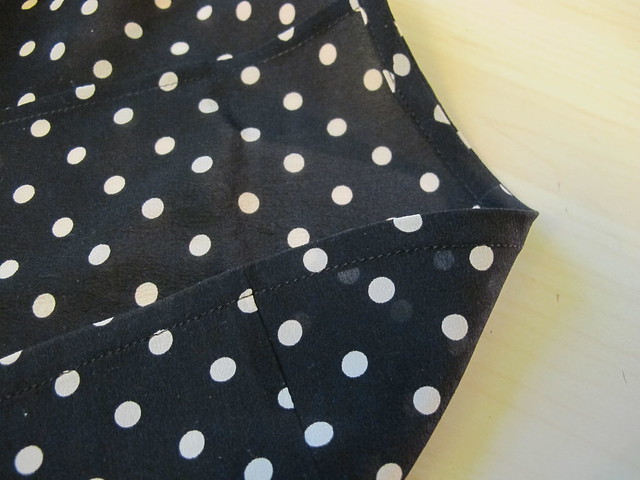
For hemming shirts – silk or otherwise! – I like to finish the hem with a self bias facing. Since the hem of shirts is usually curved, I find this gives me a MUCH easier way to get a MUCH cleaner finish. Contrasting bias is also fun, for a little flash of color! Here’s my tutorial for sewing bias facing. I like this method because you don’t have to pre-press the bias pieces – you press them after they are sewn, and it’s much faster and more accurate. I also used this method to finish the arm holes of my (obviously sleeveless, ha) blouse.

Silk Tie Blouse - button placket

After hemming the shirt, I added the button placket. Since this is one of those areas where you want to be really accurate and careful, I fused lightweight interfacing (I use this stuff from Fashion Sewing Supply, it’s a little pricey but it is 100% worth it in my opinion!) to my pattern pieces and then re-applied the spray stabilizer just so everything was really easy to handle. Honestly, attaching that silk crepe placket was no more difficult than if it were made out of cotton. YES!

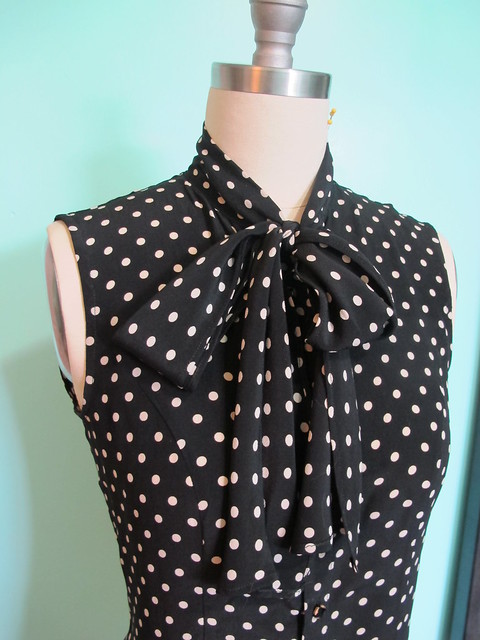
I seem to have lost the pieces of me adding the neck tie – whoops! But that was pretty easy. It is cut on the straight grain, and the edges are rolled up to where the tie is attached to the neckline. It’s doubled over *only* at the neckline, and the ends are twice as wide so you can make a nice fat bow. In silk crepe, it’s super floaty and awesome. Love.

Silk Tie Blouse - button hole

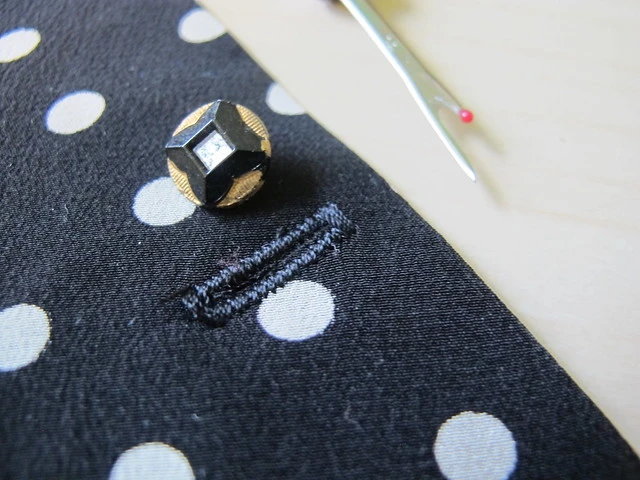
The last step was adding all those button holes! I wasn’t sure if the Spiegel 60609 machine was going to come through on this one – button holes can easily look really terrible, really fast – but it did not let me down! The stitches are nice and tight, and the button hole foot calculates the correct size using the actual button. Also, how about those buttons? I found them at the flea market years ago and I’ve been hoarding them ever since for the ~perfect~ project, ha.

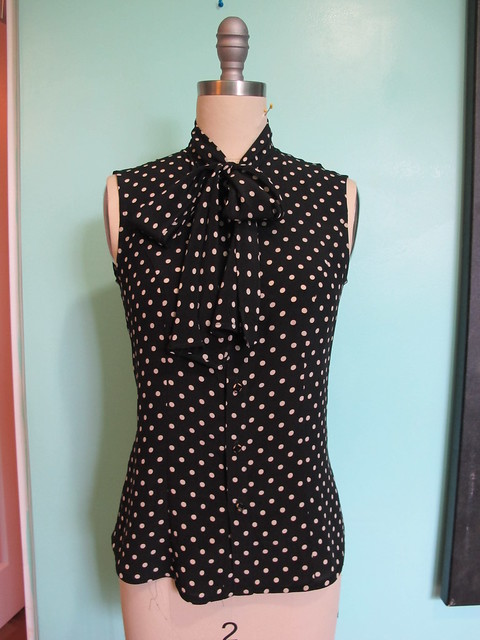
The finished blouse:

Silk Tie Blouse - finished!

Silk Tie Blouse - finished!

I am REALLY happy with how it turned out! I think the silk crepe is the perfect fabric for this type of blouse – it skims over the body, and the bow has a beautiful drape. Even with the polka dots and that big neck bow, it’s still not super incredibly sweet looking, which I like. And it feels SO GOOD to wear! I will never tire of wearing silk 🙂

~Big Reveal~ outfit photos to come soon! Next up – the bottom half of this outfit 🙂

As a side note, I’m headed back to NYC for the weekend to teach another Pants Making Intensive at Workroom Social! Just a head’s up that I’ll be a bit delayed in email/comment responses, as I tend to take off from the computer when I go out of town 🙂 I’m excited to go back to the city and get people making some pants, though! This particular workshop is sold out, however, there are still a couple spots open at my Garment Sewing Weekend at A Gathering of Stitches in Portland, Maine! Yay sewing! :DDD