Tag Archives: sleeveless

OAL2015: Assembling the Bodice // Adding Sleeves

22 Jun

Hey hey everybody! I’m finally back from my 2 weeks of traveling Peru with my best friend, and it was amazing. I spent a week in Lima (first half in the Miraflores District, which is absolutely beautiful, and the second half in the San Borja District), where we stayed with the family of a friend and basically ate our weight in ceviche. The second week, we flew up to Iquitos and spent a couple of days in the city, as well as a week deep in the jungle off the Amazon (and before you ask, yes, I was there for the ayahuasca). We did not visit Machu Picchu (I guess this is the main reason why people visit Peru, because EVERYONE asked us if we were planning on going!) – we considered it, but it was too expensive and we had to choose because Cusco and Iquitos… Iquitos won out, and I’ve no regrets 😛  It was an incredible 2 weeks, although I’m pretty happy to be home where I can throw my TP in the toilet and drink straight from the faucet 😉 hahaha

Anyway, it’s back to the real world for me! Which means it’s time to jump straight into business mode and kick this OAL off once and for all! Yay!

OAL_Banner

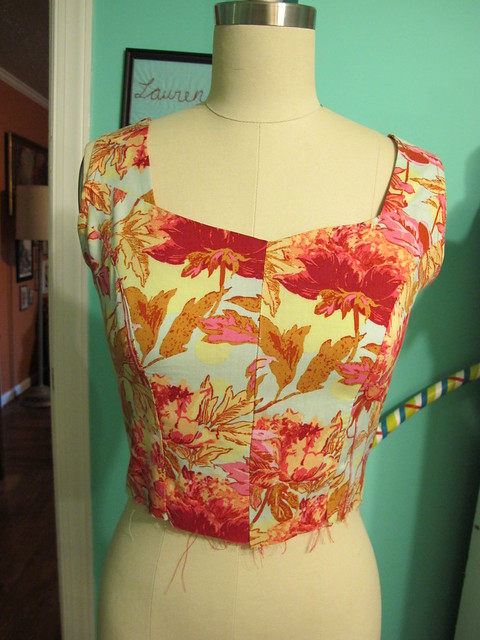
Today, we’ll be assembling the bodice of our dresses. This part is pretty easy and straightforward (well, honestly, the whole dress is pretty easy and straightforward!), although this post is quite a bit picture-heavy. Sorry in advance, ha. This method of bias facing is for those of y’all who are making their dress without a lining. If you plan on adding a lining, ignore these sewalong posts and use the instructions included in the pattern 🙂

OAL 2015
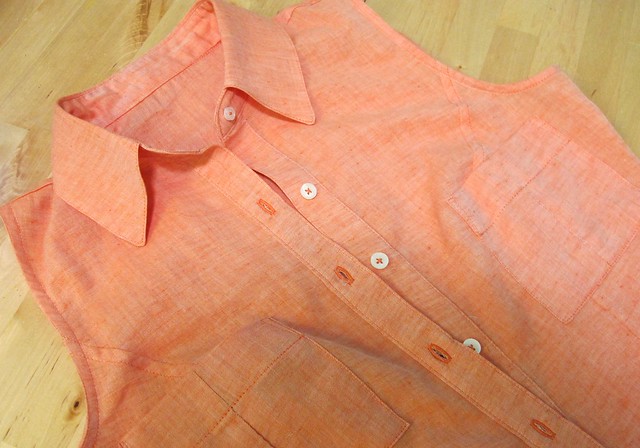
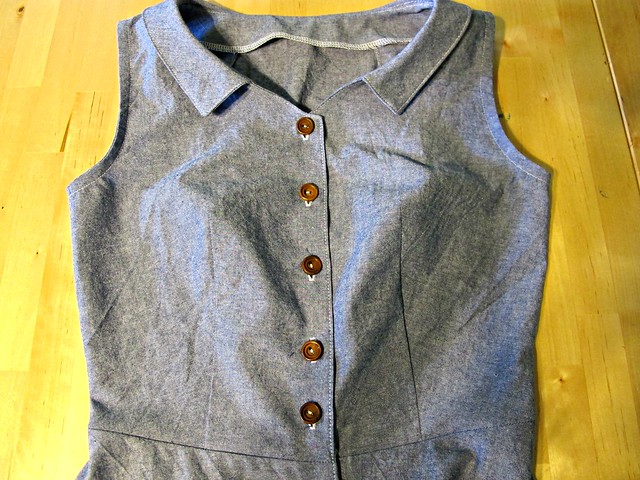
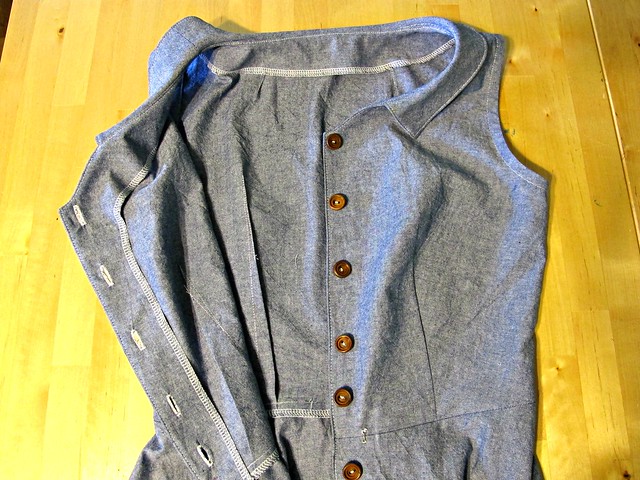
First things first – if you haven’t already done so, go ahead and fuse your little rectangles of interfacing to the back bodice where indicated. This will give that area a bit of stability for adding buttons later (or, if you’re like me – mock buttons. Either way, don’t skip the interfacing!).

OAL 2015
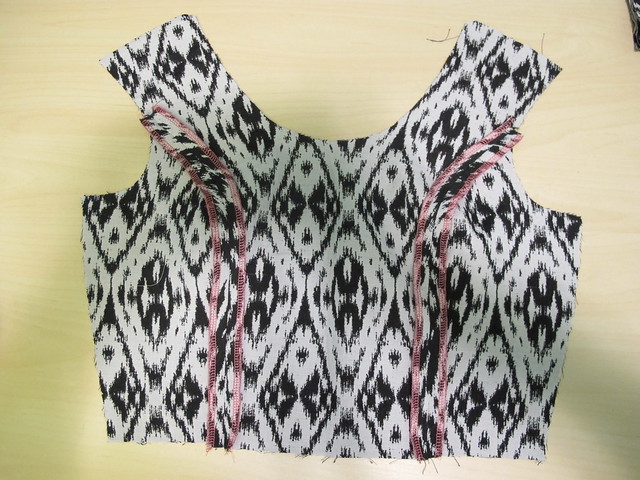
Sew the bodice front to the bodice side front princess seams (need a refresher on sewing princess seams? I got ya!) and finish the seams as desired. Since my fabric is a bit bulky, I chose to serge mine separately (with hot pink serger thread because, obvs) and press them open. You can certainly finish the seams as one and press them to one side, though.

OAL 2015
Next, attach the front bodice to the back bodice pieces, at both the shoulders and the side seams. Again, finish the seams as desired and press.

OAL 2015
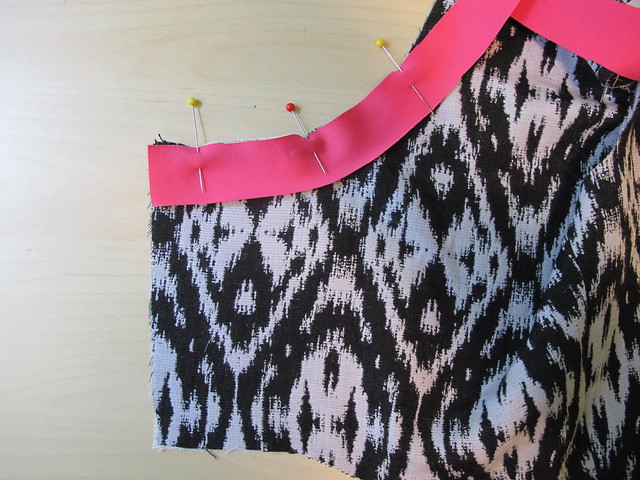
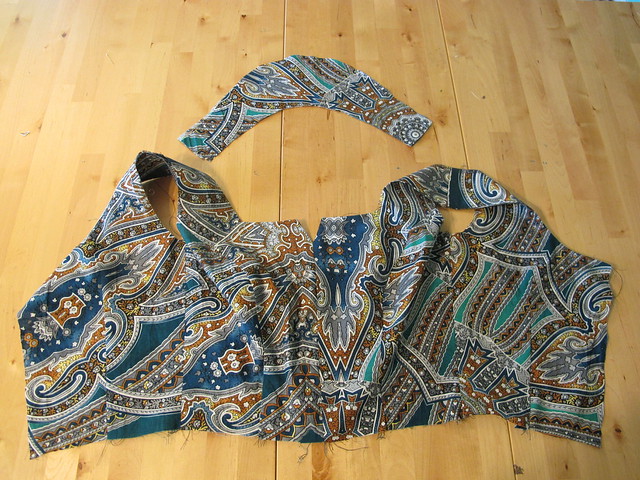
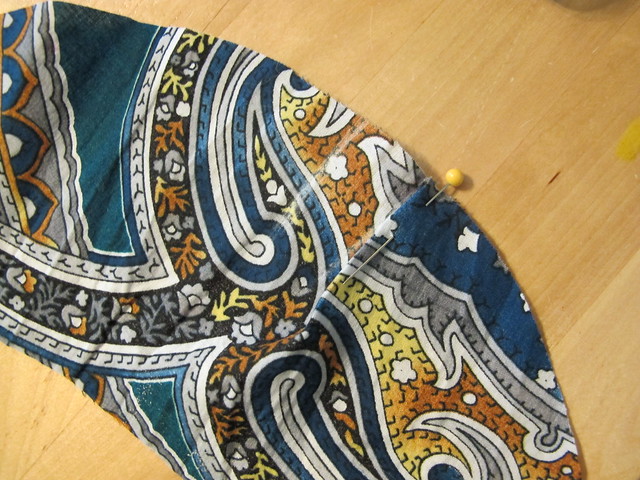
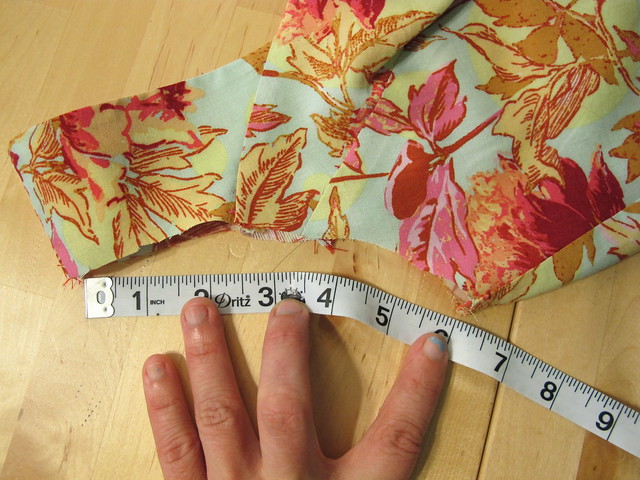
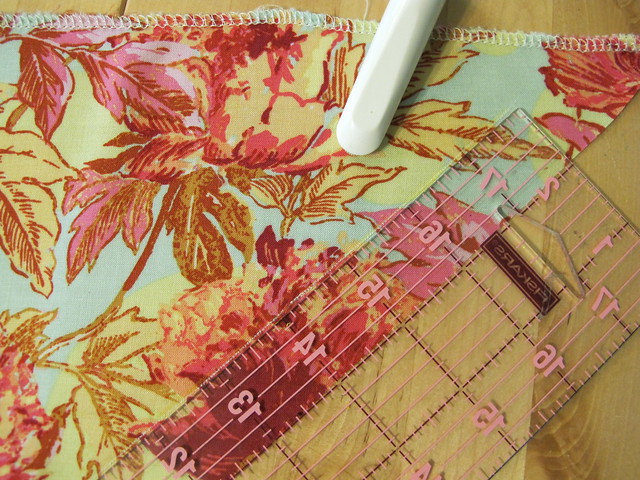
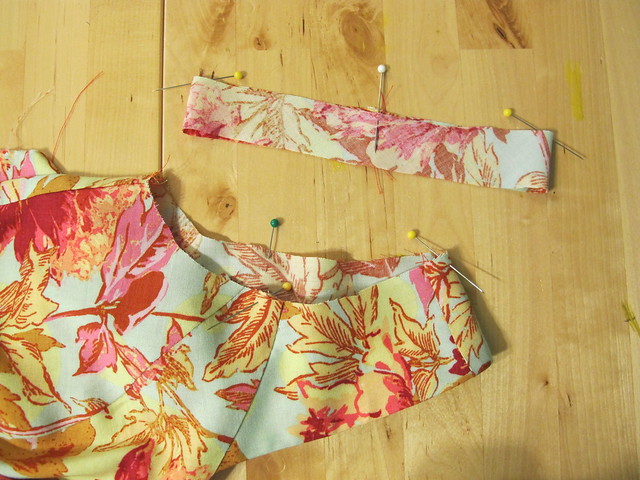
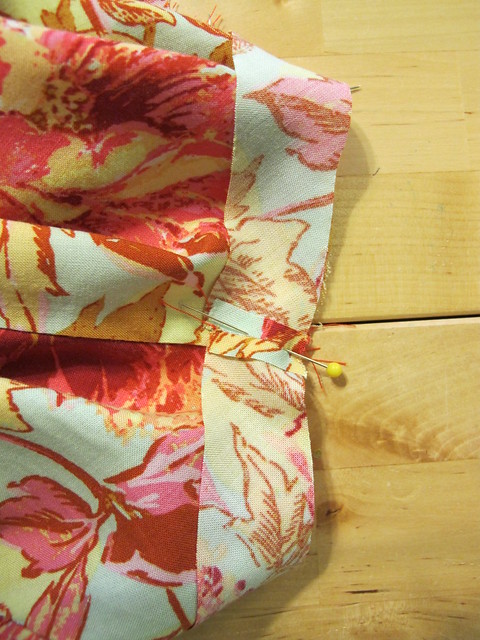
Next, we are going to finish the entire neckline (all the way around) with a bias facing. Measure your neckline, starting at the interfacing of one of the back pieces and continuing all the way around the front to the opposite back piece. There are a few ways to do this – you can use a flexible measuring tape, you can measure with the bias tape itself, or you can use a Curve Runner (am I the last person on earth to find out about this little tool? HOLY SHIT that thing is so cool!). Cut your bias tape the length of your measurement and pin around the neckline, right sides facing.

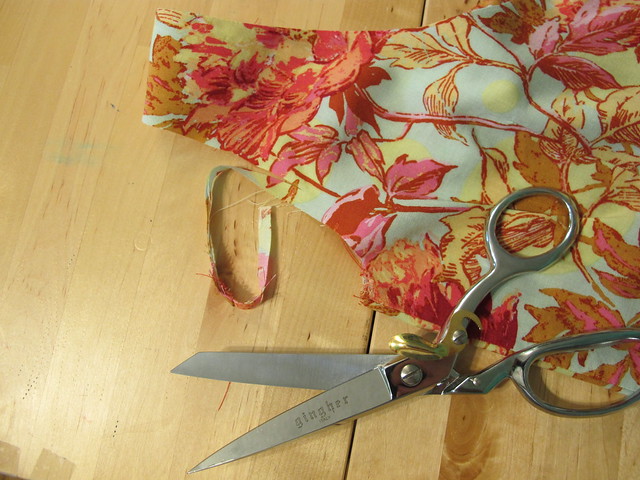
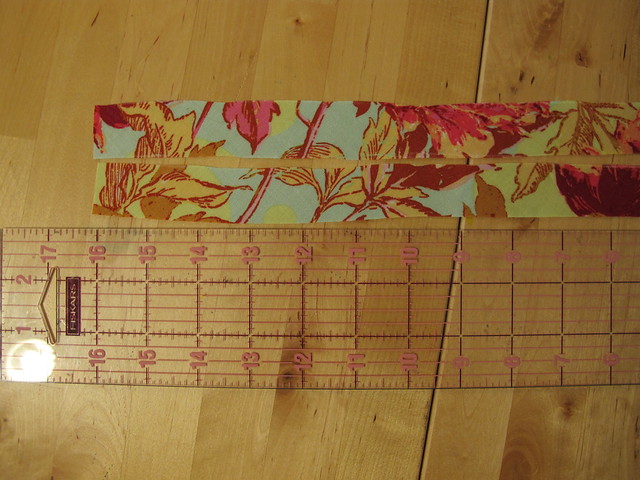
Note: For this particular method of finishing, you will want bias strips that are 1″ wide. You can certainly buy the pre-made packages if you’d like, but I personally like to make my own – it handles and sits better than the pre-made stuff, plus, you have a much better selection of colors and prints (and it’s a GREAT way to use little scraps that are too awesome to throw away). If you haven’t made your own bias strips, it’s super easy! There are tons of methods all over the internet on how to do it; the one I personally use is the continuous bias method since it means you don’t get stuck doing a lot of piecing.

OAL 2015
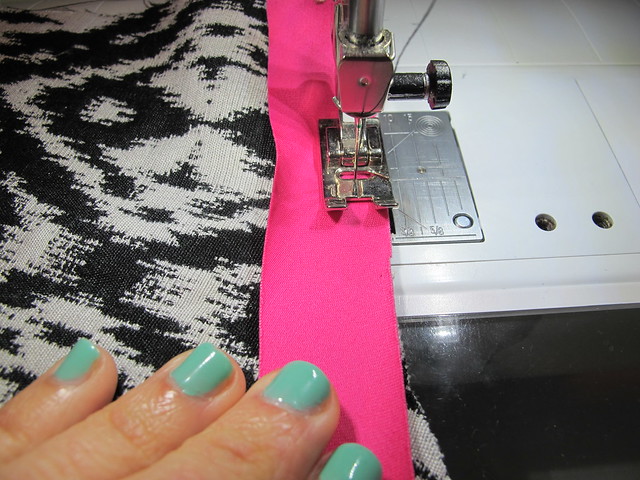
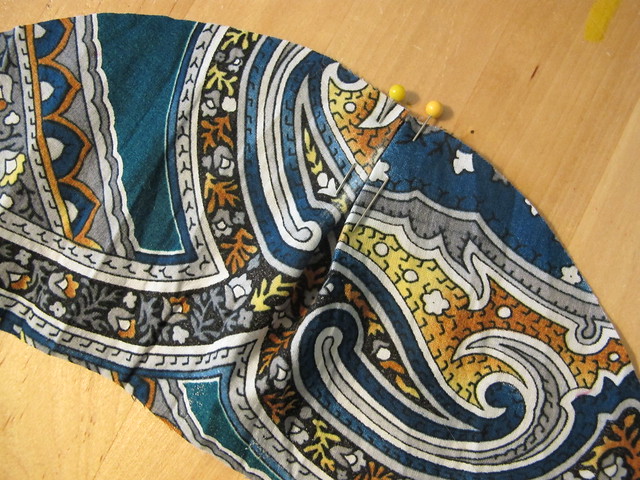
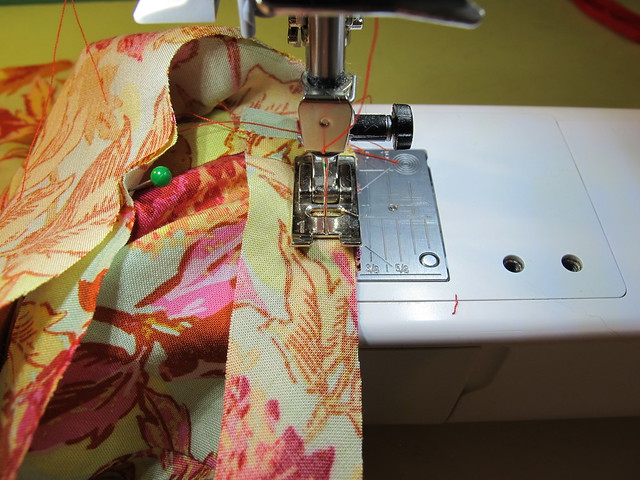
Sew the bias all the way around the neckline – again, starting at one back and continuing across the front all the way around to the opposite back – right sides together, with a 1/4″ seam allowance. Stretch the bias tape *slightly* as you sew, which will help snug up the neckline so it doesn’t gape open.

Note: The pattern is drafted with 5/8″ seam allowances, so you may want to trim 3/8″ off all around the neckline before adding your bias facing. I did not do this and the fit is fine. Just an fyi, though!

OAL 2015
If your fabric is on the bulky side, or your bias is a crazy contrast (like my hot pink), you may want to understitch the facing so it stays in place and doesn’t peek out from the right side. Push all the seam allowances toward the bias and stitch through all the layers 1/8″ from the seamline. I use an edgestitch foot for accuracy, but you can also eyeball it. If your fabric is lightweight and responds well to pressing, you can skip this step.

OAL 2015
OAL 2015
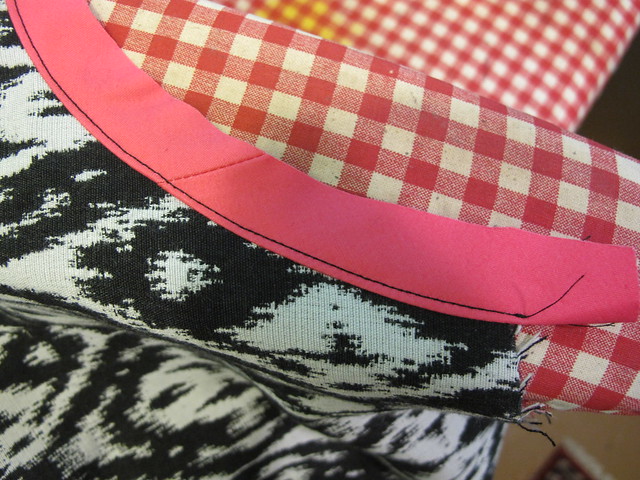
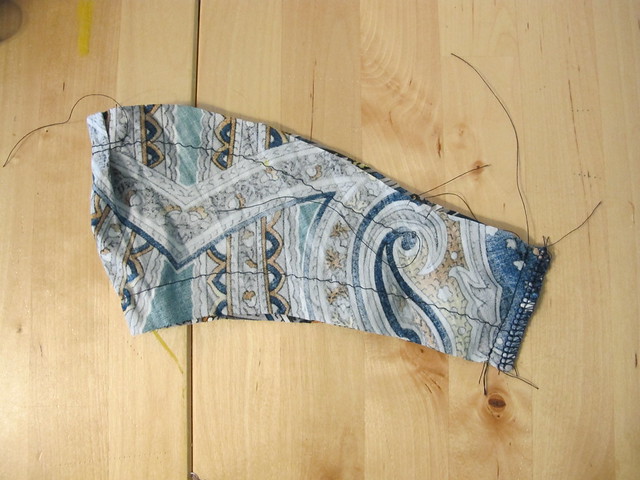
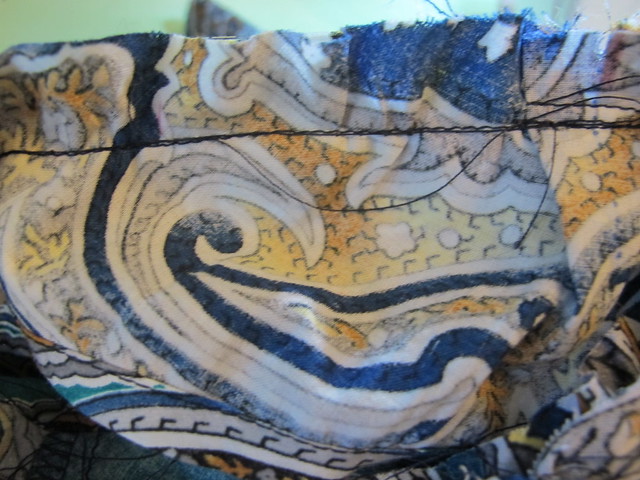
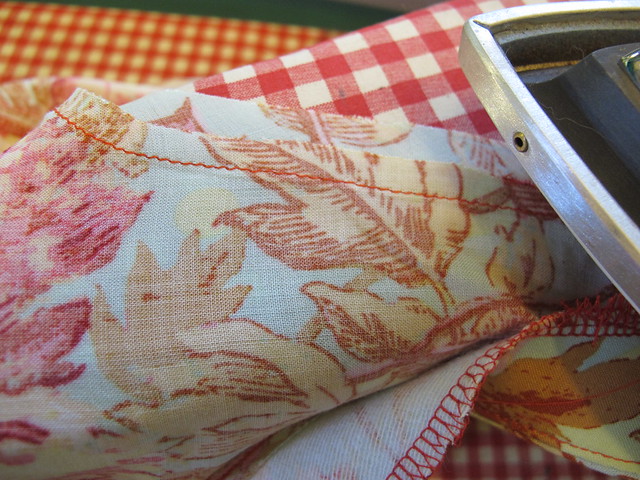
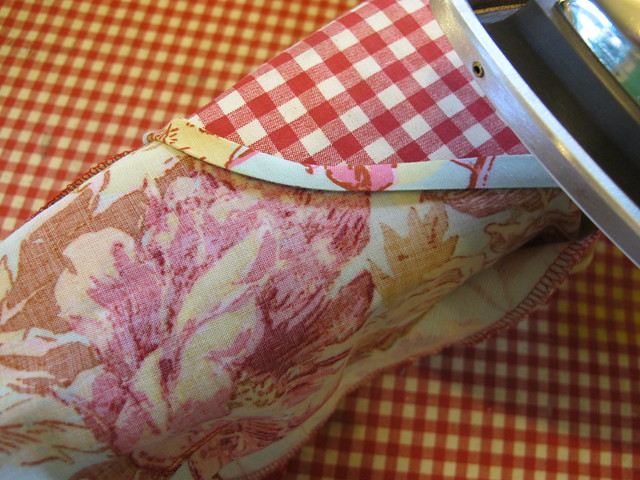
Here is the bias attached and understitched. Take it over to the ironing board; we’re going to press the hell out of this shit now.

OAL 2015
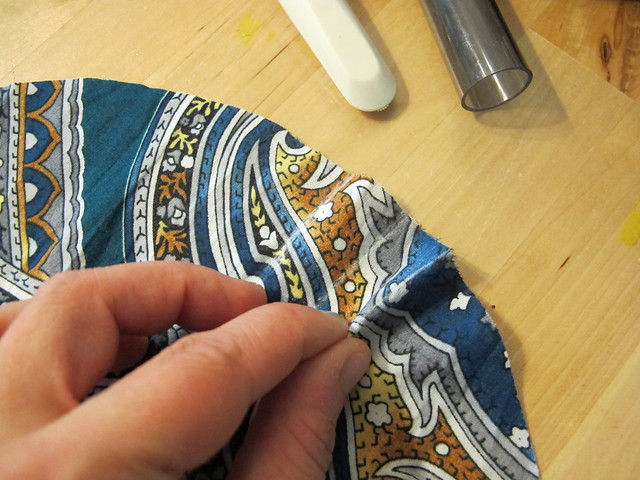
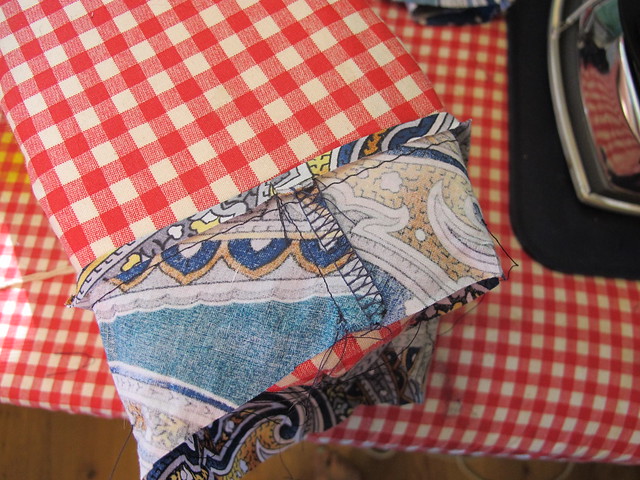
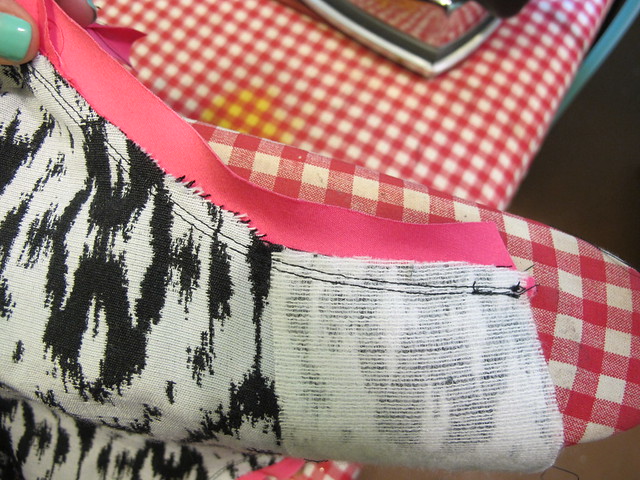
Fold the bias over to the wrong side of the bodice, so that the edge meets the stitching line where it is attached. (yes, it should actually line up with the stitching – my fabric is a little bulky, so the turn of the cloth means that it doesn’t quite meet up. That’s ok, though!

OAL 2015
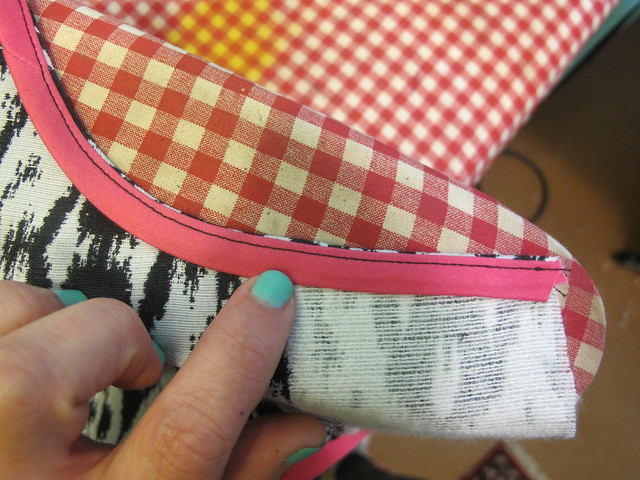
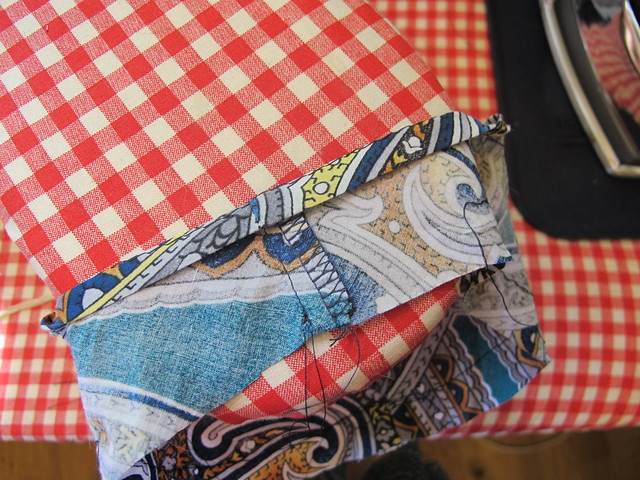
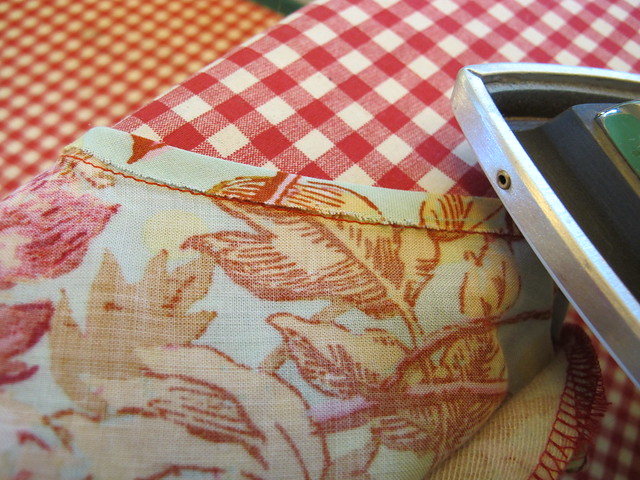
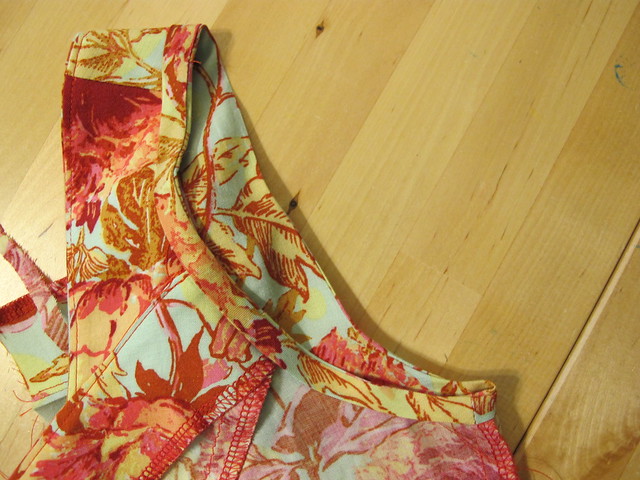
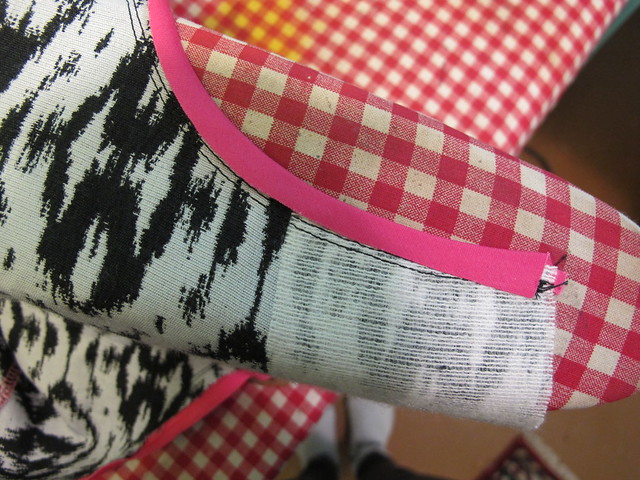
Now fold the entire thing one more time to the inside, so all of the bias is on the inside of the bodice. Press.

OAL 2015
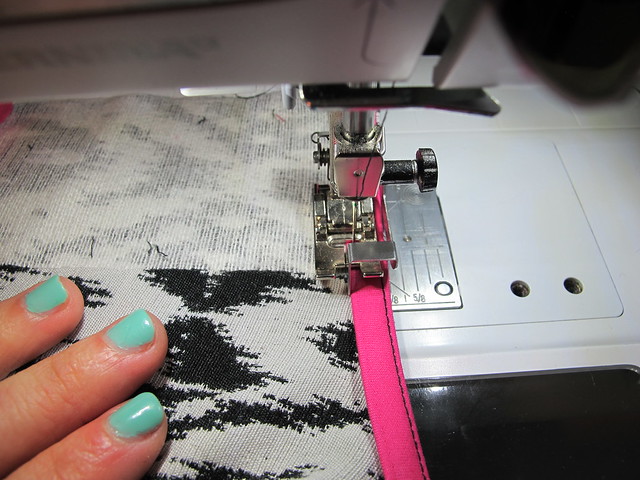
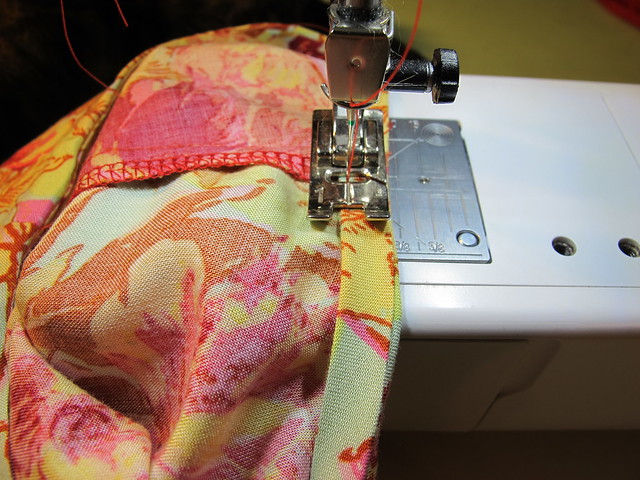
Topstitch 1/8″ away from the folded edge.

OAL 2015
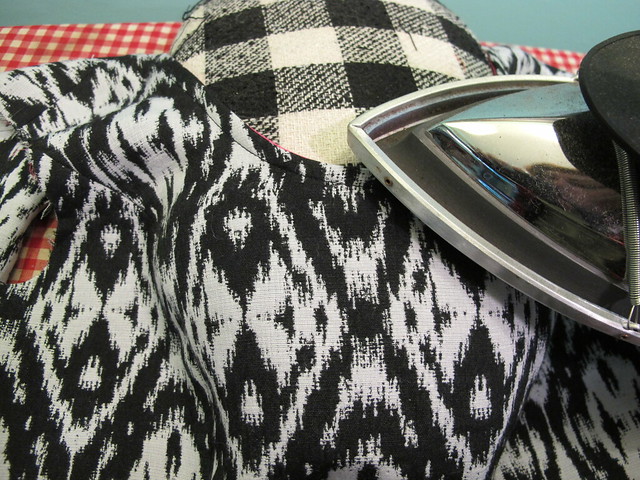
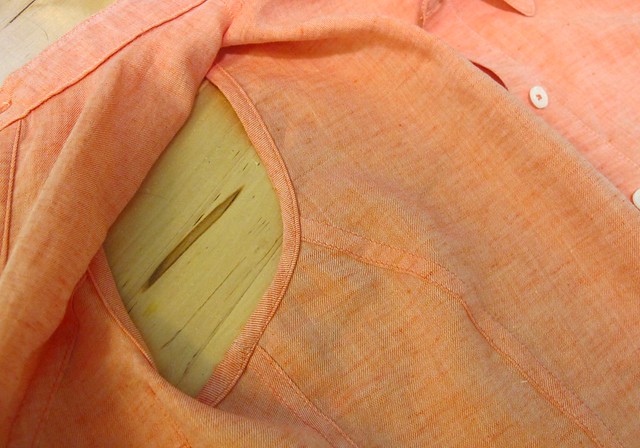
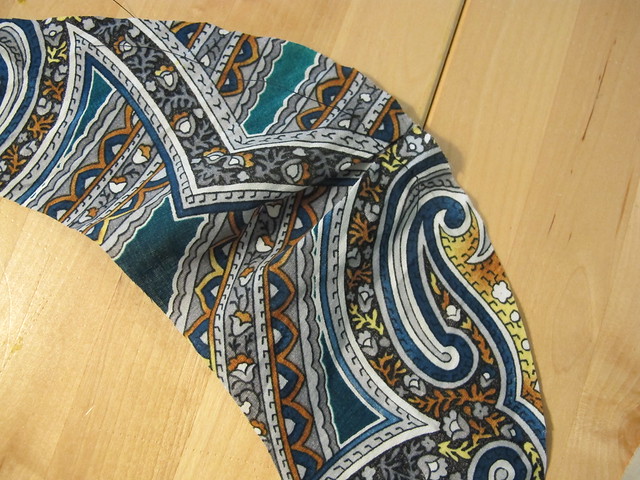
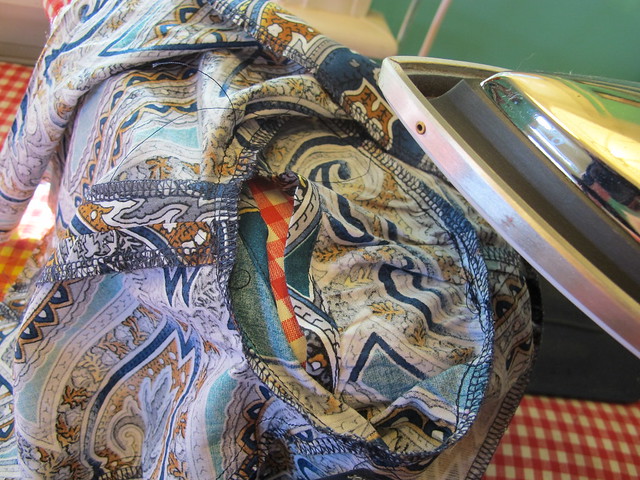
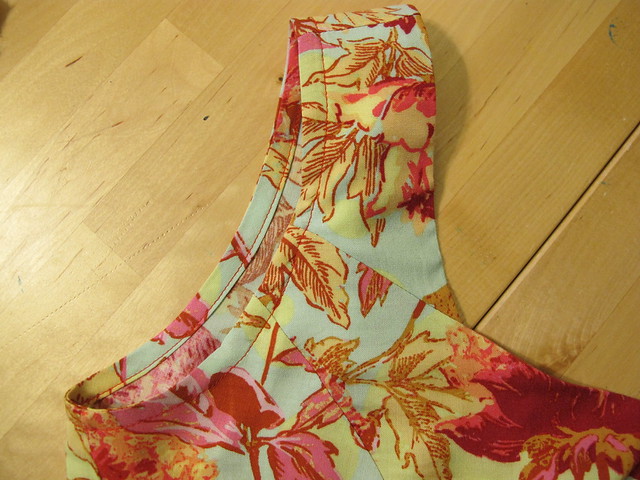
Take the bodice back to the ironing board and give the neckline a good press, preferably over a tailor’s ham if you have one (and if you don’t have one, might I suggest this lovely tutorial for making your own? har har), to smooth out the curves and make sure that all the bias is pressed to the inside of the garment.
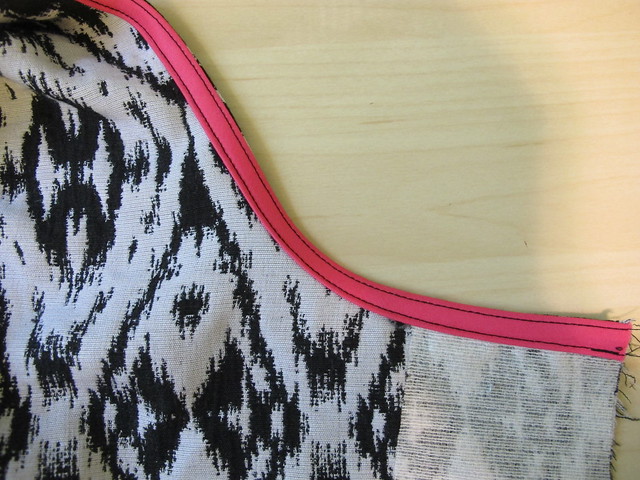
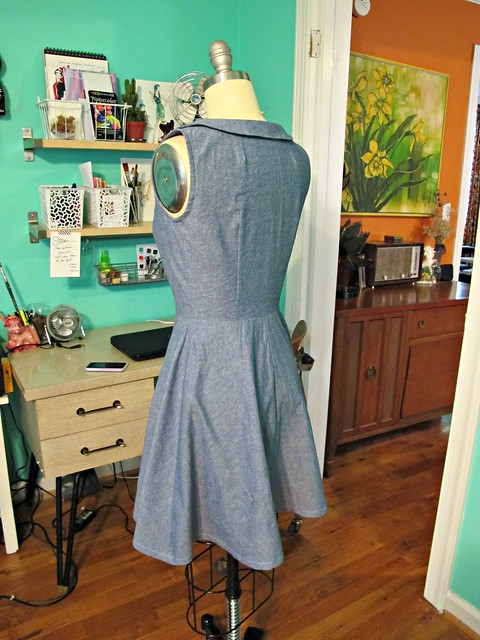
OAL 2015
OAL 2015

Et voilà!

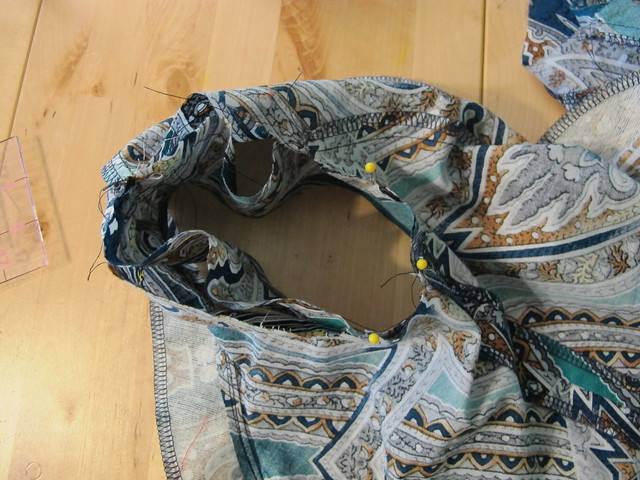
Next, you are gonna want to tackle those arm holes. For those of you leaving your dress sleeveless, you will want to finish the arm holes the same way that you finished your neckline – i.e., with the bias facing (here’s a tutorial on adding bias facing to armholes if ya need it!). For those of you who are adding the standard short sleeves (view B), you will want to follow the instructions to set in the sleeves (or you can follow this tutorial on setting in sleeves, which I find a bit more clear). Don’t forget to finish the seam and press. For the cute little cap sleeves (view D), you will not only set in the sleeve but also need to deal with the underarm finishing (since the sleeve doesn’t go all the way around the arm hole). Normally this is finished with the lining, but since we are little rebels who aren’t playing by the rules, we are gonna finish that with bias facing.

OAL 2015
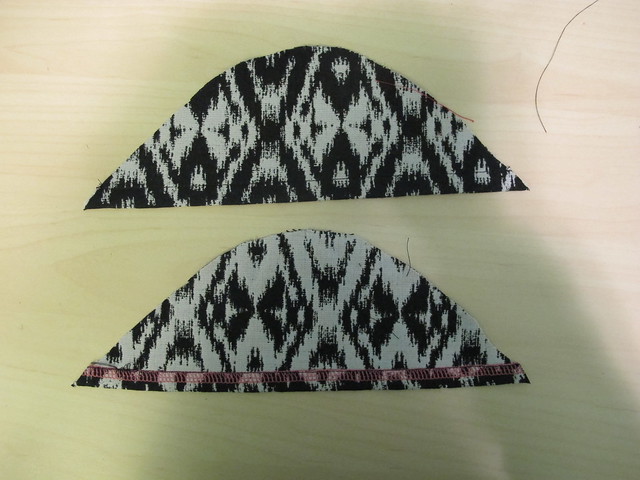
Start by finishing/hemming the bottom of your cap sleeves, in whatever way you prefer. I just serged, turned the hem to the wrong side, and topstitched.

OAL 2015
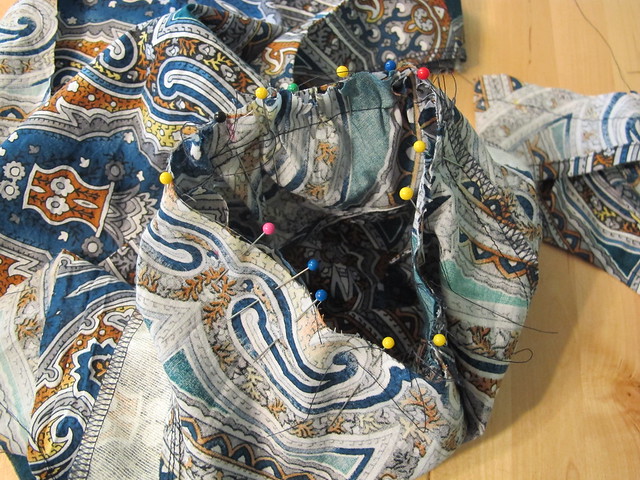
Attach the sleeve to the armscye the same way you set in a standard sleeve – sew a line of basting stitching at 5/8″ all around the curve of the sleeve cap (in a standard sleeve, there are dots to indicate where the basting goes – but for this little cap sleeve, you’ll baste from tip to tip), pin the sleeve into the armscye and pull the gathers so that it fits smoothly inside with no puckers. Sew at 5/8″. (if you need more tutorial help with setting in a sleeve, see the link above 🙂 ). I continued my stitching line all the way around the entire armscye to help with trimming in the next step, although this is not necessary and you can totally eyeball it.

OAL 2015
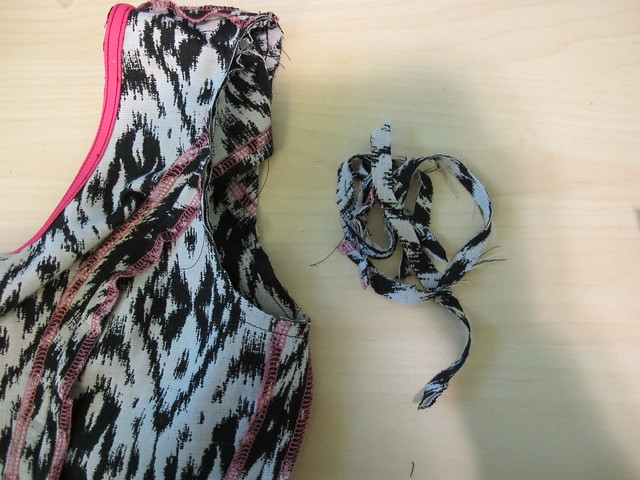
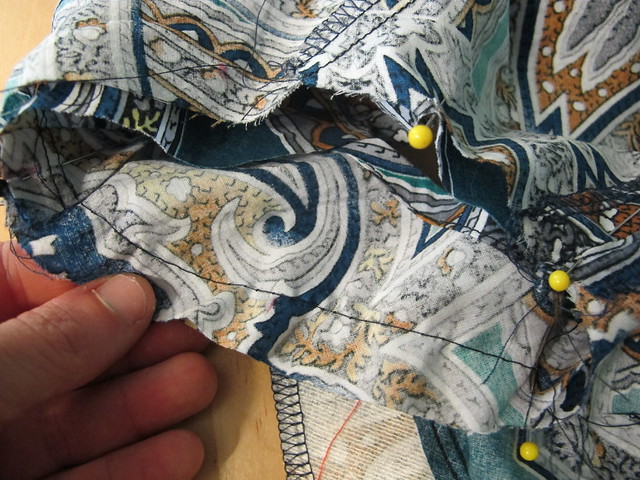
Trim all your seam allowances down – all the way around the entire armscye, including the bottom part that hasn’t been attached to anything yet – to 1/4″. Measure the armscye (this is where one of those Curve Runners would come in super handy, argh. Or you can measure the trimmings that you cut off, ha) and cut your bias strips to length, minus 1″ (to account for stretching the bis as you sew it on). Sew the ends of the bias together to make a circle, and attach to the entire seam/unfinished edge of the arm hole at 1″, again, stretching *slightly* as you sew. Understitch and press as previously directed.

OAL 2015
Before you make the final press to pull the facing all the way to the inside of the arm hole, be sure to pull the sleeve out so that you don’t accidentally tack the sleeve to the bodice. Been there, done that, and it sucks.

OAL 2015
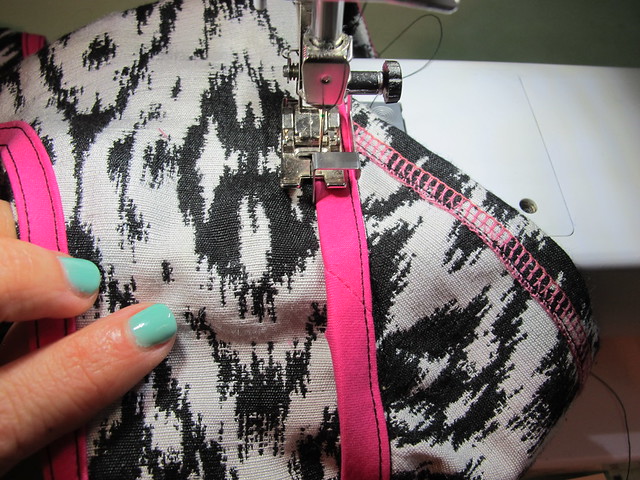
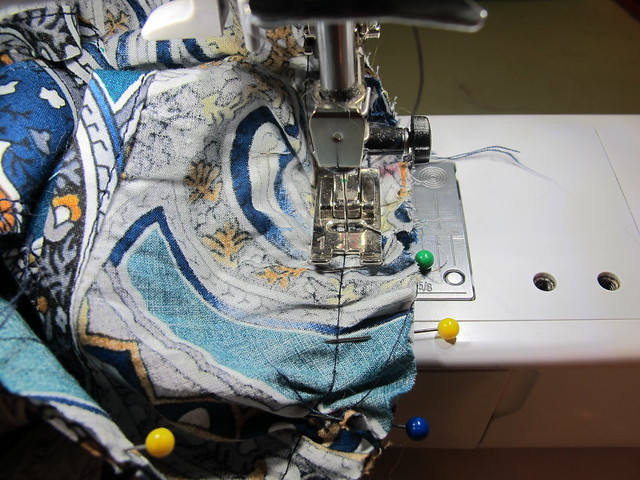
Stitch the bias facing all the way around the arm hole 1/8″ from the edge, being sure that the sleeve is out of the way and you are *only* sewing through the bodice and the bias facing. Press over a tailor’s ham, to set the curves and get everything to lay nicely.

OAL 2015
OAL 2015
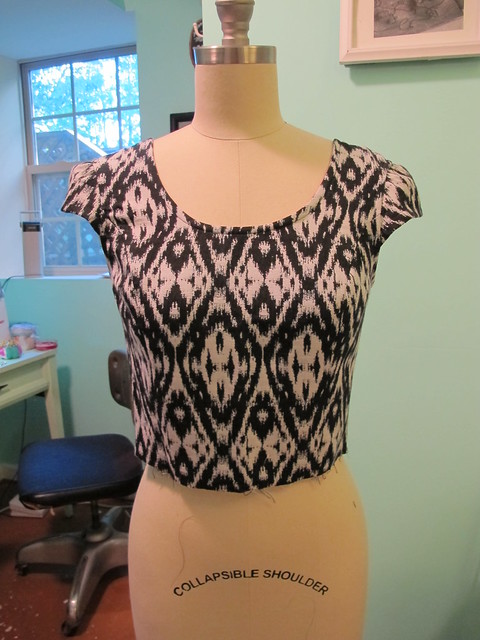
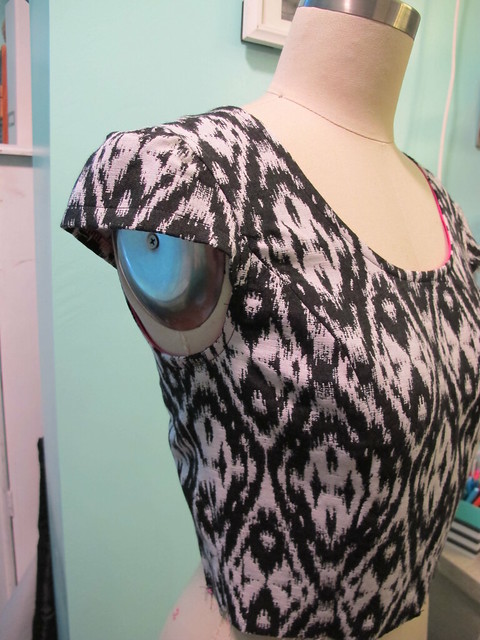
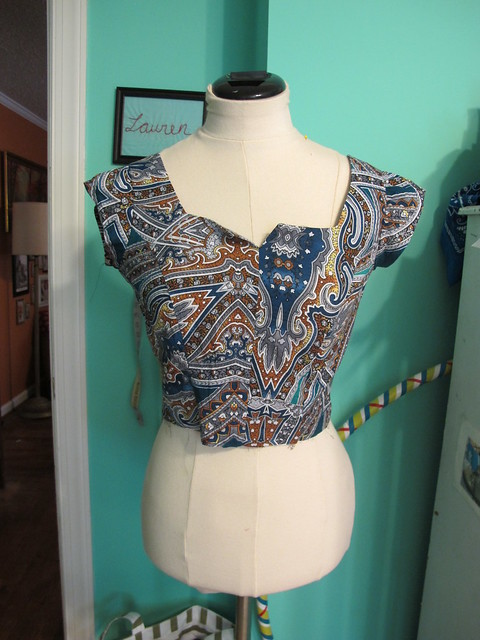
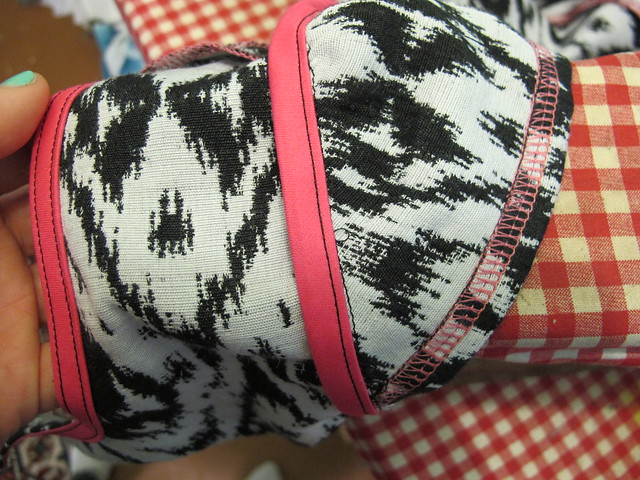
Finished cap sleeves! I really like this method because the extra stitching really strengthens where the sleeve attaches to the arm hole – since it doesn’t go all the way around, sometimes they can start to tear off if there’s too much strain on them (I had a dress like that in my early days of sewing that would NOT keep the cap sleeves attached. Every time I moved, they would rip out. I eventually dumped the dress, too bad I didn’t know how to fix that problem!). And by “strain,” that usually happens from hugging people.  Shitty way to ruin a dress if you ask me hahaha. Anyway, once I started sewing them in this way, my cap sleeves tend to be a lot stronger and I don’t have problems with busted seams. You do have to be ok with visible topstitching – but in a dress like this, there’s already a bunch of topstitching, so it works.

OAL 2015
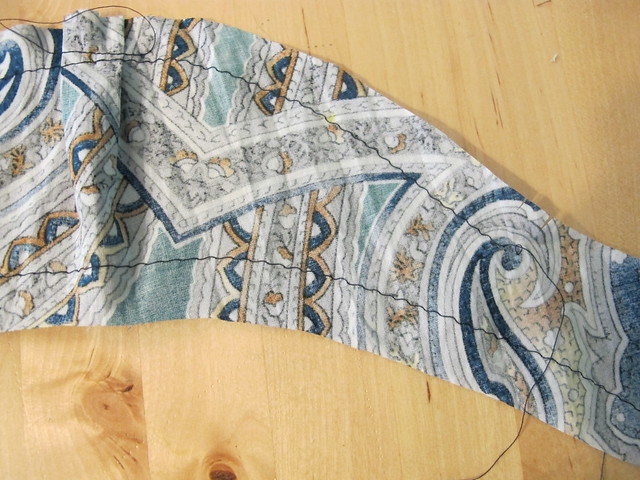
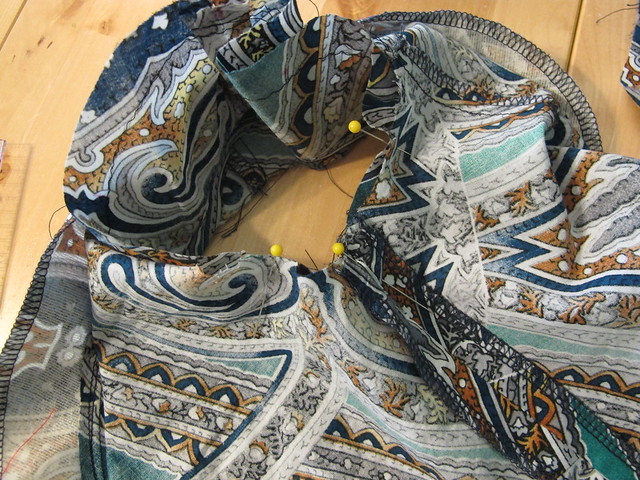
Here’s the inside of the bodice 🙂 Fun!

Ok, whew, I think that’s enough for today! Do let me know if you have any questions about any of these steps 🙂

How’s your sewing coming along for the OAL?

Completed: Another B5526 + Ginger Jeans Get-up

18 May

So sorry to dump this on y’all yet again – another collared shirt + jeans outfit combination. Yawn.

Gingers & B5526

Well, to backtrack – yawn for you, but 😀 😀 😀 😀 😀 for me hahahaha. I will never get tired of this outfit combination. Or, at least, not anytime soon. Maybe never is too strong of a word to use here.

Gingers & B5526

What’s mildly frustrating about writing a long-term blog (at the time of this posting, I’ve accumulated nearly 500 entries since I started waaaay back in 2009, WTF) is that you eventually reach a point when you’re just making the same thing over and over again (well… those of us who don’t make our blog our full-time income fall in this category. I’m sure if I was sponsored out the wazzoo and had all the time I spend at work to spend making content for my blog, it would be a different story, ha.). After re-assessing my wardrobe at the end of 2014 and realizing that I *still* had shitloads of clothing that I made simply for the new and shiny, I have made it a big point to really be honest with myself about whether or not I’ll actually wear something that I make. Like most people, I have a pretty predictable style. And like many sewers, I don’t want to spend a lot of time reinventing the wheel with new patterns if I can get the look I’m going for with an old TNT. So this translates to repeats upon repeats upon repeats.

So, while you might be yawning about the majority of the stuff that’s been posted in 2015… I gotta say, I am elated with the way my closet is looking these days!

Gingers & B5526

Gingers & B5526

With all that being said, there’s not much to report on either of these pieces since I’ve made them soooo many damn times. Jeans + collared shirt is totally my go-to when I want to feel comfortable but still look like I made an effort in the AM. I’ve found my TNT patterns and I feel good about the way they fit and the construction methods that I use.

Gingers & B5526

Gingers & B5526

The top was made using my beloved Butterick 5526. Y’all, I don’t know if I’ll ever sew another button up pattern again! (we all know that’s a lie) I’ve gotten to the point with this one where I can bang one out in a couple of days, which is really nice when you’re coming up on a looming Mood Sewing Network deadline, ha. The fabric is this amazing tigerlily orange cotton voile from Theory, which is a bit more of a coral-y pink than it is orange in real life (I don’t know how the color translates on your screen, but on the Mood Fabrics website it’s definitely pretty muted. The real color is much closer to what you see in my photos. It’s BEAUTIFUL). It has a beautiful chambray weave, which gives the color lots of dimension. This fabric was so so nice to work with – ok, it was a shifty bitch to cut, but once I got past this point, it handled and pressed like a boss. It’s also super comfortable to wear on even the hottest day.

Since the fabric does have a tendency to fray, I used flat-felled seams every where in my shirt. I also left off the sleeves and finished the armhole with self bias binding – it makes the shirt really casual and, again, awesome for hot weather. The pockets are the same pockets that come with the pattern, but I made them slightly smaller because the original size was a little overwhelming on me. Buttons are from my stash; they’re just your standard white shirt buttons. Oh! And the matching thread also came from Mood Fabrics – I noticed that when I was ordering my fabric, there were thread suggestions at the bottom of the page. I figured I’d try out the service – you know, for science – and I’m super pleased with the color match. Even more pleased that I was saved a trip to the fabric store. Mostly because those tend to be very dangerous places for my wallet, ha.

Gingers & B5526

Gingers & B5526

The good thing about running a long-term blog and making a bunch of pattern repeats is that you will eventually bore of just making things that are passable to wear in public, and start focusing on really honing your skills to the next level. Or, at least, that’s how it worked out for me. Look at those clean finished insides! I should wear this shit wrong-side out.

Gingers & B5526

I did shorten the length of the shirt by about 2″ – I think the original length was just sliiiightly too long for my height. This way I can wear it untucked or tied at the waist. If I do a half tuck, it doesn’t pooch out all weird like some of my longer shirts tend to do. As always, I finish my shirt hems with self bias facing. I think it makes for a much cleaner finish, and it’s must easier to press and sew those curves with the bias tape instead of trying to wrangle the hem itself.

Gingers & B5526

Gingers & B5526

For my jeans, I used my now-favorite-ever-pants-pattern, the Ginger Jeans. I’ve made this a few times before (and I definitely don’t plan on stopping – I finally was able to invest in one of the denim kits because YAY) and I’m just really happy with the way this pattern fits my body. The fabric is a cool metallic gold stretch denim. I was actually looking for white denim to make this up, despite me being a stain magnet when it comes to white. At any rate, this denim’s wrong side actually is white flecked with very subtle bits of gold, and these very well almost became white jeans. I talked myself out of it because I was afraid the not-quite-pure-white would make the jeans look like they were dirty, plus again, stain magnet. So I stuck with the gold side. Also, this denim doesn’t have as much stretch as my other denims, so the jeans are a bit tight. I had to let the side seams out to 3/8″ or else I would have never gotten these things over my ass. They’re still a bit tight – mostly around the calves – but I’m hoping that they will loosen up a little with wear.

Gingers & B5526

Gingers & B5526

Gingers & B5526

Not much to report on construction. I used a combination of flat-felled and serged seams (as how most RTW jeans are made) and a triple stitch to really make the topstitching stand out. I would have loved to use topstitching thread, but I couldn’t find a good match with what is admittedly kind of a weird denim color. It’s gold, but it’s also kind of beige. Fortunately, Mood Fabrics REALLY came through with that thread match, as you can see in these close-ups.

What else? I did not interface the waistband (I like my jeans with an uninterfaced waistband; it’s much more comfortable. Not sure how that would work with a lower rise, but for the high rise version, it’s perfect). The jeans button is from Pacific Trimming, and the cotton pocket lining is left over from this crazy blue dress.

I will admit right now that this outfit inspiration came way of my boss’ closet. Since I do all her laundry for her (if you are new to this blog and that sounds REALLY WEIRD, I should probably point out that I’m a personal assistant 🙂 ha!), I’m always lurking on her clothes and I’m always finding inspiration in some of the strangest ways. She has a similar coral chambray shirt – hers has sleeves and a lace inset at the yoke, though – and white jeans. And I wanted that outfit for me. So I made it 😛

Gingers & B5526

So, hey, in other news that doesn’t involve me making my fifty billionth b5526 – I’ve got an article out in the current issue of Seamwork Magazine! If you haven’t heard of Seamwork, it’s a sewing magazine that is published online by the masterminds behind Colette Patterns. The magazine is free to read and there are optional pattern downloads with each issue (the patterns you pay for, however). ANYWAY, my article is all about visiting Nashville! I had so much fun writing a city guide about my favorite city in the entire world, and I hope you have fun reading it (and are inspired to come visit because, hey, Nashville is awesome! Really really awesome!). You can read The Seamworker’s Guide to Visiting Nashville at Seamwork. My first published article! Yay!

Completed: A Chambray Hawthorn

10 Jul

I know, like, everyone and their freakin’ MOM seems to have one of these dresses made up in chambray. I’m just following the crowd here, ain’t no shame in that. But there’s a pretty good reason why we all seem to gravitate toward the same fabric for the same pattern – it’s just such a perfect marriage of the two. Check it out:

Chambray Colette Hawthorn

If you haven’t been able to guess it yet, this is the Hawthorn from Colette Patterns. A simple and flattering style that I’ve loved ever since it came out – this is my third one, actually, although it’s been nearly a year since I last touched the pattern (see versions one and two here). I’ve been planning a few versions since, and chambray was one of them – although I had a helluva time trying to find a good chambray. But here it is! I found it!

Chambray Colette Hawthorn

My chambray actually came from the NYC Garment District – I picked up a couple of yards while Clare & I were chatting up Sam. I know Trice also bought some, because I totally talked her into it (no shame). At the time, I wasn’t exactly sure what I would make with the fabric – but I knew it would end up something button-down inspired. Either a shirt or a shirtwaist, but definitely something that would take advantage of the crisp hand and beautiful cotton goodness. I bought two yards, washed it when I got home, and it’s been sitting on my shelf ever since.

Chambray Colette Hawthorn

This particular fabric very nearly almost became a button down shirt instead of the Hawthorn it blossomed into. Like, much closer than you think – I actually had the fabric on my cutting table, with my beloved Butterick 5526 pattern, and decided at the very last minute to use this fabric to make the dress instead. I wanted a chambray button down as well (and I definitely ended up with one… out of a different chambray. More on that in another post, though!), but I realized that this fabric was simply too thick to wear as a shirt in the summer time. The chambray La Sylphide I made last year barely gets worn in the summer, as it’s just tooooooo freakin’ hot! But for the purposes of a dress, this particular fabric was perfect. So I swapped out the pattern for the Hawthorn, and got to making it happen.

Chambray Colette Hawthorn

There’s not much to say about the pattern itself – like I said, I’ve made the pattern before, so I don’t really have anything new to add to the table, in terms of reviewing. All fitting changes I made in my previous versions were used for this Hawthorn, and it was pretty straight forward sewing for the most part. However, my pictures turned out kinda nice (well, I think so! Good hair day!), so you have to look at all of them anyway. Sorry!

Chambray Colette Hawthorn

One thing I did that ended up being unintentionally hilarious was when I tried to lower the bust darts. I remembered from previous versions that they are a little high in this dress – and kind of look nipply if you catch the light right. So I redrew the point about 1″ below where they were marked on the pattern, and went about sewing as normal. Except, I dunno what happened exactly, but they ended up WAY too low! Which was a shame because they were the perfect little boob shape, just in an area where boobs (well, my boobs) don’t really belong. Before you start scrutinizing my boobs in these photos, I should mention that I fixed the dart issue. So there’s that. I don’t know where I was going with that story. Boobs.

Chambray Colette Hawthorn

Man, this fabric was SO MUCH FUN to work with! It’s a beautiful cotton chambray, so it presses like an angel (not sure how that would work exactly, but let’s just roll with it) and it takes well to topstitching. It’s also lovely to wear in the summer here – breathable, and a little lightweight (but still feels like a good weight for a dress). I feel like I say this with every make I, er, make, but this is totally my new favorite dress.

Chambray Colette Hawthorn

The collar is so good for all those tiny brooches I have that I never wear. Like this insect brooch.

Chambray Colette Hawthorn

Chambray Colette Hawthorn

The color also goes really nicely with my hair, yeah?

Chambray Colette Hawthorn

Chambray Colette Hawthorn

I think a dress like this would be good for traveling, as it’s one of those neutral-type pieces that provides a nice background to whatever other garb you are throwing on (cardigans, jewelry, shoes, etc), so you can wear it multiple times without people judging you. You know, like those ~travel articles~ in magazines that tell you to bring a classic black/white/denim/whatever solid-colored dress so you can mix up your jewelry and shoes and look like you actually brought 10 outfits? Except, I never really have a good neutral dress like this – almost everything I make has patterns, and those that are solid (such as my navy cotton sateen version of this) still feel like they really only have 1-2 pairs of shoes or whatever that ‘go’ with them. This dress, though, feels like the equivalent of blue jeans and a white tshirt. I kind of want to wear it for a week straight just to see how many different ways I could style it.

Chambray Colette Hawthorn

Chambray Colette Hawthorn

Chambray Colette Hawthorn

The wood buttons are from Fashion Sewing Supply, by the way! Last time I ordered interfacing from them, I ordered a couple of packets of buttons as well so I could play around with them in garments. All the buttons are shirt buttons, but they have some cool ones that aren’t so cool-looking they look kind of cheap (does that make sense? Main reason why I generally stick with plain white buttons. NOW YOU KNOW MY SECRET, I’m afraid of looking cheap!). I had no real plans for these when I ordered them, but they look beeeeautiful with this chambray!

Chambray Colette Hawthorn

Chambray Colette Hawthorn

The armholes are finished with bias binding. And check out that topstitching! I recently bought myself a topstitching foot for my Bernina, and I’ve been having a lot of fun using it to get super precise stitching. I mean, how good does that look? ALL IN THE FOOT, BABY!

Chambray Colette Hawthorn

As with my other two Hawthorns, I respaced my button holes so they didn’t interfere with the waist seam. There is a hook and eye at the seam to keep it closed invisibly; this way I can still wear belts with the dress.

Chambray Colette Hawthorn

I kept things simple with the construction and finishing and just used my serger to finish the raw edges.

Chambray Colette Hawthorn

And that’s it! I’d love to go through with my forever-planned other version of this dress – plaid with long sleeves. Wouldn’t that be so nice? Although it’s definitely too hot to think about sleeves right now (as Landon would say – “Sun’s out; guns out”), so I’ll stick with the sleeveless for now 🙂

OAL: Sewing Sleeves or Bias Facing

23 Jun

Hiya OAL-gers! Today we are going to attach our sleeves and/or finish our arm hole edges with bias facing (depending on which version of the bodice you are sewing). Again, this is a long, picture-heavy post, so sorry! I will be covering my favorite way to sew bias facing (as I mentioned in my silk cherry Vogue 1395 post last week), so you may want to check this out even if you’re not sewing along with us 🙂

For the version with sleeves, read on!

OAL 2014 - Sleeves and Bias Binding
You should have a bodice and two sleeves. If you have not already done so, you may want to baste the edges of the facing along the arm hole, as that will all get attached in just a moment.

OAL 2014 - Sleeves and Bias Binding
Make sure your pleat markings for the sleeves are marked on the RIGHT SIDE of the fabric. I used chalk so it will just brush out and not leave a permanent mark.

OAL 2014 - Sleeves and Bias Binding
To form the pleat the top of the sleeve, fold the fabric exactly along the solid line and bring it to the dashed center line. Pin in place. Do this for both sides, forming two pleats.

OAL 2014 - Sleeves and Bias Binding
Baste the pleats into place.

OAL 2014 - Sleeves and Bias Binding
Now you are going to sew two lines of basting stitches. The first line of stitching is along the curve of the sleeve cap, starting at one set of notches and ending at the opposite set, at exactly 5/8″ from the raw edge*. Leave long thread tails. This basting will be used to ease the sleeve into the arm hole. The second line of stitching is along the hem edge of the sleeve, from end to end, at 5/8″ as well. This basting will be used to hem the sleeve. You can leave it off if you feel confident in your sleeve-hemming skills, though!
* Note: Lots of people like to ease their sleeves in with two lines of basting, at 5/8″ and 1/2″. You are more than welcome to do that if that’s your jam, but I’ve found that I get much more gentle easing with less puckering if I use one line at 5/8″. Totally up to you!

OAL 2014 - Sleeves and Bias Binding
Sew the underarm seam of the sleeve, right sides together. Finish the edges and press.

OAL 2014 - Sleeves and Bias Binding
To hem the sleeve, first fold up the bottom edge 1/4″ and press. Fold up the remaining hem allowance, exactly along the line of basting stitches that you created, and press again. All raw edges should be encased inside the hem at this point.

OAL 2014 - Sleeves and Bias Binding
Topstitch the sleeve hem into place and press again. If you’d like, you may use a slightly long stitch length (I use 3.0 to my normal 2.5) – I personally just think it looks a little nicer 🙂

OAL 2014 - Sleeves and Bias Binding
Time to stick that shit in the arm hole! Starting at the bottom, match up the side seam with the underarm seam, and match the notches. Match the dashed line at the sleeve cap (the one that both pleats are folded to) to the shoulder seam. Your sleeve will be obviously too big for the arm hole, that’s fine, we are going to fix that.

OAL 2014 - Sleeves and Bias Binding
Very gently pull the line of basting stitches, easing the sleeve excess to fit the arm hole. We don’t want to create big gathers here – we just want the sleeve to be a little smaller so it fits smoothly. Once you’ve got the sleeve eased in, pin everything into place.
* Note: Easing sleeves can be a little difficult! These sleeves will ease in smoothly, but if you are having problems with puckers, you may want to open up your pleats at the top of the sleeve and make them a little bit deeper. That’ll use up some of the excess ease 🙂 Don’t go too crazy with that, though, as you do need a little bit of easing so the sleeve has a pretty curve and enables you to move your arms around and all that.

OAL 2014 - Sleeves and Bias Binding
Now you can sew the sleeve in! Sew exactly along the 5/8″ line of basting, being careful to make sure there are no puckers or gathers and that your sleeve in eased in smoothly. I like to sew my sleeves in with the gathered side facing up – that way, I can periodically lower my needle, raise the presser foot, and adjust the easing as I go.

OAL 2014 - Sleeves and Bias Binding
Once you’ve got the sleeve sewn in, double check both sides to be sure that there is no gathering or puckering. Your sleeve will probably have a bunch of excess at the seam allowance like I have here – that’s fine! As long as it’s smooth at the stitching line 🙂 Now go ahead and finish your seams.
* Note: The instructions tell you to sew a second line of stitching right by the first one. Honestly, I’ve never done this before – even before I had a serger – and I’ve never caused a Sewing Apocalypse, so take that as you will.

OAL 2014 - Sleeves and Bias Binding
Press the seam allowances (I press toward the bodice) and steam the sleeve cap to remove any excess fullness.

OAL 2014 - Sleeves and Bias Binding
Finished: Cute little cap sleeves! Yeeeahhh!!

For the sleeveless, read on for the bias facing tutorial!

OAL 2014 - Sleeves and Bias Binding
The first thing we want to do is remove some of the seam allowance from the arm hole of our bodices. This bodice is designed to be sewn with a 5/8″ seam allowance, and we will be attaching our bias strips at 1/4″. So you’ll want to shave off about 3/8″ from the entire circumference of the arm hole.

OAL 2014 - Sleeves and Bias Binding
Now measure the arm hole, so you know how long to cut your bias strips.

OAL 2014 - Sleeves and Bias Binding
Next, we are going to cut bias strips from our fashion fabric (or cool contrasty fabric, if you want!). There are lots of tutorials on how to do this; I am just showing you my preferred method 🙂 Start with a piece of fabric that has two straight edges at a right angle. For the cross grain, you can just rip your fabric, which will give you a perfect straight edge without cutting.

OAL 2014 - Sleeves and Bias Binding
Fold the ripped edge up to meet the top straight edge, thus forming a diagonal line. Cut along the diagonal line (you may want to gently press first, if you need a guideline); you have just created a bias edge.

OAL 2014 - Sleeves and Bias Binding
Now cut two strips on the diagonal/bias – 1″ wide and the length of your arm hole measurement. I like to draw my lines with chalk and cut with scissors; you can also use a ruler and rotary cutter if that’s your jam.

OAL 2014 - Sleeves and Bias Binding
Sew each little bias strip into a circle with the right sides together, using a 1/4″ seam allowance. Press the seam allowances open.

OAL 2014 - Sleeves and Bias Binding
Next, we want to make sure the facing will fit inside the arm hole before we actually sew it in. *Generally* speaking, most bias facing is fine at 1/2″ shorter than the measurement of what it’s being sewn into (which is why we cut our strips at the measurement of the arm hole – 1/4″ seam allowance x2 = 1/2″), but some stretchier fabrics – such as my rayon challis – require a shorter bias strip. So we are going to check that measurement now. This pinning/sectioning also makes it easier to sew the bias strips in if you’re a newb.
Anyway, section your arm hole and bias strips into 4 equal sections, and mark with pins.

OAL 2014 - Sleeves and Bias Binding
Pin the bias facing to the arm hole, starting with the seam matching the side seam, with right sides together (so your bias facing is on the outside of the garment). Match each section, so your bias facing is pinned at 4 points. From there, check one section and see if the facing is short enough for the arm hole – you just need to be able to gently stretch it to match the length of the bodice arm hole (gently, I say! We are not sewing ribbing onto tshirts here!). If it’s too long, pull it out and shorten the bias strip accordingly, then repin. I had to shorten mine by another 1/2″ to get it to fit.
* Note: If you want your bias facing on the OUTSIDE of your garment (again, cool contrasty thing), you will need to pin it to the inside of the arm hole.

OAL 2014 - Sleeves and Bias Binding
Once your facing is the correct length and pinned into place, sew it down with a 1/4″ seam allowance, catching the edges of the bodice facing in your stitching as you come across them. Again, the bias facing needs to be on the outside of the garment, right sides together.

OAL 2014 - Sleeves and Bias Binding
Now take the whole thing to the ironing board and press the seam allowances toward the facing.

OAL 2014 - Sleeves and Bias Binding
Fold the facing down toward the arm hole, wrong sides together, matching the raw edge of the facing with the stitching line you just created. Press.

OAL 2014 - Sleeves and Bias Binding
Fold the entire thing down one more time, along the stitching line, to the inside of the arm hole (or outside, if you’re going that route). All raw edges should be completely encased at this point.

OAL 2014 - Sleeves and Bias Binding
This is what your pressed/unstitched facing should look like. Note that I also caught my bodice front facing in the stitching/binding, so it’s all encased and won’t need to be tacked down later.

OAL 2014 - Sleeves and Bias Binding
Now topstitch your facing to the arm hole, about 1/8″ from the fold. Try to keep your stitching line consistently spaced, as this will show on the outside of your garment. You may need to gently stretch the binding as you sew the curves. Alternately, you can slipstitch this binding if you don’t want the stitching to show on the outside, but I’ve found that works best if you have underlining to sew it to (otherwise you may have little thread puckers).

OAL 2014 - Sleeves and Bias Binding
Once you’ve sewn down your bias facing, take it back to the iron and give it one last press, to ease out any wrinkles or fullness, and to make the edges nice and sharp.

OAL 2014 - Sleeves and Bias Binding
And that’s it! A gorgeous bias facing that doesn’t require using a fiddly tool (man, those things can be obnoxious). I LOVE this method and I find it much easier than any other binding method I’ve used before. This works for both necklines and arm holes, and can be done either flat or in-the-round as I demonstrated.

Phew! That’s all for this week! As always, let me know if you have any questions 🙂