Tag Archives: deer and doe

Completed: Rayon Crepe Magnolia Dress

4 Feb

LMAO for some reason I’ve been sitting on these photos since Thanksgiving, no idea why I’ve been dragging my feet to post this! Anyway, better late than never!

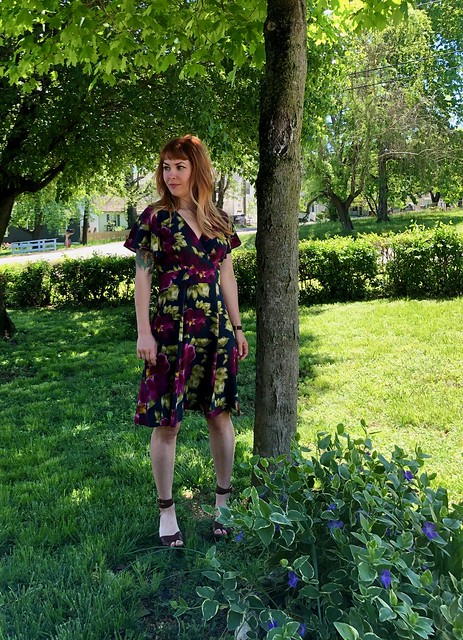
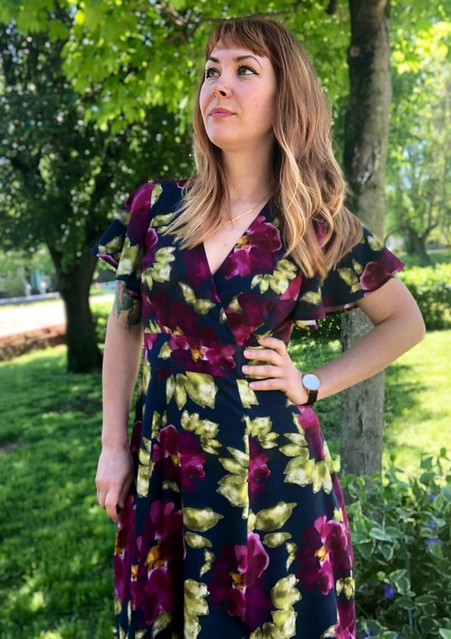
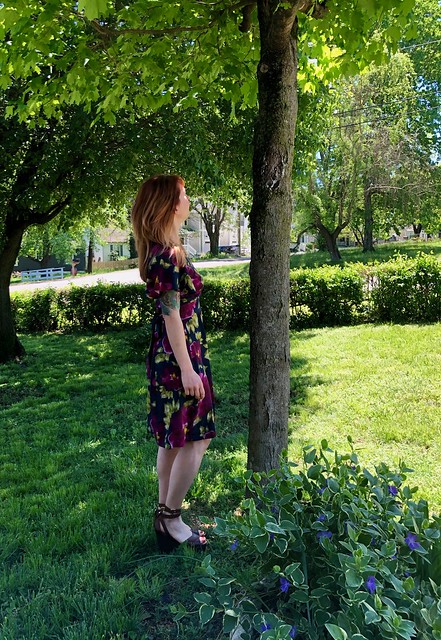
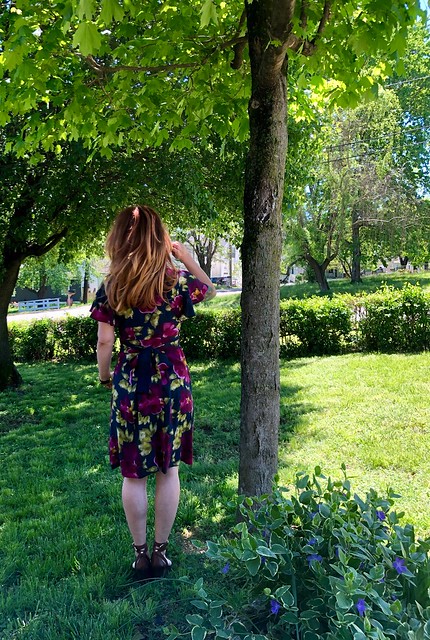
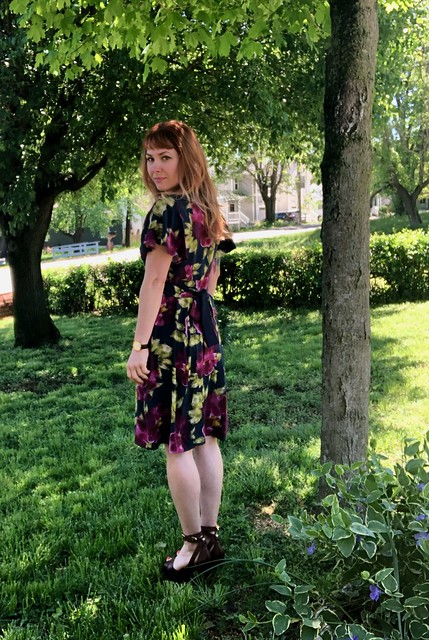
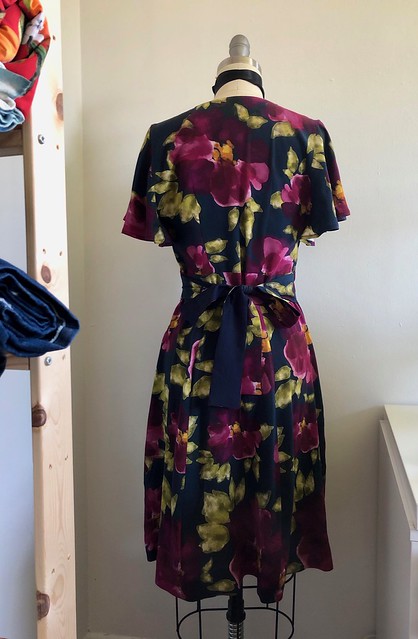
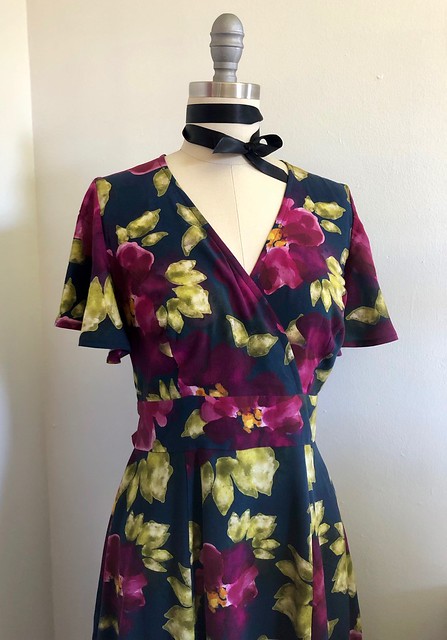
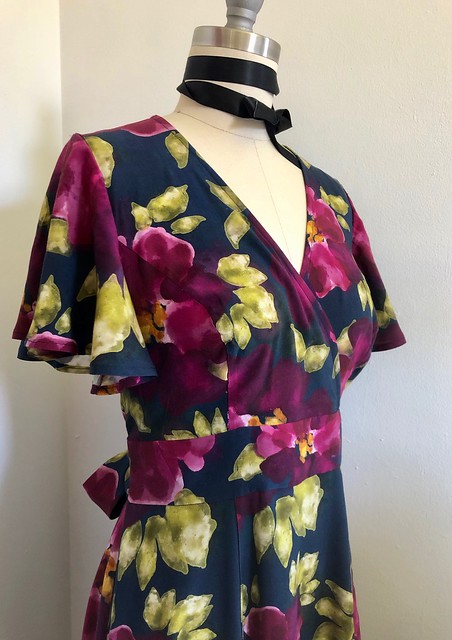
Rayon Crepe Magnolia dress

This is the Magnolia dress from Deer & Doe, this time in View A with the plunging neckline, long sleeves, and a very mini length (ok, so that’s not view A exactly, but let me live). I’ve made this dress before and wore it a few times this last year, and I was interested to try it again with some modifications.

Rayon Crepe Magnolia dress

Rayon Crepe Magnolia dress

My original Magnolia dress skews quite a bit more romantic than how I normally dress (and while I’m not quite ready to let it go yet, I will admit that it doesn’t get a whole lot of wear), but I loved the pattern and I wanted to try it with a more modern twist. One thing I have noticed with my OG dress is the bust is just a bit more generous than my actual body. As I mentioned, I sewed a different view, sized down to a 34 at the bust (keeping the 38 at the waist / hip) and made a quick muslin to assess the fit. Here are the changes I made:
– Took an additional 1/4″ out of the CB along the fold for my narrow back
– Removed a 1/2″ wedge from the front neckline because it was gaping (same as this method, except obviously on the front. Also, oh my god I miss that dresssss)
– Reduced the upper bust by about 1/4″ by shaving it off the princess seams to the bust point (I wanted to wear this dress without a bra and my breasts tend to be a little more bottom-heavy)
– Removed an additional 1/4″ off the side seam

Sounds like a lot, but it was just tiny tweaks! I wanted the dress to be fitted, but still skim over my body (rather than just be tight). Shortening the neckline to bring in the gaping was definitely the biggest thing; I knew I wasn’t going to wear a bra with this dress and I wanted to be CONFIDENT that there was no danger of accidental nip-slips. I’m not going to go into detail the weird gymnastics I performed in my studio to really test this theory, but believe me… the ladies aren’t going anywhere.

Rayon Crepe Magnolia dress

I bought my rayon crepe from Stone Mountain & Daughter Fabrics, back in March last year. I loved the autumnal colors and that beautiful drape! I took home 3 yards, and used nearly every last inch of it, despite this dress being a mini. Those sleeves took up a lot of fabric!

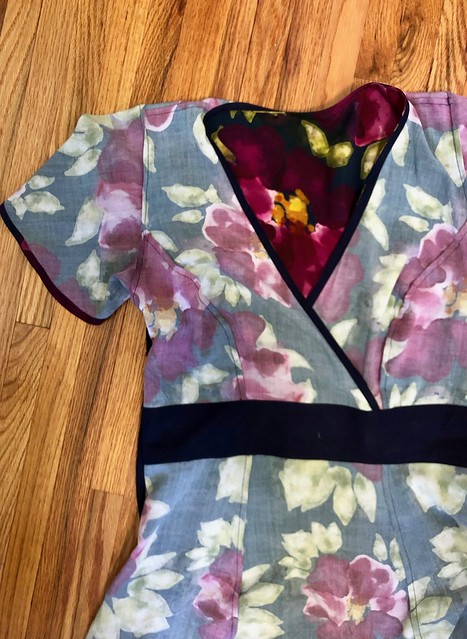
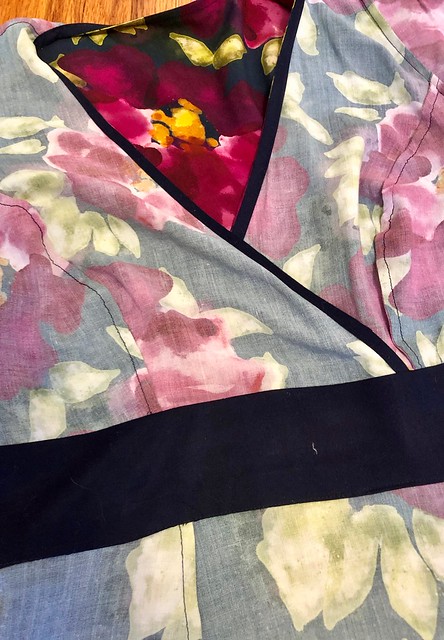
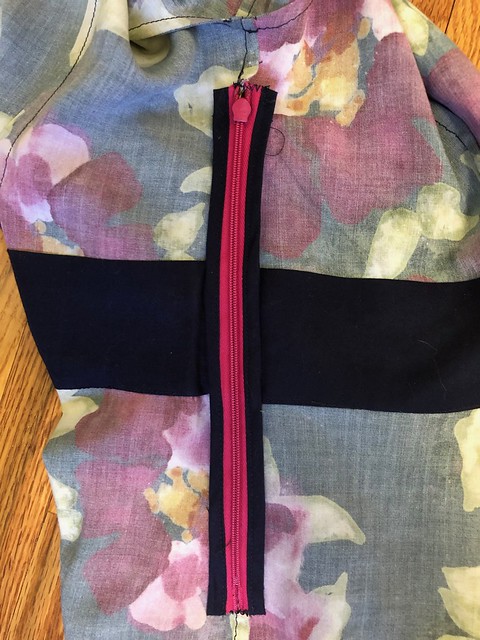
Construction-wise, I didn’t make too many changes to the dress beyond what the instructions call for. I did opt to self-line the entire top – the instructions just have you self-line the bodice, which I think is fine but why not the back? By doing this, I was able to eliminate all the bias facings, and have a completely clean finish. I also self-faced the waistband pieces, again, for a clean finish but this time on the inside. This is just personal preference; I don’t like exposed waistband seams in dresses and for the most part, I always face them. I don’t have any photos of this, so you’ll need to use your imagination.

Rayon Crepe Magnolia dress

To keep that neckline intact and immune to stretching out, I used strips of twill tape to stabilize the edges (here is a similar method to what I used). One thing I irrationally hate in clothing is weird gapey necklines that don’t stay close to the body, so I will do whatever it takes to keep that shit in check. Especially with a low-cut top like this, and again, especially since I ain’t wearing a bra with it! Anyway, the twill tape means that edge is nice and stable.

Rayon Crepe Magnolia dress

Unfortunately, I do think I was a little overzealous with my neckline tweaking – I shortened the twill tape too much, because now the center front of the waistband rides up. It’s noticeable for sure, but it also looks intentional so we’ll just say that was the case.

Rayon Crepe Magnolia dress

Rayon Crepe Magnolia dress

Rayon Crepe Magnolia dress

Surprisingly, the sleeves were the correct length for me without any adjustments (I think having a gathered elastic edge makes things a bit more forgiving). And I believe I did shorten the skirt length further, but I couldn’t tell you by how much (sorry). It is pretty short, though I love it! I feel so sassy and groovy and a little floaty when I wear this dress.

Rayon Crepe Magnolia dress

Anyway, that’s all for this make! Short and sweet (both the dress and the blog post lol). I’d love to make this again in a solid color in the future, but for now, I love the fun print!

Completed: Deer + Doe Myosotis Dress

26 Aug

Welp, I see that it has been 3 months since my last post haha! Honestly not trying to kill my own blog but it looks like I’m causing a slow death regardless.

ANYWAY

I have a new project! Yay! This is also 1/2 of my Outfit Along project – the sewing portion. The knitting portion is, unfortunately, still unfinished. More on that in a minute, I want to talk about the dress!

Coral Rayon Lawn Myosotis Dress

I actually started this dress back in 2018 – I was inspired by Fiona’s gorgeous white version and immediately wanted to make one for myself. I ordered the Myosotis Dress from Deer & Doe, and a lovely white rayon lawn from Mood Fabrics to make it up. I got as far as cutting the fabric pieces and then… just kind of gave up. I’m not sure what exactly caused the flame to burn out – but I stuck it in a drawer and left it alone for the winter. I definitely still had every intention to sew it – it survived a pre-move purge and was shuttled from one house to the next – but not really any current desire. I think I realized that the style + color weren’t really something I wanted to wear (looking at Fiona’s post again, I still think the dress is great but I also don’t know WHAT I was thinking when i decided to make it for myself as it is absolutely, definitely not something I would necessarily wear myself), but since I had already committed and cut the fabric I felt the best solution was to sew it up and at least then I could donate the dress to someone if I still didn’t like it.

So, that’s a long, boring-ass story about how the dress started. This year, when Andi and I planned the OAL, I immediately knew the Myosotis was going to be my sewing WIP. I got the pieces out, and had everything sewn up with a couple of days.

Coral Rayon Lawn Myosotis Dress

Coral Rayon Lawn Myosotis Dress

Now, the first rendition of the dress post-sewing looks completely different than the final version. I had a feeling that I was going to want to change the color, but I wanted to give the white version a fair fighting chance before I made that decision. As far as sewing – this was a simple, efficient make. I cut a size 36, with no pattern adjustments. I made version A, with aaaaall the ruffles, and added slim waist ties to pull in the waist a little bit (I can’t take credit for this inspiration, again, this was something I saw + liked on Fiona’s dress!). I sewed all the seams with a fine 70/10 needle and serged the seam allowances. Even though I was fairly certain I was going to dye the dress, I still chose to use white thread since I wasn’t sure what the final color would be. Since the thread is polyester, that meant it would not take the dye – meaning the topstitching would end up contrasting. I was aware of this going into the sewing, and just made sure to be extra careful that my topstitching was even and nice-looking.

One of the biggest complaints I read about this pattern is that people seem to really hate all the gathering. Y’all, I don’t know what kind of lazy sewers are out there but honestly it’s really not that bad and goes together really fast.

Coral Rayon Lawn Myosotis Dress

Coral Rayon Lawn Myosotis Dress

Once I finished the dress, I tried it on to confirm that the style was not going to work for me. Again, it’s a beautiful and romantic look – which isn’t how I like to dress. Furthermore, the fine, lightweight fabric was essentially see-through (as clearly seen on my dressform). I’m no stranger to dressing like an absolute hussy in the summer, but even this was a bit outside of my comfort level (and before you get at me with crazy suggestions like “adding a lining” or “wearing a slip,” let me remind you that summer here is very hot and I try to get away with wearing as few layers as possible, ha!).

Rayon Lawn Myosotis Dress

Rayon Lawn Myosotis Dress

Rayon Lawn Myosotis Dress

I knew I’d never wear the dress as it was, so I decided to experiment with dyeing it using coral Rit dye! I followed the instructions for doing this in the washing machine, using about 3/4 of the bottle and allowing it to agitate for about 50 minutes. The resulting color is VERY saturated – much more me! – and also takes the edge off the sheerness so that I can wear this dress without looking like I’m trying to win a wet t-shirt(dress?) contest. I should also report that I was dismayed to discover the dye turned my washing machine pink, despite running a couple of loads with bleach + old towels afterward (as instructed by the bottle). I own my washing machine, so it’s not a huge deal, but it was kinda lame regardless. That all being said, after a couple months of regular laundry, the washing machine is no longer pink whatsoever (I should also did – and did not transfer any dye to my other clothes). So it does eventually come out! Now, the dress itself – I have to wash it by itself as the dye still bleeds. I wash it in the sink using Soak rinseless wash (if you don’t already own this, do yourself a favor and invest. It’s marketed toward knitters but I use it for all my hand-washing, including lingerie, and it RULES) to prevent it from dyeing an entire load of laundry. My kitchen sink is stainless steel so I have not noticed any dye transfer by using this method.

Coral Rayon Lawn Myosotis Dress

Here is the dress after dyeing! It was almost good but I tried it on one last time and decided the sleeve ruffles had to go.

I cut them off, plus a few more inches so the sleeves would be cap-length. These were turned under and hemmed – using white thread, to match the rest of the topstitching.

Coral Rayon Lawn Myosotis Dress

Coral Rayon Lawn Myosotis Dress

The finished dress is definitely much more my style! The saturated coral color is one of my favorites for summer, and loose, swishy shape is perfect for the extreme heat we are experiencing lately. I’m actually surprised at how much I enjoy wearing this dress – it’s still a slight departure from my usual style, but it is a fun little way to change things up.

Coral Rayon Lawn Myosotis Dress

So that’s my finished sewn garment for the OAL – what about my knitted garment? Well. I had an Improv sweater waiting in WIP purgatory that I had all intentions of finishing for this OAL. I had started it about 3-4 years ago (back when I lived in an apartment in West Nashville)(ooh and here I am back in West Nashville IN MY OWN HOUSE look at how things go full circle yay), got about halfway down the body and decided I didn’t like how loose the fit was. Rather than unknit, I just left it in my knitting basket. Upon rediscovering for the OAL, I tried it on again and was fine with the sizing so decided to finish that.

Unfortunately, since this sweater has been out of my queue for so long, I seem to have lost all the notes I made with the math for sizing. I was able to finish the body, but the sleeves are a little slower going as I had to work out the equations for decreasing, and also try the sweater on frequently to make sure things aren’t going haywire. It is working out fine and I will certainly finish it – it’s just slow-going. At this point, the sweater is too bulky to comfortably carry around outside the house (and again, there’s that whole issue of trying it on as I’m knitting), which means it doesn’t go with me when I travel – which is frequently! AND, in the meantime, another WIP that I started right before the OAL had a major error that required a lot of unknitting so I’ve been focusing on that. So, I didn’t finish my knitted sweater – but I plan to in time for sweater season! Which to me encompasses the general spirit of the OAL that I was aiming for!

I think that’s all for this make! Lord, I don’t know how I manage to take a simple dress and turn it into a giant blog post of verbal diarrhea. If you’re wondering, I’m like this IRL too when people try to talk to me. What can I say, I’m from the South haha. Mindless chatter is our love language.

Coral Rayon Lawn Myosotis Dress

** Note: The fabrics + RIT dye used in this post were provided to me by Mood Fabrics, in exchange for my participation in the Mood Sewciety Blog (oh yeah, MSN moved!). All opinions are my own!And extra big thanks to my friend Jennifer for being a real pal and taking these photos for me when I was in Brooklyn last month for recent Jeans Making Intensive class at Workroom Social! Which, btw – 2020 for WS dates are listed! Yay! More dates to come as a I finalize them!

Completed: Denim Centaurée Dress

25 Oct

Good morning, everyone! I am writing this from my local airport lounge, waiting for my flight this morning to San Francisco! Figured I’d take advantage of the downtime (and free WiFi!) and see if I could throw together a little post! I feel like a big part of the reason why I stopped posting as much was because there is so much EFFORT that goes into it – I have this weird need for them to be long and therefore “worth it,” (and a long post takes a really long time to write!) but really, short posts are better than no posts… right? I don’t want to let my blog die!

Another reason why I post less is because I really seem to have hit a hard rut with photos. I just really hate taking them, I feel like they always look shitty and I honestly don’t know how to improve them (one would think that standing in the same spot where I take my dressform photos would work, but nope, sadly not the case). I snapped these very quickly using the self-timer on my phone, right before I took a walk down the block to my local cookie shop (oh yeah). The lighting isn’t great and I have my shades on, but… whatever. It’ll do!

Deer & Doe Centaurée dress made with denim from Mood Fabrics

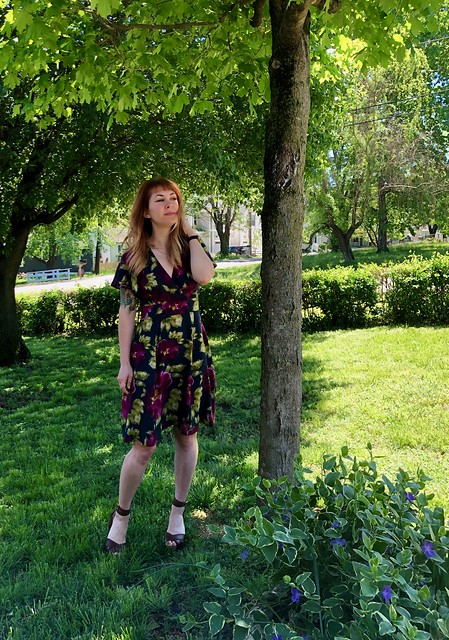
Anyway – the dress! I made this little denim sundress a few months ago, one last dress hurrah for summer. The pattern is the Deer & Doe Centaurée dress, which I loved when was first released – it’s a great little basic sundress with some fun details that make it a little more interesting. The bodice shaping is created with interesting seamlines that form a star (y’all know how I feel about a good star), and the edges are finished with a self bias binding that turns into double straps (a super cute detail IMHO but definitely requires no bra or a strapless bra to get the full effect – fwiw, I am bra-less in these photos). The skirt is a simple gathered skirt – no pockets, but I was able to easily add some simple patch pockets.

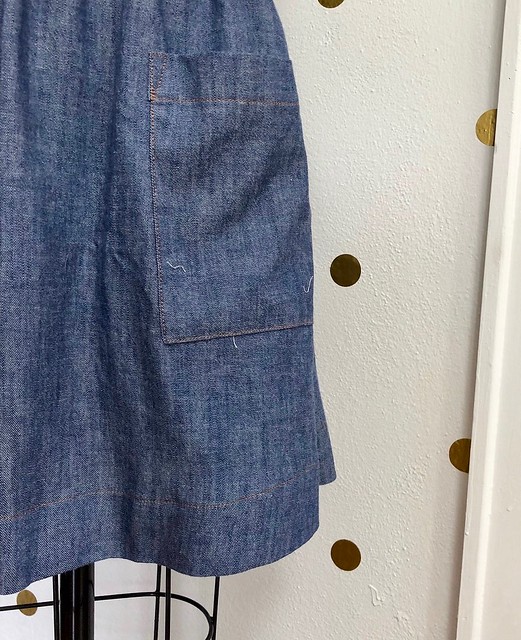
I cut a size 36 at the bust, grading out to a 38 at the waist and hip. No other alterations were necessary, which is good because I totally threw caution to the wind and make this up without first sewing a muslin o_O haha! Like I mentioned, I did add patch pockets – simple squares (I think I took the pattern piece off my Ariana Dress but they can easily be drafted if you don’t have a pattern to steal from), to bring a little more interest down to an otherwise plain skirt and to also incorporate more topstitching. Everything else about this dress is exactly as the pattern intended!

Deer & Doe Centaurée dress made with denim from Mood Fabrics

My fabric is a lightweight denim from Mood Fabrics. I found this in the store while I was in NYC – I was actually looking for bottomweight to make a pair of jeans with, but this was too good to pass up. It’s a fine, lightweight Japanese denim that is very narrow (like less than 45″). This denim on the Mood Fabrics website appears to be very similar, although it’s a little wider. I originally purchased this with the intention of making a shirtdress – I specifically had a Colette Hawthorn dress in mind, to replace my beloved denim Hawthorn that no longer fits – but decided to try something a little different than my norm SINCE I MAKE SO MANY DAMN SHIRTS.

Deer & Doe Centaurée dress made with denim from Mood Fabrics

Deer & Doe Centaurée dress made with denim from Mood Fabrics

Sewing this fabric was super easy, as most denims are! I used two sewing machines to construct this – one threaded with regular polyester thread, and the second threaded with topstitching thread (you can totally do this one with machine if you don’t mind re-threading over and over!). I chose to highlight all those interesting seamlines with gold topstitching thread, which makes it look more like a pair of jeans, just reincarnated as a dress. All seams are finished with my serger (the multitude of intersecting seamlines on the bodice + the gathered skirt would have made it difficult to flat fell, plus, I wanted the option to be able to let out or take in areas since, again, I did not make a mock-up), and I used self-binding to finish the edges of the bodice as instructed by the pattern.

Deer & Doe Centaurée dress made with denim from Mood Fabrics

Deer & Doe Centaurée dress made with denim from Mood Fabrics

Deer & Doe Centaurée dress made with denim from Mood Fabrics

Deer & Doe Centaurée dress made with denim from Mood Fabrics

The dress closes with an invisible zipper on the side seam. Here’s a fun fact – the only zipper I had in my stash was off-white, and I didn’t feel like going to the shop to grab another one in the right color (another fun fact – I live 3 blocks from one fabric store, and less than a mile from a much bigger one so I absolutely have no valid excuse, #teamlazy)… so there is a off-white invisible zipper in this dress. You’d never guess it unless you see the zipper pull, which is located under my armpit, and I take a lot of pride in this. Not to toot my own horn, but hell yea my invisible zipper game is strong. You can’t even see that shit.

Deer & Doe Centaurée dress made with denim from Mood Fabrics

Deer & Doe Centaurée dress made with denim from Mood Fabrics

The skirt is finished with a wide hem – I wanted mine shorter than the pattern is drafted for, and I like the way the wide hem looks with the topstitching + pockets. Plus, it will be easy to let the hem out if I decide I want a longer skirt in the future (whether or not that will actually ever happen is up for debate, but at least I have options now!).

As a side note, the patch pockets on this dress are perfectly sized to hold a Christie Cookie… speaking from experience here. And! After I finished taking this photos and took my walk, I ran into the sweetest little cat:

neighborhood cat

That’s all for this make! Admittedly, we are a little late in the season now for a sundress (Tennessee appears to have completely skipped fall and jumped straight into early winter… wah!), but if I was a cooler person I could totally rock this with a white t-shirt underneath. Alas, my inner Cher Horowitz definitely won’t be making an appearance, but I do think this dress would look cool with a cropped sweater over it (like my Chuck!). So, sundress or not, this can definitely be a transitional garment!

Deer & Doe Centaurée dress made with denim from Mood Fabrics

Anyway, I’m out! Berkeley, I will see you soon! For those of y’all in the area – Stone Mountain & Daughter Fabrics is hosting a meet-up tonight at 5:30PM. Full details are on my IG 🙂

** Note: The fabrics used in this post were provided to me by Mood Fabrics, in exchange for my participation in the Mood Sewing Network. All opinions, as always, are my own!

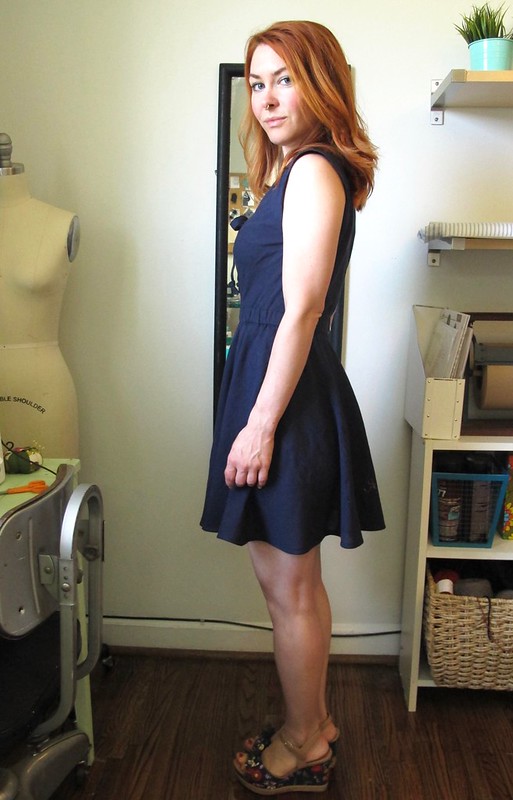
Completed: Deer & Doe Réglisse Dress

23 May

I feel like it’s been a long time since I’ve made a pretty dress. To be fair, it’s also been a long time since I’ve felt like wearing a pretty dress – something about the cold and winter just makes me want to dress in head-to-toe black, and only wear pants (very, very stretchy pants, I should add). Once the sun starts heating up our side of the world, though, I’m ready for pretty dresses, bright colors, and fun shoes!

Deer & Doe Réglisse dress

I was anticipating this a few months ago while still stuck in a winter spiral, so I planned for this one early. I knew I wanted to make the Deer & Doe Réglisse dress – it’s a pretty design, without being toooo frou-frou (I admire everyone who can stick to that look, but my style has really evolved to that point where that is totally not me anymore).

The original plan was to make this out of a traditional white/blue striped cotton seersucker, which I bought several yards at Metro Textile while I was in NYC. Unfortunately, my fabric – ok, actually the entire load of laundry – was victim to a laundry mishap, and now I have a bunch of indigo-dyed stuffed that was not supposed to be indigo dyed (and as of now, indigo dying and myself are NOT FRIENDS and don’t try to get us to kiss and make up, it won’t happen). I can probably salvage some of that yardage by cutting around the spots – or even re-dye the whole thing – but I was feeling a little over that particular piece of fabric so I decided to make the pattern out of something else entirely.

Deer & Doe Réglisse dress

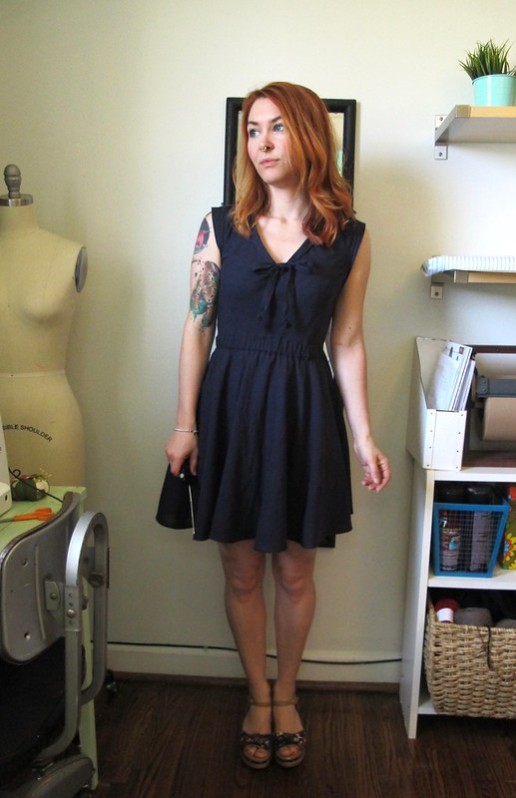
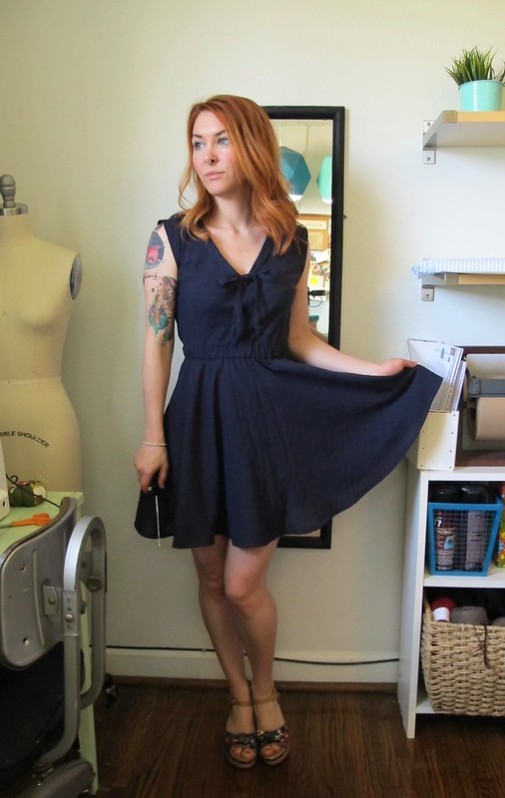
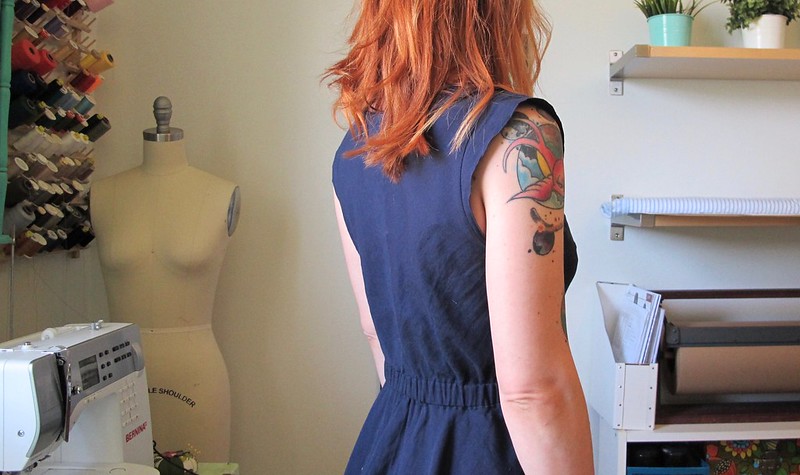
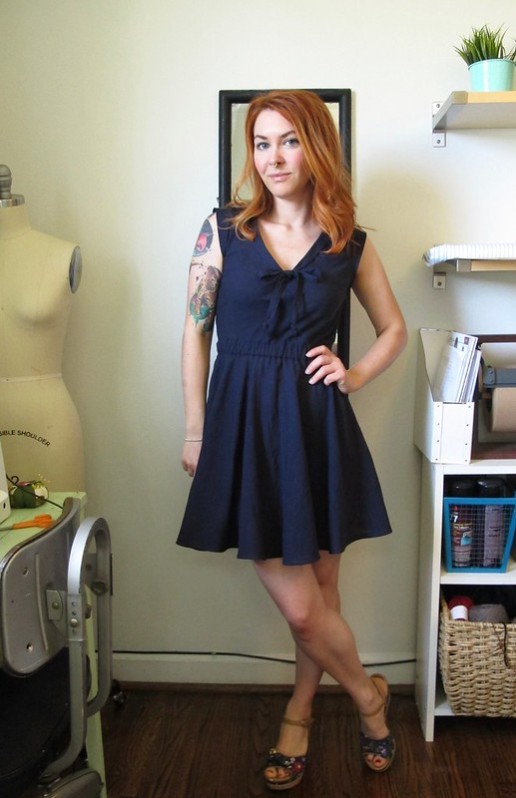
Anyway, it ended up working out in the best way possible because I am super happy with the end result! The Réglisse can run the risk of looking very juvenile if you’re not too careful – which, again, isn’t a bad thing, but it’s definitely not my style these days. Using a solid fabric really toned down the sweetness of the design, and also makes the dress a little more versatile. I’m trying to make myself be better about repeating outfits, and it’s easier to repeat an outfit when you know it’s not an entire statement piece on it’s own, you know? This solid navy is a great neutral for me, and goes with pretty much all of the rest of my wardrobe. Including all my shoes 🙂

Deer & Doe Réglisse dress

Deer & Doe Réglisse dress

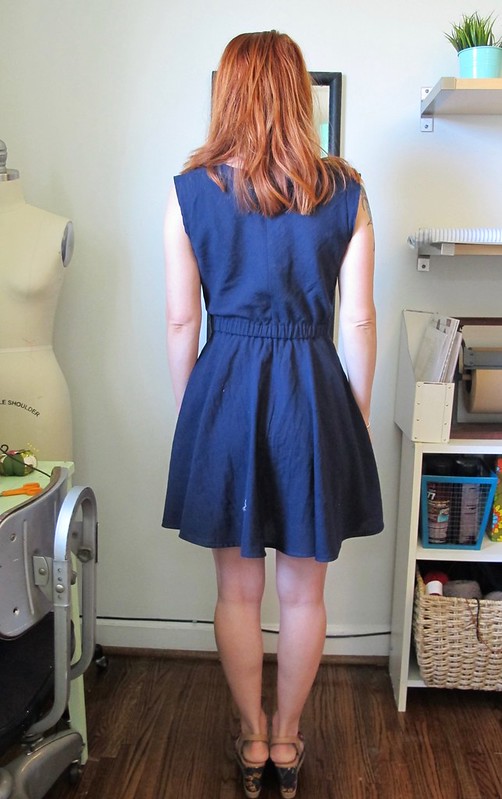
The fabric I used for this dress is just a simple lightweight woven cotton, but it’s quite special to me because I bought it when I went to Egypt! It’s very soft and a little translucent, so I knew it would be really lovely to wear in the heat. Again, the deep navy color is a color that I wear a LOT, so it goes with most of my wardrobe. I only bought 2 yards, so I had to be a little creative with my cutting layouts – like, the undercollar is pieced, instead of cut in one piece – but I was able to eek it out!

I sewed this dress over the course of a few days. It was a nice, relaxing sew, which I really enjoyed. I cut a size 34, which is a little bit smaller than my measurements. I decided to do this because some of versions of this dress I googled seemed to run a little large, and I didn’t want it to be too blouse-y on me. As it stands, I think the arm holes are a little too deep – any lower and they would definitely show my bra – but the overall fit is good, and I am happy with it. I chose the elastic length by putting it around my waist to determine what was comfortable. My experience with using elastic is that I tend to pull it too tight, and it ends up being so uncomfortable that I never wear the dress (which means that, right now, I am in the middle of Operation Remove All Elastic And Replace With Longer in my wardrobe). So I left this one a little loose, which ended up being sooo much more comfortable.

All the seams are finished with my serger – I used 3 threads instead of my usual 4, since it’s a little narrower and worked better with the delicate fabric – I serged them individually and pressed the seams open as instructed. The bodice and skirt are cut on the bias, so I made sure to really stabilize the neckline with staystitching before handling it, to prevent it from stretching. The skirt needed to hang on my dressform for about 48 hours before I could hem it, and it was super uneven after all the bias settled and dropped. I did make a couple of changes to the construction – added some topstitching where it wasn’t required (mostly because I thought it looked better that way) and I sewed the elastic waistband casing so that there are no raw edges. I don’t have any pictures of the inner construction, so, sorry, you’ll have to trust me on that one haha.

Deer & Doe Réglisse dress

Deer & Doe Réglisse dress

Deer & Doe Réglisse dress

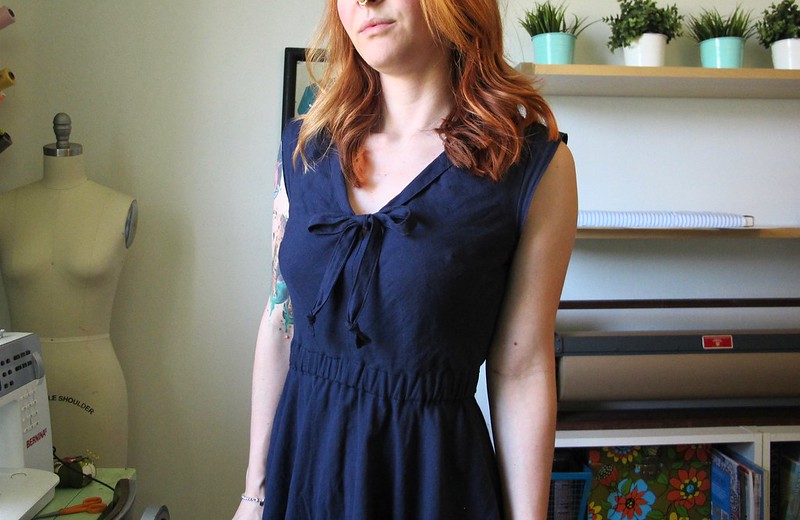
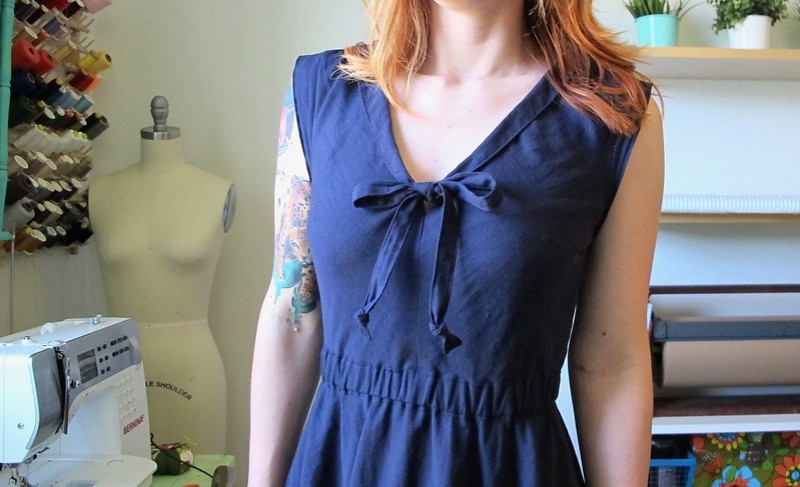
I was a little afraid up until the very end that I wasn’t going to like this dress – the sweet little collar and bow were making me a bit nervous. But I am happy with how it turned out, and I think the solid dark color helps with that! I experimented with tying the neck ties so that it’s more like a necktie, but I actually like it as a bow. I knotted the ends because, I dunno, I like the way it looks haha.

I see that Deer & Doe have updated their pattern to include an option without the bow – which I may try in the future. I’ll have to draft it myself, though, since I have one of the older paper copies, before the rebranding.

Deer & Doe Réglisse dress

I think that’s all for this dress! BTW, as a side note – I have some more workshops coming up! And don’t forget about the OAL, which is kicking off very soon! 😀

Garment Sewing Weekend July 14-16, 2017
Three Little Birds Sewing Co., Hyattsville, MD
Come spend a weekend working through a sewing project of your choosing with meeee as your guide! For 2 glorious days, work on the project of your choice in the Three Little Birds Sewing Co. space. The beauty of this workshop is that each students get to choose their own project. Do you need help with fitting? With construction? Interested in bra making? Perhaps you’ve had your eye on a garment you don’t feel comfortable tackling on your own.  I will guide you through all of these and more!

Jeans Making Sewing Intensive August 11-12, 2017
Workroom Social, Brooklyn, NY
Let me show you how fun and fulfilling it is to make your own jeans! In this class, we will work out way through the Ginger Jeans pattern (my personal favorite!), learning the basics of fitting and construction for making your own jeans. We will also go over all the fun extras that separate jeans from mere pants – topstitching, fancy seam finishes, and installing hardware. Yay!

What are your sewing plans for this summer?

Completed: The Mélilot shirt

5 Dec

Hey guys, New Favorite Outfit alert!

Mélilot shirt - front

This is the Mélilot shirt from Deer & Doe Patterns. I vaguely remember when this pattern came out – although I didn’t give it more than a second glance (the main version you see on their website is long sleeved, with dropped shoulders and a peter pant collar. It’s very nice, but it’s not really my style). Once I started googling around for the short sleeved version, though – I decided it was super cute and that I wanted to make it in a lovely drapey silk.

(It feels so redundant to talk about silk… I should just dub my 30s “The Silk Decade” because I feel like it’s ALL I sew now haha)

Mélilot shirt - front

Mélilot shirt - side

Mélilot shirt- back

Mélilot shirt- back

I sewed Version B, with the short sleeves, and used the hidden placket from Version A. My shirt is a size 34 (which is what I usually sew from this company) with no alterations to size or length. The instructions were reasonably easy to follow, although the hidden placket info was a bit sparse and took some head scratching before I really figured it out (and don’t ask me for a tutorial, bc I don’t remember exactly what I did haha)

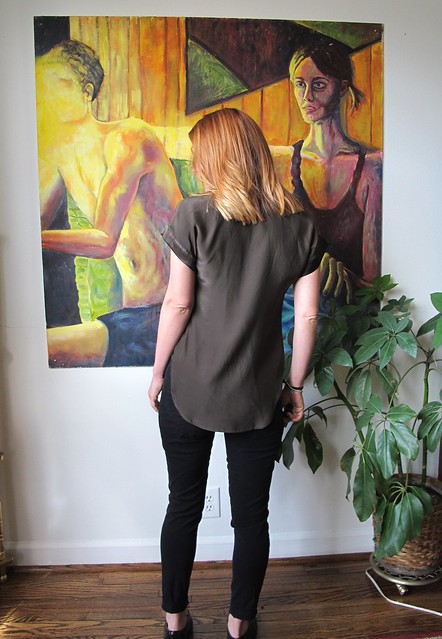
My fabric is an olive green / brown (depending on the light you are in, ha) silk charmeuse with the slightest amount of stretch, from Mood Fabrics. I bought this at the store while I was in NYC in November, with the intention on making this pattern with it. I used the matte side for the body, and the shiny side for the collar stand, pockets, and sleeve bands. It’s a very subtle contrast, but I love the way it looks. I use a Spray Stabilizer on my fabric, which made it easier to cut and eventually sew. One thing I have learned with fabrics like this is to leave the pockets off until the garment is completed. I don’t know what it is – but every time I put the pockets on, the end up super crooked and I have to unpick them and re-sew. Maybe it’s how the garment hangs off my body, maybe I’m just an idiot WHO KNOWS. But I had the same crooked pocket problem with this top (I took a photo, but you couldn’t really tell… but trust me, it was bad in person. Even my mother, who thinks I’m the great sewer ever, laughed when she saw it), so next time I’m just going to wait till the end. No sense in doing things twice!

I will admit that the color of this shirt is kind of ugly… but it definitely works really well with my coloring. How awesome that the doo-doo colors suit me best. Ha.

Mélilot shirt - front

Mélilot shirt- back

Mélilot shirt - front

I just love the fluid drape of this fabric, and the way the little sleeve bands stick up. I am not normally a fan of these deep curved hems, but I think it works well with the style of the shirt. Same with the pockets – this shirt definitely needs the pockets, or else it looks really unbalanced in a bad way. I am thinking this will be a good shirt to take with me to Egypt – it covers my shoulders and butt, and I can button it up pretty high for modesty.

Mélilot shirt - on dressform

Mélilot shirt - on dressform

Mélilot shirt - sleeve detail

Mélilot shirt - hidden placket detail

Mélilot shirt- hidden placket detail

The pattern calls for lined pockets, which makes it easier to get identical, crisp curves on both pockets. For buttons, I actually used the wrong side of a bunch of those shell/mother of pearl buttons that I found in my stash. The back side is a little matted and kind of a taupe color, which went really well with the fabric. Due to the covered placket, you only see a couple of buttons anyway. Oh, and as always – the inside seams (you know, all 2 of them haha) are French seams. FYI, watch those seam allowances if you make this pattern and omit the French seams – because I’m pretty sure the side seams are only 1/2″. The pattern instructs you to sew French seams for these seams, with two passes at 1/4″, which doesn’t add up the standard 5/8″ seam allowance on the rest of the pieces. Just a thought! Also, I always trim down my first pass to like 1/8″ before sewing the second pass, as it ensures that the seam allowance it caught in that stitching. Ain’t nobody got time for hairy seams amirite.

Mélilot shirt - front

That’s all! A pretty simple shirt, but the silk makes it feel super fancy. I am wearing it with my Cecila Pants from Elizabeth Suzann. Y’all, these are magic pants. The denim is suuuuuper stretchy and comfy, and has a fantastic recovery – I can wear these several times before they need a wash to shrink back up. And while I didn’t personally make these pants – I can tell you exactly who did. Her name is Colette 😉

Completed: The Bruyère Top

29 Dec

Now that’s one plaid flannel top that definitely doesn’t look like something a man would wear, amirite.

Deer & Doe Bruyere

This is the Bruyère top from Deer & Doe. I’ve actually had this pattern for quite a while – I bought it immediately after it’s release. I LOVE the cute and feminine twist it gives to a plain button down, and I knew it’d be beautiful in a plaid flannel. I’ve been sitting on it for this long because I haven’t been able to find the right plaid flannel – either the plaid was unbalanced (get out of my nightmare), or the colors were ugly, or the flannel was shitty. Or maybe a combination of the three. Either way, no Bruyère for me 😦

Deer & Doe Bruyere

This plaid flannel actually came from the same place that the pattern did – aaaaaall the way from Paris, France! Yup! It was the first piece of fabric I bought during my shopping spree, from Les étoffes du Sentier. The shop had a 3 meter minimum, but it was only 5€ a meter and I figured 3 is a safe number for a button up, so I went with it. It’s a nice soft cotton plaid flannel and I like how the colors are so un-girly, especially with this pattern. And, bonus – even after plaid-matching, I have leftovers to make something else with! Yes!

Deer & Doe Bruyere

First, though, check out those matched side seams! Ahhh yeah!!

Deer & Doe Bruyere

And the other side!

Deer & Doe Bruyere

And the back!

Deer & Doe Bruyere

Hi!

Deer & Doe Bruyere

Seriously, though, I’m pretty happy with how this turned out (if you couldn’t tell 😛 ). I cut the size 34, and the only fitting change I made was to remove a little bit of length from the peplum and sleeves, because I am so short. Other than that, it fits pretty well! I’m surprised at much much I like the collar – I was afraid it would look flat and dumb, but the flannel gives it some lovely body.

For cutting the plaid, I cut on the single layer and cut the waistbands, cuffs, placket and back yoke on the bias. Since the bias tends to stretch, I also cut my second yoke on the straight grain, as well as a second set of waistbands. Further, I interfaced my waistbands (to be really sure they don’t stretch out), as well as the cuffs, collar, and placket. I’m not sure why these aren’t included in the instructions, but my guess is to keep the overall look of the shirt very soft and unstructured. Which is fine, but, I do think anything that has a button will need a little extra help from interfacing. I’d definitely make some test button holes before you commit, at any rate!

Deer & Doe Bruyere

I spent a really long time trying to decide how to order the construction steps for this. The instructions are fine as they are – the process for attaching the placket/collar/facing is very clever (and clean!) and it works. However, I’m a diehard who wanted flat felled seams. In addition – I wasn’t 100% on the fit of the side seams, and I wanted to sew that last so I could tweak it after attaching the placket (when sewing flat felled shirt seams, once generally attaches the sleeves before sewing the side seams. Sewing a flat felled seam in the round just sounds like a painful thing I don’t want to do). Because of how the shirt is assembled per the instructions, you can’t really switch them out – you have to have the hem sewn to add the placket, but the side seams need to be sewn to add the hem. I know this sounds really vague and probably doesn’t make sense, but if you look at the instructions for this shirt vs ones for, say, the Negroni, it will. Anyway, this is what I ended up doing:
– I left the side seams open and sewed about 2″ of the shirt hem by the placket
– Followed the instructions for adding the collar, placket and facing
– Attached the sleeves with flat-felled seams
– Sewed the side seams with flat-felled seams
– Finished the remainder of the hem

That worked out great! My shirt is finished with flat-felled seams and it looks beaaaaaauuuutiful on the inside as well as the out 😀

Deer & Doe Bruyere

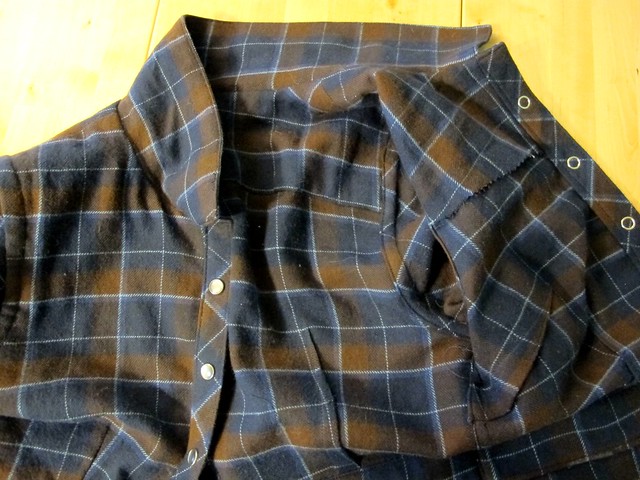
What else? Well, I added PEARL SNAPS. God, I love those things – nothing like being able to Hulk out of our clothes at the end of the day amirite. I feel like the very top needs a pearl snap (it’s not marked on the pattern), however, I couldn’t get the prongs through all the layers so no pearl snap there!

Deer & Doe Bruyere

Here’s the inside. I finished the edge of my facing with pinking shears – I think anything else would show a ridge on the right side. Of course, I probably should have first sewed a line of stitching before pinking, because it’s already fraying like crazy, but whatev.

Deer & Doe Bruyere

Deer & Doe Bruyere

I guess that’s it! Glad I finally got this finished – plaid flannel shirt of my dreamssss ♥

Deer & Doe Bruyere

Hope everyone had a Merry Christmas! Just a couple days left until the end of the year – aiee!

Completed: The Sureau Dress

8 Sep

You know what rules? When you have a brilliant strike of inspiration that comes together perfectly – from fabric, to pattern, to completed project.

Deer & Doe Sureau dress

AKA this dress.

Deer & Doe Sureau dress

I’ve been holding onto this silk cotton voile from Mood Fabrics since the beginning of this year (it’s sadly long gone from the site now, but they have lots of other options – including this gorgeousness. Ok, that doesn’t have silk, but it belongs in my fabric stash nonetheless). I had originally planned to make an Aubepine dress with it – but changed my mind at the last minute and ordered the Sureau instead, also from Deer & Doe (I still have the Aubepine & still plan to make it, but I’m thinking I would like it better in a dark/solid color, possibly even a lightweight knit. We’ll see!)

Deer & Doe Sureau dress

I LOVED sewing this dress! Too bad the pictures are kind of shitty. I promise it’s much prettier in real life – the voile is floaty, slightly sheer, and fucking ethereal. The colors are amazing and very fall-like, but the lightweight fabric keeps things from getting too sweaty.

Deer & Doe Sureau dress

You’ll notice that my version differs quite a bit from Deer & Doe’s – I had to make a few changes – both fitting and design – to get the look I wanted.

For fitting changes, I made a muslin and made the following adjustments:
– The front neckline was slightly gaping, so I removed a 3/8″ wedge (similar to this method)
– The upper back was a little loose, so I removed about 3/8″ from the center back, starting at the top and tapering to nothing at the bottom.
– Shortened the shoulders 1/2″
– Added 1/4″ to the side seams

Deer & Doe Sureau dress

I also made a couple of major design changes! The main one was that I lengthened the sleeves to be full length, and added a cuff and placket (stolen from Archer pattern). Unfortunately, I didn’t correctly measure the sleeve length – which seems to be a common mistake that I ALWAYS ALWAYS make, argh! – so they’re a tiny bit on the short side 😦 Bummer! Fortunately, the sleeve placket means I can roll them up, so there’s that.

The other ridiculously hilarious issue with the sleeves is that they are sewn on backwards – and I did that shit on purpose! Let me back up a little. When I altered the sleeve pattern to include the placket, I used my Grainline pattern as a guide. I didn’t think to make sure that I was tracing the placket to the correct side of the sleeve, so – you guessed it – the placket ended up on the front of the sleeve. Didn’t realize this until I’d already attached the cuffs and everything, derp (and didn’t have enough fabric to recut because, come on, that would make too much sense). I weighed out the options, and decided that a backwards sleeve cap was easier to forgive than a placket in the wrong place, so the back of the sleeve is now at the front, and vice versa. Fortunately, the sleeves are fairly loose & the cap is slightly gathered, so it’s not obvious that I inserted them incorrectly, and I still have plenty of room for movement. That being said, y’all all know my secret now. Don’t tell anyone.

Deer & Doe Sureau dress

The other design change was adding that cute little half collar! I used this tutorial to draft my little collar, and interfaced one layer of the fabric before sewing them together. I hemmed and hawwed over whether or not to include it – but ultimately, Landon & I both agreed that the dress looked weirdly unfinished without the collar at the neckline, at least with this particular fabric.

Deer & Doe Sureau dress

Because the fabric is so lightweight, I took extra care with the construction. All seams – including the waistline and sleeves – are sewn with a French seam, for a durable and elegant finish. The facings are finished with pinking – any other finishing would result in showing through the fabric. The instructions don’t have you interface any part of the dress, but I added interfacing to the facings, sleeve cuff, collar, and both front placket pieces (both the front and the placket facing). Again, the fabric is super lightweight, so it needed a little more support from the interfacing. Specifically, I used the Pro Sheer Elegance Couture fusible interfacing from Fashion Sewing Supply. I like that is gives a little needed support, but it doesn’t actually change the drape of the fabric. I had black on hand, which was perfect for my emerald fabric as white would have slightly shown through.

Also, ugh, guys, I know it’s REALLY short. Wasn’t planning on that! My fabric shortages meant that I couldn’t lengthen anything, and once I got the dress sewn up – I realized it would look way better with a deep 2″ hem. Which means the dress is now rill short (again, didn’t have enough fabric left to face the hem, which is how I would have normally solved that issue), but I plan on mostly wearing it with tights and/or boots sooo it’s not too bad.

Deer & Doe Sureau dress

Deer & Doe Sureau dress

Pretty much everything to do with this dress – other than my frantic last-minute pattern ordering – came out of my stash! Fabric, buttons, interfacing, even the thread – I love it when that happens!

Deer & Doe Sureau dress

Deer & Doe Sureau dress

There’s a cute little lapped zipper in the side of the dress 🙂

Deer & Doe Sureau dress

And that damn deep hem! Ha! I topstitched it because, I figured the rest of the dress has lots of topstitching, so it woudn’t look out of place 🙂

Deer & Doe Sureau dress

And that’s it! I like to wear the dress with a belt – I’m still not sold on how I look with gathered skirts (even slightly gathered, like this one), but I think the belt breaks things up nicely 🙂 I also wear it with the sleeves rolled up, because, again – they are too short (even if they look ok in the photos, trust me, once I start moving around, it’s evident that they are too short)(maybe someday I’ll have sleeves the right length. Sigh.). It’s pretty short, but not so short that I flash cheek when I bend over (as several people have been kind enough to observe and report on).

I’ll count this one as a success! 🙂 Next question – whyyy have I not been sewing Deer & Doe patterns? They are SO GOOD. I actually just ordered the Bruyere and am anxiously awaiting it’s arrival (as is apparently most of the sewing world :P). I have plaid flannel dreams for that bad boy. Man, I love sewing ♥