Tag Archives: organic cotton plus

Completed: Rise Turtleneck

26 Oct

Hello everyone, from the other side! I’m back from my weekend at Camp Workroom Social, which was incredible and full of wonderful friendships with hilarious and awe-inspiring women. I got to room with Devon, who I have missed terribly since she moved away to Atlanta, so it was great to see her again! I had such an amazing weekend, full of awesome memories and SO MANY BOOBS (this is what happens when you assist a bra making class, y’all). Get excited for Amy’s new pattern, btw. Based on what was sewed up in our class, it makes everyone’s boobs happy and beautiful and bouncy.
Anyway, as soon as I got home – I crashed real hard and got real sick. Bummer! I am just really thankful that this didn’t happen while I on either of my trips! I guess my body just needed a serious rest. At some point during my sick week (I’m a huge baby when I get sick, and tend to sleep for a couple days straight until it clears up, no shame), I did something weird to my neck and I guess pinched a nerve… I’ve had a migraine since Friday! Needless to say, I have not felt like doing ANYTHING and have been pretty mopey/miserable since then. I have an appointment with a chiropractor later today – I am literally counting down the hours at this point, it’s that bad – which will hopefully get me fixed up, or at least started down the right path!

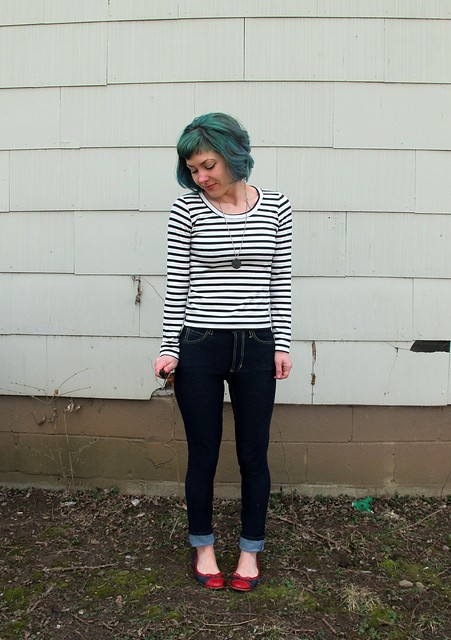
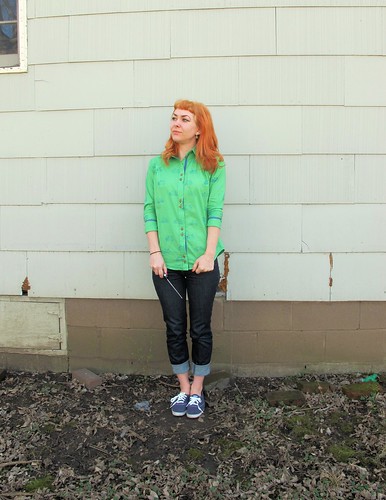
So I guess the theme for this post is comfy clothes. Because that’s about all I have been able to handle for the past week… super comfy clothes that double as secret pajamas.

( Also, I took these photos a couple weeks ago, so hold back on your comments of “oh you look nice even when you’re sick!” I wasn’t sick when I took these pictures 😛 haha )

Rise Turtleneck

Rise Turtleneck

It’s still not quite cold here in Nashville… we are in those wonderful in-between days where it’s chilly in the morning, very warm in the afternoon (the high today is 83*, yay!), and only a little chilly in the evening. I haven’t turned my air or heat in weeks… my last electric bill was $60 😛 But I know the cold weather is coming, and I’m trying to prep in advance by filling any major wardrobe holes. I know at least when I get cold, I want to be as comfy as possible, in secret pajamas. I won’t go as far as to leave my house in actual pajamas – it’s just not a thing I do, unless I’m super sick (and even then, I can usually muster up the energy to pull on a pair of ponte leggins and a sweatshirt so I’m not rolling up to the Kroger in my flannel pjs or some shit) – but I am all about wearing clothes that feel comfy like pjs while looking much more pulled-together from an outsider perspective. Stretch fabrics are the key here, y’all. I think we all already know that, but I just said it again anyway.

Rise Turtleneck

Rise Turtleneck

Rise Turtleneck

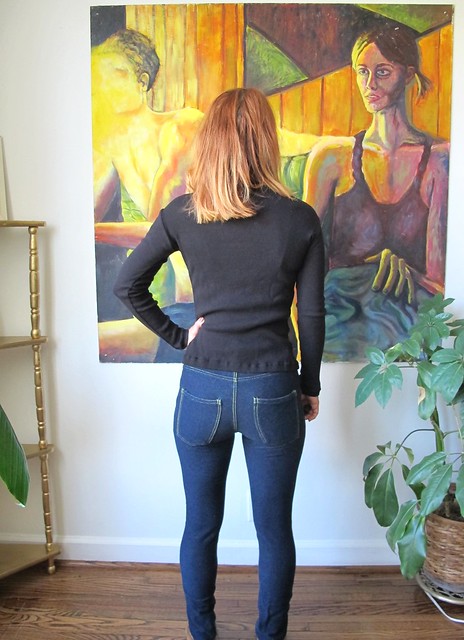
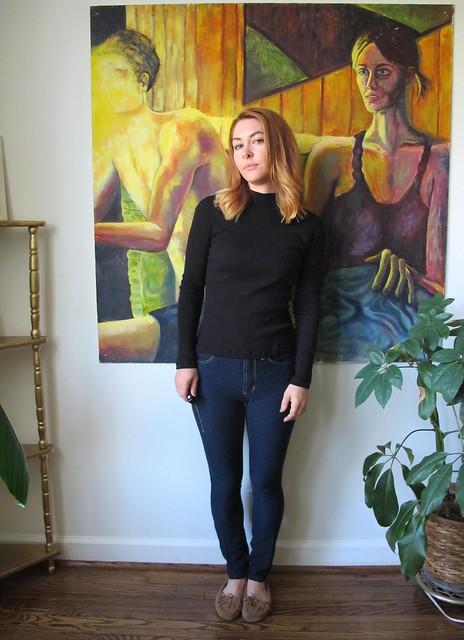
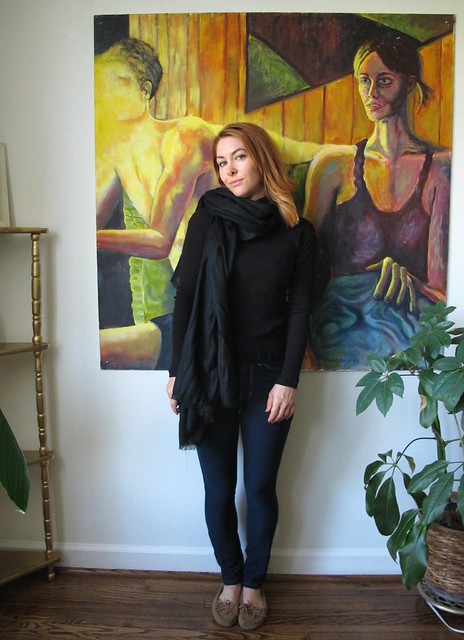
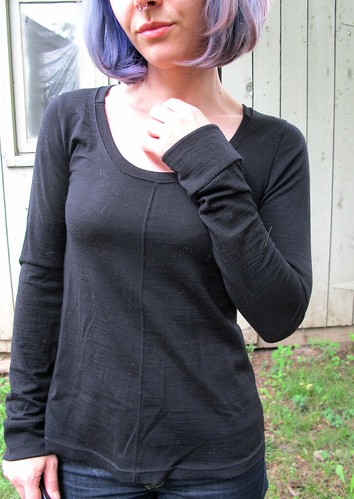
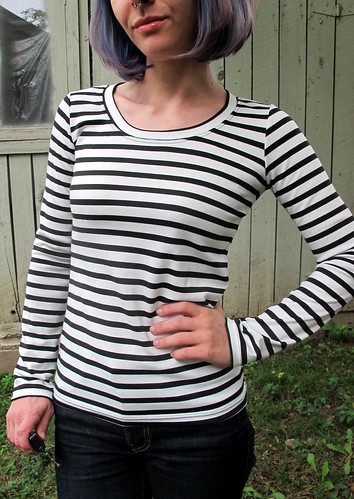
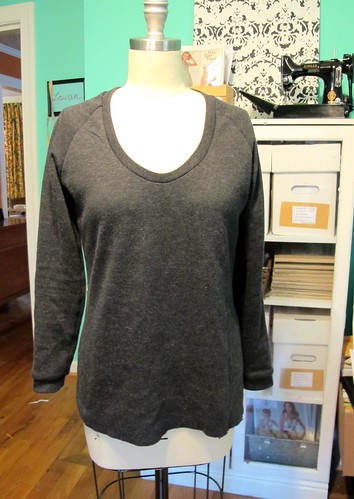
One thing I was thinking I needed in my closet was a fitted black turtleneck… to wear with high-waisted skirts, jeans, or as an additional layer of warmth. I remember owning a ribbed black turtleneck back in the 90s and wearing the everloving shit out of that thing because it made me feel like I looked sophisticated. I don’t think sophisticated is a word that anyone would ever use to describe my style, but whatever. I can still have these goals.

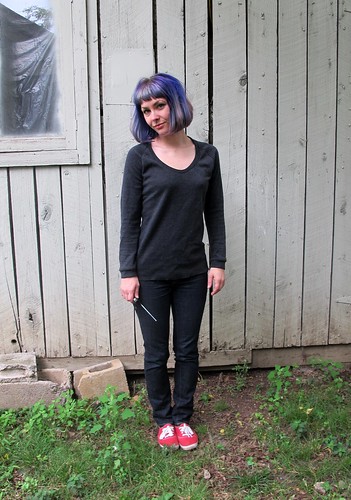
Anyway, I used the Rise and Fall Turtleneck from Papercut Patterns, which I’ve had my eye on since it was released last year. There are two versions in this pattern – I made the “Rise,” which is more fitted with a mock turtleneck, the sleek look I was going for. I cut an XXS to start, but it was still a bit more loose than what I was envisioning. I kept taking in the side and sleeve seams until it was more fitted, which probably brought it down to – my guess – about an XXXS (if that was even a size option). I think the shoulder seams are still a bit more dropped than what was comfortable, so after I took these photos I ended up taking the sleeves off, cutting back the shoulder, and then reattaching them (sorry, I don’t have any photos of this and I am not able to take any of my sick ass so you can just believe me here, ha). When I make this pattern again, I will double check the shoulder/armscye seams against another pattern that fits me and make adjustments before I cut my fabric. For my on-the-fly alterations, this was fine.

Rise Turtleneck

Rise Turtleneck

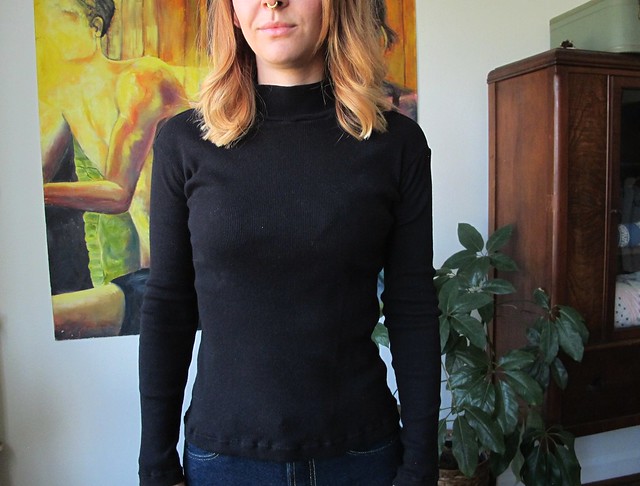
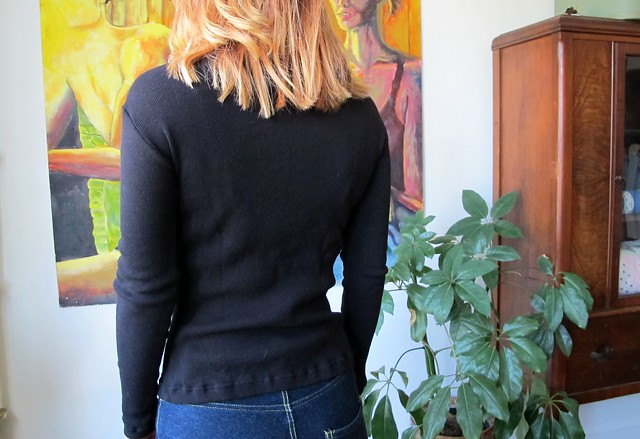
I used light rib knit fabric from Organic Cotton Plus for my turtleneck, in a classic black. This stuff is traditionally used to make ribbed cuffs and necklines, but like I said, I wanted a whole 90s-eqsue turtleneck out of that shit. It’s super soft and laundered up beautifully. It did stretch out a bit when I stitched the hem with a twin needle – it actually got really flared and crazy looking, to be honest – so I threw it in the wash and it shrunk up to what you see now. Still a little wavy, but it’s not terrible. I am guessing this particular fabric won’t have a fantastic recovery since it’s 100% cotton – and cotton tends to grow over the course of the day, it needs a little bit of Lycra to snap it back into shape – but it should shrink up after it’s washed. I haven’t had a chance to wear it properly yet as it’s still a bit too hot for full-on neck coverage, but we’ll see how that works out. I may like it a little more loose. Maybe.

Rise Turtleneck + pashmina

Rise Turtleneck + pashmina

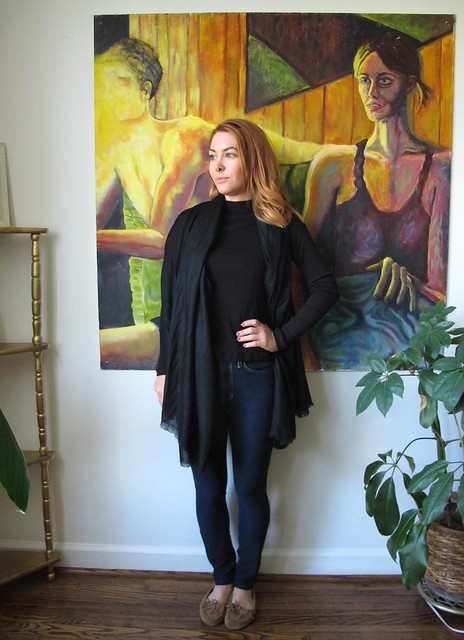
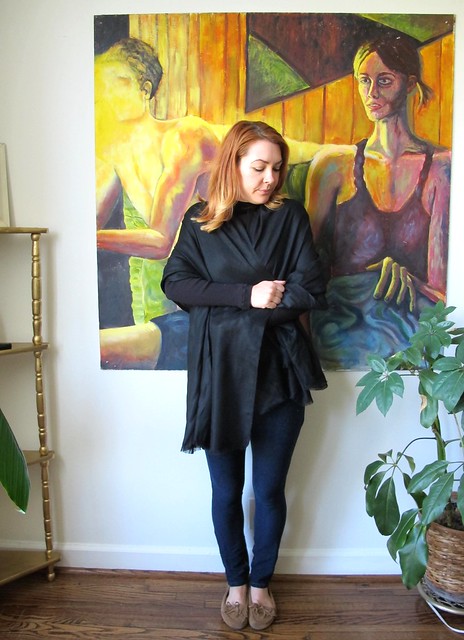
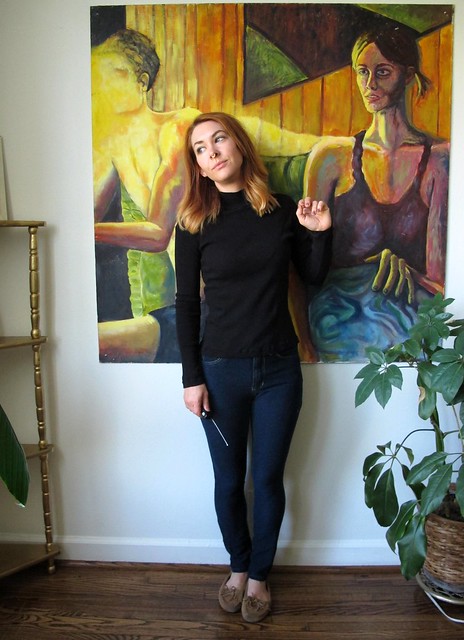
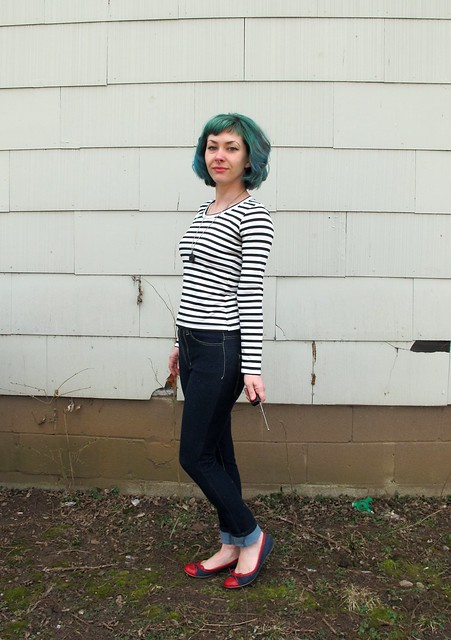
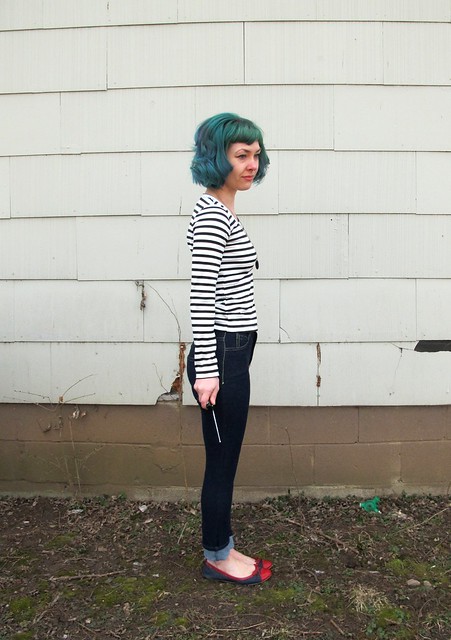
Aaaaaand while we’re talking about comfy – I also made a Pashmina! I LOVE Pashminas; they are one of my go-to souvenirs when I’m traveling. Not to mention, they are handy to have while you’re traveling, especially if you’re on a chilly airplane. Wearing it as a regular scarf definitely keeps me warm, but it can also double as a lightweight blanket without actually looking like… well, a blanket (you can also wad it up and use it as a pillow if you’re lucky enough to get the window seat). It’s also a nice alternative to a sweater or cardigan when you’re wearing fancy dress – again, draped over the shoulders like a cape looks really lovely.

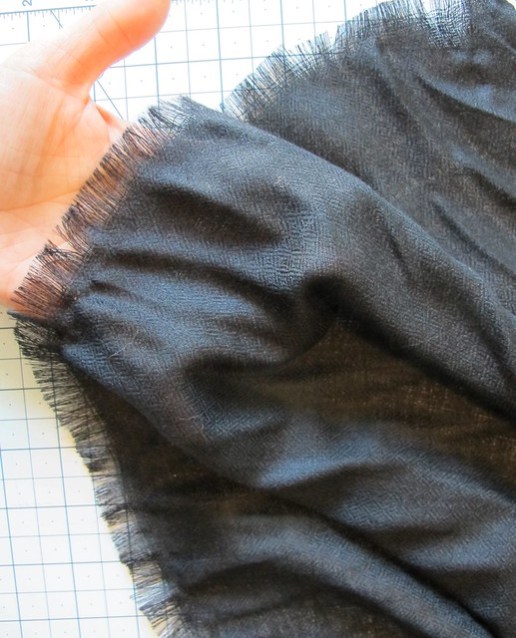
Ok, “made” is a very very loose term here 😉 I got 2 yards of wool cashmere Pashmina fabric (also from Organic Cotton Plus) and frayed the edges with a pin. So there’s not really so much making here – I didn’t even sew a thing, the selvedge edges were finished as they were – but not even project needs a mess of sewing to be proud of, you know? At $26 a yard, this fabric is far from cheap – but a total of $46 (and maybe an hour of fraying) but it is organic wool, and certainly less expensive than the questionable-origins Pashminas I see at Nordstrom. So there’s that.

It’s hard to get a good photo of this fabric, but it’s very light and floaty with a loose weave that has a bit of a design in it-

Organic pashmina

Organic pashmina

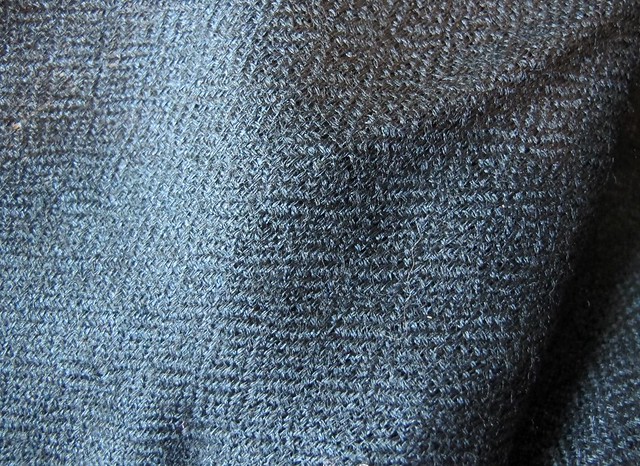
It’s also pretty translucent. I originally considered using it to make a full-on lined wool skirt, but it’s just too loosely woven and lightweight, like, well, a scarf 😉

Organic pashmina

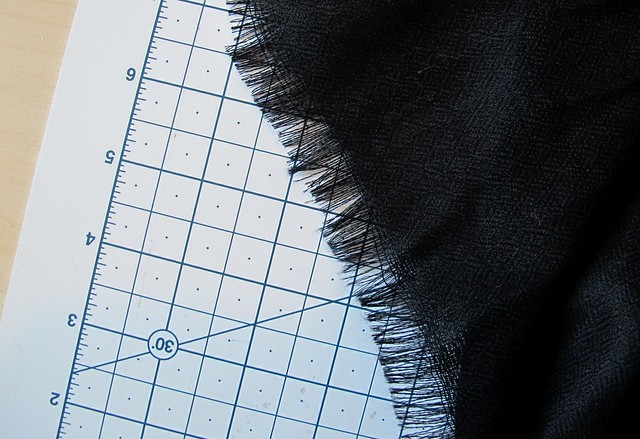
Here is a close-up of my fraying. I pulled one cross grain thread to make a straight line (same as you’d do when tugging your fabric to be on-grain) and then gently pulled the threads below to make a fringe, using a pin. It probably took about an hour, and wasn’t too bad once I got into the swing of things. I did not secure my fraying with a line of stitching or anything – upon examining all my other scarves, they don’t have any stitching at the end and they have held up fine.

Rise Turtleneck + pashmina

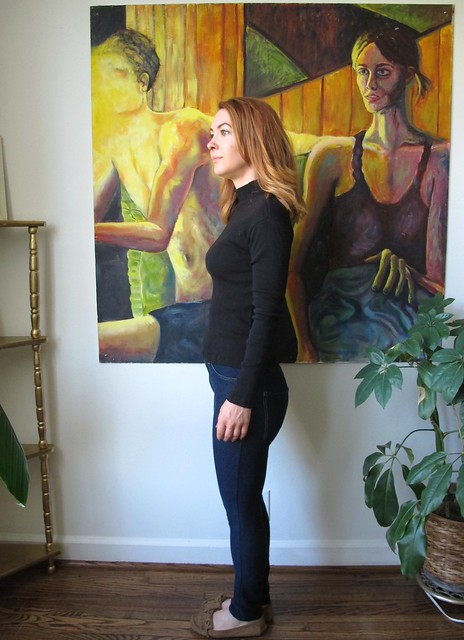
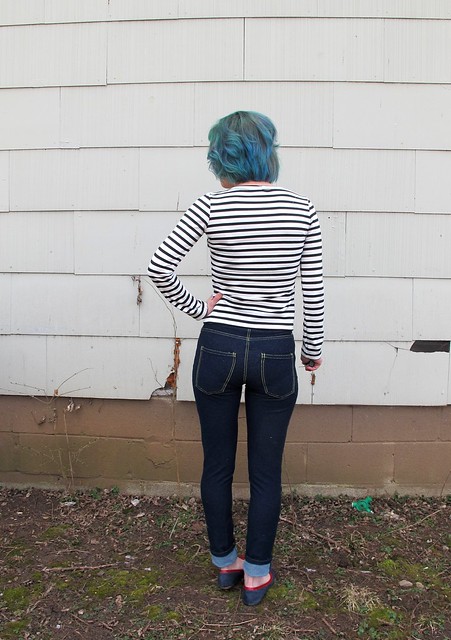
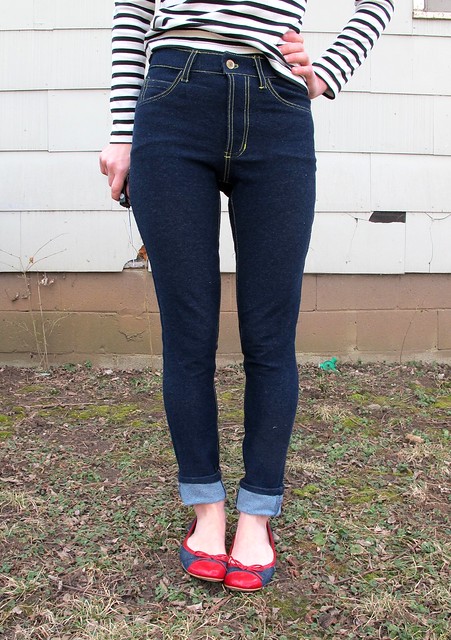
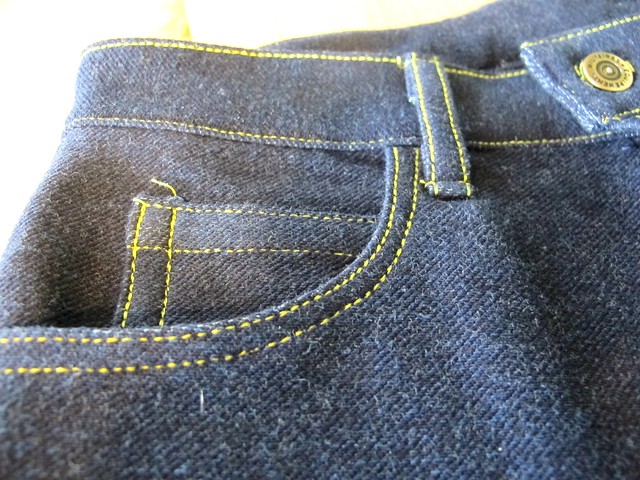
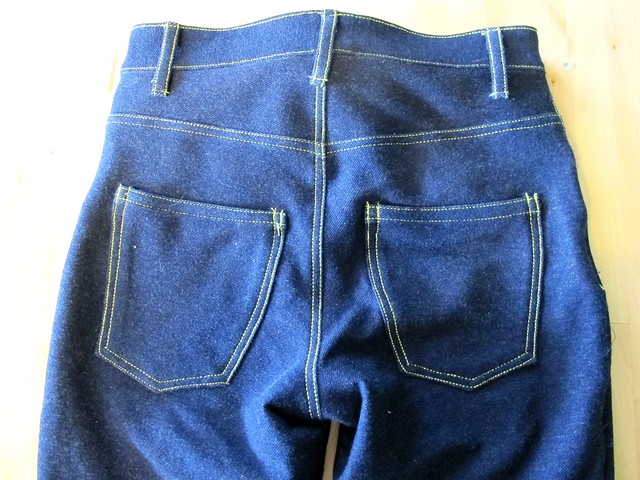
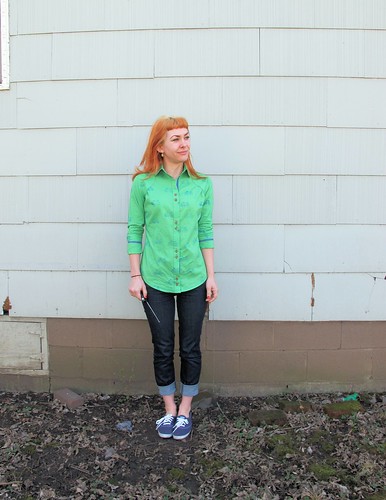
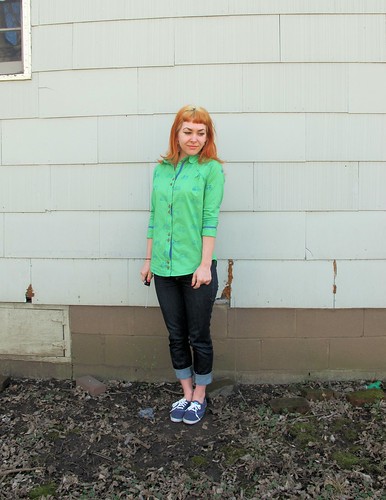
Finally, I should mention – those jeans are secret pajamas too, y’all! They are actually JEGGINGS, made with cotton stretch denim knit, which is like a really awesome ponte that looks like jeans. You can read the post about them here. I’ve worn them steadily for about a year and a half and they’ve held up nicely – washed and worn well, and are still sooo comfy. See! Secret pajamas. These were totally in regular rotation while my dad was in the hospital, btw. I had to wear pants because they keep that ICU freeeeeezing, so it was nice to have something knit that was comfortable enough to wear for hours of sitting. Should you be lucky enough to not have to spend a week in an ICU waiting room, I can also vouch that these pants/this fabric is great for traveling 😉

Speaking of traveling – I have one more workshop (well, two back to back) before I’m done for the year! I’ll be in NYC next weekend for jeans making (which is sold out!) and the ever-popular Weekend Pants Making Intensive (which I think still has a couple of open spots if you’ve been on the fence! TREAT YO SELF), both at Workroom Social! Can’t wait 😀

**Note: The fabrics in this post were provided to me by Organic Cotton Plus, in exchange for a blog post review. All opinions are my own, however, all links to said fabrics *are* affiliate links (which all funds will divert to my Coverstitch Savings Account). The Papercut pattern was purchased with my own dollars, though! ♥
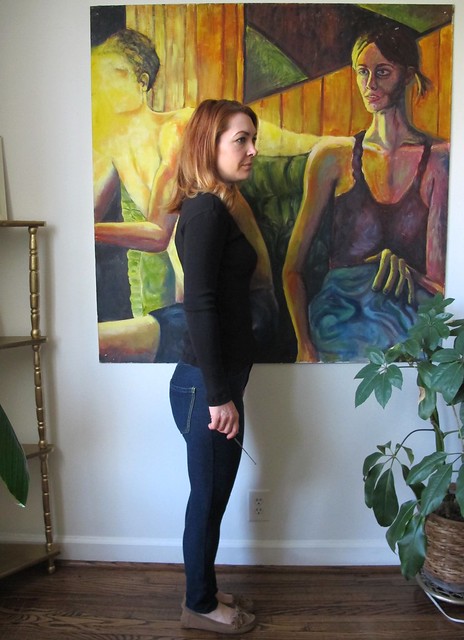
EDIT: I can’t believe I didn’t notice that this is totally a Steve Jobs outfit hahahahaha

Completed: Augusta Hoodie // Anima Pants

22 Aug

I know it’s still like 8000 degrees here in the South, but I’m already thinking ahead to the next season! This year, I want to be ready when the cold starts creeping in – even though you & I both know that won’t realistically happen here until, like, December (if not later!).

With that being said, I started this project WAY THE FUCK back in May – you know, when summer was the creeper. Took me this long to finish it, but whatever!

Prepare yourselves. This is a two-part project, so there are a bunch of pictures.

Organic French Terry Augusta Hoodie

First part – the one I started in May (or was it April? omg.) is this sweet-ass track jacket hoodie combo! The pattern is the Augusta Hoodie from Named. I don’t tend to sew a lot of patterns from this company – I find most of the styles a bit outside of my personal style preferences (like the Inari dress that everyone is going apeshit over and I JUST CAN’T GET BEHIND THAT SORRY), but occasionally I’ll come across something that makes *me* go apeshit (see: my beloved Jamie Jeans LOVE U). As was the case with this jacket! The pattern was given to me as a gift by my lovely friend Carla; it has taken me over a year to decide what to make it up with, but I think it was worth the wait!

Organic French Terry Augusta Hoodie

Organic French Terry Augusta Hoodie

Organic French Terry Augusta Hoodie

Organic French Terry Augusta Hoodie

The Augusta Hoodie is a combo track jacket/hoodie with welt pockets, front snaps, and seaming that is perfect for some crazy colorblocking (even though I totally went the boring route). I made a size 32, and adjusted the sleeve length as I found them a bit long (a normal alteration for me).

Pattern construction wasn’t too terribly difficult – Named has gotten much better with their pattern instructions (they used to be quite sparse) and I had no problems with any of the steps, including the welt pocket. The jacket is unlined, but there is a facing so you get a nice clean edge at the front. The hood is lined, which I left off because my fabric was so thick. I also added a drawstring to the hood, cos I liked the way it looked. Ideally, I would have done this before finishing the hood – and used my machine to sew grommets around where the drawstring goes. Instead, I decided to do it after the hoodie was completely finished, and thus just popped a couple holes in the hood with my scissors and hoped for the best, ha.

Organic French Terry Augusta Hoodie

Organic French Terry Augusta Hoodie

Organic French Terry Augusta Hoodie

The fabric is a super thick, super heavy cotton French Terry from Organic Cotton Plus. I went with the Cranberry color, although they have tons of other color options for French Terry. This fabric is amazingly thick and soft and will be wonderful to wear when the temperatures start dropping. The piped sleeve seams are done with strips of rib knit fabric, just flat – there is no piping in there (only cos I didn’t have any on hand and I didn’t feel like waiting for any to ship). The ribbing at the bottom and cuffs is actually two different kinds of fabric – I originally planned to use the aforementioned rib fabric from OCP, to keep everything consistent, but it was way way WAY too lightweight to work with this thick fabric. I ended up painstakingly ripping off the bottom band (which was serged on) and replacing it with a sturdy rib knit from Mood Fabrics, which holds up much better with the thick French terry. Of course, I fucked up my measurements and didn’t buy enough, so the cuffs is an entirely different rib knit that is a lighter weight (but heavier than the rib fabric from OCP). I don’t remember where that rib came from as it was in my stash, but I’m sure it was also from Mood. If you look closely, you can see that they are two slightly different shades of white, but I am choosing to ignore that. Also, rib is a weird word when you type it over and over. RIB.

Sewing with this fabric wasn’t necessarily difficult, but it did require some finesse because it is SO THICK. Cutting was kind of awful – my scissors are still pretty dull (yup, haven’t gotten them sharpened yet. How long have I been meaning to do this? 2 years?), and they didn’t have the easiest time chopping through all that thickness. It actually hurt my hand to cut through double layers, but also I am a huge baby. I sewed the majority of this on my serger – French Terry sheds like crazy, and serging helps keep that at minimum – and there were a few sections of massively thick layers where I had to coax the handwheel to get things to keep moving. My snaps are set using an industrial snap-setter – again, I have access to this from my old job (in sewing production) – I have NO idea how you’d set snaps in this otherwise! I guess the pattern calls for a lighter fabric, which would certainly be easier to work with. Overall, I wouldn’t say it was hard – it just required being slower and more patient. Which is infinitely easier when you are sewing something way the fuck out of season and know you won’t be able to wear it for months regardless 🙂

Organic French Terry Augusta Hoodie

Organic French Terry Augusta Hoodie

Organic French Terry Augusta Hoodie

Organic French Terry Tracksuit

Organic French Terry Tracksuit

This track jacket reminds me of the stuff we used to wear back in the early 2000s, which I was still super active in the Nashville Hardcore scene. We were ALL ABOUT track jackets and hoodies, which looked real good with our tight jeans and Saucony Jazz shoes 😉 I definitely had a baby blue track jacket for years, which I loved everything about except that the fit was just a little boxier than what I wanted. So, here I am reverting back to my 16 year old self. Maybe should buy some Sauconys and relive the memories of the mosh pit or some shit.

Organic French Terry Anima Pants

Organic French Terry Anima Pants

Organic French Terry Anima Pants

Anywayyyy, after I finished the jacket, I realized I had enough French terry left over to make a pair of pants. Sweet! Like I said, this fabric is really thick and cushy, and I figured it would make a nice and warm pair of pants for lounging around the house.

I used the Anima Pants pattern from Papercut Patterns, sewn in a size XXS with about 2″ of length taken off. This was a very easy and straightforward pattern – basically just a knit pant with pockets, cuffs at the hem, and an elastic waistband with a drawstring. I did have minor troubles getting the elastic waistband sewn in – I think mostly due to fabric choice, as again, SO THICK OMG – but it’s fine, just a bit wonky looking. Whatever! For the white ribbing, I used a white cotton interlock knit, also from Organic Cotton Plus, which I so happened to have in my stash (the knits I used on the hoodie didn’t have enough yardage for these pants). It is leftover from these tshirts, btw. I can’t believe that shit was still hanging around my stash, but I ain’t gonna argue with that!

I am quite happy with how the pants fit, as well as how comfy and cozy they are. I am not especially happy to see that I have basically made an unintentional pair of Santa pants, but, it is what it is. I wasn’t planning on wearing these out of the house anyway (sorry, the whole ~athleisure~ trend is another thing I just cannot get behind), so I’m not terribly concerned about it. At least I have the perfect outfit to wear this Christmas.

(Btw, in case you were wondering – I also made my top. It’s a Papercut Patterns SJ Tee, sewn in a lightweight jersey fabric and cropped.

Organic French Terry Anima Pants

Organic French Terry Anima Pants

I should add, another thing I had no intention of doing was actually wearing these two pieces together.

Organic French Terry Tracksuit

Because I definitely look more like a late 90s Puff Daddy in this ensemble HAHA

Organic French Terry Tracksuit

I will let y’all know when my rap album drops, ok? Holler.

**Note: The French terry was given to me by Organic Cotton Plus, in exchange for a review. All rap opportunities are 100% my own.

Completed: Ginger Jeans + Silk Cami

15 Feb

Well, it’s finally too cold to take photos outdoors.

Ginger Jeans + Silk Tank

Hello, wall!

Ginger Jeans + Silk Tank

Anyway, I made another pair of Ginger jeans – and finally used up my second piece of the Cone Mills denim I’ve been hoarding since I bought it last year (FYI, in my last post it was brought to my attention that Threadbare Fabrics also sells Cone Mills denim by the yard. I haven’t ordered from them yet – but it made it much easier to cut into my precious stash knowing that I could get more of the stuff. Yay!). This is the lighter weight of the two denims I received in my kit; I think it’s a 10oz. It’s thinner and a little stretchier than what I used in my previous pair, and I like it a lot more. Actually, it’s almost identical to the denim I used in my very first pair of Gingers – same color and everything. I realize I essentially made two pairs of the same pants, but that first pair is starting to show it’s age (saying that I wear them a LOT is a huge understatement), so I am just thinking I’m ahead of the curve for once.

Ginger Jeans + Silk Tank

I was originally saving this denim to make a pair of flares – either using the Ginger jeans flare expansion add-on (um, btw, how genius is that idea?!) or the new Birkin flares that everyone is obsessing over, but in the end I just decided to remake my ol’ TNT (especially since the fabric on the first pair is a bit subpar quality, and one of these days I might have an unfortunate butt-rip happen. Hopefully not in public. I am wearing cute underwear at all times just in case, though). Like I said, I can reorder more of the Cone Mills, so perhaps there will be flares in my future. Just not this pair. No ragrets.

Ginger Jeans + Silk Tank

I wanted to improve on my last pair – they’re ok, but the bunching at the knee really bothered me way too much. I tried to research what the issue was – some people suggested that I might have knock-knees which is causing the bunching, but I’m pretty sure that’s not the case (I definitely don’t look like I have knock-knees, anyway). One of the comments in my last jeans post suggested checking out Cation Designs as she has a few posts on pants fitting. I usually refer to my pants-fitting bible, Pants for Real People, as it has never steered me wrong. However, this particular fit issue wasn’t covered in the book (I think it’s a product of tight/stretchy jeans, which they certainly don’t show any of in the book hahaha), so it was good to have a back-up resource! And this post in particular is FANTASTIC – plus, I think I found my solution! Yay! The #10 Hyperextended Calf alteration sounded like what I was dealing with – the calves of my tight pants are always REALLY tight, which then causes them to ride up and bunch at the knee (I have muscular calves, so this makes sense!). I did this alteration to my jeans pattern, adding 1 1/8″ to the calf (this was just a wild guess; I wasn’t about to slash up a pair of pants to figure out the exact amount I needed). It worked pretty well, but I think I could stand to add even a little more width. How they are now, though, is pretty magical -they only bunch a little, and I think that’s just from moving around. I don’t have giant folds of denim hanging around my knee. It is AWESOME. However, I am not a huge fan of how big it makes the ankle – I can deal with this pair, but on my next pair I would like to figure out a way to keep the tightess at the ankle while still allowing some room in the calf. Anyone have suggestions? Just tapering the ankle at the side and inseams doesn’t work, FYI. haha.

Ginger Jeans + Silk Tank

Other than that one alteration, not a lot of changes to this pair. I added the length back and then removed about 2.5″ – I wanted them to be long enough to pool a little at the ankle. I used my original Ginger pattern – the one before it was updated with a pocket stay – and sewed the size 2 instead of the 4. Topstitching and all that is pretty simple – one color of jeans topstitching thread. I did add an X to one leg in lieu of a bartack. Kind of a riff on the + on my I+W jeans haha. What, they’re made of the same denim!

Silk Tank

This silk cami is something I made ages ago and completely forgot to photograph for my blog! It’s a Ruby Slip that I modified to include gathers at the bust and silk bias finishing on the edges and straps, and then shortened to cami length. I made this slip a couple of years ago out of some really amazing 4ply silk, and I love how it looks so it was only natural to use it for a cami pattern.

The silk I used is a really wonderful new silk from Organic Cotton Plus, called Peace Silk. I really love OCP and I’ve been happy with all the fabrics I’ve received from them, and this silk is pretty fantastic too. It’s a wonderful lightweight, organic silk, with a feel similar to a thicker china silk or a less crepey crepe de chine. Really easy to work with, and feels amaaaazing after a wash in the machine. It’s called Peace Silk because it’s produced in a way that does not kill the silk worm and instead allows it to emerge from the cocoon first. While I definitely have no problem eating meat or wearing animal fibers, I thought that was a pretty neat solution! Plus, the name just makes me happy 🙂

That’s about all I have left to talk about, so here’s a bunch of pictures of my butt:

Ginger Jeans

Ginger Jeans

Ginger Jeans

Ginger Jeans

And some flat jeans shots:

Ginger Jeans

Ginger Jeans

Ginger Jeans

Ginger Jeans

Ginger Jeans

Everything was constructed on my Pfaff 7570, and topstitching was done on my Bernina 350PE. I used regular black poly thread for piecing, and Gutterman jeans topstitching thread for the topstitching. The aqua serging thread is just a fun color that matched my pocketing (which I got from the free fabric pile at A Gathering of Stitches because GOD it’s beautiful!) and my zipper (from the Garment District!). I wanted to add rivets, but they need to be trimmed down and I apparently don’t own wire cutters anymore, womp womp.

Overall: A+ jeans, would sew again (and I will – I have enough Cone Mills left to make a couple pairs of jorts! HA HA HA IT NEVER ENDS).

In closing, two things:

One, here is my Calvin Klein ~modeling~ shot. Can’t you see people just banging down my door to be a jeans model? Gah.

Ginger Jeans + Silk Tank

Two, the Spiegel 60609 winner! Yay! First of all, I cannot BELIEVE how many entries that giveaway got – over 1,100! That’s definitely the biggest one I’ve ever hosted on this blog (and I guess y’all agree with me that one should never say no to a free sewing machine, amirite). Thank you for blowing up my email last week and making me feel super duper popular haha. I enjoyed reading everyone’s comments – and yes, I read every single one of them! – but there can only be one winner:

winner1 winner2

Congratulations, thefilling!! I want to also mention that this comment filled me with delight – although, what is exactly is a snapback hat? (Can I see a picture? Can you tell me more about this cheeseburger print? We have a lot to discuss, dude) We will be in touch to get your new 60609 out to you ASAP 😀 😀 😀 Happy belated Valentine’s Day!

If you’re still trying to holler at the 60609, watch this space – I have some upcoming projects and tutorials that use the machine so you can see it in ~action~. And if you don’t care about the 60609, well, I hope you at least find the content interesting 🙂

Have a great day, everyone!

Completed: Organic Cotton Jeggings

9 Mar

Good morning, friends! I hope this post finds you well – I have missed all of you! If you missed out on the drama last week (and/or were wondering why I suddenly fell silent and my website went poof into the night), I had a bit of an issue with an expired domain and transferring it back into my name. You can read the boring backstory about it in this post, but basically – everything should be fixed and up and running. If you’re still having problems getting to the site (I was until last night, thanks to my internet provider), try clearing your cache and cookies and see if that helps. Sorry for all the dramz! Shit should be back to normal from here on out!

Anyway, enough of that boring internet talk – let’s talk about why we’re all here! Sewing and fabric and actual fun happy stuff, yeah!

Ginger Jeggings

For this week’s project, I bring you: Jeggings. I’m not sure if this means I’ve cracked some kind of sewing power code with all the ridiculously normal/boring things I’ve made at this point, or if it means I’ve hit rock bottom (I mean, we are talking about the ultimate comfort clothing here. I am not above making fun of jeggings, just so we’re clear). You tell me. What I can tell you is that these are INSANELY comfortable and now I kind of get the hype.

Ginger Jeggings

I’m not really much of a comfort-clothes seeker/wearer – I’m ok with being a little pulled in for the sake of looking nice when I’m out in public. That being said, it’s not a very interesting story as to how I came about obtaining a pair of the ultimate comfort/secret pajama clothes. It started out as a fabric review for Organic Cotton Plus. I was prowling around on their website, looking for something to pick as my next project, when I came across their organic knit denim. The fact that it’s called “knit denim” should have raised some sort of warning flag, but I didn’t even notice it – I just saw denim and immediately got starry-eyed. I’m always on the lookout for a good denim source, and this sounded too good to be true. Organic cotton denim with 5% lycra? GET ON MY BODY. I submitted my order and anxiously waited for my shipment.

Ginger Jeggings

The spoiler here is that this definitely is not denim – not in the true sense of what you get when you buy a pair of jeans. It’s definitely a knit fabric – a very thick, stable ponte-ish type of fabric that looks exactly like denim. It’s the right color and has that twill weave look. It thick and squishy with a good, firm stretch. It’s like a marriage of a tshirt and a pair of jeans. I don’t really understand it, but I’m not going to argue with it. At any rate, I had a yard of this stuff and I realized I needed to make something with it. And that’s where jeggings came in. I wanted to see if I could actually make a pair of jeggings. I did, and now y’all get to see how they turned out.

First things first, I realize that these don’t technically classify as actual jeggings. The material does – it’s more of a knit than a denim, it’s very stretchy and it has a lot of spandex in it. However, these are constructed like an actual pair of jeans. They have working pockets (both front and back), they have an actual zip fly, and there is no elastic in the waistband. The only part about these things that makes them even remotely jeggings-like is the fabric they’re made from. However, I’m going to keep calling them jeggings because – well, I made them, and I get to call the shots. Them’s the rules.

Ginger Jeggings

When I was planning these out (after receiving the fabric, but before cutting into it), I debated on whether to make these into jeans-looking pants – aka, true jeggings, with the pockets and fly simply suggested by lines of topstitching. I thought it would be interesting to see how the fabric works when it’s treated like a woven, so I decided to use an actual jeans pattern and follow it the same way I would if I was making these out of denim. I used the Ginger Jeans pattern and basically did not make any changes for the fabric. The size is the same size I used for my woven denim and stretch twill jeans, and all finishing and topstitching uses the same methods as those pairs do. The only difference is that I didn’t flat-fell any of my seams – I figured it was enough that I was making these out of stretch material, so I just serged and topstitched (like you would with leggings). I’m surprised at how well they fit, although I think the legs could be a little tighter around the ankle. Also – they turned out surprisingly long, due to the 4 way stretch. I actually cut 3″ off the pattern legs before cutting (that was the ONLY way I could make these out of a yard of fabric – short inseam!), which should make them the correct length – but they magically grew, and now they’re too long. I’ve cuffed them for now, because I want to wash them a couple more times and eliminate any additional shrinking before I re-hem them.

Ginger Jeggings

Making these was really fun, and surprisingly quick! Like I said, I made them the same way you’d make a pair of jeans, except I didn’t flat-fell any of the seams. Everything was sewn on my sewing machine with a stretch needle and the edges were finished with my serger. For the topstitching, I used a triple stitch (thanks to Emmie for showing me the stitch on my Bernina – I guess this means I should probably read the manual more often, ha!), which makes a nice defined topstitch that also stretches quite a bit. The waistband is interfaced with my favorite stretch interfacing (seriously – this stuff is AWESOME), which gives it enough structure to look nice, but doesn’t sacrifice any of that comfy stretch. There is an actual zipper and button installed, however, I did leave off the rivets.

Ginger Jeggings

Ginger Jeggings

Basically, these look & wear like jeans – BUT THEY FEEL LIKE PAJAMAS. If that doesn’t blow your mind with amazement, then I give up.

Ginger Jeggings

Sorry ’bout that VPL, story of my life. I do think the pockets are a bit low, which is likely due to the 4 way stretch. I don’t care enough to remove them and raise them, so it’s whatever.

Ginger Jeggings

Ginger Jeggings

Here are some gut close-ups so you can better see what I was working with. The material really looks like denim! Everything handled pretty well, except attaching the belt loops did get a little difficult at the end, just because there were soo many layers (I ended up hammering them as flat as I could, which helped a little. Still broke a couple of needles in the process, argh.). All the topstitching was done with a single needle and a single piece of thread, sewn with the triple stitch. I used lemon yellow cotton thread, also from Organic Cotton Plus, which was nice and thick and worked out quite well with the triple stitch. It looks more gold than neon yellow when it’s against the dark indigo, which I really like.

Ginger Jeggings

Proof that there’s actually a zipper in there! The zipper is also from Organic Cotton Plus; it’s just a heavy brass jeans YKK zipper, but it works really nicely with this pattern. The 6″ length was just barely long enough for the high-waisted version of this pattern; I ended up cutting about 1/2″ off in excess when all was said and done. The pocket lining is just some stretch cotton sateen I had in my stash. I wanted to use something with a stretch, so it wouldn’t fight against the stretch of the exterior fabric.

Ginger Jeggings

And here’s the back! Mock-flat felled seams (just serged and topstitched) and patch pockets! I had to cut the waistband in pieces, because I didn’t have enough fabric to cut it on the fold – but the seam is covered by the back belt loop, so it can just be our secret, ok.

Ginger Jeggings

So that’s my little sewing experiment! Turns out you *can* make jeans with jegging material – with all the look of jeans, but the comfort of leggings. Love it! And since there are back pockets, I don’t feel as compelled to cover my butt haha. What do you think? Is this a win or just the weirdest garment I’ve ever made? Have you – or do you – wear jeggings? I always made fun of them, but man, can’t deny how comfy they are!!

As a side note – I mentioned this on Instagram yesterday, but it bears mentioning here too. I’m moving soon! I was finally able to get hold of my landlord with the notice and vacate date (they require 60 days, but they’re gonna let us out in 30 days because they love us for being awesome tenants haha), so we’ll be out of this house by the end of March! My best friend/life partner/former roommate just bought a house in the woods in a small town outside of Nashville, and Landon & I will be moving into the lower level as her roommates! The house is cool as shit, the land is AMAZING (did I mention it’s in the woods? Gah I can’t wait to be a hippie and raise chickens in the forest lolol), and I so look forward to living with my two very best friends in one house. Plus – I get a new sewing room! How cool is that? 🙂


** Note: Organic Cotton Plus provided the materials (denim knit, zipper, thread) for this project in exchange for a review. All thoughts and options are my own.

Completed: Some Tshirts!

26 Sep

Oh hey, head’s up – this post is all cake and no frosting. No apologies, though! Lord knows I can never have enough Tshirts.

Rather than bore y’all with a bunch of posts featuring patterns I’ve made before, though, I’ve compiled a trio of 3 different tshirt patterns – ranging from Free to You Gotta Pay For That Shit – for science and comparison purposes. Who doesn’t love a good Tshirt debate, amirite? Also, I took these pictures before I redyed my hair, fyi. Just in case you were curious, haha.

LET’S TALK ABOUT TSHIRTS NOW, GUYS.

Plantain Tee

First up is the Plantain Tshirt, from Deer & Doe Patterns. This is that free pattern I was telling y’all about. This is a great beginner tshirt pattern – there aren’t a lot of pieces, it includes some new techniques for beginners (such as sewing the neck binding), the instructions are very clear, and the fitting is quite loose at the bottom. I was initially afraid that I wouldn’t like this shape on me AT ALL, but I’m surprised at how much I love it!

Plantain Tee
Plantain Tee

Even though it’s a free pattern, I think it’s far from being a “crappy” pattern, if that makes sense. The sizing is perfect – I sewed up a straight 34, with no tweaks. I used the last scraps of my black merino wool from Organic Cotton Plus to sew this up – I like how the wool gives the bottom some structure (and the wrinkles? Not as much a fan of those, but I’ll live :P). And it’s SO COZY. Cozy tshirts, FTW!

Plantain Tee

I did make a couple of changes to the design of the pattern itself – the main one being that seam that runs down the front and back of the top. This was done out of necessity, as I didn’t have enough fabric to cut on the fold. I simply added a seam allowance and created a CF and CB seam. I topstitched the seams so they’d look more intentional, ha. I also added cuffs to the sleeves – because, I dunno, I like them! There’s a bit of piecing at the neckline binding as well. Since I was making this out of leftover scraps, I didn’t have a long enough piece to cut continuous binding. I don’t think it’s that noticeable, and hell, I’ll deal with some seams if that means I get a merino wool top out of it amirite.

Stripey Renfrew

Next up is my tried-and-true tshirt allstar – the Renfrew from Sewaholic Patterns! I LOVE this pattern, a fact that I believe is pretty well documented. Renfrew is favored by me because I think it most resembles what we think of when we think of a tshirt – slightly fitted, set-in sleeves, and 3 neckline options (in addition to the scoop, there’s also a cowl and a v-neck), as well as sleeve length options. The pattern is written to have a band of self-fabric at the sleeve cuffs and hem, in addition to the neckline. I’ve found that I prefer to hem my tshirts (rather than use the fabric band), and some of the more casual ones I like to hem the sleeves as well. One thing to keep in mind – should you decide to join me in my tshirt anarchy – is to add that length to the sleeves and hem before you cut them out. Otherwise, they might end up short! Ask me how I know about THAT 😉

Stripey Renfrew

Fitting-wise, this is a great pattern, although I did make a lot of tweaks to get to the point I am now. It’s been a long time since I tweaked, but if I recall – this is a size 0, with additional ease removed from the waist. I also shortened the shoulders a smidge and made them slightly narrower. All those tweaks paid off, because this is a pattern I reach for again and again when I need a tshirt. At any given time, if you see me in a tshirt – ask me if it’s a Renfrew, the answer will probably be yes! Seriously! Oh, and my fabric is a striped ponte from Mood Fabrics (the store, not online).

SJ Tee

The last top in this trifecta is the SJ Tee from Papercut Patterns. Another new-to-me top, and I admit this is more like a sweatshirt than a true tshirt (but mostly due to fabric choice). It’s kind of like a sexy sweatshirt, tbh – raglan sleeves and WHOA SCOOP NECK. Forreal, make this in something too stretchy and you’ll end up in boobie city. Again – want to ask me how I know about that? 🙂 haha!

SJ Tee

I’m surprised at how much I like the fit of this, considering that I don’t normally go for things so loose. I did end up taking the CB in by about 1″ – I’d already sewn the neck binding in at that point, so the seam runs clear from the bottom to the top of the binding, oops. But that made a HUGE difference in the fit, especially at the back. I used the size XXS and – other than the chunk taken out of the CB – it’s relatively unchanged. Oh, and I did shorten the cuffs so they’d look more like a sweatshirt. The fabric I used here is the last of my wool knit from Mood Fabrics (the same knit I used to make my grey Jenna cardi), and I had JUST ENOUGH. It’s amazing how much I love such a simple sweatshirt, by the way – I’ve been wearing it every night. It’s so cozy!

Here are the three patterns as modeled on my form:
Plantain Tee
Plantain Tee

Stripey Renfrew
Renfrew Top

SJ Tee
SJ Tee

I think it’s really interesting how something so simple as a damn tshirt can yield such different results, based on pattern and fabric choice. These are all pretty basic designs in the grand scheme of things, but they’re different to stand on their own. Obviously there are many, many more tshirt patterns out there (off the top of my head, these come to mind: Ensis, Briar, Bronte, Coco, and Lord, don’t get me started on dresses that can be hacked into tees), but I stuck with these three because I feel they’re the most basic/versatile. Also, let’s be real – if I fall down a tshirt rabbit hole, it might be months before this post sees the light! Ha!

Stripey Renfrew

Out of all these, I think my favorite is the Renfrew, just because it’s so damn versatile and I love how it fits (not to mention, the slim fit is ideal for layering). It might also have something to do with the Renfrew being my first love – can’t ever abandon her now 😉

I can’t stop thinking about that SJ tee too, though – I already have some future plans for her, including camel-colored boiled wool. Yum!

Plantain Tee

What’s your opinion on tshirt patterns? Do you have a favorite – and if so, dish please!

(psst! Don’t forget to enter the Sewtionary Giveaway, if you haven’t already done so! Entries close on Monday morning!)

Completed: The Jenna Cardi (+GIVEAWAY)

15 Sep

In my wardrobe, I have a very small selection of RTW clothing that is quickly dwindling to nothing. Out of those pieces, the majority of them are lightweight knit cardigans. You know the kind I’m talking about – sewn, rather than knitted, lightweight enough to throw in a purse, wearable for all seasons (I dunno about y’all, but I wear my cardigans throughout the summer – air conditioning is tooooo cold for me!). As I’m quickly replacing all my clothes with handmades, the one major hole – other than undergarments (which I’m working on!) – has been those damn cardigans. I love knitting cardigans, don’t get me wrong – but those take loads of time, not to mention even the lightest fingering weight yarn can’t compete with how lightweight a knit fabric is, you know?

I’ve been on the lookout for a good cardigan pattern – not even really for the pattern itself, but rather, the instructions. Y’all, the one time I tried to sew button holes on a knit, it ended up being slightly traumatizing. Then there was that time recently that I tried to use an old RTW cardigan to copy into a handmade one (cutting it apart to use as a pattern – same concept as how I made my striped hoodie). Spoiler alert: it didn’t work out at all. Clearly I can’t hack this on my own. I need someone else to do it for me.

20121202-210149

Also, that cardigan I chopped up? As much as it wasn’t really my favorite – it was the one grey cardigan that went with basically everything. And here it was, chopped up into little bits and, uh, I kinda needed it back.

Jenna Cardi

Anyway, all that being said – right about the time I realized I was making a huge mistake (chopped up cardigan and all), Kat emailed me, saying she’d just launched her new pattern company, Muse Patterns, and would I like to try and review the Jenna Cardi?

UM. YES.

Jenna Cardi

HI GUYS, LOOK, DREAM CARDI PATTERN RIGHT OVER HERE.

Jenna Cardi

The Jenna Cardi comes with a few different options, so you mix and match to create the cardigan of your dreams (I’m not the only one who dreams about cardigans, am I?). You can choose a cropped or waist length version, sleeves ranging from full, to three quarter, to short, and then there’s also an option to include a beautiful curved yoke detail.

I’m a boring person with no imagination when it comes to wardrobe basics, so I chose something plain and simple for my first hurrah – cropped length, long sleeves. The thing about this cardigan that makes it so special, though (I mean, other than the fact that I SEWED IT MYSELF yaaaay for not buying RTW!), is the fabric I used! HOMEGIRL GOT HER HANDS ON SOME MERINO WOOL.

Jenna Cardi

Are we all still freaking out about merino wool or has that ship sailed? Whatever, *I’m* still freaking out over it! Ever since Katie started pushing it on me like an extraordinarily effective drug, I have been trying in vain to locate a US source. That stuff isn’t cheap, even in the best of times – and to ship it all the way from NZ obviously adds some dollarz to the cost.

So where did I find this golden merino ticket, you might ask? Surprise – Organic Cotton Plus, of all places! They are starting to branch out to include other natural fibers than just cotton, which is all kinds of awesome. When they asked me if I’d like to try a little piece of whatever caught my fancy from the website, I stumbled across the merino wool and, forreal you guys, my heart stopped for a nanosecond. There aren’t a whole lot of options on the site at the moment – just the black I have here, as well as a natural colorway (which I almost got, but then the idea of dying that shit seemed too overwhelming. Plus, black is so useful! Even if it photographs like crap). At $33 a yard, it is not cheap – but it’s worth it. That black merino is a whopping 61″ wide, plus, IT’S MACHINE WASHABLE WOOL. Oh, and you don’t pay NZ shipping prices! Win win!

Jenna Cardi

Having used both merino wool from Organic Cotton Plus, as well as the stuff straight from New Zealand – I can confidently say that this is pretty good stuff. It’s soft and lightweight without being see-through, it has a nice stretch and drape to it, and it cuts and sews like a dream. Wait till you see the topstitching on this baby – it’s ridiculously beautiful. Ahh I just love this fabric.

Jenna Cardi

The only downside I can think of is that it does wrinkle up a bit, as you can see in these photos (it’s not nearly as noticeable in real life – otherwise, I would’ve steamed things up before taking photos. Womp whomp, deal with it). Kind of the same thing as linen – just natural wear wrinkles. If that bothers you, you’ll want to stick to something with a poly blend. For me, though, wrinkles are an ok trade-off for natural fibers!

Jenna Cardi

Anyway, I loved my Jenna cardigan so much – I immediately made a second one!

This one is pretty boringly similar to the black merino one, except it’s longer. It’s not quite the longer version – I cropped some off for my proportions – but it does look better with the shirt I’m wearing underneath it, ha 🙂 Instead of using merino wool, I used some wool knit that I picked up at Mood Fabrics when I was recently in the store. This stuff is less drapey than the merino – it’s almost like sweatshirting, except without a fleecy side. It’s also not machine washable, so there’s that. I’ll have to handwash it like I do all my hand knits, oh well.

Jenna Cardi

Sewing both of these was ridiculously easy, by the way. My second version took me all of 2 hours – not bad! I made the bust 32″ and took in the sleeves a bit because they were a little wide. I also had to shorten the sleeves by a couple of inches.

As I mentioned, I was pretty apprehensive about the button bands – but surprisingly enough, the button holes were way less problematic than I was anticipating! I made some test button holes – experimenting with interfacing, tear-away stabilizer, no interfacing – but ultimately went with the instructions, as I figure Kat knows more than I do when it comes to knit button holes 🙂 The button band is stabilized with woven fusible interfacing, and it’s sewn on with a 1:1 ratio (meaning it’s not stretched at all). This gives the knit fabric enough heft to tolerate a button hole stitch without getting eaten into the bobbin area (my former experience with this sort of thing). For the black merino cardi, I also used tear-away stabilizer in addition to the interfacing. For the grey cardi, I skipped the tear-away stablizer and just kept things purely interfaced. Both worked out splendidly!

Jenna Cardi

Another thing I’ll point out is that, while these cardigans are somewhat fitted, there’s just enough ease included to keep the button bands from gaping open. Always a plus in my book!

Jenna Cardi

Jenna Cardi

I’m thrilled that they both look just as good unbuttoned as they do buttoned – which is important to me, as a cardigan-wearer. I usually button things up, but it’s nice to have unbutton options:)

Jenna Cardi

Jenna Cardi

Here are some ~extreme~ close-ups of the merino wool cardigan. Check out that topstitching! Ughhh it’s so beautiful! I did add a little more topstitching than called for in the pattern – I wanted to tie in the topstitched button bands and button holes, so I included it at the shoulder seams and along the bottom band. Plus, it’s just beautiful. Seriously.

Also, how bout them buttons? These are also from Organic Cotton Plus. I know black and brown is generally frowned upon as a color combination, but I like it 🙂

Jenna Cardi

Grey cardigan close-up 🙂 Boring buttons are from my boring stash.

So what do you think – are you team sew-your-own-cardi yet? I hope so, because Muse Patterns has hooked me up with an extra pattern to giveaway! 😀

Jenna Cardi

GIVEAWAY IS NOW CLOSED
To enter to win your very own Jenna Cardi, just leave a comment on this post and tell me what you plan on makin’! Which view? Any particular fabric? Do you have a wild card up your (cardigan)sleeve? Inquiring minds want to know! 🙂 This giveaway is open WORLDWIDE and I will close the comments a week from today, on MONDAY, SEPTEMBER 22, 2014 7:00 AM CST. Good luck, y’all!
GIVEAWAY IS NOW CLOSED

**Some disclosures now – I was given the Jenna cardi pattern from the patternmaker herself, for free, to try and review. I was *also* given the organic merino wool fabric & butons from Organic Cotton Plus, again, for free to try and review. The grey wool knit was purchased at Mood Fabrics NYC out of my own pocket. No one paid me for this post – I’m just doing it for the freebs! As always, all opinions are my own 🙂

Completed: the Meissa Blouse

28 Feb

I think every sewist has a dream fabric that they’ve spent years searching for in vain. It’s not necessarily a weird combination of prints and colors on a totally inappropriate weave, but whatever the specific end result is, it’s nowhere to be found. I have two – a wide (like 3″ or more) white and navy striped twill, and a bicycle print that is NOT quilting cotton.

Meissa Blouse

I gave up on the stripes, but the bicycle print really haunts me. I’ve seen some cute little stylized bikies (see my Bicycley Belladone for an example), but I was holding out for that literal printed-bike-on-some-lightweight-cotton-in-a-nice-color-combination that didn’t seem to exist. And NO pennyfarthings! I want real bikes, not some super hipster twiddly mustache crap.

Meissa Blouse

I had this particular fabric in mind when I was contacted by Organic Cotton Plus with offers to try out some of their yardage. I’d just been back from snooping at Brooks Brothers, specifically zeroing in on this Bicycle print button-up. Isn’t that shit amazing? Argh! So I thought to myself, “Cool, well I’ll just get a stamp and make my own, yeah? Oh, they don’t have any batiste in good colors… but they do have dye…”

And this, my friends, is how I ended up with two yards of white cotton batiste, emerald green Procion dye and some weird little bag of soda ash. Have I gotten in over my head? Probably.

Meissa Blouse

My first couple of days were preparing the fabric – first, I dyed it in a bucket (for real; I stood at the kitchen sink with a my Kindle on Netflix and squished it around the water while wearing gloves, ha!). I wish I would have used a bit more dye in my mix; the end result color is pretty, but it is lighter than the emerald green I was anticipating. On the flip side, though, the dye took evenly all the way across the fabric, so yay!

After I finished the dye bath and let the fabric dry, I took to stamping the entire yardage with a rubber stamp and fabric paint (I blobbed my paint into a dried-up ink pad to make it easier to use). I thought this part was gonna take forever, but it wasn’t too bad! Since stamping tends to look pretty, well, stamped (i.e., it’s not exact and you won’t get a perfect image transfer every single time), I didn’t follow any straight lines and just kind of stamped around haphazardly. After I cut the pieces, I re-stamped a few that had big gaps. This particular ink is great because you don’t have to heat-set it to keep it from washing out (which is good bc I’d spent long enough prepping the fabric, so one less end task is good in my book!), and the ink itself absorbs into the fabric and is not stiff.

Meissa Blouse

Other than the dye reaction it had (which is I think my fault for not making a strong enough dye bath, oops. Live and learn!), I really enjoyed working with this fabric. The batiste is one of those good ones that feels like there’s silk or something smooth and luscious blended in the fabric, but it is truly 100% cotton (and organic, no less!). Because it is cotton, it presses well, which makes it perfect for shirtmaking. It’s also not super sheer like some batistes – even the virgin white would be fine for a shirt. Always a plus in my book!

Meissa Blouse

The pattern I used is the Meissa Blouse from my beloved Papercut Patterns. I love this pattern because it’s a casual button-up without being an Archer (which I obviously LOOOVE, but hey yo, a girl’s gotta branch out!), ha. The little feminine details – the rounded collar, the shoulder yokes with the little gathers, the double buttons – seemed like a good match for this fabric, and a nice nod to my original inspiration without being a blatant copy.

Meissa Blouse

The pattern instructions make this thing really, really easy. Katie has had lots of praise around the webs for how good they are, and it’s all try! Really basic, really straightforward, and beautiful results. I did change a few things just because I’ve hit my personal shirtmaking stride – I flat-felled every seam (the way the shirt is made, only the side and underarm seams are not enclosed, so it’s not like you have a flat fell a million seams to do this) and I pulled in the waist an additional 1/2″ or so. I also shortened the sleeves by about 1″.

Meissa Blouse

Meissa Blouse

Whatever I did to the sleeve seams now means that I cannot button the cuffs around my wrist – they are WAY too small! Whoops! Oh well, this is totally a summer shirt, and I’ll never wear those sleeves rolled down anyway. Ha!

Meissa Blouse

Meissa Blouse

To keep the shirt from being overwhelmingly green, I added some cotton braid to the inside of the button band (butted up right against the stitching line) and inside the sleeve cuffs.

Meissa Blouse

Meissa Blouse

The sleeve cuff treatment is something I saw on the Brook’s Brothers shirt (seriously… if you have a Brooks Brothers in your area, you should snoop it. Some of the finishing inside the clothes there was pretty awesome!). There was a little piece of petersham ribbon tucked in the seam at the top of the cuff, which shows when you flip up the cuffs. Using that inspiration, I tried to do the same thing with my shirt. It’s a liiiiiittle sloppy because I was experimenting, but I like how it turned out! It even makes me ok with the fact that I can’t use the cuffs 🙂

Meissa Blouse

I’m super happy with all the detailing on the shirt. I used lots of topstitching so it would really stand out.

Meissa Blouse

And hey, check it out – the shirt is long enough to where I can tie the bottom in a knot, like a fashion blogger or some shit.

Meissa Blouse

Meissa Blouse

~So fashun.

Meissa Blouse

I still have quite a bit of the dye & soda ash left over. I’m thinking I may buy a load of silk and sandwash the shit out of it. My friend Elizabeth uses soda ash to prewash her silks into this amazing textured wonderland, so I can’t wait to try that! I will definitely report back with results. First, I gotta find a washing machine, though 😉

Ok, ONE last thing – and I promise this is a good one! Remember The Great British Sewing Bee and how we (we as in Americans, ha) bitched about not having a US version of the show? Well, I was contacted by a Love Productions, who is in the process of producing and casting a pilot for – you guessed it – an American version, called The Sewing Bee! They are currently on the hunt for amateur sewists in the NY, CT & NJ area (although if they get picked up, they will expand to nationwide). I actually ended up talking to one of the producers on the phone and I’m really excited to hear about the plans they have in the works – such as, the show will differ slightly from the UK version in that there will be a different set of contestants and winners every week. One thing that is similar is how they plan on editing – as far as I know, it will be as drama-free as the UK version, which is what I like most about it!

img-227171148-0001
Click here for a bigger version of the flyer

If you’re in the area (or don’t mind traveling and camping out for a couple of weeks, I guess), you should definitely try out for the show! And then report back to me, because I want to see y’all on the teeeveeee!