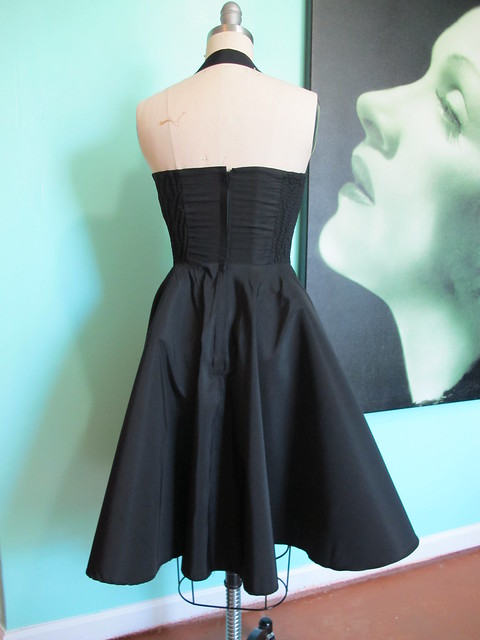
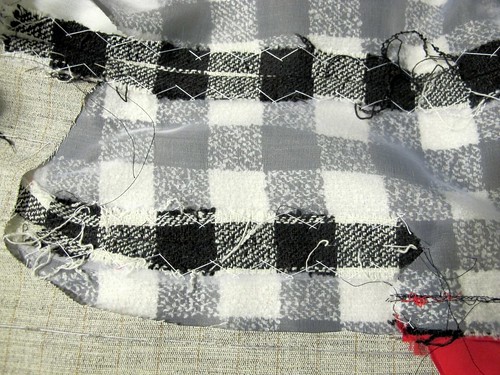
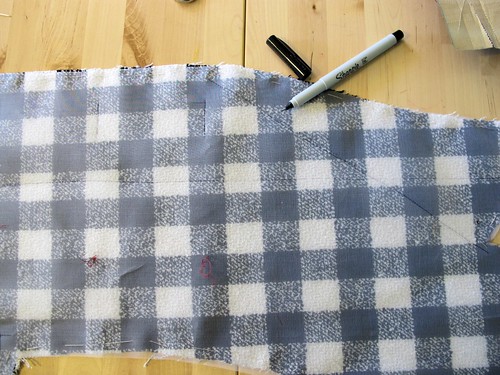
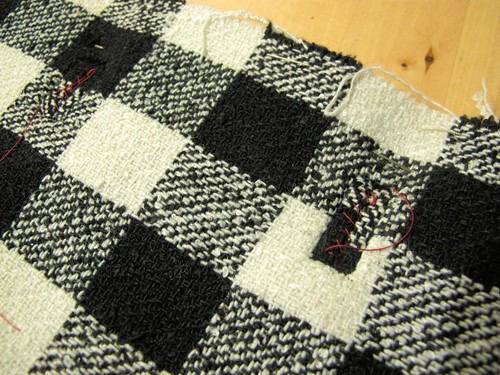
Tag Archives: work in progress

OAL2017: Pintucks & Gathers

16 Jun

What up y’all, welcome back. Let’s get into this!

Short week here – we are basically assembling the skirt and attaching it to the bodice. I don’t think any of this warrants a full-fledged tutorial, but as always – I have some tips!

The first step is sewing the pintucks to the bottom of the skirt. You may have transferred those markings when you cut your fabric and marked your pattern pieces – if you didn’t (guilty!), it’s easy to draw those in now. I just measured the distance from the bottom to the lowest pintuck, and then the distance between pintucks, and used those to draw my lines on with a ruler and a chalk pen.

OAL2017- Marking pintucks

Since I wanted to see my lines from both sides of the fabric – and also because chalk tends to rub off – I thread-traced those same markings with a needle and thread. I just made giant basting stitches and went across the width of each piece. This makes is easier to see the pintucks when you are sewing them.

OAL2017 - Finished pintucks

To sew the pintucks, simply bring the two lines together and sew along the markings. Remove your markings (whether they are basting threads or just drawn on with chalk or a tailor’s pencil) and give the pintucks a good press to encourage a sharp crease.

Now you’ll want to sew your skirt pieces together at the side seams (you can also do this before you sew the pintucks, but I found that the skirt pieces are HUGE before they are gathered and that’s just too much for me haha). Finish your seams however you desire – I used French seams for mine (here is a link to the post last week about sewing French seams). Don’t worry about the center back seam just yet.

OAL2017 - Sewing gathers

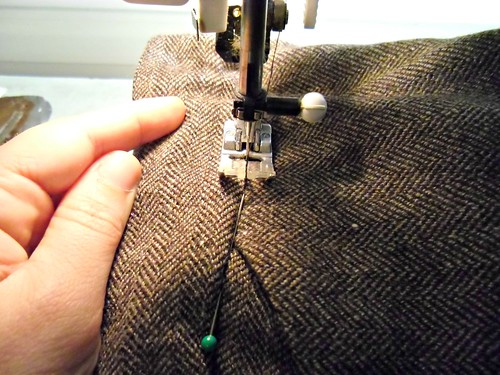
There are several ways to gather the skirt before attaching it to the bodice – you can baste with a hand sewing needle as the instructions suggest, or sew 2 lines of basting stitches on your machine – but this is my preferred method as I think it’s the fastest and you don’t risk snapping your basting threads. Get a long piece of cotton crochet thread or very thick thread (such as buttonhole twist) – or even unflavored dental floss. Whatever it is, it needs to be a bit longer than the entire width of your un-gathered skirt. Take it to the machine and lay it over your seam allowance where you are gathering, then use a zigzag stitch to attach it to the fabric. Your zigzag should just straddle the string – not actually pierce it – so you may need to adjust the width of your zigzag if it’s too tight. Leave long string tails on either end.

OAL2017 - Sewing gathers

Here is what the string looks like after it’s been zigzagged. You are basically making a zigzag tunnel that the string feeds through.

OAL2017 - Sewing gathers

Now pull your string tails, which will cause the fabric to gather. Keep gathering until the skirt fits the circumference of the bodice (this is a super gathered skirt, so be patient!), match the side seams and center back/center front, then adjust the gathers so they are even all the way around the skirt. Sew into place with a straight stitch, remove your gathering string, and finish the seam allowance. Real talk: I serged this one. I am not even going to try French seaming that mess lol

OAL2017 - Gathers

My gathers!

OAL2017 - Dress

And now it looks like a dress!

All that’s left now is inserting the zipper and sewing the hem 🙂 FYI – I am going on vacation next week (to BELIZE), so the blog will be quiet! I will not have access to my computer at this time, but will be back in business after I get home on the 27th. If you have burning questions, ask them now – or wait a few days 🙂

Happy Friday, everyone!

OAL2017: Assembling the Bodice

9 Jun

Hey everyone, and welcome back to the second week of the 2017 OAL! This post today is all about assembling the bodice of the dress – stabilizing the neckline, sewing French seams, and attaching the facing.

A few things before we jump in:

  • The pattern I using is the Kim Dress from By Hand London, but these method should apply to most any pattern that you are sewing!
  • If you missed the first post, you can find it here.
  • If you don’t give a shit about sewalongs and hate me right now (it’s cool, I don’t give a shit about anyone else’s sewalongs either haha), I promise it will be over soon! 😉 It is impossible to please everyone, but lord knows I try!

Your fabric should be cut, your markings all clipped and transferred to your pieces, and you should be ready to sew!

OAL2017: Stabilizing Neckline

OAL2017: Stabilizing Neckline

Before you drag your pieces over to the sewing machine, it’s a good idea to stabilize your neckline first. This will prevent it from stretching and distorting over time – which can happen both during the sewing, and over normal wear. They are multiple ways to stabilize a neckline – such a staystitching or using silk organza (here are 3 methods, all with their own tutorial!) – but for the purposes of this particular garment (considering how lightweight the fabric is, and also the overall casual-ness of the dress), I chose to use a lightweight fusible stay tape. This “extremely fine fusible knit stay tape” is the exact one I used – I bought it at my local Bernina dealer years ago, and it is especially helpful to stabilize shoulder seams on knits! Since it’s knit, it curves very easily, which makes it perfect for this pattern.

I fused my stay tape to the curved edges of both the front and back neckline, ending just before the tips of the strap ties. Since the seam allowances are 5/8″ and my stay tape is 1/2″, I made sure it was 1/4″ from the edge so I would be sure to catch it in my stitching. Since I am using stay tape, I did not staystitch these areas.

Now you’ll want to sew your front and back princess seams. Because my rayon is nice and lightweight, I using French seams, which I love because they conceal the raw edges beautifully. Pretty sure I don’t need to throw out another French seam tutorial into the WWW, but I was really having fun with this white piece of posterboard backdrop SO HERE YOU GET IT ANYWAY:

OAL2017: Sewing French Seams

I start by placing the pieces WRONG SIDES TOGETHER and sewing with a 3/8″ seam allowance. Lay the piece flat and trim the seam allowances down quite aggressively – to about 1/8″. You want them to be smaller than the second seam you sew, so they don’t peek out.

I should mention – this is assuming you are using a pattern with a 5/8″ seam allowance. If your seam allowance is larger or smaller, you’l want to adjust your math accordingly.

OAL2017: Sewing French Seams

Press the seam allowances open as best you can. They are tiny, so this won’t be the easiest thing – I’ve found I get the best luck if I use my fingernail to pry them open, and then the tip of the iron the whole way down. If you found you have cut them *too* small and simply cannot press them open, it’s acceptable to iron to one side.

At this point, your bodice is going to look at sorts of wrong. Just trust me here.

OAL2017: Sewing French Seams

Now flip your pieces so the right sides are facing, effectively sandwiching the seam you just created. I like to take this to the iron and press right around the seamline I just sewed, so everything lies flat. Then sew along the edge at a 1/4″ seam allowance.

OAL2017: Sewing French Seams

Press your seam allowances to one side, according to your pattern instructions. In the case of this pattern, we are pressing them toward the side seams.

OAL2017: Sewing French Seams

OAL2017: Sewing French Seams

Repeat for the remaining princess seams. Your front and back pieces should look like this.

OAL2017: Sewing French Seams

Finally, sew your front and back pieces together at the side seams. Again, I used French seams for this.

OAL2017: Attaching the Facing

Now to attach the facing! Start by fusing interfacing to the front and back facing pieces that you created. I used a very lightweight interfacing, and opted to cut it so that the interfacing does not extend all the way into the ties (I want those to stay soft and floppy!). To prevent a hard ridge from showing where the interfacing ends, I cut that with pinking shears.

OAL2017: Attaching the Facing

Attach the front and back facings at the side seams, and press the seam allowances open (don’t worry about using French seams for this, unless you wanna be super extra or some shit). You will also want to finish the lower edge of your facing – I serged mine, to prevent it from fraying and also from showing bulk from the outside. You can also using pinking shears here, or bind the seam allowance.

OAL2017: Attaching the Facing

Attach the facing to the bodice, all the way around the neckline and strap edges. Trim the seam allowances down, and then understitch to help turn the facing to the inside. You won’t be able to understitch all the way if you are doing tie straps – just go as far as you can.

Turn the facing to the inside of the bodice, and give it a good press. You’re done!

OAL2017: Attaching the Facing

OAL2017: Attaching the Facing

Ok, that’s all for this week! As always, let me know if you have any questions! 🙂

In Progress: Butterick 6019 (Continued!)

20 Apr

Butterick 6019

I’m back for round two of this prom dress in-the-making extravaganza! Let’s get right to it!

After finishing the construction of the bodice, I assembled the skirt. Since I chose the option with the circle skirt, this was incredibly easy (especially compared to engineering that dang bodice!). Three pieces, three seams. I serged all the edges and pressed them open (I normally French seam my silk, but silk faille is a bit thick so it’s not really suitable for that), and also serged the edges of where the zipper will go. I don’t have a photo of all this, but, I reckon y’all know what a circle skirt looks like 🙂

Butterick 6019 - progress//embedr.flickr.com/assets/client-code.js

After that, I attached the bodice to the skirt and finished the raw edges (again, with my serger). Because the center back pieces include a lining, I made sure to not stitch those down (they will be slip-stitched to the zipper later).

Butterick 6019 - progress

My dress will have a lapped zipper, so I prepared the back bodice by folding back and pressing – 5/8″ on the left side, and 1/2″ on the right side. The lining pieces were already folded back and pressed 5/8″, as per the instructions.

Butterick 6019 - progress

Butterick 6019 - progress

My zipper was quite a bit too long, but it’s easy to shorten! I just use the machine – no hand-stitching required! Mark where the zipper should end, and sew back and forth over that marking a few times with a straight stitch, then cut off the remaining zipper end about 1″ below the stitching. Easy! 🙂

Butterick 6019 - progress

On the right side (the side folded under 1/2″), the zipper is sewn with the teeth up against the fold, like so. At this point, I don’t worry about the top of the zipper past the pull – you can push that under the lining and deal with it when everything is getting slip-stitched down. But you do want to be sure that the teeth of the zipper are riiiiight up in that fold’s business.

Butterick 6019 - progress

Butterick 6019 - progress

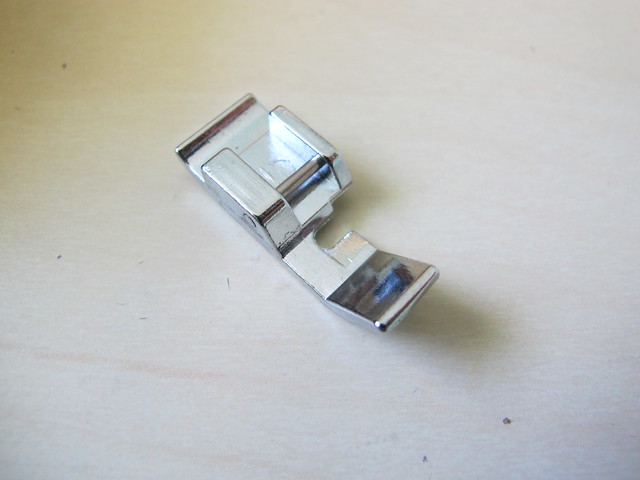
This is where the humble zipper foot comes into play. Most machines come standard with this foot. On the Spiegel 60609, it looks like this. The side is notched out to let you get really close to the zipper, like so.

Butterick 6019 - progress

Side one done, now to the second side!

Butterick 6019 - progress

The left side (the side folded under 5/8″) will be placed along the zipper tape with the folded edge right on top of the stitching you just did (on the right side), thus creating a lap. I start by matching at the waistline seam, so I can be sure the seamline is uninterrupted.

Butterick 6019 - progress

When I pull the left side open, I can see where the zipper tape needs to lay along the fold to create that overlap. I find this much easier than trying to overlap and pin while the zipper is closed.

Butterick 6019 - progress

Then you just pin all the way up (to the bodice *only*, the lining should remain free). Once you get to the top, you can tuck the remaining zipper tape down and inside where the lining will cover.

Butterick 6019 - progress

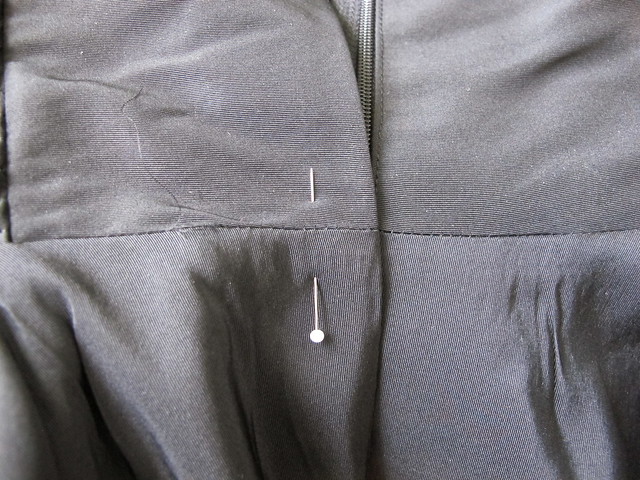
Here it is pinned front the outside. One thing I highly recommend (which I didn’t take a photo of, hm) is to hand baste the zipper into place before stitching. This ensures that everything is in the right place and won’t shift when it gets under the needle (and that you’re actually catching the zipper tape!). The topstitching step of this process is not difficult, but it can be tricky to see what you are doing! Definitely take the extra couple minutes and baste that sucker into place with some long basting stitches.

Butterick 6019 - progress

Once basted, open up the zipper and topstitch from the right side, again, keeping the lining free.

Butterick 6019 - progress

When you get to the bottom, lower your needle, lift the presser foot and pivot the fabric, then sew across the bottom of the zipper back and forth a couple times to secure everything.

Butterick 6019 - progress

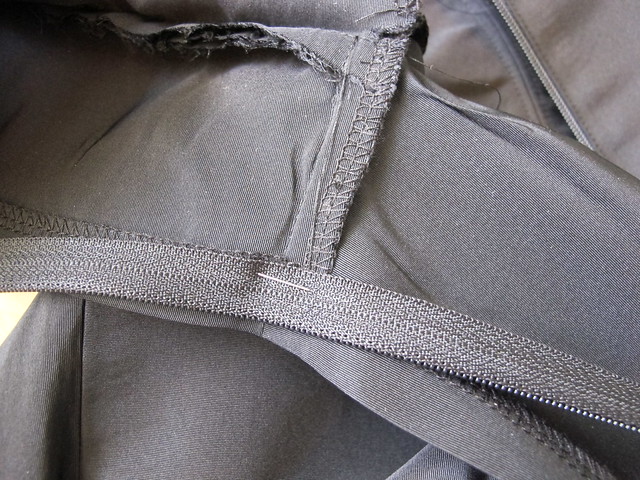
Finally, pin the lining to the zipper tape and slip-stitch everything down.

Butterick 6019 - progress

Beautiful, right? 🙂

Butterick 6019 - progress

Next step is hemming! Since this dress has a circle skirt, that means the bias needs to settle before hemming (otherwise, the hem will end up being super uneven!). I have a dressform for this purpose – both for hanging and hemming (if you don’t have a dressform, you can hang bias stuff on a hanger, but you’ll probably need a second person to help you with the actual hemming. There are also doodads you can use for solo-hem jobs, but I don’t have any experience with those). Bias garments need to hang for a minimum of 24 hours to get their stretch out. Being paranoid, I let this one chill for like 5 days lolol.

Butterick 6019 - progress

Once that’s done, you hold a yardstick (or in my case, a T Square) at the floor and measure the same point all the way around the hem.

Butterick 6019 - progress

I mark every couple includes or so with a pin. Look at how uneven my skirt was!

Butterick 6019 - progress

After trimming the skirt, I added 2″ wide black horsehair braid to the hem. Mostly, to give it some extra body – but also because it makes hemming easier, as the braid kind of acts like bias tape (as in it’s very flexible and curves along with the curve of the circle skirt). I started by sewing it to the right side of the side, using the width of the Spiegel 60609 presser foot as my seam allowance guide.

Butterick 6019 - progress

First press pushes the horsehair braid down and the seam allowances up.

Butterick 6019 - progress

Then second press folds everything to the inside nice and flat.

Butterick 6019 - progress

From there, it’s just endless slip stitching (well, not *too* endless – I think this took me about an episode and a half of Mad Men haha). You can topstitch at this step, but I feel like a fancy prom dress needs an invisible hem! It just looks so nice!

Butterick 6019 - progress

Here is some of the inside finishing – I added buttons for the strap, as well as ribbon loops for hanging (literally a piece of ribbon lopped and handstitched in). And my tags! I need a tag that says ♥Made with My Spiegel 60609♥ hahaha

And some full shots on the form – these were taken before hemming or adding the hook & eye, but you get the idea 😉

Butterick 6019 - progress

Butterick 6019 - progress

Let me know if you have any questions about any part of this process – I tried to explain as clearly as I could, but I have a cold right now so I’m pretty medicated haha. And the fact that I’m sewing with black fabric doesn’t help!

Super pumped for prom next week!! 😀 Is it bad that I want to wear my converse with this dress? I don’t think I’ve worn heels since I quit my office job 3 years ago! :B

In Progress: Butterick 6019

13 Apr

Hey guys, guess what.

I’M GOING TO PROM.

This is 100% not a joke. I am going to a literal high school prom.

Butterick 6019

Before anyone starts thinking that I’m dating someone WAY too young for me, I should probably use this opportunity to point out that my date is my BFF, who happens to be a high school English teacher and gets 2 free tickets to prom every year 🙂 I will take any excuse I can get when it comes to dressing up, though – especially if it means I get to make a party dress! The bulk of my sewing used to involve a lot more frosting than cake, and while I’ve reverted to making a lot of useful basics, I still get starry-eyed when I think about ridiculous party dresses. Prom is the *perfect* excuse to get some fancy sewing out of my system!

My pattern of choice is Butterick 6019, which I have been wanting to make for ages. I’m going with view A, which includes removable halter straps and a circle skirt. The fabric is a black solid silk faille from Mood Fabrics. I ain’t gonna lie – I originally tried to buy something with actual color, red being my first choice. But it being prom season and all, Mood ended up selling out before my order was fulfilled and I had to choose a different color on the spot. Since I didn’t have time to get swatches for color comparison (and I didn’t want to end up with a bad color, considering this silk is $50/yard and non-returnable!), and the selection was super limited at that point, I ended up getting basic black. This means I probably am sewing the most practical formal dress ever. Oh well! 🙂 At least I’m ready for my next black tie wedding, ha!

One more thing I want to point out about silk faille – it’s pronounced “FILE.” Not fail or foll (both of which I have tried and been laughed at for. Ok, y’all, it’s been like 10 years since I studied French and I wasn’t very good at it to begin with! Give me a break). I already made an ass out of myself, so now you don’t have to! ♥

Butterick 6019 - In progress

This project is definitely a labor of love – there’s a lot of work (and notions!) that go into a dress like this. The bodice is lined with self fabric, and features boning, shirring, a lapped zipper, bust padding, and that beautiful bias-cut crossover piece. For the skirt, I decided to add horsehair braid to give it some extra body and really make it flare out. Whenever I start a project that includes a lot of notions, I like to corral them into one place so they are easy to find. In the past, it’s been Ziploc bags – which are super useful, but not really that pretty! I recently received this sewing notions pouch from Tailor Made Shop and it’s perfect for this use! The pouch is roomy enough to hold everything I need (it even fits a pair of 8″ Gingher scissors – not really necessary for this particular use, but GREAT for when I’m teaching and I need to take some tools with me!) and it zips securely so nothing spills out. And it’s way prettier than a Ziploc bag 🙂

Butterick 6019 - In progress

I don’t want to freak anyone out here – but I actually TRACED my pattern pieces for this project. lolwut right!? I had a hard time determining my size (even with the finished measurements and cup sizing – the sizing on this pattern just doesn’t make sense to me at all), and so I needed to keep the sizes intact in case I cut the wrong one. Fortunately, the bodice of this pattern involves a lot of small pieces, so it wasn’t a huge time suck. I ended up going with a size 6 A/B cup at the bust (FWIW, I wear a D/DD bra so yeah, um, the cup sizing is a bit skewed here!) and graded out to an 8 at the waist. Since the skirt is just a giant circle, I didn’t trace those pieces.

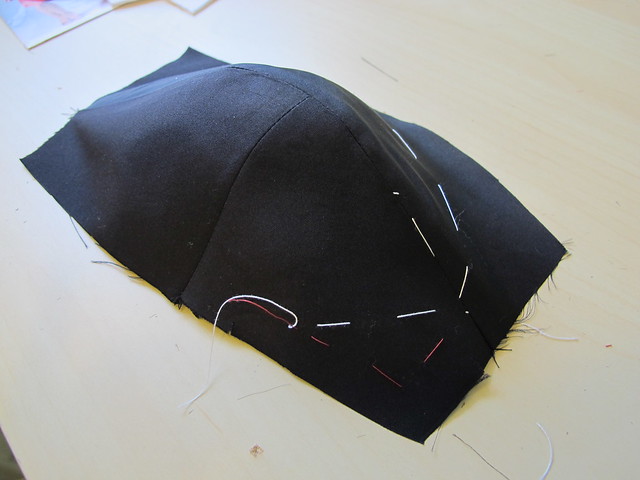
I made a muslin of the bodice – shirring included, but no boning. The shirring is extremely necessary if you’re muslining this dress, as it drastically affects the fit. The sizes I traced and cut ended up being perfect, albeit the top of the dress itself is quite low (which I had read about in reviews, so no surprise there!). The pattern changes I made were to add 5/8″ to the top of the bodice all the way around, and then shorten every piece by 1/2″ at the lengthen/shorten line so the skirt seam would hit my waist. I also traced the cup pieces a second time and removed the seam allowances all the way around. These pieces ended up making the bust padding, which is constructed the same way a foam cup bra is made (with the pieces butted up together and zigzagged across the seam). Rather than cut my pieces and then remove the seam allowance – which is wasteful as hell, sorry – I did this instead. Look at the difference in their size!
Butterick 6019 - In progress

The pattern has a lot of markings for placement – boning placement, the bias strip, and just basic construction seam allowances. Since I didn’t want to risk a permanent stain on my dress, I marked the wrong side and then thread traced the markings with silk thread. The silk thread allows the markings to be seen from both sides, and can easily be removed. I used a different color for the type of markings – tan for the strip, white for boning, red for construction. This was MASSIVELY helpful when putting together the puzzle that is this dress.

Butterick 6019 - In progress

To keep the cups curved against my body and to prevent them from stretching out, I added twill tape to the seam allowance. This isn’t instructed in the pattern, but it’s good practice for anything that runs the risk of gaping (such as bustier tops like this, or woven wrap dresses). You basically just cut 1/4″ twill tape the length of the neckline minus 1/4″, then place it inside the seam allowance, up against the seam line. Since the tape is shorter than the neckline, the neckline gets eased into the length of the tape. The easing means the neckline curves with your body, and the twill tape provides some stability to an area that would otherwise stretch out over time.

Butterick 6019 - In progress

Assembling the bodice is pretty easy and straightforward. I trimmed down, clipped, and graded my seam allowances pretty aggressively to prevent a bunch of bulk (silk faille is quite stiff), and pressed the life out of everything. #1 reason why I went with silk faille instead of cheaper polyester faille – it’s just easier to work with. I really shudder at the thought of trying to make this dress with something that doesn’t press well.

And now it’s time to shirr! I STRONGLY recommend testing this out on a scrap of your fabric first, as you might need to tweak your machine settings a bit.
Butterick 6019 - In progress

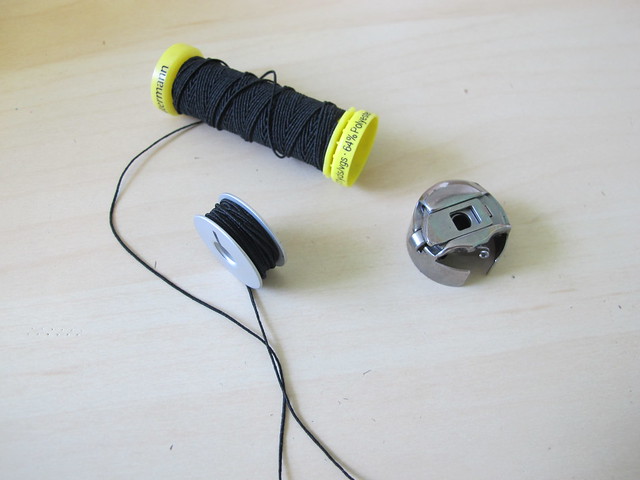
For shirring, you need elastic thread. Be *very* aware of the yardage amounts that your spool contains, by the way – I didn’t realize this brand only has like 11 yards, which is not enough for this project and I unfortunately ran out and had to stop and buy more (also, black elastic thread is harder to find than white, ugh). I used 2 spools, even though the pattern has you only buy one. Just FYI! Anyway, the elastic thread goes in the bobbin, and it is wound by hand with only a slight tension in the thread. The upper thread is your basic all purpose polyester.

Butterick 6019 - In progress

Set your machine with a longer stitch length. For the Spiegel 60609, I used a 4.0 length.

Butterick 6019 - In progress

At this point, you’ll want to test the stitches and make sure the tension is good. If it’s not, you can adjust the tension in the bobbin (the little screws you see here). The needle tension (the numbered dial at the top of the machine) can also be used. If you mess with the bobbin tension, its a good idea to mark the location of the screws before you start twisting them around – just use a really fine point marker and draw directly on the bobbin. Otherwise, you might have trouble getting the tension balanced again when you’re done shirring – and you’ll need to take the machine in for a service to set things back to default (and this question has come up a few times – you can get a Spiegel machine serviced at pretty much any sewing machine dealer, regardless of the brand that they sell. *Most* dealers will service all machine brands, even if they sell something different). My Spiegel 60609 did not require any tension adjustments for shirring, so yay!

Butterick 6019 - In progress

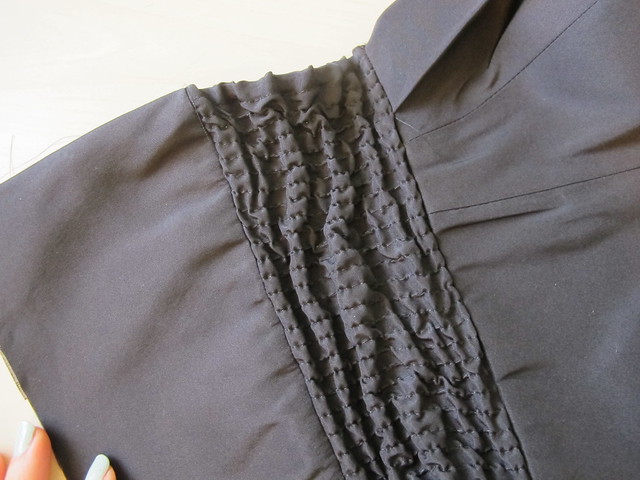
To shirr, you’ll sew long lines of parallel stitching 1/4″ apart. Some people draw guidelines for this, but I just use the edge of my presser foot as a guide. The foot on the Spiegel 60609 is the perfect width for this. Start your first line of stitching a little outside of the seam allowance, and continue sewing parallel lines until the whole piece is covered. Leave long thread tails at the beginning and end of each line, otherwise your shirring will come undone.

Here are what my shirred pieces look like after stitching. Also, I know my nail color keeps changing. I told you, I had to go out and buy more elastic thread! Sewing came to a stall for a few days! blech!

Butterick 6019 - In progress
Right side

Butterick 6019 - In progress
Wrong side

After you’ve finishing sewing all those lines, you’ll have a really hairy looking piece of fabric that still doesn’t stretch. The real magic happens with you steam the crap out of it, which shrinks up the elastic thread and makes the whole piece really stretchy and awesome. It’s fun to watch it shrink up! However, I recommend skipping this step for now and waiting until the bodice is constructed first. It is a lot easier to sew those pieces when they are flat and non-stretchy. You’ll see the shirred pieces in all their glory at the end of this post 🙂

Ok, back to the bodice construction!

Butterick 6019 - In progress

As I mentioned at the beginning of this post, the bust cups are slightly padded (to give that area some structure and also for modesty reasons, if you’re wearing this dress without a bra). The pattern calls for cotton batting, which I did not have on hand. Instead, I used foam padding that is used for bras. The pieces have the seam allowances removed, and then the edges are butted up next to each other and sewn across the split with a zigzag stitch.

Butterick 6019 - In progress

Then the little padded cups are nested in the cups of the bodice lining, and sewn in. The pattern has you catchstitch this part, but I don’t particularly care if you see stitching inside my lining so I zigzagged those pieces in. YOLO, y’all.

Butterick 6019 - In progress

Butterick 6019 - In progress

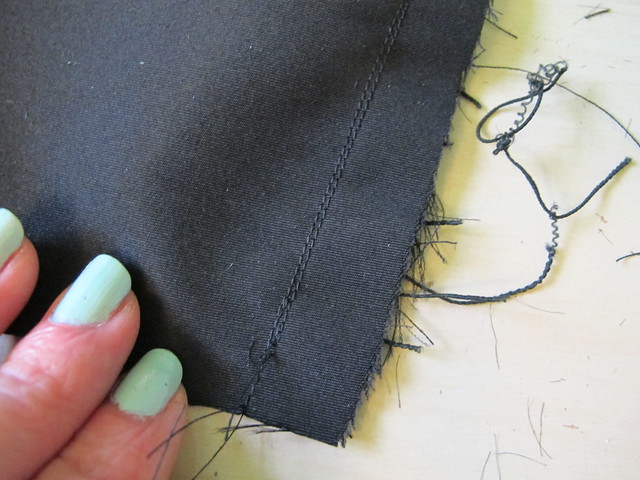
I used plastic sew-in boning for this dress – the kind that comes pre-covered (purchased at Mood Fabrics, if you’re curious!). Spiral steel boning is nice, but a pain to work with (it has to be cut *exactly* to size and capped, and no). This stuff is much easier to use. I straightened out the pieces by blasting them with steam while they were still in their fabric casing (you can also dunk them in hot water to relax the plastic), and then removed the boning and sewed the empty casing to the bodice lining. Like I said, the boning can be sewn through – but it’s easier to get a consistent straight line if the casing is completely flat. After the casing is sewn down, you can just slide the boning in. I trimmed off the sharp corners at the top of the boning so it won’t tear through my dress fabric, and left the ends long (those will be trimmed when I attach the skirt).

Here is the bodice lining once assembled:

Butterick 6019 - In progress

Butterick 6019 - In progress

I added a couple extra pieces of boning for additional support – the center front was especially necessary to keep things smooth. Looking good so far!
Butterick 6019 - In progress

Finally, time to attach those shirred pieces and cut off the thread tails! The pattern has you tie off each individual line of shirring… I don’t know about y’all, but pretty sure ain’t nobody got time for that. Instead, I shortened my stitch length and sewed two lines of stitching when attaching the shirred panels to the rest of the bodice. Once those were secure, I gave all those thread tails a haircut and then steamed the elastic.
Butterick 6019 - In progress
Butterick 6019 - In progress

It shrunk up quite nicely!

Butterick 6019 - In progress

Here is the finished bodice flat.

Butterick 6019 - In progress
And here it is on my dressform! 🙂

WHEW that was a lot of post! Next week, I’ll go over the rest of the construction. Can’t wait for prom! Yay for fancy dress making! 😀

Tailoring the Vogue Coat, pt 2

23 Dec

Man. Tailoring. It is always (always!) worth the extra cost and effort, but lord I always forget how much extra effort is actually involved. I’ve been plugging along on my coat since I last posted my progress, so here’s what I’ve been up to in the meantime!

I finally got the padstitching on the lapels done. That alone took the longest – not because padstitching takes forever, necessarily (well, I guess it depends on the size of the lapels), but because I kept putting it off for as long as possible. I was not looking forward to how long it would take. Guys – when I finally sat down and made myself do it, I finished both lapels in like 45 minutes. I’m such a baby, haha! Fortunately, while I was putting off the padstitching, I was not sitting idle – I skipped ahead of the instructions, and assembled the coat back (minus the tailoring) and lining, so that should save me some time now.

Now, I totally could have skipped the padstitching – it’s not 100% necessary, although it will 100% of the time make your coat look sooo much nicer. RTW coats do NOT have this sort of tailoring in them, and they obviously get away with it because people still buy them. But look at what a difference it makes:

Vogue Coat - Tailoring

If you can’t tell, the padstitched lapel is on the left (the side that overlaps), and the one that hasn’t been padstitched is on the right (the underlap). Do you see how flat the non is in comparison to the one with stitching? It’s pretty incredible!

Vogue Coat - Tailoring

LOOK AT THAT ROLL LINE, JUST LOOK AT IT.

Padstitching, in a nutshell, is basically just sewing diagonal stitches in straight lines (eventually forming a bunch of chevrons) using silk thread, so the hair canvas adheres to the coating fabric. You don’t sew all the way through the fabric – just pick up a little nip here and there to keep things connected. You hold the fabric+canvas over your fingers so it is encouraged to roll while you sew, and then when you’re finished, you steam the shit outta that sucker so it is hold it’s shape. Again, time consuming and not totally necessary, but it really is the difference between “Hey, I made a coat” and “~*Hey I tailored a fucking coat are you so impressed*~”. I mean, I’m impressed with myself and I haven’t even finished the thing yet!

After I finished the Dreaded Lapels, I focused my attention on the collar.

Vogue Coat - Tailoring

First, I sewed the two under collar pieces together. These are cut on the bias, so they will stretch and sit correctly underneath the upper collar. They are also cut slightly smaller than the upper collar, so the seam will roll to the underside and you won’t see it. That’s the plan, anyway.

Vogue Coat - Tailoring

To sew the interfacing pieces together (remember, they need to be on the bias so I can’t cut them on the fold), I removed all seam allowances and zig-zagged the pieces together at the center, secured with a piece of seam binding. I then marked my roll line and, I know, it looks really shitty. Sorry about that.

Vogue Coat - Tailoring

As with the lapels, I marked the padstitching lines with my trusty Sharpie. Above the roll line gets heavy padstitching (1/4″ tall, spaced 1/4″ apart) and below the roll line is more lightly padstitched (1/2″ tall, spaced 1/2″ apart). This will help the collar to stand so it looks nice and full and not sad and flat.

Vogue Coat - Tailoring

After I finished padstitching, I wrapped the collar around my tailor’s ham and, again, steamed the shit out of it. So qt, so pro.

Vogue Coat - Tailoring

I drafted a back stay, although my pattern doesn’t call for it. It’s always a good thing to include, though – it’ll reduce the strain on the coat back from moving your arms around/hugging people, and thus give your coat a longer lifespan. Plus, you can use cheapie muslin and I love me some cheaping out.

By the way, I use the term “draft” veryyyy loosely. I pinned my back and side back pieces together (so they would be one continuous piece with no seams) and marked 8″ below the neckline and 3″ below the armhole, then used my curved ruler to connect the two lines.

Vogue Coat - Tailoring

The resulting piece (cut on the fold, because, again, no seamlines) is the back stay. I pinked the bottom edge so there wouldn’t be a sharp line on the outside of my coat. Real talk: this is the only reason why I own pinking shears at all. For tailoring. I’m not even kidding about that a little bit.

Vogue Coat - Tailoring

The back stay then lays on top of the coat back and is basted to the arm holes, side seams, neckline, and shoulder edges. The bottom just kind of flaps free in the breeze. And that’s all there is to it!

Vogue Coat - Tailoring

I also stabilized my shoulder seams with twill tape – no real reason, except that my Tailoring book (lol why the fuck is that listed at $65 what is this madness) said it was a good idea so I just went along with it. It should reduce the strain at the shoulders, which is good because this coat is starting to get a little heavy!

Vogue Coat - Tailoring

Finally, I catch-stitched down all my seams on the coating fabric, catching only the underlining. Honestly, I should have done this as I sewed each piece – I really had to reach up under the back stay to get some of those seams sewn down – but I wasn’t thinking about it at the time. Catch-stitching down the seam allowances is one of those weird optional steps that isn’t necessarily bad if you skip it (like I was planning to), but it does help keep everything in place on the inside, thus prolonging the life of your coat. And, I mean, it’s sort of relaxing. I really love to catch stitch, what can I say?

So there’s that! I’m mostly done with the fiddly tailoring at this point – I still have the sleeves to deal with, but they shouldn’t be too bad. Since I’ve already assembled the lining, it’s really now just a matter of putting everything together.

My original plan was to have this finished by Christmas, but I’m now shifting that to a (hopeful) NYE completion date. Construction hasn’t necessarily been dragging- I just haven’t been home at all to work on it! My dad ended up in the hospital last Monday, where they discovered that his colon was completely blocked due to cancer, so they wheeled him into emergency surgery on Tuesday and cut out 30% of that shit (pun intended). They also removed a bunch of lymph nodes and tested those – turns out that stuff is cancer-free, which is AWESOME – but he does have spots on his liver that will require him to go through chemo. Scary, scary shit, man. Fortunately, my dad has been a total trooper and by Wednesday morning he was walking up and down the halls like a champion. Things are good now – he finally passed gas yesterday (lol @ us being excited about my dad farting, considering he regularly likes to stink us out), and we’re hoping he can be home in time for Christmas. Fingers crossed! Although, to be honest, I’ll totally spend Christmas in that tiny hospital room if I have to!

I don’t like to discuss my personal life here much, this being a sewing blog and all, but my dad is a pretty inspiring/amazing dude. He regularly runs ultra marathons – 50-100+ miles at a time, up a mountain, sleeping in the bushes, that’s all normal for him. I laugh when someone corrects me for saying 500k (“Oh, you mean 5k, silly.” “No, dipshit, I meant 500k. He ran 314 miles.”) when I brag about his racing. And dude is fast – he regularly smokes out all the little 25 year olds who run the same races. Not bad for a 54 year old who looks like Santa! Not to be a total sap, but getting to spend the last week with my family (despite the less-than-ideal circumstances) and knowing that my dad is going to be a-ok is literally the best Christmas present I could have ever asked for. I’m just so thankful.
❤️❤️

Anyway, I hope everyone has a Merry Christmas! I’m hoping to get in some much-needed sewing time – my machine has been idle for way too long 🙂

Tailoring the Vogue Coat

5 Dec

When I originally posted my Vogue coat muslin posts, there was quite a bit of interest about what goes in the process of making a coat from start to finish. I’m not one to tease, so here’s a glimpse into what I’ve been up to, coat-wise, for the past couple of weeks.

The first thing I should mention is that coat-making isn’t hard. It is time consuming, for sure, but anyone with a few projects under their belt could easily tackle this. It might take you a couple of months, and you may have some hair-pulling moments (either with deciphering instructions or actually trying follow them), but it’s doable. I don’t know who started this whole thing of ~omg coat-making is so hard~ (probably the same person who said that sewing with knits was also difficult. Nope! It sure ain’t!), but, ugh, just ignore them. It’s not hard. It’s time consuming, it’s expensive, and you definitely need to muslin the shit out of your pattern before you even think about cutting into your coating… but in reality, it’s not terribly different from making a lined skirt or dress. You just need to follow a few more steps. You can also totally omit the whole tailoring part, with the special interfacing and padstitching and bound button holes and all that – and then shit gets super easy (well, as super easy as sewing a lined garment can get :)). Personally, I don’t see the point in spending all that money on a garment if you’re not going to go all out and do the whole nine yards, but then again, I think tailoring is fun. So do what you will.

My first task, post-muslin, was to start cutting the plaid coating. I won’t go into detail on that process – basically the same steps as the tutorial I posted on matching plaid – and it took foreverrrr. Seriously, I think I spent close to three hours just cutting the outside fabric! WOOF. I also had to cut interfacing (I am using hair canvas, which is a hefty interfacing commonly used for tailoring purposes, such as coats!), lining, and silk organza. The silk organza was a last-minute addition – I originally wasn’t planning on underlining, although the pattern calls for it, since I don’t need my coating to be super warm in our mild winters. However, my pattern is a fairly structured peacoat, and the coating has a bit of a loose weave, so I decided to underline with silk organza to give it that nice crisp hand without adding a lot of bulk or unneeded warmth.

Vogue Coat WIP

Silk organza can be expensive, and some people like to use poly if it’s not touching the skin… but personally, if I’m going to dump all this time and money into a coat, the couple dollars in price difference doesn’t really effect my final budget. So I went with silk, since it presses nicely along with the wool.

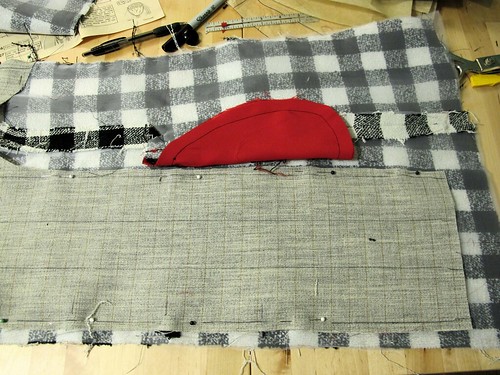
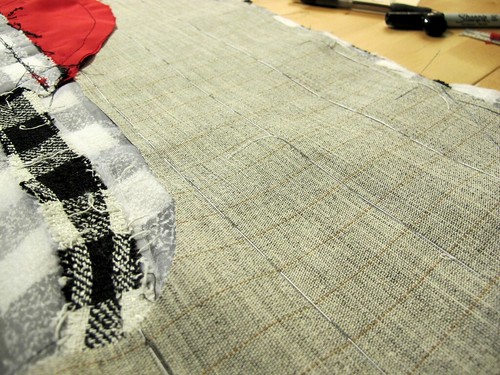
The bonus part of using an organza underlining (or really, any underlining at all) is that you can mark directly on the underlining and you don’t have to worry about it showing through the coat fabric. I totally use a sharpie. Go ahead, judge me.

I underlined my pieces flat on my tabletop (see this tutorial if you need more info on underlining!), using silk basting thread and going alllll the way around each piece. Every piece is underlined except the facing – only because I ran out of silk organza :). I will be interfacing that piece with a fusible. This process took a long time, but it’s pretty relaxing work – perfect for grabbing the computer and watching shitty documentaries. That’s my excuse, and I’m sticking to it.

After underlining, it was time to put in the bound button holes!

Vogue Coat WIP

I was actually a little scared of this part! I don’t know why – I’ve sewn plenty of successful bound button holes in my day, and used a different technique each time. Maybe I’m out of practice, but for whatever reason, I was not looking forward to this part and I definitely put it off for like, a week. Which is shitty because bound button holes are the kind of thing that get done before you do any other work on the coat, so that meant the project was put on hold until I got my ass in gear and put those damn button holes in the front piece!

To make my button holes, I wanted to try yet another technique, so I downloaded Karen’s e-book on bound button holes and followed her instructions. Folks, these are the prettiest, most perfect button holes I’ve ever made on the first try. Seriously! If you have any concerns about doing these, or have fucked them up in the past, you should definitely check out her book. I think I paid about $3.50 for it after the rate conversion. For $3.50, you really have no excuses.

Vogue Coat WIP

I mean – look at them! I even managed to match up the plaid on that particular one, ha!

Vogue Coat WIP

As I mentioned previously, the instructions include all the steps needed for a fully tailored coat, so fortunately I don’t need to compile a list of steps and modify the pattern to suit my needs. They are a little different from the previous coats I’ve made, in that some of the pieces are sewn together before you start with the interfacing and pad stitching. Personally, I like to do all that before I assemble the rest of the coat because it makes it easier to handle, but I’m also a stickler for following instructions. So, I attached the pocket, the front and side pieces (being careful to match up the plaid, which for some reason took me like an HOUR. Shifty plaid, go die.). I attached the interfacing using long basting stitches with my silk thread. This took a while, but I also recently rediscovered all my favorite awful pop-punk and ska bands from my youth, so I may or may not have had a personal dance party in the process.

Vogue Coat WIP

Here you can see some of the details – the hair canvas, the uneven permanent basting with the silk thread, my underlining, the pressed open seams. It’s coming along, that’s for sure!

Vogue Coat WIP

Next, I sewed my twill tape to the roll line of the collar. This will help the collar keep it’s shape as a wear it, since the twill tape will dictate how it falls at the fold line. You measure your twill tape to the length of the roll line, then subtract 1/4″ from the length and ease the coating to the tape and catch stitch it down. Pretty simple, but it makes a huge difference in the finished coat.

I also marked my pad stitching lines on the collar, but I forgot to take a photo. I totally used that sharpie, too. Ha!

Vogue Coat WIP

So that’s where we are now! The coat fronts have been mostly assembled – I just need to pad stitch the collar, and it’ll be ready to attach to the back and side back pieces. Obviously, it’s not anywhere near completion, but that doesn’t stop me from pinning it to my dress form and pretending it’s a coat. Call it inspiration, or call it a kick in the pants, or whatever. Either way, I’d love to finish this by Christmas, but we’ll see!

I know the plaid looks like it doesn’t match in those pictures, but the fronts are not properly overlapped. Trust me. Three hours of cutting means all the plaid fucking matches, dammit.

What’s on your sewing table this week?

The Vogue Coat: Muslin #2

15 Nov

Well well, 3 posts in one week! That doesn’t happen too often, huh? Hopefully y’all aren’t tooooo sick of hearing from me, because I have lots to say apparently!

Starting with yet ANOTHER muslin post. Forreal, tho, y’all were so helpful in my last muslin post, that I’m sticking my hand back in the cookie jar again. A little help, yes yes?

Coat Muslin, part 2

First things first, you probably noticed that this coat looks entirely different – that’s because it’s a different pattern altogether! I ended up scrapping the original Vogue pattern plan – a shame, because I really wanted to use it (it was a gift from a reader, and I like to make use of awesome things, see), but there’s no point in trying to make something work that needs, well, that much work. Especially considering all the modifications I’d have to make beyond just sizing – including drafting a new lining, facing, and undercollar. No, no thank you.

So I dug around in my stash and pulled out Vogue 7666, which happens to actually be in my size. And to make things extra exciting, this pattern has all sorts of fun goodies in the instructions for creating a beautiful hand-tailored coat – things like separate lining pieces, instructions for padstitching, a marked roll line, etc. Fun!

Coat Muslin, part 2

I made up a quickie muslin and here are the pictures! Based on everyone’s suggestions, I am wearing this muslin with a sweater underneath, and I slipped some shoulder pads in the muslin as well. The shoulder pads may be on the large size, I dunno, they were in my stash.

Coat Muslin, part 2

I think it fits much better than the first, off the bat. Look, the arm holes are normal!

Coat Muslin, part 2

I can’t tell if the shoulders need to be narrowed a little, though?

Coat Muslin, part 2
Coat Muslin, part 2

Back and sides look ok.

Coat Muslin, part 2

I know the back looks a little loose, but I honestly can’t go much smaller without making the coat difficult to move around in.
Also, ignore that weird shit going on at the bottom half – there will be a back vent there, but I didn’t bother sewing it in the muslin, ha.

Coat Muslin, part 2

I know the collar and lapels are kind of weird and pointy, but I like them! Keep in mind that they will be a little bit smaller – the 5/8″ seam allowance is there, and once I get the facing installed there will be notches and topstitching and all that.

I also need button help! What would you choose? I really love these black glass buttons from Mood Fabrics – one, two, three or four?

Or do you have a better suggestion? My only requirements are that they are black (sorry, but I think anything other than black is just going to look off with my fabric choice), 1″ with shank, and they reeeeally need to be $3.50 or less because I need 8! Again, you can see my fabric and pattern in this Instagram picture.

Coat Muslin, part 2

Sooo, to sum up: coat muslin #2, y/n? See any fitting changes I need to address before I start slicing in to my beautiful coating?

Vogue 2765, The Muslin

4 Nov

I’m afraid I don’t have a finished object to show y’all today. For exactly one week now, I’ve been dealing with a kidney stone that will NOT leave my body. Seriously, I’ve had these before and they generally pass within a day or two, but these little shits have made a home inside me, I guess, and no amount of water (or other weird home remedy, yes, I drank the olive oil and lemon juice, eww) will expel them. I hate peeing into a screen, I hate taking painkillers, and I hate this little segment of my life right now. I missed half a week of work last week, and get up to go to the bathroom about every twenty minutes on average. Shit blows.

Anyway, enough about me and my TMI, let’s talk more about… me! While I didn’t make anything finished, I did finish the muslin for my Vogue coat! Let’s have a look see.

V2765 Muslin

To be honest, I’m a little underwhelmed. It’s just so… meh. But then again, it’s a coat muslin made with a patchwork of different muslin fabrics, two different sleeves, and I’m not wearing a sweater under it. I was, but I took it off for the pictures because I don’t know why. I guess I wanted to make sure that it still looked good when it was loose. It’s not like I always wear a sweater 24/7, this is Tennessee we are talking about here.

I can’t tell if it really looks ok or if I’m just delusional. Help me.

V2765 Muslin

My pattern was a size too big to start, so I sewed most seams with a 3/4″ seam allowance and I think that really helped with pulling in the fit. It still looks a little loose, but this is also lightweight muslin and not a heavy coating.

V2765 Muslin

The underarms, though. Yikes. Need to raise that quite a bit.

V2765 Muslin

So, more about those sleeves. The right side is the original pattern piece. It’s terrible. I actually left it on so we could laugh at it together. The left sleeve is a two piece sleeve from my Fabiani coat (whyyy can’t I just wear that this winter? Wish it still fit 😥 ). I definitely like the two piece better, but it needs some tweaking as it’s a bit tight when I have on a bulky underlayer. I sewed it with the same 3/4″ seam allowance, so I think the normal 5/8″ will be fine.

V2765 Muslin
V2765 Muslin

Ahaha! See how bad the underarms are? Granted, that’s the shitty sleeve, where the problem was actually worse.. but still. It’s bad either way.

V2765 Muslin

Speaking of the original sleeve, this is why it’s so bad. It is a straight line from underarm to wrist – no tapering whatsoever. So the cuff, you can see straight to the elbow. Who thought that was a good idea?! God, it’s so terrible.

Anyway, I’m still on the fence about this, although I will say that leaving it alone overnight on my dressform (which, if you were wondering, is almost entirely what I use the dressform now these days. Putting shit on it so I can decide if I hate it the next day) gave me a ~fresh eye~. I guess I just want to make sure I’m not off my rocker here.

To recap, the fabric I’m using is this black and white checkered coating (which I’m almost having second thoughts about because, ughhh princess seams) and I haven’t settled on a lining, but I’m leaning heavily toward tango red. Also haven’t picked buttons (lolol I’m a hot mess), but I’m thinking toggles would be FUN.

Soo, what do you think? Vogue 2765, yea or nay? See any other fitting issues I failed to mention (beyond the underarms)? Want to sew a coat along with me (I’m going the “barely tailored” route)? Have any well-wishes you’d like to share with a lady who needs to exorcise this demonkidney stone? I’m all ears!

Sewing the Robson Trench Coat, part 2

29 Apr

Following up on last week’s Robson progress post, I have a few more bits and pieces I’d like to share before the ~big reveal~. I normally hate dragging these types of projects out over several posts, but I think this coat deserves more than just a single post (plus, I haven’t taken pictures of my newest projects! So consider this filler, ha!).
Robson Progress

Last week, I left off with the main body of the coat completed – everything from the collar, to the facing, to the hem. All that was left was the sleeves, the belt and belt loops, and the buttons. Easy enough, yeah?

I WISH. I about killed myself over those dumb ol’ sleeves! Putting them together was easy – even with the added step of trimming/grading the sleeves and adding the bias binding – but setting them in took me close to 2 hours, and there was lots of scream-cussing involved. The hardest part was getting the bias binding on the sleeve seam allowance once everything was set in – mostly because the area was obscenely thick with all those fabric layers, and also because I’m an idiot and I trimmed the seam allowances to super short before putting on the bias binding.

PROTIP: Sew one side of the bias binding on before you trim down those seam allowances. It will give you much more leeway in an area that’s already pretty tight to maneuver around.

Lace Trench

I will say that, despite my troubles, those sleeves set in perfectly the first time – and they look beautiful! The drafting on this thing is pretty amazing.

Lace Trench

Hemming the sleeves was also kind of tough, because the total circumference of the sleeve was smaller than the circumference by the throat plate. Which means I couldn’t just slide the sleeve over the arm of my sewing machine and go in the round – I had to do some horrible wedging and go VERY VERY slowly. To keep my hem even, I stuck a piece of tape on the arm of my machine (you can barely see it in this picture, if you squint) and used that as a guideline. My hems turned out pretty straight and even – not that you can see it with that busy lace pattern :B

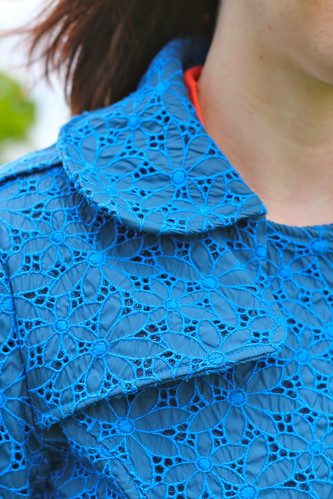
I did come across one problem when sewing the sleeve tabs – the pattern calls for you to sew 3 edges, right sides together, and then turn right side out and press. Well, I tried that…

Lace Trench
Lace Trench

And, um well, I’m not sure exactly what happened. HAHA. I guess my loop turner just grabbed the lace and not both layers? Anyway, I was able to shove the underlining back inside the lace tube with a knitting needle, but it made me think about how I was going to tackle the belt and belt loops, since they are also sewn the same way.

To make the belt loops, I followed the same procedure as for the Thurlow belt loops. You can see a tutorial on that here (from my Thurlow sew-along!).

Lace Trench

For the belt, I folded in 5/8″ along each edge and pressed it.

Lace Trench

Then I folded the whole thing in half…

Lace Trench

And topstitched along all four sides. This made for a nice, crisp belt – without having to worry about turning a long tube and ending up with that… thing.

Lace Trench

Here is my finished belt. As you can see, I made a few changes – I decided to use a buckle instead of tying the belt, as I think it makes the coat look a little more trench-y. It’s just a basic self-covered buckle that I pulled out of my stash, and covered with the navy sateen that I used for underlining (also, the sticky guide in the kit was all dried up, so I used spray-mount on the fabric to get it to stick aaaaand I didn’t go outside to do this, so my sewing room may or may not be covered with spray glue jsyk). I also narrowed the belt by about an inch – I’m not sure exactly how much, I just kept hacking at it until it fit in the buckle. With this in mind, the belt loops were also shortened to accommodate the narrower belt.

With all that done, it was time to add the button holes and buttons! Not much to report on that – I used my button hole cutter to slice through the holes, and I am pleased to report that they are decidedly unhairy. The buttons were sewn on with silk thread, which I first ran through beeswax – I wanted them to stay on that damn coat! I moved the bottom buttons outward slightly, so the coat is more straight than A-line (I just think that suits my figure better!). Oh, and I didn’t bother with the interior buttons – I don’t ever use those things anyway, meh.

As it stands now, the coat is finished! I am so proud of it and I can’t WAIT to show it off 🙂 I even got some super-fancy pictures taken, and damn it looks good.

Here is a sneaky peek because I can’t help myself.

IMG_6541

Stay tuned!

Thurlow Sew-Along: Attaching the Waistband

7 Nov

Holy shit, do y’all even realize what is going on today.


FINAL COUNTDOWN PANTS PARTY TIME.

Ha! But in all seriousness… we’re just a few steps away from being finished! Let’s get excited, yeah? 🙂


Today we are attaching the waistband, steps 15-19. You should have a semi-finished pair of pants at this point, all major seams sewn except the back extension. We will get to that today!

wb1
You should have two waistband pieces – a right side (with one square end) and a left side (with one pointed end) – cut in both your regular fabric and your lining fabric, and one set should be interfaced (I opted to interface the side with my fashion fabric, as it needed a bit more structure. Do what works best with your particular fabric, though!). Stack both left pieces together and both right pieces together, and sew along the top edge – the un-notched, concave curve – and the center front (the aforementioned square/pointed ends).

wb2
Trim, grade, and understitch the seam allowance.

wb3
You won’t be able to understitch all the way into the center front sections – that’s ok! Just understitch as far as you can 🙂

wb4
Open up your waistband pieces, and start pinning the main fabric side to the top of your pants, right sides together. Don’t worry about the lining at this point. Go all the way around, center front to center back (and yep, back extension is still open. We’re getting there!). Sew this seam.

wb5
Trim your seam allowances.

wb6
And press everything up toward the waistband.

wb7
Now for that pesky back extension! See my pretty, bright pattern markings? We are going to sew right over that. Pin along the marked line, all the way up through the waistband. I know, the marking doesn’t extend that far but do the best you can. The instructions indicate that you should baste first, check the fit, and then sew your permanent seam. However, if you already made a muslin, you don’t need to worry about basting first – unless you really want to fine-tune the fit. Personally, I always baste first. Even after multiple muslins 🙂
Be very careful to ensure that all your seams are aligned when you sew up the center back seam! If one side of your waistband is wider than the other, it will result in one side that has a little peek of lining popping out. So double-check before and after you sew!

wb8
Press open the center back extension. Those giant seam allowances are supposed to hang around – later, you can adjust the waist of your pants, making it bigger or smaller as needed 🙂

Sooo… pinning the waistband. Fair warning: this part is a bit fiddly and you will probably end up hating me for making you slog through it. I know, it sucks! But it’s better than unpicking a bunch of stitches, or having a janky looking waistband. Spend a little extra time up front making sure everything is lined up, and it will save you hours of banging your head against the wall when you realize that your third waistband attempt looks even worse than the first one.

wb9
Start with your lining all spread out and hogging the spotlight inside your pants.

wb10
Fold the lining under to the inside until the fold is covering the stitching underneath by about 1/8″-1/4″.

wb11
Now flip the waistband over and pin through the front, right in the middle of the ditch between your pants and your waistband.

wb12
When you flip the waistband back over to the lining side, the pin should just be catching the lining. The fold underneath the pin should be no more than 1/4″ – anything more than that will just look sloppy.

wb14
Repeat all the way around the pants, skipping the 3″ or so section of lining that covers the back extension. We aren’t going to stitch that part down, so just leave it open.

wb13
STOP PRESS. Are those chickens?? SHUT THE FUCK UP.

ahem.

wb15
With your sewing machine, stitch all the way around the lining, exactly in the little waistband/pants ditch that you pinned into. This is called stitching in the ditch. Yes, I know. It’s so clever.
Again, don’t worry about the section with the back extension is. Just skip over it and continue stitching in the ditch.

wb16
Afterwards, you can tack down the lining over the extension. The instructions call for just a few stitches worth of tacks, but I like to slipstitch mine down all the way so I know it’s not going anywhere. And also, I used yellow thread, because yellow is delightful.

wb17
Give the waistband a good steam press, both inside and out.

That’s all! That wasn’t so hard, huh? 🙂
Expect a wrap-up post in a couple of days – belt loops, buttons, and hemming. And then PANTS PARTY 2012, YO.