Tag Archives: review

Completed: Niizo Be Strong Backpack

30 Nov

I made another backpack! While my original Freedom backpack from Niizo has been holding strong (and been schlepped across the US many times over the past 2 years), a couple months ago I was offered the opportunity to try the newly updated Be Strong backpack pattern from Niizo. While I don’t necessarily need a new backpack (what is a “need,” anyway, amirite), I was looking forward to the chance to sew one up! Niizo patterns – as well as the kits – are some of my favorite satisfying projects to work on.

Niizo Be Strong Backpack

I also, in all honesty, have been yearning for this specific pattern since I first discovered Niizo a couple of years ago. The patten was only available as a PDF with no included kit, and I wanted the kit… so I stuck with the Freedom backpack. But now the Be Strong backpack has been updated with some new features, and comes with a kit option. Yeah! And let me tell you – it is as good as I was expecting it to be!

Niizo Be Strong Backpack

Niizo Be Strong Backpack

Niizo Be Strong Backpack

The Be Strong backpack is a bit similar to the popular Herschel backpack – with a large zippered opening (no flap) and a 3-D zippered pocket on the front. The backpack features padding in the back and the straps, adjustable straps, a few interior pockets and exterior pockets, and a leather-wrapped handle. It also has a cool hidden pocket on the side that can be used to hold small items that you need to reach quickly – such as your phone, wallet, passport, etc (I don’t think this pocket is exactly pickpocket-proof, as it’s pretty visible, so obviously use some common sense if you are traveling somewhere that this could be an issue. But for schlepping around the airport and not wanting to dig through a huge bag to find your cash, this thing is AWESOME).

Niizo Be Strong Backpack

Niizo Be Strong Backpack

Of course, you can buy the pattern solo and use your own fabrics, but I wanted one of those sweet kits! I chose the kit with the waxed canvas, in the khaki colorway. The lining is waterproof nylon fabric, and the contrast is a basic cotton. The kit also includes all the zippers (with leather pulls!), leather pieces (with the holes pre-punched, as well as waxed thread for sewing them), nylon strapping and adjustable sliders, and foam. Basically, all you need to supply is the thread and sewing machine.

Niizo Be Strong Backpack

Niizo Be Strong Backpack

I wasn’t sure what waxed canvas would be like to work with, but this stuff was really nice! The biggest thing I noticed was that it finger-pressed with absolutely NO effort – I didn’t need to use my iron at all! And while it does have a good amount of body (the backpack is completely empty in these photos, fyi), it isn’t hard to wrangle around and manipulate under the sewing machine. Although, there were a couple of points when I was literally sweating while I was sewing it haha. For the most part, it was fairly straightforward and super relaxing to make up. I found it easier to sew than the Freedom backpack – primarily because you don’t have to pull the entire backpack through a small hole in the lining (which can get difficult with all those layers + foam). Instead, you assemble + line the front and back, and then connect them. That connecting seam is then covered with a cotton binding. It looks REALLY nice and makes sewing the backpack soooo much easier!

Niizo Be Strong Backpack

I did encounter one big problem when I sewed this – I actually finished the entire thing (including hand-stitching the binding for a really clean and flawless finish), went to put it on… and realized I’d attached the zippered panel in backwards. Which meant the bulk of the backpack went toward the back of the pack, not the front. I don’t know how i managed to mess that up, but after a few minutes of thinking about what I was going to do, I came to the conclusion that I wasn’t going to be happy with a half-assed backpack. I knew I’d never use it. So… I ripped the pieces apart and re-did the backpack. It added an extra day to this project, but I’m so glad I fixed it!

Niizo Be Strong Backpack

Niizo Be Strong Backpack

The backpack is slightly smaller than the Freedom backpack, but still big enough to carry my laptop (a 13″ MacBook Pro), along with my ipad, Kindle and Field Bag full of whatever I’m knitting. I prefer a smaller backpack as it means I’m not tempted to overpack, which can get quite heavy! This one has been the perfect size for the last 2 trips I’ve brought it on. I especially like that it holds its shape when it’s less full, which makes it good for a daypack to carry while exploring around a city.

Oh, and in case you were wondering – the “Nope” patch is from Mood Fabrics!

And, because I’m a spoiled brat… I also got a kit to make the Fortune Wallet:

Niizo Fortune Wallet

I’ll spare you another 20 photos and direct you to this Instagram post, where you can see lots of sexy close-ups (or just stay here and admire how beautiful this wallet looks when taken in Portrait Mode haha).

The kit I chose was the royal blue colorway, and again, it included everything I needed to sew the wallet. This was a SUPER easy project that I finished in the course of a couple of days, to warm myself up for the backpack. Not really much to report here – everything came together perfectly and now I have an adorable wristlet that I can carry when I just need my wallet/phone and am lacking pockets.

My biggest advice for making one of these patterns (whether you buy just the PDF or order the kit – but – you should order the kit! They are really nice!!) is to TAKE YOUR TIME. Don’t try to rush the project – go slow, take accurate measurements and rip out stitching when you fuck something up. The #1 reason why these look so good is because I didn’t cut corners at any point in the construction. My other smaller tip is to try using a e-reader or your computer for the instructions, rather than print them out. I use my iPad – this was originally to save on paper, but I found that I can zoom in on the photos if a particular step is confusing. Can’t do that on a printed sheet of paper! (or can you? Are we in the Matrix yet?)

Niizo Be Strong BackpackLast thing! Niizo is currently offering a discount on all items in their Etsy shop! Yay!

🍎Dec 1st βˆ’13th 10% off on all items in the niizo Etsy shop

🍎Find out the coupon code in the maze. It is valid from Dec 1st βˆ’ 7th, 15% off (when you spend over US$15)

To get the secret coupon code, you must solve this maze. Need more clues? Visit these websites for the other pieces of the map:

☞ https://lladybird.com/

☞ https://www.instagram.com/trine.schroeder

☞ http://bymyhand.net/

Machine Review: Janome CoverPro 2000CPX

17 Jan

Good morning, everyone! As I mentioned in my year end post (as well as on Instagram a few times!) – I bought a Coverstitch machine in October! Specifically, a Janome CoverPro 2000CPX, which I purchased from Craft South here in Nashville. Now that I’ve had a couple of months to play with the machine and learn more about it, it’s time for a review post! Get a cup of tea, this one is long.

coverpro review

The Janome CoverPro 2000CPX is a 4 thread coverstitch that can accommodate up to 3 needles. It has minimal differences from the 1000CPX, which I also considered buying – basically, it’s a little easier to thread. There is also a 2 needle 2000CPX, but I wanted the 3 needle.

I chose this particular brand for 2 reasons – first of all, Janome tends to get very high praise for their coverstitch machines. This machine is pretty popular and gets great reviews across the board. It’s inexpensive (but not cheap), easy to thread, and provides a nice variety of stitches. Full disclosure for reason #2 – I work at Craft South, and I got a very generous employee discount with this machine purchase. This also swayed my decision, however, I was considering this machine before I even started working at Craft South (and I’m not gonna lie – knowing I’d get a discount on it was part of the reason why I agreed to work there, haha). While I did purchase this machine with my own money, it was discounted.

Why a coverstitch machine? Y’all. I have wanted one of these since 2007, no exaggeration. I put it on my wishlist every single year, and every year I convince myself that it’s a frivolous purchase. Since buying this machine and using it, I have learned that it does do more than just hem – however, it’s still an expensive machine that only does a few things. I ultimately decided to buy this machine because I do occasional alterations + fitting for clients, plus I got that discount, so it made sense for me to own one. However, it took me 10 years to decide to buy one. Don’t feel bad if you are still in twin needle mode when you hem your knits!

One question that I get a lot is – what is the difference between a coverstitch machine and a serger? Basically, a serger is used for creating + finishing seams – it has a knife blade that cuts the excess fabric so threads can wrap around the edge. It is great for knits as the stitches stretch with the fabric. A coverstitch does not seam, it only finishes. You can use it for hemming, attaching binding or foldover elastic, or creating decorative stitches (but not creating the actual seams). It is also ideal for knits, as the stitches stretch. If you are deciding between the 2 machines, I find a serger to be more useful for the most part. If you are debating on getting one of those 2-in-1 serger/coverstitch combos… don’t. They are a pain to use (you have to pretty much disassemble them each time you want to switch between machines) and cost the same as having 2 separate machines. Unless space is a big issue, get 2 separate machines.

All right, that all out of the way – let’s talk about the machine!

Janome Coverpro 2000cpx

Here is the machine in all it’s glory. Yay!

Janome Coverpro 2000cpx - free arm

One of the features it includes is a free arm (so you can sew small things in the round, like the hem of a sleeve). This is the free arm. I don’t know why but this is very hilarious to me, it’s so tiny!

Janome Coverpro 2000cpx - threading

When you open the coverstitch, it’s pretty clean and empty on the inside. There is only 1 looper to thread, and it’s very, very easy. Like, threading a sewing machine easy (not like threading a serger).

Janome Coverpro 2000cpx - threading

Janome Coverpro 2000cpx - threading

One of the nice features of this machine is that the looper has a tab to pull it out so you can more easily thread it (unlike some sergers where you have to use tweezers to weasel the thread in the looper hole under the needle plate, lord, I’m getting the sweats just thinking about that shit lol). This one pops out, so you can thread it and pop it back in.

Janome Coverpro 2000cpx - stitch options

The inside of the machine shows all the different stitch types that are available – two and three thread overlock, and a chainstitch. Since the machine has 3 needles, it means you have more options in terms of stitch width and needle position (something I didn’t consider when I purchased the machine but I’m pretty stoked about now!).

Janome Coverpro 2000cpx - threading guide

There’s also a diagram on how to thread the machine. See what I mean? Fucking easy.

Using the machine was definitely a steep learning curve for me – my serger (a Babylock Imagine) does automatic tension adjustments, so I don’t have a lot of experience with manually adjusting tension to correct my stitches (that serger is awesome btw, I’ve had it for nearly 10 years and I swear to god if it broke I would buy another one in a heartbeat haha). There are needle tension dials on this serger, plus looper tension, PLUS another switch that goes from “soft” to “tight.” The user manual is very brief, but my understanding is that soft is ideal for your lightweight fabrics and single/double layers that experience fabric curling and tunneling. The tight is for heavier fabrics, multiple layers (such as flatlocking or applying binding), especially if you are prone to skipped stitches. You can also adjust the tension on the needles for tunneling and skipped stitches.

Something else I have noticed with this machine is that it prefers a heavier needle if I am sewing through multiple layers (again, flatlocking or binding, or using a heavy fabric). It really does best with a 90/14. If you experience skipped stitches, I would recommend changing to a heavier needle and see if that helps.

One thing to keep in mind when using this machine is that you have to knot your threads or they will unravel the second you look at them. Once you are finished sewing, you pull the needle threads to the back and knot them by hand. I didn’t realize this at first and could not understand why my hems were coming unraveled so quickly haha.

Janome Coverpro 2000cpx - stitches, front

Janome Coverpro 2000cpx - stitches, back

Here are the stitch options, front and back. From left to right:
– Binding: 2 needles + looper. I used a binding attachment for this! There are several size options of attachments, mine is the wider one (42mm-12mm). The finished binding is roughly 3/8″ wide. You cut strips of binding (this example is a woven, but it is AWESOME for knits) or use foldover elastic, feed them into the attachment and the machine wraps it around your fabric and stitches it in one go! It’s super fast and fun, but that shit was a steep learning curve. Also, that attachment is not cheap. Again, I got mine at a discount, but it was still a bit eye-wateringly expensive, just FYI.
– Chainstitch: Single needle + looper. This can be used to baste (apparently, since it’s easy to pull out. Jury is still out on that one in my experience tho), or hem jeans (look at your RTW jeans! The hem is chainstitched!). What I use it for is single-needle topstitching on knits, like on a neckline. It looks really clean and neat – but unlike a regular sewing machine, it also stretches!
– 3 needle coverstitch: 3 needles + looper. This creates a nice, stretchy hem for knits. Another thing you can use this stitch for is a mock flatlock. Serge your seams as normal, then stitch over them with the 3 needle coverstitch, with the needles on the wrong side of your garment (so the looper side ends up on the right side). It functions just like a flatlock – reasonably flat (non-irritating), strong, stretchy, and looks cool!
– 2 needle coverstitch: 2 needles + looper. You have several options for this stitch, since there are 3 places to put your 2 needles. Narrow or wide (shown above is wide), left or right. I have found that I prefer the wide for hemming, and the narrow with both needles to the left when using my binding attachment. You can also use this to do a mock flatlock, but I think the 3 needle version looks better.

So far, I’ve used my machine to make loads of underwear and tank tops. The binding attachment is perfect for finishing all the edges very quickly (again, you can either use strips of knit fabric or foldover elastic) while still keeping them stretchy like you’d get with regular lingerie elastic. The 3 thread coverstitch is awesome for activewear and creating flatlock seams that don’t rub or chafe and also look super professional. And, of course, I love using the 2 or 3 thread coverstitch for hemming my knits!

If you’re interested in seeing how the binder on this machine works, I have made it a highlighted story on my Instagram (computer users, I think you have to be on the actual app to view it). It’s pretty awesome! I will write a more in-depth post on using the binder, stay tuned for that.

So, do you need a coverstitch machine? Honestly, I can’t answer that question for you – it depends on how much you sew, your budget, and the amount of space you have to store one. Since I do this work professionally (and also sell these machines at the shop!), it made sense for me to own one. This machine does do a great hem on knits, but there is certainly a learning curve involved and it’s pretty expensive considering it only does a handful of functions. I also really really REALLY love that binding attachment; it’s great for finishing edges on underwear and activewear. However, a regular machine can also apply binding – albeit not as quickly and not with quite the same finish.

In regards to the learning curve – well, there is one. It took me several days of playing around with the machine, testing different stitches, settings and fabrics, before I felt like I really had a good handle on how the machine works. The only way to get past the learning curve is by PRACTICE. No amount of blog posts, YouTube videos, internet research, or telling everyone how scared you are of your machine is going to magically make it suddenly easy to understand. Get a glass of wine, put on some Duran Duran, and get to know your machine. Learn what works, what doesn’t work, try different needles and tension settings, rip out your stitches, make mistakes, learn from those mistakes, and take a lot of notes because I guarantee you won’t remember half this shit the next day. Like parallel parking a car for the first time, yes it’s a hot mess in the beginning. But eventually you get past fear and start working in autopilot. And also, for the record, I am an excellent parallel parker (after many, many years of practice lol).

Janome Coverpro 2000cpx

If you are considering this machine, my advice NOT to buy this online (even if it’s cheaper). Your local shop will be able to show you how to use the machine and answer questions and troubleshooting you may have. I also am real big into supporting your local shop, and keeping them in business πŸ™‚ If you don’t have a local shop that sells Janome – and this post swayed your decision to a yes – you can buy one from me at Craft SouthΒ πŸ™‚ We ship to anywhere in the US for free and offer a discount below the MSRP you see on Janome’s website. There are no affiliate links in this post, however, I do receive a commission for every machine sale I make through our shop. FYI!

Whew! Ok, I think that’s a long enough post so I’m gonna wrap this up. Did I miss anything about this machine that you still have a burning question for? Do you have a coverstitch machine? Are you gonna buy one now? πŸ˜‰

Review: The Janome AMH M100 Sewing Machine

19 Dec

Good morning, everyone! I have a review post today (if you’re not into reviews, no worries – I will have a ~normal~ post later this week, too! So much catching up on projects before the year ends!) – for a sewing machine! NGL, I am pretty excited about this little machine.

As you may or may not know, I started working for Craft South earlier this year. Craft South is an adorable little fabric/yarn/crafty store, located in the seriously hip 12 South neighborhood in Nashville, TN, and owned by our fearless leader, Anna Maria Horner. In addition to our sewing, fiber and other craft supplies, we also sell Janome sewing machines. Now, I am not particularly attached to any one brand of sewing machine – I have several different brands that I use at home myself – and I strongly believe that all brands are good brands, it’s just a matter of what fits best with your budget and needs. Whenever I have the opportunity to try out a new machine – especially one that’s perhaps a little more budget-minded than whatever I have on my sewing table at home (sorry, guys, but I LURVE me some expensive-ass sewing machine hahahaha) – I am ALL about that! This particular machine is especially delightful to me, cos it’s a branded Anna Maria Horner machine *and* it’s our future classroom machine for Craft South.

I will lead with a stock photo from the Janome website, because it’s much prettier than the pile of trash photos you’ll see in the rest of this post, lolz

AMH M100

This is the AMH M100 – designed by Anna Maria Horner, and manufactured by Janome sewing machines. It’s a reasonably basic machine – no crazy embroidery functions, a few decorative stitches – that is easy to use, has some fun features, and is just plan adorable! It’s a fairly small machine, and I think the floral design is so beautiful! There’s also a big honkin’ space that is perfect for having signed by Anna herself, and yes, speaking from experience here.

There are a lot of features about this machine – too many to put in a blog post (well, without making this post insanely boring), so I am just going to touch on the ones that I think are really cool, as a sewist and also a sewing teacher. You can always go to the website and get the full run-down, or, if you’re local – come in our shop and play with the machine.

AMH M100 Sewing Machine

The machine has 99 stitch designs – ranging from your basic utility stitches (straight, zigzag, button hole, etc) to some crazy looking embroidery stitches that are perfect for quilting and applique projects. They’re all based on Anna Maria Horner designs – so lots of hearts, swirls, girly things like that. I admit, I don’t ever use stitches like this in my projects, but they are REALLY fun to just sew samples on and ooh and ahh over.

As a sewer of garments, the stitches I use most are 00, 01, 04, 06, 07 & 18. That’s your basic straight stitch, the Lock-O-Matic stitch (it will automatically backstitch at the beginning and end of your seam, which I find especially useful for bra making), the triple stitch (which is what I use now for topstitching, instead of topstitching thread + straight stitch), zigzag stitches, and the button hole stitch. There is also a locking stitch (02, it’s the same idea as the lock-o-matic, except it locks the stitches by stitching in one place instead of backstitching), stretch stitches, overcasting stitches, darning stitches, blind hem stitches, the triple zigzag, and all those applique stitches. One thing I do appreciate is that there isn’t a mass overload of decorative stitches – just a handful. It’s not overwhelming, but there are a few cute options to play around with.

AMH M100 Sewing Machine

AMH M100 Sewing Machine

The little stitch card fits in a piece that clips to the machine, so you can keep it attached to your machine if you want to reference it. The clip also folds down, so you don’t have to stare at it if you don’t want to. Or you can take it off completely and lose it somewhere in your sewing space, which is generally what I do.

AMH M100 Sewing Machine

There are several feet and accessories included with the machine – a straight stitch foot (not shown in this photo, but it’s attached to the machine), a clear satin stitch foot, a 1/4″ foot (PRAISE), an overcasting foot, a blind hem foot (which I use as an edgestitching foot), a zipper foot, a button hole foot, *and* an Even-Feed Foot. The Even-Feed foot is similar to a walking foot, except instead of “walking”, it clamps down on the fabric and moves it. I am told this is more precise than a walking foot, since the pieces are held together when they are moved. At any rate, that alone is a pretty sweet add-on! Those feet tend to be pretty expensive on their own.

The machine also comes with boring but useful things, like extra bobbins, spool caps, a seam ripper, etc. The Organ needles included are a new thing for me – I’d never heard of this brand before I started working at Craft South, but they are just as nice as Schmetz and soooooo much cheaper. I can get a pack of 10 Organ needles for like $2.30, WTF. Janome machines are made to work specifically with Organ needles – they will work with other brands, including Schmetz, but the needle-threader is calibrated to work with the eye placement of an Organ needle. So you can sew on the machine with any brand of needle, but you may or may not be able to use the needle threader if it’s not an Organ brand. I haven’t tested this theory bc Organ is all I keep in my sewing room now (and it’s all we have at Craft South, too).

AMH M100 Sewing Machine

AMH M100 Sewing Machine

The front box opens up so you can store all your feet and accessories in one handy spot. This piece can also be removed so that the machine has a free arm – useful for sewing stuff with a small circumference, such as sleeves and pants hems.

AMH M100 Sewing Machine

AMH M100 Sewing Machine

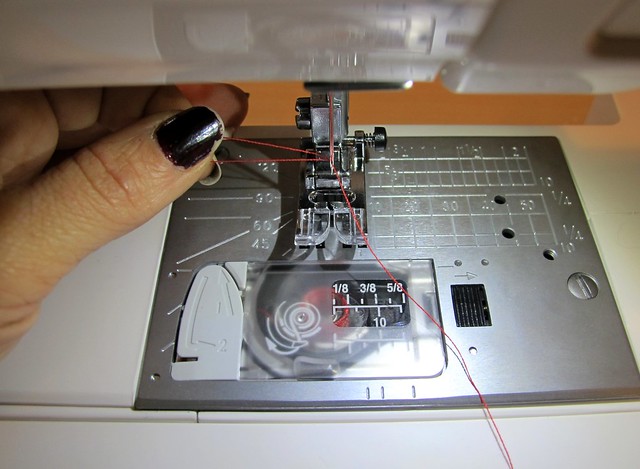
Threading is super easy. For the needle, there are numbers and arrows to direct you the thread path (if you’ve ever threaded ANY sewing machine before, just know that they are all mostly the same in this regard), and then there is an automatic needle threader to pull the thread through the eye if you have trouble seeing / are lazy.

AMH M100 Sewing Machine

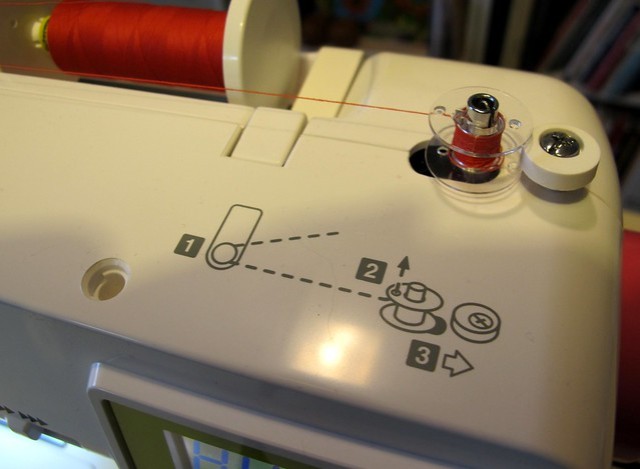
The bobbin winder also has a clear diagram. One thing I really love that about this machine is that the bobbin can be wound without the foot pedal – just unplug it and press the Start/Stop button on the machine. This is incredibly handy when I am setting up for class – sometimes I’ll have all 10 machines winding bobbins simultaneously and I feel like a little Sewing Machine Goddess hahahaha

AMH M100 Sewing Machine

The AMH M100 has a drop-in bobbin, which makes it incredibly easy to thread. There is a little diagram on the case cover to show you how it is threaded – just a head’s up, 9 out of 10 of my students always thread it backwards the first time (actually, on my old Janome – I had it threaded backwards for like the first 6 months of use haha). The threading feels counterintuitive to what you’d think, but it’s necessary for proper tension. At any rate, you’ll know if you thread it backwards because your stitches will pull out very easily.

AMH M100 Sewing Machine
To thread the bobbin, you drop in your spool and pull the thread down, with the tail pointing toward the left…

AMH M100 Sewing Machine

Then you pull it under the metal piece and up the channel, toward the 1…

AMH M100 Sewing Machine

And pull the thread down toward the 2…

AMH M100 Sewing Machine

Where there’s a built-in thread cutter that will clip the tail to the correct length. Then you just put the cover on. That’s it! No need to pull up the bobbin threads, it’s ready to sew.

A word about drop-in bobbins: I’ve used both drop-in and front-loading, and both have their merits. The front-loading bobbins will give you a more even, precise stitch. However, they are also prone to tangling and creating thread needs on the underside of your work. The drop-in bobbins don’t give you quite as beautiful of a stitch (I think this is negotiable, though, since very few people are going to be able to tell the difference just by glancing), but they are a lot more user-error-proof. These bobbins in particular are known for being really really hard to mess up. We rarely have problems with the bobbin in our classes, unless something else is wrong (such as a dull needle, or incorrect threading). Our Janome rep loves to do this trick where she throws a big thread nest in the bobbin and sews a seam – the nest just shoots out of the back and doesn’t affect the stitching. It’s kind of weird and also really amazing haha. I think this sort of bobbin is really ideal for the beginner sewer, or someone who buys a machine for their kid and doesn’t want to mess with fixing it when they inevitably screw something up. Like I said, it’s really hard to jam it up, even if you intentionally shove a thread nest in it.

AMH M100 Sewing Machine

Here are the buttons on this machine. The Start/Stop can control the machine without the foot pedal – you just have to unplug it first. I will admit I’ve never personally used this button except to wind the bobbin, but kids whose feet don’t quite reach the floor love it. ha. There is also a backstitch, locking stitch (again, same as the backstitch except it stitches in one place to lock. This is really useful for those embroidery stitches), needle up/down, aaaaand my favorite button – the scissors! Press that little dude after you finish sewing, and it will raise the needle and clip your threads! Argh I love that feature so much! There is also a slider to control the machine speed.

AMH M100 Sewing Machine

The stitch buttons are in the green section. From here you can select your stitch, move the needle position, adjust length/width, make a button hole, and there’s also a “memory” feature for the scissors button.

AMH M100 Sewing Machine

The throat plate has a ton of markings for measurements, which are especially useful for quilting and applique. This is my only beef with the machine, actually – I absolutely hate the guide markings. I find them really confusing to see which one you’re using, and I don’t like that they are only on one side of the needle. This is easily solved by slapping a piece of tape on the machine along the markings, which is what I do for my classes.

AMH M100 Sewing Machine

AMH M100 Sewing Machine

The machine also comes with this giant (removeable) tabletop, which is ideal for quilting.

Finally, here are some stitch samples:

AMH M100 Sewing Machine

AMH M100 Sewing Machine

Just your basic straight stitch. The top fold is the bobbin stitching.

AMH M100 Sewing Machine

Here is the straight stitch with a triple stitch underneath. These stitches used the exact same thread – just basic polyester Gutterman, the stuff you use to sew a garment. This is why I love that triple stitch – it’s sooo much thicker than the straight stitch, but doesn’t require a special thread or needle.

AMH M100 Sewing Machine

I also played around with some of the embroidery stitches.

AMH M100 Sewing Machine

And a few of the utility stitches (zigzag, triple zigzag, and stretch/lightning bolt stitch). Sorry the angles are so weird and artsy, it was really hard to take a photo without a huge shadow over it.

Here are some more photos of the machine working her glorious angles:

AMH M100 Sewing Machine

AMH M100 Sewing Machine

AMH M100 Sewing Machine

AMH M100 Sewing Machine

In conclusion, this is a fantastic little machine and I’m excited to bring these into the Craft South classroom! It’s very easy to use (as in, intuitive and user-friendly) and a solid little machine that doesn’t bounce around the table when you’ve got it on a high speed. It’s very similar to our current classroom machines, the Janome 4120 – the main differences that I have noticed thus far is that the AMH M-100 has less decorative stitches (and doesn’t have the stitch alphabet – which, let’s be honest, rarely gets used). However, the AMH M-100 does come with that Even-Feed foot. I love those 4120s and think they are wonderful machines, but I can’t wait to make our classroom just a little bit prettier πŸ™‚

AMH M100 Sewing Machine

Note: I was not compensated in any way for this post (no, I did not get a free machine either). However, if you come to Craft South and buy a machine from me, I *do* get a commission. If you’re not local and are interested in this machine, visit your local Janome dealer!

GIVEAWAY: Sewing for Fashion Designers

6 Apr

Well hello there, folks! Sorry about my sudden abrupt absence (I wouldn’t normally even mention it, but I got a few concerned emails over the week, so I thought I would clarify!) – we spent the last weekend of March moving house, and then the past week painting and unpacking and then throwing our first party in the new place. I actually haven’t been at my sewing machine since before I went to New York last month, and I’m kind of going crazy! The good news is, I’m pretty much completely unpacked and set up at this point (I told myself I wasn’t allowed to sew until the house was set up – talk about a good motivator!). The bad news is, I don’t have anything new to show y’all just yet. The awesome news is, I do have a giveaway! So there’s that! Bear with me here and regular posting will resume shortly, I promise.

Sewing For Fashion Designers_Front

Sewing for Fashion Designers is one of the newest titles from one of my favorite sewing book publishers, Laurence King. The beautiful hardcover book has over 300 pages of information, covering everything you need to know about sewing from a professional production standpoint.

I admit, when I received my copy in the mail – my first thought was, “For real? Another book on learning how to sew? How many more of these do we need, really?” And while I still agree with that to a certain extent, this particular title doesn’t necessarily fall into that category. This book won’t teach you how to thread your domestic machine and it doesn’t include any sewing patterns. What it is is a dictionary’s-worth of sewing knowledge, beautifully photographed and illustrated, giving you all the information you could possibly need to create clothing the same way it is done in the industry. To be honest, I found it really fascinating.

Sewing For Fashion Designers_Spread_01

The book is a bit textbook-like in how it’s laid out – the first chapter covers tools and equipment, working with patterns and cutting out your fabric. Chapter 2 is a comprehensive overview of fabric, notions, and supporting materials (such as interfacing for tailoring a jacket) and underpinnings. Chapter 3 covers stitches – both hand and machine – as well as finishing seams. Chapter 4 is for general techniques, such as setting in a sleeve or creating a welt pocket. Finally, chapter 5 explores fabric and cut-specific techniques, like working with sequined fabrics or fur. There’s a good mix of both illustration and photography, plus little tips scattered through the pages. There are also plenty of runway photos to illustrate the techniques and fabrics described in a particular section.

Sewing For Fashion Designers_Spread_07

As someone who has an aggressively edited sewing library (I can – and will – buy sewing books all day, but there comes a time in every sewer’s life when you realize you gotta let some of ’em go so they can be loved and appreciated by someone else, rather than gather dust on their shelves, you know?), I really like this book and I definitely made some space for it in my collection. I love that it covers an entire range of techniques and I love how the instructions are laid out and how easy they are to follow. It doesn’t cover fit – but I’m ok with that (I think fitting really belongs in its own book – that’s a whole world of knowledge that can’t possibly be covered in 20 pages). I love that it’s not necessarily geared toward the beginner female sewer – it speaks from a fashion industry standpoint, and holy shit there are actually photos of men sewing in this book. It’s also, like I said, just fascinating to flip through. I’ve been reading it, well… like a book. Ok, a novel. Whatever.

(psst – click the photos to enlarge)

Sewing For Fashion Designers_Spread_02

Sewing For Fashion Designers_Spread_03

Sewing For Fashion Designers_Spread_04

Sewing For Fashion Designers_Spread_05

Sewing For Fashion Designers_Spread_06

Sewing For Fashion Designers_Spread_08

GIVEAWAY IS NOW CLOSED
Like I said at the beginning of this post, there’s a giveaway here! Laurence King has been kind enough to offer a second copy to one lucky winner, yay! If you’d like to throw your name in the hat to win your own copy of Sewing for Fashion Designers, just leave a comment on this post. You don’t have to say anything in particular, unless you want to tell me your favorite joke! (please – I need some new jokes!) This giveaway is open to US READERS ONLY (sorry, my international friends! I love you!) and I will close the comments one week from today, Monday, April 13, 2015 at 6:30 AM CST.
GIVEAWAY IS NOW CLOSED

If giveaways aren’t your jam, you can also get a copy of the book on Laurence King’s website and, of course, good ol’ Amazon. Please be aware that the title has not been released yet, and is currently on pre-order.Sewing For Fashion Designers_3DGood luck, everyone! In the meantime, you can bet I’ll be back puttering around the new sewing room – now that I’m unpacked, I can finally start sewing! I even made a cardigan last night! Life is good πŸ˜€

Note: Sewing for Fashion Designers was given to me by Laurence King, in exchange for this review. All thoughts and opinions expressed are my own πŸ™‚

Completed: The Jenna Cardi (+GIVEAWAY)

15 Sep

In my wardrobe, I have a very small selection of RTW clothing that is quickly dwindling to nothing. Out of those pieces, the majority of them are lightweight knit cardigans. You know the kind I’m talking about – sewn, rather than knitted, lightweight enough to throw in a purse, wearable for all seasons (I dunno about y’all, but I wear my cardigans throughout the summer – air conditioning is tooooo cold for me!). As I’m quickly replacing all my clothes with handmades, the one major hole – other than undergarments (which I’m working on!) – has been those damn cardigans. I love knitting cardigans, don’t get me wrong – but those take loads of time, not to mention even the lightest fingering weight yarn can’t compete with how lightweight a knit fabric is, you know?

I’ve been on the lookout for a good cardigan pattern – not even really for the pattern itself, but rather, the instructions. Y’all, the one time I tried to sew button holes on a knit, it ended up being slightly traumatizing. Then there was that time recently that I tried to use an old RTW cardigan to copy into a handmade one (cutting it apart to use as a pattern – same concept as how I made my striped hoodie). Spoiler alert: it didn’t work out at all. Clearly I can’t hack this on my own. I need someone else to do it for me.

20121202-210149

Also, that cardigan I chopped up? As much as it wasn’t really my favorite – it was the one grey cardigan that went with basically everything. And here it was, chopped up into little bits and, uh, I kinda needed it back.

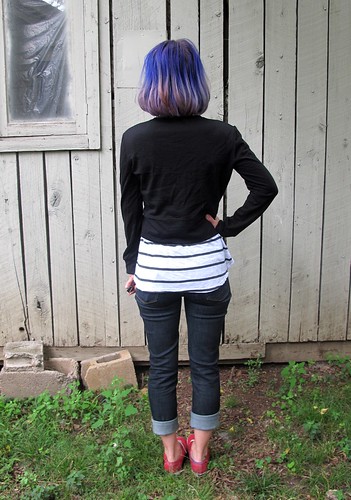
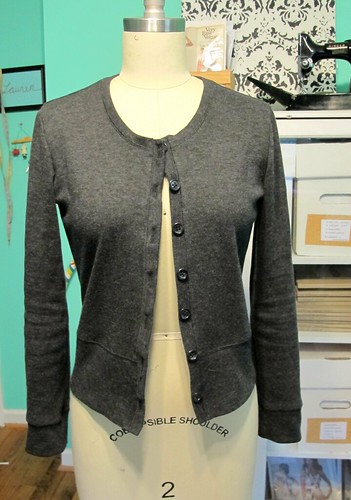
Jenna Cardi

Anyway, all that being said – right about the time I realized I was making a huge mistake (chopped up cardigan and all), Kat emailed me, saying she’d just launched her new pattern company, Muse Patterns, and would I like to try and review the Jenna Cardi?

UM. YES.

Jenna Cardi

HI GUYS, LOOK, DREAM CARDI PATTERN RIGHT OVER HERE.

Jenna Cardi

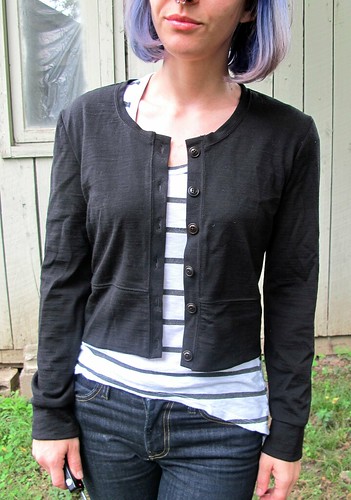
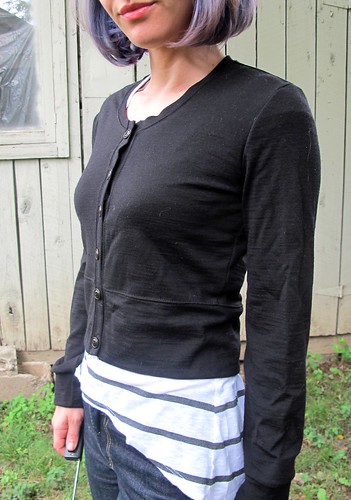
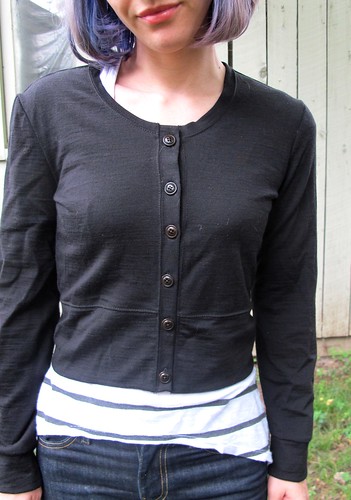
The Jenna Cardi comes with a few different options, so you mix and match to create the cardigan of your dreams (I’m not the only one who dreams about cardigans, am I?). You can choose a cropped or waist length version, sleeves ranging from full, to three quarter, to short, and then there’s also an option to include a beautiful curved yoke detail.

I’m a boring person with no imagination when it comes to wardrobe basics, so I chose something plain and simple for my first hurrah – cropped length, long sleeves. The thing about this cardigan that makes it so special, though (I mean, other than the fact that I SEWED IT MYSELF yaaaay for not buying RTW!), is the fabric I used! HOMEGIRL GOT HER HANDS ON SOME MERINO WOOL.

Jenna Cardi

Are we all still freaking out about merino wool or has that ship sailed? Whatever, *I’m* still freaking out over it! Ever since Katie started pushing it on me like an extraordinarily effective drug, I have been trying in vain to locate a US source. That stuff isn’t cheap, even in the best of times – and to ship it all the way from NZ obviously adds some dollarz to the cost.

So where did I find this golden merino ticket, you might ask? Surprise – Organic Cotton Plus, of all places! They are starting to branch out to include other natural fibers than just cotton, which is all kinds of awesome. When they asked me if I’d like to try a little piece of whatever caught my fancy from the website, I stumbled across the merino wool and, forreal you guys, my heart stopped for a nanosecond. There aren’t a whole lot of options on the site at the moment – just the black I have here, as well as a natural colorway (which I almost got, but then the idea of dying that shit seemed too overwhelming. Plus, black is so useful! Even if it photographs like crap). At $33 a yard, it is not cheap – but it’s worth it. That black merino is a whopping 61″ wide, plus, IT’S MACHINE WASHABLE WOOL. Oh, and you don’t pay NZ shipping prices! Win win!

Jenna Cardi

Having used both merino wool from Organic Cotton Plus, as well as the stuff straight from New Zealand – I can confidently say that this is pretty good stuff. It’s soft and lightweight without being see-through, it has a nice stretch and drape to it, and it cuts and sews like a dream. Wait till you see the topstitching on this baby – it’s ridiculously beautiful. Ahh I just love this fabric.

Jenna Cardi

The only downside I can think of is that it does wrinkle up a bit, as you can see in these photos (it’s not nearly as noticeable in real life – otherwise, I would’ve steamed things up before taking photos. Womp whomp, deal with it). Kind of the same thing as linen – just natural wear wrinkles. If that bothers you, you’ll want to stick to something with a poly blend. For me, though, wrinkles are an ok trade-off for natural fibers!

Jenna Cardi

Anyway, I loved my Jenna cardigan so much – I immediately made a second one!

This one is pretty boringly similar to the black merino one, except it’s longer. It’s not quite the longer version – I cropped some off for my proportions – but it does look better with the shirt I’m wearing underneath it, ha πŸ™‚ Instead of using merino wool, I used some wool knit that I picked up at Mood Fabrics when I was recently in the store. This stuff is less drapey than the merino – it’s almost like sweatshirting, except without a fleecy side. It’s also not machine washable, so there’s that. I’ll have to handwash it like I do all my hand knits, oh well.

Jenna Cardi

Sewing both of these was ridiculously easy, by the way. My second version took me all of 2 hours – not bad! I made the bust 32″ and took in the sleeves a bit because they were a little wide. I also had to shorten the sleeves by a couple of inches.

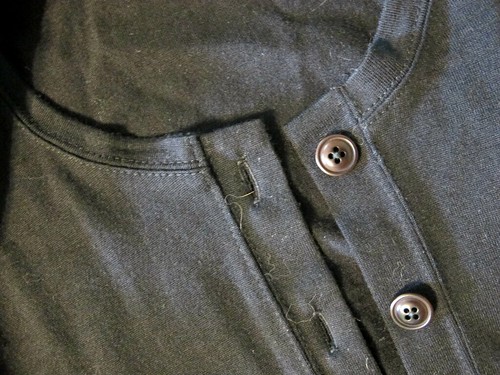
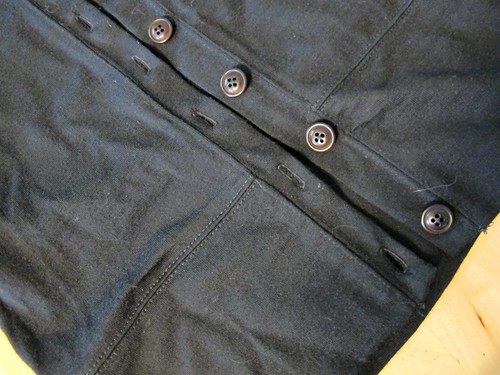
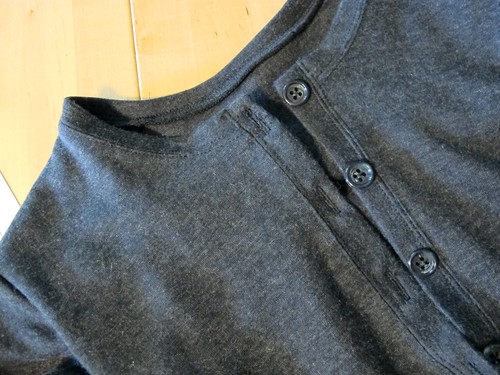
As I mentioned, I was pretty apprehensive about the button bands – but surprisingly enough, the button holes were way less problematic than I was anticipating! I made some test button holes – experimenting with interfacing, tear-away stabilizer, no interfacing – but ultimately went with the instructions, as I figure Kat knows more than I do when it comes to knit button holes πŸ™‚ The button band is stabilized with woven fusible interfacing, and it’s sewn on with a 1:1 ratio (meaning it’s not stretched at all). This gives the knit fabric enough heft to tolerate a button hole stitch without getting eaten into the bobbin area (my former experience with this sort of thing). For the black merino cardi, I also used tear-away stabilizer in addition to the interfacing. For the grey cardi, I skipped the tear-away stablizer and just kept things purely interfaced. Both worked out splendidly!

Jenna Cardi

Another thing I’ll point out is that, while these cardigans are somewhat fitted, there’s just enough ease included to keep the button bands from gaping open. Always a plus in my book!

Jenna Cardi

Jenna Cardi

I’m thrilled that they both look just as good unbuttoned as they do buttoned – which is important to me, as a cardigan-wearer. I usually button things up, but it’s nice to have unbutton options:)

Jenna Cardi

Jenna Cardi

Here are some ~extreme~ close-ups of the merino wool cardigan. Check out that topstitching! Ughhh it’s so beautiful! I did add a little more topstitching than called for in the pattern – I wanted to tie in the topstitched button bands and button holes, so I included it at the shoulder seams and along the bottom band. Plus, it’s just beautiful. Seriously.

Also, how bout them buttons? These are also from Organic Cotton Plus. I know black and brown is generally frowned upon as a color combination, but I like it πŸ™‚

Jenna Cardi

Grey cardigan close-up πŸ™‚ Boring buttons are from my boring stash.

So what do you think – are you team sew-your-own-cardi yet? I hope so, because Muse Patterns has hooked me up with an extra pattern to giveaway! πŸ˜€

Jenna Cardi

GIVEAWAY IS NOW CLOSED
To enter to win your very own Jenna Cardi, just leave a comment on this post and tell me what you plan on makin’! Which view? Any particular fabric? Do you have a wild card up your (cardigan)sleeve? Inquiring minds want to know! πŸ™‚ This giveaway is open WORLDWIDE and I will close the comments a week from today, on MONDAY, SEPTEMBER 22, 2014 7:00 AM CST. Good luck, y’all!
GIVEAWAY IS NOW CLOSED

**Some disclosures now – I was given the Jenna cardi pattern from the patternmaker herself, for free, to try and review. I was *also* given the organic merino wool fabric & butons from Organic Cotton Plus, again, for free to try and review. The grey wool knit was purchased at Mood Fabrics NYC out of my own pocket. No one paid me for this post – I’m just doing it for the freebs! As always, all opinions are my own πŸ™‚

GIVEAWAY: Casual Sweet Clothes

29 Aug

I’m still not quite back into my normal routine as of now (YET – the good news is, I can finally see the light at the end of the tunnel! Yay!), so today I wanna take it easy with some eye-candy of the Laurence King variety πŸ™‚

Casual Sweet Clothes book

This is Casual Sweet Clothes by Noriko Sashara, a new Japanese pattern book from – you guessed it – Laurence King. This arrived as a nice little surprise at my door recently (which, speaking of LK and surprise book, I don’t know how they manage it but they have their send-Lauren-a-surprise-book-so-it-arrives-when-she’s-having-a-bad-day shit down to a SCIENCE. It’s almost creepy how much they are on my vibe brainwaves, haha), and I really enjoyed looking at the pictures so I thought y’all would too!

I generally don’t care for most of the patterns in these sorts of books – they are cute, but not always really my style – but I see a lot of things in this particular book that I would actually like wearing! The styling is especially great – it’s still pretty sweet, but it’s not so sweet that you’re giving it the side-eye and wondering who the hell would wear that shit out in public.

Casual Sweet Clothes book

FORREAL THO. What is it about this photo? Is it the styling? Is it that the shirt is actually pretty freaking fabulous? Is it the hat (I could never pull off a hat like that)? Is it the babely model herself? I don’t know, but I want everything about that outfit on my body right now (minus the model because, guys, I already have a boyfriend ok).

Casual Sweet Clothes book

Not sure if I would wear the jacket, but it’s ADORABLE. I love the camel wool with the black bow contrast! And on the opposite page – such a pretty tank top! I have a vintage RTW dress from Mexico that’s in a similar style, and I’ve worn it so much it’s basically deteriorating. I’d love to make another one to replace it.

Casual Sweet Clothes book

If those last 2 photos were still sweet enough to give you a toothache, just know that there are some good solid basics in this book as well – like this tiered pencil skirt.

Casual Sweet Clothes book

One thing that I love about these types of books is that they offer a lot of inspiration in ways other than just the pattern itself. This dress pattern in particular isn’t necessarily something I would wear – but I *would* wear that cool lace inset in the sleeves! The book gives great instructions for adding this design element, and it would be so easy to modify an existing pattern to allow for a little lace love πŸ™‚

Casual Sweet Clothes book

I REALLYYYY love this blouse. Look at the cute little bows on the shoulders! Ahhh!!

Casual Sweet Clothes book

Also – this coat. See what I mean about the styling? It’s still pretty sweet (like, girl is wearing a tutu), but that coat would not look out of place in my closet.

Fun fact: this is the same pattern as the second photo (camel wool swing coat with the black bow). Just a couple small design changes – pocket, hood – plus the fabric choice make it a completely different garment! That’s another thing I love about these types of books – even if you don’t like the patterns offered, it’s pretty cool to see how the designer took the same pattern and reworked certain parts to make a completely different garment.

Casual Sweet Clothes book

My very VERY favorite part of these books are the instructions! Yesss! I LOVE the diagrams – those alone are basically artwork to me. I’m so tempted to rip them out and stick them directly on the wall, but I’m one of those people who is mortified to see books get torn apart haha.

Casual Sweet Clothes book

There are a couple small drawbacks to the patterns in this book- the sizing and the seam allowance (or, lack thereof). As with most Japanese sewing books (well, at least in my experience), the sizing is pretty limited – the largest size allows for a 36″ bust. That being said, the clothing is all very simple and relatively loose-fitting (and the finished measurements are printed for each pattern), so it wouldn’t be too hard to increase the size a little bit – or you could even find a similar shaped pattern and made adjustments (such as adding the shoulder ties to that tshirt). Or you could just use the book as inspiration, because there’s plenty of it in there! Ha! The patterns are all nested and crazy overlapped (so you gotta trace ’em if you wanna make ’em), and there are no seam allowances included, just fyi! Fortunately, the patterns don’t have a lot of pieces either, so there’s that!

GIVEAWAY IS NOW CLOSED
Ok, giveaway time! πŸ˜€ Laurence King has generously offered a copy of this book to one lucky reader! Yess!! If you’d like to enter to win your very own copy of Casual Sweet Clothes, just leave a comment on this entry and let me know where YOU like to go for eye-candy inspiration (I love eye-candy, need more in my life!). This giveaway is US ONLY and I will close the entries a week from today, FRIDAY, SEPTEMBER 5 2014 at 8:00 AM CST.
GIVEAWAY IS NOW CLOSED

If you are itching for your own copy RIGHT NOW, no worries, I got a discount code for ya! Use the code LLADYBIRD35 to get Casual Sweet Clothes for a whopping 35% off! This code is good through 10/1/14, so you have time after the giveaway ends if you want to make sure you didn’t win first πŸ˜‰ Whoop whoop! Don’t say I never did anything for ya πŸ˜‰

Good luck, guys! I promise I’ll try to be back to a more regular posting schedule next week πŸ™‚ Also, international readers – I’ll make it up next month! Haven’t forgotten about you β™₯

Review: My New Dressform!

25 Jul

Hey everyone! I have a review for y’all today! I know – blecch ughhhh, review posts are the worst, amirite? But I think this one is actually pretty relevant to everyone’s interests (unlike a good 90% of the review offers I am constantly being offered. Like, once a company offered me padded butt underwear. lolwut!), so bear with me here.

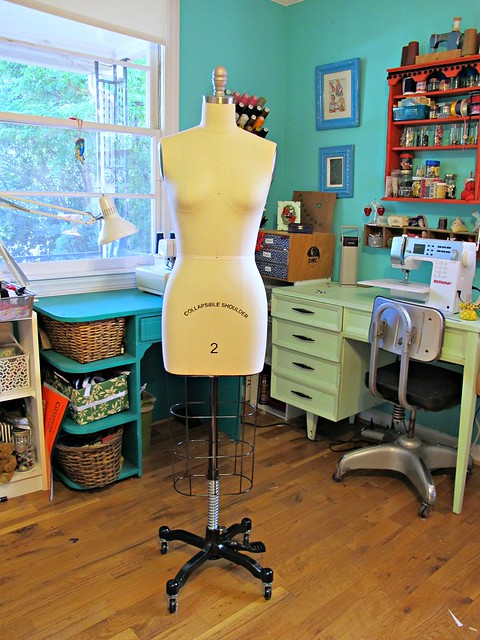
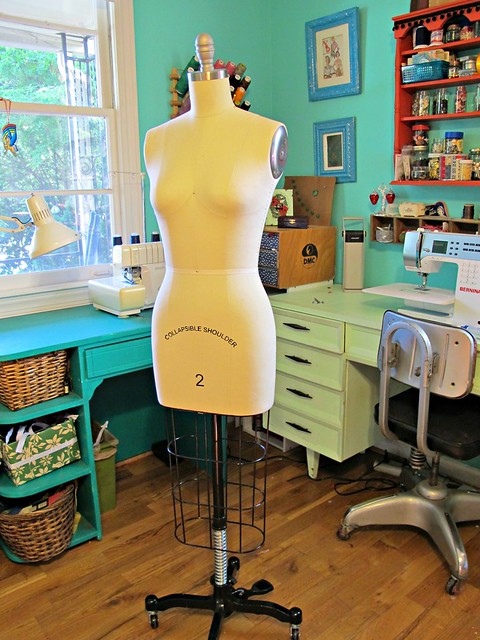
Check out the new lady in my life-

Dressform - The Shop Company

Gorgeous, right? This gal comes courtesy of The Shop Company, who reached out to me about a month ago and asked if I’d like a form in exchange for review. In the interest of full disclosure – I did not pay for this form, although I have been wishful shopping for one for a couple years now (and The Shop Company was actually on my list, after reading Gertie’s review). I currently have a form, but it’s a terrible piece of shit so obviously I jumped at the chance for a nicer model.

Dressform - The Shop Company

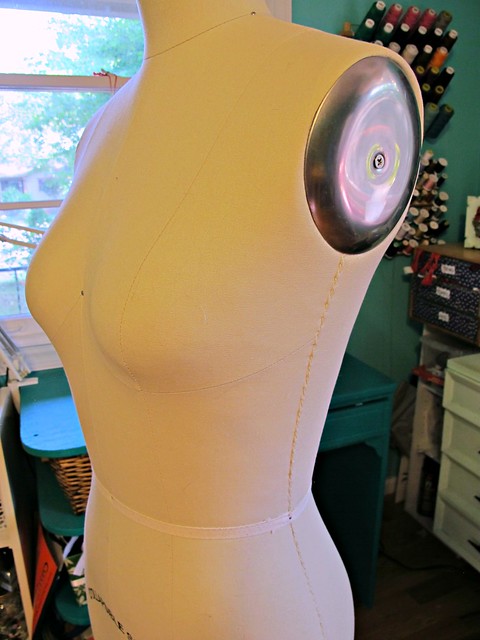
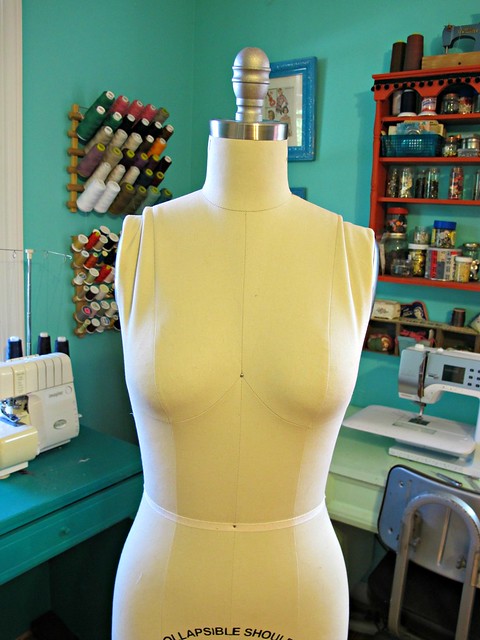
I was given full realm to choose any professional form from the site, which I ultimately went with the Professional Female Form with Collapsible Shoulders (although I totally lurked the Full Body form with arms and legs, until Landon told me he’d bury it in the backyard the minute I left the house). Like I said, I’ve been faux-shopping for a form for a while now, so I knew exactly what I wanted and this one checked off all the boxes.

Before we dive too deep into the new form, we should probably talk about my old form – a Dritz My Double (I’m not even going to link you to it, it’s so terrible). I’ve had it for a few years and it’s just really awful – extremely rickety, lightweight, and poorly designed. Every time I moved it, part of the tripod would fall out (which actually happened when I finally dragged it out to the shed the other day. FUCK YOU, DRITZ DRESSFORM). After about a year of use, the “cover” (I use this word lightly because it was really just cheap fabric glued to a plastic core) started to peel off – not to mention, it’s red. Who the hell chooses a red dressform? That shit clashes with everything. The Dritz form claimed to be adjustable, but that never really worked and it also adjusted across all size points (so, say, you couldn’t make it pear-shaped, since increasing the hip size would also make the bust and waist increase). The shoulders didn’t collapse, so getting garments on and off that thing was a nightmare. You couldn’t stick pins in it. Plus, it was ugly. Ugly forms are the worst, amirite?

So what’s so cool about this new form from The Shop Company, and why is it any better than the old one I was using? GUYS, LET ME TELL YOU.

Dressform - The Shop Company

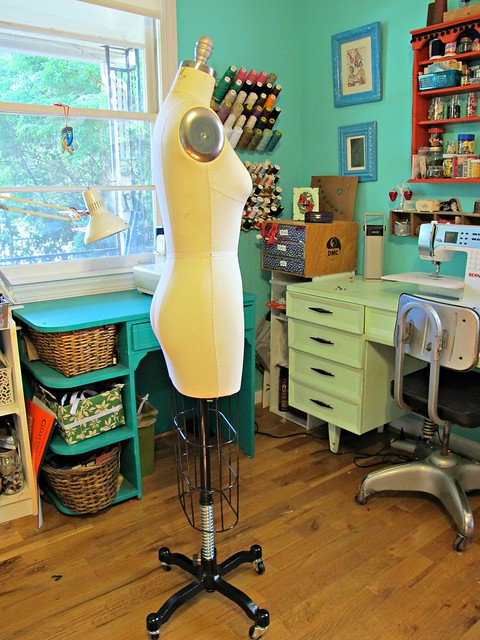
It’s solidly built. The base is extremely heavy (which made for bringing the box inside very entertaining, I’ll have you know)(also, I’ll have to know that I literally fit inside the box because, yes, I tested. What?), so there’s no danger of it tipping over. The wheels roll smoothly, the metal skirt cage doesn’t bend, and all the little metal-looking parts are actually metal – not painted plastic. I have pinned the shit out of the cover over the course of the month, and you can’t even tell – no snags, no pin holes, no marks. I’ve used professional dress forms in the past, and this one feels pretty comparable to the almighty Wolf form – at a fraction of the cost.

Dressform - The Shop Company

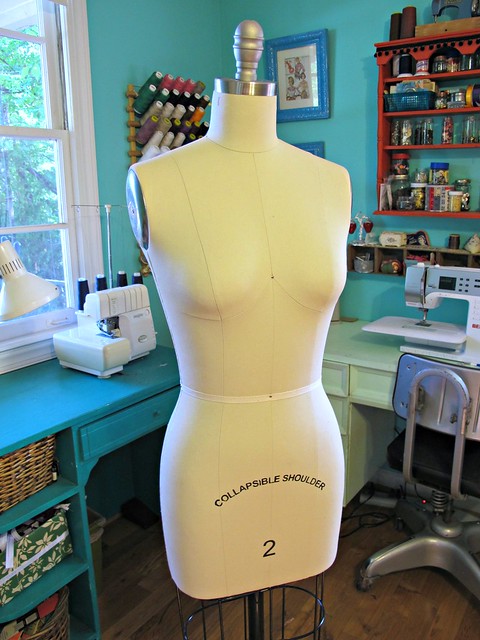
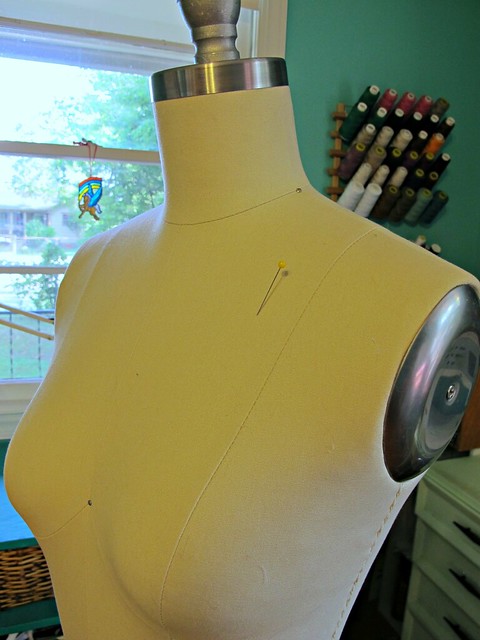
Not only does it have markings to aid in draping/fitting/patternmaking, but many of them are raised (including the side seams), so you can feel them straight through the fabric.

The form also raises and lowers via a pedal at the base. Interestingly, I lowered mine as far as it will go… laughed at how short it was…. and then realized it was exactly my height o_O hahahaa whoops!

Dressform - The Shop Company

THE SHOULDERS ACTUALLY COLLAPSE. You have no idea how much this delights me! Sometimes I just stand there and snap the shoulders in and out because it’s fun as shit. Don’t judge me.

Side note: Up until very recently, I couldn’t wrap my head around the concept of collapsible shoulders. Like… what are they collapsing into…? I only learned what that entailed when I was working at Muna’s and I started playing with her dressforms. So, the above image is what it looks like when you collapse the shoulders of your form. You just push them in and they snap into place. It makes getting on garments SO much easier, plus, like I said – it’s fun!

Dressform - The Shop Company

You can also stick pins in it! Not directly straight in – they have to go in at an angle (as with most professional forms; the core is still solid and unpinnable). But hey, they stick and they stay and it’s pretty awesome.

Chambray Colette Hawthorn

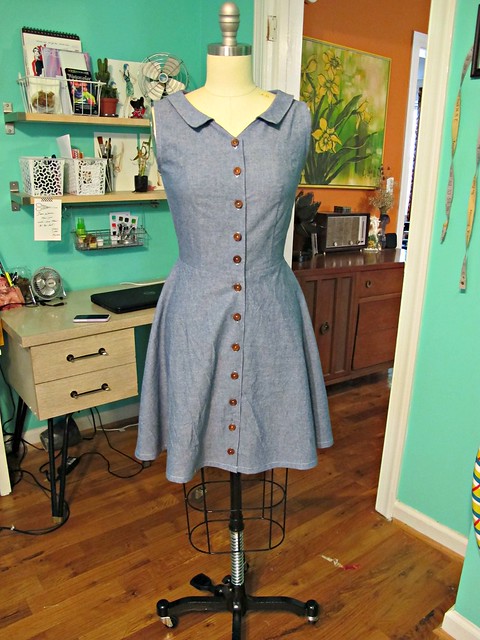
Oh, right, and it’s beautiful! I mean, seriously, look at that gorgeous dress form! It’s currently modeling my Chambray Hawthorn, but seriously, any piles of rags would look beautiful on this thing.

Old Form/New Form

I’m sure you’ve noticed me using the form since I got it – I’ve had it for about a month at this point. I waited this long to post a review because I figured the review would be much more accurate if I’d actually used it for a bit before gushing. The form actually came in while I was writing posts for the OAL, which means I switched that shit out in the middle of posts. This is actually a really good example of the difference a nice form makes when displaying your garments – check out my old form on the left, and the new form on the right. Doesn’t it make a world of difference?

Dressform - The Shop Company

The only downside I can think of to this form is that the sizing is pretty limiting. It’s not adjustable, and it’s a straight size that only goes up to a 20. However, for my size and body shape, the 2 is a pretty close match. I am of the camp that you can’t really use a form for intense fitting purposes (you’ll never 100% mimic your body with a form – and even if you do with, say, a literal body double, it still is rigid in areas that squish), so a close match is good enough for me. Of course, you can always pad out the form (I have used the Fabulous Fit system in the past, but good ol’ batting and a new knit cover will also work) if you need to add some additional curves. I use my form to display clothing, take photos, make minor fitting adjustments, help with design decisions while sewing, hang half-finished garments so they don’t turn into a cat bed, and to creep Landon out. For all these purposes, it works great.

Also – the price is pretty freaking amazing. It’s $225, which is insane for a form this nice. As a comparison – Wolf forms retail for around $850, and like I said, this one is pretty comparable. On the flip side, the cheapie ones from Joann tend to list around $260 – and while you can get a coupon to knock down the price, I’d really recommend saving your money for this nicer one. More expensive up front, but much much cheaper in the long run.

I am so excited about this new form – mostly because I actually have a legit recommendation now when people ask what kind of form I use! πŸ™‚ Thanks so much to The Shop Company for providing me with this form! If you’re in the market for a new form, definitely check them out – they have male forms, fully pinnable forms, creepy forms with arms, and even child forms. Something for everyone πŸ™‚

What about you? Do you have a dress form? Are you happy with it? Also – what should I name my form? The old one was Dolly. Should this be Dolly 2? Help.

* Disclosure: I received this form from The Shop Company for free, in exchange for a review. I know this review sounds really gushy and biased, but I promise it’s 100% honest; the product is just that good. I was not additionally compensated for this post. Also, despite the number of links in this post – none of them are paid affiliate links. Click away, y’all πŸ™‚

Review: The Colette Guide to Sewing Knits (+ a giveaway!)

5 May

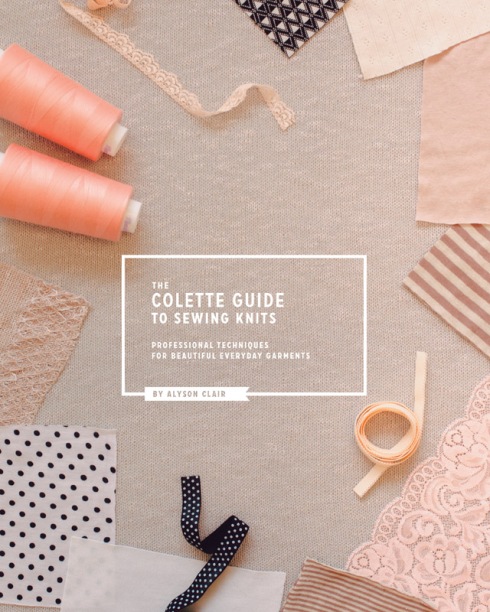
cover.indd

Y’all know how much I love sewing knits (just to reiterate: I LOVE that shit!). While knits tend to get a bad rap for being β€œtricky” to sew, I find them to be quite easy to fit and manipulate – not to mention, knits are worn more than any other fabric in my closet (and I’m sure most of y’all are the same way!). They’re just so comfy and easy to wear, you know?

Despite my never-ending campaigning to get people on board the Knits Boat, some of y’all are still a little scared to take the plunge. Whether you don’t know where to start when it comes to choosing a fabric, or if you think your standard machine can’t handle sewing on knits (spoiler: it totally can), or the techniques just seem completely foreign to your woven-trained brain – there is always room for more guidance.

Which is why I’m so excited for Colette’s newest book release – The Colette Guide to Sewing Knits. Written by Alyson Clair (a patternmaker with years of experience working in the knitwear industry) and then put together Colette-style with clear photographs and easy to understand descriptions, this book is a fantastic resource for tackling knits – taking you from the different types of fabrics, to what needles and threads to use, to the difference between sergers and coverstitch machines (and how to use them – from threading to tension to troubleshooting!), to how to sew knits on a regular ol’ sewing machine (for those of y’all who don’t have a serger ;)), to fitting, to different finishes. Whew!

Although I definitely have some experience with sewing knits, I can always use more tips and ideas for branching out and discovering new techniques. This book is pretty fabulous in the sense that it’s both helpful for knit newbies *and* those of us who have a few years under our belts – I even learned a thing or two in the first chapter. The chapter Stitching and Finishing totally blew my mind, though.

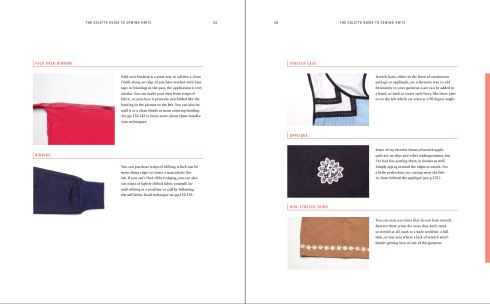
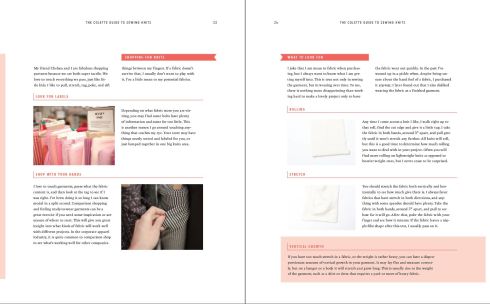
Want to take a little sneaky peek? Of course you do! (psst, you can click the photos to enlarge them :))

serger roadmap

When I said there was a full section on your serger (as well as the coverstitch and standard machine), I was not kidding! There are several pages dedicated to showing you the different parts of each machine, and what they do.

threading serger

There’s also a section on threading- for both the serger and coverstitch (ohhh, someday I will have a coverstitch β™₯)! Yay! So much easier to read than those little manual diagrams, yeah? πŸ™‚

serging a corner

Here’s a neat little tip on how to serge an inner corner.

elastic types

Like I said, though… the finishing section is my favorite part.

decorative elastic

Inserting decorative elastic – gah, I wish I’d had this resource when I was experimenting with making my own underwear a couple of months ago. I found the elastic really difficult to sew in, which is why I stopped after one pair πŸ™‚ Turns out I was sewing it in the hard way, doh!

lace neckline

Stretch lace – isn’t this so pretty? I’d love to try this with the new Moneta pattern.

buying fabric

There’s also an entire section devoted to knit fabrics – how they’re made, what the different types are, what needles to use, what to look for while shopping.

Pretty cool, huh? I’m so glad I picked up this book – I’ve learned a lot just from flipping through the pages, and I can’t wait to try some of these new techniques with my next knit project.

GIVEAWAY IS NOW CLOSED
If you’ve made it all the way to the end- yay! Prize time! Sarai has generously offered a copy of the book to one lucky reader – it could be you! To enter the giveaway, just leave a comment on this post and tell me what you’d love to sew up in a knit – a dress? A swimsuit? Boring white tshirts? What’s your knit end goal? I’m curious πŸ™‚ This giveaway is open WORLDWIDE and I will close the comments a week from today, Monday, 12 May 2014 at 7:00AM CST.
GIVEAWAY IS NOW CLOSED

For those of you who simply can’t wait and must have this book NOW, you can order The Colette Guide to Sewing Knits from Amazon or directly from the Colette website.

Good luck!

2013: A Year in Review

30 Dec

I can’t believe we’re coming up on the end of 2013! I hate sounding like an old fart, but where has this year gone? I feel like we barely reached summer and then it was suddenly Christmas! Whaaat! Anyway, I wanted to do a little round-up of 2013, because I just love reading this sort of thing. First things first, let’s look at all the garments I made –

2013... in a nutshell

I just counted those up and it would seem that I made over 86 projects/garments this year… that’s not counting the handful of double-garment posts (like when I’d make a tshirt to go with my new shorts), anything that didn’t make it to the blog (not much, but a few tshirts and leggings because, eh, boring), and stuff I made at my job that wasn’t for meeeee and therefore didn’t count.

Still… dang. That’s a lot.

If you don’t recognize anything from the last collage – it’s pieces I made for the Papercut Collective! I try to keep that stuff separate, as I figure if you wanted to see what I was making with Papercut, you’d follow that blog. Right? Right. Too much crossposting drives me nuts, haha.

Anyway, I tried to make everything up in a cute pie chart with percentages, but I apparently forgot how to count and I cannot be bothered to try again. I also would love to link y’all to every single one of the 86+ garments I made this year, but again – nope. However, you can totally lurk my closet and find every single one of my makes in there!

So what did 2013 entail for me? Let’s talk about some highlights, and… lolights (that’s not the word I want, is it?). In no particular order:

– I joined the Mood Sewing Network and my entire 2013 has been filled with the most wonderful fabrics and lots of new learning experiences – both in fabrics and garments (remember the silk Anna maxi? GOD can the weather get warm again already?!)
– I went to both NYC and Chicago and had a wonderful time in each city, with some of the most amazing people. I’ll definitely be back to both in 2014!
– I knit 8 sweaters and only one of them was a fail.
I made a bathing suit! And it held up to swimming in the Gulf of Mexico! Yes! I’m so proud of that little bugger, you have no idea.
– Another successful year of Me Made May! I had a lot of fun finding new ways to wear my handmades, but I will admit that taking daily pictures got a little trying. And May is such a long month! Whatever, I’m looking forward to it again in 2014 πŸ™‚
– I found the sweetest kitten under my house and rehomed him with my brother and sister-in-law! Theodore has been renamed Mr. Kitten and he’s sooo big and handsome now – look!
My favorite crawl space kitten is all grown up now  @ttamdude
(just the cat. Although, baby brother Matt is single too. Ladiesss~)
– 2013 has basically been the year that I had to remake my entire wardrobe due to weight loss giving me a complete change in size. I got tired of feeling sad every time I opened my closet and stared at all those beautiful clothes that no longer fit, so I started selling them on Etsy. Thanks to everyone who bought something – I’m so happy to know that those pieces have a loving home, and I was also able to pay some medical bills with the money I made! As a side note, I added a few more winter pieces to my Etsy shop over the weekend, so feel free to take a look. Everything is priced to moooove!
– I wrote this post on Sewing and Time Management and it ballooned into my most popular post by far. I still get emails and comments on that post on a regular basis – I had no idea so many people would find that sort of information useful and applicable to their own lives! Feels really good to know that I can give back to the sewing community that I love so much, even if it’s a weird kind of giving back that’s just writing up a post πŸ™‚
– I’ve had my Bernina for a full year now and I’m happy to say that we are just as in love as we were on day 1! I love discovering new things about my machine, and even the high cost of feet and bobbins hasn’t put me off from feeling good about the investment that I made. People ask me sewing machine advice all the time, and while I think buying a machine is a very personal choice based on budget and preferences – if you have the budget for a Bernina, DO IT. You won’t regret it πŸ™‚

One elephant in the room that I need to address is my current employment. At last mention, I had just quit my job to pursue a career as a seamstress. I’m sorry to say that particular stint did not work out – we actually parted ways a couple of weeks ago. There were several things leading up to it, but the general gist was that we simply did not work well together. With as much sewing knowledge as I brought with me, I still had a lot to learn – learning how to use an industrial machine (scary at first! But of course now I miss it, ha!), learning how to sew without instructions or pattern markings, learning how to properly do alterations (I did learn, and I also learned something even more important, which is that I still fucking hate doing alterations, ahah), as well as re-learning basically everything I know about sewing. Everything that came out of Muna’s shop was sewn in a more RTW manner – i.e., linings were entirely inserted by machine, for example, whereas the ones I do are applied by hand. Which makes sense, considering you have to really push stuff out quickly to be able to make any sort of profit. But there was a problem where I wasn’t learning fast enough, because there wasn’t enough time to teach me, and what I did learn was not taught in a way that I could quickly grasp it (I’m a kinesthetic learner, plus I’m one of those annoying people who asks lots and lots of questions. Looooots of questions). The end result was that we were not happy working together, and the combined stress of everything (new job, whooooole big change for the first time in years, problems with personal time management, etc) was making me very sick. Probably even caused that kidney stone, to be honest! So we made the mutual decision to part ways a couple of weeks ago. It sucks that it didn’t work out, but I’m glad I gave it a shot and tried something new – and got out of a job that I needed to get out of (and I’m pretty sure my old bosses agree πŸ™‚ the girl who replaced me is really great and they’re very happy with her!). I still consider Muna to be a dear friend and a wonderful person who I look up to. We just didn’t work well together, that’s all πŸ™‚ And honestly, I think the timing came out quite nicely because I had plenty of days off to spend with my dad at the hospital, when he and my mom needed me the most.

I have some other employment opportunities lined up for 2014, which I’m very excited about. I probably sound like a broken record at this point because I talk about it aaaalll the time, but one thing I’m really excited to pursue in this new year is teaching! I will finally have the opportunity – i.e., downtime – to do so, and I’ve been making plans and sending emails and chatting with all sorts of people who have given me some wonderful advice! I’m still working out details as far as trying to get together group classes, but if you’re in the Nashville area and are interested in private lessons (or want to arrange a group lesson with some friends) – email me and let’s talk! I’d love to share my knowledge with you and help you improve your skills! Non-Nashvillians… do you think Skype sewing lessons would ever be a thing? Ha πŸ™‚

Ok, sorry about the tangent, let’s get back to the year round-up!

My favorite things I made this year (this was soo hard to narrow down, all my handmades are like my little bayybies ok)
Orange Minoru
Nard-Dog Minoru
I wear this shit ALL THE TIME. All the time! It is a lightweight jacket, so I can’t wear it when it gets toooo cold… but that’s like 2 weeks out of the entire winter here. I love this jacket, it goes with everything, I feel cute and pulled together, and it has a hood!

Lace Trench
Lace Trench Coat
I can’t say I wear this one quite as much as the Minoru, just because it’s kind of a weird coat weight. But I love it so much and I loved working on it. It’s definitely a statement piece that I get a lot of compliments on every time I wear it – and a lot of surprised gasps when I smile and answer, “I made it.” πŸ™‚

Belladone Dress
Stripey Belladone dress
Such a simple dress, but it really is the perfect Saturday dress! I probably wore this shit once a week at the height of the summer because it was just SO easy and comfortable! The cutout design at the back and the simple stripes make this dress ideal – I can ~jazz it up~ with some fun shoes and accessories or a belt, but it also looks good enough on it’s own!

Marc Jacobs Birds
Fabulous Silk Birds
My labor of love for 2013 (other than the coat, which I’m still working on… I might possibly be finished by the end of the year, but you’ll have to wait until January to see heh heh heh!). I poured so much time and research into this dress – from fitting, to learning how to deal with the fabric, to finishing, to making the matching slip. It’s one of those dresses that I know I can pull on and feel fabulous in, even if I’m having a day where I hate everything in my closet. I’d love to make more of these in a solid fabric, although let’s be honest – the bird fabric is the best part πŸ™‚

Audrey in Unst
Audrey in Unst
My first knit with fingering-weight! This was kind of a big deal for me – not just a first with the fingering weight, but it was a pattern that was a bit hard to read (for me, anyway, as I tend to take everything quite literally and need things spelled out), and I also swapped out the yarn weight and added fit modifications. Happily, it all worked out and I just love how the sweater ended up!

Lumberjack Archer; Ponte Leggings
Lumberjack Archer
This one is kind of a surprise me to – but I wear these pieces so much! Those ponte pants, man. I can’t get enough of them. And I love the Archer, definitely planning on more of those in 2014!

Well, that was a long post! All in all, I think 2013 was a good year! A bit trying at times – I’ve had more health problems this year than probably every before, not to mention other setbacks – but I feel so much stronger and better as a person, and more willing to take chances now that I know a fail doesn’t necessarily mean the end of the world. I don’t have any specific resolutions for 2014 – except that I want to be fearless.

WHAT THE FUUUUCK omg omg omg

Here’s to a bright and beautiful 2014!

DIY with Zazzle

6 Dec

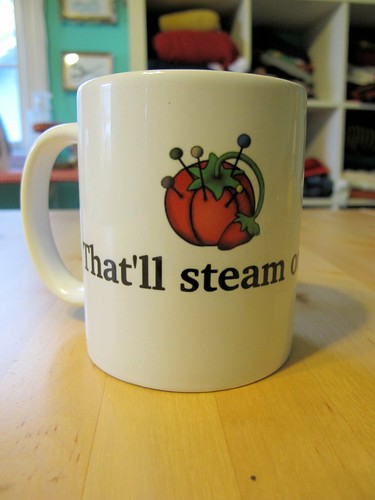
Have y’all ever heard of Zazzle? It’s an online marketplace where you can create custom, well, anything, and have it printed and shipped directly to you, on demand. Not only that, but you can also upload your designs to sell and have other people buy them! Pretty neat, and pretty perfect if you love creating designs but hate going through with actually getting the design printed on anything. Ooh La Leggings Zazzle contacted me a couple of months ago to see if I wanted to try out some of their products for a review. Did I! The hardest part was figuring out what I wanted – seriously, the options are endless. You can make tshirts (with like 50+ styles and colors to choose from), business cards, coffee mugs, key chains, buttons, stretched canvases for your wall, phone cases, greeting cards, custom wrapping paper… the list goes on and on and on and on and on! And everything can be customized. Ooh La Leggings I spent about 2 weeks trying to sort through the products, and in the end I decided to go with a pre-designed raglan tshirt – the Crafty Tee! Isn’t it cute? I love the design and the fact that I could get it printed on a raglan. You can also change the colors of the raglan, but I love the simple black and white. Ooh La Leggings My only beef with this top is the sizing – the suggested sizing says I need to go up from my normal size, since it runs small. So I ordered a medium, and it was just too big 😦 Should have trusted my gut and went with the small, oh well! Fortunately, I have a serger and I can make shit, so one quick swipe through my machine and the fit is perfect. No bagginess! Ooh La Leggings Ooh La Leggings Keeping things relevant with the ol’ blog, I also made my leggings. I used the Ooh La Leggings pattern (my flavorite), and this amazing solid red rayon ponte from Mood. You can’t see too well in the pictures, but it has a lovely sheen to it and it’s very soft. I love these ponte leggings because they are SO comfortable, and they almost pass as pants! Especially if you tuck them into boots, ha. Zazzle Loot I still had some extra credit burning a hole in my account, so I decided to also order some tiny business cards and a custom mug. Aren’t they cool! Zazzle Loot Zazzle Loot You probably saw this mug on my Instagram, because it’s hilarious. My sewing motto (other than “I’ve made a huge mistake” haha) is “That’s steam out” (because, seriously, IT WILL STEAM OUT). I say it all the time! So naturally, I needed a mug that said it. I couldn’t think of an appropriate, non-licensed picture to include, so I just went with one that I know doesn’t have any copyrights attached to it – my tattoo! Ha! “Designing” the mug was really easy – I just uploaded my picture, centered it where I wanted it on the mug, and then added text and played around with fonts until it looked right. There are multiple views of the mug, so you can do a 360 to make sure everything is placed correctly. If I could change anything about the whole process, I would include some pre-set, standard placements to choose when you’re centering your picture and text. There is a center vertically and center horizontally, which helps a lot, but most of my mugs have the design centered when the mug is turned to the side – so it looks nice while you’re holding it. I’ve learned that choosing placement is hard when you don’t have the physical mug to look at, and as a result, my stuff isn’t quite centered. And it’s also on the wrong side (I’d say oops, but it faces me when I’m holding it sooo that’s actually kind of a good thing, maybe). Honestly, I could send this back and get it fixed (it’s Zazzle’s policy to refund or replace if you’re not satisfied with how your design turned out), but I dunno, I guess I’m lazy. This works good enough for me! I’m also happy with the quality – it’s a nice, solid porcelain (makes a fun ‘ting!’ when you hit it with your spoon, aha) and the image is very sharp with saturated colors. Zazzle Loot The last product I chose were these skinny business cards for my blog! Nothing fancy, just my name, email and blog address (plus that little pincushion because, d’awww). I forever have people asking me for my blog link when they find out I have one, and I’m forever searching for paper to write it down on. Now I can just hand them a card! And they’re so tiny and cute. I also love the package they came in – it keeps the cards safe from the dangerous land that is the inside of my purse, but it’s easy to pull a card out by sliding your thumb across the top. Ooh La Leggings Overall, I’m very happy with my Zazzle experience – everything went to print and then shipped quickly, and the ordering process was smooth and simple. I would love to create a custom printed tshirt and then work some refashioning magic on it – how fun would that be?! Plus, I think I need more coffee mugs – like this one. And ooh, check out the cool sewing tshirts – one, two, and holy shit this is hilarious. Thanks, Zazzle, for letting me test and review a tiny offering of your massive array of products! Guys, just as a head’s up – this post contains affiliate links. Meaning, if you click the link and then buy the product, I get a teeny kick-back. Just in case some of y’all hate me or something, and don’t want to contribute monetarily. No worries! Anyone else get a hankerin’ for some DIY with someone else doing the work? Have you ever ordered from Zazzle before? I think I’m in love!

edit sorry the tshirt link was bad, y’all! I updated it and hopefully it’s fixed now πŸ™‚ Also, I just noticed that everything on the site is 20% off – and tshirts are 50% off! Sale runs today only, so go shop your little hearts out πŸ™‚