Tag Archives: Mood Sewing Network

Completed: Deer + Doe Myosotis Dress

26 Aug

Welp, I see that it has been 3 months since my last post haha! Honestly not trying to kill my own blog but it looks like I’m causing a slow death regardless.

ANYWAY

I have a new project! Yay! This is also 1/2 of my Outfit Along project – the sewing portion. The knitting portion is, unfortunately, still unfinished. More on that in a minute, I want to talk about the dress!

Coral Rayon Lawn Myosotis Dress

I actually started this dress back in 2018 – I was inspired by Fiona’s gorgeous white version and immediately wanted to make one for myself. I ordered the Myosotis Dress from Deer & Doe, and a lovely white rayon lawn from Mood Fabrics to make it up. I got as far as cutting the fabric pieces and then… just kind of gave up. I’m not sure what exactly caused the flame to burn out – but I stuck it in a drawer and left it alone for the winter. I definitely still had every intention to sew it – it survived a pre-move purge and was shuttled from one house to the next – but not really any current desire. I think I realized that the style + color weren’t really something I wanted to wear (looking at Fiona’s post again, I still think the dress is great but I also don’t know WHAT I was thinking when i decided to make it for myself as it is absolutely, definitely not something I would necessarily wear myself), but since I had already committed and cut the fabric I felt the best solution was to sew it up and at least then I could donate the dress to someone if I still didn’t like it.

So, that’s a long, boring-ass story about how the dress started. This year, when Andi and I planned the OAL, I immediately knew the Myosotis was going to be my sewing WIP. I got the pieces out, and had everything sewn up with a couple of days.

Coral Rayon Lawn Myosotis Dress

Coral Rayon Lawn Myosotis Dress

Now, the first rendition of the dress post-sewing looks completely different than the final version. I had a feeling that I was going to want to change the color, but I wanted to give the white version a fair fighting chance before I made that decision. As far as sewing – this was a simple, efficient make. I cut a size 36, with no pattern adjustments. I made version A, with aaaaall the ruffles, and added slim waist ties to pull in the waist a little bit (I can’t take credit for this inspiration, again, this was something I saw + liked on Fiona’s dress!). I sewed all the seams with a fine 70/10 needle and serged the seam allowances. Even though I was fairly certain I was going to dye the dress, I still chose to use white thread since I wasn’t sure what the final color would be. Since the thread is polyester, that meant it would not take the dye – meaning the topstitching would end up contrasting. I was aware of this going into the sewing, and just made sure to be extra careful that my topstitching was even and nice-looking.

One of the biggest complaints I read about this pattern is that people seem to really hate all the gathering. Y’all, I don’t know what kind of lazy sewers are out there but honestly it’s really not that bad and goes together really fast.

Coral Rayon Lawn Myosotis Dress

Coral Rayon Lawn Myosotis Dress

Once I finished the dress, I tried it on to confirm that the style was not going to work for me. Again, it’s a beautiful and romantic look – which isn’t how I like to dress. Furthermore, the fine, lightweight fabric was essentially see-through (as clearly seen on my dressform). I’m no stranger to dressing like an absolute hussy in the summer, but even this was a bit outside of my comfort level (and before you get at me with crazy suggestions like “adding a lining” or “wearing a slip,” let me remind you that summer here is very hot and I try to get away with wearing as few layers as possible, ha!).

Rayon Lawn Myosotis Dress

Rayon Lawn Myosotis Dress

Rayon Lawn Myosotis Dress

I knew I’d never wear the dress as it was, so I decided to experiment with dyeing it using coral Rit dye! I followed the instructions for doing this in the washing machine, using about 3/4 of the bottle and allowing it to agitate for about 50 minutes. The resulting color is VERY saturated – much more me! – and also takes the edge off the sheerness so that I can wear this dress without looking like I’m trying to win a wet t-shirt(dress?) contest. I should also report that I was dismayed to discover the dye turned my washing machine pink, despite running a couple of loads with bleach + old towels afterward (as instructed by the bottle). I own my washing machine, so it’s not a huge deal, but it was kinda lame regardless. That all being said, after a couple months of regular laundry, the washing machine is no longer pink whatsoever (I should also did – and did not transfer any dye to my other clothes). So it does eventually come out! Now, the dress itself – I have to wash it by itself as the dye still bleeds. I wash it in the sink using Soak rinseless wash (if you don’t already own this, do yourself a favor and invest. It’s marketed toward knitters but I use it for all my hand-washing, including lingerie, and it RULES) to prevent it from dyeing an entire load of laundry. My kitchen sink is stainless steel so I have not noticed any dye transfer by using this method.

Coral Rayon Lawn Myosotis Dress

Here is the dress after dyeing! It was almost good but I tried it on one last time and decided the sleeve ruffles had to go.

I cut them off, plus a few more inches so the sleeves would be cap-length. These were turned under and hemmed – using white thread, to match the rest of the topstitching.

Coral Rayon Lawn Myosotis Dress

Coral Rayon Lawn Myosotis Dress

The finished dress is definitely much more my style! The saturated coral color is one of my favorites for summer, and loose, swishy shape is perfect for the extreme heat we are experiencing lately. I’m actually surprised at how much I enjoy wearing this dress – it’s still a slight departure from my usual style, but it is a fun little way to change things up.

Coral Rayon Lawn Myosotis Dress

So that’s my finished sewn garment for the OAL – what about my knitted garment? Well. I had an Improv sweater waiting in WIP purgatory that I had all intentions of finishing for this OAL. I had started it about 3-4 years ago (back when I lived in an apartment in West Nashville)(ooh and here I am back in West Nashville IN MY OWN HOUSE look at how things go full circle yay), got about halfway down the body and decided I didn’t like how loose the fit was. Rather than unknit, I just left it in my knitting basket. Upon rediscovering for the OAL, I tried it on again and was fine with the sizing so decided to finish that.

Unfortunately, since this sweater has been out of my queue for so long, I seem to have lost all the notes I made with the math for sizing. I was able to finish the body, but the sleeves are a little slower going as I had to work out the equations for decreasing, and also try the sweater on frequently to make sure things aren’t going haywire. It is working out fine and I will certainly finish it – it’s just slow-going. At this point, the sweater is too bulky to comfortably carry around outside the house (and again, there’s that whole issue of trying it on as I’m knitting), which means it doesn’t go with me when I travel – which is frequently! AND, in the meantime, another WIP that I started right before the OAL had a major error that required a lot of unknitting so I’ve been focusing on that. So, I didn’t finish my knitted sweater – but I plan to in time for sweater season! Which to me encompasses the general spirit of the OAL that I was aiming for!

I think that’s all for this make! Lord, I don’t know how I manage to take a simple dress and turn it into a giant blog post of verbal diarrhea. If you’re wondering, I’m like this IRL too when people try to talk to me. What can I say, I’m from the South haha. Mindless chatter is our love language.

Coral Rayon Lawn Myosotis Dress

** Note: The fabrics + RIT dye used in this post were provided to me by Mood Fabrics, in exchange for my participation in the Mood Sewciety Blog (oh yeah, MSN moved!). All opinions are my own!And extra big thanks to my friend Jennifer for being a real pal and taking these photos for me when I was in Brooklyn last month for recent Jeans Making Intensive class at Workroom Social! Which, btw – 2020 for WS dates are listed! Yay! More dates to come as a I finalize them!

Completed: Bathroom Update + New Shower Curtain!

22 May

WHAT UP FOLKS it’s time for my yearly home decor sewing post 😛

Bathroom Update!

I actually don’t mind this sort of sewing – it’s certainly not something that I would do for income (past Lauren has been there, done that. Ooh, fun fact – I sewed curtains for this guy’s house once for a feature in Better Homes & Gardens lol y’all I can’t make this shit up), but it’s a fun sort of puzzle that requires some mental energy upfront (good) with lots of mindless making once you’ve passed that peak (even better). And, while it’s definitely not cheaper than buying something from Target, it is definitely the least expensive way to have custom soft goods in your home. There is a reason why this shit costs so much to have made – it’s a lot of work!

Anyway, I’ll get back to the whole point of this post! My updated bathroom! Let’s start with a series of before photos:

Bathroom Update - the before

Bathroom Update - the before

Bathroom Update - the before

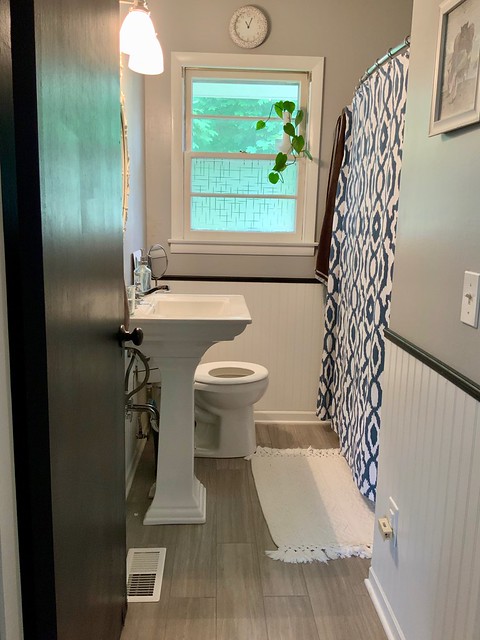
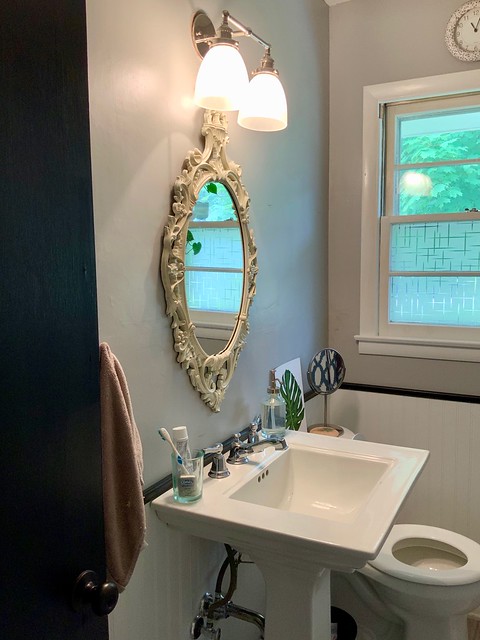
This pretty close to how the bathroom looked when I first moved into my house. By the time this photo was taken, I had already made a few changes – for once, I changed out the mirror (the original one was just some cheap $25 mirror with a black frame that I’m sure the sellers slapped in at the last minute). I also added a curved shower rod and some hooks to hang towels and toilet paper. Those updates were fine for while I was still unpacking and setting up, but now that the house is in a “normal” state I am ready to really get started on the fun updates!

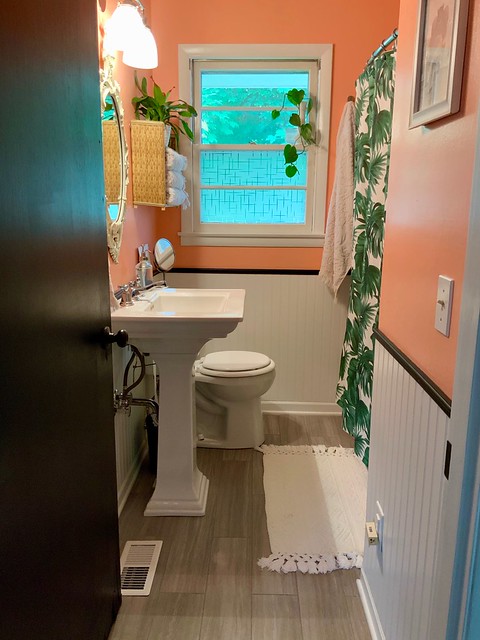
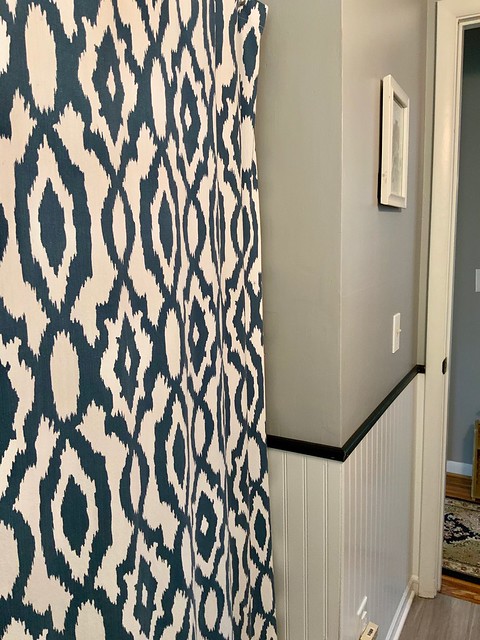
The main thing I wanted to do was repaint the room. The sellers had everything painted this same shade of gray, I guess to help sell the house to make it look a little more modern and trendy. They also painted all the doors, and some of the window frames, black. Don’t get me wrong – it’s a reasonably inoffensive gray, and I totally get if that’s your thing. More power to you, etc. But, gray is NOT my thing, and now that I can I’m gonna paint every fucking room in this house. It’s been a slow process (I currently have the kitchen & studio changed to white, plus now this room), mostly delayed due to paint color debates. The idea for this coral came pretty quickly, and once I’d decided on the color I got to go on the adventure of finding the right decor items to finish out the space. At some point I’d love to change the flooring to something less grey – however, that laminate is brand-new and I don’t see a point in ripping up a perfectly functional floor so the grey floor stays for now.

Bathroom Update!

Bathroom Update!

The paint color is “Simply Coral” by Behr (edit: Update, the paint is actually by Valspar. I don’t know why I said Behr!) (I know, riveting name choice there). I painted this on a Saturday afternoon, leaving it overnight to do the 3rd coat first thing in the morning. Yes, 3 coats! Despite this gray being fairly light, it did take a bit of effort to get full coverage! Which wasn’t too bad, due to the wainscotting and shower liner taking up most of the wallspace in this tiny room. Also, I feel like it’s worth noting that I actually took some extra effort with this project, including taping off the edges (I am actually really good at edging with an angled brush, but there were so many tight angles in this room that it made sense to take the extra time to tape everything off. Just so we are clear, I still managed to get paint on the ceiling and door trim haha), waiting for the paint to properly dry between coats, and actually doing that third coat (even though 2 would have been “good enough.”). Since I know I’m going to be in this house for an indefinite amount of time – and any poorly done projects will eventually need to be fixed by, well, ME – I really want to do things right!

Bathroom Update!

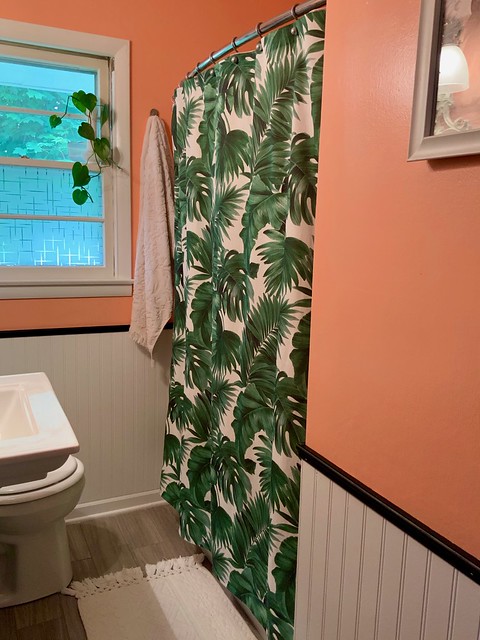
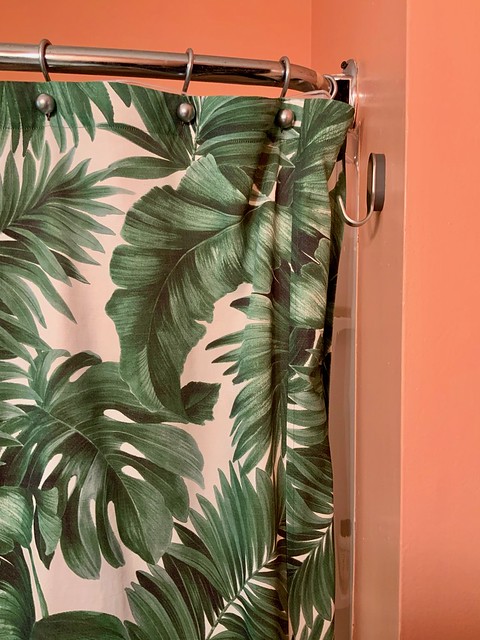
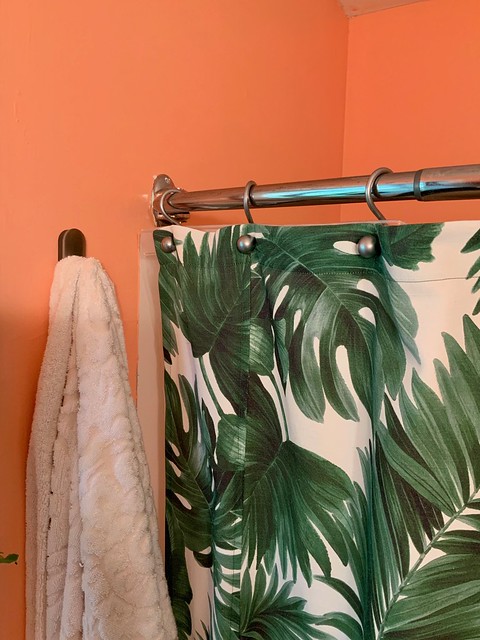
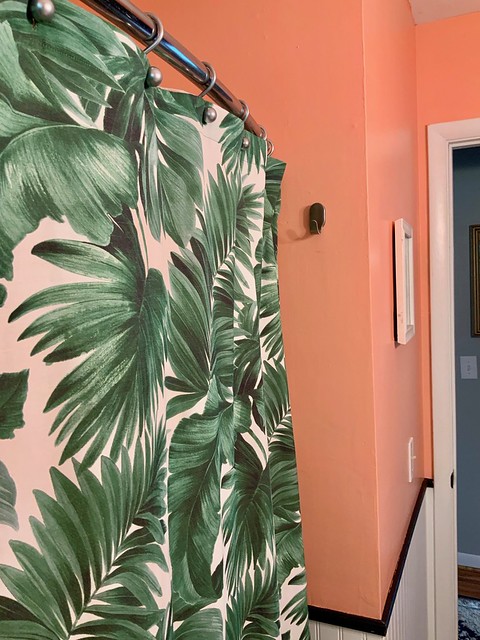
Anyway, sorry to go on so long about painting! There is a sewing purpose to this post, I swear! Because I made the shower curtain! I actually was not planning on doing this – I am perfectly happy to pay someone else (i.e., a manufacturer) to do my home decor sewing so that I don’t have to. However, I had a specific vision in mind that was apparently impossible to fill! Everything I found was either the wrong colors, bad proportions (I didn’t want leaves that were, like, 5′ long haha) or just didn’t look quite right. The few that I did find that were passable were either 1. Printed directly on plastic, which imho just looks really cheap and was not the look I was necessarily going for! or; 2. Quite expensive (more than twice what I was willing to pay), but not necessarily good enough to warrant the splurge. I am happy to pay extra if I’m getting exactly what I want, but in this case I was not. After a couple weeks of looking, I came to terms with the fact that I’d probably have to sew my own and took a look at some of the home decor offerings on Mood Fabrics. And – lo and behold – my perfect fabric was waiting for me! This tropical home decor print ticked off all the right boxes – medium weight with a nice hanging drape, a beautiful texture that adds some visual interest, and a print with the right colors, proportions, and randomness. This fabric actually comes in a few colors, but I chose the dark green because I thought it would look best with my coral.

Bathroom Update!

Bathroom Update!

I bought 3.5 yards, which put me right at my limit for my monthly allowance. This amount was sufficient, however, a full 4 yards would have been perfect in retrospect. Due to minor fabric limitations, I didn’t have *quite* enough to get the full length that I wanted (more on that in a minute), but I am still pretty happy with the end result!

Before I started sewing, I had to do some basic math so I’d know what dimensions to cut everything to. Funny, this actually isn’t the first shower curtain I’ve ever made – I recall sewing a black one about 10 years ago for a bathroom redo (actually, I’m pretty sure that’s around the same that I bought these curtain hooks HAHA)– but it has definitely been a looong time time I have embarked on this endeavor, and furthermore, I’m definitely a better seamstress now than I was back then!

Bathroom Update!

To start, I measured my current shower curtain and wrote those numbers down (68″ wide by 71.5″ long, which I think is pretty standard). I then added in seam allowances, which gave me cutting dimensions of 69.5″ wide and 75.5″ long. My fabric is only 55″ wide, which meant I did not have quite enough for the full width. And, while 3.5 yards sound like an ass load of fabric – when you cut it in half lengthwise, you only end up with 63″ in length and you will recall that I needed nearly 10″ more than that for my length. Hence why getting the full 4 yards – or even a little more than that – would have been more sufficient. Oh well! I knew going into this that I would need to piece my fabric, but upon receiving the whole piece I realized that the scattered and random print would not lend itself well to matching, which meant a seam right down the middle of the curtain would look pretty shitty. So instead, I pieced along either side of the curtain, adding side panels that were approximately 7.25″ wide. Having them on either side makes them look intentional, I think, and doesn’t make the unmatched design look as jarring. I sewed these on with flat-felled seams, which, again, I think makes it look a bit more intentional.

To preserve as much length as possible, I used leftover fabric (after piecing the sides) to add facings to the top and bottom of the curtain. By using a 1/4″ seam allowance, I only lost about 1/2″ in total which keeps the curtain from being too short. With the hem being 1″ and the top taking about 3″ of fabric (as it is turned the full amount twice), I was able to save quite a bit of length by doing this! I think adding a trim to the bottom – such as a pom pom trim or even a fringe! – would look really cute as well as add some length, but I haven’t found anything I like yet so, current length certainly works for now 🙂

Anyway, once I had my dimensions figured out and my plan written down, the sewing part was very easy and relatively mindless! I pressed all my edges and topstitched with matching thread, added my facings and understitched and topstitched, then sewed the button holes along the top edge for the curtain hooks. I used my old curtain to help me get the spacing right, and then sat and waited while my machine sewed 12 buttonholes. LOL. Interestingly, I did not use interfacing for this part. The original curtain does not use it, so I decided to go with their lead. Since the fabric at the top is turned twice, there are plenty of layers behind the buttonhole for stability. And since I am not using the buttonhole very frequently, there’s not a lot of wear happening up there so I think the uninterfaced part is fine. Time will tell!

All in all, I spent about 3 hours on this project. That included all the measuring, cutting, and sewing. Obviously with the cost of the fabric, this was not a money-saving project – but it could be, if you used less expensive fabric. For me, it was a way to get exactly what I wanted and I could not be more thrilled with the outcome. I especially loved figuring out ways to solve the puzzle of getting this to work with the amount of fabric that I had.

Bathroom Update!

Bathroom Update!

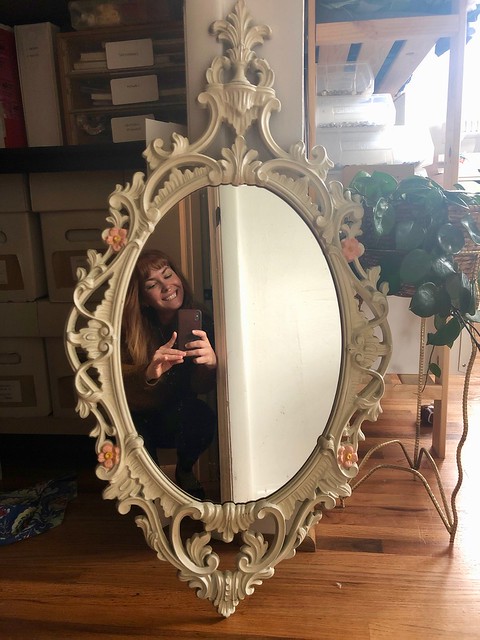
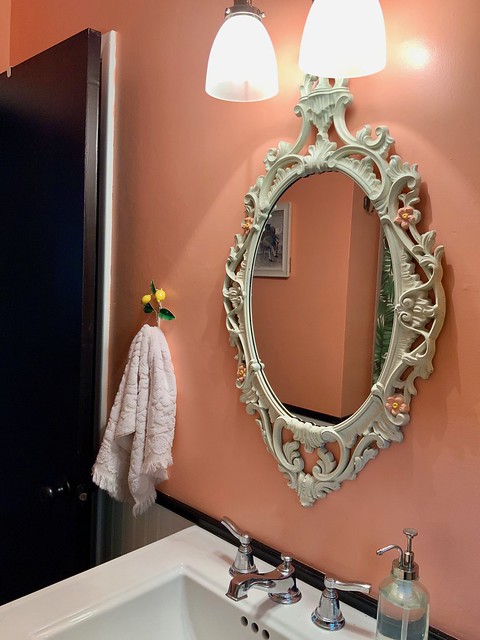
Oh! One last update I did – I added some color to the mirror. I’ve actually had that mirror for many years (I bought in my early 20s, from a thrift store for a solid $24.99), and it’s changed colors a few times as well as moved from room to room. It’s also gone through a few repairs, but it still hanging out strong! Like I mentioned, the original mirror in this bathroom was really boring and uninspiring, but as soon as I saw it I knew I could replace it with something more fun! I wasn’t terribly thrilled with how the plain creamy white frame looked in the bathroom, so for fun I used my coral paint to color in the flowers. It’s a very slight update but I really love the way it looks!

Bathroom Update!

This was a really fun project to work on, and surprisingly not too expensive when all was said and done! Here’s a cost breakdown of all my updates:
– Paint: $36 – I only needed about 1/2 a gallon (Lowes)
– Shower curtain: c/o Mood Fabrics (price would have been $104.95 without my allowance, though!)
– New bath rug: $24.99 (Walmart)
– Towels: Approximately $100~ (Target) (I don’t have an accurate amount since I bought them in phases, so this is just an estimate. Also, new towels definitely aren’t necessary but I have been wanting to replace mine for a while so I used this as an excuse! Buying towels specifically to match my bathroom sure feels grown-up lol)
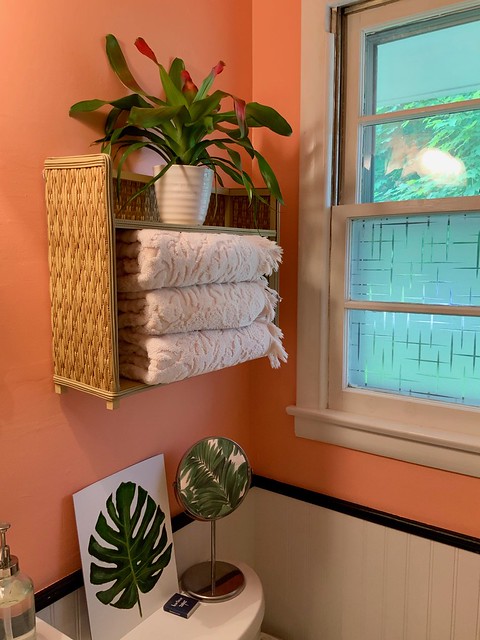
– Wicker Shelf: $8 (Nashville Flea Market) (fun story: I offered the guy $10 for this shelf and he haggled me DOWN to $8! What!!)
Plants: The one on the windowsill was a cutting from my mom, in a vase that I got from a wedding. So, free! The one on the shelf was $9 from Lowes.
Make-up Mirror: $4.99 (Ikea)
Towel hooks (silver): $.499 (Ikea)
Hand towel hook (lemon): $1 (Nashville Flea Market)
Window Privacy film: $13 (Amazon)
Monstera Leaf Painting: Painted by me! Eventually I’d like to build a simple frame and hang it on the wall.
I also changed out the light fixture globes, although I don’t have a before photo of what used to be there! (I tried to find a photo and Google is failing me… imagine a shallow glass shade. Believe me when I say it looked terrible.) These came from Habitat for Humanity and were $6 for both. Eventually I’d like to replace these with something that looks like flowers, but they are good enough for now!

Bathroom Update!

ANYWAY I guess that about wraps this post up! I am really happy with how the bathroom turned out – it brings me joy just to be in there now! And as an added bonus, coral is a SUPER flattering color for me, so I basically am always feeling my look when I’m getting ready in the morning haha.

I’m not sure what room I want to work on next, but I’m excited regardless – I feel like this house is one big neverending art project, and I am here for it!

** Note: The fabrics used in this project were provided to me in exchange for my participation in the Mood Sewing Network. All opinions are my own!

Completed: Cherry Print Knit Boylston Bra

4 Apr

What’s up everyone! I’m bringing it back a little old school today with a lingerie project – yes! I haven’t shared one of these in ages, since I feel like they can get a little redundant to talk about (I mean for me specifically, as the writer. How many times can you discuss the same pattern repeatedly before you get bored as hell? Yeahhh I’m not doing that!). But this project in particular is a little different and I think warrants its own blog discussion. So here we are!

Also, side note – I’m in the airport lounge as I write this and despite trying to find a sneaky little place where no one could see behind me, I think I failed and undoubtedly there is someone who is watching me upload photos of my underwear to the internet. So, there’s that too.

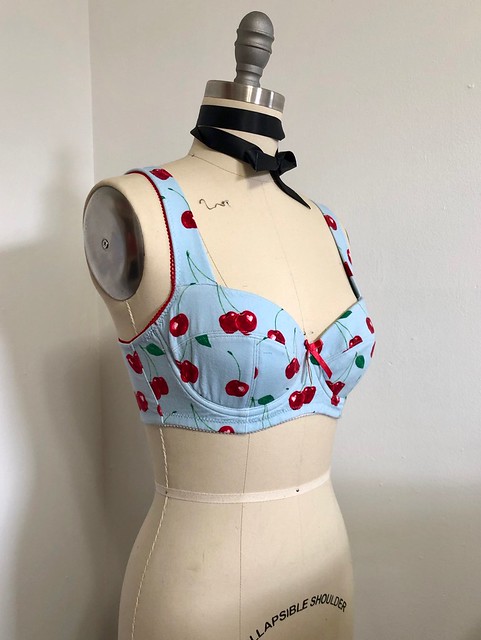
Boylston Bra made with Cherry Cotton Knit from Mood Fabrics

Anyway, about the bra in question! This is the Boylston pattern from Orange Lingerie. I’ve made this pattern a few times in the past, but it has admittedly been a minute since I whipped one up. My cup size has changed in the past couple of years, and while I wasn’t entirely sure what the new size was, I knew it wasn’t whatever I had been previously sewing. This is a balconette-style pattern, but it was, um, VERY balconette on me haha. I know one of the biggest hesitations that people have with starting to sew lingerie is the understanding that your first project(s) may not fit! And while I totally believe that it’s not an absolute waste if you were able to learn from the process, it still really sucks to make something that doesn’t fit the way you intended! This is where I stood with Boylston (and honestly, most bra patterns) until I finally sucked it up and just tried out a cup size bigger to see what would happen. And guess what?? EVERYTHING WAS FINE.

Boylston Bra made with Cherry Cotton Knit from Mood Fabrics

Boylston Bra made with Cherry Cotton Knit from Mood Fabrics

Boylston Bra made with Cherry Cotton Knit from Mood Fabrics

So that’s where this bra comes into play! I made the size 30DD, which is exactly the right amount of cup coverage (finally!). For fabric, this bra is made with… wait for it… jersey knit! Yes! Ever since this pattern was released, I have been DYING to try it in a jersey, which I believe was originally suggested by Norma in the big reveal. Since this pattern relies on foam cups, you can use pretty much any fabric as that area is already stabilized. I fell in love with the idea, but honestly, it took me almost this long to find a fabric that I felt deserved to be made into a bra.

My jersey knit is from Mood Fabrics and it was one of those last-minute purchases that grabbed my attention when I was filling up my cart and I just couldn’t say no. Y’all know I love a good cherry print – however, I don’t wear light blue. But it was on saleeee and it was cherriessss and I just… well it arrived at my house and I had to do something with it. This print was a great contender for turning into a bra as it is reasonably stable (not super flimsy and lightweight, like the knits I like to wear as garments) and the print is small so it’s not totally cut up by the pattern pieces. This specific fabric is unfortunately sold out, but Mood Fabrics has tons of other fun prints available on their website. The Cotton Jersey Prints specifically is the line that I pulled this one from, FYI!

Boylston Bra made with Cherry Cotton Knit from Mood Fabrics

After I pre-washed my fabric, I cut a small yardage off and block fused the entire thing with lightweight fusible weft interfacing. I wanted the knit fabric to be stable so that it would be easy to handle, and also work for a bra pattern (this pattern does not call for stretch fabrics, except at the very back band, so you want to stabilize your fabric in order for the garment to fit properly). Once the fabric was fused, I then cut all my pieces except for the back band (which, again, needs to remain stretchy). I also cut the cups out of foam, the bridge and frame pieces with sheer cup lining, and the back band pieces with medium weight powermesh. I like my bras to be lined (hence the sheer cup lining) and the powermesh was needed to keep the uninterfaced knit back pieces from stretching out over time.

Boylston Bra made with Cherry Cotton Knit from Mood Fabrics

Once all that was cut, this project sat in a WIP box for about a month. Ha! (not for lack of wanting to sew – but for traveling + moving house!) But once I was back in Sew Mode, this came together in a couple of hours! I raided my stash for notions and was pretty pleased with how well everything matches! I’m actually trying not to stash lingerie notions anymore (it can be really obnoxious to have everything you need for a project except some weird width of elastic in a particular color, or whatever) and in the future will just buy on a per-project basis. But in the meantime – I need to work through my stash. Other than the cherry fabric, this was 100% a stash-busting project! Yeah!

One question I get pretty frequently whenever I post a lingerie project is whether the pattern (whatever pattern I’m sewing) is good for a first-time bra sewer. While I do generally recommend Orange Lingerie as a good resource for first bra patterns (my first bra was a Marlborough!), I honestly would not recommend the Boylston for your *very* first. Making and inserting the foam cups can be a little confusing, and if you’re already embarking on a new adventure in lingerie then you probably don’t want to add any more stress than necessary! Once you’ve sewn up a bra or two and understand the general idea of how they are put together, though, I think this is a great next project!

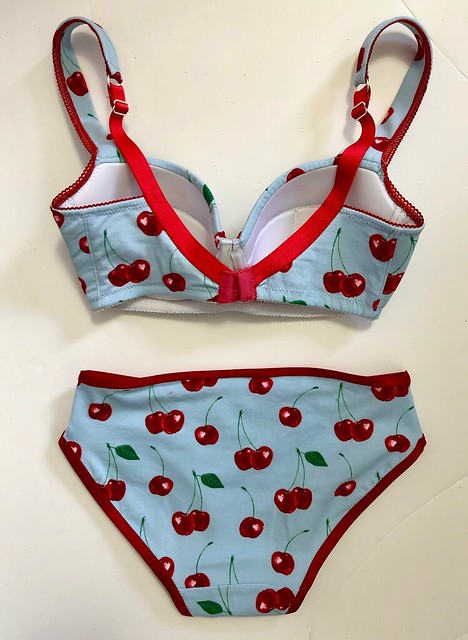
After I finished the bra, I had enough fabric left over to make some matching undies!

Acacia Undies made with Cherry Cotton Knit from Mood Fabrics

I used the knit fabric (uninterfaced, to retain the stretch), and finished the edges with red fold over elastic. The pattern is the Acacia Underwear from Megan Nielsen patterns. These were super fast to sew and look really cute with my new bra!

Boylston Bra made with Cherry Cotton Knit from Mood Fabrics

Boylston Bra made with Cherry Cotton Knit from Mood Fabrics

I actually have tons of this fabric leftover (I think I bought 2 yards and lingerie sewing just barely sips on fabric yardage), so I may make some matching knit PJs. It’s a little too thick for what I like to wear as a tshirt, and the color isn’t something I’d reach for in the every day – but who knows, maybe wearing this set will change my mind 😉

Boylston Bra made with Cherry Cotton Knit from Mood Fabrics

Anyway, I think I’ve waxed poetic enough about this pattern *and* I’m pretty sure they just swapped out breakfast for lunch at the buffet which I desperately need to investigate so consider this blog post officially done!

Have you tried this pattern before in a knit fabric?

** Note: The fabrics used in this post were provided to me by Mood Fabrics in exchange for my participation in the Mood Sewing Network. All opinions are my own!

Competed: Wiksten Unfolding Jacket

14 Mar

Good morning, everyone! I started this post a couple of weeks ago while I was waiting in the airport, and I’m just now finding time to revisit (naturally, while in the airport AGAIN. Yes, class season is ramping back up woohoo!). My February has been weirdly busy – I worked on two massive photoshoots, and also represented the Craft South booth at Quilt Con here in Nashville! On a more personal note, February was the 2 year anniversary of my dad’s passing, and, as it did last year, shit hit me like a ton of bricks. And finally, I bought a house! I closed last week and have been tackling my to-do list like crazy to get everything ready before I move in.

The bad news is – there has been very little time for sewing (to be honest – I haven’t touched my sewing machine since, well, February!). But the good news is – a new studio is a-coming 😉 I took some photos of a couple of completed projects so I have something to share here, now the challenge is finding the time to sit down and type everything up!

Wiksten Haori made with Mood Fabrics

Today’s offering is something that has been finished since January, which means it has gotten a lot of use during recent months. My current house (the rental that I’m fixin to move out of), is a beautiful 1935 stone Tudor. Built before central a/c (which has been retrofitted in this house now, thank god!), and located in a very hot part of the country – this is a house that was designed to stay cool. It’s quite lovely in the summer, but LORD it stays chilly in the winter! And due to the old windows, plaster walls, and overall poor insulation – there’s not really much of a point in trying to keep the place warm, as the (really expensive, I should add) gas heat just slips right out. So I spend most of my winters wrapped in robes, electric blankets, and rolling a space heater around each room. Not gonna lie – as much as I love this house, the chill is one thing I will NOT miss! I’ve been wearing the robe I made when I first moved in, but it’s always made me feel like… well, like I’m wearing pajamas. Don’t get me wrong – it is warm and cozy and certainly serves its purpose, but I don’t even like to answer the door in this thing because I know it straight-up looks like I rolled out of bed when I have it on. I do work from home, but I still put on “real” clothes and style my hair. Wearing PJs makes me feel like I am having a sick day, and that’s exactly the vibes this robe was giving me. I wanted to make something that would serve a purpose of keeping me warm while inside my house, but still look pulled together enough to wear outside the house should I choose to do so.

So, anyway – that was an unnecessarily long intro to tell you that I made a Wiksten Unfolding Jacket, which is sort of like a literal house coat as far as I’m concerned.

Wiksten Haori made with Mood Fabrics

This plaid flannel from Mood Fabrics has been rolling around in my stash for about 2 years now. I originally bought it to make an Archer button-up, but upon receiving I realized it was a bit too heavy for a shirt – and also a bit too light to be a proper coat. I’ve hung onto it since, and while some pattern contenders have certainly caught my eye, it has remained uncut this entire time. Once I acknowledged my need for a house coat, I remembered this fabric and decided to give it a go. Being a nice thick wool flannel, it is perfect for this application – it is warm and cozy, but still reasonably lightweight. And the colors just make so me happy (even if they don’t necessarily coordinate well with my all-black-tragic-goth look that I typically wear in the winter). I bought this fabric long ago enough that it is no longer available, but Mood Fabrics has tons of other lovely wool flannels to choose from should you want to make your own!

Wiksten Haori made with Mood Fabrics

Wiksten Haori made with Mood Fabrics

This jacket is fully lined, and rather than go with a traditional slippery lining, I kept things casual with a matching lightweight cotton voile. This jacket is oversized enough that it’s easy to put on (including the sleeves), and the nature of how this is sewn means that it is completely reversible. Also, cotton voile is incredibly easy to handle, which made the sewing on this jacket a total breeze.

For the pattern, I sewed a size XS based on my measurements, although in retrospect I think the XXS might have been a little better. This is a nice oversized fit that works over multiple layers, but the sleeves are a bit wide and they get in the way when I’m trying to wash the dishes (or even my hands, for that matter). I usually wear them slightly rolled up to bracelet length, so they are out of the way but can easily be rolled down if I need the extra warmth. I waffled on which length to sew (there are 3 lengths included in the pattern) but ultimately decided on the happy medium of the mid-length. I’m pretty satisfied with this decision, and I had just enough fabric to make everything work.

Wiksten Haori made with Mood Fabrics

Wiksten Haori made with Mood Fabrics

I used the main fabric for the neckband, rather than the lining contrast, as the pattern calls for. I also opted to not interface the neckband pieces, since my wool flannel is so thick and didn’t really need the extra support. This also gives the jacket a bit of a softer structure, which I think is nice for a house robe. For visual interest, I cut the pockets on the bias. Since they are lined with che cotton voile cut on the straight grain, they should stay supported and not stretch out.

Wiksten Haori made with Mood Fabrics

So. About this fabric. It was super easy to sew + press (it is, after all, wool flannel), but in retrospect this pattern really isn’t suited for a plaid design. I promise I actually did try to match the plaid lines – which was reasonably successful at the side seams, but failed miserably anywhere the sleeves were involved. OH WELL. I figure – this is a house coat, I don’t give a shit if it’s less than perfect. Even with mismatched plaid lines, it is still lightyears ahead of of the old fuzzy robes I used to wear.

Wiksten Haori made with Mood Fabrics

I made this jacket out of a pretty desperate need (it was quickly getting cold and I couldn’t face another winter of wearing my old robe around the house), which means the sewing was a little rushed. The pattern is super easy – it’s just a series of rectangles, for the most part – but I always find rushed sewing to be kind of unpleasant. To be completely honest with y’all, I did not really enjoy sewing this jacket at all specifically for that reason. Plus, when I finished it and put it on for the first time, I was pretty underwhelmed with how it looked on me. It is REALLY oversized and boxy, which isn’t necessarily a look that I tend to gravitate to. It is, however, very comfortable – and very warm – and as far as the type of garment I was aiming to make, it pretty much fit the bill perfectly.

I will say – despite my initial reaction after finishing, this jacket has really grown on me! Like I said, it is warm and comfortable – like being wrapped in a cozy blanket. The pockets are absolutely enormous, too – like, big enough to hide a kitten in (I think. Does anyone have a kitten I can borrow to test this theory?). I’ve taken to wearing this when I need to pop out to the grocery store or to check the mail, and the pockets are really useful for replacing my need to carry a purse. So, this is basically a blanket with storage. Like, what more do you need in life?

** Note: The fabrics used in this post were provided to me by Mood Fabrics, in exchange for my participation in the Mood Sewing Network. All opinions are my own!

Completed: Papercut Patterns Palisade Pants

31 Jan

I think I told y’all last year how much I love the new Geo Collection from Papercut Patterns. In case you missed it – I LOVE THE NEW GEO COLLECTION FROM PAPERCUT PATTERNS! As a shameless Papercut Fangirl, I am of course extremely biased regardless, but it is honestly a great collection. I’ve made the Pinnacle Top (twice, actually!), and the Fjord Cardigan (unblogged!), and now I’ve got some fresh new Palisade Pants to add to the mix!

Palisade Pants made with Mood Fabrics

I just think this pattern is so cool! I love the relaxed (but not oversized) shape, with the interesting pocket detail and elastic waist that doesn’t go all the way around (personally, I find a flat front to be more… well, flattering). These are very similar to the Elizabeth Suzann Clyde pants, with a different pocket shape and, again, a flat front with no elastic. Both pants have the same high waist and seams running down the front and back leg.

Palisade Pants made with Mood Fabrics

As much as I love a fitted pant, I didn’t want these to be too tight in the hip so I went with a size XS (based on my measurements). I ended up taking an additional 1/4″ out of the inseam to tighten up the legs ever so slightly (I don’t generally mess with the inseam, however, these pants do not have side seams), but I am very happy with how the hip and waist fits. FWIW, I did use the suggested elastic measurement and it fits perfectly without being too tight.

I made a muslin of the shorts before cutting into my fabric, because I wasn’t sure how these would fit on my body. I actually do own a pair of Clyde pants (from way back when I still worked at ES), and I always felt like the crotch was a little too long on me, so I went ahead and sewed up a test pair before committing. My test pair is actually a fully-finished wearable muslin – I used cotton bottomweight fabric, as well as the suggested interfacing, elastic, and topstitching details. So I also basically have a new pair of shorts when summer comes around haha. My sample showed that I did need to take some of the crotch length out – a full 1.5″ (crotch length refers to the measurement from front waist to back waist spanning the crotchal area, NOT the length from crotch to waist when you sit down, which is considered crotch depth. See this image for a visual) (also, every time I type crotch I accidentally type crochet instead what is wrong with me). Before you start wringing your hands on the mysteries of pants-fitting, please be aware that this is not an adjustment I see a lot of people make (and I touched a LOT of crotches last year during all my workshops). If you do need it, the explanation and process of how to fix are best outlined in Pants For Real People, which I recommend checking out for further questions!

ANYWAY, the amount that I took off the length was easily adjusted (albeit in a very hacky way) to my shorts, so yes, those are still wearable! One more adjustment I made to the pants was to change the crotch curve, as it was a little flat for my body (this is indicated by vertical folds in the fabric in a very unflattering spot). This was not necessary in my sample, but did show more prominently in my finished pants – probably because the fabric has more drape. The front still isn’t completely flat if I stand a certain way, but I think that’s pretty unavoidable with this soft fabric + pants shape combination.

Palisade Pants made with Mood Fabrics

Palisade Pants made with Mood Fabrics

Construction changes were minor. I wanted to keep the fabric soft, so I omitted about half of the interfacing (anywhere that there would be double layers of interfacing). This included the pockets and the center front waistband. In retrospect, I probably should have left the double layer of interfacing on the waistband as it does get a crease with wear, but, whatever. I used a lightweight fusible weft interfacing, which is pretty much my go-to for most fabrics.

I left off the mock fly (for aesthetic reasons), and just topstitched the center front and center back seams. I also added some topstitching to the back elastic, to keep it from twisting. And I also unintentionally shortened the pants when I shortened the crotch depth, so they are about 1.5″ shorter than the pattern – which thankfully is the perfect length for me haha.

Palisade Pants made with Mood Fabrics

Palisade Pants made with Mood Fabrics

Palisade Pants made with Mood Fabrics

Palisade Pants made with Mood Fabrics

My fabric is a gorgeous wool suiting that I bought from Mood Fabrics when I was in NY last month for Christmas. I only had one day in Manhattan, and my mom agreed to go with me while I did a quick little shop around the Garment District. Mood has tons of great wool suitings on their website, but I wanted to see the goods in person so I could get a nice feel for drape, weight, itchiness, and color. I knew I wanted something soft, lightweight, non-itchy (as I would not be lining these) and with a little bit of dimension and texture that didn’t look too suit-like. This stuff hit all those boxes, and only cost around $20/yard. It was wide, too, so the 2 yards I bought were more than enough for these pants – meaning I have leftovers to whip up something else if the mood strikes.

I actually pre-washed my wool – like, in the washing machine – because I wanted to see what would happen. Generally, wool felts due to heat combined with agitation, so I used cold water and low heat in the dryer. I didn’t measure before/after to see if anything shrunk, but this definitely isn’t felted so it worked out ok! When I wash the actual pants, I will use cold water in the washer and hang them to dry (how I treat most of my wool garments, except for handknit sweaters obviously).

The wool was really easy to sew, as wool tends to be. I suspect there is some poly blended in here, though, since it didn’t press as well as most wools do (this would also explain why the fabric was fine in the dryer when I pre-washed). I used high heat and a clapper to hold the seams down while they cooled, then for extra credit I topstitched as much as possible to keep the seams nice and flat. To sew, I used a universal 80/12 needle and finished all seams with my serger.

Palisade Pants made with Mood Fabrics

I think that about covers it! This was a fun project to make, and I really like how the pants turned out. I’m still undecided if these are really “me,” but I’ve worn them for the past 2 days while we’ve had a cold snap in Nashville and they are warm and comfortable. I do want to try this pattern with a fabric better suited for warmer weather – such as linen or tencel – and perhaps in a cropped length or even the shorts. The pocket detail just makes me so happy.

Oh! And in case you were curious – the shirt I am wearing is a mash-up of the Nikko Top and the Nettie Bodysuit. I basically just combined the bottom edge of the shirt with the lower half of the body suit, to make a Nikko Bodysuit. This piece has been really useful in my wardrobe – it looks great with high-waisted skirts and pants, and stays tucked in no matter which way I move. I made it with lightweight merino wool fabric, also from Mood Fabrics, and I love it so much!

**Note: The fabrics used in this post were provided to me by Mood Fabrics, in exchange for my participation in the Mood Sewing Network. All opinions are my own!

Completed: Pinnacle Sweatshirt

11 Dec

Have y’all seen the new Geo Collection from Papercut Patterns? It’s no big secret that I am a DIEHARD Papercut Fangirl, but this recent collection really blew me away more than usual (which is saying a lot!). I love everything that was released and have many plans!

To start, I wanted to try out the Pinnacle Top. I find this pattern really interesting as it can be made with either a woven or a knit, which really changes the finished look! I love the geometric design on the front, and the pattern itself has some crazy looking pieces that come together in a very origami-like fashion. Pretty standard of Papercut Patterns, which is part of what I find so appealing about them!

Pinnacle Sweatshirt made with Mood Fabrics

I really want to try the v-neck version of this pattern, in a soft linen or even a drapey silk – but for this time of year, the sweatshirt is king. I love that I can sew my own sweatshirts, which gives me the ability to add cool design features or use fancy fabrics. Nothing like the basic stuff I wore when I was a kid! And this pattern looked like it would be fun to put together, and I assumed correctly.

Pinnacle Sweatshirt made with Mood Fabrics

Pinnacle Sweatshirt made with Mood Fabrics

I had this super soft bamboo French Terry in my stash that I purchased from Mood Fabrics earlier this year… it comes in a load of amazing colors, and while I WANTED to stick with my TNT black/grey colorways, I went a little wild and ended up with 2 yards of Moroccan Blue. Almost more like a teal, this is a very deep, rich blue. I love it and I’m happy to report it’s seamlessly worked its way into coordinating with *most* of my wardrobe (unlike some colors that I try out and then realize I have nothing to wear them with!).

The fabric itself is amazing. Like I said, it is super soft on both sides, thanks to the bamboo. The terry loops are very fine and small, which means the fabric isn’t bulky – but it is dense and heavy. It also has a great amount of 4 way stretch, which makes me think this would be an ideal fabric for lounge pants (leggings, joggers, whatever keeps ya warm on the couch). At $20/yard, it certainly is not cheap – but it’s super fucking wide (I still have quite a bit left from my 2 yard cut after making this sweatshirt) and it washes and wears great. The only downside I have noticed is that it does wrinkle when you store it folded in the drawer – which is easily solved by tossing it in the dryer for a few minutes before wearing (and bonus, it’s like PUTTING ON A HUG! omg you guys why I am I so alone). Traveling or don’t have a dryer? Laying it out flat in the bathroom while taking a hot shower also does the trick!

Pinnacle Sweatshirt made with Mood Fabrics

I’m sorry, I don’t know how I ended up with so many of what is basically the same picture. It’s either feast or famine when it comes to me and my camera, deal with it.

Pinnacle Sweatshirt made with Mood Fabrics

So, the pattern piece for this shirt is really interesting! It’s GIGANTIC (which means you really do need to pay attention to the fabric requirements), and goes together in a way that makes a shirt with no shoulder seams. The pieces are assembled with center front seams (in the form of this cool-ass triangle) and a center back seam, then closed with side seams (which gives you the chance to tweak the fit a little if needed). I made mine with one piece of fabric, although the geometric design on the front would lend itself well to colorblocking. For a little added interest, I used the wrong side out on the top triangle of my shirt, so you can see the texture of the French terry there, but the shirt in general is pretty monochromatic otherwise.

I sewed a size XS based on my measurements, which gives a nice, roomy fit. For future makes, I may side down to the XXS as I feel like I’m swimming a little in this version.

Pinnacle Sweatshirt made with Mood Fabrics

Pinnacle Sweatshirt made with Mood Fabrics

Pinnacle Sweatshirt made with Mood Fabrics

Construction-wise, not much to report here. I sewed this almost entirely my serger, which made this a really fast and efficient make. My one tip is to be careful with where the seams intersect at the center front, and baste them in place (either by machine or by hand) before sewing them for real. The seamlines matching are pretty essential to this shirt looking good, and if you baste them first, you can rip them out if they don’t match up!

Pinnacle Sweatshirt made with Mood Fabrics

I’ve been wearing this sweatshirt a lot since I finished it – it’s perfect for staying cozy around the house, but also looks pulled-together if I need to step out or have an unexpected delivery. Secret pajamas are always a go in my world!

*Note: The fabrics used in this post were provided to me by Mood Fabrics, in exchange for my participation in the Mood Sewing Network. All opinions are my own!

Completed: Denim Centaurée Dress

25 Oct

Good morning, everyone! I am writing this from my local airport lounge, waiting for my flight this morning to San Francisco! Figured I’d take advantage of the downtime (and free WiFi!) and see if I could throw together a little post! I feel like a big part of the reason why I stopped posting as much was because there is so much EFFORT that goes into it – I have this weird need for them to be long and therefore “worth it,” (and a long post takes a really long time to write!) but really, short posts are better than no posts… right? I don’t want to let my blog die!

Another reason why I post less is because I really seem to have hit a hard rut with photos. I just really hate taking them, I feel like they always look shitty and I honestly don’t know how to improve them (one would think that standing in the same spot where I take my dressform photos would work, but nope, sadly not the case). I snapped these very quickly using the self-timer on my phone, right before I took a walk down the block to my local cookie shop (oh yeah). The lighting isn’t great and I have my shades on, but… whatever. It’ll do!

Deer & Doe Centaurée dress made with denim from Mood Fabrics

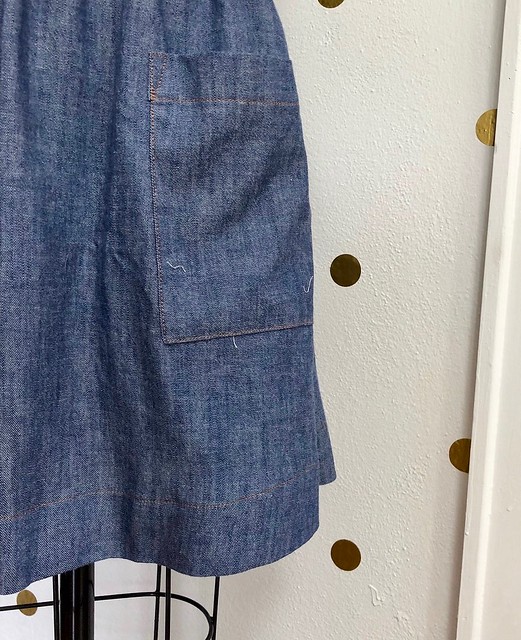
Anyway – the dress! I made this little denim sundress a few months ago, one last dress hurrah for summer. The pattern is the Deer & Doe Centaurée dress, which I loved when was first released – it’s a great little basic sundress with some fun details that make it a little more interesting. The bodice shaping is created with interesting seamlines that form a star (y’all know how I feel about a good star), and the edges are finished with a self bias binding that turns into double straps (a super cute detail IMHO but definitely requires no bra or a strapless bra to get the full effect – fwiw, I am bra-less in these photos). The skirt is a simple gathered skirt – no pockets, but I was able to easily add some simple patch pockets.

I cut a size 36 at the bust, grading out to a 38 at the waist and hip. No other alterations were necessary, which is good because I totally threw caution to the wind and make this up without first sewing a muslin o_O haha! Like I mentioned, I did add patch pockets – simple squares (I think I took the pattern piece off my Ariana Dress but they can easily be drafted if you don’t have a pattern to steal from), to bring a little more interest down to an otherwise plain skirt and to also incorporate more topstitching. Everything else about this dress is exactly as the pattern intended!

Deer & Doe Centaurée dress made with denim from Mood Fabrics

My fabric is a lightweight denim from Mood Fabrics. I found this in the store while I was in NYC – I was actually looking for bottomweight to make a pair of jeans with, but this was too good to pass up. It’s a fine, lightweight Japanese denim that is very narrow (like less than 45″). This denim on the Mood Fabrics website appears to be very similar, although it’s a little wider. I originally purchased this with the intention of making a shirtdress – I specifically had a Colette Hawthorn dress in mind, to replace my beloved denim Hawthorn that no longer fits – but decided to try something a little different than my norm SINCE I MAKE SO MANY DAMN SHIRTS.

Deer & Doe Centaurée dress made with denim from Mood Fabrics

Deer & Doe Centaurée dress made with denim from Mood Fabrics

Sewing this fabric was super easy, as most denims are! I used two sewing machines to construct this – one threaded with regular polyester thread, and the second threaded with topstitching thread (you can totally do this one with machine if you don’t mind re-threading over and over!). I chose to highlight all those interesting seamlines with gold topstitching thread, which makes it look more like a pair of jeans, just reincarnated as a dress. All seams are finished with my serger (the multitude of intersecting seamlines on the bodice + the gathered skirt would have made it difficult to flat fell, plus, I wanted the option to be able to let out or take in areas since, again, I did not make a mock-up), and I used self-binding to finish the edges of the bodice as instructed by the pattern.

Deer & Doe Centaurée dress made with denim from Mood Fabrics

Deer & Doe Centaurée dress made with denim from Mood Fabrics

Deer & Doe Centaurée dress made with denim from Mood Fabrics

Deer & Doe Centaurée dress made with denim from Mood Fabrics

The dress closes with an invisible zipper on the side seam. Here’s a fun fact – the only zipper I had in my stash was off-white, and I didn’t feel like going to the shop to grab another one in the right color (another fun fact – I live 3 blocks from one fabric store, and less than a mile from a much bigger one so I absolutely have no valid excuse, #teamlazy)… so there is a off-white invisible zipper in this dress. You’d never guess it unless you see the zipper pull, which is located under my armpit, and I take a lot of pride in this. Not to toot my own horn, but hell yea my invisible zipper game is strong. You can’t even see that shit.

Deer & Doe Centaurée dress made with denim from Mood Fabrics

Deer & Doe Centaurée dress made with denim from Mood Fabrics

The skirt is finished with a wide hem – I wanted mine shorter than the pattern is drafted for, and I like the way the wide hem looks with the topstitching + pockets. Plus, it will be easy to let the hem out if I decide I want a longer skirt in the future (whether or not that will actually ever happen is up for debate, but at least I have options now!).

As a side note, the patch pockets on this dress are perfectly sized to hold a Christie Cookie… speaking from experience here. And! After I finished taking this photos and took my walk, I ran into the sweetest little cat:

neighborhood cat

That’s all for this make! Admittedly, we are a little late in the season now for a sundress (Tennessee appears to have completely skipped fall and jumped straight into early winter… wah!), but if I was a cooler person I could totally rock this with a white t-shirt underneath. Alas, my inner Cher Horowitz definitely won’t be making an appearance, but I do think this dress would look cool with a cropped sweater over it (like my Chuck!). So, sundress or not, this can definitely be a transitional garment!

Deer & Doe Centaurée dress made with denim from Mood Fabrics

Anyway, I’m out! Berkeley, I will see you soon! For those of y’all in the area – Stone Mountain & Daughter Fabrics is hosting a meet-up tonight at 5:30PM. Full details are on my IG 🙂

** Note: The fabrics used in this post were provided to me by Mood Fabrics, in exchange for my participation in the Mood Sewing Network. All opinions, as always, are my own!

Completed: Jenny Overall Shorts

29 Aug

I’m just gonna go out and say it now: these pictures are shitty, but I’m posting them anyway. Considering how long it took me to even get photos in the first place, lord knows I’m not gonna make the effort to re-shoot them. Sorry, not sorry!

Also, if you’re seeing this post twice – that’s because I mistakingly published it yesterday, realized my error, and immediately deleted it. I wasn’t going to say anything at all (honestly it’s an embarrassing mistake) but I’ve gotten several comments and emails expressing concern, so I wanted to clarify. The error post yesterday was meant for the Mood Sewing Network. I was just typing it in my blog because I like the format better, and unfortunately I hit the wrong publish button lol. Oops! If you already read the other one, I would still suggest reading this one as well because both posts are different – and this one has more (shitty) photos ! Ok that is all!

Organic Twill Jenny Overalls

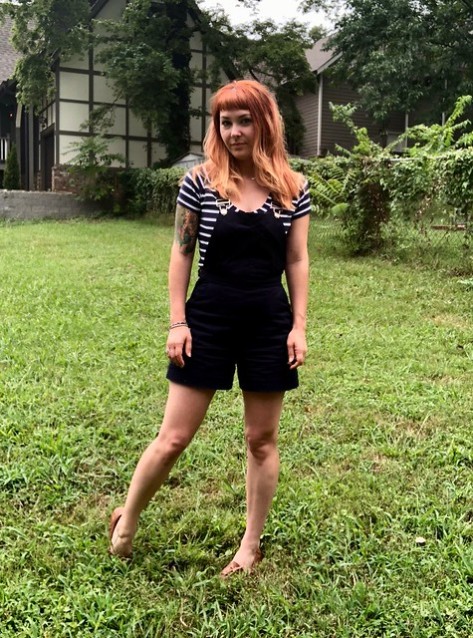
So these are the Jenny Overalls from Closet Case Patterns – one of many, many overall patterns that are currently available. I’ll be the first to admit it – I haven’t been a big fan of the current overall trend (“current” being the key word here – 90s-era Lauren definitely had a pair of denim overall shorts with Mickey Mouse embroidered peeking out of the pocket. God, I loved those things. Wore them with my purple Looney Toons baseball cap and my Adidas slides with white Tommy Hilfiger socks. You’re welcome for that mental image). In fact, when this pattern first came out – my initial reaction was “meh.” Everyone who was at my weekend workshop in Alexandria VA can attest to that, ha! I received a copy of the pattern from Heather, but truly I was more interested in the pants than anything that has a bib attached to it.

Organic Twill Jenny Overalls

So what changed? Honestly… I blame Heather. Shortly after the pattern release, she posted an ass-load of photos of her galavanting all over London & Stockholm in her cropped Jenny Overalls. Every outfit looked rad as shit, and I eventually swayed my overall stance. I think my biggest issue is that overalls seem very utilitarian – which really is not a look I typically go for. This specific pattern is more 1940’s Rosie the Riveter glam, with a high waist and wide legs. Make them out of something other than denim, and they seem pretty sleek. I was willing to give it a go!

Organic Twill Jenny Overalls

Organic Twill Jenny Overalls

For this pair, I went with the shorts version although in hindsight I kind of wish I’d made the cropped legs (more on that in a minute). I cut a size 4 at the waist, grading out to a 6 at the hip. Those of you who have been following my blog for a while may notice a size discrepancy here – I pretty much exclusively make a size 2 in Closet Case Patterns. Well, my measurements have always been right between the 2 and 4, so I simply sized down instead of up. Aaaaand the 30s are hitting hard, which means I’ve gained a little bit of weight! Just enough that I needed to go up a size – and in the case of my hips and thighs, 2 sizes. Just a head’s up! The sizing on this pattern is still pretty consistent; MY size in particular has been the inconsistent one!

Organic Twill Jenny Overalls

Organic Twill Jenny Overalls

Organic Twill Jenny Overalls

Rather than use denim, I used Organic Cotton Twill from Mood Fabrics as my main fabric. Again, if you’ve followed my blog for a long time you are probably aware that I LOOOOVE this fabric. It’s the best! A great bottomweight, 60″ wide, available in an array of great colors… and less than $15/yard? YES, SIGN ME THE FUCK UP. I can also personally vouch that this stuff washes and wears beautifully. So it was a no-brainer that I opted to use it for this particular project.

As far as construction goes… not too much to report on this particular make. The instructions are great, easy to follow, and I really found this project to be super satisfying to work on. It’s similar to making a nice pair of jeans – lots of pressing and topstitching, and working with an easy fabric. I didn’t make any fit or construction adjustments to the pattern, other than (accidentally) using too long of a zipper. The only thing I’m not crazy about is how bulky the seam allowances are by the zipper – once you factor in pockets, the lap over the zipper ends up pretty thick. I don’t think swapping out for buttons would change that, and I’d rather have the pockets and just deal with bulk, so it’s not a big deal I guess.

Organic Twill Jenny Overalls

Organic Twill Jenny Overalls

So… as for the verdict? Well, they did turn out really cute! Every time I wear these out, I get loads of compliments. I think the dark color and subtle topstitching do help to make these look a little less farmer-y (you do you, but personally I do not want to look like a farmer), and the high waist and comfortably loose leg are definitely chic. I like that the bib is proportionally small, and that the straps cross over. All in all, it’s a nice look.

But… is it a look for me? Not really. I feel kind of uncomfortable in them, to be honest. The fit itself isn’t uncomfortable – the sizing includes an appropriate amount of ease, although I will say that I’m not used to wearing anything quite this fitted at my waist these days (with no stretch whatsoever), so that has taken some getting used to! I also feel weirdly overheated when I wear these if it’s super hot outside, so I can’t wear them if it’s higher than, say, 85 degrees (aka most of the summer in Tennessee). I don’t know why the addition of that bib makes them feel unbearable in the heat, but it’s a thing! Which is why I wish I’d made mine with longer legs – I think they’d be more practical, as I could just wear them in cooler weather. Finally, it has been surprisingly hard to style these. Since they are fitted and high-waisted, they really only work with tight or cropped tops. Anything loose- even if you tuck it in – just looks kind of weird in my opinion. I realize there are lots of tight top patterns out there (including Nettie!), but I don’t have any in my wardrobe as, again, I don’t like wearing tight things in the heat! Pretty much the *only* thing I own that looks good with these is the shirt I’m wearing in these photos – a Papercut Patterns SJ Tee.

Were I to make these again, I’d do the longer version and cut the waistband on the crossgrain so there’s a bit more stretch. Styling-wise, I actually do wear pretty fitted tops the rest of the year so that wouldn’t be a problem.

Organic Twill Jenny Overalls

Overall (lol see what I did there), I do like this pattern and the resulting overalls are pretty cute! The jury is still out on if I really feel sartorially comfortable wearing these, so I’m giving them a few more goes before I make a decision. I’m glad I made them because I did enjoy the experience, and if I decide to pass them on I’m sure someone else will love wearing them 🙂

Note: The fabrics used in this post were provided to me by Mood Fabrics, in exchange for my participation in the Mood Sewing Network. All opinions are my own!

Tropical Print Chair Cushions (aka boring home decor sewing)

31 Jul

Hello everyone! I’m back again with my annual ONE boring home decor sewing project for the year!

Chair Cushions made with Mood Fabrics

When I moved into this place last year, one of the biggest perks was the amazing porch that takes up an entire side of the house! Situated in the perfect spot to catch a good cross-breeze, and shaded by several walnut trees at the peak of summer, it is a seriously cool area (both literally and figuratively) to hang out in. I love sitting out here, whatever the reason – while working in in the morning, while having cocktails with friends, I even use this space to clip my cat’s nails (she loves it haha). Real talk, I am sitting on this very porch right now writing this blog post hahaha.

I brought this patio set (originally from IKEA – here is the table & the chairs)) with me when I moved here – it’s a bit small, as it was originally intended for a MUCH smaller space. Anyway, I have been wanting to add chair cushions to make them a little more comfortable. Since the seats are very small, I couldn’t find any cushions that fit – plus, outdoor cushions are expensive! I figured I’d make my own, which set me on a looong quest to find that perfect outdoor cushion fabric. That fabric ended up being this Sunbrella Fusion Tropics Jungle Leafy Jacquard from Mood Fabrics (surprisingly, still in stock!). I’m loving this botanical vibe that’s currently taking over home design, and this fabric is one of the best ones I’ve seen! Since it’s an outdoor-suitable home decor fabric, I knew it would stand up to the sun, wind, and rain. At $42 a yard, this fabric certainly isn’t cheap – but it’s wide, so even a yard goes a long way.

Chair Cushions made with Mood Fabrics

I bought some inexpensive upholstery foam from Walmart and used the seat measurements to make a very basic pattern (basically 2 big rectangles, then 4 smaller rectangles to go around it). I wanted a cushion cover that would box around the entire block of foam, with a zipper at the back so I could remove it to wash if needed. The foam I used is quite thin, so I doubled it for a cushier chair pad. The metal zippers were pulled from my stash.

I debated on whether or not to pre-wash the fabric before sewing – ultimately, I decided against it. The fabric is polyester, so I don’t think it runs the risk of shrinking. That being said, it does fray like CRAZY (seriously, my studio was covered with little green hairs after this project), so I serged every single seam before attaching pieces together. I don’t sew a lot of home decor projects, so I want the ones I do manage to make to last!

Chair Cushions made with Mood Fabrics

Chair Cushions made with Mood Fabrics

Chair Cushions made with Mood Fabrics

To attach the cushions to the chairs (mainly so they don’t fly off during a windy day!), I added long velcro strips that wrap around the metal parts of the chair. In retrospect, I’m not crazy about how this looks – I may take those out and replace them with self-fabric ties. But they are functional for now. I had also considered getting fancy and adding piping around the seams, but, again, real talk – that shit was never gonna get finished if I kept upping the ante. Basic and boring is about all I can manage these days.

Chair Cushions made with Mood Fabrics

And that’s pretty much it for this project! Short and sweet, pretty simple, but a nice touch to my outdoor space! I actually finished these a couple of months ago and they have been living on my porch since then – through Tennessee summer storms and crazy sunshine (although my porch is pretty shaded, so not *that* much sunshine), and you can see how well the fabric has held up! The colors are still nice and bright, and the cushions have avoided stains. I will bring these inside when winter comes, of course, but they are great for staying out all summer long.

Writing this post made me realize that I have been in this house for a solid year now, and still haven’t shared my new studio! I finally got around to taking photos over the weekend, so I’ll be sharing those soon 🙂

Chair Cushions made with Mood FabricsSoooo then – who’s coming over for a cocktail?!


Note: The fabrics used in this post were provided to me by Mood Fabrics, in exchange for my participation in the Mood Sewing Network. All opinions are my own 🙂

Completed: Scuba Watson Bra + Bikini Set

26 Jun

I can pretty practical when it comes to sewing garments – I’ve figured out what I will and won’t wear, and stick with those styles & colors pretty consistently across the board (save for the occasional wild hair because YOLO). However, this goes completely out the window when it comes to making lingerie.

Me: I should really make some neutral bras, almost all my summer clothe are see-through.
Also Me:

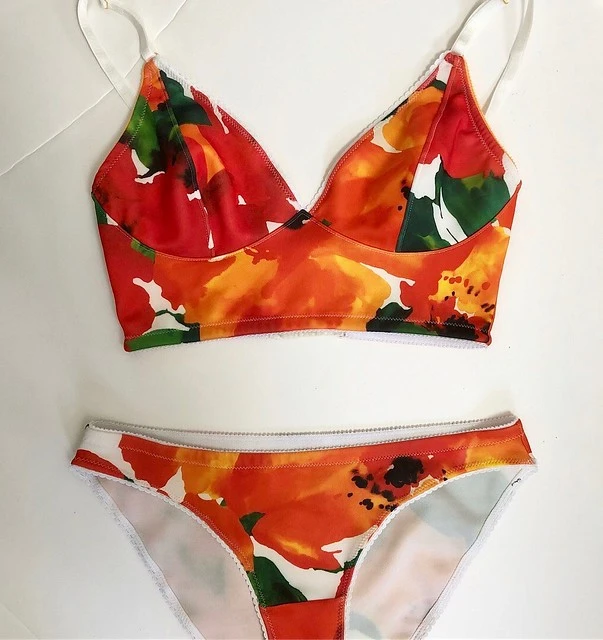
Watson Bra made with Scuba Knit from Mood Fabrics

ha! I realize there is a trend right now of wearing your underwear as outerwear, and while I did not sew this set with that intention in mind, I will certainly mostly definitely be following it. Because, again, YOLO. btw, sorry about the YOLO.

In all seriousness, though, I actually do need some new bras in my wardrobe. Most of the stuff I sewed in the past has gotten quite ratty and stretched out, and definitely needs to be replaced. I also appear to have gone up a cup size (wah), so they don’t quite fit right, either. It seems really silly to have the ability to make beautiful underwear and yet still be wearing the faded/ratty pieces that give me quadboob, so I’m slowly trying to fix that.

Watson Bra made with Scuba Knit from Mood Fabrics

Watson Bra made with Scuba Knit from Mood Fabrics

Watson Bra made with Scuba Knit from Mood Fabrics

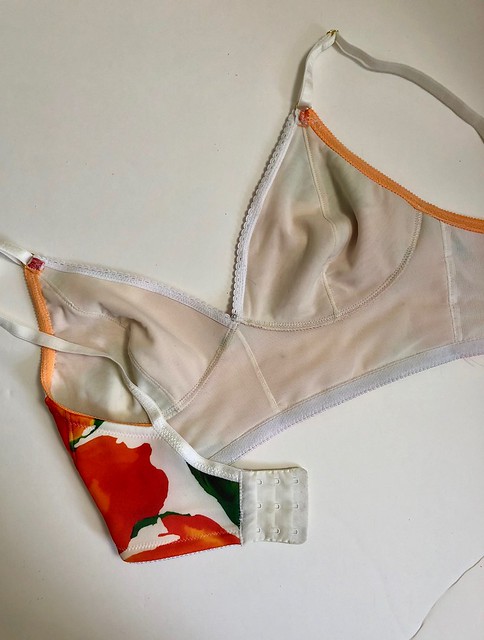
Sooo, this fabric! This is the Italian Red & Orange Floral Scuba Knit from Mood Fabrics. I’ve been creeping on this fabric for a minute now (it’s actually still available if you want to creep, too!) but I honestly don’t like the way Scuba feels and didn’t have any interest in sewing anything out of it. It seems that the thickness and body of Scuba – aka, the two features that people enjoy the most – were everything I did not want in a fabric. Eventually, the creeping got to me and I decided to buy a yard and see what I could figure out.

You know what works splendidly with this fabric? Lingerie. There’s enough stretch for comfort (assuming you are making a pattern that requires stretch), and the additional thickness means you get a little extra coverage. So I decided to make a Watson Bra & Bikini set with this fabric. If you look at the product listing for the fabric, you’ll see that the floral design is fairly large scale, which means it got chopped up to make the cup pieces for the bra. I wasn’t sure how much I’d like that; turns out I LOVE it. It turns this decidedly floral style into something more abstract and a bit painterly. I think it’s very pretty!

Watson Bra made with Scuba Knit from Mood Fabrics

Watson Bra made with Scuba Knit from Mood Fabrics

I did have to do a bit of testing to figure out the best way to sew this scuba – needle choice is very important, otherwise you’ll get skipped stitches (and there is a lot of topstitching here, so I definitely wanted to avoid that). I actually tried every single needle in my arsenal before determining that the 70/10 Jersey needle (not stretch, not ballpoint) was the way to go. After that – it was pretty smooth sailing! I don’t know how well Scuba does or does not press, but you don’t have to press it for lingerie (hence all the topstitching) so that wasn’t an issue.

I’ve made this pattern numerous times before, so nothing new to report on that end. I did go up a cup size, which means I sewed a 30E for this piece. I lined the entire bra with lightweight power mesh – this isn’t necessary (the scuba is comfortable enough on it’s own), but I like the clean interior finish. The bridge is also lined with sheer cup lining under the power mesh, for added support. All elastics are from my stash; likely mostly from Pacific Trimming or Tailor Made Shop. I kept all the elastic white except under the arms, which is orange (just cos a little to get a little wild sometimes).

Oh, I also made some matching underwear, too!

Watson Bra made with Scuba Knit from Mood Fabrics

Watson Bra made with Scuba Knit from Mood Fabrics

I am making it a point to sew 1-2 pairs of underwear with each bra that I make – so that I actually have matching sets (and stop complaining internally that my lingerie doesn’t match). I did cut two pairs here, but I wasn’t careful about pattern placement and the other pair looked like there was a flower exploding out of my butt. So. Scrapped that one, will revisit later haha. The underwear is single-layer scuba (no power mesh), except for the crotch lining, which is 100% organic cotton (cos I’m a fancy bitch). Again, all white elastics.

AND A BONUS HERE’S ANOTHER WATSON I MADE:

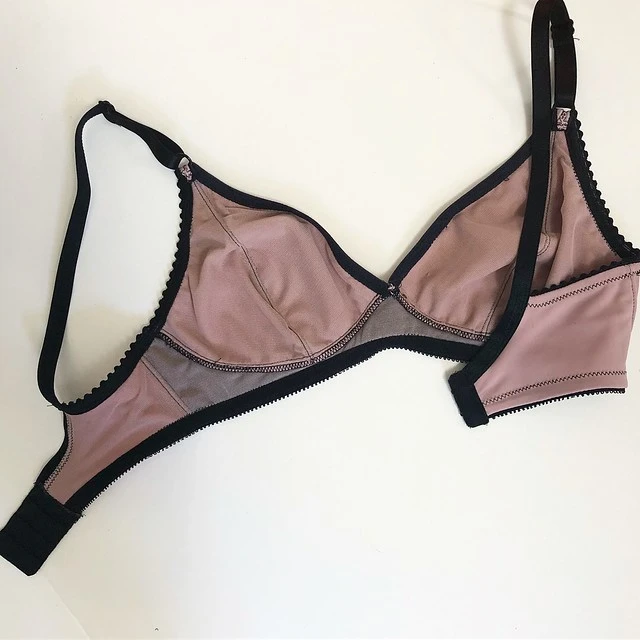
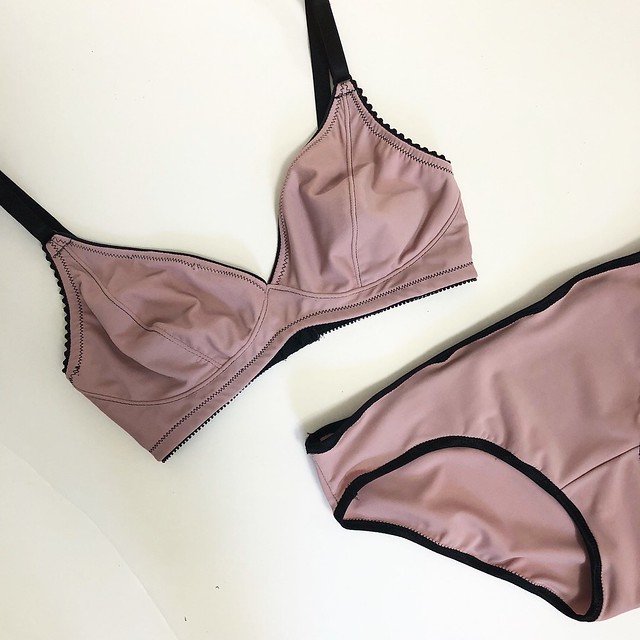
Spandex Watson Set

AKA my attempt at pretending I was going to sew something neutral (this dusty rose is pretty neutral on me, fyi). It all went great until I decided to add black elastics 😛

So I actually bought this fabric from Spandex House back in March – it’s just a basic, I dunno, spandex knit – in order to sew some underwear. I had just bought the Joan bra from Agent Provocateur and was considering the matching underwear, except they were slightly uncomfortable, very unflattering (on me) and also $60 and you know what, let’s not. So I took my bra to Spandex House and found the exact same spandex, figuring I’d sew my own matching underwear for WAY less than $60/pair. Which I did, but I also decided to make this non-neutral Watson bra, too!

Spandex Watson Set

Spandex Watson Set

So yep, there’s that. Same 30E, but the regular (not longline) version. Lined with matching powermesh (also from Spandex House), with black elastics and topstitching. It’s… neutral-ish. I like it! 🙂

Spandex Watson Set

The matching underwear is unlined and finished with black foldover elastic.

Next up – I need to make some underwired bras in my new cup size, and realistically at least one needs to be neutral. I am hoping to combat the beige boredom by finding a pretty lace to compensate, and sewing it up in the Berkeley Bra pattern. Stay tuned!

**Note: The floral scuba knit was provided to me by Mood Fabrics, in exchange for my participation in the Mood Sewing Network. All other patterns, notions, and spandex were purchased by me, though!