Tag Archives: skirt

Completed: Pulmu Skirt Kit from Needle Sharp

15 Dec

Y’all, I love a good kit. I think I’ve mentioned this before, but I just want to reiterate in case you didn’t hear me the first time – I LOVE KITS. Something about having everything already picked + sorted, then corralled in its own little box just pleases me to no end.

So, today, I have another kit to show you. Or, rather, the results of a project from a kit.

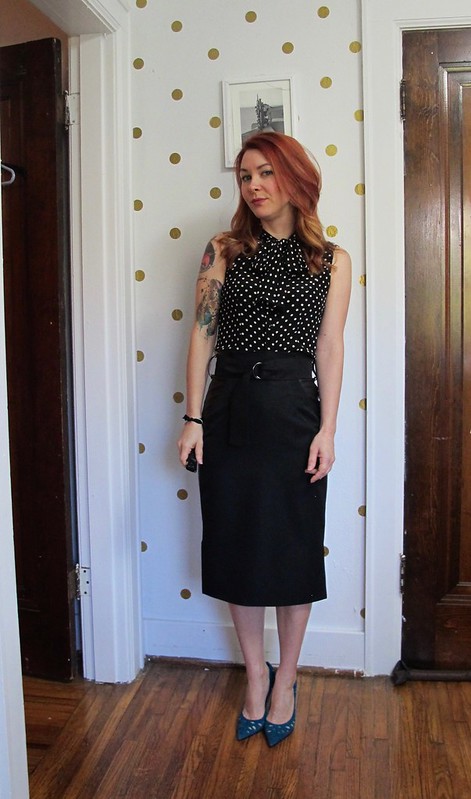
Pulmu Skirt with Needle Sharp

A few months ago, I was contacted by Mary of Needle Sharp, who wanted to send me one of her kits to try out in exchange for some honest feedback. Now, if there is one thing I love more than kits, it’s sharing my opinion! Needle Sharp is a new company that provides sewing subscription boxes. There are 3 different levels to choose from – the Lightweight, the Mediumweight, and the Heavyweight (plus a Starter Box if you literally don’t have the tools), with 3 fabric options to choose from each category. Each month focuses on a theme – this month it’s pencil skirts, last month was wiggle dresses – and the boxes include everything you need to make the project, including pattern, fabric, interfacings and stabilizers, thread, notions, even machine needles. All you need to supply is the sewing machine and any tools (such as scissors, pins, chalk, etc).

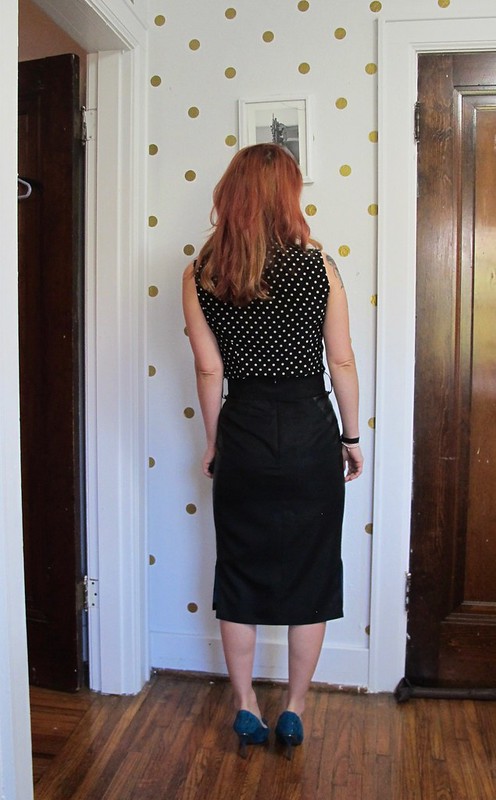
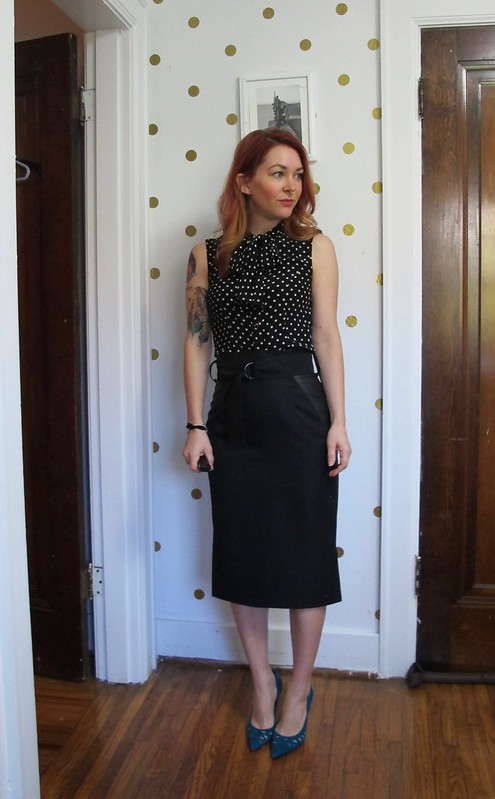
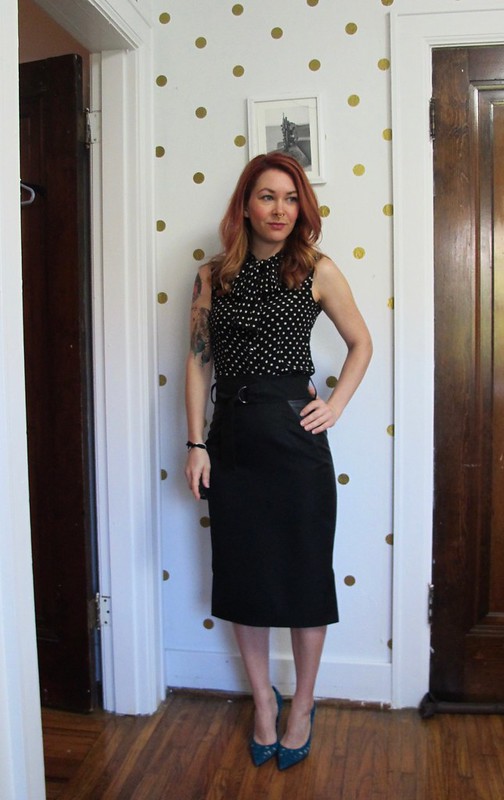
I was given several box options to choose from (including upcoming months that haven’t been announced yet!), and I went with the mediumweight pencil skirt box. I chose the rock’n’roll option – black polyester suiting, black pleather triangle inserts. Let me say this is a DEFINITE departure from my style (minus the black part) – I haven’t worn a pencil skirt in ages, and this one is long enough that it requires wearing heels or else it looks stupid – but I’m pretty into it!

I took some photos of the box before I tore into it, so here’s that:

Needle Sharp box

The box arrived on my doorstep with the logo clearly visible, so I knew exactly what was waiting for me (rather than it being a nondescript box that I ripped open with glee to realize it was just a bunch of Amazon books that my upstairs neighbor had ordered, ugh I’m still mad about that lol).

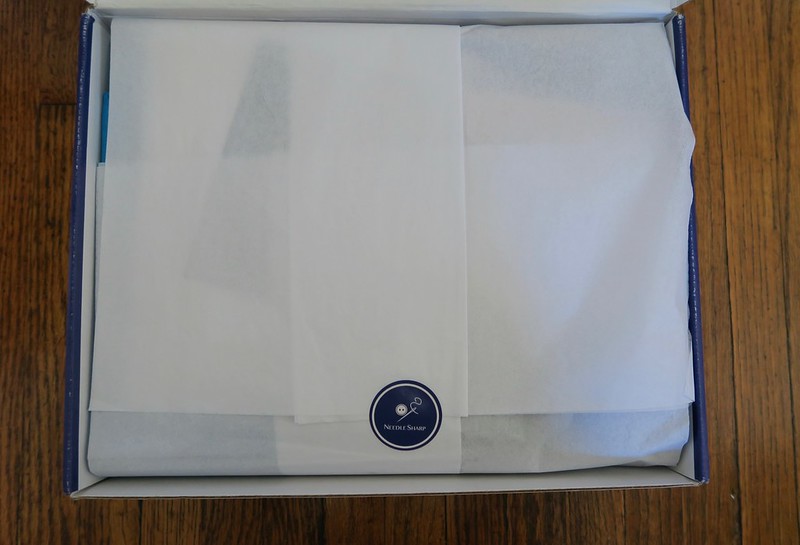
Needle Sharp tissue

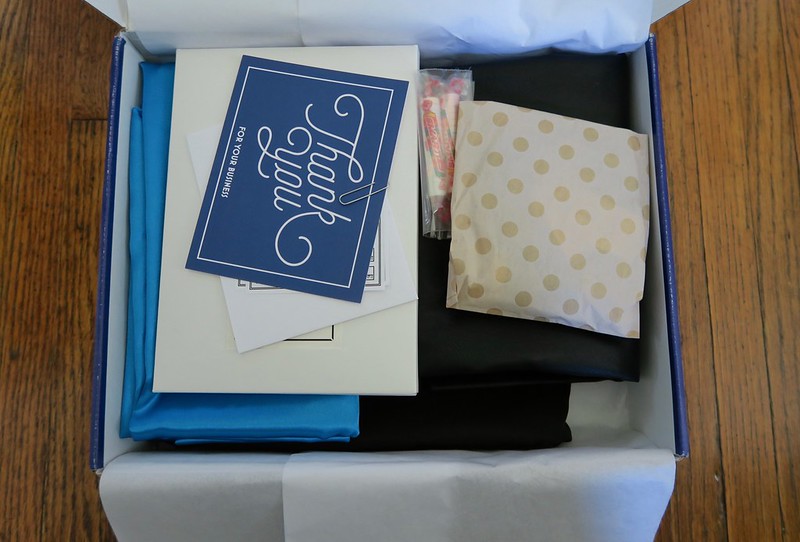
Needle Sharp contents

Everything was beautifully packaged, it looked like a present when I opened it. I didn’t take a picture of all the included stuff (well, I did, but it was a dumb and useless-looking picture so I deleted it), but my box contained the sewing pattern, suiting fabric, lining fabric, pleather, interfacing, 2 D rings, an invisible zipper, a spool of black thread, 2 sewing machine needles (80/12 and a leather needle – both clearly marked on a small card), and CANDY. TBH, the candy might have been the best part. I am always so tickled when I get surprise candy.

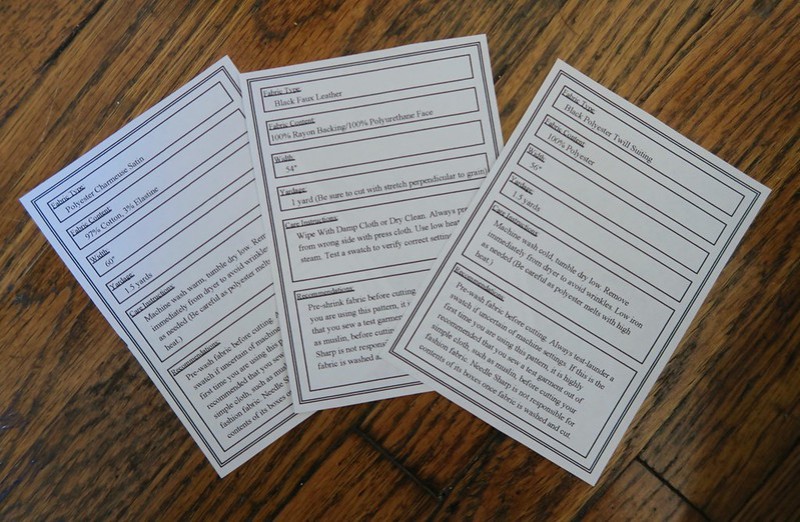
Needle Sharp fabric care

Another thing included in the box were cards for each piece of fabric, with yardage, content, and care instructions. I really appreciated this, since this information is rarely included with online fabric orders.

While I’m generally not a fan of polyester, the contents of this box were definitely a very high quality. It didn’t feel plastic-y like some polys, and in general the fabrics were easy to work with and handle. That lining shed all over the place like a bitch (a month later, I am still finding surprise tufts around my studio), but charmeuse has a tendency to do that regardless of whether it’s silk or poly. I especially loved the faux leather! It is a SUPER nice quality and actually looks like leather (as opposed to plastic, like a lot of the faux leathers I’ve seen). It is backed with a knit rayon, so it’s super easy to sew and doesn’t require a special foot (I did use the included leather needle). I received more fabric than I needed (each kit comes with enough fabric to make any of the sizes in the pattern), so I have tons to play with and put toward future projects. Pretty stoked about that!

Pulmu Skirt with Needle Sharp

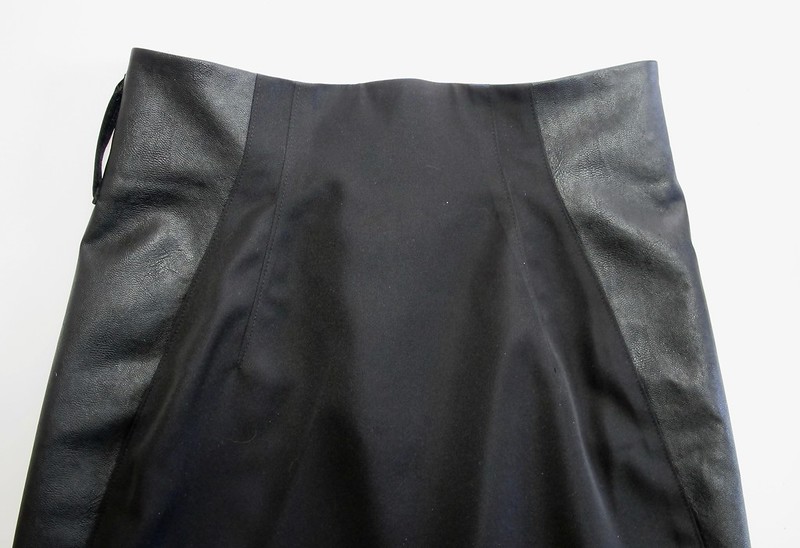
So, now, let’s talk about the pattern – the Pulmu skir from Named Clothing. This was the pattern that was included in my box. As I’ve mentioned, a high-waisted pencil skirt really isn’t the kind of thing I wear these days, but I’m willing to branch out. I loved the way this one looks and I loved the idea of putting a cool fabric in those triangle inserts. This pattern is definitely a neat twist on an otherwise plain pencil skirt, and I’m totally into that.

With that being said, I feel like Named Patterns can be a little hit or miss. Some of the designs are cool (some of the designs leave me scratching my head. Sorry. I’m not a cool person.), the drafting is great and the pieces fit together well. The instructions make me want to SCREAM. Key steps are left out, additional wtf steps are included (like serging all the seam allowances – on a *closed* lined skirt. Really, dude?), but tbh I’m mostly mad because this pattern didn’t include any lengthen/shorten lines. Who does that?? And why??? So, that agitated me. Minor complaint, but frustrating nonetheless.

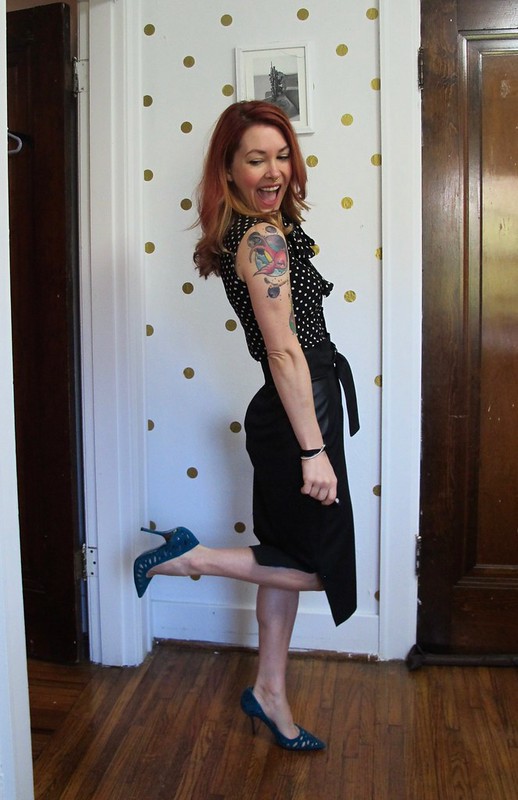
I knew this skirt was going to be long – the instructions state that the pattern is drafted for someone who is 5’8″ and to shorten if needed (again, then why the HELL would you not include lengthen/shorten lines, like, seriously dude), and I am more like 5’2″! The skirt is intended to hit calf length, and I was tempted to make it way shorter than that but decided to embrace that whole “wearing clothes out of my style comfort zone” and stick with the longer demure length. It does look cool, but the downside is that I have to wear heels or else I look frumpy. The upside is, I finally have something to wear these turquoise Jimmy Choos with, ha!

Pulmu Skirt with Needle Sharp

Pulmu Skirt with Needle Sharp

I mean, seriously, look at how fucking cool those shoes are.

In case you were curious, they are as uncomfortable as they look. I actually bought some new insoles to try out on these shoes and they have kind of changed my life – the Vivian Lou Insolia insoles, seriously amazing. My problem with heels is that all my weight gets pushed to my toes, and it gets incredibly painful really really fast (I took these photos before I tried the insoles and just the time it took to get pictures, my feet were screaming). These insoles redistribute the weight so your heel takes a lot of it, which makes the shoes easier to wear. I’m not delusional and I’m not going to tell you that these feel like sneakers now – but I can wear them and walk around and it’s way more tolerable. They are expensive for insoles – like $30! – but they have a money-back guarantee, so you’re not stuck with them if they suck. I’m pretty happy with this discovery!

And, in case you were wondering why I own a pair of designer shoes that I couldn’t even wear – my boss gave them to me (she never wore them either). I do not normally buy $1,000 shoes just for the hell of it 😛

Ok, moving on!

Pulmu Skirt with Needle Sharp

Pulmu Skirt with Needle Sharp_4662

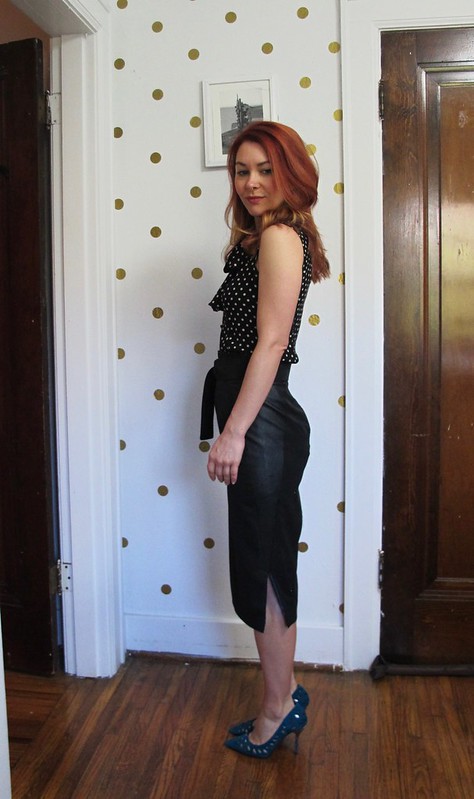
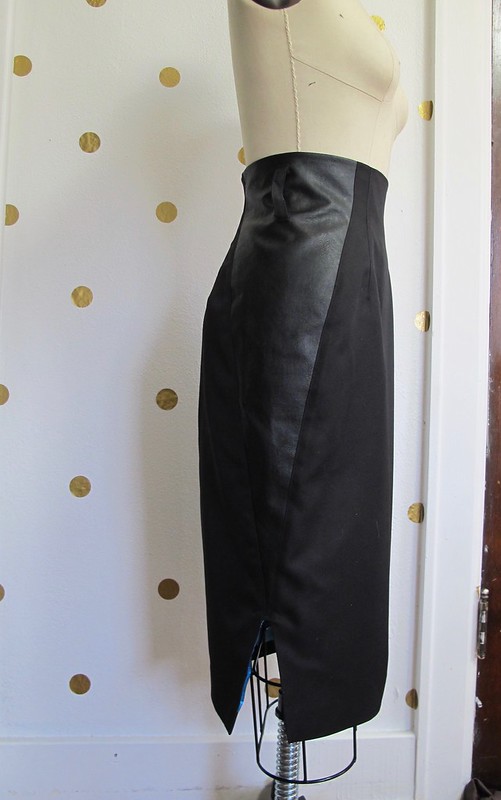
Based on my measurements, I’m a size 34 at the hip and between a 34/36 at the waist. I cut my skirt pattern between the 34/36 lines at the waist, grading down to a 34 at the hip to the hem. I also shortened the skirt by 2″ – which took a little problem solving on my end, as the skirt is pegged at the hem and has that triangular insert to contend with. What I ended up doing was shortening the skirt 1″ in two different places, which I think worked quite well. In addition to the pegged hem, the skirt has 2 side slits and an encased lining (it doesn’t hang free; it’s attached at the hem), so I wouldn’t be able to shorten the skirt after assembling it. Figuring out which 2 places to shorten was part of the challenge, but I ultimately went with around the hip area (which, strangely, is marked on the pattern), as well as a couple inches above the slits.

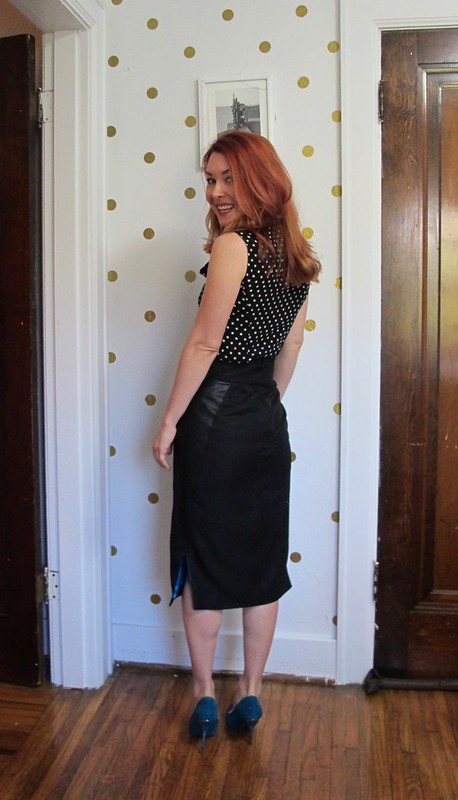
The waist fits great, but the hips could have stood to go up a size- as you can see, there are drag lines all over my butt. I’m not terribly concerned about it – the 3/8″ seam allowance means there’s not much room for fit adjustments, so I’m just gonna deal with what I was given here – but I’m certainly aware of it. Like I said, I cut my size based on my measurements, so I’m not sure if the finished hip is tighter due to my fabrics or an error in the sizing. The fabric recommendations on the pattern aren’t exactly helpful – they just say get fabric with “up to 5% stretch.” Oh, ok. To be fair, my leather inserts are stretch – but the lining isn’t, so it negates that. At any rate, I’m not concerned about it so whatever!

Pulmu Skirt with Needle Sharp

Pulmu Skirt with Needle Sharp

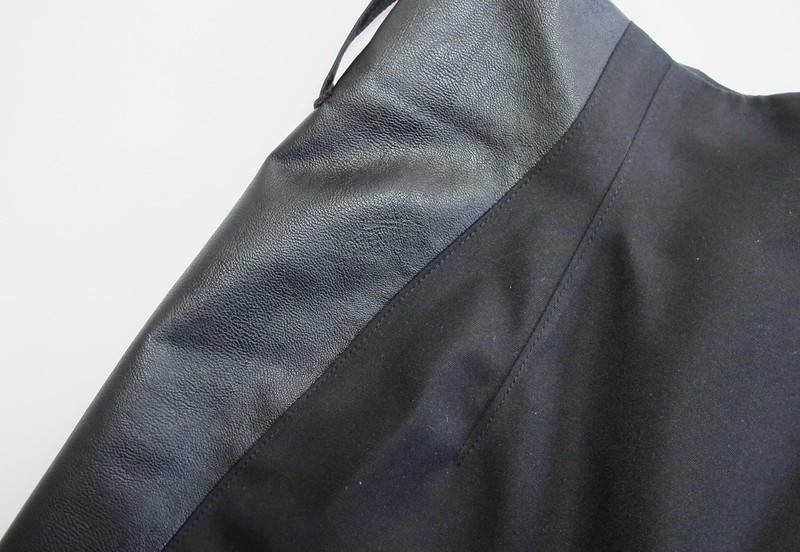
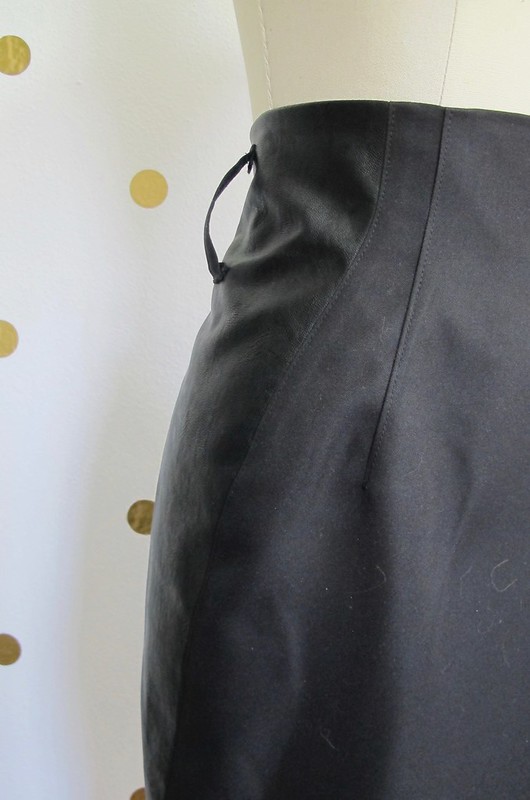
The poly + leather in this skirt pressed surprisingly well (I used medium heat, a presscloth, and a clapper to hold the heat in until it cooled), but I added a bunch of topstitching to get a really sharp edge. I topstitched all the darts, as well as the inserts, and I love the way it looks.

Pulmu Skirt with Needle Sharp

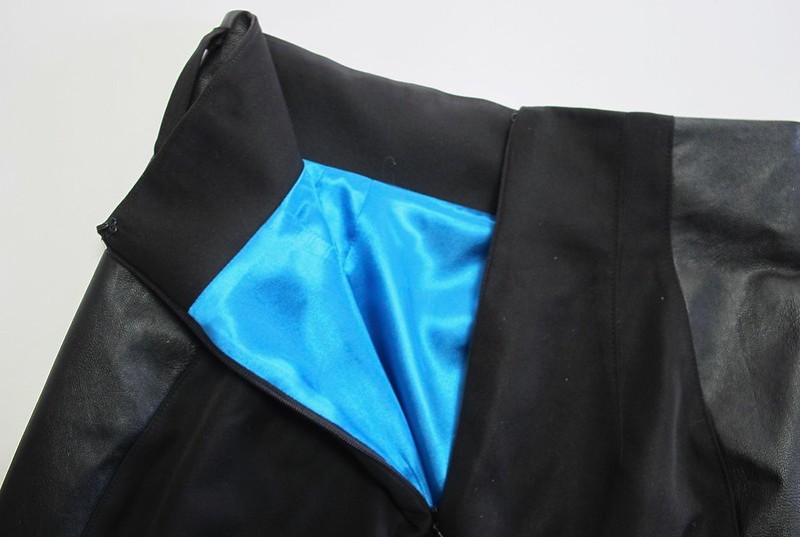
The skirt features a self-fabric facing to keep the top lining from peeking out, and the back closes with an invisible zipper.

Pulmu Skirt with Needle Sharp

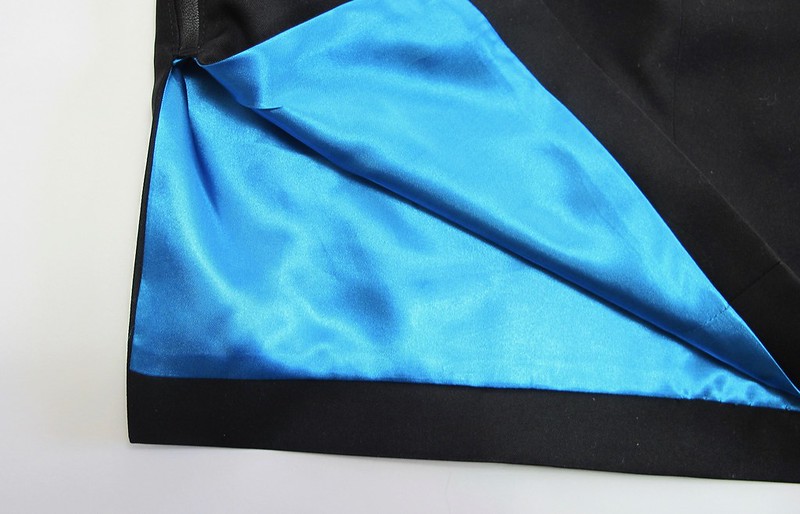
The “vents” are actually just slits. I love the look of them but be aware they are not faced like a true vent – so your lining fabric will show. This was my one complaint about the kit is the color of that lining fabric. I know that people love a contrasty lining, but I generally stick with neutrals, especially in a black skirt that is going to show the lining. Based on my feedback, the kits now have the option to choose your lining color (you can get plain black and be boring like me, or a fun contrast if that’s what you like!).

Pulmu Skirt with Needle Sharp

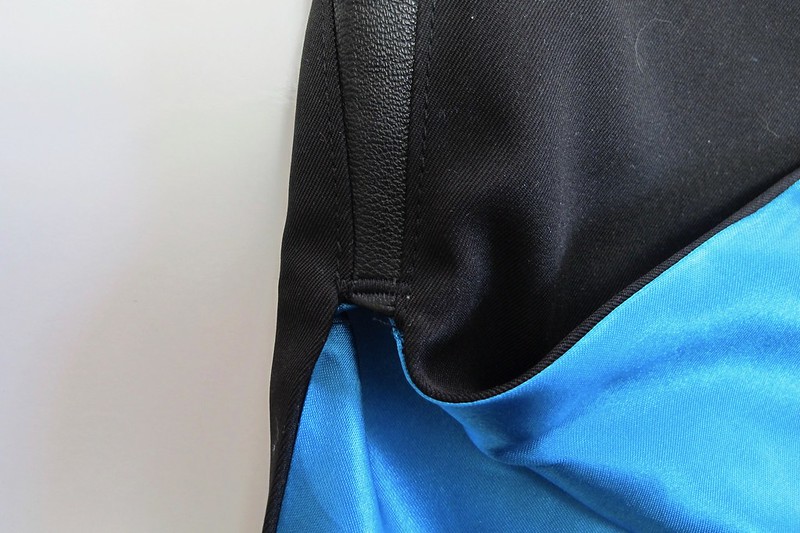
One thing I added was a small bartack at the bottom of the slit, to reinforce it from tearing. BTW, the slit instructions are… interesting. It’s not my cleanest work, but it’ll do.

Pulmu Skirt with Needle Sharp

Pulmu Skirt with Needle Sharp

The skirt includes belt loops and a self-fabric belt that closes with D rings. I don’t know why I love that part so much, but I do. I’ve actually found other ways to wear the belt with different garments, so that’s a bonus!

Pulmu Skirt with Needle Sharp

I think that’s all the word vomit I have to say about this project! In short: the kit was great, and especially awesome for getting me to branch out a little, style-wise. If you are making this skirt (whether with a Needle Sharp kit or just because you own the pattern), I recommend sizing up at the hips, or using a fabric with some stretch (and making sure your lining stretches as well). And also check that length, because once you’ve sewn up the skirt you can’t exactly shorten it!

Oh, one last thing! If you want to try a box with Needle Sharp – use the code HOLIDAY10 to receive 10% off any box! This promo is good through 12/24/17.

** Note: All the supplies used to make this skirt were provided to me as a free kit from Needle Sharp, in exchange for my honest feedback. I was not required to post about this project, I just wanted to!

Completed: Wool Crepe Mirambell Skirt

30 Nov

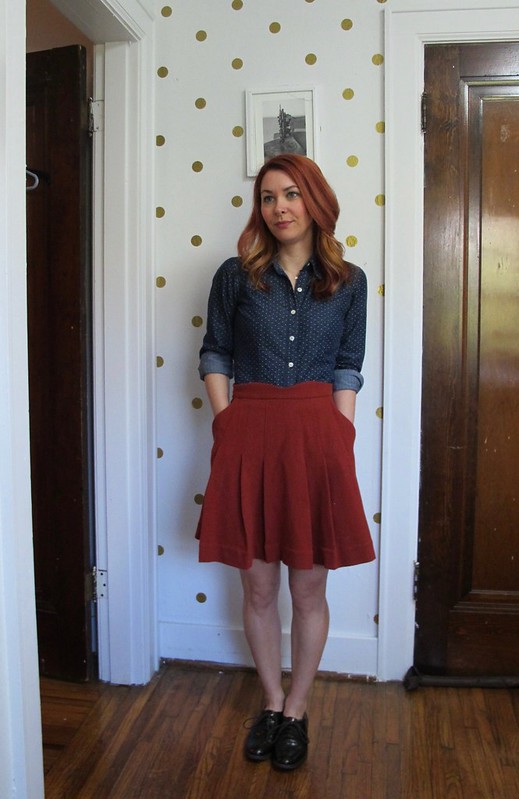
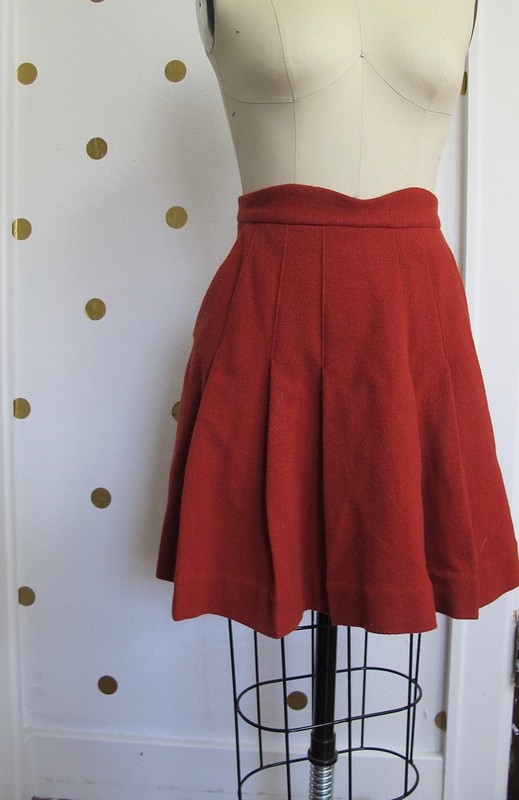
Look – it’s two of my favorite things, rolled into one! Wool crepe + rust orange. YES!

Mirambell Skirt

I haven’t sewn with wool crepe in ages, which is weird because I consider it one of my favorite fabrics. Since my life is so… casual now, I really just wear a lot of pants, tshirts, and button ups. Dresses only happen if they are knit, and anything remotely resembling a suit hasn’t graced my body in about 5 years. Lol, remember when I worked in an office and had to dress up for work? Yeah. That was a long time ago.

Anyway, wool crepe! I love it! I love how squishy and soft it is, I love how it drapes and hangs off the body, I love the rich color. I love working with it – it’s easy to cut, easy to sew, rarely frays, and responds to pressing like a fucking dream. I love wearing it because it’s warm and comfortable, but also looks polished. Wool crepe, where have you been? Why did I forsake you? I’m so sorry.

Mirambell Skirt

This wool crepe is from Mood Fabrics, which I found in the store when I was in NYC a few months ago. There is a nice selection of wool crepes online if you aren’t local, but I love the opportunity of being able to go to the store and actually see/feel the fabrics before committing to one. This particular fabric is the result of a rare instance where I went to Mood with a specific fabric I was looking for (my lists are usually pretty vague – x amount of knit for a tshirt, for example) and amazingly, somehow managed to find (despite the selection in that store, I feel like they rarely have the specific things I want haha. Which is why I usually end up with vague lists!). But, no – for this skirt, I wanted wool crepe in either rust orange or saffron yellow. And I actually found it! Amazing!

Mirambell Skirt

Mirambell Skirt

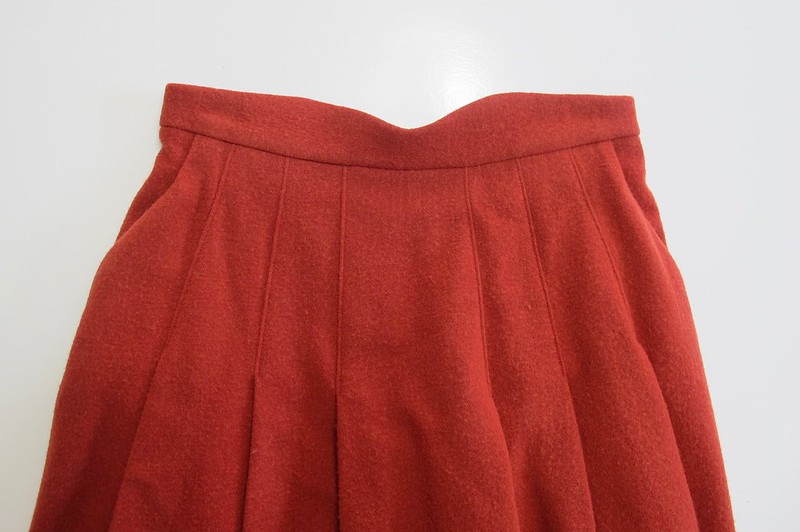
The pattern I used is the Mirambell Skirt from Pauline Alice. It’s actually the second version I made – my first one was a sheer navy cotton/silk blend. It’s beautiful; maybe someday I’ll get around to blogging about it lol. Anyway, I originally bought the pattern specifically for that fabric – I was envisioning something similar, and then the pattern appeared on my radar a few days later. The pattern features a high waist with a curved waistband, topstitched pleats, and shaped pockets. There are two versions – one that closes with an invisible zipper, and one with buttons down the front. It is, admittedly, pretty similar to the Colette Zinnia, which I have made twice before (see: one, two). Between the two, I absolutely prefer the Mirambell. I always felt like the shape of the Zinnia was a little off – it tends to flare right about the hips, which is weird. Even topstitching the pleats further down did nothing to rectify this. Also, the inseam pockets on the Zinnia contribute to that flare – which isn’t an issue with the Mirambell, since the shape of the pockets makes them life more flat. The Mirambell does have a shaped waistband, but that can easily be straightened if you hate it. Anyway, my two cents!

I made a size 36, with no further fitting adjustments. The waist is just perfect on me – it’s fitted, but not uncomfortably tight. I love the length, although I’ll tell ya I was tempted to make it incredibly short.

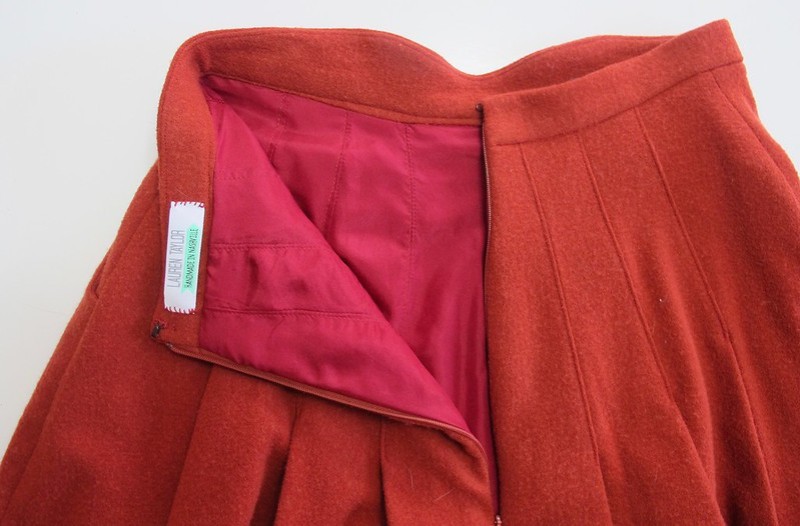
One thing I did change was to add a lining, because I tend to wear wool crepe during tights season and it’s just easier to add a lining than deal with a slip. This is not included in the instructions, but it was easy to figure out (I’d already done this for my aforementioned prior version anyway, so I knew what I was getting into). I used china silk (originally from Mood, and languishing in my stash for the past year or so) and cut a second skirt out of it (I taped the pocket piece to the skirt front since there’s a slash where the pocket goes on the outside… man I hope that makes sense haha), 2″ shorter than the skirt I cut out of my crepe. I assembled each skirt individually as instructed (omitting the pockets on the lining), and then attached the lining to the waist seam of the outer skirt before attaching the waistband. Easy and effective! China silk is not my favorite fabric to work with as it’s INCREDIBLY shifty, but occasionally I’ll take one for the team if I feel like the end result will be worth it. This was one of those instances. The entire making of this skirt was just really fun and satisfying.

Mirambell Skirt

Here is the inside with the lining. Sorry about the wrinkles, that’s just the nature of silk.

What else? I finished all my seams with pinking shears, since the wool doesn’t fray and it was also going to be lined. I love using pinking shears, they feel so quaint and sweet haha.

Mirambell Skirt

Mirambell Skirt

Mirambell Skirt

Mirambell Skirt

Mirambell Skirt

Mirambell Skirt

Overall, a very happy skirt that combines my favorite color *and* my favorite fabric! Double bonus in that it looks so good with my polka dot chambray button up I made back in 2014. I’ve been trying to stick with a general color palette so that my pieces coordinate (and I don’t have any weird closet orphans), and this skirt is a great addition to that.

*Note: The fabrics used for this project (skirt) were provided to me by Mood Fabrics, in exchange for my participation in the Mood Sewing Network.

Completed: Plaid Rosarí Skirt

29 Nov

Y’all. I love this skirt pattern.

Plaid Rosari Skirt - front

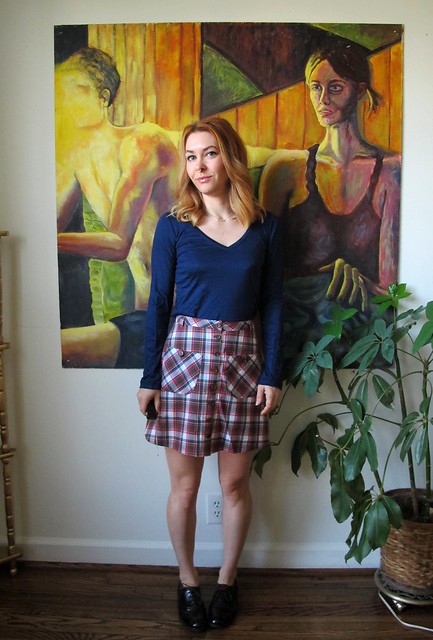
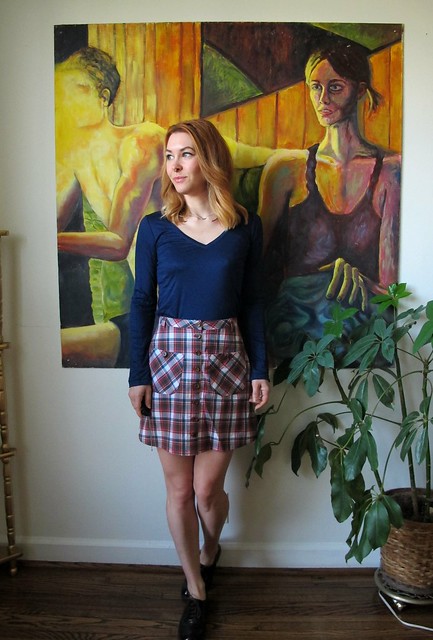
I’ve made it in corduroy, stretch twill, and Cone Mills denim, and I’ve had my sights on making a plaid version as well. Nothing like channeling your inner Cher Horwitz with a plaid mini amirite? This pattern is especially great for plaids as it doesn’t involve a lot of matching – just center front, center back, and the side seams – and you can add some ~visual interest~ by cutting the pockets and waistband on the bias.

If you didn’t already figure it out, this is the Rosarí Skirt from Pauline Alice Patterns. I made the mini version in a size 34, and added curved front pockets and a lining (this is not covered in the pattern, but it was pretty easy to figure out).

The plaid fabric is from Mood Fabrics. It is listed as a cotton flannel, but I think “flannel” is a bit of a stretch. It is VERY slightly flanneled if you look at it really really closely, I guess. Honestly, it just looks like a plaid shirting to me. It’s definitely cotton, just the flannel part isn’t exactly accurate. While I had visions of a cozy flannel skirt when I ordered the fabric, I think the smooth cotton works just fine. Probably makes it look a bit less like pajamas, ha. With that being said – if you are wanting to order any of this fabric, definitely get a swatch first!

The lining is Bemberg Rayon that I had in my stash (I’d say it was a miracle that I had a perfect color match, but ha ha have y’all seen my stash?), and the buttons are also old stash (I think they are originally from the flea market, though, probably).

Plaid Rosari Skirt - front

Plaid Rosari Skirt - side

Plaid Rosari Skirt - side

Plaid Rosari Skirt - back

Sewing this up was really easy and mostly uneventful, considering I’ve already made this pattern so many times. Like I said, I added a lining so that I could wear this with tights – the one thing that bums me out about my other Rosarí skirts is that they stick to tights and ride up (generally right in between my legs, which is sooo attractive I know) (I ended up making a teeny half-slip out of stretch silk charmeuse to wear with those – so problem solved! This is the tutorial I followed, FYI!). To add a lining, I cut the lining from the front and back pattern pieces, and sewed them together like a lining skirt. Then I attached them to inside along the top edge of the plaid pieces (also assembled together), and then treated everything as one piece. The lining is basically flat-lined to the outer fabric, except the side and back seams are enclosed. The front button band and hem are turned to the inside as per the pattern and topstitched down.

The only part that was eventful about this sewing – the fit! I was nearly finished – like, button holes sewn in and marking button placement nearly finished – and I tried the skirt on to mark those damn buttons. That’s when I realized that it was too tight – way too tight. I could get it to close, but it was less “cute plaid skirt” and more “sausage stuffed in a casing,” if you know what I mean. I couldn’t figure out why it was too small – did I gain weight? did I fuck up the seam allowances somewhere? – because, again, I’d made this skirt several times, all in the same size, and THOSE still fit just fine (I went in my closet and tried them all on to be sure haha). Then I threw it on the cutting table and plotted how I was going to fix this mess.

Well, first of all – I figured out why it was too small. See, all 3 previous versions were made using stretch fabric. Due to the addition of the lining, this skirt didn’t have any give to allow for a little more room (actually, the fabric itself wasn’t very stretchy either, so – that factors in as well). I probably also fucked up a seam allowance somewhere, idk.

To fix the skirt and actually make it wearable, I removed the waistband entirely. I let out the side seams until the skirt fit comfortably (I think I ended up with 3/8″ seam allowances – I don’t remember), in both the outer and the lining. Then I cut a new waistband and reattached everything. As you can see, it now fits. Success!

Here are a lot more photos. Sorry about that giant-ass wrinkle on the right, by the way.

Plaid Rosari Skirt - on dressform

Plaid Rosari Skirt - on dressform

Plaid Rosari Skirt - on dressform

Plaid Rosari Skirt - flat

Plaid Rosari Skirt - flat

Plaid Rosari Skirt - flat

Plaid Rosari Skirt - flat

I guess that’s it for this post! Moral of the story – even if you’ve made a pattern numerous times, always ALWAYS check that fit as you go! Your fabric can really change the fit of the garment. I generally do this when I sew, but the ONE time I did not, I ended up regretting it!

Plaid Rosari Skirt - front

OAL2016: Part 2 (Zipper + Finishing)

15 Jun

Hey everyone! Welcome back for the second (and final!) sewing post of the Outfit Along 🙂

OAL_Banner

At this point, you should have your skirt mostly assembled (all seams except the center back seam) with the waistband partially attached (not finished). Today, we will insert the zipper and finish the waistband in one go! I  am making my skirt with this awesome rayon crepe from StyleMaker Fabrics (don’t forget that there is free US shipping/discounted international shipping on all orders through 6/30/16 when you use the code OAL2016 😉 ), using my Spiegel 60609 sewing machine. If you missed the previous posts, here is Part 1!

For this particular skirt, I am sewing an exposed metal zipper. If you hate exposed zippers, that’s ok! You have options! Check out my tutorial for sewing a lapped zipper, and also my tutorial for sewing an invisible zipper.

For sewing the exposed zipper:

OAL2016- Sewing an Exposed Zipper
Start by marking a rectangle where the zipper is to be inserted. For a 9″ exposed zipper on a garment with a 5/8″ seam allowance (if your measurements differ, you will need to adjust these accordingly!), make a rectangle that is 10″ long and 7/8″ across. I use a Chaco Pen liner, but again – anything works! Then go over your markings with a long basting stitch on your machine. Don’t be lazy and skip this step. I know it’s tempting, but trust me on this one. The stitches will make it visible from both sides, and also won’t rub off.

OAL2016- Sewing an Exposed Zipper
If your fabric is very lightweight and/or drapey, you will want to interface the area where the zipper is going, just to give it some extra support. I cut strips of lightweight fusible and applied them over my basting lines.

OAL2016- Sewing an Exposed Zipper
Clip into the bottom corner of the rectangle at a 45 degree angle, being careful not to snip into your basting lines.

OAL2016- Sewing an Exposed Zipper
Fold along the vertical basting stitches and press.

OAL2016- Sewing an Exposed Zipper

OAL2016- Sewing an Exposed Zipper
Starting at the horizontal basting stitches, sew the center back seam at 5/8″, ending at the hem.

OAL2016- Sewing an Exposed Zipper
Press the seam allowances open.

OAL2016- Sewing an Exposed Zipper
On the right side of the skirt, lay the zipper face down with the bottom facing toward the waistband. Line the horizontal basting stitching just below the zipper stop.

OAL2016- Sewing an Exposed Zipper

OAL2016- Sewing an Exposed Zipper
Sew along the horizontal basting ONLY, using a zipper foot. PROTIP: I just found this out, but you *can* move the needle of the Spiegel 60609. While the machine is on straight stitch (#1), increase the zigzag width to 7.0 and that will move the needle! So you can get RIGHT UP IN THERE to do that zipper!

OAL2016- Sewing an Exposed Zipper
Here is the bottom of my zipper after it is attached. You only need to sew along the basting stitches – not the entire width of the zipper tape.

OAL2016- Sewing an Exposed Zipper
Flip the zipper to the inside of the skirt and press the line you just sewed.

OAL2016- Sewing an Exposed Zipper

OAL2016- Sewing an Exposed Zipper
Now turn back the skirt pieces, one at a time, and sew the zipper tape to the skirt along the vertical basting stitches, starting at the zipper top stop and ending at the bottom stop (don’t sew all the way to the very end of the tape). Again, use a zipper foot and move your needle over to one side if you can.

OAL2016- Sewing an Exposed Zipper
Here is what things should look like after you’ve attached both sides. Note that the top of the zipper will NOT reach the top of the waistband – it should only go about halfway, since we are folding the waistband to the inside. On the Hollyburn, there is a notch to indicate where the waistband folds – so the zipper  stop should reach that notch.

OAL2016- Sewing an Exposed Zipper
Now we need to finish the waistband. Fold the seam allowance (5/8″) along the long raw edge to the inside, and press. You may trim this seam allowance down to 1/4″ if it’s bulky.

OAL2016- Sewing an Exposed Zipper
Fold the remaining bits of the top of the zipper tape toward the inside of the waistband, and pin to keep them out of the way (if you accidentally sewed down this part, you gotta unpick 😉 ).

OAL2016- Sewing an Exposed Zipper

OAL2016- Sewing an Exposed Zipper
Now fold the waistband down to meet right below (about 1/8″) the stitching line at the top of the skirt, making sure that the top zipper stop is even with the top of the waistband fold. Make sure the raw edges are tucked in around the zipper and pin everything into place.

OAL2016- Sewing an Exposed Zipper

OAL2016- Sewing an Exposed Zipper
Now to topstitch! Starting at the top of the zipper, topstitch 1/8″ from the edge down to the seamline where the skirt meets the waistband, lower your needle and pivot. Then continue around the entire waistband until you reach the other side of the zipper, pivot, and sew back up to the top.

Alternately, you can also topstitch around the entire exposed zipper – but you’ll need to sew down the waistband in a second pass 🙂

OAL2016- Sewing an Exposed Zipper

OAL2016- Sewing an Exposed Zipper
Now pat yourself on the back for sewing an AWESOME EXPOSED ZIPPER WTF.

Finally, just a couple more things to finish your skirt! If you want to add belt loops or the waistband tabs, you can do so now. Then you just need to hem. I ended up taking about 3″ off my skirt length to make it more of a mini, and then finished with a double turned hem (1/4″ on the first turn, 3/4″ on the second) that is simply topstitched. Here are my hemming tutorials if you need a refresher!

That’s all for today! As always, please let me know if you have any questions!! How is your sewing coming along? 🙂

OAL2016: Part 1 (Pockets + Piping)

8 Jun

Good morning, everyone! Time to get some sewin’ done for this OAL!

Before we get into the post, a few things I wanted to mention:
– Unlike previous years, I will not be doing a full step-by-step of sewing the pattern. Part of the reason is because this is a really easy pattern and the instructions are super straightforward and simple to understand on their own.
– Now, before you freak out – there IS a sewalong for the Hollyburn skirt! Not hosted on this blog, but a sewalong nonetheless! You can find it here on Lavender Lane. So if you reeeally need the help and the instructions just aren’t cutting it for some reason or another, there is that option!
– Instead of step-by-steps, I am splitting the OAL sewing stuff into 2 posts – today and next week – both with modification tutorials. I will also include links to relevant tutorials from older posts as they are needed. That way, those of you who are not following the OAL and/or don’t care about sewalong posts (I’ll be honest – I skip over them too!) – this is less for you to skip over 🙂 And for those who are here for the OAL and love reaching sewalong posts – they’re still here! 🙂
– And DUH, I’ve made like a zillion of these skirts – so feel free to ask me questions as well! Either in the comments, or you can email me! Don’t worry! I got ya covered!
– FINALLY, I should mention that I’m using my Spiegel 60609 sewing machine to construct my Hollyburn, so you’ll see it in the photos! I wanted to see how it handled my mega-shifty fabric 🙂

Ok, back to the OAL!

OAL_Banner

Before you do anything, it’s a good idea to prewash your fabric in the same manner you will be washing/drying it once the garment is complete. Some fabric reeeeally likes to shrink, so you want to get that out of the way before it’s cut! I am using this cool zigzag rayon crepe from Style Maker Fabrics and it certainly shrunk a LOT! It’s a bit shifty to work with, but I think the payoff will be pretty sweet – it has the dreamiest, swishiest drape! I found that my increasing my stitch length just a hair (the standard stitch length on the Spiegel 60609 is a little short for sewing really delicate and shifty fabrics, I’ve learned) and using lots of pins was enough to keep the fabric in check for the most part.

Some notes on cutting:
Here is a post I wrote for the 2014 OAL on cutting and marking. Different pattern, same concept.
– It is entirely possible to make this pattern with a striped or plaid fabric! You will need extra fabric to allow for matching and it may take longer to cut, but it can be done! Depending on your stripe/plaid, you may only be able to match 2 seams instead of 4 – if this is the case, match the center front and center back seam. Mismatched side seams are less noticeable 🙂 Here is my tutorial for matching plaids. Also relevant: my tutorial on matching the stripes at the pocket.
– This pattern calls for you to cut the waistband on the straight grain (parallel to the grain line). If your fabric has a bit of stretch, though, you may want to consider cutting on the cross grain (perpendicular to the grain line). This is what I did 🙂 Keep in mind that if you cut on the cross grain, you’ll want to interface the waistband with a tricot interfacing to retain that stretch. I personally love the PROtricot at Fashion Sewing Supply, but most fabric stores have something similar 🙂
– If your fabric is super drapey and you don’t want the pockets to bag out, you may consider eliminating them entirely (go ahead, gasp or whatever). This is what I did on my skirt, to allow for a smooth front. You can always add in-seam pockets if you’d like.

Eliminating the pockets is super easy:
OAL2016- Removing Pockets
You’ll need your pocket piece and your skirt front piece.

OAL2016- Removing Pockets
Fold the pocket piece in half along the foldline, matching the notches.

OAL2016- Removing Pockets
Lay the pocket piece behind the skirt front at the pocket opening, again matching the notches. Then just tape it down into place – I am using surgical tape because it peels off easily without tearing the paper (I can’t take credit for this – I got it in my goody bag at A Gathering of Stitches. Sam makes the BEST goody bags!), but you can also use regular tape, painter’s tape, pins, or even just trace off the pattern pieces. Whatever works!

Next steps are to construct the skirt as per the directions. Sew the pockets (if you still got ’em!). Sew the center front and side seams at 5/8″, but leave the center back seam open. If you would like to finish your seams, now is the time. I used my serger to overlock the seams after I sewed them, and then I pressed them open. Finally, staystitch the waist of your skirt (just a straight stitch about 1/2″ from the edge) to keep it from stretching out.

At this point, I decided to add flat piping to my waistband seam. So you get a tutorial!

OAL2016- Flat piping
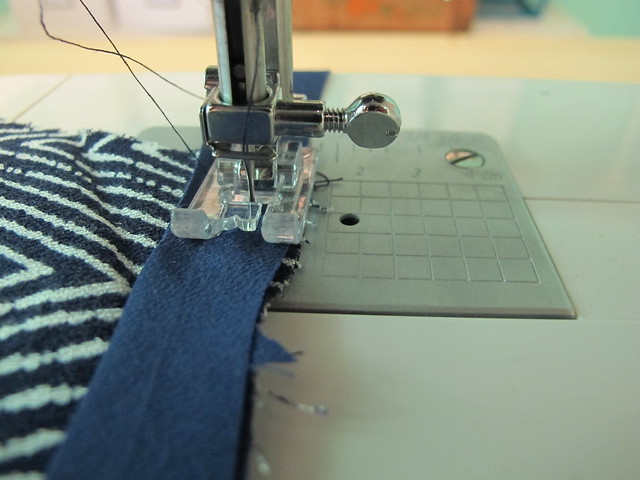
I started with a strip of bias-cut silk crepe that was 1.5″ wide. The width of your piping will determine how wide to cut your bias – you’ll want 2x the finished width, plus 2x seam allowance. Cut enough bias to go all the way across the waist of your skirt. Fold the strip in half, length-wise, with the WRONG sides together, and press.

I promise I will get a new ironing board cover eventually. Ew, that yellow stain. haha.

If you don’t know how to cut bias, here are two really great tutorials: continuous bias (my favorite!) and bias strips.

OAL2016- Flat piping

Lay the folded bias along the waist edge of your skirt, matching raw edges at the top, and pin into place.

OAL2016- Flat piping

Sew the bias in place just within the seam allowance (I sewed at 3/8″) to hold it there. You can use a basting stitch for this step; it’ll get a second sewn pass in a minute!

OAL2016- Flat piping

Lay your interfaced waistband on top of your skirt, with right sides facing and raw edges matching. The bias strip should be sandwiched between the two.

OAL2016- Flat piping

Now sew your second pass to secure all the layers at 5/8″. Make sure to shorten your stitch back to it’s normal setting if you were basting 🙂 I ended up sewing another line a little more than the seam allowance, because I wanted the piping a little bit narrower.

OAL2016- Flat piping

Check the right side to make sure that everything looks good. I have no idea how I managed that unintentional perfect pattern matching, but hey, I’ll take it!

OAL2016- Flat piping

Press all the seam allowances up toward the waistband, using lots of steam so the piping lays nice and flat. If your fabric is bulky, you may want to trim down your seam allowances and/or grade them (trimming them in staggering layers) to prevent bulk from showing from the outside.

OAL2016- Flat piping

Now admire your pretty, flat piping! Isn’t that dainty? 🙂

Ok, that’s all for this week! Let me know if you have any questions about these steps 🙂 Next week, we sew in the zipper and finish the thing! Woohoo!

Completed: Denim Rosarí Skirt

3 Jun

Told ya’s I had another Rosarí skirt up my… sleeve? Skirt? Hm.

Denim Rosari Skirt

At any rate, a Big Warm Welcome for version #3! Yay!

Denim Rosari Skirt

Denim Rosari Skirt

Considering this is the third time I’ve sewn (and posted about!) this pattern, there’s not much to say that hasn’t already been covered. This is a Rosarí skirt, size 34, and I made the version A pockets. If you haven’t already figured it out, I luuuurve this pattern ♥

I should probably point out that all the wrinkles are from a day’s worth of wearing and about 2 hours of driving. Normally I would apologize for how unkempt I look, but gah you guys this is ~the real life~. Also, I always look unkempt. I blame the humidity, but honestly, I’m just lazy enough to not want to spend a bunch of time fussing with my appearance.

Denim Rosari Skirt

Anyway, I made this version using a leftover piece of my Cone Mills Denim (from the kit I bought from Closet Case files last year). I had enough to cut either shorts or a skirt, and decided a skirt was the way to go. This fabric was perfect for the pattern because it’s structured enough to really emphasize the flare, it’s heavy enough to accommodate all those buttons without the band collapsing on itself, and it’s got just enough stretch so the waistband is SUPER DUPER comfy. YES YES Y’ALL.

Denim Rosari Skirt

Denim Rosari Skirt

I’ve been wanting to make a replacement denim skirt for some time now – just something really simple to wear when I want to be casual but need a step away from shorts. Some of the other versions I’ve made in the past have ended up a little too fussy for my current style preferences (like, I really loved my denim Kelly skirt but I am reeeeally over that style right now. And I love the Hummingbird skirt but I rarely wear it because I don’t get a great range of motion with how fitted it is down the legs. I LOVED my denim Ginger, but Current Lauren prefers something shorter. Also, lolz at that old-ass blog post, lord), so it was time to start anew! I like that the waist on this one is really high, so I can wear it with cropped tops. I like the button front, because it definitely makes it look more like a “jeans skirt” (instead of, I dunno, a skirt made out of denim). And I like how short it is. Yay for short skirts.

Oh, and in case you were wondering – I DID make that tshirt. It’s a Renfrew and I used white bamboo jersey to make it. Also lurve this tshirt pattern. Man this post is just full of favs today.

Denim Rosari Skirt

Denim Rosari Skirt

In the interest of keeping things relatively sleek and simple, I opted to use navy denim topstitching and even then only sparingly. I wanted the focus to be on the denim itself, and not the topstitching (although I guess that all flew out the window when I added those big honkin’ silver buttons haha). It’s still a jeans skirt for sure, but it’s a sleek jeans skirt. That is what I tell myself.

Denim Rosari Skirt

There is a small party on the inside, though! 😉

Denim Rosari Skirt

Denim Rosari Skirt

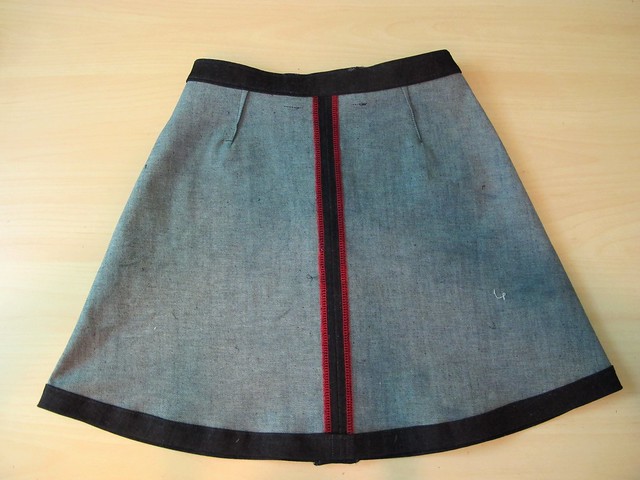
The pocketing is some red polka dot cotton I had in my stash. I am not entirely sure where it originated from, my guess is the flea market. I used red thread in my serger to finish the seams, rather than flat-fell them, because I like the extra splash of color 😉 You can sort of see this on the outside of the skirt, as I used the red thread also on my belt loops. Whoops. Whatever, YOLO.

Denim Rosari Skirt

For those of you who have been silently cursing my smug ass for using that professional snap setter in my other 2 skirts – rejoice! I just used a hammer to set in these jeans buttons 😉 But you can still be mad, I guess, cos I did buy the buttons in the NYC Garment District heh heh heh.

Denim Rosari Skirt

On a completely unrelated note – I received an email last week that there is a cool new sewing app in the works, and they need some help with survey responses! If you love filling out little boxes about yourself (who doesn’t?), they can sure use your input! Here is the link to the survey – Mo’Stash Survey – and also, can I get a HELL YEAH for cool new sewing apps??

Ok, that’s all for now I guess!

Completed: Black Twill Rosarí Skirt

23 May

I’m really behind on posting my projects – I finished this skirt almost two months ago, LOL WHOOPS. To add insult, I took these photos around that time as well – and have since changed my hair color :3 (spoiler: it’s still red). But these will do for now! Let’s just appreciate Past Lauren in this post, yeah?

Black Stretch Twill Rosari Skirt

Another Rosarí skirt! How predictable of me. What can I say – when I like a pattern, I like it enough to make it over and over and over until everyone gets sick of it (everyone except meeeee, that is). This is my second version (you can see my first version in mustard corduroy here), and I’ll just go ahead and admit that there is a third version that’s currently waiting to be posted. Don’t look at me like that. I wanted to try all the views offered in the pattern. ha!

Black Stretch Twill Rosari Skirt

This version is the same size as my previous – 34 – with the D pockets. I am not normally drawn to things like pockets with exposed zippers, but I saw a really cool version during my daily Instagram lurking and that shit immediately moved to the top of my sewing queue. Made in black fabric (which, honestly, a black summer-weight skirt is missing from my wardrobe. Well, not anymore!) with matching snaps down the front, it kind of has a cool rocker vibe… as long as you don’t look at the person wearing it :B

Black Stretch Twill Rosari Skirt

Black Stretch Twill Rosari Skirt

I found the fabric while I was in NYC at Mood Fabrics. It is a bottom weight black cotton twill with a really generous stretch. I actually bought a lot of twill while I was there because I’ve found that I don’t like ordering stretch fabrics (for bottoms, anyway) online. I find it really unpredictable in terms with what I end up receiving (I like my pants fabric to have a LOT of stretch), and nine times out of ten I can’t be arsed to wait on a swatch and/or that shit sells out way too fast. My new strategy is to wait until I get into the Garment District (which at this point has morphed into twice a year, yay) and then just stock up my suitcases. And then fly Southwest cos, 2 free checked bags woohoo.

ANYWAY, I am all about this stretch twill! It’s nice and heavy and it has enough stretch so that the skirt can be fitted but still super comfortable. The only downside is that is shows cat hair REAL fucking bad. I think that tends to be the case with all black fabrics, but this one seems to have a special cat hair magnet. I am not the kind of person who stresses over lint and cat hair, but I actually bought a lint remover specifically for this skirt. It is that bad. And, yet, there is still fuzz all over the skirt in these photos. Oh well.

Black Stretch Twill Rosari Skirt

Black Stretch Twill Rosari Skirt

I kept the style of the skirt fairly simple because I wanted the focus to be on those pockets! The zippers are from Sil Thread in NYC, which is my favorite place to buy zippers… they cost around $1 each (more or less, depending on length) and come in a nice range of colors and metal finishes. They didn’t have quite the right length, so I just shortened them at the bottom (basically catching the zipper teeth in my topstitching and *then* cutting the excess of). Even with shortening the zipper, doing that exposed zipper pocket thing was super easy. The pocketing is used to make a facing for the cutout, and then you just slap in the zipper and topstitch it down.

Black Stretch Twill Rosari Skirt

Black Stretch Twill Rosari Skirt

Black Stretch Twill Rosari Skirt

Same as with my corduroy version, I used a professional snap setter (courtesy of Elizabeth Suzann studios) to set the snaps down the center front. I’ve used the Dritz kits before (both the hand held one that looks like a hold punch and also the little metal thing you use with a hammer) and they work ok for what they are. That being said, I have access to one of those honkin’ big cast iron ones that they use in factories, so obviously I am gonna take advantage of that haha.

The only downside to these big industrial snap setters is that they mean BUSINESS. As in, you better be real sure of your placement because that shit ain’t going nowhere once it’s set. My coworkers warned me of this, and I smugly went ahead and set the first snap at the waistband… upside down. Whoops. Thankfully, I was able to pry it out with the help of a flathead screwdriver and seam ripper, but believe me when I say that I was really sweating for a minute there.

Black Stretch Twill Rosari Skirt

Oh hey, I didn’t even show y’all the cool POCKET LINING!

Black Stretch Twill Rosari Skirt

This lil’ piece of awesome is also from Mood Fabrics – you can find it here. It’s labeled a stretch twill, so I bought a yard of it last year to make some cRaZy shorts. Unfortunately, I wasn’t thrilled with the weight (it’s a bit on the light side) and the fact that it was printed off grain and thus hard to match the print. I gave up and stashed it, and have only now found a use for it. It makes REALLY FUN pocket lining! And since it’s stretch, it stretches with the outer fabric. I thought I would be real clever and sew it wrong side facing out, so that the inside of my skirt looked super fun. The only downside is that now the inside of my pockets don’t look super fun… they’re just kind of, fabric wrong side white. Oh well. It’s not like I walk around with my pocket zippers flapping open.

If you can see in the picture, I also used the same fabric to make a bound edge for the waistband facing. I really love the way that looks, and it’s so much easier than trying to fold up the seam allowance of the facing and get everything all even when you topstitch it down.

Black Stretch Twill Rosari Skirt

I guess that’s about all the Rosarí chat I have in me today! How about those zippered pockets, tho? 😉

Completed: Silk Polka Dot Blouse + Corduroy Skirt

29 Mar

Its time for the ~big reveal~ – my first completed outfit, sewn entirely on my new Spiegel 60609 sewing machine 😀

IMG_2438

I love that this machine is pretty enough to make even a subpar photo look great 🙂 Ha!

Silk Top & Corduroy Mini Skirt

I covered a lot of ground about the making of these garments in my previous posts, however, I’ll include some notes and highlights in this post in case you missed/skimmed/didn’t care then but suddenly care now 🙂

Silk Top & Corduroy Mini Skirt

The silk top was made using silk crepe from Mood Fabrics (purchased at the NYC store last year) and a combination of Butterick 5526 (my TNT button-up shirt pattern) for the body of the blouse, and vintage Simplicity 4676 for the tie neck. I used Sullivan’s Spray Stabilizer to wrangle the drapey silk into submission for ease of cutting and sewing, which worked great! The shirt is finished with French seams and self-bias facing at the arm holes and hem.

Full details on the silk top can be found in this blog post 🙂

Silk Top & Corduroy Mini Skirt

Silk Top & Corduroy Mini Skirt

I wanted my first project on the Spiegel 60609 to be something silk, because, honestly – I wanted to see how it could handle working with a notoriously difficult fabric. Of course, stabilizing the whole yardage first definitely helped, but that doesn’t solve all issues (such as when your sewing machine tries to eat delicate fabrics – not a problem with this one, I will add!). I’m really impressed with how the machine sewed through this fabric with absolutely no issues – it even did a great job on the button holes! I do wish that the measurements on the throat plate were marked differently, as it’s hard to get a narrow seam with what’s standard on this machine, but that’s a relative non-issue (I just use post-it notes to mark my seam allowance lines and it works fine). So yeah, Spiegel 60609 + silk gets a thumbs up from me!

Silk Top & Corduroy Mini Skirt

The mini skirt was made also on my Spiegel 60609! I used the Rosari skirt from Pauline Alice Patterns and some lightweight/stretch corduroy from Mood Fabrics. The skirt includes pockets, bound seams on the inside (for a bit of extra pretty cos why not?) and professionally set snaps down the front.

Full details on the corduroy mini can be found in this blog post!

Silk Top & Corduroy Mini Skirt//embedr.flickr.com/assets/client-code.js

I don’t necessarily find corduroy difficult to sew – most of the problem lies in making sure everything is cut and pressed correctly, as not to mess too much with the nap. Sometimes, depending on what machine I’m using, it’s a good idea to use a walking foot to help keep all layers feeding evenly, but I didn’t have any of these problems with the Spiegel 60609. The feed dogs were good enough on their own without any extra help. Always a plus! 🙂

Silk Top & Corduroy Mini Skirt

Silk Top & Corduroy Mini Skirt

Silk Top & Corduroy Mini Skirt

Corduroy Mini Skirt

Corduroy Mini Skirt

That’s all for this outfit! Stay tuned next month for that project – all I can say is, it’s gonna be FANCY 😀

Silk Top & Corduroy Mini Skirt

Note: The fabric used is part of my monthly allowance from Mood Fabrics, as part of my involvement with the Mood Sewing Network. The Spiegel 60609 was given to me by Spiegel, and it’s awesome!

In Progress: Corduroy Mini Skirt

22 Mar

IMG_2367

Following up on part one of my Spiegel 60609 sewing project for March (here is that post, in case you missed it!), let’s get to part 2! The bottom half 🙂

bdg-corduroy-button-front-mini-skirt-mustard-6

My original inspiration came from a skirt I saw at Nordstrom a couple of months ago – the most adorable a-line mini skirt, made in mustard corduroy with pocket flaps and snap closures down the front (above is an image of it – I think. It’s been a while and I’m forgetful!). I liked it enough to actually try it on (which was weird enough in itself – I haven’t been in a fitting room in ages, ha), but the fit wasn’t very good so it didn’t leave the store with me. Instead, I thought I’d try to make my own (surprise!).

I found this mustard cotton corduroy on the Mood Fabrics website and immediately set about finding a good skirt pattern for the fabric (unfortunately, that fabric is already sold out – sorry! I guess a lot of us snapped it up at the same time – it’s really the perfect shade of mustard, and a nice light weight with a subtle stretch. Just gorgeous!). Lots of googling around led me to eventually settle on the Rosarí skirt as it included pretty much all the elements of the original inspiration skirt, minus the separate side panels and with big (usable) pockets instead of just flaps. Honestly, it totally looks like something I’ve already made, I still wanted to give it a try. The patterns were just different enough to justify a second purchase, and plus, I’ve been wanting to try a Pauline Alice pattern.

Going by the finished measurements, I cut a size 34 and made the mini length with pocket C. Spoiler: The fit is really excellent and I’m totally gonna make this again with those zippered pockets. Anyway, back to the corduroy!

Corduroy Mini Skirt - cutting

One of the most important things to keep in mind when dealing with corduroy is the very visible nap. On fabrics with a pile (basically… hairs. Velvet, velour, corduroy, even fake fur – are all examples of fabric with a pile), the hairs lie in a particular direction, which is referred to as “nap.” If you run your hands up or down the pile, you can feel the pile. The pile can change color very subtly depending on the direction of the nap, so it’s extremely important to cut everything in the same direction – or else you run the risk of your pieces looking like they are slightly different colors. For my skirt, I made sure to lay all my pieces with the top facing the same end of the yardage, as shown in the picture.

Corduroy Mini Skirt - pressing naps

Another issue with naps and piles is that it’s *really* easy to crush the pile with your iron if you’re not careful. To prevent, this, the fabric can’t be pressed against a flat surface (like the ironing board, or the iron itself). One way to do this is to use a velvet needleboard, which has a million tiny wires to make a not-flat surface that the pile can lay against while you press. However, needleboards are freaking expensive (that one is $40, there, I just saved you a click haha)! They are fun to use, but ain’t kind on the wallet. So the cheap alternative is to just use a scrap piece of your napped fabric, and lay it right side up on your ironing board. You can press all your pattern pieces with the right side down, against the scrap fabric, and that provides enough texture to keep the nap from crushing. I had about 1/4 yard leftover from cutting my skirt, so I had a nice big piece to lay on my ironing board for pressing. Look at the picture above – do you see the iron imprints around my interfaced pieces? That’s what happens if you don’t protect the nap before pressing!

So those are two big things to keep in mind if you’re sewing with corduroy (or any other napped fabric, for that matter). Mind the nap 🙂 And just FYI – some napped fabrics (especially velvet and faux fur) require a little more finesse with sewing as they don’t like to feed evenly through the sewing machine. That being said, I didn’t have any problems with this particular fabric. Normally, I would use a walking foot – but the feed dogs on the Spiegel 60609 did a good job on their own, no extra foot required. Yea!

Since this is a really straightforward pattern with very few seams, I thought it would be fun to go the extra mile and do some pretty seam finishing on the inside 🙂 I decided to bind my seams with bias tape, which not only looks nice, but prevents the seam allowances from unraveling as the skirt gets washed/worn. This particular corduroy frays like a MOTHER, so it’s a very necessary step. I could have used my serger, but this looks prettier (and I didn’t have matching thread, ha!)!

Corduroy Mini Skirt - bound seams

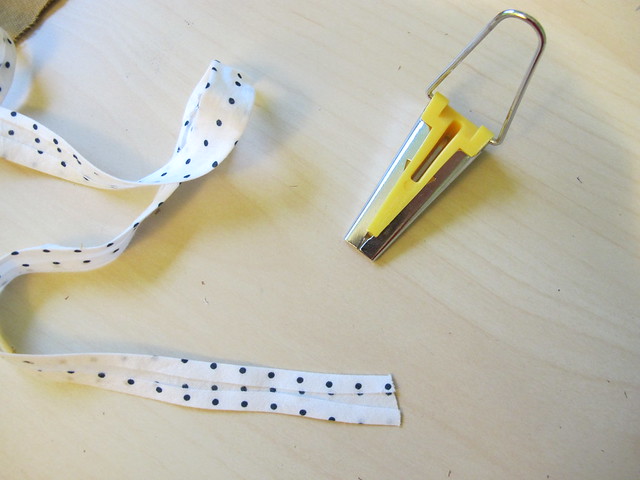
You can use pre-packaged bias tape to bind your seams, but I like to make my own because it’s a bit softer (and you get a waaaay better selection of colors and prints). This particular fabric has showed up on soooo many of my makes – I made a truckload of bias strips with it and it’s like the gift that keeps on giving! 🙂 I will be so sad when it runs out hahaha. Anyway, I like the Clover 1/2″ bias tape maker – I find the width is great for this finish, and the Clover brand ones in particular work really well. I’ve tried cheaper bias makers and they just don’t work as well for me. This one is tight enough at the opening to really fold the bias, and then it’s easy to press it flat so it stays that way.

Corduroy Mini Skirt - bound seams

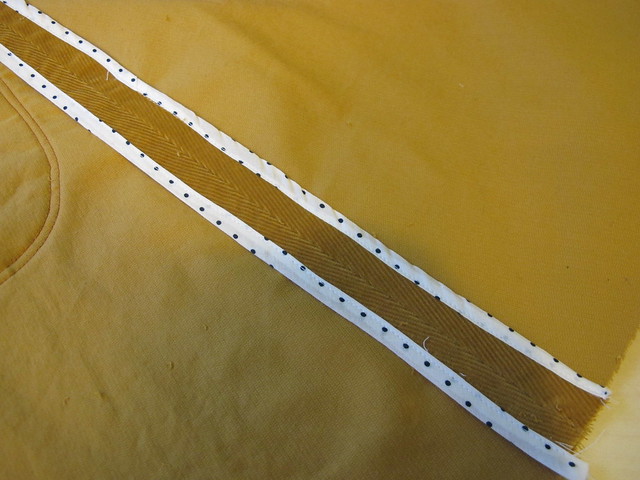
For this skirt, I did a Hong Kong bound finish – so both sides of the seam allowance are bound and then pressed open. You can also press the seam allowances to one side, and bind them together.

Corduroy Mini Skirt - bound seams

On the first seam allowance, sew the bias binding to the underside (the side that is against the garment when it’s pressed into place),  keeping your stitching line right along the pressed crease of the binding.Corduroy Mini Skirt - bound seams

Corduroy Mini Skirt - bound seams

Pull the unsewn side of the bias around so it comes to the top and just covers the stitching line you created. Pin into place, and then topstitch close to the fold. Repeat for the opposite seam allowance, then press the seam allowances open.

Corduroy Mini Skirt - bound seams

Here is what the underside of the seam allowance looks like. I do the first pass on the underside, so any stray topstitching is hidden when the seam allowances are pressed open 🙂

Corduroy Mini Skirt - bound seams

And here are both sides bound 🙂

Corduroy Mini Skirt - bound seams

AND HERE IS THE WHOLE DAMN SKIRT 😀

I love this finish! It’s definitely a time-consuming addition, but it’s not so bad when the garment in question only has 3 seams to bind 🙂 And it looks soooo pretty on the inside!

Corduroy Mini Skirt - grading seam allowances

Last corduroy tip! This fabric tends to be really bulky, so it is important to really grade down your seam allowances in any part where there are multiple layers – such as the waistband. I trim my seam allowances down at staggering heights so that there isn’t a giant bulky ridge showing from the outside once the skirt is complete.

Corduroy Mini Skirt

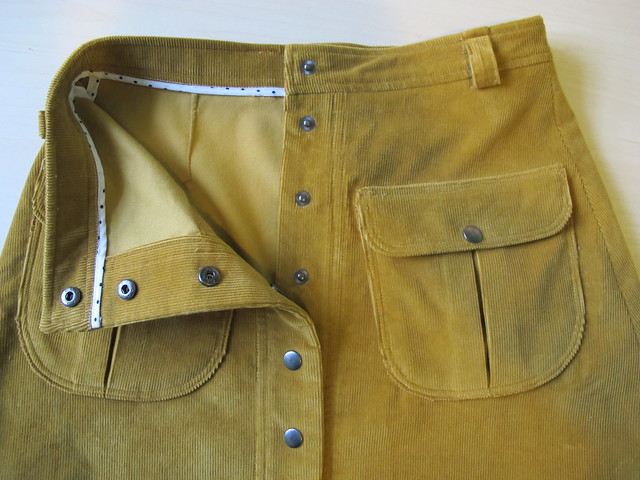
And that’s it! Here’s a little sneak of the pretty insides 🙂 I also bound the lower edge of the waistband – instead of turning it under 1/4″ to hide the raw edge – as I’ve always liked the way that looks in dress pants hahaah. Oh, and my snaps were set using a professional snap setter (cos I work for a clothing manufacturer!)! They look GOOD.

Corduroy Mini Skirt

Corduroy Mini Skirt

Some shots of the finished skirt on my form 🙂 I’ve already worn the hell out of this thing – the fit is great, I love the mini length, and the mustard color goes with pretty much everything in my closet. It looks EXTRA good with black and white polka dotted silk, though 🙂 I will be sharing the completed outfit next week!

Completed: Fancy Silk Georgette + Brocade

2 Feb

Here’s something a little different than my normal meat-and-potatoes (mmm… meat and potatoes) sort of dressing – FANCY GARB. YAY!!

Silk Georgette B5526 + Stretch Brocade Circle Skirt

Also: SNOW! Like, holy shit it snowed soooo much last weekend! I had a nice snow-in for a few days (it’s true that Tennessee all but shuts down when the snow comes in – but, before you make fun: we don’t have snow tires, we don’t know how to drive in it, and the roads are not properly salted or cleared so they’re actually pretty dangerous. Also, come and deal with our 100* heat in August ffs. Ok, soapbox off haha), which was even better considering that I basically was in a Winter Wonderland. We ended up with a little over 6″ – y’all, I can’t even remember the last time I saw that much snow. Shit was crazy. Also, it all melted within like 3 days, and then the temps went back up to 65*. Yay I love Tennessee and it’s fickle weather haha.

Anyway, I wasn’t planning on taking snow pictures – it was obviously very very cold outside, and so bright that I could barely keep my eyes open (sorry in advance for all the squinty haha). But the indoor lighting was just terrible, so I took one for the team and tromped outside. You are welcome.

Ok, back to the real subject of this post!

Silk Georgette B5526 + Stretch Brocade Circle Skirt

I made these two pieces about a month apart, so I didn’t actually wear them together for NYE – although I definitely wanted to. Considering I didn’t start sewing for the party until a few days before the end of the year, I knew that shirt would not turn out nice if it was rushed. So I focused on the fancy skirt, and wore it with a fuzzy black sweater knit Renfrew (you can see a photo of the outfit on Instagram). It was the perfect New Year’s Eve outfit for my plans – reasonably warm, yet stylish, and had these big pockets so I could carry my phone, wallet and flask without worrying about a purse. Which, by the way, my phone ended up leaving my pocket at some point that night (I think it was more that it didn’t *make* it to the pocket, rather than leapt out on it’s own accord). Here’s the New Year’s Miracle, though – someone found it – in a pile of trash on Lower Broadway, apparently – and then returned it to me the next day. How awesome is that?! 2016, you’re off to a promising start! ♥

Silk Georgette B5526 + Stretch Brocade Circle Skirt

Silk Georgette B5526 + Stretch Brocade Circle Skirt

The metallic stretch brocade that I used for this skirt has been in my stash for a long time – over a year, at least (if not longer). I never knew what to do with it – it’s kind of thick, it has a really heavy stretch, and it’s pretty freaking fancy. I figured a pencil skirt or bodycon dress would be suitable, but I rarely wear stuff like that. When I was planning my NYE outfit, I decided to find a use for this stuff. I’ve been on a circle skirt kick lately, so that’s what I went with. I used my self-drafted circle skirt pattern (I used Casey’s circle skirt tutorial aaages ago, which I can’t seem to get a valid link to now 😦 There’s also the By Hand London circle skirt app, which does the maths for you!), pieced to include side seams and a center back seam. This was mainly due to fabric restrictions – I had only a yard of this fabric. It’s super wide, though, so I was just barely able to squeeze it out. I also knew I wanted an exposed zipper and side seam pockets, which mean seams were necessary. The waistband was cut so the greatest amount of stretch ran along the length; I stabilized it with a piece of stretch interfacing to retain that comfy-ass stretch. Yeah man, it’s comfy.

Silk Georgette B5526 + Stretch Brocade Circle Skirt

Sewing was easy, and relatively straightforward. My only complaints are that this fabric frays like a MOTHER, and it’s basically all polyester so it’s a nightmare to get a good press. For the fraying, I serged each seam separately to minimize the fuzz potential. For the pressing, I just used my super awesome, super hot gravity feed iron and then just held the seams in place with my clapper until they cooled. One thing I will note is that my iron has a shoe (basically a cover that acts as a press cloth), which keeps things from melting. If your iron does not have a shoe, you’ll want to use a press cloth on poly fabrics + high heat. Otherwise, melting will happen!

Silk Georgette B5526 + Stretch Brocade Circle Skirt

Silk Georgette B5526 + Stretch Brocade Circle Skirt

Silk Georgette B5526 + Stretch Brocade Circle Skirt

Silk Georgette B5526 + Stretch Brocade Circle Skirt

I thought an exposed metal zipper would look cool next to the fancy brocade, so I pulled a metal zip from my stash and used Megan Nielsen’s method to insert it (these are the same instructions that are included with the Brumby pattern, fyi). The pockets are silk crepe, also pulled from my stash. Nothing like using silk pockets to stow your whiskey amirite 🙂

Silk Georgette B5526 + Stretch Brocade Circle Skirt

This past month, I finally gathered up all my cojones and made the intended matching shirt. Remember when I made Butterick 5526 in silk Georgette? I want to hate that shirt so bad – it’s pretty poorly constructed, I mean, that fabric was EVIL – but every time I put it on, I can’t deny that I like the way it looks. I want more floaty button-ups in my closet. I figured enough time had passed to forget the trauma, and I tried again, this time with much more success.

Silk Georgette B5526 + Stretch Brocade Circle Skirt

There are two major factors that contributed to the success of this version of B5526 in silk Georgette. First of all, I chose the fabric in-person, rather than blindly ordering online. Which means I don’t have a link for the exact fabric I used – I bought it at the Mood Fabrics in NYC when I was there in November. I have since ordered some swatches from the website, and it’s definitely not the same fabric as what I have here. Mine is more like a double Georgette – it’s much thicker, and less see-through (I’m not wearing anything under this top, except a bra. I think it’s a nude bra, but I’ve worn a black one underneath too and no one has noticed, HA!). That alone made a world of difference in handling the fabric. I also prewashed it in the washing machine/dryer (just a cold wash, ma’am!), which helped beef it up a little more. The second factor is that I used a spray stabilizer on my fabric before cutting or sewing. I’ve heard of people using a spray stabilizer – and allegedly, you can also soak your fabric in unflavored gelatin for the same effect, although I haven’t personally tried this yet – but I never cared to try it myself because I wanted to be able to tackle the fabric without any outside help. Also, a can of that shit is like $12, which is way too rich for my blood (says the girl who is currently looking at $45/yard silk faille lolwut). It just seemed silly and unnecessary. I always felt like using outside tools like that almost negated my skills as a seamstress, but you know what? That’s not true. It’s not any different than using a special presser foot to get good edgestitching. Whatever works… it just works. And that’s ok.

I am not going to go into too much talk about using spray stabilizer because this was my first experience with it – and I want to try it a few more times before I give it a big write-up (aka I don’t want to eat my words later haha). But I will say that it REALLY changed how the fabric handled, in a good way. Instead of it slipping around like butterfly wings, it held more like a silk organza. It made cutting things straight much more easy, and the shirt fits better as a result. I think my topstitching looks really good, and all those fiddly pieces weren’t quite as fiddly. Spray stabilizer isn’t going to turn your silk into quilting cotton – you still need some finesse with those fine layers – but it helps tremendously. It won’t work for anything that you can’t wash it out of – such as a coat lining (unless, I guess, you assembled the lining separately and then wash/dry it before putting it in the coat?) – but it’s perfect for this sort of project. These photos are post-washing, so it has the proper drape, fyi. I soaked it in the sink with some lingerie wash, hung it to dry, and then re-pressed. I have since worn the shirt and washed it in the normal wash, and it’s held up fine.

Silk Georgette B5526 + Stretch Brocade Circle Skirt

Silk Georgette B5526 + Stretch Brocade Circle Skirt

All that being said, I don’t think there’s much else to say about the sewing of this shirt. I’ve made it like a dozen times at this point, so there’s nothing new for B5526. The shirt is constructed with French seams and I used a very lightweight interfacing to stabilize while retaining that beautiful drape. I added buttons and button tabs to the sleeves, so I can wear this shit into the warmer weather. Yay!

Silk Georgette B5526 + Stretch Brocade Circle Skirt

Silk Georgette B5526 + Stretch Brocade Circle Skirt

Silk Georgette B5526 + Stretch Brocade Circle Skirt

Silk Georgette B5526 + Stretch Brocade Circle Skirt

Silk Georgette B5526 + Stretch Brocade Circle Skirt

Silk Georgette B5526 + Stretch Brocade Circle Skirt

I finally go to use some of my fancy vintage glass buttons for this top – yay! I didn’t have quite enough, so I had to mix them. There are beautiful black/green/gold Art Deco buttons for the front placket and sleeve tabs, and then solid black faceted buttons for the cuffs and collar. The white buttons you see on the inside of the placket prevent gaping at the boobs (I can’t take credit for this tip – I got it from Emmie and Jane). Speaking of which, if I’m getting boob gape… that probably means I need to start doing a FBA to my pattern. Sigh. Or else just keep adding hidden buttons hahaha.

Silk Georgette B5526 + Stretch Brocade Circle Skirt

I think I’ve run out of things to talk about with this outfit, so I’ll wrap up. What’s your best tip for sewing the slinky? Have you tried spray stabilizer? Hey, how was your New Year’s Eve, anyway?

Note: Fabrics were purchased with my monthly allowance for the Mood Sewing Network. Also, there are affiliate links in this post FYI. Click at yo’ own risk.