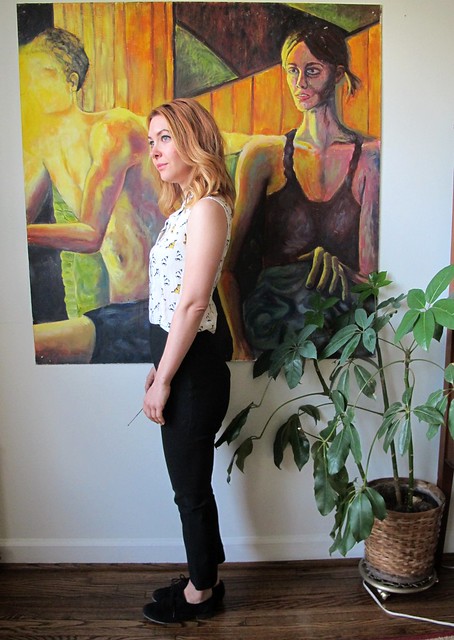
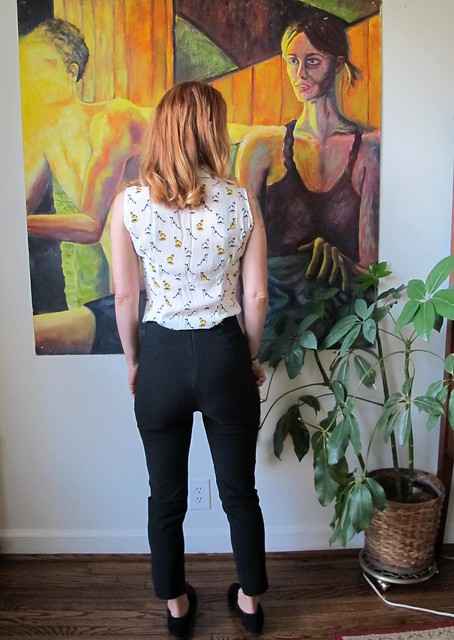
Here’s an old projects from my archives – I finished this months ago (in, like, August haha) and never got around to posting it. Mainly because it’s a pattern that I have done to death and I might be just as sick of talking about it as most people are probably reading about it. With that being said – I am feeling this weird urge to wrap up all my projects for 2016 before the year ends (and I also feel bad for doing 2 review posts back-to-back, sorry friends), so this is the project I’m sharing today!
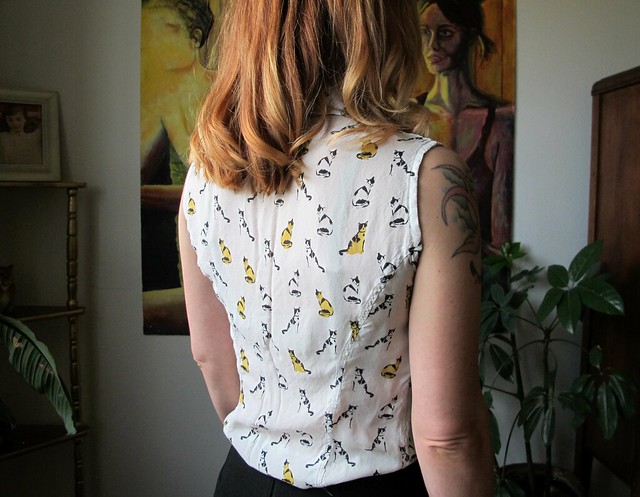
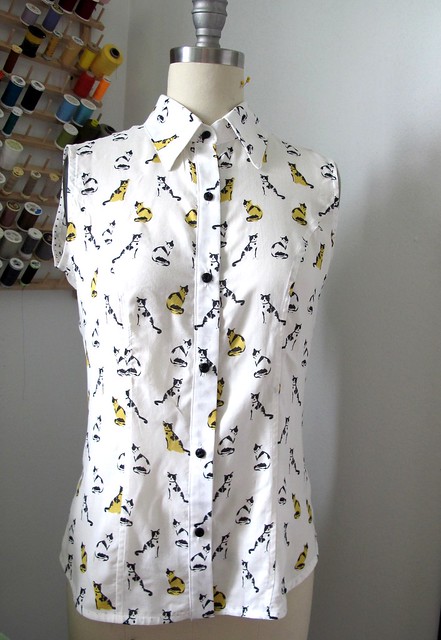
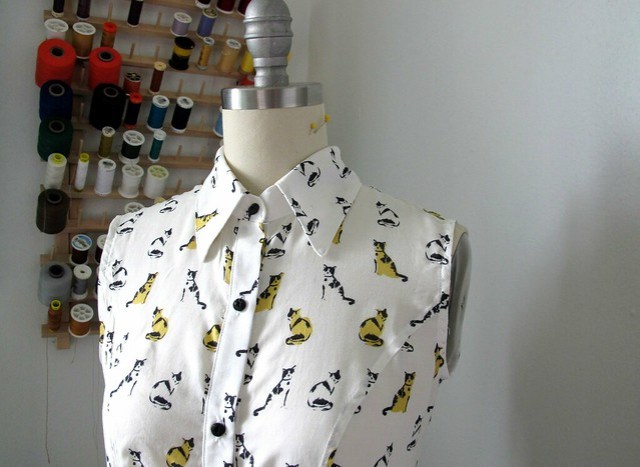
It features KITTY CATS yay!

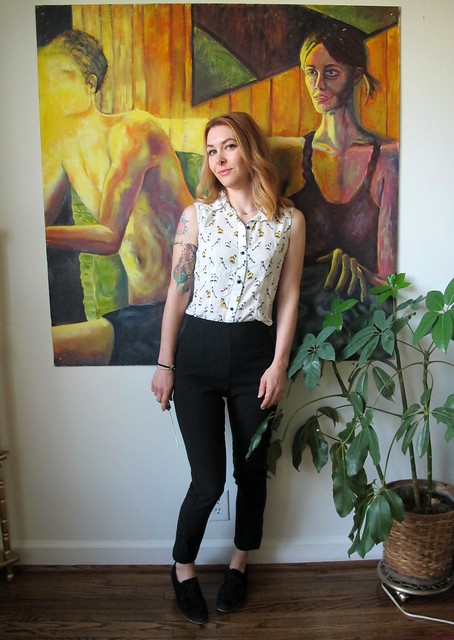
First things first – the pattern is Butterick 5526, yes I’ve made it like a dozen times (see my tag for all my renditions of this pattern!) and no I don’t plan on branching out to other shirt patterns in 2017 haha. I love this pattern – I love the fit on me and I love how it looks in pretty much any fabric, although my personal fave is something lightweight with a soft drape. And sleeveless, so it works in both summer flyin’ solo, or in winter under a sweater or cardigan. My TNT, my desert-island pattern. MWAH ♥
This pattern is pretty similar to a button-up pattern, although it lacks a back yoke (I was able to draft one for my Tencel B5526, which wasn’t difficult). It has back and front princess seams, which give a lovely fit, and a traditional collar, collar stand, and separate button placket. It’s drafted as a sleeved pattern, but making it sleeveless is pretty simple – mainly, you want to raise the arm hole just a smidge and also sew a deeper side seam at the underarm. This is a super hack-y way to give the arm hole a good sleeveless fit.
Anyway, yawn, enough about the pattern. This post is all about the INCREDIBLE KITTY RAYON CHALLIS FABRIC.


I spent a few days in San Francisco at the beginning of this year, and while I had some fun things planned (like going to the Computer History Museum and nerding out so hard), I didn’t even consider my fabric shopping options bc I figured anything worth visiting would be in Los Angeles. Once I landed on my first day, I had some free time to kill and decided to walk around for a bit. On a whim, I typed “fabric store” into my Google Maps app and was surprised to find that Britex Fabrics was not only in SF, they were actually about a mile away from where I was currently sitting. So obviously I HAULED ASS over there to see what kind of fabric souvenirs were waiting for me.
I’d never been in Britex, but it’s a beautiful store with lots of incredible fabrics. It’s also quite expensive – I was drawn to the designer silks, but I didn’t see any that I loved enough to justify the price (like, all the ones I kept grabbing were like $80/yard lol nope). I spent an hour or so crawling the store – digging around the silks, revisiting the sale section, admiring all the lace trims. Don’t get me wrong – it’s a beautiful store with lots of amazing fabrics and notions, but I was traveling with a fully-packed carry-on, and only had enough room for a couple of special pieces (yes, I did this on purpose haha). I eventually found the rayon section, squirreled away near the silks (who were taking all the attention), and when I found this fabric there was absolutely no question that I had found THE ONE.
This fabric ticks all my boxes – it’s a unique novelty print that doesn’t look like a quilting cotton (sorry, quilting cotton lovers – that just ain’t my jam) *and* it’s in the softest, drapiest rayon challis. My favorites! Not to mention, the novelty print is little cats, which I just think is really cute! I hadn’t – and still haven’t – even seen a fabric like this, so it was definitely going to come home with me. The price wasn’t too terrible, either – I don’t remember exactly what I paid for it, but I think it was around $18/yard (definitely under $20/yard). This is one of those rayons that is quite wide – around 55″ – so after some deliberation, I had 1.5 yards cut and folded into the tiniest little cloud of a square.
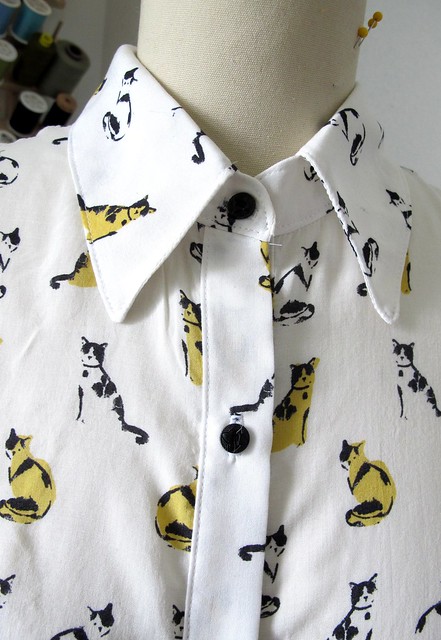
I spent a few months waiting before cutting into this and sewing it up – I wanted to perfect the fitting tweaks I’d been doing on B5526, and I also wanted a little more practice sewing rayon challis before I cut into something this precious (precious in that I couldn’t buy more, not precious that it was terribly expensive). I’m a firm believer that fabric is best when it’s being cut and sewn and worn – not hanging out on a shelf for years – but I don’t think there is anything wrong with wanting to get your ducks in a row before you dive in, as long as the ducks don’t take like 5 years. I debated on a few design elements on this shirt that I ultimately did not end up doing – black piping at the collar and button band, rounding the collar to be a peter pant collar, black topstitching – I felt it was best to keep things simple and let the fabric be the star of this garment.
A note about rayon – it’s not the easiest thing to cut and sew, but it is definitely easier than a slippery silk. You can use a spray stabilizer to make the fabric even easier to handle, but I usually just throw all shits to the wind and sew it up in it’s slinky glory. Which is what I did here, and it wasn’t too bad – even with the fiddly collar stand and such.
Care-wise, I wash my rayon on cold and either tumble dry low or hang to dry (depending on whether I feel like ironing after the fact – which is usually no, so usually a hang-dry haha). Actually, I hand wash this shirt quite frequently – not because it necessarily needs it, but because I rarely wear white so I never have a full load when it’s time to wash. As much as I am not careful with my laundry, I am careful about not mixing my precious whites with darks that could potentially dye them. I use Soak Wash for all my hand-washing needs – lingerie, clothing, etc – because you don’t have to rinse it. Just soak it for 15-25 minutes, squeeze the water out, and dry it. I have always hated hand-washing, but this stuff makes it so much less of a pain!
Speaking of washing – the photos of you see of the shirt on my form are immediately after I finished it, without washing (other than the fabric pre-wash). The photos of me wearing the shirt as after a few washes. It has some soft wrinkles at the seams, but nothing super dramatic.
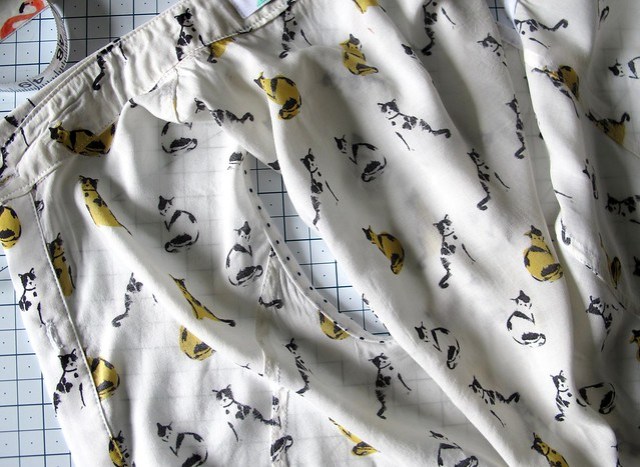
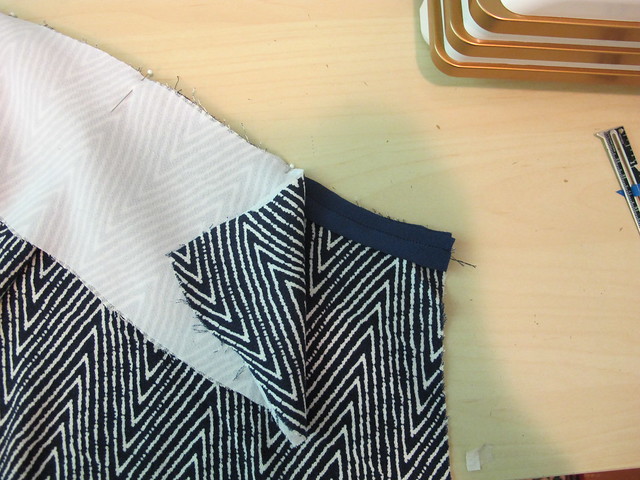
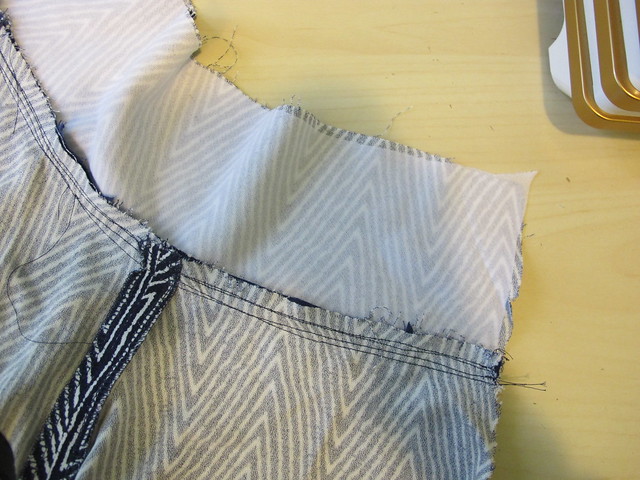
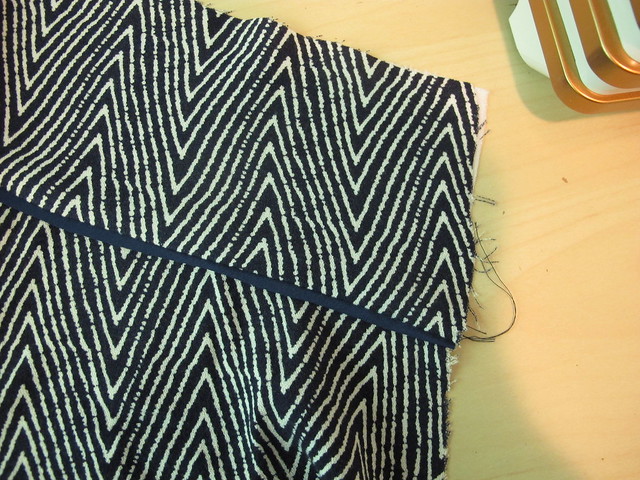
Here’s a peek at the inside! I used French seams to assemble, then topstitched them down so they looked like flat-felled seams (easier to do on this rayon than a true flat-felled seam, and prettier and stronger than a mock-flat-fell). The arm holes are hem are finished with bias facing. I actually didn’t quite *quite* enough of my polka dot bias facing, wah! I was a few inches to short, so part of the hem just has white batiste facing kind of patched in haha. But I loved the polka dots with the cats, so I wanted to use what I did have. Aaaand now that is the last of my polka dot bias – I’ve been using it on the inside of garments for YEARS (it’s first appearance was with this trench coat haha), surprised it’s hung around my sewing room this long!
I didn’t get a great close-up of the buttons, but they are vintage glass buttons that I also bought at Britex, specifically for this fabric. The girl working the button counter spent foreeeever with me trying to find a set of matching buttons (they were all just dumped in a jar) and we had a great chat while digging through the beautiful buttons. I found out she was originally from Nashville, even, which I thought was an interesting coincidence.
Anyway, that’s all for this project! While we’re on the subject of rayon – have you seen the new rayon fabric line from Workroom Social, Miramar? Jennifer gave me a little peek of this stuff while I was up there in November, and I can personally vouch for how awesome it is! I especially love that the designs are a bit more grown-up, and in darker colors (that lemon print needs to get in my life!). They are taking pre-orders now through tomorrow, which an expected ship date of 2/15/17. Once the pre-order sale is over, they are gone, so act fast if you are even considering it haha.
Oh, and one more thing (sorry) – Indie Stitches is closing shop, and all patterns are currently on sale for $15 AUS (which my currency convertor tells me is a little under $11 USD woohoo). Go help Caitlan clear our her remaining stock, and get yourself a nice gift at the same time 😉
Merry Christmas, y’all! ♥
Tags: b5526, Britex fabrics, butterick 5526, button-up, cats, completed, indie stitches, rayon, rayon challis, workroom social