Tag Archives: Untangling Knots

Announcing the 2018 OAL!

15 May

By popular demand, we’re back for another year!

Yes! The Outfit Along is back, and this year we are turning five! (whaaat!)

I’m teaming up with knit designer extraordinaire, Andi Satterlund, to host a combination knit-along and sew-along. The idea behind the Outfit Along (OAL) is to make a complete outfit by sewing a garment and knitting (or crocheting, if that’s more your thing) a garment. This is a great opportunity to fill your wardrobe with more beautiful handmade pieces, and we’ll have two official patterns that will have additional blog support, should you need it.

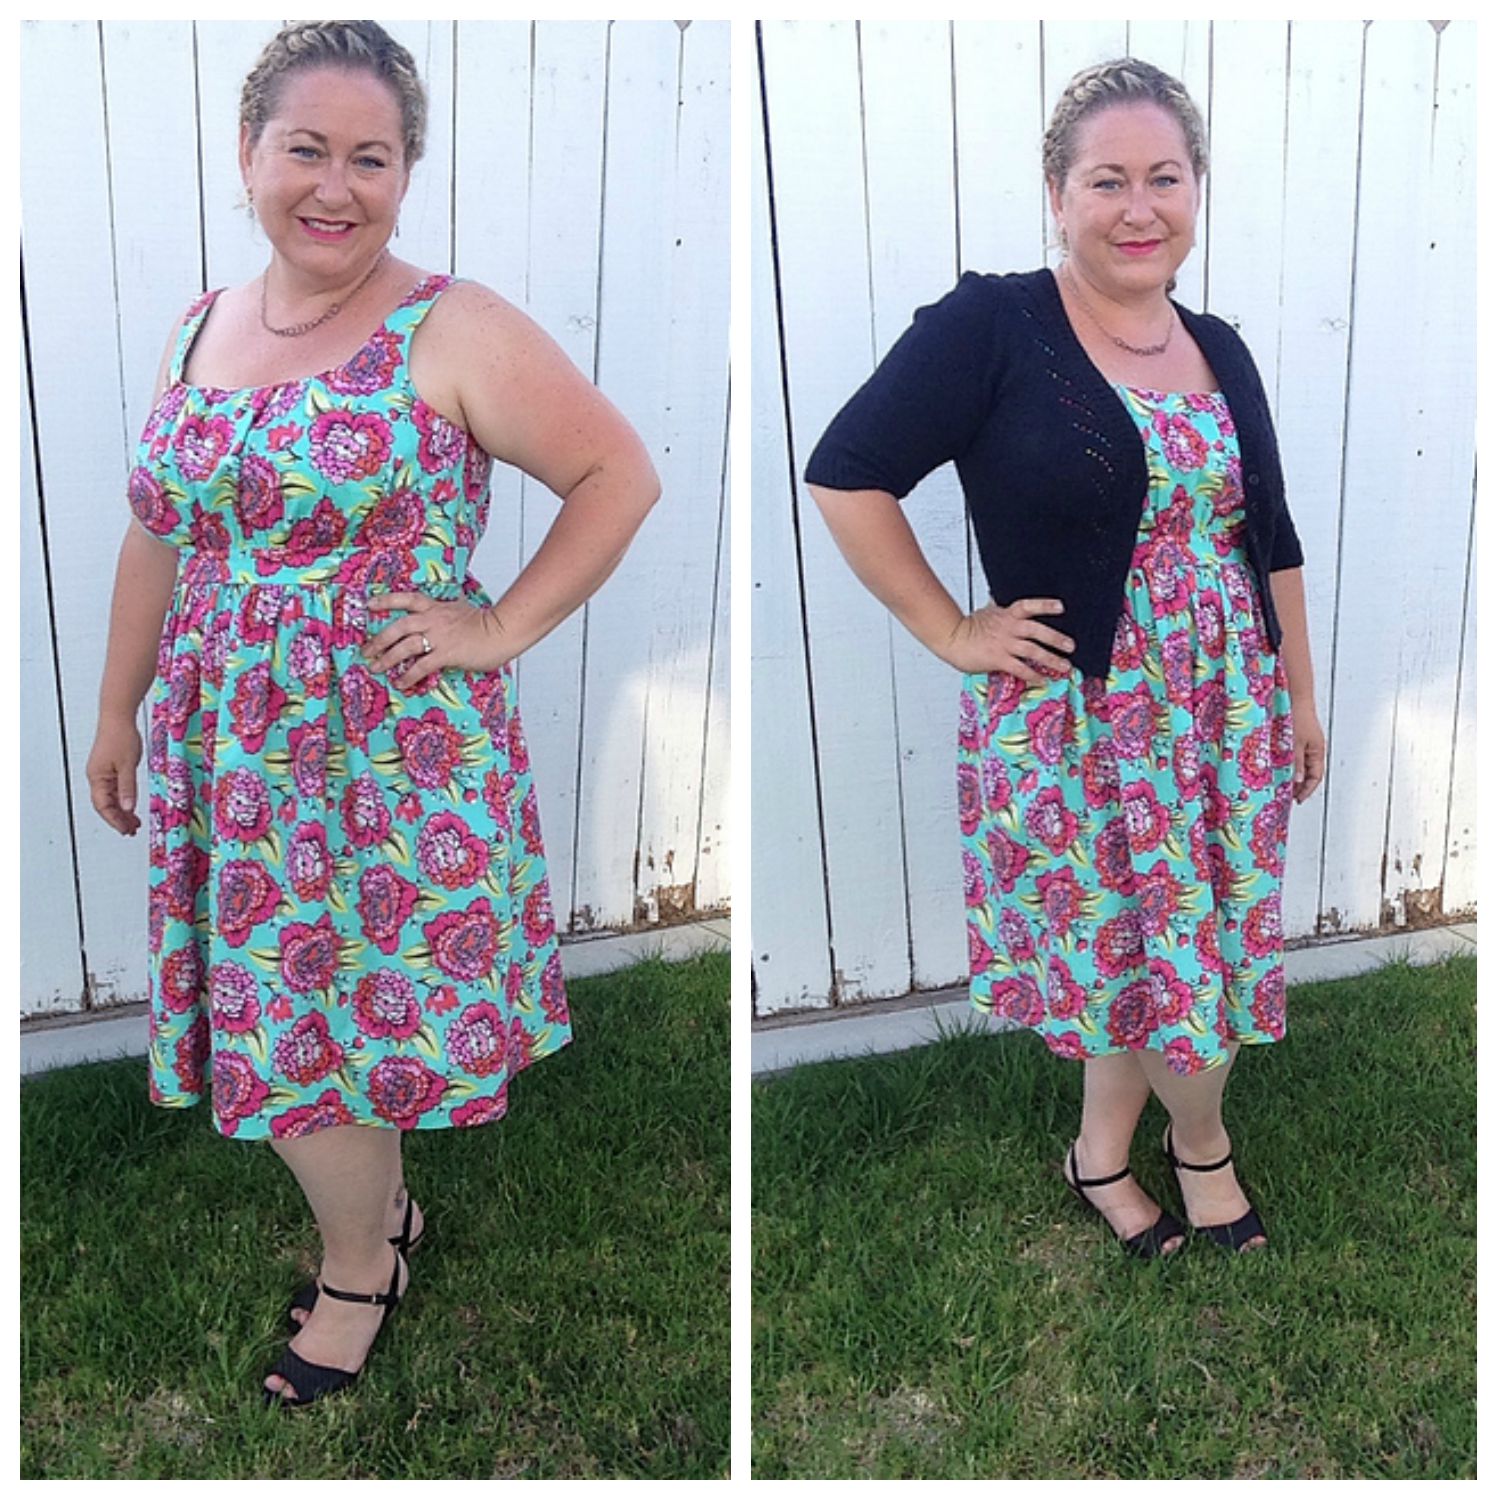
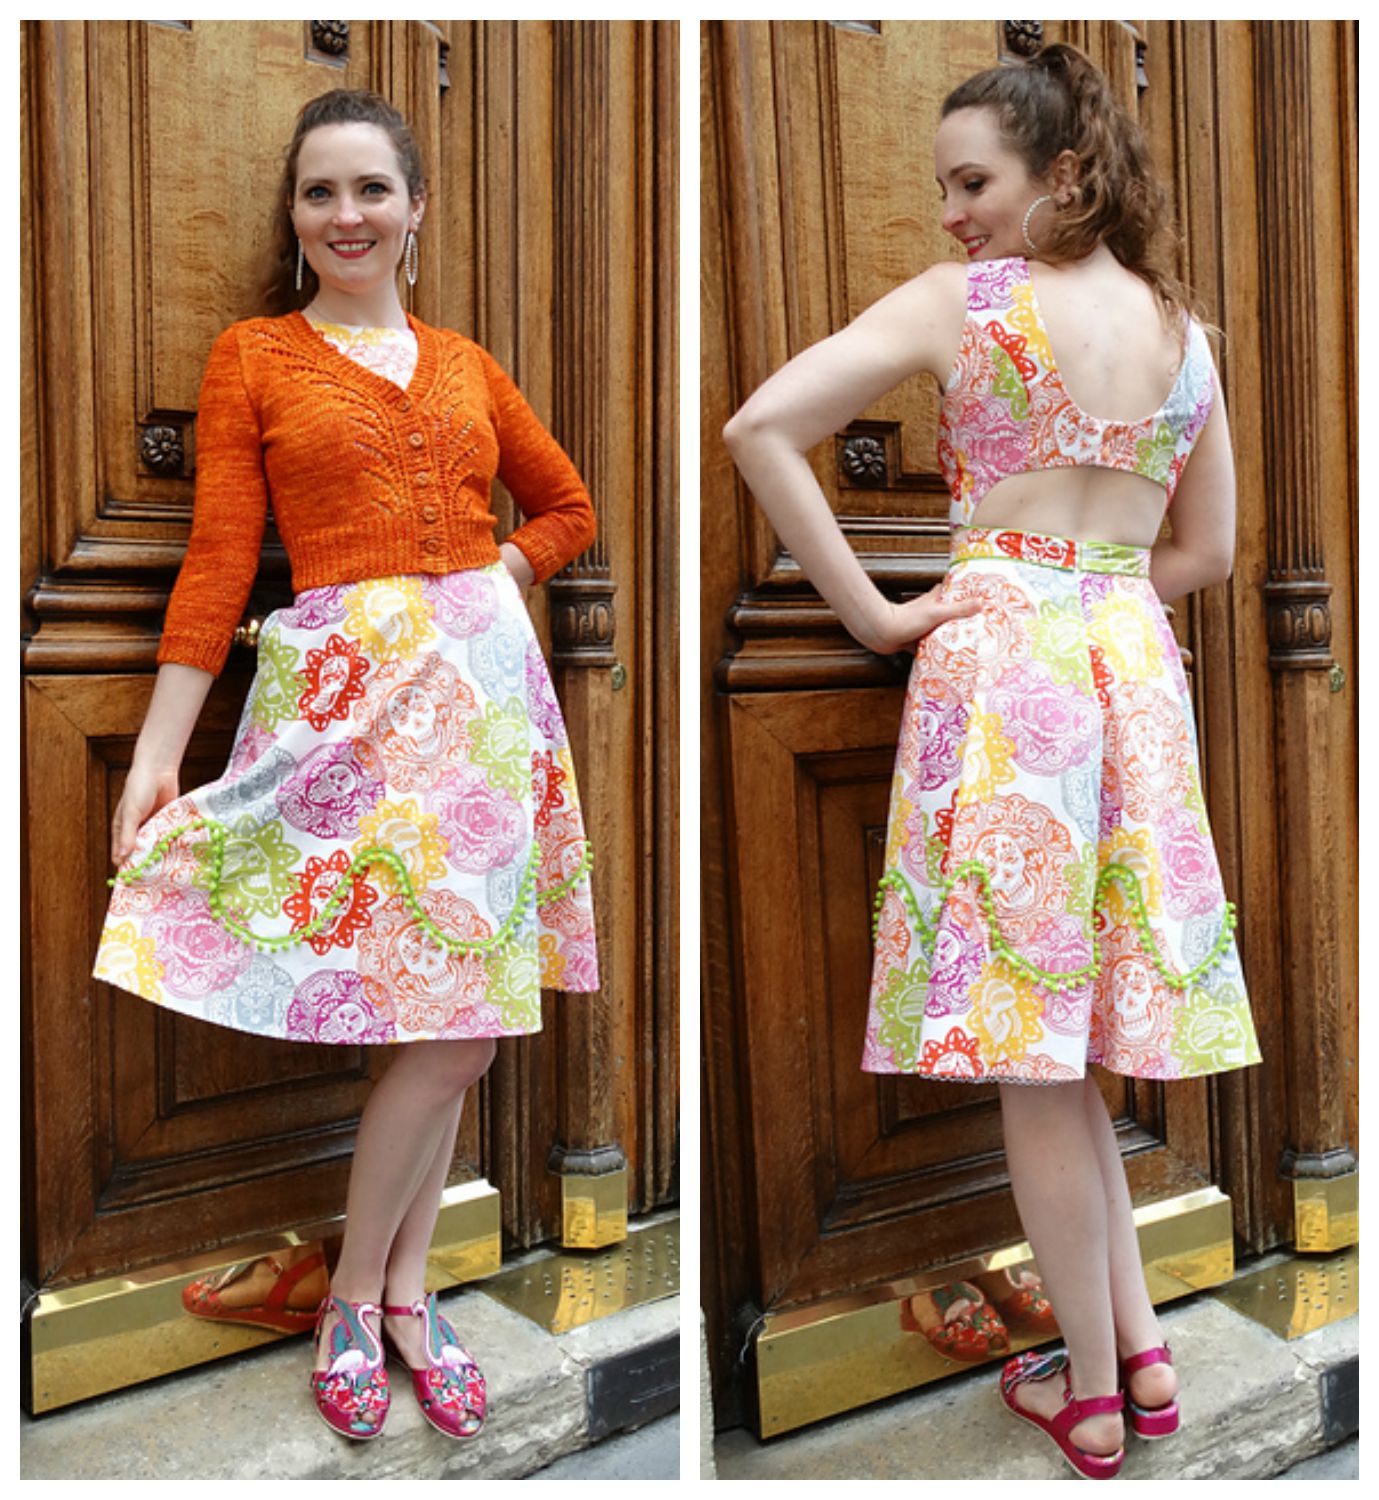
The official sewing pattern will be the Lander Pants by True Bias, and the official knitting pattern will be Andi’s newest design, Waters. I will be blogging about the official sewing pattern and Andi be blogging about the knitting pattern, so we can all sew and knit along together. If you don’t love the official patterns, you can still join in! The Outfit Along is about making an outfit you’ll actually wear, so to participate, all you need to do is to sew a garment and knit a garment to make an outfit. You’re more than welcome to pick projects that fit your own style and skills – after all, you’ll be the one wearing it 🙂 Make a knitted skirt and sewn top, make a dress and cardigan – doesn’t matter what the combination is, as long as it makes an outfit 🙂

You can read all the relevant details over at Untangling Knots – as well as a FAQ for common questions – but in a nutshell:

– We will be kicking off the OAL on June 1, 2018.
– The deadline for completion is July 31, 2018, which gives you two months to finish both garments.
– There IS incentive for finishing your garments within the deadline – PRIZES!!! We will be drawing 3 winners this year, and each winner will receive a $50 voucher to use at Indie Stitches, a $25 voucher to use at The Confident Stitch, and 4 patterns of their choice from the Untangling Knots Ravelry store.
– To be eligible for said prizes, you must finish BOTH garments by July 31, 2018 and post them in the OAL Finished Outfit thread in the Untangling Knots group on Ravelry. Prize winners will be randomly selected from those who finish both their knit and sewn garments and post pictures in the appropriate thread by the deadline.

So, now that’s out of the way – let’s talk about the patterns!

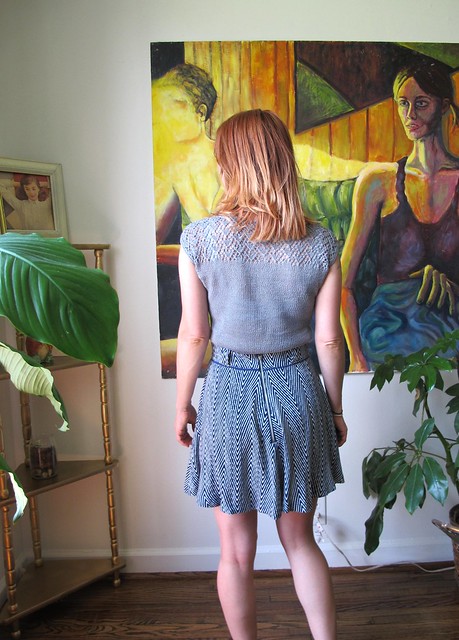
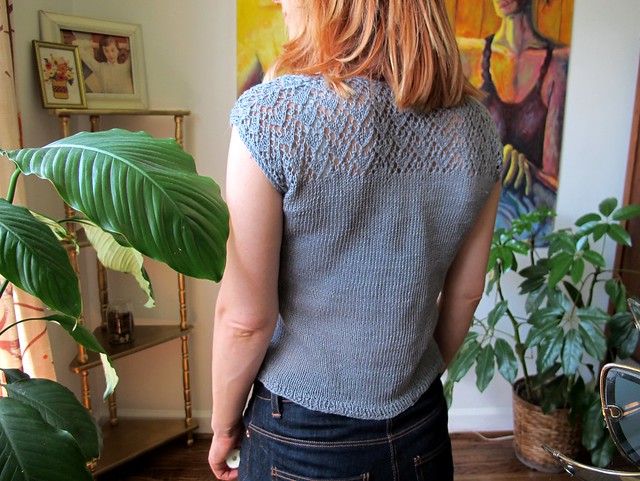
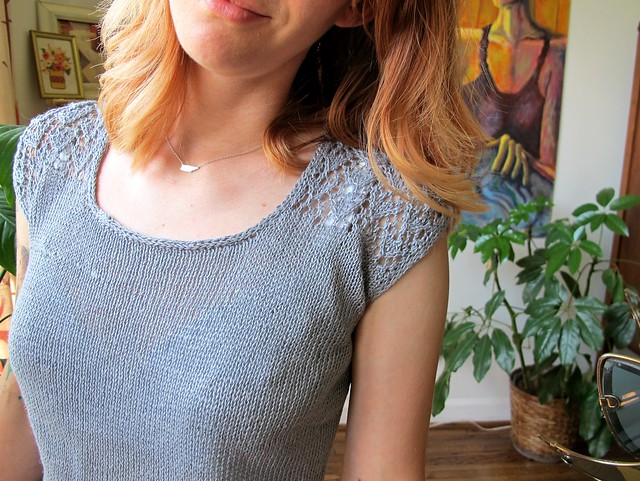
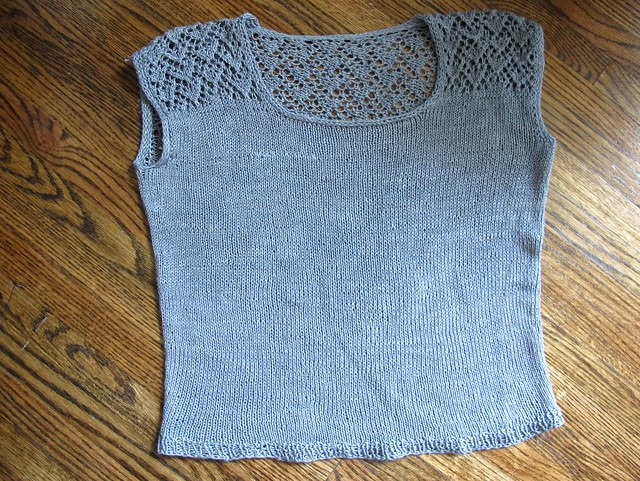
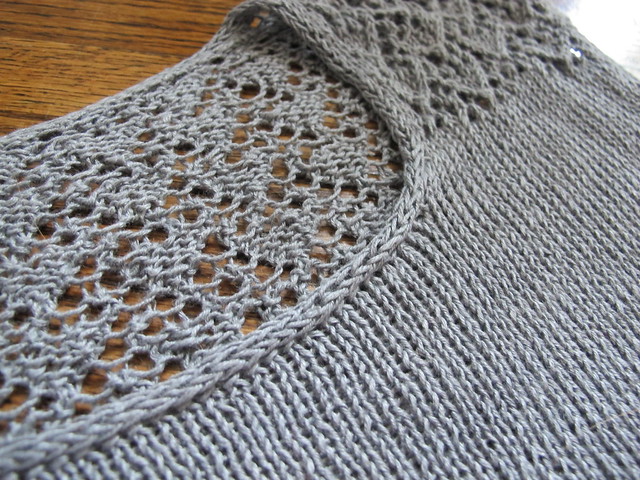
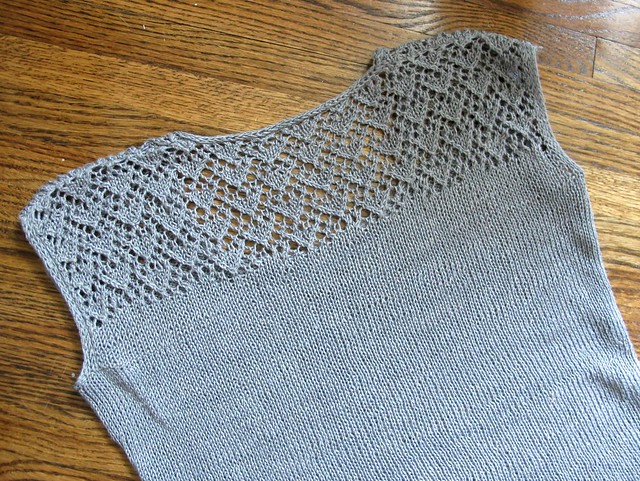
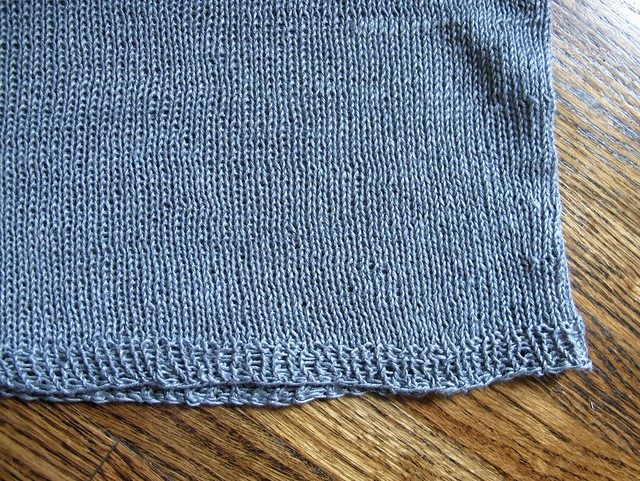
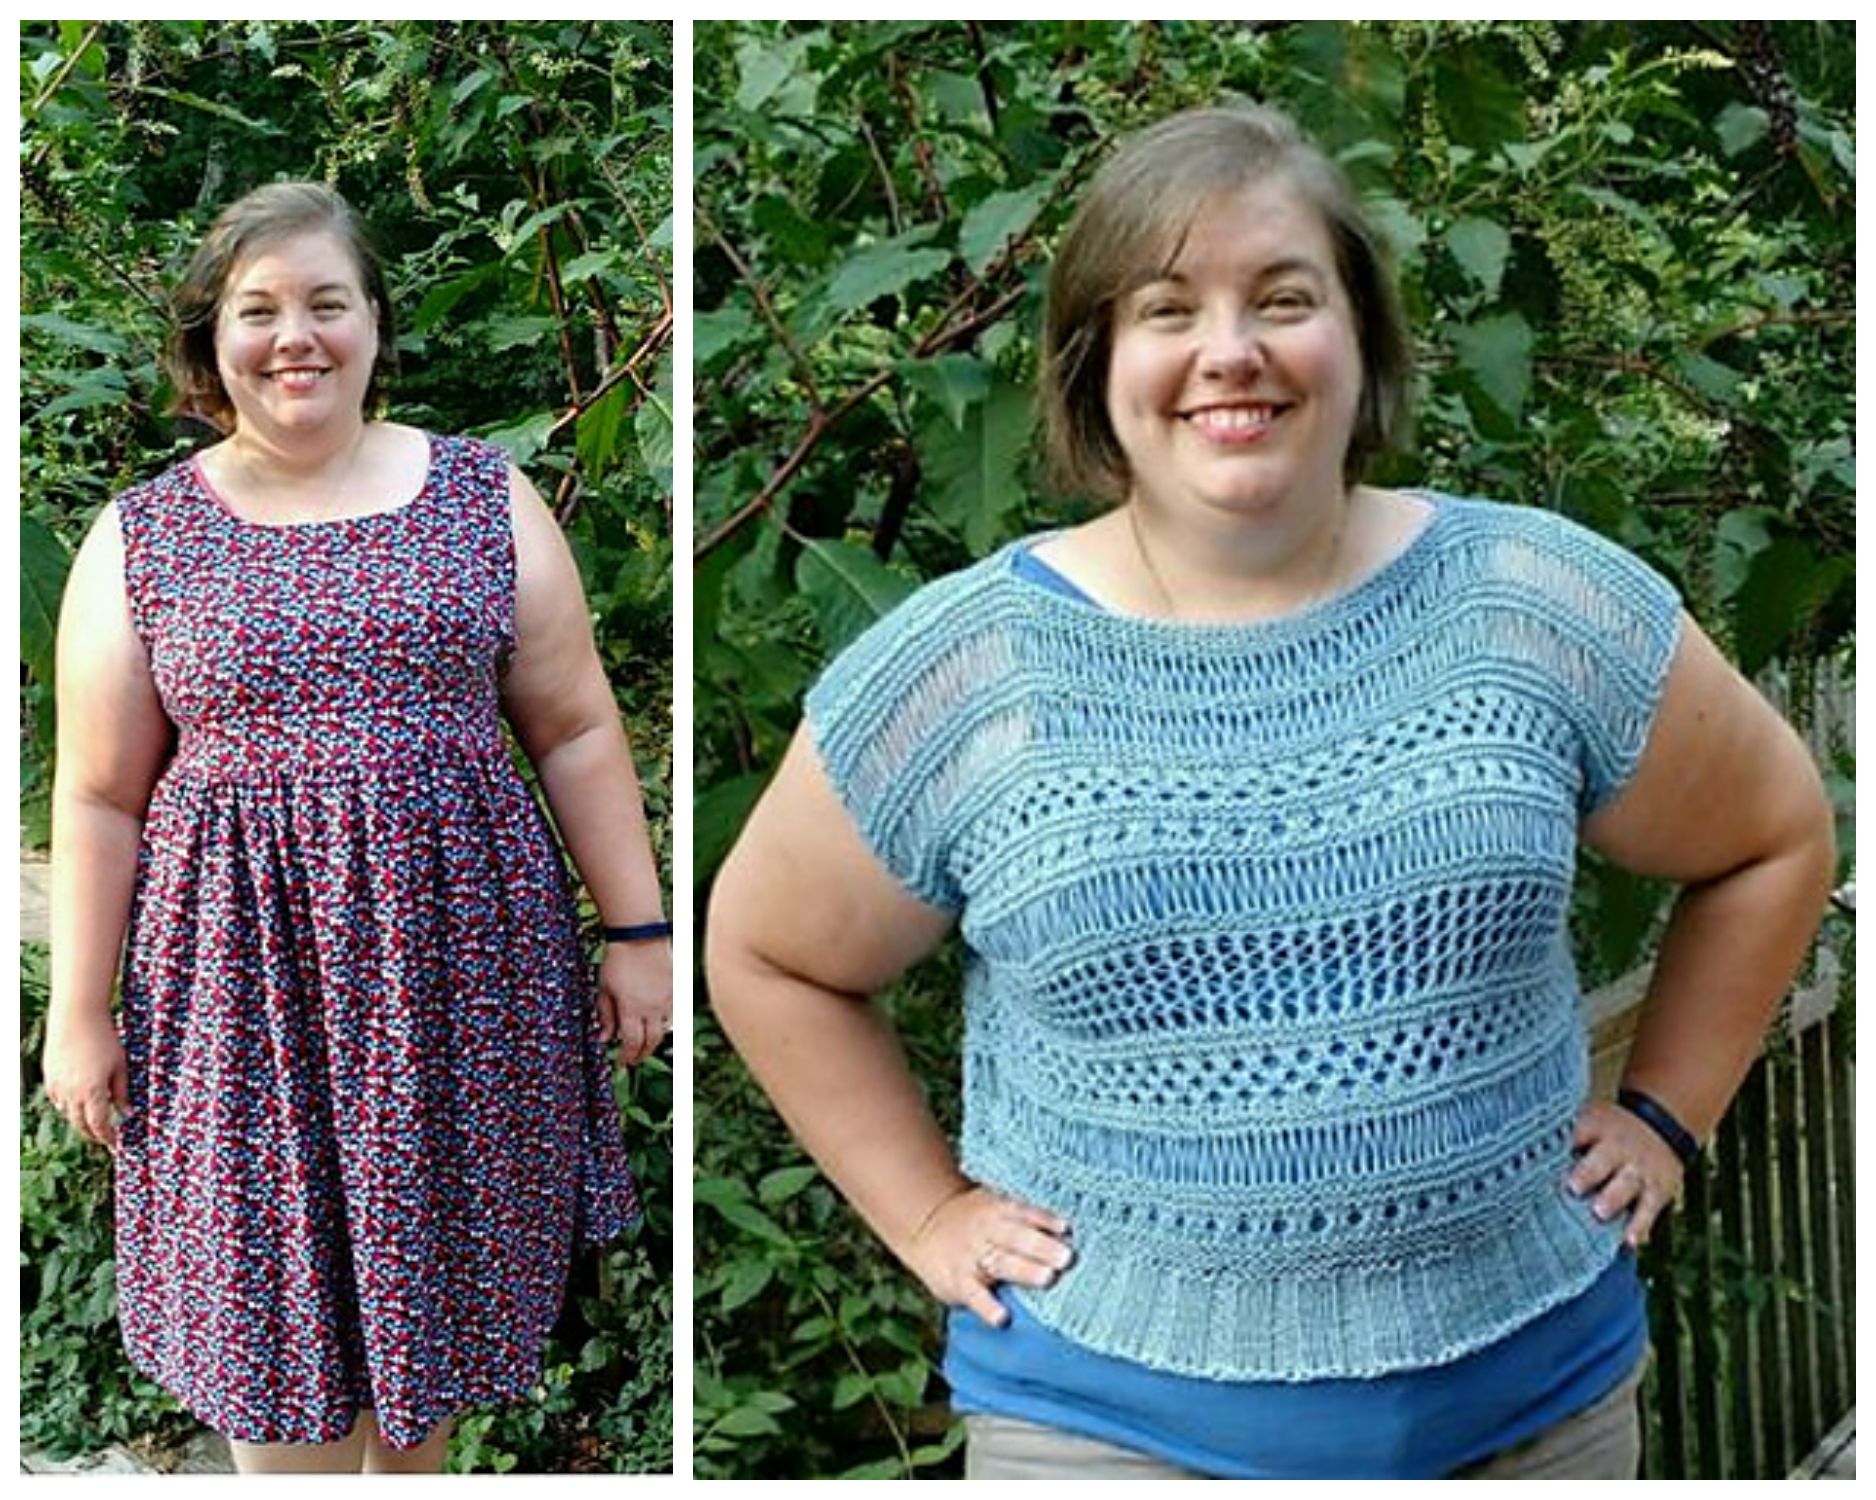
The official knitting pattern, Waters, is one I’m really excited about! Light and easy, uncomplicated and fuss-free, this linen pullover is the perfect garment to ease you toward the hot months of summer (or layer into the early cool months if you’re in another hemisphere!). The retro-style top features a high front neckline with a deep scooped back, classic skinny stripes (which can easily be customized if you prefer a different stripe option), and loads of relaxing stockinette. The pullover is knit seamlessly from the top down (editor’s note: upon proofreading, I originally had this written as “top dog” lolwut ok carry on), so there are very few purl stitches and even less seaming (aka: no seaming. Yay!). The yarn is Quince + Co Sparrow, which is a fingering weight linen yarn, and the fit should have 0-3 inches of positive ease – making this top super comfortable and cool to wear in the heat of summer.

If Waters looks vaguely familiar, that’s because it is! I love my Zinone from 2016’s OAL and wear it all the time – but reversed, with the lace in the front and the scoop in the back. Andi took a note from this riff and designed Waters to fit the same way, and at my suggestion we are using the same linen yarn because Y’ALL I LOVE THIS YARN. It’s a great price, knits up fast, and you can wash and dry it in the machines (which makes it even softer!). My zinone gets a lot of wear and I’m thrilled to have another linen knit to add to my wardrobe!

Anyway, I’m not saying that you need to knit the official OAL pattern this year… but you should really, really, really consider it. Plus, it’ll be 20% off until the OAL begins on June 1st when you you checkout on Ravelry using the coupon code OAL2018 – so yes, get you that discount!

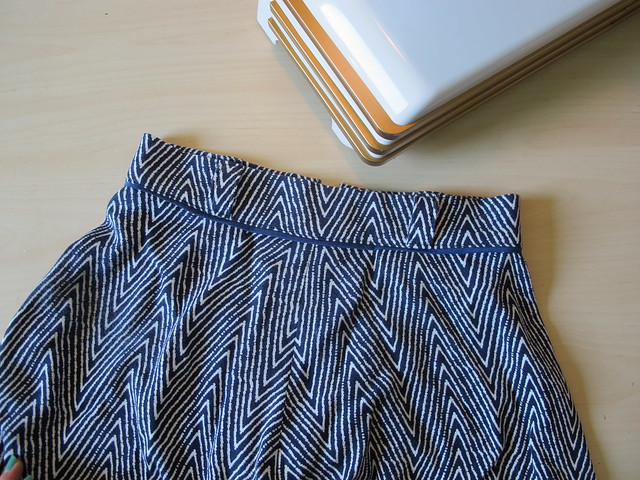
The official sewing pattern, the Lander Pants, is already a beloved darling in the sewing community, and for good reason! The pattern features a super high waist, button fly (or optional zipper fly if you hate buttons!), and generous patch pockets on both front & back. The legs have a wide, straight fit, and three length options – full length, ankle length, or shorts.

I’ve already made a couple pairs of cropped Landers – the red linen ones I shared here on my blog last month (and, um, spoiler: my shorts will also be red linen LOL), and a pair of navy twill tencel ones that have yet to make an appearance. I LOVE this pattern and can personally vouch that it works great with my Zinone sweater, and am excited to pair it with the new Waters top!

Same as with last year’s OAL, I will not be doing a series of super in-depth tutorials of making this pattern from start to finish. I will, however, be posting project updates and my own personal tips for making this pattern! There is a full sewalong here on the True Bias blog if you need the extra help, though!

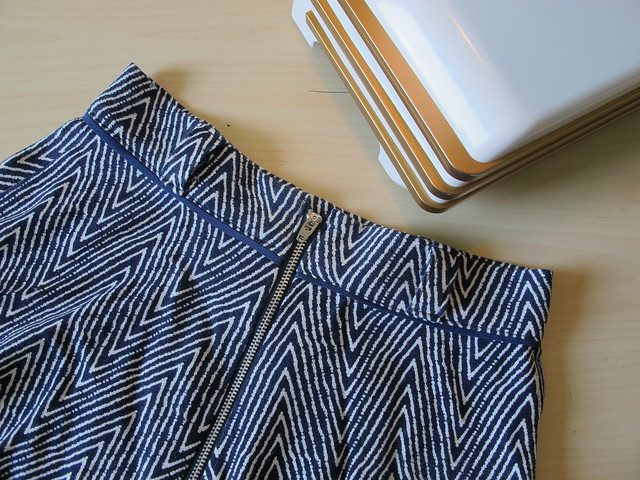
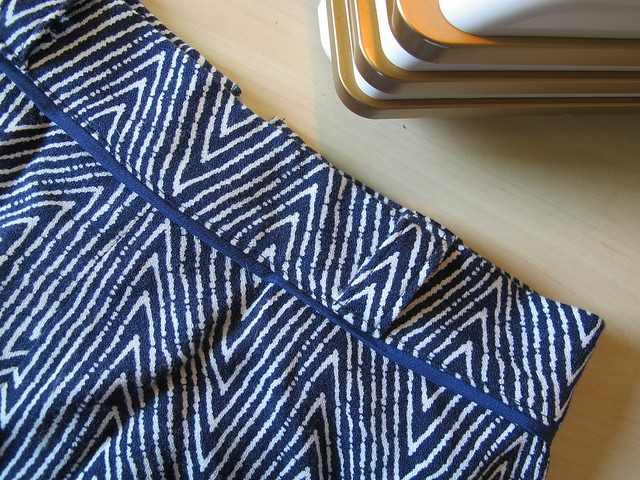
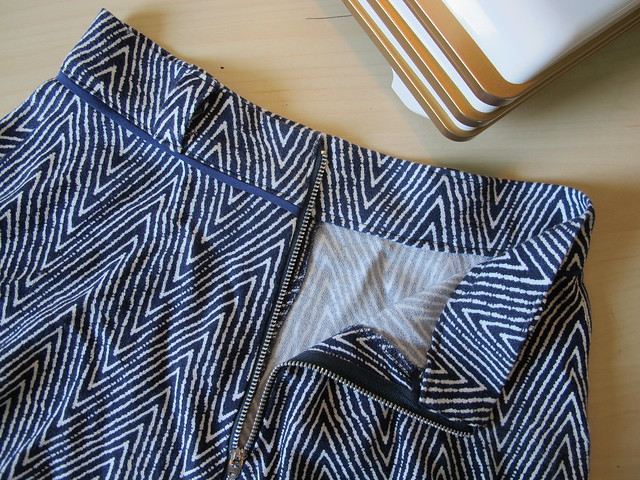
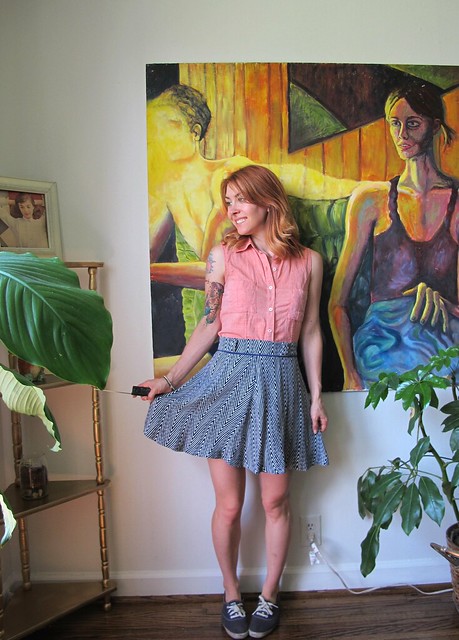
Again, if the Landers ain’t your thing – you don’t have to commit! The OAL is about what YOU want to wear, and you can absolutely choose a different pattern! 🙂 Another option we considered for this OAL was the Ginger Jeans. The new Jenny pattern from Closet Case Patterns would also be a great match for this sweater. And, of course, there are always skirts!

Should you need to pick up some fabric, our fabric sponsor, The Confident Stitch, has generously given us a discount code! Use the code OAL2018, and receive 15% off your entire order through June 15.

As always, you can spread the word by using the hashtag #OAL2018 or use this fancy badge. And don’t forget to join the OAL2018 discussion thread in the Untangling Knots group on Ravelry, for all your OAL chatting needs (and please tag me directly if you have a question, because sometimes I personally have a hard time with keeping up with all the action that happens in that thread ;)). Questions? Be sure to read the FAQ on Andi’s official announcement post in case it’s already been covered, but if not… ask away! 🙂 And don’t forget to use the OAL2018 discount code for 20% off the Waters knitting pattern + 15% of at The Confident Stitch!

YAY I’m so excited! Who is joining in this year? 😀

OAL2017: My Completed Anaheim Sweater / OAL Winners / Updates

4 Aug

Hello hello! A bit of a long post ahead – including my finished OAL sweater (yes! I finished it!) and the randomly selected winner for this year. A few updates/housekeeping before I get into everything-

  • I love Kickstarter, and I love funding new projects and ideas from brilliant people. MyBodyModel is a new one that sounds really incredible – a web app that creates a croquis based on your specific measurements (no more 9-heads-tall fashion sketches amirite)! You can then print the images or edit them from a tablet. I am actually a tester for this service – which I’m pretty excited about! – but they need quite a bit of funding to get it started. You can see all the details on their Kickstarter page (they do a way better job of describing the service than I am doing, ha), as well as back the project. No amount is too small!
  • Totally forgot to mention this, like, AT ALL – but I’m going back to Finch Knitting + Sewing Studio for another weekend garment sewing workshop! The dates are 9/29 – 10/1, and the project is WHATEVER THE HELL YOU WANT IT TO BE. Seriously! Whether you need a cheerleader to encourage you to start a scary project, a little help whenever you get stuck, or just want to be surrounded by other people who are also doing amazing creative things – this is a great place to do it! Finch is located in download Leesburg, VA; the cutest little sewing shop in the cutest little historic town. We had an amazing time when I was there earlier this year, and I am so excited to come back! You can see more details, as well as sign up for the workshop here 😀
  • OAL winners! I used the handy Random Number Generator to draw our 3 winners this year – and here they are!


First up is Helen, who actually made TWO dresses this year, in addition to her incredible cardigan. I can’t even tell you how much I love that cardigan, y’all. Everything about it – from the color, to the fit, to the beautiful lace work – is perfect. I am bummed that there is not a pattern for it, bc I’d knit that shit up in a heartbeat!


Our second winner is Linda, who also made a cardigan + dress combo! I have had my eye on that Blaster cardigan for a while now, and Linda’s outfit is making me want to add that pattern to my queue! It’s wonderful!


The third winner is Lycaenid, who took things in a completely different direction by crocheting a skirt! I never would have considered a crocheted skirt, but man, it looks pretty great – especially paired with a crisp white shirt. We get a lot of questions every year about if people can crochet instead of knit, or make something other than the standard knitted top/sewn bottom (or dress) – and here’s a perfect example of that working out beautifully!

Congratulations to our 3 OAL winners – please check your emails and/or Ravelry accounts for a note from me about claiming your prize! Each winner receives 2 patterns+shipping of their choice from Indie Stitches, plus 2 patterns of their choice from Untangling Knots. Woohoo!!

Ok, now let’s talk about MY finished sweater!

OAL2017 Anaheim Sweater

I actually finished knitting this the day that I wrote my post on the OAL dress – I was feeling inspired to get it done so I could move onto other things. There wasn’t too much left to do – I think I had maybe a total of 50 rounds for one sleeve, and then blocking. Not bad! I’m so glad it’s done – partly because it opens up my queue to whatever else I want to work on, and also because it’s a pretty sweater that goes with a lot of stuff in my closet! I’m especially happy with how good it looks paired with my Kim dress.

OAL2017 Anaheim Sweater

OAL2017 Anaheim Sweater

In case you missed it, the pattern I used is Anaheim, which is the official knitting pattern for the OAL2017. This is a relatively simple garment, knitted top-down in one piece with an easy to memorize lace pattern (which I say easy to memorize, I mean that even my dumbass could handle remembering it! Ha!). It’s pretty mindless – so you can work on it while doing something else, such as watching tv or working in a craft shop (guilty!), but it’s also interesting to knit so you don’t get bored. I really enjoyed working on this pattern, although I did have a bit of trouble with the icord edging – I simply could not wrap my head around the instructions. I chatted with Andi about and she wrote a blog post that goes into a lot more detail, which was immensely helpful. Unfortunately for me, I stalled waaaay too long with even starting the icord edging, which is a huge reason why I didn’t finish my sweater in time. Oh well! It’s done now, and that’s really what matters!

For yarn, I used Quince + Co Phoebe, which is a DK weight merino wool yarn, purchased from Craft South. This yarn is incredibly soft and just lovely to touch – and it’s so beautiful! I really enjoyed knitting it and it’s a great color for my personal wardrobe palette.

I knit the size XS – which is my usual size for Andi’s patterns – and was able to get gauge with my yarn, so I didn’t need to change needle sizes. Besides the icord edging drama, this knit up easily and quickly. I will be honest – I wasn’t sure if I’d ever wear this sweater because it didn’t seem like really my ~style~, but I am really really happy with how it’s turned out, and how it looks with other pieces in my wardrobe! I think it’ll be great for the transitional weather in spring and fall, and again, the color is spot-on to pair with basically everything I already own. I am even scheming ways to wear it without a shirt underneath – just a pretty bralette! We’ll see how brave I get when the time comes, though, ha!

OAL2017 Anaheim Sweater

The sweater is intended to be worn with the fronts crossed over and buttoned at the side – can I just say how happy I am that there are NO ties involved?! – but you can also wear it open. I’m not really a fan of the open look – I don’t think it looks quite right, as much yarn doesn’t have very much drape. But I love how it looks buttoned up! I just used buttons that were in my stash, although I think I need to reposition them slightly.

OAL2017 Anaheim Sweater

OAL2017 Anaheim Sweater

OAL2017 Anaheim Sweater

OAL2017 Anaheim Sweater

OAL2017 Anaheim Sweater

OAL2017 Anaheim Sweater

OAL2017 Anaheim Sweater

OAL2017 Anaheim Sweater

I do want to touch on something I brought up in my last post – about not having any creative energy. Since losing my dad in February, it has been a strange and very sad year. I think that’s to be understood- losing anyone is hard, losing a parent is absolutely traumatizing. After the shock of the first week and then immediately trying to dive back into “normal life,” I thought I was ok. I thought, oh, I’ve dealt with my grief and I have survived this. You know what though? That’s not how grief works. Grief is sneaky, and it will creep up on you when you are not expecting it. It will affect your life in ways that you don’t even realize it is doing, and you won’t know why. At least, that was what I found myself dealing with when May rolled around. All of a sudden, I just felt sad all the time and I didn’t know why. I slowly lost the ability and desire to do anything – I didn’t want to be active, I didn’t want to see anyone, I didn’t want to leave my house, and I didn’t want to spend any time in my studio. All of this is stressful, but my lack of creativity was stressing me out the most and just making it so much worse. I make things because I find it therapeutic and calming – so losing that outlet was very worrying to me. I had a lot of trouble making any sort of emotional connection with people, and I was just sad all the time. This is NOT how I normally am, and I didn’t know what to do about it. I ended up having a meltdown while with a group of friends, and I realized that shit was not normal and I needed to do something about it if I ever wanted to feel like myself again.

So, I started seeing a grief counselor, which has been immensely helpful. I’ve slowly incorporated exercise back into my routine (running and yoga), which makes me feel good both mentally and physically, as well as helps my sleep. The creative energy has taken the longest to return – I had to stop trying to force it. I have been gentle and kind to myself, and patient. I really had no interest in sewing whatsoever during the OAL – it just felt like a chore. It wasn’t until the very end that I could feel my creativity reigniting, and I started getting excited about future projects. Knitting wasn’t as much of a struggle, as you can do that pretty mindlessly (I just like keeping my hands busy, really). I actually got a lot of knitting done during this time because it was the only thing I could really bring myself to do, in those weird weeks where I was so incredibly lonely but also completely isolating myself from everyone. For those who have reached out to me in the past months – whether it was to offer condolences, or to see how I was holding up – thank you. I really appreciate every single message I received, even if I couldn’t necessarily bring myself to reply to all of them.

I’m happy to say that my creativity has come back with a vengeance – it was hard for me to sit down and write this post, because I really want to go back in my studio and make some stuff! 🙂 I feel inspired again, and that’s such a good feeling. More importantly – I feel happy. I still have a ways to go – and I know that the grief will never truly go away. But I am learning how to deal with it when it rears its ugly head, and I know now when to give myself kindness and grace.

Announcing the 2017 OAL!

15 May

Hi friends! It’s about mid-May, which can only mean one thing…

The Outfit-Along is back for another year! Our 4th consecutive year, to be exact 😉 I’ve announced this annual challenge several times already (well, 3 to be exact haha), so it may not need introducing – but just in case you’re new here, I’ve got details!

I’m teaming up with knit designer extraordinaire, Andi Satterlund, to host a combination knit-along and sew-along. The idea behind the Outfit Along (OAL) is to make a complete outfit by sewing a garment and knitting a garment. This is a great opportunity to fill your wardrobe with more beautiful handmade pieces, and we’ll have two official patterns that will have additional blog support, should you need it.

The official sewing pattern will be the By Hand London Kim Dress, and the official knitting pattern will be Andi’s newest cardigan, Anaheim. I will be blogging about the official sewing pattern and Andi be blogging about the knitting pattern, so we can all sew and knit along together. If you don’t love the official patterns, you can still join in! The Outfit Along is about making an outfit you’ll actually wear, so to participate, all you need to do is to sew a garment and knit a garment to make an outfit. You’re more than welcome to pick projects that fit your own style and skills – after all, you’ll be the one wearing it 🙂 Make a pullover and shorts, make a dress and cardigan – doesn’t matter what the combination is, as long as it makes an outfit 🙂

You can read all the relevant details over at Untangling Knots – as well as a FAQ for common questions – but in a nutshell:

– We will be kicking off the OAL on June 1, 2017.
– The deadline for completion is July 31, 2017, which gives you two months to finish both garments.
– There IS incentive for finishing your garments within the deadline – PRIZES!!! This year, we are welcoming back sponsor Indie Stitches, who is donating 3 prize packages consisting of 2 patterns (winner’s choice), plus free shipping. Winners will also receive 2 patterns of their choice from the Untangling Knots Ravelry store.
– To be eligible for said prizes, you must finish BOTH garments by July 31, 2017 and post them in the OAL Finished Outfit thread in the Untangling Knots group on Ravelry. Prize winners will be randomly selected from those who finish both their knit and sewn garments and post pictures in the appropriate thread by the deadline.

The official knitting pattern, Anaheim, is a sweet cross-over front cardigan that buttons at each side and features and all-over lace pattern. The pattern is knit in one piece, top down, with DK weight yarn and includes sizes XS – 3X (bonus – you can easily move the placement of the buttons to adjust the fit at the waist, should you prefer it tighter or looser). If you’ve never knit a garment before, this pattern is a great one to start with – the sweater is simple (and small!) enough to easily finish during the allotted time, and I can personally vouch that Andi’s instructions are clear and easy to follow (one of her patterns was actually my first knitted garment, too!). Plus, top-down in one piece? YAY NO SEAMING, Y’ALL!

BTW, Anaheim will be 20% off until the OAL begins on June 1st when you you checkout on Ravelry using the coupon code OAL2017 – so yes, get you that discount!

The official sewing pattern, Kim, is one I’ve personally never sewn before (YET) but I think will be a great addition to my summer wardrobe! The pattern features a princess seamed, sleeveless bodice, two neckline options (straight and sweetheart), plus two skirt options (tulip and gathered).

For this year’s OAL, I will not be doing a series of super in-depth tutorials of making the dress from start to finish (I feel like there are PLENTY of these on the internet – including one for the Kim dress!), but I will post tutorials for the changes that I am making to my version of the pattern.

Again, if Kim ain’t your thing – you don’t have to commit! The OAL is about what YOU want to wear, and you can absolutely choose a different pattern! 🙂

As always, you can spread the word by using the hashtag #OAL2017 or use this fancy badge. And don’t forget to join the OAL2017 discussion thread in the Untangling Knots group on Ravelry, for all your OAL chatting needs. Questions? Be sure to read the FAQ on Andi’s official announcement post in case it’s already been covered, but if not… ask away! 🙂

YAY I’m so excited! Who is joining in this year? 😀

OAL2016: My Finished Outfit!

29 Jul

What up, everyone! It’s practically the end of the July – two days left to go! – which means one thing ’round these parts… The Outfit-Along is nearly over!

OAL_Banner

I’ve had a lot of fun with the pieces this year – both making and wearing them! – and I’m excited to finally show you guys my finished sweater + skirt!

OAL2016: Zinone Sweater + Hollyburn Skirt

Here is the complete outfit!

The sweater is Zinone by Andi Satterlund, and the skirt is a Hollyburn from Sewaholic Patterns.

OAL2016: Zinone Sweater + Hollyburn Skirt

OAL2016: Zinone Sweater + Hollyburn Skirt

OAL2016: Zinone Sweater + Hollyburn Skirt

OAL2016: Zinone Sweater

Zinone was made using the suggested yarn, Quince + Co Sparrow (the color is Moon), which is a fingering weight linen yarn. This was my first time working with linen and OMG TRUE LOVE Y’ALL. Very easy to work with and felt so good on my hands! My gauge swatch put me at size 2 needles, and I knitted the size XS (which is my usual size for Andi’s patterns and corresponds with my bust measurement). I chose to knit the version with the partial lace back, and slightly cropped. I was originally going to do the full lace version, but I guess I’m way out of lace-knittin’ practice because I had a helluva time working this one out. Fortunately, the directions for the partial and full lace back at the same for a bit at the beginning of the pattern, which gave me plenty of time to change my mind 😛 I also completely frogged the entire thing and started over after finishing the lace section, because I realized way too late that I had read the pattern wrong (which is why I was having issues in the first place). I was trying to be clever and separate my repeats with stitch markers – you can’t do that with this pattern, as some of the stitches borrow from previous repeats. Whoops. Once I realized I’d done goofed, let me tell you… it was hard to rip everything out and start over. But I’m glad I did, because my second attempt at the lace looks pretty bomb-ass, if I do say so myself 😉

I made some slight sizing and length modifications to the sweater as well – I knitted the correct number of rows for the cropped version, but somehow it ended up really short (I am thinking I read the pattern wrong). I just continued knitting until I got to the length that I wanted, and did a couple more rounds of decreases as well. Speaking of length, this sweater is only about an inch shorter than the schematics – it’s 16.5″ long from the shoulder, which hits me right about at the belly button. The cropped version on Andi appears to be a lot shorter than mine, even though it says it’s an inch longer.

Anyway, this was a very easy and satisfying knit. I did nearly run out of yarn at the end – I bought enough for the cropped version, and ended up frogging about 3 rows of my gauge swatch. Actually, I had an extra skein but I was trying really hard not to use it so I could be cheap and return it to the store 😉

OAL2016: Zinone Sweater

OAL2016: Zinone Sweater

I LOVE how this linen feels in the summer heat – finally, an excuse to wear my handknits even in July! 😀 And it’s pretty awesome that it’s machine washable. I haven’t done the recommend 3 washing cycles yet, though – I did one Soak wash (this is how I wash all my knits… and my lingerie for that matter. Soak is AMAZING, cannot recommend enough) and then one wash in the washing machine. My new place has me doing laundry at the ‘mat, so running 3 loads back to back to back isn’t exactly doable for me! (well, it is. But I’m not about to pay for that haha) So far, though, it has softened up considerably after even 2 washes. Can’t wait to see how it softens even more with additional wear and washing 😀

OAL2016: Zinone Sweater

OAL2016: Zinone Sweater

OAL2016: Zinone Sweater

OAL2016: Zinone Sweater

OAL2016: Zinone Sweater

Sorry, loads of photos!

OAL2016: Hollyburn Skirt

OAL2016: Hollyburn Skirt

Now for the Hollyburn!

I already wrote a couple posts about the modifications to make this particular skirt (see: Choosing Your Fabric, Flat Piping, and Installing an Exposed Zipper), so I’ll just brief over the key details here.

The navy rayon crepe is from StyleMaker Fabrics (who is one of our sponsors for this year’s OAL!). I added flat piping at the waistband (sewn with silk crepe – from my stash) and an exposed metal zipper to the back. I also shortened the length considerably, omitted the pockets, and used stretch interfacing on the waistband.

I sewed the entire skirt on my Spiegel 60609, and it did pretty well overall! While I don’t want to say I was concerned to see how it would handle that shifty fabric (I have sewn straight-up silk and a bra on the 60609, and it hasn’t given me any problems thus far with my fabric choices), I was still pleasantly surprised at the entire experience. I didn’t use any special stitches, and only feet that came with the machine. The zipper foot in particular was great for both applying the piping and the invisible zipper, as well as making sure the topstitching was nice and straight and close to the edge. I did find that I needed to increase the stitch length just a smidge for this fabric, as it wanted to bunch a little bit otherwise, but overall I’m pretty happy with it! I am glad that moving the needle over is an option with this machine (you just increase the zigzag width while on a straight stitch), however, I’d love to see some new feet released to use with this machine. Maybe a 1/4″ foot or an edgestitching foot? 😉 HINT HINT.

OAL2016: Hollyburn Skirt

OAL2016: Hollyburn Skirt

OAL2016: Hollyburn Skirt

For me, the most fun part about this challenge is ending up with TWO pieces that I can mix with other garments in my wardrobe. I love this top + skirt together… but honestly, I like them even more with different things from my closet! They are definitely wearable with a bunch of what I already have (which is part of the reason why I got a little boring with the colors 😉 I wanted the versatility!); here are a couple of examples:

OAL2016: Zinone Sweater

Zinone top + Ginger jean shorts
I don’t know about y’all, but I am LOVING the cropped trend! Slightly cropped with a slightly high-waisted bottom is my new favorite thing right now (not your cup of tea? This is the beauty of knitting your own – you get to decide the length!). I love the way this top looks tucked into a skirt, but the combination with my high-waisted Ginger shorts really makes my heart sing the most.

OAL2016: Hollyburn Skirt

Hollyburn skirt + sleeveless coral B5526 button up
I did not realize when I made this shirt that it was going to be one of my top 10 handmade garments of all time, but it is. It goes with everything. The sleeveless option + lightweight cotton fabric make it a great option for summer, and it layers beautifully under sweaters in the winter. The color is perfection and looks especially great with navy (my go-to summer dark neutral). It’s as easy to wear as a knit tshirt, but looks a helluva lot more refined and classy.

OAL2016: Zinone Sweater + Hollyburn Skirt

Anyway, I guess that’s it for this post! Those of you still scrambling to finish your outfits – you have 2 days before the deadline! Make sure you upload your finished outfit to the Official OAL2016 Finished Outfit Thread on Ravelry before 7/31/16 Midnight PDT if you wanna win one of those sweet prizes! Andi and I will be drawing 3 winners at random, who will win fabric, sewing pattern, and knitting pattern vouchers! Even if you’re not participating, do take a look at that thread! There are some amazing outfits to drool over 🙂

OAL2016: Part 2 (Zipper + Finishing)

15 Jun

Hey everyone! Welcome back for the second (and final!) sewing post of the Outfit Along 🙂

OAL_Banner

At this point, you should have your skirt mostly assembled (all seams except the center back seam) with the waistband partially attached (not finished). Today, we will insert the zipper and finish the waistband in one go! I  am making my skirt with this awesome rayon crepe from StyleMaker Fabrics (don’t forget that there is free US shipping/discounted international shipping on all orders through 6/30/16 when you use the code OAL2016 😉 ), using my Spiegel 60609 sewing machine. If you missed the previous posts, here is Part 1!

For this particular skirt, I am sewing an exposed metal zipper. If you hate exposed zippers, that’s ok! You have options! Check out my tutorial for sewing a lapped zipper, and also my tutorial for sewing an invisible zipper.

For sewing the exposed zipper:

OAL2016- Sewing an Exposed Zipper
Start by marking a rectangle where the zipper is to be inserted. For a 9″ exposed zipper on a garment with a 5/8″ seam allowance (if your measurements differ, you will need to adjust these accordingly!), make a rectangle that is 10″ long and 7/8″ across. I use a Chaco Pen liner, but again – anything works! Then go over your markings with a long basting stitch on your machine. Don’t be lazy and skip this step. I know it’s tempting, but trust me on this one. The stitches will make it visible from both sides, and also won’t rub off.

OAL2016- Sewing an Exposed Zipper
If your fabric is very lightweight and/or drapey, you will want to interface the area where the zipper is going, just to give it some extra support. I cut strips of lightweight fusible and applied them over my basting lines.

OAL2016- Sewing an Exposed Zipper
Clip into the bottom corner of the rectangle at a 45 degree angle, being careful not to snip into your basting lines.

OAL2016- Sewing an Exposed Zipper
Fold along the vertical basting stitches and press.

OAL2016- Sewing an Exposed Zipper

OAL2016- Sewing an Exposed Zipper
Starting at the horizontal basting stitches, sew the center back seam at 5/8″, ending at the hem.

OAL2016- Sewing an Exposed Zipper
Press the seam allowances open.

OAL2016- Sewing an Exposed Zipper
On the right side of the skirt, lay the zipper face down with the bottom facing toward the waistband. Line the horizontal basting stitching just below the zipper stop.

OAL2016- Sewing an Exposed Zipper

OAL2016- Sewing an Exposed Zipper
Sew along the horizontal basting ONLY, using a zipper foot. PROTIP: I just found this out, but you *can* move the needle of the Spiegel 60609. While the machine is on straight stitch (#1), increase the zigzag width to 7.0 and that will move the needle! So you can get RIGHT UP IN THERE to do that zipper!

OAL2016- Sewing an Exposed Zipper
Here is the bottom of my zipper after it is attached. You only need to sew along the basting stitches – not the entire width of the zipper tape.

OAL2016- Sewing an Exposed Zipper
Flip the zipper to the inside of the skirt and press the line you just sewed.

OAL2016- Sewing an Exposed Zipper

OAL2016- Sewing an Exposed Zipper
Now turn back the skirt pieces, one at a time, and sew the zipper tape to the skirt along the vertical basting stitches, starting at the zipper top stop and ending at the bottom stop (don’t sew all the way to the very end of the tape). Again, use a zipper foot and move your needle over to one side if you can.

OAL2016- Sewing an Exposed Zipper
Here is what things should look like after you’ve attached both sides. Note that the top of the zipper will NOT reach the top of the waistband – it should only go about halfway, since we are folding the waistband to the inside. On the Hollyburn, there is a notch to indicate where the waistband folds – so the zipper  stop should reach that notch.

OAL2016- Sewing an Exposed Zipper
Now we need to finish the waistband. Fold the seam allowance (5/8″) along the long raw edge to the inside, and press. You may trim this seam allowance down to 1/4″ if it’s bulky.

OAL2016- Sewing an Exposed Zipper
Fold the remaining bits of the top of the zipper tape toward the inside of the waistband, and pin to keep them out of the way (if you accidentally sewed down this part, you gotta unpick 😉 ).

OAL2016- Sewing an Exposed Zipper

OAL2016- Sewing an Exposed Zipper
Now fold the waistband down to meet right below (about 1/8″) the stitching line at the top of the skirt, making sure that the top zipper stop is even with the top of the waistband fold. Make sure the raw edges are tucked in around the zipper and pin everything into place.

OAL2016- Sewing an Exposed Zipper

OAL2016- Sewing an Exposed Zipper
Now to topstitch! Starting at the top of the zipper, topstitch 1/8″ from the edge down to the seamline where the skirt meets the waistband, lower your needle and pivot. Then continue around the entire waistband until you reach the other side of the zipper, pivot, and sew back up to the top.

Alternately, you can also topstitch around the entire exposed zipper – but you’ll need to sew down the waistband in a second pass 🙂

OAL2016- Sewing an Exposed Zipper

OAL2016- Sewing an Exposed Zipper
Now pat yourself on the back for sewing an AWESOME EXPOSED ZIPPER WTF.

Finally, just a couple more things to finish your skirt! If you want to add belt loops or the waistband tabs, you can do so now. Then you just need to hem. I ended up taking about 3″ off my skirt length to make it more of a mini, and then finished with a double turned hem (1/4″ on the first turn, 3/4″ on the second) that is simply topstitched. Here are my hemming tutorials if you need a refresher!

That’s all for today! As always, please let me know if you have any questions!! How is your sewing coming along? 🙂

OAL2016: Part 1 (Pockets + Piping)

8 Jun

Good morning, everyone! Time to get some sewin’ done for this OAL!

Before we get into the post, a few things I wanted to mention:
– Unlike previous years, I will not be doing a full step-by-step of sewing the pattern. Part of the reason is because this is a really easy pattern and the instructions are super straightforward and simple to understand on their own.
– Now, before you freak out – there IS a sewalong for the Hollyburn skirt! Not hosted on this blog, but a sewalong nonetheless! You can find it here on Lavender Lane. So if you reeeally need the help and the instructions just aren’t cutting it for some reason or another, there is that option!
– Instead of step-by-steps, I am splitting the OAL sewing stuff into 2 posts – today and next week – both with modification tutorials. I will also include links to relevant tutorials from older posts as they are needed. That way, those of you who are not following the OAL and/or don’t care about sewalong posts (I’ll be honest – I skip over them too!) – this is less for you to skip over 🙂 And for those who are here for the OAL and love reaching sewalong posts – they’re still here! 🙂
– And DUH, I’ve made like a zillion of these skirts – so feel free to ask me questions as well! Either in the comments, or you can email me! Don’t worry! I got ya covered!
– FINALLY, I should mention that I’m using my Spiegel 60609 sewing machine to construct my Hollyburn, so you’ll see it in the photos! I wanted to see how it handled my mega-shifty fabric 🙂

Ok, back to the OAL!

OAL_Banner

Before you do anything, it’s a good idea to prewash your fabric in the same manner you will be washing/drying it once the garment is complete. Some fabric reeeeally likes to shrink, so you want to get that out of the way before it’s cut! I am using this cool zigzag rayon crepe from Style Maker Fabrics and it certainly shrunk a LOT! It’s a bit shifty to work with, but I think the payoff will be pretty sweet – it has the dreamiest, swishiest drape! I found that my increasing my stitch length just a hair (the standard stitch length on the Spiegel 60609 is a little short for sewing really delicate and shifty fabrics, I’ve learned) and using lots of pins was enough to keep the fabric in check for the most part.

Some notes on cutting:
Here is a post I wrote for the 2014 OAL on cutting and marking. Different pattern, same concept.
– It is entirely possible to make this pattern with a striped or plaid fabric! You will need extra fabric to allow for matching and it may take longer to cut, but it can be done! Depending on your stripe/plaid, you may only be able to match 2 seams instead of 4 – if this is the case, match the center front and center back seam. Mismatched side seams are less noticeable 🙂 Here is my tutorial for matching plaids. Also relevant: my tutorial on matching the stripes at the pocket.
– This pattern calls for you to cut the waistband on the straight grain (parallel to the grain line). If your fabric has a bit of stretch, though, you may want to consider cutting on the cross grain (perpendicular to the grain line). This is what I did 🙂 Keep in mind that if you cut on the cross grain, you’ll want to interface the waistband with a tricot interfacing to retain that stretch. I personally love the PROtricot at Fashion Sewing Supply, but most fabric stores have something similar 🙂
– If your fabric is super drapey and you don’t want the pockets to bag out, you may consider eliminating them entirely (go ahead, gasp or whatever). This is what I did on my skirt, to allow for a smooth front. You can always add in-seam pockets if you’d like.

Eliminating the pockets is super easy:
OAL2016- Removing Pockets
You’ll need your pocket piece and your skirt front piece.

OAL2016- Removing Pockets
Fold the pocket piece in half along the foldline, matching the notches.

OAL2016- Removing Pockets
Lay the pocket piece behind the skirt front at the pocket opening, again matching the notches. Then just tape it down into place – I am using surgical tape because it peels off easily without tearing the paper (I can’t take credit for this – I got it in my goody bag at A Gathering of Stitches. Sam makes the BEST goody bags!), but you can also use regular tape, painter’s tape, pins, or even just trace off the pattern pieces. Whatever works!

Next steps are to construct the skirt as per the directions. Sew the pockets (if you still got ’em!). Sew the center front and side seams at 5/8″, but leave the center back seam open. If you would like to finish your seams, now is the time. I used my serger to overlock the seams after I sewed them, and then I pressed them open. Finally, staystitch the waist of your skirt (just a straight stitch about 1/2″ from the edge) to keep it from stretching out.

At this point, I decided to add flat piping to my waistband seam. So you get a tutorial!

OAL2016- Flat piping
I started with a strip of bias-cut silk crepe that was 1.5″ wide. The width of your piping will determine how wide to cut your bias – you’ll want 2x the finished width, plus 2x seam allowance. Cut enough bias to go all the way across the waist of your skirt. Fold the strip in half, length-wise, with the WRONG sides together, and press.

I promise I will get a new ironing board cover eventually. Ew, that yellow stain. haha.

If you don’t know how to cut bias, here are two really great tutorials: continuous bias (my favorite!) and bias strips.

OAL2016- Flat piping

Lay the folded bias along the waist edge of your skirt, matching raw edges at the top, and pin into place.

OAL2016- Flat piping

Sew the bias in place just within the seam allowance (I sewed at 3/8″) to hold it there. You can use a basting stitch for this step; it’ll get a second sewn pass in a minute!

OAL2016- Flat piping

Lay your interfaced waistband on top of your skirt, with right sides facing and raw edges matching. The bias strip should be sandwiched between the two.

OAL2016- Flat piping

Now sew your second pass to secure all the layers at 5/8″. Make sure to shorten your stitch back to it’s normal setting if you were basting 🙂 I ended up sewing another line a little more than the seam allowance, because I wanted the piping a little bit narrower.

OAL2016- Flat piping

Check the right side to make sure that everything looks good. I have no idea how I managed that unintentional perfect pattern matching, but hey, I’ll take it!

OAL2016- Flat piping

Press all the seam allowances up toward the waistband, using lots of steam so the piping lays nice and flat. If your fabric is bulky, you may want to trim down your seam allowances and/or grade them (trimming them in staggering layers) to prevent bulk from showing from the outside.

OAL2016- Flat piping

Now admire your pretty, flat piping! Isn’t that dainty? 🙂

Ok, that’s all for this week! Let me know if you have any questions about these steps 🙂 Next week, we sew in the zipper and finish the thing! Woohoo!

Announcing the 2016 Outfit Along!

15 May

It’s mid-May, so you know what that means…

OAL_Banner

The Outfit Along is officially back for 2016! Yay!!

Once again, I’m teaming up with knit designer extraordinaire, Andi Satterlund, to host a combination knit-along and sew-along. The idea behind the Outfit Along (OAL) is to make a complete outfit by sewing a garment and knitting a garment. This is a great opportunity to fill your wardrobe with more beautiful handmade pieces, and we’ll have two official patterns that we will hold your hand with should you need it.

Zinone_Both_Front_02

The official sewing pattern will be the Sewaholic Hollyburn skirt, and the official knitting pattern will be Andi’s newest summery top pattern, Zinone. I will be blogging about the official sewing pattern and Andi be blogging about the knitting pattern, so we can all sew and knit along together. If you don’t love the official patterns, you can still join in! The Outfit Along is about making an outfit you’ll really wear, so to participate, all you need to do is to sew a garment and knit a garment to make an outfit. You’re more than welcome to pick projects that fit your own style and skills – after all, you’ll be the one wearing it 🙂 Make a pull over and shorts, make a dress and cardigan – doesn’t matter what the combination is, as long as it makes an outfit 🙂

Paisley Hollyburn

You can read all the relevant details over at Untangling Knots – as well as a FAQ for common questions – but in a nutshell:

– We will be kicking off the OAL on June 1, 2016.
– The deadline for completion is July 31, 2016, which gives you two months to finish both garments.
– There IS incentive for finishing your garments within the deadline – PRIZES!!! This year, we have two sponsors who have donated prizes to the OAL: Each winner will receive the pattern of their choice from Indie Stitches, a $20 voucher to StyleMaker Fabrics, and two knitting patterns of their choice from Untangling Knots.
– To be eligible for said prizes, you must finish BOTH garments by July 31, 2016 and post them in the OAL Finished Outfit thread in the Untangling Knots group on Ravelry. Prize winners will be randomly selected from those who finish both their knit and sewn garments and post pictures in the appropriate thread by the deadline.

Zinone_Both_Back_medium2

The official knitting pattern, Zinone, is a casual summer top knit in sport weight linen yarn. You have the option to include either a partial or full lace back, and choose either a cropped length or full length to the hips. It’s a little different from our previous OALs – definitely not a cardigan this year! – but I think it’s a really fun switch (and, again, you can totally knit a cardigan if that’s what your little hear desires. Or crochet one! Ain’t no knitting police running around over here). The top is knit in one piece, in the round, so it goes pretty fast. And linen is so lovely to wear in the summer! You can read more about the pattern here. AND, To celebrate Zinone‘s launch, Andi is offering 20% off up until the official OAL start of June 1. Use the code OAL2016 to get you that discount!

Striped Cabernet Cardigan + Yellow Hollyburn

The official sewing pattern, the Hollyburn skirt, is a great little wardrobe staple that no doubt many of you have already made! It’s a simple, flared skirt, that works great in both a rigid and fluid fabric, depending on the look you are going for. The pattern is perfect for a beginner as it’s relatively simple (and the only fitting you need to worry about is the waist measurement), but it’s also a good canvas for a variety of customization to make it your own, should you require a little more of a challenge in your sewing 🙂 I will be covering basic construction of the pattern, as well as how to adjust the skirt to leave off the pockets, and installing an exposed zipper. And yes, I’ve already made like 5 of these babies (1 2 3 4 5), so you know it’s a good basic wardrobe staple!

Oh! And to help with your fabric buying needs – StyleMaker Fabrics is offering FREE SHIPPING to all US orders (and $8.95 off shipping to all international orders), through 6/30, using the code OAL2016! Definitely check them out if you’re not working from your stash – they have a fantastic selection of wonderful fabrics, and you can search by garment type and color! If you need help choosing your fabric, stick around – StyleMaker Fabrics will be guest posting on the start of the OAL as well 🙂

As always, you can spread the word by using the hashtag #OAL2016 or grab a little badge below (or over on the Untangling Knots blog, where the fancy html is already embedded for you, ooh la la). And don’t forget to join the OAL2016 discussion thread in the Untangling Knots group on Ravelry, for all your OAL chatting needs. Questions? Be sure to read the FAQ on Andi’s official announcement post in case it’s already been covered, but if not… ask away! 🙂

OALBadge3

OALtag_2016

I’m super excited to be running this awesome challenge for the third year in a row! 😀 Who’s in?

OAL2015: The Winners!

3 Aug

Hey everyone! One more OAL post for this year 🙂

OAL_Banner

This was my second year co-hosting the OAL with Andi Satterlund, and I think it’s safe to say that we both had a most excellent time! There was a great turnout of participants (61 outfits in the official Ravelry thread!) and I really enjoyed following along with everyone’s progress and lurking all those beautiful finished outfits! Thanks so much to everyone who joined in – whether you made a whole outfit, just sewed or knit one piece, or watched and cheered along from the sidelines. Y’all are the best! ♥

While making an outfit is a pretty sweet deal in itself, Andi & I wanted to draw out the fun even more by offering prizes to 4 random winners who posted completed outfits in the thread. This year, we doubled up and have two sponsors who have generously donated prizes, so I’d like to take a minute and acknowledge them! The first sponsor is Indie Stitches, who you might remember also donated prizes last year. Based in Australia, Indie Stitches sells both paper patterns and downloads, and offers selections from a huge plethora of indie designers, all of which are super good! Our other sponsor is The McCall Pattern Company, who owns and manages 3 of the famous Big 4 pattern companies (McCall’s, Vogue and Butterick, as well as Kwik Sew). I absolutely adore the McCall Pattern Company, even when I’m poking fun at them (and adore them even more for being basically the best sports ever about it!), so I’m pretty thrilled to have them on as a sponsor for OAL2015!

Both Indie Stitches and The McCall Pattern Company have offered to donate one pattern to each of the 4 winners. The winners will also get two patterns of their choosing from the Untangling Knots shop. So you will get to keep on making outfits! Yay!

Now for the winners! These were pulled from the official Ravelry thread and drawn by random number generator.

kari1276
Kari // Vianne cardigan + Carolina Mae dress

Can you believe that this is Kari’s second sewing project?? That dress fits beautifully and I just love the fabric! Also loving the idea of a black Vianne – that’s definitely a sweater you can wear with anything 🙂

feminizzle
Ann Marie // Vianne cardigan + self-drafted dress

I love the colors in Ann Marie’s outfit! That orange Vianne is especially beautiful with all the subtle color gradation. The addition of a waistband on the dress is a really nice touch!

egwene2211
Angela // Myrna cardigan + V8726

Another first-timer here – this is Angela’s first cardigan! I think it turned out awesome and, again, love that orange! The colors of her cardigan & dress remind me of sherbert 🙂 Yum!

irish1970
Jeri // Cancun Lacy Box top + Angie dress

Love everything about Jeri’s outfit, but ESPECIALLY that little lacy top! Ahh!! I never realized how much I needed a lace-knit crop top until right this second. It looks great on Jeri, both with and without the dress. The whole outfit looks so cool and comfortable, perfect for summer!

Congratulations, OAL winners! Expect some emails to get those prizes out 🙂 I’m so happy to wrap up another successful OAL, and even happier to have a few new knitting and sewing patterns to add to my never-ending queue! Starting with that lace crop top. haha!

Thanks again to everyone who participated! Thanks to Andi for hosting along with me this second year, and big thanks to our sponsors Indie Stitches & The McCall Pattern Company for the great prizes! If you’d like to see more OAL garments, check out the official Ravelry thread, as well as the hashtag #OAL2015 on Twitter & Instagram 🙂

Announcing the 2015 OAL!

15 May

Happy Friday, everyone! I just wanted to pop in and let y’all know that the Outfit Along is back for a second year! WOOHOOO!!!

OAL_Banner

Once again, I’m joining forces with Andi Satterlund of Untangling Knots to combine a sew-along with a knit-along. The idea behind the Outfit Along (OAL) is to make a complete outfit by sewing a garment and knitting a garment. This is a great opportunity to stretch your crafting skills, and we’ll have two official patterns that we’ll help you with along the way.

The official sewing pattern will be McCall 6887, and the official knitting pattern will be Andi’s newest cardigan pattern, Vianne. I will be blogging about the official sewing pattern and Andi be blogging about the knitting pattern so we can all sew and knit along together. If you don’t love the official patterns, you can still join in! The Outfit Along is about making an outfit you’ll really wear, so to participate, all you need to do is to sew a garment and knit a garment to make an outfit. You’re more than welcome to pick projects that fit your own style and skills. You can look through the 2014 Outfit Along FO thread in the Untangling Knots group on Ravelry to see the variety of patterns people chose to use last year.

Vianne

McCall 6887 - Pineapple dress!

You can read all the juicy details over at Untangling Knots, but in a nutshell:

– We will be kicking off the OAL on June 1, 2015.
– The deadline for completion is July 31, 2015, which gives you two months to finish both garments.
– Did I mention that finishing within the deadline means you are eligible for PRIZES? Yes! We are cooking up some fun pattern giveaways to reward those of y’all who complete their outfit within the allotted deadline, so stay tuned for more information!
– To be eligible for said prizes, you must finish BOTH garments by July 31, 2015 and post them in the OAL Finished Outfit thread in the Untangling Knots group on Ravelry. Prize winners will be randomly selected from those who finish both their knit and sewn garments and post pictures in the appropriate thread by the deadline.

Vianne_Back
The official knitting pattern, Vianne, is a seamless, top-down cardigan, knit using DK weight yarn on US 8/5mm needles, which makes it a lovely lighter weight cardigan for the summer months. The v-neck cardigan features a set of mirrored lace panels that run along the front neckline and frame a large mesh panel on the back. To celebrate Vianne’s launch, Andi is offering 20% off up until the official OAL start of June 1. Use the code OAL2015 to snag the discount! You can read more details in the Untangling Knots shop or check Vianne out on Ravelry.

McCall 6887 - Pineapple dress!
The official sewing pattern, McCall 6887, is a fun little summer dress with a surprise cut out in the back! You probably remember my Pineapple Delight version from a few weeks ago – well, I’m dying to make more, and I want to drag all y’all down with me (mwahaha). The pattern features front princess seams, skirt variations (flared or fitted) and the optional open back (there is also an option for a non-open back if that’s your jam!). I will be covering basic construction of the dress, and including tips swapping out the lining for a clean bias facing, and adding pockets. The pattern is rated as “easy,” so y’all beginners should have no problem tackling this! Also, just a head’s up – I just checked my local Joann’s and it looks like all McCall’s patterns are on sale for 3/$5 through 5/16, so go save some dollaz!

Since I’ll be traveling around Peru during the first couple of weeks of the OAL, we won’t start the sewing portion until June 22nd. Of course, you are welcome to get a head start and begin sewing on June 1; there just won’t be any sew-along posts until the 22nd! Andi will be managing the knitting posts over on her blog starting on June 1. If you knit and sew along with us, you’ll get your projects done in plenty of time.

Help spread the word and grab one of the badges below or use the hashtag #OAL2015. If you want to hang out and chat about the OAL, come join the OAL2015 Discussion Thread in the Untangling Knots group on Ravelry. You do need a Ravelry account to view and post on the thread, but it’s totally free and totally worth it if you do any knitting at all 🙂

OALBadge3


OALtag_2015

Y’all, I am SO EXCITED. Who else is joining in the Outfit Along this year?

Completed: The Aiken Sweater

19 Sep

Yay for finished knitting projects!

Aiken Sweater

This is the Aiken pullover from Andi Satterlund (aka my faaaavorite knit designer, to whom I should probably just establish a direct deposit of a portion of my paychecks, because, YES). Aiken is everything I love in a knit project – seamless, top down construction, knit in the round on worsted weight yarn, with just a little bit of lace to keep things interesting.

Aiken Sweater

Aiken Sweater

I knit the XS (size range goes up to 3X, whoop whoop), using my normal size 6 needles and this delightfully soft and squishy Debbie Bliss Rialto yarn (oh shit, I just realized this is 100% Merino and here I’ve been telling everyone who will listen that it’s Cashmerino… I’m a lying piece of shit, you guys. But really, it is SOFT). By the way, I LOVE these Debbie Bliss yarns. This is the second sweater I’ve knit up with ’em (the first one being my Cashmerino cowl neck sweater, well, I reckon there’s where I was assuming this one also involved cashmere, ha), and they’re just so lovely and soft with the most beautiful saturated colors.

The Debbie Bliss yarns are kind of expensive, though – around $10+ for a 100 yd skein (compared to Cascade 220, which I think I pay around $11 for a 220 yd skein at my local yarn store) (yes, I know it’s a little cheaper online, but I want to keep my LYS in business, thanks, bye). With that being said – my favorite yarn shop – Haus of Yarn – has an awesome sale at the end of every year where they mark a big chunk of the yarns at half off – and there’s always some Debbie Bliss lurking in the piles. So these skeins were $5 a pop, which made this sweater cost me a very affordable $30. Can’t beat that with a stick!

Aiken Sweater

This pattern is relatively plain – the body and arms are plain stockinette, with 1×1 ribbing at the edges. The neckline is a very simple slash – it’s not finished with ribbing, so it has a soft roll, which I think is very pretty! And then there’s the lace inset, which is mirrored for both the front and back. As far as lace goes, this one is preeetty simple. It’s not super mindless lace like the Myrna – there’s a little more stitchcraft involved. I did have to unpick a couple of rows when I missed a yarn over and thus messed up my count, but it’s not so bad. The good news is that you start at the top, so you get the longest part done first and then progress to less lace knitting as you go down to the tip of the V. Then you combine the whole thing into a tube and knit in endless circles for the rest of the way.

THEN, because there’s no neckline finishing or button bands to contend with – you just block it and wear it! SO gratifying! OMG I love knitting pullovers!

Aiken Sweater

My sweater is worn with about 1″-2″ of negative ease, which is why it’s a little more fitted than the version in Andi’s shop. The lacework surprisingly doesn’t dip as far as I thought it would – I’m not wearing anything under the sweater (well, I mean other than a bra haha), and there’s absolutely no danger of cleavage flashing. That being said, I don’t have much cleavage to begin with sooo that might also have a lot to do with it 🙂 I really like to way it looks with my polka dot trousers, though! I imagine it’ll also look pretty ace with a collared shirt underneath it. And it’s the perfect length for wearing with high-waisted skirts.

Aiken Sweater

(not sure why I basically took the same picture twice. Deal with it?)

Aiken Sweater

Love the back! ♥

Aiken Sweater

Aiken Sweater

It took me a little over 2 months to knit this – which is slow for me, but has also become my new normal, if that makes sense (gone are the days of my luxurious one hour knitting break at the office – I still have an hour to knit, yes, but I’m usually home and DAMMIT I’d rather sew! :)). It was a relatively easy knit, and I think would make a great first sweater pattern if you’re somewhat comfortable with knitting lace.

Full Ravelry notes are here.

Aiken Sweater

That’s all, folks! Right now I’m working on my first pair of socks (I haven’t gotten to turning the heel yet, so I’m going to refrain from commenting on whether or not they’re easy until I get to that point! But so far, the cuff has been easy 🙂 HAHA) – but I’m still dreaming of sweaters! What should I knit next? Would love to do another pullover; I’m a little cardigan’d out at this point 🙂 Looking at Berwick, Ease, Cloudy Sunday (maybe lengthen those sleeves, tho), or Praline – what would you choose? Alternately – what’s on your needles right now?

(Psst! Not a knitter but want some handmade cardigans nonetheless? Don’t forget to enter the Jenna Cardi Giveaway for a chance to win an awesome cardigan sewing pattern PDF! Giveaway ends on Monday morning 😉 )