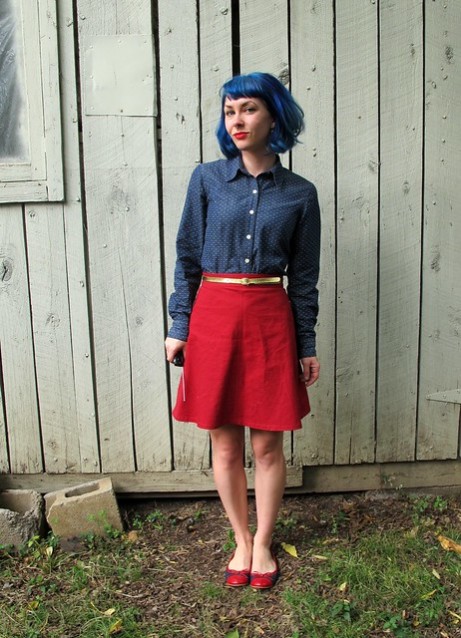
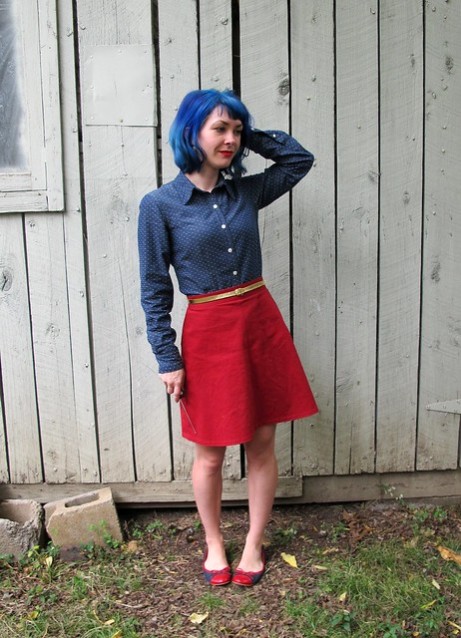
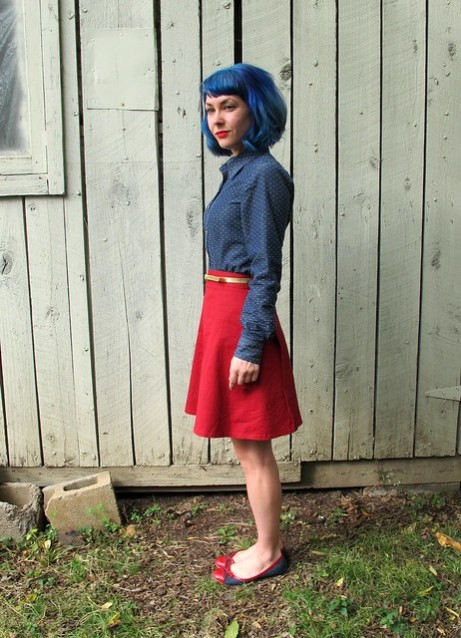
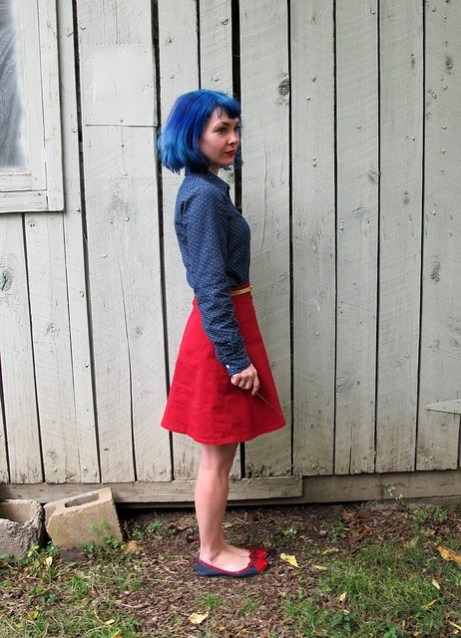
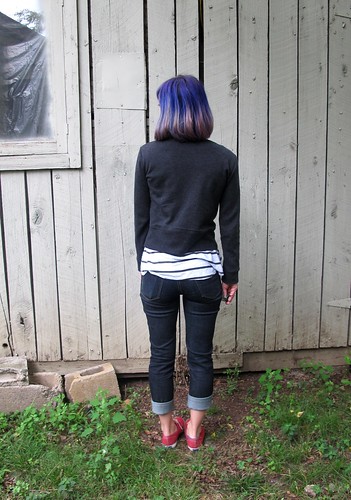
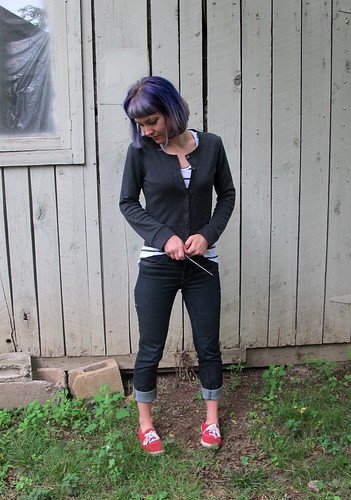
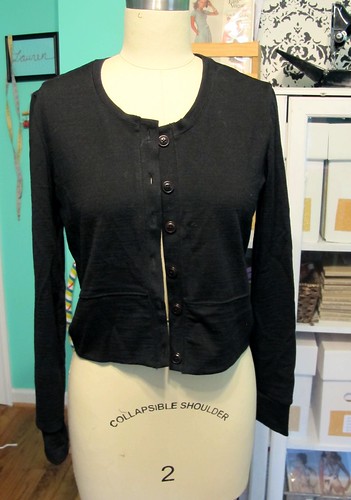
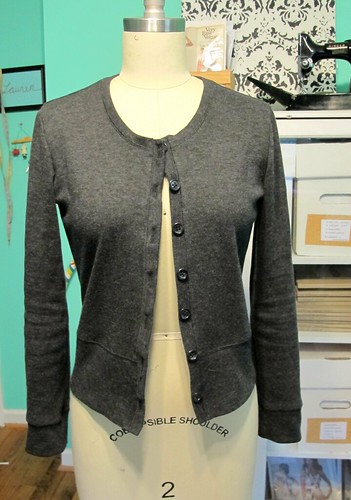
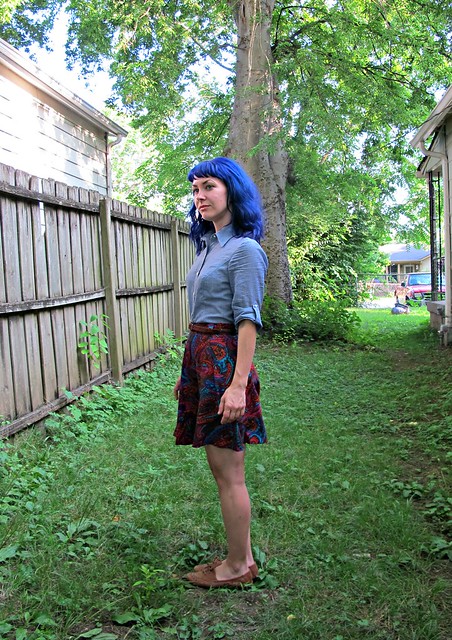
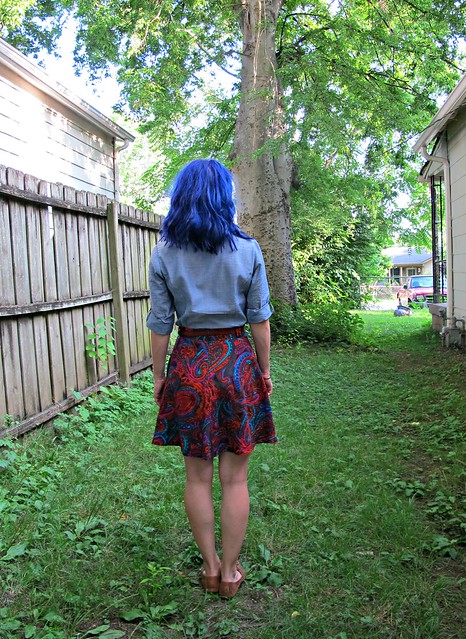
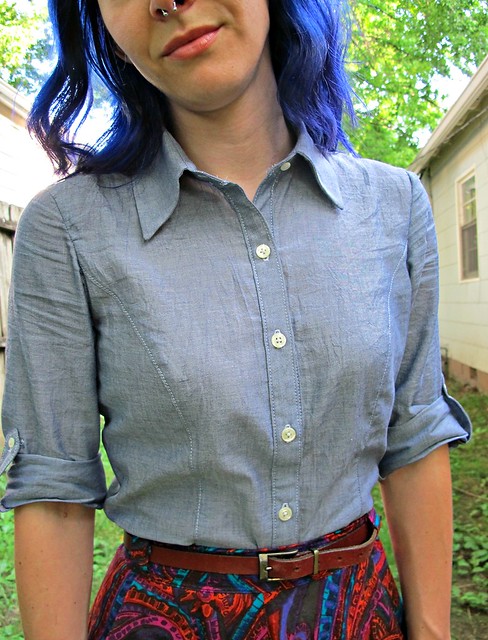
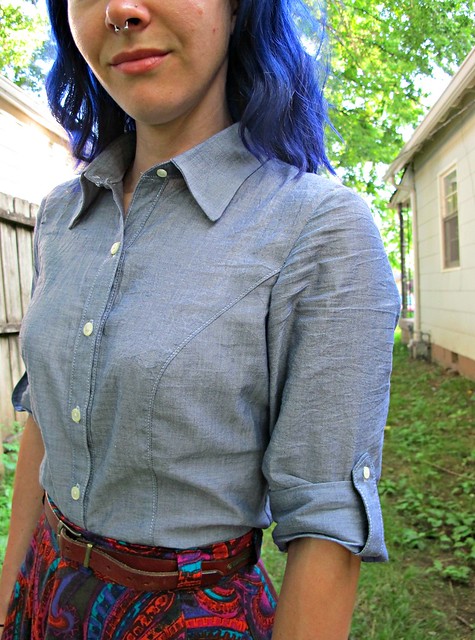
Tag Archives: buttons

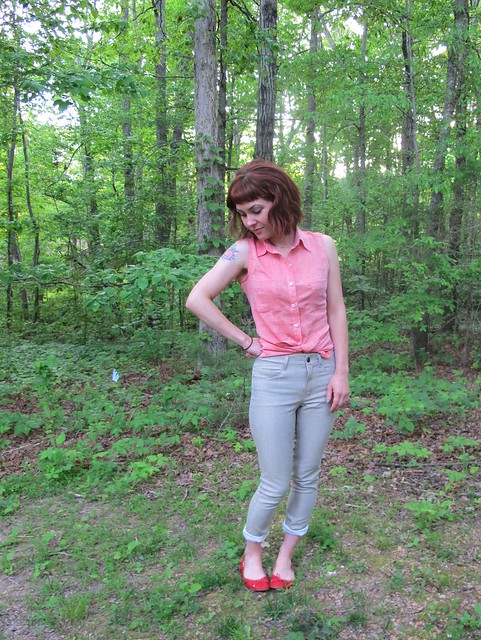
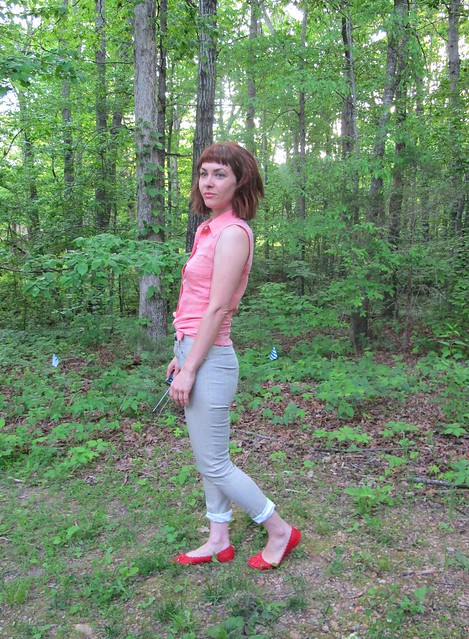
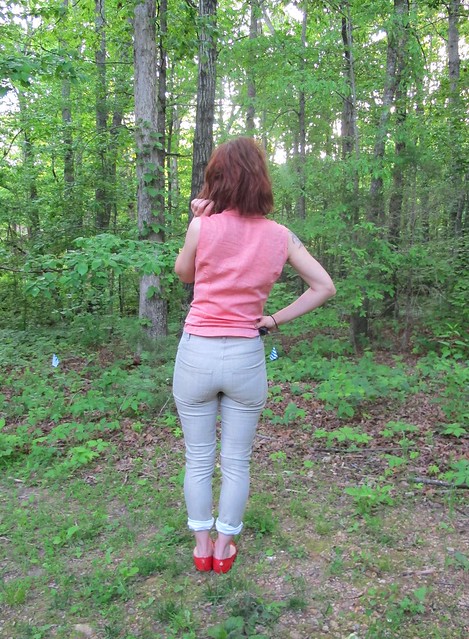
Completed: Another B5526 + Ginger Jeans Get-up

18 May

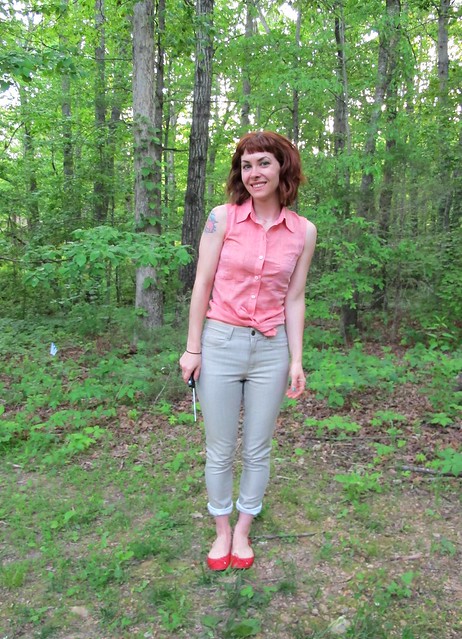
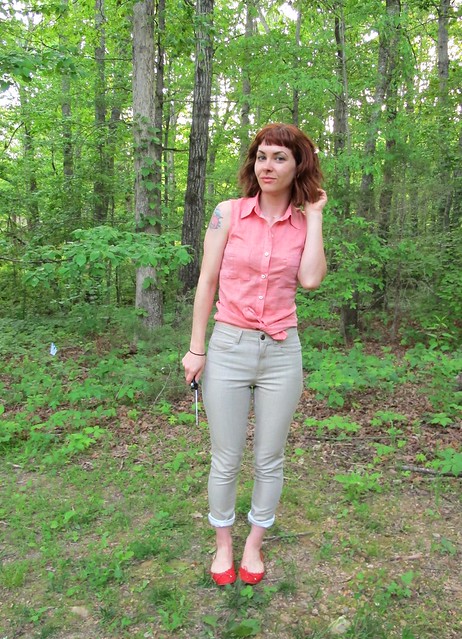
So sorry to dump this on y’all yet again – another collared shirt + jeans outfit combination. Yawn.

Gingers & B5526

Well, to backtrack – yawn for you, but 😀 😀 😀 😀 😀 for me hahahaha. I will never get tired of this outfit combination. Or, at least, not anytime soon. Maybe never is too strong of a word to use here.

Gingers & B5526

What’s mildly frustrating about writing a long-term blog (at the time of this posting, I’ve accumulated nearly 500 entries since I started waaaay back in 2009, WTF) is that you eventually reach a point when you’re just making the same thing over and over again (well… those of us who don’t make our blog our full-time income fall in this category. I’m sure if I was sponsored out the wazzoo and had all the time I spend at work to spend making content for my blog, it would be a different story, ha.). After re-assessing my wardrobe at the end of 2014 and realizing that I *still* had shitloads of clothing that I made simply for the new and shiny, I have made it a big point to really be honest with myself about whether or not I’ll actually wear something that I make. Like most people, I have a pretty predictable style. And like many sewers, I don’t want to spend a lot of time reinventing the wheel with new patterns if I can get the look I’m going for with an old TNT. So this translates to repeats upon repeats upon repeats.

So, while you might be yawning about the majority of the stuff that’s been posted in 2015… I gotta say, I am elated with the way my closet is looking these days!

Gingers & B5526

Gingers & B5526

With all that being said, there’s not much to report on either of these pieces since I’ve made them soooo many damn times. Jeans + collared shirt is totally my go-to when I want to feel comfortable but still look like I made an effort in the AM. I’ve found my TNT patterns and I feel good about the way they fit and the construction methods that I use.

Gingers & B5526

Gingers & B5526

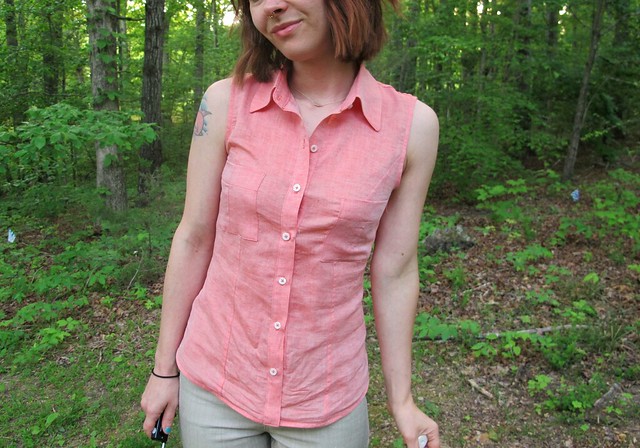
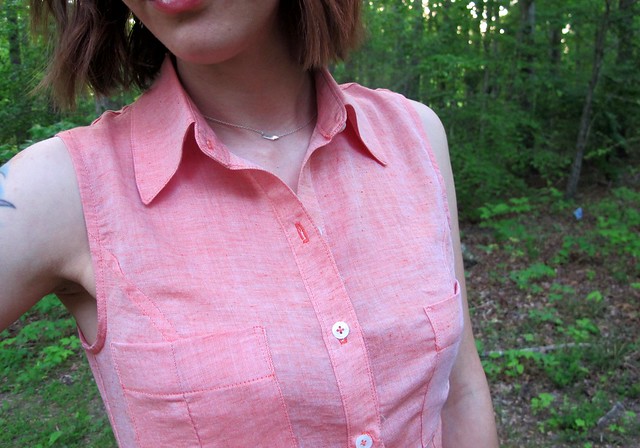
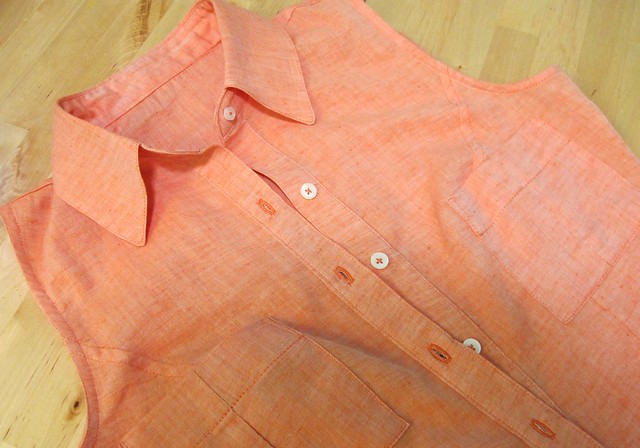
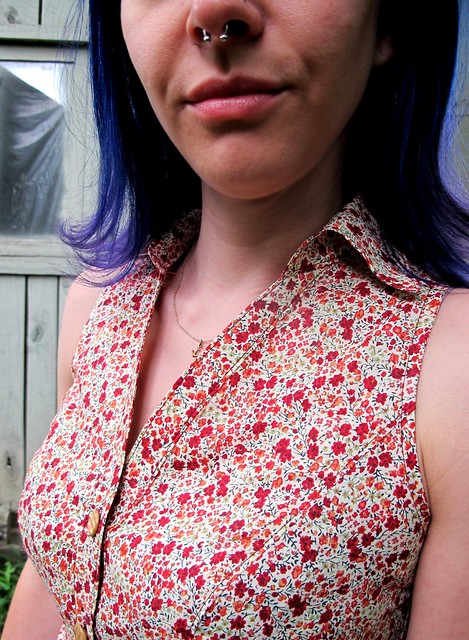
The top was made using my beloved Butterick 5526. Y’all, I don’t know if I’ll ever sew another button up pattern again! (we all know that’s a lie) I’ve gotten to the point with this one where I can bang one out in a couple of days, which is really nice when you’re coming up on a looming Mood Sewing Network deadline, ha. The fabric is this amazing tigerlily orange cotton voile from Theory, which is a bit more of a coral-y pink than it is orange in real life (I don’t know how the color translates on your screen, but on the Mood Fabrics website it’s definitely pretty muted. The real color is much closer to what you see in my photos. It’s BEAUTIFUL). It has a beautiful chambray weave, which gives the color lots of dimension. This fabric was so so nice to work with – ok, it was a shifty bitch to cut, but once I got past this point, it handled and pressed like a boss. It’s also super comfortable to wear on even the hottest day.

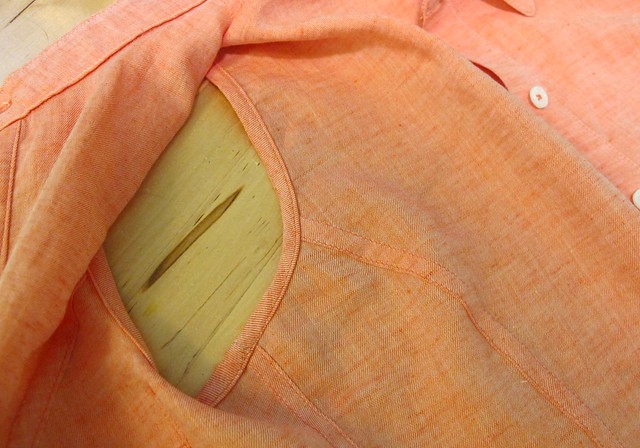
Since the fabric does have a tendency to fray, I used flat-felled seams every where in my shirt. I also left off the sleeves and finished the armhole with self bias binding – it makes the shirt really casual and, again, awesome for hot weather. The pockets are the same pockets that come with the pattern, but I made them slightly smaller because the original size was a little overwhelming on me. Buttons are from my stash; they’re just your standard white shirt buttons. Oh! And the matching thread also came from Mood Fabrics – I noticed that when I was ordering my fabric, there were thread suggestions at the bottom of the page. I figured I’d try out the service – you know, for science – and I’m super pleased with the color match. Even more pleased that I was saved a trip to the fabric store. Mostly because those tend to be very dangerous places for my wallet, ha.

Gingers & B5526

Gingers & B5526

The good thing about running a long-term blog and making a bunch of pattern repeats is that you will eventually bore of just making things that are passable to wear in public, and start focusing on really honing your skills to the next level. Or, at least, that’s how it worked out for me. Look at those clean finished insides! I should wear this shit wrong-side out.

Gingers & B5526

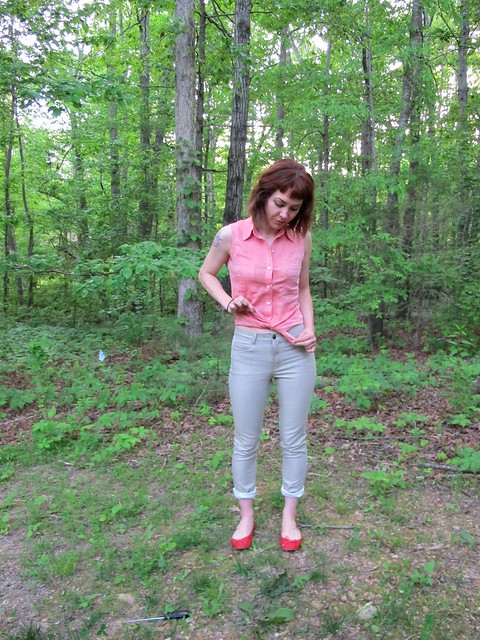
I did shorten the length of the shirt by about 2″ – I think the original length was just sliiiightly too long for my height. This way I can wear it untucked or tied at the waist. If I do a half tuck, it doesn’t pooch out all weird like some of my longer shirts tend to do. As always, I finish my shirt hems with self bias facing. I think it makes for a much cleaner finish, and it’s must easier to press and sew those curves with the bias tape instead of trying to wrangle the hem itself.

Gingers & B5526

Gingers & B5526

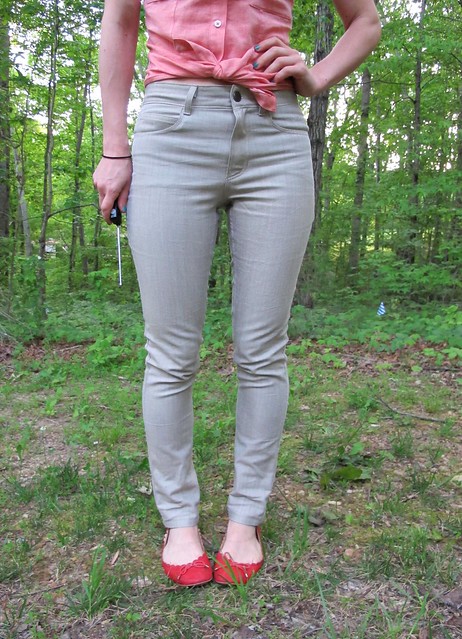
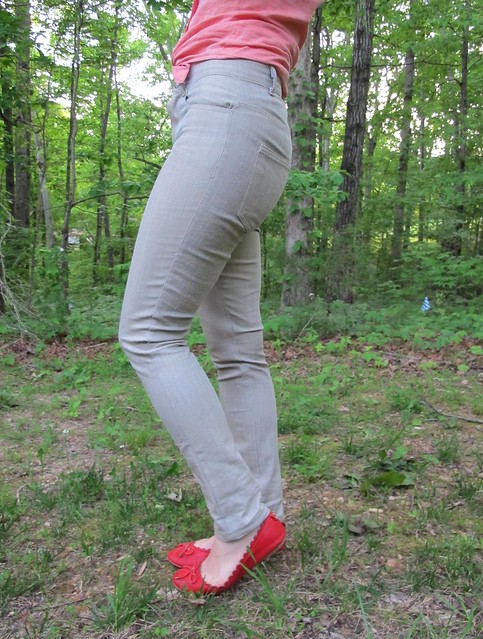
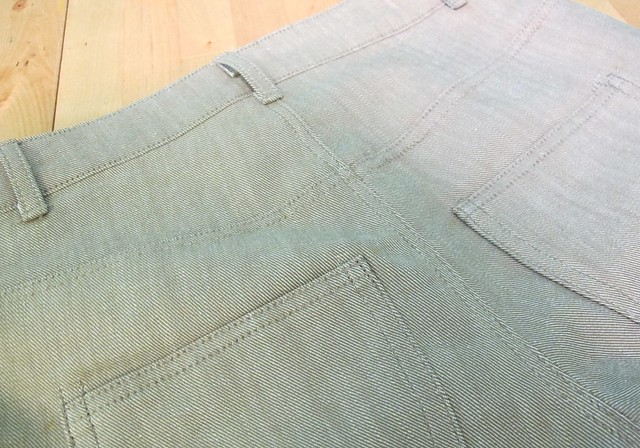
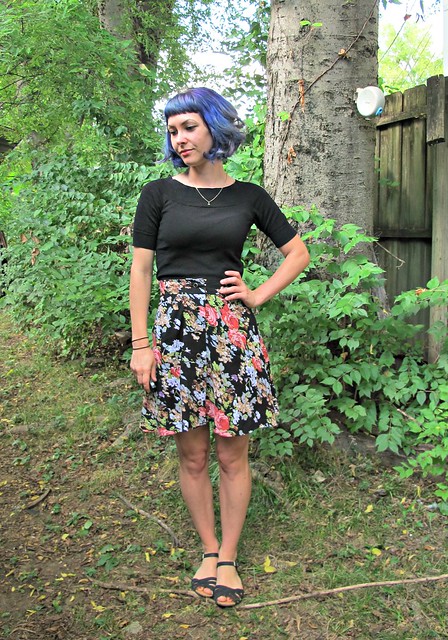
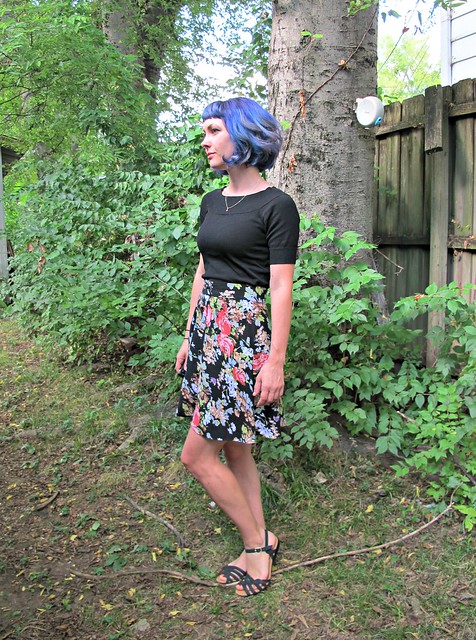
For my jeans, I used my now-favorite-ever-pants-pattern, the Ginger Jeans. I’ve made this a few times before (and I definitely don’t plan on stopping – I finally was able to invest in one of the denim kits because YAY) and I’m just really happy with the way this pattern fits my body. The fabric is a cool metallic gold stretch denim. I was actually looking for white denim to make this up, despite me being a stain magnet when it comes to white. At any rate, this denim’s wrong side actually is white flecked with very subtle bits of gold, and these very well almost became white jeans. I talked myself out of it because I was afraid the not-quite-pure-white would make the jeans look like they were dirty, plus again, stain magnet. So I stuck with the gold side. Also, this denim doesn’t have as much stretch as my other denims, so the jeans are a bit tight. I had to let the side seams out to 3/8″ or else I would have never gotten these things over my ass. They’re still a bit tight – mostly around the calves – but I’m hoping that they will loosen up a little with wear.

Gingers & B5526

Gingers & B5526

Gingers & B5526

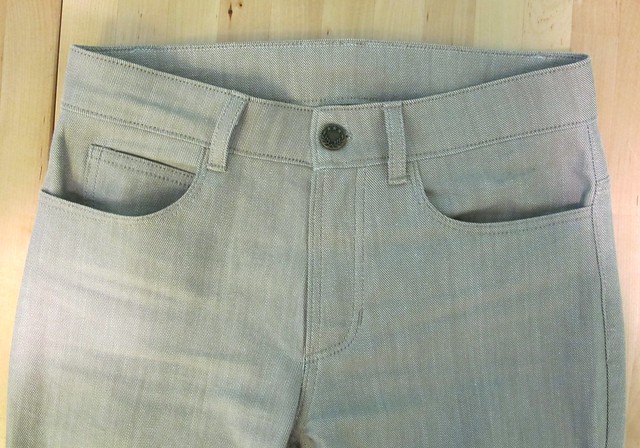
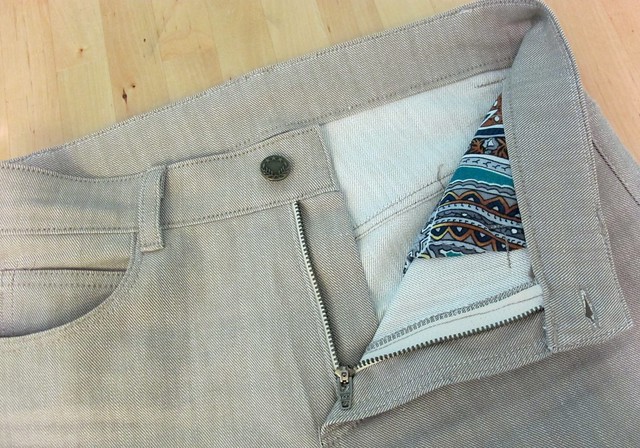
Not much to report on construction. I used a combination of flat-felled and serged seams (as how most RTW jeans are made) and a triple stitch to really make the topstitching stand out. I would have loved to use topstitching thread, but I couldn’t find a good match with what is admittedly kind of a weird denim color. It’s gold, but it’s also kind of beige. Fortunately, Mood Fabrics REALLY came through with that thread match, as you can see in these close-ups.

What else? I did not interface the waistband (I like my jeans with an uninterfaced waistband; it’s much more comfortable. Not sure how that would work with a lower rise, but for the high rise version, it’s perfect). The jeans button is from Pacific Trimming, and the cotton pocket lining is left over from this crazy blue dress.

I will admit right now that this outfit inspiration came way of my boss’ closet. Since I do all her laundry for her (if you are new to this blog and that sounds REALLY WEIRD, I should probably point out that I’m a personal assistant 🙂 ha!), I’m always lurking on her clothes and I’m always finding inspiration in some of the strangest ways. She has a similar coral chambray shirt – hers has sleeves and a lace inset at the yoke, though – and white jeans. And I wanted that outfit for me. So I made it 😛

Gingers & B5526

So, hey, in other news that doesn’t involve me making my fifty billionth b5526 – I’ve got an article out in the current issue of Seamwork Magazine! If you haven’t heard of Seamwork, it’s a sewing magazine that is published online by the masterminds behind Colette Patterns. The magazine is free to read and there are optional pattern downloads with each issue (the patterns you pay for, however). ANYWAY, my article is all about visiting Nashville! I had so much fun writing a city guide about my favorite city in the entire world, and I hope you have fun reading it (and are inspired to come visit because, hey, Nashville is awesome! Really really awesome!). You can read The Seamworker’s Guide to Visiting Nashville at Seamwork. My first published article! Yay!

V1419 Sewalong: Steps 64-86

10 Nov

Good morning, sewalongers! This is the week we finish up our coats – woohoo!! (and those of y’all who are not following the sewalong – this is the last week you have to skip a boring sewalong post! Woohoo!). Can you just feel the excitement radiating in the air? 😉

So, the good news is – this is the final construction post before we have our sharextravaganza next week. The bad news – it’s a HELLUVA post. Lots and lots of pictures (in advance: I’m soooo sorry! Tried to cull them down as much as possible. On the flip side, none of them are of me 😉 lolololol), lots of little fiddly steps here. On the flip side, this is all finishing – which means when it’s done, the coat is done – but expect this to take some time, especially since there is lots of hand sewing in this section.

Anyway, onto finishing!

The first thing you will want to do is sew the bias facing to both of the opening edges of the coat front, as well as along the neckline and across the hem. I’m not going to go into detail of how to do the facing – we’ve all done enough bias facing on this coat, I think most of us can do it in our sleep at this point 😉 – but I did want to mention a couple little tips that helped me.

V1419 Ralph Rucci Sewalong
Once I sewed the facing on and trimmed down the seam allowances, I pressed all the raw edges toward the facing, using lots of steam.

V1419 Ralph Rucci Sewalong
Then simply press the facing to the inside of the coat. You will want to hand baste this in place, which will give you greater control when top stitching (especially important at those coat front edges).

V1419 Ralph Rucci Sewalong
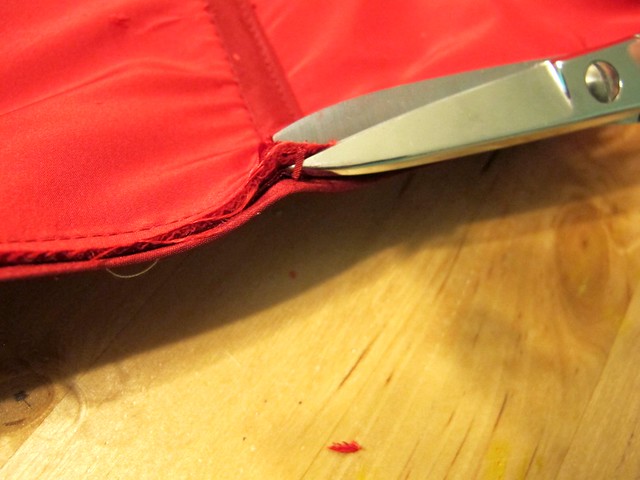
At the hem and neckline, you may find that where you are intersecting seams tends to be *very* bulky – like, so bulky that you can barely turn the facing to the inside. I used my scissors to chop out as much of the bulk as possible (being careful not to cut into the stitching line or outside of the seam allowances), and them hammered them down like crazy with my clapper, to make things very flat.

Actually, if you have a clapper – it’s a good idea to smack down those edges after you’ve top stitched them, to flatten them as much as possible and give them a nice sharp crease. This will make your coat look much more professional 🙂

Now, for the button holes! Fair warning – these took foreveeeeer to finish! Lots of fiddly pieces, lots of fiddly hand stitching. I know at this point, most of y’all are probably over this coat and just want to finish so it can be worn, but please take your time with these steps. The button holes are one of the most visible parts of the coat, and you don’t want them to look sloppy!

V1419 Ralph Rucci Sewalong
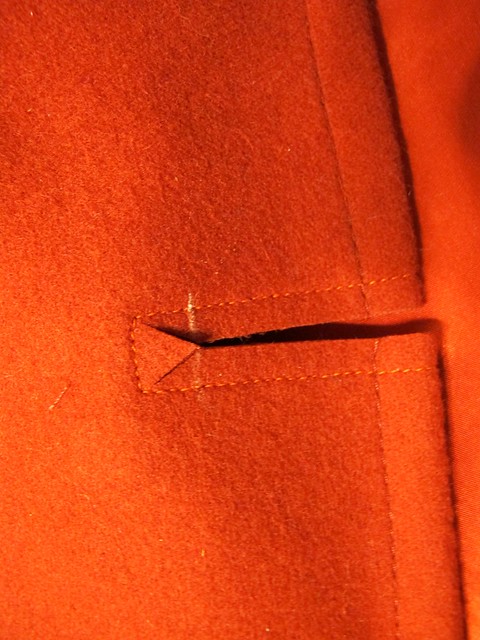
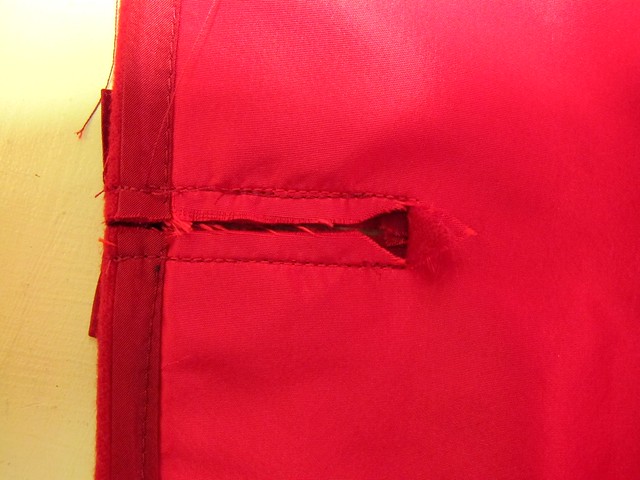
Remember when we sewed around the edges of where the button holes would go? Now you need to cut right in the middle of those stitches. I first used chalk to mark where the V would start, and then cut along the lines indicated. Cut right up to the stitching, but not through it.

V1419 Ralph Rucci Sewalong
You will have a little V flap at the inside end. Fold this to the inside and press.

V1419 Ralph Rucci Sewalong
To make the button hole binding, find those 4 bias pieces you cut, and press down one long edge about 1/4″. You will want to cut the binding into 20 pieces – 4 pieces will be 2.5″ long, and 16 pieces will be 2.75″ long. You should have enough binding to cut exactly the number of pieces needed (if for some reason you screw up and need more binding – just salvage a piece of leftover facing, and cut it in half at the fold. Y’all have lots of bias facing left over, right? I do hahaha). Fold in 1/4″ at short edges of each little piece and press. Yes, this part takes forever. Sorry.

V1419 Ralph Rucci Sewalong
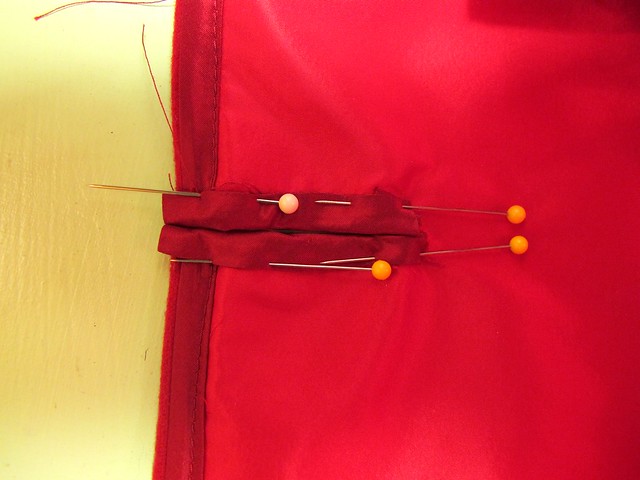
On the bottom of your button hole, pin a piece of binding with the right sides facing and the raw edges matching. The edge that meets the front edge of the coat should be flush, the edge against the end of the button hole should extend a bit farther. Be aware of what binding goes on what button hole – the 2.5″ binding is for the top 2 button holes (on the left and right side of the coat front); the remaining binding is for the remaining button holes.

V1419 Ralph Rucci Sewalong
I went ahead and pinned the top binding as well, because I am impatient.

V1419 Ralph Rucci Sewalong
Sew the binding to the coat, stitching along your original stitching lines. I found it easier to do this from the inside, so I could make sure I was sewing in the correct place. When you get to the end of your stitching line – where the stitching pivots to the end of the button hole – stop and back stitch. Do not go any farther than the existing stitching line.

V1419 Ralph Rucci Sewalong
Your binding should look like this on the outside of your coat. Notice that the stitching does not go all the way across to the tip of the binding. This is good; it means we can pull the end of the binding to the inside.

V1419 Ralph Rucci Sewalong
Here it is from the inside.

V1419 Ralph Rucci Sewalong
Starting at the open end, fold the binding to the inside and pin into place. I pinned both top and bottom because – again, impatient. You could also work with one side at a time. Whatever is easier!

V1419 Ralph Rucci Sewalong
For the end of the binding that is by the V you clipped, pull all the binding to the inside of the coat and pin down. This should cover the V completely, but if not, you can always clip whatever is sticking out 🙂

V1419 Ralph Rucci Sewalong
Repeat for the bottom (or top). Your finished pinned button hole should look like this.

V1419 Ralph Rucci Sewalong
Here it is from the outside.

The next thing you nee to do is slipstitch alllllll those bindings invisibly to the inside of the coat. Yep! This part takes forever! I also stitched my bindings so the edges encased the edge of the coat front, as well as slip stitched the open ends together with a few stitches. When you get to where the binding covers the triangle, be sure to catch that in your stitches so the button hole is secure. Check from the front occasionally to make sure everything looks good, especially making sure that triangle is pushed all the way to the inside of the coat and not sticking out.

V1419 Ralph Rucci Sewalong
Once you’ve finished the torture that is slipstitching ALL THAT BINDING, give everything a good press (and maybe a smack with the clapper, too, if it needs it. Mine did!). We’re not done yet!

V1419 Ralph Rucci Sewalong
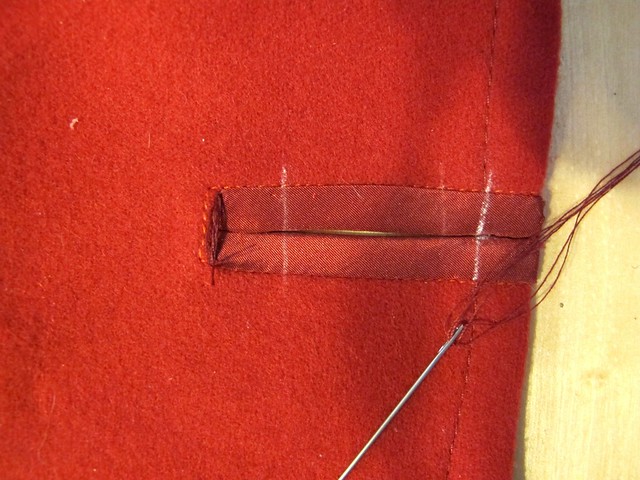
Next up is thread bartacks! Start by marking where the bartacks will go – you will have 4 total for each button hole – left and right (so a total of… 40. Woof.). There will be a bartack at each end of the button hole, plus another bartack 1/2″ from each end. I marked mind with chalk.

V1419 Ralph Rucci Sewalong
The bartacks will go faster/look better if you thread up with multiple strands. I used 3 strands of thread, and then doubled my needle, for a total of 6. You can also use embroidery floss – I just didn’t have any of the right color on hand.

V1419 Ralph Rucci Sewalong
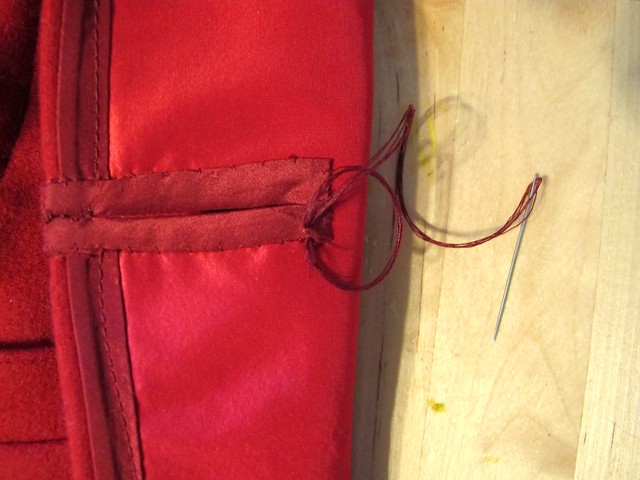
Starting on the inside, make a small knot with your thread, or tack it in a couple spots to secure it. I made a small loop and then pulled the needle through it.

V1419 Ralph Rucci Sewalong
Pull the needle to the outside and stitch across the button hole to the other side, letting the thread connect the two sides. Make another knot on the inside (or, again, secure with a few stitches), and then pull the needle back to the outside.

V1419 Ralph Rucci Sewalong
To make the bartacks, loop your thread like so.

V1419 Ralph Rucci Sewalong
Then pull the needle through the loop to create a knot (same concept as a button hole stitch, or a blanket stitch).

V1419 Ralph Rucci Sewalong
Pull the loop until it knots at the end. Repeat this over and over until you have a chain of knots that completely covers the thread. This is your bartack. Do this 4 times for every button hole. Also, have a glass of wine while you’re doing this – you’ll be sitting for a hot minute 😉

V1419 Ralph Rucci Sewalong
Some bartack tips:
– You will get better as you do these! I recommend starting with the button side first, at the bottom button hole, so your practice attempts won’t be as easily seen 🙂 Of course, you could practice on scraps first – but, naw, not me!
– Don’t pull the knots too tight, or you will distort them and they won’t be as pretty 😦
– Try to make your knots in the same direction as you go – this will keep them uniform and hopefully prevent twisting!
– If at all possible, try to do these in one sitting. The repetition means you will get better as you do it, so if you complete them all in one sitting, you won’t need to go through multiple learning curves (than if you picked it up several times during the week).
– The original Rucci coat has the bartacks continue on the back side of the bound button holes as well. The instructions for this pattern only call for the bartacking in the front (which is what I did). If you want to mimic the original and bartack the back of the button holes – well, don’t let me stop you 🙂
– Don’t get too hung up on perfection – yes, you want these to look nice, but at the same time, most of them will be covered by the buttons. Not worth killing yourself over!

V1419 Ralph Rucci Sewalong
Once you’ve finished your loops, time to sew on those buttons! Sew the buttons in the middle of the binding on the left front, catching both bindings in the stitches. For the top button, sew it 1/2″ away from the edge (it won’t be quite in the middle).

V1419 Ralph Rucci Sewalong
You can also go ahead and sew those back buttons on the belt. The pattern actually has you make button holes first – which of course you can do, but I omitted mine.
One word of note about the belt – don’t try to cinch it in too tight, or you’ll create gathers on the coat sides. Pin the belt closed first, and try it on to make sure everything is smooth and flat.

Finally, all that’s left is the sleeves. Go ahead and hem them with the bias facing – same concept as the other hemming and facing we did in these steps.

V1419 Ralph Rucci Sewalong
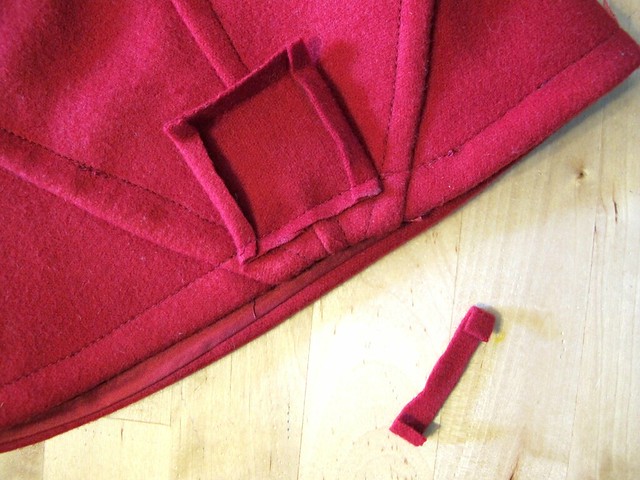
The last thing we will do is make these little sleeve binding pieces, to cover the edge where all the crazy sleeve seams intersect. Cut 2 pieces that are approximately 1.5″ long by 1″ tall (or possibly taller, if your fabric is very thick and bulky – I cut mine 2″x2″, because my fabric required the extra room!). Fold one long edge under 1/4″ and press, and both short edges as well.

V1419 Ralph Rucci Sewalong
Sew the binding to the outside of the sleeve, with the right sides facing, at the point where all the seams intersect. Sew right along your topstitching line. If your fabric is bulky, you may want to trim down the seam allowance of this binding piece.

V1419 Ralph Rucci Sewalong
Turn the binding to the inside, wrapping around the sleeve hem and being sure that all folded edges are tucked under. Slipstitch around the 3 edges and press. Again, this is a good time to use your clapper to really flatten those seams. Gah, you guys must think I have stock in clappers at this point hahaha.

V1419 Ralph Rucci Sewalong
Your finished sleeve will look like this. Yes, some of my top stitching is wonky. Oh well!

Whew! That’s all for this post – AND THIS COAT! How’s everyone coming along with their coats? I’ve been loving all the progressing (and some completed!) coats that are popping up in the Flickr Group. You’re SO almost done!! If you want to show off your coat in our Parade of Coats next week (which, obvs, you should!), you have a few options – you can upload to the the Flickr Group, and you can also upload to the Pinterest Fan Gallery. Be sure to use the hashtag #v1419Sewalong so you’ll appear in our Tagboard, where we will also be pulling finished coat photos. Can’t wait to see everyone’s coats!! 😀

Completed: Polka Dot Chambray Butterick 5526

21 Oct

HAHAHAHAHA I bet you guys are sooo sick of seeing me in renditions of this pattern, huh? 🙂

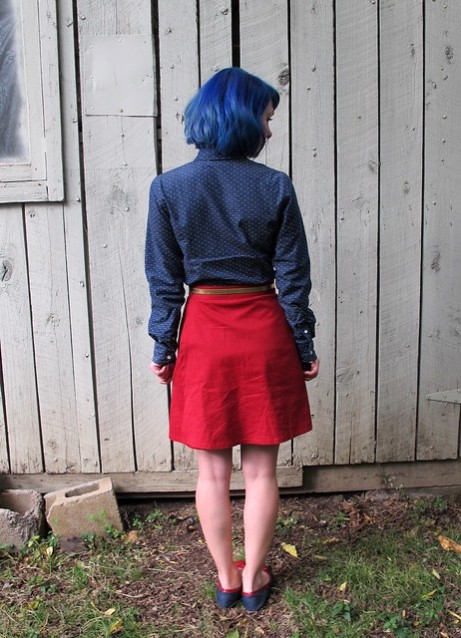
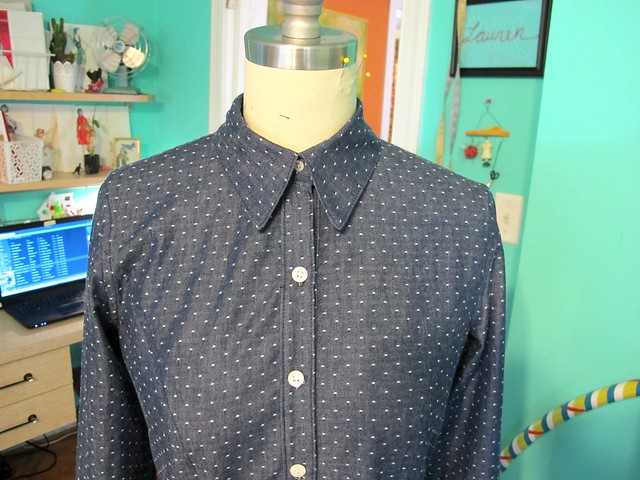
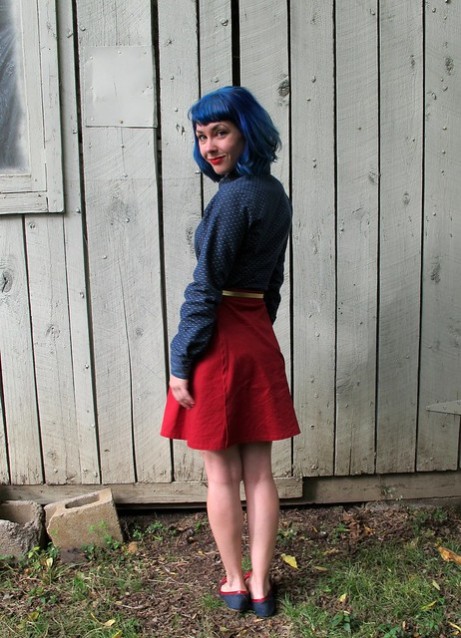
Polka Dot Chambray Button down

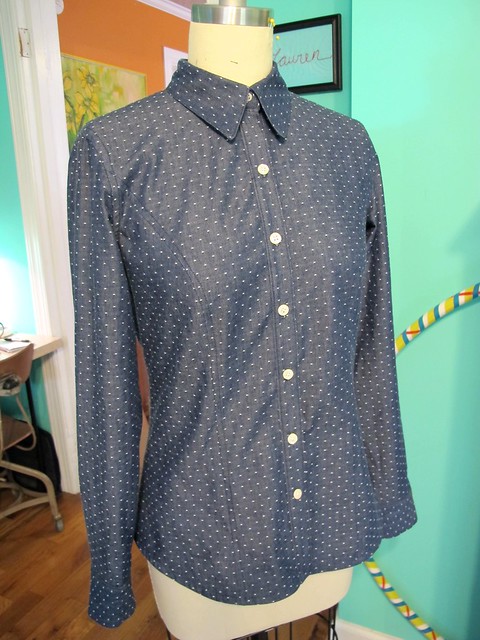
SUP Butterick 5526. My heart, my soul, my official tried’n’true button down pattern. I don’t know how many times it has to be before it’s considered “the charm,” but I’m pretty sure this is legit the nicest button down I have ever made. I am so pleased with myself right now!

Polka Dot Chambray Button down

Since I’ve made this pattern, um, a lot (see: 1 2 3)(ok that’s not a lot, but it sure feels like a lot!), I’m pretty well-versed in the fitting and construction of this dude. It’s practically an autopilot pattern for me – apart from selecting the fabric & buttons, I don’t really have to think much while I’m putting this together. It’s like my hands have repeated the process so much, they don’t need any instruction from my brain at this point.

Polka Dot Chambray Button down

So, I’m sorry if you’re bored with looking at this pattern. Deal with it.

Polka Dot Chambray Button down

Seriously, though, I did have to figure out those damn sleeves, because all my previous versions have some awkward lengthage going on. My last attempt at making them full-length ended up with them being some weird purgatory of not-quite-long-but-not-quite-short – like the highwaters of shirt sleeves (do we still make fun of highwaters, or is that the cool thing to wear now? I just looked down and realized the jeans I am wearing are cuffed to the length of highwaters, SHIT!!). Since I actually want to wear this top underneath sweaters – and hence why I made a second chambray button down when the first one is actually quite wonderful (spoiler: dem sleeves, tho) – I needed to figure that shit out once and for all. And, look ma! They’re the right length! Finally!

Polka Dot Chambray Button down

Although, now I can’t decide if they are… too long? They look bunched up when my arms are hanging. However, when I reach my arms out – they are exactly the right length (as in, any shorter, and they would ride up to be too short and expose too much wrist). Thoughts? This is why I always roll up my sleeves (and jeans, for that matter) – I can’t find a happy hem length! Anyway, what is the point of making all your clothes if you can’t even hem them correctly?

Also, I think the sleeves might be a bit loose? Or do they look ok? Thoughts on that?

Dammit, this totally isn’t a TNT pattern, is it? 😛

Polka Dot Chambray Button down

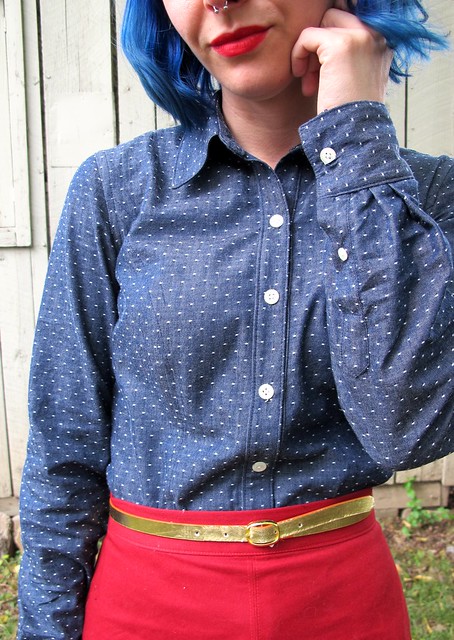
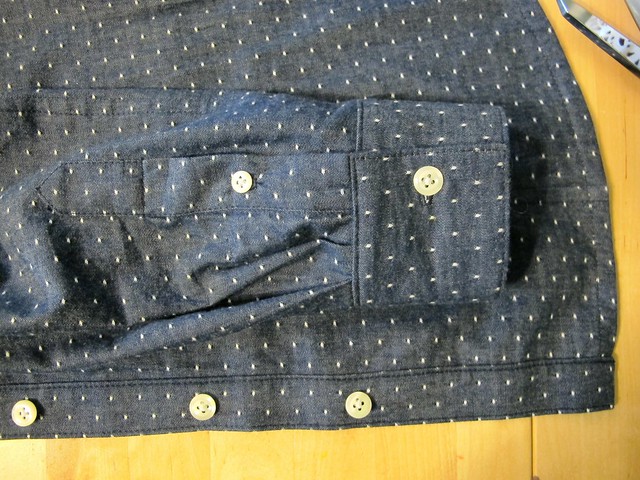
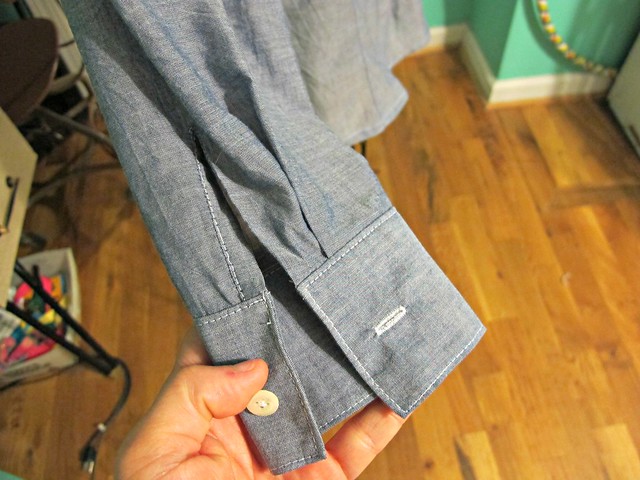
Anyway, whatever, let’s talk about the victories! Check out that sexy sexy sleeve placket. I used the placket for the Negroni (which, honestly, that pattern piece + instructions are alone worth the price of the pattern) instead of what was included with 5526. Lurrrrve it.

Polka Dot Chambray Button down

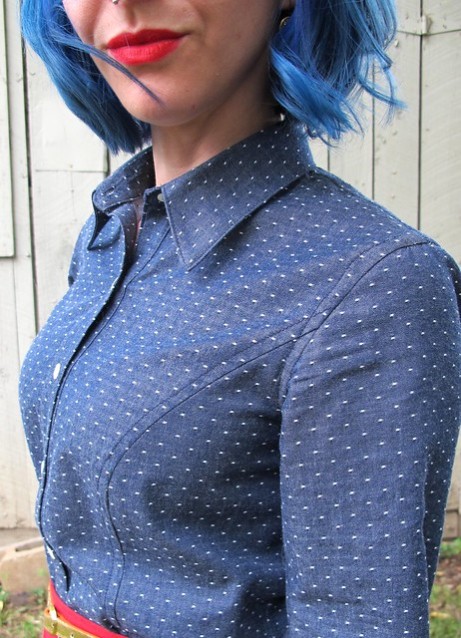
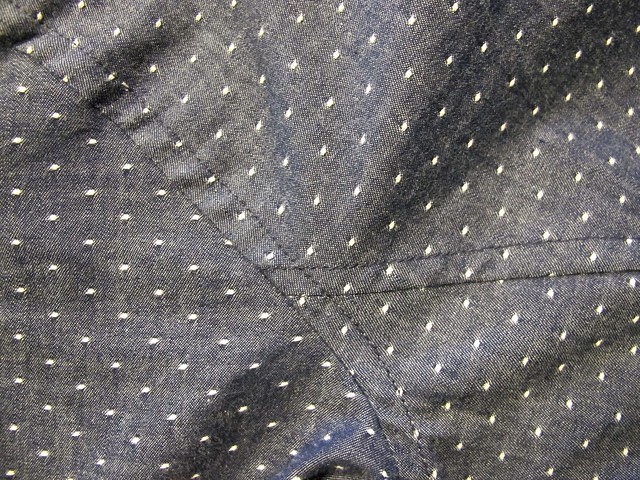
I also sucked it up big time and flat-felled every single seam on this shirt – the princess seams, the side seams, the arm holes (thanks to Negroni for those sweet instructions – see? Negroni, you rule!) – everything! What you see here is a beautiful and clean-finished top that doesn’t have ANY serging on the inside. Just miles and miles of flat-felled seams and gorgeous topstitching. Ugh, so good.

Polka Dot Chambray Button down

Don’t you love the fabric? I picked this up at one of our local fabric stores, Textile Fabrics. They were having a 40% off sale, so I treated myself to this and some soft fleecy knit. I was originally going to use this to make the Bruyere, until I realized I didn’t want to look exactly like the pattern cover (which is beautiful, don’t get me wrong!). I’m more of a plaid flannel kinda gal, for which I’m still stubbornly holding out for the perfect one to reveal itself to me. Textile Fabrics, unfortunately, couldn’t deliver on that front – but they did have polka dot chambray, so that’s ok enough in my book. Speaking of which, I think this is Robert Kaufman fabric. Don’t quote me on that, though!

Polka Dot Chambray Button down

Anyway, it’s a very lovely fabric – and it was soo nice to work with! Very soft and smooth, easy to cut and sew, SUPER easy to press (which is important with this style of shirt). The topstitching just sinks right in.

Polka Dot Chambray Button down

Again – placket! Sorry the cuff looks uneven. I promise it’s not. Buttons are these dress shirt buttons from Fashion Sewing Supply – part of my neverending stash.

Polka Dot Chambray Button down

I’m just including this because it looks so damn good – topstitched intersecting flat-felled seams (arm hole & princess seam). Also, if you were wondering – flat-felling princess seams really is not any more difficult than flat-felling straight seams. I don’t know why I put it off like it’s impossible to do. It’s not. It’s definitely more time consuming than just serging your raw edges, but the end result looks SO nice.

Polka Dot Chambray Button down

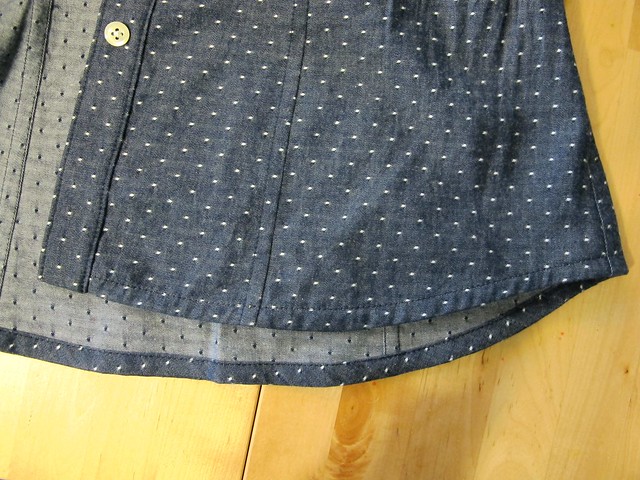
Finally – can we talk about how good this hem looks? Y’all, shirt hems have always been the bane of my sewing existence. I could never figure out how to get them to be straight and even with that giant curve. They ALWAYS look like shit. Not anymore, though! This time, I was inspired by Rochelle and tried using bias facing at the hem. I made self-bias strips with my fabric, and then applied it the same way I bias face sleeves & necklines (I did this before attaching the placket, as per the instructions). Since I used self-fabric for the bias, the end result looks like a simply turned up and stitched – except I didn’t, and this was SO MUCH EASIER. Plus, it give a nice bit of weight to the hem, which I like. Consider me a convert! Bias facing FTW!

Polka Dot Chambray Button down

So yay! I’ll consider this shirt a success – even if the sleeves are a little iffy. At any rate, I’m serious when I say it’s the best-made shirt I’ve ever constructed (if you see me in the wild and compliment it, there’s a good chance I’ll rip it off my body so I can show off the insides. TRUTH.). Little things like this make me happy! I think that’s the best part about sewing with a pattern you know and love – instead of focusing on new instructions and fit, you can zero all your attention on improving your technique.

Oh, and if you were wondering – that’s my Tie-less Miette I’m wearing in the photos. The shoes (because everyone always asks) are from the clearance rack at Nine West and no, I did not buy them to match this outfit. Ha! 😛
Two more things!

1. My lovely sponsor (and OG to the LLADYBIRD Sponsor Game), Sweet Little Chickadee, is closing up shop for the time being 😦 We will miss her (I will miss her! Where do I buy my patterns from now?! I got candy with those orders hahaha), but on the flip side – this means closeout saaaaale! 😀 From now till whenever the shop runs out, use the code SHOPCLOSING to get 25% off your entire purchase. Apparently there are also some sweet flat-rate shipping options at checkout, so you may save there, too! Please keep in mind that you are buying from a one-woman shop who is running a sweet freaking sale, so please be patient if your order takes a couple days to ship out. Not a bad payoff for 25% off, though, yeah? Now go forth and help Juli clear out that inventory!

2. Affiliate links. I wrote this blurb out in my last post, but realized after the fact that not everyone reads sewalong posts (I’m guilty of this too – those posts can be boring if you’re not following along). I definitely want y’all to be aware of my use of affiliate links, because I think it’s important, so I’m copying this verbatim into this post. Sorry if you’re reading this twice  🙂
Side note/disclaimer: Ok, so I decided to start occasionally using affiliate links on this blog. Sorry if you hate me! 🙂 I am currently only affiliated with Amazon, and I promise I will only be linking things that I personally use and recommend – such as those scissors & that clapper. Y’all will never ever ever see me link something just for the sake of linking it – that’s just crappy. However, please keep in mind that any purchases you make through these links will net a small kickback to me, which I will likely spend immediately on yarn & fabric (and thus pour back into this blog, in the form of content for y’all to read!). Also, no sneaky linkies – I will always describe the item I’m linking so you don’t have to click to see them, if affiliate links squick you out 🙂 I won’t be posting this disclaimer at the end of all my posts, as it seems a little redundant, but you can always view it in my About Me page. That’s all! Thanks for supporting my blog, dudes! ♥

Ok, that’s it! Have a lovely Tuesday, guys!

Completed: The Jenna Cardi (+GIVEAWAY)

15 Sep

In my wardrobe, I have a very small selection of RTW clothing that is quickly dwindling to nothing. Out of those pieces, the majority of them are lightweight knit cardigans. You know the kind I’m talking about – sewn, rather than knitted, lightweight enough to throw in a purse, wearable for all seasons (I dunno about y’all, but I wear my cardigans throughout the summer – air conditioning is tooooo cold for me!). As I’m quickly replacing all my clothes with handmades, the one major hole – other than undergarments (which I’m working on!) – has been those damn cardigans. I love knitting cardigans, don’t get me wrong – but those take loads of time, not to mention even the lightest fingering weight yarn can’t compete with how lightweight a knit fabric is, you know?

I’ve been on the lookout for a good cardigan pattern – not even really for the pattern itself, but rather, the instructions. Y’all, the one time I tried to sew button holes on a knit, it ended up being slightly traumatizing. Then there was that time recently that I tried to use an old RTW cardigan to copy into a handmade one (cutting it apart to use as a pattern – same concept as how I made my striped hoodie). Spoiler alert: it didn’t work out at all. Clearly I can’t hack this on my own. I need someone else to do it for me.

20121202-210149

Also, that cardigan I chopped up? As much as it wasn’t really my favorite – it was the one grey cardigan that went with basically everything. And here it was, chopped up into little bits and, uh, I kinda needed it back.

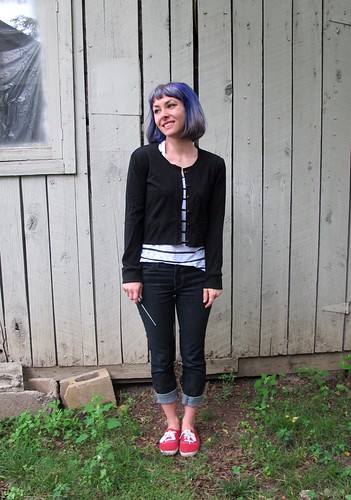
Jenna Cardi

Anyway, all that being said – right about the time I realized I was making a huge mistake (chopped up cardigan and all), Kat emailed me, saying she’d just launched her new pattern company, Muse Patterns, and would I like to try and review the Jenna Cardi?

UM. YES.

Jenna Cardi

HI GUYS, LOOK, DREAM CARDI PATTERN RIGHT OVER HERE.

Jenna Cardi

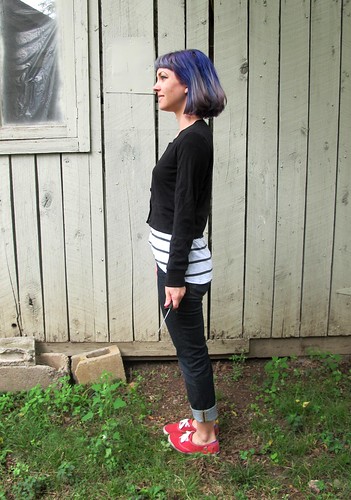
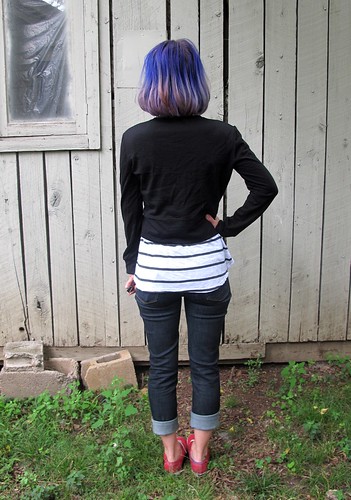
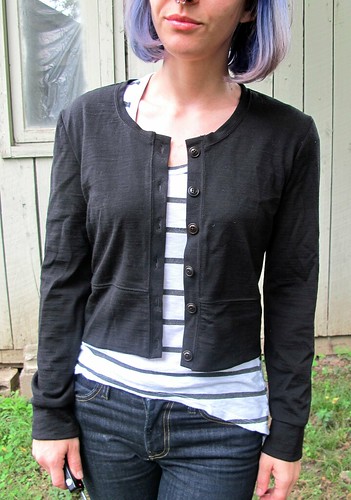
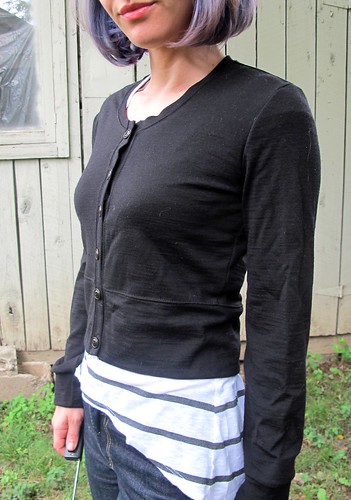
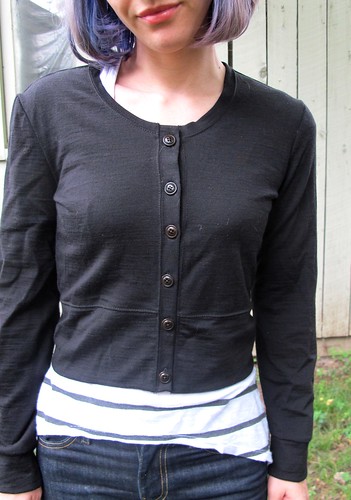
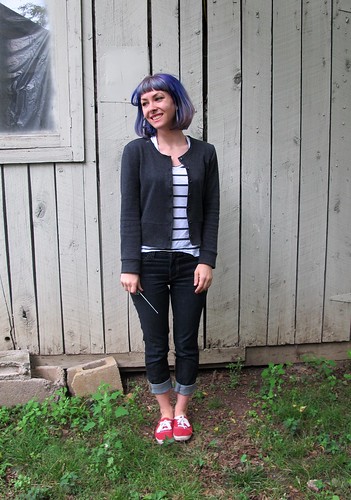
The Jenna Cardi comes with a few different options, so you mix and match to create the cardigan of your dreams (I’m not the only one who dreams about cardigans, am I?). You can choose a cropped or waist length version, sleeves ranging from full, to three quarter, to short, and then there’s also an option to include a beautiful curved yoke detail.

I’m a boring person with no imagination when it comes to wardrobe basics, so I chose something plain and simple for my first hurrah – cropped length, long sleeves. The thing about this cardigan that makes it so special, though (I mean, other than the fact that I SEWED IT MYSELF yaaaay for not buying RTW!), is the fabric I used! HOMEGIRL GOT HER HANDS ON SOME MERINO WOOL.

Jenna Cardi

Are we all still freaking out about merino wool or has that ship sailed? Whatever, *I’m* still freaking out over it! Ever since Katie started pushing it on me like an extraordinarily effective drug, I have been trying in vain to locate a US source. That stuff isn’t cheap, even in the best of times – and to ship it all the way from NZ obviously adds some dollarz to the cost.

So where did I find this golden merino ticket, you might ask? Surprise – Organic Cotton Plus, of all places! They are starting to branch out to include other natural fibers than just cotton, which is all kinds of awesome. When they asked me if I’d like to try a little piece of whatever caught my fancy from the website, I stumbled across the merino wool and, forreal you guys, my heart stopped for a nanosecond. There aren’t a whole lot of options on the site at the moment – just the black I have here, as well as a natural colorway (which I almost got, but then the idea of dying that shit seemed too overwhelming. Plus, black is so useful! Even if it photographs like crap). At $33 a yard, it is not cheap – but it’s worth it. That black merino is a whopping 61″ wide, plus, IT’S MACHINE WASHABLE WOOL. Oh, and you don’t pay NZ shipping prices! Win win!

Jenna Cardi

Having used both merino wool from Organic Cotton Plus, as well as the stuff straight from New Zealand – I can confidently say that this is pretty good stuff. It’s soft and lightweight without being see-through, it has a nice stretch and drape to it, and it cuts and sews like a dream. Wait till you see the topstitching on this baby – it’s ridiculously beautiful. Ahh I just love this fabric.

Jenna Cardi

The only downside I can think of is that it does wrinkle up a bit, as you can see in these photos (it’s not nearly as noticeable in real life – otherwise, I would’ve steamed things up before taking photos. Womp whomp, deal with it). Kind of the same thing as linen – just natural wear wrinkles. If that bothers you, you’ll want to stick to something with a poly blend. For me, though, wrinkles are an ok trade-off for natural fibers!

Jenna Cardi

Anyway, I loved my Jenna cardigan so much – I immediately made a second one!

This one is pretty boringly similar to the black merino one, except it’s longer. It’s not quite the longer version – I cropped some off for my proportions – but it does look better with the shirt I’m wearing underneath it, ha 🙂 Instead of using merino wool, I used some wool knit that I picked up at Mood Fabrics when I was recently in the store. This stuff is less drapey than the merino – it’s almost like sweatshirting, except without a fleecy side. It’s also not machine washable, so there’s that. I’ll have to handwash it like I do all my hand knits, oh well.

Jenna Cardi

Sewing both of these was ridiculously easy, by the way. My second version took me all of 2 hours – not bad! I made the bust 32″ and took in the sleeves a bit because they were a little wide. I also had to shorten the sleeves by a couple of inches.

As I mentioned, I was pretty apprehensive about the button bands – but surprisingly enough, the button holes were way less problematic than I was anticipating! I made some test button holes – experimenting with interfacing, tear-away stabilizer, no interfacing – but ultimately went with the instructions, as I figure Kat knows more than I do when it comes to knit button holes 🙂 The button band is stabilized with woven fusible interfacing, and it’s sewn on with a 1:1 ratio (meaning it’s not stretched at all). This gives the knit fabric enough heft to tolerate a button hole stitch without getting eaten into the bobbin area (my former experience with this sort of thing). For the black merino cardi, I also used tear-away stabilizer in addition to the interfacing. For the grey cardi, I skipped the tear-away stablizer and just kept things purely interfaced. Both worked out splendidly!

Jenna Cardi

Another thing I’ll point out is that, while these cardigans are somewhat fitted, there’s just enough ease included to keep the button bands from gaping open. Always a plus in my book!

Jenna Cardi

Jenna Cardi

I’m thrilled that they both look just as good unbuttoned as they do buttoned – which is important to me, as a cardigan-wearer. I usually button things up, but it’s nice to have unbutton options:)

Jenna Cardi

Jenna Cardi

Here are some ~extreme~ close-ups of the merino wool cardigan. Check out that topstitching! Ughhh it’s so beautiful! I did add a little more topstitching than called for in the pattern – I wanted to tie in the topstitched button bands and button holes, so I included it at the shoulder seams and along the bottom band. Plus, it’s just beautiful. Seriously.

Also, how bout them buttons? These are also from Organic Cotton Plus. I know black and brown is generally frowned upon as a color combination, but I like it 🙂

Jenna Cardi

Grey cardigan close-up 🙂 Boring buttons are from my boring stash.

So what do you think – are you team sew-your-own-cardi yet? I hope so, because Muse Patterns has hooked me up with an extra pattern to giveaway! 😀

Jenna Cardi

GIVEAWAY IS NOW CLOSED
To enter to win your very own Jenna Cardi, just leave a comment on this post and tell me what you plan on makin’! Which view? Any particular fabric? Do you have a wild card up your (cardigan)sleeve? Inquiring minds want to know! 🙂 This giveaway is open WORLDWIDE and I will close the comments a week from today, on MONDAY, SEPTEMBER 22, 2014 7:00 AM CST. Good luck, y’all!
GIVEAWAY IS NOW CLOSED

**Some disclosures now – I was given the Jenna cardi pattern from the patternmaker herself, for free, to try and review. I was *also* given the organic merino wool fabric & butons from Organic Cotton Plus, again, for free to try and review. The grey wool knit was purchased at Mood Fabrics NYC out of my own pocket. No one paid me for this post – I’m just doing it for the freebs! As always, all opinions are my own 🙂

Completed: The Sureau Dress

8 Sep

You know what rules? When you have a brilliant strike of inspiration that comes together perfectly – from fabric, to pattern, to completed project.

Deer & Doe Sureau dress

AKA this dress.

Deer & Doe Sureau dress

I’ve been holding onto this silk cotton voile from Mood Fabrics since the beginning of this year (it’s sadly long gone from the site now, but they have lots of other options – including this gorgeousness. Ok, that doesn’t have silk, but it belongs in my fabric stash nonetheless). I had originally planned to make an Aubepine dress with it – but changed my mind at the last minute and ordered the Sureau instead, also from Deer & Doe (I still have the Aubepine & still plan to make it, but I’m thinking I would like it better in a dark/solid color, possibly even a lightweight knit. We’ll see!)

Deer & Doe Sureau dress

I LOVED sewing this dress! Too bad the pictures are kind of shitty. I promise it’s much prettier in real life – the voile is floaty, slightly sheer, and fucking ethereal. The colors are amazing and very fall-like, but the lightweight fabric keeps things from getting too sweaty.

Deer & Doe Sureau dress

You’ll notice that my version differs quite a bit from Deer & Doe’s – I had to make a few changes – both fitting and design – to get the look I wanted.

For fitting changes, I made a muslin and made the following adjustments:
– The front neckline was slightly gaping, so I removed a 3/8″ wedge (similar to this method)
– The upper back was a little loose, so I removed about 3/8″ from the center back, starting at the top and tapering to nothing at the bottom.
– Shortened the shoulders 1/2″
– Added 1/4″ to the side seams

Deer & Doe Sureau dress

I also made a couple of major design changes! The main one was that I lengthened the sleeves to be full length, and added a cuff and placket (stolen from Archer pattern). Unfortunately, I didn’t correctly measure the sleeve length – which seems to be a common mistake that I ALWAYS ALWAYS make, argh! – so they’re a tiny bit on the short side 😦 Bummer! Fortunately, the sleeve placket means I can roll them up, so there’s that.

The other ridiculously hilarious issue with the sleeves is that they are sewn on backwards – and I did that shit on purpose! Let me back up a little. When I altered the sleeve pattern to include the placket, I used my Grainline pattern as a guide. I didn’t think to make sure that I was tracing the placket to the correct side of the sleeve, so – you guessed it – the placket ended up on the front of the sleeve. Didn’t realize this until I’d already attached the cuffs and everything, derp (and didn’t have enough fabric to recut because, come on, that would make too much sense). I weighed out the options, and decided that a backwards sleeve cap was easier to forgive than a placket in the wrong place, so the back of the sleeve is now at the front, and vice versa. Fortunately, the sleeves are fairly loose & the cap is slightly gathered, so it’s not obvious that I inserted them incorrectly, and I still have plenty of room for movement. That being said, y’all all know my secret now. Don’t tell anyone.

Deer & Doe Sureau dress

The other design change was adding that cute little half collar! I used this tutorial to draft my little collar, and interfaced one layer of the fabric before sewing them together. I hemmed and hawwed over whether or not to include it – but ultimately, Landon & I both agreed that the dress looked weirdly unfinished without the collar at the neckline, at least with this particular fabric.

Deer & Doe Sureau dress

Because the fabric is so lightweight, I took extra care with the construction. All seams – including the waistline and sleeves – are sewn with a French seam, for a durable and elegant finish. The facings are finished with pinking – any other finishing would result in showing through the fabric. The instructions don’t have you interface any part of the dress, but I added interfacing to the facings, sleeve cuff, collar, and both front placket pieces (both the front and the placket facing). Again, the fabric is super lightweight, so it needed a little more support from the interfacing. Specifically, I used the Pro Sheer Elegance Couture fusible interfacing from Fashion Sewing Supply. I like that is gives a little needed support, but it doesn’t actually change the drape of the fabric. I had black on hand, which was perfect for my emerald fabric as white would have slightly shown through.

Also, ugh, guys, I know it’s REALLY short. Wasn’t planning on that! My fabric shortages meant that I couldn’t lengthen anything, and once I got the dress sewn up – I realized it would look way better with a deep 2″ hem. Which means the dress is now rill short (again, didn’t have enough fabric left to face the hem, which is how I would have normally solved that issue), but I plan on mostly wearing it with tights and/or boots sooo it’s not too bad.

Deer & Doe Sureau dress

Deer & Doe Sureau dress

Pretty much everything to do with this dress – other than my frantic last-minute pattern ordering – came out of my stash! Fabric, buttons, interfacing, even the thread – I love it when that happens!

Deer & Doe Sureau dress

Deer & Doe Sureau dress

There’s a cute little lapped zipper in the side of the dress 🙂

Deer & Doe Sureau dress

And that damn deep hem! Ha! I topstitched it because, I figured the rest of the dress has lots of topstitching, so it woudn’t look out of place 🙂

Deer & Doe Sureau dress

And that’s it! I like to wear the dress with a belt – I’m still not sold on how I look with gathered skirts (even slightly gathered, like this one), but I think the belt breaks things up nicely 🙂 I also wear it with the sleeves rolled up, because, again – they are too short (even if they look ok in the photos, trust me, once I start moving around, it’s evident that they are too short)(maybe someday I’ll have sleeves the right length. Sigh.). It’s pretty short, but not so short that I flash cheek when I bend over (as several people have been kind enough to observe and report on).

I’ll count this one as a success! 🙂 Next question – whyyy have I not been sewing Deer & Doe patterns? They are SO GOOD. I actually just ordered the Bruyere and am anxiously awaiting it’s arrival (as is apparently most of the sewing world :P). I have plaid flannel dreams for that bad boy. Man, I love sewing ♥

Completed: Butterick 4066

5 Sep

Ummmm so this may or may not be the third garment I’ve posted this week that is made of rayon challis.

Butterick 4066

No shame.

Butterick 4066

These pictures are also horrifyingly bad and blown out, but… meh. We all know y’all don’t come here for the ~dazzling photography. Again: No shame.

Butterick 4066

I picked up this copy of Butterick 4066 while I was last at the flea market in July. The cover art is a little outdated (and not in a cool vintage way, but rather, I feel like I can probably smell my Mamaw’s house if I lean in too close. Wait, just kidding, my Mamaw’s house smells great. That shit probably smells like someone else’s Mamaw’s house, maybe), but the line drawings looked promising enough – almost like the Kelly skirt and Hollyburn skirt had a secret affair that ended up with a little love child.

Butterick 4066

It’s hard to see, thanks to my terrible photos, but the skirt has pockets, a smooth A-line shape with no darts or tucks, and buttons down the front. I used this shameless 90s black floral rayon challis from Fashion Fabrics Club, as I knew the shape would look great with a drapey fabric (just like my Crazy Paisley Hollburn).

Butterick 4066

My skirt pattern was just a smidge too big (not the fault of the pattern itself – my copy is a size too big, since we don’t normally get to be choosy when it comes to buying vintage patterns!), but that was easily fixed by taking in the side seams before attaching the waistband. The big challenge was cutting off length – a LOT of length. Even after I’d shortened the shortest version of the pattern tissue by a good 6″, I had to go back after making the skirt and hack off another 4″! Shortening the length did wonders for the overall look of the finished skirt – before, it was pretty dowdy and outdated looking (mostly due to fabric choice, I mean – we are talking about the 90s here), but I think it looks pretty cute now! Shorter skirts FTW!

Butterick 4066
Butterick 4066

I finished the seams with my serger and used these pretty black and gold buttons that I had lurking in my stash.

Butterick 4066

I love how the finished skirt turned out – and I think it’ll transition really nicely for our “fall”**, since it’s so cool and lightweight, but still has those nice dark fall/winter colors. That being said, it’ll look great with tights and a sweater, too 🙂 (maybe with a silk slip, though! It’s not very warm!) I’m interested to try pairing this print with black and white stripes – I can imagine it in my head, but until I start sewing up the striped knits I got while I was in Mood last month, your guess is as good as mine.

** Tennessee Fall: Beyond gorgeously colorful (visiting Tennessee in the fall should be on every single one of y’alls bucket lists), but still blazing hot and, yes, we absolutely make fun of those dumbasses who insist on wearing wool caps and jeans tucked into tall boots while marinating in giant pools of sweat. I mean, COME ON LADY, it’s 90* outside FFS! You aren’t fooling anyone!

One last thing – Giveaway Winner! Lucky number is…

winner1

winner2

Congratulations, Sue Martin! I love your method of sneaky inspiration by way of shop dressing rooms – something I’m too chicken to do myself (I got major stink-eye once while manhandling a rack of dresses in Buckle and I’m kind of traumatized now haha). As far as adding hours in the day – well, let me know when you figure it out! 🙂 haha!

Thanks to everyone to entered the giveaway – and thanks to Laurence King for providing us with a copy to giveaway! Friends, if you’d like to buy your own copy of Casual Sweet Clothes, use the code LLADYBIRD35 to get 35% off! The code is good through 10/1/14 🙂

Completed: McCall’s 5803

21 Jul

For the past couple of weeks, I’ve been slowing reorganizing my pattern stash. You guys, I had no idea how much shit I had stuffed in those boxes until I really started culling through them. Let’s just say I’ve made 3 trips to my local comic book store to buy more packs of 100 backing boards and clear sleeves. It’s kind of disgusting when I think about how many patterns I have (although, to be fair, most of them are old vintage ones I picked up at our flea market for next to nothing because they would have gotten thrown away otherwise oh god), and even more so when I realize I have so many that I haven’t even thought about since I took them home. On the flip side, I’ve been rediscovering a lot of cool ones!

McCall 5803 - Liberty

This is McCall’s 5803 – it’s an old OOP Lizzy McGuire (lol yep) pattern that I’ve had for god knows how long. I’ve actually made this one before – in the form of a Plaid Clusterfuck – and I’ve always (well, when I remembered about it hahahahaha) wanted to made a more demure version, since I love the shape of the arm holes and button placket (and I’d love one with a proper collar and not just the stand). I swear, every time I wore that Plaid shit, I would think, “Man, I wish this didn’t have the ruffles.” So as soon as I rediscovered it, I knew I could make it happen.

McCall 5803 - Liberty

My original version of this top included a big ol’ 1.5″ FBA, which was no longer needed to get a good fit (I don’t even have the original one; I sold it last year when I realized it didn’t fit me at all anymore). Since I’m too much of a stubborn ass to trace my patterns and preserve the original, that meant I had to remove the FBA by carefully peeling up tape and carefully repiecing tissue together. It worked, for the most part I guess, but something tragic happened at the waist because this baby is apparently painted on. Despite a tissue fit (and my stubborn ass thinking, “noooooo I don’t need a muslin, I’ve made this before lololol) and everything. Argh.

I also didn’t bother to staystitch the neckline (whyyy), so it stretched out a little on one side. To remedy this, I pulled that side lower while marking the button spacing, which is why it’s not even at the bottom (you probably didn’t even notice that until I said something, oh well). These types of shirts are generally hemmed during the beginning of construction, so I couldn’t fix the unevenness when I was doing the buttons, if that makes sense. I should probably unpick the hem and fix it now, but eh. It doesn’t bother me as much as it should.

McCall 5803 - Liberty

McCall 5803 - Liberty

I know these pictures make it hard to see what’s going on. I’m sorry 😦 You can click on them to make them bigger through Flickr, if that helps.

McCall 5803 - Liberty

I let out some of the side seams to try to add a little more tummy room, and that helped a little. I’ve also just recovered from a couple weekends of eating some of the worst shit for me ever – I don’t necessarily diet, but I try to maintain regular exercise and eat things that are beneficial to my health/body and that seems to work well enough for me. After a couple of weekends of eating cupcakes and cookies and fried deliciousness in a to-go box, though, I was feeling tired and bloated and definitely like a stuffed sausage when I put this damn shirt on. I put the shirt aside for a week (wadded up in the corner, because that’s how I roll), I think it looks a bit better now that my body is back to normal. It’s definitely still pretty tight, but at least the busy print hides most of the wrinkles! Ha!

McCall 5803 - Liberty

Speaking of this busy print – isn’t it beeeeeautiful!? Ahh!! It was a gift from Sunni, who sent me a box of some of the most lovely fabrics earlier this year. I guess I never blogged about that, but we decided during Project Sewn that we both deserved a little treat and decided to have a fabric trade! She sent me all kinds of amazing shit – stuff that I’m now just sitting on because it’s almost too good to cut (and I’m waiting for divine inspiration)! That woman has some fabulous taste – and this is the first piece I actually made something with.

McCall 5803 - Liberty
The goodness you are looking at right now is actually Liberty of London shirting cotton (I told you, that woman has some fabulous taste!) from Sunni’s personal stash. Ahh!!! I’ll admit – and y’all can chase me with pitchforks if you’d like – but I’ve never really cared much for Liberty fabrics. Sorry! I think the prints are lovely, but they also remind me way too much of my Laura Ashley bedroom from my childhood. Too girly and floraly and, well, y’all look pretty in them but I’d rather not. I’d rather be clothed in NEON! But anyway, I’ve always been curious to try it because sewists don’t only rave about the prints – they rave about the quality of the cotton as well. You know I love trying new things for science, so I was pretty excited to have my own piece to play with when I got Sunni’s package. And I do think this print is super beautiful – it’s floral, sure, but it’s not all ditzy and super pastel girly like the Liberty I always see. It’s much more along the lines of my style, and I knew it would make a fabulous top.

McCall 5803 - Liberty

I’m so glad I made this work, because I would have been really really angry at myself if it had ended up being a wadder! I could probably stand to let out a couple more seams, but everything is topstitched, so it’s really a matter of me getting the energy to go through all that unpicking and retopstitching. Argh! Anyway, at least I left off the ruffles this time 😉

McCall 5803 - Liberty

Anyway, here she is in all her glory! Beautiful print, topstitching (that will be the end of me), and those gorgeous buttons. If those look familiar, it’s because I used them on my Audrey in Unst cardigan. Not the same ones – my cardigan still has buttons – but from the same batch. My sister-in-law helped me pick them out for the cardigan, and I bought them from a vendor at our flea market. He had all kinds of cool vintage buttons – I think he said these are vegetable protein from the 20s? – and she actually went back afterwards and bought up the rest for me for Christmas. So awesome 🙂 So obviously, they were perfect for this shirt – both in specialness and general matchy-ness 🙂

McCall 5803 - Liberty

Construction-wise, nothing new to report here. I finished the arm holes with self bias facing and topstitched with a slightly longer stitch length so the stitches would be more defined.

McCall 5803 - Liberty

So, what’s the verdict on Liberty of London? Well – y’all sewists are right, this shit is a JOY to sew up! It presses well, it doesn’t show pin holes, it’s easy to cut, and the fraying is minimum. It also just feels absolutely luscious. I totally understand the rabid fangirling over this shit. I don’t know if there is much Liberty in my future – after all, it’s still hideously expensive – but considering this shirt barely took any yardage, I could probably squeeze out a special piece for another special top 🙂

So, THANK YOU, Sunni, for the amazing gift of this gorgeous fabric (not to mention the chance to get to sew on it!)! Have any of y’all ever sewn with Liberty? Are there any cool non-floral prints that I’m blindly overlooking?

Completed: Butterick 5526, in Chambray

18 Jul

Good morning, everyone!

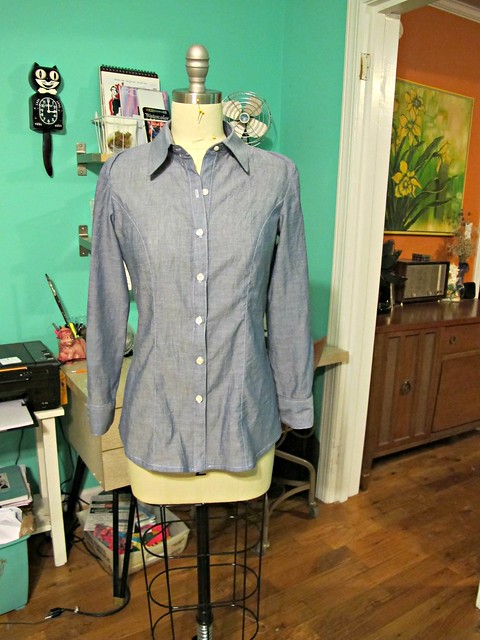
Sooo, anyway… remember when I said I was going to use that other chambray to make Butterick 5526 but ended up coaxing it into a Hawthorn instead? Well, I still wanted that damn chambray shirt – lucky for me, I had more in my stash! Check it out!

Chambray Buterick 5526

GOD, I JUST LOVE CHAMBRAY.

Chambray Buterick 5526

Seriously, tho, if you follow my Instagram, you probably noticed a couple weeks ago that it was Unofficial Chambray Week in my sewing room. Part of the reason for that is because I have been experimenting with starting multiple projects at once, then working through them all in succession. That probably makes no sense. What I mean is, I’ll prep 2-3 projects at once (cutting, interfacing, marking), pile them at the end of my table, and then complete each project by itself. I’m still working on one project at a time – but I’ve prepped multiples in the queue, so I don’t have to stop and cut the next one, thus losing my steam (oh, who the fuck am I kidding, I never lose steam. Not when it concerns sewing, anyway :P). This particular week, I was trying to stick with projects that use the same color thread/serger thread, because I dunno. Changing thread isn’t exactly difficult, as we all know.

But anyway, that shit’s fun – to get all the cutting out of the way at once, and then you have a glorious week to focus on dressmaking (or whatevermaking). I’ve blabbed on and on about taking advantage of short time chunks, and I’ve found it’s much easier to do that when you don’t have to set aside time and space every time you want to cut a new pattern (I don’t know about y’all, but I like to do it all in one fell swoop. So when it’s time to get my cut on, I need a long uninterrupted stretch of time to take care of business).

Chambray Buterick 5526

So anyway, I cut a Hawthorn AND a button down, and they were both chambray because they both used the same thread (and dammit, I want both of those chambray goodies in my closet by the end of the week, DAMMIT!) and there’s that.

Chambray Buterick 5526

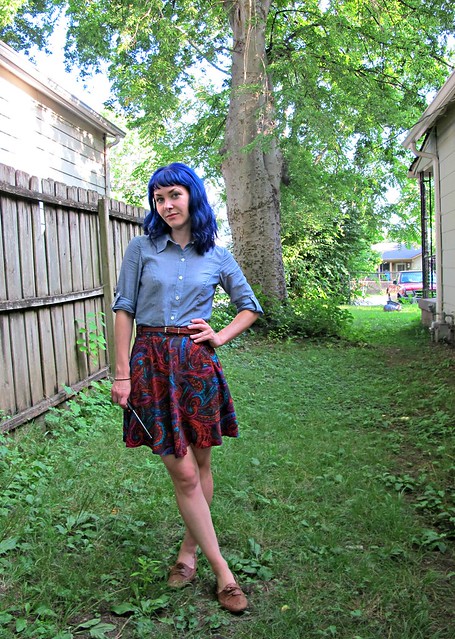
Also, you probably noticed, but I’m wearing my Crazy Paisley Hollyburn AGAIN. That skirt with this top is just too good.

Chambray Buterick 5526

Chambray Buterick 5526

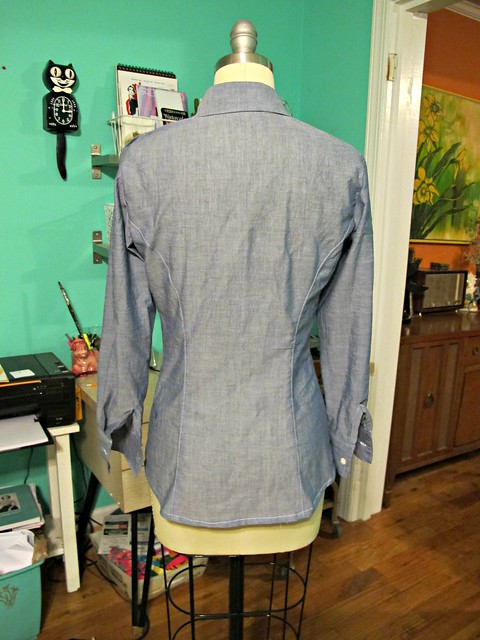
I’m still tweaking this pattern every time I sew it. Isn’t that what makes something TNT – you’ve used it enough to where you’ve ironed out every little kink in the fit and construction, so you just know it’ll work when you make it up? Butterick 5526 isn’t quite a TNT for me, yet, but it’s on it’s way! I’ve made it 3 times now (see versions one and two), and each version just gets a little better than the previous.

Chambray Buterick 5526

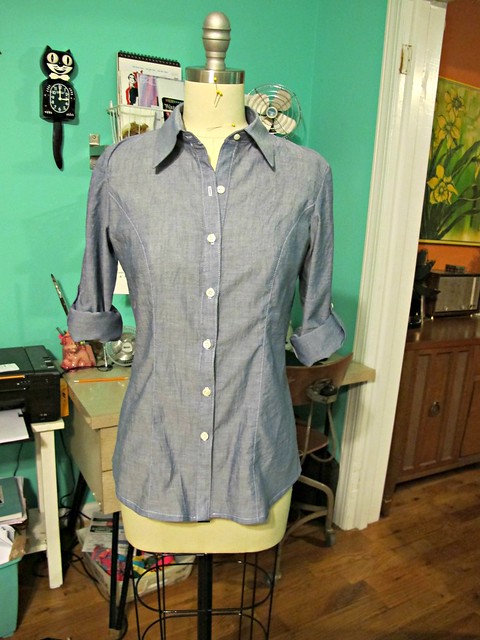
I tried to make the sleeves the correct length on this version. My first one – the white button down – used the 3/4 sleeves that were really more like 7/8 sleeves. Like, wtf, those things looked like they were just a couple inches too short! So, with that in mind, I knew I wanted long sleeves for this shirt (not for now, but maybe in the future, or when I complain about the cold if/when the night temperatures drop to 75 lolz), so I checked against a couple other long sleeved shirts in my closet and transferred that measurement (minus the cuff, of course) to my pattern piece. I double-checked every measurement, but still ended up with something slightly too short! DERP. So the sleeves on this shirt will just be perma-rolled up. And that’s ok! It’s all a trial and error at this point anyway 🙂

Chambray Buterick 5526

Chambray Buterick 5526

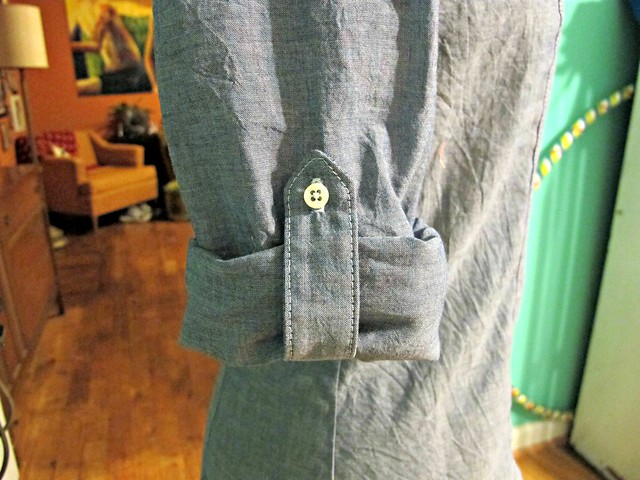
They do look good rolled up though, huh? I can’t even tell you how pleased I am with those sleeve tabs. BEYOND pleased!

Chambray Buterick 5526

Chambray Buterick 5526

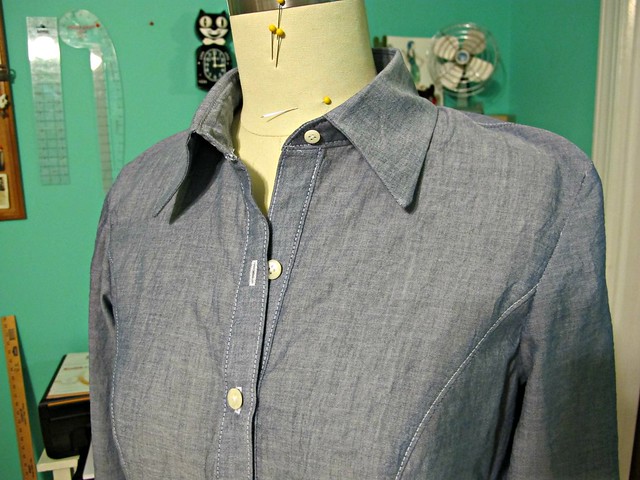
This chambray is pretty freaking amazing. It’s from The Fabric Studio here in Nashville. Where my Hawthorn chambray has a crisp drape and loads of body, this one is so lightweight and soft that it’s a little bit see through. Which is why I thought it would make a great button down – even with the sleeves – since it’s like I’m wearing chambray colored air. The looseness of the shirt really compliments the drape of the fabric, and the color almost has a sheen. It also doesn’t wrinkle as much as you would think – I took these photos after a full day of wearing the shirt, and while it has some “wearing” wrinkles, they just look comfy and relaxed, you know? I. LOVE. IT.

Chambray Buterick 5526

It’s also, like, $8 a yard. So it’s affordable chambray perfection! (and before you ask – yes, The Fabric Studio will ship! Contact Nancy here!)

Chambray Buterick 5526

For a fabric as light as this stuff, it didn’t take a lot of extra effort when it came to sewing everything together (or cutting, for that matter). It is on the delicate side, so be aware of pin holes (or use fine silk pins, if you got ’em!) and be careful ripping out stitching because you will totally rip the fabric (ask me how I know about that…). But, just like the heavier chambray – it sews and presses like a dream. I enjoyed every single minute of working on this shirt, and it totally shows!

Chambray Buterick 5526

Look at that beautiful topstitched cuff! I only interfaced one side of the cuff (the pattern has you interface the entire cuff piece, so when it’s folded you will have two layers of interfacing), so the fabric would maintain it’s pretty lightweight drape. Too bad no one will ever seen the cuff since the sleeve is too short! Ha!

Chambray Buterick 5526

There’s another one of those sleeve tabs that I’m just stupidly proud of. I think they really make the shirt.

Chambray Buterick 5526

Oh yeah! The buttons are also from Fashion Sewing Supply – just classic white shirt buttons. Very simple, but they look so polished and clean with this chambray.

Chambray Buterick 5526

So, yeah. Another basic closet staple that should be boring (and y’all might be yawning, but oh well, my blog->my rules, aka sorry not sorry), but it’s pretty exciting to me! Chambray goes with everythingggg, so this is a great top to have to pair with all my skirts and pants. I would almost say this is the kind of shirt one could wear for a week straight without anyone noticing, except, I definitely did that as a preteen and someone definitely noticed*. Then again, do I really care? Naw.

Couple more things-
– Damn, y’all went crazy over my recent Vogue pattern review. There are a lot of good comments on that post – some defending some of the patterns (even comparing them to runway version, which is all kinds of awesome to see), some making their own hilarious jokes, oh, and some from The McCall Pattern Company themselves. Forreal! If you haven’t had a chance to read through the comments on that post, you should definitely give them a lurk – McCall’s (who owns the Vogue Patterns line) has proven themselves to have an amazing sense of humor, as well as a really graceful way of handling some not-so-nice feedback. They have been very active in the comments – not in a butthurt way, so sorry if you’re looking for dramz 😉 – and answering questions from readers. I, for one, had no idea that the designers actually choose the fabric that is used for the designer patterns. Vogue has nothing to do with that (although they do choose fabric for all other pattern categories, just not designer). So some of those awful fabric choices should have their blame shifted to the designer. The things you learn!
more u
– Omgg you guys – my Weekend Pants-Making Intensive class at Workroom Social has officially sold out! Cannot WAIT to meet, hang, and of course, sew with y’all who all signed up! It is going to be a fabulous weekend! Didn’t make the class and are regretting that decision? You can sign up for the wait list here and cross your fingers 🙂 Everyone else – I’ve got a free afternoon/evening on Friday, where I plan to destroy my bank account with fabric purchases. Anyone want to join me in the Garment District and/or possibly for drinks afterward (I hear there is an outdoor bar at Bryant Park nearby, which sounds amazing!)? Shoot me an email! lladybirdlauren at gmail dot com 🙂
– Lastly (and I know this has NOTHING to do with sewing but it’s my blog and duh I do what I want), have y’all ever heard of the ride service Lyft? It’s like a taxi service, except the drivers use their own cars and the costs are much much cheaper. Everything is run through the app, including payment – so you don’t have to deal with cash or credit cards, and you can pay up to 24 hours after the ride has ended. It’s really fun and a great way to get around if you don’t have a car/plan on drinking/hate driving. Anyway, the reason why I’m telling you this is because my best friend recently signed on to be a driver, and that means free Lyft rides for everyone! Really! If you’ve never used Lyft before, download the app and use the code MORGAN1407 for a free ride up to $25. No strings attached (unless you go over the $25 credit, but that would be a looong ride. One person I know here managed to hit $30 once, and that was for a 20+ mile ride), just free ride goodness! It does have to be active in your city, but the company is growing fast so definitely check! Just remember to input the code into your app (in the payment section) BEFORE you take your first ride, so you can actually use the credit. And, sorry babes, but this is first-time riders only (I know!!). But yeah! Go forth and get you some free rides!

*ok, it was a shiny blue polyester button down from Rave, and it was totally my favorite shirt. Also, when it was pointed out that I’d worn the same shirt for multiple weeks in a row (so not technically days in a row, but every Sunday to church. For at least a couple of months, haha), I was so mortified that I never wore it again. RIP, shiny blue shirt.

Completed: A Chambray Hawthorn

10 Jul

I know, like, everyone and their freakin’ MOM seems to have one of these dresses made up in chambray. I’m just following the crowd here, ain’t no shame in that. But there’s a pretty good reason why we all seem to gravitate toward the same fabric for the same pattern – it’s just such a perfect marriage of the two. Check it out:

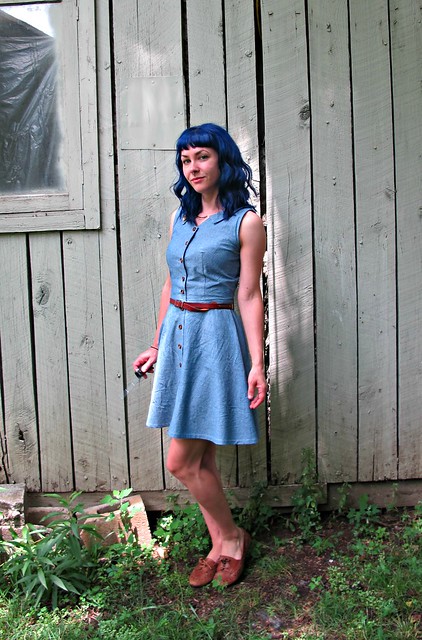
Chambray Colette Hawthorn

If you haven’t been able to guess it yet, this is the Hawthorn from Colette Patterns. A simple and flattering style that I’ve loved ever since it came out – this is my third one, actually, although it’s been nearly a year since I last touched the pattern (see versions one and two here). I’ve been planning a few versions since, and chambray was one of them – although I had a helluva time trying to find a good chambray. But here it is! I found it!

Chambray Colette Hawthorn

My chambray actually came from the NYC Garment District – I picked up a couple of yards while Clare & I were chatting up Sam. I know Trice also bought some, because I totally talked her into it (no shame). At the time, I wasn’t exactly sure what I would make with the fabric – but I knew it would end up something button-down inspired. Either a shirt or a shirtwaist, but definitely something that would take advantage of the crisp hand and beautiful cotton goodness. I bought two yards, washed it when I got home, and it’s been sitting on my shelf ever since.

Chambray Colette Hawthorn

This particular fabric very nearly almost became a button down shirt instead of the Hawthorn it blossomed into. Like, much closer than you think – I actually had the fabric on my cutting table, with my beloved Butterick 5526 pattern, and decided at the very last minute to use this fabric to make the dress instead. I wanted a chambray button down as well (and I definitely ended up with one… out of a different chambray. More on that in another post, though!), but I realized that this fabric was simply too thick to wear as a shirt in the summer time. The chambray La Sylphide I made last year barely gets worn in the summer, as it’s just tooooooo freakin’ hot! But for the purposes of a dress, this particular fabric was perfect. So I swapped out the pattern for the Hawthorn, and got to making it happen.

Chambray Colette Hawthorn

There’s not much to say about the pattern itself – like I said, I’ve made the pattern before, so I don’t really have anything new to add to the table, in terms of reviewing. All fitting changes I made in my previous versions were used for this Hawthorn, and it was pretty straight forward sewing for the most part. However, my pictures turned out kinda nice (well, I think so! Good hair day!), so you have to look at all of them anyway. Sorry!

Chambray Colette Hawthorn

One thing I did that ended up being unintentionally hilarious was when I tried to lower the bust darts. I remembered from previous versions that they are a little high in this dress – and kind of look nipply if you catch the light right. So I redrew the point about 1″ below where they were marked on the pattern, and went about sewing as normal. Except, I dunno what happened exactly, but they ended up WAY too low! Which was a shame because they were the perfect little boob shape, just in an area where boobs (well, my boobs) don’t really belong. Before you start scrutinizing my boobs in these photos, I should mention that I fixed the dart issue. So there’s that. I don’t know where I was going with that story. Boobs.

Chambray Colette Hawthorn

Man, this fabric was SO MUCH FUN to work with! It’s a beautiful cotton chambray, so it presses like an angel (not sure how that would work exactly, but let’s just roll with it) and it takes well to topstitching. It’s also lovely to wear in the summer here – breathable, and a little lightweight (but still feels like a good weight for a dress). I feel like I say this with every make I, er, make, but this is totally my new favorite dress.

Chambray Colette Hawthorn

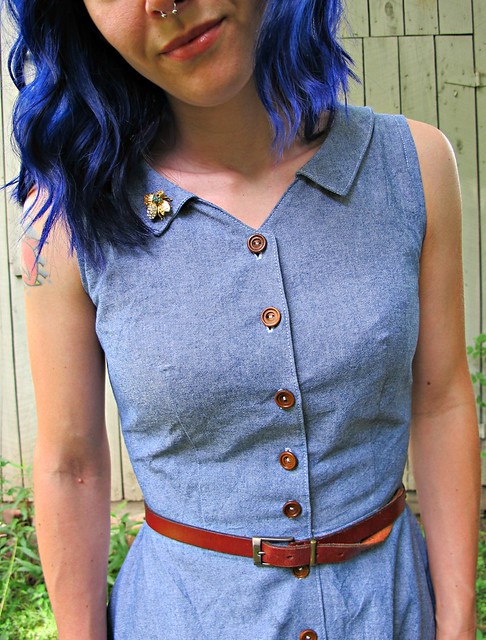
The collar is so good for all those tiny brooches I have that I never wear. Like this insect brooch.

Chambray Colette Hawthorn

Chambray Colette Hawthorn

The color also goes really nicely with my hair, yeah?

Chambray Colette Hawthorn

Chambray Colette Hawthorn

I think a dress like this would be good for traveling, as it’s one of those neutral-type pieces that provides a nice background to whatever other garb you are throwing on (cardigans, jewelry, shoes, etc), so you can wear it multiple times without people judging you. You know, like those ~travel articles~ in magazines that tell you to bring a classic black/white/denim/whatever solid-colored dress so you can mix up your jewelry and shoes and look like you actually brought 10 outfits? Except, I never really have a good neutral dress like this – almost everything I make has patterns, and those that are solid (such as my navy cotton sateen version of this) still feel like they really only have 1-2 pairs of shoes or whatever that ‘go’ with them. This dress, though, feels like the equivalent of blue jeans and a white tshirt. I kind of want to wear it for a week straight just to see how many different ways I could style it.

Chambray Colette Hawthorn

Chambray Colette Hawthorn

Chambray Colette Hawthorn

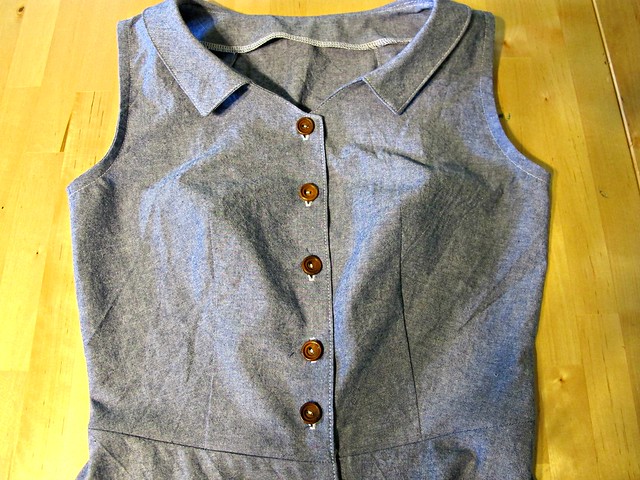
The wood buttons are from Fashion Sewing Supply, by the way! Last time I ordered interfacing from them, I ordered a couple of packets of buttons as well so I could play around with them in garments. All the buttons are shirt buttons, but they have some cool ones that aren’t so cool-looking they look kind of cheap (does that make sense? Main reason why I generally stick with plain white buttons. NOW YOU KNOW MY SECRET, I’m afraid of looking cheap!). I had no real plans for these when I ordered them, but they look beeeeautiful with this chambray!

Chambray Colette Hawthorn

Chambray Colette Hawthorn

The armholes are finished with bias binding. And check out that topstitching! I recently bought myself a topstitching foot for my Bernina, and I’ve been having a lot of fun using it to get super precise stitching. I mean, how good does that look? ALL IN THE FOOT, BABY!

Chambray Colette Hawthorn

As with my other two Hawthorns, I respaced my button holes so they didn’t interfere with the waist seam. There is a hook and eye at the seam to keep it closed invisibly; this way I can still wear belts with the dress.

Chambray Colette Hawthorn

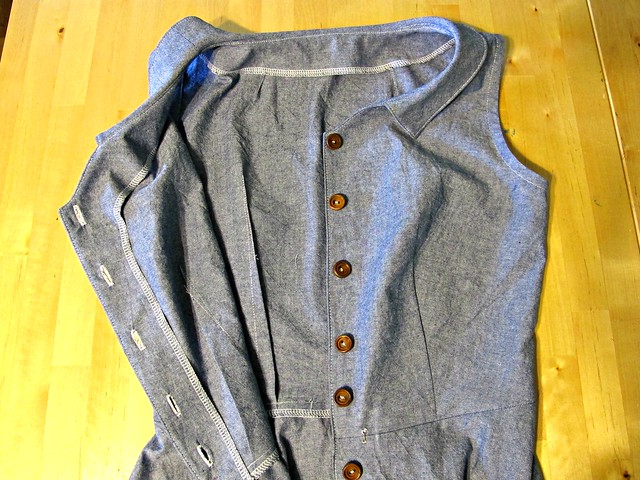
I kept things simple with the construction and finishing and just used my serger to finish the raw edges.

Chambray Colette Hawthorn

And that’s it! I’d love to go through with my forever-planned other version of this dress – plaid with long sleeves. Wouldn’t that be so nice? Although it’s definitely too hot to think about sleeves right now (as Landon would say – “Sun’s out; guns out”), so I’ll stick with the sleeveless for now 🙂

Tutorial: How to Stablize a Buttonband with Petersham

20 Jun

Stablizing a buttonband with Petersham

A promised, here is the much-requested tutorial for adding Petersham ribbon to the button band of your handknits! This is a little trick I’ve done for nearly all my handknits since I started cranking ’em out… it’s not 100% necessary for finishing your knits (so please don’t be freaking out if you’ve never heard of this technique before!), but it is super handy if you wear knits with negative ease and have problems with the button band/button holes gaping open. We are basically going to take a firm woven ribbon and sew it to the inside of the button band, so it will stabilize the knit and prevent it from stretching and thus gaping open.

I know there are a million ways to do this particular technique; this is my personal favorite TNT. It involves hand sewing and machine-worked button holes (although they are not sewn through the sweater as done in (Tasha’s tutorial from a few years ago). I personally like to use Petersham ribbon as my stabilizer – it’s relatively inexpensive, wears well and feels luxurious. You can also use grosgrain ribbon, seam binding, firm lace, satin ribbon, or even fabric selvedge – whatever you want! I ain’t here to judge 🙂

Stabilizing a button band with petersham
You will need: your finished+blocked cardigan, a length of petersham ribbon (this will vary depending on the length of your sweater, but aim for approximately the length of your button band x2 plus a couple inches to fold under), and your buttons.
NOTE: I am using 1″ wide petersham for this particular sweater. The width of your petersham may vary, depending on how wide your button band is. Always measure to be sure!

Stabilizing a button band with petersham
Measure your ribbon to the length of your button bands plus about 1″ extra (for 1/2″ overhang at both the top and bottom of the button band), and cut two pieces to this length.

Stabilizing a button band with petersham
OPTIONAL: You may want to interface one piece of the petersham, so the button holes are reinforced. Just cut a strip of interfacing on the straight grain and fuse it to one side of one piece of ribbon. Set the non-interfaced ribbon aside for now.

** Yes, your interfacing will show slightly on the outside of your sweater, if your gauge is loose enough. If this is a concern (obviously it’s not a concern with this sweater; but I could see how using white interfacing+black sweater miiiight look a little weird!), you might consider making a Petersham sandwich and using two lengths of the ribbon with the interfacing in between. I haven’t personally tried this, but it makes sense in my head. Also, now I want a sandwich. I just ate breakfast. Fuck.

Stabilizing a button band with petersham
Pin the interfaced ribbon to wrong side of the button band with the button holes, interfacing side on the inside, and fold under the top and bottom edges by 1/2″. Try to center the ribbon so that there is about a stitch’s worth of overhang on the outside edge of the button band.

Stabilizing a button band with petersham
Use a marking tool to mark a small dot in the center of each button hole, on the interfaced side of the petersham. You may want to use chalk or disappearing ink; I used a sharpie because I’m a terrible person with no morals.

Stabilizing a button band with petersham
Take the petersham off the button band and, using your sewing machine, stitch button holes at each of the markings you made. Dab each button hole with a drop of Fray Check (this is optional, but I think it makes for a cleaner/non-hairy button hole) and allow to completely dry. Carefully cut all the button holes open.
PROTIP: Test your button hole size first on a scrap of interfaced petersham so you can be sure that your buttons fit the holes! Ain’t nobody got time for wrong size button holes.

Stabilizing a button band with petersham
Open your sweater up and pin the petersham to the inside of each button band. Match the petersham with the buttonholes to the button band with the button holes (being careful to make sure that each button hole is aligned so that they can be used!), and match the other petersham on the button side of the button band. On both bands, fold the petersham under 1/2″ at the top and bottom. Again, try to center the ribbon so that there is about a stitch’s worth of over hang on the outside edge of each button band (this is just so it looks nice 🙂 ).

Stabilizing a button band with petersham
Here’s a close-up of my ribbon pinned to the button band. You can see there is a little bit of button band overhang on either side of the ribbon.

Stabilizing a button band with petersham
Now is a good time to check and make sure that the button bands are the same length on your sweater. If one is longer than the other (which can totally happen if you stretched the button band while pinning everything down), unpin and readjust until they are the exact same length.

Stabilizing a button band with petersham
Now time to stitch! Using doubled-up thread, whipstitch all the way around all 4 sides of the petersham, starting at the top and working your way around. Do this to both button bands.

Stabilizing a button band with petersham
Here’s another photo of the handstitching. Try to keep your stitches evenly spaced (this will give them more strength, in addition to just looking nice!) and try not to gouge a big chunk your sweater yarn with each stitch.

Don’t worry about stitching around the edges of the button holes. I always leave mine loose, and I’ve never had a problem with the buttons getting stuck and/or not being stabilized enough. I imagine if you were using super huge buttons – like, 2″ big buttons – you might want to sew around the edges, but for buttons smaller than 3/4″ it’s fine to leave them unsecured.

Stabilizing a button band with petersham
Once your button bands are stabilized with ribbon, lay them petersham sides together and raw edges matching.

Stabilizing a button band with petersham
Stick a pin down the center of each button hole.

Stabilizing a button band with petersham
Gently pull the button bands apart, pulling the head of the pin through the button hole and leaving it sticking in the button side of the ribbon.

Stabilizing a button band with petersham
Now you can use the pins as a guideline for where to sew your buttons! This ensures that they are exactly centered in the button band and also aligned with the button holes.

Stabilizing a button band with petersham
And there you go! Stabilized button bands with NO GAPE!

Stabilizing a button band with petersham

Stabilizing a button band with petersham

Stabilizing a button band with petersham
God, is that just like, the sexiest button band or what.

Hetty
And here’s the sweater on me! (Hetty, in case you missed the post!) Notice that the lacework is nice and open, thanks to the negative ease – but the button band is strong and secure and there is no pulling at the button holes. Oh petersham, how I love you ♥

Aaaaaand, that’s it! Told y’all this was an easy technique 🙂 Now, go forth and conquer that button gape once and for all!