Tag Archives: ponte

Completed: Navy Ponte Morris Blazer

10 Nov

Continuing on the Navy Train (although not really, bc I actually made this shit ages before I made my Navy Twill Gingers), here is what I guess we can consider the other half to my ~casual navy suit~ – the blazer!

Navy Ponte Morris Blazer

Navy Ponte Morris Blazer

Although, unlike most blazers – this one is made of a ponte knit, which makes it about as comfortable to wear as a knit hoodie. I dunno about y’all, but this is basically a huge score as far as I’m concerned.

Navy Ponte Morris Blazer

Navy Ponte Morris Blazer

Navy Ponte Morris Blazer

The Morris Blazer from Grainline Studio has been out for a while (and yes, I completely acknowledge that my finished blazer looks exactly like the shop sample no regrets), but I initially disregarded it as an option for my wardrobe as I haven’t bothered to wear a blazer since pretty much my very first office job. Even when I was working in office environments up until I switched to a more casual work life a few years ago, I eschewed the (often uncomfortable, often ill-fitting) blazer in favor of simple and much more comfortable cardigans. Actually, I had a really beautiful black wool blazer that I bought on sale at Bebe when I was in high school (lol anyway, but you’d lol even harder if you knew me in high school because my preferred places to shop were generally Hot Topic and the kid’s section of Goodwill hahahahah oh teenagers) that I wore the hell out of, and it was sadly stolen right my desk when I was 19, at the T-Mobile call center I was working at. To whoever stole that thing: fuck you. Also, I hope you couldn’t fit into it. I was really really small back then, like 90 lbs small. My clothes from back then were fucking comical… and also the reason why I learned how to sew in the first place. Alterations! Yay!

ANYWAY MOVING ON.

What eventually caught my attention about the Morris Blazer is that it is a much more casual take on the traditional blazer – obviously you can’t wear this in a corporate environment, but it’s still a step up from that aforementioned hoodie. It is intended to be made using a stretch woven fabric, and the blazer is unlined. I’d seen some people make it out of a ponte knit, which really piqued my interest because I am all about some ponte knit and its secret pajama properties.

I used a navy nylon Ponte de Roma from Mood Fabrics – it’s currently sold out in this colorway, but they have other colorways and it tends to go back in stock pretty frequently, FYI. I have also bought this ponte in the black & wine colors – it is great! Nice and thick, a good heavy stretch in 4 directions, and it remains opaque and holds its shape quite nicely. It washes really well and I haven’t noticed any pilling on any of my pieces. The rayon content makes it feel a bit nicer than the pure poly stuff, but the spandex/nylon additions give it that good recovery so it doesn’t bag out of shape over the course of the day.

I initially was a tiny bit concerned about using this fabric, as the Grainline website really suggests against using knits with a 4 way stretch – this pattern is intended for 2 way stretch wovens, so that the blazer doesn’t stretch and sag downward against the facing. I couldn’t find a good knit fabric that was heavy enough, had the intended stretch amount, *and* came in the color I wanted, however. So I threw caution to the wind and just used this stuff. I’ve been wearing the finished product for about 2 months and I reckon it turned out fine. So, in case you were wondering about 2 way vs 4 way stretch with this pattern!

Navy Ponte Morris Blazer

Navy Ponte Morris Blazer

I made the size 0, which is my usual size for Grainline patterns. I lengthened the sleeves to full-length – bracelet length is pretty, but I’ve decided there is no place in my life for that nonsense (either I’m cold enough to need full sleeves, or don’t want sleeves at all. My sleeve opinions are very black and white haha). I had also originally raised the armholes by about 1″, since I found the armholes in my Lark tee to be about that much too low (if you’re wondering why you don’t remember that post, it’s cos I haven’t written it yet haha), but lowered them back down to the original size when I tried on the blazer without sleeves. I used fusible tricot knit to interface the facings (I did not interface the entire front section, which is suggested in the sew along if you use a 4 way stretch as I did), and sewed most of the construction on my serger, with all topstitching done on my regular machine with a straight stitch.

Overall, I found this pattern really easy to follow. There is some interesting seam wizardry going on to create that shawl collar out of the shoulder seams, but none of it is particularly difficult. I like how the hems are all faced, and I like the topstitching detailing – especially at the bottom hem, which I know some people weren’t a fan of. I like that the knit fabric makes as comfortable as wearing a ratty hoodie, without actually looking like a ratty hoodie. I wasn’t sure if I would like that it didn’t have closures – I am the sort of person who never wears things open; if there are zippers or buttons, they are done up – but it hangs really nicely and I rather like how smooth and streamlined it is. One thing to note is that the facing is not tacked down at the front of the blazer, except at the shoulders and where it is caught in the hem. I read some reviews that people did not like how it flipped out, however, I haven’t found this to be an issue with my blazer.

Navy Ponte Morris Blazer

Navy Ponte Morris Blazer

Navy Ponte Morris Blazer

Navy Ponte Morris Blazer

Navy Ponte Morris Blazer

I have worn this quite a bit over the past couple of months – it’s a nice protection against the freezing a/c blasts Tennesseans love to subject people to, and a pleasant style change from the basic cardigans I usually carry around. I think this pattern combined with the Pinot pants would make an awesome ponte fake suit – you know, kind of dressed up from a distance but TOTAL LEISURE COMFORT in reality haha.

Also, in case you were curious -I also made the rest of my outfit! The jeans are Cone Mills Ginger jeans, and my tshirt is a Renfew made with bamboo knit ♥ that knit is another fabric I buy over and and over again – because it’s awesome! It’s super soft, incredibly stretchy without being sheer, and has an amazing recovery. It’s also super wide, so I can cut a long sleeve shirt out of a single yard of fabric. It tends to go in and out of stock quickly, but it looks like they just restocked the website. FYI!!

Completed: Cozy Loungewear

7 Dec

It’s officially that time of year – black and grey layers from head to toe. My favorite!

Colette Oslo Cardigan - front

I feel like I spend the beginning of every winter on the prowl, looking for pieces that will keep my warm and comfortable, without looking like a complete slob (only, like, 30% slob. I have my limits, you know). Every year, I wear said pieces until they are ratty beyond repair, so each new season means new duds. Honestly, none of the pieces in this post are particularly earth-shattering, which is why you get a 3-fer post, ha.

Colette Oslo Cardigan - side

Colette Oslo Cardigan - side

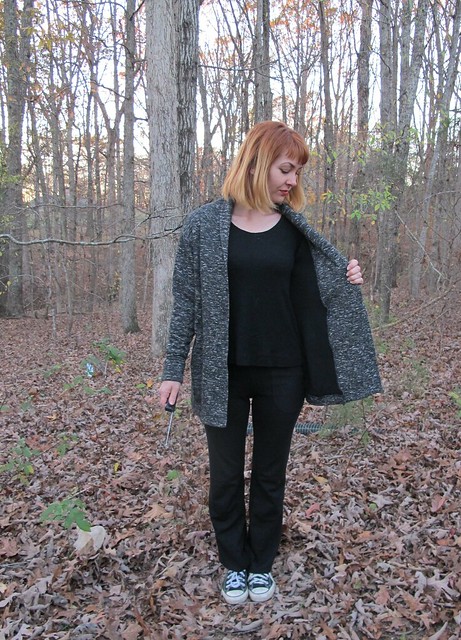
The grey/black cardigan is hands-down the coziest cardigan I have ever made – it even works as a light coat! The pattern is the Oslo from Colette’s Seamwork Magazine. I didn’t care much for the pattern when it was first released, however, I kept noticing cool versions popping up and eventually became mildly obsessed with the idea of making my own. I love the long, butt-covering length, as well as the big shawl collar. In September, Oslo was granted the glory of being “Pattern of the Month,” which knocked the price down to $5 and thus justified my immediate purchase.

Colette Oslo Cardigan - back

Anyway, I can see why everyone and their mom has made an Oslo – it’s a great pattern! It’s a super simple, super quick make, and the resulting garment is a great layering piece that I find vaguely reminiscent of those knit duster cardigans we all wore back in the late 90s (I bought mine at Rave. SUP.). It works especially well with heavier knits – which is great, because I keep buying them but I never know what to make them into! I don’t want a super heavy tshirt. I’ll wear a super heavy cardigan/duster hybrid, though, hell yeah I will.

Colette Oslo Cardigan - inside

Speaking of heavy knits, this was certainly one of those! I bought this double-cloth Italian wool sweater knit months ago, and while it’s really awesome – it’s also super thick. It’s basically two layers of wool knit – black on one side, grey on the other – fused together to make one really heavy layer. It makes for the perfect Oslo, because it’s super warm, but I had no idea what to do with it when I originally bought it. Also, it was kind of expensive, so I only bought 1.5 yards. I BARELY had enough yardage to eek this out – I had to do some piecing at one shoulder, and cut everything on the single layer, but I managed!

Colette Oslo Cardigan - front

Tetris-ing the shit out the cutting layout took a long time, but the actual sewing part did not take long at all! I used my serger for everything – shit got REAL bulky when I was attaching the shawl collar, but other than that was smooth sailing. I cut the size XS and sewed the pattern as drafted with folded back cuffs, although I didn’t add the buttons. I wish I’d had enough fabric to add front patch pockets, as I feel like that’s the only thing this pattern is missing.
Vespa Patterns Grail tshirt - front

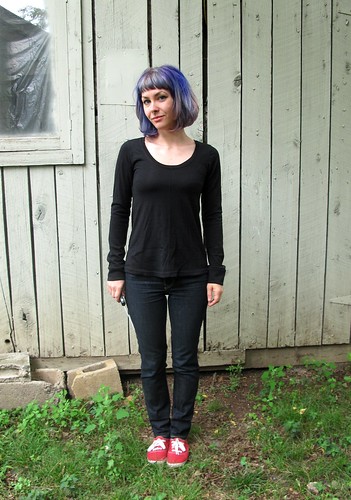
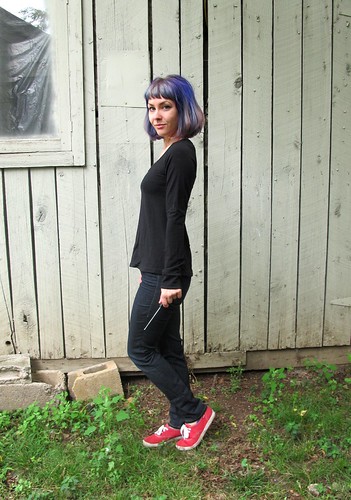
The next piece is a boring ol’ black tshirt! Haha! Well, I used a new pattern to make this – so that makes things a little less boring 🙂

Vespa Patterns Grail tshirt - front

This is the Grail tshirt from Vesta Patterns, a new company in the pattern world. These patterns are drafted and produced for 3 different body shapes, so that you don’t have to do so much futzing with the flat pattern for a good fit. I’ve been super interested in the idea but haven’t had a chance to try out the patterns, despite having them in my arsenal for a few months now. I have both the patterns for E & S (well, I had A too, but I gave it to an A-shaped friend 😉 ), so I started with the E in a size Small. The patterns are drafted to have a bit of ease, which I found to be too much for my personal fit preferences – I had a bit of excess from the underarm down to the waist, but that was easy to nip in before I hemmed the sleeves and bottom. Next time, I may go down a size for a closer fit, or use a more stable fabric like the pattern suggests. That being said, I am really impressed with how well and proportional the neckline and shoulders fit!

Vespa Patterns Grail tshirt - back

Like the cardigan, construction was straightforward and simple. The pattern doesn’t include a lot of information for construction – the steps are written out, but they are short, concise, and don’t include pictures or line drawings. Having made zillions of tshirts in my time, this does not phase me. I don’t need a full booklet with step-by-step instructions for sewing a shoulder seam, you know? But if you need the hand-holding, you may want to consider finding a tutorial online or consulting a book for further assistance.

The one construction element about this pattern that differs from most knits that I’ve sewn, is how the neckline was finished. Strips of fabric are sewn as a sort of binding around the neckline, wrapping the raw edges. It’s similar to how I did the binding on my Mission Skater dress, although without the serged edge. I think it makes a really nice, clean finish that looks really good from the outside. I hemmed the sleeves and bottom at 1″, and just used the zigzag on my sewing machine.

Vespa Patterns Grail tshirt - front

I stayed on the wool bandwagon with this top, and used another wool knit to make it up. I found this weird “black cozy knit” (their description, not mine) on the Mood website – appears to be sold out now. Y’all, this was a WEIRD fucking fabric! I don’t know what I was expecting to get, but what I received was what I would describe as a wool crepe knit. It has that crepey, spongey texture – but it’s a true knit, and stretches as so. I’ve never seen fabric like this before. It’s borderline semi-sheer, but works well for a tshirt. Because of the crepey texture, it has a fantastic drape – perfect for a loose-fitting shirt. It’s also surprisingly not itchy. Just, well, cozy 🙂 It also attracts cat hair like a magnet, sooo, sorry bout that!

SBCC Pinot pants - front

Finally, pants! These are the Pinot Pants from SBCC Patterns and they are my FAVORITE lounge pants ever ever. These are just basically yoga-style pants – not true yoga pants, as they don’t have a crotch gusset, but they do have the flared leg and elastic waistband. I have actually practiced yoga in these pants (not my preferred style of yoga pants – I like slim leggings – but I went to yoga with Jenny when I was in Boston, and hey, I actually had yoga pants in my suitcase!), and they worked just fine. Terrible fabric choice for hot yoga, but I had a great range of movement hahaha.

I made the size XS and cut a longer inseam so I’d have some length to play with (which I immediately cut off, and now they’re a smidge too short. Wah!). I added the free pocket add-on, which was the best decision ever! There aren’t any instructions for attaching these, but I just topstitched them on with a straight stitch (and left the edges raw – other than the top opening edge, which is finished with a self-fabric band). Leaving the edges raw is fine with this sort of fabric, as it’s not prone to unraveling or fraying (and, speaking of raw edges – these pants are unhemmed. Like I said, I cut them too short as it is and I couldn’t afford to lose any length! haha!). I also left off the elastic waistband, and instead used some heavy-duty power mesh in it’s place. Betsy had mentioned once that she preferred power mesh over elastic for a flat, yet stretchy, waistband, and I was immediately intrigued. I actually have some heavy power mesh that is way too heavy for general lingerie (I believe it’s probably good for shapewear, though), so I used that in the waistband. Just cut a waistband layer in the mesh, basted it to the wrong side of the fabric waistband, and sewed as normal. It holds as well as elastic does, but it’s flat like a traditional yoga waistband. I love it!

For fabric, I used black nylon/rayon ponte de roma, which is AWESOME and I wish I had more! It holds shape really nicely and doesn’t stretch out. Like I said, it’s not so great for shit like actual yoga – it retains heat a little too well – but for general lounge pants, it’s perfect.

Colette Oslo Cardigan - on dressform

Vespa Patterns Grail tshirt - on dressform

Vespa Patterns Grail tshirt - neckline detail

You can really see the texture of the knit here. And check out that bound neckline!

Colette Oslo Cardigan - flat

Here is where I had to piece the shoulder area of my Oslo, in order to get the pattern pieces to fit on my limited yardage. You can’t really tell it’s there when I’m wearing it.

Colette Oslo Cardigan - flat

SBCC Pinot pants - flat

Ok, that’s it! Sorry for the overwhelming amount of black + cat hair, ha.

Colette Oslo Cardigan - front

This is the kind of ensemble I reach for when I’m feeling crappy (sick, sad, hungover, etc) but still need to look somewhat presentable out of the house. As much as I love my plaid flannel Carolyn pajamas, they definitely look like pajamas! With these pieces – either all worn together, or individually with other garments – they keep the comfy factor without compromising the yes-i-put-on-pants-to-leave-the-house element. I consider that a win!

Completed: A Cozy Wren Dress

17 Nov

I really love summer, but man, I LOVE winter clothes. I think most people in general just look a lot classier with some added layers, and I really embrace the opportunity to dress in head-to-toe black and pretend like I look chic and not at all like an angsty 15 year old wandering into Hot Topic circa 2001. I can and do look like a total slob in the summer time, but add a little windchill into the mix and I’ll dress like I’m heading straight into the office.

Colette Wren dress - front

So, today, I give you Wren. A pretty little transitional dress that works SO WELL with a heavy knit and sleeves. If I still worked in an office, I’d rock this shit every day.

Colette Wren dress - front

This dress is a story of fabric + pattern both acquired without any pairings in mind. I was actually sent an advance copy of Wren from the team at Colette Patterns – no strings attached, just as a gift. They made it very clear that they weren’t expecting a review post in exchange for the pattern. I thought it was a pretty pattern and I knew I wanted to make it up at some point, but I wasn’t sure what fabric. I love the solid colors they use for the promotional shots, but I rarely feel compelled to sew solid colors (which is something I’m working on, because lord knows I like to wear solid colors!).

In the meantime, I’d been eyeballing this black cozy knit fabric from Mood Fabrics (their description, not mine. But it is a black cozy knit. It’s also super sold out, and I can’t find a link to it. Sorry! I’m pretty sure I bought the last yardage. Not sorry about that!). I had my swatch and I knew I wanted it for… what? No matter, I bought 2 yards of it and figured I’d figure that shit out later.

It wasn’t until I saw Deepika’s classy black and white Wren dress that I had my aha moment of fabric and pattern marriage. As in, I totally copied Deepika’s dress. Thanks for the inspo, Deepika! I hope you are ok with being my twinsie 🙂

Colette Wren dress - side

Colette Wren dress - side

These pictures are borderline awful, by the way. I was waiting for the golden hour, and I think things got a little too golden. Oh well!

Colette Wren dress - back

The Wren dress is a lovely knit dress that features a surplice/wrap-style bodice, set into a closed skirt (aka, it’s not a true wrap dress). You have the option of adding either a gathered or a fitted, 6 gored skirt, and the bodice can be sewn with or without sleeves. My favorite part of the dress are the soft gathers along the neckband, which are so feminine and pretty (and you can barely see them for this print that I used haha oh well). The sleeves included in the pattern are just for short sleeves, but it’s pretty easy to lengthen those to whatever suits your needs. Colette patterns did offer a sleeve download when the pattern was first released – for both a long sleeve and a 3/4 sleeve – which is what I used here. I actually cut the long sleeves, but they were weirdly tight below the elbow. Hence, my elbow-length sleeves. All good here, though, because those long sleeves looked a little overwhelming with this print!

Making the dress was super super easy. Since it’s a knit, I whipped everything through my serger to piece it together, and used my twin needle to hem the neckline and sleeves and hem. I was a little concerned about the top gaping since it’s only hemmed (and not finished with a knit band, which is my preferred method), but I figured I’d give it a try and I have not experienced any gaping. The only thing I’d change in the future is to deepen the hem on the neckband – at 3/8″, it’s a little shallow, and I just think it would look better and the stitching would lie more flat if it was closer to 5/8″.

For size, I cut an XS based on my measurements. I’m really pleased with the fit – and this is straight out of the envelope, no additional shaving off side seams or anything like that. I will mention that the waistline is pretty high on me – and I’m of average torso length – so that’s just something to be aware of. It’s definitely higher on me than it is on the model or in the illustration, but my knit does have only a 2 way stretch so that’s likely the case.

Colette Wren dress - front

Colette Wren dress - back

The ~black cozy knit~ is pretty awesome! It’s a poly knit, which I’d normally stay far far away from in the summer months – but I’m ok with poly in the winter. It sewed and pressed fine, and it’s just a really nice fabric. It feels a bit like lightweight ponte, with a nice heft and weight to it. The design is woven, so the wrong side is pretty cool too. My favorite part is that the right side is a little fuzzy and feels like a cozy sweater. My other favorite part is the print- up close, I think the white design looks like a city skyline 🙂

Colette Wren dress - front

Here it is without the belt!

I don’t think there’s much else to say about this simple dress, so have some more photos:

Colette Wren dress - flat

Colette Wren dress - flat

Colette Wren dress - on dressform

Colette Wren dress - on dressform

Colette Wren dress - front

I think the dress looks pretty classy – it would be awesome for all those fancy dinners and evening concerts that I don’t attend. HA! Or maybe just wallowing around on the couch, I dunno. Actually, my roommate and I are going to see Neil deGrasse Tyson this week and I’m TOTALLY wearing this shit for that. I am going to be so comfy while I simultaneously have my mind blown about the universe, wheee!

* Note: This fabric was given to me in exchange for my participation in the Mood Sewing Network. The pattern was also given to me from Colette Patterns, as a gift and with no strings attached. Per usual, all the opinions you are reading here are my own!

Completed: Leopard Cabernet Cardigan

13 Apr

Good morning, everyone! Lots of changes happening in my world over the past couple of weeks – as you know, we moved out to the country, about 20 miles west of Nashville in beautiful Kingston Springs, TN. Our house sits on a 5 acre plot of land surrounded by woods, and wow, spring is gorgeous here! The leaves are finally starting to poke out – I can’t wait until all the trees are green! As I mentioned before, my best friend bought the house, and Landon and I are occupying the lower level apartment. We are still settling in, but making good progress. I promise I will share sewing room photos as soon as the space is ready. It’s still a work in progress – for one, I need to finish painting (I mean, Landon needs to help me finish painting because I am SO OVER painting by myself!), and I need to get some rugs because the floors are coooold. So it’s not quite ready for it’s ~big reveal~, but it is totally usable for makin’ shit! Which is what I’ve been doing since the second the space was finally unpacked. And here is evidence of my first completed garment in the new place! It’s not anything fancy, but it fills a fabulous gap in my wardrobe 😉

SBCC Cabernet Cardigan

Oh, right, that’s the other big change – I changed my hair color back to something a bit more normal! 🙂 My stylist and I have been talking about this for a few months – even before I went to London in November, we were planning. I was starting to get really sick of doing the upkeep myself – redying the roots, dealing with fading, hair color rubbing off on everything, etc etc – and I knew I wanted my hair to look relatively normal for when we go to Peru in June. I actually had all this done the day before we moved at the end of March. It took about 7 hours (woof) and we’re still not done – there’s a little bit of green showing through in certain spots. I need to go back later this week and get another fill or whatever, but my scalp was just done. I gotta say – I’m REALLY happy with how the color turned out! My stylist is seriously a hair magician. And while I’m not delusional enough to think that my hair is 100% undamaged as a result, it’s still in pretty outstanding condition, considering what we put it through. Eventually, I’d like to lighten everything up to a brighter, more coppery red (still natural, but less brown), as well as let her do some fun stuff with highlights. But that’s all in due time! For now, I’m loving this red-brown 🙂

Ok, back to sewing stuff!

SBCC Cabernet Cardigan

This leopard beauty is the Cabernet Cardigan from Skinny Bitch, Curvy Chic patterns. I was REALLY excited when this shit was released because I love wearing v-neck cardigans. I really like the way they look both buttoned and unbuttoned – which is the one minor complaint I have about my Jenna cardis – the crew neck just feels like it looks really weird when it’s unbuttoned, at least on me. Also, this pattern very closely mimics the poor v-neck cardigan I ripped up to use as a pattern (which was totally in vain, because that shit DID NOT WORK. But I guess it’s ok bc the cardigan in question was destined for the scrap heap anyway, since it was holey-er than, like, the Pope at that point), so yay! V neck cardis all day, erryday!

SBCC Cabernet Cardigan

See? Looks totally legit unbuttoned. Also, I promise I’m wearing a shirt under the cardigan – it’s just a white v-neck, and the sun was VERY bright that morning. So I look nakey, but honestly, I’m not that exciting of a person.

You can’t see much of the details of this piece due to the (admittedly fabulous) fabric that I used, but it has some nice and simple finishing. The sleeves and hem are finished with a wide band (same with the Jenna cardi) and the neckline also has a folded-over band. The difference between this cardigan and the Jenna is in the neck band – on the Cabernet, it’s one long piece that is interfaced only where the buttons/button holes go, and stretched just at the back of the neck. It’s also a wider band than the one on the Jenna, which means the button holes were a helluva lot easier to get in there without fucking them up.

SBCC Cabernet Cardigan

This cardigan also features the cutest little teensy pockets! Yay pockets!

SBCC Cabernet Cardigan

SBCC Cabernet Cardigan

Not a lot of changes went into the sizing of this pattern. SBCC drafts for petite proportions, so the length of both the body and the sleeves are pretty spot-on for me. I cut the size XXS, based on the pattern suggestion, but ended up taking about 1/2″ out of each side seam because I felt that even the slim version was still a bit boxy on me. This was totally a hack alteration – I’d already finished the cardigan at that point (and Instagrammed it, so you know that shit’s forreal), and rather than pull off the bottom band and do things properly… I just nipped in the sides with my serger and continued the seam down to the bottom of the band. Better to have a slightly subpar finish than a cardigan that I never wear, right?

SBCC Cabernet Cardigan

Since this was my first rodeo with the pattern, I followed the instructions as written. I topstitched everything with a straight stitch, as recommended – I was afraid it would look kind of homemade and tacky, but I think it actually looks really nice! Since the cardigan is an easy fit that doesn’t reply on much stretch (unlike, say, a tshirt), I don’t have to worry about the stitches popping. Everything else was finished on my serger, and I used regular lightweight fusible woven interfacing for the neckband. All in all, I think this took maybe 2 hours to sew, start to finish. It’s a quick little make and it’s already getting very regular rotation in my wardrobe.

Also, speaking of instructions – the booklet that comes with the pattern is super cute! (well, the printed version, which I’m totally glad I sprang for the couple of extra dollars because yay for not having to print and tape PDF patterns!) It’s about the same size as a standard piece of paper, and the pages are stitched together along one edge. The illustrations are large and very clear, and the instructions are very much direct and to the point. There are no cutting layouts included, and not a lot of hand-holding involved (i.e., no beginning section telling you how to work with knit fabrics, for example. Kind of refreshing, honestly! I think there’s enough of that out there as it is, ha). So if you’re a super beginner and want to try this pattern, but need some help with sewing knits – definitely research beforehand. It’s an easy pattern, though, and I think it’s totally doable for the beginner knit-sewer.

SBCC Cabernet Cardigan

SBCC Cabernet Cardigan

The super fabulous leopard print ponte was one of my scores from when I was in NYC last month. It was one of the very few things I had specifically on my list to pick up – leopard print ponte, yellow stretch twill, and stone washed stretch denim, to be precise (sadly, I did not find the stonewashed stretch denim. Everything available right now is dark indigo or black – wtf? Do y’all seriously not want me 90s-mom’ing it up or something?). I actually met up with Renee during my first shopping expenditure that weekend (who is just as awesome in real life as she is on her blog – maybe even more so, actually, because she came bearing a selfie stick), and while we were in Metro Textile, I asked Kashi for leopard print ponte and everyone laughed at me for being way too specific. Well, joke’s on all y’all because I found my damn ponte the next day – in Mood Fabrics, no less! (although I did get some amazing shit from Kashi. Just wait for it.). This ponte in particular is a bit more lightweight than usual, which is nice for this warmer weather. It’s stretchy, but it’s really easy to work with. My scissors did not particularly enjoy trying to cut through all the thickness, but I’m pretty sure it’s because they desperately need sharpening.

I also realize and completely acknowledge that this v-necked leopard print cardigan kiiiind of makes me look like one of those Ladies Who Lunch, but I’m totally ok with that. I like eating lunch with my lady friends.

SBCC Cabernet Cardigan

So yeah! So much newness up here today – new cardigan, new hair, new background in mah photos. I am LOVINGGGG these woods; it’s so quiet and serene out here, and you can actually see the stars at night. And we’re still a relatively short drive from Nashville, which is nice for when I need my hot chicken fix 😛

One last thing – the Sewing for Fashion Designers giveaway winner!

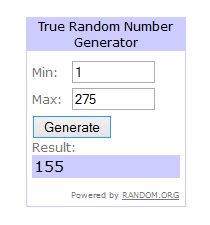
winner1

Congratulations, Vickie C! I will be in touch to get that book mailed out to you ASAP 🙂 The rest of y’all – as always, the book can be pre-ordered on Laurence King’s website and Amazon 🙂 Thanks for your support, y’all are the best!

Completed: Two Colette Mabels

8 Oct

I totally skipped all the hullabaloo that came out when the Colette Patterns Mabel skirt was released – but that’s ok! I’m here now, reporting for duty!

Colette Mabel & Sewaholic Renfrew

I actually made two – just to be safe!

Colette Mabel & Grainline Archer

Let’s start with a basic Mabel lowdown. I made the grey version first, out of some leftover ponte knit that I used to make a pair of Ooh La Leggings (not pictured – because neither photographed nor blogged, but they are basically the same thing as these black ponte leggings except, you know, grey). I actually have no idea why I bothered saving that little piece of fabric, because it was about half a yard and thus not enough to do anything with – and the ponte is pretty thick, which means it wouldn’t work for something like, say, colorblocking a tshirt (which can be a good use of leftover knit scraps, if you tend to get hoardy like I do). Anyway, it’s a good thing I did, because I had exactly enough to make a little Mabel mini! Yay! I love it when these things work out!

Colette Mabel & Grainline Archer

Colette Mabel & Grainline Archer

Mabel Mini 1 is view A, size XS. I sewed the pattern exactly as per the directions, except I opted to understitch the waistband lining (I used my machine’s lightning bolt stitch – kind of like a very short zig zag stitch), to keep it from sticking out. The seams of the skirt were sewn on my serger, and the hem is done with a twin needle. From cutting, to sewing, to hemming – this entire thing took… I dunno, maybe 30 minutes? It was VERY fast.

I didn’t really use the instructions – I mean, it’s a knit skirt, it doesn’t need much introduction – but they looked to be pretty good, based on my glance over. Like the Moneta pattern, they include lots of tips and info on how to sew knits with a regular machine, which is always nice. The only thing I did not like about this pattern was taping it together (I have the PDF). Holy shit, talk about too many pages! My disdain for PDFs is no secret (I get why other people like/need them… no defense necessary 🙂 But for me? Nope, no way! Can’t do it!), so maybe I’m biased – but this one seemed to be unnecessarily large & unwieldy. My advice: get the paper pattern. Ha!

Colette Mabel & Sewaholic Renfrew

Anyway, speedy instaskirt is the reason why I obviously needed to jump right into Mabel Mini 2 immediately after 😛

Colette Mabel & Sewaholic Renfrew

I made a couple very minor changes for this one – I took in the center back and side seams by about 3/8″ (in retrospect, I should have taken in more, because it’s still a little loose around the waist and thus rides down farther than I want the rise to sit), as well as the waistband by the same amount. I used the last of my black striped ponte from Mood Fabrics NYC store. Again – 30 minute skirt. Talk about fast fashion, amirite.

Colette Mabel
Colette Mabel
Colette Mabel

For both skirts, I used a lightweight black rayon jersey (the same jersey that my black tshirt is made out of, incidentally. That tshirt is a Renfrew, by the way!) to line the waistband. I considered using a self-lining – but decided the fabric was a smidge too bulky, so I went with a lighter weight lining, which ended up being a Good Decision.

Oh yeah! I made that plaid flannel button down too! SUP!

Grainline Archer

This was made using the Archer pattern. I actually finished it waaaay back in… March. Yep. I got it in my head that I needed to make a new plaid Archer to wear when I went to NY, so I nearly killed myself trying to finish the shirt in something crazy like 2 days. I did end up finishing it – and bringing it to NY to wear – and I learned two things about the experience:
1. My life did not suddenly become more fabulous because I had a new shirt to wear while on vacation; and
2. Pushing myself to the point of exhaustion to finish something for a self-imposed deadline is not fun at all. Seriously – it’s shitty, it makes me anxious for no reason, and I didn’t enjoy any part of sewing that shirt. Which is sad, because button downs are one of my favorite things to sew! I love how precise the stitching is, and all the little details that make it special. I unfortunately didn’t get to enjoy any of that because I was too rushed trying to hurry up and finish (when, realistically, I should have either started earlier, or accepted that I just wouldn’t finish before I left), and yeah, that’s just lame.

So, with that being said – no more unnecessary last-minute vacation sews with shitty deadlines! If I need clothing that quickly, I will buy it (lol jk I’LL NEVER BUY CLOTHES AGAIN)(ok, seriously, kidding with that last part… mostly.). So far, I’ve done a decent enough job of putting this into practice, so that’s good!

Grainline Archer

And, for what it’s worth – I do like the shirt. I could have done a better job with it – the topstitching is not my best, and the grain is all wonky because the plaid fabric was hideously off grain (like, to the point where I actually cut the entire shirt twice. Yes. I did that. And it’s still pretty bad) – but it is what it is. It’s snuggly, it’s warm, and I also just realized that I made it to match the leggings that I made with the rest of that grey ponte fabric hahaha omg my life is fabulous.

Grainline Archer

Anyway, I hope you liked my Archer story. Have some pearl snaps.

Grainline Archer

And a sleeve placket while we’re at it!

Ok, so here’s my dilemma – and I’m hoping y’all can help me. I HAVE NO IDEA WHAT TO WEAR WITH THESE SKIRTS. I feel like everything I put on just gives me weird proportions! The tops I’m wearing here are ok, I guess, but that’s about the extent of what my closet can offer. Most of my other tops just look… weird? I think the biggest problem is the waist line- it kind of hits at a strange place:

Colette Mabel & Grainline Archer

See what I mean? It’s about right at my belly button – which isn’t quite high waisted, and not quite low waisted. I can’t tuck anything in – partially because it’s very lumpy under the ponte, and partially because the waistline hits at a sort of wide point on my body. Untucked, most stuff just looks sloppy or gives me that weird long-abdomen proportion that we just loved soo much in the early 00s (y’all know what I’m talking about!). So yeah, can’t figure that one out. Any suggestions? Should I stick with more fitted, cropped sweaters (such as what the model is wearing on the website)? HELP ME I CAN’T ADULT.

Colette Mabel & Sewaholic Renfrew

Anyway, let’s talk! Answer one or more of the following:
– What shirts should I be wearing with these skirts?
– Have you ever made yourself sick by rushing to complete a garment before going somewhere?
– What happened when you finished it? Did a unicorn grant you 3 wishes or did you just realize that life was still doing life things and dammit is it Monday already?
– Seriously, though, what should I wear with these skirts?

** Necessary disclaimer: I received the Colette Mabel skirt from Sarai of Colette patterns, gratis. No review was requested – but as always, all opinions are my own. All fabrics in this post were purchased by me 🙂 I do get a monthly Mood allowance, but that doesn’t mean that I don’t also spend plenty of my own money there! Just wanted to clear that up 🙂

Completed: Some Tshirts!

26 Sep

Oh hey, head’s up – this post is all cake and no frosting. No apologies, though! Lord knows I can never have enough Tshirts.

Rather than bore y’all with a bunch of posts featuring patterns I’ve made before, though, I’ve compiled a trio of 3 different tshirt patterns – ranging from Free to You Gotta Pay For That Shit – for science and comparison purposes. Who doesn’t love a good Tshirt debate, amirite? Also, I took these pictures before I redyed my hair, fyi. Just in case you were curious, haha.

LET’S TALK ABOUT TSHIRTS NOW, GUYS.

Plantain Tee

First up is the Plantain Tshirt, from Deer & Doe Patterns. This is that free pattern I was telling y’all about. This is a great beginner tshirt pattern – there aren’t a lot of pieces, it includes some new techniques for beginners (such as sewing the neck binding), the instructions are very clear, and the fitting is quite loose at the bottom. I was initially afraid that I wouldn’t like this shape on me AT ALL, but I’m surprised at how much I love it!

Plantain Tee
Plantain Tee

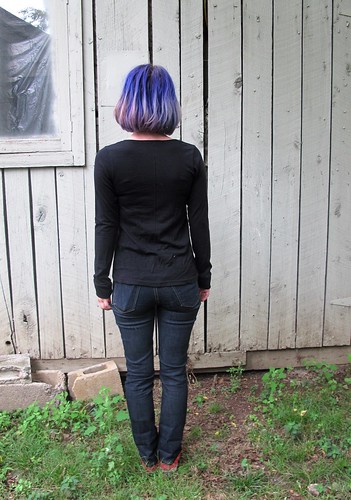
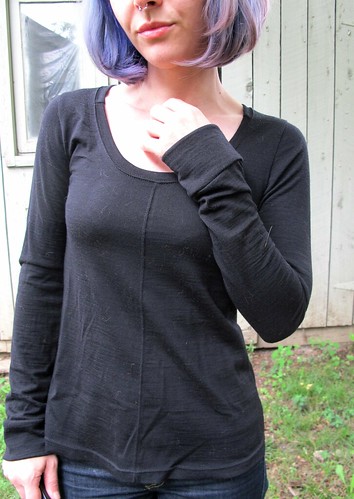
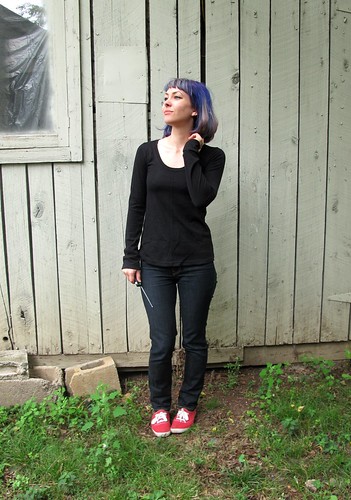
Even though it’s a free pattern, I think it’s far from being a “crappy” pattern, if that makes sense. The sizing is perfect – I sewed up a straight 34, with no tweaks. I used the last scraps of my black merino wool from Organic Cotton Plus to sew this up – I like how the wool gives the bottom some structure (and the wrinkles? Not as much a fan of those, but I’ll live :P). And it’s SO COZY. Cozy tshirts, FTW!

Plantain Tee

I did make a couple of changes to the design of the pattern itself – the main one being that seam that runs down the front and back of the top. This was done out of necessity, as I didn’t have enough fabric to cut on the fold. I simply added a seam allowance and created a CF and CB seam. I topstitched the seams so they’d look more intentional, ha. I also added cuffs to the sleeves – because, I dunno, I like them! There’s a bit of piecing at the neckline binding as well. Since I was making this out of leftover scraps, I didn’t have a long enough piece to cut continuous binding. I don’t think it’s that noticeable, and hell, I’ll deal with some seams if that means I get a merino wool top out of it amirite.

Stripey Renfrew

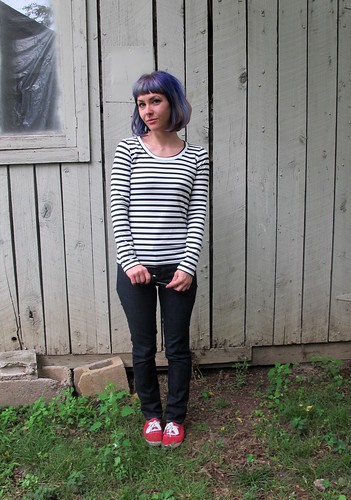
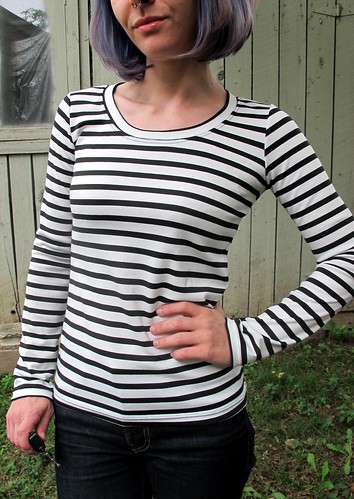
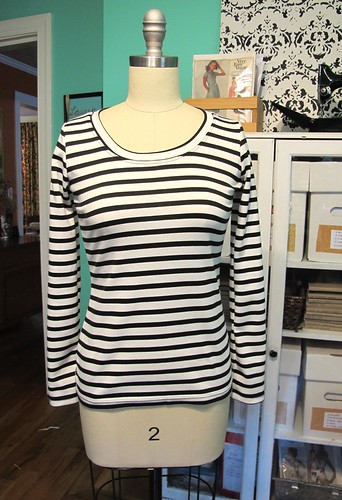
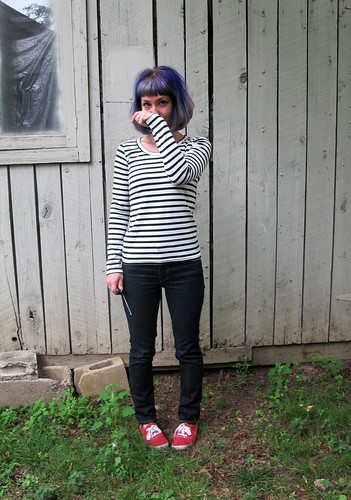
Next up is my tried-and-true tshirt allstar – the Renfrew from Sewaholic Patterns! I LOVE this pattern, a fact that I believe is pretty well documented. Renfrew is favored by me because I think it most resembles what we think of when we think of a tshirt – slightly fitted, set-in sleeves, and 3 neckline options (in addition to the scoop, there’s also a cowl and a v-neck), as well as sleeve length options. The pattern is written to have a band of self-fabric at the sleeve cuffs and hem, in addition to the neckline. I’ve found that I prefer to hem my tshirts (rather than use the fabric band), and some of the more casual ones I like to hem the sleeves as well. One thing to keep in mind – should you decide to join me in my tshirt anarchy – is to add that length to the sleeves and hem before you cut them out. Otherwise, they might end up short! Ask me how I know about THAT 😉

Stripey Renfrew

Fitting-wise, this is a great pattern, although I did make a lot of tweaks to get to the point I am now. It’s been a long time since I tweaked, but if I recall – this is a size 0, with additional ease removed from the waist. I also shortened the shoulders a smidge and made them slightly narrower. All those tweaks paid off, because this is a pattern I reach for again and again when I need a tshirt. At any given time, if you see me in a tshirt – ask me if it’s a Renfrew, the answer will probably be yes! Seriously! Oh, and my fabric is a striped ponte from Mood Fabrics (the store, not online).

SJ Tee

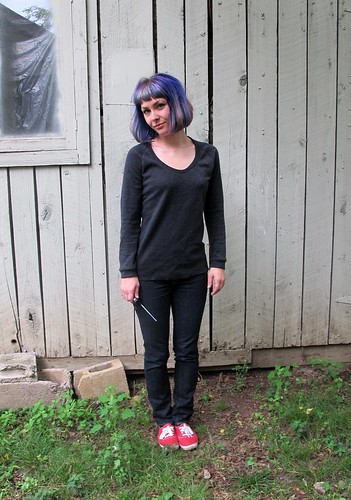
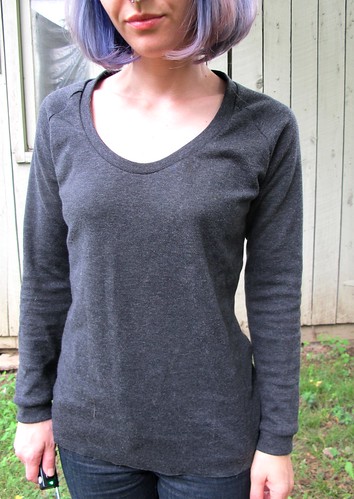
The last top in this trifecta is the SJ Tee from Papercut Patterns. Another new-to-me top, and I admit this is more like a sweatshirt than a true tshirt (but mostly due to fabric choice). It’s kind of like a sexy sweatshirt, tbh – raglan sleeves and WHOA SCOOP NECK. Forreal, make this in something too stretchy and you’ll end up in boobie city. Again – want to ask me how I know about that? 🙂 haha!

SJ Tee

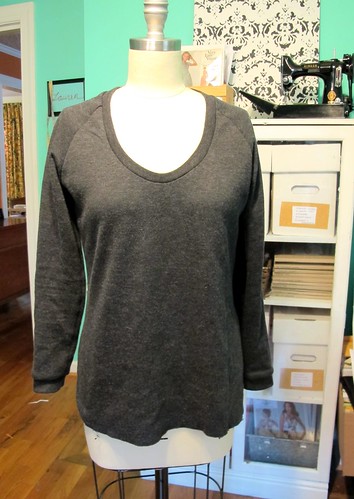
I’m surprised at how much I like the fit of this, considering that I don’t normally go for things so loose. I did end up taking the CB in by about 1″ – I’d already sewn the neck binding in at that point, so the seam runs clear from the bottom to the top of the binding, oops. But that made a HUGE difference in the fit, especially at the back. I used the size XXS and – other than the chunk taken out of the CB – it’s relatively unchanged. Oh, and I did shorten the cuffs so they’d look more like a sweatshirt. The fabric I used here is the last of my wool knit from Mood Fabrics (the same knit I used to make my grey Jenna cardi), and I had JUST ENOUGH. It’s amazing how much I love such a simple sweatshirt, by the way – I’ve been wearing it every night. It’s so cozy!

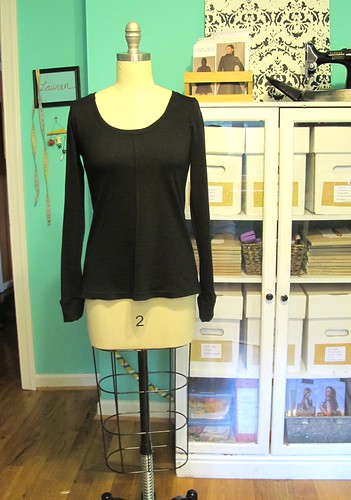
Here are the three patterns as modeled on my form:
Plantain Tee
Plantain Tee

Stripey Renfrew
Renfrew Top

SJ Tee
SJ Tee

I think it’s really interesting how something so simple as a damn tshirt can yield such different results, based on pattern and fabric choice. These are all pretty basic designs in the grand scheme of things, but they’re different to stand on their own. Obviously there are many, many more tshirt patterns out there (off the top of my head, these come to mind: Ensis, Briar, Bronte, Coco, and Lord, don’t get me started on dresses that can be hacked into tees), but I stuck with these three because I feel they’re the most basic/versatile. Also, let’s be real – if I fall down a tshirt rabbit hole, it might be months before this post sees the light! Ha!

Stripey Renfrew

Out of all these, I think my favorite is the Renfrew, just because it’s so damn versatile and I love how it fits (not to mention, the slim fit is ideal for layering). It might also have something to do with the Renfrew being my first love – can’t ever abandon her now 😉

I can’t stop thinking about that SJ tee too, though – I already have some future plans for her, including camel-colored boiled wool. Yum!

Plantain Tee

What’s your opinion on tshirt patterns? Do you have a favorite – and if so, dish please!

(psst! Don’t forget to enter the Sewtionary Giveaway, if you haven’t already done so! Entries close on Monday morning!)

Completed: Coco!

21 Feb

YAY I’m so glad I finally get to share this secret with y’all – Coco!

Coco Top

For those of you living under a rock (a… really big rock, I’d assume), Coco is Tilly‘s newest pattern, just released last week! Tilly asked me a few months ago if I’d like to test the pattern, and as soon as I saw the word “knit” in the description, I immediately jumped at the chance. I can’t resist knits, I’m sorry!

Coco Top

Coco is a lovely, simple shape reminiscent of those gorgeous Brenton tops that everyone except me seems to own. Sewn up in a more stable knit (I love my slinky jerseys, but this pattern is not really the place for that… although I will probably experiment with that shit in the future anyway!), it’s very easy to assemble and very forgiving to fit, making it perfect for beginners to tackle. I made the short length with 3/4 sleeves and a funnel neck; there are three views included in the pattern (that you can mix and match for endless variations) – you can see them all in more detail on Tilly’s blog.

Coco Top

For my fabric, I used a heather grey ponte knit from Mood Fabrics. I sewed the entire thing on my serger, although you can absolutely sew this on a regular machine if need be – the pattern even includes some instructions and tips if that’s the case for you! I made no alterations to the pattern itself; just sewed it up in a straight size 1 and followed the instructions to assemble! I used a straight stitch to sew the side slits and the hem, which have held up quite well, despite all the washing and wearing I’ve given this top. This is also the first thing I made using my new gravity feed iron, and WOW you guys – that hem pressed like a dream!

Coco Top

I’ll admit; when I was sewing this up, I was a little afraid it looked a bit Star Trek-y for my tastes, with the solid color and the big funnel collar. I think the end result turned out really cute, though, and it’s sooo comfortable to wear with leggings. I’m wearing this one with my red ponte leggings; it’s like a ponte double-whammy up in hurr, yeah!

Coco Top

Also, check out that throwback hair! You can tell how old these pictures are, ha 😉

Coco Top

I think this would be REALLY cute up in a stripey fabric (which I looked for, but no dice. Whyyy is a good stripey knit so hard to find, anyway??). I’d love to try the variation with the boat neckline and keep the little side slits – maybe even go with the longer length. It’s a simple shape for sure, but it’s also open to LOTS of possibilities!

Coco Top

What do you think? Love Coco or LOVE Coco? Get your copy here!

Completed: A Snuggly White Hoodie

17 Feb

Oh my god, I love this hoodie.

White Hoodie

Remember that stripey hoodie I made last year with a sacrificed RTW hoodie that I ripped up to use as the pattern? I LOVE that thing – I wear it allll the time – but it’s a bit lightweight for winter. I mean, the fabric is a very flimsy jersey knit. I knew I wanted to make something with a bit more heft and warmth to it, but every fabric in my stash just seemed… wrong.

White Hoodie

Then I bought that ridiculous chunk o’ yardage of ivory jersey from Mood and I was like, YES. White hoodie it is!

White Hoodie
White Hoodie

BUT WAIT THERE’S MORE. This isn’t just any ol’ white hoodie – this is a white hoodie that has been lined in fluffy faux sherpa, at the pockets and the hood, for extra warmth and snuggliness!

White Hoodie

I bought sherpa remnant while I was in Chicago last year, at the Vogue Fabric Store (Here is it on their website, I think). I had no idea what I was going to do with it, but I knew it had to come home with me! After seeing how great it looked next to the ivory knit, I knew I’d found a match made in heaven.

Since the sherpa only has a slight stretch to it, I knew I couldn’t use it for anything that was dependent on being stretchy – i.e., the body or the sleeves. This left the hood and the front pockets, both of which I lined. I cut the pattern pieces from both the knit and the sherpa, giving the sherpa an extra seam allowance at the hemmed edge. After sewing the pieces together, the smaller size of the knit meant that it easily pushed inside the lining, so I had a cute ~sherpa edge~ on the hem of my front pockets and the edge of my hood.

“But Lauren,” you might be thinking, “isn’t sherpa hard to sew? Don’t you need to use a special leather needle or risk blowing up your machine?” Naw! Not even! My sherpa is pretty thin, even with the suede backing, so it sewed up fine with a ballpoint needle (normally I would have opted for a universal needle, but we are dealing with knits on the other side here) and serged effortlessly. It also wasn’t quite as messy as other faux furs I’ve used – no fur tumbleweeds blowing around in my sewing room or anything! – but be warned that it does still shed. I was wearing my Lola Sweater Dress  while working on this and by the time I was finished, I looked like I had crawled through a snowstorm. So, you know, maybe invest in a lint roller or something.

White Hoodie

I topstitched down around the perimeter of the hood hem, which turned the sherpa into a casing where I could insert a drawstring and some little sherpa pom poms. I mean, if you’re gonna go all out – you should go all out, yeah?

Pom poms are SO easy to make, by the way!

White Hoodie - pom pom

Cut a circle out of your fabric (cut it bigger than you think you should) and baste all the way around with a long running stitch.

White Hoodie - pom pom

Gently pull one thread tail to gather, and the circle will form itself into a ball.

White Hoodie - pom pom

Before fully closing the ball, you will want to stuff it so it has some body. You can use polyfill or just fabric scraps – I decided to use some of my leftover tiger jersey because I thought it would be a fun little secret 😉

White Hoodie - pom pom

Finally, just fold gathered raw edges under and sew across the top several times, pulling the thread tight (but not so tight that it snaps!) until the hole is closed. Not pictured but you should do this anyway: make sure you put your drawstring in the hole before you close it up! I first tied a giant knit at the end of mine so it wouldn’t pull out.

White Hoodie
White Hoodie

Pom poms + sherpa = best hoodie ever

White Hoodie

This hoodie was one of those weird experiments that I wasn’t sure was going to work out until the very end – the front pockets are pretty thick, thanks to the sherpa, and the hood fits a bit tighter than normal because of the multiple layers. But I really LOVE the way it turned out! Exactly as I imagined!

White Hoodie

The only question (and the only thing I didn’t think through before plowing ahead): Um. How does one wash suede-backed sherpa?

White Hoodie
White Hoodie

Here are some less blown-out close-ups. Man, this thing was hard to photograph! I tried taking the pictures in my living room so it wouldn’t be quite as bright, but it’s still hard to see the details.

White Hoodie

One thing that really upped the luxe factor of this hoodie (or, as luxe as a hoodie can get, I guess!) is the zipper I used. Instead of going to Joann and getting a plastic white zipper like I usually would, I went to my Bernina store and bought one of those special gold metal zippers that costs like $8. Ha! It’s not quite as fancy as a Riri zipper, but it’s the best thing I could find locally 😉 I think it really adds a nice touch and makes the hoodie look super professional!

White Hoodie

To get the zipper in was a bit fiddly, since I had so many layers going on at the pockets. I basted the layers together by machine, folded the edges under and fused stitch witchery in between to keep everything in place. I sewed the zipper in with two lines of straight stitching – the closest line going right up against the zipper. I used a walking foot and a ball point needle so the fabric did not move around at all.

White Hoodie

There are those pom poms again! Ha! I LOVE them! 😀

White Hoodie

Leaving y’all with this picture because it’s so amazing. What am I even doing here, I have no idea, but it makes me laugh every time I see it.

Psssss- I just got wind that the Great British Sewing Bee is casting for Season 3! Ahh!! I know I said I don’t like participating in sewing contests, but were I qualified for this one I would be ALL over it like white on rice! Which means, if you DO qualify – go on and let us live vicariously through you! Do it do it!

Completed: The Ensis Tee

13 Feb

I feel like such a bad friend, but I’ve hardly managed to make a ding in my stack of Constellation patterns from Papercut Patterns. Not for lack of inspiration – I have plans for almost every pattern in that horde – but a lack of time. Well, I guess time isn’t such a bad issue now, huh? 🙂 YAY TIME TO GET SEWING.

Ensis Tee - stripes

So here’s the first of the series – the Ensis Tee! Actually, hush hush, but this is the second Ensis Tee I’ve sewn – the first one, I tried to use pieced fabric scraps to make the yoke up and it just ended up a mess of mismatched seams. It’s super comfy, though, so I wear it as loungewear 🙂

Ensis Tee - stripes

Ensis Tee - stripes

I really love the colorblocking effects with this pattern – I have so many ideas that I want to put into action! Like making it into a colorblocked turtleneck or cutting the yoke out of lace. Such a great little basic pattern!

Ensis Tee - stripes

For this particular Ensis, I used more my stripey ponte from the making of my Stripy Lady Skater, and the matching ivory ponte for the colorblock at the top. I also managed to cut out a Renfrew with the tiny bit of remaining yardage left, so expect one more garment out of this amazing fabric. What? Don’t look at me like that.

Ensis Tee - stripes

I cut the size XXS and the only alteration I made was a nip the waist in just a tiny bit for some added shape. My original Ensis was made using a very drapey Merino wool and the unaltered size is perfect, but when the fabric has a bit more body, you may need to add a little bit more shaping or else run the risk of looking boxy.

Ensis Tee - stripes

Ensis Tee - stripes

I also shortened the sleeves a little, as the originals were too long with the addition of the cuffs. You can’t see too well in these pictures, but the hem is slightly curved. I finished that with a simple twin-needle stitch – the rest of the shirt is sewn entirely on the serger. Yess!

Ensis Tee - stripes

I mostly like this top because I think it makes my boobs look big. There, I said it.

Ensis Tee - stripes

Ensis Tee - stripes

Ok, FINE, I reckon we can now address the elephant in the room – my hair! What is UP with my hair?!

Ensis Tee - stripes

I told y’all it was bright orange!

Ensis Tee - stripes

So, this is phase 1 of a two-part hair makeover. I had it bleached out last week at the salon (my salon does a training program that needed a bleach model, which means I got this done for a STEAL. srsly, srsly cheap), but I haven’t had a chance to deposit my color on it yet – hopefully this weekend. YES, it’s very orange – I had old box color already on my hair, which makes for unpredictable bleaching results. This was as light as we could go without really damaging my hair, and it’s fine for what I have planned. YES, I am aware that orange is not the most flattering color for my complexion, and I don’t intend to leave it like this for forever (although it’s kind of fun right now, not gonna lie!). I’m now working a job that doesn’t require a natural hair color as part of the dress code, so I jumped at the opportunity to do something weird with my hair. It’s just hair, it’ll grow back!

Ensis Tee - stripes

Also, say hello to my sewing room! The winter has been wretched cold, but with enough random warm days scattered throughout so I was able to squeeze in some outside photos from time to time. We’re right in the midst of another below-freezing week, so I’m back to shooting in my sewing room 🙂

DIY with Zazzle

6 Dec

Have y’all ever heard of Zazzle? It’s an online marketplace where you can create custom, well, anything, and have it printed and shipped directly to you, on demand. Not only that, but you can also upload your designs to sell and have other people buy them! Pretty neat, and pretty perfect if you love creating designs but hate going through with actually getting the design printed on anything. Ooh La Leggings Zazzle contacted me a couple of months ago to see if I wanted to try out some of their products for a review. Did I! The hardest part was figuring out what I wanted – seriously, the options are endless. You can make tshirts (with like 50+ styles and colors to choose from), business cards, coffee mugs, key chains, buttons, stretched canvases for your wall, phone cases, greeting cards, custom wrapping paper… the list goes on and on and on and on and on! And everything can be customized. Ooh La Leggings I spent about 2 weeks trying to sort through the products, and in the end I decided to go with a pre-designed raglan tshirt – the Crafty Tee! Isn’t it cute? I love the design and the fact that I could get it printed on a raglan. You can also change the colors of the raglan, but I love the simple black and white. Ooh La Leggings My only beef with this top is the sizing – the suggested sizing says I need to go up from my normal size, since it runs small. So I ordered a medium, and it was just too big 😦 Should have trusted my gut and went with the small, oh well! Fortunately, I have a serger and I can make shit, so one quick swipe through my machine and the fit is perfect. No bagginess! Ooh La Leggings Ooh La Leggings Keeping things relevant with the ol’ blog, I also made my leggings. I used the Ooh La Leggings pattern (my flavorite), and this amazing solid red rayon ponte from Mood. You can’t see too well in the pictures, but it has a lovely sheen to it and it’s very soft. I love these ponte leggings because they are SO comfortable, and they almost pass as pants! Especially if you tuck them into boots, ha. Zazzle Loot I still had some extra credit burning a hole in my account, so I decided to also order some tiny business cards and a custom mug. Aren’t they cool! Zazzle Loot Zazzle Loot You probably saw this mug on my Instagram, because it’s hilarious. My sewing motto (other than “I’ve made a huge mistake” haha) is “That’s steam out” (because, seriously, IT WILL STEAM OUT). I say it all the time! So naturally, I needed a mug that said it. I couldn’t think of an appropriate, non-licensed picture to include, so I just went with one that I know doesn’t have any copyrights attached to it – my tattoo! Ha! “Designing” the mug was really easy – I just uploaded my picture, centered it where I wanted it on the mug, and then added text and played around with fonts until it looked right. There are multiple views of the mug, so you can do a 360 to make sure everything is placed correctly. If I could change anything about the whole process, I would include some pre-set, standard placements to choose when you’re centering your picture and text. There is a center vertically and center horizontally, which helps a lot, but most of my mugs have the design centered when the mug is turned to the side – so it looks nice while you’re holding it. I’ve learned that choosing placement is hard when you don’t have the physical mug to look at, and as a result, my stuff isn’t quite centered. And it’s also on the wrong side (I’d say oops, but it faces me when I’m holding it sooo that’s actually kind of a good thing, maybe). Honestly, I could send this back and get it fixed (it’s Zazzle’s policy to refund or replace if you’re not satisfied with how your design turned out), but I dunno, I guess I’m lazy. This works good enough for me! I’m also happy with the quality – it’s a nice, solid porcelain (makes a fun ‘ting!’ when you hit it with your spoon, aha) and the image is very sharp with saturated colors. Zazzle Loot The last product I chose were these skinny business cards for my blog! Nothing fancy, just my name, email and blog address (plus that little pincushion because, d’awww). I forever have people asking me for my blog link when they find out I have one, and I’m forever searching for paper to write it down on. Now I can just hand them a card! And they’re so tiny and cute. I also love the package they came in – it keeps the cards safe from the dangerous land that is the inside of my purse, but it’s easy to pull a card out by sliding your thumb across the top. Ooh La Leggings Overall, I’m very happy with my Zazzle experience – everything went to print and then shipped quickly, and the ordering process was smooth and simple. I would love to create a custom printed tshirt and then work some refashioning magic on it – how fun would that be?! Plus, I think I need more coffee mugs – like this one. And ooh, check out the cool sewing tshirts – one, two, and holy shit this is hilarious. Thanks, Zazzle, for letting me test and review a tiny offering of your massive array of products! Guys, just as a head’s up – this post contains affiliate links. Meaning, if you click the link and then buy the product, I get a teeny kick-back. Just in case some of y’all hate me or something, and don’t want to contribute monetarily. No worries! Anyone else get a hankerin’ for some DIY with someone else doing the work? Have you ever ordered from Zazzle before? I think I’m in love!

edit sorry the tshirt link was bad, y’all! I updated it and hopefully it’s fixed now 🙂 Also, I just noticed that everything on the site is 20% off – and tshirts are 50% off! Sale runs today only, so go shop your little hearts out 🙂