Tag Archives: Fabiani coat

Revisiting the Fabiani Coat – and I Hit The Holy Grail

30 Jan

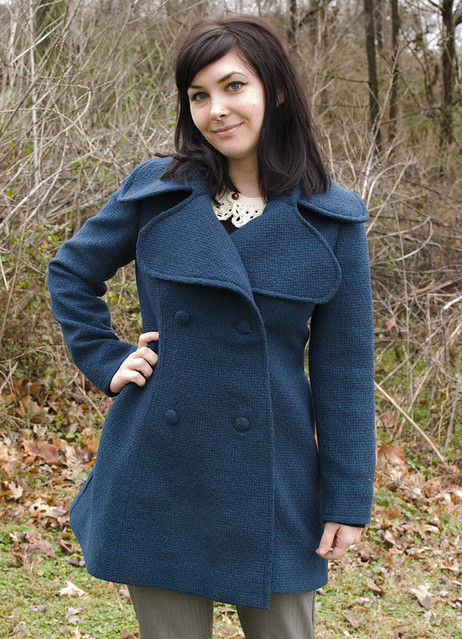
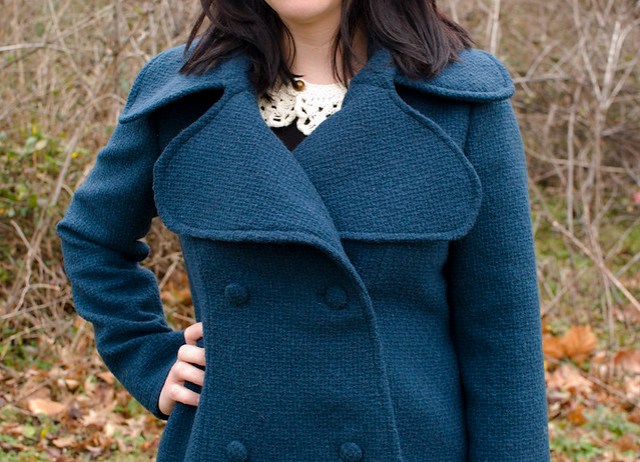
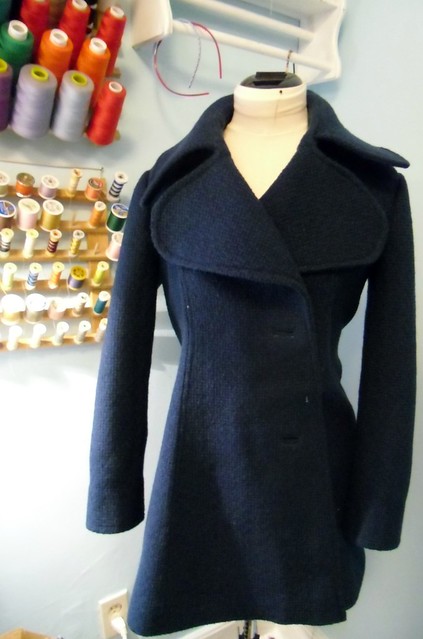
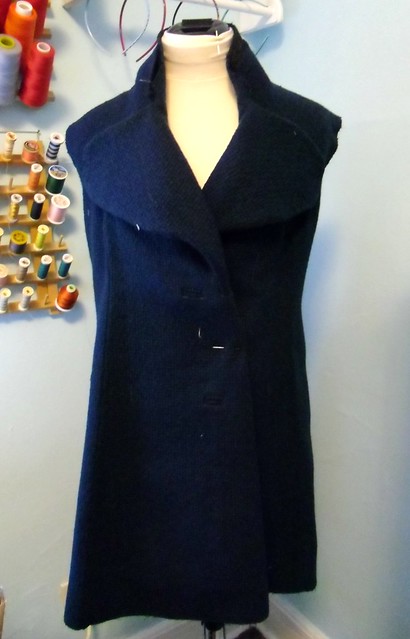
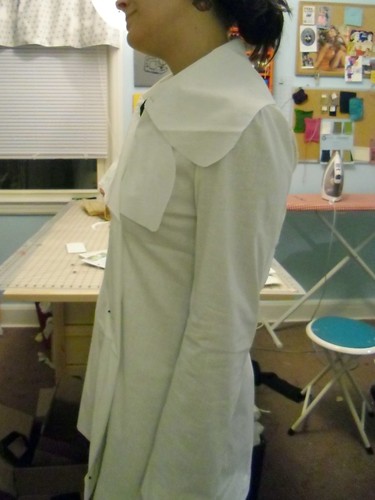
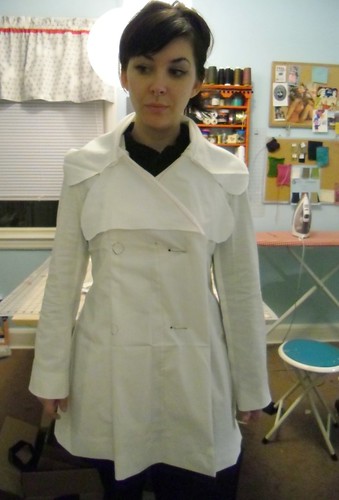
Guys. Remember when I made this coat last year?
Coat front
This is Vogue 2925, which is one of them special designer patterns from the 70s. The pattern is really wonderful – the instructions include light tailoring, with the pad stitching and the fancy interfacing and back stay and all that good stuff. I spent about a month working on the coat, from the muslin to the finishing touches – truly a labor of love. Sadly, I haven’t worn it much this year because I’ve lost weight and it doesn’t fit me as well as it did. But, ugh, whatever about that, that’s not the point of this post.

The point of this post is that I got an email a couple of weeks ago from someone who actually made the coat when the pattern was originally released in the 70s. AND she lives in Nashville. AND she wanted to meet up.

!!!

WOULD I???

Fabiani coat - the original!

Fabiani coat - the original!

How many times have we looked at vintage patterns and thought, “I’d love to know who made that, for what purpose, and what fabric they used.” How excited do we get when we find little scraps of fabric or newspaper clippings in the pattern envelopes, offering a little hint to the pattern’s previous life? I don’t know about y’all, but my favorite part about vintage stuff is learning the history behind the people who previously owned them. So to say that I was excited to get to hash this stuff out in real time is a bit of an understatement.

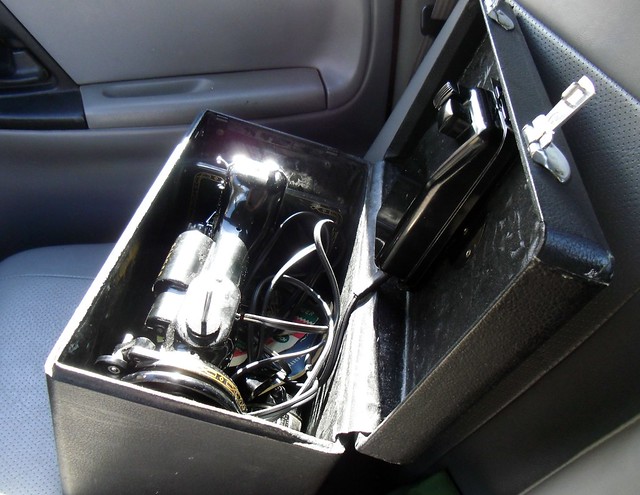
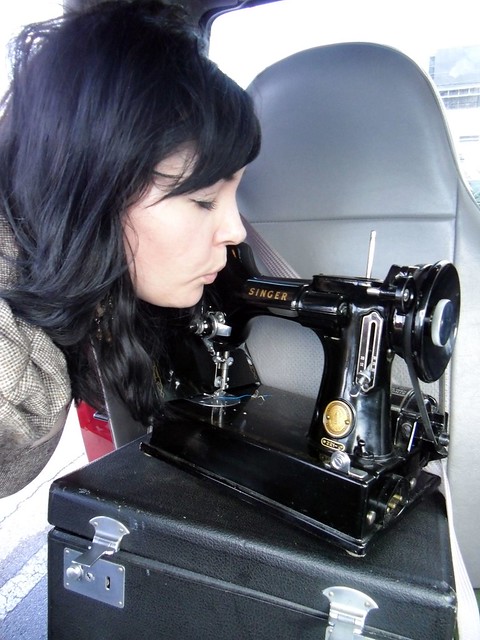
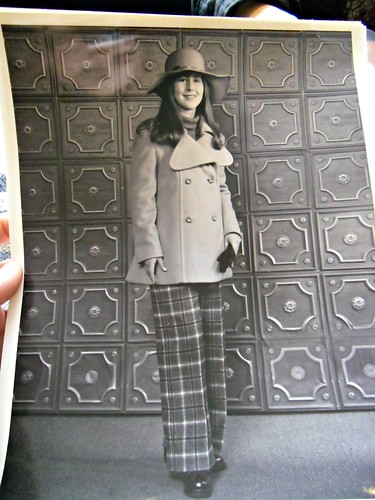
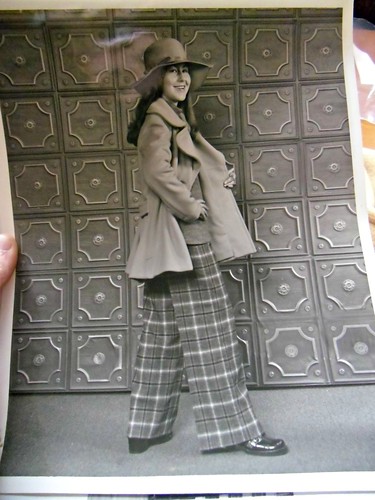
Karen, the original owner/maker of the pattern, agreed to let me take some pictures of the coat and share some information about making it. We met up at Bread & Company on Sunday afternoon and ended up chatting for over 2 hours – about all kinds of stuff, not just sewing! Although sewing stuff came up too 🙂 We brought our coats and showed them off, compared sewing notes and talked about our fabric and finishing choices. You know, basically sewer’s heaven 🙂 The pictures of Karen above were taken in 1973 – she made the entire outfit (pants and top included) for a sewing contest. Although she didn’t win (which surprised me – but hold up, bc I got pictures of the winners too ahaha), she did win the regionals and got a Singer Genie sewing machine out of it.

Fabiani coat - the original!
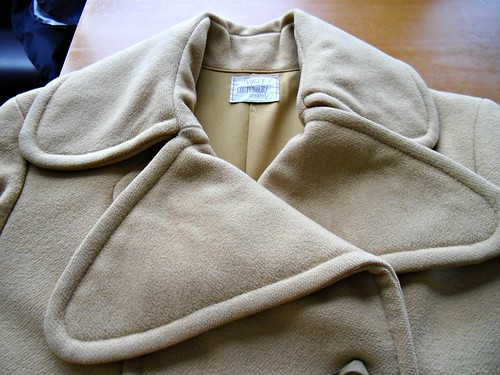
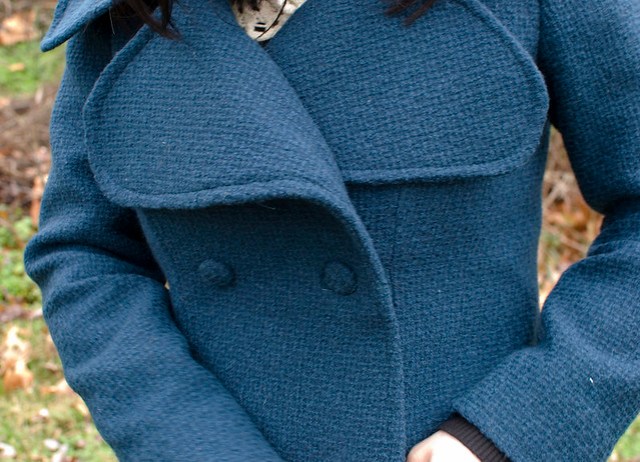
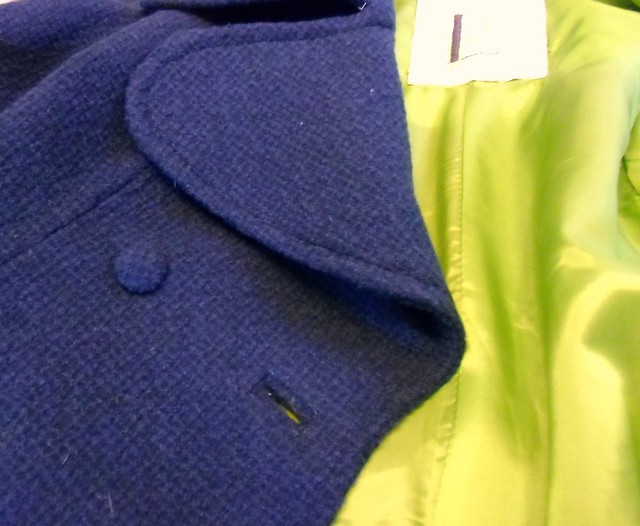
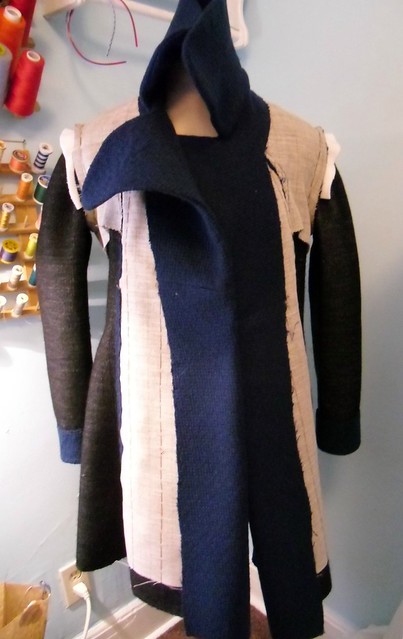
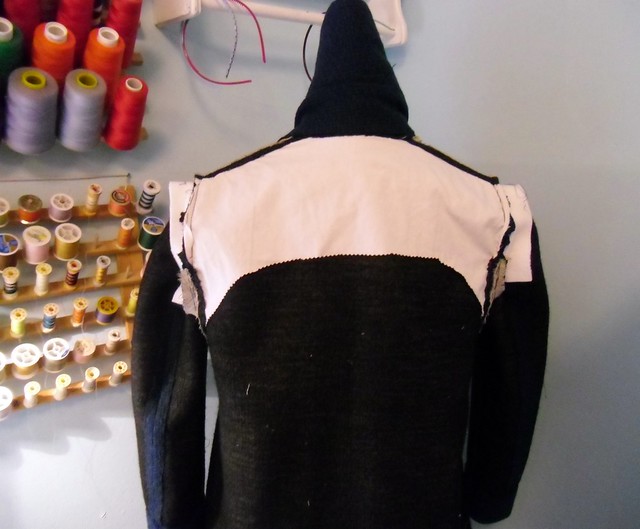
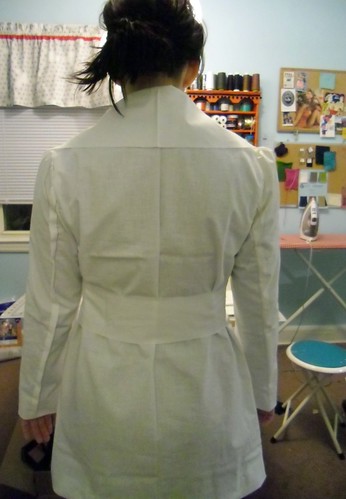
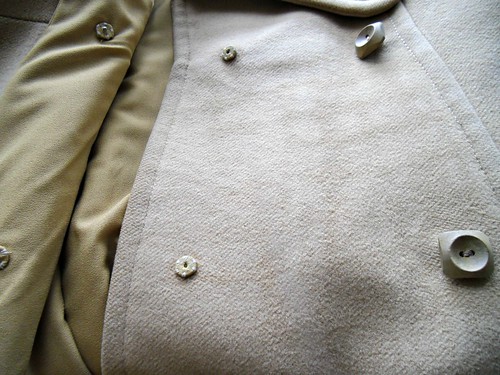
The coat really is a thing of beauty – I think it’s waaaay better than mine, for sure! Karen said she spent an entire summer working on it for her tailoring class, and the workmanship is just amazing. So much detail and care went into everything – all the way down to how the buttons are sewn on.

Fabiani coat - the original!
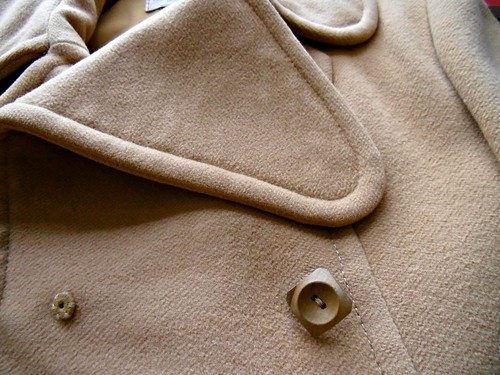
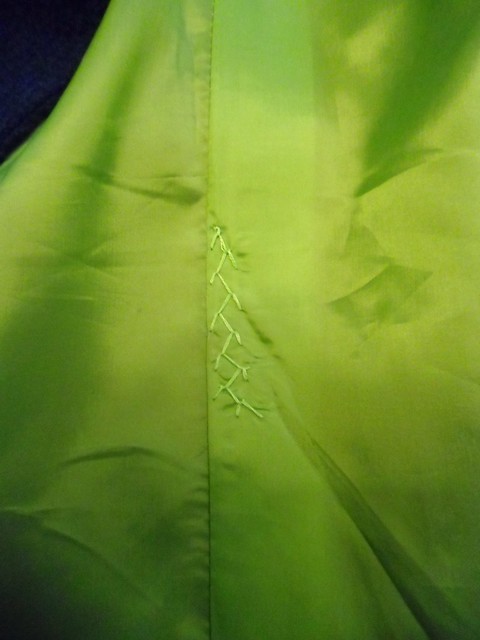
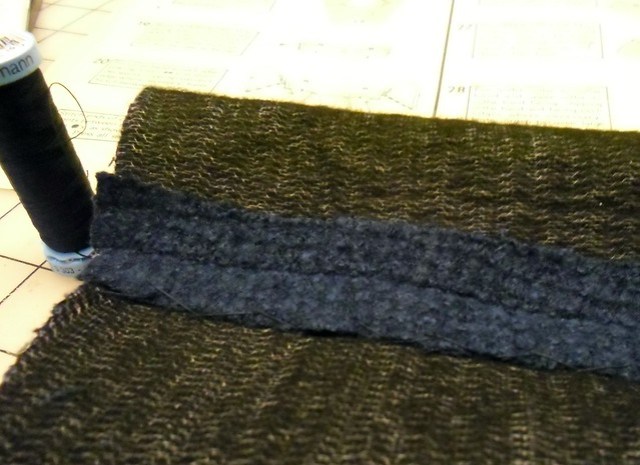
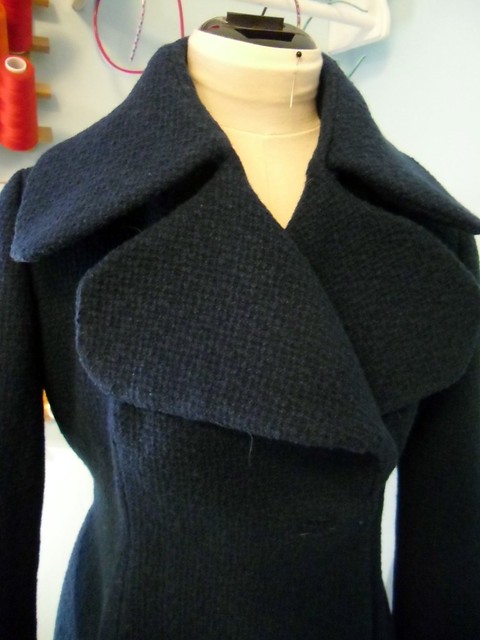
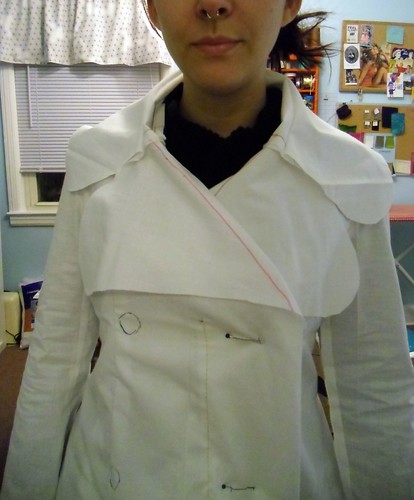
Look at that beautiful top stitching!

Fabiani coat - the original!

Fabiani coat - the original!

Fabiani coat - the original!
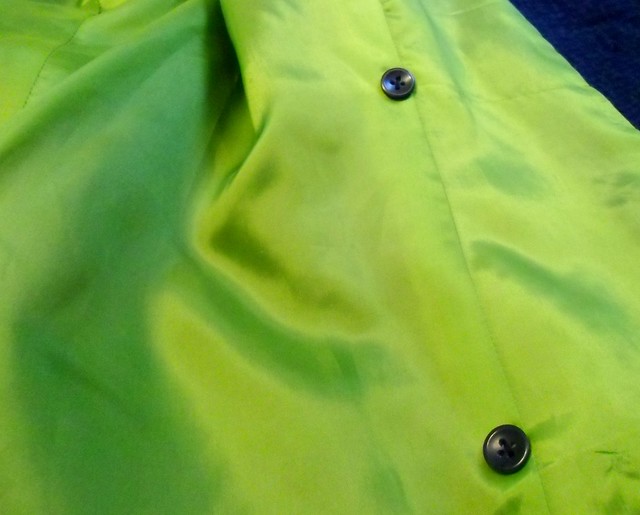
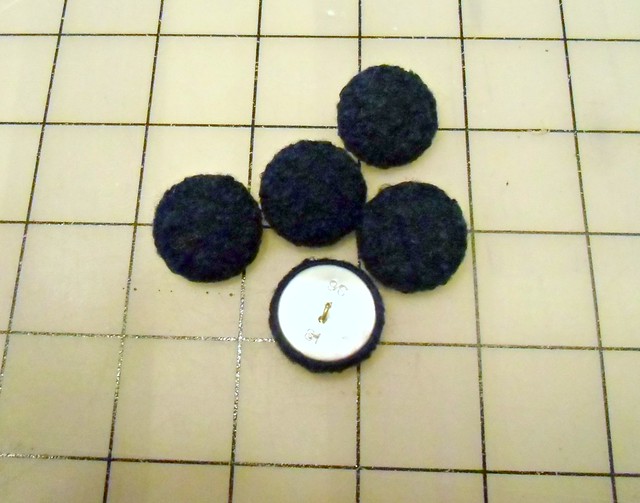
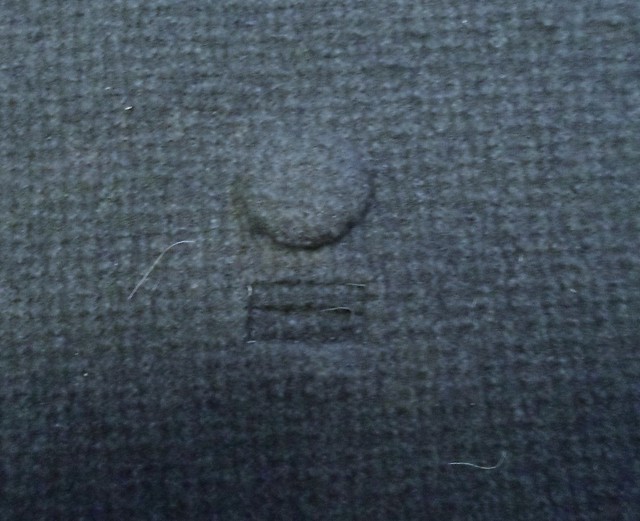
I love how she added piping between the lining and the coating – as well as the fabric covered snaps.

Fabiani coat - the original!

Fabiani coat - the original!

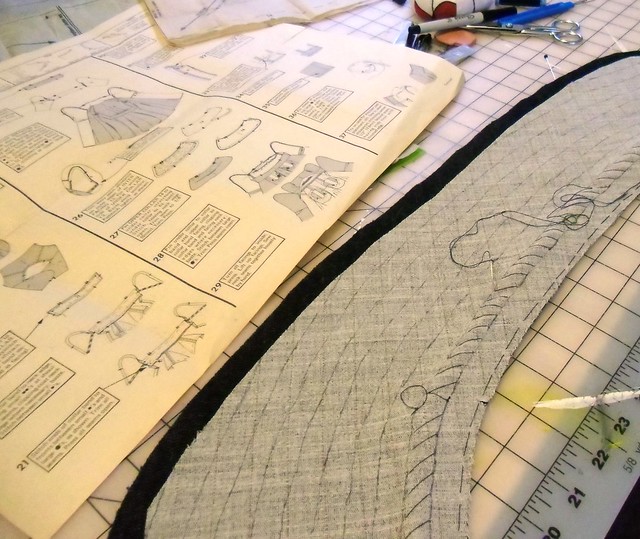
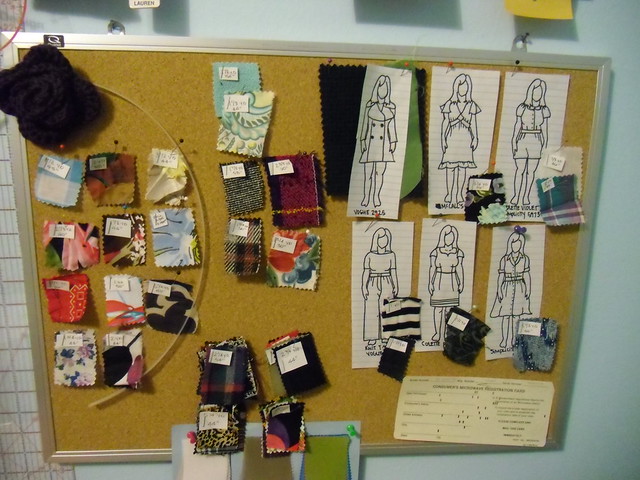
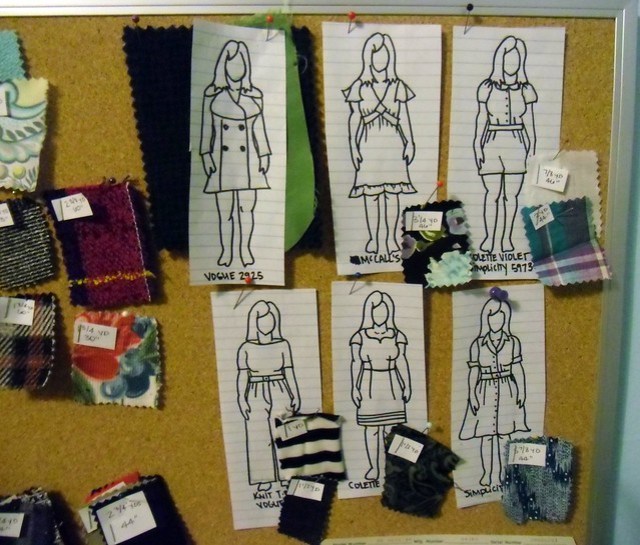
Karen also brought the pattern envelopes, as well as swatches for all the garments she made. Sadly, the coat is the only piece that still exists, but between the pattern envelopes, swatches, and those 8×10 photos, you can get a pretty good idea of how the entire outfit turned out.

Fabiani coat - the original!
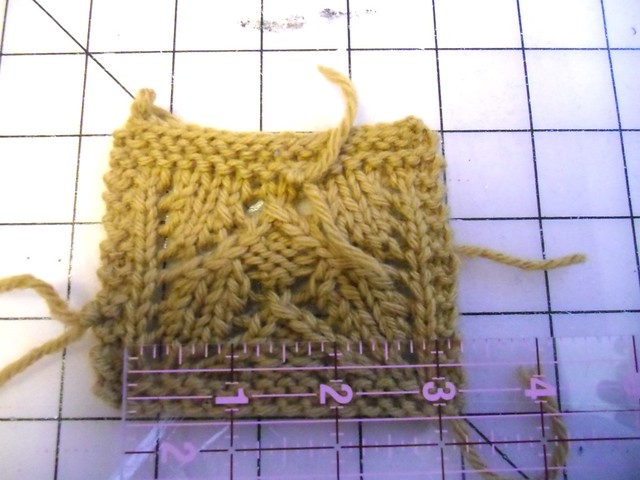
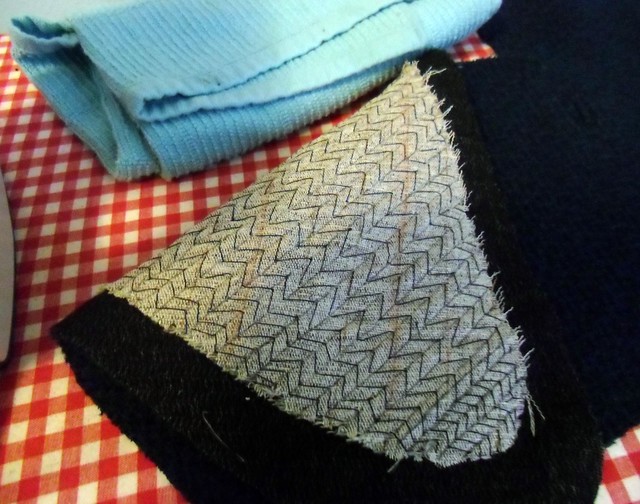
Here’s the coat – with swatches for coating (which cost $25/yard in 1973! Ouch!), lining, interlining, and the horsehair interfacing.

Fabiani coat - the original!
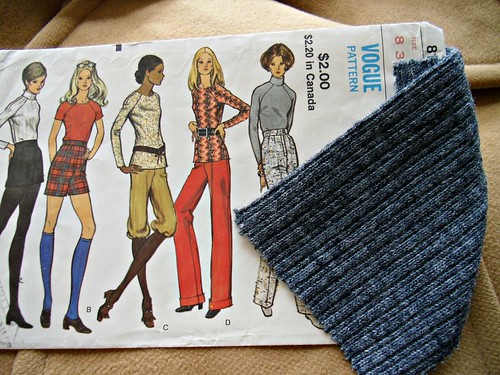
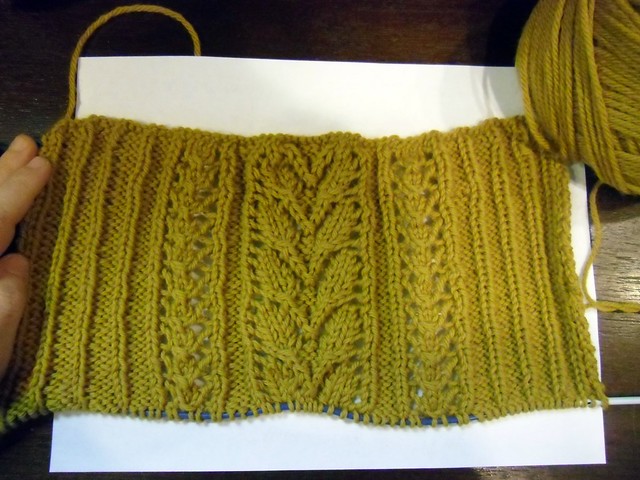
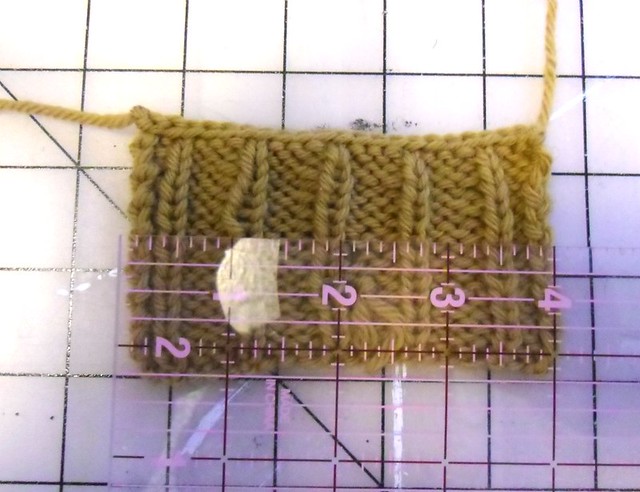
The turtleneck, and the knit fabric.

Fabiani coat - the original!
And the pantssss!! MAN, I wish these pants still existed!!!

After seeing all this stuff (and rubbing my hands all over the coat, bc SHIT), I was really curious to see who won the contest! It would have to be something amazing to win out over a hand-tailored, wool designer coat, you know?

The winners were separated by age groups – Karen was 17 at the time, so here are the people who beat her out:
Fabiani coat - the original!
WHY OH WHY did they not include the pattern numbers?! I need that Heidi-esque Vogue coat!!

Fabiani coat - the original!
Look at the age bracket for these winners – 13-15??? How…?

CFabiani coat - the original!IMG0021
SHUT THE FRONT DOOR, THERE WAS A 10-12 BRACKET.
How many 10 year olds do you know who can make a suit set? Or a hooded coat?? Mind blown over here.

And here’s the best part-
Fabiani coat - the original!
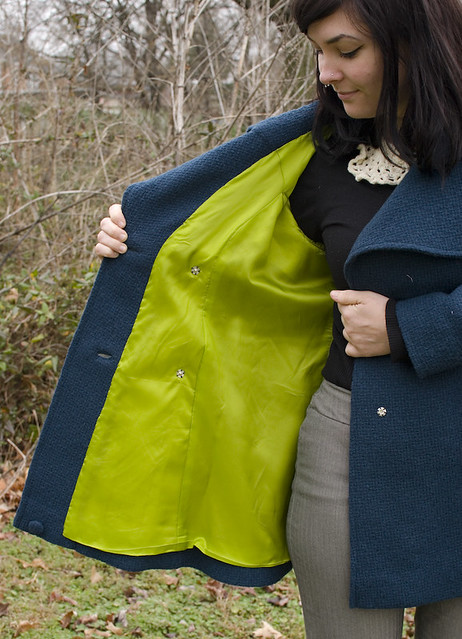
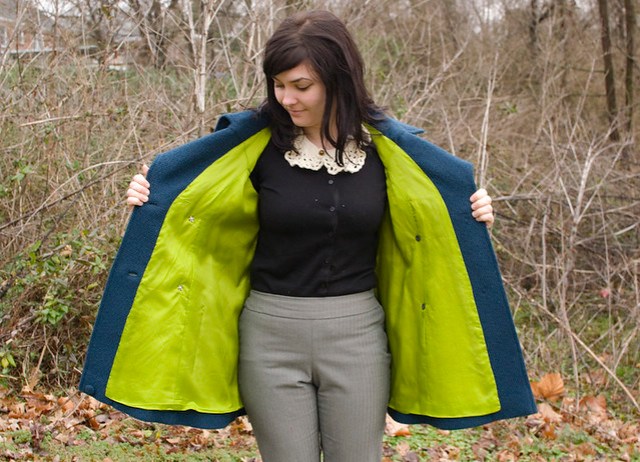
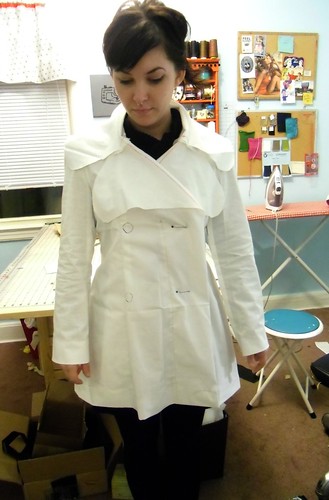
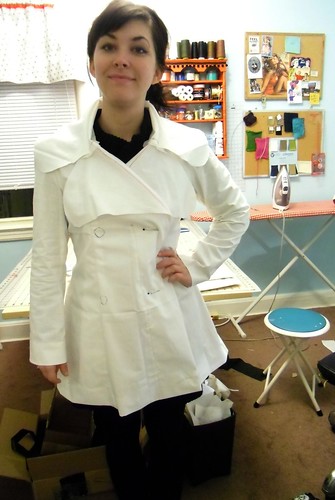
Karen let me try on the coat!! Ahhhahahaha, so awesome! It actually fits better than mine does, yeah?

Fabiani coat - the original!
Of course, this post wouldn’t be complete without a picture of us both wearing our coats 🙂

So yeah, that was a pretty cool way to spend a Sunday! I just love how sewing and blogging can bring people together like that. I had a wonderful time meeting with Karen and talking shop – and trying on that coat! Oh oh, she even gave me a copy of Seventeen magazine from 1976… I’ve been flipping through it over the past few days, and the advertisements alone are just amazing. I may have some post some pictures of that, too, there are even ones for sewing patterns 🙂 Big thanks to Karen – for emailing me, for meeting up with me, and for letting me post these pictures on my blog so we could all enjoy them!

In other news, I just wanted to give y’all a heads up about a Kickstarter that my best friend, Morgan, is raising money for right now. You may or may not remember my talking about when she joined the Peace Corps and moved to Macedonia – which was hard on all of us (but duh, especially me because I need my bestie 😉 ). She accomplished a lot in the year that she was there – in addition to teaching English, she opened a dance studio and taught dance camp. She is back in the US now, but she wants to return to the ‘donia and teach another dance camp this summer, hence the purpose of raising the funds. You can read more about the cause here, and contribute to the Kickstarter here – backing starts at $1. ONE DOLLAR, PEOPLE.

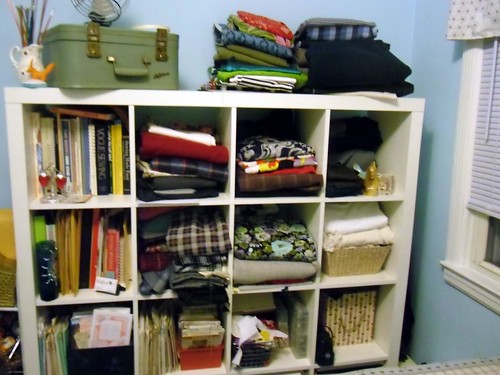
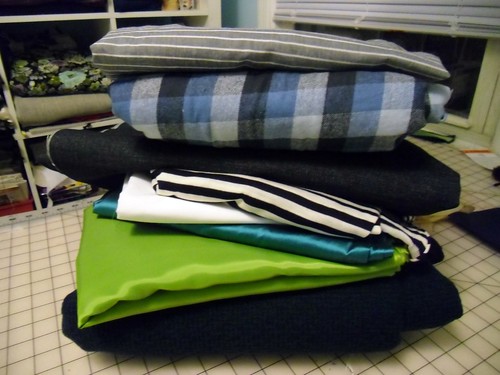
And in case you were wondering how the hell this relates to this here sewing blog (other than the fact that Morgan is my Life Partner and such as), I have been promised Macedonian fabrics. Here is the piece she bought me last year (it’s still waiting to be sewn; haven’t found the perfect pattern yet!), the softest, most beautiful cotton dream fabric. And obviously I need more. So let’s pull those dollars out and help me get more of that fabric. I mean, shucks. I might even get her to buy two pieces an host an awesome giveaway!

Oh, and Morgan also promised a video teaching us how to curse in Macedonian. So there’s that, too 😉

The Big Reveal – The Fabiani Coat!

6 Feb

Finally! I get to show off my new coat! 🙂

Coat front
Notice anything different (aka: good) about the pictures? Yeah, it’s because I didn’t take them! Ha! These were all shot by Sarah McDonald – aren’t they gorgeous!?

Quick details recap-
Pattern: Vogue 2925 (Thank you, Molly!)
Fabric: Coating – Sea Green Solid Coating (Thank you, Tracy!!); Lining – Bemberg Rayon Ambiance Lining in Kiwi
Notions Used: Horsehair interfacing, fusible interfacing, silk thread, self-covered buttons (made to order, yeehaw!), and the tiniest piece of silk organza.
I didn’t initially intend on this, but I guess this actually ties in quite nicely with Sew Grateful Week – showing my thanks for this pattern, fabric, and the pictures! Yay!

What else is there to say about this coat? It was definitely a task, although it went together much faster than my first coat – I guess I had enough practice to better understand what I was doing 🙂

Buttons

Coat - side
I am REALLY pleased with how it turned out! The coat is so warm & snuggly – too bad it’s been 60* (that’s 15* for all you non-Americans :P), and thus too warm to wear a coat! Ah, well, maybe I’ll go on a short vacation somewhere cold. Ha!

Coat back
Pretty much the whole thing is interfaced – in addition to the interfacing already fused to the fabric (which definitely gave it a nice hand and made it really easy to handle), I used horsehair interfacing on the front pieces & on the collar/lapels. The hem & sleeves are interfaced with a lightweight fusible that was cut on the bias. This coat is nice and heavy!

lining peek
There are snaps under the fake buttons to keep everything in it’s proper place.

Lining
Oh, yeah, and the lining is pretty freakin’ bright!

Top stitching
I love how the top-stitching turned out and I’m really pleased with my buttons. I tacked the spare on the inside by the hem, but forgot to take a picture of it. Sorry 😦

Tag :3
Here’s my tag!

And some flat shots – sorry these pictures are awwwwful, lol you can definitely tell I took them.

Coat - button backs
The functioning buttons are backed with small buttons – partially to keep them on the coat, and partially to cover the ugly threads on the lining :B

Coat - feather stitched lining pleat
I tacked the lining pleat down with feather stitches, as originally suggested by Gertie.

Coat - buttonholes & top stitching
Bound button holes

Coat - label
Here’s another label shot. It’s hand-embroidered on bleached muslin & then catch-stitched down to the lining. I sewed everything in after the coat was finished, which was a bad idea… very difficult to get everything in there! Next time, I will sew the label in while the coat is still being assembled.

Coat front
So yep, that’s my coat! I hope these pictures were worth the wait 🙂 Hehe!
Thanks again for all your patience/input/contributions – and thank you Sarah for taking these amazing pictures!

Soooo, now that that’s over… have I inspired anyone else to make a coat yet? 🙂

Agatha Sweater – Finally, Progress!

2 Feb

For a couple hours a day (mostly on my lunch break and while unwinding before bed), I’ve been knitting up the back of my Agatha sweater. We had a very very rough start – for some reason, I kept mixing up the rows and having to rip my work. It always happened at row 10, too. I frogged the entire thing 6 times (maybe 7 – I stopped counting because I started getting mad!). It was very frustrating, especially since this particular section casts on 69 stitches. 69 stitches + 10 rows – that’s a LOT of re-knitting! UUGHHHGHHHHHH!!

Anyway, we made peace on Tuesday and I was able to jump over the hurdle of 10 and start exploring new knitting territory. And by “exploring new knitting territory,” I mean I repeated rows 10 & 11 seventeen times each. Ha! But you know – the back looks gorgeous and I’m really excited to be almost finished with it!

Agatha - back
Here is my progress as of, oh, about 10 minutes ago. This sweater is knit top-down, so you are looking at the back right-side up.

Agatha - lace pattern
Despite how much I wanted to destroy things every time I gave up & frogged, I actually think it was good that I worked the lace pattern over and over – my stitches are pretty even!

Agatha - lace pattern & ribbing
Once you get past the first 3 or 4 rows and the pattern actually starts to show in your knitting (lol I just started to type “shitting” right there GET A HOLD OF YOURSELF, LAUREN), it is much much much easier because you can follow the pattern based on what you already knitted, instead of getting to the end of the row and realizing you missed a bunch of stitches and have to unknit all 69 of the little buggers… not that I know anything about that.

Agatha - Back
Following the pattern can be a little difficult, since you are following lace panel rows in addition to the regular ol’ rows that make up the rest of the sweater. I found it very helpful to stick post-it notes under the row I was following, so I wouldn’t accidentally follow row 6 when I was supposed to be on row 7 (this is where the majority of those first mistakes happened. Ouch!). Once you start knitting short rows, the lace panel rows don’t match up with the rest of the rows, so the post-it notes were VERY helpful with keeping me on track with everything.

Anyway, I feel really good about my sweater & the progress I’ve made. It is REALLY fun to knit – just complicated enough to keep it interesting, but not so complicated that I feel like I can’t do it. Hopefully I will be starting the front panels within the next day or so – and once I get farther into those, I can actually try it on!

For those of you knitting along (Agatha or not!) – how are you coming along with your sweaters? 🙂

Oh! One more thing –
Buttons!
I got the buttons to my coat last night 🙂 I had to have them made since those kits you buy at the fabric store at totally shitty. These are really nice – the lady uses a machine, and I don’t think I could pull them apart if I tried! I had an extra made just in case 🙂

Coat pictures to come soon – Monday, perhaps? 🙂

Join Us For A Knit-Along!

24 Jan

Remember when I said I was going to knit me up an Agatha sweater as my first big project? Turns out Mika is also knitting the same sweater, and suggested we do a lil’ knit-along for anyone else who wants to join! You don’t have to knit the Agatha sweater if you aren’t feelin’ it (although the pattern is only $6.50 on Ravelry!) – first sweaters are welcome too! I don’t know about y’all but I am needing a lot of hand-holding during this process 🙂 And here’s the fun part – unlike me, Mika is not a knitting n00b, and she has graciously offered to answer any questions you may have about knitting your first sweater.

If you want to join us, we’d love your company! Join the Flickr Group and stick the badge on your blog! If you just want to watch this ’round, that’s ok too 🙂 This is a pretty informal/flexible knit-along – I personally don’t plan to be completed for at least a couple of months.

Speaking of sweaters – I have more swatches! Ahh I am so sick of swatching! I think I finally got gauge, though 🙂
knit swatch, finally got gauge!
Lace swatch

another swatch
Ribbing swatch

So yay! Thanks again for all your help with my first batch of swatches – I had to go down to a 5 to get gauge. Now I’m ready to knit 🙂

In coat news – I finished the lining last night, yay! Started to sew the buttons on and every single one of them broke, boo! Cheap ass covered buttons, guh. I did, however, find a local source that will cover my buttons for me with a machine… the only drawback is there is at least a week processing time. So we are pushing back the coat unveiling and I would say I’m sorry but I’m really not because I demand perfect buttons.

In the meantime, Amelia seems to think my coat is a suitable cat bed:
Amelia
She knows what she is doing is wrong. You can see the guilt in her eyes.

Coat: The Final Countdown

23 Jan


Yep. I’ve had this song stuck in my head all week.

Guys! I’m almost done with my coat! 😀 😀 😀 We are entering FINAL COUNTDOWN phase – all the pattern pieces have been removed from their respective fabrics, folded & replaced back in the envelope, and my cutting table is (mostly)clean. I just have a bit more hand-sewing to do and then it’s time for a coat fashion show! Yay!

Here are some in progress pictures to get you pumped & ready…
steaming the undercollar
Steaming the undercollar – I wrapped it around my seam roll & propped it up against my clapper. Doesn’t it look so smug & satisfied in that picture? How can a seam roll look smug, anyway?

catch-stitch at the seams
Part of what has taken me so long with this coat is all the hand-sewing involved – there is a LOT. I pressed every seam open and catch-stitched down both sides. This really helps eliminate bulk, which is really necessary with fabric as thick as mine. I also beat the shit out of every seam with my clapper. That was fun.

Ever wondered what the inside of a tailored coat looks like?
tailored inside of coat
Here ya go! I already sewed on the facing pieces, so no pretty padstitching pictures for youuu – but you can see how the front is interfaced with hair canvas. I told you – lots of handstitching! And look at my cute sleeve heads 🙂 I used Gertie’s tutorial for setting in tailored sleeves – I have done this before with my Lady Grey (and much success!). It is my favorite method for setting in sleeves and it makes everything easy easy! Got it right the first time, yeah!

back stay
Here’s the coat back – not much to see here, just a back stay. Boring!

collar - no topstitching
Collar is looking good, thanks to all that padstitching.

coat with topstitching
And then topstitching. I was a little apprehensive about doing this – I think topstitching can really make or break the look of a garment. Usually the latter – sometimes it looks kind of cheap. But I like the way it looks on the coat, which is good! Don’t wanna rip all those stitches out, el oh el.

So that’s where we are as of today! I actually dropped the lining in the coat yesterday afternoon, although you can’t see it from the pictures – all I have left is more hand-stitching. And sewing on the buttons. And then I’m going to throw a hissy fit because this whole week is going to be a balmy 60*. Lovely, but coat-wearing weather it is not.

One last thing…
featherweight!
Look who is coming home with me today 🙂

she's coming home with me today :)
WE ARE IN LOVE.

A Knitted Lacy Collar

20 Jan

I swear this is a sewing blog… I’ve just been bitten by the Love Bug. I can’t stop knitting! We’re still in the honeymoon phase, where everything is fresh & new & super sweet. So forgive me while I gush about another knitting project (or two)!

knitted lace collar
This is the Lacy Collar – it’s from the book Knitting Vintage, which I swiped from my library last week (Sidenote: our local library RULES. Not only do they have practically anything I could want, but you can use their website to request books that are shelved at any of the branches and have them delivered to your local branch. Awesome awesome awesome!). I used yarn left over from my Bunny Slippers, and a button from my stash. Basically – free lace collar! Woohoo! I was inspired by these little autum collars from Casey – I love the idea of a removable peter pan collar, but I didn’t want to spend my precious sewing time making one. Instead I spent a WEEK of precious knitting time on one! No, I don’t get it either.

I only made one change to the pattern, and it was unintentional – I left out a couple of rows by the bottom lace edge. So my collar is a little smaller than the one modeled. Oh well! I learned how to pick up knit stitches with this project, and the lacework is a little more advanced than what I had previously done. I wish it had blocked a little flatter, but whatever – it’s lace, I’ll deal. Isn’t it pretty, though?

lace collar front

lace collar back

knitted lace collar
I am really pleased with how the lace work turned out! And it was such an easy project!

knitted lace collar

Ok, here’s a question for all you knitters – I need some swatch hand-holding!
I had to make two swatches for my knitted cardigan – ribbing and a lace panel. I actually made 4 because it looks like my gauge is a little loose. In both pictures, the left was knitted with size 7 needles (as per the pattern’s suggestion), and the right was knitted with size 6 needles. All swatches have been blocked & dried.
ribbing swatches
The ribbing swatches should measure 2″x2″. As you can see, thanks to my handy-dandy 1″ gridded cutting mat, one measures 2″x3″ and the other is 2″x2.5″. So they are both still a little big! Does it really matter if they are long, though? Or is the width the only thing I should worry about?

lace swatches
Here are the lace swatches. These should be 2″x3″, and the size 6 looks like it baaarely sticks outside of the 2″ margin. 7 is more like 2.5″, so obviously that’s too big!

So I guess my question is, I should use the size 6 needles, yes? Or do I need to go down another size & make another swatch (eeep!)? Help meeeeee!

For your patience, here are some pictures of the current coat progress:
padstitching the undercollar
I started padstitching the undercollar last night, but as you can see I got a little antsy in my pantsy & decided to stop after one row. The undercollar is lightly padstitched (1/2″ stiches spaced 1/2″ apart); there is no need for a fall since the coat has a collar band. At least, I hope that’s the case lol.

coat as of 1/20 - i'm a slacker :(
And here’s where I am so far! Kinda looks like a (sleeveless)coat, eh?

A randumnb news story to brighten your Friday – Dolly Parton & Gaylord just annouced that they will be opening an amusement park in Nashville. Nashville has been mourning the loss of our beloved Opryland for over 10 years now (they replaced it with a shitty mall. Ew!), but it looks like we’re gonna get it back! Yay! Just another reason to love Dolly 🙂

Using A Croquis

13 Jan

I’ll admit, I initially made a digital croquis of myself for no reason other than to see what I could come up with. I didn’t really plan on using it – that is, until I finished drawing the figure. I printed out a couple in different sizes, took them home, and started eyeballing my pattern stash.

And now I CAN’T STOP DRAWING. It is so much fun! I’m no artist, but I am pretty good at copying stuff. The patterns are so easy to draw from because they have little line-drawings, so you can just copy directly onto your figure, making any necessary design changes (such as making the vintage wasp-waists more like your own waist). If you really wanted to, I’m sure you could print the croquis out to the exact dimensions of the line drawings, and then just trace everything over – I don’t have that kind of patience, though.

After I printed my croquis to the correct size (mine are approximately 5.5″ tall), I simply laid a sheet of paper over the print-out and traced lightly with a pencil. I drew the clothing on the croquis and erased whatever needed to be erased, then traced over everything again with a fine-tip sharpie. And I think they look pretty good! Not perfect, but good enough for me!

Then I stuck them all over my fabric board:
fabric & pattern planning board
You can see I got a little crazy & drew several!

croquis
I pinned fabric swatches to each one, and wrote the pattern number on the bottom.

croqui for coat :)
I even made one for my coat!
Silly croquis – couldn’t bother to put on pants or anything 😉

Speaking of my coat, progress is plodding along! I haven’t posted any updates because I’m at the boring tailoring stage – fun for me, boring for pictures. Here, have some pictures anyway.

bound button hole & covered button!
One of two bound button holes – and a fabric-covered button to boot! Covering that button was a PAIN IN MY ASS. I dread covering the other 3. But it looks good, no?

yes
I started pad stitching the other day, and it has gone by really fast. Much faster than pad stitching my Lady Grey coat. I’m not sure if it’s because I actually know what I’m doing this time ’round, or if it’s the fabric I’m using. Probably both. PROTIP: if you plan on tailoring a coat, do yourself a favor and pick some wool coating that has a lot of texture. The stitches don’t show at all. I wish I’d figured this out on my last coat, it would have saved me hours of time.
See my new toy? I bought myself a Kindle Fire for Christmas 🙂 (right before I discovered the Featherweight, actually – hence why it’s being paid off via layaway and not livin’ the good life in my sewing room. Wah!) It’s great for my crafty time – I can keep it in my sewing room & listen to music/watch sewing videos while I work, and it holds all my PDFs for knitting patterns so I’m not carrying around a bunch of ratty pieces of paper.
And yes, I listen to 80s pop when I sew. Or the Rhythm is a Dancer station. I love shitty 90s dance club music, lol.

I finished pad stitching the lapels last night while watching The House of Yes (which is my favorite movie – it’s really messed up but but but Parker Posey! Dressed as Jackie-O!). Like I literally pulled the last stitch through as the credits started rolling. I told you pad stitching is going faster!

Then I put the lapels out for a little steam session:
steaming the lapels

finished padstitching!
And here they are as of this morning! Beautifully rolled!

Next up – actually putting the jacket together! Yay!

How Do You Notch?

5 Jan

I took the first step last night and cut out my coat pattern pieces – all 21 of them! Coating, lining & interfacing – I basically cut the coat out three times. The coating & interfacing were fine the way they are, but cutting the Bemberg rayon took a little bit of finesse – I used Sunni’s brilliant tutorial for cutting slippery fabrics and used silk pins for the first time. My tip if you want to try this – pin the slippery fabric to the muslin first (especially if you have the slippery fabric doubled) and when you pin your pattern pieces down, give the pins some extra breathing room and put them at least 1/2″ from the edge of the tissue. It may pull you out of the seam allowance (hence why I used such fine pins), but it does make it easier to wedge those scissors in there! And no jagged edges! Yay!

I noticed this while I was cutting out my pieces:
wait, people really do this?
I actually see this a LOT when using vintage patterns (and wearing vintage handmade stuff) – people who go the extra mile and give those notches a proper space to call their own. I remember my mom doing this on the clothes she made for me, and I always thought it was such a fiddly extra step. Cutting out fabric is obnoxious enough without having to maneuver around the table to cut some tiny extra pieces with the tips of your shears.

Here’s how I handle the situation:
snipping off notches
I cut the triangles off entirely & notch directly into the seam allowance. It’s quick, painless, and efficient.

And it gives me a good excuse to use my tailor snips, a Christmas present from Landon:
tailor snips!
(Seriously, he is the best! I AM NOT WORTHY)

Now seems like an appropriate time to introduce you to my Gingher Family:
my gingher family :3
8″ knife-blade shears, pinking shears, applique scissors, and the new tailor snips.

Anyway, back to the subject at hand – how do you handle your notches? Do you cut out the entire triangle, or just snip a little snip? Or do you do something else? Is there any benefit to leaving such a giant piece flapping around the notch? Should I stop cutting (hahahahaaaa see what I did there?) corners?

In other blog-land news, I was nominated for the Versitale Blogger Award by miss Joanne and given this cute button to share!

Now I’m supposed to tell you seven things you don’t know about me. Let’s see…
– My last name is Taylor! Every so often, I’ll have a friend make the connection and get really excited about their epiphany.
– I got the bird tattoo before I got the name. I am not really sure what to tell you about the second L. I wanted it to be like Lloyd, the silent L that makes for confusing pronunciation.
– I love obsolete electronics & I collect bits & pieces when I can. My favorites are computers/game systems and cell phones.
– I was homeschooled from third grade until graduation. This REALLY confuses people when I tell them, because apparently I don’t “act homeschooled.” Well all right, then!
– In addition to Nashville (my hometown & forever Lover), I have also lived in New Orleans & Pittsburgh. I left New Orleans because a bitch named Katrina kicked me out 😦 I left Pittsburgh because it was a terrible idea. The cold & I do not get along.
Johnny Paycheck serenaded me on Lower Broadway in front of a bunch of tourists shortly before he died. I told him to bugger off & he thought it was the most hysterical thing ever. I didn’t find out who he was until years later – I thought he was some rando tourist just being an ass.
– I have pretty bad TMJ, so my jaw pops every time I open it all the way. My dentist finds this hilarious.

Now I am supposed to nominate some people for being my new favorites of awesome, so I pick Molly and Oona. I would nominate more but it looks like Joanne already jumped on the others I was going to pick. Boo!

Okay, back to cutting! I have a shirt muslin that requires my complete & undivided attention.

Of Muslins & (Fabric) Musings

3 Jan

Welcome to 2012, everyone! Did you make any resolutions for the new year? I only made one, forreal-legit resolution, and I actually made it just now (as opposed to pre-2012): I have decided to enter the world of adulthood & start using proper capitalization on this blog. No real reason in particular except that it makes it easier to read. So there you go – my Christmas gift to y’all!

Another goal for 2012 started running through my mind last night while I was working on my coat muslin:
ughhh my fabric stash
Dear Lauren,
You are not allowed to buy anymore fabric this year until you cull that stash under control.
Love,
Lauren.

EXCEPTIONS (ah, but isn’t there always an exception?): January & July, my amazing local fabric store has a 40%-50% off sale on all fabrics. I generally use this opportunity to stock up for the upcoming season, and to pick up fabrics that I know I will use but are normally a bit cost-prohibitive (such as silk organza, and extra yardages of rayon lining to, er, hoard). So I’ll allow myself to buy stock-up fabric during these sales, and also a piece or two for funsies. Another exception is anything that involves my mega-cheap fabric scores – flea markets, yard sales, thrift stores, donations, etc. I mean, they’re practically paying me to take this stuff! I’d be a fool to not grab it and go, amirite?

Speak of the fabric sale, I already hit that shit up yesterday (first day!) and picked up a rather modest pile (considering my usual history of how much I tend to spend…):
the only fabric I bought in 2012 :)
The top two don’t count; they are shirting fabrics for Landon’s Negroni. More on that when I make a muslin!
That black under the plaid flannel is dark-wash denim with a slight stretch (for another pair of wide-legged trousers), the stripey is jersey knit with navy & white stripes, the white is boring old cotton batiste (for lining summer dresses), the shiny blue is silk shantung (actually from Mood fabrics), the green is Bemberg rayon lining for my coat (yes! I went with green!), and the big blob at the bottom is my coating fabric from Mood.

Speaking of my coat – have some muslin pictures!

coat muslin
This is actually my second muslin – the first muslin was almost workable, but needed a little bit of tweaking. This is what I ended up with:
– Remove 1/4″ from top & bottom sleeve side seams
– Reduce sleeve head ease (appx 7/8″ at peak)
– Taper lapel 1/2″
– Shift button position
– Shorten back belt 3/4″ on each end
– Remove 5/8″ from center back seam
– Remove 3/4″ from side back seam
– Raise underarm seam 1″
– Reduce shoulder width 5/8″
I think I’m pretty happy with the fit! Tell me what you think, fitting princesses & princes.

coat muslin
The underarm seam was the most confusing adjustment I made. Clearly there was something wrong with the first muslin, as I couldn’t move my arms at all without the entire coat joining the parade. I checked several fitting books, but none of them mentioned the actual armhole unless they were referring to a sleeveless top. I finally determined that the armhole was too low (which makes sense, as the pattern is a slight bit too large for me), and raising it 1″ pretty much eliminated the problem.

coat muslin
the lapels were also a little too wide around the neckline which resulted in some gaping. I pinched out the excess and re-smoothed the lines. There is still a small amount of gape but I want to be able to wad a scarf in there so I’m ok with it.

coat muslin
The back in cinched in via the belt, which is a design feature i loooove. Check out my mismatched sleeve caps – I put one in before I realized it needed to be reduced.

coat muslin
Side looks okay.

coat muslin
What do we think about the overall length? I folded back the sleeves the suggested 2″, but I think they are a smidge too long (like, no more than 1/2″). I like the coat length, although I realize now that I hemmed it 2″ and the pattern calls for 3″. So – current length or 1″ shorter? Eh?

Transferring the fitting adjustments was a PAIN IN THE REAR. This coat has separate pieces for everything – coat, lining, and interfacing! So every adjustment was transferred three times. And I will just (wo)man up and say right now that I did it all to the pattern tissue – no tracing. Whoever owned the pattern before me wrote all over it and made their own fitting adjustments, so I didn’t see much of a point in preservation. I will include my fitting notes should someone obtain this pattern after me, and they can re-add the stuff I cut off. Or something. Don’t be mad!

Anyway, I’m pretty happy with the overall fit of the coat! I think everything looks good & I’m ready to cut straight into the coating fabric. I have my (green!)lining & I picked up some giant covered buttons. Oh, and 3 yards of 72″ horsehair interfacing. Hopefully I won’t need to buy interfacing again until 2013 😉