Tag Archives: shorts

Completed: Sewaholic Pacific Shorts + Dunbar Sports Bra

12 Jul

Since moving into my new apartment last month, I have been busy discovering all the cool stuff in my area (bonus that it’s all pretty walkable/bikeable, unlike at my last place in the middle of nowhere :P). One major selling point for me was that I am now super close – about 2 blocks, and again, walkable – to a really great greenway. The multi-use paths are nice and wide, mostly shaded by the trees, and there is a big creek that runs through it which means lots of cool bridges to cross! It’s a fantastic area for both cycling *and* running, and I’ve been taking full advantage of it.

While I have my fair share of workout wear, it quickly became clear to me that what I had was lacking pretty badly, at least for running. My preferred workout of choice has traditionally been hot yoga – where I tend to wear leggings or capris (you know, for the sake of whoever is unfortunate enough to practice right behind me hahaha) and they don’t need any pockets because you are standing in one place. I find those long pant lengths to be way too hot and restrictive for running, at least in the summer time. And I definitely need a pocket to hold my phone and keys, so I can listen to music and/or podcasts and keep my hands free! I noticed that Mood Fabrics has added a lot of performance/activewear fabric to their site, so this seemed like a good excuse to stock up and try them out.

Sewaholic Pacific Shorts + Dunbar Sports Bra

Sewaholic Pacific Shorts + Dunbar Sports Bra

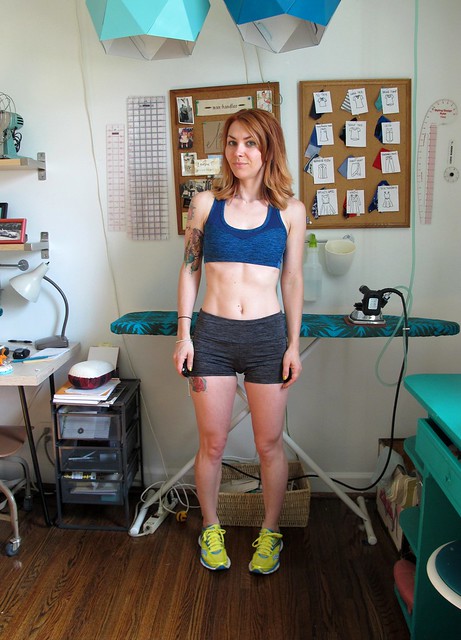
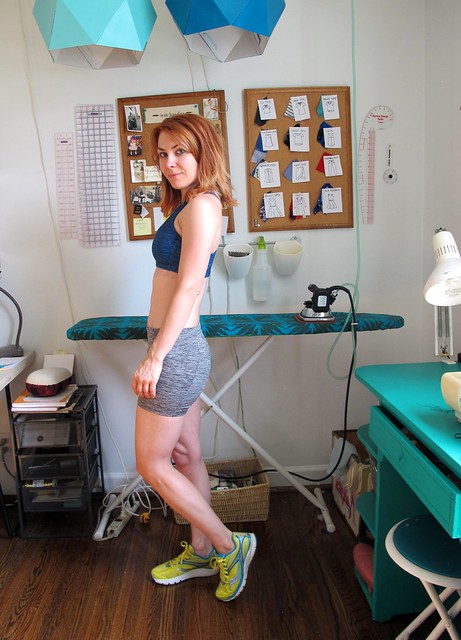
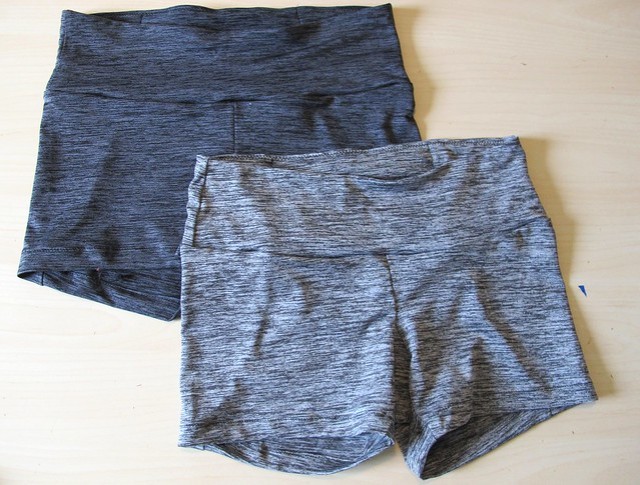
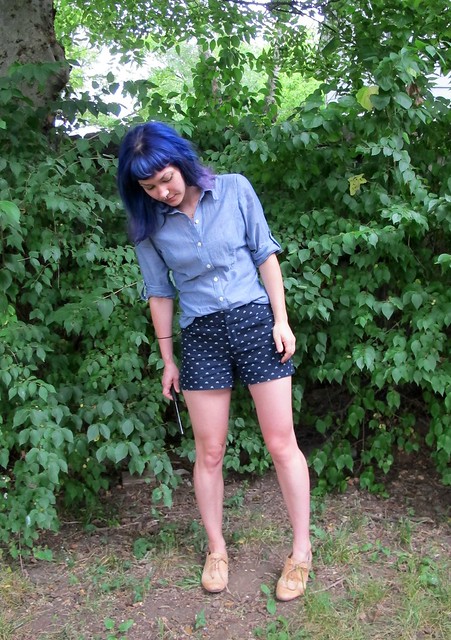
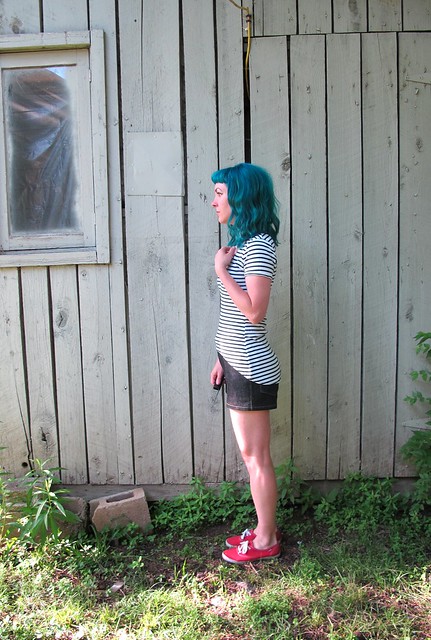
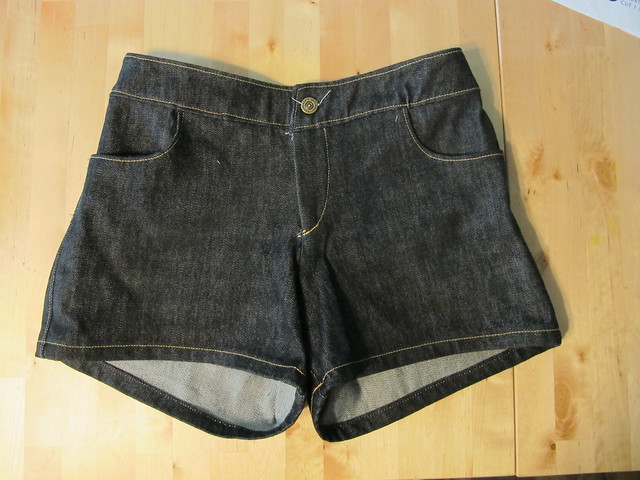
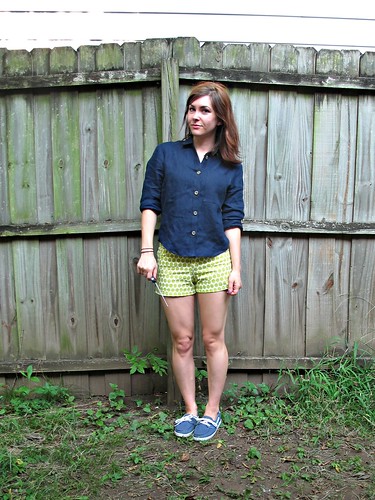
I ended up making 3 pairs of shorts and a sports bra. The first pair uses Midnight Black Max Dri Performance jersey, although you can see here that they are much closer to a darker grey. I love these mottled jerseys and bought them in several colors!

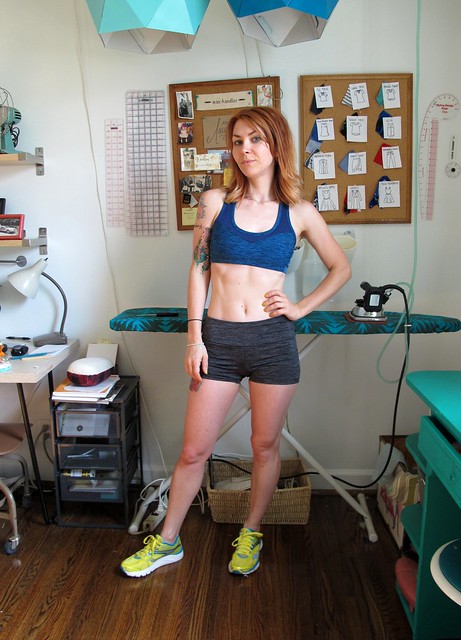
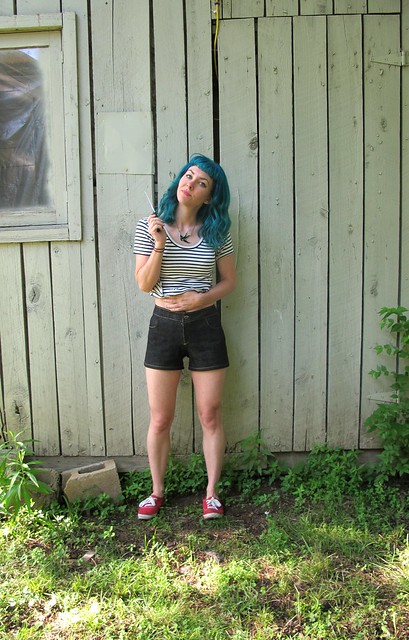
Also – hello from my new studio! I’m still trying to get the hang of taking photos indoors (not cool enough to lug a tripod down the greenway and take action shorts, sorry guys), so I’m sorry that these are subpar.

Sewaholic Pacific Shorts + Dunbar Sports Bra

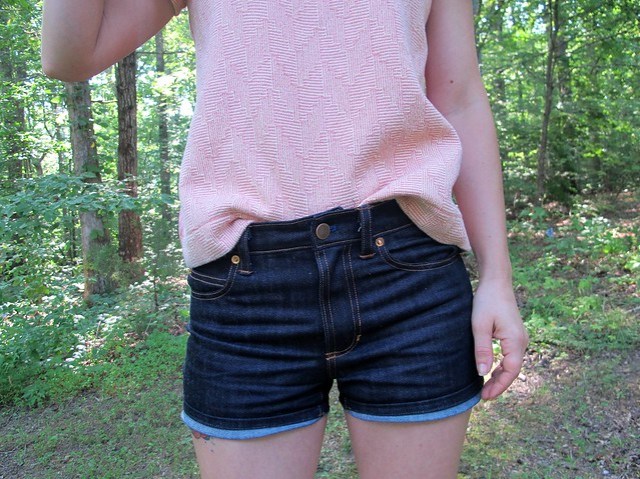
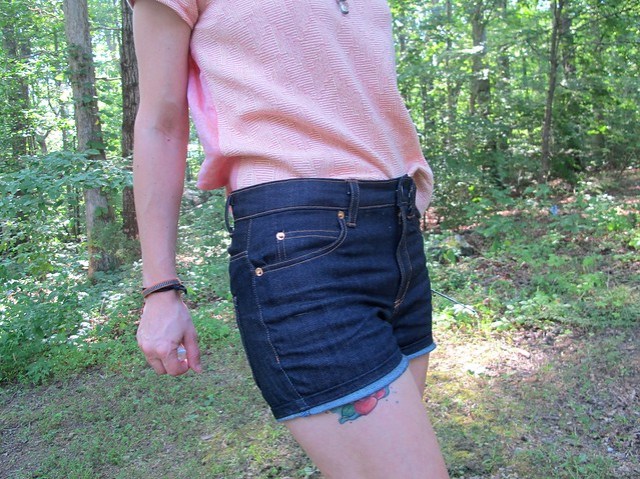
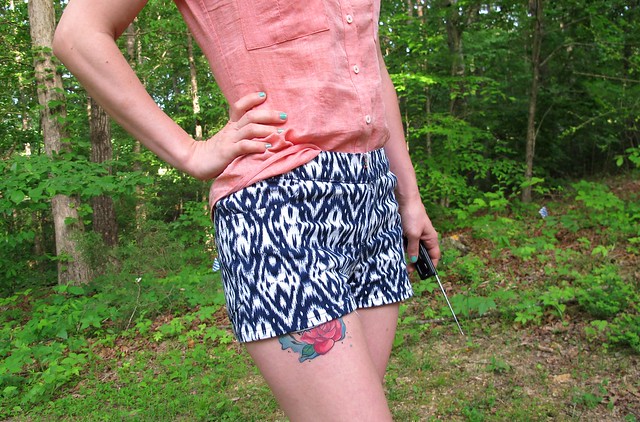
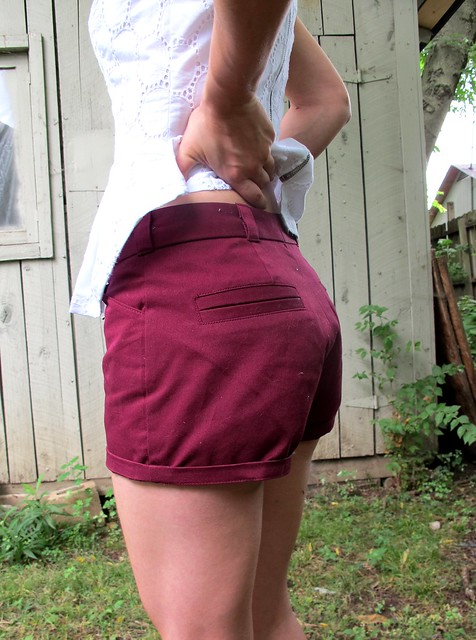
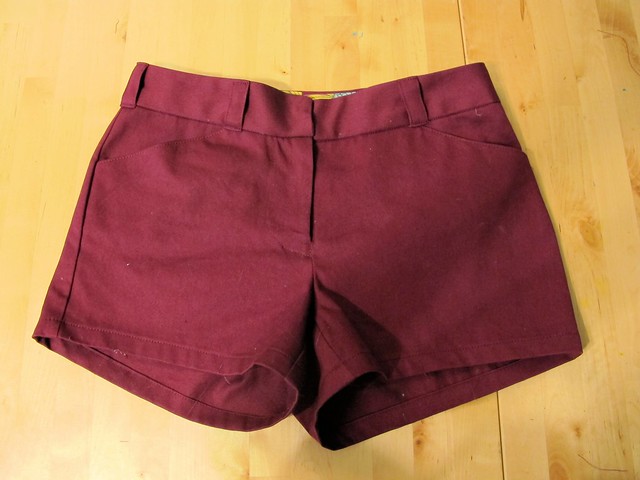
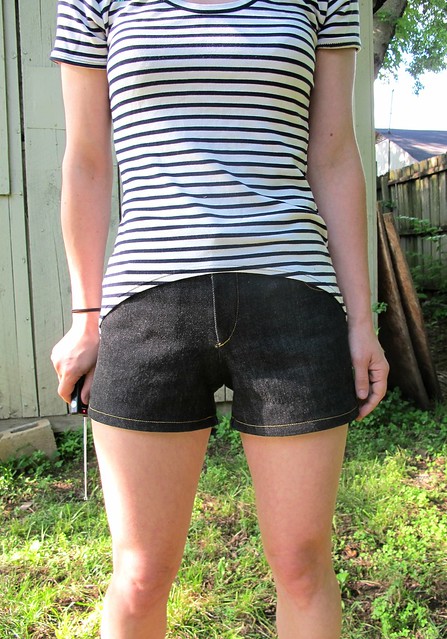
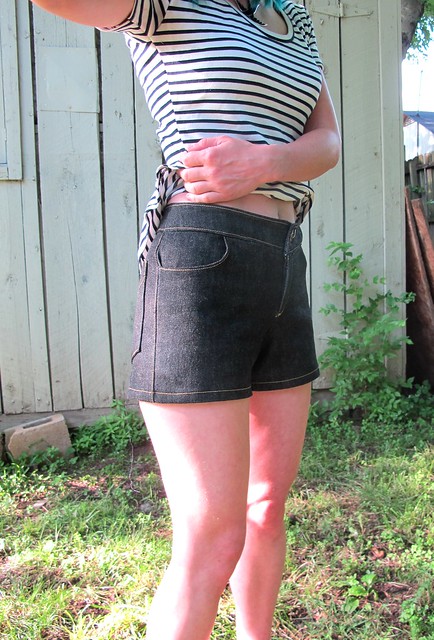
The pattern I used is the Sewaholic Pacific Leggings – although, obviously, I made some changes to the pattern to turn them into little running shorts! This was as simple as drawing a line where I wanted the new hemline to be, making sure to include a 3/4″ seam allowance for hemming. I started out with a 4.5″ inseam, based on a pair of shorts I already had, but ended up taking another inch off before hemming. I like my shorts short enough for some buttcheek to peek out. Ain’t no shame in that.

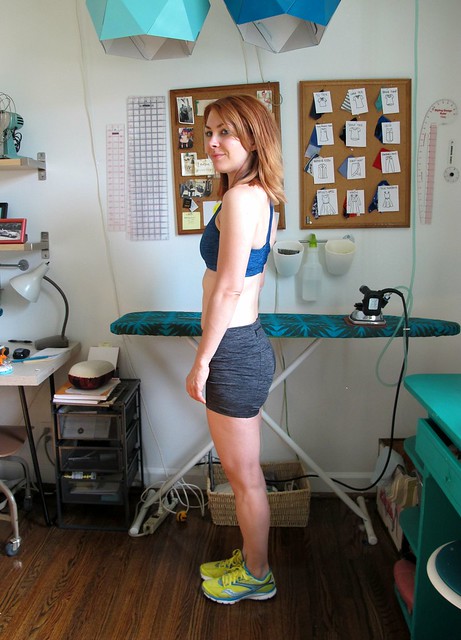
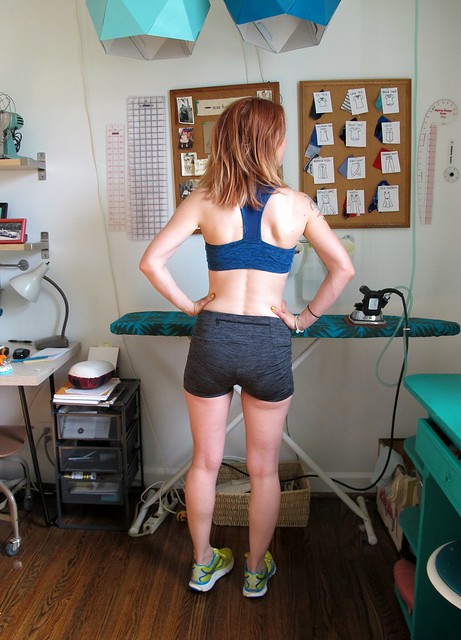
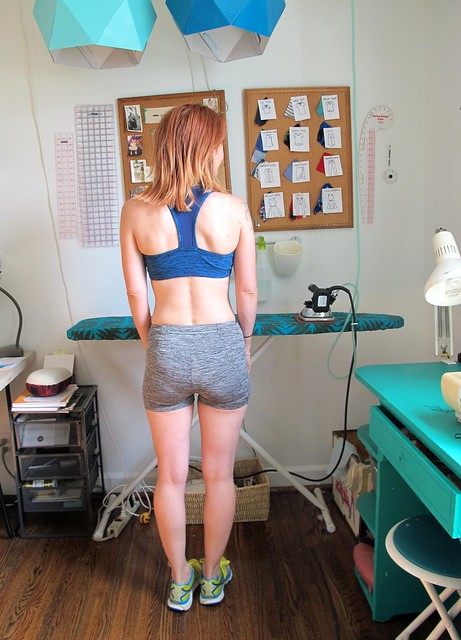
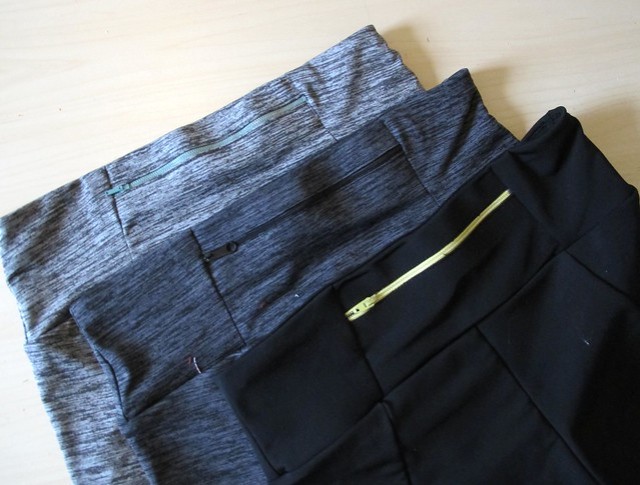
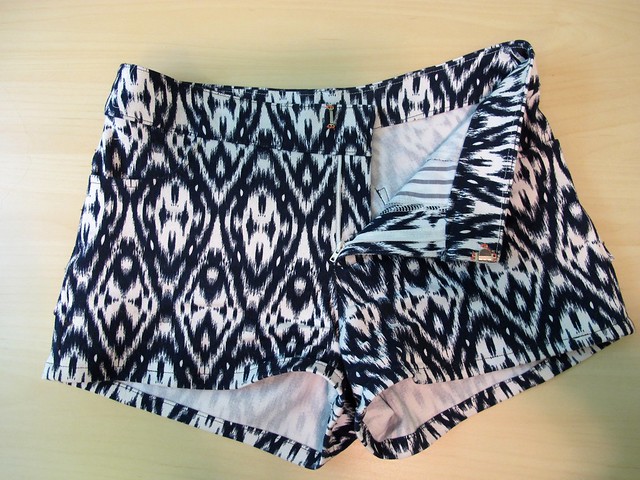
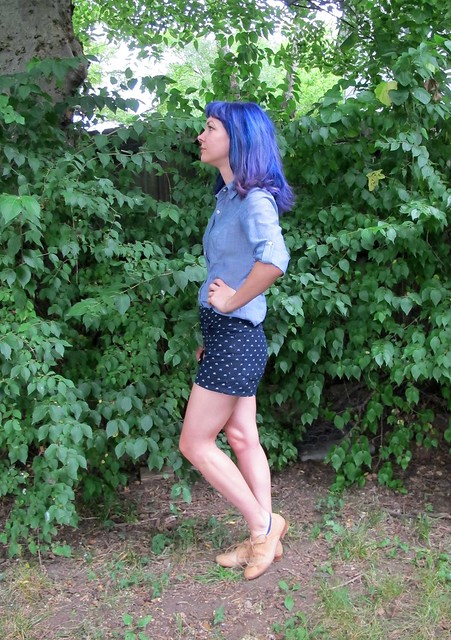
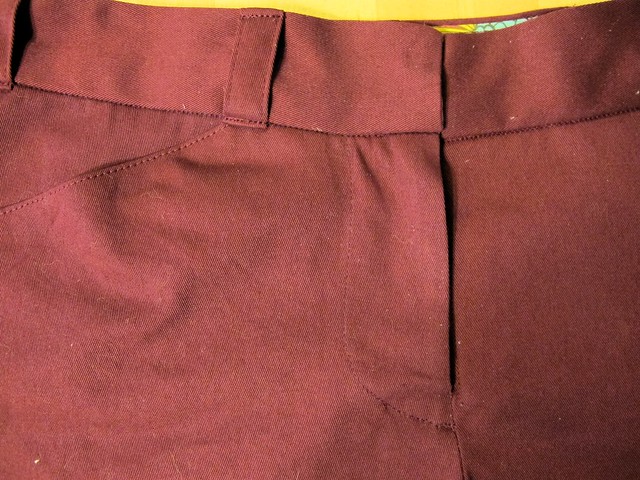
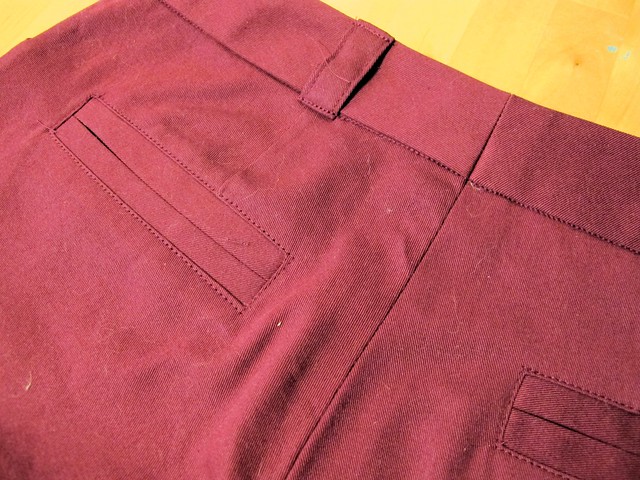
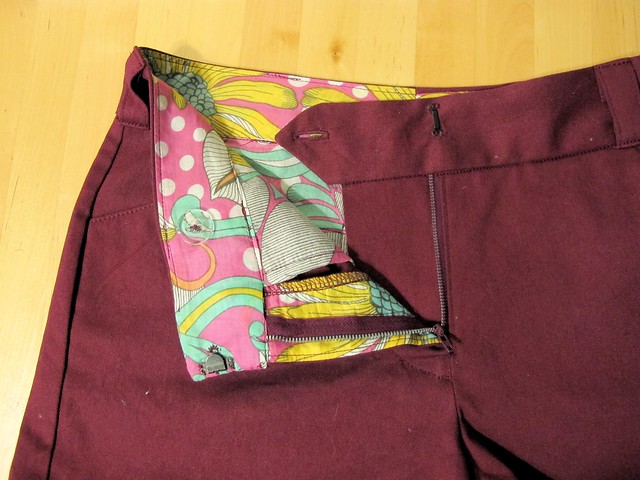
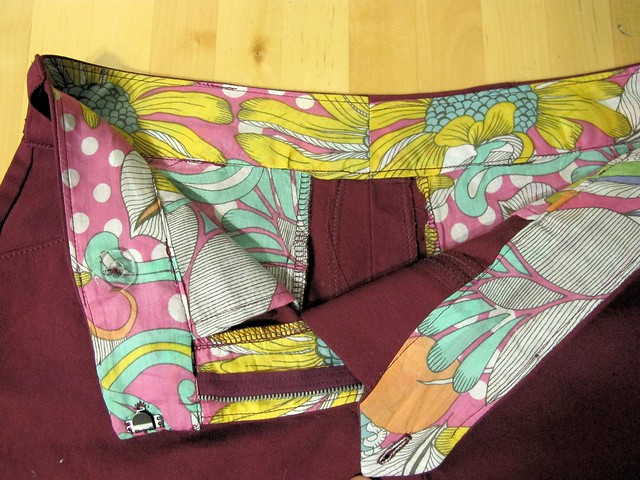
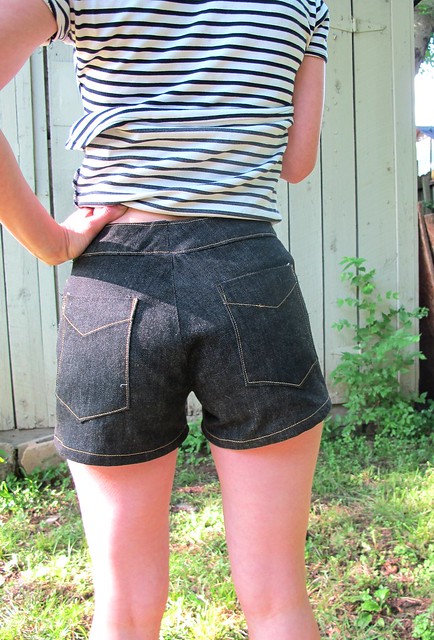
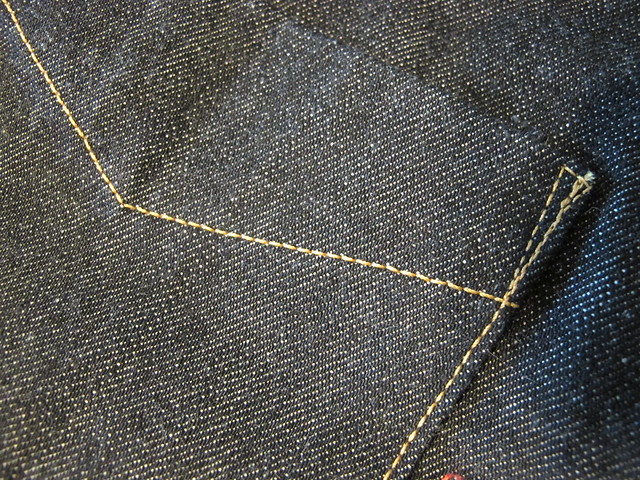
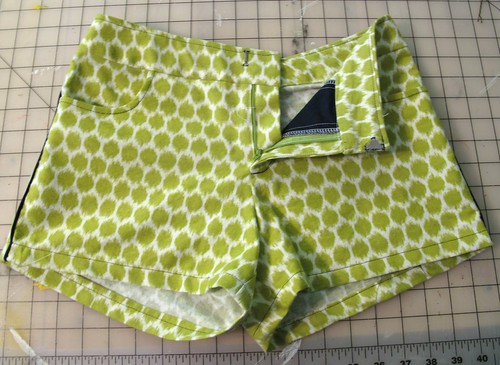
I made this pattern before earlier this year, for a couple of full-length yoga pants (which I never posted about, ha). It’s pretty great in terms of fit. I sewed my usual Sewaholic size – a 0 – and even though the line is geared toward pear shapes, my un-pear-shaped ass fits in it just fine. The pattern has some cool seaming on the legs (which is awesome for color and pattern blocking), a nice snug waistband that stays in place, and a back zippered back pocket that is actually big enough to hold my iPhone 6 – check it out!

Sewaholic Pacific Shorts + Dunbar Sports Bra

Sewaholic Pacific Shorts + Dunbar Sports Bra

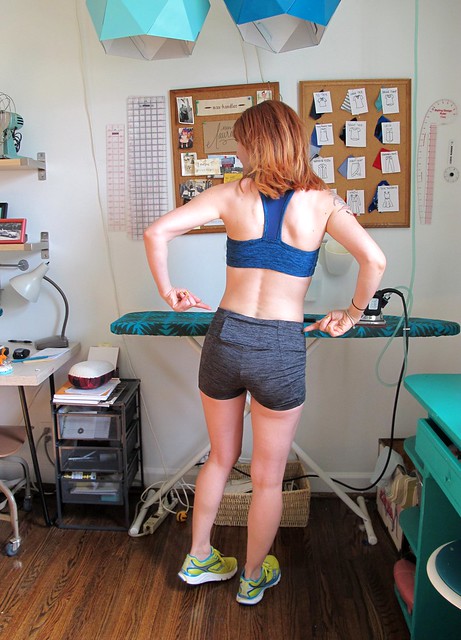
Now I can run to my heart’s content and know that my phone is safe and secure without worrying that it’s going to bounce out. This pocket is also big enough to hold my key and cash, should I need it (laugh all you want, but the greenway in question actually connects to a Target, soo… I’m just saying.).

Sewaholic Pacific Shorts + Dunbar Sports Bra

Sewaholic Pacific Shorts + Dunbar Sports Bra

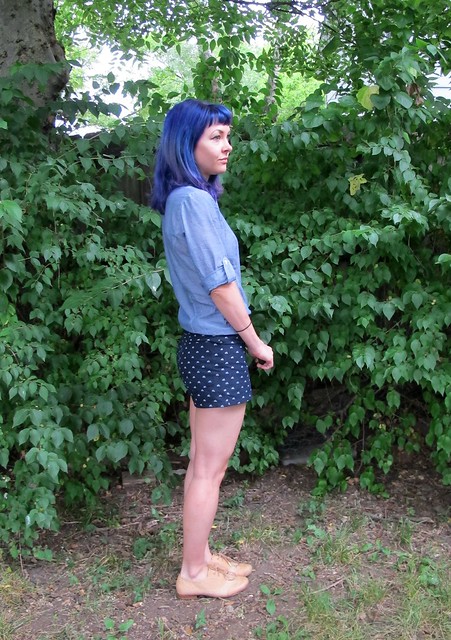
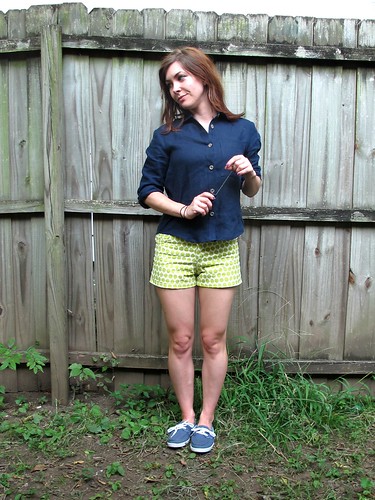
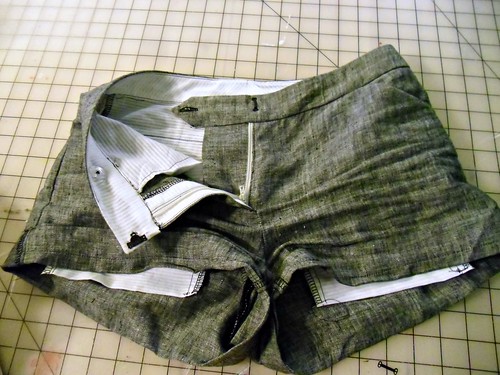
The second pair of shorts is pretty much the same as the first pair, except I used the Husky Grey colorway instead. You can barely see the zipper in this picture – it’s pale blue (that was the closest match I had on hand in my stash).

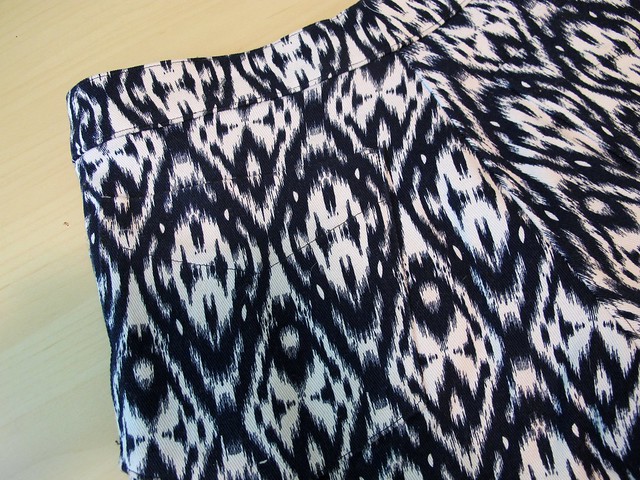
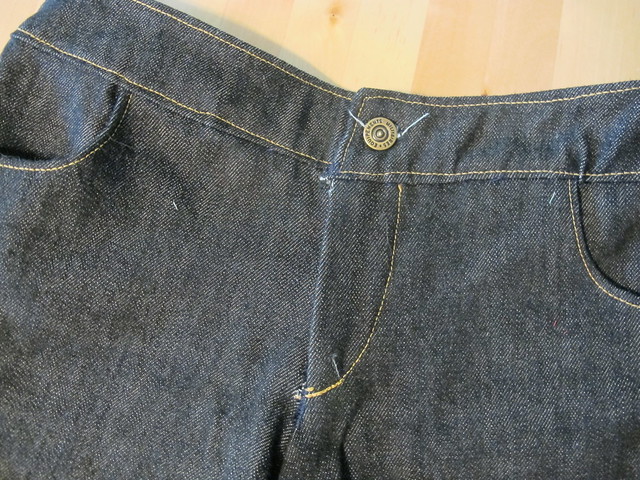
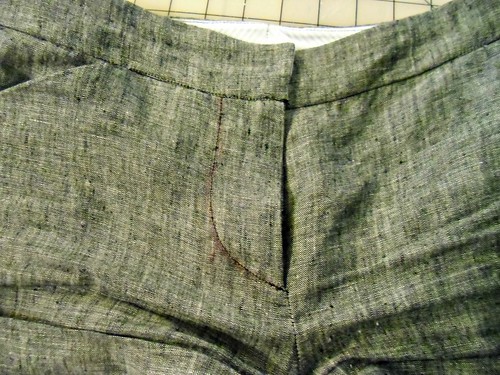
As with the first pair, I used a combination of my serger + sewing machine to construct these. The zipper area gets stabilized with a piece of fusible stay tape (to keep the fabric from going haywire while you’re putting the zipper in), so it’s really easy to sew in. The waistband has clear elastic sewn inside the seam allowances at the top to keep things snug and in place. The only part I did not enjoy sewing was the gusset – that thing is super tricky! I found the only way to get it in even somewhat nicely was to baste with my sewing machine first (because you are gonna end up ripping it out multiple times, so you might as well make it easy on yourself) and then go over the basting with my serger. I am still not a huge fan of the gusset – it kind of gives me cameltoe, if we’re being completely honest here (aaand now that I’ve said THAT word, I’m gonna get some weirdos in here via Google search, lord). I just ignore it and figure – if someone is staring there hard enough to judge the ‘toe, I’ve got a much bigger problem on hand hahahah.

Sewaholic Pacific Shorts

Sewaholic Pacific Shorts

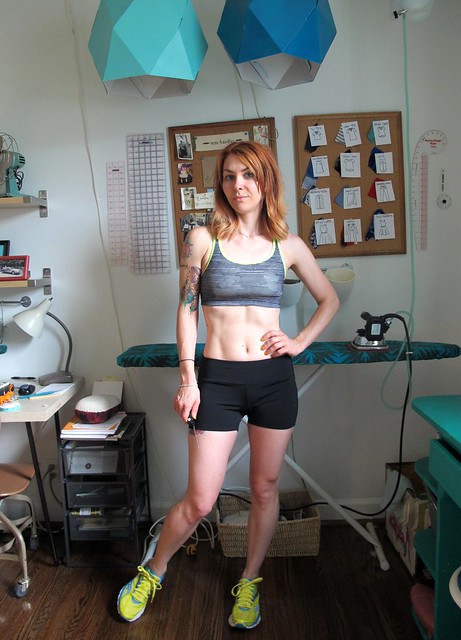
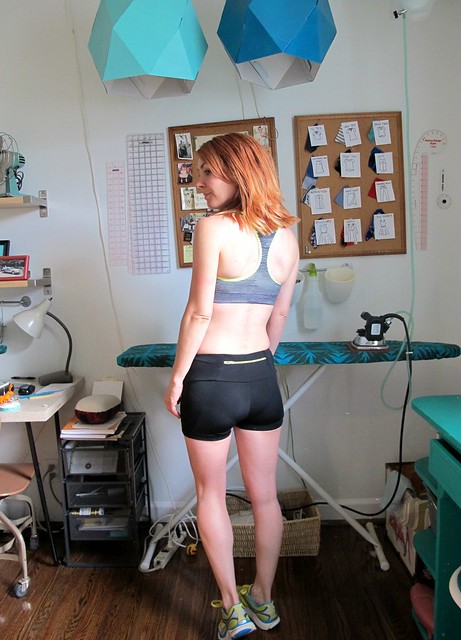
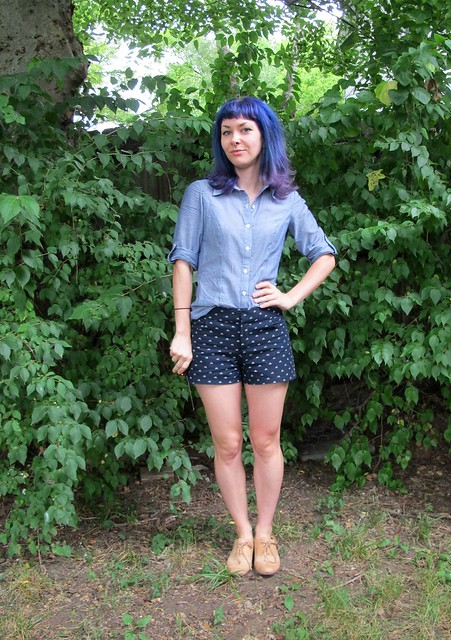
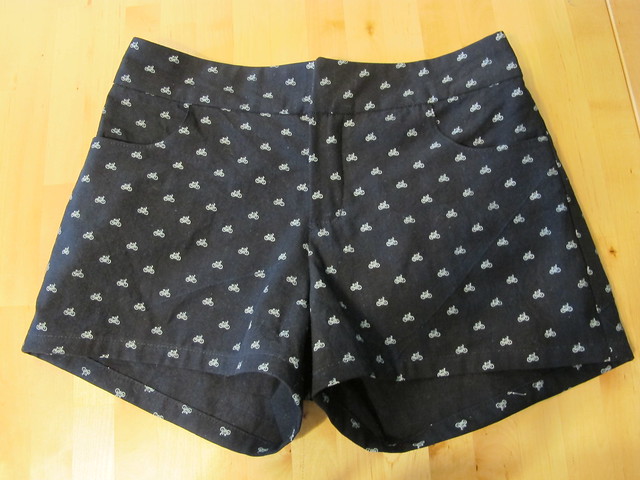
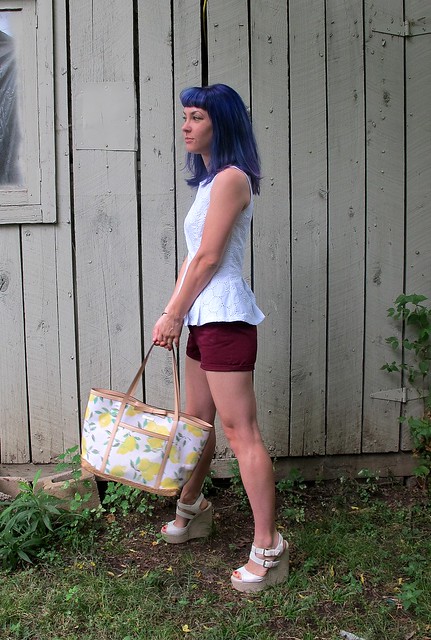
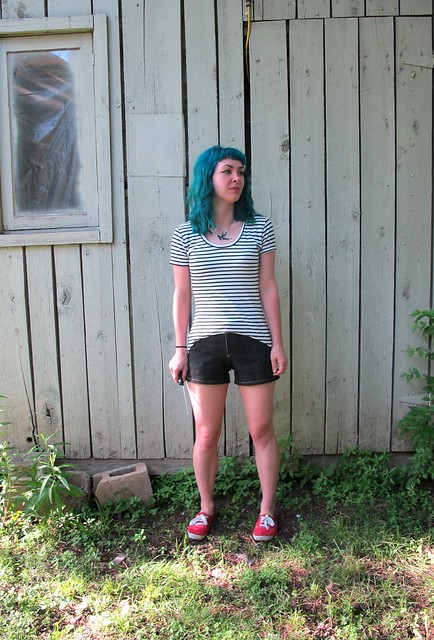
Last pair of shorts! These are a boring, basic black. The fabric is one that I have had in my stash for a couple of years – it’s a another dry-wicking activewear fabric, although I think it’s actually from Nike. My girl Lola sent me a yard of it way back in the day, so I’m not sure where it was purchased from. What I can tell you is that I put it in a really weird stash place and couldn’t find it for those 2 years, whoops. Imagine my delight when I unearthed it while packing for this recent move! Yay! In comparison to the stuff from Mood, this fabric is a lot thicker and more robust. It wears and dries about the same, but the heavier weight does make it feel like it’s a higher quality. It was a little more difficult to sew because it is more slippery, but not too bad. Even with adding a zipper and dealing with a tricky fabric, these shorts don’t take a lot of time – or fabric! – to make. And they are SO MUCH cheaper than buying some shitty Lululemon or whatever.

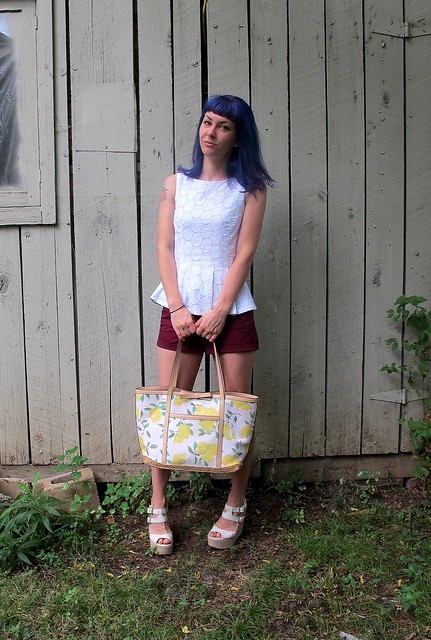
(In case you were curious, the yellow/grey sports bra is not a handmade – it’s RTW. I like the color combo though and would like to try something similar! Also, I have no idea what happened to the lighting in those photos! Took them at the same time as the others, wtf)

Sewaholic Dunbar Sports Bra

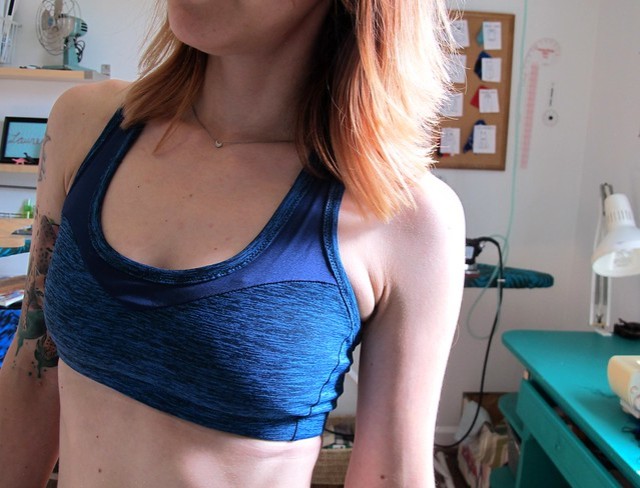
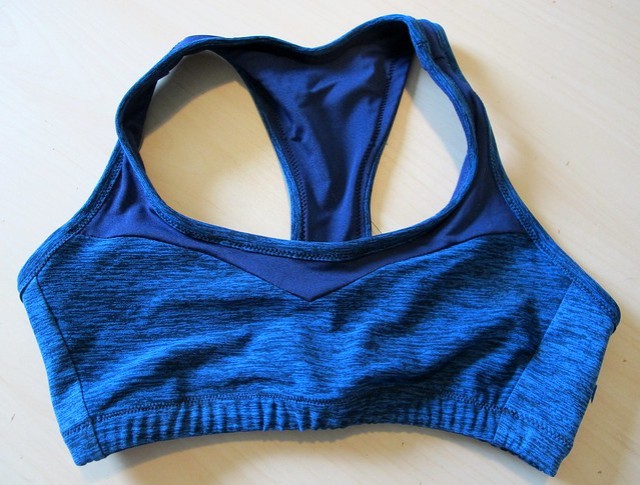
Finally, the sports bra! I’ll be honest – I am 100% a-ok with the stash of RTW sports bras in my drawer. I have a fairly small bust, don’t need a lot of support, and fit well within the size ranges that are available at the store. I tend to buy them on clearance, so they rarely cost me more than $15 a pop. I wasn’t totally interested in making a sports bra because what I already have works, but the Dunbar top pattern (also from Sewaholic) caught my attention enough where I figured I’d try it. I like the details and fabric combinations, and being able to use one of the cool printed Activewear fabrics that Mood Fabrics carries (or even just making a bra to match my shorts because I am SO that person) was a plus. So I tried it out, and I’m a fan! I spent a really long time debating what size to sew – and even traced the pattern just in case I chose the wrong one – but ultimately, went with my usual size 0 and the fit is pretty good. I ended up taking in the band elastic a LOT more than what the pattern calls for, but I have a small ribcage so that’s not surprising (I think the pattern calls for 26″ of elastic at the band, and my ribcage measures 27″. I needed more negative ease than that!). For the record, my full bust measures closer to the size 4, but the 0 was just the right amount negative ease for me.

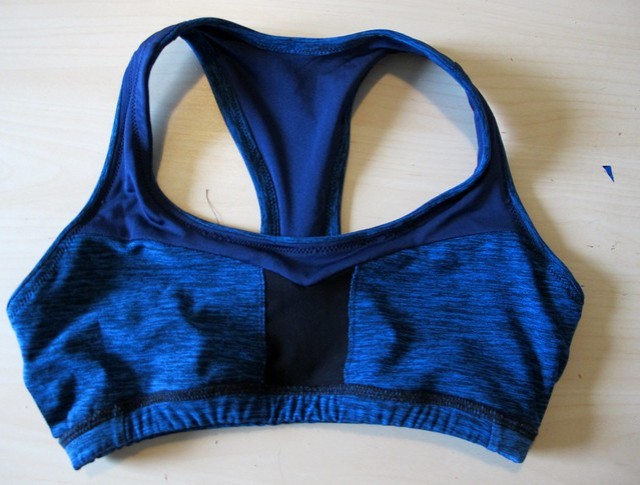
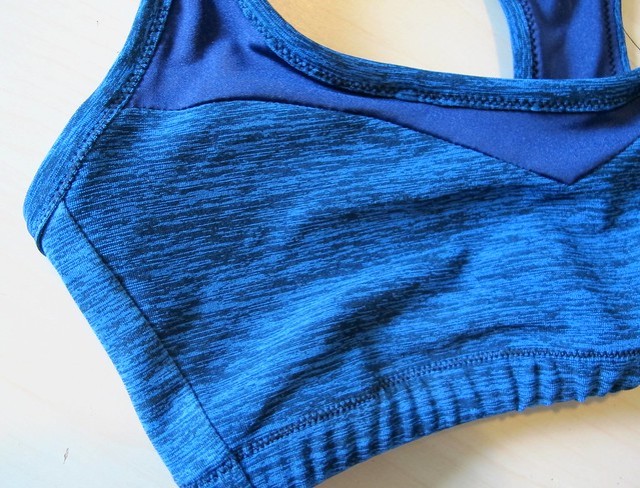
I used – again! – the Max-Dri Performance Jersey, this time in Midnight Blue – for the main color of my top. For the dark blue contrast, I used navy nylon spandex. The top gets its support by compression – which is achieved with an underlayer of Powermesh . I can’t speak for every boob out there, but my experience with the support in this bra was great. Again, I ain’t rocking a huge cup size here and I don’t need much support to begin with, so take that as you will 🙂

Sewaholic Dunbar Sports Bra

Sewaholic Dunbar Sports Bra

Sewaholic Dunbar Sports Bra

Anyway, the sports bra was a bit fiddly with all the little pieces – but it was overall easy to make. I used my sewing machine for the majority of the construction and elastic application, just as you would with a regular bra. I think it turned out quite nice! I think the ability to have really cool patterned/colored sports bras (especially using some of my leftover swimwear spandex, which I am totally eyeballing now) negates the downside of how fiddly it was to sew. It wasn’t even difficult to make, just time consuming with a lot of tiny pieces. Sort of like, I dunno, a bra. lolz.

Sewaholic Pacific Shorts

Sewaholic Pacific Shorts

I’m feeling pretty good about these new additions to my drawers! I didn’t realize how much more fun it is to exercise when your clothes are fun too – even if you’re going to get all sweaty, it’s nice to feel like you look nice while you’re doing it. And speaking of sweaty – these performance fabrics have definitely lived up to their “Max-Dri” hype. I still sweat – a lot! – but they dry very quickly, which is awesome.

Sewaholic Pacific Shorts + Dunbar Sports Bra

I am pretty sure one of the things I said I would never make is activewear – so, I guess I take that back! Honestly, though, I’m running (lol) out of practical holes to fill in my closet, at least in terms of fun practical. Now I’m down to sewing things activewear, white tshirts, and panties. I really love the experience behind sewing and creating, but I don’t want to be wasteful and make things just to make them, you know? So this feels like a good compromise, even if it’s not a necessarily interesting end result.

Note: The fabrics used for some of these projects were supplied by Mood Fabrics, in exchange for my participation in the Mood Sewing Network. I should also point out that Tasia of Sewaholic sent me all the patterns in the Vancouver collection – which includes the Dunbar Top and Pacific Leggings – free of charge last year when the line launched. There was no stipulation that I needed to review the patterns, Tasia is just a nice person 🙂 And I have nice things to say about her patterns because they are fucking awesome. That is all.

Completed: Red Cotton Twill Thurlows

11 Sep

I’m pretty sure I’ve added “make red shorts” to my summer sewing list for at least the past couple of years. I had a really awesome high-waisted pair that I made a few years ago and wore the hell out of (red shorts go with everything, don’t ya know), but eventually they got too big and I sold them off. I’ve been meaning to replace them for years, but never got around to it – partly because I couldn’t find a good fabric that I liked, but mostly because I kept getting distracted by the new & shiny.

Sooo, this post is dedicated to those red shorts. I finally made some! Although they’re nothing like the OGs – no high waist, no pleats, none of those – but they’re red, and that’s the most important part.

Red cotton twill Thurlows

Red cotton twill Thurlows

I’m going to keep this (relatively, for me) brief, because nothing about this project is new information as far as my blog is concerned. I used the Sewaholic Thurlow trousers as my pattern. This is a really, really fantastic pants pattern and I’ve made it up numerous times – from jeans to red skinnies to shorts to more shorts to MORE SHORTS. (+ even more that I did not link because, well, that’ll be enough for now). I even had a Thurlow Sewalong on this here blog like, a thousand years ago! I loooveeeeeee me some Thurlows! They are beautifully drafted, have an awesome butt-fit, and they look really nice and professional when they are sewn up. Thurlows win.

That being said, I’ve talked about the Thurlows a LOT on this blog. It’s kind of hard to keep waxing poetic about something you’ve already publicly loved on to the point of it becoming embarrassing PDA, so I’m going to refrain in this post. Nothing new about this project. I made my usual size with my usual adjustments (for more details on that, see one of the many MANY posts I’ve written about this pattern hahaha) and followed the instructions. Yawn.

Red cotton twill Thurlows

Red cotton twill Thurlows

Even my fabric choice doesn’t really offer much in terms of exciting and new. I used an Organic Cotton twill from Mood Fabrics – it’s the same fabric I used last year to make my tie-less Miette skirt. I had just enough to squeeze out a lil’ pair of shorts, so, awesome! I love using this twill to make Thurlows (yeah, even fabric choice isn’t a first – I’ve made this pattern using the deep wine color before, too hahaha), as it holds it’s shape really well and is comfortable to wear. It also washes and wears beautifully, which is, well, pretty important too. The only thing that sucks about this fabric is that it tends to sell out pretty quickly on the website!

Red cotton twill Thurlows

Red cotton twill Thurlows

Red cotton twill Thurlows

To make up for an unexciting pattern review – here’s an ~exciting~ photoshoot! Well, this isn’t nearly so much exciting as it is just different from the mess of trees I usually have going on in my photos (which I ain’t complaining about one bit, because I can – and will – stare at those trees all day long. They are so beautiful!). Landon and I took a hike a couple of weeks ago, in search of this waterfall, and we ended up taking these photos just because the scenery was so awe-inspiring. My hair is a rat’s nest of a mess and these were taken with his phone – but I like them! I don’t normally go for photo-shooty type pictures on this blog (I personally don’t think artsy photos do a good job of showing details. Also, I abhor the idea of having to leave my house to take pictures for a blog haha), but I’ve posted about this pattern a zillion times, so I think it’s ok if you can’t see every little detail.

Red cotton twill Thurlows

What’s exciting about these pictures is that, even though we were hiking to get to this point – it’s not like we hiked very far, or even had to drive anywhere to begin the journey. We started out in our backyard and traveled through the neighbor’s yard to find this spot (I should add – our neighbor has repeatedly invited us to explore and enjoy his land. He’s the one who told us about the waterfall in the first place). So, while this isn’t literally in my backyard – it’s close enough! We only had to walk about 30 minutes. Yeah, neighbor has a LOT of land hahaha. Way more than our puny-by-comparison 5 acres!

Red cotton twill Thurlows

Red cotton twill Thurlows

God, I love living in the country 😀

And because this is still at sewing blog, here at Thurlow short gut photos:

Red cotton twill Thurlows

Red cotton twill Thurlows

Red cotton twill Thurlows

Red cotton twill Thurlows

Red cotton twill Thurlows

Oh, I did change up what pieces I cut from the lining. The waistband and fly facing are self-lined (instead of using contrasting lining fabric); only the pockets are cut with lining. I did this because I always felt like the lining showed from the right side, which I wasn’t a fan of. I guess this may not work for really heavyweight fabrics, but it was fine with the cotton twill. Everything else stayed pretty much the same. Also, I dunno why my fly shield doesn’t cover the bottom of my zipper, but, oh well. Finally, I have come to accept the fact that I use this striped cotton for pretty much all my pocket linings, and I will not apologize for that. It makes a really good pocket lining hahaha.

Red cotton twill Thurlows

That’s all for today! I have a few more projects that are patiently awaiting a post (I told y’all, I’m behind), and then it’s on to sewing for the next season! I’ve been writing out my plans and gathering supplies, and I’m really looking forward to switching gears for the cozy. Another thing I’m looking forward to is seeing what this area looks like when the leaves start changing. I am pretty sure it’s gonna be insanely gorgeous 😀

Completed: Scout Tee + Gorts

10 Aug

Today’s post features a two-fer – a top AND shorts! Woohoo! Be prepared for a slight photo overload ahead.

Scout TeeI’ll start with the top. This is the Scout Tee from Grainline Studio. It’s your basic woven tshirt with a scoop neck and a relaxed, boxy fit below the bust. I know everyone and their mom has made this pattern already, and I’m only a few years behind on the bandwagon! Honestly, the pattern didn’t appeal much to me until recently – I generally prefer to wear more fitted shapes, especially at the waistline. This was a bigger deal in the past when I had a larger bust – but the girls have shrank over the years, which has made me feel a little bolder about experimenting with different shapes and silhouettes, since I don’t feel like my waist is being quite as swamped as it was in the past. Plus, loose styles are waaaay more comfortable in the summer heat, since they allow a better airflow (I know most of you are thinking, “No shit, Sherlock,” but I have ignored this for most of my adult life! Cut me some slack!). Scout Tee

Anyway, I quite like this style on me! I guess it’s still not the most “flattering,” but I’m kind of getting to the point where I don’t care quite as much about flattering. That’s one major difference I’ve noticed about being 30 vs being 20 – I don’t really give a shit about looking ~sexy~ every time I leave the house. I’m also sure my long-term relationship has a stake in this as well, but I’ve been in long relationships in the past and my attitude was definitely the opposite. Wearing loose-fitting anything – especially around my waistline – is a pretty new style territory for me, one that I’m starting to slowly explore and actually wear out in public. Also, it’s damn comfy.

Scout TeeBack to the pattern! I cut the size 0 and shortened the hem by a couple of inches to give it a more cropped length (but long enough so that it still covers the waistband of my pants). The pattern was really easy to put together – it’s just a front and a back, little cap sleeves, and a neckline bound with a bias facing. I like that it fits through the shoulders and the bust, then falls straight down to the hem. Even though it’s loose, it doesn’t look sloppy. One thing I noticed is that the shoulders tend to pull toward the front – since I used a different fabric for the back, this is a lot more noticeable. It doesn’t bother me at all – I actually like the way it looks, to be honest – but I’m also not sure if it’s part of the pattern, or a fitting issue. Thoughts?

(ps, sorry about the wrinkles – like most of my makes lately, these were taken after a full day of wearing) Scout Tee

The fabric is what really makes this top shine, though! It is GORGEOUS, amirte?! This is a pretty special piece – it’s handwoven here in Nashville! The company who makes this beautiful cotton fabric is Shutters & Shuttles. I don’t know if they even sell yardage anymore, but they used to. I believe they sell yardage to local designers, which – ding ding ding! – is where I got my little piece from. Back when Elizabeth Suzann used to sell limited-edition tops made with this beautiful handwoven fabric (and other colors/styles of fabric as well), she had a whole stash of it. Eventually, the limited edition ended and Elizabeth’s line moved in a different direction. And then she destashed the studio, and this piece ended up in that stash bag I was telling y’all about. It was a very small piece, so it took me a while to figure out what to do with it. A lot of Georgia Tees were made using Shutters & Shuttles fabric, and they all looked awesome, so I followed that lead with my own boxy tee. Scout Tee it was! Except that I didn’t have *quite* enough fabric to cut both fronts and backs, so the fabric sat on my shelf for several months while I looked for a good color match.

Scout TeeWhen I made my coral B5526, the coral voile was stored right next to this fabric, and I realized that they were perfectly matched. Which was lucky enough in itself, because this is a really weird (albeit beautiful) coral to try to match. I bought another yard on my next Mood order, and used the voile to cut the back of this tee. I also used the voile for the bias facing at the neckline – it’s a much lighter weight with less bulk than the handwoven cotton, so it sits on the neckline a little better (plus it looks pretty on the inside!). Scout Tee

I got these little tags in an order from Grey’s Fabric awhile back, and I think they are so cute! I wanna be a crafty fox!

Scout TeeTo crop the hem, I just folded up an extra-deep hem allowance and topstitched it. One, because I like the way the shirt hangs with the extra weight at the hem, and two, because I wasn’t sure if this whole slightly-cropped-tshirt thing was going to be my jam next summer. I might change my mind and want it to be longer (or even shorter, I dunno), so I left the hem allowance there as a bit of a safety measure. And also a big ol’ dangly thread, it seems.

Now for the shorts! Ginger Gorts

I made Jorts – or Gorts, as I am calling these (jorts is a really annoying way to say jean shorts, in case you were wondering!)! Remember when I utterly failed at that shit last year? Man, those shorts look fucking stupid in retrospect. What was I thinking? And if you were wondering – I never wore them beyond that blog post. They were just tooo uncomfortable and I was terrified the zipper was going to bust. They sat guiltily in my dresser for a few months before I finally chucked them.

Anyway, I’m glad I failed at that shit because I learned some very important Sewing Life Lessons:
1. Don’t make jorts out of a pattern intended for trouser shorts. It looks fucking stupid. Better to start with a jeans (pants) pattern and cut it short accordingly.
2. Jorts need fancy jean topstitching, or they aren’t proper jorts. And, they look stupid.
3. Until you figure things out otherwise, jorts need some stretch in the fabric, else they won’t be comfortable.
4. For zipper security, there needs to be a bartack connecting the fly shield to the front of the pants. This is EXTREMELY important. That’s why my zipper kept breaking on the fail pair – pulling the shorts on and off was putting way too much stress on the bottom of the zipper, which caused it to break. I eventually figured this out by inspecting a pair of my jeans – the bartack that hits right at the curve of the fly topstitching is intended to take the stress off the zipper, so you can pull on and off your tight pants. I had left that bartack off, which made my pants weak right at the crotch (kind of like most men lololol amirite)(sorry).

So, with those lessons in mind, I re-attempted the jorts. These are way better! Not perfect, but better. I know they look pretty wrinkly in these photos, but again, those are wearing wrinkles – not fitting wrinkles. Well, maybe a couple of them are fitting wrinkles. I am human, after all.

Ginger GortsI call these Gorts because I used the Ginger jeans pattern to make them! Ahahaha aren’t I clever! I just love this pattern and I spent a solid chunk of my time in Peru dreaming about making more jeans because I just looove all the detail that goes into the topstitching – but knowing that I don’t need jeans right now, because it’s way too hot! So I was happy to compromise with shorts instead. To make the pattern shorts-appropriate, I just measured the inseam of my favorite shorts and cut that length + 1″ from the inseam of the pattern. In retrospect, I should have added a little more length so that I would have a proper cuff (I didn’t plan these to have a cuff, but they were too long once I’d already hemmed them and I didn’t feel like-rehemming). Maybe next time! Also, if I go with the future cuff, I need to widen the bottom of the shorts at the hemline, because they are a little tight at the thigh (cuffs need to be wider so that when they flip up, they are the right width. This is hard to explain without pictures, so here’s an example in this book I found. Thanks, Google Books!). Giving them a good stretch when I put them on helps, though. Ginger Gorts

For fabric, I used a stretch denim from Mood Fabrics. The weight was perfect, but the stretch was a little less than what the pattern calls for (which I determined the unscientific way by comparing it to the denim I used to make my first pair of Gingers). I added 1/4″ to the side seams to accommodate for this, but they are still a little bit stiff. The other bummer is that this fabric has a severe bleeding problem – the first time I wore these jeans, they rubbed indigo dye all over the inside of my purse. I was carrying the only nice purse I’ve ever owned, which HAPPENS to be white. Wah!! I was able to get the majority of the discoloration off with a stain remover, but now I’m afraid to sit on anything remotely light-colored. I washed the denim a second time with a cup of vinegar in the wash to set the dye, but they are still rubbing off a little.

All in all, though, I’d say these are a good practice run! When I finally make my fancy Ginger jeans with the Cone Mills denim kit that I bought earlier this year, I am hoping that I’ll have enough leftovers to make some solid Gorts. We’ll see! Pants first!

Anyway, photos:

Ginger GortsGinger Gorts

Ginger GortsGinger Gorts

Every time I make jeans, I want to experiment with different colored topstitching thread & serger thread – but I always punk out at the last minute. With these, I used bright blue thread for the button hole – baby steps! It also matches the lining and the serger thread.

Ginger GortsOh, right, and the backside of the button hole is emerald green 🙂 Ginger Gorts

For the topstitching, I used my new 1/4″ foot. THAT THING IS AWESOME. There’s a dull blade that sits exactly 1/4″ from the needle, to help you align your stitching and ensures erfect parallel lines every time. Totally worth the $$$ I spent on it. Although I should probably focus on my bartacks next – those clearly need a bit more work. My machine doesn’t have a setting for bartacks, so I have to trial-and-error with experimental zigzagging.

Ginger GortsGinger Gorts

Ginger GortsYou can also see that I changed up the positioning of the rivets – they are only on the front pockets. The pattern has you put 2 rivets on the back pockets, which I did with my first pair, but I never really liked the way it looked. RTW jeans don’t typically have rivets on the back pockets – ok, ok, SOME DO, but not the majority! – and I thought it made them look sort of homemade. I also recall reading, like WAY back in the past, that the original Levi’s didn’t have rivets on the back pockets because they would get too hot when the gold miners sat next to a fire. Full disclosure, it was a research paper on the history of jeans/Levi’s that my cousin wrote for one of her classes in high school, and I found it because I was snooping in her room when she wasn’t home (what? She had a really cool Barbie Dream House that she wouldn’t let me play with). That one statement was really fascinating to me and has stuck with me through the years (although I don’t remember anything else about the paper). This would have been around 1992-1993, so yeah, a while ago (and yes, I realize we are talking about a paper written by a high schooler, back before you could use the internet for research – so obviously I can be completely off my mark here). A quick Google tells me that the rivets also scratched cowboy’s saddles, which might be another reason why the back pockets ones were eliminated. Either way, I think they look weird and out-of-place on the back pockets. So front pocket rivets only for me! Scout Tee

And that’s it for this outfit! Tell me – has your style relaxed as you aged? Do you find yourself experimenting with new silhouettes, or do you stick with the tried and true? How do you feel about rivets on the back pockets of jeans? Do you think the cowboys were onto something?

Completed: Ikat Maritime Shorts

26 May

Good morning, everyone! I hope y’all had a nice weekend – we spent the holiday driving back from the beach, which was AWESOME – well, the beach I mean, not the drive, ha – but I’m soo happy to be home! Apparently, my cat spent the entire time sulking downstairs and trying to attack my roommate when she would try to feed her. Great job, cat. And you wonder why no one wants to be your friend 😐

ANYWAY, now that the summer heat is in full swing round these parts, I’ve really started rolling with my warm-weather wardrobe. Beginning with shorts, obviously, because ain’t no way I’m trying to wear pants in this humidity.

Ikat Maritime Shorts

Ikat Maritime Shorts

The pattern I used is the Maritime Shorts from Grainline Studio. I have a long history with this pattern – having made shorts with crazy colors, home decor weight fabric, bicycles, and even some failed jorts. This is a good little workhorse of a pattern, and I love the modern, clean cut (which kind of reminds me of something you’d pull from a JCrew catalog, especially in a printed fabric like those bikes!). They’re also REALLY easy to whip up, Ikat fabric notwithstanding, and can be squeezed out of a fairly paltry yardage. All good things, in my book!

Ikat Maritime Shorts

Ikat Maritime Shorts

Since I’ve made these so many times before, there’s not too much to comment on construction or fit. I made my usual size, although it needed a bit of pulling in due to my fabric choice (more on that in a sec). I used stretch interfacing for the waistband and fly pieces and shortened the hem as much as I could before the pockets threatened to poke out. Most seams are serged, although there are a few flat-felled seams in where I could manage it. Oh! I also used both of my machines to make this – one threaded with white, one with navy. This meant that I didn’t have to change out the thread over and over, as I did with the skirt. Made sewing these shorts go a LOT faster!

When it came time to sew the fly zipper, I skipped over Jen’s instructions and followed the ones for the Thurlow pants (you can see my sewalong post for those steps here). I don’t know what it is, but the included fly instructions don’t make a lick of sense to me. This seems to be the case for about 50% of sewers who make these shorts – some people think the instructions are awesome, and some of us are just sitting there scratching our butts, confused as shit. Obviously I fall into the latter. Anyway, it’s easy to swap out the directions with something that makes a little more sense to you, so in my case, it’s Thurlow. All good!

Ikat Maritime Shorts

If this fabric looks familiar, it’s because I’ve used it before – on another Grainline pattern, no less. This is a stretch cotton twill that I bought from Mood Fabrics aaaaages ago – and have been hanging onto ever since, mostly because I had to work up the courage before I attempted pattern matching again! As with the Moss Mini, pattern matching these shorts was a total and complete bitch. I cut everything on the single layer, but even then it was really really difficult. Matching plaids and stripes is pretty easy – I could do that shit in my sleep at this point – but I had it in my head that I needed to match the print like freaking wallpaper for this piece, so the Ikat pattern runs seamlessly all the way around. I actually did manage to do just that, but not without wasting a shit load of fabric – seriously, I think I started out without about 2 yards, and I just barely had enough to match the back pockets by the time I was done. I kept mis-cutting and it was extremely frustrating. Of course, I have more Ikat lurking in my stash and I’m just side-eyeing it with terror now. I don’t know if I can deal anymore. I just don’t know.

Ikat Maritime Shorts

Ikat Maritime Shorts

Ikat Maritime Shorts

Anyway, I’m happy with how everything turned out – it was totally worth the effort. You’ll notice that my print-matching is not 100% – especially at the center back. This is because I used a twill with a heavy stretch, which rendered the shorts waaaay too big when I sewed them with the normal 1/2″ seam allowance included in the pattern. I tried them on before attaching the waistband, so it was easy to nip in the sides until I got a closer fit, but that meant I had to sacrifice some of my perfect print-matching. The Ikat still runs in a straight line, which is good – it’s just a little interrupted at the sides. The center back looks like a vortex leading straight to hell, but there’s really not much I can do about that, so whatever. At least the back pockets are good, ha.

All in all, I think I pinched out about 1″ off each side before the shorts were finally the right size. Again, this is due to the stretch in the fabric. I’d normally size down for this sort of thing, but I sewed the smallest size so that wasn’t really an option.

I don’t have much else to say about this project, so here are some pictures.

Ikat Maritime Shorts

Ikat Maritime Shorts

(I totally sewed the hook & eye on with pink thread – I am pretending like it’s a design feature, but in all honesty it’s because I already had a needle threaded with pink thread and I didn’t feel like changing out to white. Ha!)

Ikat Maritime Shorts

Ikat Maritime Shorts

Ikat Maritime Shorts

Ikat Maritime Shorts

Notice that the bottom of the fly shield is unfinished – I sewed it in upside-down on accident. This seems to be a running theme for fly shields+me, as it certainly isn’t the first time I’ve made this mistake. Oh well.

Ikat Maritime Shorts

Ok, I guess that’s it! So happy to finally bite the bullet and put that Ikat to good use. These shorts turned out really awesome, and they’re much more wearable than the mini skirt was (it’s hard for me to justify wearing something if I can’t comfortably sit on the floor with it on). And they look great with my new coral button-up, so bonus!

In other news, I recently decided to quit drinking coffee for the next couple of weeks – I felt like my caffeine dependency was getting out of hand, so I wanted to try to 0 out and start new. Omg you guys, it is REALLY hard! I am fortunate not to have any withdrawal headaches, but instead I’m just tired and listless and feel a little depressed, which is weird. I’ve also taken way too many naps over the weekend. I’m hoping things will balance out soon and I’ll feel back to my normal self but – ugh. So pardon me if I seem irritable – I’m just under-caffeinated! In the meantime, if you have any tips to help me ease out of this ~trying time~ in my life, I’m open to suggestions! I mostly just miss the taste of coffee. It was like getting a warm hug in the morning.

Completed: Bikey Maritime Shorts

31 Jul

I love it when a single piece of clothing incorporates a bunch of my favorite things at once.

Bikey Maritime Shorts

Bicycles? Check.
Maritime shorts? Check.
Roisin? FUCK YEA.

Bikey Maritime Shorts

I know they look like polka dots from a distance, but seriously there are teeny-tiny little bicycles all over these shorts and OMG SO CUTE.

Bikey Maritime Shorts

I’m a sucker for bicycle printed fabric – this is a true fact, and I don’t think I even need to say it, because most of y’all are probably nodding your heads (and/or rolling your eyes) from how often I mention it. That’s ok, I’ll say it again – bicycle fabric rules! This stuff is extra special, though, because it came as a gift from my homegirl, Roisin. Recently on her honeymoon in Paris, Roisin posted this shit on Instagram after a fabric shopping bender (seriously… she went home with some really beautiful stuff) and I nearly had a heart attack over the BICYCLE PRINTED DENIM. Because she’s an amazing sport, Roisin offered to go back to the fabric store and pick me up my own 3m length. On her freaking honeymoon! Do you see why this lady is amazing? Because she’s amazing.

Bikey Maritime Shorts

And because of her, I now am the proud owner of these cute little bike shorts! Yay!

Bikey Maritime Shorts

I’ve made this pattern – the Maritime shorts – a million times, so there’s not a lot left to say about them. I cut my usual size, and sewed these up as normal. I knew I wanted to stick with a good tried-n-true to be absolutely positive that we would have no fitting issues here, especially after all that trauma I had trying to make jorts. Speaking of which, I think I figured out the issue with the zipper – after inspecting the zipper of my jeans (the ones I bought, not me-mades), I noticed that the fly extension is tacked down right at the base of the zipper, which takes a lot of the strain when you’re pulling them off and on. It’s amazing that something as simple as reinforcing the extension with a bartack really makes such difference but it does. After realizing this, I checked the pattern and it does instruct you to tack the extension down. I guess I skipped over it in my jeans haste? I dunno. But hey, now you can learn from my mistake! 😀

Bikey Maritime Shorts

Sorry ’bout all the wrinkles. I took these photos after wearing the shorts all day, so most of them are from sitting and moving around. While this fabric is a denim, it’s pretty lightweight for shorts, so it tends to wrinkle. The fabric softened up quite a bit after prewashing, and also set a few wrinkles in permanently (such as the one you see by the side seam).

Bikey Maritime Shorts

Some additional notes:
– I debated on topstitching with a contrasting thread – either white or gold – but ultimately decided to let the bikes take center stage and kept the topstitching navy. I love how it’s subdued and classy – well, as classy as a pair of short shorts covered in bicycles can be 😛
– My pocket lining is Liberty fabric, left over from my recently Liberty make! I know it doesn’t exactly match the denim, but I couldn’t resist pairing these two special fabrics together – after all, they’re both from some of my favorite bloggers, so it seemed only natural 🙂
– You may have noticed that I didn’t finish the edge of that fly extension. Actually, I did. It’s just up under the waistband because I’m fucking stupid haha. Oh well!

Bikey Maritime Shorts

I tucked my chambray button-down in so you could really see the way the shorts look, and I surprised myself because I actually kind of dig the way it looks (even if it does scream ~Fashion Blogger on Pinterest~, which we all know I most certainly am NOT haha!). For the most part, though, I wear the shirt untucked, as in the above photo.

Bikey Maritime Shorts

The best part – those lil’ shorts use barely any fabric at all, which means I still have about 2m left to play with! I’m debating what to do with the remaining yardage. It’s too heavy to be any sort of top (well, any sort of top that I would wear) and I’m not keen on making a matching pair of pants… but a dress, perhaps? What pattern would you suggest?

Thanks again, Roisin, for being such a star and making these cute shorts a reality! When I finally get my butt to London, I owe ya a drink 🙂 Or two 🙂

Completed: Simplicity 1425

22 Jul

Today’s outfit inspiration comes from a completely new realm for me – watercolor painting!

Eyelet Peplum Top & Thurlow Shorts made with Mood Fabrics

Remember that watercolor class that I signed up for earlier this summer? Well, here’s a shot of one of the paintings I did in my final class (no, it wasn’t a fashion illustration class, but the teacher was open to letting us paint whatever wanted – and she was tickled that I went with fashion illustration, ha!). I had some swatches from Mood Fabrics that I knew I wanted to turn into an outfit for my next MSN post, but the outfit inspiration didn’t come until my pen er, watercolor hit the paper 🙂

Eyelet Peplum Top & Thurlow Shorts made with Mood Fabrics

Let’s start at the top and work our way down! I used Simplicity 1425 for the pattern, and cut the most simple version (sleeveless, no yoke, no collar). I cut the size 4 and took a little in at the waist, as well as made my normal gaping-upper-back alteration that seems to be a running theme for me when it comes to sewing Simplicity patterns.

Eyelet Peplum Top & Thurlow Shorts made with Mood Fabrics

My fabric is this beautiful white cotton eyelet from Mood fabrics, which I underlined with this bright white cotton batiste (also from Mood Fabrics), for modesty and some opacity. It’s still a little on the sheer side – as in, I have to watch what color undergarments I’m wearing! – but the two fabrics together make such a fun light and airy top.

Also, I just noticed that there is a fly on my boob in this picture (at least, I’m pretty sure it’s that fly that was buzzing around). Gross.

Eyelet Peplum Top & Thurlow Shorts made with Mood Fabrics

Sewing was very simple and straightfoward – not to mention fast! Seriously did all this (minus the initial muslin) in the space of a Saturday afternoon. Not too bad! I underlined all the pieces by hand with silk thread (it’s not totally necessary to use silk thread, but it does make it easier to pull out the basting when you attach the seams – which, if you’re as anal-retentive as I am about sewing, you will totally appreciate that, ha!) and I used a 70/10 Microtex needle to prevent puckering, since the fabric is so lightweight. Most of the inside seams are serged, although I did finish the armholes and neckline with bias facing (cut from the same batiste). I can’t really speak for the instructions on this pattern as I didn’t use them at all, but the overall finished top is pretty nice!

Eyelet Peplum Top & Thurlow Shorts made with Mood Fabrics

For an extra lil’ punch, I stuck an exposed separating zip right up the center back. Kind of toughens up the overall sweetness of the eyelet, yeah? 🙂 This pattern was actually written for there to be buttons down the back – which is a cute idea in theory, but they only called for 3. THREE. How that doesn’t look like a fucking hot mess when you’re wearing the top and moving around is beyond me. I imagine that would gape a lot! So I swapped out my buttons for a fun zipper and I’m loving the way it turned out.

Eyelet Peplum Top & Thurlow Shorts made with Mood Fabrics

Getting the zipper in was kind of an adventure in itself. I tried googling around for directions on inserting an exposed zipper (I mean, I had a vague idea of how to do it, but I always like to check and see if my technique is right first), but everything I was pulling up was for close-ended zippers. Since my zip is separating (you know, so I can get the top off and on without destroying something in pure rage during the process), those particular tutorials were kind of a moot point. In the end, I kind of winged it, but I think it worked out!

Eyelet Peplum Top & Thurlow Shorts made with Mood Fabrics

As far as the style of the top – well, I like it. I know it’s super trendy- especially with the dang exposed zipper! – but I’m ok with being trendy. I think peplum tops are super cute and the white eyelet will go with lots in my summer wardrobe. Plus, I can tuck that peplum into high-waisted skirts, so it’s like two tops in one! Woohoo!

Eyelet Peplum Top & Thurlow Shorts made with Mood Fabrics

Eyelet Peplum Top & Thurlow Shorts made with Mood Fabrics

Now for the shorts! I used my beloved Sewaholic Thurlow pattern, matched up with my other beloved plum organic cotton twill from Mood Fabrics. My love affair with that organic cotton twill should be well known at this point, I hope. That stuff is amazing. Soft and cottony with a bright, saturated color… a dream to sew, and a dream to wear. I’ve made so much with this particular fabric in different colorways – including moreeee Thurlows! – and I’m sorry y’all have to see it again. Just kidding, I’m not sorry! These shorts rule! Get you some of that organic cotton twill, you won’t regret it!

Eyelet Peplum Top & Thurlow Shorts made with Mood Fabrics

I don’t really know how much more I can talk about these shorts until y’all tell me to shut up. I’ve seriously made them so many times, it’s kind of like autopilot at this point. I found that I did have to take quite a bit of excess out of the legs this go-round… I think I might be getting too un-curvy to wear this particular pattern 😦 I’m already at the smallest size, so it’s not like I can size down. I’m hoping my adjustments will work for future Thurlow shorts, but I’m kind of afraid to try the pants at this point since there is soo much that needs to be changed now, ugh. I reckon I could find another pants patterns to sub out, but wah! I want to keep making Thurlows forever!

Eyelet Peplum Top & Thurlow Shorts made with Mood Fabrics

Anyway, fitting issues aside, these shorts were a delight to put together. I played around with the topstitching on this pair and I really love how the it looks so gorgeous and crisp against this fabric. I tried topstitching around the welts this time – something I’ve seen in RTW and always wanted to try – and I think it looks pretty nice!

Eyelet Peplum Top & Thurlow Shorts made with Mood Fabrics

Oh, and check out that fun lining! Yeah girl! That comes courtesy of this crazy/awesome psychedelic cotton voile print, which is unfortuanately sold out now (but take a look at the other cotton voiles from Mood Fabrics. Sweet!). I love putting crazy prints in my pants because, dude, why not? Business in the front, party on the inside. Or something like that!

Since we’re on a roll with all these detail shots, here are some of the top:

Eyelet Peplum Top & Thurlow Shorts made with Mood Fabrics

I took waaay too many pictures, but there was so much detail to capture! Sorry bout that!

So I guess the next question is – does she have that outfit from the fashion illustration?

Eyelet Peplum Top & Thurlow Shorts made with Mood Fabrics

Fuck yeah I do! Ok, maybe not so much the shoes, but I’ve got the purse! Ha! This shit’s from Kate Spade – I bought it after I was having a really rough week (retail therapy totally works, y’all.). It was on sale, but it is still also the most expensive purse I’ve ever bought – and it’s totally worth it! I knew I couldn’t find that lemon fabric anywhere, so I justified it with the purse hahah 🙂

Eyelet Peplum Top & Thurlow Shorts made with Mood Fabrics

Just for fun, here I am trying to strike a pose like my fashion illustration. Hmm… probably should stick to painting, not posing! 🙂

Completed: Jorts Fail

28 May

Jean shorts (or jorts, as I like to call them – because it’s ridiculous and hipster and sounds completely stupid) are something that have been on my to-sew list for a looong time. Super long. In fact, my jort supply has long run dry – I used to get those the old-fashioned way, by waiting until summer to hack the legs off my jeans so they’d be warm weather appropriate (and later realizing my huge mistake come fall – argh! Whyyyy!!). Jean shorts are an American thing – and I haven’t worn a proper pair in years. No wonder I always see pictures of bald eagles crying:

zWCcW

Anyway. Back to jorts. I knew I wasn’t going to get them by way of cut-offs (I love my jeans too much to do that to them!), so I figured I’d make a pair from scratch and call it a day.

Jorts

My denim is a bit special – I actually bought it during Imogene + Willie‘s big yard sale. I went because I knew they’d have markdowns on jeans (although, when I finally got there, they’d put all the pants away due to threat of rain, wah), but I didn’t realize they’d also have leftover yardage of fabric! For cheap! I got 4 yards of this ridiculously amazing denim for $5 – yes, it’s super narrow (it is selvedge denim, after all), but still. That’s cheap as shit.

Jorts

The denim was really nice to work with. I always complain that good-quality denim is really difficult to find for the home sewer – either it’s too lightweight, it has too much stretch, it has awful stretch recovery, it feels cheap, the color is awful, etc etc. And while I have found some really great denims that make fabulous skirts and dresses, I’m not so convinced when it comes to pants. This fabric, though, is really good. It’s very sturdy and luxurious, with absolutely no stretch.

Jorts

Jorts

Honestly, I think the lack of stretch is what did me in. These jorts are, unfortunately, a fail for me. Wah!

Jorts

They look WAY better in these pictures than they look in real life – so much, I’m almost second-guessing my fail label. But, no, they’re pretty bad.

Jorts

Jorts

I had a somewhat traumatizing experience while making these. Things were going along great – I’d unearthed my Featherweight to do the topstitching (which is BEAUTIFUL, btw! Well. Beautiful where it’s not crooked lolz), I was having a lovely time stitching that denim, I was confident in my TNT shorts pattern, Grainline Maritime shorts. I love my Thurlows, but these are a fab casual shorts pattern if you don’t want all the fuss of the lining and welt pockets! I’ve made them a couple of times before, and while I’m not going to discuss the sizing and construction in detail on this post, you can read all my thoughts on the pattern here and here.

Anyway, I decided to try them on before attaching the waistband, and the zipper immediately popped in half.

“Well, that was probably a shitty zipper. It looked kind of old, probably just gave up on life right as I was pulling them on. I’ll put in another zipper, should be fine.”

So I unpicked the zipper, inserted a new one (have you tried to insert a zipper into a front fly that’s already been assembled? It’s… weird. Not a fan.), attached the waistband, and was getting ready to stitch down the waistband facing when I decided to try the shorts on again.

Oh, right. I popped that fucking zipper too. DAMMIT!

This is when I took an emergency trip to the fabric store (guys, I never do this – but desperate times call for desperate measures and I am DESPERATE for some jorts ok) and bought the strongest denim zipper I could find. I figured the shorts were probably straining against the bottom of the zipper because there was no give in the fabric, so I decided to let out as many seams as I could. I gave myself as much extra room as I could squeeze out, and then reinserted the (third!!!) zipper and finished the waistband.

Then I tried them on. Meh.

Jorts

Jorts

The fit is just… weird. I’m guessing my emergency unpick didn’t work as well as I had anticipated, so now I’ve got some weird lumps in seams that shouldn’t have weird lumps. They also just feel vaguely uncomfortable – I get that selvedge denim is pretty tough, and needs to be worn in a bit before it’s actually comfortable, but I don’t like it. Not in shorts, anyway. I know it looks like they are painted on, but they are honestly not that tight (except I guess somewhere around the base of the zipper, where it strains when I pull them on). Then there’s that whole issue with me being terrified that I’m going to snap this zipper every time I pull them off.

Jorts

Jorts

Jorts

Here’s a closer photo of the shorts and the way they fit. You can see they’re kind of off – it’s not horrible, but it’s enough to bother me. Actually, I think the thing that bothers me the most is the fact that the damn waistband isn’t lined up. I have NO idea how that happened – it matched up perfectly the first time I attached it (right before I popped the second zipper), but it looks terrible. Oh well.

Jorts

Aside from the fit – and the laughingly terrible waistband assembly, seam pucker and all (fyi, that’s where I gave up) – the construction is something I’m moderately proud of. While I didn’t go as far as doing flat-felled seams (and thank GOD for that, since I ended up unpicking them. Well, it didn’t help in the end. But, you know), I did topstitch them with proper denim thread. It looks so good!

Jorts

Well, I guess it would look better if the topstitching were straight, haha! Oh well! Like I said, I used my Featherweight to do all the topstitching – I figured it would be better than unthreading my Bernina every couple of seams. I’m really glad I did, because being able to switch machines made things go a lot faster. Plus, the Featherweight just produces some of the prettiest topstitching! Now I understand why people flip their shits over these machines. They’re pretty fun!

Jorts

Of course, that machine handles entirely differently than the Bernina I’m so used to, so I definitely went through a bit of a curve with this project. My topstitching isn’t straight, but that’s ok. It was a good practice and I’m over these shorts anyway 🙂

I’m totally ashamed to admit that I’ve barely used that Featherweight since I bought it, btw. I used it to make a failed Amy Butler bag right after purchase, and after that it just sat on my cabinet as decoration… until I pulled it out to make these failed shorts. And now I’m wondering if this is a jinxed machine ohgod.

Jorts

Anyway, here’s that damn fly that gave me so much trouble. At least I have lots of practice sewing flys now! Haha!!

Jorts

Sorry for all the unclipped threads and general messy inside. I think I just mentally gave up on this project after the first zipper broke.

Jorts

So, overall – these jorts are definitely a fail for me. Not entirely happy with the fit, I think the topstitching looks sloppy, the back pockets are weirdly in the wrong place, they’re uncomfortable, the stupid waistband looks stupid, but most importantly… I will always always be afraid I’m going to break that zip when I’m taking the shorts off. Not worth the stress. Also, as a side note, that’s my Briar I’m wearing and I’m thinking it looks too big and droopy on me now 😦 Sad.

I’m not entirely bummed with this project, because I had a good time making them (despite the multiple zipper incidents) and I definitely learned a lot during the process. This probably makes me look bad now, considering I just announced my pants making extravaganza, but you know what? Mistakes happen. None of us are immune to the occasional sewing fail, and even if I don’t get a completed outfit out of it, I at least come away with the knowledge to improve on future makes and not repeat those mistakes. I’m also really happy that I reunited with my Featherweight! Maybe I’ll get around to actually fulfilling my sewlution of using that machine to make an entire garment. Sure, it was set for 2013, but… better late than never, right? 🙂

Waverize It! Maritime Shorts

3 Sep

Ok, this is a liiiittle bit different than a normal post, but there’s still a totally rad finished product being shared, so I hope y’all can get excited about this with me 🙂 A couple of months ago, I was asked if I wanted to participate in the Waverize It! campaign, courtesy of Waverly Fabrics and Joann. I was given a piece of fabric, my only guideline being: Waverize It!

Archer Shirt & Maritime Shorts

I should tell you right now, that fabric they sent me was a total surprise. Upon receiving the package, this was me:

20121202-210149

Haha! Just kidding – I actually really like the fabric, although it’s definitely not a color that I wear or decorate with AT ALL. Coupled with the fact that it’s home decor weight, well, that narrowed my options even more. That being said, I am not one to admit defeat, so I racked my brain for a few days. I realized a couple of things:
1. Home decor weight means ~*~BOTTOM WEIGHT~*~
2. Any color can be improved by adding ~*~MORE COLOR~*~

And that was how I ended up with this amazing pair of shorts.

Archer Shirt & Maritime Shorts

I used the Maritime pattern to make these shorts. I have already discussed making this pattern, so I’m not going to repeat myself – but this pattern is a pretty freaking perfect backdrop for jazz up some otherwise basic shorts.

Archer Shirt & Maritime Shorts

Oh lord, did I actually use “jazzed” to describe these?

Archer Shirt & Maritime Shorts

I know they look pretty plain from the front, but then you turn to the side and…

Archer Shirt & Maritime Shorts

Piping! 🙂

Archer Shirt & Maritime Shorts

PIPING ON BOTH SIDES, Y’ALL!

Archer Shirt & Maritime Shorts

To be honest, I didn’t have much of a plan in mind when I started these up. I knew the base fabric, and I knew the pattern I would be using, and that was about it. I decided to pair the green with a solid navy (the same solid navy sateen I used in my lace trench coat) for the pocket lining, and upon realizing just how freakin’good those two fabrics look together, I thought I would add some navy love on the outside as well. I had a lot of ideas floating around while working on these shorts – piping around the pocket edging? Piping at the top of the back pockets? Piping at the waistline? Adding a navy sateen cuff? In the end, I chose to keep things simple with a single line of piping down the side seams, and a little bit of navy top stitching.

Maritime Shorts

I could not be more pleased with the finished piece!
(ps do me a favor and don’t look at my legs in these pictures… I was in the midst of a mosquito attack, hence the furious scratch marks everywhere. I know they look disgusting. Ain’t nothin’ I can do about it now!)

Maritime Shorts

In case you were wondering – I did make my navy shirt, too! Unfortunately, it’s kind of a Monet, though it looks fine in these photos. I will go more into that whole saga later this week with a proper post, but right now I’m still a little bit traumatized.

Maritime Shorts

Maritime Shorts

It’s difficult to see all the topstitching in the pictures, thanks to the lighting, but I used navy around the front and back pocket edges, the front fly, the top of the waistband, along the piping at the side seams, and around the bottom hem.

Maritime Shorts

While figuring out exactly what I would do with my fabric was a little challenging, actually working with it was a total breeze! Waverly makes a nice substantial cotton that sews up like a mid-weight denim – which means it presses well, it doesn’t crazy unravel, and it doesn’t require any special handling to get it to do what you want. I didn’t even have to beef up my machine needle – a universal works fine here.

Maritime Shorts

The fabric selvedge suggested that I dry clean my piece, but honestly? I don’t dry clean anything, like, ever. I can see how dry cleaning may be beneficial if you’re making curtains or whatever, but I wear my clothes hard and I don’t have time to schlep to the dry cleaner every time I inevitably spill something on myself (which is a daily occurrence, ok). Nor do I hand-wash, well, anything. Sooo needless to say, I tossed this bad boy in the washer AND the dryer, pre-cut, and I’m totally thrilled with how it softened up.

Maritime Shorts

I even had a lime green zipper lurking in my stash, how perfect is that?!

Maritime Shorts

The topstitching on the back pockets is my favorite part, too bad you can’t really see it in the photos! Oh well!

Archer Shirt & Maritime Shorts

If you made it through this post, yay! Now here’s the fun part – to celebrate National Sewing Month and Waverly’s 90th anniversary, Waverly and Jo-Ann Fabrics are hosting a Waverize It! Facebook contest through 9/22. You definitely will want to enter this one – winner takes home a $250 Jo-Ann Fabrics gift card and $1000 in Waverly Fabrics! For more info, you can check it out here (or click below, do what you want!). Good luck, my friends!

Waverly_JoAnn_Animation

I really enjoyed the challenge of making something with a fabric I would not have otherwise chosen – and I’m super happy with how the shorts turned out. I still have a bit left over, so tell me – what would you have done with this Waverly fabric?

~~Disclaimer: I was not financially compensated for this post. I did receive 2 yards of Waverly Fabric to review and keep. All opinions are my own.

Completed: Maritime Shorts, Straight Outta the 80s

28 Jun

As I mentioned at the end of Me Made May, I really have been wanting to try my hand at a different shorts pattern. Not because there is anything wrong with my beloved Thurlow pattern – but I want to change it up! Try something new! So here’s my first stab at trying something new.

So, check these babies out~
Maritime Shorts

This is the Maritime Shorts pattern from Grainline Studio. I only just recently discovered these and immediately decided that I wanted to try them. I like that they are similar to the Thurlows but a little more casual – patch pockets instead of welts, no cuffs, and the detailing is a little less fussy. While I was summoning up the courage to buy these (only because I didn’t want to have to assemble the PDF, ha!), Carla contacted me and asked if I would like the pattern as a gift. Yep, same Carla who also gifted me the pattern for those glorious culottes. So not only is she a sewing saint of gifted patterns, but she can also read my mind. AMAZING.

Also, just for the record – taping this pattern together was not difficult. I was surprised at how smoothly it went, actually!

Maritime Shorts

Putting this pattern together was interesting. I’ve slapped the Thurlows together more times than I even want to count right now, so much that I really think I could assemble a pair in my sleep. Jen’s instructions for these is totally different though! Not in a bad way, however, I did have to pry myself away from what I thought was ~the right way~ and let myself at the mercy of the instructions. Turned out ok in the end, though, as you can see!

Maritime Shorts

The only thing I didn’t like about the instructions was inserting the front fly. I don’t know, maybe I’m just stuck way too much up my own Thurlow ass, but I found them a bit confusing. Fortunately, Jen has a whole tutorial on assembling these shorts, from beginning to end, and that includes inserting the zipper! So that helped. I do think that in the future, however, I’ll probably go with the Thurlow instructions just because they make more sense to me.

Maritime Shorts

I wasn’t sure what size to make, since I usually base mine off the finished measurements. In the end, I decided to go with my actual measurements and cut the size 2. The shorts were a little big at the sides, but I was able to pinch those in nbd. However, the back gaped a LOT at the waist. This was super easy to fix – I just pinched out the excess and stitched a new CB line before putting on my waistband. Easy!

Untitled

Maritime Shorts

But hey, it’s fixed! And I managed to avoid mount crackatoa in the process! TAKE THAT.

Maritime Shorts

Oh, so, now let’s talk about the fabric I used!

Maritime Shorts

It is awesome, yeah? I’ve actually been hoarding this for over a year… it was a gift from Sonja during the 2012 Summer Sewing Swap. I could never figure out what exactly to make with it, but I knew a good fabric when I saw it, so I hoarded and waited patiently. I’m happy to say, it totally paid off! This fabric looks perfect as shorts.

I’m tempted to use the rest (assuming I have enough – I haven’t measured my remaining yardage) to make a matching Victoria Blazer, like the most amazing summer power suit you ever did see.

Maritime Shorts

The only change I made to the pattern was to swap out the hook & eye closure for a button. I did originally sew on the hook & eye, but it was pulling the waistband really weird, so I decided to do the button instead. I think the pulling is actually because all the stress is on that ONE closure, so next time I will extend the back of the waistband to be long enough where there can be a second button the inside, as with my Thurlows. Just a personal preference!

Maritime Shorts

I’m also a little bummed about my topstitching choice. Wish I’d gone with a darker thread. Oh well!

Maritime Shorts

The pockets are lined with a super soft purple voile I had in my stash. With such a loud outside fabric, I wanted to keep the inside plain!

Maritime Shorts

And because you guys love inside shots as much as I do, here are some pretty serged seams for ya.

Finally, this is what happens when I get bored with taking pictures of myself:

Maritime Shorts
Maritime Shorts
Maritime Shorts

If you’ve been hesitant to buy the Thurlow pattern because you’re not as curvy as the pattern is drafted for, this is a GREAT alternative. You could even follow the Thurlow Sew-Along for extra hand-holding, since the construction is mostly the same.

Maritime Shorts

Psst! That’s one of my white tshirts I made with fabric from Organic Cotton Plus. I just wanted y’all to know that I am wearing a BLACK bra underneath it in these pictures. Pretty cool, huh?

Also, I have a few updates that need to be mentioned:
– I don’t know if I have any local readers on this blog (well – I know there’s at least one because I met you the other day! 🙂 Hi, Beth! haha!), but I am going to be teaching sewing classes with a local dressmaker 😀 We are still nailing down details, but it will be a small, open-workshop class where people bring in what they want to sew (so you don’t get stuck sewing something you have no interest in ever wearing) where we will be on hand to demonstrate techniques and answer any and all questions. Classes will be on Tuesdays, last 2 hours, and will start in August. If you are interested in attending the class, please email me at lladybirdlauren at gmail dot com. If the days don’t work for you, we may be able to offer a different class day. Right now I’m just trying to figure out if there is an interest 🙂 So, please, let me know! Teaching sewing has been a longtime goal of mine and I’d love to see it actually happen this year 🙂
– Theodore has now gone to his new home, and I MISS HIM, but I’m also very pleased that he is in such wonderful hands! Thanks everyone for your support and comments. He’s a little stinker (literally – he stepped in his shit every single morning, and got an emergency bath every single morning as well), but he’s a CUTE little stinker! He is now with my brother and sister-in-law, which means I should still see him from time to time 🙂
– My other little brother, Matt, won’t be going to England this summer! So sorry to everyone who offered to show him around 😦 He actually made it across the ocean, but when they asked him for his work visa and he didn’t have one (he told customs he was there for an internship, even though “internship” really meant he was fixing this place’s website in exchange for a free place to stay), they put him in a holding cell for 22 hours and then shipped him home. I’d say poor Matt, except he’s now planning a road trip around the US and some parts of Canada, so I’m actually quite jealous. Ha!
– I finally stepped up and got my own domain! You can now find my site at WWW.LLADYBIRD.COM. No need to update all your readers and whatnot – the wordpress.com site should redirect to the main domain. If it doesn’t, do let me know! GOD, THIS IS ALL SO EXCITING.
– As most of you should be aware by now, Google Reader is dying a tragic death come Monday, 7/1. If you haven’t already started moving your blogs to a different reader, better hurry up! You can follow me here on Bloglovin.

WHEW that was a big ol’ wall of text! If you managed to read through all that – yay! Your consolation prize is another kitten picture:
Untitled

If that’s not enough, Here is a little video of him playing with his feet. I DIE.

Have a great weekend, everyone! Don’t forget to sign up for the Fashion A-Z Giveaway if you haven’t already done so – it closes on Monday!

Completed: The Briar Tshirt (with Bonus Thurlows!)

21 May

Hey, look, I finally got my ass into gear and hopped on the Briar bandwagon! Yay!! I know I’ve hated on the high/low hems in the past (aka mullet hems) but if anyone can make a high-low hem look like something I need in my closet, it’s Megan Nielsen, Our Lady of the High/Low.

Stripey Briar, Linen Thurlows

Actually, I made TWO!!

Red Briar, Linen Thurlows

Oh, and another pair of Thurlow shorts for good measure 🙂

Linen Thurlows

I mean, why would I pair my beautiful new tshirts with an old pair of shorts? AS IF.

Red Briar, Linen Thurlows

This red one is the first one I made (and sorry in advance for the overly saturated pictures – red is hard to photograph!). I used a super drapey rayon knit from Fabrics for Less in NYC; it’s delicious and airy and PERFECT for this kind of top. I don’t normally wear such loose-fitting clothing (and I know y’all are laughing because this is hardly loose-fitting, but it is for meeeeeee ok!), but I LOVEEE this way this looks and feels. Must make several more.

This version has a tiny pocket (which, yep, you totally can’t see) and I finished the neckline with a binding – partially because the fabric is soo drapey, it wouldn’t work with the normal stretched bands, and partially because I wanted to try a new technique! I must say, I’m really happy with now the neckline turned out. It’s perfect and flat and looks really good. Megan Nielsen, you are a binding genius.

Red Briar, Linen Thurlows

I was smacking a mosquito in this picture (the ‘skeeters were sooo bad this morning, ugh!), but I like that it shows the tshirt doesn’t gape out when you bend over. Nice!

Red Briar

For this shirt, I sewed an XS and took in additional bit at the side seams because it was a little loose. I also cut about 3″ off the length (I cut it off the bottom for this one, but for the next one I did properly slash and shorten the pattern pieces like a good seamstress ;)).

Red Briar

Oh, yeah, and I used the last of my neon yellow twill tape to stabilize the shoulder seams 😉

Stripey Briar, Linen Thurlows

I made the second version immediately after. Ha! This one is a fairly hefty weight knit from Mood when I was in NY. I’ve been hoarding this fabric for the months since and I’m so glad I went with this pattern because I think it’s pretty perfect! Of course, I got way too excited/ahead of myself and neglected to match the stripes at the side seams… oh well!

Stripey Briar, Linen Thurlows

This version is pretty much the exact same as the red one, except that I finished the neckline with a band instead of the binding. I actually tried the binding first, since I loved it soo much – but my machine was NOT having it. The fabric was too thick, anyway. So, band it is!

Stripey Briar, Linen Thurlows

Stripey Briar

I left off the pocket for this one, and also ended up taking in the side seams quite a bit – at least 1″. Since the fabric is fairly heavy, it looked weird all blousey. Like it was too big. This looks much better, and bonus – it looks great tucked in!

Stripey Briar

I really love this fabric and I wish I’d bought several yards of it, oh well!

Linen Thurlows

For the shorts, I don’t have much to elaborate on as this is like my squillionth pair. Haha! I used my TNT pattern and whipped these up in a couple of evenings (they are RILL easy after you made a bunch of them, just fyi!).

Linen Thurlows

For fabric, I used a beautiful, soft grey linen that I got from my new favorite local fabric source, Muna Couture. Muna’s shop is actually a dressmaking shop – and she makes some pretty incredible ball gowns and wedding dresses – but she also sells fabric. Not just fancy dress fabric (although there is plenty of that, and it is AMAZING), but also basic stuff for daily wear, like wools and linens and prints. I got this remnant from her and it was *just* enough to squeeze out some shorts. I love that they’re linen – so breezy and nice for summer! They do wrinkle a bit with wear, but not too bad 🙂 The white lining is fabric leftover from my Madeline bloomers.

Linen Thurlows

This is the only bummer about the shorts – I drew on the fly with my disappearing wax, and it didn’t disappear! WTF!!! I managed to fade it out a bit (put a piece of paper over it, applied heat, and then rubbing alcohol very sparingly, if yr curious), but it’s still pretty disappointing that you can see it. Sooo with that being said, important lesson learned here – ALWAYS test your marking utensils before marking on your fabric! DUH. I should have been doing that anyway, but I wasn’t, and now I know, and it won’t happen again. Learn from my mistakes 🙂

Side note, today is the last day to get 15% off at Sweet Little Chickadee, so get on it, son! Use the code LLADYBIRDBIRTHDAY and get to shoppin’! You could even get the Briar and Thurlows, y’know, if you wanted to be like me 😉 ha!!

Another side note, it’s my birthday todayyyy!! Yay!! Happy birthday to all my birthday twins (there were several of you, yay 5/21!!!) and all the other May Babies 🙂

me & my dad :3

Here is my gift to you, baby L with my dad 🙂 AWWWW!!!