Tag Archives: shirt

Completed: Cropped Linen Kalle Shirt

11 Jun

I finished this shirt about 2 months ago but am just now getting around to posting it! I have worn it TONS since finishing, and it’s definitely one of my 2018 Summer Staples.

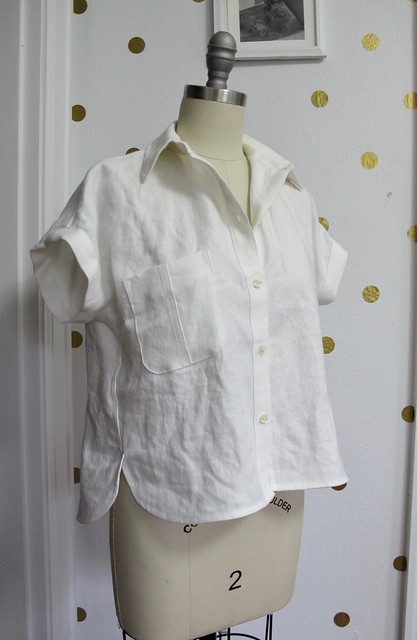
Linen Kalle Shirt

This is the Kalle Shirt from Closet Case Patterns. I made the dress version in linen last year, and I wore it a LOT, so I was interested to try the shirt for this summer. It’s a basic little collared/buttoned shirt that has plenty of options (exposed or hidden placket, collar or no collar, cropped or long), and I like the nice loose fit paired with the banded kimono sleeves. I always felt so pulled together when wearing the dress, and I figured the shirt would make me feel similarly.

Linen Kalle Shirt

I did make a few changes to the pattern due to fabric amounts & personal preferences. Having sewn a few Closet Case Patterns in my time, I find the cropped version of the tops to be VERY cropped. I measured the length of this top and realized it was going to be too short for me to comfortably wear, so I added an extra 2″ of length, which makes the finished top reach right at the waistband of my pants (the shorts I’m wearing in these photos are just thrifted jeans that I cut off, FYI, but they hit close to the same spot that my Ginger jeans do). I added length to both the front and the back, however, I thought the back looked ridiculously long once it was finished so I chopped that added length back off. The back is still longer than the front, only not as dramatic now.

The other changes I made were due to fabric shortages, as I was working with a very small piece of fabric for this shirt. I had an offcut piece of medium weight white linen that measured out at less than 1.5 yards (I don’t remember the exact amount, but it was definitely less than the suggested 2 yards that the pattern calls for), which I was bound and determined to use. It was just *barely* enough to eek out the main pieces of the shirt, and I did not have enough fabric to cut the facings or the pocket. I made an executive decision to finish the hem with a bias facing (made of an entirely different fabric – cotton lawn to be exact) and leave off the pocket.

I can’t say for certain, but I believe the fabric came from an Elizabeth Suzann sample sale last year (hence the weird size). It’s a nice medium weight linen that feels wonderful and also does not wrinkle as much as the lighter weight linens – it’s actually very similar to the Vivaldi Linen from The Confident Stitch (I think the Vivaldi is slightly softer, but that also may be because I’ve washed it more), if you are looking for a good sub 🙂 (and go back a couple posts to my OAL Announcement for a discount code that’s still good as of this writing :)). This shirt has done really well with traveling especially – the worst wrinkling I get is at the collar, which I usually end up fixing with my flat iron 😛 As you can see, it does rumple a bit but I actually like that.

Linen Kalle Shirt

Linen Kalle Shirt

Linen Kalle Shirt

Sewing up the shirt was easy – I’ve made dozens of these sorts of patterns, so I feel like I can almost do it in my sleep at this point. The seams are flat-felled and there’s lots of satisfying topstitching (albeit white). I realized about halfway through that the shirt really, really needed that pocket – I think it just looks barren without it. But, y’all, I am not exaggerating when I say that I had fumes of fabric leftover after cutting. You’d think I’d be able to squeeze out a pocket – it’s a tiny piece, after all – but I was playing some serious Fabric Tetris as it was and the leftover pieces were miniscule. After thinking on it for a minute, I realized I did have a couple of pieces that were about half the size of a pocket… so, again, I made an executive decision and decided to sew them together to make a full sized piece that I could then cut the pocket out of. To make this look a bit more intentional, I flat-felled the connecting seam. I can’t even tell you how pleased I am with this save; the shirt looks great with the pocket and that flat-felled seam look intentional as fuck amirite.

Hemming was a whole other beast that I had to work my mind through before I came to a solution. I usually just hem my curved woven hems with a bias facing – it creates a beautiful finish with minimal effort – but the way the side seams are curved on this top doesn’t work terribly well with bias, it really needs a facing. Especially when you are connecting that to a flat-felled seam (which would otherwise be hidden under the facing). I ended up hemming the front and back separately, then clipping the side seam and bartacking it down over where the curved side meets. One thing I didn’t consider is that the seam allowance for the hem (due to the facing) is 5/8″, and you sew a bias facing on at 1/4″… so my side seams have extra seam allowance and thus overlap differently than the pattern intended. It’s not a bad thing, but it is different! Something to keep in mind if you decide to omit the facing and use bias instead.

Linen Kalle Shirt

Linen Kalle Shirt

It looks cool buttoned up all the way, but let’s be real – I won’t wear it like this, like, ever haha

Linen Kalle Shirt

Linen Kalle Shirt

The aforementioned side seam with overlapping curves and a bartack!

Linen Kalle Shirt

My cool little pocket 😀

Linen Kalle Shirt

I think that’s all for this little shirt! I’m surprised at how much I love wearing it – it’s been in regular rotation since I’ve finished, as it’s light and airy in the heat but still looks very pulled together – and I get loads of compliments on it. I’d love to make another in a different color or even a patterned fabric, once I find something suitable. Making collared shirts is so much fun!

Completed: Polyester Chiffon Archer Shirt (+ Announcing the Sprout Sew-Along!)

23 Feb

It’s that time of the year again – when we start our spring sewing in a desperate attempt to hurry the warm weather up. And by we, I mean me.

While it’s still a little warm here – not quite shorts and tank tops warm, but no-socks warm – I know that we’ll get at least one more cold snap before the temperatures steadily start rising. So while my wardrobe needs to maintain a bit of coverage, I’m using lighter colors and designs that look decidedly more spring than my standard black and grey winter wear.

Polyester Chiffon Archer Shirt / Sprout Patterns

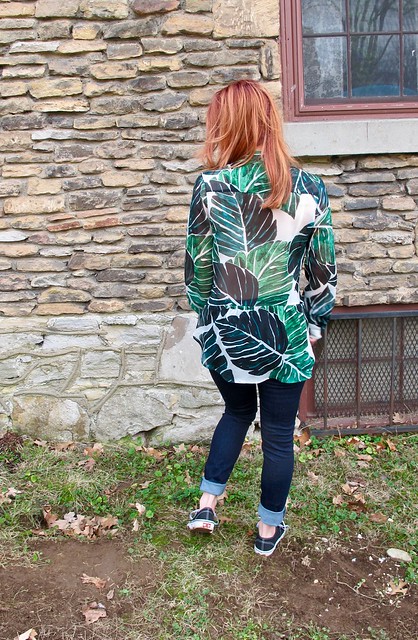
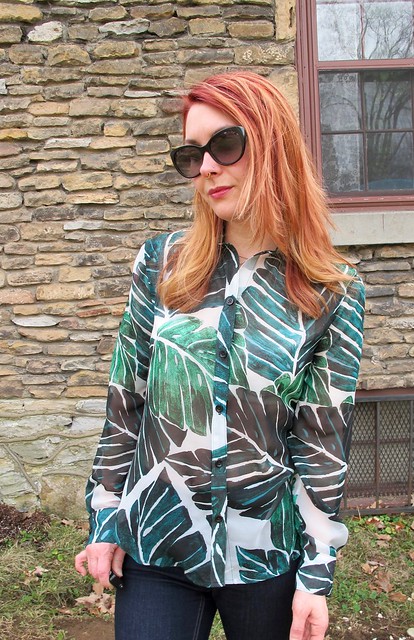
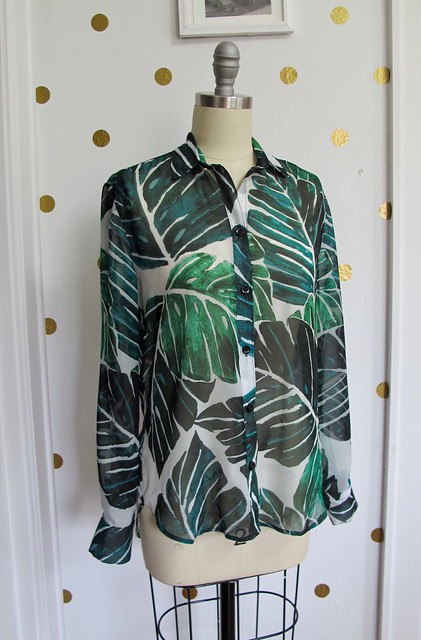
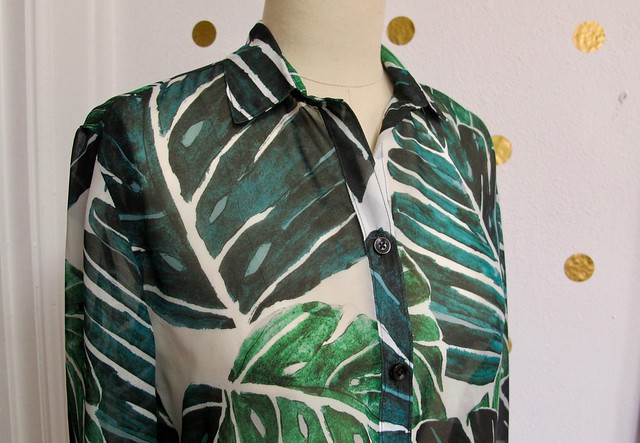
Like giant tropical leaves. Now THAT is a spring statement, amirite

Polyester Chiffon Archer Shirt / Sprout Patterns

As the title of this post says, this shirt is the Archer button up from Grainline Studio. But wait, there’s more! I ordered my fabric from Sprout Patterns, meaning I got to choose the fabric design as well!

I feel like most people are pretty familiar with Sprout Patterns at this point, but in case you aren’t – owned by Spoonflower (beloved on-demand printer of fabrics, wallpapers, and more) – Sprout offers the same on-demand fabric printing but with the additional twist of also printing your pattern pieces directly on the fabric. This not only makes cutting a breeze (no giant flat table space needed – just sit at your couch and cut along the solid lines), but it also gives you total control over pattern placement without the additional brainbending. There are a few catches to this service – one, you are limited to the patterns they have on their site; two, you are also limited to the types of fabrics they offer; and three, having the pattern printed on your fabric does not leave room for flat pattern adjustments – but overall, I think the pros absolutely outweigh the cons.

I’ve heard of this service before – both through blogs and website ads, and also because one of my students at at Workroom Social class actually works for Spoonflower (!!!) – but I hadn’t actually tried the service until now. This year, I’m cooking up some fun plans with Spout pattern and Spoonflower (Spoiler: It’s a class. More info at the end of this post!!), so they offered to send me one to try out!

Polyester Chiffon Archer Shirt / Sprout Patterns

Polyester Chiffon Archer Shirt / Sprout Patterns

Polyester Chiffon Archer Shirt / Sprout Patterns

The Archer shirt works in a variety of fabrics, with the most common/easiest ones being the Basic Cotton Ultra and the Kona Cotton Ultra. While the cottons are definitely great, I love being difficult and asked if I could instead try the Polyester Chiffon. I really love this style of shirt in a soft, drapey fabric and I REALLY loved the idea of the cutting being way easier since the pieces are printed on the fabric. I made a size 2, View B (with the butt ruffle, because, butts) printed on Spoonflower’s Polyester Chiffon. The design is Monstera Leaves. You do have the ability to create your own design, but I’ve learned over time that I am decidedly NOT a fabric designer and would rather use something already made by someone who knows what they are doing. I chose this design because I liked the predominantly dark colors over a white background – it feels breezy without actually being super see-thru – and, of course, who doesn’t love some big ass tropical leaves?

Polyester Chiffon Archer Shirt / Sprout Patterns

Polyester Chiffon Archer Shirt / Sprout Patterns

Polyester Chiffon Archer Shirt / Sprout Patterns

Some notes about this fabric:

  • Polyester is not something that gets a lot of praise in the sewing community, present company included. To be completely honest, I generally HATE the stuff. Hard to wear, hard to sew, sweaty pit dump USA, etc etc. I gave this one a chance because, one, there were no other options for sheer drapey fabric (no silk!); and, two, I thought the sheer chiffon would offset the fact that poly doesn’t really breathe. I am happy to report that my hunches were right, and I actually really enjoyed working with – and now wearing! – this fabric. It’s a great quality poly, feels very nice against the skin, and while I can’t yet report on its heat-retaining properties (it just ain’t hot enough here yet, y’all), I can say that it’s been really pleasant to wear on our warmer days. It also took really well to pressing, so no problems there.
  • I told you this shirt is chiffon, and it is. I should also tell you that I’m only wearing a bra underneath it – no cami. It’s only slightly see-thru, and even then mostly shadows. This chiffon is slightly thicker than some chiffons I’ve tried – almost like a double chiffon – and the dark colors also help with preventing a peepshow. Not having to wear a cami under this really helps me feel, you know, ~breezy~.
  • Chiffon can be tricky to work with, as it is very lightweight and VERY shifty. My first combat against this was to get the pattern via Sprout, which saved me the drama of worrying about whether I was cutting the pattern pieces on grain. Since the fabric has the pattern pieces printed directly on it, cutting is WAY easier – seriously, you can just sit on the couch and cut it with scissors like you’re making a paper snowflake (this was me, in case you were wondering). My other combat for dealing with the chiffon was to soak the entire yardage in a gelatine mixture before cutting, which stiffened up the fabric to more of an organza weight/hand, making it much easier to cut and sew. I talked about using a gelatine mixture in this blog post (and here is the method I used on the Threads website), and ugh you guys it is is a LIFESAVER. Made the fabric soooo much easier to manage, and it washed right out when I was finished with the shirt (machine wash cold, normal dry). If you want to try a tricky pattern like this in a tricky fabric, I really encourage this method – it was one of the easiest experiences I’ve ever had with chiffon! Like, even my sleeve plackets look amazing. Super stoked.

Polyester Chiffon Archer Shirt / Sprout Patterns

Polyester Chiffon Archer Shirt / Sprout Patterns

Anyway, I LOVE how this turned out! The soft, drapey fabric – the shape of the shirt – and the leaves offering a bit of modesty so I can continue to be immodest 😛 This shirt looks equally good with the sleeves rolled up or left down, with the front buttoned or unbuttoned (ok, I guess THEN I’d wear that cami), or even knotted into a crop.
Polyester Chiffon Archer Shirt / Sprout Patterns

Some additional sewing notes:

  • I used French seams to construct the shirt, 1/4″ for each pass (for a total of a 1/2″ seam allowance). Since the fabric is so sheer, I like how the visible seams look this way.
  • I used black thread for constructing and topstitching, and a new 70/10 microtex needle for this lightweight fabric.
  • For interfacing, I made a few test swatches (there is plenty of extra fabric around the perimeters of your pattern pieces that is ideal for this use) to determine what would work best. I ended up using this lightweight woven fusible interfacing (from Workroom Social), which was a perfect match for the chiffon – it offers enough support for the collar and buttons, but it is light enough that it doesn’t interfere with the drape of the chiffon. And since is it white, it brightens up the white background of the fabric without looking super obvious. I also considered interfacing the back of the yoke for this same reason (since the yoke is a double layer of fabric), but I found that I actually preferred the look of the 2 layers so I left them as-is.
  • Like I said, this chiffon pressed without a problem. I use a gravity feed iron (affiliate link) with a shoe, which works the same as using a press cloth. This allows me to press at a high heat without melting my fabric or giving it a weird shine. I definitely do not recommend trying to sew a shirt like this in a fabric that won’t hold a press, however, this fabric didn’t give me any issues!
  • Buttons are just plain black plastic buttons from my local fabric store. Nothing fancy there!

Polyester Chiffon Archer Shirt / Sprout Patterns

Polyester Chiffon Archer Shirt / Sprout Patterns

Polyester Chiffon Archer Shirt / Sprout Patterns

Polyester Chiffon Archer Shirt / Sprout Patterns

Polyester Chiffon Archer Shirt / Sprout Patterns

Ok, so here’s the fun part! I was sent this fabric + pattern by Sprout patterns, in preparation for a workshop that I will be teaching at Spoonflower! Here are the details:

Spoonflower presents the 2018 Sprout Sew-Along with Lauren Taylor (also known as Lladybird)! With the help of Lauren and her sewing expertise, students will be led through the construction of a Grainline Studios’ Archer Button Up from start to finish using their custom printed Sprout Pattern. Our intimate class setting ensures all students the chance to get one-on-one instruction from Lauren as we tackle this wardrobe staple. This class is sure to build your confidence in garment construction! We hope you can join us!

Class fee includes the printed Archer button-up, and there is an early bird discount for those who register before March 3! The workshop is April 6 – April 8, and will be held at Spoonflower Greenhouse in Durham, NC. If you’ve been wanting to tackle this pattern but feel a little overwhelmed with the steps, this is a great opportunity to have a little bit of guidance and hand-holding for your first go! While we will be sewing exclusively with the Kona Cotton Ultra for this class (just because we gotta speed everyone along so we actually finish in two days!), it will give you the skills you need to try this pattern later with a more complicated fabric – such as the polyester chiffon 😛

You can find all the details of the workshop – as well as sign up – here!

Polyester Chiffon Archer Shirt / Sprout Patterns

A side note about the sunglasses – it was very bright outside and I thought I would pretend like I was a fAsHuN bLoGgEr. Suffice to say, I am not happy with how these pictures turned out (and I had to delete more than half of them because it bothered me that you could see the tripod in my lenses haha) but I also don’t care enough to retake them. No more sunglasses photos for me. It weirds me out that you can’t see my eyes. Oh well, you live and learn!

**Note: The fabric for this shirt was given to me by Spoonflower, in preparation for my workshop with them in April! Will I see you there? 🙂

Completed: Black + Grey Flannel Archer

3 Nov

IT’S FLANNEL SEASON AGAIN, Y’ALL.

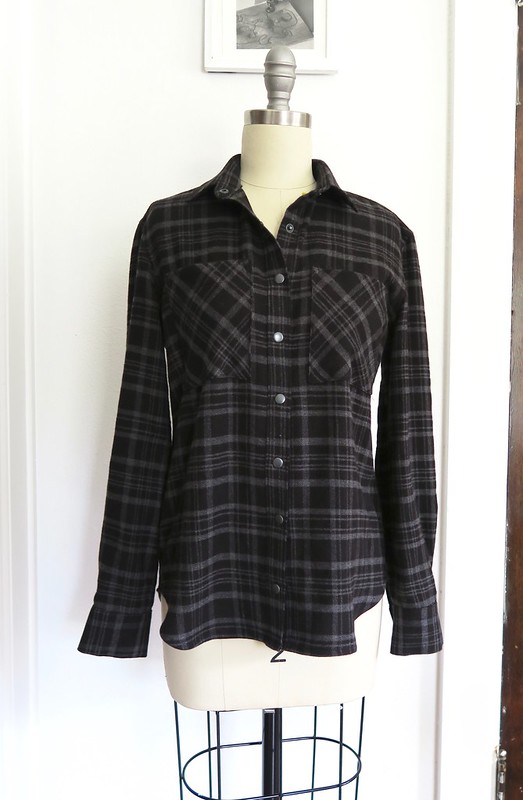
Plaid Cotton Flannel Archer

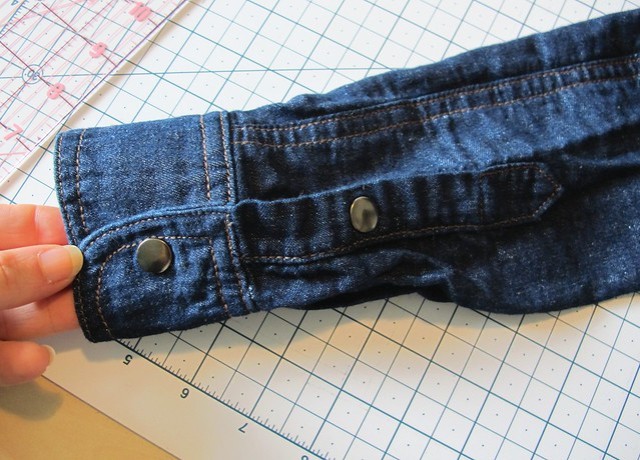
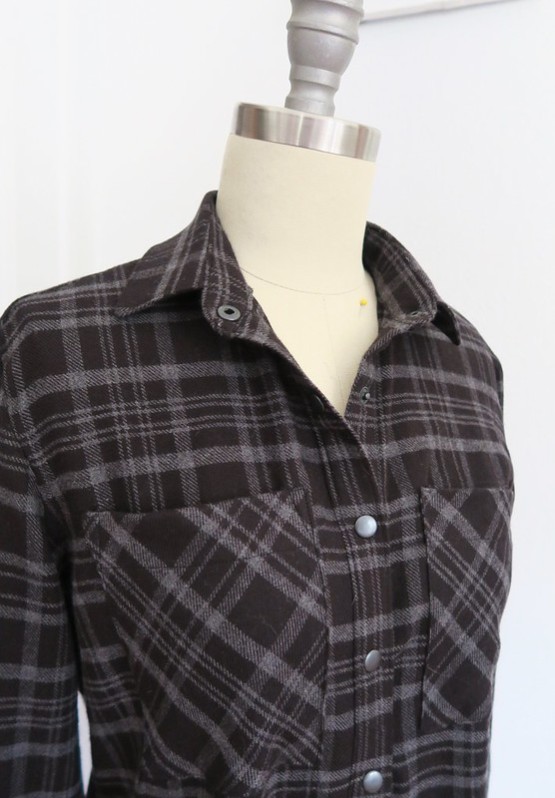
I don’t like the cold – like, at all – but I do love the clothes that are associated with this season. Layers, textured fabrics, WOOL, dark colors and jewel tones… gimmie all of it. Flannel button-ups are at the top of my list. I love that they can be worn solo and buttoned up, layered under a sweater, or layered over a tank or tshirt and left to swing free in the breeze. Snaps at the cuffs make it easy to roll the sleeves up, snaps at the button band make it possible to Hulk out at the end of the day (don’t pretend like you don’t do this with snap-up shirts, you liar).

Plaid Cotton Flannel Archer

I have a few handmade plaid flannel shirts, all of which I love to wear, so I put a short hold on adding to that stash. I finally allowed myself this year to make 2 more – both out of plaid cotton flannel from Mood Fabrics. This is the first of the two. I haven’t taken photos of the second one yet, but rest assured – it’s almost the exact same as this one, just a different colorway. Because if I am anything, I am consistent haha.

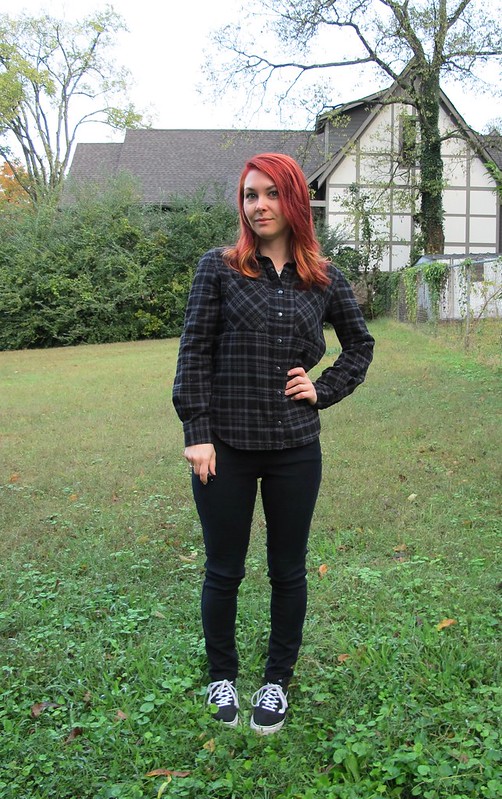
As I said, this is the Archer button up from Grainline Studio. I’ve made this shirt a lot, so there’s not a lot to elaborate on here, just a few small changes. I sewed view A with the angled cuffs, swapped out the included placket for a tower placket (I use the placket from the Negroni pattern, but this placket download from Threads is basically the same thing).

Sizing-wise, I cut a size 0 (which is the size I pretty much always sew with Grainline). One thing I did change with this pattern was to increase the seam allowances at the side and sleeve seams to 5/8″ – the included seam allowances are 1/2″, and I actually sew them at 5/8″ since I like to flat-fell those seams. I’ve noticed that my shirts are pulling ever-so-slightly at the bust now (told ya I’ve gained some weight. And also an entire cup size, ughhhhh), so I added in that extra 1/8″ and the fit is much better now!

Plaid Cotton Flannel Archer

Plaid Cotton Flannel Archer

Plaid Cotton Flannel Archer

I cut my fabric on the single layer to get the plaid all matched up (see here for my plaid-matching tips!), and cut the outer yoke and pockets on the bias. I originally had the pockets cut to match the plaid at the front, but they matched so well they basically disappeared, and I wasn’t crazy about that look. So I re-cut them and I think they look much better!

As I mentioned, all seams are flat-felled so there is a nice clean finish on the inside. I used a super lightweight interfacing so that everything would stay nice and soft – I didn’t want a stiff button placket in contrast to the otherwise floppy fabric. Everything is topstitched in black, and I used black snaps for closures.

My cotton flannel was found at the Mood Fabrics store in NYC, back in August. I had a hankering for a new flannel, and I wanted one that was soft and lightweight, like it had already been worn to death. I found this and another similar flannel in a different colorway, both of which work perfectly with the color palette that my closet has ended up morphing into. Since flannel tends to shrink up quite a bit, I washed and dried my fabric three times before cutting into it. I kept the sleeves slightly on the long side, again, in case they decide to shrink up (my first flannel shirt has quite short sleeves now!).

Plaid Cotton Flannel Archer

Plaid Cotton Flannel Archer

Plaid Cotton Flannel Archer

Plaid Cotton Flannel Archer

Plaid Cotton Flannel Archer

Plaid Cotton Flannel Archer

I think that’s all I can say about this make! I’ve already worn it loads and I look forward to some hardcore layering here in the next few months 😀

A couple other things of note:
1. Yes, I made my jeans! They are Gingers that I made with veeeeery stretchy twill fabric (like, they are almost jeggings haha I love them). Just some basic black pants that don’t necessarily warrant a whole post. However, here’s a shot of the butt (and my new belt) (and this shirt, too, apparently lol)
2. Yes, that’s a new hair color! After a REALLY long time (for me anyway haha) with the same color, I decided I was ready for a change! I love the new color so much!

Plaid Cotton Flannel Archer

** Note: The fabrics used in this post were provided by Mood Fabrics, in exchange for participation in the Mood Sewing Network.

Completed: Knot-Maste Top + Pneuma Bra

12 Jul

Hello hello! Sorry for essentially dropping off the face of the earth there for a minute – after I got home from Belize, I was immediately sucked into a full week of Maid of Honor duties (yes, my BFF got married!!!), including making a dress to wear in the wedding (more info on that once we get the photos back). The wedding was fantastic and I had loads of fun, but it feels pretty good to not be under anymore deadlines and have a chance to breathe finally!

This project is actually a pretty old one – I finished it ages ago. If these photos are confusing you, just know that I took them back in May when I was still in my old apartment. I was in the middle of packing – I think my sewing room was partially torn down by that point – hence the stack of boxes next to me. But, you know – better late than never!

Anyway, enough with the half-assed apologies – y’all’s is here for the SEWING, anyway!

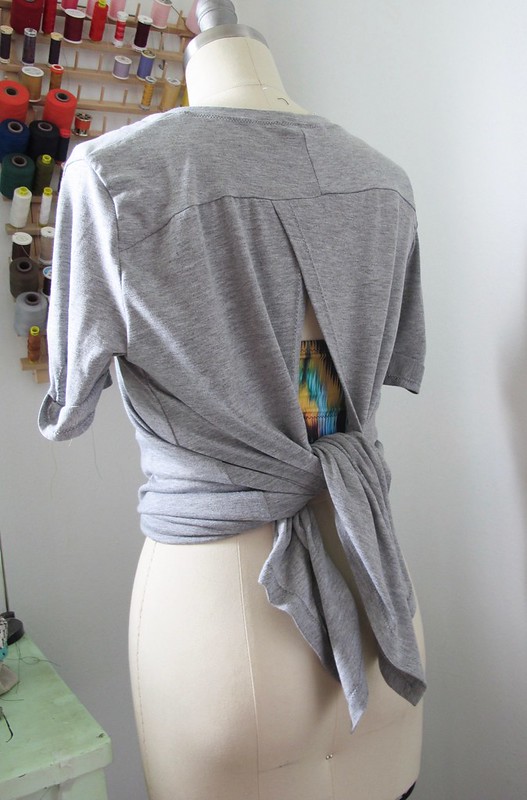
Knot-Maste Top

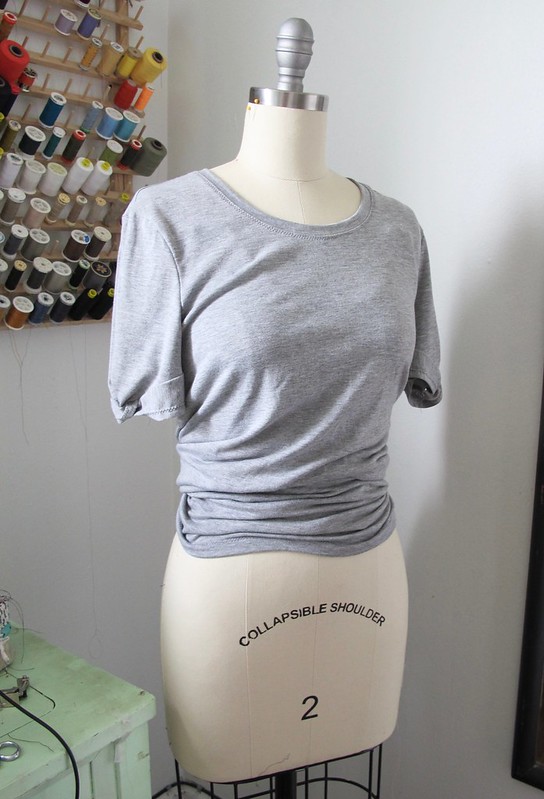
This is the Knot-Maste Yoga top from Fehr Trade. When Melissa first introduced this pattern a few months ago, I bought it immediately because, tbh, it’s pretty bomb-ass. I’m definitely not the sort of person who wears workout clothes anywhere except to workout (and I am definitely the sort of person who always wants to ask the Yoga Moms at Whole Foods – you know, the ones in Lululemon with a full face of make-up and perfectly styled hair – how their workout went just because I am also an asshole), and my preferred workout duds can be described as “as little as I can get away with.” That being said, I don’t think this pattern – especially the top – should be restricted to only for exercising. I guess it depends on how much skin you like to bare outside the gym, but I totally saw this top as something I’d wear just as normal everyday clothes. And the bottoms could easily be the comfiest pajamas. Sold and sold!

Knot-Maste Top

Knot-Maste Top

Designed to be sewn in a lightweight, 4 way stretch knit (Melissa recommends using bamboo knit), this pattern features an open back that can be worn 2 ways. You can leave the ends loose for a really nice back breeze, or tie them together to make the shirt look fitted from the front (and also still get a lil’ bit of a back breeze). The idea is to get some airflow while you’re yoga-ing – but still be able to tie that floaty knit out of the way of your face while you’re in downward dog – but, again, it also totally works as something you can wear out and about and yet not look like you’re en route to a gym.

Knot-Maste Top

Either way, it’s a total mullet of a shirt. Business in the front, party in the back – woohoo!

Knot-Maste Top

I also love that it looks like a tshirt dress when it’s untied. Note to self: this is cute, make a tshirt dress.

Knot-Maste Top

Knot-Maste Top

To get the maximum impact of this pattern, lightweight + stretchy knits are key. You don’t want to make this out of anything that is even remotely thick – or even medium weight, to be honest. Think of the slinkiest, most obnoxious-to-sew knit, and that’s probably gonna be your best bet. Lightweight merino, bamboo knit, rayon, and cotton-spandex blends all work great.

For my particular version, I actually used a poly knit that I bought at Walmart, of all places. It cost me about $3 a yard, which I figured was a fair price to pay for what is essentially a wearable muslin. The weight and drape is spot on, but the fact that it’s polyester makes it pretty unbearable in the heat here – even with that back breeze. I know some people can handle poly in the summer, but I cannot! I’ll still wear this one because I’m bound and determined to suffer for fAsHuN, but I would love to make a replacement version in a more suitable fiber.

Knot-Maste Top
Knot-Maste Top

The pattern has some fun details, such as the knotted bands at the sleeves. This results in a completely wack looking pattern piece, but it comes together really satisfactorily. Be warned that there is a ton of hemming with this top – the sleeve bands and all around the bottom hem (if you’re making the longer, non-banded version), as well as the open back. The instructions suggest using a twin needle, but I opted for a zigzag as, again, this is just a wearable muslin. I also topstitched the neckband with a zigzag, so at least things would look cohesive.

As far as assembly, this was really easy to put together and doesn’t take much more time than sewing a plain tshirt. I did mess up the back overlap (one side is not as overlapped as it should be, whoops), but it doesn’t affect the fit at all. I sewed an XXS in the long (non-banded) version, and am very happy with the fit. I think the sleeves could stand to be shorter (I prefer to wear cap sleeves), if not eliminated altogether (sun’s out, gun’s out, y’all). I started to fiddle with the pattern to try to figure out a tank version and just got overwhelmed and gave up.

Knot-Maste Top

Knot-Maste Top

The only downside to this style of top is that your back bra band is visible no matter how you wear it. And while I am an advocate of going bra-less if you feel compelled to do so, this is sooo not the top for that (unless you get your rocks off being a breeze away from being considered a sex offender, I guess you do u). Which is why you get two projects in this post – I had to make a bra to wear under it!

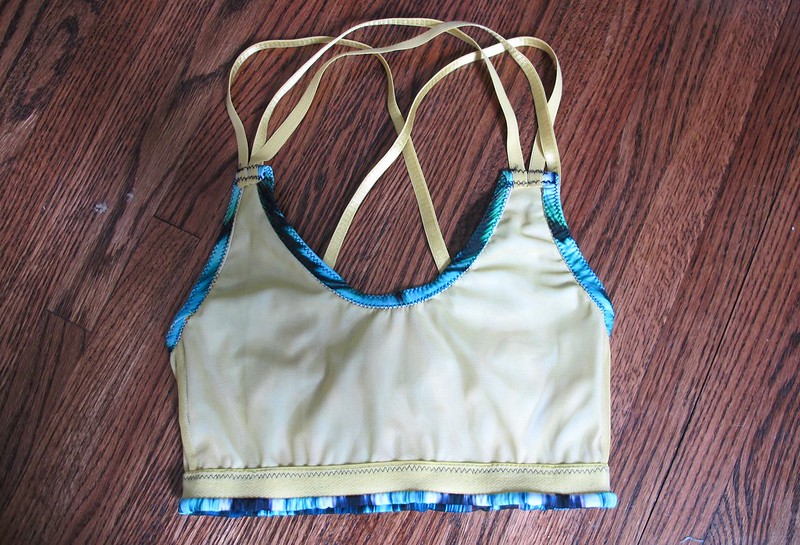
Pneuma Bra

Pneuma Bra

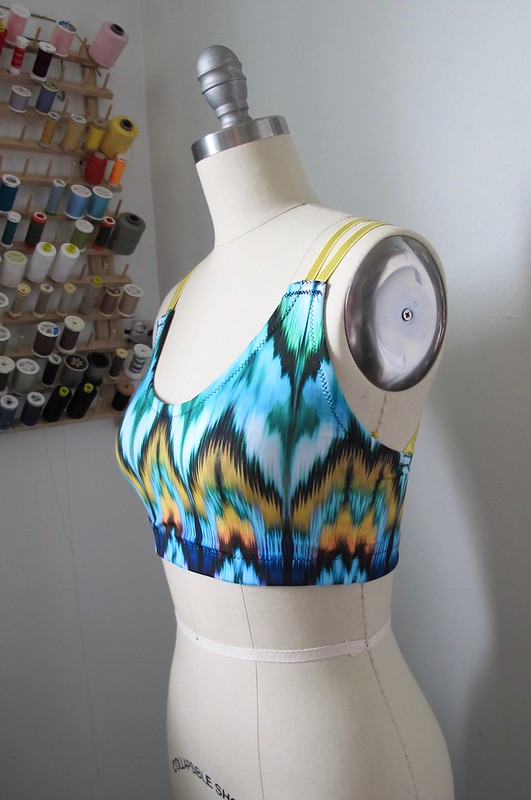
The sports bra is the non-tank version of the Pneuma Tank from Papercut patterns. I’ve had this pattern in my stash since it was first released, but haven’t had the chance to make it up until this project screamed for it. Which is dumb, because it’s actually a pretty badass sports bra – it looks cool as shit, and gives me enough support for a light run (keep in mind that I don’t *need* a lot of support with the size of my rack so YMMV, my DDD+ sisters). I even wore this shit to powerwash my mom’s side deck. I just love clothing that has multiple uses.

Pneuma Bra

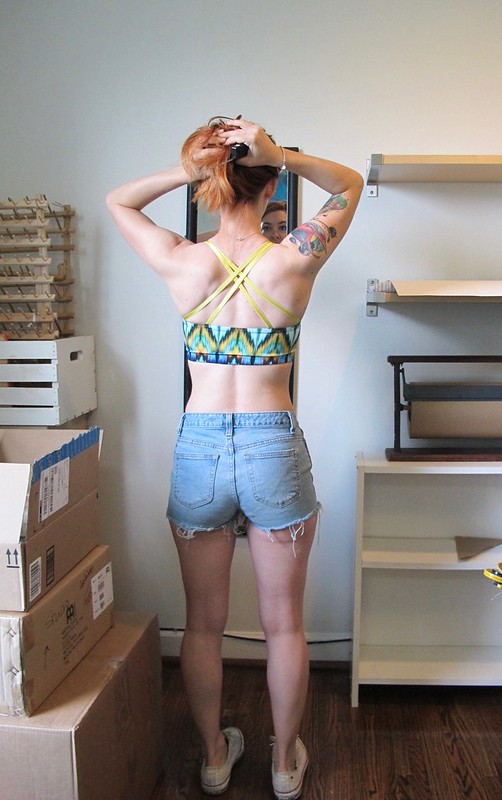
As with the Knot Maste top, the back of the Pneuma tank is my favorite part. LOOK AT THAT SUNBURST OF PURE DELIGHT.

Knot-Maste Top

Knot-Maste Top

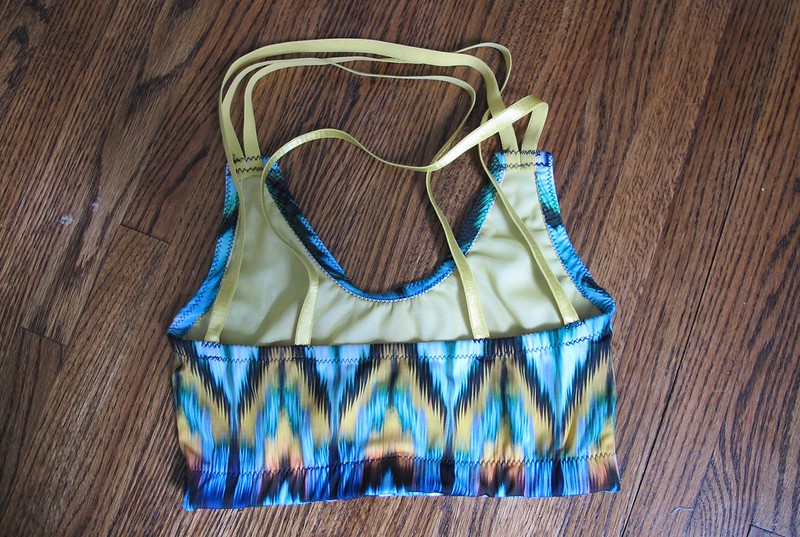
I sewed this one up in a size XXS, which is my typical size for Papercut Patterns. All the elastics were raided from my stash of bra-making supplies – including the yellow strap elastic, which I weirdly bought a few years ago and have never had a use for until now (it’s narrower than I like to wear my bra straps, and also a strange shade of yellow to try to match to anything!). The outer fabric is a swimsuit spandex from Mood Fabrics – the particular one I used is now sold out, but ummm they have some pretty rad ones up on their site right now! Apparently this one comes with 50+ SPF and ~aloe vera microcapsules~, whatever the fuck that means. I’ll let y’all know if my skin gets more supple in the future.

Knot-Maste Top

And here’s the back view on me! Despite having more straps than needed, this bra is surprisingly easy to put on (I haven’t had a tangled incident yet, knock on wood) and super comfortable to wear. Now that I know I like it as a bra, I’m even more keen to make the tank version. I’ll let y’all know how that goes when I get around to doing it in 5 years.

Pneuma Bra

Pneuma Bra

Pneuma Bra

A few more construction notes – I lined the front and back with lightweight power mesh, for additional support/compression and a little bit more modesty. The seams are sewn with a serger, and the elastic is applied with a regular sewing machine. I did move the straps to a better position in the front after taking these pieces, so there’s not that weird angle between the top of the front piece and where the strap is attached. I didn’t realize how stupid it looked until I was looking at the photos, ha.

Since this top is sewn with a swimsuit fabric, that means I can actually wear it as a swimsuit! I didn’t make matching bottoms, but my black swimsuit bottoms go quite well with the colors in this one.

Knot-Maste Top

Anyway, I think that’s all for this set! Just writing about how awesome that top is makes me want to make another one in a less shitty fabric, ha. As a side note, I did also make the pants that are part of the Knot Maste duo- and they turned out great, but they are black and really underwhelming to photograph. I will not be writing a post on them, but I’m happy to answer any burning questions about them that you may have!

Completed: Linen Archer Button-Up

11 May

Does anyone remember my first linen Archer shirt, and the disaster that it was? Like, I don’t even think I wore that thing out in public one time. I’m pretty sure it went straight to Goodwill, where a less discerning eye was hopefully excited to find it. Hopefully.

Well, I always said I’d revisit this pattern+fabric combination again, once I’d had a little more practice with it – and here we are! I can’t believe it’s taken me nearly 4 years to actually get around to making that linen button-up of my dreams, but better late than never, I reckon!

Linen Archer Button-Up Shirt

Basic details first: This is the Archer button-up from Grainline Studio. Sewn up in a size 0, with all my former modifications (shortening the hem, shortening the sleeves, and also adding a tower placket to the sleeve instead of the bias placket, which I’m sorry but I just don’t like). I’ve made this shirt several times, so if you want more in-depth info from an earlier version – check out this tag! The only former modification that I did NOT make to this version was to sew the side seams at their 1/2″ seam allowance (all my other versions, I used a 5/8″ seam allowance for this, to make the the body a smidge narrower. But for this one, I kept it as-drafted).

Linen Archer Button-Up Shirt

Linen Archer Button-Up Shirt

Linen Archer Button-Up Shirt

Ok, boring shit out of the way – what makes this one so special is the fabric I used! Omg you guys. It’s hard to convey in a photo – even harder with these less than sub-par ones I have going on (and yah, I’ve already started packing for my move at the end of the month. Backgrounds are about to get a lot sadder ’round here haha) – but this particular linen is one of the prettiest solids I’ve ever seen! It looks like a basic chambray from a distance, but once you get closer – it’s really more of a periwinkle blue, with a definite purple sheen to it. I am not a huge fan of purple – and honestly, wasn’t a huge fan of linen until recently (something about getting old idk but god bless I feel like I sweat more than ever now, which is disgusting I know) – but this one is pretty freaking special.

I got my magical linen from South Street Linen, waaay back in 2015 when I was in Portland, ME for my first retreat at A Gathering of Stitches. We took an impromptu class field trip to the shop after we’d been told there was a linen sample sale going on… and DUDES WHAT A SAMPLE SALE. So many amazing pieces of absolutely beautiful linen, priced according to their yardage. You couldn’t get the pieces cut, but it was easily enough to split with someone else (we’re talking bundles of 6-10 yards per piece, so some people split 3 ways and still had tons). I personally got 2 pieces myself – both shared splits – and this is one of them. It’s been so long that I don’t actually remember what I paid, but I’d guess probably $30-$40 for 3 yards. Maybe less, again, I don’t remember!

Again, these pictures do not do this fabric justice – but it is even more beautiful in person. It’s also incredibly soft – not rough at all like some linens can be. It’s a slightly heavier weight, too, which means it’s more opaque and a bit less prone to wrinkling and fraying. I’ve been sitting on this piece of fabric for a very long time, waiting for inspiration to strike, and I’m glad I waited! I like the idea of having a summery button-up shirt (I’m not opposed to wearing my flannels in the summer, but this just looks better, yeah?) that is made of a nice breathable linen, with long sleeves that can protect my skin from the sun and/or insects (seriously, Morgan had one of these in Peru and I was SO JEALOUS of it!)…. or more specifically, air-conditioning, ha!

Construction-wise, this was waaaaay easier than my first linen attempt. I suspect part of that has to do with my now experience sewing this type of pattern- and part because of the fabric itself. Being a heavier linen means it is less shifty and less prone to fraying, which made the entire experience a BREEZE to navigate.

Linen Archer Button-Up Shirt

Linen Archer Button-Up Shirt

An unexpected perk of this style is how good it looks when it’s unbuttoned to be borderline scandalous. Since I’m not rocking much in the boob department these days, I can totally get away with these things hahahaha.

Linen Archer Button-Up Shirt

Linen Archer Button-Up Shirt

Linen Archer Button-Up Shirt

Linen Archer Button-Up Shirt

Linen Archer Button-Up Shirt

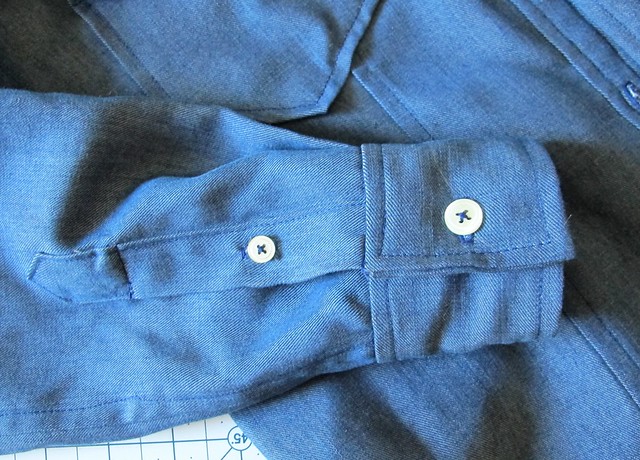
A few more minor construction notes: the shirt is finished with flat-felled seams, for a neat and durable finish. I did add a tower placket to the sleeve, as mentioned, so it would be easier to roll up (I use the placket pattern piece from the Colette Negroni pattern, but there are other options available). I also added button tabs (nabbed from my copy of B5526) to further aid with rolling up the sleeves (sorry, I didn’t think to take a photo of them rolled up – but you can see a shot here on my Instagram). The topstitching is off-white, and the buttons are just standard off-white shirt buttons, nothing fancy.

Linen Archer Button-Up Shirt

I guess that’s all for this make! I have already worn it several times since finishing (hence the wear-wrinkles in my “modeling” photos – but as you can see, it doesn’t wrinkle that much! And there are pressed fresh-off-the-sewing-machine shots on my dressform, if you’re a hater of wrinkles!) and it’s been a nice and cool alternative to my standard cardigan. I like that the purple makes it a little less plain than an ordinary chambray, yet it’s still a really versatile color that can be worn with most of my wardrobe.

Completed: Pink Flamingo B5526

27 Mar

Another sleeveless B5526! Betcha didn’t see that one coming :B

B5526 Flamingo

I am pretty certain I’ve shared this pattern enough times that it definitely absolutely does not warrant another blog post, but, oh well. My blog, my rules, my pink flamingo shirt haha.

Some very brief info for anyone who is just dropping in for the first time:

  • The pattern is Butterick 5526. Yes, it is my favorite shirt pattern. I’ve made it over and over and over again. It’s a great, versatile pattern that is easy to fit and easy to modify. I lurvs it.
  • I originally cut a size 6, but have made several additional modifications – including shortening the length of the body and making the sleeves full-length (that is, when I add sleeves. Ha).
  • I have only made view D, which has the princess seams. I am sure the other versions are nice, but view D is the only one I have experience with!
  • I have finished my shirts with both flat-felled and French seams. Yes, you can do both on sleeves. Totally possible. I am living proof right here.
  • In other news, I think my sewing machine could sew this thing SOLO at this point.

For those of you who have seen every version of this shirt I’ve made over the years, here’s another one for you to enjoy!

B5526 Flamingo

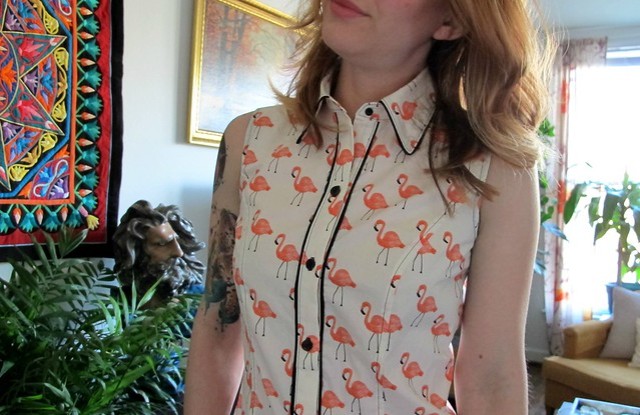
Isn’t this pink flamingo lawn the cutest? I bought it ages at Craft South, aka where I work a couple of days a week. It’s from the Cotton+Steel Les Fleurs Collection, one of the pieces from their Rifle Paper Co collaboration. I had actually put myself on a fabric-buying ban just that morning (thinking I had enough beautiful fabric that I needed to actually use without buying more) and then this shipment came in. What do you do when you are presented with pink flamingo lawn? YOU BUY THAT SHIT. I got 1.5 yards and I’m glad I did, because it sold out quite quickly!

I’m not generally a fan of Cotton+Steel designs – I appreciate what they do, and I think their fabrics are lovely for quilting – but even the rayons and lawns tend to look, well, quilt-ty (except that cherry print rayon I got a couple of years ago, which is equally gorgeous and ooh I can’t wait until it warms up to wear again!). I think the collaboration with Rifle Paper Co was incredibly brilliant – pretty much all the pieces sold out as soon as they hit the shops – but again, too quilt-y/floral for my tastes. But these flamingos totally appealed to me. They’re kitchsy and novelty without looking too much like I made the shirt myself.

B5526 Flamingo

B5526 Flamingo

When I buy fabric, it’s about a 50/50 even split on whether or not I have a pattern in mind. I try to always have a plan, but sometimes you end up seeing something fabulous that just needs to go home with you RIGHT THEN and you will figure out the logistics later! But for this piece, I knew it would be a great button-up shirt. I actually prefer my button-ups to be in a drapier fabric – soft chambrays and silks are tooootally my jam – but a crisp lawn is also wonderful to make and wear them with. Since I knew I would be making this shirt for summer – aka without sleeves – the 1.5 yards I bought was plenty. I actually cut the pieces within a week or so of bringing the fabric home… and then it just sat for months. ha!

I eventually finished the shirt in February (seriously, months… according to Instagram, I bought that shit back in AUGUST hahahaahaha), when we were having this weird warm spell of 70-80 degree days. I figured if it was gonna feel like summer, I might as well dress the part! Of course, it immediately went back to frigid here, but after that Freak Snow we got at the beginning of March, we are creeping back toward warmer days. Which means I’ll be prepared now!

Part of the reason why I waited so long to finish this shirt is because I was stuck on a few details. I had considered adding piping (Rosa had just been released and I was feeling mad inspired by the black piping detail), but I wasn’t sure what fabric to use to make my self-piping – silk crepe in my stash, or go buy something? How big should the piping be? Where exactly do I want to put it? What should I use to finish the arm holes? Also, I had just finished 2 other button-up shirts and was feeling really shirted-out at that point (that’s totally a thing). So I shoved it in my not-technically-a-UFO-because-I-haven’t-actually-started-it box for a few months. I am glad I waited because I am quite happy with all the design decisions I made!

B5526 Flamingo

I did end up using piping – just around the collar and outsides of both button bands. I made my own self-piping, using 1″ bias strips of silk crepe (ultimately, it was the right color/weight and what I had on hand, so I went with that. I prewashed the silk ages ago, so the shirt should launder up in the machine fine). For the cording, I found a thick cord in my stash that was made with big twists and untwisted it to get 3 narrower cords. I had originally experimented with flat piping, but it looked a hot mess so I unpicked everything and added the cord.

Sewing piping in was very easy – here’s a tutorial from Tilly that goes over it. I can’t remember the last time I sewed piping into a collar (if… ever?) but it went in flawlessly the second time (first time being flat piping… yaaaaah, don’t do that you guys haha). Piping the button bands was really easy because they are separate pieces, so you’re basically just piping a seam. I topstitched 1/8″ away from the piping with black thread, to keep it in place and also cos it looks cool. I also topstitched all my flat-felled seams with black thread as well, to keep the look cohesive.

B5526 Flamingo

B5526 Flamingo

The arm holes and hem are finished with the same 1″ bias silk crepe, to make bias facings. The black buttons are just from Craft South. I bought an extra one so I could sew it on the inside of the button band as a spare, because I am a huge nerd and am delighted by details like that.

B5526 Flamingo

B5526 Flamingo

B5526 Flamingo

I don’t think there’s much else to say about this shirt. This was a fun little project and it layers nicely under a sweater, and will look awesome with shorts in the summer.

B5526 Flamingo

In other news, I know my pictures here aren’t that great. I feel like I am experiencing growing pains with my photo situation. I can’t go outside (ok, I can, but I live in a busy apartment building and I’m not gonna. Sorry.), and the lighting is really lacking inside. I just keep moving around my apartment in search of good light. It’s hard to tell how bad it is from the camera screen, and by the time I upload the pictures, I’m like “fuck it, I’m not taking those again” soo this is what you end up with. In the meantime, I guess it gives prime Lurk opportunities in my living space. That’s my living room! The creepy bust staring at me is named Saul, if you were wondering.

Completed: The Mélilot shirt

5 Dec

Hey guys, New Favorite Outfit alert!

Mélilot shirt - front

This is the Mélilot shirt from Deer & Doe Patterns. I vaguely remember when this pattern came out – although I didn’t give it more than a second glance (the main version you see on their website is long sleeved, with dropped shoulders and a peter pant collar. It’s very nice, but it’s not really my style). Once I started googling around for the short sleeved version, though – I decided it was super cute and that I wanted to make it in a lovely drapey silk.

(It feels so redundant to talk about silk… I should just dub my 30s “The Silk Decade” because I feel like it’s ALL I sew now haha)

Mélilot shirt - front

Mélilot shirt - side

Mélilot shirt- back

Mélilot shirt- back

I sewed Version B, with the short sleeves, and used the hidden placket from Version A. My shirt is a size 34 (which is what I usually sew from this company) with no alterations to size or length. The instructions were reasonably easy to follow, although the hidden placket info was a bit sparse and took some head scratching before I really figured it out (and don’t ask me for a tutorial, bc I don’t remember exactly what I did haha)

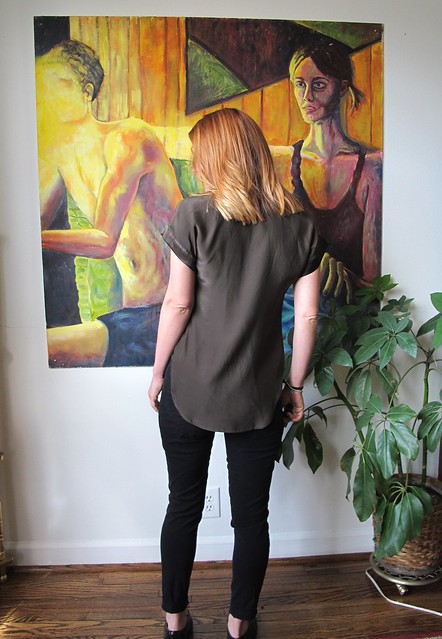
My fabric is an olive green / brown (depending on the light you are in, ha) silk charmeuse with the slightest amount of stretch, from Mood Fabrics. I bought this at the store while I was in NYC in November, with the intention on making this pattern with it. I used the matte side for the body, and the shiny side for the collar stand, pockets, and sleeve bands. It’s a very subtle contrast, but I love the way it looks. I use a Spray Stabilizer on my fabric, which made it easier to cut and eventually sew. One thing I have learned with fabrics like this is to leave the pockets off until the garment is completed. I don’t know what it is – but every time I put the pockets on, the end up super crooked and I have to unpick them and re-sew. Maybe it’s how the garment hangs off my body, maybe I’m just an idiot WHO KNOWS. But I had the same crooked pocket problem with this top (I took a photo, but you couldn’t really tell… but trust me, it was bad in person. Even my mother, who thinks I’m the great sewer ever, laughed when she saw it), so next time I’m just going to wait till the end. No sense in doing things twice!

I will admit that the color of this shirt is kind of ugly… but it definitely works really well with my coloring. How awesome that the doo-doo colors suit me best. Ha.

Mélilot shirt - front

Mélilot shirt- back

Mélilot shirt - front

I just love the fluid drape of this fabric, and the way the little sleeve bands stick up. I am not normally a fan of these deep curved hems, but I think it works well with the style of the shirt. Same with the pockets – this shirt definitely needs the pockets, or else it looks really unbalanced in a bad way. I am thinking this will be a good shirt to take with me to Egypt – it covers my shoulders and butt, and I can button it up pretty high for modesty.

Mélilot shirt - on dressform

Mélilot shirt - on dressform

Mélilot shirt - sleeve detail

Mélilot shirt - hidden placket detail

Mélilot shirt- hidden placket detail

The pattern calls for lined pockets, which makes it easier to get identical, crisp curves on both pockets. For buttons, I actually used the wrong side of a bunch of those shell/mother of pearl buttons that I found in my stash. The back side is a little matted and kind of a taupe color, which went really well with the fabric. Due to the covered placket, you only see a couple of buttons anyway. Oh, and as always – the inside seams (you know, all 2 of them haha) are French seams. FYI, watch those seam allowances if you make this pattern and omit the French seams – because I’m pretty sure the side seams are only 1/2″. The pattern instructs you to sew French seams for these seams, with two passes at 1/4″, which doesn’t add up the standard 5/8″ seam allowance on the rest of the pieces. Just a thought! Also, I always trim down my first pass to like 1/8″ before sewing the second pass, as it ensures that the seam allowance it caught in that stitching. Ain’t nobody got time for hairy seams amirite.

Mélilot shirt - front

That’s all! A pretty simple shirt, but the silk makes it feel super fancy. I am wearing it with my Cecila Pants from Elizabeth Suzann. Y’all, these are magic pants. The denim is suuuuuper stretchy and comfy, and has a fantastic recovery – I can wear these several times before they need a wash to shrink back up. And while I didn’t personally make these pants – I can tell you exactly who did. Her name is Colette 😉

Completed: Denim Rosa Dress

16 Nov

Good morning, everyone! As I write this, I am preparing to experience what will probably be the shittiest day of my life (literally – I have a colonoscopy tomorrow and today is prep day) (lol) (bet you never expected to read THAT on a sewing blog). I haven’t had solid food since last night and I’m stuck in this house for the rest of the day. Lucky for you, I am writing this blog post to pass the time!

I’ve had quite a few people ask me when this project was going to be posted (Rosa made her debut on my Instagram nearly 2 months ago, and I’ve worn her several times since – including to all the workshops I’ve been traveling to in between!), and honestly, the only reason it’s taken so long is because I really hate taking photos! So, with that being said, sorry in advance for the quality of these – namely, how freakin’ wrinkled the dress is! It looks much worse in photos than it did in real life – otherwise I would have at least steamed it a little – however, I have been wearing it pretty rumply in real life so I guess this is as close to authentic as one can get.

Also, I’m sorry if I don’t make any sense in this post. I’m blaming it on the lack of food.

Denim Rosa Dress - front

Denim Rosa Dress - front

Rosa is one of Tilly & the Buttons‘ newer patterns, and it includes options for both a shirt and shirtdress. The pattern features front and back princess seams, a pointed back yoke (which I LOVE!), plus all the features that make for a proper button-up shirt – collar, collar stand, button placket. There’s also an online video workshop if you need help with the steps, although I didn’t use this (I’ve made plenty of these sorts of garments before, and plus, the instructions are pretty great as they are).

I made a size 1, as I wanted a very fitted dress. I made a muslin before cutting into my real fabric, which I’m glad I did because the arm holes ended up needing a little adjusting for me. Apparently I have very small armscyes – arm holes almost always tend to be too low and/or too large for my body, which restricts movement when you add sleeves to the equation. The sleeves in this dress weren’t necessarily bad as-drafted, but I knew they could be better. I ended up raising the armscye 3/4″ higher at the bottom, and also adding 3/8″ to the back arm curve, which made the entire arm hole that much smaller. I reduced the sleeve cap ease, so that the sleeve would properly fit without a bunch of gathers. This worked perfectly and I have a full range of movement with my dress, woohoo!

Denim Rosa Dress - side

Denim Rosa Dress - side

Denim Rosa Dress - back

Denim Rosa Dress - back

Style-wise, I shortened the hem 1″ for a real mini length, and also added a curved cuff so that sleeves would be full-length (the bracelet-length sleeves are sweet, but as I mentioned before – it’s either full sleeves for me, or none at all!), as well as a tower placket so I can roll the sleeves up if I need to. I left off the sleeve tab, because it just ended up feeling too bulky with all the denim. To make the curved cuff, I used the straight cuff from my B5526 pattern and just curved the edges using curved ruler. The tower placket pattern piece is from my Negroni pattern.

The denim that I used to make this dress – honestly, I have no idea where it originally came from, ha! It was in my stash and it’s a much lighter weight than what I would use to make jeans. I imagine I probably bought it intending on a skirt, but I don’t think it would really even be suitable for that (considering how easily it wrinkles). It’s a woven cotton denim with no stretch, and clearly I should have pre-washed it at least one more time because it has shrank a little since I finish this dress. On the flip side, I intentionally made the sleeves a little long in anticipation of that – and now they are the correct length. On the downside, the dress is even shorter than I was planning and it pulls a bit across the bust now. Oh well! Lesson learned haha.

Denim Rosa Dress - detail

Denim Rosa Dress - detail

Denim Rosa Dress - detail

My inspiration for this dress came from the Rosa inspiration post, in fact. The top left denim dress immediately caught my attention and I knew that was exactly what I wanted mine to look like. A few clicks later brought me to the Net-A-Porter page, which at the time showed close-ups of the dress from several angles (unfortunately not the case now, I guess, since it’s sold out – sorry!). This was extremely helpful in assisting me with my blatant rip-off.

I used a brown/taupe thread for all my topstitching – it’s just some weird cotton crap I had in my thread rack, and I used the triple stitch on my machine so that the stitches were nice and thick like topstitching. Most of the topstitching is two rows – the first row 1/8″ from the edge, and the second row is 1/4″ from that first line. Instead of doing a true flat-fell seam, I just mock flat-felled them as per the instructions (stitch as normal, serge, and then topstitch from the right side). The tops of the pockets are secured with bar tacks. The snaps are gunmetal snaps done up with an industrial snap setter (I use the one at Elizabeth Suzann’s production facility bc they haven’t shooed me away yet haha). I LOVE hulking out of this thing at the end of the day, y’all!

What else? I think that’s about it. Have a picture dump (pun intended looool):

Denim Rosa Dress - on dressform

Denim Rosa Dress - on dressform

Denim Rosa Dress - on dressform

Denim Rosa Dress - on dressform

Denim Rosa Dress - on dressform

Denim Rosa Dress - on dressform

Denim Rosa Dress - detail

Denim Rosa Dress - detail

Denim Rosa Dress - detail

As I said, I am pretty happy with this finished dress and I have worn it tons! It’s a nice autumnal version of my beloved chambray Hawthorn (which, 2 years later, is still one of my most worn me-mades to date) – a good neutral base that can be worn as-is with flats when it’s warm, or layered with tights and a slip when it gets cold. I’d love to make another version in corduroy – currently on the lookout for a good one if you have any suggestions! 🙂

Completed: Chambray Tencel Butterick 5526

3 Oct

Well, surprise surprise…. I am back again with – you guessed it! – another button-up shirt. Ha! Is this all I wear these days? Probably. I’ve been sewing – and making button-ups – for years at this point, but it still tickles me to no end that I can get them to fit every part of my body without bagginess or gaping. To hell with all those tiny safety pins and double-sided tape – I finally have buttons where the buttons need to go! Yay!

So now, my wardrobe is just slowly filling up with the button-ups of my dreams. Also, button-ups are really really really fun to make. You like making jeans and bras? You’ll love making button-ups. So many tiny pieces with lots of precise topstitching I LURVES IT ♥

B5526 Chambray Tencel

B5526 Chambray Tencel

When I was in NYC earlier this year, I made some time during my trip for a couple hours at Mood Fabrics flagship store in the Garment District. Since I live way way outside of NYC, I don’t generally get this opportunity except once or twice a year – so I try to make it count! I always come prepared with a list and a plan – and while I allow myself to veer off the list if I see something shiny that appeals to my magpie tendencies (very much like when I go grocery shopping, although that sort of veering usually involves chocolate :P), the list is helpful for keeping me on track so my purchases are a little more focused. I don’t know if you’ve had the pleasure of shopping in the physical Mood Fabrics store, but it is QUITE overwhelming if you’re not used to it! The aisles of fabric go on forever, piled to the ceiling – and there are 3 glorious floors of it!

One of the things on my list for this trip was to find a chambray Tencel shirting. I’ve seen this all over sewing blogs and even in RTW – chambray Tencel was apparently very hot last fall (whether or not it’s still hot this fall – whatever, I like it, that’s all that matters!). I wasn’t familiar with Tencel until a couple of years ago, when I was sewing for Elizabeth Suzann and she started using it for some of her designs. Tencel is very similar to rayon – it’s a wood cellulose fiber, so it breathes beautifully, and it has an incredible drape. Unlike most of the rayons I have sewn with, this is a bit thicker and easier to handle – it’s not quite so floaty. My brief internet research also tells me that Tencel is a very environmentally friendly, and the fibers are grown sustainably. Gooooo Tencel!

I found this particular Tencel in the depths of the shirting fabrics in Mood’s store, and it was exactly what I had been dreaming of when I wrote my list. It’s drapey and nearly as soft as a baby’s butt – just like rayon – but with a thicker hand and an incredible sheen. I am pretty sure this is the same stuff available on the website, actually (also FYI, Mood Fabrics now has tons of Tencel on their site – including flannel WUT). I bought enough yardage to make a long sleeved button up, prewashed that bad boy when I got home, and set it aside to allow summer to pass before I cut into it. And finally, here we are!

B5526 Chambray Tencel

B5526 Chambray Tencel

B5526 Chambray Tencel

B5526 Chambray Tencel

B5526 Chambray Tencel

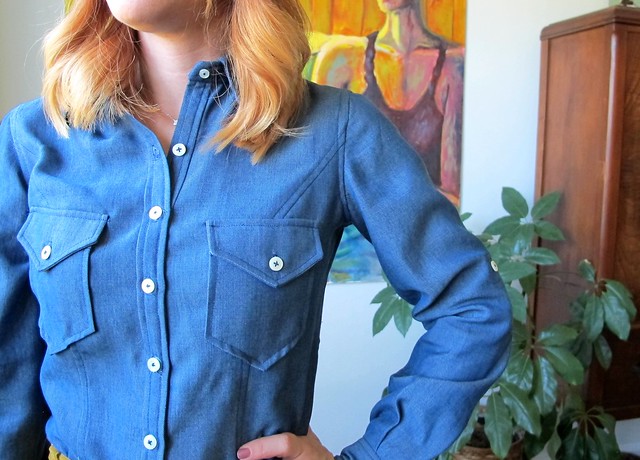
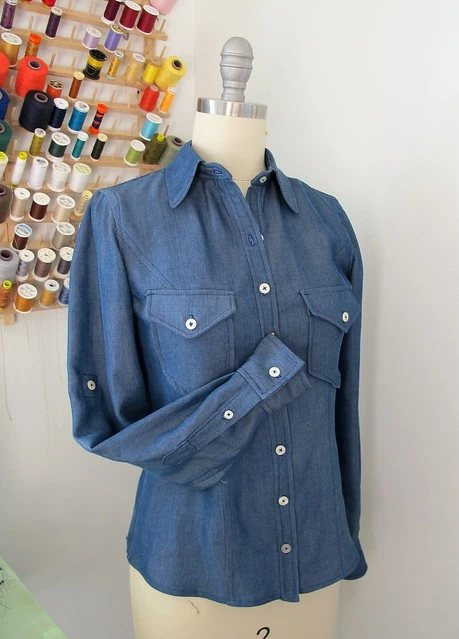
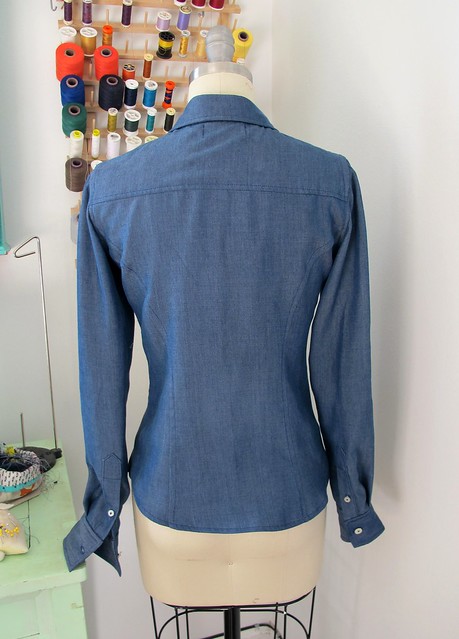
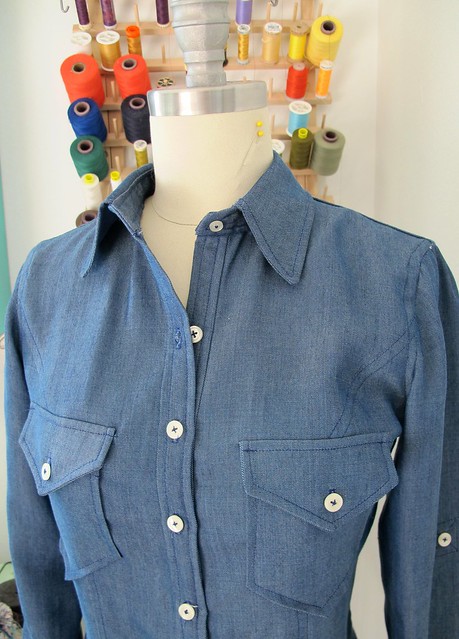
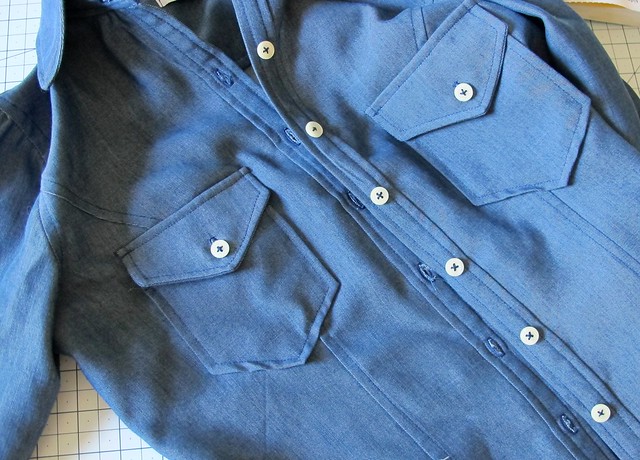
I used my very favorite shirt pattern, Butterick 5526, to sew this up. I’ve made this pattern dozens of times at this point, so there’s not much I can say about it that I haven’t already said dozens of times. I’m so familiar with this pattern, I’m pretty sure it could sew itself if I gave it a chance. I decided to mix a couple things up to make my shirt look a little more like a workshirt – rugged, casual details, but with that pretty, slim fit that only princess seams can give you. And also to make it look less like I am just wearing the exact same shirt every day. Even though I totally am.

I redrafted the back to include a yoke (and by redrafted – I mean I just sliced off the top of the pattern piece and added seam allowances, ha!) and swapped out the simple bias plackets for a more manly tower placket. I also drafted pointed pockets with matching pointed flaps (again, I am using the term “drafted” VERY VERY loosely here!). Another big change was to topstitch everything at 1/4″, instead of my usual 1/8″ edgestitching. It’s a lot more bold and pronounced, like the RTW stuff I’ve been lurking on, and gives a completely different look! I imagine that over time, the edges will curl and wave a bit and make the whole shirt look more settled in. All the interior seams are flat-felled, with the exception of the yoke – which is faced with more Tencel. Oh, and I added button tabs to the sleeves, so I could roll them up if I wanted to!

B5526 Chambray Tencel

B5526 Chambray Tencel

B5526 Chambray Tencel

B5526 Chambray Tencel

Working with Tencel wasn’t much different than any other shirting fabric I’ve used, although it does have a tendency to stretch and slide if it things it can get away with it. I added lightweight fusible interfacing to all the normal shirting bits – collar, collar stand, button placket, etc – as well as the sleeve tabs and pocket flaps, just to give them a little more structure. This fabric responds really well to heat, so I was able to steam everything easily into submission, which is a must for shirt making.

I did have one pretty big unpicking session with this shirt – for some reason, the collar ended up too big (I don’t think it stretched out, as the top collar is cut on the straight grain and was also immediately interfaced after cutting – I am thinking maybe I skewed my seam allowances somewhere, somehow?) and went almost to the ends of the collar stand. I noticed it right before I started topstitching, and while I tried to convince myself it was ok – it wasn’t, and I knew deep in my heart of hearts that it looks absolutely fucking shitty. At this point, I had already aggressively trimmed down all those seam allowances and pressed the shit out of everything, and while I could still unpick things – it would going to be a giant PITA. I left the shirt on my dress form for a few days so I could get some space, and upon revisiting, I knew I wouldn’t be happy with the collar the way it was. Considering how much time I had already spent making this shirt (and the uncertainty of knowing whether or not I’d be able to get more of this fabric to cut another one), I ultimately decided it was worth the time to unpick everything, re-sew the collar with larger seam allowances, and then re-insert it. Not gonna lie – it took me about 2 weeks of leaving the shirt wadded up in the corner of my sewing room (so it could really think about what it had done) before I got up the energy to do all that unpicking, and another week or so before I re-sewed everything. But you know what? It looks SO SO SO much better now (it’s not perfect, but it is a 1000% improvement, no question) and it was worth the anguish! Sometimes you just gotta step away from whatever is frustrating you, to get another perspective.

B5526 Chambray Tencel

B5526 Chambray Tencel

B5526 Chambray Tencel

B5526 Chambray Tencel

B5526 Chambray Tencel

B5526 Chambray Tencel

Butterick 5526 is *my* personal go-to button-up pattern for sure – I’ve got my tweaks down to a science at this point, and there’s nothing this shirt pattern can’t do for me! I love a good button-up shirt and I’m so happy to see more of this sort of pattern emerging out of the wild these days! Cashmerette’s Harrison Shirt is drafted specifically for plus sizes all the way up to an H cup (like, seriously, the double princess seams with no gape is absolutely mind-blowing to me) and Tilly & The Button’s new Rosa Shirt & Shirtdress is a gorgeous little beginner-friendly piece that will walk you through every single step (stay tuned for my Rosa review, btw, bc OF COURSE I made one of those bad boys!). I also love the Grainline Studio Archer for a more rugged/boyfriend looking shirt (lack of princess seams on this one means less fitted, but also much more suitable for those cozy plaid flannels!) aaaand I just got my hands on a copy of Deer & Doe’s Mélilot shirt so that’s coming up next! What’s your favorite shirt pattern?

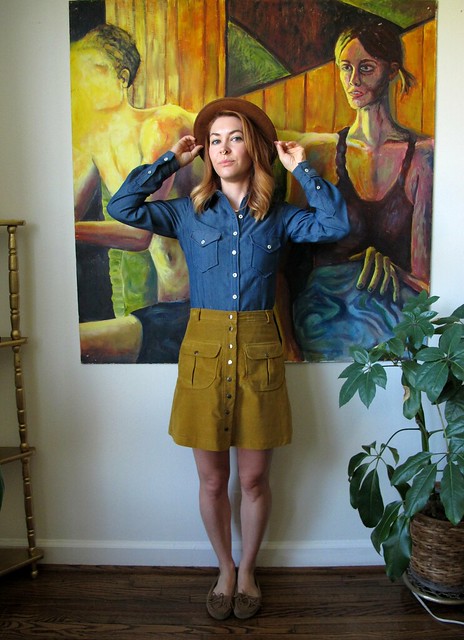
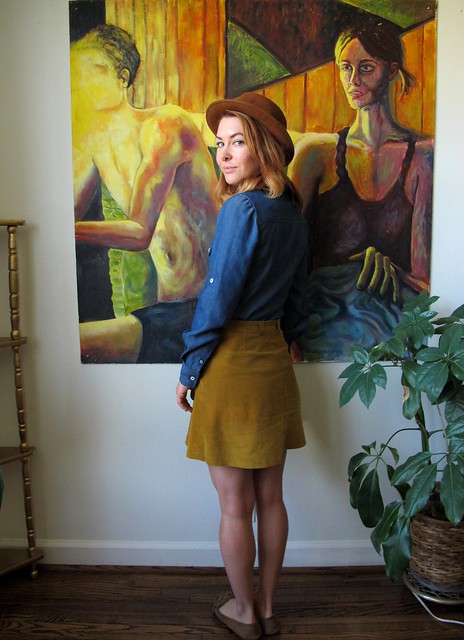
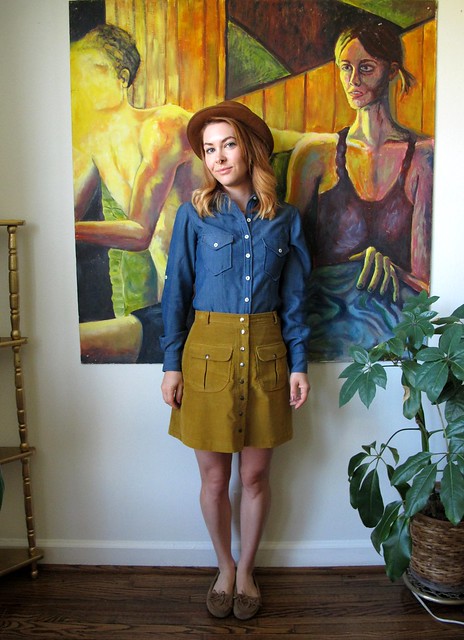
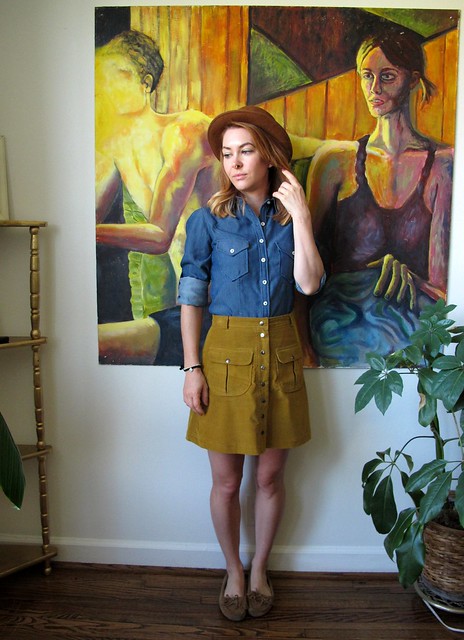
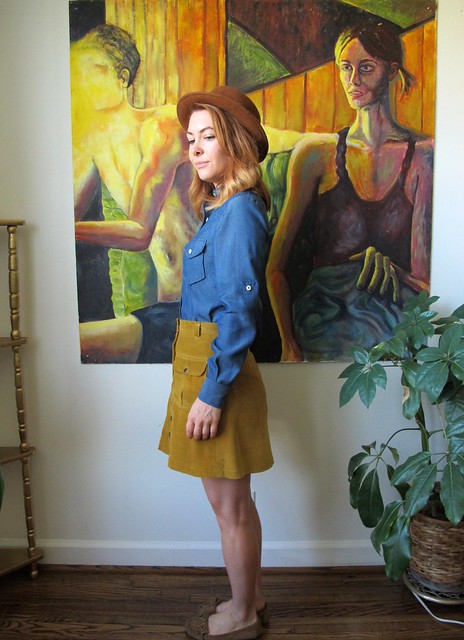
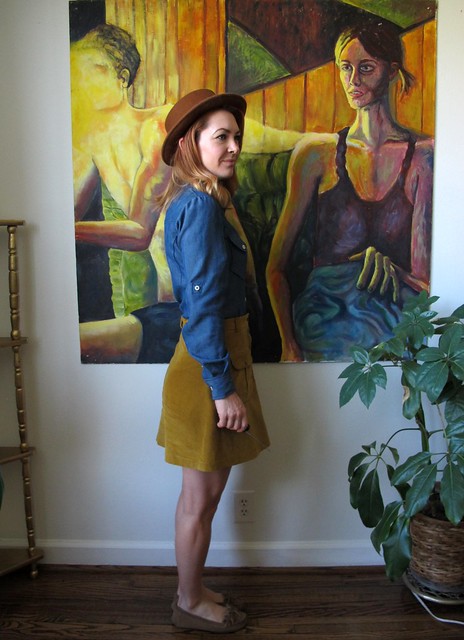
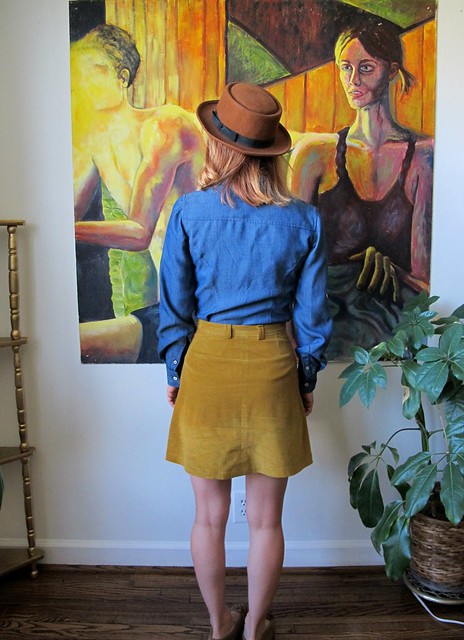
As a bonus, the skirt I am wearing in these photos was also made with fabric from Mood Fabrics! I used a cotton corduroy and you can read all about it in this post from earlier this year. This skirt has been on hold during the summer – it’s too hot here to wear cord, plus, it just looks silly in 100* weather – and I am excited to bring it back into wardrobe rotation with these dipping temperatures! Mustard and denim – is there a prettier color combination? I think not!

Note: The fabrics used in this post were provided to me by Mood Fabrics, as part of my participation with the Mood Sewing Network. That fabulous hat is all mine, though 😉

Completed: The Lil’ Bird Scout Tee + A Giveaway!

3 May

I’m not really sure what prompted this, but lately I’ve REALLY been loving these boxy loose shapes on me. Made in a super drapey fabric and cropped just so, I find them really flattering and even more comfortable. It’s funny – the older I get (ya know, this RIPE OLD AGE of 30 lol amirite), the more I find myself comfortable with my body – and the more I’m ok with nto wearing things that are incredibly skintight. Both of those statements seem to contradict each other, but, it is what it is!

Silk Bird Scout Tee

The Scout Tee is certainly not a new pattern – not even in my personal arsenal (I made a really fun one last year with some beautiful handwoven fabric, in case you missed it!). But hell, I have loved wearing it! My first version was made with a fabric that made it really boxy, which I liked a lot – but I wanted to see how it would feel in a drapey fabric. Spoiler alert: This is love. This is true love. I already have the next one planned.

Silk Bird Scout Tee

Silk Bird Scout Tee

Silk Bird Scout Tee

This tee is pretty similar to my last one, in terms of construction. I sewed the size 0, and the only modification I made was to deepen the hem to about 2″, which is a good slightly cropped length for me. All the seams are French seams, and the neckline is finished with self bias facing. Overall, this was really fast and easy to put together. Since there are so few pieces – just front, back, sleeve, and that bias piece – it was even quick to cut. Yay!

I love the subtle high-low hem and I think it really benefits from some extra fabric down there to give it more weight. Especially with a fabric this lightweight and floaty!

Silk Bird Scout Tee

Anyway, this post is less about the pattern and really about the fabric! What do you think of my AWESOME TROPICAL BIRD PRINTED SILK, huh?! 😀

Silk Bird Scout Tee

The fabric is from Contrado, which is a company in the UK that specializes in custom printing – including on fabric! They reached out to me several months ago about trying out some fabric design, and I’ve finally had a chance to make that happen! It was the designing part that tripped me up and slowed me down so much – I’m not much of a designer, and most of my “art” involves direct copies. Tell me that I can design literally any print that I want, and watch the fear fill my eyes haha.

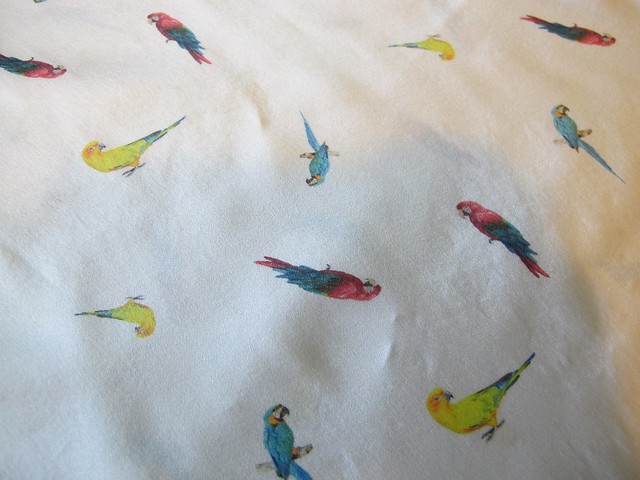
It seriously took me a couple of months to even think of what kind of design to do, but I had seen a few tropical bird prints floating around on RTW stuff and I immediately knew that’s the direction I wanted to take it. I googled around for some images that I liked and played around with them in my image editing software (it’s not anything fancy like Photoshop, just so we’re clear here haha. You could probably use pickmonkey.com to do your edits) until the design looked right. Then it was a matter of uploading the file to the website, making a few more minor tweaks – and that’s it! It was actually really really easy. The hard part is definitely choosing the design.

Narrowing down a fabric choice was also difficult! Contrado offers a massive array of fabric choices – over 75, in fact. From basics (such as cottons, polys, and knits) to fancier stuff (like cashmere !!!). They sent me a swatch pack so I could see all the printed samples, which made things both easier and harder 🙂

Silk Bird Scout Tee

The fabric I chose to print on is a beautiful silk satin. It practically drapes like a liquid and it feels really incredible against the skin. I was initially a little worried about it being SO shiny – I generally use the “wrong” side of my silks, as I don’t like really shiny stuff. But since this fabric was printed, the wrong side looked.. well, wrong. I think the nature of this design works with a shiny fabric, although now I am wondering how practical it is to make a summery sleeved top out of white silk… I sweat a lot! Ha! Well I guess I can always yank the sleeves off if it comes down to it 😉

I will admit that this was not the easiest fabric to work with – the silk is quite slippery on the satin side, and there’s not much of a “grab” to the wrong side either (by “grab,” I mean like what you’d feel with a silk crepe). I chose a very simple pattern for this reason, which definitely worked in my favor. I didn’t do any sort of prepping before cutting – no stabilizers or using a rotary cutter or anything like that – and while cutting took a bit longer than it normally does, it wasn’t too terrible. I think when it comes to dealing with silks and other slippery fabrics, cutting is the worst part. Once you get past that point (assuming you cut everything correctly and on-grain), actually sewing the pieces together is relatively painless.

Silk Bird Scout Tee

Silk Bird Scout Tee

Silk Bird Scout Tee

I actually took these photos after wearing and washing the shirt, and you can see how well the colors have held up (as well as the back wrinkles – sorry about that!). Speaking of washing, I get this question ALL the time, so it bears repeating – I wash all my silk on cold in the washing machine, and hang it to dry (it’s safe in the drier as I pre-wash and use the drier, but I hate ironing so hanging to dry is the way to go!). As long as you pre-wash your silk before cutting into it, it’s safe to wash it in the machine!

One last thing – in case you were curious 🙂

Silk Bird Scout Tee

GIVEAWAY IS CLOSED.

Time to talk giveaway! The folks at Contrado are offering a whopping £100 voucher to use on their site, to print whateverrrrr your desires on your dream yardage! Further, this giveaway is open WORLDWIDE, so you don’t need to be a UK resident to enter! (My US folks – as of today’s currency exchange rates, that comes out to approximately $146.29, fyi!)

To enter the giveaway:
1. You need to LIKE the Contrado Facebook page. Show them your love and support!
2. Comment on this post and tell me what you’d design, and what you’d make out of said fabric.

As I said, this giveaway is open WORLDWIDE and the winner will be chosen by a random number generator. I will close the comments one week from today, on TUESDAY, MAY 10, 2016 8AM CST.

GIVEAWAY IS CLOSED.

Silk Bird Scout Tee

Good luck, everyone! ♥

Note: This fabric was provided to me by Contrado, in exchange for this giveaway post! Who’s gonna be the lucky winner? 😉