Tag Archives: silk

Completed: A Very Festive Brocade V8998

26 Dec

After many years of saying I was gonna do it and then never actually doing it… I made a Christmas party dress!

Vogue 8998

I wanted something sparkly and festive to wear to Christmas parties (before you think I go to fancy parties… I don’t. I have consistently been the most overdressed person at every party this year, not that I’m complaining!), but every year I put it off until it’s too late. This year, I was determined to use my Mood allowance to make something fabulous, so I forced myself to start early. I’m so happy it paid off!

Vogue 8998

With this make, I chose fabric before the pattern. I had an idea that I’d like to make my dress out of a sparkly brocade – a fabric that I don’t have a lot of experience with. I generally prefer a fabric that has less body, plus, my lifestyle doesn’t really warrant a need for fancy dress. This seemed like a good opportunity to jump out of my comfort zone a little, so I waited until I was back in NYC for another workshop and used that change to stop by Mood Fabrics store to pick my brocade.

I’m not going to lie – I spent over 2 hours in that shop trying to decide. There are sooo many options, it’s a bit overwhelming! I had a couple of things in mind to narrow it down – I wanted a fabric that was primarily black, gold or silver (so I could wear it with my turquoise heels), and I was budgeting $50/yard or less (you’d be surprised how expensive brocade can get! I only needed 2 yards, which helped a lot). I wanted something that was more floral than abstract, and nothing that was super dimensional (I don’t like puffy brocade, I’ve learned). Even with those terms narrowing it down, there was a LOT of fabric to wade through. God bless all the people at Mood who helped me pull bolts and kept their grumbles to themselves every time I changed my mind. I’m sure it helped that I was there on a slow weekday morning, but still! I must have been annoying. Those people are saints haha.

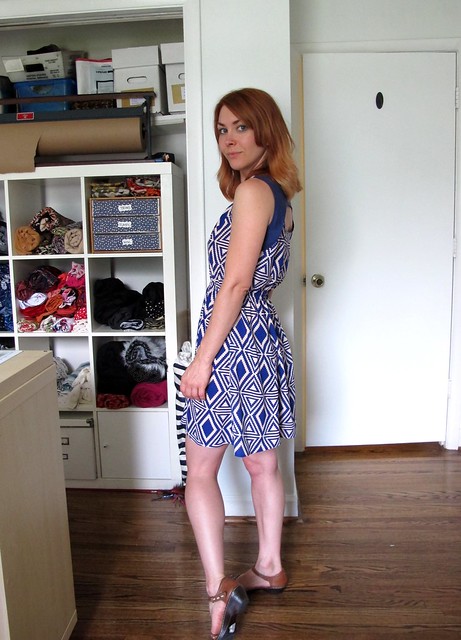
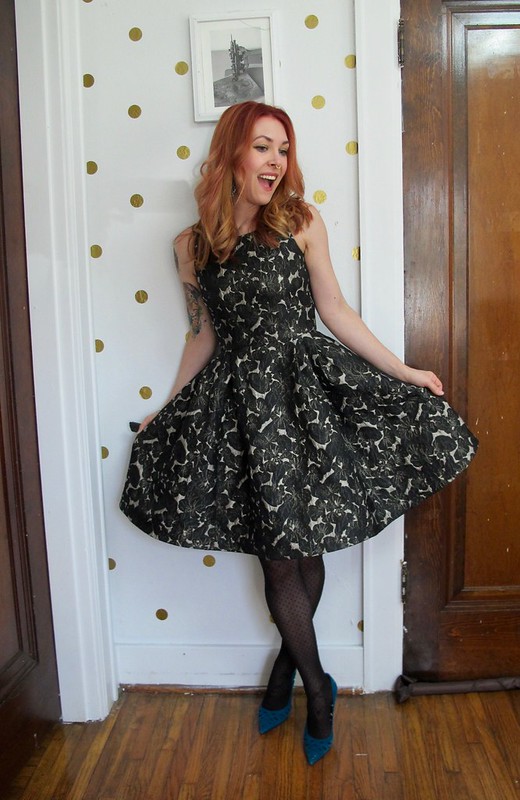
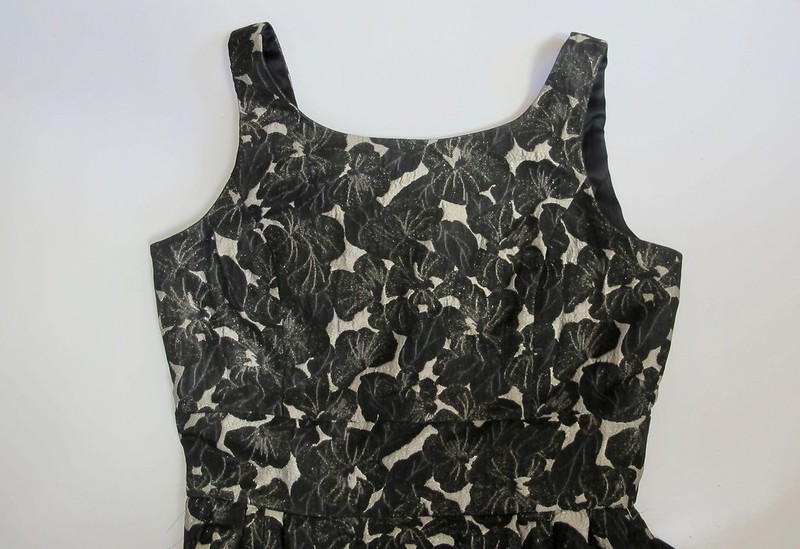
Anyway, I found this fabric and eventually settled on it (someone else was considering it for their wedding party, and decided against it – so she was happy to see me buy it instead!). What you see in my photos is actually the wrong side of the fabric – the right side is more dimensional with silver + gold, as you can see here. I had a hard time deciding what size to use – and even asked IG for opinions – but ultimately decided that the wrong side really made my heart sing. Plus, it looked better with my turquoise shoes (and also, someone on IG pointed out that it looked mature and tbh I just couldn’t see past that after that fact haha). Wrong side it was, then! I did consider adding in a bit with the right side for contrast (such as at the waistband), but upon pinning the pieces to my dressform, it definitely did not work. Rather than look cool, it looked like I made a mistake. So I scrapped that idea and just went with the wrong side all over.

Vogue 8998


Vogue 8998

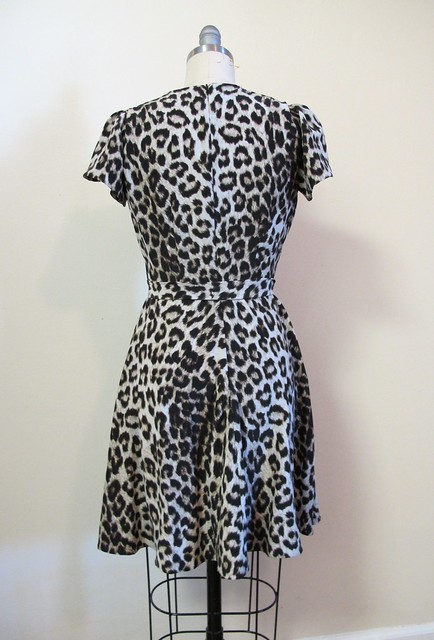
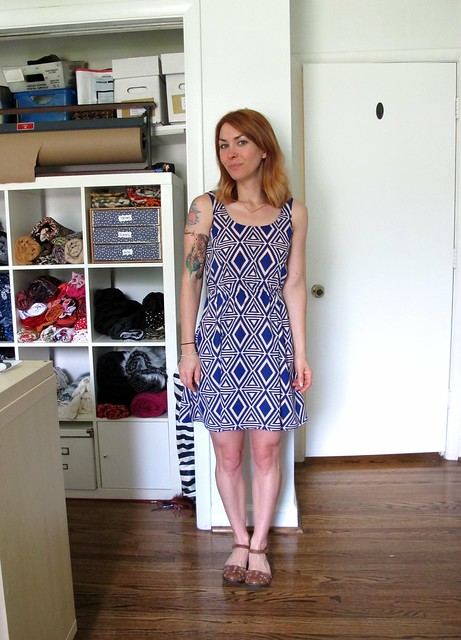
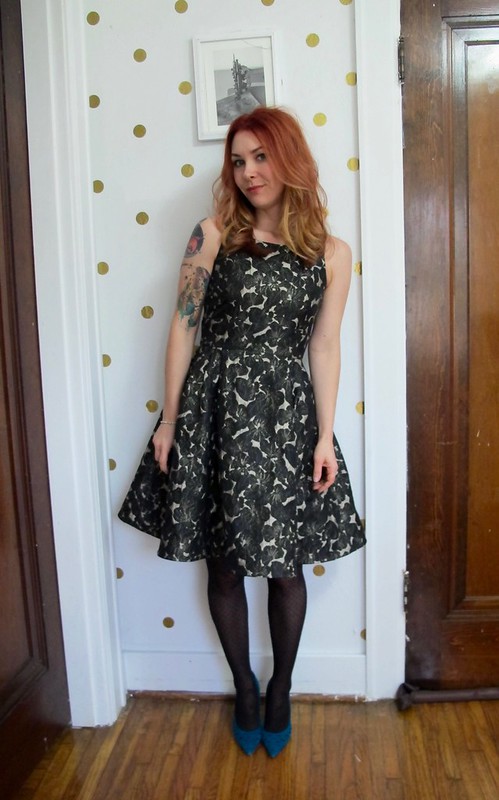
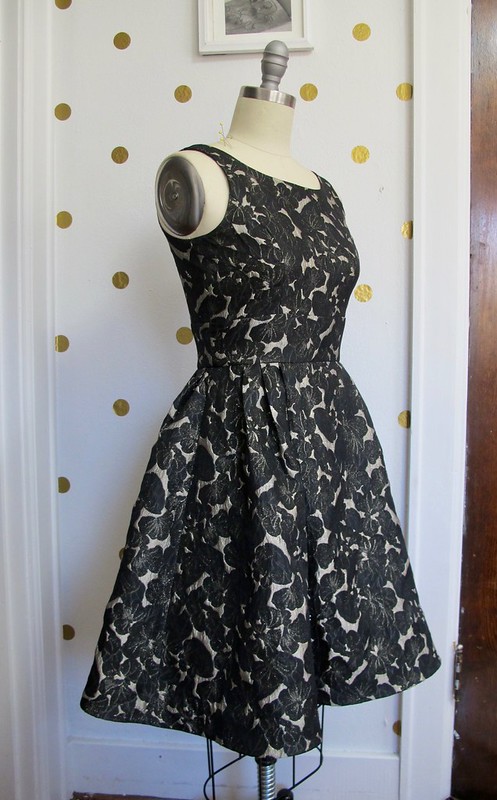
For my pattern, I used Vogue 8998. I cut a size 6 at the shoulders and bust, grading out to an 8 at the waist and hips. I made view E, but changed the skirt gathers to soft pleats. A quick muslin of the bodice showed that I needed to remove about 1″ from the shoulder to make it fit better, and I also removed 2″ from the skirt length before cutting. I made no other fitting changes.

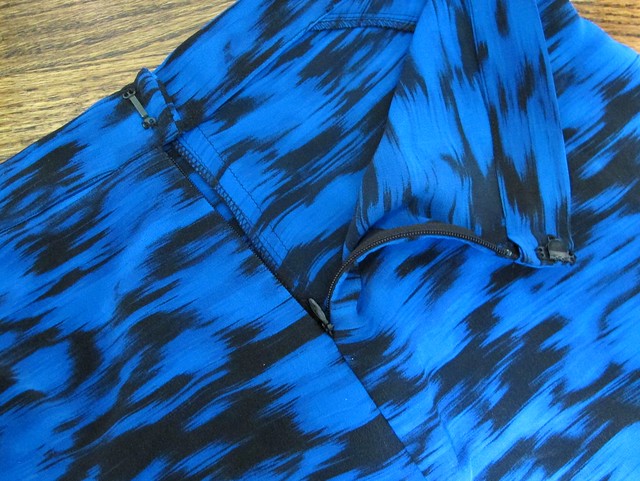
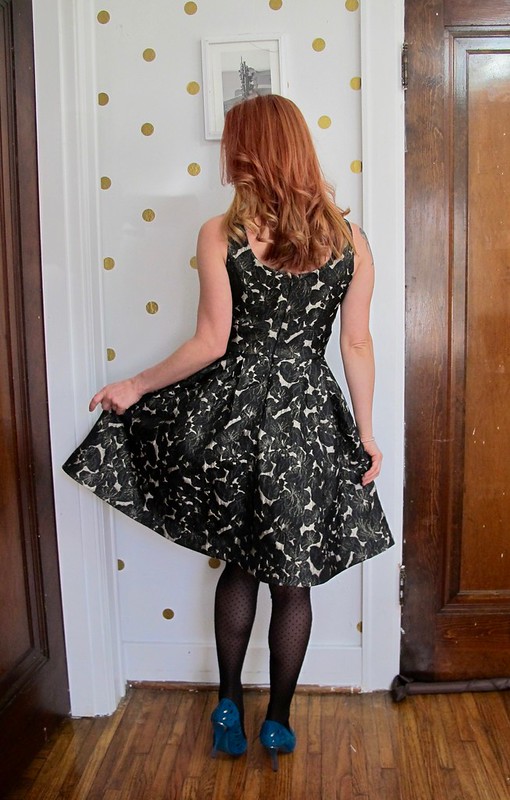
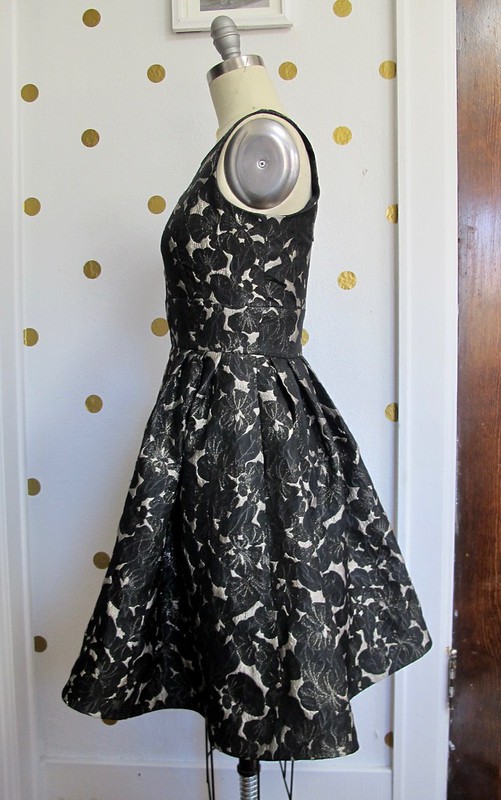
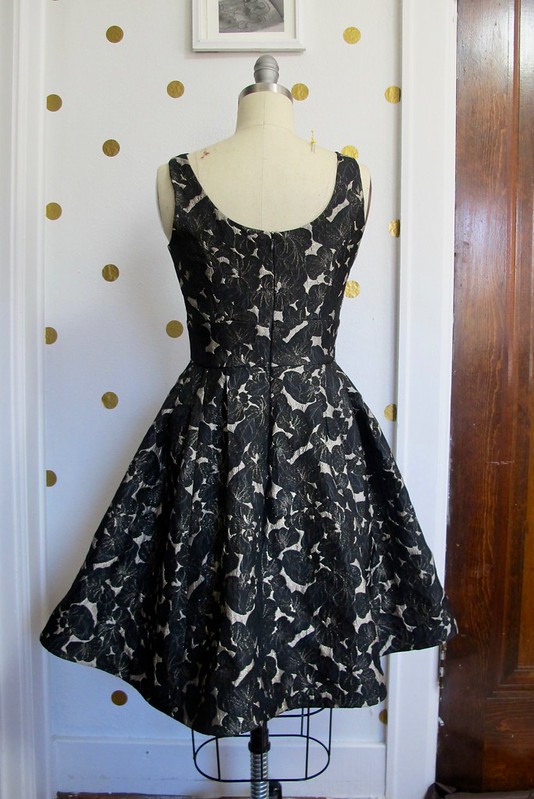
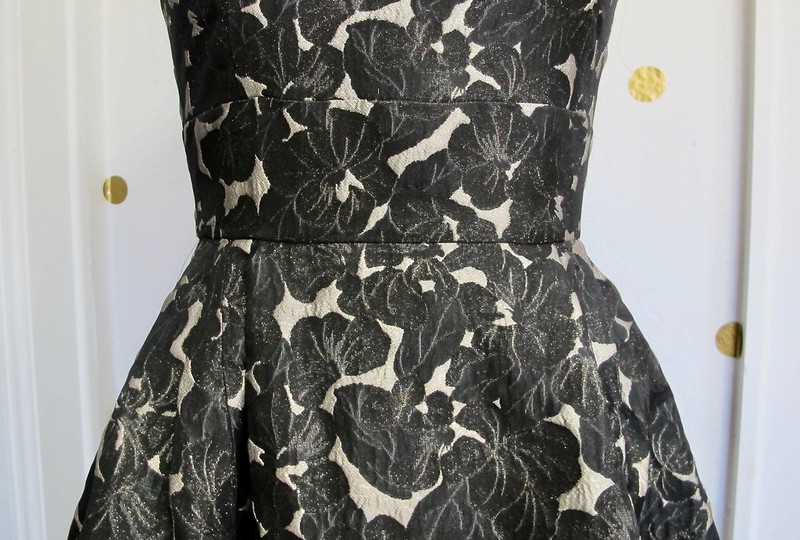
Construction-wise, I mostly followed the pattern but changed a few things to suit me + my fabric. I did not interface the entire bodice – I get why they have you do it, but I felt like my brocade had enough body where it wasn’t needed. I did interface the midriff with silk organza, just to give it some extra stability. I also changed out the lapped zipper for an invisible zipper.

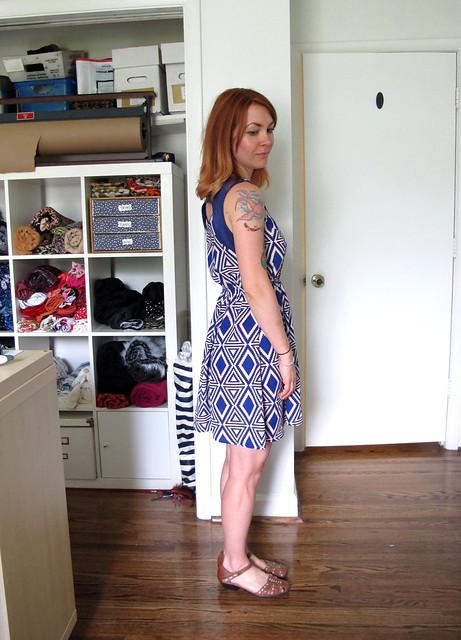
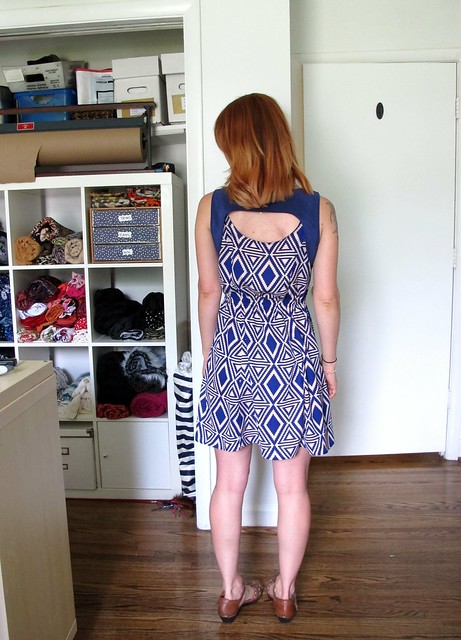
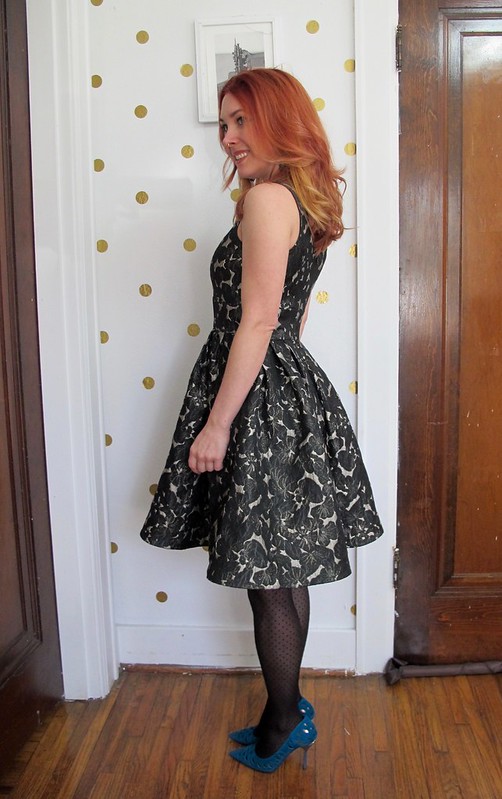
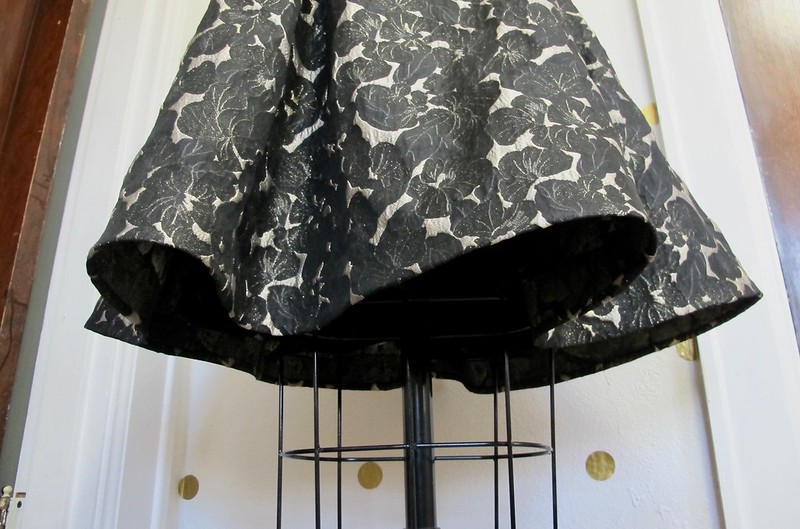
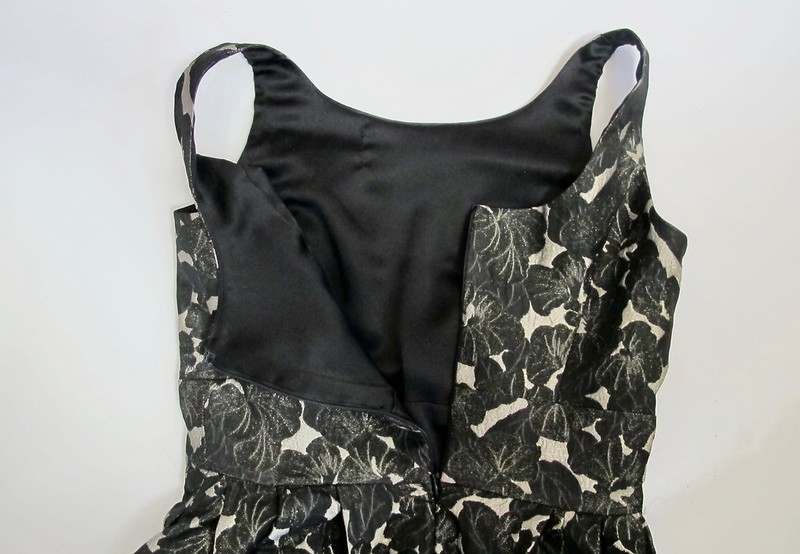
The whole dress is lined in black silk charmeuse, which gives the garment a bit of weight and makes it feel SUPER luxurious when I’m wearing it. There is 2″ wide horsehair braid at the hem to give the dress a bit of extra volume. This is one area that I totally deviated from the instructions. They have you attach the horsehair to the lining and then sew that to the outer fabric, so everything is encased… but I wanted my layers to be separate (mainly so I could show people the “right” side of the fabric haha). So I sewed the horsehair to the outer, and rolled the hem of the lining.

Vogue 8998

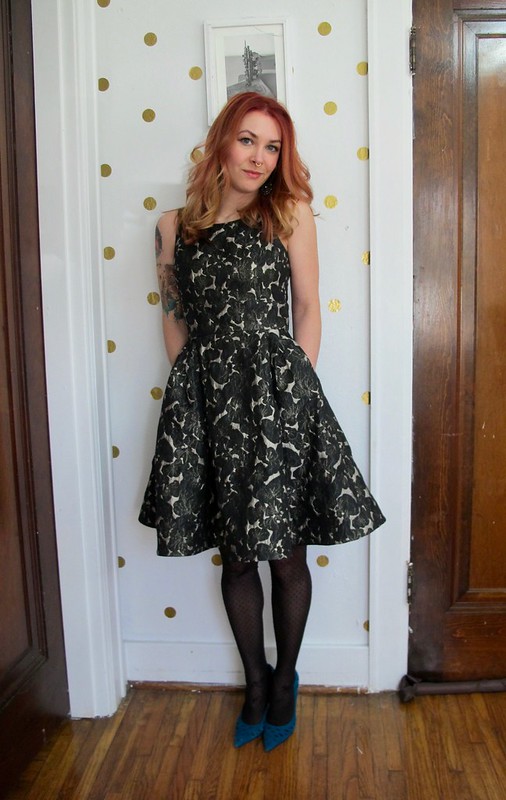
After a little bit of internal debate, I also added pockets (also out of silk charmeuse). I figured it would be nice to have a place to hold my phone (or stolen snacks), and I’m glad I did!

Vogue 8998

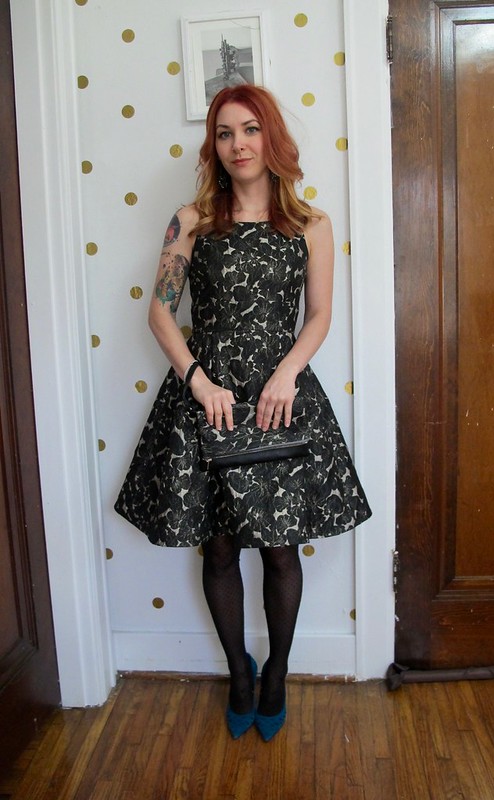
Oh, right – AND I made a matching clutch, using all leftover fabrics + my new Cricut Maker! More details on that in the next post 😛 But doesn’t it look great with my dress? haha!

Vogue 8998

Vogue 8998

Vogue 8998

Despite this being a fairly fancy, pretty $$$$ dress made with fine materials… it was really easy to sew. It’s just a basic dress (I mean, style-wise it’s technically a sundress, you know?) that is fully lined with a center back zipper. There aren’t a ton of pieces, and while I can’t say that the silk was the easiest thing I have ever cut… the brocade was super easy to work with. It doesn’t shift around, it pressed fine with high heat + a press cloth (sorry, I’m terrible but I use high heat for everything haha), and all my hand stitches disappeared which made hand sewing the hem very satisfactory! The only downside to brocade is that it sheds like CRAZY… so I just serged all my seams (even the ones that are completely covered by lining) to prevent them from fraying more. I am still finding sparkly bits of brocade in my studio. It’s kind of great.

Vogue 8998

Vogue 8998

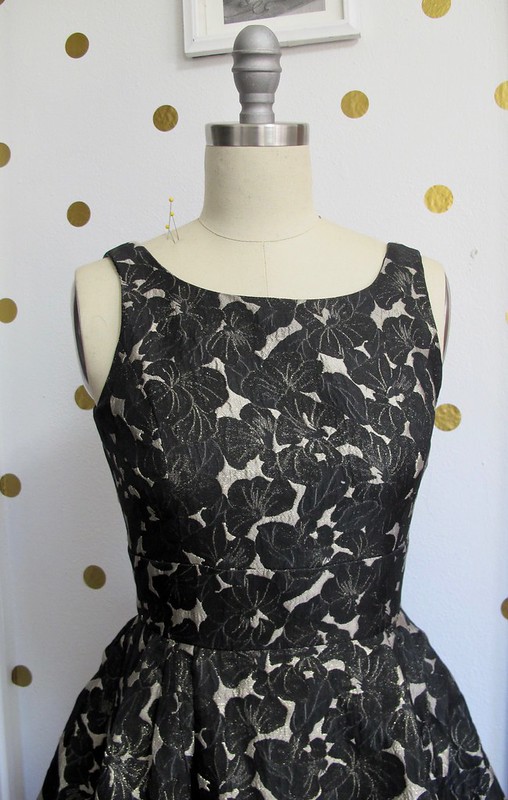
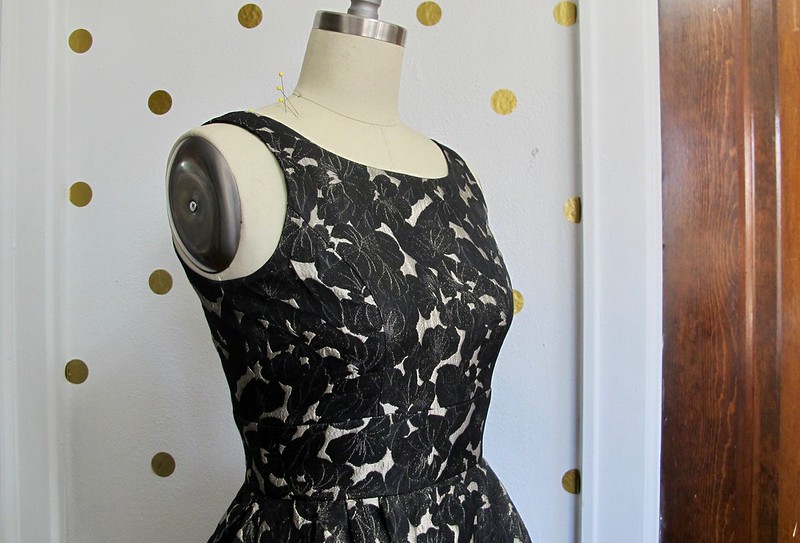
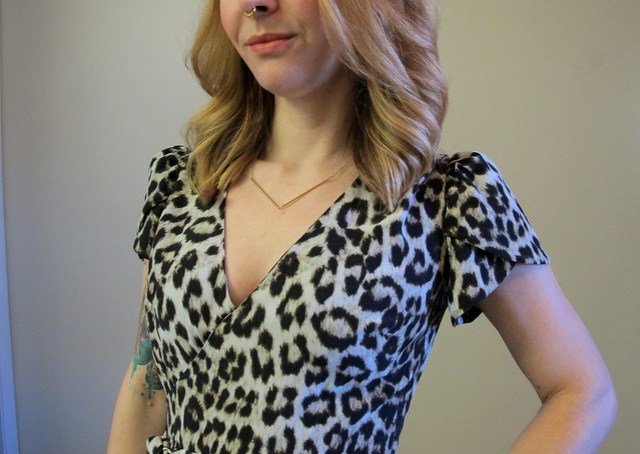
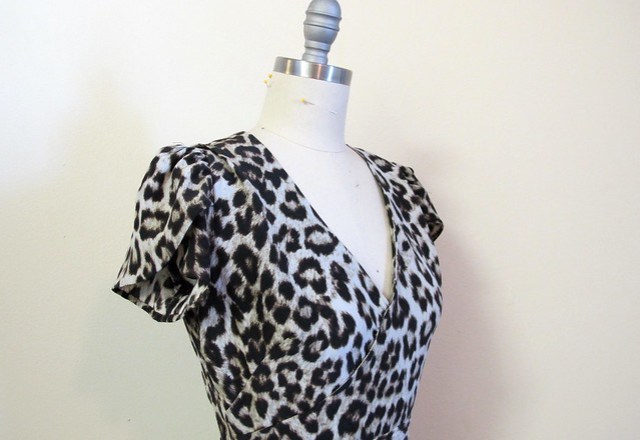
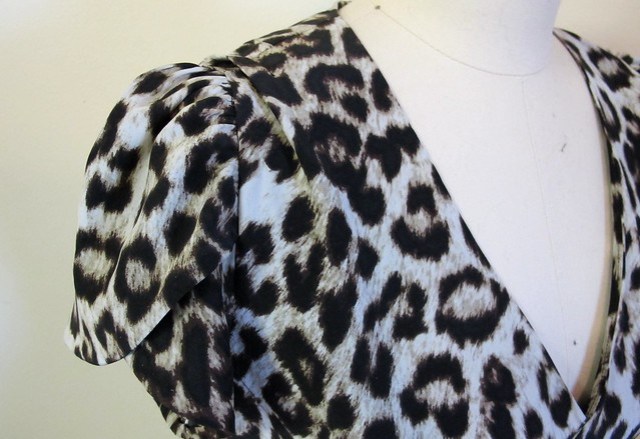
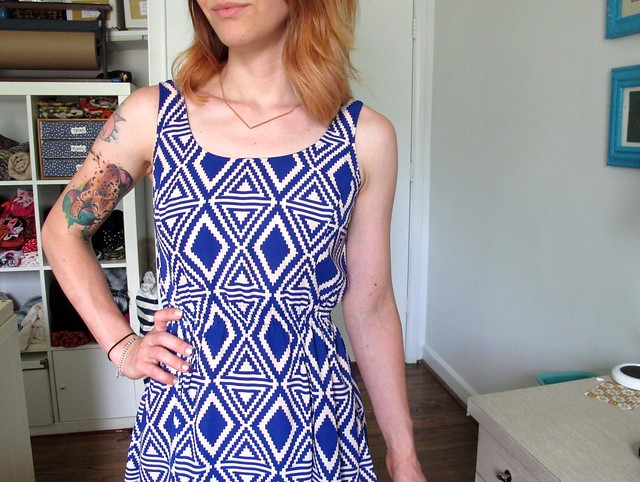
I love the shape of the bodice, and the wide waistband.

Vogue 8998

Vogue 8998

Vogue 8998

Vogue 8998

Vogue 8998

Vogue 8998

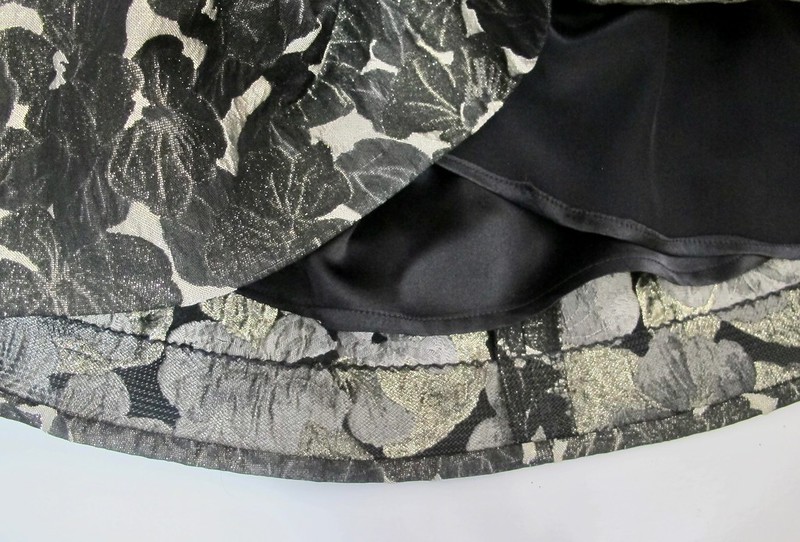
Here you can see the “right” side of the fabric! 🙂

Whew! All right, sorry, that was a load of photos. I am so excited about this dress, though, it’s been a while since I worked on such a big, fancy project!

Vogue 8998

I’m happy to report that I have now worn this dress 4 times – 3 parties, and one night out with my coworkers for fancy drinks! It’s super comfortable to wear, and the silk lining makes it a touch more warm than I expected. A couple of the parties I went to were waaaay more low-key than this dress would require, but it actually looks super cute with my cropped Chuck sweater worn over it with a belt.

Anyway, that’s all for this dress! I’ll be back later this week to talk more about the clutch I made to go with it 🙂

**Note: The fabrics used in this post were provided to me by Mood Fabrics, in exchange for my monthly contribution to the Mood Sewing Network. All opinions are my own!

Giving New Life (+ Lining) to An Old Coat

14 Mar

Hi everyone!

Wow. It’s been a minute, huh? Many, many thanks/hugs/appreciation for everyone who reached out regarding my dad. Every single comment, email, text message, card – I read every single one of them. While I can’t possibly reply to every single one of them, I do want to thank all of you, as I found them all so comforting. I feel like I am saying this way too much lately, but y’all truly all are the best.

As it is, it’s time to jump back into real life. Actually, I did that pretty much the day after the funeral – I went to Leesburg, VA to teach a workshop at Finch Knitting and Sewing Studio, which was really wonderful and a very welcome distraction from what I had been dealing with the week prior. The next weekend, I flew to Brooklyn, NY to teach my Jeans Making Intensive and Pants Making Intensive classes at Workroom Social. I just got home about a week ago, and have spent this time trying to catch up all the things I’d set aside while I was gone- boring adult-y things, like work and cleaning my much-neglected apartment. I’ve finally gotten a chance to get back into my normal life indulgences – like sewing! – and man, it feels good to be back!

Before I get into the post, I did want to announce my next upcoming workshop in May! I will be traveling to Hyattsville, MD to teach another workshop at Three Little Birds Sewing Company May 13th and 14th (and also a meet and greet / project gossip the evening of May 12th, because wine). This is like all the other workshops I do (other than the pants-specific ones in Brooklyn, which are also Workroom Social specific ;)) – you get to choose whatever project you want to work on that weekend! Whether you want to make a lined dress, a fabulous pair of jeans, a new winter coat, your first bra, whatever – I’ll be there to support ya! And if you don’t have a particular project that is screaming for support, can I just say that this is also a great excuse to make your sewing a little more social for the weekend 😉 I always have such a great time running these workshops, and I’m so excited to do it again!! You can read more about the workshop here, and also sign up! It’s going to be an awesome weekend 😀

Ok, now for the post!

Re-Lining a Coat - before

This is a bit different that what I usually post about – it involves repairing an existing garment, rather than making a new one from the start. I think most of us have announced at some point or another that we’d rather make a new piece than alter or repair one that needed it. I know I’m guilty of it! But lately, I’ve been making a bigger effort to reduce waste whenever I can, and repairing garments that need it is a great place to do this!

I bought this coat at Banana Republic when I was 19. I remember being super proud of the purchase – it was one of the first “nice” things I ever bought with my own money (well, and the help of some gift cards). It’s not the nicest thing I own – and I can certainly produce better garments out of my own sewing room today – but it’s followed me around for the past 12 years regardless. I love the color and I love the way it fits me. It has certainly seen it’s share of wear over the last decade, though – the lining was shredding in several places (I can specifically vouch that the lining at the hip was probably torn by my studded belt – YES, THAT’S HOW LONG I’VE HAD THIS DAMN COAT), and I recently ripped a huge hole in the sleeve lining while trying to put it on. I realized that I would either need to replace the lining entirely, or just get rid of the coat. Y’all all know that I am pretty much always up for a challenge, so I decided to give it a shot! Worst thing that could happen was that I’d ruin a coat – which, admittedly, was already kind of halfway ruined anyway.

Re-Lining a Coat

Re-Lining a Coat - before

Re-Lining a Coat - before

Here you can see some of the places the lining was tearing. The lining was also discolored, especially under the arms, and wearing very thin in several places.

I actually planned this project last year, in December. I waited until I could go to Mood Fabrics in NYC and pick my replacement lining fabric in person – the green wool is a really unique shade, and I wanted to try to match or coordinate with it as much as possible. Spoiler, I never did find a perfect match to the green (not surprised), but I found a print that I adore, so there’s that!

Re-Lining a Coat - process

This is the silk that I went home with me – it was with the rest of the silk prints on the 2nd floor. I am not sure what type of silk it is specifically – it has a heavy, fluid hand just like silk charmeuse, but it is slightly textured, almost like a twill. I suspect it may also be a blend, because it didn’t take to pressing as well as I would have liked. I bought 2 yards (after consulting with the guy who cut my fabric and going by his suggestion), which ended up being plenty. I actually have leftovers – matching silk top, anyone? 🙂

After I bought the lining fabric, this project had to sit on hold for about 3 weeks while I went to Egypt. I haaate leaving stuff half-finished if I’m going to be gone for longer than a weekend, and this project I especially didn’t want to have a lapse in, since I was kind of winging it. So I didn’t actually start until the end of January, but fortunately it did not take very long!

I should confess: I had every intention of turning this post into a tutorial on how to re-line a coat. I started with a bunch of photos, but as soon as I got to the sewing part – guys, it’s pretty much impossible to photograph these steps. Plus, every coat is a little bit different in how it’s constructed. So this post is more of a loose guide if you’re considering doing this yourself, and I have linked to the resources that I found useful when I was in the throes of my repair. Also, I should point out that I have made several lined coats at this point, so the process isn’t really that different from sewing a coat and then adding the lining. If you have sewn a lined coat, you can totally handle this. If you have yet to hit this milestone in your sewing practice, maybe wait before you tackle this project 🙂

Re-Lining a Coat - lining removed

The first step is removing the lining from the coat entirely. This part wasn’t difficult, but it was annoyingly tedious. I knew I didn’t want to deal with the drama of drafting a lining, so I needed to keep the lining pieces as intact as possible in order to use them as my pattern pieces. I removed the lining from all the way around the facing of the coat, being sure to take notes and photos of anything that I might need to know when I was putting it back in – such as the seam allowances used, how the back pleat was sewn in, stuff like that. This was the #1 reason why I waited to start this project – I knew I’d forget everything while I was in Egypt!

Re-Lining a Coat - lining removed

Pulling out lining can be kind of interesting though – you get to look into the guts of the coat and see how it was put together! I’m always fascinated to see how RTW does things, as opposed to what the home sewer does. For example, they sewed small rectangles of the lining into the seam allowances where one traditionally puts thread chains (such as under the arms). Then, the rectangles were sewn directly to the seam allowances of the outer, eliminately the time it takes to make a thread chain and attach it. I thought that was pretty cool!

Re-Lining a Coat - lining removed

Another thing I found interesting was the tailoring done on the coat. It’s actually pretty nicely tailored (with fusible interfacing), considering its just a coat from Banana Republic.

Re-Lining a Coat - process

After I had the lining out of the coat, I carefully separated all the pieces and marked which one was which. I flattened them with an iron and marked grainlines. I will be honest here – I used a similarly-styled jacket pattern I had in my stash to figure out where the grainlines were. They might be slightly off, but eh, it’s a lining. I could NOT for the life of me see where the grain was on the actually pattern pieces, and the fabric was so delicate that is just kind of disintegrated when I tried to rip it.

One thing I will point out when you are marking your pattern pieces – it is really important to mark the sleeve front and back, and also where the sleeve cap hits the shoulder seam. You can snip directly into the seam allowances before taking the pieces apart – presto, notches 😉

From there, you just lay your pattern pieces on the fabric and cut them out. Remember, they already have seam allowances – no need to add those.

I should also point out that I did not pre-wash my silk before cutting it. Since the jacket outer is wool/polyester, it is dry clean only. Which means this silk will never hit a washing machine, so I didn’t bother to wash it! I DID wash the leftover piece after I finished the coat, and it changed the texture of the silk a bit. More on that if I ever get around to sewing that piece up haha.

Re-Lining a Coat - process

Next, you assemble the lining to make a lining-coat. Easy stuff!

Ummmm so here’s where I stopped taking pictures haha. I had to figure out how to get the lining into the coat shell, and not a single one of those steps was remotely photogenic 😉

You have two options when putting the lining in- One, you can do it the old school couture way, and hand sew it around the entire perimeter of the facing. This is definitely the easier of the two options, but it’s more time-consuming. The second option is bagging the lining into the coat – sewing everything together at the hems and pulling the coat through a hole in the lining. This step is much more fiddly – you have to set everything up properly so you don’t twist the sleeves or whatever, and it totally looks like a hot mess until the very end. Also, I realized this a bit late in the game – but it’s reaaaally finicky to sew the lining to the facing at the neck (where the collar is). The layers are super bulky and you don’t have much of a seam allowance to work with. I made it work, obviously, but I did end up un-picking out my stitches a few times.

If you need help bagging a lining, this tutorial on bagging a lining from Grainline Studio is great. For the back vent, I watched this YouTube video from FashionSewingBlogTV on sewing a lining to a vent.

Re-Lining a Coat - process

So, I bagged my lining, pulled everything from a hole in the sleeve, and then went back on the inside and attached the lining to the shell with thread chains (I wasn’t even gonna try those weird lining rectangle things haha). Then I pressed everything really well, and attached new buttons. Oh, and I sewed the labels back on too – the original BR one, and one from Mood Fabrics (the sizing and fiber info tag is underneath the Mood tag, fyi). It’s kind of a collab coat now, you know?

Sooooo, drumroll pls…

Re-Lining a Coat - after

Yay!!! I just love it so much 🙂

Re-Lining a Coat - after

Due to the new layer of silk, the jacket is actually much warmer now (the old lining was polyester). Always a plus!

Re-Lining a Coat - after

Re-Lining a Coat - after

The colorful new lining makes me so happy!

Re-Lining a Coat - after

Re-Lining a Coat - after

Re-Lining a Coat - after

Re-Lining a Coat - after

Re-Lining a Coat - after

I also replaced the buttons, with something similar but a little more refined. These buttons are from Pacific Trimming, which I also picked up while I was lining shopping. I reallllly wanted to do self-covered buttons, but I could not find anything that remotely matched this green. So I went with tortoiseshell, although these are shank buttons (the original buttons are flat).

Re-Lining a Coat - after

I really enjoyed the challenge of working on this project – in fact, taking things apart and putting them back together was how I originally taught myself how to sew, so it was a cool throwback to revisit those roots. I like doing things that force me to slow down (and/or walk away) and think, and this was definitely one of those. And hell yeah, this coat is finally back in rotation! Feels good!

Note: The silk fabric used in this post were purchased with my monthly Mood Fabrics allowance, in exchange for my participation in the Mood Sewing Network.

Completed: Leopard Silk Simplicity 6266

3 Jan

Happy 2017, everyone!! I’m going to kick off this year with one of my last makes from 2016 – featuring some uhhh-mazing leopard print silk charmeuse!

Leopard Silk Simplicity 6266

Having spent the last 1-2 years of my sewing working on essential wardrobe basics, my handmade wardrobe is quite practical these days. Lots of pants and jeans, lots of tshirts and button ups, lots of comfortable and stylish casual sundresses. I feel really good about where I’m at when it comes to those needs, and as I mentioned before – right now I am just updating the old/worn out and not really scrambling around to make new stuff anymore. WITH THAT BEING SAID, I ended up with a surprising hole in my wardrobe – fancy dresses! This is somewhat hilarious to me, considering I spent the first several years of my sewing career endlessly making frilly party dresses that I rarely wore (or stopped wearing after I got over the novelty of wearing a party dress to, say, the bar. Hey, if that’s your jam, you keep doing you! Me, I will put on leggings and a giant sweater instead haha). I ended up with a closetful of impractical clothing, and have spent all these years trying to rectify that with the practical. I also did a bunch of purging with what was already hanging around, getting rid of things that no longer fit (or never fit right in the first place) or in colors/styles that I didn’t feel like suited me.

I have done such a great job that once the holiday season hit, I quickly realized that I have nothing to wear. lolwut.

I still have my glorious Marc Jacobs birds dress (which is still my favorite favorite thing EVER), this blue cotton sateen dress via the Sew Bossy challenge, and my sparkly brocade skirt. Both of these have been great to have for festive holiday parties, or the occasional wedding ceremony, or that one fancy date that I get to on on like every 6 months. I am also totally not opposed to wearing the same thing multiple times – having been the sort of person who needed a new dress for every occasion, I would rather now just have a handful of things I really really love that I know I look and feel good in – I felt that it was time to give myself permission to make another fancy dress. Just in time for the holiday season to end, ha! Whatever, I’ll take myself out for a steak date and wear this shit!

Leopard Silk Simplicity 6266

Leopard Silk Simplicity 6266

Leopard Silk Simplicity 6266

After some deliberation, I ended up with Simplicity 6266, cos I just can’t get enough of that 70s mock-wrap neckline and those sweet tulip sleeves. Honestly, I wanted to make this version with the long sleeves – but I didn’t have enough fabric to cut everything (which, in restrospect, was probably for the best – I think that sort of style would do better in a solid color. That much leopard print could be overwhelming!) because I’d already cut a little bit off and used it to make a bra. I’ve made this pattern before twice (one and two), and yes, I realize that I basically just made a duplicate of the first version. I totally still have that dress – after a couple rounds of alterations when my weight started changing – and I love it, but the polyester content of the fabric makes it not such a great choice for summer. I’ve always wanted to make another version in a more breathable fabric, so here we are.

My leopard print silk charmeuse is from Mood Fabrics, and while it hung around on the site for months after I bought it, it’s sold out now. I think it was originally Rag and Bone, and it’s been in my stash since 2015 hahaha. It’s a nice weight with a gorgeous drape, and I gave it a cold wash before cutting which helped make the shiny side a little more matte (and now I can wash this dress like any other old thing in my laundry basket, ha!). The shiny side was still a little too shiny for my tastes, so I used the matte side as the right side of my fabric. The added bonus to doing this is that the dress feels REAL nice on the inside now, heh heh heh.

I wanted to try a new way to stabilize the silk for this project – in the past I’ve used Sullivan’s Spray Stabilizer, which works GREAT but it can be $$$. I was tipped off to try using gelatine – yes, basically unflavored Jell-o – and I decided this was the project to test this theory with. You can read the full instructions on how to do this here, but basically – you cook the gelatine in water until it boils, add more water, stir in your fabric and let it sit for an hour to soak everything up, then wring it out and lay it flat to dry. I folded mine in half lengthwise and then used a series of chairs and my drying rack to get it as smooth as possible so it would dry reasonably flat. Once the fabric was dry, it had a much more stiff body – similar to a silk organza before you pre-wash it. To remove the gelatine, you just wash the garment as normal (so, this will only work with something that’s been pre-treated – you can’t use it to sew something you wouldn’t wash, such as a coat lining that’s not removable) and it will soft right back up to how it was originally. It’s still not the easiest thing in the world to sew – I mean, we are talking about silk charmeuse here, y’all, it’s never going to be completely fool-proof – but it was a HELLUVA lot easier to manhandle than it had been before the treatment.

Because of the gelatine treatment, assembling this dress was reasonably easy. I used a brand new, 70/10 sharp needle to sew it, and finished all my seams with a serger and then pressed them open (I know that traditionally you sew silk with French seams – and this is what I usually do – but I was anticipating alterations with this. More on that in a sec). For the hems, I turned them under 1/4″ twice and blind-stitched them by hand. The stiffness of the fabric only moderately affects things, if you’re a fit-as-you-sew kind of person (I am!) – as in, the fit is still accurate, but everything just kind of hangs weird because it’s lacking that drape. My sleeves in particular looked RIDICULOUS, but they are fine now that they are soft again. I left off all the topstitching, except at the waist (only because I felt like the silk needed the topstitching for extra stability), and sewed the ties together into a removable waist tie instead of attached at the side seams. Oh, and I used an invisible zipper instead of a lapped zipper. I added a strip of fusible interfacing to both edges of the dress where the zipper would go, which keeps the area smooth and supported.

Leopard Silk Simplicity 6266

Leopard Silk Simplicity 6266

I did have some snafus with the fit on this dress, which at least I was anticipating. See, my pattern isn’t exactly my size – it’s for a 33″ bust, and I’m closer to 32″. This is why I had to take in the original cheetah version, and I had some fitting tweaks that needed to be made on the polka dot one as well. With both dresses, I didn’t actually record my changes – so I had to start from scratch, again. Awesome. For this dress, I sewed the side seams and shoulder seams at 3/4″, instead of the usual 5/8″. This helped a bit – the dress still isn’t super tight, but I like the drape of charmeuse with a little bit of ease. Interestingly, it was the sleeves that gave me trouble with this dress. First, I sewed them with the wrong side on top – and I didn’t notice until after I had finished the dress (including all the serging) and I was comparing it to the original cheetah version. They look really awful when they are the wrong way, in case you were wondering – and I had to unpick and resew them. Also, the shoulders were strangely wide on this dress – the armscye was the correct depth (thanks to that 3/4″ seam allowance), but the sleeves started past the edge of my shoulder and it was channeling some serious linebacker shit. Of course, I noticed this AFTER I had fixed the sleeves – and I wasn’t about to unpick that shit again! So I added a 1/2″ tuck on top of the shoulder, which only goes about 2″ and then folds into a soft pleat over the bust and down the back. This was enough to pull in the sleeve cap so it actually started where a sleeve cap was supposed to start – and also made the bodice fit a little better, too. It’s not the most elegant of solutions – it’s a total hack job, tbh – but it worked!

I also tacked down the center front invisibly, because the dress wanted to gape open (probably cos my boobs don’t quite fill it out lolz).

Leopard Silk Simplicity 6266

Leopard Silk Simplicity 6266

Leopard Silk Simplicity 6266

Leopard Silk Simplicity 6266

As a side note, I am trying a new spot to take photos. I had a few people tell me that my other location was too distracting, and, well, it totally is haha 🙂 I don’t know why I never tried this wall – it’s pretty empty and gets ok light. What’s weird is how different it looks with me standing there vs the dress form (I took all these photos in one session). The background is boring as hell but it’s not like anyone is here for my stunning photography. Also I’m not really sure how to get rid of that giant shadow behind me.

And because I’ve gotten some comments on it recently – the thing I’m holding is my camera remote (my camera is old and the only remote that works with it has a giant antennae), not a screwdriver hahaha.

Leopard Silk Simplicity 6266

Anyway, thanks for all of your great comments and insights on my last post. I had a great time ringing in 2017 and I look forward to what this year has to offer!

Note: The leopard print silk charmeuse was purchased with my allowance from Mood Fabrics, as part of my participation in the Mood Sewing Network.

Completed: The Mélilot shirt

5 Dec

Hey guys, New Favorite Outfit alert!

Mélilot shirt - front

This is the Mélilot shirt from Deer & Doe Patterns. I vaguely remember when this pattern came out – although I didn’t give it more than a second glance (the main version you see on their website is long sleeved, with dropped shoulders and a peter pant collar. It’s very nice, but it’s not really my style). Once I started googling around for the short sleeved version, though – I decided it was super cute and that I wanted to make it in a lovely drapey silk.

(It feels so redundant to talk about silk… I should just dub my 30s “The Silk Decade” because I feel like it’s ALL I sew now haha)

Mélilot shirt - front

Mélilot shirt - side

Mélilot shirt- back

Mélilot shirt- back

I sewed Version B, with the short sleeves, and used the hidden placket from Version A. My shirt is a size 34 (which is what I usually sew from this company) with no alterations to size or length. The instructions were reasonably easy to follow, although the hidden placket info was a bit sparse and took some head scratching before I really figured it out (and don’t ask me for a tutorial, bc I don’t remember exactly what I did haha)

My fabric is an olive green / brown (depending on the light you are in, ha) silk charmeuse with the slightest amount of stretch, from Mood Fabrics. I bought this at the store while I was in NYC in November, with the intention on making this pattern with it. I used the matte side for the body, and the shiny side for the collar stand, pockets, and sleeve bands. It’s a very subtle contrast, but I love the way it looks. I use a Spray Stabilizer on my fabric, which made it easier to cut and eventually sew. One thing I have learned with fabrics like this is to leave the pockets off until the garment is completed. I don’t know what it is – but every time I put the pockets on, the end up super crooked and I have to unpick them and re-sew. Maybe it’s how the garment hangs off my body, maybe I’m just an idiot WHO KNOWS. But I had the same crooked pocket problem with this top (I took a photo, but you couldn’t really tell… but trust me, it was bad in person. Even my mother, who thinks I’m the great sewer ever, laughed when she saw it), so next time I’m just going to wait till the end. No sense in doing things twice!

I will admit that the color of this shirt is kind of ugly… but it definitely works really well with my coloring. How awesome that the doo-doo colors suit me best. Ha.

Mélilot shirt - front

Mélilot shirt- back

Mélilot shirt - front

I just love the fluid drape of this fabric, and the way the little sleeve bands stick up. I am not normally a fan of these deep curved hems, but I think it works well with the style of the shirt. Same with the pockets – this shirt definitely needs the pockets, or else it looks really unbalanced in a bad way. I am thinking this will be a good shirt to take with me to Egypt – it covers my shoulders and butt, and I can button it up pretty high for modesty.

Mélilot shirt - on dressform

Mélilot shirt - on dressform

Mélilot shirt - sleeve detail

Mélilot shirt - hidden placket detail

Mélilot shirt- hidden placket detail

The pattern calls for lined pockets, which makes it easier to get identical, crisp curves on both pockets. For buttons, I actually used the wrong side of a bunch of those shell/mother of pearl buttons that I found in my stash. The back side is a little matted and kind of a taupe color, which went really well with the fabric. Due to the covered placket, you only see a couple of buttons anyway. Oh, and as always – the inside seams (you know, all 2 of them haha) are French seams. FYI, watch those seam allowances if you make this pattern and omit the French seams – because I’m pretty sure the side seams are only 1/2″. The pattern instructs you to sew French seams for these seams, with two passes at 1/4″, which doesn’t add up the standard 5/8″ seam allowance on the rest of the pieces. Just a thought! Also, I always trim down my first pass to like 1/8″ before sewing the second pass, as it ensures that the seam allowance it caught in that stitching. Ain’t nobody got time for hairy seams amirite.

Mélilot shirt - front

That’s all! A pretty simple shirt, but the silk makes it feel super fancy. I am wearing it with my Cecila Pants from Elizabeth Suzann. Y’all, these are magic pants. The denim is suuuuuper stretchy and comfy, and has a fantastic recovery – I can wear these several times before they need a wash to shrink back up. And while I didn’t personally make these pants – I can tell you exactly who did. Her name is Colette 😉

Completed: Silk Rite of Spring Shorts

19 Sep

Hey everyone! I want to thank all of you for your kind words, thoughts and prayers in regards to my last post about my dad. I am overwhelmed (in a good way) by the outpouring of support I received via blog comments, Instagram comments, and emails. I’ve said a million times before how much I love and appreciate everyone in the sewing community, and this just really reinforced this. I sincerely appreciate all the comments and emails, all the kind words and wishes, prayers and positive thoughts, and I am so so grateful for all of you. Thank you all so much ♥

With that being said, I do have a positive update! On Saturday evening, I came to the hospital after getting off my shift at Craft South (which was a whole drama in itself – my dad is in a hospital in Hendersonville, TN, which is about 20 miles from where I am in Nashville. Not a huge deal, however, there is currently a gas shortage here that people are PANICKING over and of course I only had like 1/4 tank when it happened! But I decided not to stress about it and just deal, and that’s when I managed to find gas. A miracle in itself because most of the stations here were completely out!) and they had been able to successfully wake him up out of the sedation! They took the tube out on Sunday morning and have slowly been introducing soft foods and liquids, and he may be able to get out of the ICU and into a normal room within the next day or two – and then home after that (hopefully soon!)! There is still a lot that he needs to overcome, of course – but this is a very good, very positive improvement over last week and we are all so so so happy. I honestly wasn’t sure that he was going to pull through, but I guess I forgot that my dad is even more stubborn than I am. Literally, his first words when they took the tube out were (to my mom): “Your husband ain’t done yet.”

So anyway, back to regular posting – here’s a project I finished a couple of months ago.

Silk Rite of Spring shorts

Pin-up Style silk shorts! You know, totally appropriate to combine in a post about my dad (you know what the other option was as far as photos I had on hand? Bras. Sooooo booty shorts it is hahaha):P

These are the Rite of Spring shorts from Papercut Patterns. Remember when I made a really adorable pair of these a few years ago? I have been wearing the hell out of them this summer – they look really excellent with my Elizabeth Suzann Birdie Crop (mine is the ivory one). I wanted to make a couple more pairs, so I started with this silk crepe (leftovers after making those Silk Lakeside Pajamas).

I’ll just say this right now – I don’t like these at all. I don’t think they are flattering on me – they make me look sort of boxy (maybe they look ok in the photos but I reeeeeeally HATE the way they look in real life!) – and the silk crepe feels just a bit too lightweight to be bottom coverage. I actually wasn’t planning on posting this project at all, however, I think it’s important to share the fails along with the victories.

Silk Rite of Spring shorts

Silk Rite of Spring shorts

Silk Rite of Spring shorts

Why I’m not happy with them, I couldn’t tell you exactly. I think it’s a combination of bummers that makes the overall effect just “meh.” I do love this fabric, but I don’t like it as shorts. While I love the idea of a drapey little pair of high-waisted shorts, these just look kind of… saggy and sloppy, at least on me. They’re also too big in the waist, and while I did take them in a little – it wasn’t enough and I realized I just don’t care to keep futzing with them. I’m not going to wear them. I didn’t even bother to straighten or edit these photos. That’s how much I just don’t care about this project haha.

Silk Rite of Spring shorts

Silk Rite of Spring shorts

Silk Rite of Spring shorts

Silk Rite of Spring shorts

I put some real effort into the construction, so while they aren’t that great (for me) stylistically – they are great in terms of how they were made! 🙂 There is silk crepe piping at the front seams, which is topstitched to help it lie flat. Due to the piping, I opted to just sew + serge the seams (instead of using French seams, which I generally prefer for silks). The waistband is lightly interfaced with a stretch tricot, to help it maintain a little bit of stretch and stay comfortable. The invisible zipper seam is reinforced with interfacing as well, to keep the area smooth and also give it a little bit of strength. I also interfaced the hem, to give it a little of structure and so it wouldn’t be quite so floaty.

To be completely honest, I felt a bit bummed when I finished these and realized that I didn’t really like them. It’s certainly a let-down to spend time on a project, only to be unhappy with the result. These days, I am actively working on focusing on the positive (sorry, I’m big hippy dork ok)- so instead of feeling sorry for myself for “wasting” time on a project, I instead used it as an opportunity to learn from it. Why am I not happy with these shorts? What could I change next time to make the outcome a good one? It’s important to learn from the fails so you don’t repeat them!

I think if I had straightened the hemline so it wasn’t curved (which I had considered doing before cutting the silk, but then decided it wasn’t worth the effort), and made them more fitted at the waist – that would have helped. But honestly, I think I just like this pattern in a heavier weight fabric with more structure. Not necessarily a bottom weight – but definitely not this floaty gossamer weight. My next pair (which will probably be next year, as it’s just too late in the season now to keep making butt shorts) will be in cotton sateen.

Silk Rite of Spring shorts

So, there you go – a sewing fail (at least in a sartorial sense – as I do feel good about the construction of these!) but a personal life WIN. I’ll take them both!

Tell me about your last sewing fail! Did you learn from it, and if so, what was that lesson?

As a side note… if anyone wants these shorts, email me with an offer (I will entertain anything at this point). They are a size XS and the waist is approximately 27″. The silk has a little bit of lycra so it’s slightly stretchy, and it’s machine washable! Seriously, someone take these before they end up in the Goodwill pile haha.

Completed: Silk Chiffon Archer Button-Up

30 Aug

So I guess we are now officially in that time of the year again – when the shops are screaming FAAAAAALLL (Wool caps! Corduroy bottoms! Pumpkin spice everything!) but our temperatures are still firmly stuck in summertime. While I’m not ridiculous enough to pull on my Ugg boots when it’s still 100 degrees outside (LOL JK I don’t own Uggs hahaha) (but seriously, Ugg-watching in 100 degree weather at the ritzy mall is absolutely my favorite pasttime during these months. Bonus points if they are wearing a wool hat, too.), I still want to at least look the part of the changing seasons, which still complying with the temperatures outside. For me, that means colors and silhouettes that give a nod to fall – but sticking to lighter-weight fabrics so I’m not sweating my arse off.

So anyway , with all that being said – here’s another button-up shirt! HAHA

Silk Chiffon Archer

I used the Archer pattern to make a fall-inspired button-up, but with a twist – instead of the traditional plaid flannel (which I lurrve, but again – HOT!), I used a light and breezy wide silk chiffon from Mood Fabrics for the main, and woven silk crepe de chine for the collar, collar stand, button band, pockets, and bias facings. Mood Fabrics carries tons of colors of both of these fabrics, but I went with boring ol’ basic black. In the future, I might go completely insane and try this with a PLAID silk chiffon. Maybe.

Silk Chiffon Archer

Silk Chiffon Archer

If you are feeling some major déjà vu about right now, you are absolutely correct – I totally and completely 100% shamelessly ripped off Kendra’s silk Archer from the Grainline blog. I don’t ever think I’ll look as chic as she does, but that doesn’t stop me from trying! 🙂 I followed Jen’s instructions for making the Archer sleeveless (basically shortening the shoulder drop and adding some contour to the back armhole, nothing crazy here) and shortened the length by about 2″. I sewed a size 0, which is what I normally make for this pattern.

Silk Chiffon Archer

While I have made my share of button-ups in tricky fabrics – silk georgette, silk crepe, crazy plaids, and a rayon challis that has yet-to-be-blogged – I did worry a little that this one was going to be a beast to sew. My last experience with chiffon did NOT go well (you didn’t miss anything – this was several years ago), but I think a big part of the problem was the quality of the material I was using (it was pretty cheap poly chiffon). Using a high-quality fabric makes a big difference in the ease of your sewing when it comes to tricky fabrics like this – you know they’re already on-grain (or it’s easy to straighten the grain if you need to) and the natural fiber content means you can actually press them (which, again, makes a world of difference during construction – especially for a pattern like this). With all that being said – I only used a yard of the chiffon to make this sleeveless version, which at $20.99 per yard isn’t really that expensive. I got a yard of the crepe de chine as well, but only used a fraction of that (I use silk bias on everythingggg so I have tons left over for other projects). Even having been made out of silk, it’s fairly economical! And you definitely cannot get a silk button up shirt for less than $50 in retail, at least not new. Plus, I machine-washed all my fabrics before cutting – so my silk is machine washable now 😉

Silk Chiffon Archer

Silk Chiffon Archer

Silk Chiffon Archer

Silk Chiffon Archer

So anyway, about that sewing! I didn’t do any sort of prep before getting into cutting – in the past, I’ve used fabric stabilizer to stiffen the fabric so I’d have an easier time cutting and sewing (and yes, it does work – see the aforementioned silk georgette button-up post for my full review on that), but I didn’t bother with any of that this time. It certainly would have been easier if I had, but obviously it was doable without 🙂 I did trade out my scissors and use a mat and rotary cutter to cut this, which was tremendously helpful.

Sewing was really easy and straightforward – I used a sharp 70/10 needle, polyester thread, and a lot of high heat from my iron. All seams are enclosed – the yoke and collar cover most of that, but the side seams are French-seamed, and the arm holes are finished with silk bias facing. The hem is just a simple rolled hem (I usually use bias facing there as as well, but I was afraid the crepe de chine would be too heavy for the silk chiffon). I used a super lightweight interfacing (which comes in black!) for all my interfaced areas – it gives some stability without making them weirdly stiff, which is important when you’re dealing with silk chiffon. The buttons are some vintage glass buttons that I’ve had in my stash for ages. The only thing I’m not thrilled about is the pockets – the crepe de chine sags a bit on the chiffon, so they’re not perfectly smooth when I’m wearing it (or when it’s hanging on the wall, for that matter). And also – they are a bit lopsided! Whoops! I hesitate to unpick them because I am afraid it may damage the delicate chiffon, but thankfully no one notices it – even when I point it out. Of course, that may be all you see now 🙂 Sorry 🙂

Oh, and in case you were wondering – I am wearing a black tank top under this, and I did not make the shorts (I WISH I did, though! Because then that would mean that I had found awesome fabric like that!). They are from Express, but the shape is quite similar to the Rite of Spring shorts. The fabric is a nice rayon challis. I pretty much never buy clothes these days, but these were given to me by my boss while she was cleaning out her closet in preparation for her cross-country move (she also gave me a pair of Jimmy Choo’s. Um, I WIN.). Speaking of which, I will be flying up to Rhode Island this week to orchestrate all the unpacking and whatever else you’re supposed to do when one moves cross-country (I’ll be staying here in Nashville and working remotely after that). I’ve never been to RI before so I’m excited to check it out! Wish me luck!

Silk Chiffon Archer

I don’t have much else to say about this pattern that hasn’t already been said to death, so I’ll keep this post reasonably brief. Yay for silk chiffon button-ups! Once we get into full-on winter mode, I think this top will continue to be useful as I can wear it under my cozy sweaters for an extra layer of warmth.

**Note: The fabrics for this project were provided to me by Mood Fabrics, as part of my participation in the Mood Sewing Network.

Completed: 2 More Scout Tees

8 Aug

Apologies in advance for the big Grainline kick I’ve been on lately. Nothing intentional, no ulterior motives – I am just really loving the patterns these days! Brace yourselves for more where this came from (oh ho ho ho wait till you see my backlog of finished projects), but first – some Scout Tees!

I made 2 Scout Tees, both of which I will be sharing in this post because I think splitting it into separate posts is a bit of an overload – especially since I’ve already made and posted about this pattern twice (see: handwoven cotton and birds). What can I say – I love this pattern and it’s been a hardworking staple in my summer wardrobe this year.

Gauze Scout Tee

First Scout is this one that I made out of a cool (both literally and figuratively) cotton gauze. The best part about this particular project is that the fabric didn’t start out as a yardage – it was actually a scarf! See?:

Gauze Scout Tee

I don’t know the true origins of the scarf; it was given to me by the one guy in my knitting group (btw, every knitting group should have a Token Dude. It really makes you feel like you made it as a knitting group coordinator haha). He was in the process of helping his mother downsize and move, and thus ended up with a big stack of fabrics that needed to be rehomed – most of which ended up in the trunk of my car. This scarf was part of that loot bag. I originally wanted to keep it as a scarf and just wear it like that, cos I looove those gorgeous gauzy scarves and yes I wear them in the summer don’t you dare judge me, but the fact is I never ever come across fabric in this weight/print and I felt like I needed to take advantage of that surprise yardage. Once I realized that I could squeeze a little woven top out of it, my game plan immediately changed.

Since Scout is intended for wovens, it was a good pattern for this project. It’s also fairly small (at least in the size that I cut, which was a 0), doesn’t have a bunch of pieces, and is narrow enough to fit on this scarf. The scarf was also fairly wide – not quite as wide as true fabric yardage, but wide enough to accommodate the pattern pieces on the fold. I had enough length so that I was able to place the print where I wanted it, as well as match it across the seams. I decided the pattern would look best with the paisley design across the hem (which I made sure to account for the hem allowance while cutting), and the white/blue scattered paisleys at the top and on the sleeves. Having a large cutting surface is ideal for this, as I was able to lay everything out and make sure I had enough fabric to match everything before I started cutting.

Gauze Scout Tee

Gauze Scout Tee

Cotton gauze is super lightweight, as well as borderline sheer, so I used French seams throughout for a neat and delicate finish. The hem is 2″ deep, to slightly crop the tee as well as give the bottom some extra weight. The sleeve hems are a simple rolled 1/4″ hem. And I used silk crepe as the neckline bias facing, instead of self-fabric (I don’t even want to think about trying to do a bias facing with this gauze – that shit would have been a nightmare!).

The finished top is definitely a bit see-through if you look very closely, but the busy print helps camouflage things. I also make sure to wear a light or flesh-colored bra underneath (I’m wearing my yellow lace Marlborough in these photos) so there’s not too much of a contrast. The only downside is that the fabric – despite being pre-washed by me, as well as whatever washing it may or may not have gotten in it’s previous life – tends to transfer blue dye on anything it constantly rubs against. Learned this one the hard way after getting home from the flea market last month and discovering that my bra straps were blue, as well as the back side (the part that goes against my body) of my mostly white purse. LAME. Thankfully, most of it washed off with some dish soap and a bit of patient scrubbing. As a side note, if anyone has a good recommendation on how to get a white canvas purse cleaned – yeah, I think I’m gonna need that. I have put that poor Kate Spade through hell and back at this point haha.

All right, second Scout Tee!

Birdy Scout Tee

Recognize this fabric?! I made a fantastic bird dress out of most of it (which is still one of my favorite things I’ve ever made to date, and I still wear it whenever I need to impress someone), but I had about 1 yard left over that I’ve been hoarding ever since, just waiting for the right project. Silk Scout Tee it is, then! And you can go ahead and laugh that I now have 2 bird print Scout Tees. It’s ok, I just really like birds 😛

Birdy Scout Tee

Birdy Scout Tee

As with the gauze Scout, this pattern is really great for letting the fabric take center stage. And same as with the gauze version, it doesn’t require a lot of fabric, so I was able to eek it out of my tiny yardage remains. Notice how completely different the shape is, though, since this georgette has a lot more drape an less body than the gauze. I think both look awesome, but this one is definitely a bit more flattering since it’s not so boxy.

Not much to say about this one that wasn’t already said about the gauze one (and hence why I’m slapping both into one post). It was sewn pretty much the exact same way – French seams, 2″ hem, etc etc. I did use self-fabric as the bias facing for this one, which I’m not entirely happy with how it lays and probably should have used silk or cotton voile instead, but whatever. I just don’t think the georgette behaves as well as a silk crepe would have. Too late now, though, cos I ain’t about to rip it out! It’s fine. IT’S FINE.

I don’t know why I got dressform and flat shots of this one and not the other, but here you go:

Birdy Scout Tee

Birdy Scout Tee

Birdy Scout Tee

Birdy Scout Tee

I’m trying really hard not to get all weird and hoardy with my favorite fabrics, because they don’t do me a lot of good just sitting on the shelf. I want to make them into things that I love so I can wear them and love them every day! It can be a little stressful when it’s fabric you know you can’t get more of in case you done goof it up (this bird stuff sold out REALLY fast!), but I’m working on trusting myself and my best judgement. Again – it’s not doing me any good sitting on the shelf! Gotta take that shit out and actually give it the use and love that it deserves!

Gauze Scout Tee

I think I’m done with Scouts for now, but that doesn’t mean I’m over the woven tshirt! Right after I finished cutting these two, Megan Nielsen released her Sudley pattern, and the blouse is giving me all kinds of heart eyes. I’d love to make a version with the back keyhole!

As a side note – hi, welcome to my living room. I think I like these pictures better than the ones in my sewing room (the only good lighting in my sewing room has some wretched boring background action), although the changing light is a bit of a challenge. I dunno. Taking photos indoors in general is a bit of a challenge, to be honest, but it sure beats standing outside with a tripod while all my neighbors snoop on me through their windows haha (which is what I imagine is happening, and more than likely actually not the case at all).

Completed: Silk Lakeside PJs

19 Jul

Once you get to the point of having a fully me-made wardrobe (speaking as I write this now in a 100% me-made outfit – including my bra and underwear, HA! I’m not wearing shoes just yet so I can still say that :P), that’s when you start getting to fill in the really fun gaps. For me, that means practical things made out of impractical fabrics. Like silk pajamas. Ooh la la!

Silk Lakeside PJs

I have wanted to make a new set of Lakeside Pajamas for quite a while now, since I really love my original tropical set and have worn them so much they are starting to look pretty beat-up. For the past year, it hasn’t been much of a priority because my basement apartment was WAY too cold to wear something so light and floaty to sleep in (trufax, I wore flannel pjs to bed up until I moved. In June.), but now that I’m ~solo livin’~ and have full control of the a/c (I actually turn it off before I go to bed now, which is the opposite of what most people do BUT WHATEVER I LIVE ALONE AND DO WHAT I WANT), which means light and floaty pjs are totally a go again! I have been wearing the HELL out of those tropical Lakeside PJs and loving them, but like I said, they are starting to look pretty ratty. Also, I wanted to try out this pattern in something that had a softer drape.

Silk Lakeside PJs

Silk Lakeside PJs

I made these over the 4th of July weekend, and part of the reason why I chose silk (other than what I just mentioned) was because I figured the project would keep me occupied for a few days. French seams and silk bias binding are both pretty time-consuming, and I was ready to work on something that would take longer than an afternoon. I dunno what happened – maybe the holiday got me all riled up over my freedom to sew my own clothes – but I definitely finished the entire set in a few hours. I even had time to leave my house and drive out to a party (at my old stompin’ grounds in Kingston Springs, no less) for a few hours, and STILL finish in time to wear these to sleep. To be fair, there are only a few seams on these things – and once you get the hang of the bias binding (which I have sewn so much in my day that now I can practically do it in my sleep), there isn’t really anything time-consuming about sewing them. Of course, they would be even faster in a nice cotton – but SILK. Omg I am so in love.

Silk Lakeside PJs

The silk fabric is a piece that I bought at The Fabric Studio here in Nashville during their closing sale. I snapped up a yard and a half, originally thinking I’d make a button-up shirt with it. It’s a lightweight silk crepe with a little bit of stretch, and absolutely lovely. I was all set to make said shirt with the fabric, until I realized I wasn’t crazy about the shirt pattern I had chosen (obviously no B5526, my spirit pattern :P) and instead decided to enjoy the silk fabric in the form of pajamas. I have no regrets about this whatsoever. I didn’t even realize how nice it is to sleep in fancy PJs until I owned a pair! I feel like I’m floating around the apartment when I wear these.

Silk Lakeside PJs

Silk Lakeside PJs

I think this is my favorite cut for a tank top – floaty and billowy when made in a silk, not cut on the bias (don’t get my wrong – I love bias-cut anything, but it does limit fabric choices as it turns prints on the diagonal *and* can eat up quite a bit of fabric in the process), and with that fun little peek of skin in the back. This top would totally be suitable to wear on it’s own with jeans or shorts, too, which was something I thought about while I was sewing it. That being said, I sleep in this shit pretty much every single night soooo silk-pajama-tank-as-normal-everyday-clothes still hasn’t actually happened yet 🙂

Silk Lakeside PJs

Silk Lakeside PJs

I made the size 0 in both top and bottom (my usual size for Grainline patterns) and the only thing I changed was to shorten the straps as they are a bit long for me (this is pretty typical for spaghetti-straps + me). All the seams – both for the tank and the shorts – are French seams. To sew the binding, I followed the directions in the pattern EXCEPT I reversed the order that you sew from the right side vs the wrong side. I attached the binding to the wrong side first, and then once everything was folded over, I topstitched from the right side. I noticed on my original pair that if you do it in the order that the pattern suggests, it’s hard to get an even line of stitching on the right side – where it shows. By finishing on the right side, I was able to focus on getting my topstitching even and accurate. This was super easy for the top, not as easy for the shorts… but I made it work.

Speaking of change, I also didn’t add any binding to the curved hem of the tank – just the top edge that creates the straps. For the curved hem, I just double turned a 1/4″ seam allowance and topstitched it down. I felt that the hem would lay better without the added bulk and weight of the bias.

Silk Lakeside PJs

Silk Lakeside PJs

Silk Lakeside PJs

Silk Lakeside PJs

The only snafu I hit with modifying the order that I sewed the binding was when it came time to attach it to the side seams of the shorts. I had to improvise to get everything to work out, and while I can’t remember exactly what I did – just pinning things down and looking at them was enough to figure it out. One thing I noticed on my first pair of Lakeside shorts is that the intersection where the front meets the back is a bit weak and has a tendency to fray, so I reinforced the area with a little triangle of stitching. Time will tell if I’ve actually solved that issue or not, haha.

Silk Lakeside PJs

Here is the completed set! I ♥ my silk PJs 😀

Silk Lakeside PJs

2 weeks into wearing, and I can confidently say that sleeping in silk IS THE JAM. Despite being basically the opposite of an elegant person, these sure make me feel classy as fuck 😉 What about you? Are fancy PJs worth the effort or a waste of expensive fabric?

Completed: McCall’s 6952, Peru-Style!

14 Jul

I’m so happy that I finally got to use this fabric!

McCall's 6952

This piece of lovely came aaaall the way from Peru, when I was there for 2 weeks last year. Coming into the country with only a backpack meant I had to be really careful about what I bought and brought home (I did end up buying a small bag to carry some stuff back. And I wore my new alpaca blanket like a cape for the flight home. NO REGRETS), including fabric. Not that there were a lot of places to buy fabric in Peru, at least not what I came across. Gamarra is a big garment district that did come up in my searches, but everyone I spoke to said it would be really dangerous for me to go. Our host in Lima took me to a small strip of fabric stores during our last few days there – sorry, I’m not sure where it was exactly or what the stores were called! Anyway, I knew I could really only justify buying one piece, and this one definitely jumped out at me.

Even just buying the fabric was an adventure. The store we went into didn’t have any people working who spoke English, and my Spanish is mostly limited to being able to say hello and ask where the bathroom is 🙂 (and our host didn’t speak English either! She was seriously a trooper and treated us to such a nice time, even with the language barrier) I eventually was able to ask for, find, and buy 1.5m of this fabric. It’s a double georgette, some sort of silk blend (definitely with some acrylic, based on my burn test). I thought the print was really pretty and certainly have never seen anything like it at the stores here in America! Plus, it reminds me of all the beautiful tiles I saw while walking around Iquitos. It’s a lovely piece of fabric and a perfect reminder of my time in Peru. With all that at stake, though, it did take me over a year to figure out what to sew it into 🙂 Especially since I had such a small piece!

McCall's 6952

McCall's 6952

I have enjoyed wearing my green silk version of McCall’s 6952, so I decided to use that pattern again for this dress! This time, I made the version with the plain neckline and back cutout, to mimic the geometric pattern on the fabric. I used blue silk crepe from my stash to do the back contrast (the same fabric I used to make this dress, actually); it’s not a perfect match but it’s close enough!

McCall's 6952

Cutting the pattern pieces was a BEAST. After I’d already had my heart set on using *this* pattern with *this* fabric, and after I’d already cut a couple of pieces… I realized there was a very strong line in the print that would need to be matched. Since the pattern has Princess seams – both front and back – that meant a lot of pattern Tetris to get everything to line up. I ended up cutting everything on the single layer, which is a really good way to squeeze out every last drop of your yardage. Even with that, I still couldn’t get all the lines to match up across every seam – specifically, when it came to the side seams, decisions had to be made. I figured the princess seams were more important than the side seams, so I let those go a little haywire. Honestly, I doubt anyone would even notice that the print doesn’t match across the side seams – but I wanted to do it right, even if I’m the only person who sees it. That’s why I sew. I like the challenge, even if it makes my eyes cross and gives me a reason to drink at the end of the night 🙂

McCall's 6952

McCall's 6952

Speaking of challenges, the construction of this dress had it’s fair share of those, too! Since I already went the extra mile with the cutting and print-matching, I continued that trend and gave the inside of the dress the respect it deserved. Lots of French seams all over the inside of this garment, which are both strong and beautiful. Since the fabric had a fairly high synthetic content, it was a little difficult to press – I just used high heat (my iron has a silicone shoe, which acts as a press cloth and prevents scorching on stuff liek this) and then held everything down with my clapper while it cooled, which gave me a nice sharp press. Instead of using the facing pieces to finish the arm holes and neckline, I used bias facing that I made with the silk crepe, which I just find to be a more refined finish (plus, I wasn’t sure how to finish that facing edge without there being a lump across my chest – the fabric frays too much to use pinking shears, and a serged or turned under edge would be too bulky for this lightweight fabric).

McCall's 6952

I wasn’t sure how the back cutout was gonna work – I didn’t do a muslin (unless you count that green silk version – but it had a plain back, so it was only a half-assed muslin ya know), so things were pretty up in the air as far as whether this would work out or if it would be a gaping mess in the back. (My tip is to always have a Plan B should things not work out – in my case, uhhh, this would make a fabulous skirt! haha!) It actually turned out pretty nice, though, so I’m happy about that! The back piece is interfaced to give it some strength and smoothness, and also faced so the inside is clean and pretty. I think random cutouts are starting to not be trendy anymore, but I don’t care. I think it’s fun. LOOK AT MY BACK U GUYS.

McCall's 6952

McCall's 6952

The other change I made was the elastic at the waist. The pattern calls for 1/4″ elastic, applied in a casing. I like the 1/4″ elastic ok, but it doesn’t allow for a belt to sit very well over it (and I am not a huge fan of how narrow elastic waists look, at least on me). I used a 3/4″ elastic on this dress instead, which meant I had to widen the casing that it goes in (not a problem; it’s just bias strips. Which, again, I made myself – out of that blue silk crepe), but that’s about it. I also topstitched right through the middle of the elastic, which keeps it from twisting around and also just looks cool. I am thinking the waistline could be a hair lower, but this is good enough. I ain’t ripping that shit out!

McCall's 6952

McCall's 6952

McCall's 6952

Anyway, that’s all for this little dress! It’s pretty casual, which I love, and the pattern is simple enough that all the focus is really on that awesome fabric (until you see the back cutout and then it’s extra awesome!). I try not to hoard my special fabrics any longer than it takes to decide on a project for them, simply because them sitting on the shelf doesn’t exactly give me a lot of joy. There is, however, joy in wearing said fabric. Every time I wear this dress, I think about those awesome 2 weeks I had in Peru.

McCall's 6952

Completed: Sleeveless La Sylphide

20 Jun

Welcome to my first official blog post from my new West Nashville apartment! 😉 I spent all of last weekend moving and then unpacking (which, I finished the unpacking part in a little under 4 days – a record for me! I REALLY hate living out of boxes haha), and things are *mostly* back to normal here 🙂 I’m still waiting for maintenance to come help me hang my shelves before my sewing room is really finished, but it’s usable for now and actually quite wonderful. I already love it here so so much and I cannot wait to show y’all more!

In the meantime, let’s look at another old make that I never got around to posting! Haha! Pretty sure I wore this dress on Mother’s Day, in fact 😛

Sleeveless La Sylphide

The pattern I used is the La Sylphide from Papercut Patterns, which I’ve made a few times before (although not for a few years) (see: plaid La Sylphide top, chambray La Sylphide top, and all 3 pattern variations that I made for the La Sylphide sewalong on the Papercut blog) It’s an oldie, but definitely a goodie! I had almost completely forgotten about the pattern, to be honest, until I saw a sleeveless version on one of my Instagram lurkings . I am ALL ABOUT some sleeveless anything when summer rolls around, so this shit was right up my alley!

Sleeveless La Sylphide

Making this dress without sleeves was about as easy as just not cutting them out of the fabric 🙂 Ideally, I should have raised the underarm just a bit, but I didn’t think about that while I was cutting my fabric so they are a little low (the underarms need to be lower if there are sleeves, so you have movement. If you are leaving the sleeves off, taking up the underarm seam a bit will result in a closer fit that looks much better. Here’s a post about that on the Grainline blog!), but I think they are fine as they are. I finished the arm holes with bias facing (I used a plain blue silk crepe in my stash, since I was on a massive shortage of my main print) aaaand I guess that’s it!

Sleeveless La Sylphide

Sleeveless La Sylphide

My fabric a very lightweight silk from one of my favorite discount fabric stores in the Garment District, Fabrics for Less (honestly, most of those discount stores kind of blend together into one BIG AWESOME discount store – which is why I have a really hard time giving people “Garment District Shopping Tips” when they ask – but I do remember Fabrics for Less and Chic Fabrics, and they are awesome. And cheap!). It’s labeled as a designer fabric, although I couldn’t tell you who the designer is. I love the giant zigzag print and navy/white is one of my fave color combinations, so this one was a real win. Especially since it kind of reminds me of a comic book, thanks to the dots and this big zigzags. It wasn’t necessarily the cheapest fabric in the shop – I don’t remember what I paid for it, probably somewhere around $15-$20 a yard – but it was certainly cheaper than getting the same print at, say, Mood Fabrics. If Mood even had this print, I mean :P.

ANYWAY, I was feeling the wallet pinch when I discovered this bolt waiting for me, so I only bought about a yard and a half. HA HA. I don’t know how the hell I was able to eek this dress out of such a small amount of fabric (at 44″ wide, no less!), but I somehow managed. Cutting everything on a single layer, as well as throwing print-matching out the window, certainly helped.

Sleeveless La Sylphide

Cutting this dress was an absolute fucking nightmare. I was in a pretty bad mood to begin with that day – so I don’t know why I thought that cutting silk would make me feel better, but it was quite the opposite effect. I had to Tetris the shit out of the pieces to get everything to fit, and even then, there still wasn’t enough fabric. The neck tie is pieced, although it’s not noticeable. I also didn’t match anything – including the center front, which is where it actually would have mattered. Whoops. I reckon the print is so busy, you can’t tell that it’s haywire. Especially with that bow hanging in front of it. Also, next time – I won’t cut silk while I’m in a foul mood. Promise.

Sleeveless La Sylphide

Sleeveless La Sylphide

All complaining aside, this wasn’t a bad make to assemble – after I got over the drama involved with the cutting. I cut my usual size – XXS. All the inside seams are French seams, which I never regret putting the effort into (so pretty and neat!). The arm holes, as I mentioned, are finished with silk crepe bias facing. The neckline is enclosed thanks to the neck tie, and the bottom has a simple rolled hem. The buttons are some beautiful vintage buttons I’ve had in my stash for years – I think they were originally a gift from my sister-in-law (anytime you see awesome buttons on a make, you can bet they were probably given to me from her. She seriously gives the best gifts!). I’m so happy I finally found a suitable garment for them! 🙂 Be warned that the skirt on this dress is really really short – I am 5’2″, and you can see how short it is even on me! – so you may want to lengthen before cutting, or at least measure so you know what you’re getting into.

Sleeveless La Sylphide

Sleeveless La Sylphide

Sleeveless La Sylphide

Sleeveless La Sylphide

Overall, I do like it! The waist ended up being a bit looser than what I’m used to – which isn’t necessarily a bad thing, as I like a little bit of a breeze in this heat. I even kind of like the way the print is all crazy and disjointed. I’ve been meaning to make this pattern out of silk or chiffon (or something equally floaty) basically since I first got it, and I’m happy to report that it was worth the effort! It’s definitely fun to wear – as long as I’m careful about accidental flashing, ha. I told you – that skirt is SHORT! But so am I, so I guess that makes us equals.

Sleeveless La Sylphide