Tag Archives: dress

Completed: Deer + Doe Myosotis Dress

26 Aug

Welp, I see that it has been 3 months since my last post haha! Honestly not trying to kill my own blog but it looks like I’m causing a slow death regardless.

ANYWAY

I have a new project! Yay! This is also 1/2 of my Outfit Along project – the sewing portion. The knitting portion is, unfortunately, still unfinished. More on that in a minute, I want to talk about the dress!

Coral Rayon Lawn Myosotis Dress

I actually started this dress back in 2018 – I was inspired by Fiona’s gorgeous white version and immediately wanted to make one for myself. I ordered the Myosotis Dress from Deer & Doe, and a lovely white rayon lawn from Mood Fabrics to make it up. I got as far as cutting the fabric pieces and then… just kind of gave up. I’m not sure what exactly caused the flame to burn out – but I stuck it in a drawer and left it alone for the winter. I definitely still had every intention to sew it – it survived a pre-move purge and was shuttled from one house to the next – but not really any current desire. I think I realized that the style + color weren’t really something I wanted to wear (looking at Fiona’s post again, I still think the dress is great but I also don’t know WHAT I was thinking when i decided to make it for myself as it is absolutely, definitely not something I would necessarily wear myself), but since I had already committed and cut the fabric I felt the best solution was to sew it up and at least then I could donate the dress to someone if I still didn’t like it.

So, that’s a long, boring-ass story about how the dress started. This year, when Andi and I planned the OAL, I immediately knew the Myosotis was going to be my sewing WIP. I got the pieces out, and had everything sewn up with a couple of days.

Coral Rayon Lawn Myosotis Dress

Coral Rayon Lawn Myosotis Dress

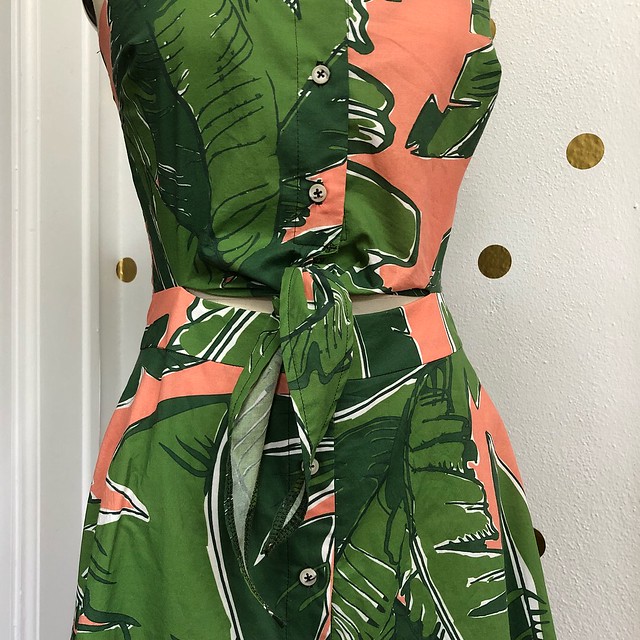
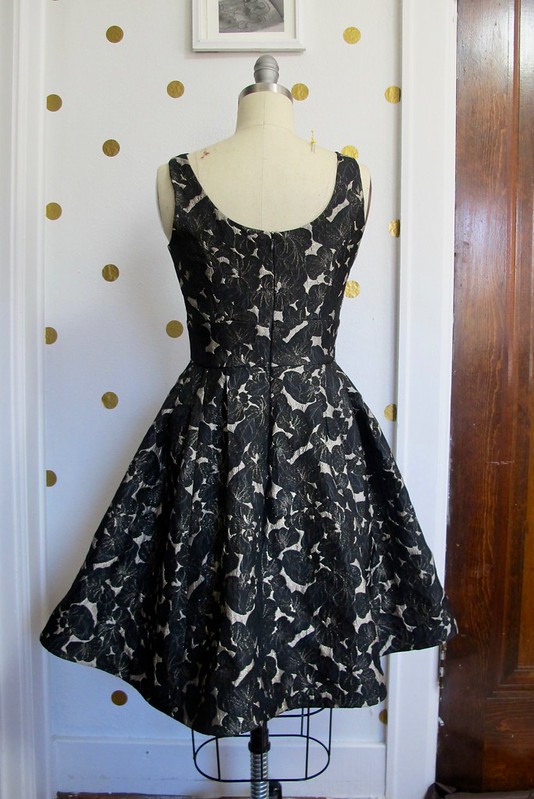
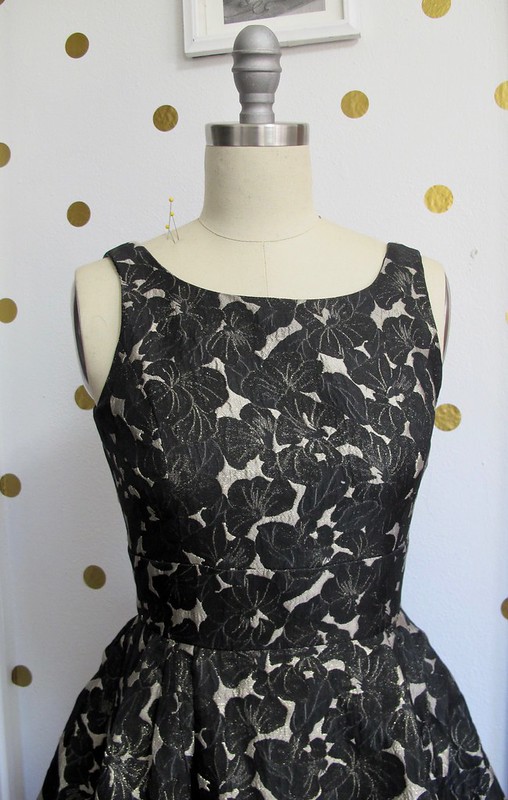
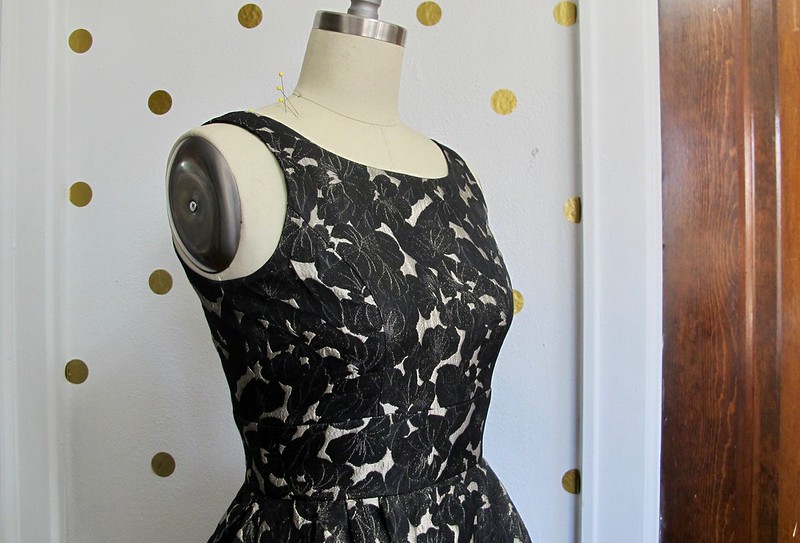
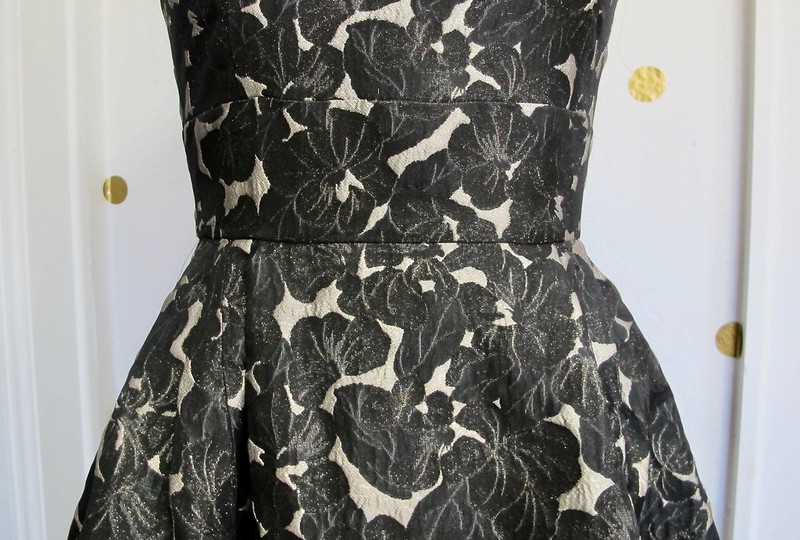
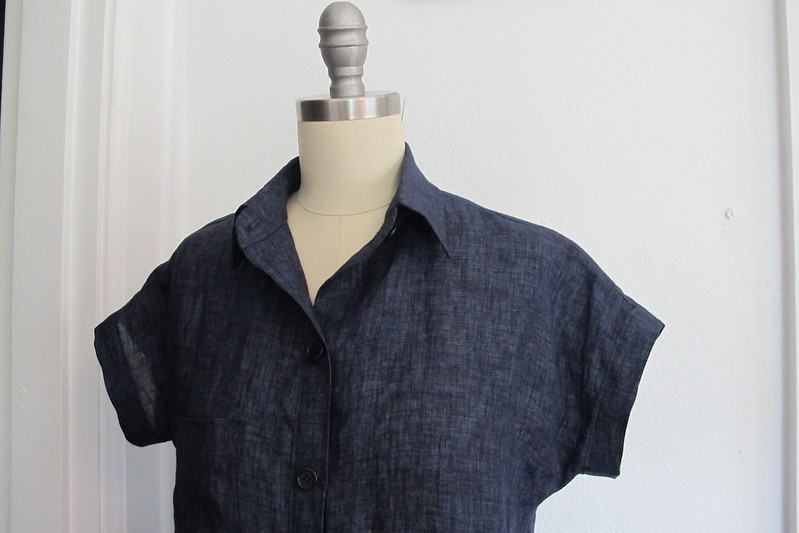
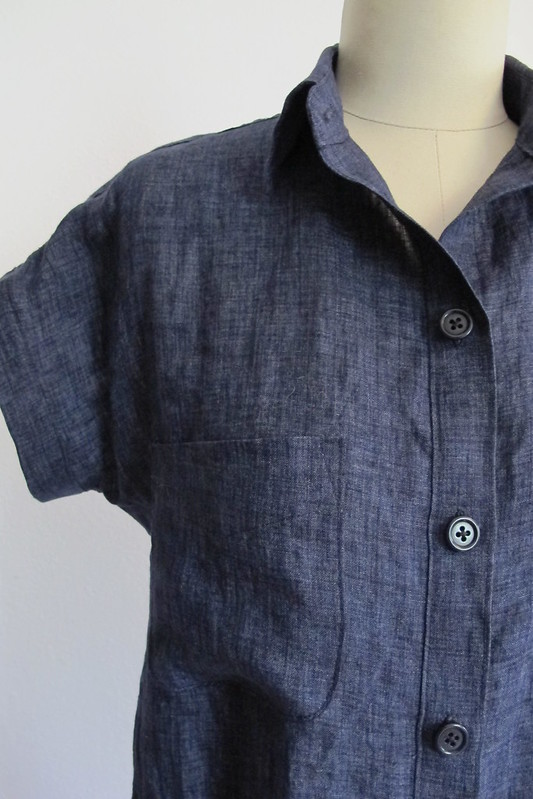
Now, the first rendition of the dress post-sewing looks completely different than the final version. I had a feeling that I was going to want to change the color, but I wanted to give the white version a fair fighting chance before I made that decision. As far as sewing – this was a simple, efficient make. I cut a size 36, with no pattern adjustments. I made version A, with aaaaall the ruffles, and added slim waist ties to pull in the waist a little bit (I can’t take credit for this inspiration, again, this was something I saw + liked on Fiona’s dress!). I sewed all the seams with a fine 70/10 needle and serged the seam allowances. Even though I was fairly certain I was going to dye the dress, I still chose to use white thread since I wasn’t sure what the final color would be. Since the thread is polyester, that meant it would not take the dye – meaning the topstitching would end up contrasting. I was aware of this going into the sewing, and just made sure to be extra careful that my topstitching was even and nice-looking.

One of the biggest complaints I read about this pattern is that people seem to really hate all the gathering. Y’all, I don’t know what kind of lazy sewers are out there but honestly it’s really not that bad and goes together really fast.

Coral Rayon Lawn Myosotis Dress

Coral Rayon Lawn Myosotis Dress

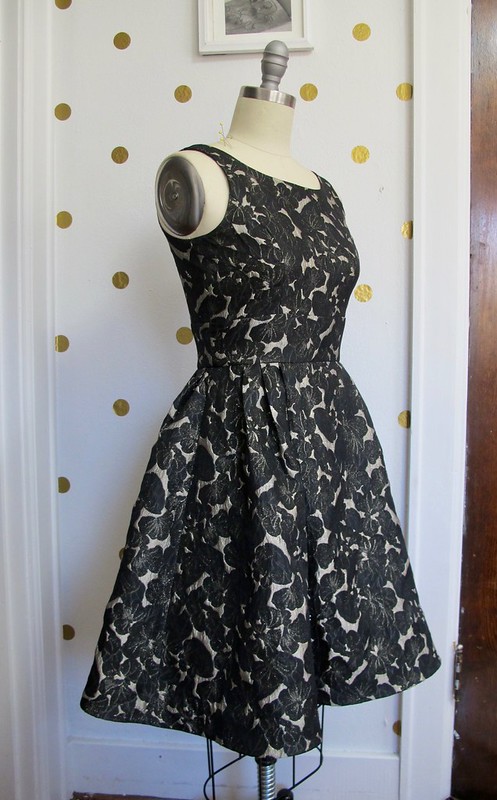
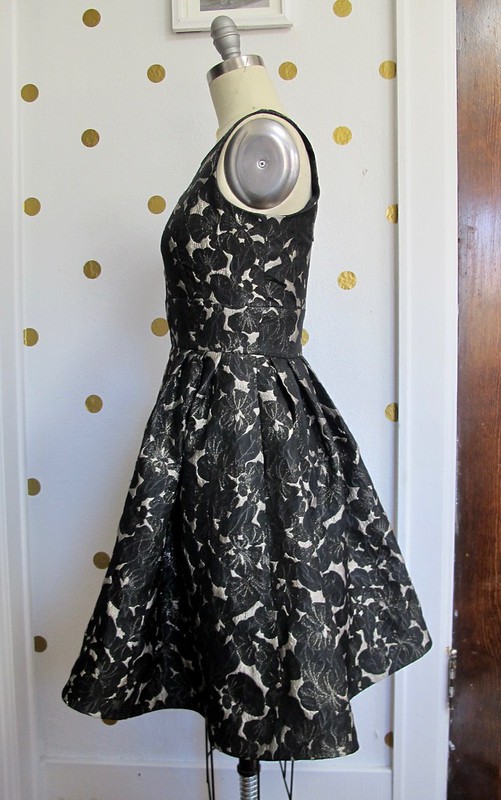
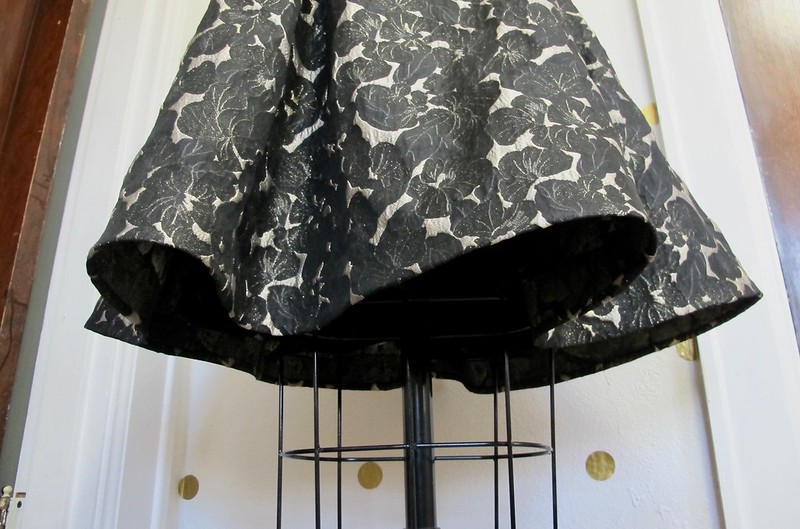
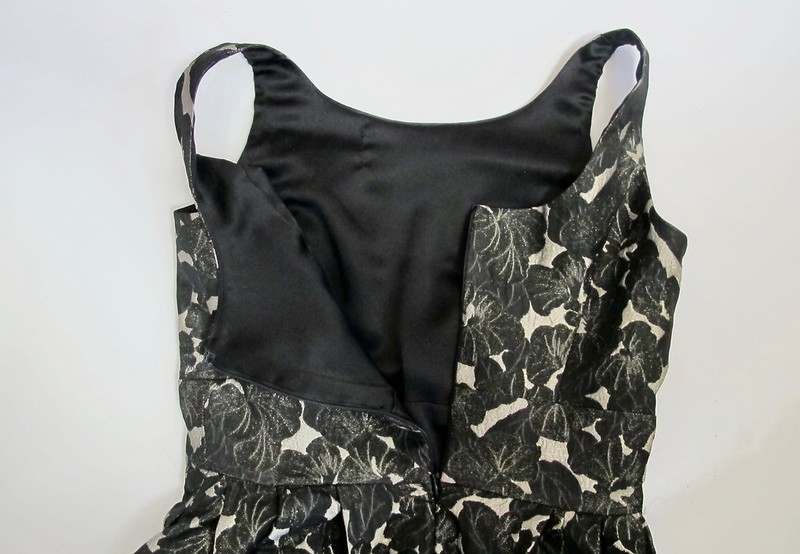
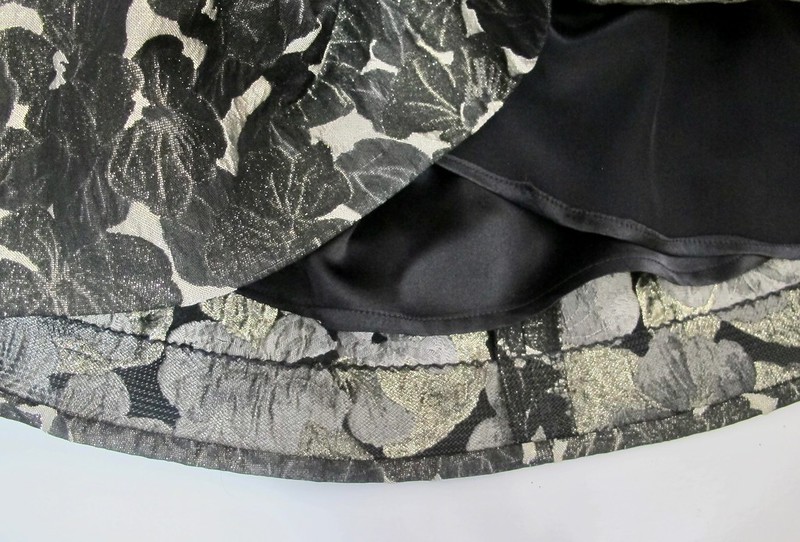
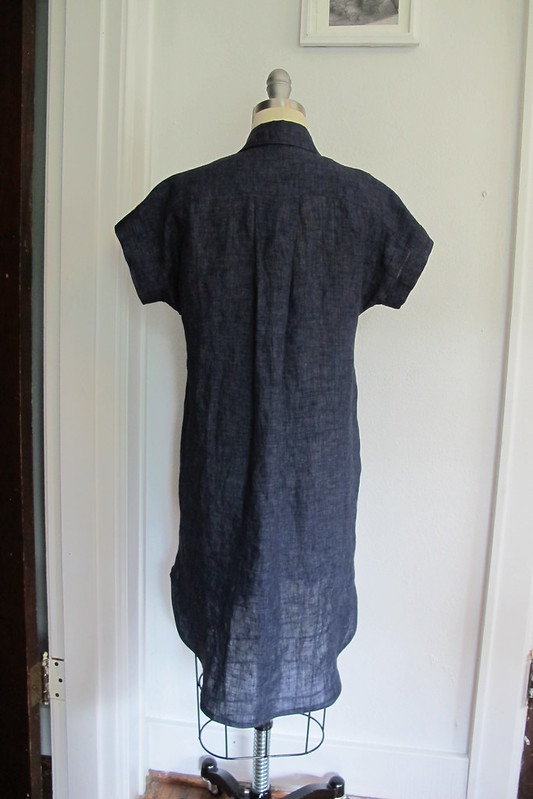
Once I finished the dress, I tried it on to confirm that the style was not going to work for me. Again, it’s a beautiful and romantic look – which isn’t how I like to dress. Furthermore, the fine, lightweight fabric was essentially see-through (as clearly seen on my dressform). I’m no stranger to dressing like an absolute hussy in the summer, but even this was a bit outside of my comfort level (and before you get at me with crazy suggestions like “adding a lining” or “wearing a slip,” let me remind you that summer here is very hot and I try to get away with wearing as few layers as possible, ha!).

Rayon Lawn Myosotis Dress

Rayon Lawn Myosotis Dress

Rayon Lawn Myosotis Dress

I knew I’d never wear the dress as it was, so I decided to experiment with dyeing it using coral Rit dye! I followed the instructions for doing this in the washing machine, using about 3/4 of the bottle and allowing it to agitate for about 50 minutes. The resulting color is VERY saturated – much more me! – and also takes the edge off the sheerness so that I can wear this dress without looking like I’m trying to win a wet t-shirt(dress?) contest. I should also report that I was dismayed to discover the dye turned my washing machine pink, despite running a couple of loads with bleach + old towels afterward (as instructed by the bottle). I own my washing machine, so it’s not a huge deal, but it was kinda lame regardless. That all being said, after a couple months of regular laundry, the washing machine is no longer pink whatsoever (I should also did – and did not transfer any dye to my other clothes). So it does eventually come out! Now, the dress itself – I have to wash it by itself as the dye still bleeds. I wash it in the sink using Soak rinseless wash (if you don’t already own this, do yourself a favor and invest. It’s marketed toward knitters but I use it for all my hand-washing, including lingerie, and it RULES) to prevent it from dyeing an entire load of laundry. My kitchen sink is stainless steel so I have not noticed any dye transfer by using this method.

Coral Rayon Lawn Myosotis Dress

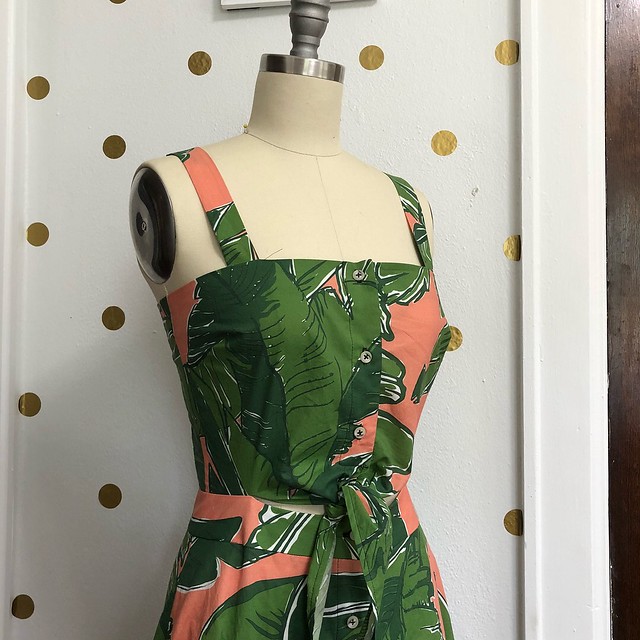
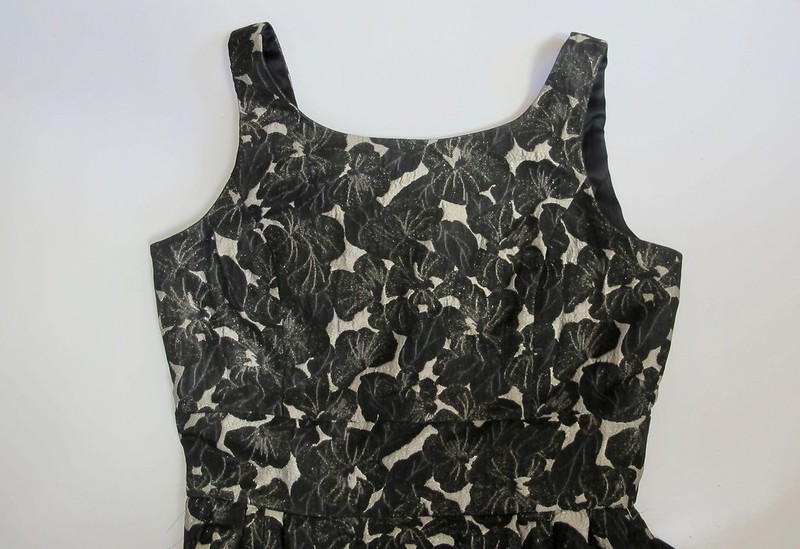
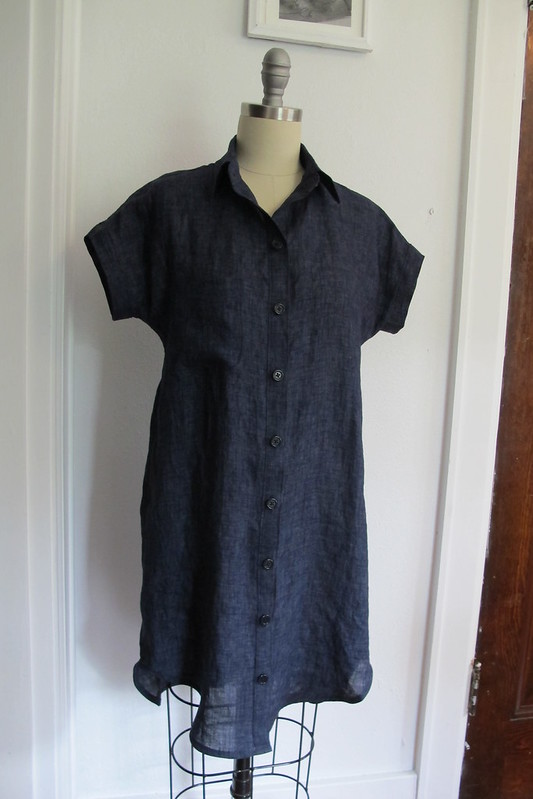
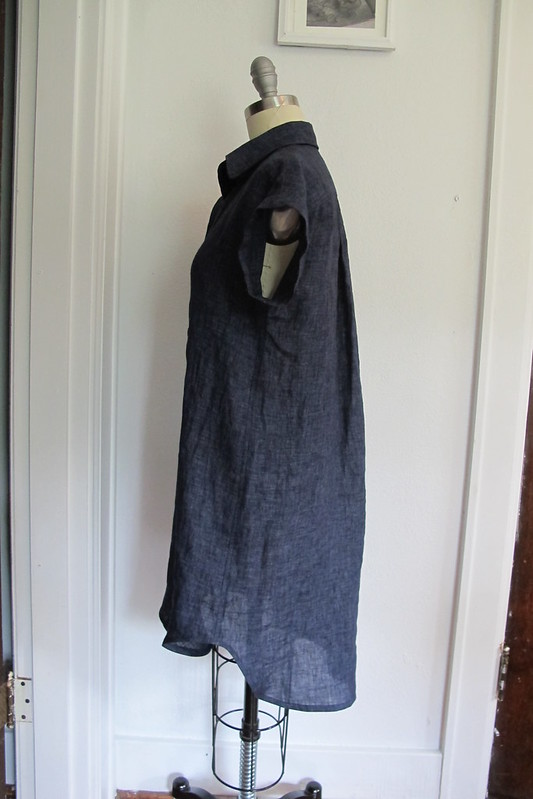
Here is the dress after dyeing! It was almost good but I tried it on one last time and decided the sleeve ruffles had to go.

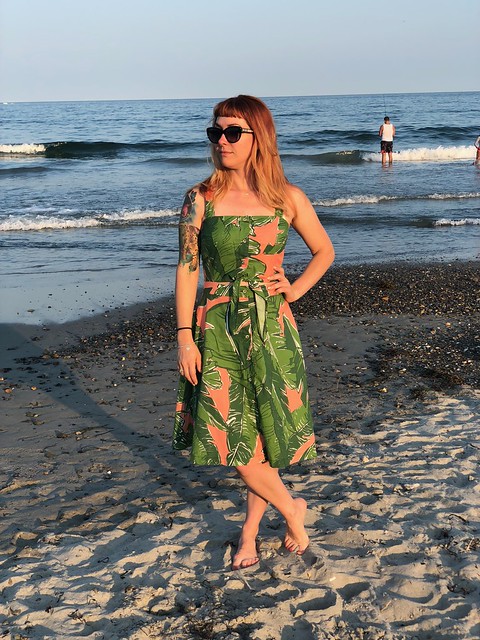
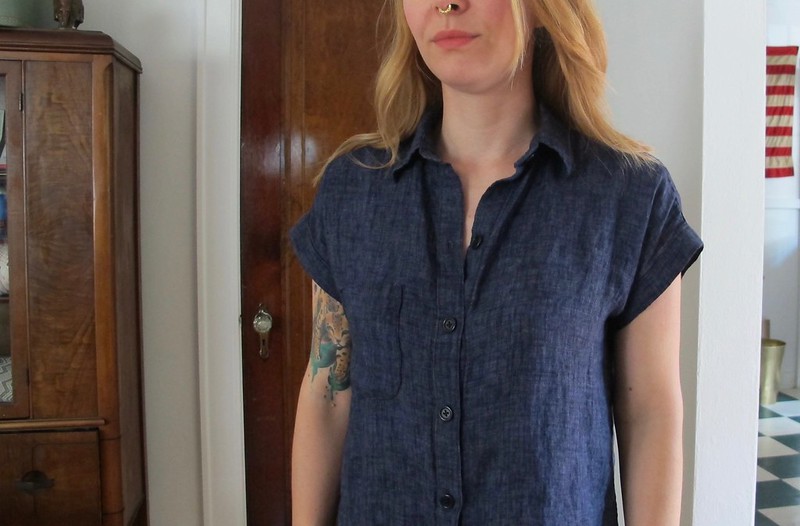
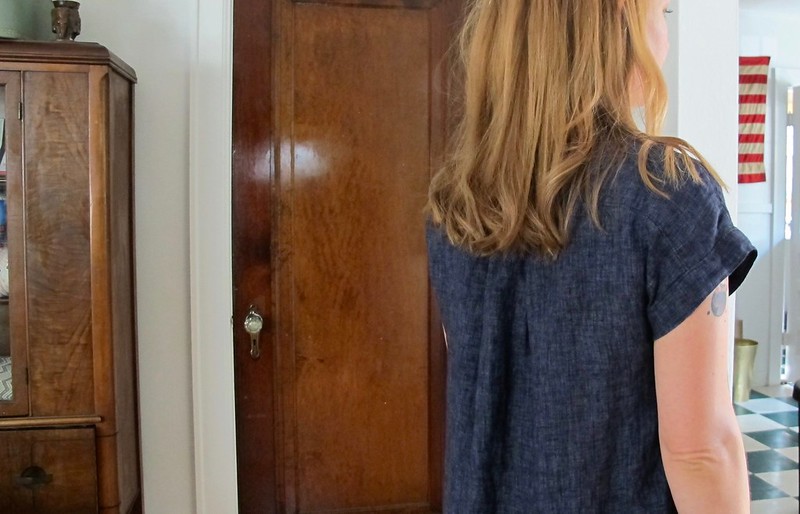
I cut them off, plus a few more inches so the sleeves would be cap-length. These were turned under and hemmed – using white thread, to match the rest of the topstitching.

Coral Rayon Lawn Myosotis Dress

Coral Rayon Lawn Myosotis Dress

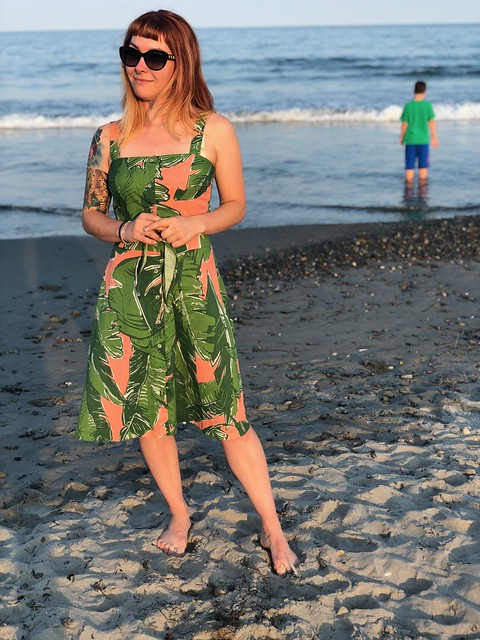
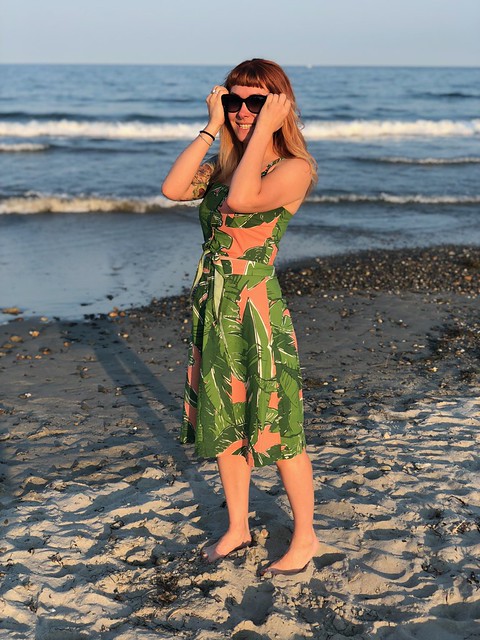
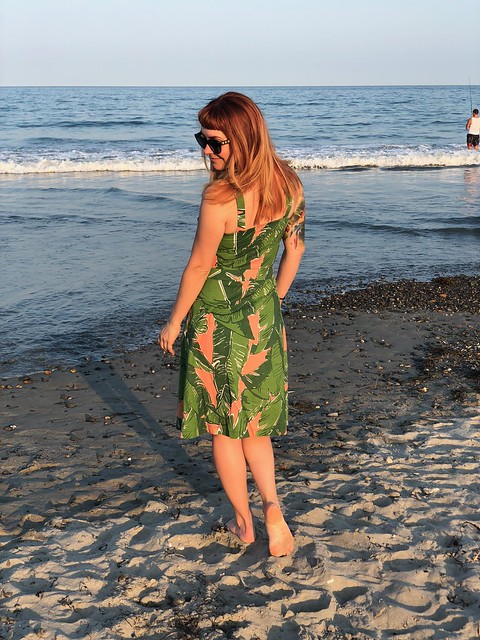
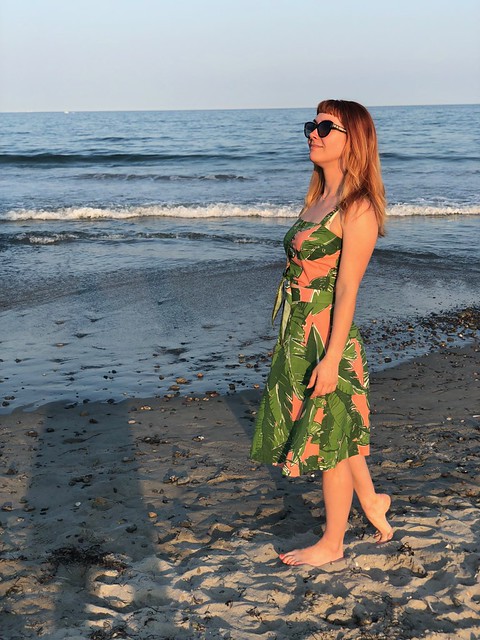
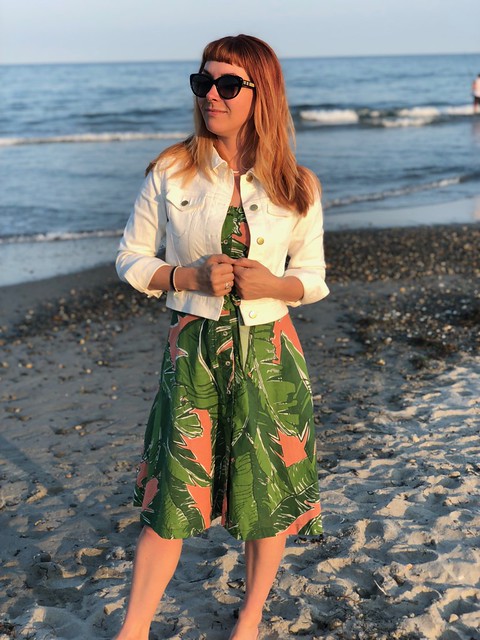
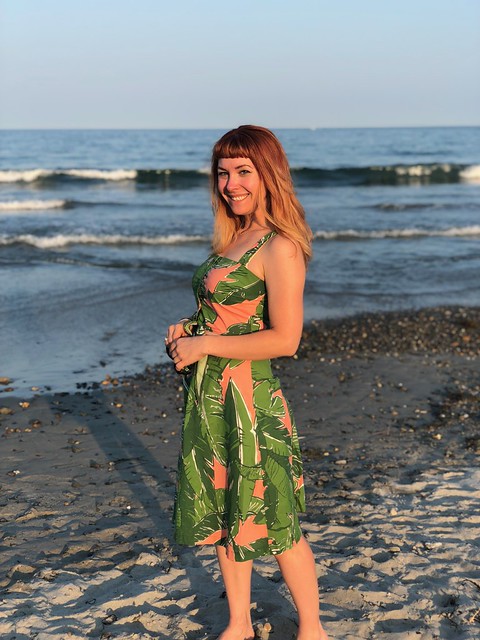
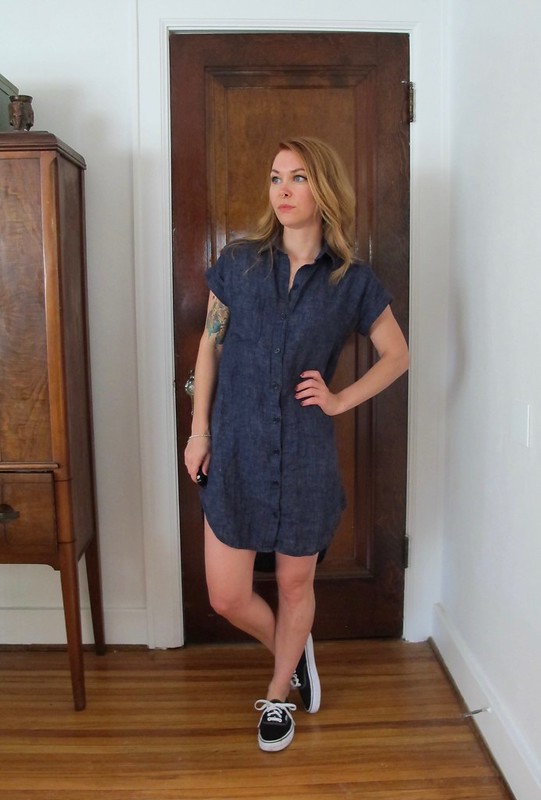
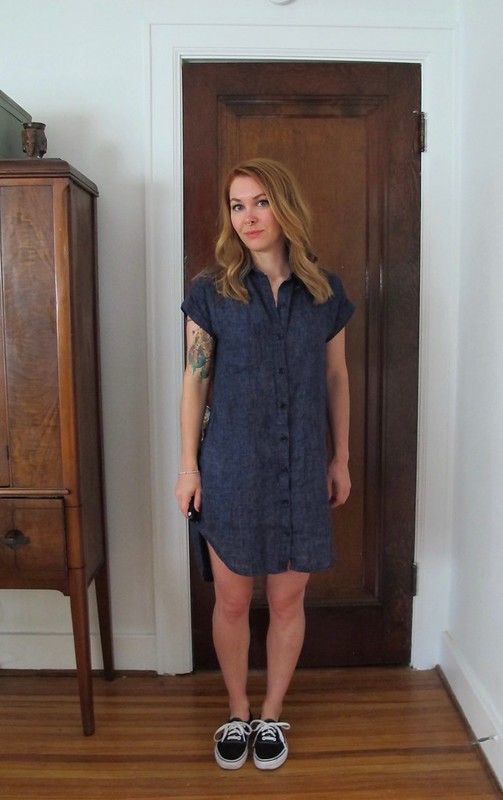
The finished dress is definitely much more my style! The saturated coral color is one of my favorites for summer, and loose, swishy shape is perfect for the extreme heat we are experiencing lately. I’m actually surprised at how much I enjoy wearing this dress – it’s still a slight departure from my usual style, but it is a fun little way to change things up.

Coral Rayon Lawn Myosotis Dress

So that’s my finished sewn garment for the OAL – what about my knitted garment? Well. I had an Improv sweater waiting in WIP purgatory that I had all intentions of finishing for this OAL. I had started it about 3-4 years ago (back when I lived in an apartment in West Nashville)(ooh and here I am back in West Nashville IN MY OWN HOUSE look at how things go full circle yay), got about halfway down the body and decided I didn’t like how loose the fit was. Rather than unknit, I just left it in my knitting basket. Upon rediscovering for the OAL, I tried it on again and was fine with the sizing so decided to finish that.

Unfortunately, since this sweater has been out of my queue for so long, I seem to have lost all the notes I made with the math for sizing. I was able to finish the body, but the sleeves are a little slower going as I had to work out the equations for decreasing, and also try the sweater on frequently to make sure things aren’t going haywire. It is working out fine and I will certainly finish it – it’s just slow-going. At this point, the sweater is too bulky to comfortably carry around outside the house (and again, there’s that whole issue of trying it on as I’m knitting), which means it doesn’t go with me when I travel – which is frequently! AND, in the meantime, another WIP that I started right before the OAL had a major error that required a lot of unknitting so I’ve been focusing on that. So, I didn’t finish my knitted sweater – but I plan to in time for sweater season! Which to me encompasses the general spirit of the OAL that I was aiming for!

I think that’s all for this make! Lord, I don’t know how I manage to take a simple dress and turn it into a giant blog post of verbal diarrhea. If you’re wondering, I’m like this IRL too when people try to talk to me. What can I say, I’m from the South haha. Mindless chatter is our love language.

Coral Rayon Lawn Myosotis Dress

** Note: The fabrics + RIT dye used in this post were provided to me by Mood Fabrics, in exchange for my participation in the Mood Sewciety Blog (oh yeah, MSN moved!). All opinions are my own!And extra big thanks to my friend Jennifer for being a real pal and taking these photos for me when I was in Brooklyn last month for recent Jeans Making Intensive class at Workroom Social! Which, btw – 2020 for WS dates are listed! Yay! More dates to come as a I finalize them!

Completed: Denim Centaurée Dress

25 Oct

Good morning, everyone! I am writing this from my local airport lounge, waiting for my flight this morning to San Francisco! Figured I’d take advantage of the downtime (and free WiFi!) and see if I could throw together a little post! I feel like a big part of the reason why I stopped posting as much was because there is so much EFFORT that goes into it – I have this weird need for them to be long and therefore “worth it,” (and a long post takes a really long time to write!) but really, short posts are better than no posts… right? I don’t want to let my blog die!

Another reason why I post less is because I really seem to have hit a hard rut with photos. I just really hate taking them, I feel like they always look shitty and I honestly don’t know how to improve them (one would think that standing in the same spot where I take my dressform photos would work, but nope, sadly not the case). I snapped these very quickly using the self-timer on my phone, right before I took a walk down the block to my local cookie shop (oh yeah). The lighting isn’t great and I have my shades on, but… whatever. It’ll do!

Deer & Doe Centaurée dress made with denim from Mood Fabrics

Anyway – the dress! I made this little denim sundress a few months ago, one last dress hurrah for summer. The pattern is the Deer & Doe Centaurée dress, which I loved when was first released – it’s a great little basic sundress with some fun details that make it a little more interesting. The bodice shaping is created with interesting seamlines that form a star (y’all know how I feel about a good star), and the edges are finished with a self bias binding that turns into double straps (a super cute detail IMHO but definitely requires no bra or a strapless bra to get the full effect – fwiw, I am bra-less in these photos). The skirt is a simple gathered skirt – no pockets, but I was able to easily add some simple patch pockets.

I cut a size 36 at the bust, grading out to a 38 at the waist and hip. No other alterations were necessary, which is good because I totally threw caution to the wind and make this up without first sewing a muslin o_O haha! Like I mentioned, I did add patch pockets – simple squares (I think I took the pattern piece off my Ariana Dress but they can easily be drafted if you don’t have a pattern to steal from), to bring a little more interest down to an otherwise plain skirt and to also incorporate more topstitching. Everything else about this dress is exactly as the pattern intended!

Deer & Doe Centaurée dress made with denim from Mood Fabrics

My fabric is a lightweight denim from Mood Fabrics. I found this in the store while I was in NYC – I was actually looking for bottomweight to make a pair of jeans with, but this was too good to pass up. It’s a fine, lightweight Japanese denim that is very narrow (like less than 45″). This denim on the Mood Fabrics website appears to be very similar, although it’s a little wider. I originally purchased this with the intention of making a shirtdress – I specifically had a Colette Hawthorn dress in mind, to replace my beloved denim Hawthorn that no longer fits – but decided to try something a little different than my norm SINCE I MAKE SO MANY DAMN SHIRTS.

Deer & Doe Centaurée dress made with denim from Mood Fabrics

Deer & Doe Centaurée dress made with denim from Mood Fabrics

Sewing this fabric was super easy, as most denims are! I used two sewing machines to construct this – one threaded with regular polyester thread, and the second threaded with topstitching thread (you can totally do this one with machine if you don’t mind re-threading over and over!). I chose to highlight all those interesting seamlines with gold topstitching thread, which makes it look more like a pair of jeans, just reincarnated as a dress. All seams are finished with my serger (the multitude of intersecting seamlines on the bodice + the gathered skirt would have made it difficult to flat fell, plus, I wanted the option to be able to let out or take in areas since, again, I did not make a mock-up), and I used self-binding to finish the edges of the bodice as instructed by the pattern.

Deer & Doe Centaurée dress made with denim from Mood Fabrics

Deer & Doe Centaurée dress made with denim from Mood Fabrics

Deer & Doe Centaurée dress made with denim from Mood Fabrics

Deer & Doe Centaurée dress made with denim from Mood Fabrics

The dress closes with an invisible zipper on the side seam. Here’s a fun fact – the only zipper I had in my stash was off-white, and I didn’t feel like going to the shop to grab another one in the right color (another fun fact – I live 3 blocks from one fabric store, and less than a mile from a much bigger one so I absolutely have no valid excuse, #teamlazy)… so there is a off-white invisible zipper in this dress. You’d never guess it unless you see the zipper pull, which is located under my armpit, and I take a lot of pride in this. Not to toot my own horn, but hell yea my invisible zipper game is strong. You can’t even see that shit.

Deer & Doe Centaurée dress made with denim from Mood Fabrics

Deer & Doe Centaurée dress made with denim from Mood Fabrics

The skirt is finished with a wide hem – I wanted mine shorter than the pattern is drafted for, and I like the way the wide hem looks with the topstitching + pockets. Plus, it will be easy to let the hem out if I decide I want a longer skirt in the future (whether or not that will actually ever happen is up for debate, but at least I have options now!).

As a side note, the patch pockets on this dress are perfectly sized to hold a Christie Cookie… speaking from experience here. And! After I finished taking this photos and took my walk, I ran into the sweetest little cat:

neighborhood cat

That’s all for this make! Admittedly, we are a little late in the season now for a sundress (Tennessee appears to have completely skipped fall and jumped straight into early winter… wah!), but if I was a cooler person I could totally rock this with a white t-shirt underneath. Alas, my inner Cher Horowitz definitely won’t be making an appearance, but I do think this dress would look cool with a cropped sweater over it (like my Chuck!). So, sundress or not, this can definitely be a transitional garment!

Deer & Doe Centaurée dress made with denim from Mood Fabrics

Anyway, I’m out! Berkeley, I will see you soon! For those of y’all in the area – Stone Mountain & Daughter Fabrics is hosting a meet-up tonight at 5:30PM. Full details are on my IG 🙂

** Note: The fabrics used in this post were provided to me by Mood Fabrics, in exchange for my participation in the Mood Sewing Network. All opinions, as always, are my own!

Completed: Seren Dress

9 Oct

I am not one to apologize for a lack of posting, but HOLY SHIT Y’ALL has it seriously been a month since my last post!? My poor little neglected blog 😦 I don’t even have a good excuse… I’ve been sitting on these photos since August haha.

Tilly & The Buttons Seren Dress
Look, a rare photo that does not involve the privacy of my own home / backyard! 🙂

Tilly & The Buttons Seren Dress

This is the Seren Dress from Tilly & the Buttons, released earlier this summer. I loved this pattern the minute I saw it; I love that it’s a simple sundress with some fun details. While I personally don’t care for the ruffle version (again, not really a ruffle girl here), I was ALL ABOUT that little midriff slit! It’s hard to tell in the pattern photos, but this dress is actually one piece – not two. True story, I thought it was a two piece dress right up until I started sewing it haha. I think it would be easy to modify to be two pieces if that’s what you’d rather wear, but I had a lot of people comment that they’d never wear it because they don’t like to expose their midriff. As you can see in these photos, it certainly doesn’t expose very much!

Tilly & The Buttons Seren Dress

Sewing this up, I made a size 2 which is based on my current measurements. I followed the instructions as written and made no adjustments to the sizing. Honestly I don’t remember much about making this dress, seeing as that I finished it back in JULY (sheesh), but I do recall it being really quick and satisfying to sew.

Tilly & The Buttons Seren Dress

Tilly & The Buttons Seren Dress

The fabric is a custom printed piece from Spoonflower, given to me by my favorite blue haired angel mermaid, Paula. Mine is printed on their fabulous lawn, which is sadly discontinued (sorry!). This might be one of my favorite fabrics I got this year – the colors are so happy, and I just love the print! I don’t typically wear pink, but I actually really like how it looks with the green. Like all lawns, this one was easy to work with and it also super easy to care for (wash & dry as normal with the rest of my clothes – no special treatment required). I do wash this dress pretty frequently and haven’t noticed any color fading.

Tilly & The Buttons Seren Dress

Since finishing this dress, I’ve worn it a surprising amount – considering I don’t typically dress up, and it does feel a little dressy! This dress has taken me to the downtown Art Crawl, various parties and first dates, as well as to Canada and New Hampshire for nice dinners out! It’s easy to wear, but is also quite the statement dress. I’m happy I went a little out of my comfort zone with the fabric, because that’s definitely the best part!

Speaking of New Hampshire, that’s where these photos were taken! When I was up in Exeter back in August for my jeans workshop at Pintuck & Purl, Maggie took me out for a really nice dinner on the beach, and helped me get some photos right as the golden hour happened! It’s definitely a better backdrop than where I usually take my photos, ha! And in case anyone was wondering… I ordered the steak for my meal. I ALWAYS order the steak.

Tilly & The Buttons Seren Dress

Unrelated to my dress, but we also got some photos of the white denim jacket I made (also earlier this year)!

Tilly & The Buttons Seren Dress

Tilly & The Buttons Seren Dress

Tilly & The Buttons Seren Dress

This is the Hampton Jean Jacket, which I made after I finished my first jean jacket. It’s pretty similar to the first one, except I cropped about 4″ off the bottom, removed the inseam pockets (bc the jacket is now too short for them haha) and used a stretch denim for a little added comfort. All topstitching is white, so the gold buttons really pop! I have enjoyed wearing this over dresses and with skirts, the cropped length is perfect for anything with a high waistline.

Some photos of the dress:
Tilly & The Buttons Seren Dress

Tilly & The Buttons Seren Dress

Tilly & The Buttons Seren Dress

I guess that’s all for this project! I have enjoyed wearing this dress all summer, but I’d be lying if I said I wasn’t looking forward to busting out my beloved jeans and handknit sweaters as the weather cool down! JK we all know it’ll stay hot here through the end of November, ha! 🙂

Tilly & The Buttons Seren Dress

Note: The Seren pattern was given to me by Tilly & the Buttons, with no obligation to post about it! And while my fabric was made by Spoonflower, it was given to me by my friend Paula!

Completed: Black Merino Wool Joni Dress

31 May

Well, I definitely made a wool dress and here are photos of me modeling it in 90 degree heat.

Merino Joni Dress

To be somewhat gentle on myself, I started (and finished) this dress when there was still a bit of a chill in the air. I didn’t think to take photos until the other day, and even by 8AM it was solidly hot and humid outside. Case in point: I curled my hair about 15 minutes prior. Can you tell? Nope!

This isn’t even my worst offense when it comes to seasonally-inappropriate garments… I still have a (truly fabulous) coat that hasn’t made it’s rounds yet. I even took photos, but I just looked at them and am pretty sure they need to be retaken. But probably not until next year because LOOOOL Y’ALL IT BE HOT OUTSIDE.

Merino Joni Dress

Anyway, I posted a dress so I’ll talk about the dress! This is the Joni Dress from the new Tilly & the Buttons book, Stretch! – it is also the same dress Tilly is wearing on the cover. While the twisty front looks complicated (I’m not going to pretend that I didn’t feel a LITTLE intimidated to start sewing it! We all get our weird cold feet sewing hang-ups from time to time!), it is deceptively simple! This is a book designed to introduce beginner sewists to working with knits, after all!

Anyway, what I liked about this dress – other than that twisty goodness – was the fitted shape with the swirly skirt. I have seen a lot of knit patterns with the twisted detail (JFC how many more times am I gonna say twist in this post I’m so sorry), but not many with the very fitted look in conjunction. I like, I like!

Merino Joni Dress

Merino Joni Dress

As I said, sewing this dress up was pretty easy. There’s a little bit of stay-stitching, a clever twist (sorry), and then your basic knit fabric sewing construction. The waist has a length of elastic sewn to it to keep the skirt from drooping over time, which is a feature I always appreciate in a knit dress. The neckline is finished with a self fabric facing, which gets topstitched down. I used a serger to sew most of the dress, except that facing part – the first time I tried that, it was too damn bulky! So I seam ripped it out and started over, using a regular sewing machine with a zigzag stitch to attach the pieces. This made for a much smoother and less bulky finish. Other than that, really straightforward for the most part. I added the little elastic runching to the sleeves (a hack option outlined in the book) and let the skirt hang for a couple of days before hemming, which I used my coverstitch to do. Oh, and I made a size 2 with no other fit adjustments (including length).

Merino Joni Dress

Merino Joni Dress

A little chat about the fabric now: wool, huh? Yeah baby THIS IS MERINO WOOL! Or, specifically, merino/bamboo jersey – and it is DREAMY. I found it on the Mood Fabrics website, which has delighted to me to no end. You may or may not know my love for merino – it’s been a hot minute since I had my hands on a piece to sew up. I love merino for it’s warmth and breathability, that it’s anti-microbial, and machine washable. It is my dream fabric and I’d probably use it for nearly every knit I make (at least in the winter), but unfortunately it can be a bit cost-prohibitive. The stuff I found at Mood Fabrics is still a little high at $30/yard, however, it’s here in the US so at least there are no international shipping fees to deal with (in the past, most of my merino came from New Zealand!). There’s not a huge color selection available on their website at the moment, but, y’all know I dress like a tragic goth in the winter so black is totally fine with me!

Merino Joni Dress

Merino Joni Dress

Merino Joni Dress

This merino is pretty lightweight, with a lovely drape and a nice soft hand. Mood’s website says that it is slightly translucent, but idk I’m wearing this with some pretty neon undergarments and you can’t see through shit – so take that as you will. It was very easy to work with – reasonably stable (as much as 4 way stretch jersey knits can be, anyway) and it did not curl when I cut it. I only had a chance to wear this dress twice before it got too hot, but I look forward to snuggling back up in it again when the weather allows! It is super comfortable and I think it looks pretty good!

Merino Joni Dress

Here’s a terribly overblown photo so you can see a little more detail.

Merino Joni Dress

That’s all for this dress! I’ve love to have a summer version – maybe made up in a patterned (or striped!) knit – but I’m trying to be realistic about how many clothes I truly *need* in my closet. So we’ll see if that actually happens or not. And, as a side note – yes, I got bangs again! Felt tired of looking at my face and decided to change up my look 🙂

** Note: The fabric used in this post was provided to me by Mood Fabrics, in exchange for my participation in the Mood Sewing Network. As always, all opinions are my own!

Completed: French Terry Stella Hoodie Dress

1 May

Here we have a tale of fabric bought wrong, then made right. Gather round, my children.

French Terry Stella Hoodie Dress

I bought this french terry from Mood Fabrics on a whim back in September. I usually swatch fabrics before ordering online – even with my knowledge of fabric and fibers, you can still be surprised by texture, hand, and color – but sometimes I get a little wild and order shit blindly. It usually works out fine, but every now and then it can backfire. Guess what happened here.

So, the french terry – it’s a glazed french terry from Helmut Lang (since sold out, yo’re welcome), which I figured would be great because 1. Helmut Lang is always expensive; and 2. It’s fucking french terry, how could you go wrong?

This, this is how you go wrong. This is one of the weirdest fabrics I’ve ever received from Mood. It was stiff and kind of scratchy, remarkably similar to how your bath towel feels when you dry it on a clothesline. I’m not going to sugarcoat this – I was really disappointed that I wasted part of my allowance buying it, because I absolutely hated it. The color was nice, but color doesn’t mean anything if the fabric itself scratches you when you touch it.

French Terry Stella Hoodie Dress

I did try washing the fabric multiple times to see if perhaps there was a sizing on it (or if the glaze has something to do with it?) that would be removed and thus soften it – but no matter what I did (hot water, cold water, different detergents, high dryer heat, etc), it didn’t change the hand of the fabric. I stuck it on my shelf and tried to figure out if there was something I could do with it. I don’t back down from a challenge, but sometimes I have to roll a problem around in my head for a minute before I come up with a solution.

During this time, I was sent an advance copy of Tilly’s newest book, Stretch! (hello, hi, that’s an affiliate link). I love most of the patterns and projects in that book, and the one that really stuck out the most to me was the Stella Hoodie pattern. I am not a huge fan of the athleisure trend, so the joggers were a bit lost on me (it’s fine if you wear them, but those are PJs are far as I’m concerned, and I don’t wear PJs in public), but I looooooved the pictures of the hoodie lengthened into a dress! I thought my weird french terry might work with that pattern – and, at the very least, it would probably function great as a swimsuit coverup.

French Terry Stella Hoodie Dress

French Terry Stella Hoodie Dress

French Terry Stella Hoodie Dress

I made the size 2 of this, based on my measurements and the suggested size from the book. I don’t remember how much length I added, whatever the book suggested (probably 8″ or 10″ – and then I cut some of it off when it came time for hemming). I did simplify mine a bit from the book – rather than line the hood and the pocket, I just turned under the seam allowances and stitched them down. The whole thing was sewn on my serger, other than the button holes (which my machine had no problem sewing, although I did back them with a little piece of fusible interfacing first), and the hems were done on my coverstitch machine. This fabric was very, very, very easy to work with – stable, not at all shifty of curly, and only shed a little bit when cut. It pressed nicely, which was great for getting those sharp hems.

French Terry Stella Hoodie Dress

I originally envisioned a black drawstring for the hood, but red was all I had on hand. I actually like it! It’s a nice little sporty pop of color. God, I sound annoying.

French Terry Stella Hoodie Dress

French Terry Stella Hoodie Dress

French Terry Stella Hoodie Dress

French Terry Stella Hoodie Dress

French Terry Stella Hoodie Dress

French Terry Stella Hoodie Dress

If you’re curious about my leggings – they are the Virginia leggings, made ages ago (in 2015, I think). My fabric is a wool knit from Paron in NYC. And those white lines are mock flatlocking done with my serger (where you sew the two layers together and pull them apart, or whatever it says to do in the instruction book I honestly I don’t remember haha) – which I 100% did because I didn’t have enough yardage to cut full length legs, so they had to be pieced. I added additional piecing so it would look intentional. It actually, in retrospect, looks kind of stupid, but honestly I usually wear these as long underwear so whatever I don’t care.

French Terry Stella Hoodie Dress

So that’s about it for this little dress! I actually quite like how it turned out – despite being apprehensive up until the very last minute of hemming. It’s cute and sporty and I feel cute in it. I think it will make for a good swimsuit coverup – but it also works as a cute little dress. As much as I didn’t like the fabric when receiving it, it works really well for this garment since it hold its structured shape. And since the garment is not close-fitting, the fabric isn’t scratchy or uncomfortable to wear. A very pleasant surprise!

In other news, if you’re still holding out for a good french terry, may I recommend this french terry from Mood Fabrics. I got a few yards of this and it is GREAT – super soft, super stretchy, super drapey, super bamboo (yas bamboo). Plus it comes in tons of colors!

**Note: The fabric used in this post was provided to me by Mood Fabrics, in exchange for my participation in the Mood Sewing Network. I also received the Stretch! book from Tilly & the Buttons as a gift, but was under no obligation to post a project from it (I just really like the book!). All opinions, as always, are my own!

Completed: A Very Festive Brocade V8998

26 Dec

After many years of saying I was gonna do it and then never actually doing it… I made a Christmas party dress!

Vogue 8998

I wanted something sparkly and festive to wear to Christmas parties (before you think I go to fancy parties… I don’t. I have consistently been the most overdressed person at every party this year, not that I’m complaining!), but every year I put it off until it’s too late. This year, I was determined to use my Mood allowance to make something fabulous, so I forced myself to start early. I’m so happy it paid off!

Vogue 8998

With this make, I chose fabric before the pattern. I had an idea that I’d like to make my dress out of a sparkly brocade – a fabric that I don’t have a lot of experience with. I generally prefer a fabric that has less body, plus, my lifestyle doesn’t really warrant a need for fancy dress. This seemed like a good opportunity to jump out of my comfort zone a little, so I waited until I was back in NYC for another workshop and used that change to stop by Mood Fabrics store to pick my brocade.

I’m not going to lie – I spent over 2 hours in that shop trying to decide. There are sooo many options, it’s a bit overwhelming! I had a couple of things in mind to narrow it down – I wanted a fabric that was primarily black, gold or silver (so I could wear it with my turquoise heels), and I was budgeting $50/yard or less (you’d be surprised how expensive brocade can get! I only needed 2 yards, which helped a lot). I wanted something that was more floral than abstract, and nothing that was super dimensional (I don’t like puffy brocade, I’ve learned). Even with those terms narrowing it down, there was a LOT of fabric to wade through. God bless all the people at Mood who helped me pull bolts and kept their grumbles to themselves every time I changed my mind. I’m sure it helped that I was there on a slow weekday morning, but still! I must have been annoying. Those people are saints haha.

Anyway, I found this fabric and eventually settled on it (someone else was considering it for their wedding party, and decided against it – so she was happy to see me buy it instead!). What you see in my photos is actually the wrong side of the fabric – the right side is more dimensional with silver + gold, as you can see here. I had a hard time deciding what size to use – and even asked IG for opinions – but ultimately decided that the wrong side really made my heart sing. Plus, it looked better with my turquoise shoes (and also, someone on IG pointed out that it looked mature and tbh I just couldn’t see past that after that fact haha). Wrong side it was, then! I did consider adding in a bit with the right side for contrast (such as at the waistband), but upon pinning the pieces to my dressform, it definitely did not work. Rather than look cool, it looked like I made a mistake. So I scrapped that idea and just went with the wrong side all over.

Vogue 8998


Vogue 8998

For my pattern, I used Vogue 8998. I cut a size 6 at the shoulders and bust, grading out to an 8 at the waist and hips. I made view E, but changed the skirt gathers to soft pleats. A quick muslin of the bodice showed that I needed to remove about 1″ from the shoulder to make it fit better, and I also removed 2″ from the skirt length before cutting. I made no other fitting changes.

Construction-wise, I mostly followed the pattern but changed a few things to suit me + my fabric. I did not interface the entire bodice – I get why they have you do it, but I felt like my brocade had enough body where it wasn’t needed. I did interface the midriff with silk organza, just to give it some extra stability. I also changed out the lapped zipper for an invisible zipper.

The whole dress is lined in black silk charmeuse, which gives the garment a bit of weight and makes it feel SUPER luxurious when I’m wearing it. There is 2″ wide horsehair braid at the hem to give the dress a bit of extra volume. This is one area that I totally deviated from the instructions. They have you attach the horsehair to the lining and then sew that to the outer fabric, so everything is encased… but I wanted my layers to be separate (mainly so I could show people the “right” side of the fabric haha). So I sewed the horsehair to the outer, and rolled the hem of the lining.

Vogue 8998

After a little bit of internal debate, I also added pockets (also out of silk charmeuse). I figured it would be nice to have a place to hold my phone (or stolen snacks), and I’m glad I did!

Vogue 8998

Oh, right – AND I made a matching clutch, using all leftover fabrics + my new Cricut Maker! More details on that in the next post 😛 But doesn’t it look great with my dress? haha!

Vogue 8998

Vogue 8998

Vogue 8998

Despite this being a fairly fancy, pretty $$$$ dress made with fine materials… it was really easy to sew. It’s just a basic dress (I mean, style-wise it’s technically a sundress, you know?) that is fully lined with a center back zipper. There aren’t a ton of pieces, and while I can’t say that the silk was the easiest thing I have ever cut… the brocade was super easy to work with. It doesn’t shift around, it pressed fine with high heat + a press cloth (sorry, I’m terrible but I use high heat for everything haha), and all my hand stitches disappeared which made hand sewing the hem very satisfactory! The only downside to brocade is that it sheds like CRAZY… so I just serged all my seams (even the ones that are completely covered by lining) to prevent them from fraying more. I am still finding sparkly bits of brocade in my studio. It’s kind of great.

Vogue 8998

Vogue 8998

I love the shape of the bodice, and the wide waistband.

Vogue 8998

Vogue 8998

Vogue 8998

Vogue 8998

Vogue 8998

Vogue 8998

Here you can see the “right” side of the fabric! 🙂

Whew! All right, sorry, that was a load of photos. I am so excited about this dress, though, it’s been a while since I worked on such a big, fancy project!

Vogue 8998

I’m happy to report that I have now worn this dress 4 times – 3 parties, and one night out with my coworkers for fancy drinks! It’s super comfortable to wear, and the silk lining makes it a touch more warm than I expected. A couple of the parties I went to were waaaay more low-key than this dress would require, but it actually looks super cute with my cropped Chuck sweater worn over it with a belt.

Anyway, that’s all for this dress! I’ll be back later this week to talk more about the clutch I made to go with it 🙂

**Note: The fabrics used in this post were provided to me by Mood Fabrics, in exchange for my monthly contribution to the Mood Sewing Network. All opinions are my own!

Completed: The Kalle Shirtdress

18 Sep

I’ve still got a few more summer projects that I haven’t shared yet, so bear with me here! Although, to be fair – we should be well within the throes of summer heat for at least the next month here (yes, it did warm up again!).

Chambray Kalle Dress

I made this dress a couple of months ago, so what you are seeing a dress that has been worn, washed, and loved quite a bit before taking photos! As a result, it’s probably not as crisp and perfect as it would have looked fresh off the sewing machine – but on the flip, it’s definitely something that I’ve had time to move around in and really get to know fit-wise in ways that might not have been so apparent immediately after finishing it. Plus, you can really see how this fabric looks after several trips through the laundry. For ages, I was firmly in the camp of photos before I wore anything I made, but I’ve really softened up on that lately. This makes more of a delay in posting (since nothing is stopping me from putting that shit on RIGHT AWAY), but I think it can also create more of an honest post, in the sense of seeing how something feels after it’s been worn around a bit.

Also, about these photos – sorry about the dark door background? I did take my tripod outside, but I had one neighbor chopping tree limbs in one yard creepin on me, and another literally sitting on her front porch just straight-up staring at me and it made me way too anxious hahaha. I may need to get something to hang over that door when I take photos (this is the door that leads to the back half of my house – where the bedrooms are – from my living room), but at least the light is pretty!

Chambray Kalle Dress

ANYWAY, back to the dress!!!

This is the Kalle Shirtdress, from Closet Case Patterns. I made view C in a size 2, with no alterations. This one is straight out of the envelope! I was so excited when this pattern came out and my finished dress did not disappoint – I wear it as much as I think I can feasibly get away with! The good thing about dressing kind of bland (simple shapes, solid colors, etc) means that people are less likely to realize you’re repeating an outfit. Or maybe they do and they are too polite to say anything, I dunno and I also kind of don’t care.

Chambray Kalle Dress

Chambray Kalle Dress

I made my dress up in a beautiful, lightweight linen from Mood Fabrics (which apparently is sold out now, sorry!). This fabric is great – it’s light and airy, and almost translucent. It is perfect for those hot summer days when you don’t want anything touching your body. The deep indigo color means that it will also transition nicely into fall – it still looks a bit autumnal, but I won’t be sweating to death in it. Plus, it layers really nicely for those chilly mornings and evenings – it looks great with a cardigan and boots.

I washed my linen three times before cutting it, as I wanted to make sure that it wasn’t going to shrink at all post-sewing. I believe this also helps keep the linen from wrinkling so much – Carolyn, was it you who told me this? – and I think that may be accurate since this fabric doesn’t really wrinkle much at all now! I’ve worn this dress on all my travels since finishing and it looks great going from suitcase to hanger. I have found that I do need to lightly press the sleeve bands after washing, because they get slightly bunched (probably because the bands aren’t interfaced), but the rest of the dress is fine without any ironing. In these photos, that’s exactly what I did not do. Un-ironed linen dress, y’all!

I finished the insides of my dress with French seams, and topstitched with navy thread. For interfacing, I used this super lightweight fusible interfacing, and then only sparingly – on the button band, upper collar, and outer collar stand – to keep the fabric supported but still soft. The hem is finished with a bias facing, which is an easy way to work with that exaggerated curve. The navy shirt buttons are from Textile Fabrics – and in the true spirit of Textile Fabrics, they are fancy and imported from Italy and cost over $1 each. Ugh. Who knew it was so hard to find navy shirt buttons? Anyway, they look good!

Chambray Kalle Dress

One thing you should know about this dress – it’s not a short dress, but the upper curve of the hem is quite high. And the arm holes are quite low, which means that the dress moves upwards if you need to raise your arms. See how high the dress goes when I reach the sky? Ok, granted – I rarely need to raise my arms *that* high, but it is something to keep in mind! For comparison’s sake, I wear my shorts very very short and only the bottom rose of my leg tattoo sticks out of the hem. If the dress hiked up any higher, you would literally see my underwear. FYI!

Chambray Kalle Dress

Chambray Kalle Dress

Chambray Kalle Dress

Chambray Kalle Dress

See how sheer the fabric is? It’s not noticeable when I’m wearing the dress, and also, I wear nude undergarments (nothing patterned).

Chambray Kalle Dress

Chambray Kalle Dress

Chambray Kalle Dress

Chambray Kalle Dress

I think that’s about all I have to say about this dress! I really love this pattern and I am excited to try the other versions in different fabrics. I also realize that this is like, my fourth chambray/denim shirtdress – but you know what? I don’t care. At least I’ve figured out what I like, I guess 😛

Chambray Kalle Dress

** Note: The linen fabric used for this dress was provided to me by Mood Fabrics, in exchange for my participation with the Mood Sewing Network. As always, all opinions are my own!