Tag Archives: delicious cake

Completed: A Solid, Structured Hollyburn

19 May

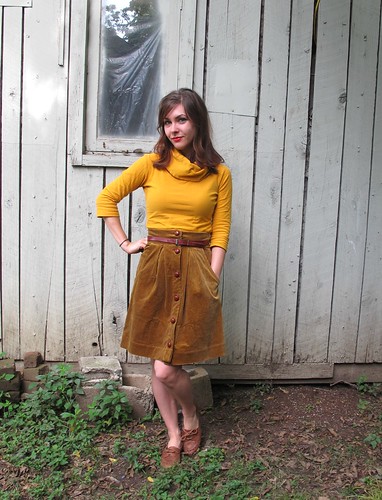
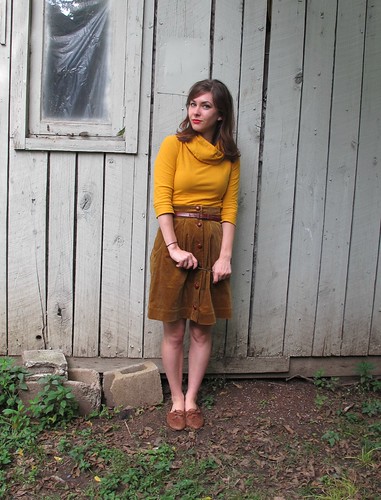
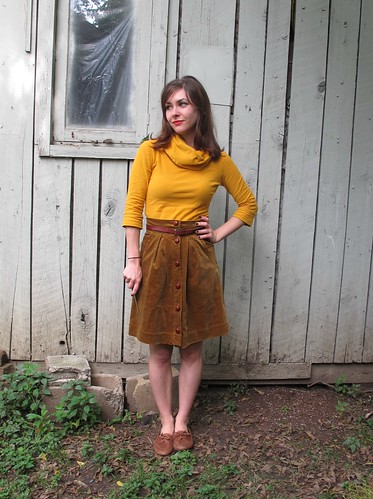
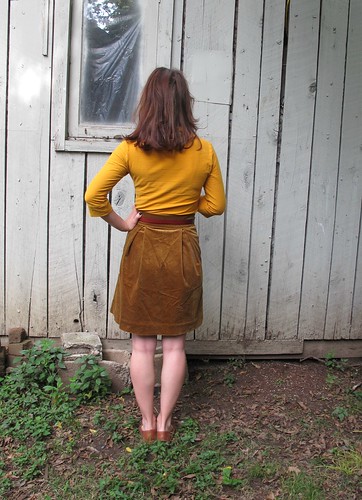
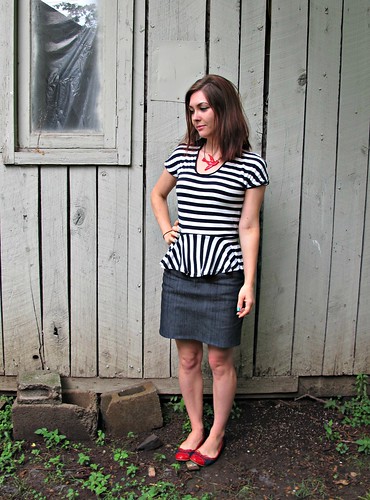
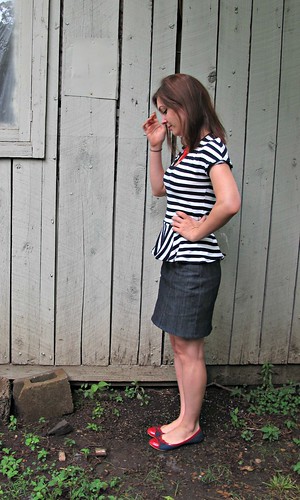
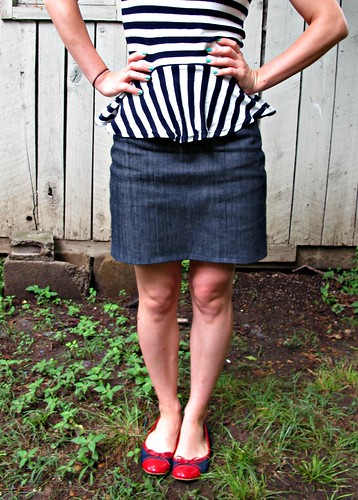
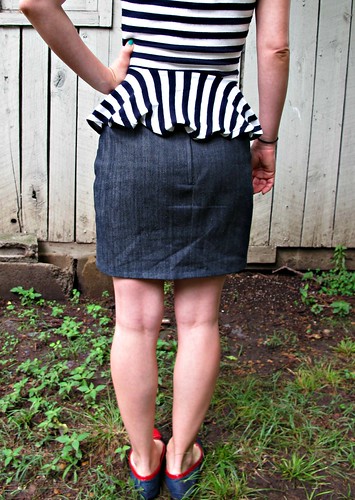
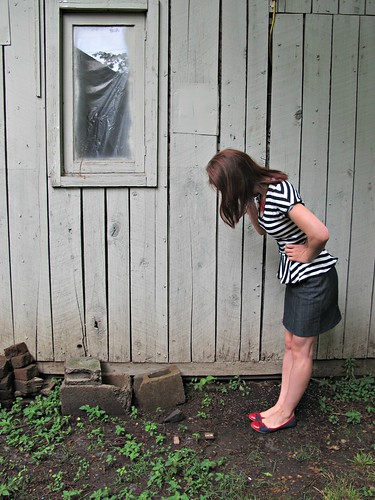
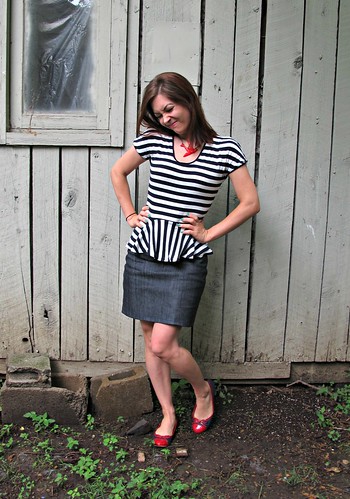
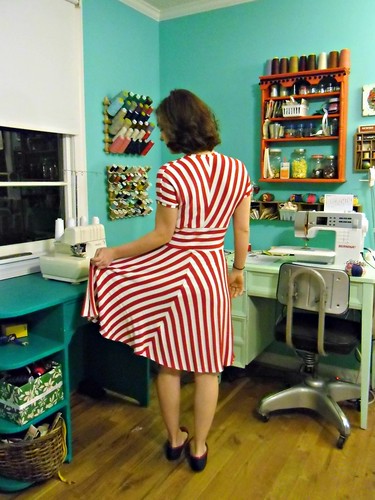
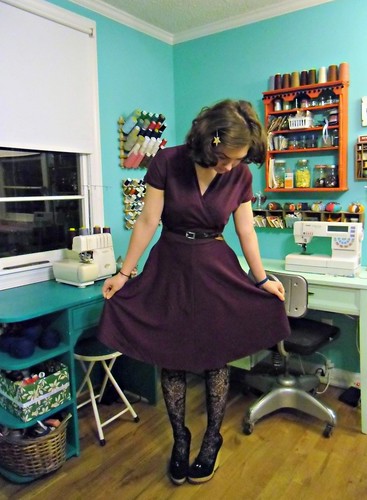
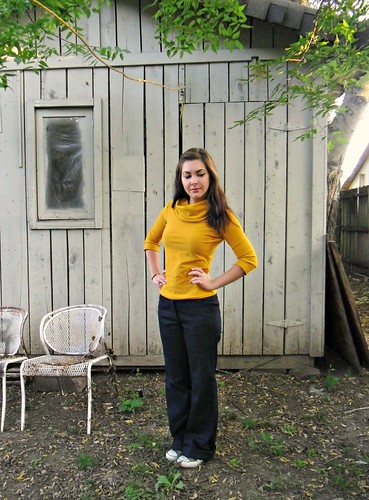
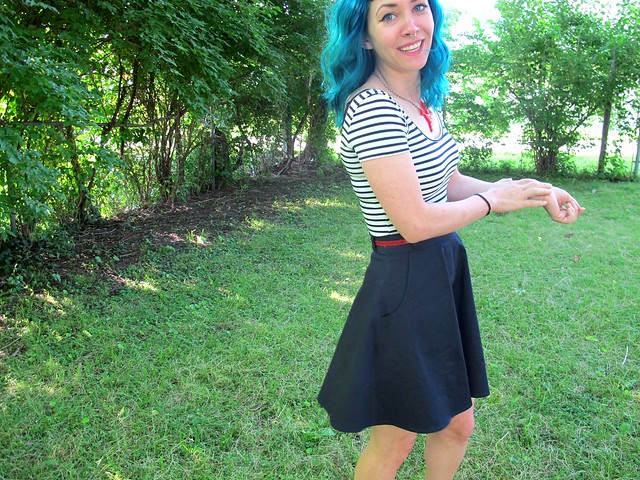
It’s official. Hollyburn is my new favorite skirt pattern. Also, that post title makes this skirt sound like it can stand up on it’s own. Well, it practically can, I guess.

Navy Twill Hollyburn

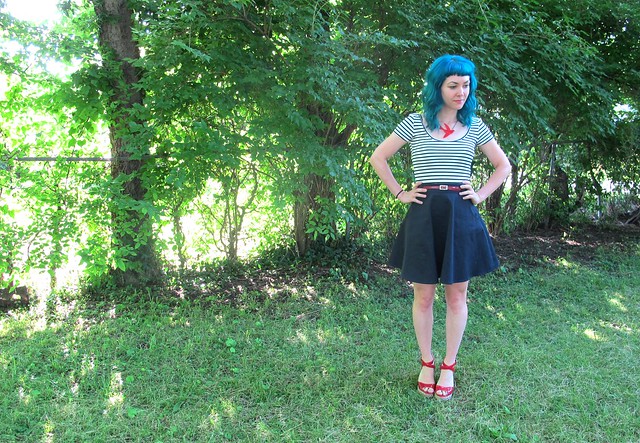
After knocking out a drapey rayon version, I was ready to try this pattern in a fabric with a little more body, like you see on the Sewaholic site. I’m a flared skirt girl at heart, but I’m kind of over circle skirts for the time being (I don’t know what happened, but I suddenly feel like I’m in costume every time I try to wear one!), so this marriage of flared-but-not-circle skirt combined with a fabric that has some structure was pretty perfect.

Navy Twill Hollyburn

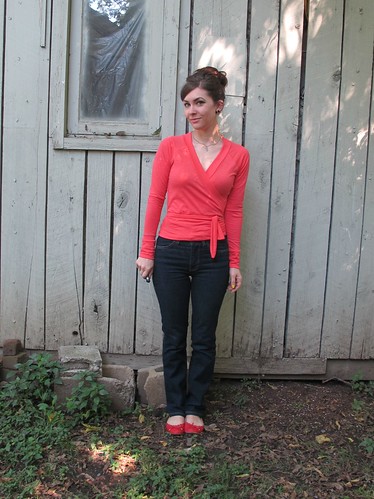
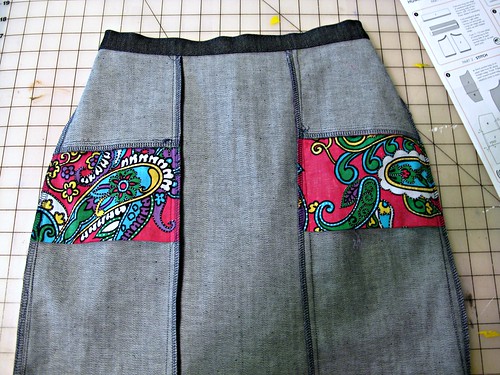
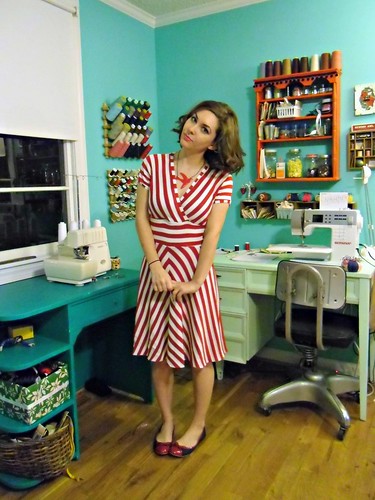
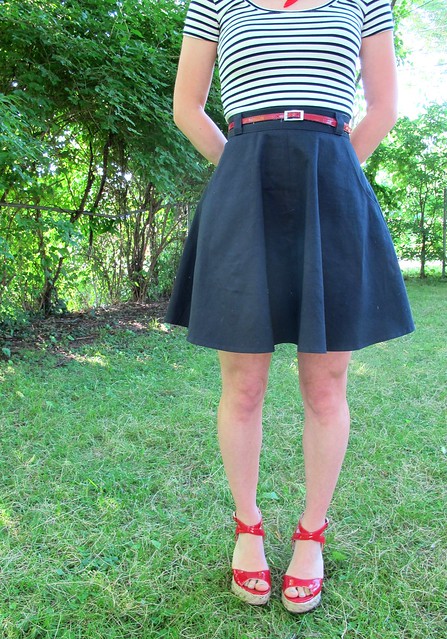
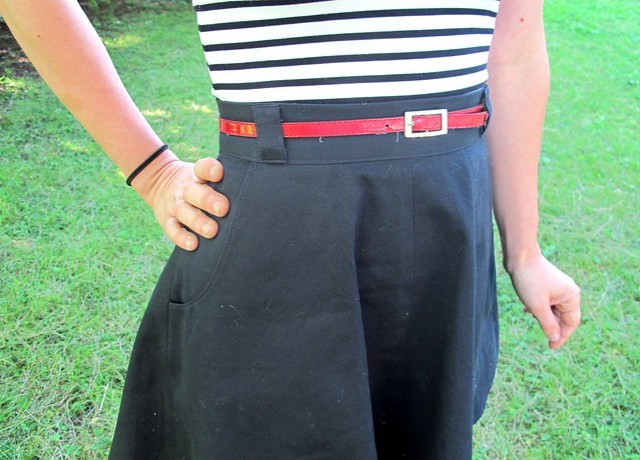
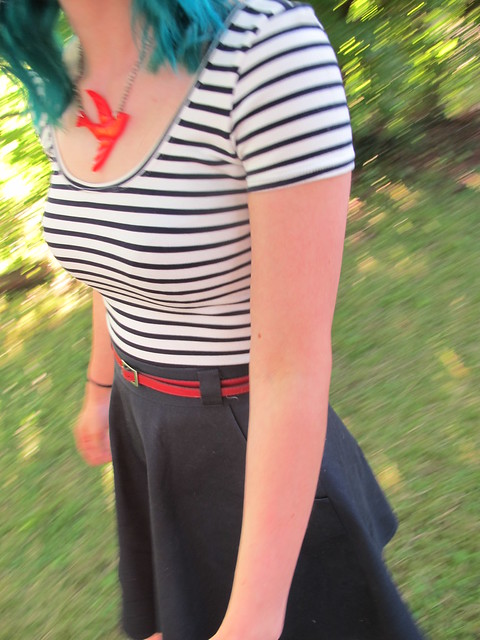
I used this navy solid organic cotton twill from Mood Fabrics that I bought while I was in NY (but, thankfully, you can also buy it on the website. Which is good, because I’m definitely gonna need to buy more asap!). This stuff is AWESOME. It’s a great, bottom-weight cotton twill with no stretch, and very saturated color. I’ve used this fabric to also make my tie-less Miette and my Red skinny Thurlow pants (albeit in different colors, obviously) and it’s just a joy to both sew and wear. Seriously, those red Thurlows get the HELL worn out of them and the fabric still looks totally pristine. I love them!

Navy Twill Hollyburn

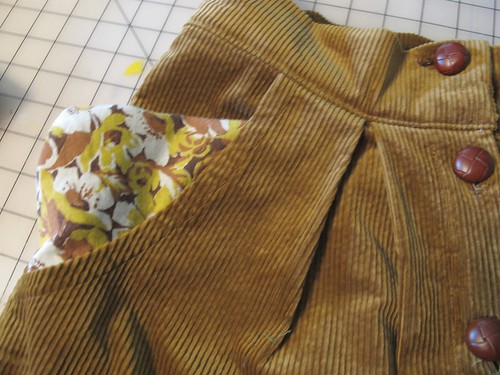
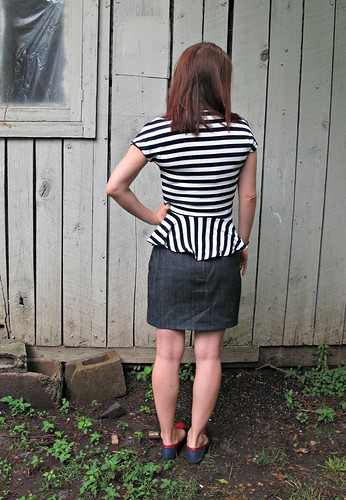
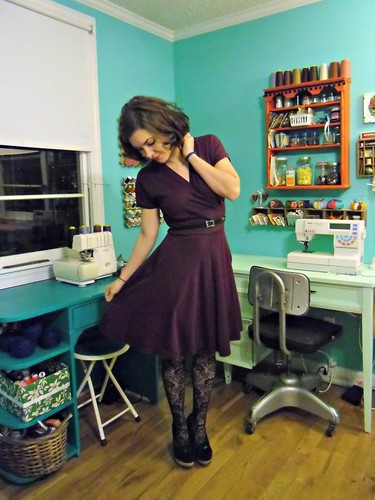
There is not much more to say about this pattern, apart from what I wrote in my previous post. I almost didn’t want to post this skirt because I feel like it’s a little redundant… like, cool, Lauren, you made another flared skirt. YAWN. However, I felt it was important to at least show what a major role fabric choice plays in when it comes to putting together a garment. This skirt is obviously much more structured than my previous Hollyburn – it practically stands out on it’s own. That’s just the fabric, by the way – I didn’t add anything to the hem, nor am I wearing anything under it. I like it though!

Navy Twill Hollyburn

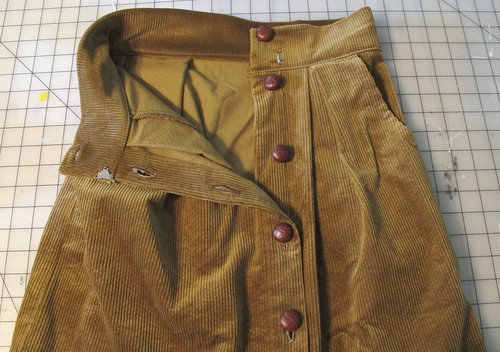
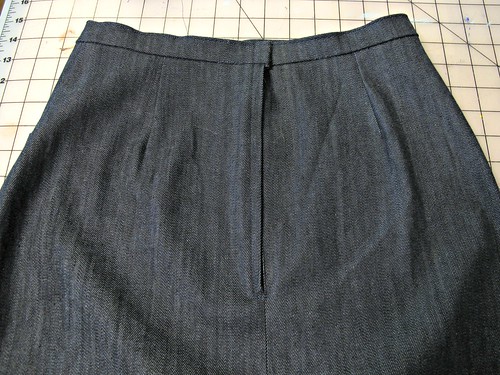
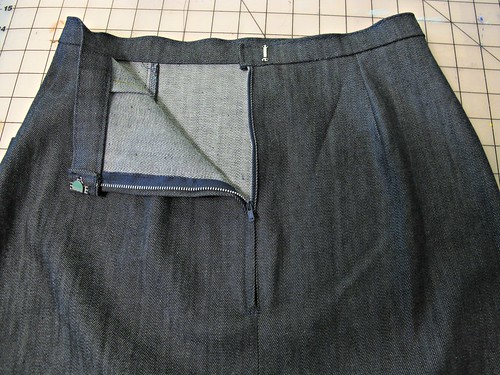
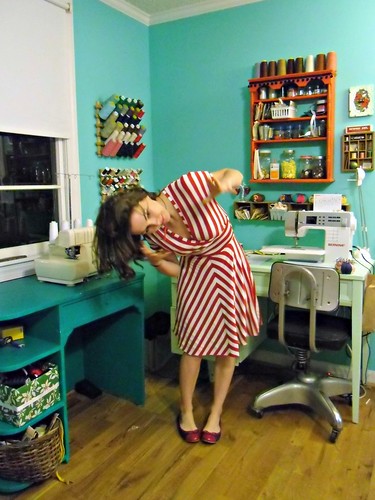
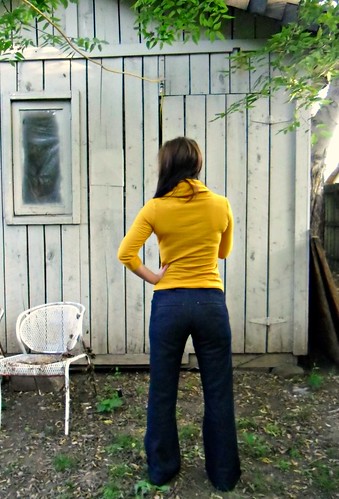
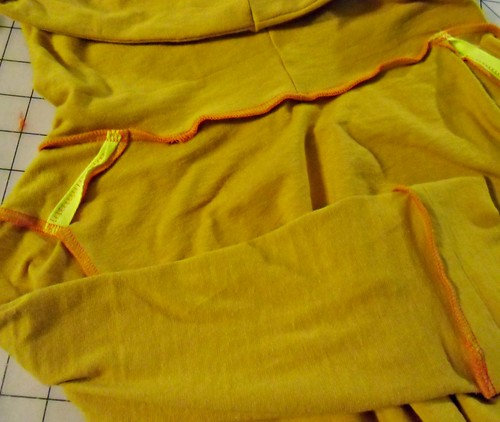
The only change I made from the first skirt (and the pattern itself) was to put in a lapped zipper. I don’t think invisible zippers are strong enough for this sort of fabric, so I like to go lapped in that case. The zipper goes all the way to the top of the skirt, and then the waistband is finished at the top with a hook and eye closure. I should have taken a picture, but, I didn’t (I actually did try, but it was already late and every photo ended up super dark and grainy). You’ll just have to trust me on this one 🙂

Navy Twill Hollyburn

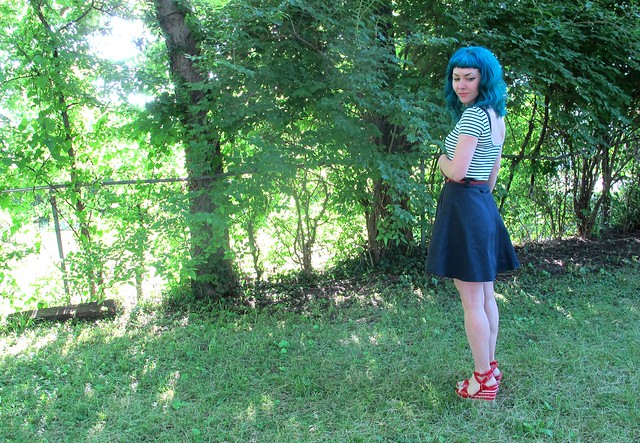
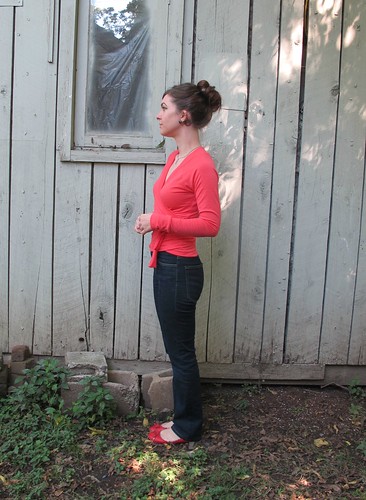
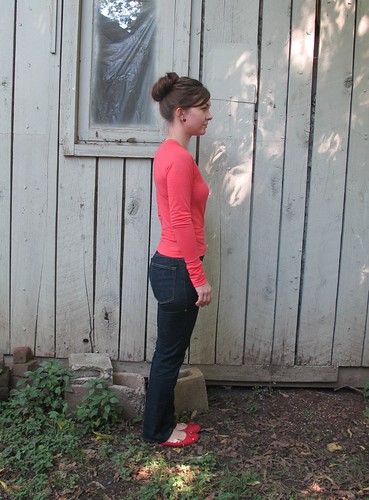
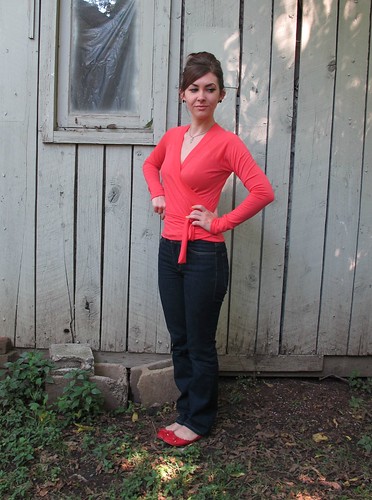
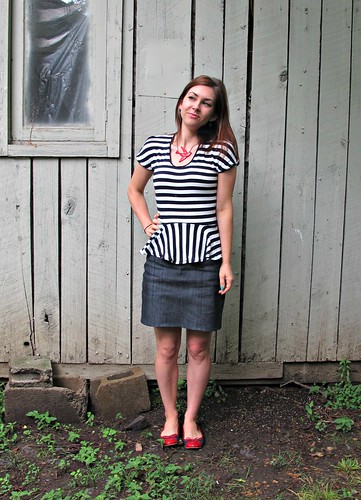
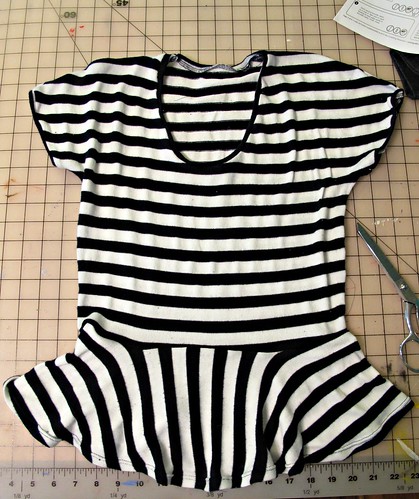
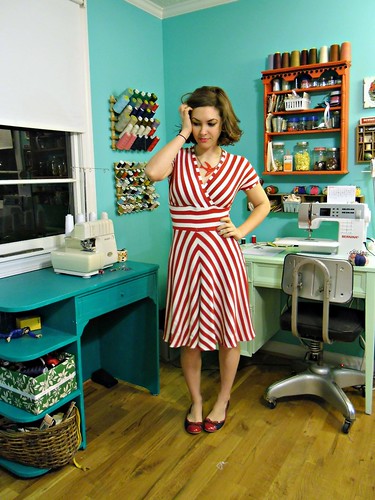
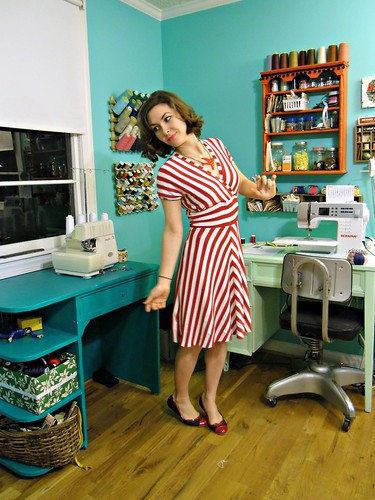
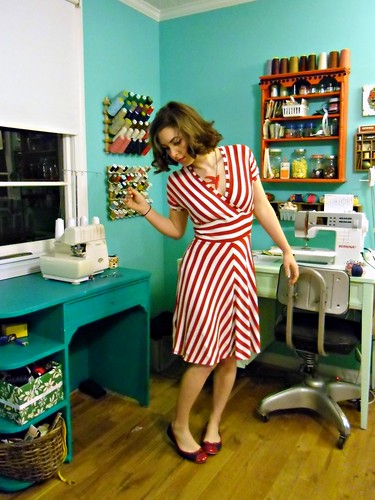
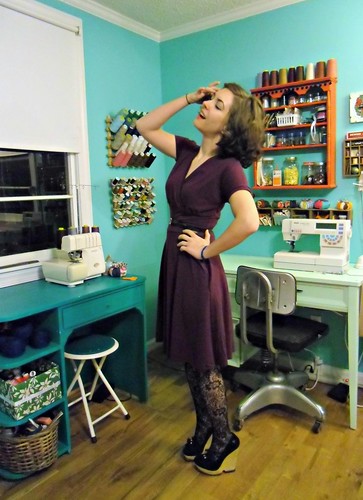
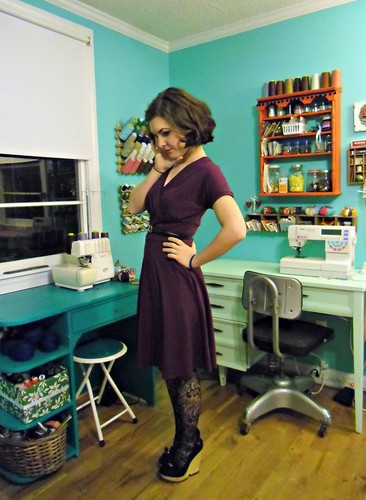
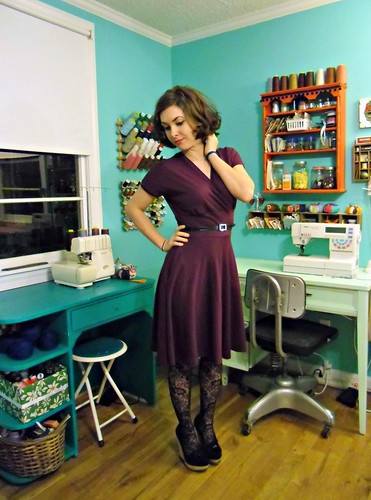
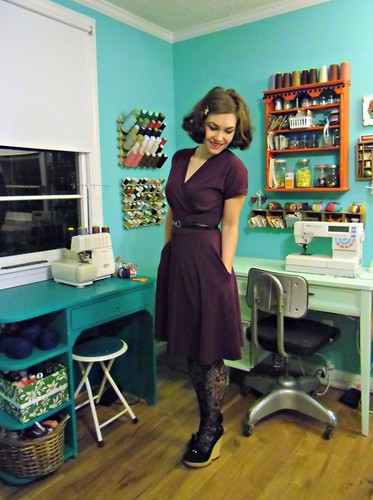
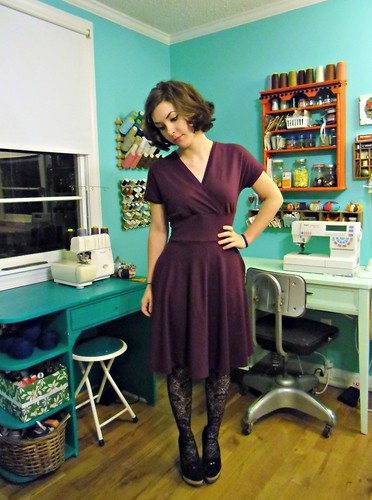
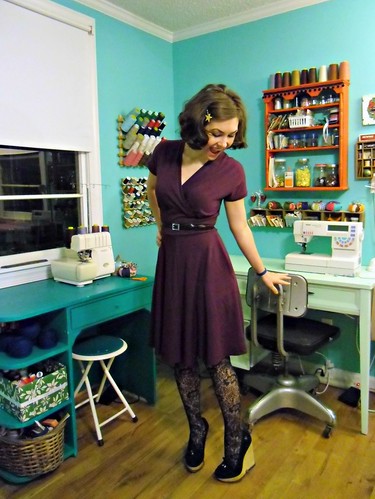
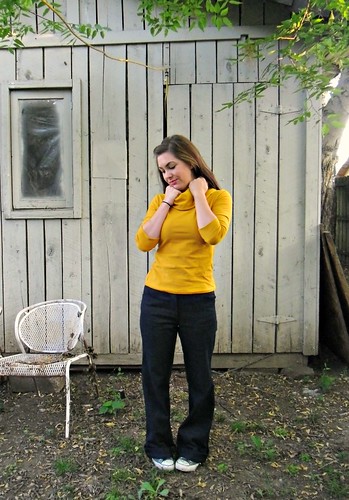
Although I didn’t take these photos on the same day I wore this outfit, I decided to repeat the overall look because I think it works really well – and why mess with a good thing, you know? Seriously, I think this combination of Nettie+Hollyburn is probably going to end up being a sort of summer uniform for me. It’s just sooo good and EXACTLY what I like to wear.

Navy Twill Hollyburn

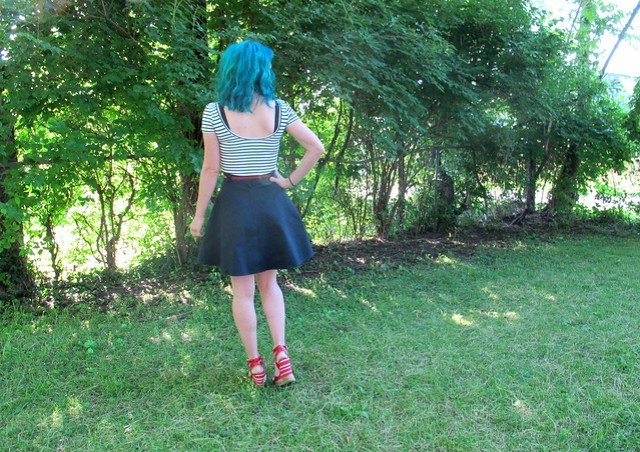
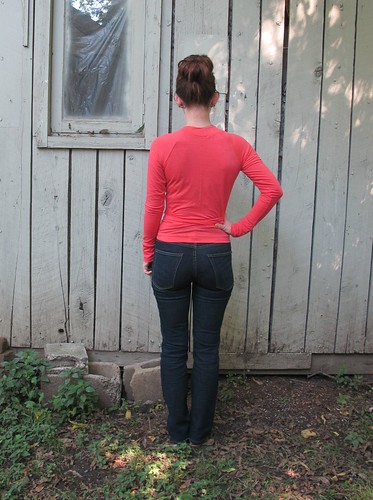
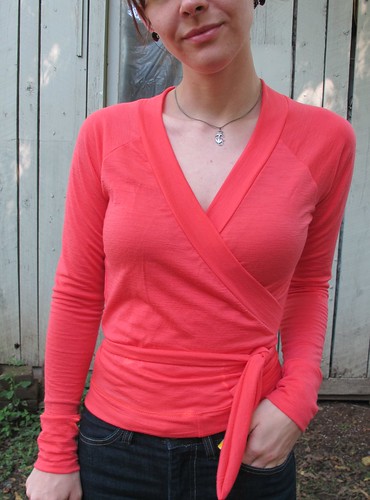
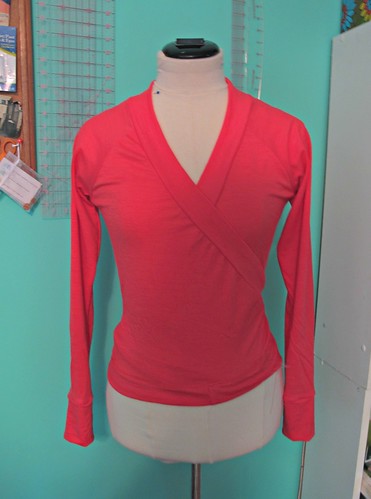
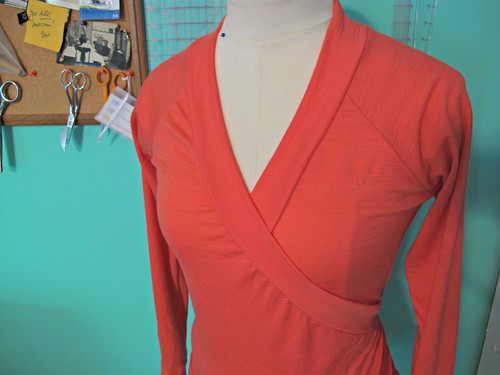
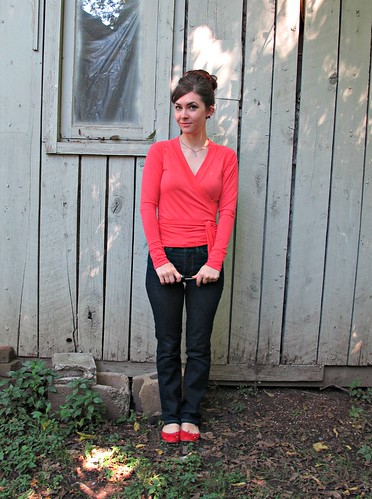
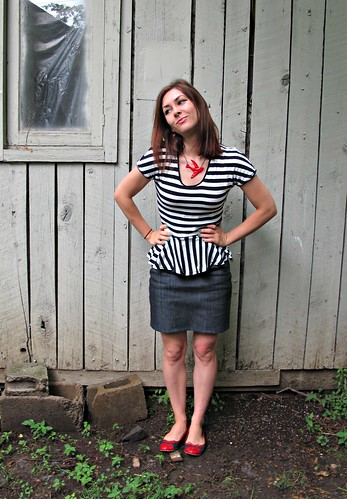
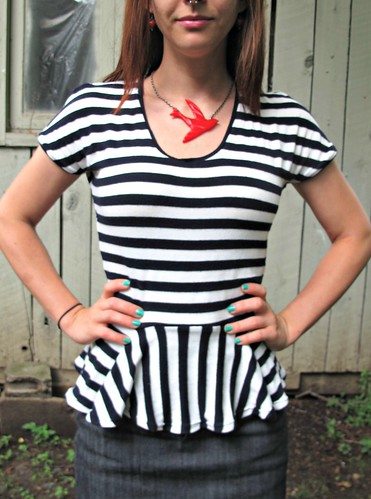
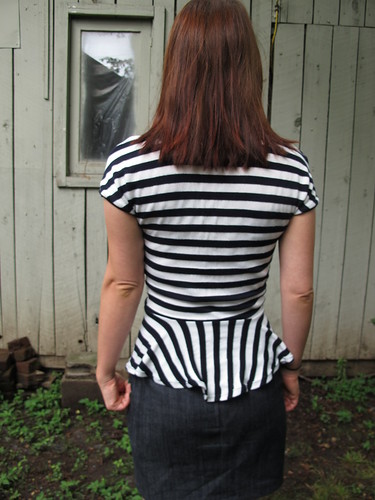
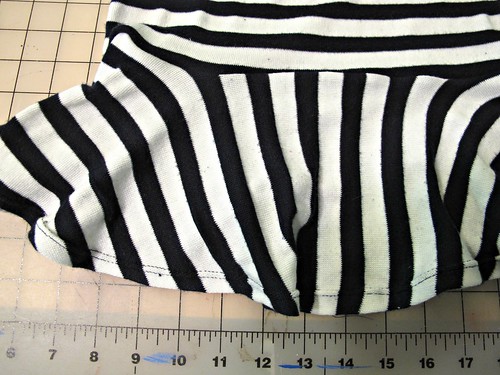
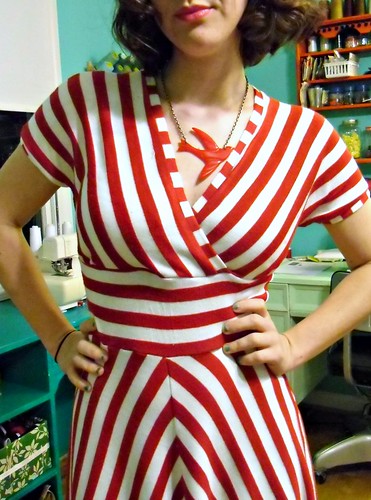
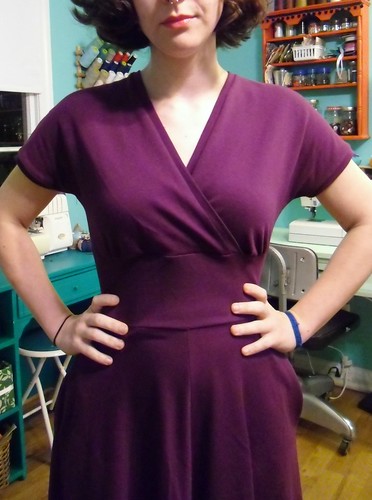
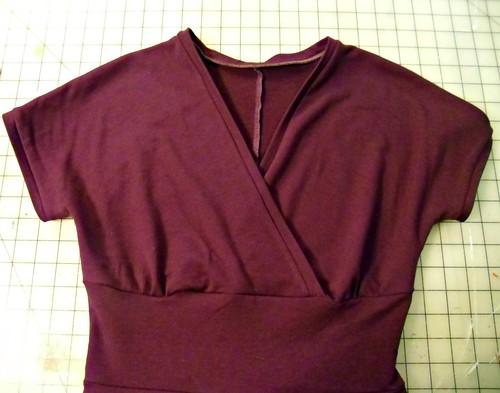
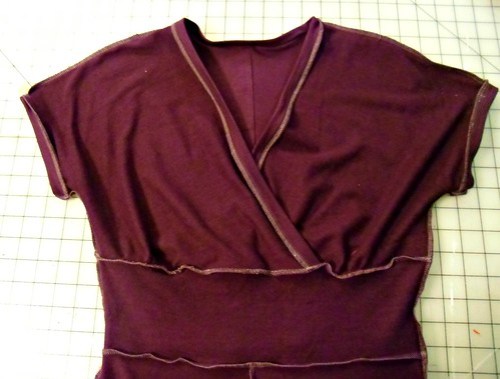
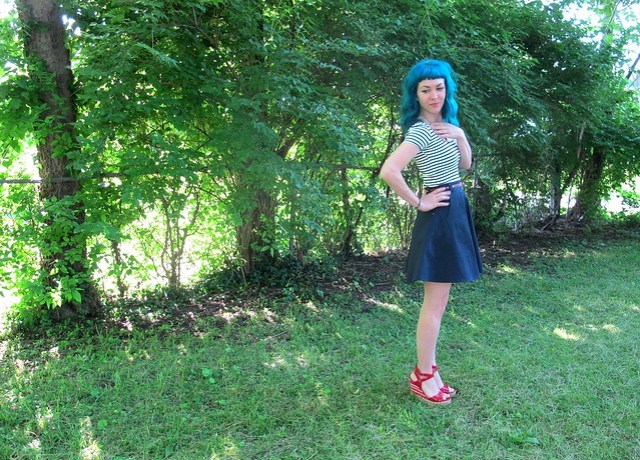
Speaking of Nettie, I did want to show y’all one downside to the scooped back version – it ain’t bra friendly, at least not on me! Of course, my particular top has a few things going against it that probably keep the scoop back from providing full coverage behind the shoulders. For one, I cut this a size smaller than I should have (this was during testing; the sizing issue has since been fixed). I also used a thick pontie-ish knit that doesn’t have a lot of stretch, which means it doesn’t stretch at key points – such as to cover a bra strap. A prior Nettie in a lighter/stretchier knit (which I’m sure will turn up at some point on this blog, ha) doesn’t have quite as much bra-showing. So, something to keep in mind, again, with fabric playing a huge role in how a finished garment looks!

I also realized after making this that I don’t really like the way the scoop back looks on my body. I’ll continue to wear this Nettie because, dammit, I love this fabric!, but future makes will probably stick with being high back.

Navy Twill Hollyburn

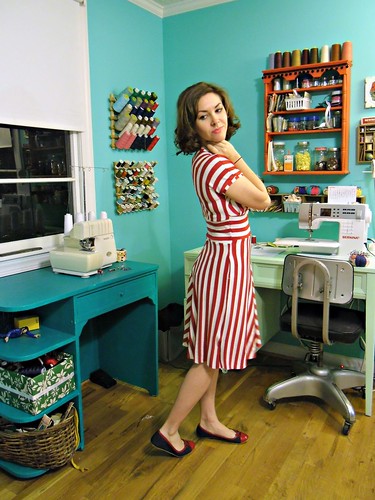
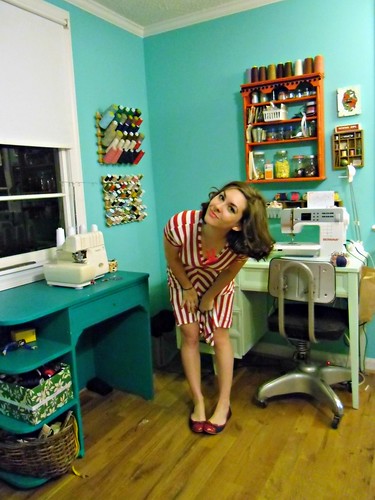
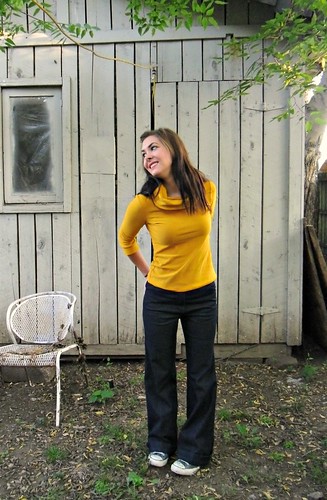
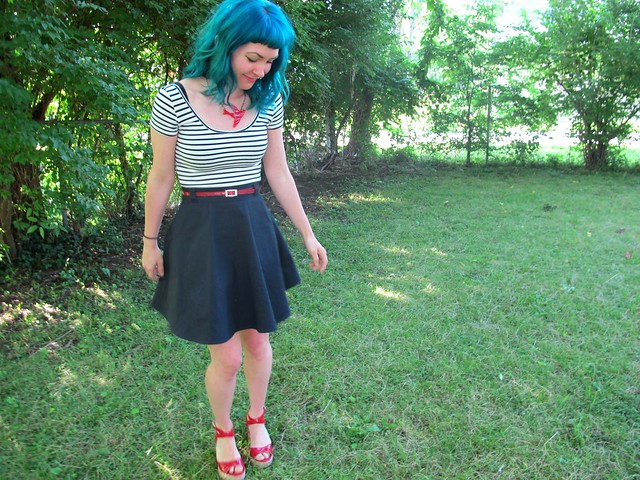
Also, in case you were wondering, those shoes are Fergalicious brand. Yes, I know. lol forever. They’re really cute, though – and surprisingly comfortable (says the girl who hates wearing heels. Flats 4life).

Navy Twill Hollyburn

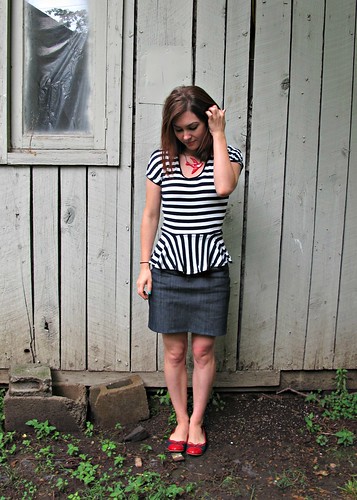
Landon took these photos, by the way! He’s such a good sport – and I’m 99% sure he offered to do these because I told him we would go for a run after, and my solo ~photoshoots~ (if you can even call them that; I mean, let’s be real – no one comes to this blog to look at pretty photos or whatever) take about 3x as long haha.
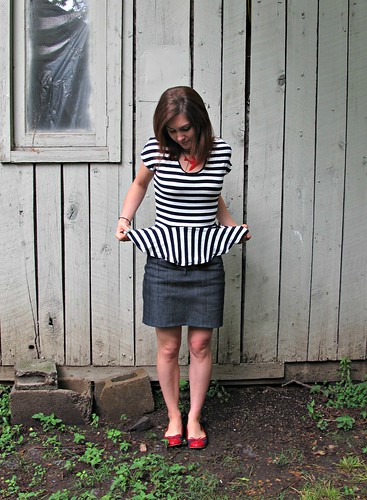
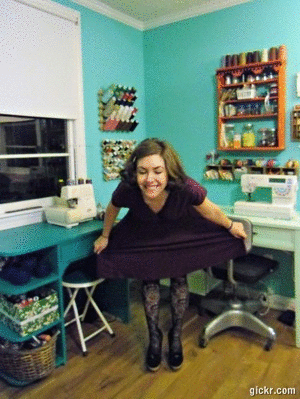
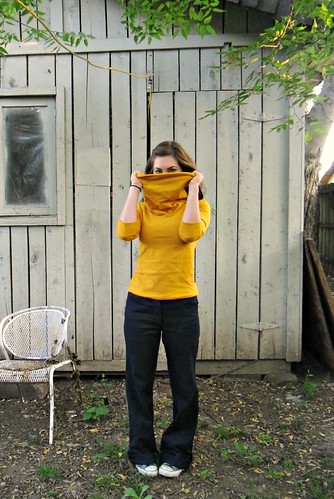
Also: outtakes!

Navy Twill Hollyburn

Navy Twill Hollyburn

Ok, so these aren’t that great… but I’ve been saving some of my better outtakes from MMM (as Landon has been taking most of my pictures for that, too, bless him), which I am going to subject all of you to at the end of the month. Well, there’s two of them, and they both involve Amelia being pissed, ha!

Navy Twill Hollyburn

I guess that’s it! What are your thoughts on Hollyburn now? Are you camp swingy or camp structured?

Completed: Coppélia in Merino

18 Sep

Just a head’s up – this is another kind of boring, repeat pattern post. Sometimes I feel like I’m a bit of a snooze for making the same things over and over, but honestly – I enjoy tweaking my patterns with each make, until I have something that is as close to perfect as humanly possible. It’s a process, to be sure. It’s also the only way I can bring myself to cut into precious fabrics. Don’t wanna goof it up!

Merino Wool Coppelia

So, with that being said – I made another Coppélia cardy! (for previous versions – see one two three). This one in another piece of my prized Merino stash, hence why I needed to perfect this fit.

I also wore my hair up for you guysss! Look at me, branchin’ out and shit 🙂

Merino Wool Coppelia

This Merino wool is different than the first piece I sewed up (see Coppélia three; the leggings are the Merino!). It is MUCH stretchier, a bit more sheer, and much much softer. Due to the stretch, I did have to take down the pattern size a little to accomodate, but it all came out fine in the end! I was also initially concerned that the color would look bad on me… and maybe it does, but ehhh I don’t care. I love it, it’s so bright and happy!

Merino Wool Coppelia

Let’s see, pattern changes. I started out with my base Coppélia, this time sized down to XXS with 1″ taken out of the center back. I took an extra chunk out of the side seams (maybe 1/2″? I dunno, I just serged it off haha) and about 5/8″ off the under arm and sleeve seam, for a much closer fit. The biggest change I made was to lengthen the top, so it would be wearable with my jeans. I slashed through the pattern about 1″ from the bottom and then added 2″, making sure to true up the lines and everything when I was done. This pulls the cardi down long enough to cover my waistband, which hits right below my navel. Perfect!

Merino Wool Coppelia

Another change I made was to tighten the neck band for a closer fit. I just kind of wing’d (wung?) it up as I went – tacked it down at the center back, then starting at the CB on one side, I pulled the band while I serged it to the neckline. Once I reached the end, I went back to the CB and attached the band from the opposite side. I think I ended up pulling about 2″-3″ off the neckband at each end. The result looks a little gathered when it’s laying flat, but once on it gives a nice snug fit – which is important with a low wrap top like this.

Merino Wool Coppelia

Merino Wool Coppelia

I like the ties wrapped in the front, but after taking these pictures I ended up tying them in the back like the pattern envelope.

Merino Wool Coppelia

And this top looks great with my jeans! Win! 🙂

Merino Wool Coppelia

So, speaking of Papercut Patterns – I know a lot of people have voiced concerns in the past about the prices of the patterns. So, with that in mind, two things: 1. Make sure you change the currency (it’s at the top right-hand corner) to USD, or whatever works for your country. NZD is the default, and their shit’s a little more expensive! 2. Consider that the price also includes free shipping, if that helps sway ya 🙂 This top is $20.48 USD, which includes the shipping – a top from other indie companies usually runs, what, $14-$18, plus the shipping, which can easily be $5 extra. Just something to keep in mind! 🙂

Merino Wool Coppelia

Now that I’ve perfected the fit on this, I can’t wait to make a million more and then post them and force y’all to look at multiples of the same shirt.

Merino Wool Coppelia

Merino Wool Coppelia

Ha! Just kidding, I wouldn’t do that to you.

Merino Wool Coppelia

Probably not, anyway.

Completed: A Cozy Kelly Skirt

16 Sep

Look at me, I’m like a 1970s Sherwin Williams swatch book all up in hurr.

Corduroy Kelly Skirt

I know I haven’t talked about her much since the denim version came out to play, but OMG I LOVE KELLY. I seriously can’t get enough of this pattern – it’s very simple, but delivers maximum effect!

Corduroy Kelly Skirt

This is my second corduroy Kelly, same difference as the first, although this cord is a much thicker wale with a softer hand. I snatched it up during my trip to NYC – it was part of a swap, although I am a terrible swapper and I don’t remember who it came from 😦 Sonja? I know the majority of the goods came from your stash haha 🙂

Corduroy Kelly Skirt

Anyway, origin aside, this fabric is pretty fabulous! It’s super soft with a fair amount of body, and the color is one of those great browns that goes with everyyyyything (except the new top I made, apparently, which is not the same top I’m wearing in these pictures btw. Oh well haha!). I love corduroys, but sometimes finding a good one that’s pure cotton with no stretch and a nice color can be surprisingly difficult!

Corduroy Kelly Skirt

I can’t speak much on this pattern because obviously I’ve already made/discussed it, but I will tell you what I did differently this time ’round. For one, I used sew-in interfacing instead of my regular fusible… corduroy can be kind of finicky when you press it (specifically – you risk squishing the wales flat and ruining your fabric and WAH), and a quick test of the fusible proved that I would be making a huge mistake. I used muslin as my sew-in – just cut the pieces, basted them to the waistband and button hole placket, and then proceeded as usual.

Corduroy Kelly Skirt

I did topstitch my skirt as directed, but it’s not really noticeable due to the thickness of the fabric. It doesn’t bother me – I like the subtle look – but if you’re planning on making this with a similar fabric and want the topstitching to be visible, you will need to use top stitching thread and the accompanying needle.

Corduroy Kelly Skirt

Obviously, you want to be careful when pressing corduroy – but some stuff does need a good sharp crease, like these pleats and the hem. To do this, I laid a scrap piece of corduroy on my ironing board, right side up, and put my skirt on top of the scrap right down down (this keeps the nap from getting crushed, as the fabric on the bottom provides some support). I used my silk organza press cloth and steamed the beejeezus out of everything, and then used my clapper to hold everything down until it cooled off.

I love that clapper. I always feel like such a fancy-pants when I use it, ha.

Corduroy Kelly Skirt

I also omitted the second button on the waistband – I want to wear this skirt with belts, which I can’t do if there’s a giant button in the way. I put in the top button and added a hook and eye where the second button should be.

Corduroy Kelly Skirt

Here you can see my hook and eye. The skirt in unlined, but it works fine with a slip underneath in the winter, for wearing with tights. Well, the other corduroy one does, anyway, haha.

Corduroy Kelly Skirt

Oh yeah, my buttons were free too! They’re some faux-leather suiting buttons that my Mamaw gave me. She gave me HUNDREDS of them (and my mom took half… but still… that’s a lot of buttons) and I rarely find a change to use them since they’re just really big. But I think they work here! The color looks great with the color of the fabric.

Corduroy Kelly Skirt

I almost forgot – look at this cute pocket lining! It’s a tiny little scrap I got at the flea market. The seller threw it in for free (lord, can I say “free” enough in this post??? FREE FREE FREEEEEEEE) with a few other scraps, after I made a purchase pile. It was just big enough to use to line the pockets. I love those colors, wish I could find a big yardage that looked like it!

Corduroy Kelly Skirt

I guess that it’s! Kind of a boring staple to make, but these kinds of basic pieces get a lot of wear in my life 🙂 Plus, it looks sooo good with my mustard Renfrew, which is always a plus in my book.

Completed: Hummingbird Separates

8 Jul

I hope everyone had a good weekend – holiday or not! I celebrated by basically NOT leaving the house, except to get an oil change (for my truck) and donate blood (from my body). It was rainy and cold all weekend, which is really abnormal for July. No complaints here!

I didn’t get too much sewing done, surprisingly (rain makes me want to lay on the couch, which means that I knit!), but I did make myself a new outfit to wear over the weekend – using the new Hummingbird pattern.

Hummingbird Set

Every time I sew up one of this patterns, I am reminded of just how much I loooove Cake (not the food, the pattern company! Although, I’m not one to turn down the food, either…). These patterns are basically my dream patterns – easy to customize the fit, easy to adjust during sewing, easy to sew (but with just enough challenge to keep things interesting), basic & wearable for all occasions. Not to mention, Steph recently changed up the paper patterns to include sizing lines in different colors. It’s like a party in the envelope, guyzzz.

Hummingbird Set

This is the whole set – both the top and the skirt. This is my second top from this pattern (and no, you haven’t seen the first because I never blogged about it. It won’t be in this post either because it was in the wash while I was taking pictures! Soon!), and my first skirt. I wasn’t sure if I would even make the skirt, since a fitted/straight style isn’t really something I wear much of – I like to be able to mooooove… ride my bike, sit on the floor, crawl under tables, you know, the usual – but it’s surprisingly comfortable! These pictures were taken after a full day, so pardon my wrinkles.

Hummingbird Set

We can discuss the top first. I cut the size 30 bust/26 waist (Cake patterns are based off your measurements, not standard sizing) with a 17″ length (this ensures that the peplum hits the right place – I think it does! What do you think?). This is exactly how the pattern is written, with NO alterations. Can you believe how good it fits straight out of the envelope?!

Hummingbird Set

Unfortuately, I don’t think I’ll get much wear out of this top. As cute as this stripey fabric is, it’s kind of tragic – loosely woven, and stretches like a mother (it also unravels. A KNIT. I can’t even…). It’s the same fabric I used for my Stripey Tiramisu, and it just sags and bags after a couple hours. I don’t know why I bought sooo many yards of it, but ugh, I did. So I’ll just enjoy the top while I can, I guess.

Hummingbird Set

To make this work with my fabric, I had to drastically shorten the neck and arm bands to keep them from being floppy (this is super easy, since you sew those on while they’re flat, instead of in the round – you can just cut the excess off). Instead of using interfacing to stabilize the shoulder seams, I pulled out the big guns and used 1/4″ elastic. I also used the same elastic at the waistline; hopefully this will keep the weight of the peplum from pulling the shirt down too much.

Hummingbird Set

Ok, skirt’s turn! This is a 26 waist/35 hip (the measurements closest to my own, obviously). I actually ended up needing to take in quite a bit during the side seam fitting – about 1″ off each side of the waist. Fortunately, this pattern is made to allow for fitting during that stage of sewing, so it didn’t mess up my pocket placement or anything.

Hummingbird Set

Be warned that this skirt is a bit on the short side – I only hemmed mine 1/2″, and this is the length I got.

Hummingbird Set

I used the same denim leftover from my Peter & the Wolf Pants – I think the stretch is key to making this skirt super comfortable. And bonus, this skirt barely took any fabric – less than 7/8 yard!

Hummingbird Set
Hummingbird Set

Sooo these pictures were taken with my new camera, btw. I think they look pretty good, but it’s obvious that the close-ups need better focus. I also discovered that I do not like the self-timer on this camera; it takes the pictures rapidly with no time between. Good thing I ordered a remote last week!

Hummingbird Set
Hummingbird Set

Ok, I’ve officially run out of things to say about this set. Here’s some flat shots!

Hummingbird Set

Hummingbird Set

Hummingbird Set

Hummingbird Set

SURPRISE FANCY POCKET LINING, YEEEAHHH!!!

Hummingbird Set

Hummingbird Set

Hummingbird Set

I took a close-up of the fabric so you could see how awful it is. It is literally a knitted fabric – that’s stockinette right there. Isn’t the macro feature on my camera delicious, though? Expect lots of close-up shots, I can’t get over it.

Hummingbird Set

I can’t wait to try the flouncy version of this sucker. Gonna shake my tailfeathers all over the place 😀

Psst! I have a couple announcements, real quick!

– My awesome sponsor, Sweet Little Chickadee, is moving to NY and closing shop for a month or so to handle the move – but in the meantime, she’s having a quick sale to empty out stock. Use the code MOVINGSALE to get 15% off your total purchase (this includes sale items!) through Tuesday, July 11. I know the blog post says Sunday 7/7, but Juli just informed me that she is extending the sale, soooo… shop your hearts out! But hurry! 🙂
– Speaking of shopping, I’ve started the mind-numbingly awful process of preparing some of my handmade and vintage clothes to be put up for sale on Etsy. I took tons of pictures and measurements over the weekend, and I’ve been slowly adding them to my shop. I thought it would be real awesome to have everything up and running by the time I wrote this blog post, but obviously that hasn’t happened yet. Check back at the LLADYBIRD shop if you are interested in buying a little piece of my history – I plan to have them all in the shop by the end of the week (and I’ll mention on the blog and/or Twitter when that’s said and done).

I hate the idea of selling my beautiful handmade clothing, but none of this stuff fits me anymore and it’s too much of a size change to take in. Rather than hoard it for no reason, I’d love to see this stuff go to a loving home where it will actually get worn. I’m not trying to make a huge profit here, so I’m pricing everything pretty low. Proceeds are going to fund some upcoming medical expenses I have, if you’re curious. Also, I am NOT trying to turn this into a big blog about how everyone should buy my shit, so don’t worry about that. Again, if you’re interested – check out my shop!

Hummingbird Set

Ok, I guess that’s it!

Completed: A Stripey Tiramisu

8 Feb

It’s no secret that I love knits – I love sewing them and I love wearing them. Sometimes when life throws you a big shit sack full of bummer, the only way to get back on the horse is with a good ol’ TNT. All knits are TNT as far as I’m concerned (so. freaking. forgiving!), but I especially love my purple Tira, because it goes the extra step of actually looking pulled together. Which is nice, especially when you just wanna feel like you’re wearing comfy pajamas.

As much as I love purple, though, it’s pretty winter and no duh I need a stripey summer Tiramisu now, right? No shame, I totally ripped off both Steph AND Penelope, because I am shameless and awesome and secretly hoping we can be twins(triplets?). Ladies, pls.

Stripey Tiramisu
Anyway, who doesn’t love stripes?! It’s like wearing a circus ON MY BODY.

Stripey Tiramisu
This fabric is from the giant sale at my local fabric store, where I totally cleaned up last month. I actually have this stuff in black/white stripes too (and I think I bought some crazy amount, like 4 yards of it haha). It’s so stripey and soft and awesome. It’s also kind of not really suitable for this kind of dress; it’s VERY stretchy, 4 ways, and super drapey. I had to make a few changes to the pattern to get it to work – which ended up ok in the end, but please heed my warning: you need something more stable for this dress, unless you want to futz with the fit all night like I did.

Stripey Tiramisu
Still, it turned out pretty cute, if I do say so myself! And it looks so good with my new shoes 😀

Stripey Tiramisu
Anyway, let’s talk about the changes I made:
– I reduced the size of the bust to a C on the pattern tissue, but once I basted the top together to test the fit, it was still a bit low (as the fabric was pulling under it’s own weight. And this was before the skirt was attached!). I removed another 3/4″ from the underbust, although looking at these pictures, I could’ve stood to remove a little more.
– I reduced the waist by 3/4″ before sewing; once sewn up I had to take in the side seams another 1/2″ or so. I’m telling you – this fabric is soo stretchy!
– I shortened the neck and arm bands and stretched them to fit when I sewed them on; without stretching, they would have ended up floppy.
– I shortened the hem twice – first hacked about 3.5″ off the pattern tissue, then another 2″ when the dress was sewn up as the skirt had stretched under it’s own weight.
– I left out the pockets – I feel like they add a lot of bulk with fabric like this.

Stripey Tiramisu
I tried to match up the stripes, but I didn’t do the best job. They match up on this side…

Stripey Tiramisu
… but not the other side. This is partially because the fabric was a PAIN IN THE ASS to cut (so shifty!), and partially because I had to keep sucking in the side seams after the dress was finished, to get it to fit. Also, please note that the waistband is not cut straight. Again, shifty fuckin fabric.

Stripey Tiramisu
The shoulder seams also do not completely match up. Oh well!

Despite my problems with the fabric, the gape factor is pretty non-existent:
Stripey Tiramisu
Stripey Tiramisu
I think the key to this is shortening the bands and stretching them to fit the neckline. It kind of sucks everything in, and allows it to curve to your body.

Stripey Tiramisu
If you have your heart set on sewing this pattern with a very drapey fabric, make sure you are vigilant about pressing every seam. It really makes a huge difference, especially on the bands.

Stripey Tiramisu
Stripey Tiramisu
Sorry about all the loose threads; I had literally just finished the dress before I took the pictures 🙂

Stripey Tiramisu
Now then, let’s have a bit of Spring up in here, pls?

Completed: The Tiramisu!

13 Dec

WHOOOOOOOOOOO LOVES CAKE? I’m talking about the new pattern line, the brainchild of our beloved StephC (although the food is all kinds of delicious too, mmm). Tiramisu is her first offering – a knit dress with a mock-wrap front (in cup sizes A-D), short kimono sleeves, and pockets.

I was actually part of the crew of ladiez who were initially chosen to test the pattern before it went to print. There was a small snafu with the tester printing (so it goes), which is why you see my dress at the same time you are (hopefully!)holding your own copy of the pattern. I’m still treating this like a test pattern, which is why I actually paid attention to the instructions and made notes as I sewed. I also made a muslin. I never make a muslin for knits – are you proud of me? ARE YOU?

Despite treating this like a test, I’m sorry to report that my pictures are still total shit. You know, winter, lack of light, I’m not getting up early, blah blah. Also, my hair looked REALLY good last night and I need to take advantage of that. Them’s the breaks!

Anyway, check out my new dress!

Purple Tiramisu
~So in love!

Purple Tiramisu
It looks totally different in a solid color, yes?

Purple Tiramisu
For this lil guy, I used a gorgeous purple bamboo knit that I bought at Vogue Fabrics while I was in Chicago. I actually bought it specifically to make this pattern; I’ve been holding it for a few months haha. I wish I had a big enough piece to send every single one of you a little swatch – it is the softest thing I have ever put on my body ahhhh!! And the color… none of these photos (mine or the ones from Vogue) do it justice. It is the most beautiful eggplant purple in the world.

Purple Tiramisu
Basically, I never want to buy another knit that isn’t bamboo again. Ever.

Purple Tiramisu
So let’s talk about the pattern! The sizing is pretty brilliant, and in fact my favorite part – you pick based on your high bust measurement, and then corresponding cup measurement (which is more of a measurement of proportion rather than the actual size bra that you would normally wear). The waist band is chosen based on your actual measurement (rather than the usual, “Well, if your bust is x, then your waist is y.”). It sounded confusing at first read, but once I actually got the pattern in my hands and looked over the sizing information, it was pretty easy to determine what size I should cut.

The size I ended up with was 30D, based on my measurements, and the waistband was cut for a 25″ measurement. I had to make a couple small changes to get my preferred fit, but even straight out of the envelope it was looking pretty good!

Purple Tiramisu
The changes I made were actually pretty mundane:
– I took about 1/2 off the bottom of the front bodice, as it stretched a little too low in the muslin (PROTIP: When making a muslin for this dress, you only mock-up the bodice & midriff. Since the skirt weighs down the whole top and thus affects the fit, it is pretty important to pull down the band to mimic this if your fabric is on the heavy side. Otherwise, you may end up with a longer bodice once you sew the skirt on!)
– I took at least 1″ off the side seams, for a much more snug fit
– I took 3.5″ off the hem, as below-the-knee doesn’t look so hot on me. The skirt is 20.5″ now.
Ok, looking back, I realize that those bust changes mean I actually ended up with a 30C. WHATEVA.

Things I love about this dress:
Purple Tiramisu
DAT SKIRT.

Purple Tiramisu
SOFT POCKETS.

dancin
NO GAPE.
Seriously, the bodice engineering on this thing is a thing of beauty and wonder.

Purple Tiramisu
One thing I did note with this particular dress is that the pockets do add a bit of bulk at the hips. I think this is unique to my particular fabric (it’s quite clingy due to the 4 way stretch), as it’s not apparent on Steph’s version (or the bonus version), but I think it bears mention if you are concerned about that kind of thing. I’m not, personally, so the pockets will stay.

Oh, here are some pictures without the belt, btw:
Purple Tiramisu

Purple Tiramisu
It’s still pretty! I just like to belt, well, everything 🙂

Purple Tiramisu
The only thing I would change next time I make this is to sew the sleeve binding on after the side seams are sewn. It’s a personal preference – I know why the pattern has you sew the binding on before (so you can test and tweak the fit – and yes, it comes in handy!), but I just like the way it looks as an, er, uninterrupted tube. It also may or may not have anything to do with the fact that I sewed the sleeve binding to the bottom of the midriff on my first go (and no, I’m not bitter or anything, why do you ask?).
Another thing I’ll mention is that the fabric estimates are generous. I only used 1.5 yards of my 60″ fabric. Even at $15 a yard, that’s a pretty cheap dress!

Purple Tiramisu
I know my threads look as white as I am, but I promise they are purple! Also, this picture is boring as hell.

Purple Tiramisu
Anyway, super happy with this one! I can see this in lots of different fabrics – it’s so comfortable, especially since you don’t have to worry about THE GAPE.

With that being said, if you haven’t already done so – you really need to pick up a copy! And OMG so excited about the upcoming Pavlova!!

Completed: The Mustard Renfrew (plus some announcements!)

26 Sep

Let’s get down to business, shall we?

First of all, you guys definitely want a sew-along. And I aim to please! So let me introduce my first sew-along (ahhh!!), for the Thurlow trousers:


Feel free to snag this button for your blog, so everyone will know how cool you are BECAUSE YOU ARE MAKING PANTS.

As it is, I am a bit swamped right now, and I know a lot of you guys are working on jackets & coats with other sew-alongs, so we won’t actually start sewing until the end of October. I am aiming for a start date of Monday 10/29, so there will be plenty of time for everyone to work on their muslins, choose fabric (but maybe hold up a week or two, I’ve got a fabric post cooking right now :)) and of course finish your coat if you’re working on one!

I also opened a Thurlow Sew-Along Flickr Group, so please join so we can all share pictures 😀 We will be posting our muslins for advice on fit, and since I’m not a muslin-master, I’m really hoping y’all can pitch in and help when you see something you know the answer to. Open discussion!

A few people asked if they could join with a different trouser pattern – and the answer is OF COURSE! We will be focusing on the Thurlow pattern specifically, but these techniques should work with any ol’ pants pattern, including the gorgeous new Juniper. However, you may need to draft pieces if your pattern doesn’t have all the cool welts & fly facings & shit.

Also, this specific pattern includes an option for shorts, so if you’d rather make shorts… make shorts! All the construction techniques will still be the same 🙂

Ok, for those of you who dgaf about a sew-along… I have something for you too. But you still have to look at my Thurlows. HEH HEH HEH.

Renfrew & Thurlows
Thought I’d whip up a little tshirt last night 🙂

Renfrew & Thurlows
This is the Renfrew top by Sewaholic patterns. I know what you’re thinking – and I promise I’m not getting paid to wax poetic about Tasia’s patterns every day lol. I just really love them and I want everyone to get excited about them too!

Renfrew & Thurlows
Anyway, I wanted to try the cowl in view C, but I was holding off for the right fabric (and weather conditions). This fabric actually came from the flea market last week – this lady was trying to dump off the remainder of her late mother’s fabric stash and this was in it. It was actually really scratchy & smelled awful, like a moldy basement in the 60s, but I took a chance. Especially since I got a big stack of fabrics for $1 lolz. Anyway, it softened up quite nicely with a wash – and the smell is gone. I just think the color is so perfect!

Renfrew & Thurlows
Here’s a back view. BACK FAT ALERT, BRO.

Renfrew & Thurlows
I feel like it also bears mentioning that this is a perfect every day wardrobe ensemble. Sure, it’s a boring concept – jeans & a tshirt. Who the fuck makes jeans & a tshirt? Actually – I think that’s the beauty of it. Instead of focusing all my sewing power on stuff that rarely gets worn, this is some straight-up cake. I am going to snuggle into this outfit all the time – I would be wearing it right now, if I didn’t work in an office with a dress code 🙂 – and it just tickles me that the entire thing is handmade by meeeee.

Oh, speaking of cake – StephC of 3hourspast just kicked off a presale for her new pattern line, Cake! And it’s a casual knit dress – designed to be worn as every day wear, or, the aforementioned cake. Mmmm, cake.

One thing I hear people mention when they discuss not wanting to sew “every day” items is that they are boring to sew. Boring fabrics (not as many pretty prints!), boring patterns, boring boring. And I get that – I really love digging my teeth into something deliciously challenging. But there are ways to make your plain garments more fun – like making the inside a party:
Renfrew - HAPPY SHIRT
GOD, what a happy shirt!

At any rate, stick around for Thurlow Extravaganza! I’ll be back next week to start muslin’ing, and we also need to talk FABRIC!!

Renfrew & Thurlows