Tag Archives: completed

MADE BETTER: TOTE BAG ALTERATION

24 May

I know what you’re thinking: “Who TF alters a tote bag?” Honestly, a lot of people asked me this – my students, my coworkers, my friends, myself. But, dammit, sometimes I wanna do weird things just to see how it turns out. And in this case, it was making this LL Bean Nor’easter Tote Bag 1000x better than straight off the rack.

Here is a photo of the bag as grabbed from LL Bean’s website. It’s a fine bag, very well made. It works great as it is. But I wanted to make it better, so I did.

I bought my tote from the LL Bean Outlet Store in North Hampton, NH. Fun fact: It’s right down the street from Pintuck & Purl, and I make Maggie take me there every time I’m in town for a workshop LOL. This time, I was determined to get a tote bag! I have a vacation coming up in July and I wanted a big ol’ tote bag to strap to my carry-on suitcase. Another fun fact about the LL Bean Outlet – you can buy mis-embroidered tote bags for about 30% off the cost. Which is how I ended up with Essie Kate’s bag.

Thanks, Essie Kate! Love u!

Apparently it is very New England to leave the wrong name on your bag, which I briefly considered, but I just love seam ripping too much. Off it went!

I did also consider just leaving it as “i ate” but the spacing was just too weird. Bye Felicia! I mean, Essie!

Like I said, the bag is great as-is – it is very roomy, has a zipper across the top, and a nice hanging pocket bag that includes a zippered pocket and 2 gusseted pockets. I liked that it included a detachable crossbody strap, in addition to the handles. The fabric is sturdy and heavy, and waterproof (both on the base and the interior). It was pretty close to what I was looking for. But after carrying it through the airport for my trip home, I made note of a few updates that would make it even better:

  • An outside pocket on the front to stash my phone
  • An slip-through panel on the back so I could attach it to my suitcase
  • An interior pocket for my laptop so it doesn’t bounce around
  • Also, the entire bag was just a hair too big. It needed to be about 2″ shorter – the height was a bit cumbersome for using the shoulder strap, and honestly just looks disproportionally large next to me, in all my 5’2″ glory

And here it is post-alterations! Hooray!

Making these adjustments actually wasn’t very hard – other than trying to wrangle the bag under my sewing machine (I’m sure you can tell that it’s not my absolute neatest sewing ever – which I’m fine with!). It only took a couple of hours and I was able to use materials that I already had on hand, so my only investment was purchasing the bag itself.

The front pocket was made using waxed canvas – I had the tiniest piece, it was actually used to keep closed a roll of wax canvas that came in a Klumhouse Kit. I saved it because it was a nice color, and it looks so good with this bag! To attach the pocket, I just ripped off the straps and inserted the pocket edges, then sewed the straps back down. I debated whether to insert it in the bottom fabric seam as well, but there was so much finishing and topstitching that I decided to just topstitch it down right above that seam instead.

I’m actually pretty stinkin proud of that back slip-through panel – I added a zipper to the bottom (which was a neat idea I nabbed from one of my Briggs & Riley luggage pieces) so it can also function as a pocket when it’s not attached to my suitcase! The fabric is waxed canvas that I bought from the Crafty Gemini ages ago, and the zipper is from an old Niizo bag kit. The topstitching does look a bit sloppy at the bottom – again, I was sewing this on a fully formed (and quite rigid) bag, so I’m cutting myself some slack here. It’s fine.

Here is a poorly-lit photo of the interior laptop pocket (can you tell that I didn’t edit these photos at all?). I sized it to fit my laptop and used more of the navy waxed canvas. I did have to be mindful of when I was sewing on white vs navy, and change my bobbin thread accordingly. I originally did not add a closure, but I hate a floppy laptop pocket (you think you’re putting something in the bag and it goes in the pocket, UGH). I used leftover canvas from the bag’s outer, and folded it up to create a tab, which got sewn into the top binding. I added a snap – the tab was sturdy enough to accommodate the snap with no extra reinforcement, but my navy waxed canvas is pretty thin so I supported it with a leather washer (this also came from a Klumhouse kit, and is absolutely 100% where I got the idea from). I use an industrial snap setter so I had no problem getting a strong snap through those layers. I like this closure because it keeps the pocket closed when not in use, doesn’t show from the outside, and also doesn’t risk scratching my laptop.

This is unrelated to my project and not something I added to the bag – but I wanted to share the free hanging pocket, which is really nice! The zipper gusset folds over the open pockets when the bag is not zipped, so your stuff doesn’t fall out 🙂 I thought that was pretty cool! PS sorry about all those threads that I need to snip!

Ok, I don’t have any photos of shortening the bag because that was a pretty straight forward process. The top is finished with a canvas binding, so I pulled that off with my seam ripper, which also removed the zipper gusset and the free hanging pocket. I also had to open the side seams a bit so I could lower the crossbody strap D rings, because they are close to the top and would get cut off. I removed 1.75″ from the top, moved down the D rings, put the gusset and pocket back in, and re-attached the binding. Like I said, the only hard part was wrangling it under then machine (which honestly felt like a walk in the PARK after sewing those pockets in haha).

I used my Janome HD9 machine, which is not an industrial but it can sew a pretty powerful stitch. I don’t know if a standard sewing machine could handle this, the layers got super thick especially when attaching the binding. I equipped with a size 18 needle and 30wt Gutterman thread – except the white topstitching, I actually didn’t have the right weight thread in that color so I doubled up 2 spools of 100wt! (this is a fun little tailoring trick I pull out of my hat when I have a rush jeans hem and don’t have the right thread color – or time to order. NO ONE can tell. Sometimes I even make my own ~custom colors~ by using two different spool colors lmao).

Aaaaaand that’s it! That’s the story how I altered a tote bag. I’m super duper happy with the changes – it’s a better size for me, and the extra pockets are highly useful. We shall see how well it fares on my international trip but in the meantime I’ll be bringing it with me to upcoming classes!

Speaking of upcoming classes – I’ve got a few more dates for my Alterations class scattered throughout the year (including one in October at Pintuck & Purl – you could walk to the LL Bean Outlet and nab yourself a discounted tote to attack!). I say this often, but I can’t say it enough – alterations does not *have* to be pants hems and boring shit. Basically anything that has been sewn can be altered. A big part of the fun of this class is bopping around ideas and changing things up in the most glorious and unconventional ways (although if you want to learn pants hems and other standard alterations – I can teach you that, too!). Read more about my alterations class here in this post, and check my upcoming dates here!

Me Made May 2021

25 Jun

Did you participate in Me Made May this year? I used to be really active in the early days, but over the last few years I have chosen to not participate as I regularly wear me-made clothes almost exclusively, which at that point just seemed a little annoying and self-congratulatory to shoot a whole ass month of photos for something I already do without prompt.

However, in the last year or so, I went through a bit of an existential crisis as far as my wardrobe was concerned. I started with changing my color palette (I’m sticking strictly to warm tones now, and holy shit I can’t believe how all my stuff just effortlessly coordinates now, what a rush), then later playing with different silhouettes. I am now starting to slowly branch out from my own personal self-imposed “style rules” and experimenting with new ways to express myself with how I dress. Clothing is supposed to be fun!

So I decided to participate in Me Made May this year, and see what else I could discover.

What I really wanted to focus on was less the fully handmade outfits, and more something that previous Me Made Mays have absolutely fucked up for me when I participated in the past – allowing outfit / garment repeats, and RTW (ready-to-wear) pieces! Old MMM’s gave me this weird aversion to wearing the same thing twice in one month – because you want every photo to be fresh, right? The major problem with this – for me – was that it trickled into my daily dressing, too. It gave me a weird complex to wear the same garment twice, even weeks apart! Y’all, I get that this is a thing that is really pushed on us with our buy-buy-buy culture, but I honestly cannot articulate how fucking STUPID of an idea it is. There is absolutely nothing wrong with wearing the same shit on repeat (especially if it’s something that makes you feel really good!). People don’t notice – do you notice when someone repeats a garment/outfit? And realistically, even if you did notice – does it really matter? Like, who really cares in the grand scheme of things? I really needed to hammer this into my own head. Again – clothing is supposed to be fun!

Another reason for joining MMM this year was to simply get more comfortable taking photos of myself, and to try different locations. Let’s be real here – the main reason why I post less and less is directly related to my comfort level with taking photographs. I’ve never liked taking photos of myself, and over the years I find myself avoiding it more and more. By making myself take a photo every single day, I hoped it would force me to get more comfortable with the whole process. And to make things interesting, I decided to take photos in as many different locations as possible. I love creeping on people’s houses in the background of their photos – I think most people do! So even if you don’t care about the Me Made May aspect of these photos, I hope you can appreciate the mini house tour!

Anyway, I think this year was very successful for me! I stuck with it for the entire month and took a photo every single day – even when I was traveling! And I allowed myself to repeat individual garments – and even full outfits! – which made the whole process less stressful. I thought it would be fun to share these here, since I know a lot of people don’t use Instagram and prefer to read blogs. So here you go! My Me Made May results from 2021 – only a few weeks late 🙂

1

Day 1: Masin Sicily Slip Dress + Alina Design Hampton Jean jacket  / This is my hallway! This photo also marks the first time I joined multiple (vaccinated) friends for a dinner party since COVID! In someone else’s house! What a rush!!

2

Day 2: (RTW) Elizabeth Suzann Florence pants (I did alter these to have narrower legs and a more cropped length, FYI) + True Bias Ogden Cami + Grainline Studio Driftless cardigan / This is my living room! Obviously I really whooped it up the night before, so I spent my day relaxing on the couch and getting absolutely nothing done 🙂

3

Day 3: Grainline Studio Scout tee + Closet Core Patterns Ginger Jeans / This is my studio, and I spent most of my day in here!

4

Day 4: Cashmerette Concord tshirt + Deer & Doe Fumeterre Skirt (made with a rayon from Workroom Social!) / This is my bathroom! I was bound and determined to get a shot in here, but it is VERY small (as is my whole house LOL) so I had to improvise 🙂

5

Day 5: True Bias Nikko top + Closet Core Patterns Ginger Jeans (again!) / This is my kitchen! Fun fact: I bought wallpaper (to cover the soffits above the cabinets) immediately after taking this photo.

6

Day 6: (RTW) Skateboarding is Stupid tshirt (cropped + re-hemmed by me) + Closet Core Patterns Ginger Jeans / This is my dining room!

7

Day 7: Allie Olsen Elio Top + True Bias Lander Pants / This is my bedroom, and also here is an Amelia cameo!

8

Day 8: Tilly & the Buttons Rosa Shirt dress / Real talk: This is an exact duplicate of the dress in that post LOL I guess I’m a different size now, so I made a bigger one! And I rarely wore it, because it felt so… overwhelmingly denim and kind of heavy. So I cut the sleeves short right before taking this photo, and it feels so much better now!) Anyway, this is my patio!

9

Day 9: Grainline Studio Archer shirt (made with Spoonflower fabric!) + (RTW) Elizabeth Suzann Cecilia pants (altered by me!) (also discontinued – sorry! But they are super high waisted and super stretchy and really awesome!) / Just hanging out in my giant + empty back yard. I love that the blank canvas gives me the option to do anything I want back here, but also, it is a little intimidating to start from scratch! Eventually I’d like to landscape and add some small gardens and maybe a patio (and someday – a separate studio building!!! #dreams), but for now, I mainly use this space to take blanket naps in the sun haha

10

Day 10: (RTW) Handpainted denim jacket, Martine Sweater (originally knitted by me, then later overdyed by me!) + Closet Core Patterns Kalle Shirt + Closet Core Patterns Ginger Jeans (again!) / I ran out of rooms so I’m back in my living room, in front of one of my favorite pieces of art! I found this delightfully creepy piece a a thrift store about 10 years ago and it gets a lot of comments (both good and bad haha).

11

Day 11: Poison Grrls Beauty School sweater + Megan Nielsen Dawn jeans / Ok so this isn’t my house – I was on set (as a tailor!) for a tv shoot! It was a very busy day but I managed to squeeze in a quick bathroom mirror selfie 🙂

12

Day 12: True Bias Nikko Top + (RTW) Talbot’s Leopard Midi skirt (I changed out the waistband for a soft, wide elastic!) / Took these photos on my front porch to show up my SEXY NEW SECURITY DOOR (here is the one I got!). I’ve wanted this door since I originally bought my house, and it is everything I dreamed it would be! (ps if you think my legs look really airbrushed… they aren’t, it was just kind of cold so I have on skin-colored pantyhose LOL)

13

Day 13: Tilly & the Buttons Stella Hoodie (shortened into a top and then I added that sparkly cat patch!) + Vogue Patterns 2442 (the original Calvin Klein jeans!) / While I had the carpenter installing that front door, I also convinced him to re-hang the screen door on the side of my house! It’s original to the house, but the sellers took it down and stashed it in the crawl space because it looked “old fashioned.” So I had it re-hung and I love it! There!

14

Day 14: Megan Nielsen Eucalypt tank + True Bias Lander pants / Just hanging out with the peonies in my front yard! The previous homeowner planted them and I have never loved a flower more!

15

Day 15: Cashmerette Concord tshirt (again!) + (RTW) Maxi skirt that originally started out as a huge 80’s dress (I cut into a skirt and then later added a wide elastic waistband. Because elastic is super comfortable and I love myself LOL) / This is the other side of my kitchen! And if you peek into the living room behind me, you can see Amelia’s favorite toy – a horrible thing that looks exactly like vomit (brown, fuzzy, and it’s even the same SHAPE ugh)

16

Day 16: True Bias Rio Ringer tshirt (with an added CAT PATCH!) + True Bias Lander pants / Here’s another little corner of my studio – I painted the mural on the wall!

17

Day 17: Sophie Hines Axis Tank + ThreadyMade Sunburst Monroe skirt (this came as a kit but I sewed it together!) / Here is another corner of my kitchen, and at this point you can see I clearly ran out of spaces to shoot…

18

Day 18: True Bias Lander shorts + Closet Core Patterns Kalle shirt + (RTW) Black sweatshirt (that I added another cat patch to LOL) / Someone thoughtfully suggested I take a photo in the laundry area, so that’s what inspired this hahaha.

19

Day 19: Helen’s Closet Arden Pants + (RTW) vintage Duran Duran concert tshirt (shortened by me!) / This is another angle of my bedroom, taken while packing for a workshop at Pintuck & Purl.

20

Day 20: (RTW) Thrifted black tshirt (cut + hemmed into a crop top by me!) + (RTW) knit skirt (brand is A.L.C.) (I did take in the waist elastic to make it a little more fitted; otherwise it is essentially un-alterable due to how it is constructed) + leopard print silk chiffon scarf that is basically a really expensive piece of fabric (Alexander McQueen from Darrell Thomas Textiles) cut into a rectangle and then hemmed / Out of my house for the weekend, and in my temporary digs in Exeter NH while I teach a workshop at Pintuck & Purl! This AirBNB was the *cutest* little space!

21

Day 21: Cashmerette Appleton Dress / This was my birthday!! Maggie brought me a CAKE – it’s a little pair of jeans with a pincushion that matches my tattoo / blog header, I mean, COME ON.

22

Day 22: Sophie Hines Axis Tank + Grainline Studio Archer shirt + (RTW) thrifted Leopard bias skirt (hemmed by me) / Day 2 of my workshop at Pintuck & Purl! Also, 2020 was the year I discovered just how much I love wearing bias cut pieces. SO. COMFY. (yet so refined!)

23

Day 23: Tilly & the Buttons Rosa shirt dress (again!) + silk leopard scarf (again!) / Day 3 + a wrap for my second jeans workshop of the year! I loved wearing this dress so much that I decided to bring it with me and wear it again! Although in retrospect, it might not be the absolute best choice for teaching – the skirt is short, and gets dangerously shorter depending on how I sit. That’s a lot of leg!

24

Day 24: Poisongrrls Beauty School sweater (again!) + RTW A.L.C. knit skirt (again!) + leopard silk chiffon scarf (again!) / I was traveling all day and this was the best photo I could manage! Also, this whole outfit is repeats. Whatever! Amazingly, I did not vanish into a puff of smoke upon leaving the house LOL

25

Day 25: StyleArc Patterns Ariana dress + (RTW) Button-up (hand embroidery on the back done by me, and I also shortened it a little!) / Another angle of my living room! This last year I also discovered using button-up shirts as a light layer to wear in the summer. Breathable fabrics such as rayon, silk, linen, and lightweight cotton are perfect for warding off the chill of an aggressive A/C, and also look much more seasonably appropriate (I think!) than a big ol’ cardigan!

26

Day 26: Sew Over It Penny dress (made with a fabulous Dolce & Gabbana cotton from Darrell Thomas Textiles) / Went out for my birthday dinner (to House of Cards in Nashville which was SO AWESOME and I highly recommend!) and decided to wear an old birthday favorite! I never posted about this dress, but I made it a couple of years ago! Also, I’m standing with my (new to me) truck! This was my dad’s vehicle and my mom titled it over to me a couple of months ago. It’s been a few years since I drove a truck (my old truck was a Ford Ranger, too!) and I forgot how fun they are!

27

Day 27: Cashmerette Concord tshirt + (RTW) Talbots leopard skirt (again!) / My niece graduated high school this year so I spent the day celebrating with her! I cannot believe it has been 18 years since this little squirt was born. Where does the time go??

28

Day 28: True Bias Lander pants + (vintage/RTW) Sheer Embroidered top + Sophie Hines Axis tank (worn underneath) / Another side of my dining room. Can you tell I’m over the daily photos by this point? LOL

29

Day 29: Professor Meow sweater + Closet Core Patterns Ginger Jeans / It got suddenly cold again which meant another opportunity to bust out the sweater collection! Yeehaw! Also, this is the other view from my hallway!

30

Day 30: Closet Core Patterns Fiore skirt + True Bias Nikko top (again!) / When I made this skirt a couple of years ago, it felt a little risky to sew it in such a weird yellow. But it has ended up being a real workhorse in my wardrobe, and that strange shade of yellow-green matches most of my clothes! I also wasn’t sure how I’d feel about the slightly longer length, but I love it! Here is another side of my living room, and where Amelia spends most of her day when I’m home with the door open (there is a bird feeder hanging on the tree right outside).

31

Day 31: Closet Core Patterns Elodie wrap dress / Last day of May, finally!! I leashed up Amelia and took her out for a little photo walk! Of course, she’s a cat so our “walk” ended up with her flopping down on the ground, dramatically eating all the grass around her like it was her last meal. Oh well!

That’s all for Me Made May this year! Not putting any restrictions on my outfits (ex., allowing repeats, RTW, etc) made it a lot easier to get dressed and feel excited about what I was wearing! If you’re thinking that there are barely any repeats here as it is – you’d be correct, as May tends to flip-flop a lot weather-wise here in Nashville, with an equal amount of warm and chilly days. So I pretty much had double the options to choose from when it came to clothes!

The biggest improvement for me was narrowing down the colors I wear, and sticking mainly to warm colors with a slightly limited palette (including lots of leopard, obviously #leopardisaneutral). This made nearly all of my pieces effortlessly coordinate, which I love! I still need to do some work when it comes to silhouettes and proportions, but keeping track of everything for a month has been really helpful.

I’m also happy to report that there were only a couple of pieces I wore that I didn’t feel super excited about. I will be removing these pieces from rotation and seeing if there is something that can be altered to make them more appealing, or releasing them into the world for someone else to wear and love.

Did you participate in Me Made May this year? What were your takeaways?

Completed: Reworking A Vintage Blazer

7 Oct

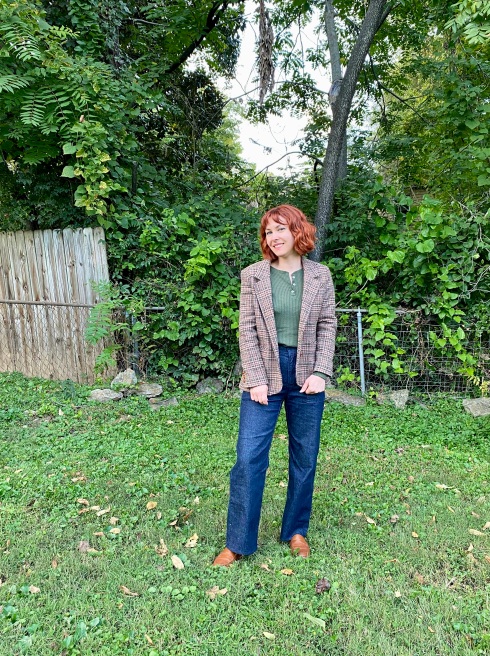
Here’s a big ol’ project I worked on for a couple months this summer that I believe warrants a whole ass blog post!

Fair warning – there are a LOT of photos in this post. I tried to narrow them down and include some collages, but… don’t say I didn’t warn you!

This project started with me wanting to make a blazer – but after months of looking and just not feeling any of the fabrics I was seeing, I decided I would try altering one instead. I’ve altered plenty of blazers, jackets, and coats for lots of clients + photoshoots over the years, but I’ve yet to really tackle complicated alterations beyond sleeve shortening and taking in the body (since, understandably, most people don’t need those kind of crazy alterations!). Over the summer, I worked closely on a photoshoot set with a master tailor here in Nashville, Loretta, who was delighted to share a lot of her trips and tricks with me. I spent some time looking for the perfect blazer for this project, and eventually found this 70s gem at the Southern Thrift in West Nashville, for a grand $5.99-

The before – click to zoom a lil’

As you can see, the before wasn’t super terrible! Obviously the sleeves were a little long and the back a bit saggy (there was no size tag in this jacket but I suspect it was probably 1-2 sizes too big for me). I also felt like the shoulders were a touch wide, and the length a little too long. But I loved the fabric and knew I could work some magic to get this bad boy to fit the way I liked!

I started with pulling off the buttons, the back belt, the cheesy patch pockets (I’m sorry, but they are SO cheesy lol and were also poorly sewn on!). I removed the entire lining from the shell and set about my alterations first. Here is what I ended up doing:

  • Narrowed the shoulders by 1/2″
  • Added shoulder pads (the original ones had disintegrated into the jacket hem! I am STILL finding old shoulder pad dust in my studio, despite regular vacuuming!)
  • Took in back arm seams 3/8″
  • Took in side back seams 1/8″
  • Took in center back seam 1/2″
  • Shortened body length 2″
  • Shortened sleeve length 3/4″

This was accomplished by lots of pinning, basting, trying on, and taking photos (so I could see what the back looked like). Usually when I do these alterations, I work with a client who is already wearing the jacket – so it’s quick and easy to pin where needed. It’s a little harder when you are doing it yourself, but still totally doable!

Adding pockets and plackets!

After finishing the alterations, I could work on the fun stuff – adding design elements to the shell! I knew I wanted to change those patch pockets out for double welt pockets. I also wanted to include sleeve vents with functioning (!!!) button holes, a single welt breast pocket, and an interior “Barcelona” pocket.

Since I had removed the patch pockets and back belt from the original jacket, I was able to carefully disassemble them which gave me some fairly good-sized pieces of fabric to work with. Adding the double and single welt pockets was pretty straightforward and easy – it’s the exact same as sewing on a piece of fabric, you just have to contend with, well, an entire jacket getting in your way haha. I used the instructions + pattern pieces from the Closet Core Patterns Jasika Blazer for the two exterior pockets, and a beloved In-House Patterns tutorial for the inner pocket. Honestly, the hardest part about this endeavor was figuring out where exactly to put the pocket! For the outside pockets, I drew chalk lines directly on the blazer and checked the proportions in the mirror until I was happy. For the interior pocket, I went a little lower than my chest after looking at loads and loads and LOADS of blazers online with interior pockets – consensus seems to be that it starts right below the welt of the outer breast pocket. Which makes sense, as you don’t want whatever you put in that pocket to sit right on top of your breast. Well, I don’t want that anyway haha.

For the sleeve placket – well, that was a fun experience! The original jacket had no placket – just buttons sewn straight on a plain sleeve. Loretta had shown me how to shorten a jacket sleeve with a working button placket, which is the same process as adding a placket. You just sew fabric to the edge to create a placket extension; all the seams are hidden when it is finished. I had no idea shit would be that simple. I think the scraps I used came from the back belt. For a step by step, I followed these directions for sewing a back vent (a back vent and button placket on a jacket are essentially the same – except there is no exposed line of diagonal stitching) from Waffle Patterns. The hardest part of that was getting the corners to miter correctly haha. Wish I could give y’all some tips for that but TBH I just used a lot of trial and error and unpicking until it was right.

I also decided to change out the lining, after determining the original lining – while a really beautiful soft pinkish beige – was just too smelly and discolored. I took the lining apart and used the pieces to cut a new lining from a piece of silk charmeuse that I already had in my stash (here is a blog post I wrote a few years ago about replacing a lining in a coat, which is the same process I used!). I made sure to add my alteration adjustments and sleeve plackets to the pieces, then sewed the whole thing together and bagged it in. I did hand sew at the sleeve button plackets and near the front facing (you can sort of see the pins in the above photos), but the rest was done by machine.

After THAT was done (whew!), I added some fun finishing touches 🙂 I sewed buttons + button holes on the sleeve plackets (using the original buttons, cos, well, I like them!), added a leather hanging tab + label to the back facing – oh, and I made a sweet wool felt embroidered undercollar!

To make the undercollar piece, I cut some Swedish tracing paper and traced it around the undercollar, trimming and refining until it was the exact same size. Then I cut it from wool felt (which I ordered the The Felt Pod); my piece was wider than the felt so there is a seam in the center. Then I embroidered it by hand with a simple chain stitch, and attached it directly over the existing undercollar using embroidery floss + a blanket stitch. It’s not visible when the collar is down, but it is a fun surprise when flipped up!

I actually finished the whole thing about a month or so ago, but didn’t get around to taking photos until this last weekend. I’ve said it before, and I’ll say it again – taking photos is the part I hate most! So, like, enjoy or something 😛 I’m pretty sure my neighbors did considering that came outside RIGHT WHILE I WAS SHOOTING THESE dear lord can you see the fear in my eyes?

And if you don’t want to look at my mug (it’s cool, I don’t want to look at it either), here are some dressform shots:

I think that’s about it for this project! I had a lot of fun digging into this one and feel extra confident in my alteration skills as a result. Funnily, the original jacket isn’t very fancy – it’s actually pretty cheaply made as far as jackets go. The wool is a blend, and there wasn’t much tailoring inside the shell apart from a bunch of interfacing. Spending so much time + effort (and silk lining lol) was basically the equivalent of polishing a turd – but, you know what? I love how it turned out, and I learned a lot during the process. I don’t know if such an involved reconstruction would be worth it if you were paying someone else to do it – but for me and my sewing practice? It was perfect. I was only out about $10 for this project (the jacket + wool felt, as I already had the lining in my stash) which we can all agree is WAY cheaper (and faster!) than making the dang thing from scratch!

I will always love making garments from their humble fabric beginnings, but truly, you can’t beat a solid reconstruction (or even just a couple simple alterations to an otherwise great + previously-loved garment!). This might be the most sustainable I get when it comes to sewing, ha! How about you? Does this inspire you to give it a try?

Completed: The Maywood Backpack

18 Jun

Wow guys, it’s been a minute, huh? I try not to neglect this space, but the fact is I only write when I feel like it… which is honestly, kind of rare. I’d rather be making stuff!

So anyway, here’s something I made recently!

Maywood Backpack

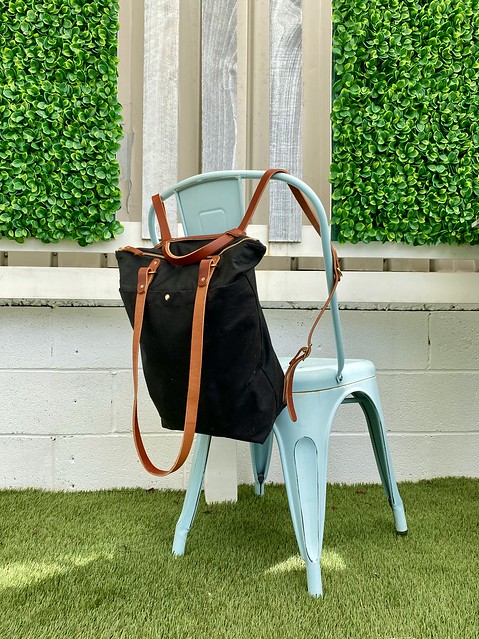
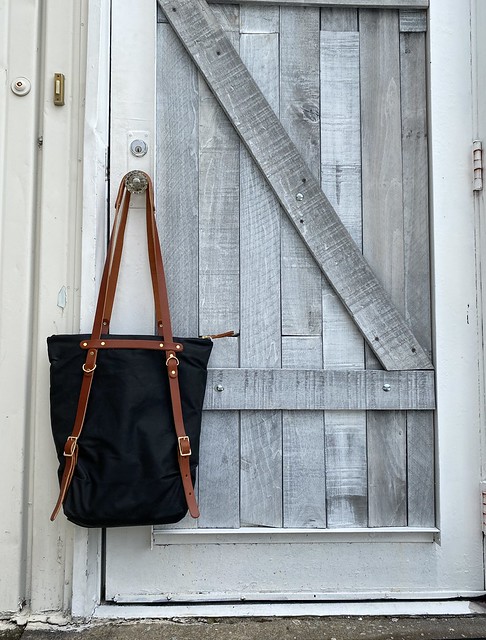
This is the Maywood Toteback! Realtalk – I have PINED for this damn bag since I first saw one in the wild (I think it might have been at one of my jean workshops!). I love how it flips from a tote bag to a backpack with a push of the straps:Maywood Backpack

Maywood backpack

I think y’all know I love sewing backpacks (1 2 3), although I have to limit myself since there are only so many backpacks a person can use! (a backpack update: #1 gets used occasionally, #2 was gifted to my little brother who absolutely loves it, and #3 still is used frequently when I travel. You know, back when we were still allowed to travel haha). I justified this one since it’s a bit more refined than my standard canvas pack – the solid black waxed canvas, gold hardware, and rich leather straps just make it look so classy. And I love that I can flip it to a tote, for times when I don’t feel like carrying my shit around on my back – or, TBH, when I feel like showing off my rad back patch haha.

Maywood Backpack

Maywood Backpack

The pattern itself is a super simple design – it’s a basic bag with boxed corners and a zippered top, fully lined to hide all seams. The pattern includes a large front pocket (for hiding the front tote strap when using this as a backpack) and an inner pocket that is large enough to fit a laptop (my 13″ MacBook Pro fits perfectly, FYI). What really makes it shine is the high-quality materials, especially those leather straps!

I knew I needed more than 2 giant pockets for this bag – and while it’s a slim size (you can fit a surprising amount in there, but it is arguably smaller than your standard backpack), I didn’t want to overload it with so many pockets that I stuff the whole thing too full to zip closed (typical Lauren – if there is space, I will find a way to fill it). But I did want a small pocket to throw my wallet in – and, based on past backpack experience, I wanted it to be zippered so nothing would fall out.

Maywood Backpack

I ended up adding a little patch pocket that closes with a zipper, using the pattern pieces + instructions from the Addictive Free Canvas Tote from Niizo. Niizo is hands-down my favorite pattern + kit maker for bags, I always find their techniques to be so clever! I’ve made the tote before so I was familiar with the steps to insert this pocket. I like that it’s a patch pocket (so I could rip it off with no issues if I ended up deciding that I didn’t want the pocket!), and it has the zippered closure that I require. It’s the perfect size to hold my wallet, which is basically what it is intended for. I also added a little loop to the side seam, which I use to hang my keys or AirPods (using a carabiner clip) so they are easily accessible, but also secure while not taking up precious pocket real estate.

I actually sewed this pocket twice – my first go wasn’t quite perfect, and there were a few mistakes that just looked glaringly bad enough that I feel it was worthy of a re-do. I made this bag while on set for a big photoshoot (it is allowed where I live, please don’t @ me), and we were done with all our sewing… so I figured I had all the time in the world to get it right. I recut my pocket pieces from muslin, and while using the rotary cutter I glanced away for a fucking second and ended up somehow slicing through the tip of my left pointer finger. To make a very long and boring story short, I got 7 stitches the next day and also lost about 1/4 of my nail as the blade cut right through the nail bed. I’ve never had to get stitches before – hell, I’ve never had a sewing accident that warranted going to the walk-in clinic! – and let me tell you… that shit SUCKED. There was about a week and a half that I had very limited use of that finger which resulted in me not being able to type or knit without pain. Thankfully, it’s completely healed up at this point and my nail is slowly starting to grow back.

I guess the moral of this story is – 1. Pay attention when you are using your rotary cutter! and 2. Sometimes re-doing a pocket is the worst decision you can make that day LOL

Maywood Backpack

Anyway, it turned out all right in the end! I’m glad I added the pocket, although I wish I’d just kept the first version (as well as part of my finger haha). I used medium weight muslin and a metal zipper and I think it fits in with the rest of the bag nicely. Also, you can see here how much stuff fits in the bag! My laptop, charger, Kindle, notebook, pen pouch, and wallet are all hanging out in there. I also typically bring my knitting bag (which is full of a sweater at this point). It holds a lot!

Maywood Backpack

So, a little more about the kit I used! I got the whole ass kit from Pintuck & Purl (I think Maggie special ordered it for me, ha!), which includes everything – fabric, hardware, leather, and the pattern. All the pieces are pre-cut and marked, which means you can jump right into making! I’m boring as shit and I wanted a 100% black bag, but there are other color options (including a contrasting front pocket) if you don’t want to embrace your inner Goth. I also got the tool kit, for hammering in all the hardware. The outer fabric is waxed canvas, the lining is a heavy cotton duck. Both materials are structured enough to stand on their own without the use of interfacing. All of the leather is hammered on – no sewing (so no worries about whether or not your machine can handle it!). The handles are backed with leather supports, so the whole thing feels sturdy even when you’ve got it overloaded to max heaviness.

Maywood Backpack

I’ve been carrying mine around daily for about 3 weeks now and it has been perfectly suited for my needs!

Maywood Backpack

In other news, I hope you enjoyed my artsy photos that were definitely not taken in my back yard haha.

Completed: Tongue-Tied Sweater

26 Feb

It’s been a minute since I shared a knitting project! I actually *have* been knitting – I always have at least 1 project on my needles at any given time (usually two – one for the couch, and a smaller/simpler one for the road!), and I always keep my Ravelry account updated! But for whatever reason, I never feel super compelled to share them on my blog. Anyway, here’s one today!Tongue-Tied Sweater + Dawn Cords

This is the Tongue Tied sweater by Poison Grrls. I actually chose the yarn before the sweater pattern – a very uncharacteristic knitting move for me (usually I have my pattern selected before I start shopping for yarn). To be completely honest – I wasn’t in the mindset for planning a new sweater when all this happened, as I was still steadily working my way through my last sweater (see! There’s one I knit and never shared here lmao). But this yarn caught my eye at Pintuck & Purl and once I got my hands on it, it was all I could think about.

Tongue-Tied Sweater + Dawn Cords

The yarn is CashLuxe Spark by Sweet Georgia Yarns, a gloriously soft and cushiony fingering-weight yarn with this incredibly rich color and the cutest subtle sparkle! I’m not a super duper yarn snob (I love natural fibers, blah blah, but I don’t typically buy *really* expensive yarn. Although. That may now change haha) but I really, really, really wanted this yarn on my body. I initially considered socks – I mean, who doesn’t want to wrap their toes in cashmere? – but at $38/skein, that was a little rich even for my blood. So obviously it made sense to buy two skeins and turn it into a sweater, because that’s totally fiscally responsible.

Tongue-Tied Sweater + Dawn Cords

Tongue-Tied Sweater + Dawn Cords

I started this sweater right after I finished my last one, toward the end of December last year. It knitted up really fast – partially because, well, it’s a tiny fucking sweater, but also I just really enjoyed every part of the process. I LOVED touching that yarn, so so much. I actually would have finished this quite a bit sooner, except once I got to the point of picking up the sleeves I let it sit dormant for a couple of weeks while I worked on other stuff.

Not a lot to say about this pattern, but here are some notes:
– I knit the size Small, based on my bust measurement. My gauge called for size 2 needles (body) and 1 needles (ribbing).
– This is a really fitted sweater! I mean, I knew that going in – but trying it on, yeah, it’s basically painted on. Aggressively blocking the entire thing really well helped a lot, and now it skims my body perfectly.
– Because it was so tight, I did have some issues with getting a stretchy enough bind off (I actually had to re-do my bind off at the bottom AND the neckline twice!). I ended up using size 3 needles and a super stretchy bind off. With the neckline, that was mainly my fault for being an idiot. I thought I’d be super clever and do a fold-over neckband, but quickly discovered (while unsuccessfully trying to pull it over my head) that those don’t stretch at all. LMAO.
– Mod-wise, I added 1″ of length to the body, since I wanted to be able to wear this with high-waisted jeans (it’s pretty short!).
– If you think you see a yarn tail in the back, you’re right. I haven’t woven it in yet. I don’t know why.

Tongue-Tied Sweater + Dawn Cords

I loved knitting this pattern! It was easy to follow, simple to knit (but not boring), and the proportions are just lovely. I’ve already got a few more Poison Grrls patterns in my radar for my next sweater. I love Amy’s aesthetic and I love that she uses fingering weight yarn – perfect for our mild winters!

Tongue-Tied Sweater + Dawn Cords

Tongue-Tied Sweater + Dawn Cords

Oh, I also made my pants, too! These are more Dawn Jeans, made in Robert Kaufman non-stretch corduroy from Pintuck & Purl! (I picked it out the same time I was fantasizing about that yarn haha). Not much to say about these that I haven’t already said – I made my normal size, this time with the wide legs and the cropped length. The cropped length isn’t actually that cropped – I ended up having to take off another 3″ or so (but I also have a 28″ inseam sooo take that as you will). I’m also not super thrilled about how the back fits, but I believe that’s just what you get with wide leg pants. The wrinkles are there because there is too much fabric at the inner thigh (the issue I had with my Calvin Klein jeans), but for true wide-leg pants you really don’t want to remove width there. Whatever, I’m not the one looking at my own butt so I don’t care.

Tongue-Tied Sweater + Dawn Cords

So anyway, that’s my new sweater! Fun to knit, fun to wear, and the sparkles make me happy 🙂 Oh! And I still have some of this yarn leftover – so you better believe I’ll be making a tiny pair of socks 🙂 If anyone has suggestions for short-cuff sock patterns – preferably one with bobbles (I don’t know why but I’m feeling like I want bobbles on these), let me know!

Completed: Rayon Crepe Magnolia Dress

4 Feb

LMAO for some reason I’ve been sitting on these photos since Thanksgiving, no idea why I’ve been dragging my feet to post this! Anyway, better late than never!

Rayon Crepe Magnolia dress

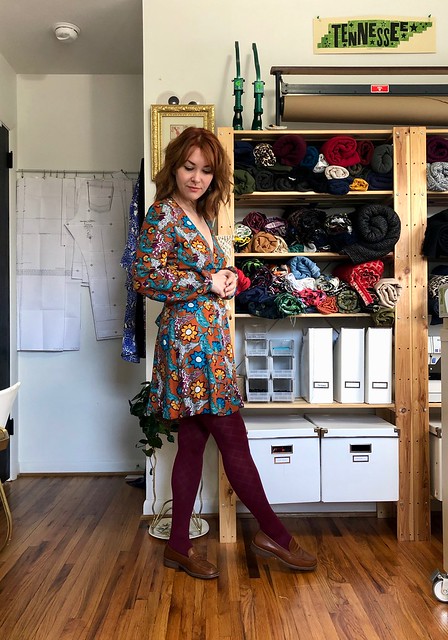
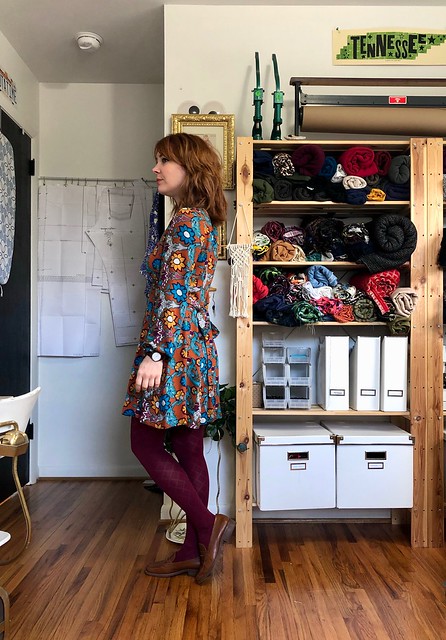
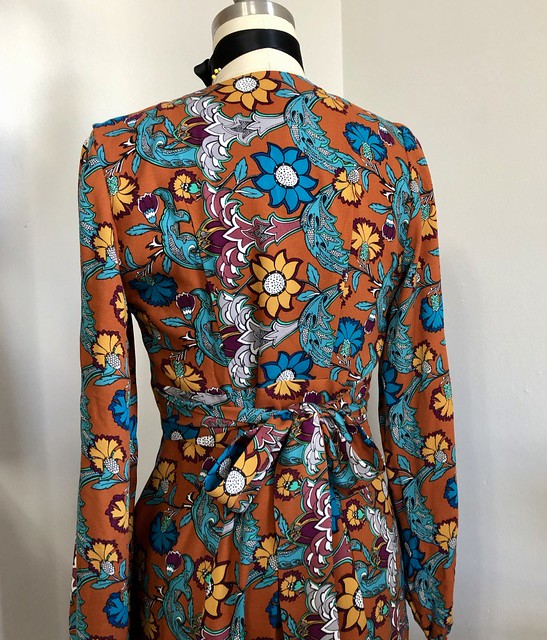
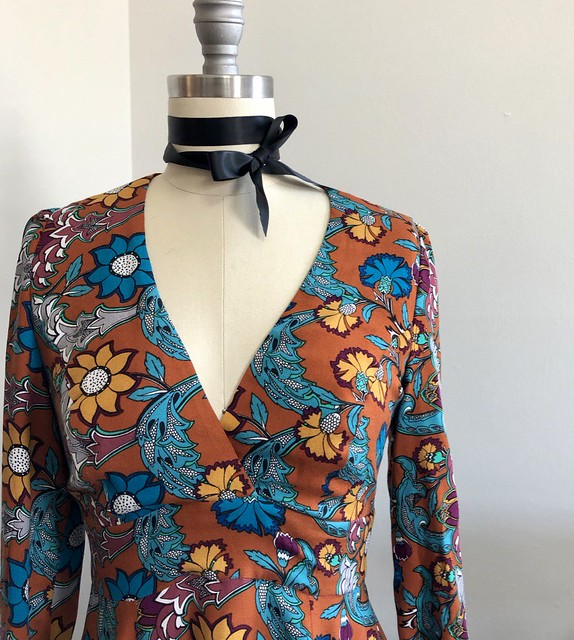
This is the Magnolia dress from Deer & Doe, this time in View A with the plunging neckline, long sleeves, and a very mini length (ok, so that’s not view A exactly, but let me live). I’ve made this dress before and wore it a few times this last year, and I was interested to try it again with some modifications.

Rayon Crepe Magnolia dress

Rayon Crepe Magnolia dress

My original Magnolia dress skews quite a bit more romantic than how I normally dress (and while I’m not quite ready to let it go yet, I will admit that it doesn’t get a whole lot of wear), but I loved the pattern and I wanted to try it with a more modern twist. One thing I have noticed with my OG dress is the bust is just a bit more generous than my actual body. As I mentioned, I sewed a different view, sized down to a 34 at the bust (keeping the 38 at the waist / hip) and made a quick muslin to assess the fit. Here are the changes I made:
– Took an additional 1/4″ out of the CB along the fold for my narrow back
– Removed a 1/2″ wedge from the front neckline because it was gaping (same as this method, except obviously on the front. Also, oh my god I miss that dresssss)
– Reduced the upper bust by about 1/4″ by shaving it off the princess seams to the bust point (I wanted to wear this dress without a bra and my breasts tend to be a little more bottom-heavy)
– Removed an additional 1/4″ off the side seam

Sounds like a lot, but it was just tiny tweaks! I wanted the dress to be fitted, but still skim over my body (rather than just be tight). Shortening the neckline to bring in the gaping was definitely the biggest thing; I knew I wasn’t going to wear a bra with this dress and I wanted to be CONFIDENT that there was no danger of accidental nip-slips. I’m not going to go into detail the weird gymnastics I performed in my studio to really test this theory, but believe me… the ladies aren’t going anywhere.

Rayon Crepe Magnolia dress

I bought my rayon crepe from Stone Mountain & Daughter Fabrics, back in March last year. I loved the autumnal colors and that beautiful drape! I took home 3 yards, and used nearly every last inch of it, despite this dress being a mini. Those sleeves took up a lot of fabric!

Construction-wise, I didn’t make too many changes to the dress beyond what the instructions call for. I did opt to self-line the entire top – the instructions just have you self-line the bodice, which I think is fine but why not the back? By doing this, I was able to eliminate all the bias facings, and have a completely clean finish. I also self-faced the waistband pieces, again, for a clean finish but this time on the inside. This is just personal preference; I don’t like exposed waistband seams in dresses and for the most part, I always face them. I don’t have any photos of this, so you’ll need to use your imagination.

Rayon Crepe Magnolia dress

To keep that neckline intact and immune to stretching out, I used strips of twill tape to stabilize the edges (here is a similar method to what I used). One thing I irrationally hate in clothing is weird gapey necklines that don’t stay close to the body, so I will do whatever it takes to keep that shit in check. Especially with a low-cut top like this, and again, especially since I ain’t wearing a bra with it! Anyway, the twill tape means that edge is nice and stable.

Rayon Crepe Magnolia dress

Unfortunately, I do think I was a little overzealous with my neckline tweaking – I shortened the twill tape too much, because now the center front of the waistband rides up. It’s noticeable for sure, but it also looks intentional so we’ll just say that was the case.

Rayon Crepe Magnolia dress

Rayon Crepe Magnolia dress

Rayon Crepe Magnolia dress

Surprisingly, the sleeves were the correct length for me without any adjustments (I think having a gathered elastic edge makes things a bit more forgiving). And I believe I did shorten the skirt length further, but I couldn’t tell you by how much (sorry). It is pretty short, though I love it! I feel so sassy and groovy and a little floaty when I wear this dress.

Rayon Crepe Magnolia dress

Anyway, that’s all for this make! Short and sweet (both the dress and the blog post lol). I’d love to make this again in a solid color in the future, but for now, I love the fun print!

Completed: Vogue 2442 Calvin Klein Jeans

7 Jan

Alright y’all, I’m back with one more jeans post – the ~Designer Jeans~ Edition!

Thanks to Vogue 2442, I was able to make my own pair of Calvin Klein jeans 😀

Before we get too far into the post, though, I just want to acknowledge how absolutely stupid this envelope cover is. You can barely see any of the details of the jeans (although the butt close-up is helpful, and to be completely transparent here, it’s a nice butt), and I don’t know why that woman is holding her leg up like that because you definitely can’t do it in these jeans. Nothing about this cover art (or lack thereof) makes me want to try this pattern, but nevertheless, I persevered. For science.

Anyway, here are mine!

Vogue 2442 Calvin Klein Jeans made with Art Gallery Fabrics denim

I went down a little rabbit hole last fall while looking at vintage jeans. I reaaaaaally wanted some vintage Calvin Kleins, if only for the brag factor, but my budget currently doesn’t allow me to spend hundreds of dollars on someone’s used jeans (RIP, the vintage market). I considered sewing them, but recalled looking up vintage CK patterns years ago and they were going for obscene wads of money. Just out of curiosity, I checked again – and was surprised to see that there are plenty to choose from for $10-$20. Calvin Klein licensed his name to Vogue patterns a bunch throughout the 80s and 90s, occasionally offering a jeans pattern. There were loads of mom jeans to choose from (including a truly horrifying Vogue 2851, I mean, come on) but I went with the OG, the Vogue 2442 from 1980. In the effort of being as science-y as possible, I re-measured myself and chose the size that closely matched my measurements – in this case, the 8.

Vogue 2442 Calvin Klein Jeans made with Art Gallery Fabrics denim

It took me a while to find a suitable denim to make these up – I wanted something non-stretch (as the pattern calls for – this was before stretch denim was really a thing!), but not too heavy, and a lighter wash. A bunch of the stuff I was coming up with ended up being way too lightweight, or had too much stretch, so this project ended up being shelved for longer than I would have liked.

Vogue 2442 Calvin Klein Jeans made with Art Gallery Fabrics denim

As you can see, I did end up finding a great denim – from Art Gallery Fabrics, of all places! I’ll admit that Art Gallery Fabrics wouldn’t be my first thought when it comes to denim, but they’ve been expanding their denim gallery and I was curious to see what the offerings entailed. There is a great selection of lightweight (4.5oz, like what you’d use to make a button-down top or a sundress) denims, both printed and dyed various colors. The heavier denims clock in at 10oz (which is the lighter end of a pants-weight denim, and my personal preference), and come in a smaller selection of colors, nonstretch only.

After playing with some swatches, I chose the Crosshatch Textured Denim, in the Bubbling Brook colorway. My other choice was the Solid Textured Denim in Bluebottle Field, but that was sold out, so hopefully I can try it out in the future!

Vogue 2442 Calvin Klein Jeans made with Art Gallery Fabrics denim

Vogue 2442 Calvin Klein Jeans made with Art Gallery Fabrics denim

Anyway, about the Crosshatch Textured Denim! First off, you probably noticed that my jeans don’t exactly have a crosshatched design on them – that’s because you are looking at the wrong side of the fabric, baby! I actually don’t mind the crosshatch look, but upon receiving the fabric I fell in LURVE with the less contrasty wrong side of the fabric, so that’s what I went with on my jeans! My sewing project, my rules! The denim was pretty stiff and definitely not soft upon first receiving; but did get really soft and supple after just one wash. Be warned that it frays a lot, though – you’ll want to make sure you finish your seams (whether serging, or zigzaging, or even binding them) because otherwise the inside of your garment will get real hairy, real fast. If that bothers you, I mean. You do you.

Vogue 2442 Calvin Klein Jeans made with Art Gallery Fabrics denim

Other than the fraying part, this denim was easy to work with. I recently got an Oliso Steam Iron (yes, the little iron that stands up when you stop touching it and yes it never ever stops being hilarious, no matter how much I use it) and this was my first real project to use it on. It doesn’t get quite as melt-your-hands-off-hot as my industrial gravity feed iron does (granted, this is cotton, so it doesn’t really need to be beaten into submission haha), but it heats up quickly, delivers a satisfying steam burst, doesn’t auto shut off every 2 minutes, oh, and IT STANDS ON IT’S OWN LITTLE FEET. My only regret in life is that I can’t find my stick-on googly eyes, because this iron needs eyeballs. Ok moving on.

Oliso Iron!

Oliso Iron!

Oliso Iron!

So, more about the pattern itself! Like I said, I went with the size 8, which was based on my current measurements. I did not make any prior fitting adjustments or a muslin before cutting my fabric – I just went for it! I wanted to see what would happen! (this might be my new motto for 2020). Fit-wise, this was almost perfect right out of the envelope. I did end up making a few minor tweaks before I attached the waistband – because I am extra, and I like fiddling with things! – but if I hadn’t done anything at all these still would have absolutely been wearable.

Vogue 2442 Calvin Klein Jeans made with Art Gallery Fabrics denim

Vogue 2442 Calvin Klein Jeans made with Art Gallery Fabrics denim

Vogue 2442 Calvin Klein Jeans made with Art Gallery Fabrics denim

Adjustments I made:
– Removed 1/2″ from the inner thighs, keeping the crotch length intact
– Scooped 1/8″ from the front crotch curve
– 5/8″ wedge at the center back yoke + waistband
– Cut 5″ total off the hem (I have a 28″ inseam, y’all lmao)

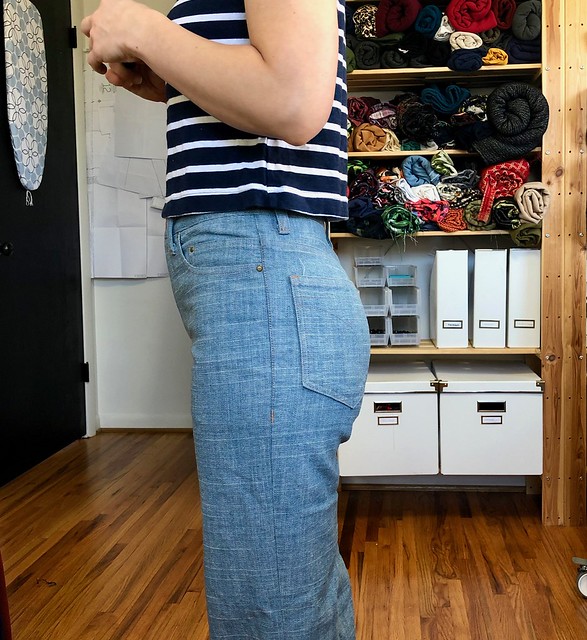
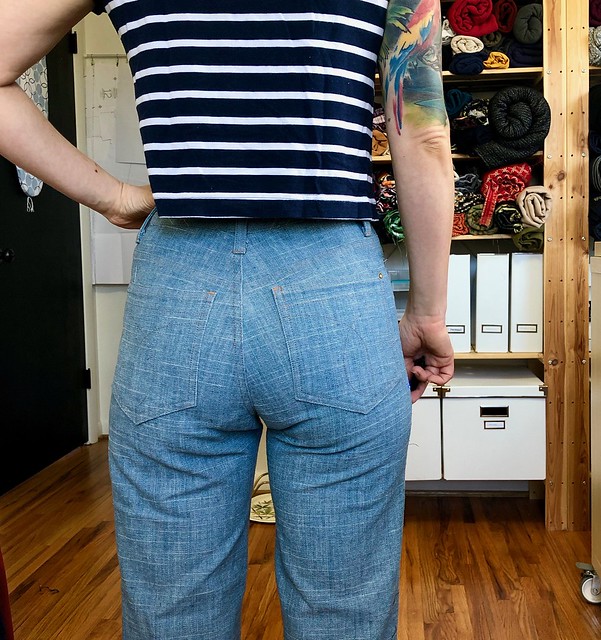
Sorry I didn’t take before photos, but these were all minor tweaks that didn’t translate very well in a photograph. Also, when I’m fitting, I don’t want to stop to take a bunch of weird ass selfies. Sorry, not sorry! Looking at these photos, I see I could have removed a little more from the inner thighs (as evidenced by the horizontal wrinkles pointing directly at my butt), but I can assure you this is a big improvement from the start, and I actually think they look worse in the photos than in real life! But, you know, it’s good enough. I spent far too much of my past sewing days overfitting myself to the point of frustration (and sometimes, actual discomfort). Nowadays, when I feel like I’m done fiddling with it, I just stop. As long as it’s not actually uncomfortable, I think it’s good enough! It has been very liberating and I encourage y’all to consider the same outlook 🙂

The instructions on this pattern certainly were interesting! As someone who’s made loads and loads (and loads) of jeans, these were a little more based on the home-sewer, rather than how RTW jeans are made (granted, I don’t have access to vintage jeans at this time, but the 1980s isn’t exactly the same type of vintage as, say, the 40s, and generally the construction methods back then were more similar to how they are now, i.e., serging seam allowances and such). As this is an older pattern, it wasn’t common for the average home sewist to have a serger – so the instructions include turning under edges, or finishing seams with a zigzag or overcast stitch. Interestingly, there is NO interfacing called for in this pattern (I interfaced the fly facing + outer waistband, out of habit and because I know that gets the me the result I like), but they do have you add twill tape to the top and bottom edges of the curved waistband to keep it from stretching out (that was a no from me, dawg). The other weird thing I noticed was that they have you double topstitch the side seams, and not the inseam. I also skipped that part (I prefer a stronger inseam, thnx) and did it my own way. However, I did follow the instructions for the most part.

Vogue 2442 Calvin Klein Jeans made with Art Gallery Fabrics denim

Vogue 2442 Calvin Klein Jeans made with Art Gallery Fabrics denim

Vogue 2442 Calvin Klein Jeans made with Art Gallery Fabrics denim

Vogue 2442 Calvin Klein Jeans made with Art Gallery Fabrics denim

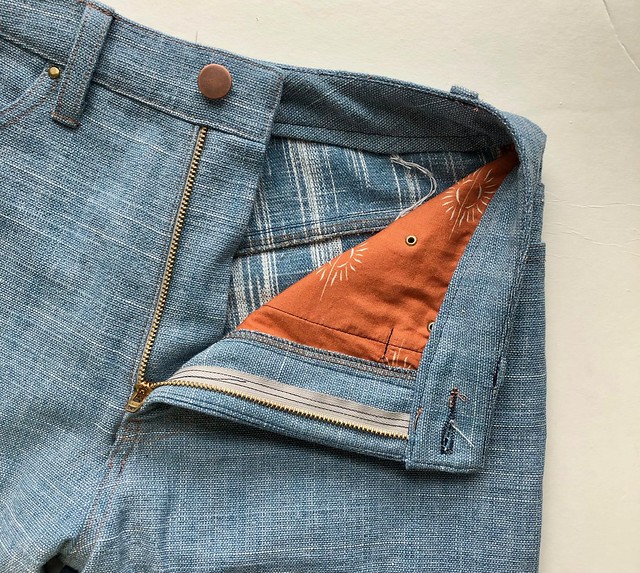
The pattern includes a back pocket topstitching design, front pocket stays (pocket lining is also from Art Gallery Fabrics, fyi!), and a two-piece curved waistband. The pants are fitted at the waist, hips and thighs, and then the leg goes straight down (which is not what the line drawing suggests; they look a little more tapered on the envelope). Since my denim is such a light color, I opted for a pale brown topstitching thread (my beloved Gutterman Mara 70), rather than gold or copper. I alter a lot of jeans for clients and one thing I’ve noticed is that most jeans use brown thread, not gold or copper! My rivets and buttons are from the Garment District (I think these rivets might actually be for bags, but whatever, I like them); I had 1 extra rivet so I attached it to one corner of the back pocket. I saw this on a pair of jeans the stylist I work with was wearing, and while I normally hate rivets on back pockets, I thought it was kinda cute.

Vogue 2442 Calvin Klein Jeans made with Art Gallery Fabrics denim

Vogue 2442 Calvin Klein Jeans made with Art Gallery Fabrics denim

Vogue 2442 Calvin Klein Jeans made with Art Gallery Fabrics denim

Vogue 2442 Calvin Klein Jeans made with Art Gallery Fabrics denim

My only issue with this pattern is the two-piece curved waistband. Since it’s in two pieces, that means there a seam at the center back – great for fitting, but it also means a lot of bulk at the center back when the inner and outer waistband are sewn together (and then later, a belt loop is sewn on top of that). I also admit that I was running on fumes by the time the waistband facing was attached, so it’s not my best work. But, it’s on the inside, so who cares!

Vogue 2442 Calvin Klein Jeans made with Art Gallery Fabrics denim

Overall, I enjoyed making this pattern and I think the finished jeans turned out great! I love the high waist (better for wearing crop tops with!), and the straight legs are a big style departure from my usual look. I love the lighter wash and subtle texture of the AGF denim, and I love love LOVE how soft it is! I don’t feel like I even really need to break these in, which is wonderful! If you’ve been looking for a good non-stretch, not-too-heavy denim, definitely check out what Art Gallery Fabrics has to offer!

** This post was sponsored by Oliso. All fabrics were provided by Art Gallery Fabrics. As always – all thoughts, opinions, and weird ideas are my own! **

Completed: Black Dawn Jeans

11 Dec

Hello everyone and welcome to my third installment of Operation-Jeans-Drawer!

Black Dawn jeans

This time, I’m sharing the Dawn jeans by Megan Nielsen. This is another great jeans pattern that, again, has some major differences from the other 2 that I previously shared. I don’t like to say that I have a “favorite” jeans pattern – since they are all so good and serve different purposes! – but right now, I gotta say, this is the one that is getting sewn the most in my studio these days. I shared the first pair I made at last year, and they still get lots of wear (they’ve truly broken in beautifully). I’ve actually made the shorts several times this summer, but this is only the second time I’m sharing the pattern here on this blog.

Black Dawn jeans

So, again, I can’t really compare these jeans to the Ginger or the Claryville since they are very different – but I’ll tell you what their key features are:
BODY TYPE: I don’t think these are necessarily designed for a specific body shape? I will say that they fit me pretty well straight out of the envelope. I did not make a muslin, just cut according to my measurements on the envelope.
FIT: These are slim-fitting, rigid jeans with a high, high waist! Like, the rise will completely cover your belly button (I love it!). If this is not your jam then this definitely is not the pattern for you lol. They aren’t a true “mom” jean – the legs and hips are a little more slim fitting than that – but they do have that suuuuper high rise. I should also add – the standard size pattern comes in sizes 0-20, and there is also a Curve range that includes sizes 14-30! Yay!
FABRIC: You want rigid denim for these! No stretch whatsoever! The good news is it means you don’t have to interface anything except maybe the fly facing (yup, I don’t interface my waistband! Not even at the button hole! Fight me!). The not as good news means that these are not gonna be the most comfy jeans you ever wear. I don’t mean to say that they are uncomfortable… I just mean, you can’t do, like, yoga in them (I can, and have, done yoga in my Ginger jeans lmao). I would not say the jeans are tight so much as they are restrictive. I hope that makes sense. Think pencil skirt vs circle skirt. I love them and I wear them all the time but I will be damned if I wear these on a 5 hour cross country flight, you know what I mean? Also, there is no law saying you can’t make these with stretch denim (def size down tho) but why? Just use a stretch pattern, save this one for those cool rigid denims, twills, and corduroys that you don’t know what to do with!

Black Dawn jeans

So, with that out of the way – here’s my newest pair! I wanted some black jeans because I made black shorts for the summer (also with the Dawn pattern) and I got a surprising amount of wear out of them. This fabric is a rigid denim from Darrell Thomas Textiles, which I bought when I was there this summer for a Jeans Workshop. When I say “rigid,” I mainly mean denim with no added stretch. A little bit of mechanical stretch is good. I have learned that I don’t like the suuuuper rigid denim that does not stretch at all; I find them hard to move in (granted, most of my moving involves a lot of squatting and crawling around the floor so maybe that doesn’t apply to you lol). Anyway, this is a nice denim and no I don’t know the weight! I felt it, it felt good, I bought 2 yards.

Black Dawn jeans

Black Dawn jeans

My only grief with this style of jean is the time that it takes to properly break in. Ugh! Like I said in my previous post, washing them a lot up front does help quite a bit. But you do still have to wear them around and get the wrinkles to soften up and have the denim mold to you body. One of these days I’ll woman up and sit in a bathtub full of warm water with the jeans on and let them dry that way. I’m not brave enough quite yet to try that tho lol. Please don’t be scared of my talk about the breaking in… it’s really not that bad, and it is ABSOLUTELY worth it. But if you make these jeans and they are super uncomfortable… that’s why! Give them some time (and WEAR THEM!) and they will soften up quite a bit.

Black Dawn jeans

Anyway, this denim wasn’t too bad as it was already pretty soft. I washed it three times before I cut it (I always do this with new denim) and that helped a lot. As you can see in these photos – it does relax out (compare these to the Dawn Jeans in my first post and you’ll see what I mean. They are the same size, those were just more fresh!). What you’re seeing is a pair of non-stretch jeans that I wore for probably a week without washing. They don’t bag out so much as they just relax. Yes, there are wrinkles under my butt but they are there to help me move. Otherwise I don’t think I’d be able to sit in these things haha.

Size-wise, I made a straight 4 but ended up letting the hips out a little. I think my hips are more in the size 6 range now, which makes sense (when I originally made these, the size 4 was fine but since then I have gained weight and also had to let my original ones out lol). I also reduced the height of the yoke by 1″ because it was too tall for me – I just ended up with a 1″ fold right in the middle when I put them on, so I cut it off the top. Finally, I also adjusted the pocket bags on this pattern. They are CRAZY deep. Like… I understand wanting deep pockets (I guess, I dunno, I don’t really use my front pockets) but with pants this tight they are absolutely fucking useless. I just cut the bottom curve off so now they are straight. Mainly it was really annoying trying to push them back into place after using the bathroom, and not being able to reach the bottom. They were THAT deep. Absolutely useless.

Black Dawn jeans

Black Dawn jeans

Black Dawn jeans

I kept these pretty simple, with black topstitching thread, black rivets and buttons (matte black from Blackbird Fabrics and I love them!), and a black leather back patch. One of the back pockets actually has a design topstitched in it (yes it’s the TCB lightning bolt, thanks for noticing) but it’s quite subtle. I am hoping that over time, as the jeans are washed and started to fade and crinkle, the design will be more noticable. We shall see! Oh, and you can’t really read the tag in the back pocket, but it says “You Can’t Buy This” Ha!

Black Dawn jeans

Black Dawn jeans

Black Dawn jeans

Forgot to say – this is the slim leg version, with the short inseam (and yes they are actually hemmed in these photos haha). This pants pattern comes with 4 different leg versions – skinny, straight, wide, and shorts – but I’ve only tried this one and the shorts. I have plans to make a pair of cropped wide-legs out of some corduroy, but we’ll see when I actually get around to it (not anytime soon now that I can’t leave the house without socks on haha).

Black Dawn jeans

Anyway, that’s it for this post, as well as for this series of “Lauren Talks About Her Favorite Jeans Patterns While She Also Revamps Her Pants Selection”! I have one more pair of jeans/pattern to share, but I need to sew them first (it’s been a busy month!). Hoping to get that accomplished before the end of the year, we’ll see!

Have you sewn jeans yet? What’s your favorite pattern?

Completed: Ginger Jeans, With A Heart On

25 Nov

Heart on Ginger Jeans

Fun fact: I am wearing this same outfit as I type this blog post. Don’t be fooled, though, I took these photos months ago! I don’t know what my deal is, but for whatever reason I’ve become the sort of “blogger” (I am putting this in quotes because I think I’ve maybe written 6 posts this entire year lol) who takes photos and then… hoards them? Whatever.

Anyway, here’s a new pair of jeans to share! I think I’ve made enough pairs of Ginger Jeans to probably warrant never needing to post them again – students always ask me how many I think I’ve made, and the answer is I actually don’t know! I’ve lost count! – but I feel weirdly guilty about all the blog neglect this year, so I’m posting for the sake of posting something and keeping the ol’ stomping ground alive.

Heart on Ginger Jeans

Also my hair looks really good in these photos, so there’s that. Gotta take those small victories wherever you find them!

Heart on Ginger Jeans

Even though I’ve made tons of jeans, I recently reached a point in my wardrobe where I realized I was in pretty dire need of some wearable bottoms. My wardrobe goes through a lot of shifts and purges – things don’t turn out the way I envisioned, the fabric or fit is weird (let me tell you right now that no matter how much you sew or even use TNT patterns, you will never be immune to making these mistakes from time to time!), it’s a strange color or style I don’t actually wear, my weight has fluctuated and it doesn’t fit anymore, or I’ve worn them so much they are wearing out and need to be replaced. The last 2 reasons have really hit hard this year, when it came down to me owning 1 pair of (very poorly fitted) shorts and maybe 2 pairs of jeans. So I’ve been on a pants and shorts making binge which has been quite fruitful!

I used 3 different jeans patterns to really round out my pants wardrobe, so stay tuned for the other 2! Today, I want to talk about the Gingers!

Heart on Ginger Jeans

Heart on Ginger Jeans

Heart on Ginger Jeans

If you’ve followed me for any amount of time, you probably know I have a mad love affair with this pattern. It’s one of my TNTs (tried’n’true), and like I said, I’ve sewn it so many times that I’ve literally lost count of how many pairs have passed through my sewing machine. I don’t know if it’s my favorite because it’s actually the best, or if it is just familiar. I do like the style and the fit works quite well for my body, though! It also helps that this is the pattern that I use for my Sew Your Own Jeans weekend workshops, so I feel like I truly know this pattern like I know the back of my hand.

I haven’t made this pattern since the end of 2017, and while I love that pair and still wear them regularly, I can see that they definitely have an end date – they are starting to wear very thin in some places, and the lycra is losing its elasticity. I think they still have quite a bit of life left to live, however, I think it’s always good to secure your back-up plan before it’s needed!

Heart on Ginger Jeans

Heart on Ginger Jeans

My fabric is a wonderful stretch denim that I purchased from Crafty Gemini back in August when I was in Florida for a sewing retreat. Usually whatever shop hosting my class will carry the specific denim that I recommend (this one from Robert Kaufman!), however, some shops like to source their own and that is also fine! In this case, Vanessa was able to get her hands on some very nice, dark indigo US-made stretch denim, which everyone in the retreat used. I was kind of jealous of how nice their pants were turning out so I decided to get a couple of yards for myself, too! This denim is just as stretchy as the RK, but a little heavier – maybe a 9 or 10oz. The color is nice and dark but I haven’t noticed as much dye rub-off as I tend to see with the RK denim.

I decided to go up a size in these jeans, which turned out to be a mistake. As I mentioned, my weight has gone up a bit this past year – mainly in my hips – so I’m sizing my new makes appropriately, and while I could squeeze into those 2’s if I really put my mind to it, I wanted some jeans that were a little less… painted on. Unfortunately, these ended up way too big so I should have just stuck with the 2’s! They look great now, but I did have to size down the side seams, and after taking these photos I also took in the waistband and center back a bit more. I think the issue is that 1. I’m exactly in between sizes with Closet Case Patterns (a little bigger than the 2, and a little smaller than the 4); and 2. My denim is very stretchy (about 25% stretch, the same as the Robert Kaufman that I usually use) which typically warrants sizing down, not up. Anyway, it was a fun experient and it all worked out in the end so I’m not mad about it, just making a mental note for next time!

Other than the sizing stuff, I did not make any other changes to this pattern. I added 1″ to the calf (ages and ages ago), but otherwise I get a pretty good fit out of the envelope, so that is nice and easy!

I did change the front pockets to be actual pockets, and not a pocket stay. I am fully aware that I am the minority in this thought process, but I HATE HATE HATE those pocket stays! I find them rigid, uncomfortable (which is all kinds of wrong when you’re wearing stretch denim, I mean wtf) and they make the fly area incredibly bulky. I know people loooove their pocket stays so please don’t @ me with your defense, just stating my personal choice here! Free-hanging pockets FTW! I have no issue tucking my pockets back in if it means I can eat a plate of nachos and not feel like I need to unbutton my pants! Fight me!

Heart on Ginger Jeans

Heart on Ginger JeansHeart on Ginger Jeans


Heart on Ginger Jeans

Heart on Ginger Jeans

For some fun customization, I used contrasting thread to do my bar tacks, and stitched this cute little emoji patch on the butt pocket. Mostly because it makes me laugh, but also because I love any excuse to tell people I have “a heart on” lulz omg.

I also do not use the back pocket markings as suggested in the pattern, because in my experience they are too low and kind of unflattering! I think a high-waisted jean needs a high pocket, so I always place mine a little higher. In my Sew Your Own Jeans workshops, I custom place these on each booty (oh yeah I bet you didn’t know that fee included a nice hand down your pants!). For me when I’m sewing alone, though, it requires a lot of basting, trying on in the mirror, removing pants and unpicking stitches, rebasting, putting pants back on again, repeat ad nauseum. Fortunately I’m at a point where I have a general idea of where the pockets should be placed with just a good confident eyeballing, but my point is that you too can have good pocket placement, even if you don’t have the luxury of a second person to help you! Just be prepared to take your pants off a LOT and also maybe consider taking photos of your butt (why is this starting to sound like a Tinder conversation… ?).

Heart on Ginger Jeans

I left the jeans unhemmed, because I’ve learned over the years that no matter how much you pre wash your denim (this one was 3x!), the length will continue to shrink in length over several more washes. I used to just hem my jeans on the long side, but these days I don’t bother hemming at all and just wear them rolled for a few months until I feel like they’ve gotten their shrink out. These are hemmed as of this posting, but were not as of the photographs.

Oh, I also made my top! It’s a True Bias Nikko Top, made with some really fun chartreuse knit that I bought at Fancy Tiger Crafts when I was there in June! I was very drawn to the color, but wasn’t sure how it would look on me – it took a lot of convincing from Bob, and then another few months of me staring at it on my shelf wondering if I had made a mistake. Honestly, though, I LOVE how it looks on me! I think it really works well with my skin tone and hair color, and it’s also a color that just makes me happy! So, Bob was right and I stand corrected!

Heart on Ginger Jeans

Ok, I’m wrapping up this long-ass post with a photo of me + Amelia. Don’t be fooled by the bitchface, she loves me and was purring very loud during this photo haha.

Want to learn how to make your own jeans? Join me in 2020 and let me teach you how!