Tag Archives: Archer

Completed: Polyester Chiffon Archer Shirt (+ Announcing the Sprout Sew-Along!)

23 Feb

It’s that time of the year again – when we start our spring sewing in a desperate attempt to hurry the warm weather up. And by we, I mean me.

While it’s still a little warm here – not quite shorts and tank tops warm, but no-socks warm – I know that we’ll get at least one more cold snap before the temperatures steadily start rising. So while my wardrobe needs to maintain a bit of coverage, I’m using lighter colors and designs that look decidedly more spring than my standard black and grey winter wear.

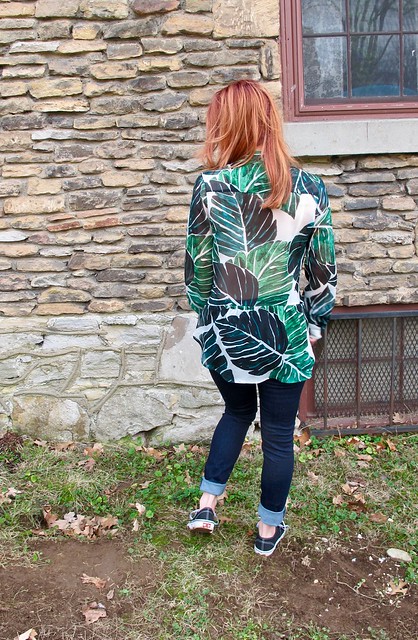
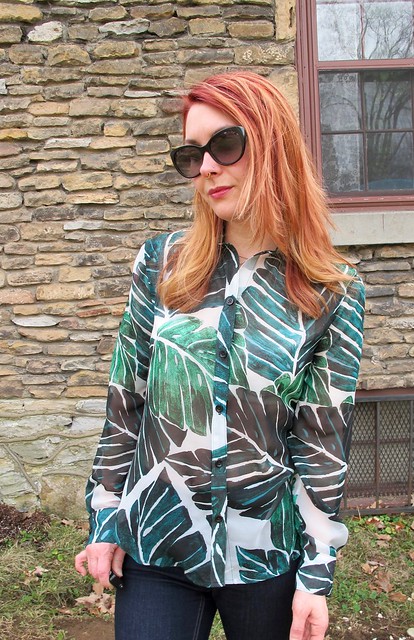
Polyester Chiffon Archer Shirt / Sprout Patterns

Like giant tropical leaves. Now THAT is a spring statement, amirite

Polyester Chiffon Archer Shirt / Sprout Patterns

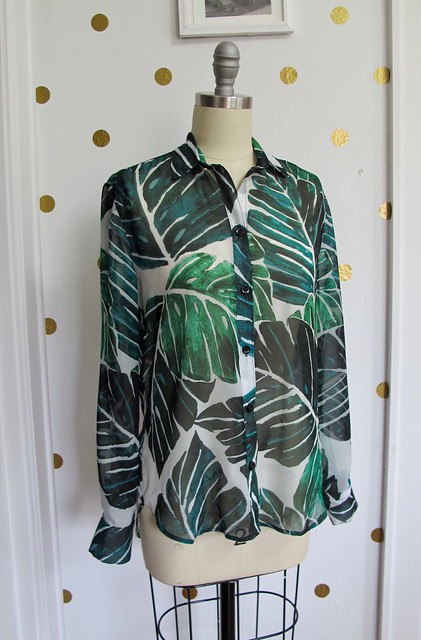
As the title of this post says, this shirt is the Archer button up from Grainline Studio. But wait, there’s more! I ordered my fabric from Sprout Patterns, meaning I got to choose the fabric design as well!

I feel like most people are pretty familiar with Sprout Patterns at this point, but in case you aren’t – owned by Spoonflower (beloved on-demand printer of fabrics, wallpapers, and more) – Sprout offers the same on-demand fabric printing but with the additional twist of also printing your pattern pieces directly on the fabric. This not only makes cutting a breeze (no giant flat table space needed – just sit at your couch and cut along the solid lines), but it also gives you total control over pattern placement without the additional brainbending. There are a few catches to this service – one, you are limited to the patterns they have on their site; two, you are also limited to the types of fabrics they offer; and three, having the pattern printed on your fabric does not leave room for flat pattern adjustments – but overall, I think the pros absolutely outweigh the cons.

I’ve heard of this service before – both through blogs and website ads, and also because one of my students at at Workroom Social class actually works for Spoonflower (!!!) – but I hadn’t actually tried the service until now. This year, I’m cooking up some fun plans with Spout pattern and Spoonflower (Spoiler: It’s a class. More info at the end of this post!!), so they offered to send me one to try out!

Polyester Chiffon Archer Shirt / Sprout Patterns

Polyester Chiffon Archer Shirt / Sprout Patterns

Polyester Chiffon Archer Shirt / Sprout Patterns

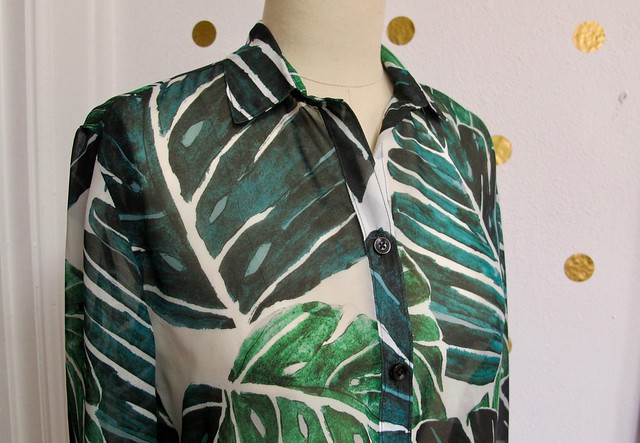
The Archer shirt works in a variety of fabrics, with the most common/easiest ones being the Basic Cotton Ultra and the Kona Cotton Ultra. While the cottons are definitely great, I love being difficult and asked if I could instead try the Polyester Chiffon. I really love this style of shirt in a soft, drapey fabric and I REALLY loved the idea of the cutting being way easier since the pieces are printed on the fabric. I made a size 2, View B (with the butt ruffle, because, butts) printed on Spoonflower’s Polyester Chiffon. The design is Monstera Leaves. You do have the ability to create your own design, but I’ve learned over time that I am decidedly NOT a fabric designer and would rather use something already made by someone who knows what they are doing. I chose this design because I liked the predominantly dark colors over a white background – it feels breezy without actually being super see-thru – and, of course, who doesn’t love some big ass tropical leaves?

Polyester Chiffon Archer Shirt / Sprout Patterns

Polyester Chiffon Archer Shirt / Sprout Patterns

Polyester Chiffon Archer Shirt / Sprout Patterns

Some notes about this fabric:

  • Polyester is not something that gets a lot of praise in the sewing community, present company included. To be completely honest, I generally HATE the stuff. Hard to wear, hard to sew, sweaty pit dump USA, etc etc. I gave this one a chance because, one, there were no other options for sheer drapey fabric (no silk!); and, two, I thought the sheer chiffon would offset the fact that poly doesn’t really breathe. I am happy to report that my hunches were right, and I actually really enjoyed working with – and now wearing! – this fabric. It’s a great quality poly, feels very nice against the skin, and while I can’t yet report on its heat-retaining properties (it just ain’t hot enough here yet, y’all), I can say that it’s been really pleasant to wear on our warmer days. It also took really well to pressing, so no problems there.
  • I told you this shirt is chiffon, and it is. I should also tell you that I’m only wearing a bra underneath it – no cami. It’s only slightly see-thru, and even then mostly shadows. This chiffon is slightly thicker than some chiffons I’ve tried – almost like a double chiffon – and the dark colors also help with preventing a peepshow. Not having to wear a cami under this really helps me feel, you know, ~breezy~.
  • Chiffon can be tricky to work with, as it is very lightweight and VERY shifty. My first combat against this was to get the pattern via Sprout, which saved me the drama of worrying about whether I was cutting the pattern pieces on grain. Since the fabric has the pattern pieces printed directly on it, cutting is WAY easier – seriously, you can just sit on the couch and cut it with scissors like you’re making a paper snowflake (this was me, in case you were wondering). My other combat for dealing with the chiffon was to soak the entire yardage in a gelatine mixture before cutting, which stiffened up the fabric to more of an organza weight/hand, making it much easier to cut and sew. I talked about using a gelatine mixture in this blog post (and here is the method I used on the Threads website), and ugh you guys it is is a LIFESAVER. Made the fabric soooo much easier to manage, and it washed right out when I was finished with the shirt (machine wash cold, normal dry). If you want to try a tricky pattern like this in a tricky fabric, I really encourage this method – it was one of the easiest experiences I’ve ever had with chiffon! Like, even my sleeve plackets look amazing. Super stoked.

Polyester Chiffon Archer Shirt / Sprout Patterns

Polyester Chiffon Archer Shirt / Sprout Patterns

Anyway, I LOVE how this turned out! The soft, drapey fabric – the shape of the shirt – and the leaves offering a bit of modesty so I can continue to be immodest 😛 This shirt looks equally good with the sleeves rolled up or left down, with the front buttoned or unbuttoned (ok, I guess THEN I’d wear that cami), or even knotted into a crop.

Polyester Chiffon Archer Shirt / Sprout Patterns

Some additional sewing notes:

  • I used French seams to construct the shirt, 1/4″ for each pass (for a total of a 1/2″ seam allowance). Since the fabric is so sheer, I like how the visible seams look this way.
  • I used black thread for constructing and topstitching, and a new 70/10 microtex needle for this lightweight fabric.
  • For interfacing, I made a few test swatches (there is plenty of extra fabric around the perimeters of your pattern pieces that is ideal for this use) to determine what would work best. I ended up using this lightweight woven fusible interfacing (from Workroom Social), which was a perfect match for the chiffon – it offers enough support for the collar and buttons, but it is light enough that it doesn’t interfere with the drape of the chiffon. And since is it white, it brightens up the white background of the fabric without looking super obvious. I also considered interfacing the back of the yoke for this same reason (since the yoke is a double layer of fabric), but I found that I actually preferred the look of the 2 layers so I left them as-is.
  • Like I said, this chiffon pressed without a problem. I use a gravity feed iron (affiliate link) with a shoe, which works the same as using a press cloth. This allows me to press at a high heat without melting my fabric or giving it a weird shine. I definitely do not recommend trying to sew a shirt like this in a fabric that won’t hold a press, however, this fabric didn’t give me any issues!
  • Buttons are just plain black plastic buttons from my local fabric store. Nothing fancy there!

Polyester Chiffon Archer Shirt / Sprout Patterns

Polyester Chiffon Archer Shirt / Sprout Patterns

Polyester Chiffon Archer Shirt / Sprout Patterns

Polyester Chiffon Archer Shirt / Sprout Patterns

Polyester Chiffon Archer Shirt / Sprout Patterns

Ok, so here’s the fun part! I was sent this fabric + pattern by Sprout patterns, in preparation for a workshop that I will be teaching at Spoonflower! Here are the details:

Spoonflower presents the 2018 Sprout Sew-Along with Lauren Taylor (also known as Lladybird)! With the help of Lauren and her sewing expertise, students will be led through the construction of a Grainline Studios’ Archer Button Up from start to finish using their custom printed Sprout Pattern. Our intimate class setting ensures all students the chance to get one-on-one instruction from Lauren as we tackle this wardrobe staple. This class is sure to build your confidence in garment construction! We hope you can join us!

Class fee includes the printed Archer button-up, and there is an early bird discount for those who register before March 3! The workshop is April 6 – April 8, and will be held at Spoonflower Greenhouse in Durham, NC. If you’ve been wanting to tackle this pattern but feel a little overwhelmed with the steps, this is a great opportunity to have a little bit of guidance and hand-holding for your first go! While we will be sewing exclusively with the Kona Cotton Ultra for this class (just because we gotta speed everyone along so we actually finish in two days!), it will give you the skills you need to try this pattern later with a more complicated fabric – such as the polyester chiffon 😛

You can find all the details of the workshop – as well as sign up – here!

Polyester Chiffon Archer Shirt / Sprout Patterns

A side note about the sunglasses – it was very bright outside and I thought I would pretend like I was a fAsHuN bLoGgEr. Suffice to say, I am not happy with how these pictures turned out (and I had to delete more than half of them because it bothered me that you could see the tripod in my lenses haha) but I also don’t care enough to retake them. No more sunglasses photos for me. It weirds me out that you can’t see my eyes. Oh well, you live and learn!

**Note: The fabric for this shirt was given to me by Spoonflower, in preparation for my workshop with them in April! Will I see you there? 🙂

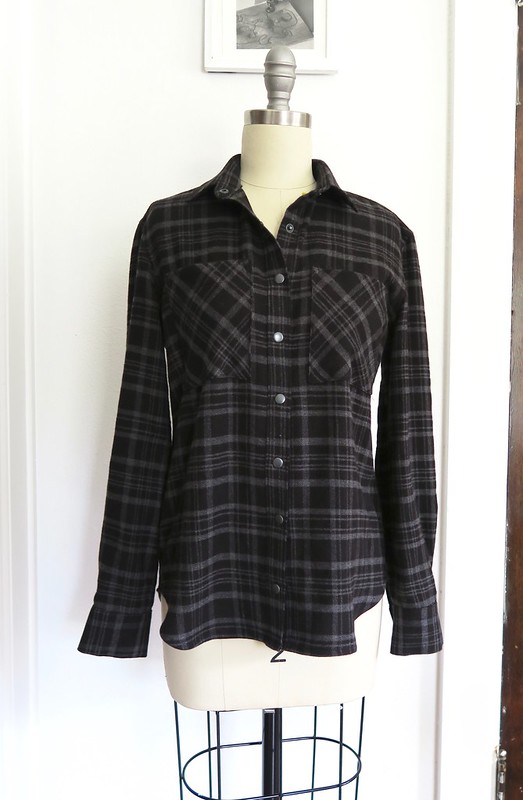
Completed: Black + Grey Flannel Archer

3 Nov

IT’S FLANNEL SEASON AGAIN, Y’ALL.

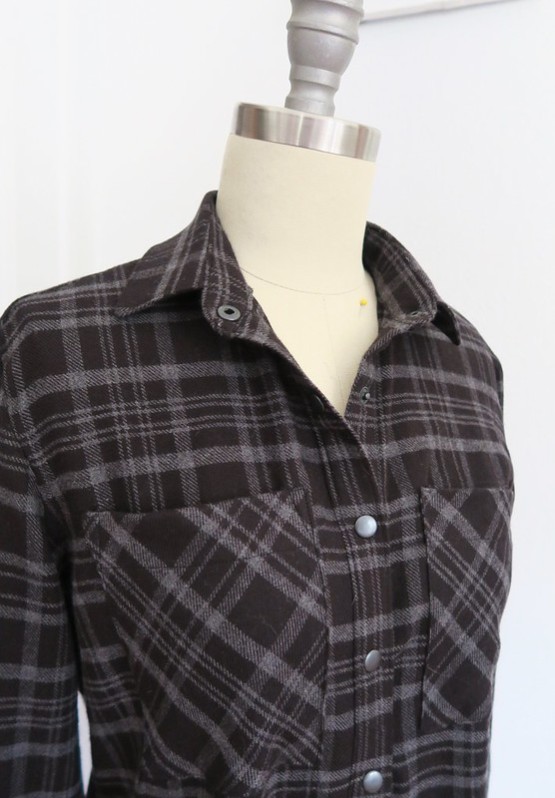
Plaid Cotton Flannel Archer

I don’t like the cold – like, at all – but I do love the clothes that are associated with this season. Layers, textured fabrics, WOOL, dark colors and jewel tones… gimmie all of it. Flannel button-ups are at the top of my list. I love that they can be worn solo and buttoned up, layered under a sweater, or layered over a tank or tshirt and left to swing free in the breeze. Snaps at the cuffs make it easy to roll the sleeves up, snaps at the button band make it possible to Hulk out at the end of the day (don’t pretend like you don’t do this with snap-up shirts, you liar).

Plaid Cotton Flannel Archer

I have a few handmade plaid flannel shirts, all of which I love to wear, so I put a short hold on adding to that stash. I finally allowed myself this year to make 2 more – both out of plaid cotton flannel from Mood Fabrics. This is the first of the two. I haven’t taken photos of the second one yet, but rest assured – it’s almost the exact same as this one, just a different colorway. Because if I am anything, I am consistent haha.

As I said, this is the Archer button up from Grainline Studio. I’ve made this shirt a lot, so there’s not a lot to elaborate on here, just a few small changes. I sewed view A with the angled cuffs, swapped out the included placket for a tower placket (I use the placket from the Negroni pattern, but this placket download from Threads is basically the same thing).

Sizing-wise, I cut a size 0 (which is the size I pretty much always sew with Grainline). One thing I did change with this pattern was to increase the seam allowances at the side and sleeve seams to 5/8″ – the included seam allowances are 1/2″, and I actually sew them at 5/8″ since I like to flat-fell those seams. I’ve noticed that my shirts are pulling ever-so-slightly at the bust now (told ya I’ve gained some weight. And also an entire cup size, ughhhhh), so I added in that extra 1/8″ and the fit is much better now!

Plaid Cotton Flannel Archer

Plaid Cotton Flannel Archer

Plaid Cotton Flannel Archer

I cut my fabric on the single layer to get the plaid all matched up (see here for my plaid-matching tips!), and cut the outer yoke and pockets on the bias. I originally had the pockets cut to match the plaid at the front, but they matched so well they basically disappeared, and I wasn’t crazy about that look. So I re-cut them and I think they look much better!

As I mentioned, all seams are flat-felled so there is a nice clean finish on the inside. I used a super lightweight interfacing so that everything would stay nice and soft – I didn’t want a stiff button placket in contrast to the otherwise floppy fabric. Everything is topstitched in black, and I used black snaps for closures.

My cotton flannel was found at the Mood Fabrics store in NYC, back in August. I had a hankering for a new flannel, and I wanted one that was soft and lightweight, like it had already been worn to death. I found this and another similar flannel in a different colorway, both of which work perfectly with the color palette that my closet has ended up morphing into. Since flannel tends to shrink up quite a bit, I washed and dried my fabric three times before cutting into it. I kept the sleeves slightly on the long side, again, in case they decide to shrink up (my first flannel shirt has quite short sleeves now!).

Plaid Cotton Flannel Archer

Plaid Cotton Flannel Archer

Plaid Cotton Flannel Archer

Plaid Cotton Flannel Archer

Plaid Cotton Flannel Archer

Plaid Cotton Flannel Archer

I think that’s all I can say about this make! I’ve already worn it loads and I look forward to some hardcore layering here in the next few months 😀

A couple other things of note:
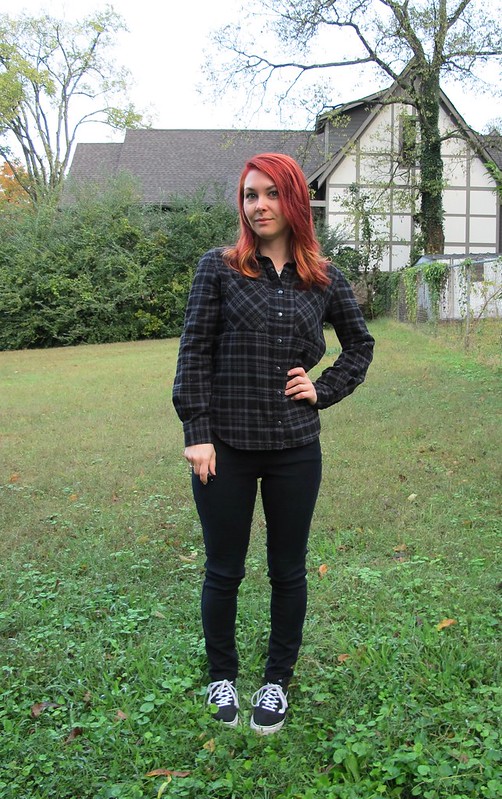
1. Yes, I made my jeans! They are Gingers that I made with veeeeery stretchy twill fabric (like, they are almost jeggings haha I love them). Just some basic black pants that don’t necessarily warrant a whole post. However, here’s a shot of the butt (and my new belt) (and this shirt, too, apparently lol)
2. Yes, that’s a new hair color! After a REALLY long time (for me anyway haha) with the same color, I decided I was ready for a change! I love the new color so much!

Plaid Cotton Flannel Archer

** Note: The fabrics used in this post were provided by Mood Fabrics, in exchange for participation in the Mood Sewing Network.

Completed: Linen Archer Button-Up

11 May

Does anyone remember my first linen Archer shirt, and the disaster that it was? Like, I don’t even think I wore that thing out in public one time. I’m pretty sure it went straight to Goodwill, where a less discerning eye was hopefully excited to find it. Hopefully.

Well, I always said I’d revisit this pattern+fabric combination again, once I’d had a little more practice with it – and here we are! I can’t believe it’s taken me nearly 4 years to actually get around to making that linen button-up of my dreams, but better late than never, I reckon!

Linen Archer Button-Up Shirt

Basic details first: This is the Archer button-up from Grainline Studio. Sewn up in a size 0, with all my former modifications (shortening the hem, shortening the sleeves, and also adding a tower placket to the sleeve instead of the bias placket, which I’m sorry but I just don’t like). I’ve made this shirt several times, so if you want more in-depth info from an earlier version – check out this tag! The only former modification that I did NOT make to this version was to sew the side seams at their 1/2″ seam allowance (all my other versions, I used a 5/8″ seam allowance for this, to make the the body a smidge narrower. But for this one, I kept it as-drafted).

Linen Archer Button-Up Shirt

Linen Archer Button-Up Shirt

Linen Archer Button-Up Shirt

Ok, boring shit out of the way – what makes this one so special is the fabric I used! Omg you guys. It’s hard to convey in a photo – even harder with these less than sub-par ones I have going on (and yah, I’ve already started packing for my move at the end of the month. Backgrounds are about to get a lot sadder ’round here haha) – but this particular linen is one of the prettiest solids I’ve ever seen! It looks like a basic chambray from a distance, but once you get closer – it’s really more of a periwinkle blue, with a definite purple sheen to it. I am not a huge fan of purple – and honestly, wasn’t a huge fan of linen until recently (something about getting old idk but god bless I feel like I sweat more than ever now, which is disgusting I know) – but this one is pretty freaking special.

I got my magical linen from South Street Linen, waaay back in 2015 when I was in Portland, ME for my first retreat at A Gathering of Stitches. We took an impromptu class field trip to the shop after we’d been told there was a linen sample sale going on… and DUDES WHAT A SAMPLE SALE. So many amazing pieces of absolutely beautiful linen, priced according to their yardage. You couldn’t get the pieces cut, but it was easily enough to split with someone else (we’re talking bundles of 6-10 yards per piece, so some people split 3 ways and still had tons). I personally got 2 pieces myself – both shared splits – and this is one of them. It’s been so long that I don’t actually remember what I paid, but I’d guess probably $30-$40 for 3 yards. Maybe less, again, I don’t remember!

Again, these pictures do not do this fabric justice – but it is even more beautiful in person. It’s also incredibly soft – not rough at all like some linens can be. It’s a slightly heavier weight, too, which means it’s more opaque and a bit less prone to wrinkling and fraying. I’ve been sitting on this piece of fabric for a very long time, waiting for inspiration to strike, and I’m glad I waited! I like the idea of having a summery button-up shirt (I’m not opposed to wearing my flannels in the summer, but this just looks better, yeah?) that is made of a nice breathable linen, with long sleeves that can protect my skin from the sun and/or insects (seriously, Morgan had one of these in Peru and I was SO JEALOUS of it!)…. or more specifically, air-conditioning, ha!

Construction-wise, this was waaaaay easier than my first linen attempt. I suspect part of that has to do with my now experience sewing this type of pattern- and part because of the fabric itself. Being a heavier linen means it is less shifty and less prone to fraying, which made the entire experience a BREEZE to navigate.

Linen Archer Button-Up Shirt

Linen Archer Button-Up Shirt

An unexpected perk of this style is how good it looks when it’s unbuttoned to be borderline scandalous. Since I’m not rocking much in the boob department these days, I can totally get away with these things hahahaha.

Linen Archer Button-Up Shirt

Linen Archer Button-Up Shirt

Linen Archer Button-Up Shirt

Linen Archer Button-Up Shirt

Linen Archer Button-Up Shirt

A few more minor construction notes: the shirt is finished with flat-felled seams, for a neat and durable finish. I did add a tower placket to the sleeve, as mentioned, so it would be easier to roll up (I use the placket pattern piece from the Colette Negroni pattern, but there are other options available). I also added button tabs (nabbed from my copy of B5526) to further aid with rolling up the sleeves (sorry, I didn’t think to take a photo of them rolled up – but you can see a shot here on my Instagram). The topstitching is off-white, and the buttons are just standard off-white shirt buttons, nothing fancy.

Linen Archer Button-Up Shirt

I guess that’s all for this make! I have already worn it several times since finishing (hence the wear-wrinkles in my “modeling” photos – but as you can see, it doesn’t wrinkle that much! And there are pressed fresh-off-the-sewing-machine shots on my dressform, if you’re a hater of wrinkles!) and it’s been a nice and cool alternative to my standard cardigan. I like that the purple makes it a little less plain than an ordinary chambray, yet it’s still a really versatile color that can be worn with most of my wardrobe.

Completed: The Archer Popover

29 Dec

Oooh, one last make for this year!!!

Gingham Archer Popover

I made this about 4 months ago, but it was a sample for Craft South so I’m just now getting possession of it to actually wear! I love making samples for the shop – you get access to the pattern + materials for free, and are allowed to sew during downtime at the store – but the trade-off is that you have to leave it at the shop for at least a couple of months. Which makes sense – it is a sample, after all, haha. But it can be frustrating when you have to wait to be able to wear it!

For this top, I used my personal Archer pattern (which we do sell in the shop, but I didn’t want to rip one open when I had a perfectly usable pattern at home), and I downloaded the popover variation. The fabric is Cotton + Steel Checkers, in the 1″ black and white. It’s a nice woven cotton that feels similar to a yarn-dyed cotton – it hangs (and feels!) nicer than a quilting cotton, but it does have a dense weave that still makes it have quite a bit of body. The checkers are woven, not printed, so the design is the same on both sides of the fabric. I did take this fabric home and prewash it before actually sewing the sample – I wanted to be sure it got its shrinking out of the way before I cut it up. Actually, I also cut it while I was at home, and fused my interfacing as well. Matching plaids takes some focus and concentration, and there are a lot of pieces to contend with on this pattern. I didn’t want to have to try to juggle cutting/matching while also dealing with customers as they come in and out of the shop, so it made more sense to tackle that part of the project at home away from distractions. But all the actual sewing did happen while I was at the shop!

Gingham Archer Popover

Gingham Archer Popover

I’ve made lots of Archers in my time, so there’s not much to say that I haven’t already said. I made a size 0, and followed the instructions as they are written. This particular version is a bit different in that the button placket doesn’t extend all the way to the bottom of the shirt – hence, that it’s a popover, not a button up. The variation pack includes a new shirt front, a new front placket, and a different sleeve placket, as well as the instructions you need to actually sew them in. It’s been a few months since I made this top, so my memory is a little fuzzy, but I recall the instructions being easy enough to follow. I do remember that I did not like the instructions or pattern pieces for the tower placket on the sleeve – I found that whole process unnecessarily fiddly, although it did turn out nice in the end. Personally, my favorite way to sew a tower placket is by way of the Colette Negroni, it is very straightforward and simple, with a really nice finished result.

Other changes I made to the pattern was to include tabs for rolling up the sleeves (I swiped the pattern piece from my copy of B5526) and different shaped pockets (pattern piece swiped from the Negroni). I cut the gingham on the straight grain as directed, except for the outer yoke and pockets, which were cut on the bias. The inner yoke is also cut on the straight grain, to give the bias side some support. I didn’t get any photos of me with the sleeves rolled down, but they are full-length.

Gingham Archer Popover

Gingham Archer Popover

There were 2 reasons why I wanted to make this particular shirt – one, I really liked that Cotton + Steel fabric and I wanted to sew something out of it; and two, I wanted an excuse to bust out some fancy machine embroidery. I love embroidered western shirts, hence the inspiration for this one. Because I work in a sewing machine shop and we have several models out on the floor to play around with, I went straight for the Rolls-Royce of the bunch and did all my embroidery (and sewing, for that matter!) on the Horizon Memory Craft 15000. Y’all, we sell this sewing machine for a little over $10,000 (yes, all those zeros are supposed to be there). It comes with a fucking IPAD. It’s a super badass machine that I’m going to confidently say will never ever be in my personal budget to own, but you bet your ass that I’m gonna take advantage of the fact that I can sew something on it right now. Ha! Honestly, it was actually a good thing for me to sew this project on that machine, because it gave me lots of time to play around with it, learn how to use the embroidery features, and get comfortable sewing on it. I can’t imagine anyone would ever want to buy a sewing machine from someone who doesn’t even know how to use the thing themselves, so it was beneficial for me to learn all that in shop downtime. Also, I have a new shirt from it. Yay!

Anyway, that particular sewing machine comes with a bunch of pre-loaded embroidery designs, plus you can download (or create) more designs and upload them straight to the machine (either via USB, or with that aforementioned iPad haha). I get too overwhelmed when presented with way too many options, so I kept it simple and stuck with what was available on the machine. This little floral design fit right in the back yoke, although the suggested colors were a little weird (those were easy enough to change, obviously). I made a few practice pieces to get a feel for the finished size and also how the embroidery goes on, then I embroidered the actual garment piece. To do this, I first cut my piece and fused a piece of interfacing to the back to stabilize it (this isn’t 100% necessary in all cases, but since that piece is on the bias, it was needed). I used my sample piece to determine where the machine would start the embroidery, and centered my pattern piece in the hoop with tear-away stabilizer. Then you just turn the machine one and let it go to town! I can’t remember how long the embroidery took – we turned the speed down and let it roll on in the background while we worked – but it wasn’t super long. The machine will stop when its time to change the colors, and thankfully its also smart enough to pick up where it left off if you run out of thread or have to stop the embroidery for any reason.

Gingham Archer Popover

Gingham Archer Popover

Other than that, sewing was pretty uneventful. I finished the rest of the shirt on the same machine, which let me play around with all the available feet and additional sewing settings. It was pretty fun! All the seams are flat-felled, so it looks just as good on the inside as it does on the outside.

Gingham Archer Popover

Gingham Archer Popover

Gingham Archer Popover

Gingham Archer Popover

Gingham Archer Popover

Gingham Archer Popover

Gingham Archer Popover

I think the shirt turned out really nice, however, I’m not super crazy about how much it stands away from my body. I normally like my Archers in a stiffer fabric, but all the others I’ve made button all the way to the bottom, so I can leave them open and wear them sort of like a little jacket.This particular style might do better in a drapier fabric. With that being said, I am hoping the fabric will soften with more washing, as cotton tends to do. We will see! In the meantime, it gave me an excuse to sew something on a machine that costs more than the first 3 cars I owned combined, so that’s saying something haha.

Gingham Archer Popover

Completed: Silk Chiffon Archer Button-Up

30 Aug

So I guess we are now officially in that time of the year again – when the shops are screaming FAAAAAALLL (Wool caps! Corduroy bottoms! Pumpkin spice everything!) but our temperatures are still firmly stuck in summertime. While I’m not ridiculous enough to pull on my Ugg boots when it’s still 100 degrees outside (LOL JK I don’t own Uggs hahaha) (but seriously, Ugg-watching in 100 degree weather at the ritzy mall is absolutely my favorite pasttime during these months. Bonus points if they are wearing a wool hat, too.), I still want to at least look the part of the changing seasons, which still complying with the temperatures outside. For me, that means colors and silhouettes that give a nod to fall – but sticking to lighter-weight fabrics so I’m not sweating my arse off.

So anyway , with all that being said – here’s another button-up shirt! HAHA

Silk Chiffon Archer

I used the Archer pattern to make a fall-inspired button-up, but with a twist – instead of the traditional plaid flannel (which I lurrve, but again – HOT!), I used a light and breezy wide silk chiffon from Mood Fabrics for the main, and woven silk crepe de chine for the collar, collar stand, button band, pockets, and bias facings. Mood Fabrics carries tons of colors of both of these fabrics, but I went with boring ol’ basic black. In the future, I might go completely insane and try this with a PLAID silk chiffon. Maybe.

Silk Chiffon Archer

Silk Chiffon Archer

If you are feeling some major déjà vu about right now, you are absolutely correct – I totally and completely 100% shamelessly ripped off Kendra’s silk Archer from the Grainline blog. I don’t ever think I’ll look as chic as she does, but that doesn’t stop me from trying! 🙂 I followed Jen’s instructions for making the Archer sleeveless (basically shortening the shoulder drop and adding some contour to the back armhole, nothing crazy here) and shortened the length by about 2″. I sewed a size 0, which is what I normally make for this pattern.

Silk Chiffon Archer

While I have made my share of button-ups in tricky fabrics – silk georgette, silk crepe, crazy plaids, and a rayon challis that has yet-to-be-blogged – I did worry a little that this one was going to be a beast to sew. My last experience with chiffon did NOT go well (you didn’t miss anything – this was several years ago), but I think a big part of the problem was the quality of the material I was using (it was pretty cheap poly chiffon). Using a high-quality fabric makes a big difference in the ease of your sewing when it comes to tricky fabrics like this – you know they’re already on-grain (or it’s easy to straighten the grain if you need to) and the natural fiber content means you can actually press them (which, again, makes a world of difference during construction – especially for a pattern like this). With all that being said – I only used a yard of the chiffon to make this sleeveless version, which at $20.99 per yard isn’t really that expensive. I got a yard of the crepe de chine as well, but only used a fraction of that (I use silk bias on everythingggg so I have tons left over for other projects). Even having been made out of silk, it’s fairly economical! And you definitely cannot get a silk button up shirt for less than $50 in retail, at least not new. Plus, I machine-washed all my fabrics before cutting – so my silk is machine washable now 😉

Silk Chiffon Archer

Silk Chiffon Archer

Silk Chiffon Archer

Silk Chiffon Archer

So anyway, about that sewing! I didn’t do any sort of prep before getting into cutting – in the past, I’ve used fabric stabilizer to stiffen the fabric so I’d have an easier time cutting and sewing (and yes, it does work – see the aforementioned silk georgette button-up post for my full review on that), but I didn’t bother with any of that this time. It certainly would have been easier if I had, but obviously it was doable without 🙂 I did trade out my scissors and use a mat and rotary cutter to cut this, which was tremendously helpful.

Sewing was really easy and straightforward – I used a sharp 70/10 needle, polyester thread, and a lot of high heat from my iron. All seams are enclosed – the yoke and collar cover most of that, but the side seams are French-seamed, and the arm holes are finished with silk bias facing. The hem is just a simple rolled hem (I usually use bias facing there as as well, but I was afraid the crepe de chine would be too heavy for the silk chiffon). I used a super lightweight interfacing (which comes in black!) for all my interfaced areas – it gives some stability without making them weirdly stiff, which is important when you’re dealing with silk chiffon. The buttons are some vintage glass buttons that I’ve had in my stash for ages. The only thing I’m not thrilled about is the pockets – the crepe de chine sags a bit on the chiffon, so they’re not perfectly smooth when I’m wearing it (or when it’s hanging on the wall, for that matter). And also – they are a bit lopsided! Whoops! I hesitate to unpick them because I am afraid it may damage the delicate chiffon, but thankfully no one notices it – even when I point it out. Of course, that may be all you see now 🙂 Sorry 🙂

Oh, and in case you were wondering – I am wearing a black tank top under this, and I did not make the shorts (I WISH I did, though! Because then that would mean that I had found awesome fabric like that!). They are from Express, but the shape is quite similar to the Rite of Spring shorts. The fabric is a nice rayon challis. I pretty much never buy clothes these days, but these were given to me by my boss while she was cleaning out her closet in preparation for her cross-country move (she also gave me a pair of Jimmy Choo’s. Um, I WIN.). Speaking of which, I will be flying up to Rhode Island this week to orchestrate all the unpacking and whatever else you’re supposed to do when one moves cross-country (I’ll be staying here in Nashville and working remotely after that). I’ve never been to RI before so I’m excited to check it out! Wish me luck!

Silk Chiffon Archer

I don’t have much else to say about this pattern that hasn’t already been said to death, so I’ll keep this post reasonably brief. Yay for silk chiffon button-ups! Once we get into full-on winter mode, I think this top will continue to be useful as I can wear it under my cozy sweaters for an extra layer of warmth.

**Note: The fabrics for this project were provided to me by Mood Fabrics, as part of my participation in the Mood Sewing Network.

Completed: The American Flannel Archer

28 Dec

Another Archer for my winter wardrobe! Yay!

Flannel Archer shirt

I actually finished this shirt nearly 2 months ago, but here I am just now getting around to posting it. I’d apologize for the delay, but honestly, I’m not sorry. It is what it is. On the flip side, I’ve been able to wear it plenty since completion, so I can actually comment on the fit from the perspective of wearing it all day. On the other hand, I’ve already made a bunch of Archers so it’s not like this is some kind of breaking news in my personal pattern collection.

Flannel Archer shirt

Flannel Archer shirt

Since I’ve made this pattern multiple times (see: one two three… well damn, there’s another one somewhere but I can’t find it oh well), I’ll spare you the nitty gritty. Like my previous versions, I cut a size 0, sewed the side seams at 5/8″ and flat-felled all the seams for a nice clean finish on the inside. The buttons are just standard shirting buttons that I had in my stash, and I matched the plaid everywhere except on the back yoke and the pockets, which are cut on the bias. Oh, and I used the pocket piece from my Negroni pattern. It looks like it belongs on a western shirt, and I like that.

Flannel Archer shirt

I really love this fabric, but this particular shirt almost didn’t happen. See, back when I bought flannel from fabric.com for my Carolyn Pajamas, I added a few yards of this Robert Kaufman Mammoth Plaid flannel to my cart so I’d qualify for free shipping (because I just love saving money when it means I have to spend more money first :P). A few days after I placed the order, I received an email from Fabric.com saying that they didn’t have the 3 yards I requested, but they did have 3 cuts (totaling around 1.5-2 yards) of a smaller amount if I wanted that. I didn’t think I’d be able to cut a shirt – let alone plaid-match – out of that small of an amount, so I picked a different plaid from the site and asked them to just change my order. When I received my order processing notification, it said I was only getting 1 yard of the new flannel (not 3, like I’d asked for in the email). I had to call the company and sort things out, and while all this was happening – they completely sold out of my back-up flannel! Argh!! Obviously, that shit wasn’t in the cards for me. I told them to cancel the second cut of flannel and just send me the original piece that I needed to finish my pajamas (which they thankfully still had! Pretty sure I bought the last of it). I was refunded for the 3 yards that were out of stock and I got free shipping too. Cool!

And then they ended up giving me the off-cuts anyway, for free. Just threw them in the package where I was surprised (but also happy because, YAY FREE FABRIC) to find them hanging out with my actual order. That’s cool, I ain’t complaining.

Flannel Archer shirt

Flannel Archer shirt

Since I had the fabric, I decided to try my original plan and make that Archer. Like I said, had 3 cuts – one was a full yard, one was a half yard, and the last was a bit less than half a yard (I’m sorry I don’t remember the exact amounts, but it was a while ago and my order history on the site doesn’t reflect the freeb). It took some ninja cutting skills to cut everything so that the plaid lines matched, but I did manage for the most part. Cutting everything on the single layer helped immensely. That being said, I was still a tiny bit short on one of the fronts, so I ended up having to piece it and there is an extra seam. It’s only a little noticeable, but, again, free flannel shirt. Not complaining.

Flannel Archer shirt

You can see the piecing here, sort of. The top seam that I’m pointing to is the actual shoulder seam. The bottom seam is the result of piecing. By carefully matching the plaids and flat-felling the seam, I was able to get it to blend pretty well.

Flannel Archer shirt

Another minor complaint is that I wasn’t able to properly match the sleeves. The lines of the plaid are uninterrupted, which is good, but the sleeves themselves are not sleeve twins. Again, fabric restrictions. Again, free flannel shirt. Not complaining.

Flannel Archer shirt

Here’s a crappy picture of the inside, in all it’s flat-felled glory. Yay!

Flannel Archer shirt

This flannel shirt is a bit different than my other ones, since the fabric is SO thick. It almost feels like I’m wearing a light jacket, as opposed to a shirt. It’s pretty awesome and super snuggly. The fit is a little more boxy, too, since this fabric doesn’t drape as well as a shirting plaid flannel. I’m pretty ok with that, though! It works well with leggings (shown here with navy Ooh La Leggings which btw FAVORITE comfy lounge legging pattern, hands down!), but also looks good with jeans. I almost wish I’d put in pearl snaps instead of regular buttons, because I really like Hulking out of my clothes, but I think the fabric is just too thick for pearl snaps. But at least I resemble an American Flag! Can’t be mad about that, not one bit.

Oh, right, and I have some winners from the Shutters & Shuttles giveaway a couple of weeks ago! First, thanks for all your awesome comments on that post – Allison and I both really enjoyed reading through them and see what you’d do with the fabric 😀 (even if it just makes me want more of that fabric now so I can steal your ideas). Second, the plural “winners” is not a typo – there are two of you! A little belated Christmas bonus and all that 🙂 Sooo congratulations are in order to both shesewsswell and Samantha! I hope you ladies love this fabulous fabric, and I cannot WAIT to see what you make up with it! ♥

Completed: Two Colette Mabels

8 Oct

I totally skipped all the hullabaloo that came out when the Colette Patterns Mabel skirt was released – but that’s ok! I’m here now, reporting for duty!

Colette Mabel & Sewaholic Renfrew

I actually made two – just to be safe!

Colette Mabel & Grainline Archer

Let’s start with a basic Mabel lowdown. I made the grey version first, out of some leftover ponte knit that I used to make a pair of Ooh La Leggings (not pictured – because neither photographed nor blogged, but they are basically the same thing as these black ponte leggings except, you know, grey). I actually have no idea why I bothered saving that little piece of fabric, because it was about half a yard and thus not enough to do anything with – and the ponte is pretty thick, which means it wouldn’t work for something like, say, colorblocking a tshirt (which can be a good use of leftover knit scraps, if you tend to get hoardy like I do). Anyway, it’s a good thing I did, because I had exactly enough to make a little Mabel mini! Yay! I love it when these things work out!

Colette Mabel & Grainline Archer

Colette Mabel & Grainline Archer

Mabel Mini 1 is view A, size XS. I sewed the pattern exactly as per the directions, except I opted to understitch the waistband lining (I used my machine’s lightning bolt stitch – kind of like a very short zig zag stitch), to keep it from sticking out. The seams of the skirt were sewn on my serger, and the hem is done with a twin needle. From cutting, to sewing, to hemming – this entire thing took… I dunno, maybe 30 minutes? It was VERY fast.

I didn’t really use the instructions – I mean, it’s a knit skirt, it doesn’t need much introduction – but they looked to be pretty good, based on my glance over. Like the Moneta pattern, they include lots of tips and info on how to sew knits with a regular machine, which is always nice. The only thing I did not like about this pattern was taping it together (I have the PDF). Holy shit, talk about too many pages! My disdain for PDFs is no secret (I get why other people like/need them… no defense necessary 🙂 But for me? Nope, no way! Can’t do it!), so maybe I’m biased – but this one seemed to be unnecessarily large & unwieldy. My advice: get the paper pattern. Ha!

Colette Mabel & Sewaholic Renfrew

Anyway, speedy instaskirt is the reason why I obviously needed to jump right into Mabel Mini 2 immediately after 😛

Colette Mabel & Sewaholic Renfrew

I made a couple very minor changes for this one – I took in the center back and side seams by about 3/8″ (in retrospect, I should have taken in more, because it’s still a little loose around the waist and thus rides down farther than I want the rise to sit), as well as the waistband by the same amount. I used the last of my black striped ponte from Mood Fabrics NYC store. Again – 30 minute skirt. Talk about fast fashion, amirite.

Colette Mabel
Colette Mabel
Colette Mabel

For both skirts, I used a lightweight black rayon jersey (the same jersey that my black tshirt is made out of, incidentally. That tshirt is a Renfrew, by the way!) to line the waistband. I considered using a self-lining – but decided the fabric was a smidge too bulky, so I went with a lighter weight lining, which ended up being a Good Decision.

Oh yeah! I made that plaid flannel button down too! SUP!

Grainline Archer

This was made using the Archer pattern. I actually finished it waaaay back in… March. Yep. I got it in my head that I needed to make a new plaid Archer to wear when I went to NY, so I nearly killed myself trying to finish the shirt in something crazy like 2 days. I did end up finishing it – and bringing it to NY to wear – and I learned two things about the experience:
1. My life did not suddenly become more fabulous because I had a new shirt to wear while on vacation; and
2. Pushing myself to the point of exhaustion to finish something for a self-imposed deadline is not fun at all. Seriously – it’s shitty, it makes me anxious for no reason, and I didn’t enjoy any part of sewing that shirt. Which is sad, because button downs are one of my favorite things to sew! I love how precise the stitching is, and all the little details that make it special. I unfortunately didn’t get to enjoy any of that because I was too rushed trying to hurry up and finish (when, realistically, I should have either started earlier, or accepted that I just wouldn’t finish before I left), and yeah, that’s just lame.

So, with that being said – no more unnecessary last-minute vacation sews with shitty deadlines! If I need clothing that quickly, I will buy it (lol jk I’LL NEVER BUY CLOTHES AGAIN)(ok, seriously, kidding with that last part… mostly.). So far, I’ve done a decent enough job of putting this into practice, so that’s good!

Grainline Archer

And, for what it’s worth – I do like the shirt. I could have done a better job with it – the topstitching is not my best, and the grain is all wonky because the plaid fabric was hideously off grain (like, to the point where I actually cut the entire shirt twice. Yes. I did that. And it’s still pretty bad) – but it is what it is. It’s snuggly, it’s warm, and I also just realized that I made it to match the leggings that I made with the rest of that grey ponte fabric hahaha omg my life is fabulous.

Grainline Archer

Anyway, I hope you liked my Archer story. Have some pearl snaps.

Grainline Archer

And a sleeve placket while we’re at it!

Ok, so here’s my dilemma – and I’m hoping y’all can help me. I HAVE NO IDEA WHAT TO WEAR WITH THESE SKIRTS. I feel like everything I put on just gives me weird proportions! The tops I’m wearing here are ok, I guess, but that’s about the extent of what my closet can offer. Most of my other tops just look… weird? I think the biggest problem is the waist line- it kind of hits at a strange place:

Colette Mabel & Grainline Archer

See what I mean? It’s about right at my belly button – which isn’t quite high waisted, and not quite low waisted. I can’t tuck anything in – partially because it’s very lumpy under the ponte, and partially because the waistline hits at a sort of wide point on my body. Untucked, most stuff just looks sloppy or gives me that weird long-abdomen proportion that we just loved soo much in the early 00s (y’all know what I’m talking about!). So yeah, can’t figure that one out. Any suggestions? Should I stick with more fitted, cropped sweaters (such as what the model is wearing on the website)? HELP ME I CAN’T ADULT.

Colette Mabel & Sewaholic Renfrew

Anyway, let’s talk! Answer one or more of the following:
– What shirts should I be wearing with these skirts?
– Have you ever made yourself sick by rushing to complete a garment before going somewhere?
– What happened when you finished it? Did a unicorn grant you 3 wishes or did you just realize that life was still doing life things and dammit is it Monday already?
– Seriously, though, what should I wear with these skirts?

** Necessary disclaimer: I received the Colette Mabel skirt from Sarai of Colette patterns, gratis. No review was requested – but as always, all opinions are my own. All fabrics in this post were purchased by me 🙂 I do get a monthly Mood allowance, but that doesn’t mean that I don’t also spend plenty of my own money there! Just wanted to clear that up 🙂

Project Sewn: Hello, Dolly!

4 Feb

All right, dudes and dudettes – Project Sewn is up and running! This first week, the theme is Style Icon.

I’m just gonna be real with y’all – as soon as I saw that challenge, my personal motto started rolling through my head. The thing is – I don’t have a style icon. I honestly don’t have a person (or designer, or whatever) who I use as inspiration for my outfits. I mean, I like the way lots of celebrities dress and I’m no stranger to the siren song of a good Joan Holloway outfit, but as far as picking a particular person… naw. I don’t even know, y’all. In the end, I decided to go with someone who I admire as a person who just happens to have amazing style….

Project Sewn, Week 1: Style Icon

Project Sewn, Week 1: Style Icon

Dolly Parton!

Project Sewn, Week 1: Style Icon

I mean, who doesn’t love Dolly, amirite? She’s such an incredibly smart, funny, generous – and not to mention talented as HELL – woman… a true icon in my book. Speaking of books, have you ever read her memoir, My Life and Other Unfinished Business? Or heard about her program Imagination Library, which sends free books to kids to get them excited about reading? Or, hell, have you been to Dollywood?? This woman, she is amazing. She’s not just a style icon for me – she’s a real life icon, the kind of person I want to emulate.

Project Sewn, Week 1: Style Icon

Plus, Dolly (specifically circa 60s-70s) was no stranger to an overly decorated/borderline tacky western shirt. And, dammit, I wanted a western shirt! I’ve actually been looking for an excuse to sew one for years.

Project Sewn, Week 1: Style Icon

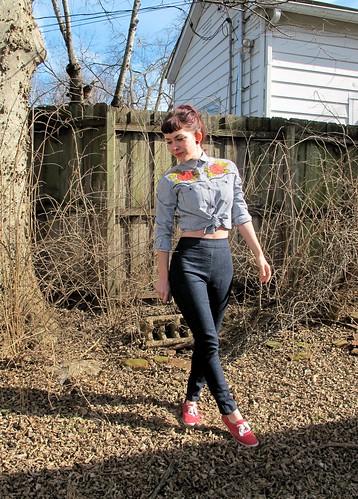
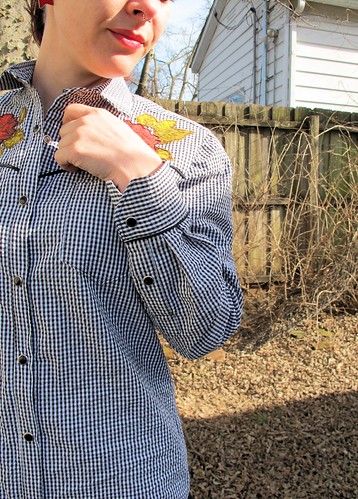
I made my entire outfit, obviously, but let’s talk about the shirt first. My fabric is a tiny check gingham seersucker from Mood. I used the Archer as my base pattern (lol, poor Jen, probably never thought her pattern would get used to make this sort of monstrosity SORRY JEN I LOVE YOUR PATTERN THO), and made a few modifications, beyond my normal ones of changing the sleeve placket, narrowing the side seams, and a different method for attaching the collar and collar stand. There’s quite a bit of piping, since we all know it’s not a real western shirt without gratuitous amounts of piping.

Project Sewn, Week 1: Style Icon

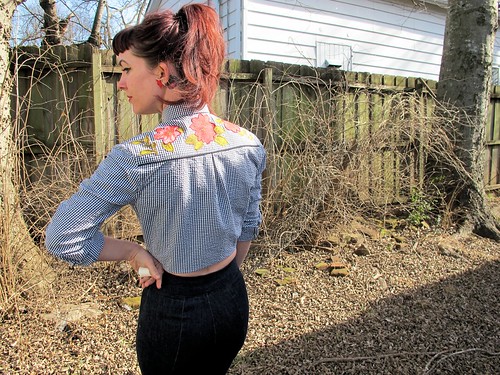
Adding the piping was really fun, and definitely adds some pizazz to an otherwise plain shirt. The piping at the back yoke and top of the sleeve cuffs was easy – I just sewed it along the seam allowance before attaching the other pieces. For the front yoke, I had to do a little bit of drafting and figuring out – I ended up tracing the front piece and cutting off where I wanted the yoke to hit (right above the pockets) and then drew my scallops with a french curve. To attach the piping, I first sewed it to the bottom of the yoke, clipped and trimmed and pressed and it toward the wrong side, and then laid the yokes on top of the front piece and topstitched along the piping. The raw edges of the piping are enclosed inside the yoke, so the inside of the front of the shirt is perfectly clean except for a line of topstitching. I think it worked out pretty well, if I do say so myself!

Project Sewn, Week 1: Style Icon

Once I had the shirt entirely assembled, less the pearl snaps and hem, I hung it on a hanger and stared at it for over a month. What to do next? I liked the way the effect was going, but it clearly needed some embroidery at the yokes to give it that western flair. I realized at the point that the tiny gingham check was working against me – any embroidery was going to get lost in all that action.

Project Sewn, Week 1: Style Icon

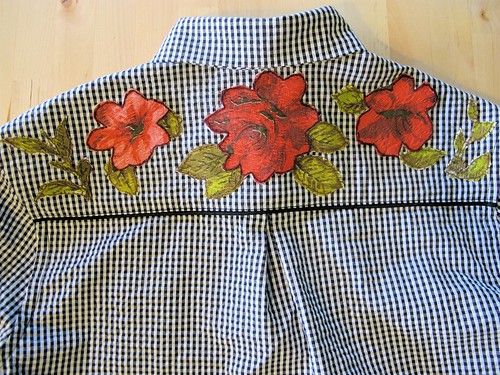
I had my epiphany right before I fell asleep one night – APPLIQUE! That would show up against the check, and it would still allow me to involve some of the embroidery I so desperately wanted. I knew I still had a piece of vintage barkcloth in my stash that would be perfect (I used the majority of it for my birthday dress a few years back, and have been hoarding the remaining yardage ever since!). I painstakingly cut around each rose and leaf, arranging the pieces so they would be mostly mirrored at the front, and attached them with fusible web to the yokes. Then I hand-embroidered around every piece – partially to keep them attached to the start, but mostly because I just loove the texture of hand embroidery!

Project Sewn, Week 1: Style Icon

I am pretty freaking THRILLED with how it turned out, what do you think??

Project Sewn, Week 1: Style Icon

The last thing my shirt needed was a little bit of pearl snap action! I got mine from Cowgirl Snaps on Etsy, and I couldn’t be more pleased with the overall experience. I actually bought both red and black pearl snaps, but once I got the shirt finished, black was the clear winner. Also, I just really love hammering shit in my sewing room, ok.

Project Sewn, Week 1: Style Icon

Ok, now let’s talk about the pants! I used a Theory stretch denim from Mood and my pattern is McCall’s 6440. This is my first version of this pattern (you’ve already seen my leopard pair, ooh la la), and I went through a BIG fitting curve with these. I initially cut the size 8, based on the finished measurements – and they were huuuuge! Pretty much every thing about them sucked except the crotch curve, basically. I spent an entire evening trying on, pinning, basting, trying on, repinning, basting, trying on… ad nauseam. I’m happy that they worked out in the end – they are SO fun to wear, and look super pin-up, yay! – but getting there was a process, plus the insides are full of thread tails from all that basting. Oh well!

Project Sewn, Week 1: Style Icon

Some gratuitous butt shots for ya. You’re welcome.

Project Sewn, Week 1: Style Icon

Oh, yeah, and in case you were wondering – I can also wear this shirt untied with the sleeves rolled down, like a proper Archer, which makes it much more wearable in day-to-day life 🙂

Project Sewn, Week 1: Style Icon

Now at this point, I’m sure you’re thinking, “Ok, fine, but where the hell are you going to wear that thing, anyway??” Guys. Guys. I live in Nashville. I’m not so stuck up my own butt that I’m not above rolling down to the tourist district and getting my Honky Tonk on. Let’s be real – Honky Tonkin’ is the best part about living in Nashville, as far as I’m concerned. OF COURSE you can go dancin’ in normal people clothes, but why the hell not throw on your best western digs and cowboy boots and dress the part? This being made of seersucker is even better – it’ll be much more comfortable come summer, compared to my RTW black cotton western shirt, especially with the looser style.

I’m also going to wear it just for the heck of it because, well, it’s awesome 😉

Project Sewn, Week 1: Style Icon

Also, in case you were wondering – I DO have cowboy boots! I just thought this outfit needed a little tone down from the ~country~, hence the Keds 🙂

Ok, hope you’re ready for some detail shots… I took a million :\….

Project Sewn, Week 1: Style Icon

The waistband of the pants is faced with more gingham seersucker. I love when my pants match my top, even if it’s only on the inside!

Project Sewn, Week 1: Style Icon

Don’t look too closely, but the embroidery on the front yokes is actually not a perfect mirror. Since the flowers weren’t printed to mirror, I had to get super creative with my cutting and appliqueing on one side, but I think it worked out quite nicely!

Project Sewn, Week 1: Style Icon

Sleeve placket + pearl snaps + piping = ♥

Project Sewn, Week 1: Style Icon

Yokes

Project Sewn, Week 1: Style Icon

Embroidery – the flowers are outlined in a 4 thread split stitch, and the leaves are outlined in a 2 thread chainstitch. I love the effect and textures with the applique and embroidery – it’s just a little bit Alabama Chanin.

Project Sewn, Week 1: Style Icon

Snaps to anyone who sat through this entire post! I have one gift for you, which I found while I was trolling the nets for Dolly inspiration (click for source):

dolly parton style inspo

NOW do you see why I chose her as my inspiration? God, I love that woman.

Project Sewn, Week 1: Style Icon

Now head on over to Project Sewn and see what everyone else has been up to! Don’t forget to vote for your favorite!

Tutorial: Matching Plaids Like A Boss

17 Oct

I know this is going to make me sound like the biggest dork ever, but I loooove matching plaids. It’s really fun and it makes me feel super smart when I get all my lines to match up. I know a lot of people are skeered of dealing with The Plaid (or The Stripes, or the Gingham, or the Buffalo Check for that matter), but I promise they’re not hard to sew! It just takes a little prep, a bit more attention while cutting, and then you’re golden!

Plaid Negroni

The first think you need to do is determine what areas need to match, and what you can get away with cutting on the bias to avoid matching. My biggest #1 tip for plaids is cut whatever the fuck you can on the bias. It breaks up a monotonous pattern, it creates visual interest, and it saves you a few matching sessions. Generally speaking, the parts that go bias tend to be pockets, the yoke and the button placket (on a shirt), princess seams (on a dress), under sleeves (on a jacket) and waistbands (on a skirt or pants), as well as anything that is a small detail (such as pocket welts).

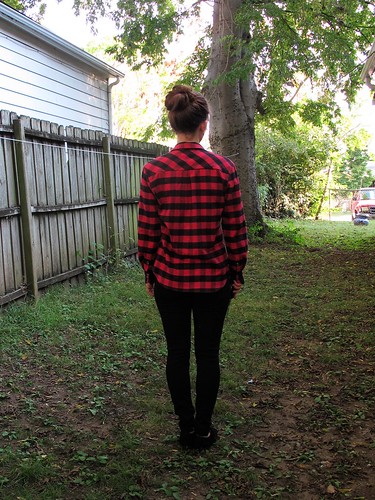
Lumberjack Archer; Ponte Leggings

A couple things I never cut on the bias – sleeve plackets (those shits are fiddly enough without throwing bias in the mix), shirt cuffs (tends to be too busy; just accept that the lines won’t match up all the way across and get on with your life), collars and collar stands (you can’t see the collar stand, and a collar doesn’t have to match up to the lines on the shirt if there’s a bias piece underneath it. And, again, too busy). It should go without saying, but try not to sew bias pieces next to each other. They are good for breaking up the lines, but use them sparingly!

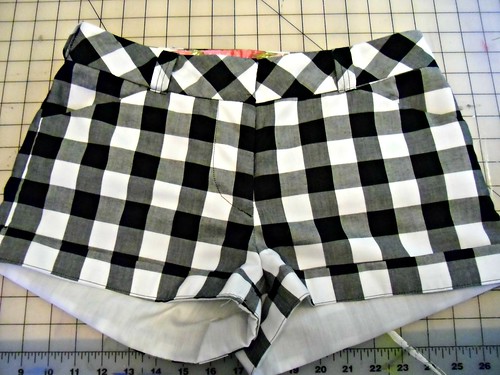
Gingham Shorts - front

Once you’ve determined your bias pieces, now is the time to locate all the seams that need to match up. Generally, it’s not very many – for my Archer, I matched the side seams and the sleeve seams. The back yoke, pocket and button placket were cut on the bias, and the remaining pieces (collar, collar stand, sleeve placket) were cut without any matching. Sounding easy so far? Ok, let’s get cutting!

Now, just a head’s up – I don’t cut my plaids on a folded layer. I know a lot of people do it that way but I personally have never ever had any luck with that method – there is always oneeee line that is slightly off, and ugh, do not want! So I cut my shit on a single layer whenever I can get away with it. This goes the same for bias pieces (if your piece is on a fold – like the back yoke – trace it so it’s a full piece and cut it on one layer. Trust me.).

1 matching plaids

Of course, there are some pieces you have to cut on the fold – like the back for the Archer shirt. Start with this piece. Fold just the amount of fabric you need, being very careful to match up every single line (and now you realize why I cut shit on the single layer, right? This part is maddening!).

2 matching plaids

Once you’re satisfied with how everything matches up through both layers, pin the selvedge down so the fabric won’t shift. Cut out your pattern piece and clip all your notches.

3 matching plaids

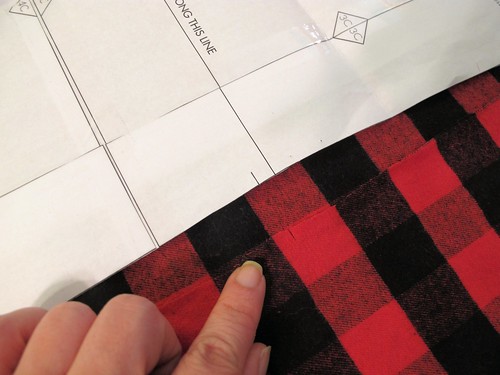
For the next piece – in my case, the two front pieces – open out your fabric so it’s a single layer. Take the folded piece you just cut and open it up (hope you marked those notches, buddy!). Line up the side seam – the part that needs to match – with the plaid lines on the fabric. Get it so it’s totally even and basically plaid camouflage.

4 matching plaids

Then take your front piece and align it on the fabric so the side seams match, from underarm to hem. I know it’s hard to see the in the picture, but the piece I’m holding at the bottom is my back piece, lined up with the remaining fabric.

5 matching plaids

Make sure your notches are aligned on the same bit of plaid, and then cut your one front piece. Don’t forget to clip your notches!

6 matching plaids

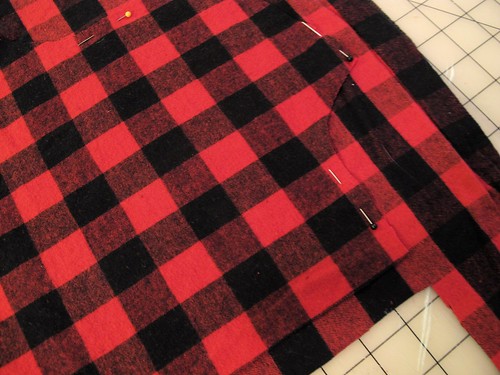
Now take the piece you just cut – the front piece – and flip it over on the single layer so the pieces are mirrored with the same sides together. Take care to match the lines on every single cut edge.

7 matching plaids

If you squint your eyes and can’t see the piece you pinned down, you know it’s matched up there perfectly.

Once you cut this piece, you should have two front pieces that are a perfect mirror image of one another – this means that the side seams will match the back on both sides, as well as the center front matching (since it’s a mirror).

I’ve found this technique to be much more successful as you have complete control over the matching and cutting since you are doing everything on a single layer (so no unhappy fabric-shifty surprises when you open up the pieces). And bonus – cutting a single layer means you use less fabric. Seriously! I think I eeked that Archer out in like, less than a yard and a half of fabric. Crazy talk, y’all!

Also, I should probably point out now that once you’ve cut all your pieces, you don’t have to give any other thought to matching the lines as they should perfectly fall into place. Yay for mindless sewing that looks difficult!

Lumberjack Archer; Ponte Leggings

Now go forth and match up those plaids like a BOSS!

boss
Man, this shit will never not be funny to me.

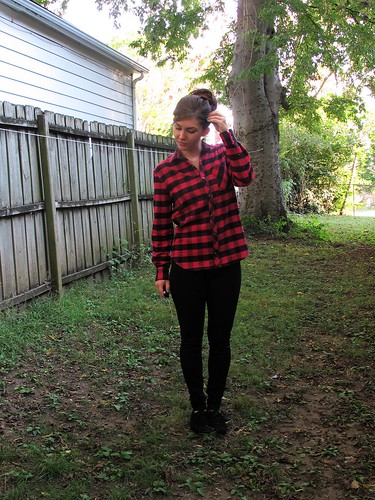
Completed: Plaid Flannel Archer (+ Draping winner!)

10 Oct

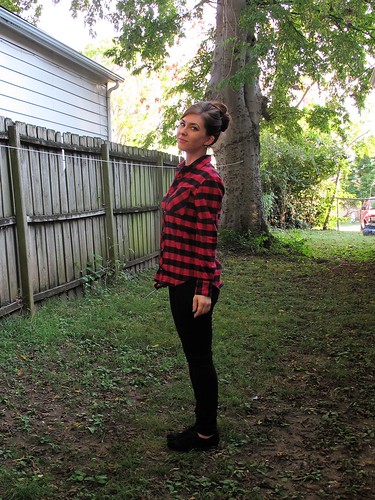
Finally, a successful Archer button-up – in my dream plaid flannel, no less (seriously, I keep eyeballing all the other colors… do I take the plunge and buy them all?? Because I want to!)

Lumberjack Archer; Ponte Leggings

I am pretty proud of this shirt, so let’s be honest – there are lots of pictures in this post.

Lumberjack Archer; Ponte Leggings

Although the more I look at these pictures, the more they appear to just be the same picture at a slightly different angle or pose. Oops 😦

Lumberjack Archer; Ponte Leggings

ALSO, please forgive my awful editing and how the color changes in every picture. I bought a new photo editing software with my new laptop (Corel Paintshop Pro, if you’re curious!) and I’m still trying to get used to it 🙂 BUT HEY, I can edit out zits and stuff now, so that’s pretty freaking awesome!

Lumberjack Archer; Ponte Leggings

Anyway, ok, let’s talk about this Archer I made! Using my failed linen Archer as a wearable muslin, I shortened the sleeves by about 1″ and left the body length intact (you’ll recall that the linen one I ended up cutting too short. Or maybe you don’t recall, see if I care). I think my sleeves are still a little long, but I also anticipate this shrinking more in the dryer (I only washed the flannel once before cutting, sorry, I was just excited!) so hopefully they won’t end up too short!

Lumberjack Archer; Ponte Leggings

I also made the pocket smaller! No rhyme or reason to how I did it, I just eyeballed until it looked “right.”

Lumberjack Archer; Ponte Leggings

Making this shirt was super fun, from cutting (what can I say… I love matching up plaids haha) all the way through sewing. I forgot how much I love sewing really precise things like button-down shirts. Makes me want to sew another shirt for Landon, maybe. What’s funny is I actually caught myself starting to rush through the construction of this – not because I was on a deadline, but because it’s starting to get cold and I wanted to wear this shit nooooooow – and I decided to force myself to slow down by sewing flat-felled seams instead of just serging the seam allowances off. Even the arms are flat-felled. I’m so glad I did, because the end result turned out pretty fabulous if I do say so myself.

Lumberjack Archer; Ponte Leggings

I cut the back yoke, pocket, and front button band on the bias. Everything else is straight and painstakingly matched. The only boo-boo I made was that I put the button band on the wrong side – oops! I originally chose the opposite side of the flannel as the right side, then changed my mind when I started sewing. Since the front pieces are not mirrored, this meant I had to compromise my button band side. Oh well, I am just pretending that it’s actually a men’s shirt, haha!

Lumberjack Archer; Ponte Leggings

At any rate, the side seams match up beautifully. Look at that shit!

Lumberjack Archer; Ponte Leggings

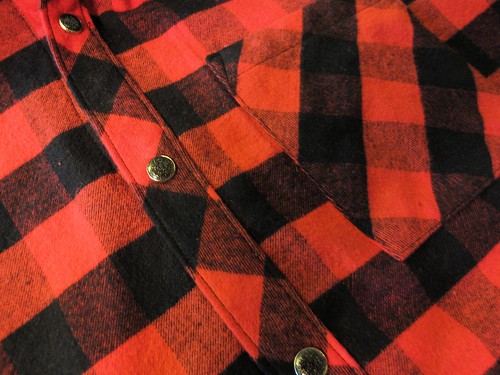
I changed out the buttons for pearl snaps, so I can hulk my way out of this shirt when the urge strikes. Funny thing about those pearl snaps – they actually started out white, and while it looked ooookay, it also just looked like I bought the wrong color pearl snap. I can’t get black snaps locally (and DAMMIT that I SAW them in Chicago and was like “nah I don’t need that” lol oh Lauren, hindsight is 20/20 or some shit) and I couldn’t wait sooo… I painted these with black nail polish. Black glitter nail polish, to be precise. Hey, it works!

Lumberjack Archer; Ponte Leggings

Lumberjack Archer; Ponte Leggings

I sewed the size 0, as I did last time, except the side seams are sewn at 5/8″ instead of the pattern’s 1/2″. This makes for a slightly (very slightly) smaller fit.

Lumberjack Archer; Ponte Leggings

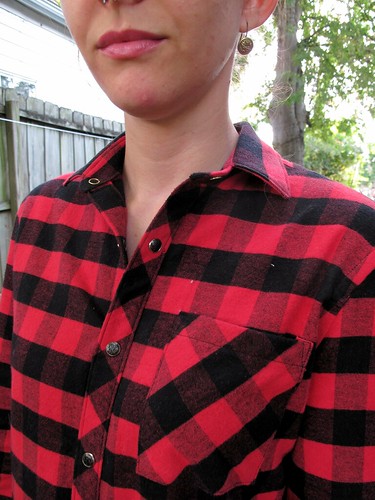
The collar stand turned out fucking perfect, which I’m VERY proud of! I followed Andrea’s tutorial and I had no unpicking with that method. I’m sold, and Andrea, I owe ya a beer for that. Thanks bb♥

Lumberjack Archer; Ponte Leggings

I also changed out the sleeve plackets and used the ones from the Negroni pattern. I just think these look so much better with the flannel check, plus they are more conductive for rolling up sleeves. I also find this type of placket easier to sew. Man, I love sewing plackets.

Lumberjack Archer; Ponte Leggings

Oh, I also made my leggings! You can’t really see any detail because they are black, wah, but I did make them! I used the Ooh La Leggings pattern and a black ponte knit from Mood Fabrics. My take on ponte leggings – AWESOME. So so awesome!! I actually wore these when I traveled to/from Chicago (so, 18+ hours total) and they were SO comfortable – and they actually look like pants! Guys, I am so sold on these.

I don’t have much else to say, so have some pictures –

Lumberjack Archer; Ponte Leggings

Glitter buttons, yeah? 🙂

Lumberjack Archer; Ponte Leggings

Collar stand pride~

Lumberjack Archer; Ponte Leggings

Lumberjack Archer; Ponte Leggings

Placketz

Lumberjack Archer; Ponte Leggings

Flat-felled seam, curved hem

Lumberjack Archer; Ponte Leggings

Proof that these are actually leggings and not some black blob.

Lumberjack Archer; Ponte Leggings

This outfit has basically become my fall uniform. Seriously! The flannel is so warm and cozy – and easy to throw on if I’m chilly (which is always. Yes, I have worn this shirt every day since I finished it, don’t judge me). I am really happy with how both turned out, and definitely plan on making more. Question – is it really dorky to make me & Landon matching plaid flannel shirts? Because I’m totally about to go there.

One last thing – We have a winner for the Draping book! Random number generator, who do you choose?

random

yaywinner

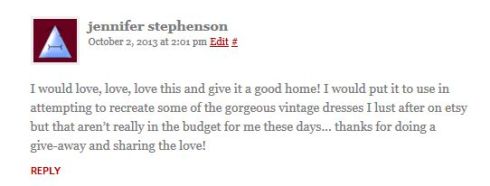
Congratulations, Jennifer Stephenson! I can’t wait to see what vintage recreations you end up making!