Tag Archives: purlbee

Sewing For My New Apartment!

28 Jun

All right, y’all, time for something different – another round of HOME SEWING PROJECTS (heh heh heh!). No wait, come back! I promise it’s at least somewhat interesting!

So, as I’ve mentioned repeatedly – I moved this month! Yay! From a basement apartment in the middle of the woods, to a second floor apartment with masses of windows in my favorite part of Nashville. Literally movin’ on up, here! :B Since things go all kinds of haywire during moving month (from packing, to moving, to unpacking, to figuring out your new neighborhood bar, etc etc), I knew I probably shouldn’t devote myself to trying to make a whole outfit or something crazy for this month’s MSN project. Never mind that I actually unpacked and set up everything in 3 days hahaha. I decided to focus my efforts on sprucing up and decorating, to get the new place real pretty instead. Not to mention, this gave me an opportunity to actually shop the home decor selection at Mood Fabrics. Yes! I don’t normally sew with home decor fabrics, like, ever (too stiff to wear, at least for me!), so that whole side of the website was so fresh and new and different and ahh I love it.

Linen apron

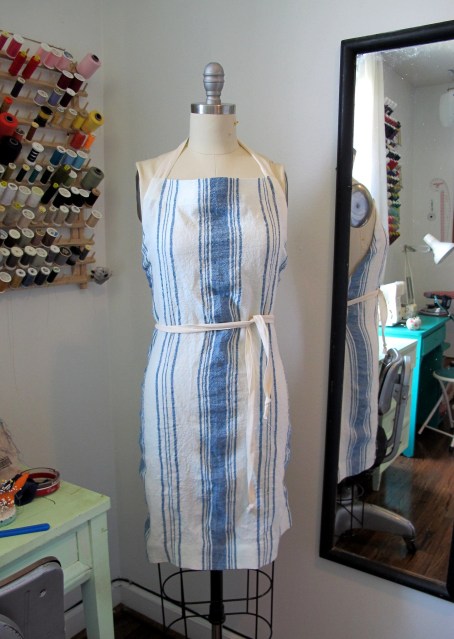
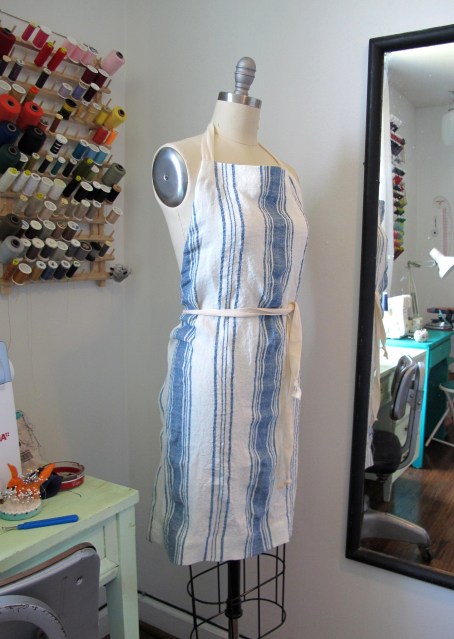
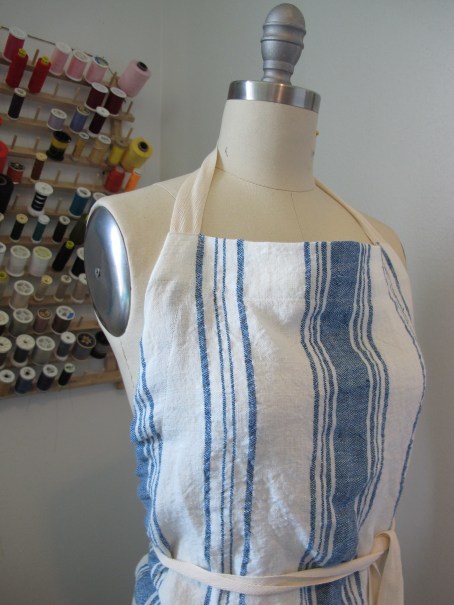
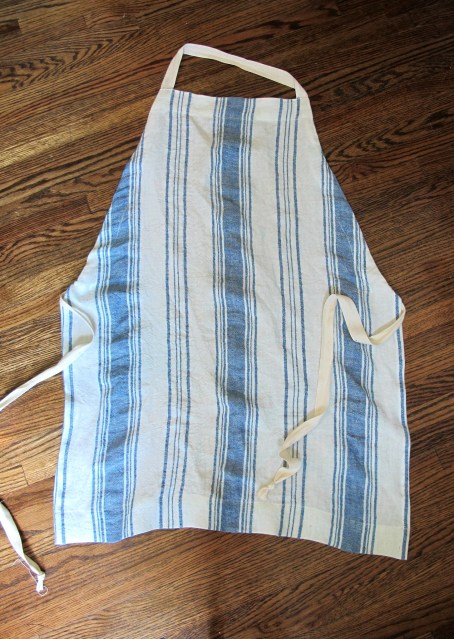
First up is a basic (but so useful!) apron, made using this Blue and White Striped Linen. I know, aprons are generally one of those things that people make when they are first learning how to sew haha. To be completely honest – I’ve never actually sewn an apron before (as with all my adult learning, I jumped straight into the “difficult” stuff). But I knew I needed one because I am a helluva messy cook – I get splatters everywhere and I’m always wiping my hands off on my clothes. I’m also a really clean cook – in the sense that I clean as I cook (seriously – I won’t even sit down to eat until all the cooking dishes are washed, unless there’s something that needs to be soaked. A sink full of dirty dishes stresses me out!) – so I’m also usually covered with water by the end of the prep. Using an apron might actually make me feel more like a grown-up. Plus it would be cool to wear one while whipping up a delicious meal to impress whatever man I have over. If that ever happens. BTW, Tinder is incredibly depressing hahaha. ANYWAY, MOVING ON NOW.

I didn’t use a pattern to make this, just this adjustable Unisex Apron tutorial from Purl Soho. You basically make a series of measurements directly onto the fabric to get your pattern. From there, it’s just a lot of folding, pressing, and topstitching. The tutorial was really easy to follow, and this linen was even easier to sew up. I did find that the straps were a bit too low to hit my waist – so to fix this, I folded over the top by another couple of inches and topstitched it down, which shortened the apron enough so that everything hit me in the right spot. A better fix would be to reduce the angle and length of the diagonal cuts, obviously, but since my pieces were already cut at this point, this was a quick and dirty fix!

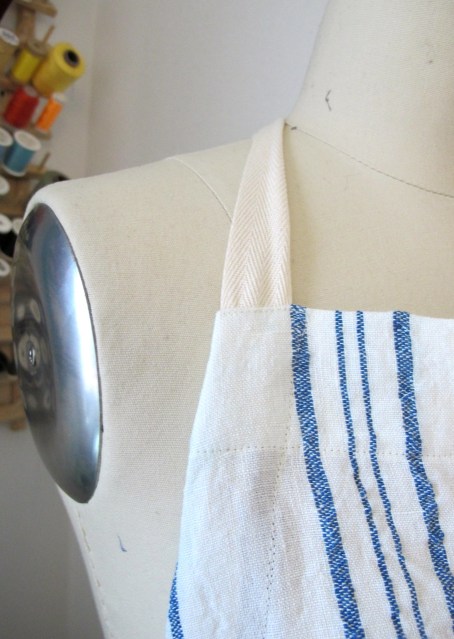
Other changes I made to the ~design~ was to leave off the pocket (what’s the pocket for, anyway? Dirty spoons? Secret snacks? Seriously, I am not putting my phone in that mess) and also to change the webbing to some 1″ twill tape. I did try the webbing, but it was WAY too stiff to be comfortable or even tie easily. The twill tape is nice and soft and it’s much more comfortable. I also topstitched along the edge of the apron where the twill tape goes around the neck, because otherwise it tends to slide off when you’re putting it on. The topstitching anchors everything so it stays in place at the neck, but the sides/back are still adjustable 🙂

Linen apron

Linen apron

Linen apron

Linen apron

Linen apron

Once I finished with the apron, I realized I had quite a bit of fabric left over (I had bought 2 yards). Not enough to make a full garment, but certainly enough for some kitchen linens! Yeah, Friday night just got WILD up in here!

Linen napkins

Linen napkins

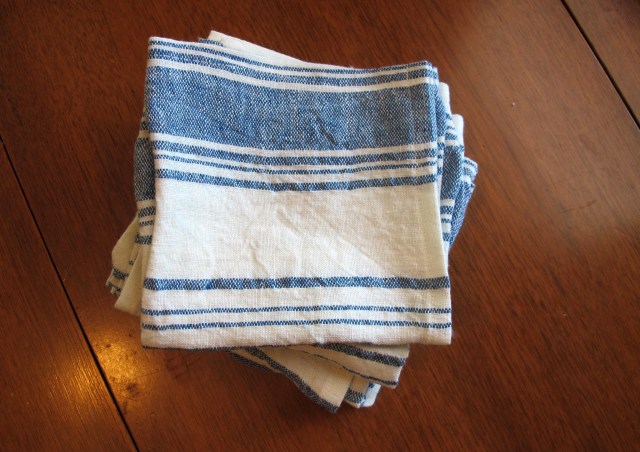
I was able to squeeze out 7 cloth napkins, and 3 dishtowels. Yay! For the napkins (pictured above), I cut 13″x13″ squares (I know there are lots of sizes for cloth napkins, but I personally like mine to be about 12″ square) and folded each edge under 1/2″ twice, and then topstitched. Really easy, and very fast when you sew it assembly-line style 🙂 This was definitely not the most exciting project, but it is certainly useful! I am trying to move away from using disposable products as much as I can, including paper products like napkins, mostly cos I’m sick of having to buy them over and over. Plus, cloth really does wipe your face off better than paper does. Now if I could just get my visiting friends to stop using paper towels to dry their hands (whyyyy do people do this, use a real towel ffs).

Linen kitchen towel

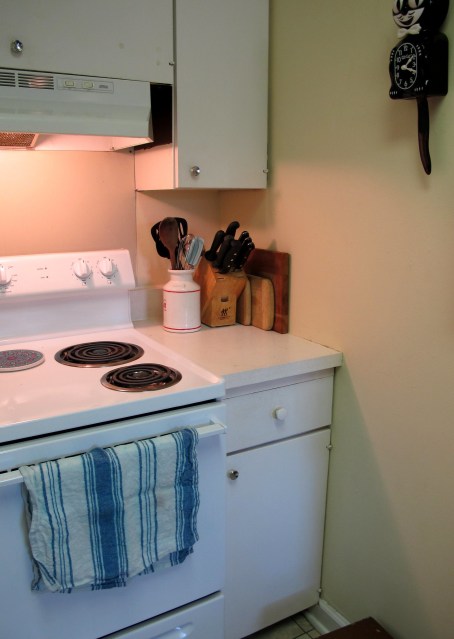
The dishtowels have a finished measurement of 25″ x 14.5″, and were sewn in the same manner as the napkins. Again, definitely a useful thing for my kitchen! I prefer smooth tea towels over the really plush terrycloth kind, at least for kitchen use, and these work exactly the same way. I love the blue stripes and I love how they look in my (admittedly boring off-white) apartment kitchen 🙂

Now, linen does tend to wrinkle up like crazy and this particular linen was no exception! I will point out that it was very stiff and flat when it arrived, but washing it made it soften up very nicely. I actually washed my linen 3x in hot water (and dried on extra hot) before cutting into it, to get it to shrink as much as possible and also because that does help with preventing future wrinkles. As you can see, they still wrinkle when they are laundered, but it’s not terrible. I’ve learned that just giving them a good shake after pull them out of the wash helps a lot. I do put mine in the dryer, however, line-drying will also prevent wrinkles as well.

My last home project doesn’t involve sewing at all – just fabric and hot glue 🙂

Recovered Lampshade

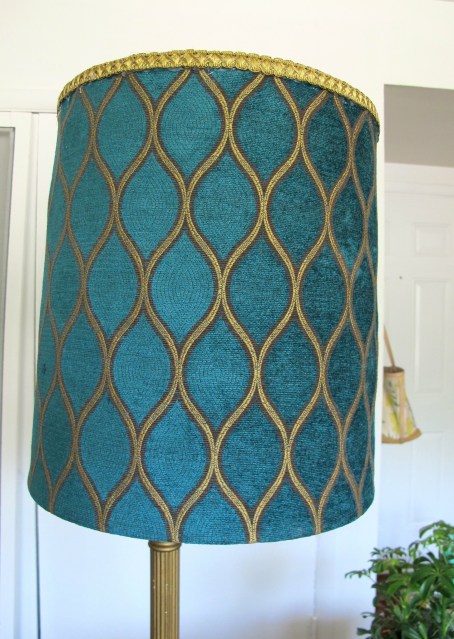
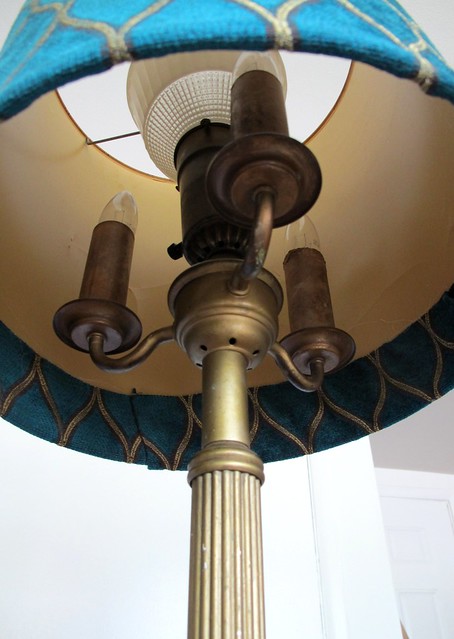
I’ve had this cool gold floor lamp for several years (and my grandpa had it in his home for even MORE years before I got my hands on it), but the drum shade has definitely seen better days. It’s pretty old and brittle and will crack if you so much as look at it funny. I also wasn’t a big fan of the yellow-y off-white color, especially not for my new place. Rather than try to buy a new drum shade (because those things are $$$ – if you can even find one!), I recovered this one!

Recovered Lampshade

Recovered Lampshade

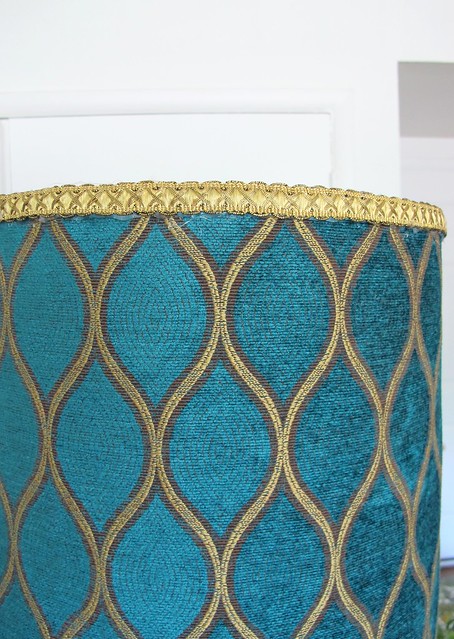
The fabric is this beauuuuutiful Peacock Geometric Chenille. The colors were perfect for my new living room, and I just love the chenille texture! The fabric was wide enough so that I only needed a half yard to cover my lampshade, but I may end up buying more to cover some pillows for my couch as well 🙂 Because it’s THAT beautiful!

Anyway, covering the shade was really simple! I cut the fabric to be a couple inches taller than what I needed to cover the shade, and then turned under one long edge by 1/4″ and hot glued that to the wrong side of the fabric (since it does fray a lot, you’ll want to cover your raw edges or double turn them). Then I carefully wrapped the shade with the fabric, hot gluing as I went. The edge at the top of the shade was left raw, and then covered with this gold metallic braid. The bottom has an overlap of about 2″ of fabric (the edge with the 1/4″ turn under). When I came back around to where I started, I turned the fabric under 1/4″ and glued it down before overlapping. Done and done!

Recovered Lampshade

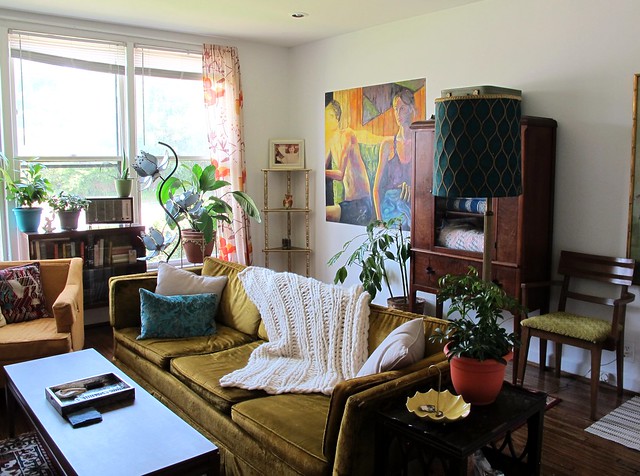
Here is the shade in all it’s glory, in my NEW LIVING ROOM 😀 😀 😀 (psst – see that chair in the background? I recovered that bad boy a couple of years ago – also thanks to Mood Fabrics! 😉 ). Also, I totally knit that white blanket – using size 50 needles and fluffy wool roving that basically feels like a cloud. It’s a simple k2 p2 rib, and just big enough for me + my cat to cuddle up. Ravelry notes are here, if you are interested!

Ok, so real talk – sewing things for the home doesn’t exactly top my list of favorite things to make, but it’s fun to switch things up every now and then! Not to mention, in a world where greys and chevrons are the current fashion, it’s really nice to have full control over my decor (even if it means I have to be a little bit more hands-on than just throwing something in my shopping cart at Target). What about you? Do you even sew (or hot glue) for your home?

Note: Fabrics were provided to me by Mood Fabrics, as part of my involvement with the Mood Sewing Network.

Completed: Little Cable Knee Highs

13 Nov

Ugh. I know, I know – two sock posts in a row. I hate to do this to y’all because I know it’s boring AF for the non-knitters (and to be honest, I’m almost borderline boring myself at this point haha), but this is what I got as far as photos! I’ve been back for a couple of days, but shit’s been hectic and I haven’t had time to fix my hair and stand in front of a camera. So, you get socks! Merry Christmas!

Grey Little Cable Knee Highs

Anyway, the truth is – even though they are socks, these totally aren’t boring because I made them and I endlessly entertain myself. So there’s that! 🙂

Grey Little Cable Knee Highs

Grey Little Cable Knee Highs

The pattern here is Little Cable Knee Highs, which is a free pattern from Purl Soho. Hey, yo, my knitters – who else looooves the Purl Bee? Favorite online knitting tutorials, hands-down. When I’m looking up a new technique – not just for knitting, but with anything, really – I find that I can’t really follow a video. I prefer a well-photographed tutorial with lots of words! In my experience, Purl Soho has some of the best – I especially love (and revisit, and revisit, and revisit) the ones for Kitchener Stitch and short rows. I find the new layout of the website really hard to navigate, btw, but that ain’t nothing Dr. Google can’t work around.

Anyway, Purl Soho has lots of beautiful, *free* patterns, and these Little Cable Knee Highs are pretty cute! I first saw the pattern when Michelle made a pair, and I decided that I needed a pair as well. Never mind that we are talking TALL-ASS socks knit in FINGERING WEIGHT yarn. Spoiler alert: these things took foreeeeever to finish.

Grey Little Cable Knee Highs

I started these waaay back when I left for Peru in June, 6/4/15 to be exact. I cast on the first sock while waiting at the airport. I knew I wanted to bring a knitting project with me while we were traveling, but since I was just packing a carry-on (a backpack carry-on, nonetheless – for two weeks of travel! Whyyy), I didn’t have a lot of room for a big project. Socks seemed like a great idea because they are so tiny, and knee-high socks would keep me entertained for a really, really long time. So I took my sock project to Peru, where they were knitted all over Lima and Iquitos – even in the rainforest! These socks are so cultured now.

Still, two weeks later – I’d finished about half a foot. Then I put the entire project on hold in order to finish my Vianne project, since that one had a deadline. Once I picked them back up again, it was an endless circle of knitting and tiny cables until I finally finished back in September – just in time to wear them while I was in Portland, Maine! So, again – traveling socks!

Grey Little Cable Knee Highs

Length of time aside, the project itself was fairly easy and mindless. These socks are knit toe-up, and the pattern is written for DPNs. I followed the DPN instructions for the foot, but once I got to the leg I switched to circulars for Magic Loop, which made things soooo much easier and faster. The little cable is really fun to knit and breaks up the monotony of knitting endless circles. Knitting 5″ of ribbing was not very fun, but I managed. I used a Jenny’s Surprisingly Stretchy Bind-Off for the BO, which ended up being a little too stretchy and I think doesn’t look as good. It doesn’t bother me enough to rip out and re-knit, though, but I did keep that in mind for the second sock. I also did a poor job with knitting the heel on the first sock, so it’s kind of sloppy – but again, I was able to do a better job on the second sock. That’s one good thing about having two socks to knit; it gives you a chance to improve the second go!

This was my first toe-up sock project, and I don’t think I like it very much – joining 8 stitches in the round is really, really hard! Those stitches are left live and grafted together after you finish the sock, which I somehow managed to mess up on my first sock – and as a result, there’s a strange little bump at the toe (I don’t even remember how I messed it up. I think I dropped a couple stitches and then tried to pick them up and just created a disaster. My knitting group meets at a bar, and while I probably should not drink and knit – I do, and drinking makes dropped stitches ok. Right?!). I was able to mostly block it out, though, so it’s no thing! For the second top, I grafted the toe closed as soon as I had enough knitted yardage to grab onto, which worked out quite well and meant that I was finished when it came time to bind off.

Grey Little Cable Knee Highs

I bought the yarn at my local yarn store, Ewe & Company, in Kingston Springs TN. It’s Dream in Color Everlasting Sock Yarn and it was soooo nice to knit. I think the color is a bit too variegated for cables, so they don’t show up that great, but I’m ok with that because I think the socks turned out lovely regardless! This yarn was a major splurge for me – I needed 2 skeins, and they were $25/skein. So yeah, a pretty expensive pair of socks! It was part birthday gift to myself (don’t you buy yourself birthday gifts? Because you should, it’s the best), but I don’t think I’ll spend $50 on another pair of socks anytime soon hahaha.

That being said – the amount of money I dropped on these socks did make me more inclined to actually finish them, rather than let them sit in UFO purgatory once I started to get bored with how long they were taking, especially when I got to the second sock. I always consider my entertainment part of the price of anything I make as well (since I’m not spending that money going to, say, a movie or the bar. Bars other than knitting night, I mean :B), which I think is important. For me, sewing and knitting is just as much as entertaining/relaxing hobby as it is a way to clothe myself, so that is part of my consideration when it comes to my budget.

Grey Little Cable Knee Highs

When it comes to buying the materials for these sorts of projects, I try not to cheap out too much. For ME (and I’m only speaking for myself – I know that budgets and the like can be a very sensitive subject for people, so I’m not trying to preach at anyone here!), I value quality over quantity. Rather than buy a bunch of cheap yarn and fabric for a dozen projects, I’d rather spend that whole wad on ONE really nice project. I know I’m going to value the time I spend working on the project, and I’m going to really put my best effort in with fit and ripping out mistakes. With cheaper materials, it’s easy for me to give up and get sloppy since shit was so inexpensive to begin with. But you better believe – if I’m spending $30 a yard on a nice piece of fabric or $80+ on a single sweater, I’m going to really do my best work so that I get my money’s worth out of it. Not to mention, the enjoyment I get from working with really nice materials! I’ve noticed that a lot of people who start with really cheap yarn or fabric are more likely to abandon a project (or leave mistakes because they don’t want to take the time to fix it) before it’s finished, because they didn’t invest a lot of money into it. Even if the materials were super cheap to begin with, that can add up over time!

This is not to say that the most expensive projects are always destined to be the best ones, or that it’s impossible to make something nice with cheaper materials. I know that budgets differ wildly, and while $20 might seem inexpensive to me, that might be a lot for someone else! But I do think there’s some value in spending as much as your budget can comfortably afford (whether it’s $10, $20, or $100 – enough that you have to really think about what you’re spending that money on, enough to make you sweat just a little bit) for a single project, and then giving that project your best effort so that you really get your money’s worth out of the end result. It makes you more conscious of what you’re buying, which means spending less in the long run. Especially at the rate that I plow through my projects – this makes me slow down and appreciate what I’m doing. All good things, in my book!

Grey Little Cable Knee Highs

Anyway, I know everyone has a different perspective when it comes to budgeting for your crafts, and that’s just mine! I’d love to hear yours! Do you choose quality or quantity when you’re shopping for yarn or fabric? Does a more expensive material make you super careful with what you’re making, or do you get paralyzed at the thought of using it? Do you value inexpensive materials or not? You know my thoughts, now tell me yours!