Tag Archives: linen

Completed: Winter Tania Culottes

28 Oct

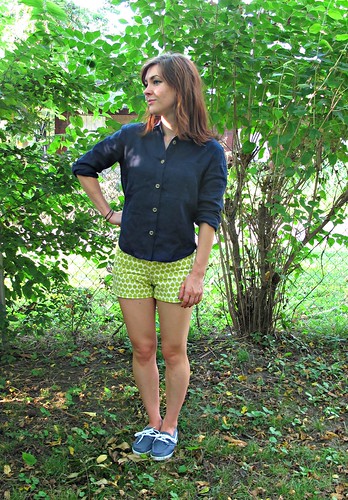
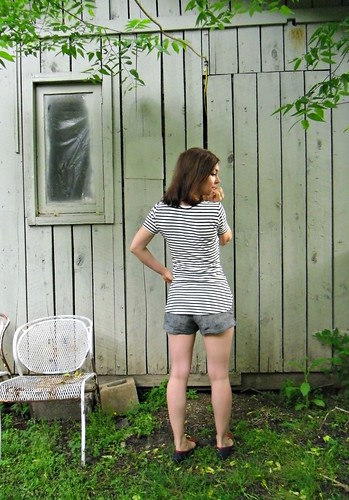
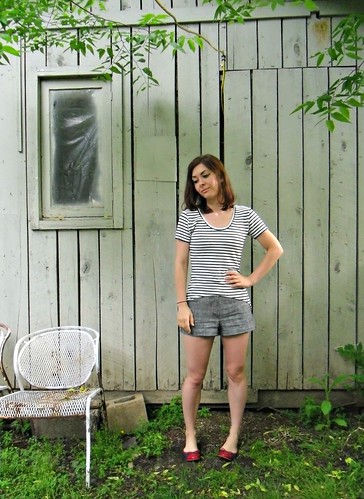
I wasn’t sure if the Tania Culottes could be winterized, but they can. THEY TOTALLY CAN.

Winter Tania Culottes

And they look really good in the process!

Winter Tania Culottes

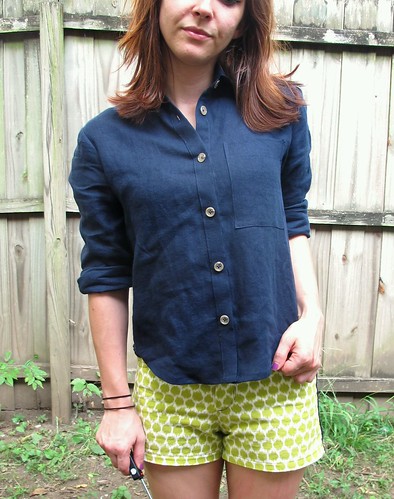
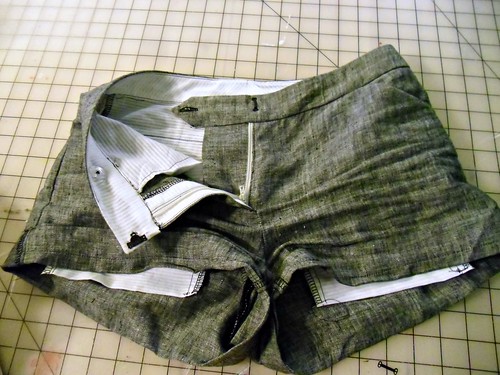
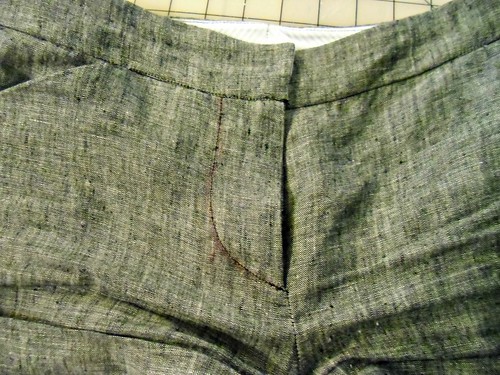
I made these using a piece of fabric I’ve had in my stash for a few years… it looks like wool suiting, but it’s actually 85/15 linen and silk. The silk addition is nice because it means the fabric doesn’t wrinkle. I guess it would be more suitable (lolz) for summer wear, but summertime is not suit fabric time, regardless of fiber content, as far as I’m concerned.

Winter Tania Culottes

Anyway, it’s a remnant from my local fabric store. It was pretty funny when I bought it, because the ladies at the register kept exclaiming, “WHAT is that? Where did you find that? Oh, it’s so amazing! And it’s so cheap!” and I’m all, “Back off bitches, I found it first.” I’d totally elbow someone over fabric, let’s just be honest.

Winter Tania Culottes

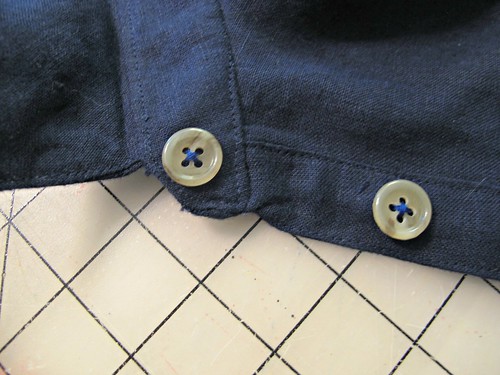
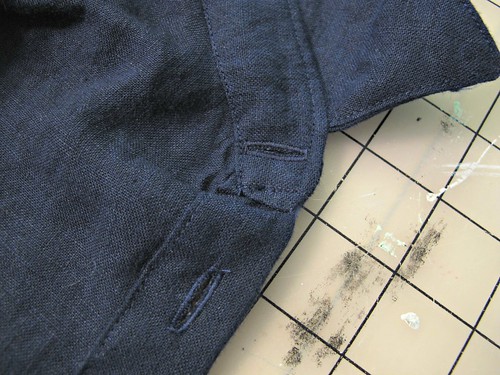
Making these wasn’t much different than sewing them with cotton. There is no lining – I reckon I could’ve popped one in (there’s a short blurb at the end of the instructions on how to do this), but I didn’t have any lining on hand and this fabric isn’t very grabby like a wool tends to be. I did take in a bit extra at the side seams, since my first Tanias are slightly loose. I nipped in the side seams at 3/4″ and the waistband fit is perfect on these.

Winter Tania Culottes

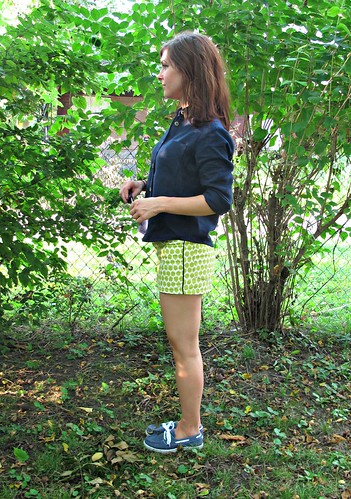
I was initially hesitant to make these up in this fabric, since it’s sorta drapey but it’s not sooo drapey like a rayon or a cotton voile would be (not to mention the fabric is much thicker), but I’m actually really happy with how the silhouette turned out. It’s so flippy and full!

Winter Tania Culottes

I have a similar miniskirt (from American Eagle, oh lol) that I’ve been meaning to replace as it doesn’t fit right anymore… and this is a perfect replacement! The longer length means I can wear it to work, and the higher waistline means I can wear it with my cropped sweaters.

Winter Tania Culottes

Not to mention, it’s essentially a pair of drapey shorts – so I can also wear this shit on my bike!

Winter Tania Culottes

(O shit, I never realized how cool these tights are!)

Winter Tania Culottes

The only blip I had with sewing these was the hemming… I couldn’t fit the bulk of the fabric under my rolled hem foot, and I will be DAMMED if I am going to sit and blindstitch all that yardage at the bottom. So I serged the edges and folded them under once with a quick topstitch. The fabric is so busy, you can’t really see the serging. And I finished my hem fast! Evening the hem out was also way easier, thanks to the stability of the fabric.

Winter Tania Culottes

Doesn’t they look so good with my cropped Chuck? Ugh, I love this sweater so much, but the length makes it difficult to pair it up with just anything. These two, though – they are a match made in heaven.

Winter Tania Culottes

I’m happy that I finally found a use for this stash fabric, and winterized one of my favorite summer patterns! Tanias year-round for everyone!

Winter Tania Culottes

Oh, and check this out – my little photo companion for the day 🙂

Winter Tania Culottes

This is Nimue, isn’t she the cutest little thing? She’s a corgi puppy – no, we didn’t adopt a pet (I wish! But I want cats. Moreeee catssssss), I was just watching her for the afternoon. She was very good, although she preferred cuddling up on the couch with me most of the time 🙂

Completed: My First Archer, A Linen Disaster

5 Sep

Remember that Monet of an Archer I posted with my lime green Maritime shorts the other day (which turned out totally awesome, and yes, that’s me tooting my own horn, toot toot)? Remember when I said I was too traumatized to talk about it any further? Well, I think I feel like dishing today. Let’s dish!

Archer Shirt
(I took these pictures at the same time as my last batch – hence the exact same outfit – but I moved to a different side of the yard so they’d look a little different. That’s how much I love y’all. Also, this is pre-skeeter attack, fyi).

Ok! This is the Archer from Grainline Studio. I cut the smallest size and shortened the hem (too much, it looks). I think my relationship with this pattern has definitely gotten off to a rocky start, but I’m willing to give her a second chance. Funny, I thought this style looked horrible on me when I checked myself out in the mirror, but it’s not so bad in pictures!

Archer Shirt

I made this using some scrumptious Ralph Lauren linen from Mood Fabrics – doesn’t the idea of a floaty linen button-up in September sound so luxe? Nice and airy for the AM, but you can roll the sleeves down with the sun sets. Also, I just really love navy and I needed a shirt to go with my new aforementioned shorts, so I was feeling pretty confident about myself. So confident, I sliced directly into the linen without the benefit of a muslin or even reading the directions carefully. Oops.

Archer Shirt

Now, don’t get me wrong here – I don’t think a shirt like this necessarily requires a muslin, so to speak. It’s fairly loose-fitting and very forgiving in that sense. However, I do think a shirt like this requires the correct length when it comes to the body and the sleeves, and I think it is kind of a bad idea to dive into something so precise as shirtmaking without giving yourself a few test runs before you get into the good stuff. These were my mistakes. Had I made a little mock-up, I might have had the chance to try out that collar deal before I done goofed it up, ripped it out, realized that the linen was fraying at an alarming rate and oh god what have I done.

Also, the sleeves are way too long and the body is a bit on the short side (the latter isn’t the pattern’s fault, I just got a little too slash-happy with the scissors).

Archer Shirt

With all that being said, I actually really enjoyed sewing this pattern – it’s very precise, with all the top-stitching and perfect pressing, the kind of thing that I find SO relaxing to sew. Rather than get bummed that I made a shirt that isn’t up to my personal sewing standards, I consider this a muslin and I can’t wait to start my ~real~ version. The instructions are clear, albeit brief (if you get stuck, there is an entire sew-along with plenty of words and pictures), and every piece fits together nicely.

I know. The shirt looks fine in the pictures.

Which is why I took close-ups of the bad parts. You know you wanna see!

Archer Shirt

My first fuck-up was the top stitching on the button band. True, it’s not tooooo bad, but it’s definitely crooked. I’m not even sure how I managed to get that seam so crooked, but a crooked seam means crooked top stitching which means sad button band.

If you zoom in, you can even see an errant line of stitching running straight into a button. What is this I don’t even.

Then I tried to attach the collar stand.

Archer Shirt

And this is what happened. The fuck is that bump sticking out there? What the hell is going on?

Archer Shirt

And here is the crowning glory, which I obviously saved for last. This is what happens when you sew the collar stand wrong, then try to unpick it, then realize that the fabric is unraveling and now you have no seam allowances so you just sew haphazardly across a few points and hope for the best. It’s wonky and terrible and I can’t even button the top button. OOPS.

Speaking of buttons, the button holes *do* look nice. Thanks, Bernina!

If you were wondering, here is what I plan on changing for my next version:
– Shorten the length (although maybe not quite as much as this one!)
– Shorten the sleeves – they are WAY too long on me, like, the cuff starts below my wrist. I actually did not even bother sewing the buttons on the cuff here because they are so laughably long, I figured I’d just roll these up 4evs. But for my next version, I need to get the sleeves the proper length.
– Change the placket to a more traditional sleeve placket (such as the ones on the Negroni pattern). The ones on this shirt are much more simple – just a little binding, which isn’t bad, but I like the fancier look of the Negroni.
– I think I need to take out some of the width of the back, it’s super blousey on me.
– Draft smaller pockets; these are a little overwhelming on my frame.
– Get that god-forsaken collar stand under control, I mean, WOOF.

If you were also wondering, here are my suggestions should you decide to tackle this pattern yourself:
– MUSLIN IT. If you feel confident in your fitting skills, you may skip this, but I strongly encourage you to at least make a mock collar/collar stand so you can get an idea of how this shirt gets put together. You may also want to consider measuring the sleeves against some sleeves that fit you, unless you prefer the perma-roll.
– Don’t make your first version in linen. Just… don’t.

Archer Shirt

Despite an iffy start with this pattern (which I’m chalking up to user error), I think it’s a keeper and I will be making this shirt again. It’s a lovely design and a fun pattern, and I’ve already sourced my dream plaid flannel. I have an entire outfit planned around this pattern in that fabric, ain’t no one gonna stop me.

Completed: The Briar Tshirt (with Bonus Thurlows!)

21 May

Hey, look, I finally got my ass into gear and hopped on the Briar bandwagon! Yay!! I know I’ve hated on the high/low hems in the past (aka mullet hems) but if anyone can make a high-low hem look like something I need in my closet, it’s Megan Nielsen, Our Lady of the High/Low.

Stripey Briar, Linen Thurlows

Actually, I made TWO!!

Red Briar, Linen Thurlows

Oh, and another pair of Thurlow shorts for good measure 🙂

Linen Thurlows

I mean, why would I pair my beautiful new tshirts with an old pair of shorts? AS IF.

Red Briar, Linen Thurlows

This red one is the first one I made (and sorry in advance for the overly saturated pictures – red is hard to photograph!). I used a super drapey rayon knit from Fabrics for Less in NYC; it’s delicious and airy and PERFECT for this kind of top. I don’t normally wear such loose-fitting clothing (and I know y’all are laughing because this is hardly loose-fitting, but it is for meeeeeee ok!), but I LOVEEE this way this looks and feels. Must make several more.

This version has a tiny pocket (which, yep, you totally can’t see) and I finished the neckline with a binding – partially because the fabric is soo drapey, it wouldn’t work with the normal stretched bands, and partially because I wanted to try a new technique! I must say, I’m really happy with now the neckline turned out. It’s perfect and flat and looks really good. Megan Nielsen, you are a binding genius.

Red Briar, Linen Thurlows

I was smacking a mosquito in this picture (the ‘skeeters were sooo bad this morning, ugh!), but I like that it shows the tshirt doesn’t gape out when you bend over. Nice!

Red Briar

For this shirt, I sewed an XS and took in additional bit at the side seams because it was a little loose. I also cut about 3″ off the length (I cut it off the bottom for this one, but for the next one I did properly slash and shorten the pattern pieces like a good seamstress ;)).

Red Briar

Oh, yeah, and I used the last of my neon yellow twill tape to stabilize the shoulder seams 😉

Stripey Briar, Linen Thurlows

I made the second version immediately after. Ha! This one is a fairly hefty weight knit from Mood when I was in NY. I’ve been hoarding this fabric for the months since and I’m so glad I went with this pattern because I think it’s pretty perfect! Of course, I got way too excited/ahead of myself and neglected to match the stripes at the side seams… oh well!

Stripey Briar, Linen Thurlows

This version is pretty much the exact same as the red one, except that I finished the neckline with a band instead of the binding. I actually tried the binding first, since I loved it soo much – but my machine was NOT having it. The fabric was too thick, anyway. So, band it is!

Stripey Briar, Linen Thurlows

Stripey Briar

I left off the pocket for this one, and also ended up taking in the side seams quite a bit – at least 1″. Since the fabric is fairly heavy, it looked weird all blousey. Like it was too big. This looks much better, and bonus – it looks great tucked in!

Stripey Briar

I really love this fabric and I wish I’d bought several yards of it, oh well!

Linen Thurlows

For the shorts, I don’t have much to elaborate on as this is like my squillionth pair. Haha! I used my TNT pattern and whipped these up in a couple of evenings (they are RILL easy after you made a bunch of them, just fyi!).

Linen Thurlows

For fabric, I used a beautiful, soft grey linen that I got from my new favorite local fabric source, Muna Couture. Muna’s shop is actually a dressmaking shop – and she makes some pretty incredible ball gowns and wedding dresses – but she also sells fabric. Not just fancy dress fabric (although there is plenty of that, and it is AMAZING), but also basic stuff for daily wear, like wools and linens and prints. I got this remnant from her and it was *just* enough to squeeze out some shorts. I love that they’re linen – so breezy and nice for summer! They do wrinkle a bit with wear, but not too bad 🙂 The white lining is fabric leftover from my Madeline bloomers.

Linen Thurlows

This is the only bummer about the shorts – I drew on the fly with my disappearing wax, and it didn’t disappear! WTF!!! I managed to fade it out a bit (put a piece of paper over it, applied heat, and then rubbing alcohol very sparingly, if yr curious), but it’s still pretty disappointing that you can see it. Sooo with that being said, important lesson learned here – ALWAYS test your marking utensils before marking on your fabric! DUH. I should have been doing that anyway, but I wasn’t, and now I know, and it won’t happen again. Learn from my mistakes 🙂

Side note, today is the last day to get 15% off at Sweet Little Chickadee, so get on it, son! Use the code LLADYBIRDBIRTHDAY and get to shoppin’! You could even get the Briar and Thurlows, y’know, if you wanted to be like me 😉 ha!!

Another side note, it’s my birthday todayyyy!! Yay!! Happy birthday to all my birthday twins (there were several of you, yay 5/21!!!) and all the other May Babies 🙂

me & my dad :3

Here is my gift to you, baby L with my dad 🙂 AWWWW!!!