Tag Archives: corduroy

Completed: Tongue-Tied Sweater

26 Feb

It’s been a minute since I shared a knitting project! I actually *have* been knitting – I always have at least 1 project on my needles at any given time (usually two – one for the couch, and a smaller/simpler one for the road!), and I always keep my Ravelry account updated! But for whatever reason, I never feel super compelled to share them on my blog. Anyway, here’s one today!Tongue-Tied Sweater + Dawn Cords

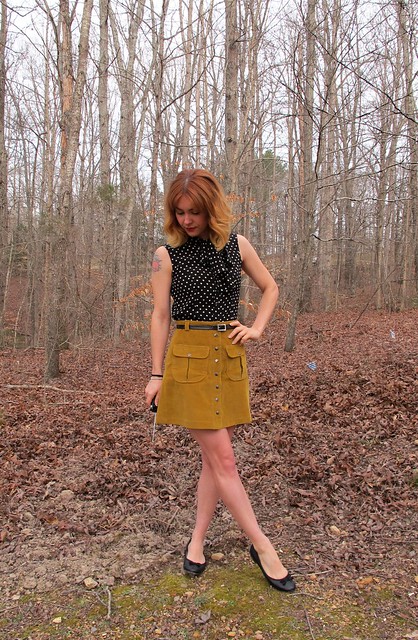
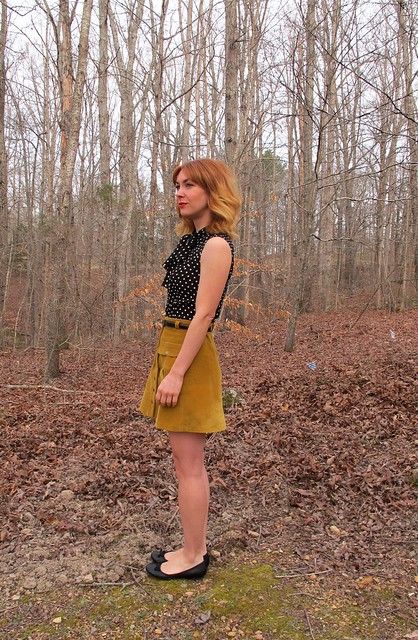
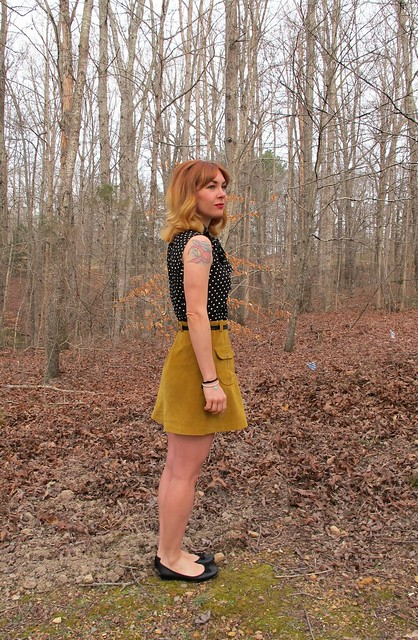
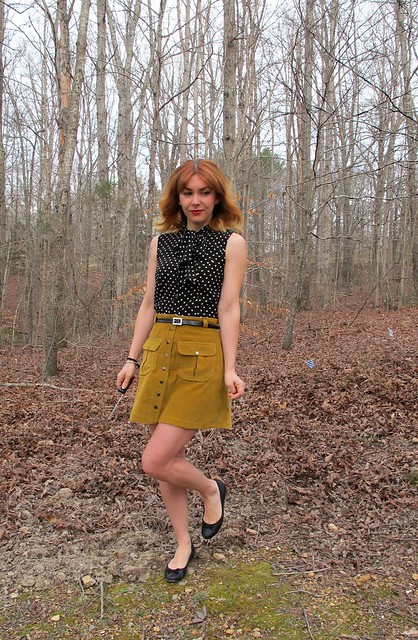
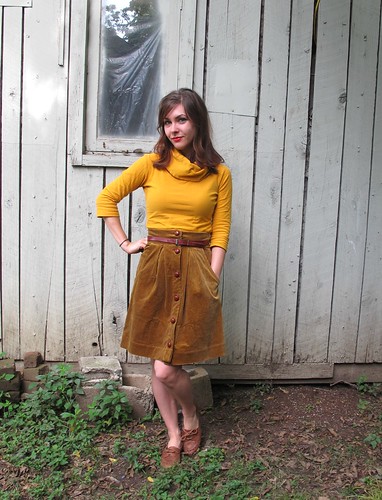
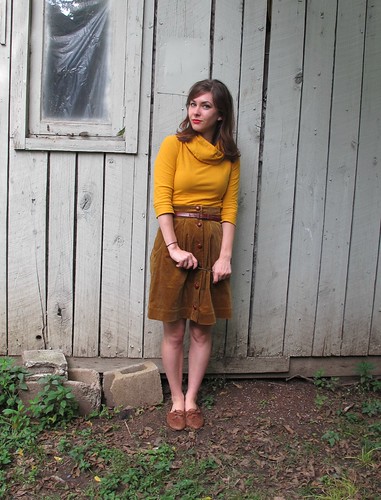
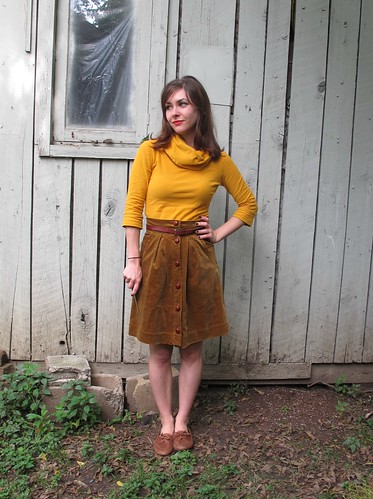
This is the Tongue Tied sweater by Poison Grrls. I actually chose the yarn before the sweater pattern – a very uncharacteristic knitting move for me (usually I have my pattern selected before I start shopping for yarn). To be completely honest – I wasn’t in the mindset for planning a new sweater when all this happened, as I was still steadily working my way through my last sweater (see! There’s one I knit and never shared here lmao). But this yarn caught my eye at Pintuck & Purl and once I got my hands on it, it was all I could think about.

Tongue-Tied Sweater + Dawn Cords

The yarn is CashLuxe Spark by Sweet Georgia Yarns, a gloriously soft and cushiony fingering-weight yarn with this incredibly rich color and the cutest subtle sparkle! I’m not a super duper yarn snob (I love natural fibers, blah blah, but I don’t typically buy *really* expensive yarn. Although. That may now change haha) but I really, really, really wanted this yarn on my body. I initially considered socks – I mean, who doesn’t want to wrap their toes in cashmere? – but at $38/skein, that was a little rich even for my blood. So obviously it made sense to buy two skeins and turn it into a sweater, because that’s totally fiscally responsible.

Tongue-Tied Sweater + Dawn Cords

Tongue-Tied Sweater + Dawn Cords

I started this sweater right after I finished my last one, toward the end of December last year. It knitted up really fast – partially because, well, it’s a tiny fucking sweater, but also I just really enjoyed every part of the process. I LOVED touching that yarn, so so much. I actually would have finished this quite a bit sooner, except once I got to the point of picking up the sleeves I let it sit dormant for a couple of weeks while I worked on other stuff.

Not a lot to say about this pattern, but here are some notes:
– I knit the size Small, based on my bust measurement. My gauge called for size 2 needles (body) and 1 needles (ribbing).
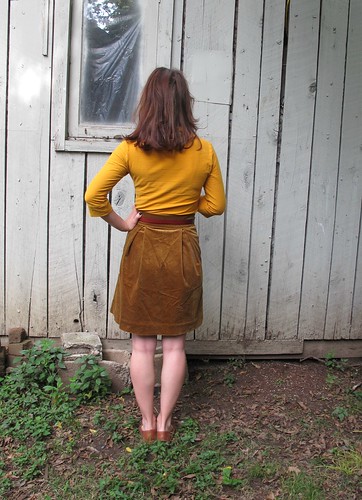
– This is a really fitted sweater! I mean, I knew that going in – but trying it on, yeah, it’s basically painted on. Aggressively blocking the entire thing really well helped a lot, and now it skims my body perfectly.
– Because it was so tight, I did have some issues with getting a stretchy enough bind off (I actually had to re-do my bind off at the bottom AND the neckline twice!). I ended up using size 3 needles and a super stretchy bind off. With the neckline, that was mainly my fault for being an idiot. I thought I’d be super clever and do a fold-over neckband, but quickly discovered (while unsuccessfully trying to pull it over my head) that those don’t stretch at all. LMAO.
– Mod-wise, I added 1″ of length to the body, since I wanted to be able to wear this with high-waisted jeans (it’s pretty short!).
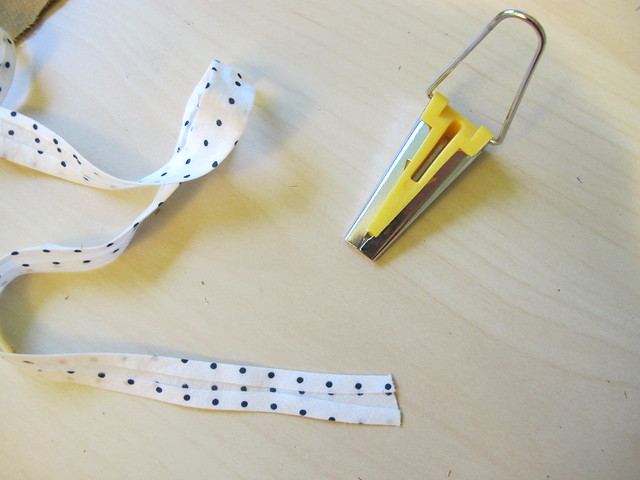
– If you think you see a yarn tail in the back, you’re right. I haven’t woven it in yet. I don’t know why.

Tongue-Tied Sweater + Dawn Cords

I loved knitting this pattern! It was easy to follow, simple to knit (but not boring), and the proportions are just lovely. I’ve already got a few more Poison Grrls patterns in my radar for my next sweater. I love Amy’s aesthetic and I love that she uses fingering weight yarn – perfect for our mild winters!

Tongue-Tied Sweater + Dawn Cords

Tongue-Tied Sweater + Dawn Cords

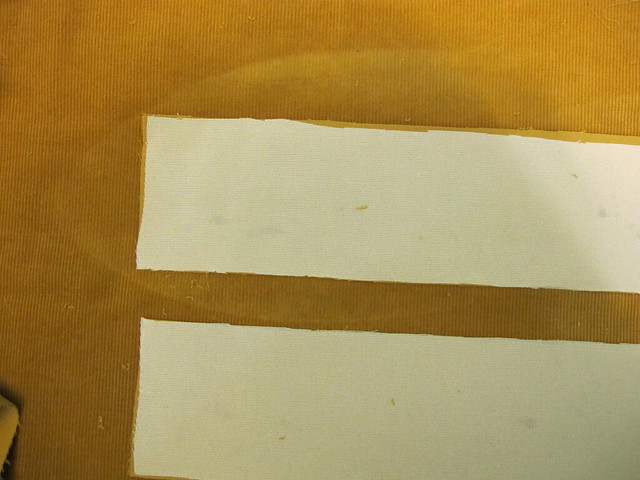
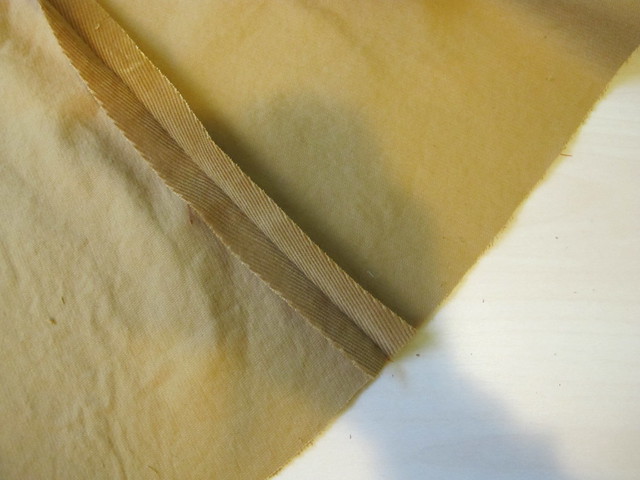
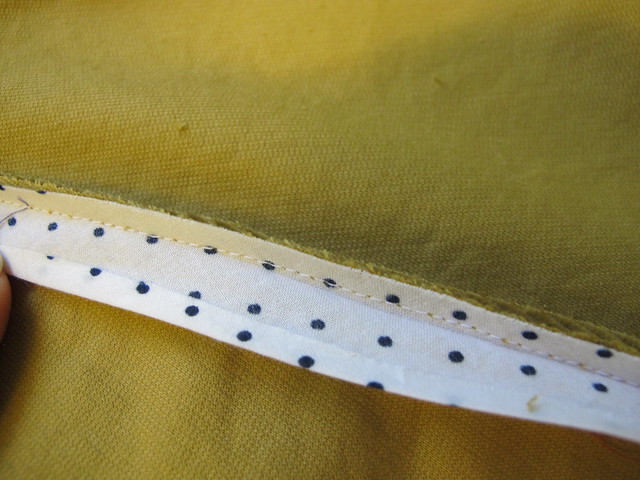
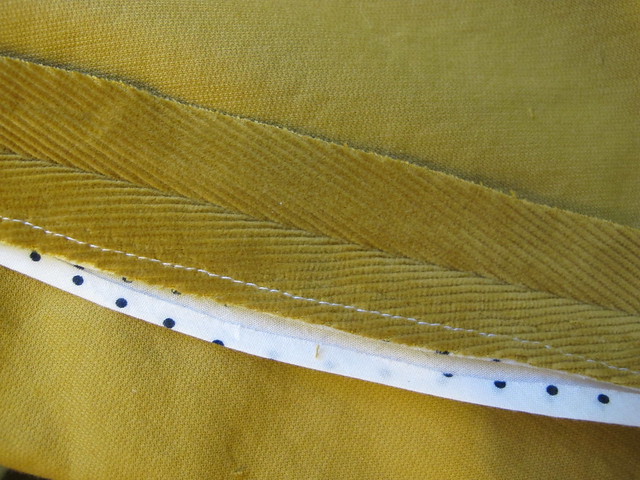
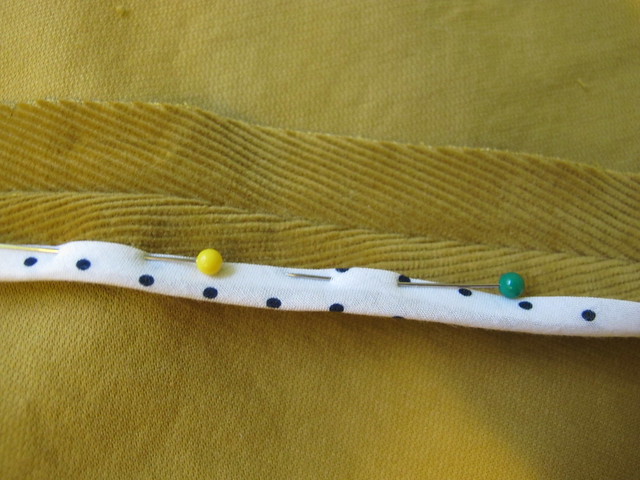
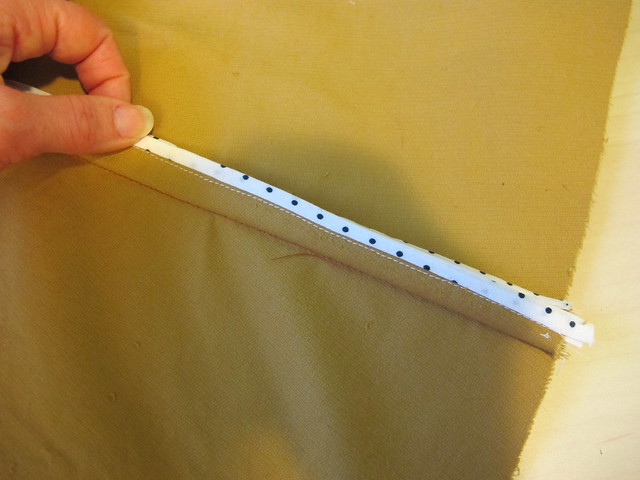
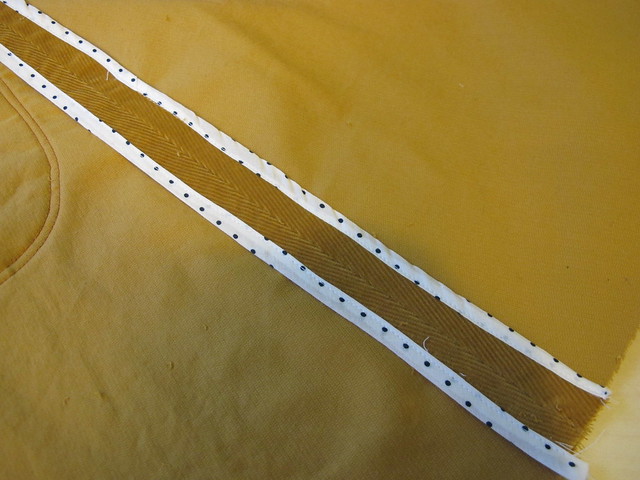
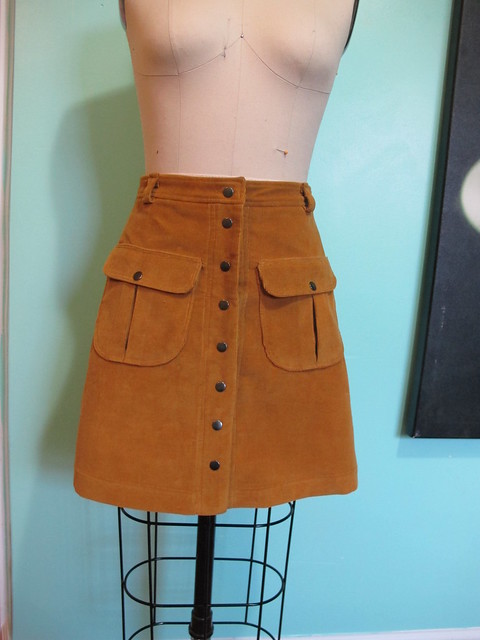
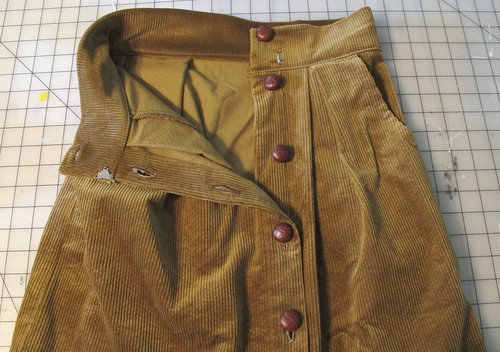
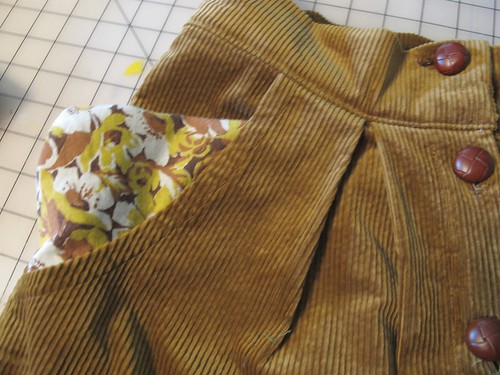
Oh, I also made my pants, too! These are more Dawn Jeans, made in Robert Kaufman non-stretch corduroy from Pintuck & Purl! (I picked it out the same time I was fantasizing about that yarn haha). Not much to say about these that I haven’t already said – I made my normal size, this time with the wide legs and the cropped length. The cropped length isn’t actually that cropped – I ended up having to take off another 3″ or so (but I also have a 28″ inseam sooo take that as you will). I’m also not super thrilled about how the back fits, but I believe that’s just what you get with wide leg pants. The wrinkles are there because there is too much fabric at the inner thigh (the issue I had with my Calvin Klein jeans), but for true wide-leg pants you really don’t want to remove width there. Whatever, I’m not the one looking at my own butt so I don’t care.

Tongue-Tied Sweater + Dawn Cords

So anyway, that’s my new sweater! Fun to knit, fun to wear, and the sparkles make me happy 🙂 Oh! And I still have some of this yarn leftover – so you better believe I’ll be making a tiny pair of socks 🙂 If anyone has suggestions for short-cuff sock patterns – preferably one with bobbles (I don’t know why but I’m feeling like I want bobbles on these), let me know!

Completed: Silk Polka Dot Blouse + Corduroy Skirt

29 Mar

Its time for the ~big reveal~ – my first completed outfit, sewn entirely on my new Spiegel 60609 sewing machine 😀

IMG_2438

I love that this machine is pretty enough to make even a subpar photo look great 🙂 Ha!

Silk Top & Corduroy Mini Skirt

I covered a lot of ground about the making of these garments in my previous posts, however, I’ll include some notes and highlights in this post in case you missed/skimmed/didn’t care then but suddenly care now 🙂

Silk Top & Corduroy Mini Skirt

The silk top was made using silk crepe from Mood Fabrics (purchased at the NYC store last year) and a combination of Butterick 5526 (my TNT button-up shirt pattern) for the body of the blouse, and vintage Simplicity 4676 for the tie neck. I used Sullivan’s Spray Stabilizer to wrangle the drapey silk into submission for ease of cutting and sewing, which worked great! The shirt is finished with French seams and self-bias facing at the arm holes and hem.

Full details on the silk top can be found in this blog post 🙂

Silk Top & Corduroy Mini Skirt

Silk Top & Corduroy Mini Skirt

I wanted my first project on the Spiegel 60609 to be something silk, because, honestly – I wanted to see how it could handle working with a notoriously difficult fabric. Of course, stabilizing the whole yardage first definitely helped, but that doesn’t solve all issues (such as when your sewing machine tries to eat delicate fabrics – not a problem with this one, I will add!). I’m really impressed with how the machine sewed through this fabric with absolutely no issues – it even did a great job on the button holes! I do wish that the measurements on the throat plate were marked differently, as it’s hard to get a narrow seam with what’s standard on this machine, but that’s a relative non-issue (I just use post-it notes to mark my seam allowance lines and it works fine). So yeah, Spiegel 60609 + silk gets a thumbs up from me!

Silk Top & Corduroy Mini Skirt

The mini skirt was made also on my Spiegel 60609! I used the Rosari skirt from Pauline Alice Patterns and some lightweight/stretch corduroy from Mood Fabrics. The skirt includes pockets, bound seams on the inside (for a bit of extra pretty cos why not?) and professionally set snaps down the front.

Full details on the corduroy mini can be found in this blog post!

Silk Top & Corduroy Mini Skirt//embedr.flickr.com/assets/client-code.js

I don’t necessarily find corduroy difficult to sew – most of the problem lies in making sure everything is cut and pressed correctly, as not to mess too much with the nap. Sometimes, depending on what machine I’m using, it’s a good idea to use a walking foot to help keep all layers feeding evenly, but I didn’t have any of these problems with the Spiegel 60609. The feed dogs were good enough on their own without any extra help. Always a plus! 🙂

Silk Top & Corduroy Mini Skirt

Silk Top & Corduroy Mini Skirt

Silk Top & Corduroy Mini Skirt

Corduroy Mini Skirt

Corduroy Mini Skirt

That’s all for this outfit! Stay tuned next month for that project – all I can say is, it’s gonna be FANCY 😀

Silk Top & Corduroy Mini Skirt

Note: The fabric used is part of my monthly allowance from Mood Fabrics, as part of my involvement with the Mood Sewing Network. The Spiegel 60609 was given to me by Spiegel, and it’s awesome!

In Progress: Corduroy Mini Skirt

22 Mar

IMG_2367

Following up on part one of my Spiegel 60609 sewing project for March (here is that post, in case you missed it!), let’s get to part 2! The bottom half 🙂

bdg-corduroy-button-front-mini-skirt-mustard-6

My original inspiration came from a skirt I saw at Nordstrom a couple of months ago – the most adorable a-line mini skirt, made in mustard corduroy with pocket flaps and snap closures down the front (above is an image of it – I think. It’s been a while and I’m forgetful!). I liked it enough to actually try it on (which was weird enough in itself – I haven’t been in a fitting room in ages, ha), but the fit wasn’t very good so it didn’t leave the store with me. Instead, I thought I’d try to make my own (surprise!).

I found this mustard cotton corduroy on the Mood Fabrics website and immediately set about finding a good skirt pattern for the fabric (unfortunately, that fabric is already sold out – sorry! I guess a lot of us snapped it up at the same time – it’s really the perfect shade of mustard, and a nice light weight with a subtle stretch. Just gorgeous!). Lots of googling around led me to eventually settle on the Rosarí skirt as it included pretty much all the elements of the original inspiration skirt, minus the separate side panels and with big (usable) pockets instead of just flaps. Honestly, it totally looks like something I’ve already made, I still wanted to give it a try. The patterns were just different enough to justify a second purchase, and plus, I’ve been wanting to try a Pauline Alice pattern.

Going by the finished measurements, I cut a size 34 and made the mini length with pocket C. Spoiler: The fit is really excellent and I’m totally gonna make this again with those zippered pockets. Anyway, back to the corduroy!

Corduroy Mini Skirt - cutting

One of the most important things to keep in mind when dealing with corduroy is the very visible nap. On fabrics with a pile (basically… hairs. Velvet, velour, corduroy, even fake fur – are all examples of fabric with a pile), the hairs lie in a particular direction, which is referred to as “nap.” If you run your hands up or down the pile, you can feel the pile. The pile can change color very subtly depending on the direction of the nap, so it’s extremely important to cut everything in the same direction – or else you run the risk of your pieces looking like they are slightly different colors. For my skirt, I made sure to lay all my pieces with the top facing the same end of the yardage, as shown in the picture.

Corduroy Mini Skirt - pressing naps

Another issue with naps and piles is that it’s *really* easy to crush the pile with your iron if you’re not careful. To prevent, this, the fabric can’t be pressed against a flat surface (like the ironing board, or the iron itself). One way to do this is to use a velvet needleboard, which has a million tiny wires to make a not-flat surface that the pile can lay against while you press. However, needleboards are freaking expensive (that one is $40, there, I just saved you a click haha)! They are fun to use, but ain’t kind on the wallet. So the cheap alternative is to just use a scrap piece of your napped fabric, and lay it right side up on your ironing board. You can press all your pattern pieces with the right side down, against the scrap fabric, and that provides enough texture to keep the nap from crushing. I had about 1/4 yard leftover from cutting my skirt, so I had a nice big piece to lay on my ironing board for pressing. Look at the picture above – do you see the iron imprints around my interfaced pieces? That’s what happens if you don’t protect the nap before pressing!

So those are two big things to keep in mind if you’re sewing with corduroy (or any other napped fabric, for that matter). Mind the nap 🙂 And just FYI – some napped fabrics (especially velvet and faux fur) require a little more finesse with sewing as they don’t like to feed evenly through the sewing machine. That being said, I didn’t have any problems with this particular fabric. Normally, I would use a walking foot – but the feed dogs on the Spiegel 60609 did a good job on their own, no extra foot required. Yea!

Since this is a really straightforward pattern with very few seams, I thought it would be fun to go the extra mile and do some pretty seam finishing on the inside 🙂 I decided to bind my seams with bias tape, which not only looks nice, but prevents the seam allowances from unraveling as the skirt gets washed/worn. This particular corduroy frays like a MOTHER, so it’s a very necessary step. I could have used my serger, but this looks prettier (and I didn’t have matching thread, ha!)!

Corduroy Mini Skirt - bound seams

You can use pre-packaged bias tape to bind your seams, but I like to make my own because it’s a bit softer (and you get a waaaay better selection of colors and prints). This particular fabric has showed up on soooo many of my makes – I made a truckload of bias strips with it and it’s like the gift that keeps on giving! 🙂 I will be so sad when it runs out hahaha. Anyway, I like the Clover 1/2″ bias tape maker – I find the width is great for this finish, and the Clover brand ones in particular work really well. I’ve tried cheaper bias makers and they just don’t work as well for me. This one is tight enough at the opening to really fold the bias, and then it’s easy to press it flat so it stays that way.

Corduroy Mini Skirt - bound seams

For this skirt, I did a Hong Kong bound finish – so both sides of the seam allowance are bound and then pressed open. You can also press the seam allowances to one side, and bind them together.

Corduroy Mini Skirt - bound seams

On the first seam allowance, sew the bias binding to the underside (the side that is against the garment when it’s pressed into place),  keeping your stitching line right along the pressed crease of the binding.Corduroy Mini Skirt - bound seams

Corduroy Mini Skirt - bound seams

Pull the unsewn side of the bias around so it comes to the top and just covers the stitching line you created. Pin into place, and then topstitch close to the fold. Repeat for the opposite seam allowance, then press the seam allowances open.

Corduroy Mini Skirt - bound seams

Here is what the underside of the seam allowance looks like. I do the first pass on the underside, so any stray topstitching is hidden when the seam allowances are pressed open 🙂

Corduroy Mini Skirt - bound seams

And here are both sides bound 🙂

Corduroy Mini Skirt - bound seams

AND HERE IS THE WHOLE DAMN SKIRT 😀

I love this finish! It’s definitely a time-consuming addition, but it’s not so bad when the garment in question only has 3 seams to bind 🙂 And it looks soooo pretty on the inside!

Corduroy Mini Skirt - grading seam allowances

Last corduroy tip! This fabric tends to be really bulky, so it is important to really grade down your seam allowances in any part where there are multiple layers – such as the waistband. I trim my seam allowances down at staggering heights so that there isn’t a giant bulky ridge showing from the outside once the skirt is complete.

Corduroy Mini Skirt

And that’s it! Here’s a little sneak of the pretty insides 🙂 I also bound the lower edge of the waistband – instead of turning it under 1/4″ to hide the raw edge – as I’ve always liked the way that looks in dress pants hahaah. Oh, and my snaps were set using a professional snap setter (cos I work for a clothing manufacturer!)! They look GOOD.

Corduroy Mini Skirt

Corduroy Mini Skirt

Some shots of the finished skirt on my form 🙂 I’ve already worn the hell out of this thing – the fit is great, I love the mini length, and the mustard color goes with pretty much everything in my closet. It looks EXTRA good with black and white polka dotted silk, though 🙂 I will be sharing the completed outfit next week!

Completed: A Cozy Kelly Skirt

16 Sep

Look at me, I’m like a 1970s Sherwin Williams swatch book all up in hurr.

Corduroy Kelly Skirt

I know I haven’t talked about her much since the denim version came out to play, but OMG I LOVE KELLY. I seriously can’t get enough of this pattern – it’s very simple, but delivers maximum effect!

Corduroy Kelly Skirt

This is my second corduroy Kelly, same difference as the first, although this cord is a much thicker wale with a softer hand. I snatched it up during my trip to NYC – it was part of a swap, although I am a terrible swapper and I don’t remember who it came from 😦 Sonja? I know the majority of the goods came from your stash haha 🙂

Corduroy Kelly Skirt

Anyway, origin aside, this fabric is pretty fabulous! It’s super soft with a fair amount of body, and the color is one of those great browns that goes with everyyyyything (except the new top I made, apparently, which is not the same top I’m wearing in these pictures btw. Oh well haha!). I love corduroys, but sometimes finding a good one that’s pure cotton with no stretch and a nice color can be surprisingly difficult!

Corduroy Kelly Skirt

I can’t speak much on this pattern because obviously I’ve already made/discussed it, but I will tell you what I did differently this time ’round. For one, I used sew-in interfacing instead of my regular fusible… corduroy can be kind of finicky when you press it (specifically – you risk squishing the wales flat and ruining your fabric and WAH), and a quick test of the fusible proved that I would be making a huge mistake. I used muslin as my sew-in – just cut the pieces, basted them to the waistband and button hole placket, and then proceeded as usual.

Corduroy Kelly Skirt

I did topstitch my skirt as directed, but it’s not really noticeable due to the thickness of the fabric. It doesn’t bother me – I like the subtle look – but if you’re planning on making this with a similar fabric and want the topstitching to be visible, you will need to use top stitching thread and the accompanying needle.

Corduroy Kelly Skirt

Obviously, you want to be careful when pressing corduroy – but some stuff does need a good sharp crease, like these pleats and the hem. To do this, I laid a scrap piece of corduroy on my ironing board, right side up, and put my skirt on top of the scrap right down down (this keeps the nap from getting crushed, as the fabric on the bottom provides some support). I used my silk organza press cloth and steamed the beejeezus out of everything, and then used my clapper to hold everything down until it cooled off.

I love that clapper. I always feel like such a fancy-pants when I use it, ha.

Corduroy Kelly Skirt

I also omitted the second button on the waistband – I want to wear this skirt with belts, which I can’t do if there’s a giant button in the way. I put in the top button and added a hook and eye where the second button should be.

Corduroy Kelly Skirt

Here you can see my hook and eye. The skirt in unlined, but it works fine with a slip underneath in the winter, for wearing with tights. Well, the other corduroy one does, anyway, haha.

Corduroy Kelly Skirt

Oh yeah, my buttons were free too! They’re some faux-leather suiting buttons that my Mamaw gave me. She gave me HUNDREDS of them (and my mom took half… but still… that’s a lot of buttons) and I rarely find a change to use them since they’re just really big. But I think they work here! The color looks great with the color of the fabric.

Corduroy Kelly Skirt

I almost forgot – look at this cute pocket lining! It’s a tiny little scrap I got at the flea market. The seller threw it in for free (lord, can I say “free” enough in this post??? FREE FREE FREEEEEEEE) with a few other scraps, after I made a purchase pile. It was just big enough to use to line the pockets. I love those colors, wish I could find a big yardage that looked like it!

Corduroy Kelly Skirt

I guess that it’s! Kind of a boring staple to make, but these kinds of basic pieces get a lot of wear in my life 🙂 Plus, it looks sooo good with my mustard Renfrew, which is always a plus in my book.