Hey guys, guess what.
I’M GOING TO PROM.
This is 100% not a joke. I am going to a literal high school prom.
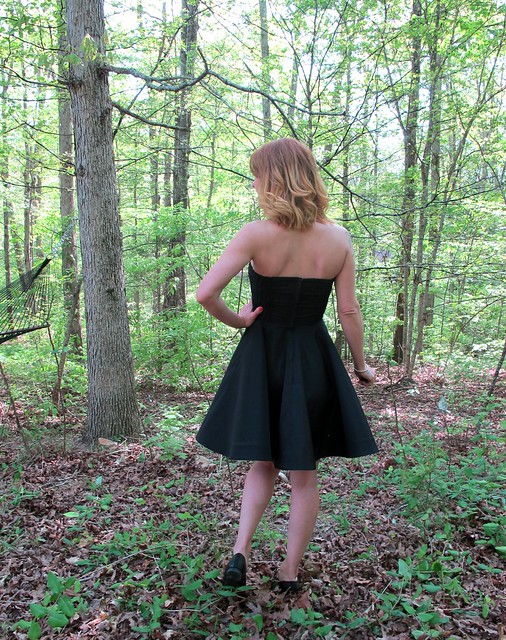
Before anyone starts thinking that I’m dating someone WAY too young for me, I should probably use this opportunity to point out that my date is my BFF, who happens to be a high school English teacher and gets 2 free tickets to prom every year 🙂 I will take any excuse I can get when it comes to dressing up, though – especially if it means I get to make a party dress! The bulk of my sewing used to involve a lot more frosting than cake, and while I’ve reverted to making a lot of useful basics, I still get starry-eyed when I think about ridiculous party dresses. Prom is the *perfect* excuse to get some fancy sewing out of my system!
My pattern of choice is Butterick 6019, which I have been wanting to make for ages. I’m going with view A, which includes removable halter straps and a circle skirt. The fabric is a black solid silk faille from Mood Fabrics. I ain’t gonna lie – I originally tried to buy something with actual color, red being my first choice. But it being prom season and all, Mood ended up selling out before my order was fulfilled and I had to choose a different color on the spot. Since I didn’t have time to get swatches for color comparison (and I didn’t want to end up with a bad color, considering this silk is $50/yard and non-returnable!), and the selection was super limited at that point, I ended up getting basic black. This means I probably am sewing the most practical formal dress ever. Oh well! 🙂 At least I’m ready for my next black tie wedding, ha!
One more thing I want to point out about silk faille – it’s pronounced “FILE.” Not fail or foll (both of which I have tried and been laughed at for. Ok, y’all, it’s been like 10 years since I studied French and I wasn’t very good at it to begin with! Give me a break). I already made an ass out of myself, so now you don’t have to! ♥

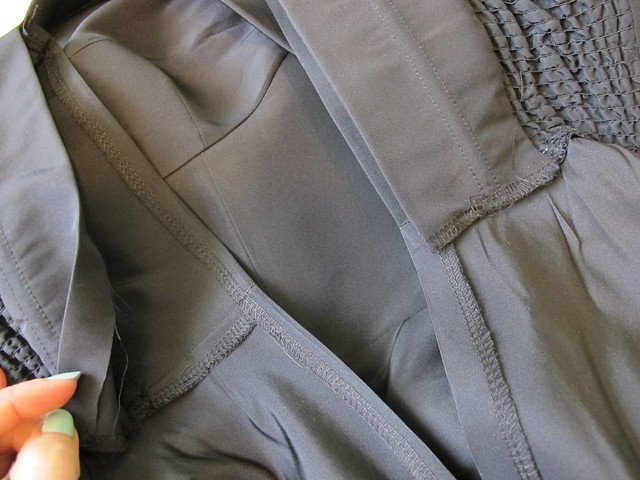
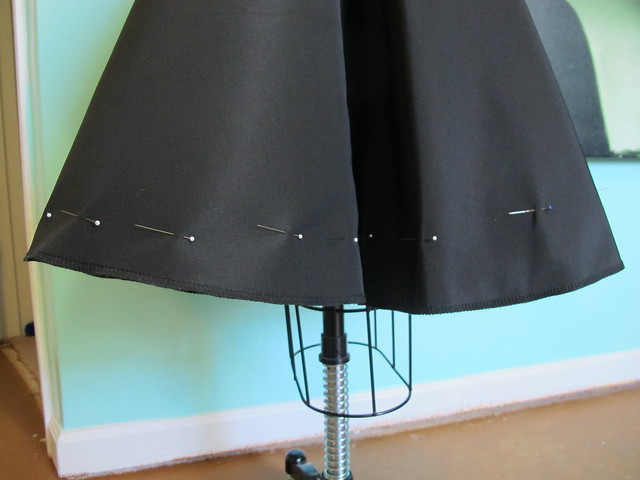
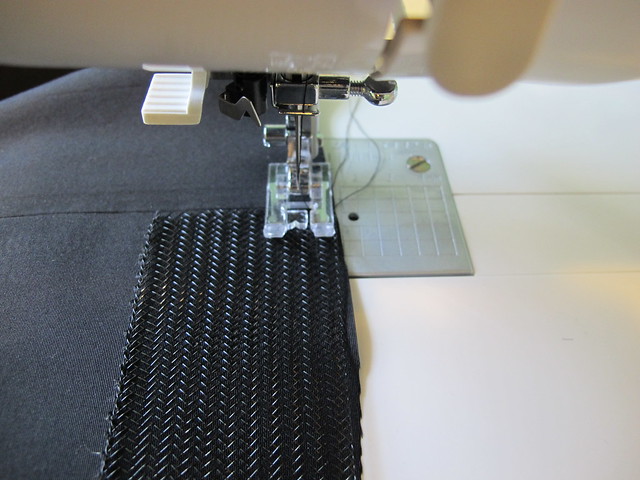
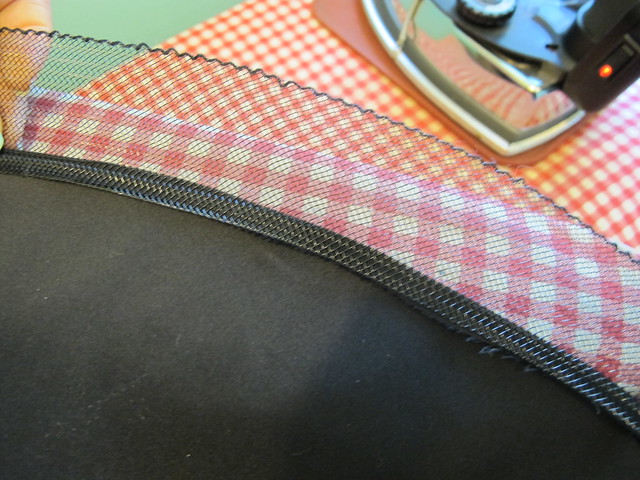
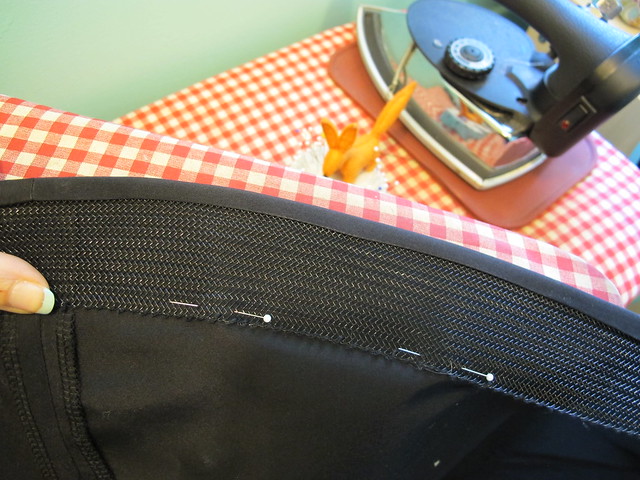
This project is definitely a labor of love – there’s a lot of work (and notions!) that go into a dress like this. The bodice is lined with self fabric, and features boning, shirring, a lapped zipper, bust padding, and that beautiful bias-cut crossover piece. For the skirt, I decided to add horsehair braid to give it some extra body and really make it flare out. Whenever I start a project that includes a lot of notions, I like to corral them into one place so they are easy to find. In the past, it’s been Ziploc bags – which are super useful, but not really that pretty! I recently received this sewing notions pouch from Tailor Made Shop and it’s perfect for this use! The pouch is roomy enough to hold everything I need (it even fits a pair of 8″ Gingher scissors – not really necessary for this particular use, but GREAT for when I’m teaching and I need to take some tools with me!) and it zips securely so nothing spills out. And it’s way prettier than a Ziploc bag 🙂
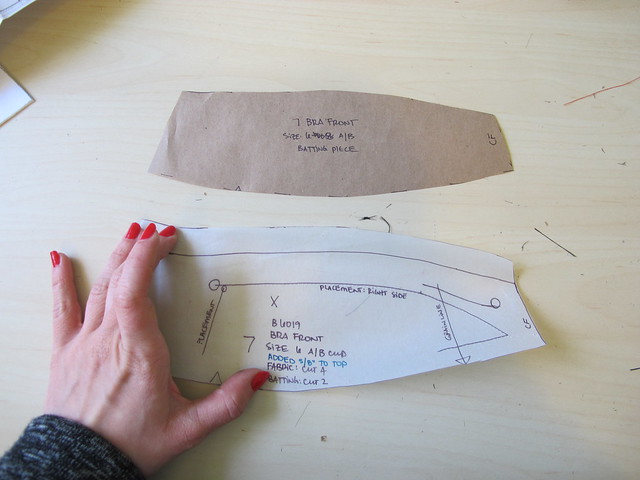
I don’t want to freak anyone out here – but I actually TRACED my pattern pieces for this project. lolwut right!? I had a hard time determining my size (even with the finished measurements and cup sizing – the sizing on this pattern just doesn’t make sense to me at all), and so I needed to keep the sizes intact in case I cut the wrong one. Fortunately, the bodice of this pattern involves a lot of small pieces, so it wasn’t a huge time suck. I ended up going with a size 6 A/B cup at the bust (FWIW, I wear a D/DD bra so yeah, um, the cup sizing is a bit skewed here!) and graded out to an 8 at the waist. Since the skirt is just a giant circle, I didn’t trace those pieces.
I made a muslin of the bodice – shirring included, but no boning. The shirring is extremely necessary if you’re muslining this dress, as it drastically affects the fit. The sizes I traced and cut ended up being perfect, albeit the top of the dress itself is quite low (which I had read about in reviews, so no surprise there!). The pattern changes I made were to add 5/8″ to the top of the bodice all the way around, and then shorten every piece by 1/2″ at the lengthen/shorten line so the skirt seam would hit my waist. I also traced the cup pieces a second time and removed the seam allowances all the way around. These pieces ended up making the bust padding, which is constructed the same way a foam cup bra is made (with the pieces butted up together and zigzagged across the seam). Rather than cut my pieces and then remove the seam allowance – which is wasteful as hell, sorry – I did this instead. Look at the difference in their size!

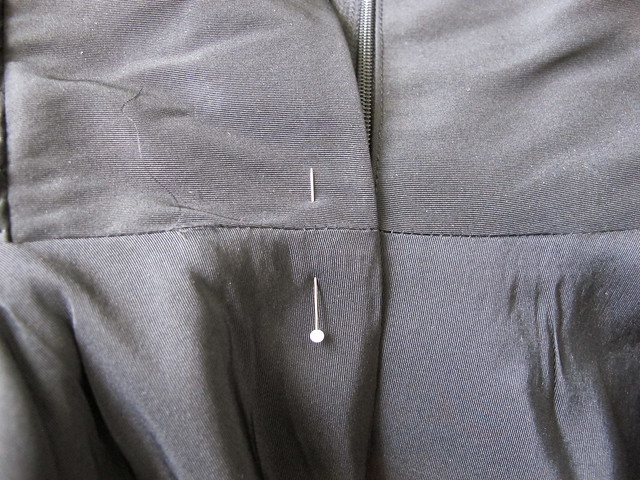
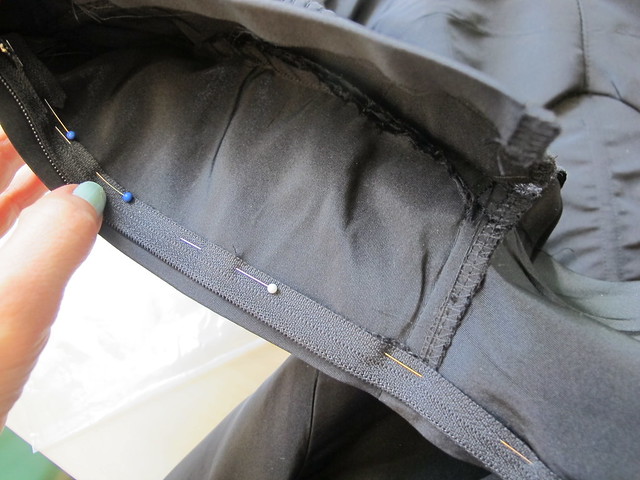
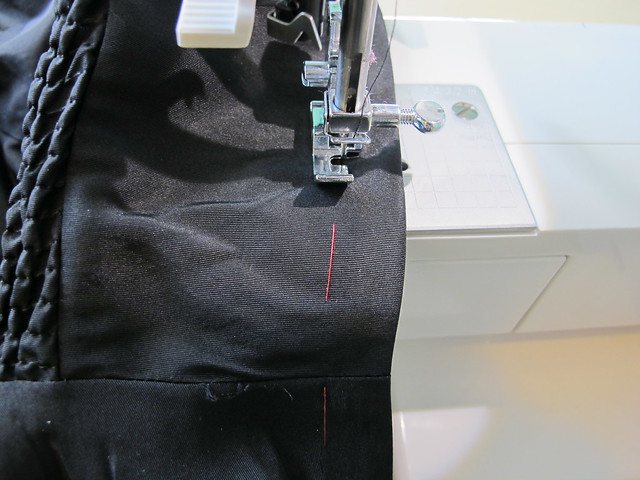
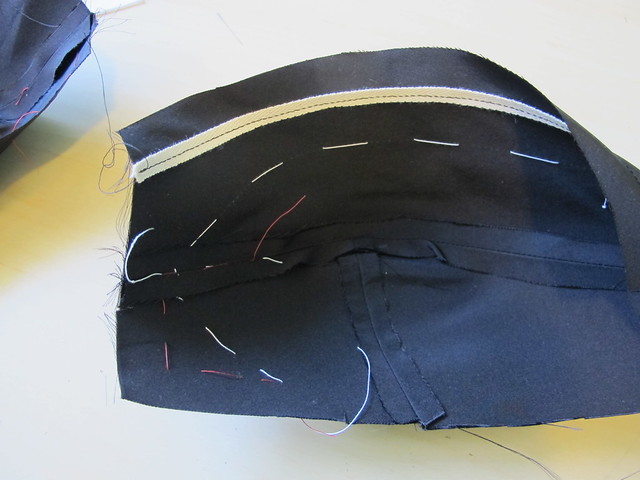
The pattern has a lot of markings for placement – boning placement, the bias strip, and just basic construction seam allowances. Since I didn’t want to risk a permanent stain on my dress, I marked the wrong side and then thread traced the markings with silk thread. The silk thread allows the markings to be seen from both sides, and can easily be removed. I used a different color for the type of markings – tan for the strip, white for boning, red for construction. This was MASSIVELY helpful when putting together the puzzle that is this dress.
To keep the cups curved against my body and to prevent them from stretching out, I added twill tape to the seam allowance. This isn’t instructed in the pattern, but it’s good practice for anything that runs the risk of gaping (such as bustier tops like this, or woven wrap dresses). You basically just cut 1/4″ twill tape the length of the neckline minus 1/4″, then place it inside the seam allowance, up against the seam line. Since the tape is shorter than the neckline, the neckline gets eased into the length of the tape. The easing means the neckline curves with your body, and the twill tape provides some stability to an area that would otherwise stretch out over time.
Assembling the bodice is pretty easy and straightforward. I trimmed down, clipped, and graded my seam allowances pretty aggressively to prevent a bunch of bulk (silk faille is quite stiff), and pressed the life out of everything. #1 reason why I went with silk faille instead of cheaper polyester faille – it’s just easier to work with. I really shudder at the thought of trying to make this dress with something that doesn’t press well.
And now it’s time to shirr! I STRONGLY recommend testing this out on a scrap of your fabric first, as you might need to tweak your machine settings a bit.
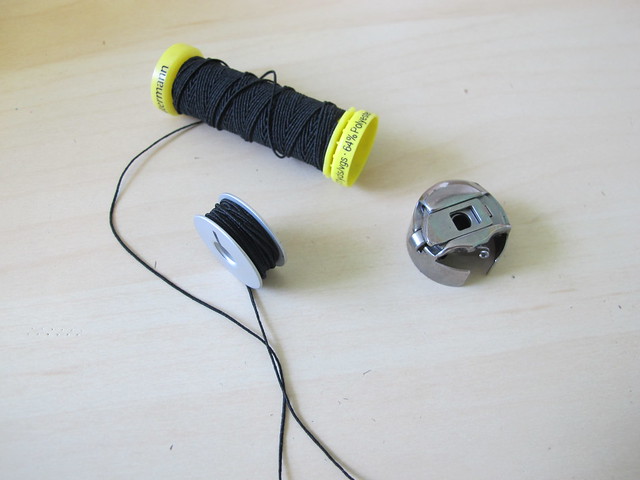
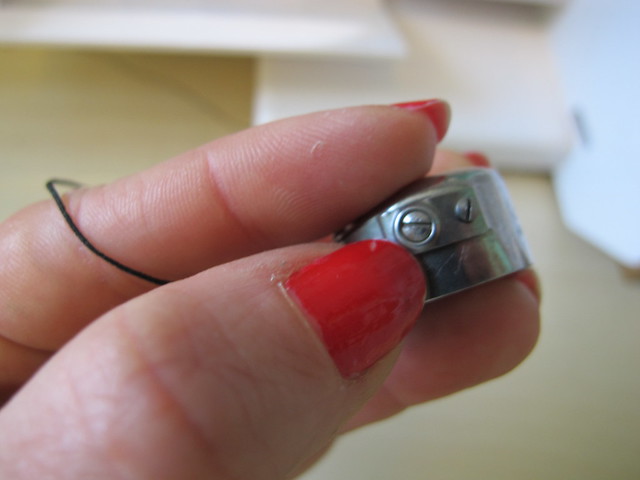
For shirring, you need elastic thread. Be *very* aware of the yardage amounts that your spool contains, by the way – I didn’t realize this brand only has like 11 yards, which is not enough for this project and I unfortunately ran out and had to stop and buy more (also, black elastic thread is harder to find than white, ugh). I used 2 spools, even though the pattern has you only buy one. Just FYI! Anyway, the elastic thread goes in the bobbin, and it is wound by hand with only a slight tension in the thread. The upper thread is your basic all purpose polyester.
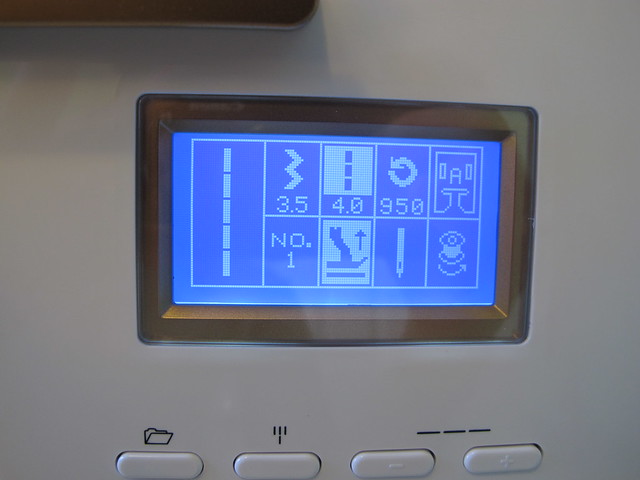
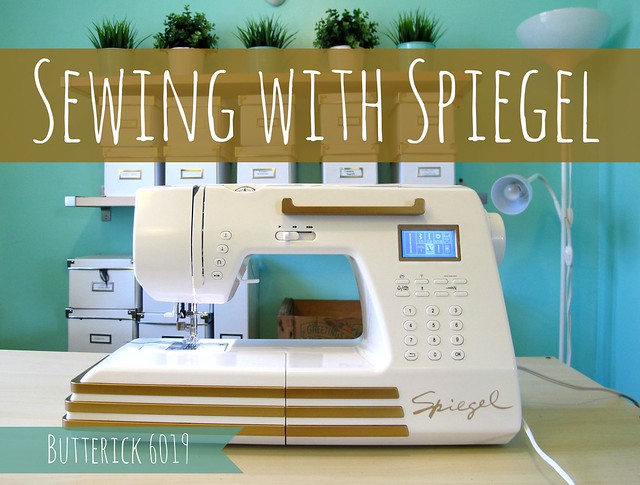
Set your machine with a longer stitch length. For the Spiegel 60609, I used a 4.0 length.
At this point, you’ll want to test the stitches and make sure the tension is good. If it’s not, you can adjust the tension in the bobbin (the little screws you see here). The needle tension (the numbered dial at the top of the machine) can also be used. If you mess with the bobbin tension, its a good idea to mark the location of the screws before you start twisting them around – just use a really fine point marker and draw directly on the bobbin. Otherwise, you might have trouble getting the tension balanced again when you’re done shirring – and you’ll need to take the machine in for a service to set things back to default (and this question has come up a few times – you can get a Spiegel machine serviced at pretty much any sewing machine dealer, regardless of the brand that they sell. *Most* dealers will service all machine brands, even if they sell something different). My Spiegel 60609 did not require any tension adjustments for shirring, so yay!
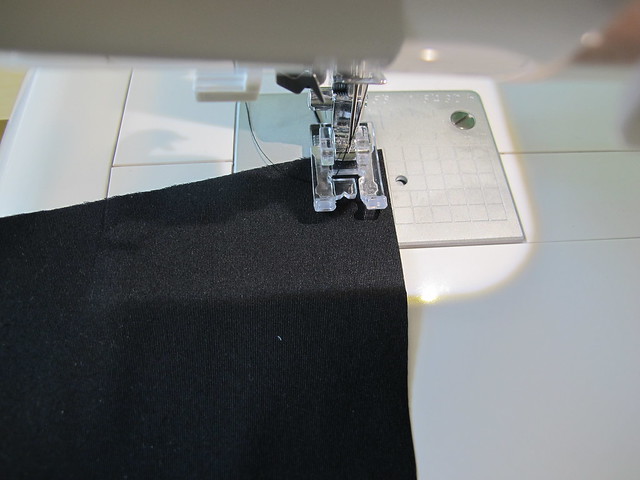
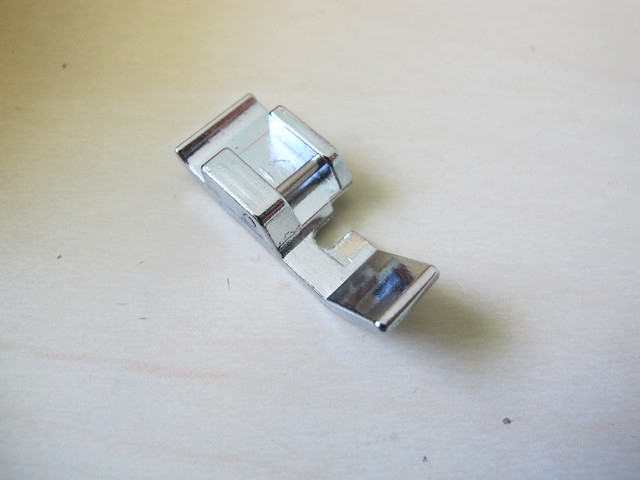
To shirr, you’ll sew long lines of parallel stitching 1/4″ apart. Some people draw guidelines for this, but I just use the edge of my presser foot as a guide. The foot on the Spiegel 60609 is the perfect width for this. Start your first line of stitching a little outside of the seam allowance, and continue sewing parallel lines until the whole piece is covered. Leave long thread tails at the beginning and end of each line, otherwise your shirring will come undone.
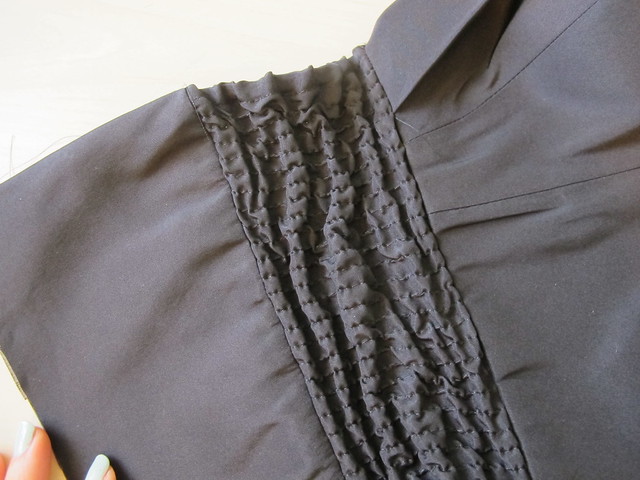
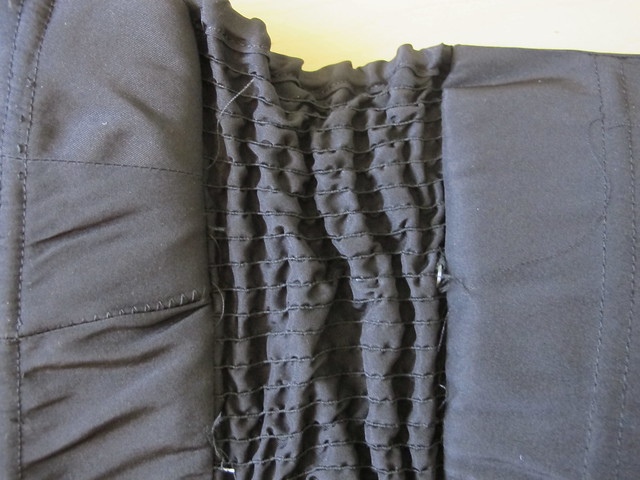
Here are what my shirred pieces look like after stitching. Also, I know my nail color keeps changing. I told you, I had to go out and buy more elastic thread! Sewing came to a stall for a few days! blech!
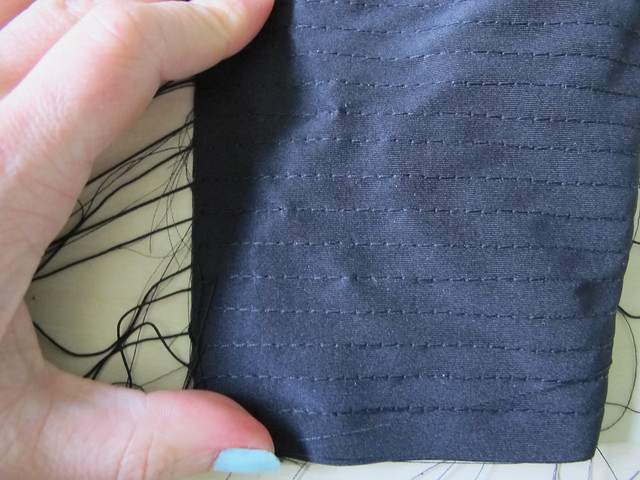
Right side
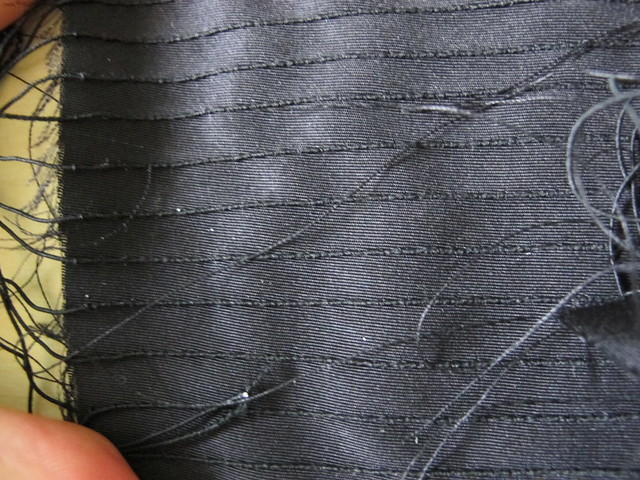
Wrong side
After you’ve finishing sewing all those lines, you’ll have a really hairy looking piece of fabric that still doesn’t stretch. The real magic happens with you steam the crap out of it, which shrinks up the elastic thread and makes the whole piece really stretchy and awesome. It’s fun to watch it shrink up! However, I recommend skipping this step for now and waiting until the bodice is constructed first. It is a lot easier to sew those pieces when they are flat and non-stretchy. You’ll see the shirred pieces in all their glory at the end of this post 🙂
Ok, back to the bodice construction!
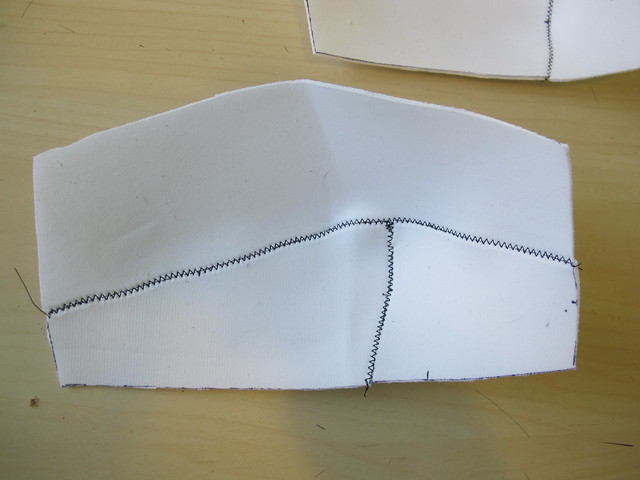
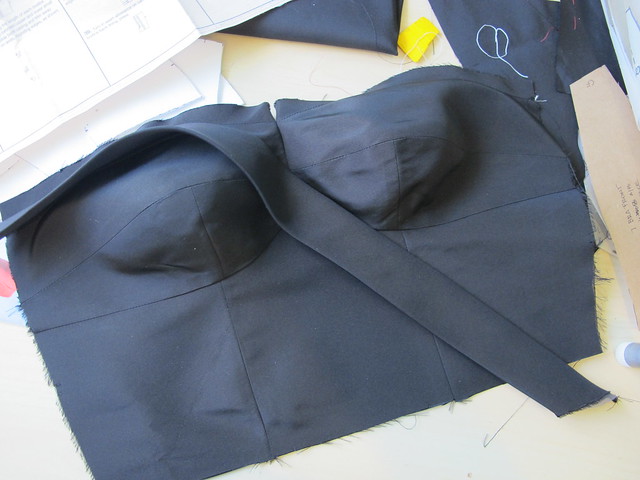
As I mentioned at the beginning of this post, the bust cups are slightly padded (to give that area some structure and also for modesty reasons, if you’re wearing this dress without a bra). The pattern calls for cotton batting, which I did not have on hand. Instead, I used foam padding that is used for bras. The pieces have the seam allowances removed, and then the edges are butted up next to each other and sewn across the split with a zigzag stitch.
Then the little padded cups are nested in the cups of the bodice lining, and sewn in. The pattern has you catchstitch this part, but I don’t particularly care if you see stitching inside my lining so I zigzagged those pieces in. YOLO, y’all.
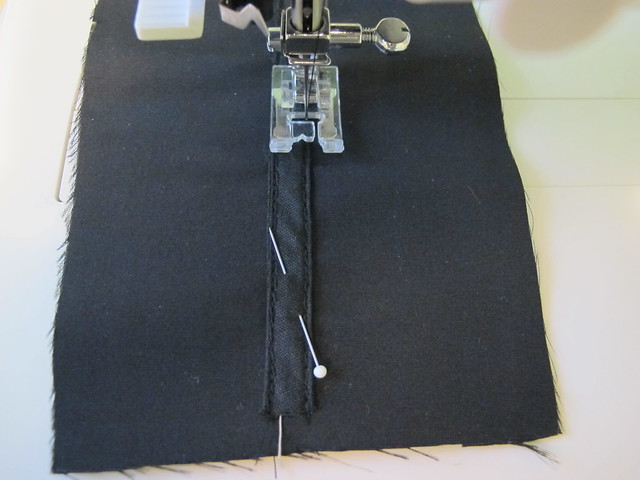
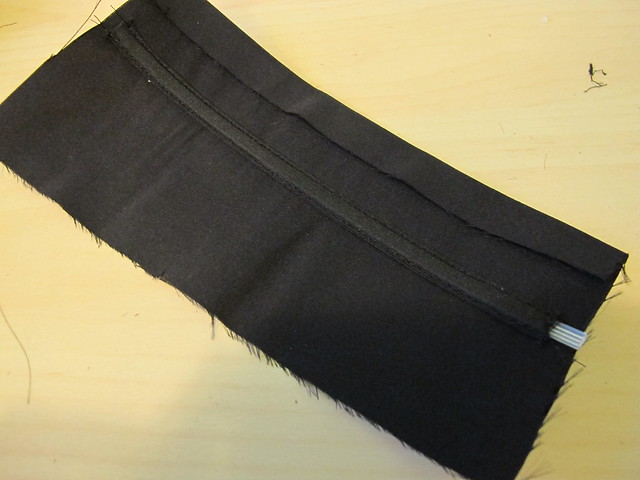
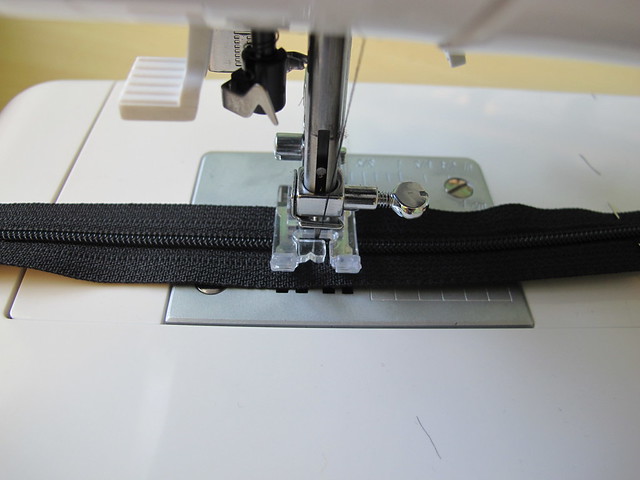
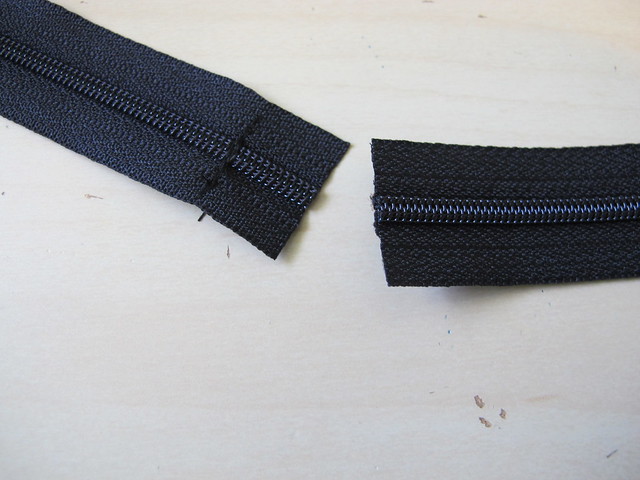
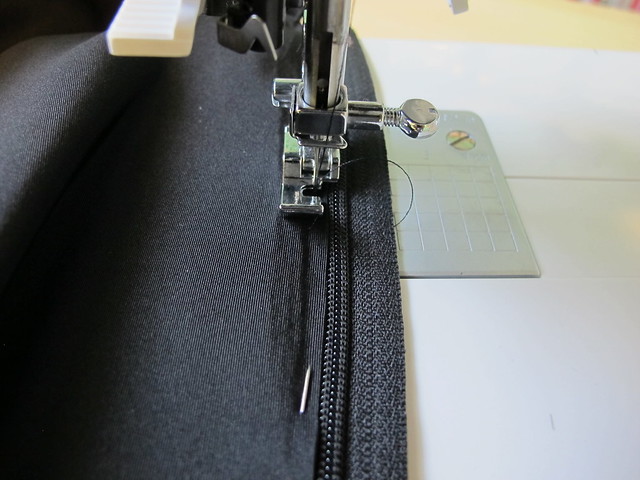
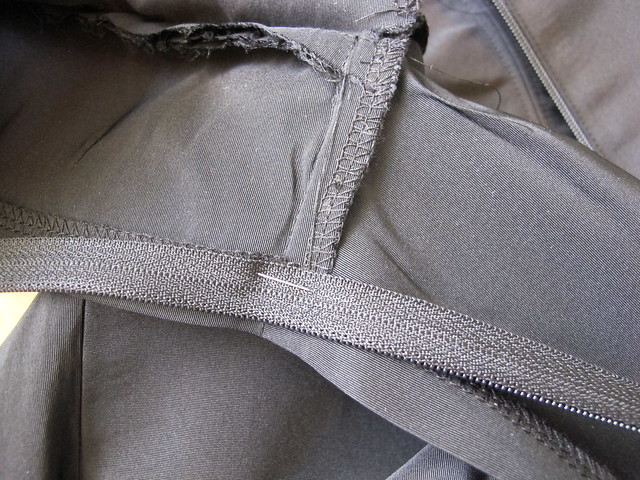
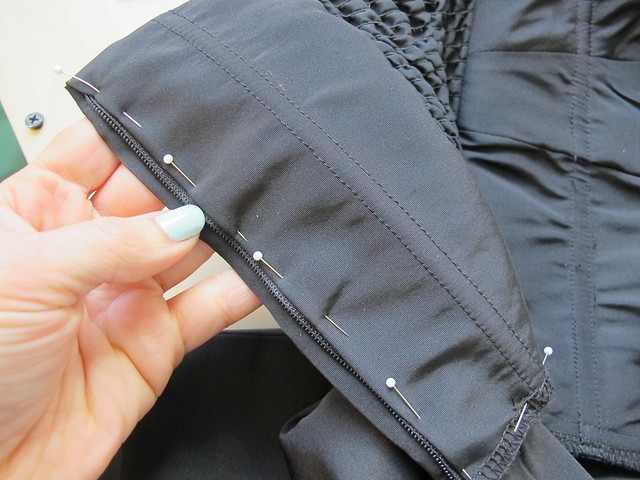
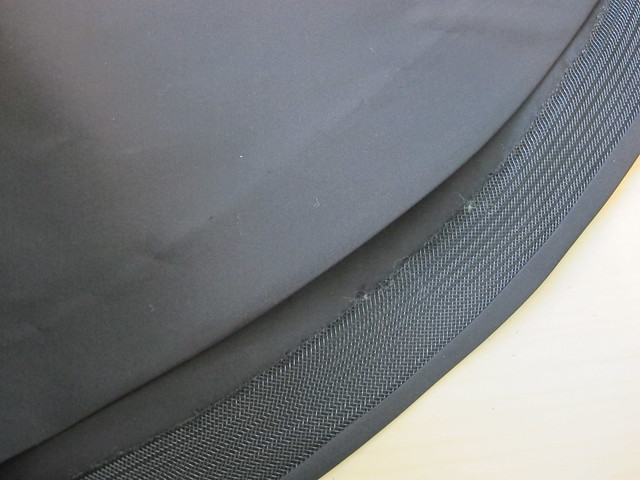
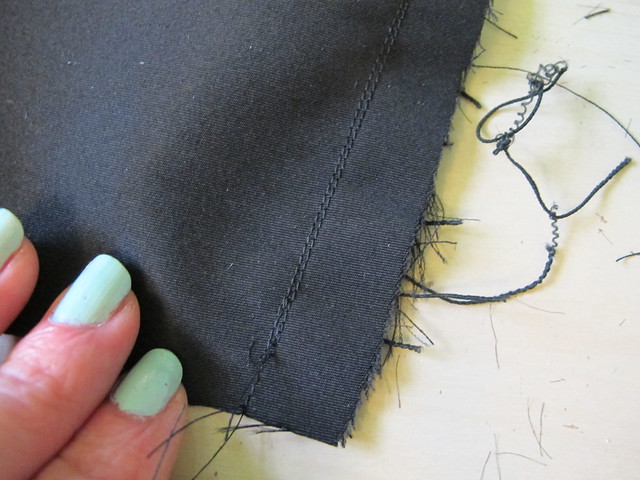
I used plastic sew-in boning for this dress – the kind that comes pre-covered (purchased at Mood Fabrics, if you’re curious!). Spiral steel boning is nice, but a pain to work with (it has to be cut *exactly* to size and capped, and no). This stuff is much easier to use. I straightened out the pieces by blasting them with steam while they were still in their fabric casing (you can also dunk them in hot water to relax the plastic), and then removed the boning and sewed the empty casing to the bodice lining. Like I said, the boning can be sewn through – but it’s easier to get a consistent straight line if the casing is completely flat. After the casing is sewn down, you can just slide the boning in. I trimmed off the sharp corners at the top of the boning so it won’t tear through my dress fabric, and left the ends long (those will be trimmed when I attach the skirt).
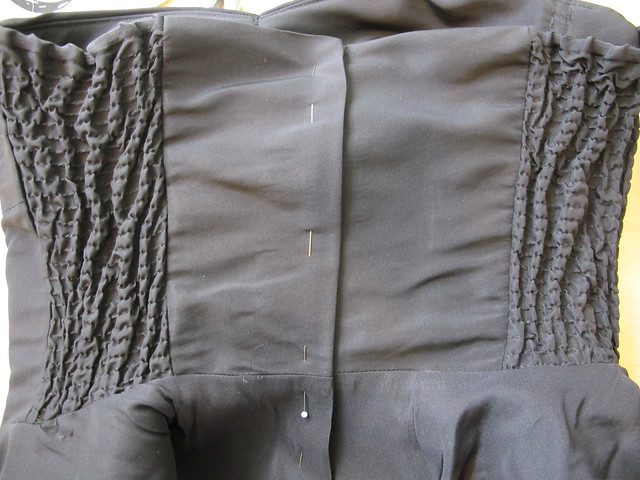
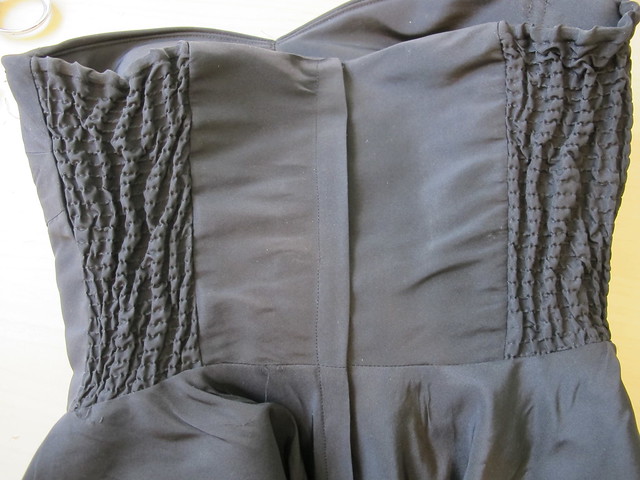
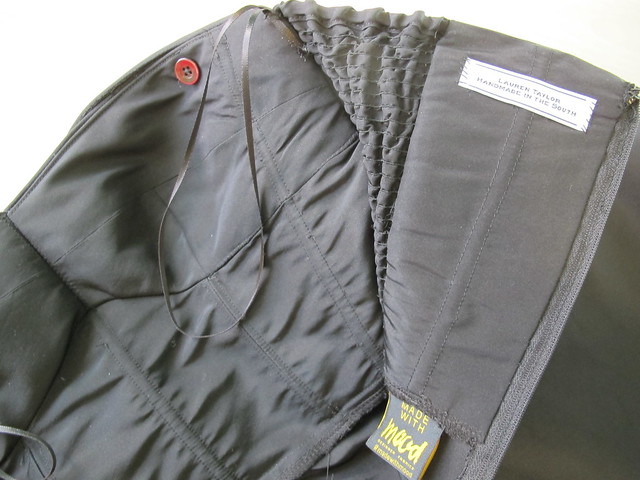
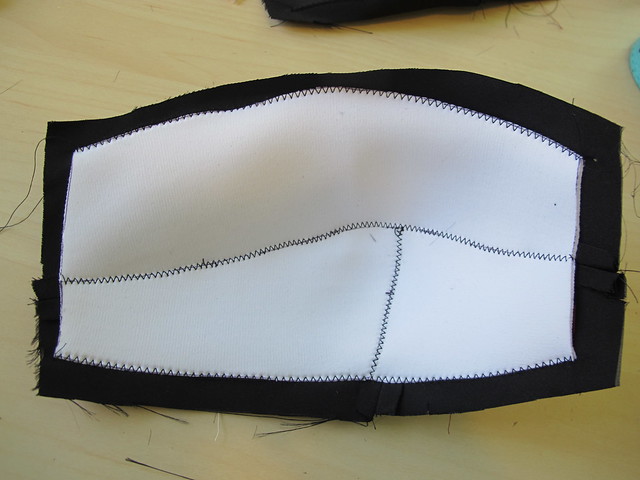
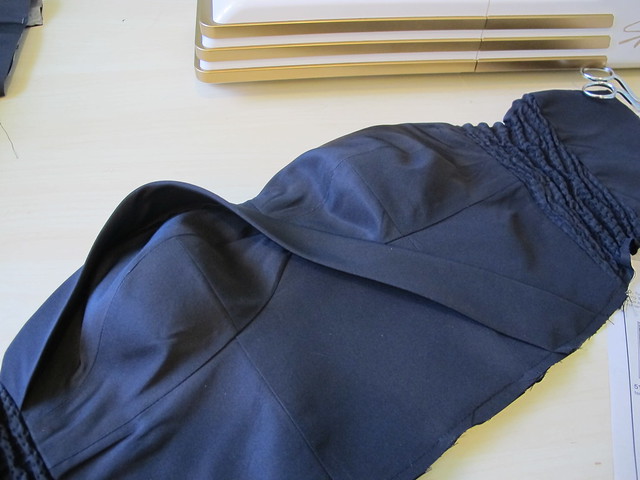
Here is the bodice lining once assembled:
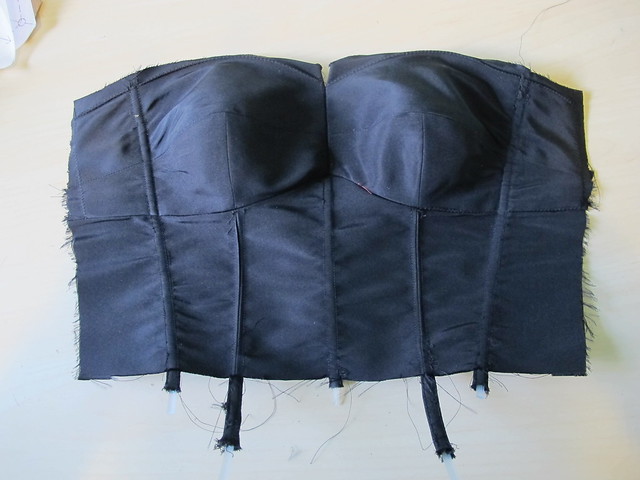
I added a couple extra pieces of boning for additional support – the center front was especially necessary to keep things smooth. Looking good so far!
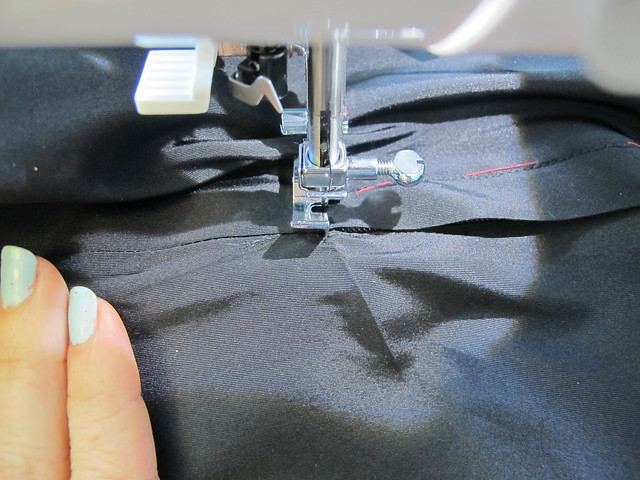
Finally, time to attach those shirred pieces and cut off the thread tails! The pattern has you tie off each individual line of shirring… I don’t know about y’all, but pretty sure ain’t nobody got time for that. Instead, I shortened my stitch length and sewed two lines of stitching when attaching the shirred panels to the rest of the bodice. Once those were secure, I gave all those thread tails a haircut and then steamed the elastic.
It shrunk up quite nicely!
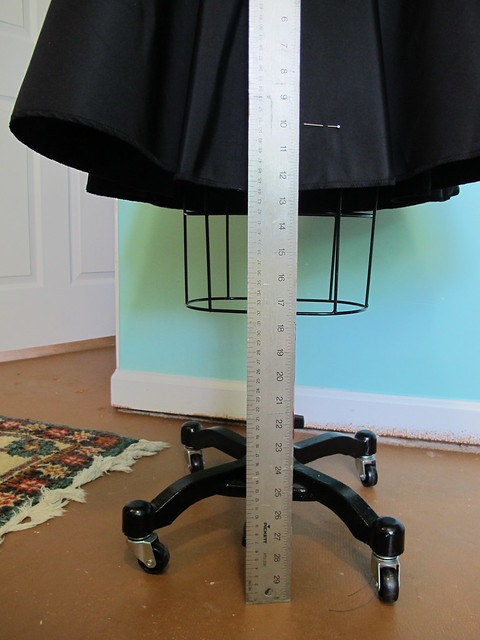
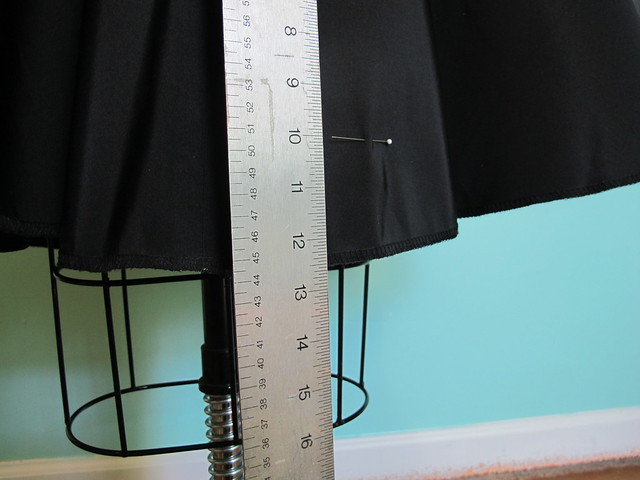
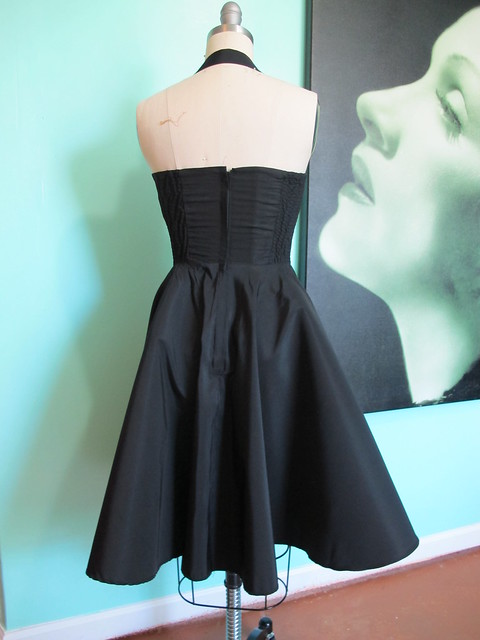
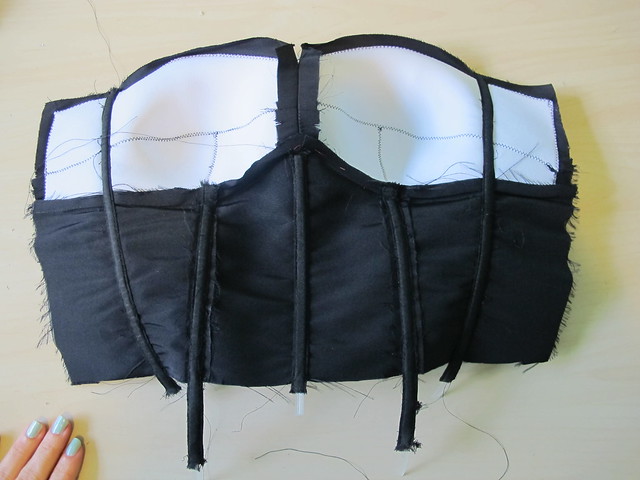
Here is the finished bodice flat.
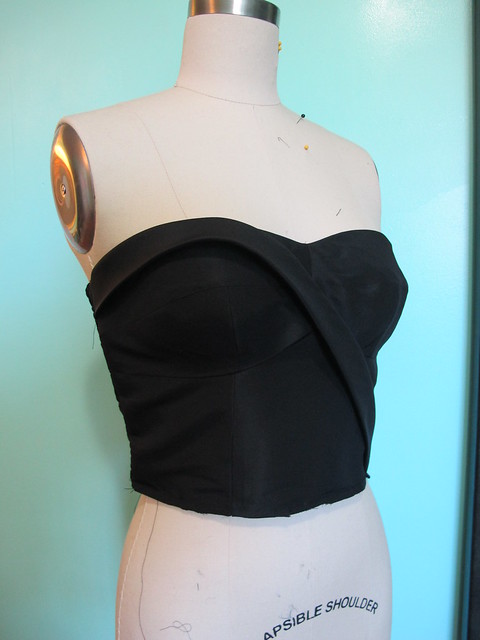
And here it is on my dressform! 🙂
WHEW that was a lot of post! Next week, I’ll go over the rest of the construction. Can’t wait for prom! Yay for fancy dress making! 😀
Tags: butterick, butterick 6019, faille, formal, Mood Fabrics, prom, silk, spiegel, spiegel 60609, work in progress