
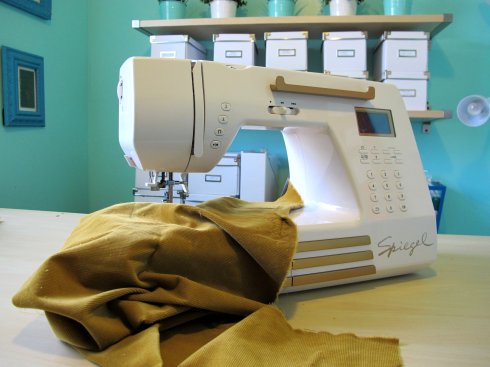
Following up on part one of my Spiegel 60609 sewing project for March (here is that post, in case you missed it!), let’s get to part 2! The bottom half 🙂
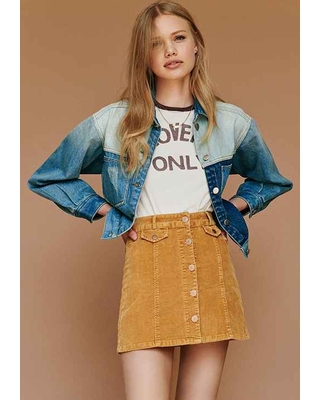
My original inspiration came from a skirt I saw at Nordstrom a couple of months ago – the most adorable a-line mini skirt, made in mustard corduroy with pocket flaps and snap closures down the front (above is an image of it – I think. It’s been a while and I’m forgetful!). I liked it enough to actually try it on (which was weird enough in itself – I haven’t been in a fitting room in ages, ha), but the fit wasn’t very good so it didn’t leave the store with me. Instead, I thought I’d try to make my own (surprise!).
I found this mustard cotton corduroy on the Mood Fabrics website and immediately set about finding a good skirt pattern for the fabric (unfortunately, that fabric is already sold out – sorry! I guess a lot of us snapped it up at the same time – it’s really the perfect shade of mustard, and a nice light weight with a subtle stretch. Just gorgeous!). Lots of googling around led me to eventually settle on the Rosarí skirt as it included pretty much all the elements of the original inspiration skirt, minus the separate side panels and with big (usable) pockets instead of just flaps. Honestly, it totally looks like something I’ve already made, I still wanted to give it a try. The patterns were just different enough to justify a second purchase, and plus, I’ve been wanting to try a Pauline Alice pattern.
Going by the finished measurements, I cut a size 34 and made the mini length with pocket C. Spoiler: The fit is really excellent and I’m totally gonna make this again with those zippered pockets. Anyway, back to the corduroy!
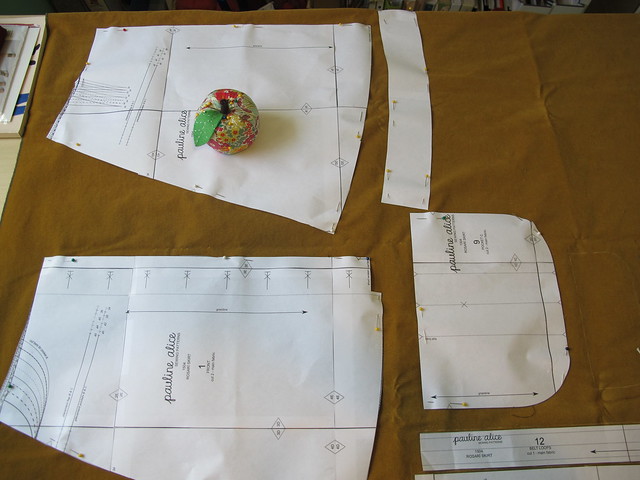
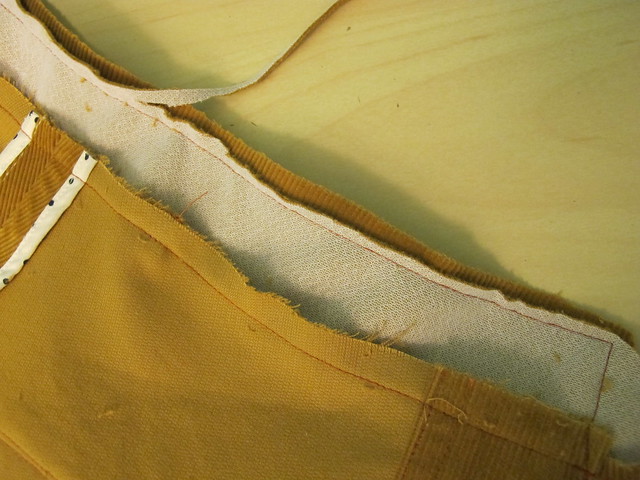
One of the most important things to keep in mind when dealing with corduroy is the very visible nap. On fabrics with a pile (basically… hairs. Velvet, velour, corduroy, even fake fur – are all examples of fabric with a pile), the hairs lie in a particular direction, which is referred to as “nap.” If you run your hands up or down the pile, you can feel the pile. The pile can change color very subtly depending on the direction of the nap, so it’s extremely important to cut everything in the same direction – or else you run the risk of your pieces looking like they are slightly different colors. For my skirt, I made sure to lay all my pieces with the top facing the same end of the yardage, as shown in the picture.
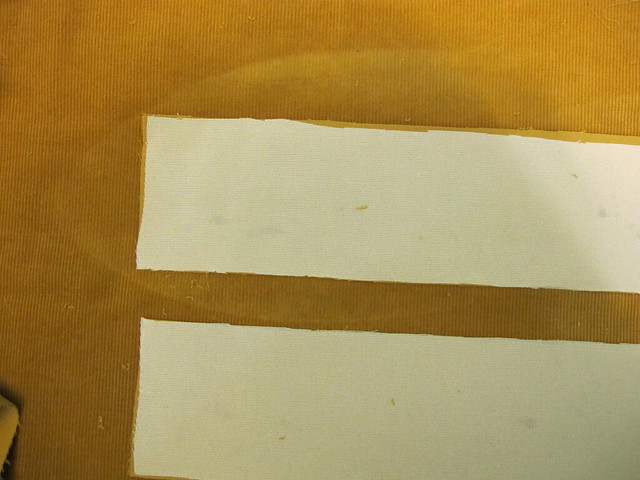
Another issue with naps and piles is that it’s *really* easy to crush the pile with your iron if you’re not careful. To prevent, this, the fabric can’t be pressed against a flat surface (like the ironing board, or the iron itself). One way to do this is to use a velvet needleboard, which has a million tiny wires to make a not-flat surface that the pile can lay against while you press. However, needleboards are freaking expensive (that one is $40, there, I just saved you a click haha)! They are fun to use, but ain’t kind on the wallet. So the cheap alternative is to just use a scrap piece of your napped fabric, and lay it right side up on your ironing board. You can press all your pattern pieces with the right side down, against the scrap fabric, and that provides enough texture to keep the nap from crushing. I had about 1/4 yard leftover from cutting my skirt, so I had a nice big piece to lay on my ironing board for pressing. Look at the picture above – do you see the iron imprints around my interfaced pieces? That’s what happens if you don’t protect the nap before pressing!
So those are two big things to keep in mind if you’re sewing with corduroy (or any other napped fabric, for that matter). Mind the nap 🙂 And just FYI – some napped fabrics (especially velvet and faux fur) require a little more finesse with sewing as they don’t like to feed evenly through the sewing machine. That being said, I didn’t have any problems with this particular fabric. Normally, I would use a walking foot – but the feed dogs on the Spiegel 60609 did a good job on their own, no extra foot required. Yea!
Since this is a really straightforward pattern with very few seams, I thought it would be fun to go the extra mile and do some pretty seam finishing on the inside 🙂 I decided to bind my seams with bias tape, which not only looks nice, but prevents the seam allowances from unraveling as the skirt gets washed/worn. This particular corduroy frays like a MOTHER, so it’s a very necessary step. I could have used my serger, but this looks prettier (and I didn’t have matching thread, ha!)!
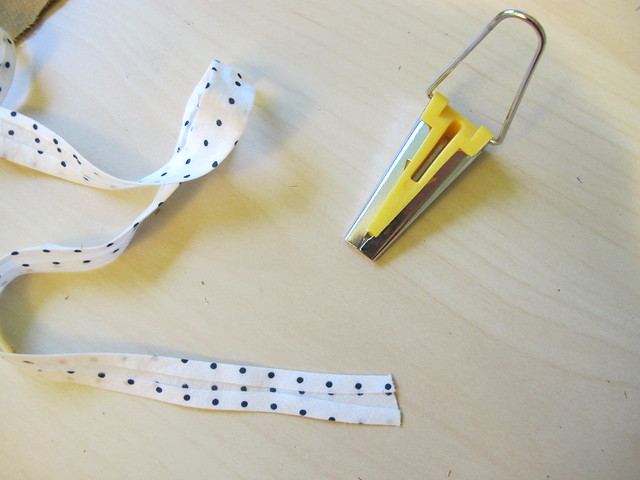
You can use pre-packaged bias tape to bind your seams, but I like to make my own because it’s a bit softer (and you get a waaaay better selection of colors and prints). This particular fabric has showed up on soooo many of my makes – I made a truckload of bias strips with it and it’s like the gift that keeps on giving! 🙂 I will be so sad when it runs out hahaha. Anyway, I like the Clover 1/2″ bias tape maker – I find the width is great for this finish, and the Clover brand ones in particular work really well. I’ve tried cheaper bias makers and they just don’t work as well for me. This one is tight enough at the opening to really fold the bias, and then it’s easy to press it flat so it stays that way.
For this skirt, I did a Hong Kong bound finish – so both sides of the seam allowance are bound and then pressed open. You can also press the seam allowances to one side, and bind them together.
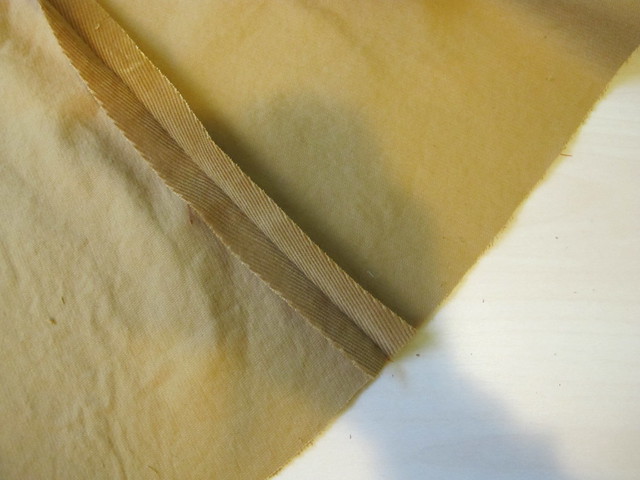
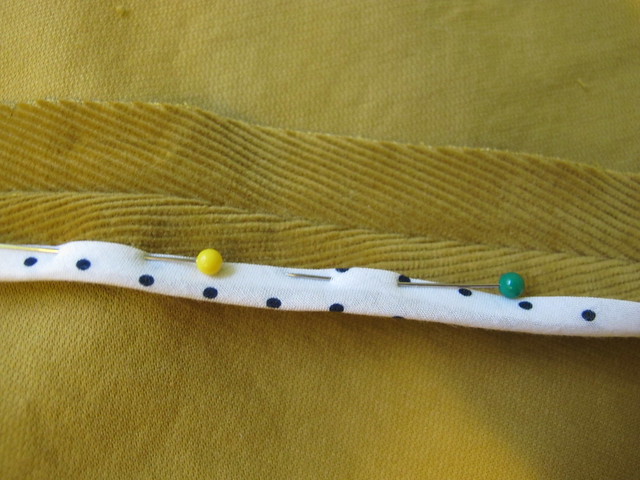
On the first seam allowance, sew the bias binding to the underside (the side that is against the garment when it’s pressed into place), keeping your stitching line right along the pressed crease of the binding.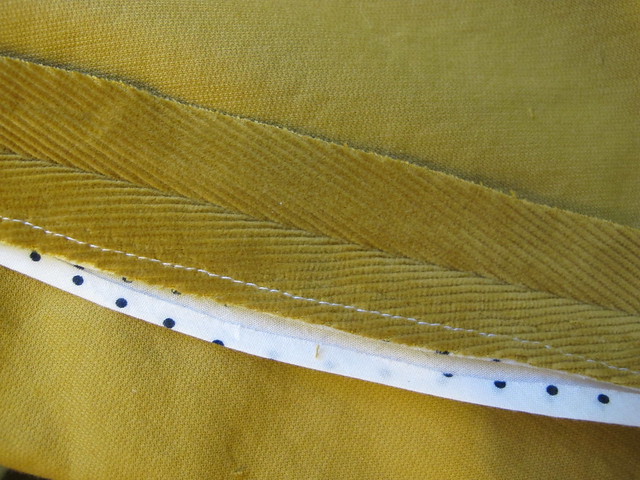
Pull the unsewn side of the bias around so it comes to the top and just covers the stitching line you created. Pin into place, and then topstitch close to the fold. Repeat for the opposite seam allowance, then press the seam allowances open.
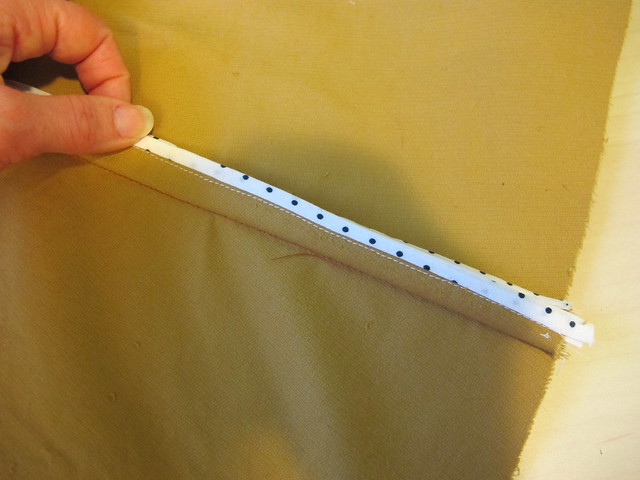
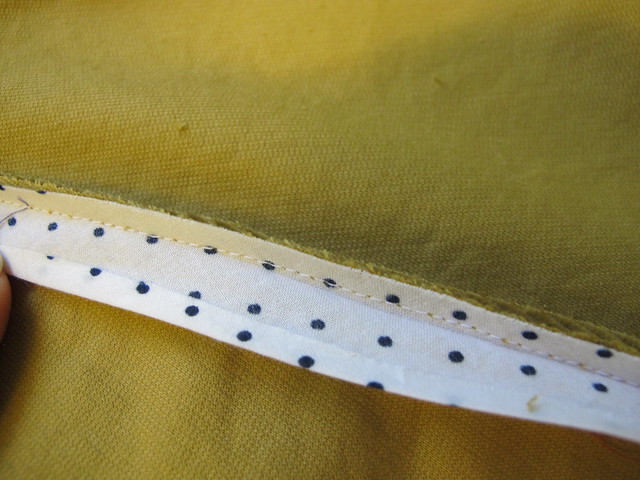
Here is what the underside of the seam allowance looks like. I do the first pass on the underside, so any stray topstitching is hidden when the seam allowances are pressed open 🙂
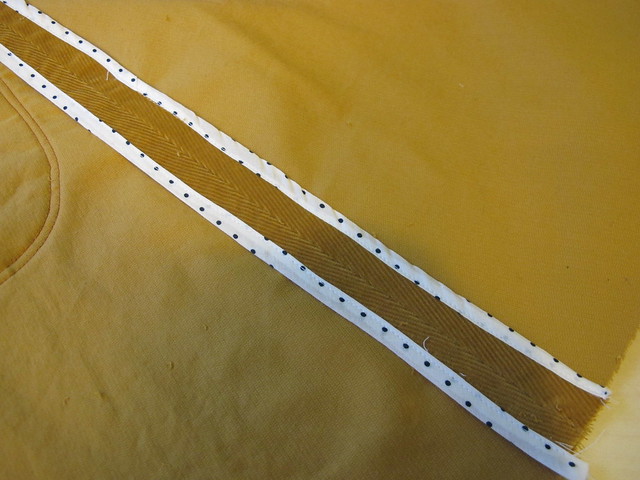
And here are both sides bound 🙂
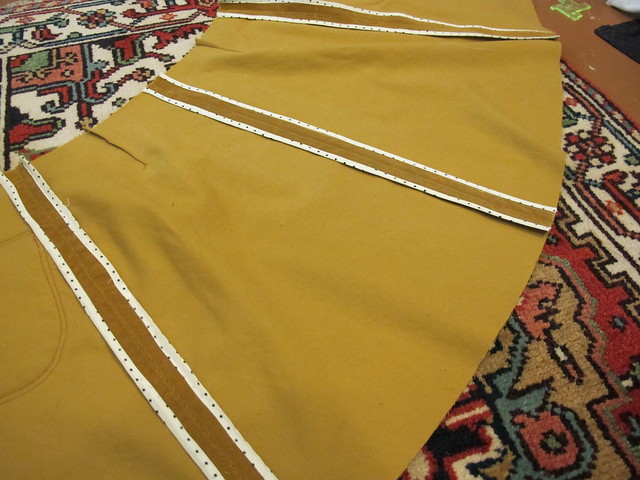
AND HERE IS THE WHOLE DAMN SKIRT 😀
I love this finish! It’s definitely a time-consuming addition, but it’s not so bad when the garment in question only has 3 seams to bind 🙂 And it looks soooo pretty on the inside!
Last corduroy tip! This fabric tends to be really bulky, so it is important to really grade down your seam allowances in any part where there are multiple layers – such as the waistband. I trim my seam allowances down at staggering heights so that there isn’t a giant bulky ridge showing from the outside once the skirt is complete.
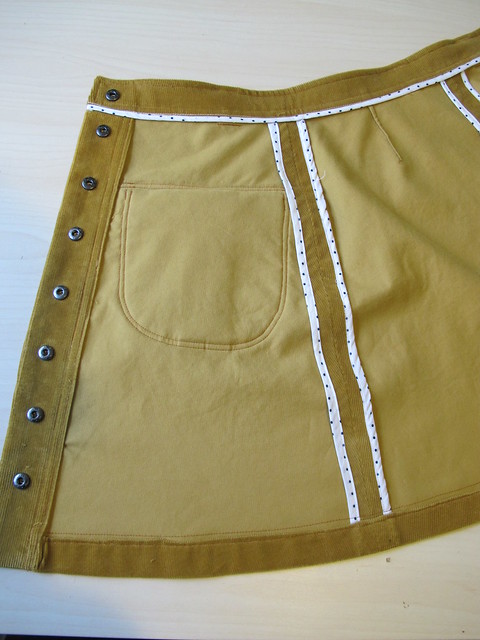
And that’s it! Here’s a little sneak of the pretty insides 🙂 I also bound the lower edge of the waistband – instead of turning it under 1/4″ to hide the raw edge – as I’ve always liked the way that looks in dress pants hahaah. Oh, and my snaps were set using a professional snap setter (cos I work for a clothing manufacturer!)! They look GOOD.
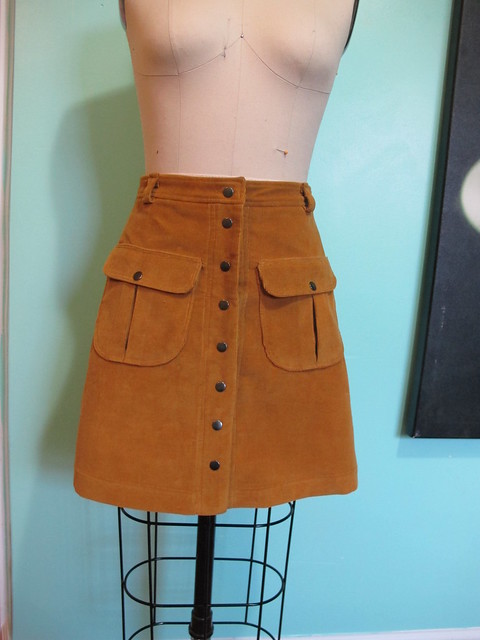

Some shots of the finished skirt on my form 🙂 I’ve already worn the hell out of this thing – the fit is great, I love the mini length, and the mustard color goes with pretty much everything in my closet. It looks EXTRA good with black and white polka dotted silk, though 🙂 I will be sharing the completed outfit next week!


Another inexpensive alternative to a needle board for pressing pile fabrics is a fluffy bath towel. And, while the Clover bias turners are excellent tools, sometimes I can’t remember where I tossed mine the last time I used it … you can also turn those bias edges on your ironing board by inserting two pins into the ironing board cover: Stick them in the distance apart you want your finished width to be, in opposite directions to each other at a steep angle. You make a little pin tunnel that you pass the bias binding through. It curls the edges over and you then steam press them into submission on the other side. If you have an iron that doesn’t turn itself off every three minutes, you can just leave the iron down on the board and pull the binding underneath it for yards and yards. Unexpected bonus is that you won’t burn your fingers on the Clover binder when it heats up.
A great idea about the pins!
I’ve tried that pin trick before and it’s never worked for me 😦 I always go back to my bias tape maker (which I keep in one particular place so I never lose it 🙂 ). That is a GREAT tip about the towel, though!
Love your skirt and saw a couple things I will try 😍 on my next project.
Yay! 😀
I love this! For nostalgia reasons too; I had this exact skirt during my university days over a decade ago. Slighter darker in colour, but I lived in minis like that in those days. Thinking I could still rock that look, even with toddlers hiding behind my legs 😁
I bet you could totally still rock the look!
I have some corduroy in my stash that I have been going back in forth about what to make of it. Thanks for the tips on pressing. Very good info. Loving that color too!
You are welcome!
Very cool skirt! I also made the Rosari skirt recently, but I think I picked the wrong fabric, the thing just stood out stiff like I was wearing a lampshade around my waist 🙂 Now I think I should just try again with better fabric!
Oh, I kind of like the idea of a skirt that looks like a lampshade around the waist! I have skirts like that and they are really fun to wear hahah. Maybe i’m in the minority here, though 😉
Yes, love the skirt. I also had this type of skirt in my highschool/college days but (ahem) that was about 4 decades ago! Just proves that a great style usually returns at some future time. Thanks for a lovely memory. Might make this for my granddaughters.
The good styles always come back for a rerun! 🙂 I bet your granddaughters would look awesome in this style!
This is great! Thank you for the progress shots! I love this type of post. Can’t wait to see the whole outfit!
Thank you! I’m excited to share it 😀
OH HEAH!! Pink corduroy in my stash…. I went in Pacific Trimmings yesterday and asked about snaps! Left with NUTHIN because the guy told me I needed a special tool… What do the folks who have no tools do?? Help!!!!! I too had a similar version of this skirt and wore it all over Italy. Lauren, you’re beautiful and fabulous, as always, thanks for inspiration!
Girl you can buy a tool! They make a handheld snap setter (kind of looks like a single hole punch) and also a little doohicky that you use with a hammer. I usually go the hammer route, helps with aggression 😉 I just went with the professional machine this time because it’s there and why not?! 😀
This skirt is amazing, I love the colour and the cut. I am a little too old to be wearing mini skirts but in my teens and twenties I would have rocked a skirt like this. It looks like a skirt that I had when I was little in the 70s. Very cool. Cheers, Michele
Sister…. With the right tights, I’m pretty sure you can still wear a cute skirt. Helen Mirren is rocking the bikini at 70…… 🙂
I bet you could still rock a mini! 😉
In the early 1970s where I lived, girls were forbidden to wear pants/slacks/trousers/jeans to school. You could wear a skirt so short that your arse and your hoo-hoo hung out the bottom, and a blouse so low in front that your nipples showed — but trousers were deemed “too distracting” for the male students and teachers.
We eventually staged a Pants Day in rebellion. Principal sent home over half the girls in school for wearing leg coverings. County administration was Not Pleased With Him. He had to relent, and there was no going back after that.
Love your fun skirt. I like it much better than the inspiration photo.
Score for me! 😀 haha! Thank you!
Soooo cute. I love your polka dot bias tape!
Thank you!
Sooo cute! Now I need a mustard skirt!
Yeah you do!!!
Very beautiful work! I enjoyed seeing a peek at the insides of the garment, thanks!
Thank you so much!
Oooo..bound seams…So you are a seam-snob..great job! 🙂
From time to time, yes 🙂
Very good! I like it when in front of a crossroads, you alwyas choose the right path, even when it means more work. Self-enrolled seams allowances would have also been a possibility… I totally envy you for the professional snap-setter! And what about working for Suzann? you haven’t explained that arragement…
I’ve mentioned it a few times in blog posts, but I’ve been working for Elizabeth for 2 years now. I’m one of the production seamstresses who makes aaaaall the clothes!
Nice skirt. Can you tell me how a person gets the Spiegel machine serviced?
Any sewing machine service center, regardless of what brand they sell, should be able to service any sewing machine, including the Spiegel 60609.
This is super cute! BTO (better than the original). You have more patience than I for the bound edges. Could you have done it with a folder at work?
Thank you!
Lovely skirt , can see that getting a lot of wear , colour is great , also loving bound seams , going to use that next time I can’t find matching threads for the overlocker! thank you for a great post
What a nice skirt! Which way did you choose to have the pile running? I’m just sewing a velveteen dress (pile upwards!) with Hong Kong-finished seams, and I *think* what you have there are actually bound seams – I believe for a HK finish you don’t turn the second edge of the bias tape under, you leave it raw.
the back/hidden edge, I mean
Love the bias binding! Great!
Did you think about flat felled seams?
yours B
Oh, and thank you so much for the advise on ironing corduroy! Came in just the right moment!
again B
I have this design clothes online and I have been stumped with what to do with it. Thanks for the tips. You’ve given me some ideas.
I have an old machine that only does straight stitch and no serger, so I enjoyed learning about this way to finish seams!
Thx for all of the courdroy tips! !