Tag Archives: flannel

Completed: Black + Grey Flannel Archer

3 Nov

IT’S FLANNEL SEASON AGAIN, Y’ALL.

Plaid Cotton Flannel Archer

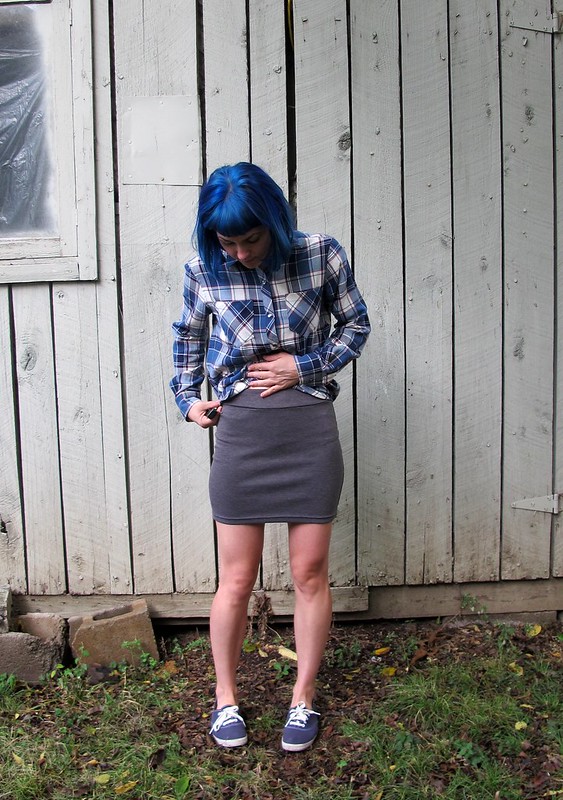
I don’t like the cold – like, at all – but I do love the clothes that are associated with this season. Layers, textured fabrics, WOOL, dark colors and jewel tones… gimmie all of it. Flannel button-ups are at the top of my list. I love that they can be worn solo and buttoned up, layered under a sweater, or layered over a tank or tshirt and left to swing free in the breeze. Snaps at the cuffs make it easy to roll the sleeves up, snaps at the button band make it possible to Hulk out at the end of the day (don’t pretend like you don’t do this with snap-up shirts, you liar).

Plaid Cotton Flannel Archer

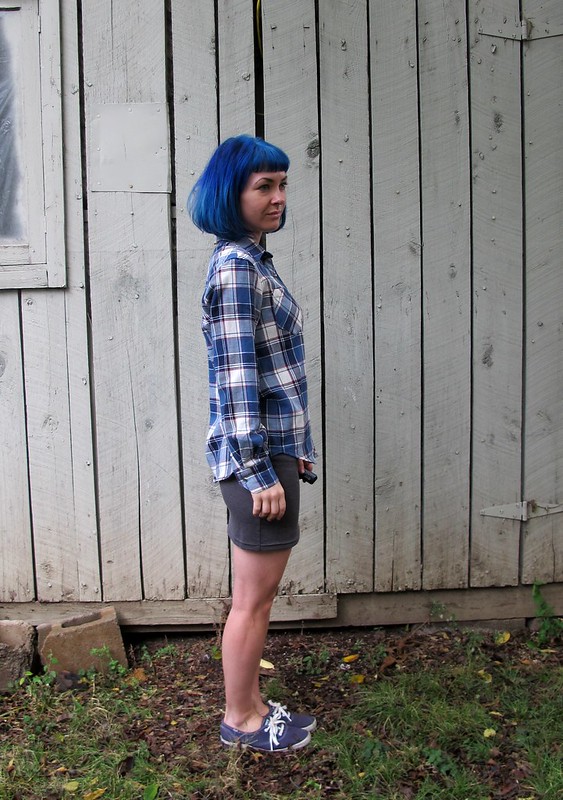
I have a few handmade plaid flannel shirts, all of which I love to wear, so I put a short hold on adding to that stash. I finally allowed myself this year to make 2 more – both out of plaid cotton flannel from Mood Fabrics. This is the first of the two. I haven’t taken photos of the second one yet, but rest assured – it’s almost the exact same as this one, just a different colorway. Because if I am anything, I am consistent haha.

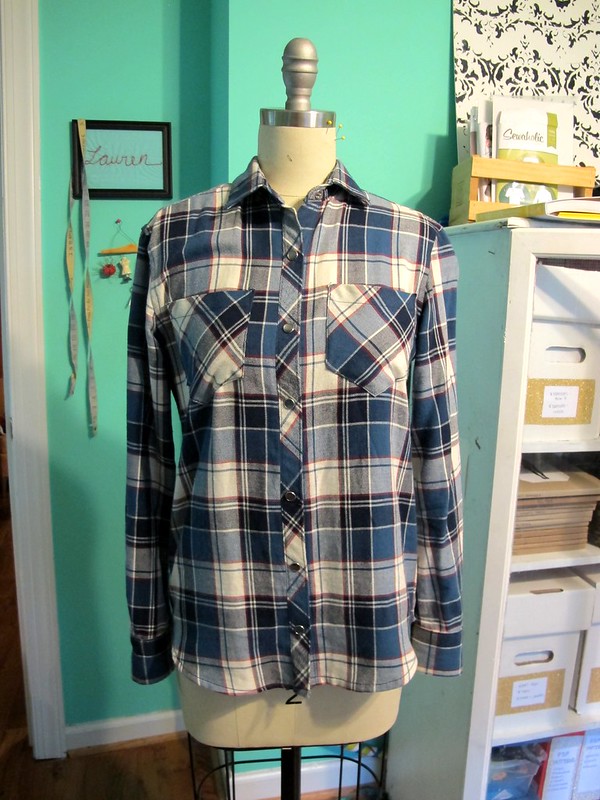
As I said, this is the Archer button up from Grainline Studio. I’ve made this shirt a lot, so there’s not a lot to elaborate on here, just a few small changes. I sewed view A with the angled cuffs, swapped out the included placket for a tower placket (I use the placket from the Negroni pattern, but this placket download from Threads is basically the same thing).

Sizing-wise, I cut a size 0 (which is the size I pretty much always sew with Grainline). One thing I did change with this pattern was to increase the seam allowances at the side and sleeve seams to 5/8″ – the included seam allowances are 1/2″, and I actually sew them at 5/8″ since I like to flat-fell those seams. I’ve noticed that my shirts are pulling ever-so-slightly at the bust now (told ya I’ve gained some weight. And also an entire cup size, ughhhhh), so I added in that extra 1/8″ and the fit is much better now!

Plaid Cotton Flannel Archer

Plaid Cotton Flannel Archer

Plaid Cotton Flannel Archer

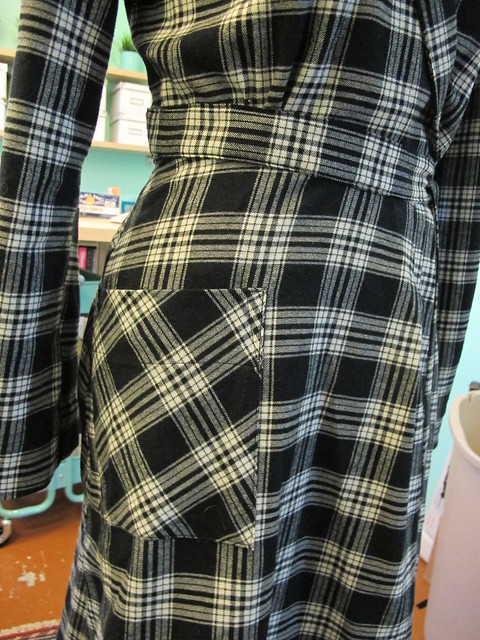
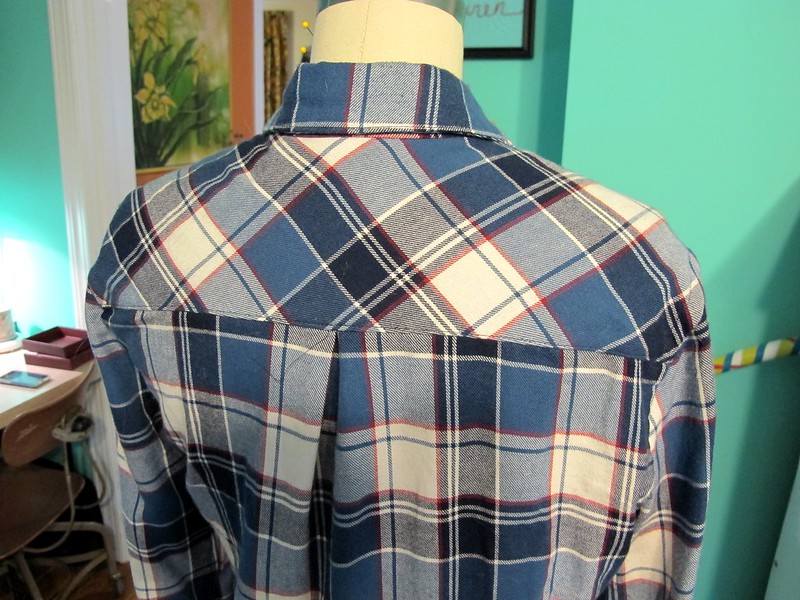
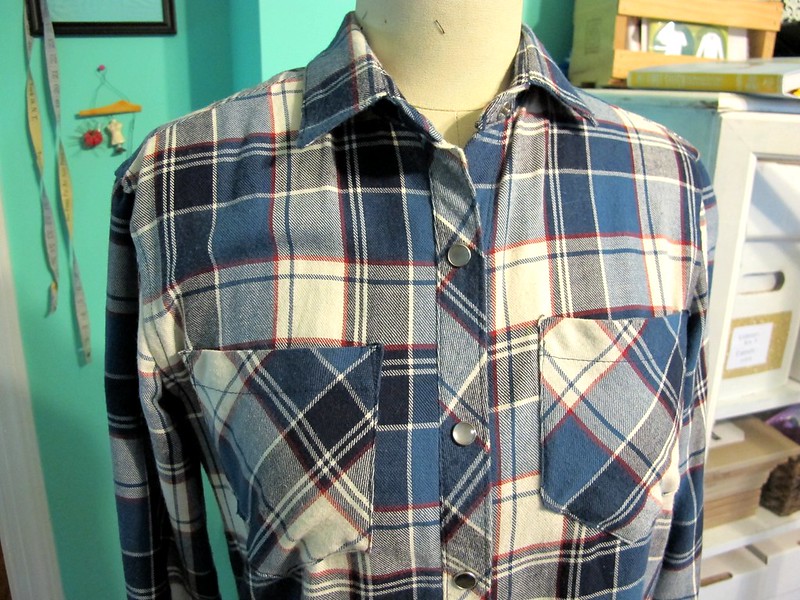
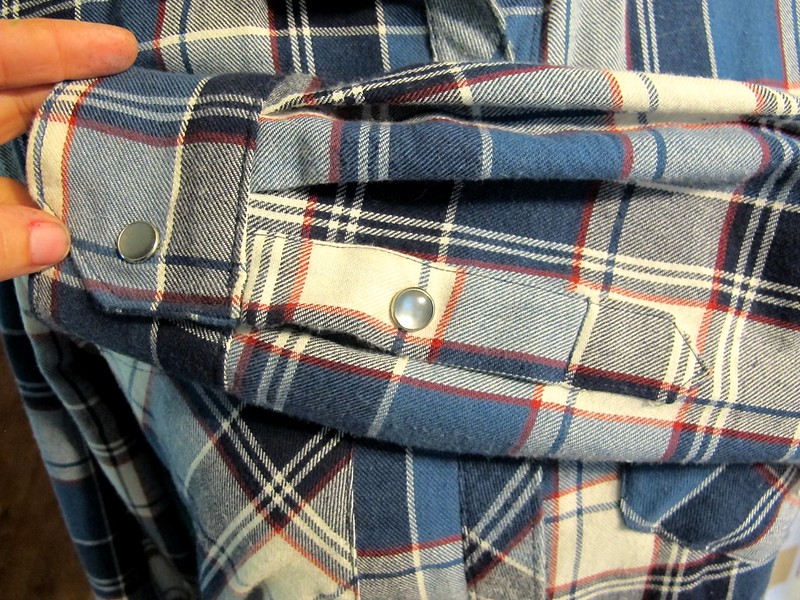
I cut my fabric on the single layer to get the plaid all matched up (see here for my plaid-matching tips!), and cut the outer yoke and pockets on the bias. I originally had the pockets cut to match the plaid at the front, but they matched so well they basically disappeared, and I wasn’t crazy about that look. So I re-cut them and I think they look much better!

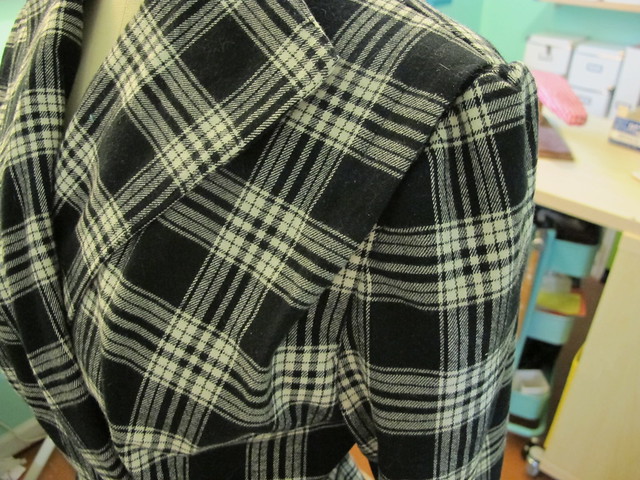
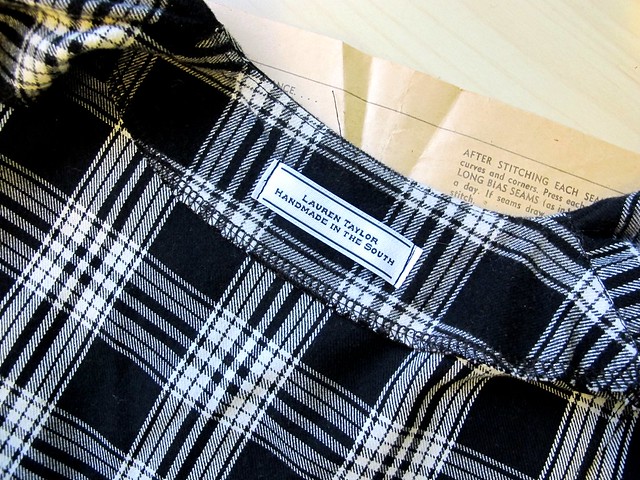
As I mentioned, all seams are flat-felled so there is a nice clean finish on the inside. I used a super lightweight interfacing so that everything would stay nice and soft – I didn’t want a stiff button placket in contrast to the otherwise floppy fabric. Everything is topstitched in black, and I used black snaps for closures.

My cotton flannel was found at the Mood Fabrics store in NYC, back in August. I had a hankering for a new flannel, and I wanted one that was soft and lightweight, like it had already been worn to death. I found this and another similar flannel in a different colorway, both of which work perfectly with the color palette that my closet has ended up morphing into. Since flannel tends to shrink up quite a bit, I washed and dried my fabric three times before cutting into it. I kept the sleeves slightly on the long side, again, in case they decide to shrink up (my first flannel shirt has quite short sleeves now!).

Plaid Cotton Flannel Archer

Plaid Cotton Flannel Archer

Plaid Cotton Flannel Archer

Plaid Cotton Flannel Archer

Plaid Cotton Flannel Archer

Plaid Cotton Flannel Archer

I think that’s all I can say about this make! I’ve already worn it loads and I look forward to some hardcore layering here in the next few months 😀

A couple other things of note:
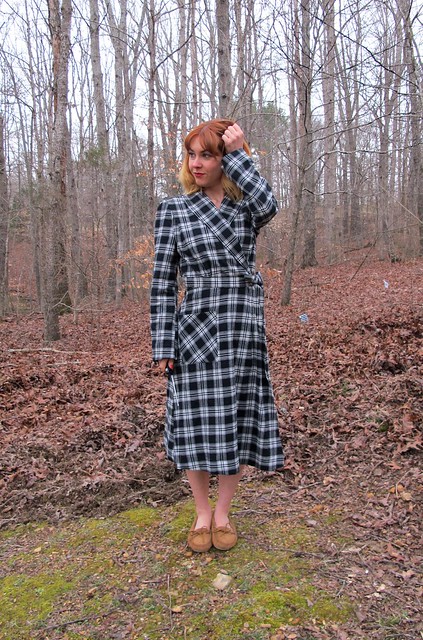
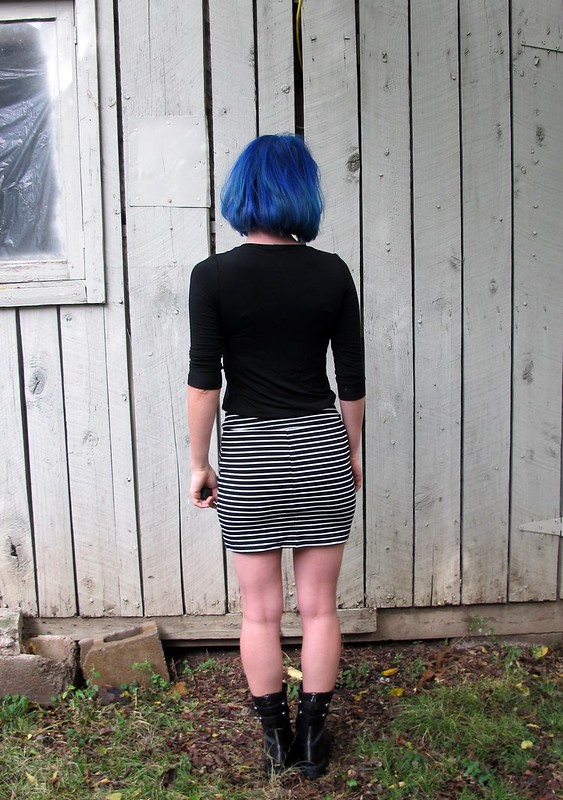
1. Yes, I made my jeans! They are Gingers that I made with veeeeery stretchy twill fabric (like, they are almost jeggings haha I love them). Just some basic black pants that don’t necessarily warrant a whole post. However, here’s a shot of the butt (and my new belt) (and this shirt, too, apparently lol)
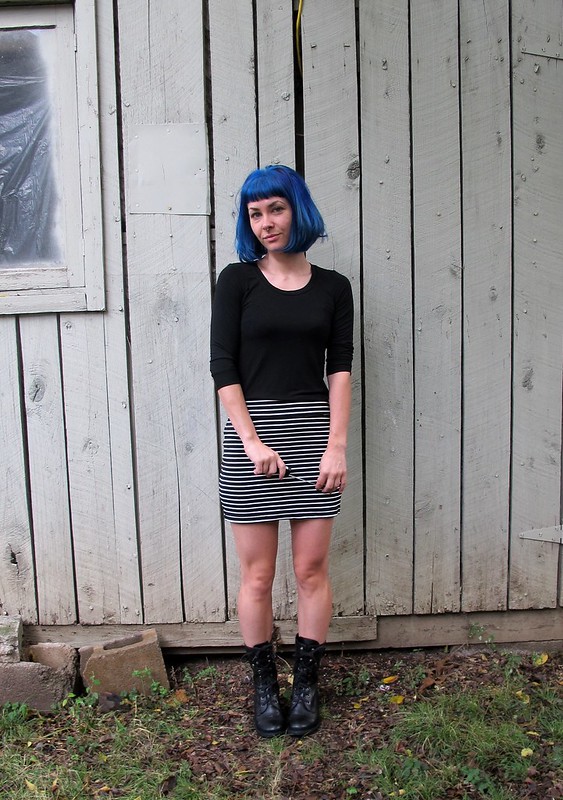
2. Yes, that’s a new hair color! After a REALLY long time (for me anyway haha) with the same color, I decided I was ready for a change! I love the new color so much!

Plaid Cotton Flannel Archer

** Note: The fabrics used in this post were provided by Mood Fabrics, in exchange for participation in the Mood Sewing Network.

Completed: Vintage Simplicity 1799

29 Feb

Raise your hands if you’re ready for spring!

Simplicity 1799 robe

This is the time of year that I spend the majority of my day wrapped up in a robe, at least those days when I’m hanging around the house. My old fleece robe has truly served me well during these trying times, but its really starting to look its age (nearly a decade, I have recently realized!). I wanted to upgrade to something that was a little classier than the ugly fleece – something that wouldn’t make me feel quite so embarrassed to run to the mailbox in. I know, I live in the middle of nowhere – but the moment you run to the mailbox in your robe, that’s the moment someone you know decides to cruise on by.

Simplicity 1799 robe

Simplicity 1799 robe

Simplicity 1799 robe

Since more fleece was out of the question, I went with a soft cotton plaid flannel from Mood Fabrics. Mood has tons of great cotton flannels on their site, but I picked this particular one because it kind of matches my plaid flannel Carolyn pajamas. It’s a thinner plaid, with one brushed side (the other side is smooth, which I used on the inside of the robe). My only complaint is that it’s quite a bit off-grain – which, combined with using a pattern that was decidedly NOT plaid-matching-friendly, meant that I really fucked up the plaid matching on this garment. Or, rather, just threw my hands in the air and gave up about halfway through cutting. I did manage to get the center back and sleeves to have a nice continuous line, but those side seams are all kinds of wrecked. Whatever. Sometimes in sewing, we have to pick our battles. I’m not going to argue with a garment that will get the majority of it’s judgement from my cat.

Simplicity 1799 robe

Simplicity 1799 robe

The pattern I used is Simplicity 1799, a 1940s vintage pattern I’ve had my stash for quite some time. I don’t really sew much with vintage patterns these days – I find the styles to be a little too cutesy and/or dated for how I roll with my clothes lately – but I still collect and appreciate them. And sometimes, you need a little cutesy glamour to make your day prettier, especially when we’re talking about an otherwise ugly robe. Look at how classy those ladies are!

One thing I really love about vintage patterns are all the beautiful details that they include in the design. This pattern has tucks and gathers all over the places, elbow darts, and a boxy 1940s upper silhouette paired with strong shoulders. The instructions are pretty sparse as you can see, but anyone with common sewing sense can easily figure them out. I mostly went my own way – finished all the seams with my serger, left out the shoulder pads, and gave nice 2″ hems on the sleeves and bottom.

It’s really hard to see the pretty details in this, thanks to the plaid clusterfuck I’ve got going on, but I’ll try to show you some highlights:

Simplicity 1799 robe

Simplicity 1799 robe

Simplicity 1799 robe

Simplicity 1799 robe

Simplicity 1799 robe

Simplicity 1799 robe

Not much else to say about this one! Keepin’ it simple and cozy this month!

Simplicity 1799 robe

Note: This fabric was provided to me as part of my participation in the Mood Sewing Network. All declarations and opinions are my own!

Completed: The American Flannel Archer

28 Dec

Another Archer for my winter wardrobe! Yay!

Flannel Archer shirt

I actually finished this shirt nearly 2 months ago, but here I am just now getting around to posting it. I’d apologize for the delay, but honestly, I’m not sorry. It is what it is. On the flip side, I’ve been able to wear it plenty since completion, so I can actually comment on the fit from the perspective of wearing it all day. On the other hand, I’ve already made a bunch of Archers so it’s not like this is some kind of breaking news in my personal pattern collection.

Flannel Archer shirt

Flannel Archer shirt

Since I’ve made this pattern multiple times (see: one two three… well damn, there’s another one somewhere but I can’t find it oh well), I’ll spare you the nitty gritty. Like my previous versions, I cut a size 0, sewed the side seams at 5/8″ and flat-felled all the seams for a nice clean finish on the inside. The buttons are just standard shirting buttons that I had in my stash, and I matched the plaid everywhere except on the back yoke and the pockets, which are cut on the bias. Oh, and I used the pocket piece from my Negroni pattern. It looks like it belongs on a western shirt, and I like that.

Flannel Archer shirt

I really love this fabric, but this particular shirt almost didn’t happen. See, back when I bought flannel from fabric.com for my Carolyn Pajamas, I added a few yards of this Robert Kaufman Mammoth Plaid flannel to my cart so I’d qualify for free shipping (because I just love saving money when it means I have to spend more money first :P). A few days after I placed the order, I received an email from Fabric.com saying that they didn’t have the 3 yards I requested, but they did have 3 cuts (totaling around 1.5-2 yards) of a smaller amount if I wanted that. I didn’t think I’d be able to cut a shirt – let alone plaid-match – out of that small of an amount, so I picked a different plaid from the site and asked them to just change my order. When I received my order processing notification, it said I was only getting 1 yard of the new flannel (not 3, like I’d asked for in the email). I had to call the company and sort things out, and while all this was happening – they completely sold out of my back-up flannel! Argh!! Obviously, that shit wasn’t in the cards for me. I told them to cancel the second cut of flannel and just send me the original piece that I needed to finish my pajamas (which they thankfully still had! Pretty sure I bought the last of it). I was refunded for the 3 yards that were out of stock and I got free shipping too. Cool!

And then they ended up giving me the off-cuts anyway, for free. Just threw them in the package where I was surprised (but also happy because, YAY FREE FABRIC) to find them hanging out with my actual order. That’s cool, I ain’t complaining.

Flannel Archer shirt

Flannel Archer shirt

Since I had the fabric, I decided to try my original plan and make that Archer. Like I said, had 3 cuts – one was a full yard, one was a half yard, and the last was a bit less than half a yard (I’m sorry I don’t remember the exact amounts, but it was a while ago and my order history on the site doesn’t reflect the freeb). It took some ninja cutting skills to cut everything so that the plaid lines matched, but I did manage for the most part. Cutting everything on the single layer helped immensely. That being said, I was still a tiny bit short on one of the fronts, so I ended up having to piece it and there is an extra seam. It’s only a little noticeable, but, again, free flannel shirt. Not complaining.

Flannel Archer shirt

You can see the piecing here, sort of. The top seam that I’m pointing to is the actual shoulder seam. The bottom seam is the result of piecing. By carefully matching the plaids and flat-felling the seam, I was able to get it to blend pretty well.

Flannel Archer shirt

Another minor complaint is that I wasn’t able to properly match the sleeves. The lines of the plaid are uninterrupted, which is good, but the sleeves themselves are not sleeve twins. Again, fabric restrictions. Again, free flannel shirt. Not complaining.

Flannel Archer shirt

Here’s a crappy picture of the inside, in all it’s flat-felled glory. Yay!

Flannel Archer shirt

This flannel shirt is a bit different than my other ones, since the fabric is SO thick. It almost feels like I’m wearing a light jacket, as opposed to a shirt. It’s pretty awesome and super snuggly. The fit is a little more boxy, too, since this fabric doesn’t drape as well as a shirting plaid flannel. I’m pretty ok with that, though! It works well with leggings (shown here with navy Ooh La Leggings which btw FAVORITE comfy lounge legging pattern, hands down!), but also looks good with jeans. I almost wish I’d put in pearl snaps instead of regular buttons, because I really like Hulking out of my clothes, but I think the fabric is just too thick for pearl snaps. But at least I resemble an American Flag! Can’t be mad about that, not one bit.

Oh, right, and I have some winners from the Shutters & Shuttles giveaway a couple of weeks ago! First, thanks for all your awesome comments on that post – Allison and I both really enjoyed reading through them and see what you’d do with the fabric 😀 (even if it just makes me want more of that fabric now so I can steal your ideas). Second, the plural “winners” is not a typo – there are two of you! A little belated Christmas bonus and all that 🙂 Sooo congratulations are in order to both shesewsswell and Samantha! I hope you ladies love this fabulous fabric, and I cannot WAIT to see what you make up with it! ♥

Completed: Albion Jacket for Landon

5 Jan

Happy New Year, everyone, and welcome to 2015! I’d like to start ringing in the new year by showing you something that I made last year (lolz, sorry). It was for Landon, aka unselfish sewing, which makes for a delightful turn of events.

Albion Toggle Jacket for Landon

An Albion jacket! Yay!

Fair warning – we took a lot of photos (if you don’t recognize the background, that’s cos these were taken in the Smoky Mountains! FANCY!), and I had a really hard time narrowing them down. This dude is just so damn gorgeous looking. I’m sorry, but you’ll just have to deal.

Albion Toggle Jacket for Landon

Anyway, I initially planned this coat with Landon earlier in 2014 – according to my Mood orders, it was sometime in January/February. We ordered swatches, settled on fabric and design changes, and I made a muslin. That’s when things just stopped and stayed that way. The muslin was all kinds of wrong and I didn’t feel like dealing with it. I was afraid I might have even cut the wrong size. So, I did what seemed like the most logical solution – I shoved everything in a box and didn’t think about it until a couple of weeks ago, when Landon started asking me again about when he might get his coat. Bless his heart.

Albion Toggle Jacket for Landon

Albion Toggle Jacket for Landon

Enough time had passed to heal my wounds, so I dug out the old muslin and we tried again. The only thing I remembered being wrong was that the sleeves were all kind of haywire – super twisted all down his arm, and the hem went up near his elbow when he raised his arms. I wasn’t sure if the issues were because of how the sleeves were drafted, or if I had just somehow managed to cut the muslin off-grain (totally possible), but I ripped one sleeve off and cut another – on-grain – to test. It must have been a grain issue, because that solved the problem. Other than tweaking a little bit of sizing at various points, and adding some length, the rest of the jacket seemed to fit pretty well. I made one more muslin with all the changes to verify that we were good to go.

As I mentioned, this is the Albion by Colette Patterns. We chose to make the shorter jacket version in a size XS (based on Landon’s measurements and his personal preferences for ease), and added 1/2″ to the side seams for a little more wearing ease (I probably could have cut up one size – but I’d already shredded the remaining tissue, and this was easier. Actually, he says the arm holes fit really well so it’s probably best we stayed with the small size). I also added 1/4″ to the CB fold, just to give him a little more room back there. The sleeves were mostly fine – except I added 1/4″ to the seams below the elbow, and removed 1/8″ above the elbow. I also added 3.5″ to the sleeve length (NO idea why it was so short!). I think those are all the fitting changes I made. Pretty minor stuff.

Albion Toggle Jacket for Landon

Albion Toggle Jacket for Landon

The actual construction took almost no time at all! I had it done within about a week, working off and on as I had time. Since it’s not a proper coat, it doesn’t require any sort of crazy tailoring – really just the same techniques you’d use to make, say, a lined dress. I did add a back stay – I just used leftover muslin – to keep the back from stretching out from all those hugz Landon gives me (aw). I also added interfacing to the places where it made sense to include it – the plackets, the sleeve tabs. It seemed weird that the pattern didn’t mention it, but maybe that’s because it’s written for a heavier coating.

For fabric, I used cotton twill for the outer, and plaid wool flannel for the body lining. The sleeves are lined with silk charmeuse (to aid with getting the jacket on, and also for warmth – cotton isn’t very warm, but wool and silk are!).

Albion Toggle Jacket for Landon

Albion Toggle Jacket for Landon

I also added an interior patch pocket for his phone, as well as a hanging loop at the back neck. The interior pocket is cut on the bias, but it’s lined with silk cut on the straight grain (to keep it from bagging out as it gets used). For the hanging loop, I just used the pattern piece from the Minoru Jacket. Not trying to reinvent the wheel here!

Albion Toggle Jacket for Landon

Albion Toggle Jacket for Landon

Albion Toggle Jacket for Landon

I knew I didn’t want to buy toggles (they’re expensive and they never look quite right), so I made them. I started with these horn toggles from Mood Fabrics, and used scrap leather (given to me by Elizabeth) and cotton cording to make them. I just goggled ‘how to make your own toggles’ (I know, I’m so creative) until I found a tutorial I liked – this was the one I used. I attached the cording to the leather patches at both ends, just for additional strength.

To attach the toggles, I marked their placement on the jacket and then stuck them down with double-sided tape. I traced around the entire toggle – patch and all – with chalk (this is helpful so it’s easy to brush off – I like my chaco liner, personally!) to be really sure of the placement, but the tape mostly helped with keeping things in place while I topstitched. I used my #10 edgestitching foot and just sewed really slow, stopping with the needle down when I needed to turn. Didn’t even need to change my needle – the leather was thin enough for the 80/12. Done and done!

Albion Toggle Jacket for Landon

Albion Toggle Jacket for Landon

I like the 3 piece hood! I like that it stays put, and it has a nice shape (you know how some hoods just kind of suck in around your head? I hate that.). I cut the center piece on the bias to ~add interest~.

Albion Toggle Jacket for Landon

Albion Toggle Jacket for Landon

I REALLY love the lining! I was initially sad to not keep it for myself (that is one helluva a wool flannel, is all I have to say about that), but it’s really perfect for this coat – and those are totally Landon’s colors. When cutting, I just made sure the side seams were matched and that was good enough (and easy!). I’m also really glad we lined the sleeves in silk, because I can’t imagine how awful it would be to try to pull this thing on without slippery sleeves, yeesh. Plus, silk charmeuse. mmm 🙂

Albion Toggle Jacket for Landon

Anyway, I’m happy to report that Landon loves his coat! He has been wearing it nonstop (seriously put it on as soon as I finished it – to wear around the house hahaha), and been showing it off to all his friends. I’m just happy to make him happy (not to mention be off the hook for another year :P). Oh, and in case you’re wondering – that’s a me-made shirt Landon is wearing, too. Gah, I am the best girlfriend.

**Disclaimer: All fabrics were provided to be as per my involvement with the Mood Sewing Network. The Albion pattern was given to me as a gift from my sponsor, Indie Stitches.

Completed: The Bruyère Top

29 Dec

Now that’s one plaid flannel top that definitely doesn’t look like something a man would wear, amirite.

Deer & Doe Bruyere

This is the Bruyère top from Deer & Doe. I’ve actually had this pattern for quite a while – I bought it immediately after it’s release. I LOVE the cute and feminine twist it gives to a plain button down, and I knew it’d be beautiful in a plaid flannel. I’ve been sitting on it for this long because I haven’t been able to find the right plaid flannel – either the plaid was unbalanced (get out of my nightmare), or the colors were ugly, or the flannel was shitty. Or maybe a combination of the three. Either way, no Bruyère for me 😦

Deer & Doe Bruyere

This plaid flannel actually came from the same place that the pattern did – aaaaaall the way from Paris, France! Yup! It was the first piece of fabric I bought during my shopping spree, from Les étoffes du Sentier. The shop had a 3 meter minimum, but it was only 5€ a meter and I figured 3 is a safe number for a button up, so I went with it. It’s a nice soft cotton plaid flannel and I like how the colors are so un-girly, especially with this pattern. And, bonus – even after plaid-matching, I have leftovers to make something else with! Yes!

Deer & Doe Bruyere

First, though, check out those matched side seams! Ahhh yeah!!

Deer & Doe Bruyere

And the other side!

Deer & Doe Bruyere

And the back!

Deer & Doe Bruyere

Hi!

Deer & Doe Bruyere

Seriously, though, I’m pretty happy with how this turned out (if you couldn’t tell 😛 ). I cut the size 34, and the only fitting change I made was to remove a little bit of length from the peplum and sleeves, because I am so short. Other than that, it fits pretty well! I’m surprised at much much I like the collar – I was afraid it would look flat and dumb, but the flannel gives it some lovely body.

For cutting the plaid, I cut on the single layer and cut the waistbands, cuffs, placket and back yoke on the bias. Since the bias tends to stretch, I also cut my second yoke on the straight grain, as well as a second set of waistbands. Further, I interfaced my waistbands (to be really sure they don’t stretch out), as well as the cuffs, collar, and placket. I’m not sure why these aren’t included in the instructions, but my guess is to keep the overall look of the shirt very soft and unstructured. Which is fine, but, I do think anything that has a button will need a little extra help from interfacing. I’d definitely make some test button holes before you commit, at any rate!

Deer & Doe Bruyere

I spent a really long time trying to decide how to order the construction steps for this. The instructions are fine as they are – the process for attaching the placket/collar/facing is very clever (and clean!) and it works. However, I’m a diehard who wanted flat felled seams. In addition – I wasn’t 100% on the fit of the side seams, and I wanted to sew that last so I could tweak it after attaching the placket (when sewing flat felled shirt seams, once generally attaches the sleeves before sewing the side seams. Sewing a flat felled seam in the round just sounds like a painful thing I don’t want to do). Because of how the shirt is assembled per the instructions, you can’t really switch them out – you have to have the hem sewn to add the placket, but the side seams need to be sewn to add the hem. I know this sounds really vague and probably doesn’t make sense, but if you look at the instructions for this shirt vs ones for, say, the Negroni, it will. Anyway, this is what I ended up doing:
– I left the side seams open and sewed about 2″ of the shirt hem by the placket
– Followed the instructions for adding the collar, placket and facing
– Attached the sleeves with flat-felled seams
– Sewed the side seams with flat-felled seams
– Finished the remainder of the hem

That worked out great! My shirt is finished with flat-felled seams and it looks beaaaaaauuuutiful on the inside as well as the out 😀

Deer & Doe Bruyere

What else? Well, I added PEARL SNAPS. God, I love those things – nothing like being able to Hulk out of our clothes at the end of the day amirite. I feel like the very top needs a pearl snap (it’s not marked on the pattern), however, I couldn’t get the prongs through all the layers so no pearl snap there!

Deer & Doe Bruyere

Here’s the inside. I finished the edge of my facing with pinking shears – I think anything else would show a ridge on the right side. Of course, I probably should have first sewed a line of stitching before pinking, because it’s already fraying like crazy, but whatev.

Deer & Doe Bruyere

Deer & Doe Bruyere

I guess that’s it! Glad I finally got this finished – plaid flannel shirt of my dreamssss ♥

Deer & Doe Bruyere

Hope everyone had a Merry Christmas! Just a couple days left until the end of the year – aiee!

Completed: Margot PJ Pants (+Love At First Stitch) (+GIVEAWAY)

31 Oct

Hey everyone! Today I’m joining the US masses to help promote Love at First Stitch: Demystifying Dressmaking by Tilly Walnes, my friend and fellow blogger.

51Nr-WjrMQL

Most of y’all probably alreaddddyyyy know all about this, but in case you haven’t – Tilly is a fabulous blogger whose clear instructions and gorgeous patterns are perfect for beginner sewers who feel overwhelmed by mysterious sewing jargon and confusing instructions. She’s done so well, in fact, that now she’s got a whole book deal out of it! Which is pretty awesome! I was contacted by Roost Books to see if I’d like to help promote the US launch of the book – it’s been out for a few months now, but we’re just now getting it here! As I’ve mentioned before, I’m kind of over book reviews – but I want to support my friends in their business endeavors, so today you get a non-review-review 😉

Margot PJs

For my non-review-review, I decided to try out one of the patterns in the book – the Margot Pajamas! For someone who loves pajamas as much as I do, it’s kind of surprising to know that I’ve never actually sewn a pair of pj pants (those Lakeside Pajamas don’t count :P). I think pajamas are kind of a rite of passage for most first-time sewers, but not me, I guess! So it’s a first for me as well 🙂

Anyway, before we go too much into the pattern, I did want to talk a little bit about the book.

Margot PJs

Margot PJs

MOSTLY THAT IT’S FREAKING ADORABLE!

Everything is laid out with bright and clear photos (LOTS of photos, I might add – it’s like reading a really good blog tutorial, except in book form), and the book progresses to build the skills you need to get into dressmaking. Starting with threading the machine, to understanding how to cut fabric, to choosing a size – it’s very well thought out, very beginner friendly, and shit, I wish this existed when I was learning how to sew. Probably would have ruined about half as much fabric if that had been the case 🙂

Margot PJs

Each included pattern comes with sections to “Make It Your Own,” for customizing and, well, making it your own.

Margot PJs

There are also blurbs for making sewing a lifestyle, including this one that is my favorite – How to Behave In A Fabric Store. Haha!

Anyway, the short: it’s adorable, it’s well-written, and it’s great for a beginner. For those of us who are not beginners, the patterns are still pretty cute (you can see all the patterns in the book here). The only drawback is that the patterns are printed double-sided, which means you have to trace them. Boo! I imagine this was done to save $ on printing costs. Also, I just hate tracing. That’s a fact of life.

That being said, I did muster up the tracing stamina to at least make some damn pajama pants. Wanna see?

Margot PJs

SUP, MARGOT. How YOU doin’?!

I hope you enjoy this new background that is my living room! To answer your questions: Yes, we love America here. And, yes, that’s a creepy-ass painting behind me, and no, I have no idea who painted it. I found it at Goodwill for $7 and it had to come home with me because reasons. It’s painted on plywood and literally drilled into the wall. My mom hates it.

Margot PJs

Margot PJs

I cannot believe how long it took me to finally make PJ pants! They are SO easy and satisfying to make – even with my construction modifications (more on that in a sec). I am between sizes in the book’s size chart, so I spliced between the 1 & the 2, and removed about 1/2″ of length from the crotch (just folded it out horizontally across the middle), as well as 1″ from the length. I also narrowed the legs a little – mostly because I was short on fabric (oops).

Margot PJs

I admit I didn’t much follow the instructions – mostly because they were way too hand-holdy for my needs. However, pj pants are pretty easy to throw together. To match the plaid, I cut everything on the single layer and used my walking foot to feed things evenly through the machine. All seams are serged to prevent unraveling.

Margot PJs

I made a couple modifications to increase the comfort level of these pants. For one, I’m not a fan of drawstring-only pj pants. I prefer a little elastic! To do this, I cut a length of elastic (1.5″ wide, because that’s what I had on hand – and it also is the same width as my ribbon) about 8″ smaller than my waist measurement (enough that it almost came around my hip bones) and sewed ribbon to either end. I threaded it through the drawstring opening as instructed, being careful not to twist the elastic.

Margot PJs

Once the elastic was in place – centered and flat – I sewed down the center back seam with a straight stitch. This keeps the elastic in place so it doesn’t shift (and I don’t accidentally pull the elastic/ribbon out!). Since the ribbon I used is polyester, I burned the edges to prevent them from fraying.

Margot PJs

The finished waistband is much more comfortable, and – bonus! I can actually pull these off without untying the ribbon. Haha!

Also, ribbon bonus: Pretty sure that stuff came from the bouquet I took home from my BFF’s sister’s wedding last year. How’s THAT for recycling? 😉 Even better – now every time I’m lounging on the couch in my comfy pjs, Landon will be reminded that I CAUGHT THE BOUQUET, HELLOOO??

Margot PJs

I ~made these my own~ by adding a pocket to the back – using my phone as a guide for the size (the pockets on most of my pj pants are too shallow, which I hate!). I cut the pocket on the bias for a little interest, and used my existing pj pants to determine the placement.

Margot PJs

The legs have a nice deep hem – partially because I love the way it looks, and also in case these shrink up more when they’re washed. The extra hem means I can let the length down if need be.

Speaking of which, isn’t that fabric glorious? It’s from Pink Chalk Fabrics, a lovely cotton flannel from Robert Kaufman (which appears to now be sold out – here are their other available flannels). When I say this stuff is lovely, I mean it’s AMAZING. It is SO SOFT AND SNUGGLY. I was seriously bummed when I finished these, because I wanted to put them on immediately but I knew I needed to wait to take photos (and have since not taken them off. They are the best!). Between this fabric & the polka dot chambray I used, Robert Kaufman is about to be my favorite fabric source, possibly. I kind of wish I’d bought more, especially now that I see they are sold out 😦

Anyway, I wanted to do something fun with these photos, but unlike Tilly – I don’t have a cool ~retro~ phone to pose with.

Margot PJs

WHAT I DO HAVE, THOUGH, IS A COMMODORE 64.

Margot PJs

“Aw hell yeah, mom, this is the best Christmas present ever!”

Margot PJs

Don’t mind us, we are just having a moment here.

GIVEAWAY IS NOW CLOSED

Anyway, if you read this far- congratulations! Let’s have a giveaway! Roost Books sent me two copies, which means I have one to mail to someone! If you’d like to enter the giveaway to win your very own copy of Love At First Stitch, leave a comment on this post and tell me which pattern you’re dying to make (again, you can see all the patterns here). That’s it! Because we are celebrating the US release of this book, this giveaway is open to US READERS ONLY (sorry, my international friends! I still love you! I’ll see some of y’all in London next month!). The entries will close one week from today, Friday, November 7, 2014 at 7:00 AM CST.

GIVEAWAY IS NOW CLOSED
If you’d like to go ahead and get a copy of the book anyway, you can either buy it on Amazon or directly from Miss Tilly herself (and unlike Amazon, she will even sign it for you!). Good luck, y’all!
GIVEAWAY IS NOW CLOSED

Disclaimer: I was given Love At First Stitch for free from Roost Books, in exchange for a review. All opinions in this post are my own.
From Love at First Stitch by Tilly Walnes, © 2014 by Tilly Walnes. Reprinted by arrangement with Roost Books, an imprint of Shambhala Publications Inc., Boston, MA.

Completed: Two Colette Mabels

8 Oct

I totally skipped all the hullabaloo that came out when the Colette Patterns Mabel skirt was released – but that’s ok! I’m here now, reporting for duty!

Colette Mabel & Sewaholic Renfrew

I actually made two – just to be safe!

Colette Mabel & Grainline Archer

Let’s start with a basic Mabel lowdown. I made the grey version first, out of some leftover ponte knit that I used to make a pair of Ooh La Leggings (not pictured – because neither photographed nor blogged, but they are basically the same thing as these black ponte leggings except, you know, grey). I actually have no idea why I bothered saving that little piece of fabric, because it was about half a yard and thus not enough to do anything with – and the ponte is pretty thick, which means it wouldn’t work for something like, say, colorblocking a tshirt (which can be a good use of leftover knit scraps, if you tend to get hoardy like I do). Anyway, it’s a good thing I did, because I had exactly enough to make a little Mabel mini! Yay! I love it when these things work out!

Colette Mabel & Grainline Archer

Colette Mabel & Grainline Archer

Mabel Mini 1 is view A, size XS. I sewed the pattern exactly as per the directions, except I opted to understitch the waistband lining (I used my machine’s lightning bolt stitch – kind of like a very short zig zag stitch), to keep it from sticking out. The seams of the skirt were sewn on my serger, and the hem is done with a twin needle. From cutting, to sewing, to hemming – this entire thing took… I dunno, maybe 30 minutes? It was VERY fast.

I didn’t really use the instructions – I mean, it’s a knit skirt, it doesn’t need much introduction – but they looked to be pretty good, based on my glance over. Like the Moneta pattern, they include lots of tips and info on how to sew knits with a regular machine, which is always nice. The only thing I did not like about this pattern was taping it together (I have the PDF). Holy shit, talk about too many pages! My disdain for PDFs is no secret (I get why other people like/need them… no defense necessary 🙂 But for me? Nope, no way! Can’t do it!), so maybe I’m biased – but this one seemed to be unnecessarily large & unwieldy. My advice: get the paper pattern. Ha!

Colette Mabel & Sewaholic Renfrew

Anyway, speedy instaskirt is the reason why I obviously needed to jump right into Mabel Mini 2 immediately after 😛

Colette Mabel & Sewaholic Renfrew

I made a couple very minor changes for this one – I took in the center back and side seams by about 3/8″ (in retrospect, I should have taken in more, because it’s still a little loose around the waist and thus rides down farther than I want the rise to sit), as well as the waistband by the same amount. I used the last of my black striped ponte from Mood Fabrics NYC store. Again – 30 minute skirt. Talk about fast fashion, amirite.

Colette Mabel
Colette Mabel
Colette Mabel

For both skirts, I used a lightweight black rayon jersey (the same jersey that my black tshirt is made out of, incidentally. That tshirt is a Renfrew, by the way!) to line the waistband. I considered using a self-lining – but decided the fabric was a smidge too bulky, so I went with a lighter weight lining, which ended up being a Good Decision.

Oh yeah! I made that plaid flannel button down too! SUP!

Grainline Archer

This was made using the Archer pattern. I actually finished it waaaay back in… March. Yep. I got it in my head that I needed to make a new plaid Archer to wear when I went to NY, so I nearly killed myself trying to finish the shirt in something crazy like 2 days. I did end up finishing it – and bringing it to NY to wear – and I learned two things about the experience:
1. My life did not suddenly become more fabulous because I had a new shirt to wear while on vacation; and
2. Pushing myself to the point of exhaustion to finish something for a self-imposed deadline is not fun at all. Seriously – it’s shitty, it makes me anxious for no reason, and I didn’t enjoy any part of sewing that shirt. Which is sad, because button downs are one of my favorite things to sew! I love how precise the stitching is, and all the little details that make it special. I unfortunately didn’t get to enjoy any of that because I was too rushed trying to hurry up and finish (when, realistically, I should have either started earlier, or accepted that I just wouldn’t finish before I left), and yeah, that’s just lame.

So, with that being said – no more unnecessary last-minute vacation sews with shitty deadlines! If I need clothing that quickly, I will buy it (lol jk I’LL NEVER BUY CLOTHES AGAIN)(ok, seriously, kidding with that last part… mostly.). So far, I’ve done a decent enough job of putting this into practice, so that’s good!

Grainline Archer

And, for what it’s worth – I do like the shirt. I could have done a better job with it – the topstitching is not my best, and the grain is all wonky because the plaid fabric was hideously off grain (like, to the point where I actually cut the entire shirt twice. Yes. I did that. And it’s still pretty bad) – but it is what it is. It’s snuggly, it’s warm, and I also just realized that I made it to match the leggings that I made with the rest of that grey ponte fabric hahaha omg my life is fabulous.

Grainline Archer

Anyway, I hope you liked my Archer story. Have some pearl snaps.

Grainline Archer

And a sleeve placket while we’re at it!

Ok, so here’s my dilemma – and I’m hoping y’all can help me. I HAVE NO IDEA WHAT TO WEAR WITH THESE SKIRTS. I feel like everything I put on just gives me weird proportions! The tops I’m wearing here are ok, I guess, but that’s about the extent of what my closet can offer. Most of my other tops just look… weird? I think the biggest problem is the waist line- it kind of hits at a strange place:

Colette Mabel & Grainline Archer

See what I mean? It’s about right at my belly button – which isn’t quite high waisted, and not quite low waisted. I can’t tuck anything in – partially because it’s very lumpy under the ponte, and partially because the waistline hits at a sort of wide point on my body. Untucked, most stuff just looks sloppy or gives me that weird long-abdomen proportion that we just loved soo much in the early 00s (y’all know what I’m talking about!). So yeah, can’t figure that one out. Any suggestions? Should I stick with more fitted, cropped sweaters (such as what the model is wearing on the website)? HELP ME I CAN’T ADULT.

Colette Mabel & Sewaholic Renfrew

Anyway, let’s talk! Answer one or more of the following:
– What shirts should I be wearing with these skirts?
– Have you ever made yourself sick by rushing to complete a garment before going somewhere?
– What happened when you finished it? Did a unicorn grant you 3 wishes or did you just realize that life was still doing life things and dammit is it Monday already?
– Seriously, though, what should I wear with these skirts?

** Necessary disclaimer: I received the Colette Mabel skirt from Sarai of Colette patterns, gratis. No review was requested – but as always, all opinions are my own. All fabrics in this post were purchased by me 🙂 I do get a monthly Mood allowance, but that doesn’t mean that I don’t also spend plenty of my own money there! Just wanted to clear that up 🙂