
Hey everyone! A little different sort of post for today – instead of showing you a finished project, I want to share some progress pictures and tips. I used to do these kinds of posts in the past, and I’ve missed nerding out on construction talk. Since this is my blog and I do what I want, that’s what you get today 🙂
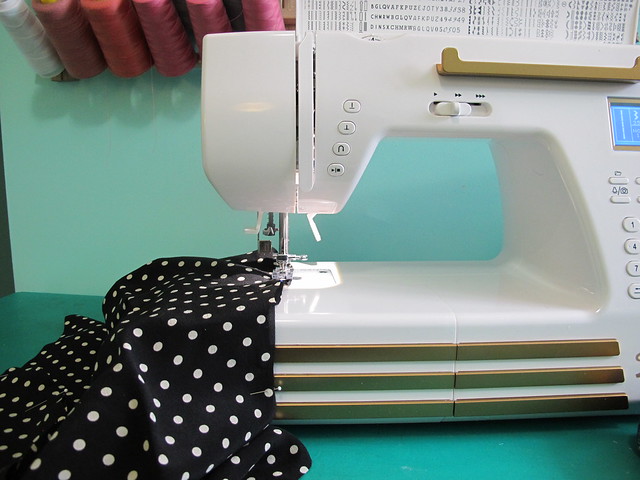
Plus, I’m gonna make it on my new Spiegel 60609 sewing machine! Woohooo! 😀
This is *also* part of my Mood Sewing Network project for March, so you’ll have to wait a couple weeks until the Big Reveal 🙂
Anyway, I bought this fabulous black with white polka dot silk crepe while I was in Mood Fabrics flagship NYC store last November. I decided to make a silk button up shirt with it, although originally I planned to do a shirt with the standard collar (as I tend to do). Right before cutting into it, I thought it might be cool to give the shirt a big floppy bow at the neck instead, just to mix things up a little bit. I have vintage Simplicity 4676 in my stash, which I’ve made before. While I love the way the bow looks, I’m not as big a fan for the shape of the actual shirt – so I just put the bow on my beloved TNT Butterick 5526 and it worked out perfectly! As long as the neck measurements on the two patterns are similar (which for these, they are), then it’s easy to sub one neckline for another.
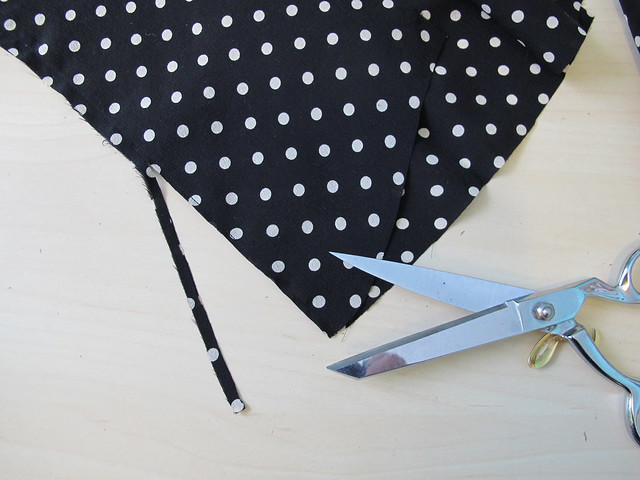
Silk crepe is one of the easier silks to work with, as the texture gives the fabric some grip, but it can still be quite shifty. It doesn’t have to be a nightmare, though, if you know how to work it! And, honestly, I think the hardest part about dealing with shifty fabrics (this isn’t necessarily limited to only silk, btw!) is getting an accurate cut without the piece morphing into a map of the United States once you move it around. There are tons of ways to accomplish this, but my personal new absolute favorite method is to use a stabilizer to make the fabric crisp, which gives it less chance to shift around. I use Sullivan’s Spray Stabilizer, as I like that I can direct that ~stable flow~ to whatever part of the fabric I need it to (sometimes you don’t need to cut your entire yardage, you know?), and it dries very fast. I have received some really good tips on other things to use for stabilizing fabric, such as gelatin, which I will eventually try! But spray stabilizer is also the bomb.
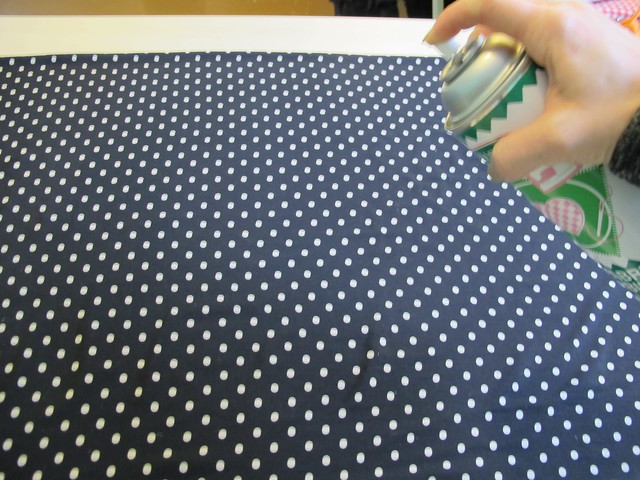
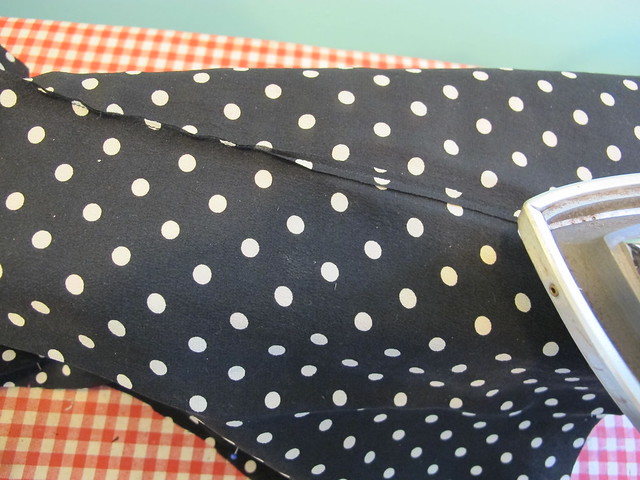
I spray it on evenly, then lay my fabric flat and straight on the table and allow it to dry (I guess you could do this on the floor if you don’t have a table, but my cat thinks that things laid on the floor are a special running obstacle course I have created just for her, so I personally try to avoid that route!). Since the fabric dries into whatever shape you leave it in, it helps to fold it in half and pin along the selvedges. Once the fabric is dry, it will feel like a silk organza – MUCH easier to handle. For pieces that really need to be accurate, such as a collar, it’s easy to reapply a second layer after you’ve cut, just to make sure there’s not shifting happening. Once your garment is completely assembled, you simply wash it out and it softens right back up. I always prewash my silks on cold water, so I don’t have to worry about water spots or shrinkage when I wash the garment.
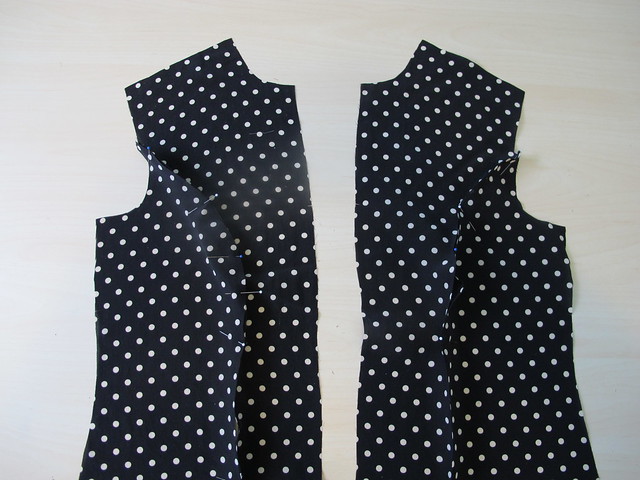
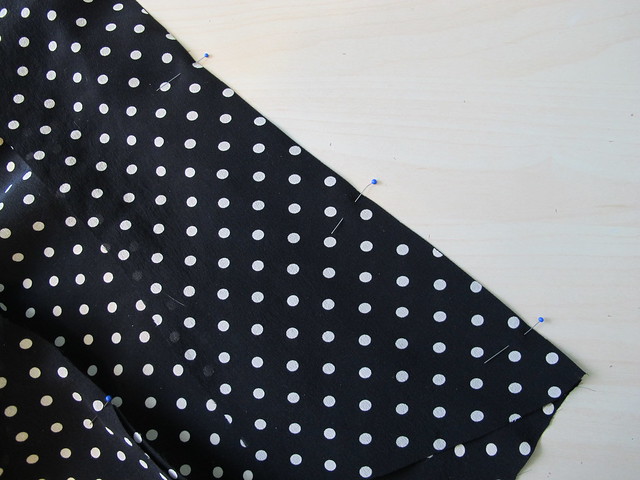
When I’m sewing a fabric that doesn’t have a definite right or wrong side, I try to be extra careful that I don’t sew two of the same piece. Unpicking sucks, and it’s even worse on a delicate fabric (that has been French seamed, no less!). To prevent this, I lay my pieces out so they mirror each other, and pin them like so before I take them to the machine. That way, I don’t accidentally sew two right fronts or whatever.
Speaking of French seams, the entire blouse is constructed using them. I love French seams because they are a beautiful finish, and they work really well with delicate fabrics. They do take some extra time because you are essentially sewing the same seam twice, but I think it’s totally worth the effort.
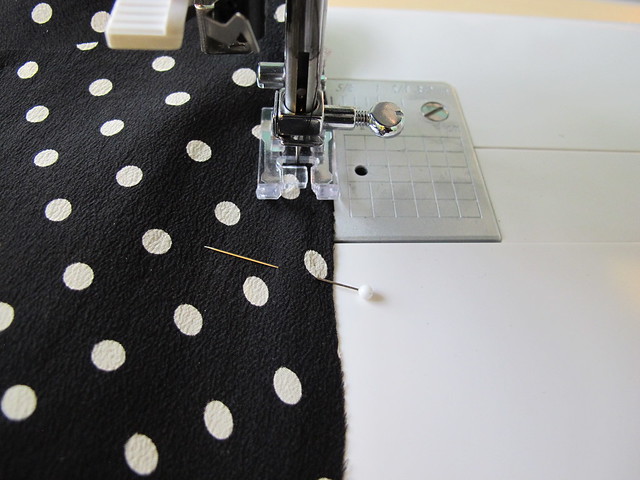
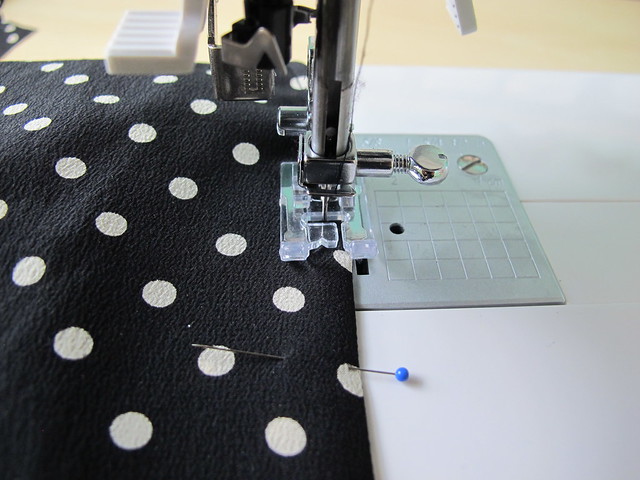
With WRONG SIDES TOGETHER, sew the first line at 3/8″ (this is assuming a 5/8″ seam allowance, which otherwise you’ll want to adjust accordingly). I know, sewing wrong sides together sounds totally backwards and all kinds of wrong, but trust.
Trim the seam allowance down to about 1/8″.
Press the seam allowances open. This can be kind of difficult if your seam allowances are super tiny, so do the best you can. I have a really hot iron and that helps a lot 🙂 Otherwise, you can press both seam allowances to one side – but I think pressing open gives a better end result.
Fold the fabric so the right sides are facing and all the seam allowances are encased on the inside, and press.
Sew again at 1/4″, then press one more time.
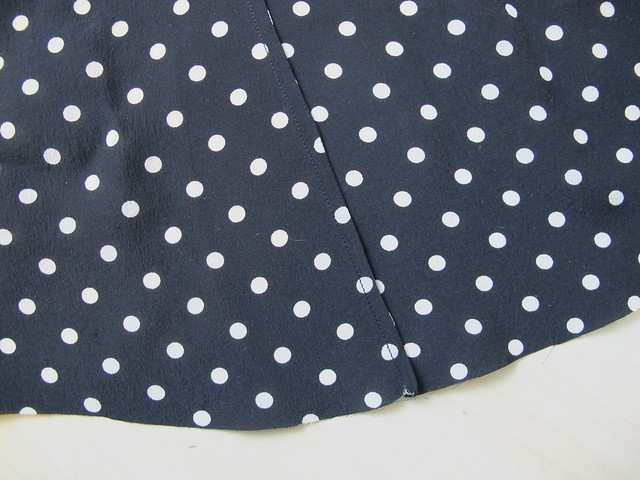
You should end up with something that looks like this – the seam allowances beautifully encased 😀
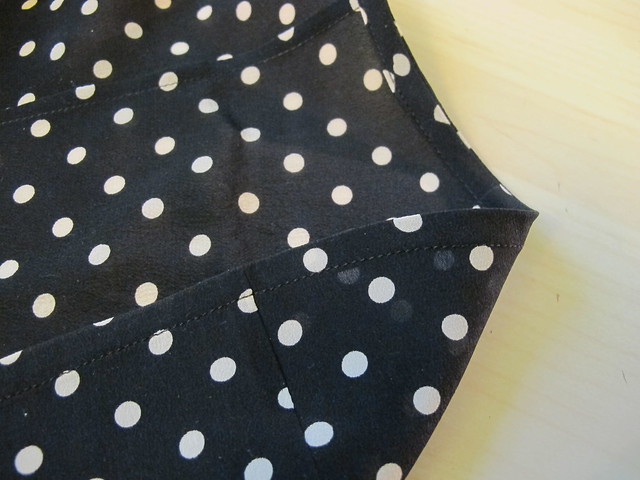
For hemming shirts – silk or otherwise! – I like to finish the hem with a self bias facing. Since the hem of shirts is usually curved, I find this gives me a MUCH easier way to get a MUCH cleaner finish. Contrasting bias is also fun, for a little flash of color! Here’s my tutorial for sewing bias facing. I like this method because you don’t have to pre-press the bias pieces – you press them after they are sewn, and it’s much faster and more accurate. I also used this method to finish the arm holes of my (obviously sleeveless, ha) blouse.
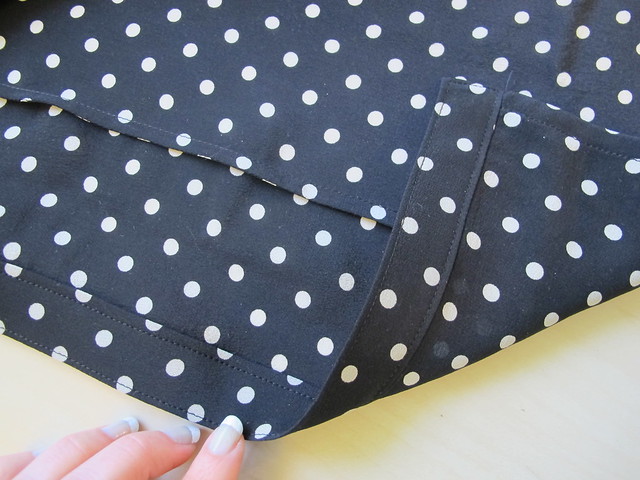
After hemming the shirt, I added the button placket. Since this is one of those areas where you want to be really accurate and careful, I fused lightweight interfacing (I use this stuff from Fashion Sewing Supply, it’s a little pricey but it is 100% worth it in my opinion!) to my pattern pieces and then re-applied the spray stabilizer just so everything was really easy to handle. Honestly, attaching that silk crepe placket was no more difficult than if it were made out of cotton. YES!
I seem to have lost the pieces of me adding the neck tie – whoops! But that was pretty easy. It is cut on the straight grain, and the edges are rolled up to where the tie is attached to the neckline. It’s doubled over *only* at the neckline, and the ends are twice as wide so you can make a nice fat bow. In silk crepe, it’s super floaty and awesome. Love.
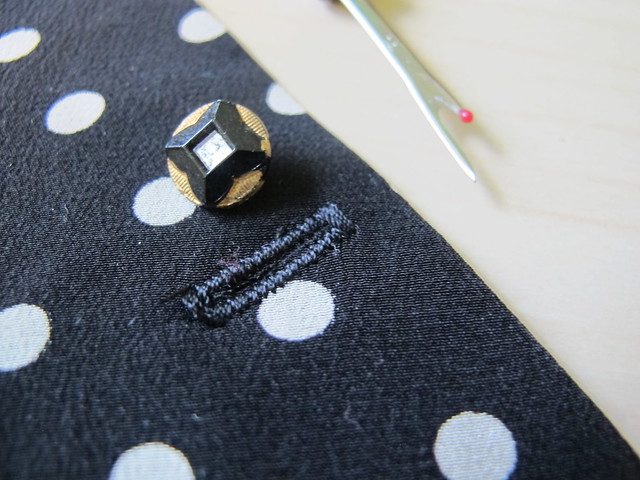
The last step was adding all those button holes! I wasn’t sure if the Spiegel 60609 machine was going to come through on this one – button holes can easily look really terrible, really fast – but it did not let me down! The stitches are nice and tight, and the button hole foot calculates the correct size using the actual button. Also, how about those buttons? I found them at the flea market years ago and I’ve been hoarding them ever since for the ~perfect~ project, ha.
The finished blouse:
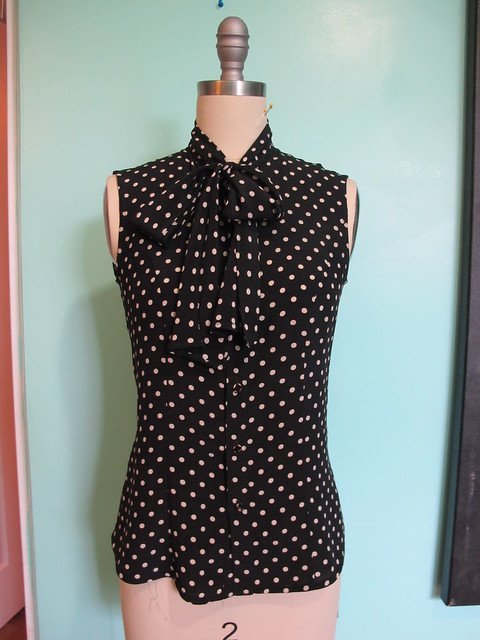
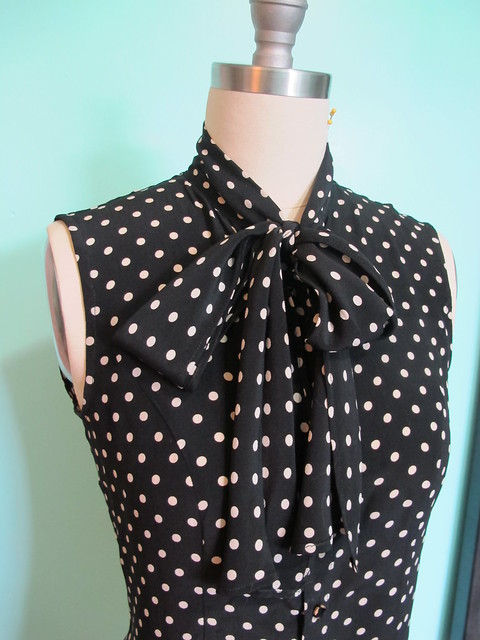
I am REALLY happy with how it turned out! I think the silk crepe is the perfect fabric for this type of blouse – it skims over the body, and the bow has a beautiful drape. Even with the polka dots and that big neck bow, it’s still not super incredibly sweet looking, which I like. And it feels SO GOOD to wear! I will never tire of wearing silk 🙂
~Big Reveal~ outfit photos to come soon! Next up – the bottom half of this outfit 🙂
As a side note, I’m headed back to NYC for the weekend to teach another Pants Making Intensive at Workroom Social! Just a head’s up that I’ll be a bit delayed in email/comment responses, as I tend to take off from the computer when I go out of town 🙂 I’m excited to go back to the city and get people making some pants, though! This particular workshop is sold out, however, there are still a couple spots open at my Garment Sewing Weekend at A Gathering of Stitches in Portland, Maine! Yay sewing! :DDD


How pretty!!! Thanks for the tips and nice pictures!
You are welcome, glad you enjoyed it 😀
Absolutely beautiful. That’s the perfect blouse pattern to go with slacks in my queue. I picked up some gorgeous Merino wool in the Houston garment district last weekend for my slacks. A blousy bow top is just the thing!
It’s so much fun to wear! Well… as long as you don’t accidentally dip the bow into your soup. Story of my (clumsy)life haha 🙂
This is so helpful to me. I’m always afraid of slippery fabrics. Thank you!
They’re not so bad as long as you have a way to wrangle them into sweet submission! Ha! 🙂
Thanks for the tip on stabilising the fabric, I never knew such a product existed. It’s amazing what you learn in blogland. Mary x
Yeah man, it’s pretty awesome! Definitely changed my sewing life for sure, at least when it comes to shifty fabrics 🙂
I really appreciate posts like this! The final product posts are great, but i love knowing how they are constructed. I just learned by experimenting how to do facings the way you do, so it’s great to have validation/tips!! I’m not just making shit up!! 😀
Haha I totally understand, as I do the same thing! I always feel so validated when I discover that my hacked method is the ~real~ one (although I feel like with sewing, you can do pretty much *any* method as long as the end result is what you wanted. But, still, validation is pretty nice!) 🙂
Love, love, live this blouse Lauren! x
*love!
Thank you, Jane! I reckon this style/fabric is right up your alley 🙂
Loved your tutorial and your beautiful finished blouse!
Thank you, Carolyn!!
Those buttons are to die for! So envious.
They are pretty gorgeous! I’m so glad I finally found a project to justify using them 🙂
The black lace bra — Madonna and Lady Gaga. This blouse — pure Grace Kelly. Beautiful!!
I like the way you think! 🙂
What a beautiful shirt – pure class. I think the idea finishing the hem with a self bias facing is great – I imagine it gives a very polished finish. Just wondered if you have any particular tips for sewing buttonholes on slippery fabrics?
Yeah, the bias facing makes a great finish – it has a little bit of weight so it hangs nicely, and it’s WAY less fussy than trying to do a narrow hem. I love it!
As far as sewing button holes on slippery fabrics – well, as long as you properly interface the area with the button hole, it shouldn’t be slippery at all by that point. So sewing the button holes shouldn’t pose an issue at all. That being said, I definitely recommend doing a couple test button holes first just so you can be sure there won’t be any issues 🙂
Thanks for the tips. I have a project in mind with some beautiful silk which I don’t want to ruin! Like you, I can’t resist wearing silk.
Oh wow, this blouse is beautiful! Yes, silk crepe was the perfect fabric. Gorgeous!
Thank you thank you!:)
This blouse is absolutely gorgeous. I am a big polka dot fan so this would definitely fit in well in my closet. I am currently working on sewing a dress from thrifted vintage bed linens. I am excited how it is coming together. Just have to insert the sleeves, the skirt and the invisible zipper. Then it will be all done. I am not looking forward to the zipper part, they are always my nemesis when it comes to sewing. I am thinking of taking some sewing classes to improve my sewing skills. You are a fantastic seamstress and I love your tutorials, they inspire me to be a better seamstress. Cheers, Michele
I used to hate doing zippers too, but I found that after practicing them a LOT, they get sooo much easier. So my advice is to just practice over and over until they aren’t a nemesis anymore 🙂 But I also think that taking a class is a fantastic idea! It’s amazing the little tips and tricks you learn in those settings (even as the teacher – I usually leave with some sort of new knowledge. It’s pretty awesome!), and being able to perfect a new technique under someone’s guidance is always a plus 🙂 And yay always happy to hear that you like my blog + tutorials 😀
Thanks for the vote of confidence. It helps if I go in with a good attitude before inserting the zipper. I will be doing that tomorrow and probably putting the dress creation up as a post soon. Thanks for the great comments, Cheers, Michele
I posted a thank you to you for helping me out with my hidden zipper problem. Just finished a dress refashioned from the bed linens, I just have to hem it and sew on the hook and eye at the top and it will be done. Thank you so much for your words of encouragement, it really helped. This project’s hidden zipper went in a dream cause I took your words of advice and practice on a scrap fabric with a reclaimed zipper til I got it right. Thank you so much. Cheers, Michele
a lovely top.
thanks for the advice on stabilizers.
Thank you! I’m glad you like it 🙂
I took your idea to heart and immediately went out and bought some spray stabilizer. I’ve always hesitated because I really hate aerosols because they get all over the place 🙂 I found some stabilizer in a pump which makes me happy! Thank you for spurring me 🙂 I love your material – there is nothing in the world like silk crepe and in poka dot it’s just beautiful. I always appreciate it when people share their process along with the finished garment.
Ah, that is awesome! I confess I like the aerosol, but I know what you mean about it getting all over the place and it’s certainly annoying. Glad you found some with a pump though 😀 And thank you!
Thank you for the construction details! I too love french seams, but I have been using different seam allowance amounts and they never are as thin as yours are. So I’ll be giving your method a try. Your work and personal style are a great inspiration – we seem to like many similar patterns and fabric, or at least your choices of fabrics always are things I like. Thank you for your great blog!
Thank you! I used to do my French seams with wider seam allowances as well – 1/4 and then 3/8 – until I started working for a dressmaker, and her and all the other seamstresses made fun of my French seams and called them “fat seams” hahahaha. I started making them thinner after that. It’s a bit more work since they need to be trimmed down, but I love how delicate they look 🙂
Adorbs! ❤
To save the fiddly pressing on a French seam, press the wst seam first and trim the two sides to 1/8″ separately. Makes the cutting double but it lies so beautifully.
Shayna, “press the [???] seam first”? What’s that word? I tried but couldn’t figure it out from context, sorry & thanks!
I love your atte tirón to detail, bias hems awesome! It looks so tidy and great! Really pretty blouse! Thanks for posting steps, very useful!
Damn this shirt looks so good! And you give the best tips – I’m always referring back to your posts for your tips and tutorials.
Love this shirt! Can’t wait to see how you wear it. Your Easter outfit that you linked back to has always been one of my favorites – that yellow skirt! I need more yellow in my life.
Perfect timing for your post. I was just asking my mom to come over and show me how to make a french seam. Now I don’t have to 🙂
I love this style of blouse. Print, fabric and pattern perfection, can’t wait to see the whole outfit. One day I will venture into working with silk….
It looks great. Thanks for sharing all the sewing advices.
This is lovely, I agree that it could have been really girly but it manages to look classy rather than cutesy. 🙂
What a great looking blouse!
Thank you for the progress pictures and the explanations. I think I am going to give the french seams and your hemming method a try on my first blouse (to be made soon, with a lot of ‘firsts’). Not looking forward to the buttonholes, though. 😉
Oh I love this ❤
What a fantastic blouse! You make the cutest stuff! As for the Spiegel sewing machine, have you tried it through very many layers (like when making jeans for example)? I’d love to give it a try as a backup to my Juki straight stitch. Sometimes I think the one I have might snap!
How did you end up finishing the neckline seam and the edges of the bow? I would love to see some photos of that! Attaching things that are different lengths is always a challenge for me!